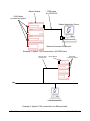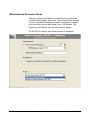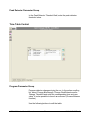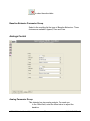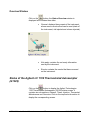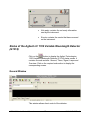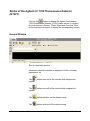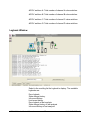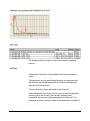
1
Varian, Inc.
2700 Mitchell Drive
Walnut Creek, CA 94598-1675/USA
Agilent Technologies 1100
LC Modules Control
Galaxie Driver Manual
©Varian, Inc. 2002 - 2006
03-914947-30:Rev.6
Table of Contents
Introduction.............................................................................................. 4
General ........................................................................................................................... 4
Installation and Configuration................................................................ 5
Installing the Driver Software .......................................................................................... 5
Configuring the HPLC Communications ......................................................................... 5
Serial Communications................................................................................................ 5
Ethernet Communications ........................................................................................... 7
Configuring the Driver ................................................................................................... 10
Configuring the Agilent Technologies LC 1100 Modules .......................................... 10
Configuring the Agilent Technologies LC 1100 Pumps............................................. 14
Configuring the Agilent Technologies LC 1100 Column Compartment .................... 20
Configuring the Agilent Technologies LC 1100 Detectors ........................................ 22
Configuring the Synopsis .......................................................................................... 26
Signal Configuration .................................................................................................. 28
Building a Method.................................................................................. 31
Creating a New Method ................................................................................................ 31
Control Method Section for the Agilent Technologies LC 1100 Modules ..................... 34
Control Section for the Agilent LC 1100 AutoSampler (G1313)................................ 36
Control Section for the Agilent LC 1100 Thermostated AutoSampler (G1329) ........ 40
Control Section for the Agilent LC 1100 Well Plate AutoSampler (G1367) .............. 45
Control Section for the Agilent LC 1100 Isocratic Pump (G1310)............................. 51
Control Section for the Agilent LC 1100 Quaternary Pump (G1311) ........................ 55
Control Section for the Agilent LC 1100 Binary Pump (G1312) ................................ 60
Control Section for the Agilent LC 1100 Column Compartment (G1316) ................. 66
Control Section for the Agilent LC 1100 Variable Wavelength Detector (G1314) .... 70
Control Section for the Agilent LC 1100 Diode Array Detector (G1315)................... 76
Control Section for the Agilent LC 1100 Fluorescence Detector (G1321) ................ 82
Control Section for the Agilent LC 1100 Refractive Index Detector (G1362)............ 89
Starting and Viewing an Acquisition.................................................... 94
Quick Start and Sequence ............................................................................................ 94
Quick Start (Single Acquisition)................................................................................. 94
Sequence .................................................................................................................. 96
Running Acquisition Status ........................................................................................... 97
Viewing a Running Acquisition .................................................................................. 97
Status of the Agilent LC 1100 Autosampler (G1313) ................................................ 97
Status of the Agilent LC 1100 Thermostated Autosampler (G1329)....................... 100
Status of the Agilent LC 1100 Well Plate Autosampler (G1367)............................. 104
Status of the Agilent LC 1100 Isocratic Pump (G1310) .......................................... 108
Status of the Agilent LC 1100 Quaternary Pump (G1311)...................................... 112
1100 LC Modules Control Manual
-2-
03-914947-30:Rev.6
Status of the Agilent LC 1100 Binary Pump (G1312).............................................. 117
Status of the Agilent LC 1100 Column Compartment (G1316)............................... 122
Status of the Agilent LC 1100 Variable Wavelength Detector (G1314) .................. 127
Status of the Agilent LC 1100 Diode Array Detector (G1315) ................................ 131
Status of the Agilent LC 1100 Fluorescence Detector (G1321).............................. 135
Status of the Agilent LC 1100 Refractive Index Detector (G1362) ......................... 138
Running Instrument Maintenance Software...................................... 143
Performing Maintenance and Diagnosis ..................................................................... 143
Diagnostic Section for the Agilent Technologies LC 1100 Modules ........................... 144
Maintenance of the Agilent LC 1100 Autosampler (G1313) ................................... 144
Maintenance of the Agilent LC 1100 Quaternary pump (G1311)............................ 152
Maintenance of the Agilent LC 1100 Diode Array Detector (G1315) and Multiple
Wavelength Detector (G1365)................................................................................. 163
Appendix .............................................................................................. 178
GPIB Addresses.......................................................................................................... 178
Configuring a Fixed IP Address .................................................................................. 180
1100 LC Modules Control Manual
-3-
03-914947-30:Rev.6
Introduction
General
This document describes the configuration of the Agilent
Technologies 1100 LC Modules drivers. It also explains how to
build a control method for these drivers, how to start and view a
running acquisition, what actions are available during an analysis
and how to diagnose using the Instrument Maintenance
Software.
The available drivers are:
Agilent Technologies LC 1100 Isocratic Pump (G1310)
Agilent Technologies LC 1100 Quaternary Pump (G1311)
Agilent Technologies LC 1100 Binary Pump (G1312)
Agilent Technologies LC 1100 AutoSampler (G1313)
Agilent Technologies LC 1100 Variable Wavelength Detector
(G1314)
Agilent Technologies LC 1100 Diode Array Detector (G1315)
Agilent Technologies LC 1100 Column Compartment (G1316)
Agilent Technologies LC 1100 Fluorescence Detector (G1321)
Agilent Technologies LC 1100 Thermostated AutoSampler
(G1329)
Agilent Technologies LC 1100 Refractive Index Detector
(G1362)
Agilent Technologies LC 1100 Well Plate Autosampler (G1367)
1100 LC Modules Control Manual
-4-
03-914947-30:Rev.6
Installation and
Configuration
Installing the Driver Software
The Galaxie software must already be installed before installing
the driver software (refer to the Galaxie CDS Installation Guide).
Configuring the HPLC Communications
Serial Communications
Configuring the communication server
To communicate with the Agilent 1100 modules, a
GPIB_Interface or an NI488 communication bus must be
configured on the acquisition server.
•
The buffer parameters of the GPIB_Interface bus to
communicate with the module must be the following:
TX Buffer: 1024
RX Buffer: 5120
1100 LC Modules Control Manual
-5-
03-914947-30:Rev.6
NOTE: For more details about the configuration of a GPIB_Interface or an NI488 bus,
refer to the Galaxie Chromatography Data System Installation Guide.
Connecting the Agilent LC 1100 modules to Galaxie
The Galaxie Chromatography Data System uses GPIB to
communicate with the Agilent 1100 modules.
For each Agilent 1100 module controlled by Galaxie, a switch
located on the rear panel of the instrument must be configured
appropriately. For all the modules, the first three switches from
left must be turned off (Down Position) for control with Galaxie as
for control with HP-CHEMSTATION. Changing the position of
these switches must be done with module switched-off.
1
2
3
4
5
6
7
8
Up (on)
Down (off)
The module where the GPIB cable is connected should be the
detector of the HPLC chain (as recommended by Agilent). This
module is called the Master module. The rest of the modules of
the HPLC chain communicate through the Master module via
CAN cables. The GPIB address entered in each module in the
Galaxie Configuration Manager must be the GPIB address of the
master module.
1100 LC Modules Control Manual
-6-
03-914947-30:Rev.6
Ethernet Communications
The Agilent Technologies 1100 modules can use Ethernet ® as
the method of communications for instrument control and for
sending digital data to the external data system. Ethernet
communication is not standard on the Agilent 1100 chain. The
Ethernet connection is made at the back of the 1100 chain.
There are two types of Ethernet cables:
• An Ethernet crossover cable is used when the Agilent 1100
chain is connected directly to the Galaxie Acquisition Server
PC.
• A standard Ethernet patch cable is used when the Agilent
1100 chain is connected to a company Ethernet network.
The Agilent 1100 modules uses TCP/IP (Transmission Control
Protocol / Internet Protocol) to communicate over the Ethernet
network and needs to be given a unique IP address to identify
the instrument.
A BOOTP Server or a DHCP server is used to send IP
addresses to TCP/IP devices.
The BOOTP Server lists Ethernet addresses along with the IP
addresses that are to be assigned to the corresponding devices.
To known how to configure the BOOTP server, refer to the
Galaxie installation Guide.
It is also possible to give a fixed IP address to the Agilent 1100
chain. To know how to fix the IP address of the Agilent 1100
chain, refer the appendix Configuring a fixed IP address.
NOTE: The BOOTP server provided by Galaxie is installed during the installation of the
Galaxie software.
Following are examples of connections between Galaxie and
Agilent 1100 modules.
1100 LC Modules Control Manual
-7-
03-914947-30:Rev.6
GPIB cable
81-839700-00
Master Module
CAN cables
provided by Agilent
GPIB cable Extender
81-839704-00
GPIB board
LAN
Galaxie Acquisition Server
Example 1: Agilent 1100 connected to an 800 MIB with a GPIB board
1100 LC Modules Control Manual
-8-
03-914947-30:Rev.6
Master Module
GPIB cable
81-839700-00
CAN Cables
provided by Agilent
Galaxie Acquisition Server
National Instrument GPIB board
Example 2: Agilent 1100 connected to a NI GPIB board
Ethernet cable
03-926129-01
Master Module
CAN cables
provided by Agilent
LAN
Galaxie Acquisition Server
Example 3: Agilent 1100 connected to an Ethernet cable
1100 LC Modules Control Manual
-9-
03-914947-30:Rev.6
Configuring the Driver
The driver software configuration is done in the Galaxie
Configuration Manager when a new chromatographic system is
created.
Configuring the Agilent Technologies LC 1100 Modules
Configuring the Agilent Technologies LC 1100 AutoSamplers
The Agilent Technologies 1100 AutoSampler (G1313), the
Agilent Technologies 1100 Thermostated AutoSampler (G1329),
and the Agilent Technologies 1100 Well Plate AutoSampler
(G1367) are available.
button corresponding to the Agilent
Click on the
Technologies 1100 AutoSampler driver and the configuration
screen appears.
For the G1313 and G1329 modules, the following screen is
displayed:
1100 LC Modules Control Manual
- 10 -
03-914947-30:Rev.6
Communications Parameter Group
Master module HPIB Address:
Select this option if the HPLC chain is controlled via a GPIB
communication and enter the GPIB address of the Master
module.
NOTE: To check the GPIB address value of the Master module, refer to the Appendix at
the end of this manual.
HPIB Hardware:
If the HPLC chain is controlled via a GPIB communication, select
the name of the bus previously configured in the HPIB Hardware
scrolling list.
1100 LC Modules Control Manual
- 11 -
03-914947-30:Rev.6
NOTE: For more details about the Bus configuration, refer to the Configuring the
Communication Server section in this manual.
Master module IP Address:
Select this option if the chromatograph is controlled via Ethernet
communication and type the IP address of the instrument.
In the Syringe scrolling list, select the injector syringe type. Two
choices are available: 100 µL syringe with 200 µL loop capillary
and 900 µL syringe with 1800 µL loop capillary.
In the Seat scrolling list, select the seat type. Five choices are
available: 2.3 µL standard seat capillary, 1.2 µL low dispersion
and 800 µL, 2800 µL and 8000 µL seat capillary for multiple
draw.
For the G1367 module, the following screen is displayed:
1100 LC Modules Control Manual
- 12 -
03-914947-30:Rev.6
Communications Parameter Group
Master module HPIB Address:
Select this option if the HPLC chain is controlled via a GPIB
communication and enter the GPIB address of the Master
module.
NOTE: To check the GPIB address value of the Master module, refer to the Appendix at
the end of this manual.
HPIB Hardware:
If the HPLC chain is controlled via a GPIB communication, select
the name of the bus previously configured in the HPIB Hardware
scrolling list.
NOTE: For more details about the Bus configuration, refer to the Configuring the
Communication Server section in this manual.
Master module IP Address:
Select this option if the chromatograph is controlled via Ethernet
communication and type the IP address of the instrument.
Settings Parameter Group
Check the Thermostat Option installed check box if the
autosampler is thermostated.
In the Syringe size scrolling list, select the syringe type. Four
choices are available: 8 µL, 40µL, 100 µL or 400 µL.
In the Seat capillary scrolling list, select the seat type. Seven
choices are available: 0.3 µL, 0.7 µL, 1.2 µL, 2.3 µL, 400 µL,
1400 µL or 5000 µL.
In the Loop capillary scrolling list, select the Loop type. Four
choices are available: 8 µL, 80 µL, 200 µL and 1800 µL.
In the Trays scrolling lists, select the type of trays installed in the
autosampler. Five choices are available: None, 15 vials, 40 vials,
100 vials and Well Plate.
1100 LC Modules Control Manual
- 13 -
03-914947-30:Rev.6
In the Plates X scrolling lists, select the type of plates installed in
the Well Plate tray.
Configuring the Agilent Technologies LC 1100 Pumps
The Agilent Technologies 1100 Isocratic Pump (G1310), the
Agilent Technologies 1100 Quaternary Pump (G1311) and the
Agilent Technologies 1100 Binary Pump (G1312) are available.
,
or
button according to the pump
Click on the
type to display the configuration screen.
For the G1310, the following screen is displayed:
1100 LC Modules Control Manual
- 14 -
03-914947-30:Rev.6
Communications Parameter Group
Master module HPIB Address:
Select this option if the HPLC chain is controlled via a GPIB
communication and enter the GPIB address of the Master
module.
NOTE: To check the GPIB address value of the Master module, refer to the Appendix at
the end of this manual.
HPIB Hardware:
If the HPLC chain is controlled via a GPIB communication, select
the name of the bus previously configured in the HPIB Hardware
scrolling list.
NOTE: For more details about the Bus configuration, refer to the Configuring the
Communication Server section in this manual.
Master module IP Address:
Select this option if the chromatograph is controlled via Ethernet
communication and type the IP address of the instrument.
Miscellaneous Parameter Group
Check or uncheck the Galaxie run started by this module (No
controlled autosampler) check box. This box should be checked
if a non-controlled autosampler present in the system is cabled
to this module to give a start signal to the 1100 module. The
Galaxie run will start as soon as this module is started.
1100 LC Modules Control Manual
- 15 -
03-914947-30:Rev.6
For the G1312 module, the following screen is displayed:
1100 LC Modules Control Manual
- 16 -
03-914947-30:Rev.6
Communications Parameter Group
Master module HPIB Address:
Select this option if the HPLC chain is controlled via a GPIB
communication and enter the GPIB address of the Master
module.
NOTE: To check the GPIB address value of the Master module, refer to the Appendix at
the end of this manual.
HPIB Hardware:
If the HPLC chain is controlled via a GPIB communication, select
the name of the bus previously configured in the HPIB Hardware
scrolling list.
NOTE: For more details about the Bus configuration, refer to the Configuring the
Communication Server section in this manual.
Master module IP Address:
Select this option if the chromatograph is controlled via Ethernet
communication and type the IP address of the instrument.
Miscellaneous Parameter Group
Check or uncheck the Galaxie run started by this module (No
controlled autosampler) check box. This box should be checked
if a non-controlled autosampler present in the system is cabled
to this module to give a start signal to the 1100 module. The
Galaxie run will start as soon as this module is started.
Solvent selector valve: Choose Installed if a solvent selection
valve is installed. The solvent selection valve (optional) permits
to select a binary mixture (isocratic and gradient) from four
independent solvent bottles.
1100 LC Modules Control Manual
- 17 -
03-914947-30:Rev.6
For the G1311 module, the following screen is displayed:
1100 LC Modules Control Manual
- 18 -
03-914947-30:Rev.6
Communications Parameter Group
Master module HPIB Address:
Select this option if the HPLC chain is controlled via a GPIB
communication and enter the GPIB address of the Master
module.
NOTE: To check the GPIB address value of the Master module, refer to the Appendix at
the end of this manual.
HPIB Hardware:
If the HPLC chain is controlled via a GPIB communication, select
the name of the bus previously configured in the HPIB Hardware
scrolling list.
NOTE: For more details about the Bus configuration, refer to the Configuring the
Communication Server section in this manual.
Master module IP Address:
Select this option if the chromatograph is controlled via Ethernet
communication and then type the IP address of the instrument.
Miscellaneous Parameter Group
Check or uncheck the Galaxie run started by this module (No
controlled autosampler) check box. This box should be checked
if a non-controlled autosampler present in the system is cabled
to this module to give a start signal to the 1100 module. The
Galaxie run will start as soon as this module is started.
Options Parameter Group
Check the Active Seal Wash box if the Active Seal Wash option
is installed on the pump. In order to preserve the seal, the seal
wash option permits to wash the back side of the seal.
1100 LC Modules Control Manual
- 19 -
03-914947-30:Rev.6
Configuring the Agilent Technologies LC 1100 Column Compartment
Click on the
1100 LC Modules Control Manual
button to display the configuration screen:
- 20 -
03-914947-30:Rev.6
Communications Parameter Group
Master module HPIB Address:
Select this option if the HPLC chain is controlled via a GPIB
communication and enter the GPIB address of the Master
module.
NOTE: To check the GPIB address value of the Master module, refer to the Appendix at
the end of this manual.
HPIB Hardware:
If the HPLC chain is controlled via a GPIB communication, select
the name of the bus previously configured in the HPIB Hardware
scrolling list.
NOTE: For more details about the Bus configuration, refer to the Configuring the
Communication Server section in this manual.
Master module IP Address:
Select this option if the chromatograph is controlled via Ethernet
communication and type the IP address of the instrument.
Miscellaneous Parameter Group
Check or uncheck the Galaxie run started by this module (No
controlled autosampler) check box. This box should be checked
if a non-controlled autosampler present in the system is cabled
to this module to give a start signal to the 1100 module. The
Galaxie run will start as soon as this module is started.
Hardware Parameter Group
Check the Switch valve option installed check box if a switch
valve is present in the module.
1100 LC Modules Control Manual
- 21 -
03-914947-30:Rev.6
Configuring the Agilent Technologies LC 1100 Detectors
The Agilent Technologies 1100 Variable Wavelength Detector
(G1314), the Agilent Technologies 1100 Diode Array Detector
(G1315), the Agilent Technologies 1100 Fluorescence Detector
(G1321) and the Agilent Technologies 1100 Refractive Index
Detector (G1362) are available.
or
or
or
button according to
Click on the
the detector type to display the configuration screen. The same
screen is displayed for the G1314, G1362 and G1321 modules:
1100 LC Modules Control Manual
- 22 -
03-914947-30:Rev.6
Communications Parameter Group
Master module HPIB Address:
Select this option if the HPLC chain is controlled via a GPIB
communication and enter the GPIB address of the Master
module.
NOTE: To check the GPIB address value of the Master module, refer to the Appendix at
the end of this manual.
HPIB Hardware:
If the HPLC chain is controlled via a GPIB communication, select
the name of the bus previously configured in the HPIB Hardware
scrolling list.
NOTE: For more details about the Bus configuration, refer to the Configuring the
Communication Server section in this manual.
Master module IP Address:
Select this option if the chromatograph is controlled via Ethernet
communication and type the IP address of the instrument.
1100 LC Modules Control Manual
- 23 -
03-914947-30:Rev.6
Miscellaneous Parameter Group
Check or uncheck the Galaxie run started by this module (No
controlled autosampler) check box. This box should be checked
if a non-controlled autosampler present in the system is cabled
to this module to give a start signal to the 1100 module. The
Galaxie run will start as soon as this module is started.
For the G1315 module, the following screen is displayed:
1100 LC Modules Control Manual
- 24 -
03-914947-30:Rev.6
Communications Parameter Group
Master module HPIB Address:
Select this option if the HPLC chain is controlled via a GPIB
communication and enter the GPIB address of the Master
module.
NOTE: To check the GPIB address value of the Master module, refer to the Appendix at
the end of this manual.
HPIB Hardware:
If the HPLC chain is controlled via a GPIB communication, select
the name of the bus previously configured in the HPIB Hardware
scrolling list.
NOTE: For more details about the Bus configuration, refer to the Configuring the
Communication Server section in this manual.
Master module IP Address:
Select this option if the chromatograph is controlled via Ethernet
communication and type the IP address of the instrument.
Miscellaneous Parameter Group
Check or uncheck the Galaxie run started by this module (No
controlled autosampler) check box. This box should be checked
if a non-controlled autosampler present in the system is cabled
to this module to give a start signal to the 1100 module. The
Galaxie run will start as soon as this module is started.
Model Parameter Group
Select in the scrolling list the model of the current detector:
Diode Array Detector (G1315) or Multiple Wavelength Detector
(G1365) are available.
1100 LC Modules Control Manual
- 25 -
03-914947-30:Rev.6
Configuring the Synopsis
In the Overview part of the system configuration, a synopsis can be defined for the
system. This synopsis depends on the configured devices.
1. To save the configuration of these devices, click on the OK
button.
2. Right click on the system name in the bottom part of the
Galaxie Configuration Manager screen. A pop-up menu
appears: click on Stop. Then right click on the system name
again, and click on Start.
3. Go back to the System Configuration screen (Properties
wizard). A graphic of the devices that comprise the system
is displayed in the synopsis screen. To configure the
synopsis as the real instrument configuration, move each
module, and then connect it appropriately. To do this, select
one anchor for each of the two modules (the selected
button; a
anchors become red) and click on the
connection tube will appear between the two anchors.
Click on the
to delete a selected tube, click on the
buttons to delete all the tubes.
Click on
to define a background color, or on
make the background transparent.
Click on the
to
icon to change the grid color.
4. Once the synopsis configuration is complete, it will be
displayed in the Galaxie Chromatography Data System, in
the Systems tab. In this tab, the Overview part will show the
synopsis of the system with some parameters displayed
1100 LC Modules Control Manual
- 26 -
03-914947-30:Rev.6
(temperature, flow, signal, etc.) depending on the installed
devices.
For example, the following pictures represent the synopsis
of the Agilent 1100 modules:
Agilent 1100 autosamplers Galaxie
Chromatography Data System Screen
Agilent 1100 autosamplers Galaxie
Configuration Manager Screen
Agilent 1100 pumps Galaxie Configuration
Manager Screen
1100 LC Modules Control Manual
Agilent 1100 pumps Galaxie
Chromatography Data System Screen
- 27 -
03-914947-30:Rev.6
Agilent 1100 detectors Galaxie
Chromatography Data System Screen
Agilent 1100 detectors Galaxie Configuration
Manager Screen
Signal Configuration
With all the detectors except with the Agilent Technologies 1100
Refractive Index Detector, it is possible to use several channels,
up to six chromatographic signals with the Agilent Technologies
1100 Diode Array Detector G1315A.
The example given below for the Agilent Technologies 1100
Diode Array Detector G1315A explains how to disconnect
channels. The way to proceed is the same for all detectors.
In the Configuration Manager, the system is displayed as shown
below:
1100 LC Modules Control Manual
- 28 -
03-914947-30:Rev.6
The method created on this system will have the following
structure:
However, if some of these signals are NEVER used, it is
possible to disconnect them.
For instance, in the Galaxie Configuration Manager, a system
has the following configuration:
1100 LC Modules Control Manual
- 29 -
03-914947-30:Rev.6
icon indicates that the corresponding channel is
The
activated.
icon indicates that the corresponding channel is
The
deactivated.
The methods created on this system will have the following
structure:
1. To deactivate a channel, just right click on the channel and
select Disconnect in the pop-up menu:
2. Right click on the system name in the bottom part of the
Galaxie Configuration Manager screen. A pop-up menu
appears: click on Stop. Then right click on the system name
again, and click on Start.
NOTE: Once the system has been created and correctly configured, it must be
associated with one or more projects in order to start some acquisitions. For
more details about the creation and configuration of a system, refer to the
Galaxie Configuration Manager User’s Guide.
Press the
driver).
button to print the current configuration (not applicable to this
1100 LC Modules Control Manual
- 30 -
03-914947-30:Rev.6
Building a Method
Creating a New Method
The method contains parameters for instrument control, data
acquisition, chromatogram processing, and editing of final
results. To initially set up a method, it is not necessary to define
all of the sub-method sections; however, you must fill in the
instrument control section prior to starting an acquisition.
1. To create a new method, select the FILE / NEW METHOD
option from the Galaxie Chromatography Data System main
menu.
A wizard guide will appear and provide assistance during the
first steps of method creation:
1100 LC Modules Control Manual
- 31 -
03-914947-30:Rev.6
2. Choose the system (chromatograph) associated with the
method. A method is created for a particular system. When
starting an acquisition, the name of the system that performs
the acquisition must be correct, since method access is
limited only to those methods associated with this system.
3. Once this field is completed, click on the Next button to move
to the second step of the method creation:
1100 LC Modules Control Manual
- 32 -
03-914947-30:Rev.6
4. Enter the New Method Name in the first field. In the
Description field, enter information concerning the method
(optional).
5. Once these two fields have been completed, click on the OK
button. The new method is created and is opened with
default parameters in the Galaxie Chromatography Data
System. The next step is the definition of each of the method
sections.
The control section must be defined in order to start an
acquisition. In the following part of this guide, only the control
section for the Agilent Technologies 1100 LC Modules is
detailed. Other parameters such as Injection Volume, Vial
and Rack number may be necessary and are defined in the
acquisition section.
NOTE: For more details about the programming of each method section, turn to the
Galaxie Chromatography Data System User’s Guide.
1100 LC Modules Control Manual
- 33 -
03-914947-30:Rev.6
Control Method Section for the Agilent
Technologies LC 1100 Modules
Once the new method is created, select the control section in the
lower part of the browser.
The following screen appears:
1100 LC Modules Control Manual
- 34 -
03-914947-30:Rev.6
Press the
button to display the System Control Method
Advanced Tools window:
to send the current method to the instrument (not
applicable to these drivers)
to get the active method from the instrument (not
applicable to these drivers)
to print the current method (not applicable to these
drivers)
1100 LC Modules Control Manual
- 35 -
03-914947-30:Rev.6
Control Section for the Agilent LC 1100 AutoSampler
(G1313)
Click on the
button to display the Agilent Technologies
1100 AutoSampler (G1313) control method section and to define
the corresponding parameters that will be used during the
chromatographic run.
Speeds Parameter Group
In the Sample Drawing Speed field, enter the sample aspiration
speed value.
In the Sample Ejecting Speed field, enter the sample injection
speed value.
1100 LC Modules Control Manual
- 36 -
03-914947-30:Rev.6
Others Parameter Group
In the Needle Offset field, enter the vertical needle offset value.
Select the injection mode in the scrolling list. Three choices are
available: Standard injection, Injection with wash and Injection
user program.
1100 LC Modules Control Manual
•
Standard injection: only the default screen is
displayed. No other parameters are displayed.
•
Injection with wash: when selecting this injection
mode, another tab is displayed allowing the user to
define the Wash vial.
- 37 -
03-914947-30:Rev.6
•
Injection user program: when selecting this injection
mode, another tab is displayed allowing you to
program different actions.
Use the following buttons to edit the table:
to add a line to the table.
to delete a line in the table.
to clear the entire table.
1100 LC Modules Control Manual
- 38 -
03-914947-30:Rev.6
After a new line has been added, double-click on it to edit. A new
window is displayed:
Use the scrolling list to choose the action to program. The
available actions are:
Draw from Sample
Draw from Vial
Draw from Seat
Draw from Air
Eject into Sample
Eject into Vial
Eject into Seat
Eject into Air
Mix in capillary
Mix in air
Wait
Inject
Valve Mainpass
Valve Bypass
Valve Mainpass with start pulse
Valve Mainpass for a time, needle in sample vial
Valve Mainpass for a time, needle in vial
Valve Mainpass for a time, needle in seat
Move Needle to uppermost position
Move Needle to seat
Move Needle to sample vial
Move Needle to vial
Move Syringe back
Move Syringe forth
1100 LC Modules Control Manual
- 39 -
03-914947-30:Rev.6
Move Syringe back and forth
Move Syringe home
Move Syringe service
Move vial to new location
Depending on the selected action, the parameters to fill in will be
different.
Control Section for the Agilent LC 1100 Thermostated
AutoSampler (G1329)
Click on the
button to display the Agilent Technologies
1100 Thermostated AutoSampler (G1329) control method
section and to define the corresponding parameters that will be
used during the chromatographic run.
1100 LC Modules Control Manual
- 40 -
03-914947-30:Rev.6
Speeds Parameter Group
In the Sample Drawing Speed field, enter the sample aspiration
speed value.
In the Sample Ejecting Speed field, enter the sample injection
speed value.
Others Parameter Group
In the Needle Offset field, enter the vertical needle offset value.
Select the injection mode in the scrolling list. Three choices are
available: Standard injection, Injection with wash and Injection
user program.
1100 LC Modules Control Manual
•
Standard injection: only the default screen is
displayed. No other parameters are displayed.
•
Injection with wash: when selecting this injection
mode, another tab is displayed allowing the user to
define the Wash vial.
- 41 -
03-914947-30:Rev.6
•
1100 LC Modules Control Manual
Injection user program: when selecting this injection
mode, another tab is displayed allowing the user to
program different actions.
- 42 -
03-914947-30:Rev.6
Use the following buttons to edit the table:
to add a line to the table.
to delete a line in the table.
to clear the entire table.
After a new line has been added, double-click on it to edit. A new
window is displayed:
1100 LC Modules Control Manual
- 43 -
03-914947-30:Rev.6
Use the scrolling list to choose the action to program. The
available actions are:
Draw from Sample
Draw from Vial
Draw from Seat
Draw from Air
Eject into Sample
Eject into Vial
Eject into Seat
Eject into Air
Mix in capillary
Mix in air
Wait
Inject
Valve Mainpass
Valve Bypass
Valve Mainpass with start pulse
Valve Mainpass for a time, needle in sample vial
Valve Mainpass for a time, needle in vial
Valve Mainpass for a time, needle in seat
Move Needle to uppermost position
Move Needle to seat
Move Needle to sample vial
Move Needle to vial
Move Syringe back
Move Syringe forth
Move Syringe back and forth
Move Syringe home
Move Syringe service
Move vial to new location
1100 LC Modules Control Manual
- 44 -
03-914947-30:Rev.6
Depending on the selected action, the parameters to fill in will be
different.
Thermostat parameter group:
Check the On box to activate the autosampler temperature
regulation.
Enter the setpoint temperature for the thermostat autosampler in
the Setpoint Temperature field.
Check Wait for temperature ready before injection if necessary.
Control Section for the Agilent LC 1100 Well Plate
AutoSampler (G1367)
Click on the
button to display the Agilent Technologies
1100 Well Plate AutoSampler (G1367) control method section
and to define the corresponding parameters that will be used
during the chromatographic run.
1100 LC Modules Control Manual
- 45 -
03-914947-30:Rev.6
Speeds Parameter Group
In the Sample Drawing Speed field, enter the sample aspiration
speed value.
In the Sample Ejecting Speed field, enter the sample injection
speed value.
Thermostat Parameter Group
Check the On box to activate the autosampler temperature
regulation.
Enter the setpoint temperature for the thermostat autosampler in
the Setpoint Temperature field.
Check Wait for temperature ready before injection if necessary.
1100 LC Modules Control Manual
- 46 -
03-914947-30:Rev.6
Others Parameter Group
In the Needle Offset field, enter the vertical needle offset value.
In the Sample Flush-Out factor field, enter the flush out factor
value that specifies the volume of mobile phase pumped through
the injector after each injection.
Check Switch valve to bypass after sample flush-out to leave the
valve in the bypass position even past analysis.
In the Wait time field, enter the wait time after drawing value.
Select the injection mode in the scrolling list. Three choices are
available: Standard injection, Injection with wash and Injection
user program.
•
Standard injection: only the default screen is
displayed. No other parameters are displayed.
•
Injection with wash: when selecting this injection
mode, another tab is displayed allowing the user to
define multiple parameters.
Select in the drop down list the type wash. Three
choices are available: Wash needle in flush port,
Wash needle in wash vial, and Flush the seat.
Depending of the wash type, the following fields will
be available.
Rack: define in which rack the wash vial is located.
Vial: define the location of the wash vial.
Cycles: define the number of time the wash
procedure will be done.
Delay: define the time the needle will stay in the
wash port or flush the seat.
1100 LC Modules Control Manual
- 47 -
03-914947-30:Rev.6
•
1100 LC Modules Control Manual
Injection user program: when selecting this injection
mode, another tab is displayed allowing you to
program different actions.
- 48 -
03-914947-30:Rev.6
Use the following buttons to edit the table:
to add a line to the table.
to delete a line in the table.
to clear the entire table.
After a new line has been added, double-click on it to edit. A new
window is displayed:
1100 LC Modules Control Manual
- 49 -
03-914947-30:Rev.6
Use the scrolling list to choose the action to program. The
available actions are:
Draw from Sample
Draw from Vial
Draw from Seat
Draw from Air
Eject into Sample
Eject into Vial
Eject into Seat
Eject into Air
Mix in capillary
Mix in air
Wait
Inject
Valve Mainpass
Valve Bypass
Valve Mainpass with start pulse
Valve Mainpass for a time, needle in sample vial
Valve Mainpass for a time, needle in vial
Valve Mainpass for a time, needle in seat
Move Needle to uppermost position
Move Needle to seat
Move Needle to sample vial
Move Needle to vial
Move Syringe back
Move Syringe forth
Depending on the selected action, the parameters to fill in will be
different.
1100 LC Modules Control Manual
- 50 -
03-914947-30:Rev.6
Control Section for the Agilent LC 1100 Isocratic Pump
(G1310)
Click on the
button to display the Agilent Technologies
1100 Isocratic pump (G1310) control method section. It contains
four sub-sections: General, Settings, Limits and Control. Click on
the required sub-section to define the corresponding parameters
that will be used during the chromatographic run.
General Control
Check Automatic Pump Stop to turn off the pump at the end of a
sequence.
1100 LC Modules Control Manual
- 51 -
03-914947-30:Rev.6
Settings Control
Prerun Elution Parameter Group
In the Flow field, enter the total flow rate.
In the Eluent name field, enter the solvent name (optional).
Program Parameter Group
Program a flow. The time is the elapsed time since the beginning
of the run. The chart represents the flow evolution.
1100 LC Modules Control Manual
- 52 -
03-914947-30:Rev.6
Use the following buttons to edit the table:
to add a line to the table.
to delete a line in the table.
to clear the entire table.
Limits Control
1100 LC Modules Control Manual
- 53 -
03-914947-30:Rev.6
Pressure Alarms Parameter Group
Enter the Minimum and Maximum pressure limits of the pump.
Outside these limits, the pump is stopped.
Flow Alarms Parameter Group
Enter the Maximum Flow Ramp of the pump. Outside this limit,
the pump is stopped.
Control Control
1100 LC Modules Control Manual
- 54 -
03-914947-30:Rev.6
Compressibility Parameter Group
To take into account the compressibility of the solvents, select
one of the available three choices: Automatic, No compensation,
or Others (in this case, enter the value of the compressibility).
Stroke Parameter Group
Select the volume of the mobile phase which is moved every
plunger stroke. Two choices are available: Automatic or Others
(in this case, enter the volume of the mobile phase which will be
moved every plunger stroke).
Control Section for the Agilent LC 1100 Quaternary Pump
(G1311)
Click on the
button to display the Agilent Technologies
1100 Quaternary pump (G1311) control method section. It
contains four sub-sections: General, Settings, Limits and Control.
Click on the required sub-section to define the corresponding
parameters that will be used during the chromatographic run.
1100 LC Modules Control Manual
- 55 -
03-914947-30:Rev.6
General Control
Miscellaneous Parameter Group
Check Automatic Pump Stop to turn off the pump at the end of a
sequence.
Active Seal Wash Option Parameter Group
Select Off to disable the Active Seal Wash Option.
Select Single Wash to perform a single wash. Enter the desired
wash time in the Duration field.
Select Periodic to perform periodic washes. Enter the Period and
On-time in the corresponding fields.
1100 LC Modules Control Manual
- 56 -
03-914947-30:Rev.6
Settings Control
Prerun Elution Parameter Group
In the Flow field, enter the total flow rate.
Enter the mobile phase composition by entering the percentage
of each solvent in the corresponding field.
The %A field is a read-only field. The %A value is automatically
calculated according to the other solvent percentage values.
Enter the name of each solvent (optional).
Program Parameter Group
Program a flow and/or a composition gradient. Each step of the
program includes time and new values for flow and/or
1100 LC Modules Control Manual
- 57 -
03-914947-30:Rev.6
composition. The time is the elapsed time since the beginning of
the run. The Pump Gradient Chart represents the pump
program.
Use the following buttons to edit the table:
to add a line to the table.
to delete a line in the table.
to clear the entire table.
Limits Control
1100 LC Modules Control Manual
- 58 -
03-914947-30:Rev.6
Pressure Alarms Parameter Group
Enter the Minimum and Maximum pressure limits of the pump.
Outside these limits, the pump is stopped.
Flow Alarms Parameter Group
Enter the Maximum Flow Ramp of the pump. Outside this limit,
the pump is stopped.
Control Control
Primary Channel Parameter Group
Select in the scrolling list the channel where the following actions
will be done. The available choices are: Automatic, Channel A,
Channel B, Channel C, Channel D.
1100 LC Modules Control Manual
- 59 -
03-914947-30:Rev.6
Compressibility Parameter Group
To take into account the compressibility of the solvents, select
one of the three available choices: Automatic, No compensation,
or Others (in this case, enter the value of the compressibility).
Stroke Parameter Group
Select the volume of the mobile phase which is moved every
plunger stroke. Two choices are available: Automatic or Others
(in this case, enter the volume of the mobile phase which will be
moved every plunger stroke).
Control Section for the Agilent LC 1100 Binary Pump
(G1312)
Click on the
button to display the Agilent Technologies
1100 Binary pump (G1312) control method section. It contains
four sub-sections: General, Settings, Limits and Control. Click on
the required sub-section to define the corresponding parameters
that will be used during the chromatographic run.
1100 LC Modules Control Manual
- 60 -
03-914947-30:Rev.6
General Control
Check Automatic Pump Stop to turn off the pump at the end of a
sequence.
1100 LC Modules Control Manual
- 61 -
03-914947-30:Rev.6
Settings Control
Prerun Elution Parameter Group
In the Flow field, enter the total flow rate.
Enter the mobile phase composition by entering the percentage
of the solvent B in the %B field.
The %A field is a read-only field. The %A value is automatically
calculated according to the %B value.
Enter the name of each solvent (optional).
For Solvent Selection Valves A and B, choose the solvent
selection channel.
1100 LC Modules Control Manual
- 62 -
03-914947-30:Rev.6
Program Parameter Group
Program an elution flow and/or a composition gradient. Each
step of the program includes time, flow and/or composition new
values. The time is the elapsed time since the beginning of the
run. The Pump Gradient Chart represents pump program.
Use the following buttons to edit the table:
to add a line to the table.
to delete a line in the table.
to clear the entire table.
1100 LC Modules Control Manual
- 63 -
03-914947-30:Rev.6
Limits Control
Pressure Alarms Parameter Group
Enter the Minimum and Maximum pressure limits of the pump.
Outside these limits, the pump is stopped.
Flow Alarms Parameter Group
Enter the Maximum Flow Ramp of the pump. Outside this limit,
the pump is stopped.
1100 LC Modules Control Manual
- 64 -
03-914947-30:Rev.6
Control Control
Left and Right Drive Compressibility Parameter Group
For each drive, to take into account the compressibility of the
solvents, select one of the available three choices: Automatic,
No compensation, or Others (in this case, enter the value of the
compressibility).
Left and Right Drive Stroke Parameter Group
For each drive, select the volume of the mobile phase which is
moved every plunger stroke. Two choices are available:
Automatic or Others (in this case, enter the volume of the mobile
phase which will be moved every plunger stroke).
1100 LC Modules Control Manual
- 65 -
03-914947-30:Rev.6
Control Section for the Agilent LC 1100 Column
Compartment (G1316)
Click on the
button to display the Agilent Technologies
1100 Column Compartment (G1316) control method section. It
contains four sub-sections: General, Left Compartment, Right
Compartment and Valves. Click on the required sub-section to
define the corresponding parameters that will be used during the
chromatographic run.
General Control
Check Automatic Thermostat Stop to turn off the thermostat at
the end of the run.
Check Combined Mode to control the two column compartments
in the same way. The control parameters will be entered in the
1100 LC Modules Control Manual
- 66 -
03-914947-30:Rev.6
Left Compartment sub-section (the Right Compartment subsection will not be active).
Check Separated Mode to control each compartment separately.
The control parameters will be entered in both Left and Right
Compartment sub-sections.
Left Compartment Control
NOTE: The Left Compartment and the Right Compartment sub-sections have the same
parameters. Only the Left Compartment sub-section parameters will be
explained.
1100 LC Modules Control Manual
- 67 -
03-914947-30:Rev.6
Left Compartment Prerun Setpoints Parameter Group
Check the On box to activate the column compartment
temperature regulation.
Enter the setpoint temperature in the Temperature field.
Enter the Temperature Delta for Not Ready in the corresponding
field.
Left Compartment Program Parameter Group
Program a temperature. The time is the elapsed time since the
beginning of the run. The chart represents the temperature
evolution.
Use the following buttons to edit the table:
to add a line to the table.
to delete a line in the table.
to clear the entire table.
1100 LC Modules Control Manual
- 68 -
03-914947-30:Rev.6
Valves Control
Valve Prerun Position Parameter Group
Select the position of the valve before the run begins. The
available choices are: Port 1>6 and Port 1>2
1100 LC Modules Control Manual
- 69 -
03-914947-30:Rev.6
Valve Program Parameter Group
Program valve position changes during the run. The time is the
elapsed time since the beginning of the run.
Use the following buttons to edit the table:
to add a line to the table.
to delete a line in the table.
to clear the entire table.
Control Section for the Agilent LC 1100 Variable
Wavelength Detector (G1314)
Click on the
button to display the Agilent Technologies
1100 Variable Wavelength Detector (G1314) control method
section. It contains four sub-sections: Settings, Analogs, Spectra
and Time table. Click on the required sub-section to define the
corresponding parameters that will be used during the
chromatographic run.
1100 LC Modules Control Manual
- 70 -
03-914947-30:Rev.6
Settings Control
Signal Parameter Group
In the Wavelength field, enter the value of the initial Wavelength.
Automatic Lamp Stop Parameter Group
Check Automatic Lamp Stop to stop automatically the detector
lamp at the end of the run.
Peak Parameter Group
Select the Peakwidth value in the scrolling list. This parameter
influences the peak detection. A response time and a data rate
are associated with each peakwidth value. The available values
are:
1100 LC Modules Control Manual
- 71 -
03-914947-30:Rev.6
<0.005 min (RiseTime<0.12 sec) (DataRate=13.74 Hz)
>0.005 min (RiseTime>0.12 sec) (DataRate=13.74 Hz)
>0.010 min (RiseTime>0.25 sec) (DataRate=13.74 Hz)
>0.025 min (RiseTime>0.5 sec) (DataRate=13.74 Hz)
>0.05 min (RiseTime>1 sec) (DataRate=6.87 Hz)
>0.1 min (RiseTime>2 sec) (DataRate=3.43 Hz)
>0.2 min (RiseTime>4 sec) (DataRate=1.72 Hz)
>0.4 min (RiseTime>8 sec) (DataRate=0.86 Hz)
Analogs Control
In the Offset field, enter the offset value to adjust the baseline.
In the Attenuation scrolling list, enter the attenuation value. The
available values are:
0.97 mAU full range, 1.95 mAU, 3.90 mAU, 7.81 mAU, 15.62
mAU, 31.25 mAU, 62.50 mAU, 125 mAU, 250 mAU, 500 mAU,
1000 mAU, 2000 mAU and 4000 mAU.
1100 LC Modules Control Manual
- 72 -
03-914947-30:Rev.6
In the Range scrolling list, enter the output voltage range value.
The available values are: 0.1 Volt Full Scale and 1Volt Full
Scale.
In the Source scrolling list, enter the collected signal type. The
available values are: Absorbance Units AU, Sample AU without
Reference, Reference AU without Sample, Test Chromatogram,
Unfiltered and not logarithm Sample, Unfiltered and not logarithm
Reference, Analog Output Test Function, Sample Diode Current,
Reference Diode Current, Lamp Anode Voltage, Lamp Anode
Current, Lamp Heater Voltage, Lamp Heater Current, Grating
Motor Step, Filter Motor Step, Board Temperature and PTC
current.
In the Polarity scrolling list, enter the detector polarity. The
available values are: Positive and Negative.
Spectra Control
1100 LC Modules Control Manual
- 73 -
03-914947-30:Rev.6
Wavelength Parameter Group
In the Wavelength Start field, enter the minimum spectra
wavelength.
In the Wavelength End field, enter the maximum spectra
wavelength.
In the Wavelength Step field, enter the wavelength step.
Peak Detector Parameter Group
In the Peak Detector Threshold field, enter the peak detector
threshold value.
In the Peak Detector Peakwidth scrolling list, select the peak
detector peakwidth value. A response time is associated with
each peakwidth values. The available values are:
<0.005 min (RiseTime<0.12 sec)
>0.005 min (RiseTime>0.12 sec)
>0.010 min (RiseTime>0.25 sec)
>0.025 min (RiseTime>0.5 sec)
>0.05 min (RiseTime>1 sec)
>0.1 min (RiseTime>2 sec)
>0.2 min (RiseTime>4 sec)
>0.4 min (RiseTime>8 sec)
1100 LC Modules Control Manual
- 74 -
03-914947-30:Rev.6
Time Table Control
Program Parameter Group
Program detector changes during the run. In the action scrolling
list, select Change Wavelength, Change PeakWidth, Change
PeakDetector and/or Change Threshold and enter the
corresponding time and new value. It is also possible to launch
an autozero, (Process Balance function) or collect spectra
(Normal spectrum, Blank, Unknown and Holmium of the Take
Spectrum function).
Use the following buttons to edit the table:
to add a line to the table.
1100 LC Modules Control Manual
- 75 -
03-914947-30:Rev.6
to delete a line in the table.
to clear the entire table.
Control Section for the Agilent LC 1100 Diode Array
Detector (G1315)
Click on the
button to display the Agilent Technologies
1100 Diode Array Detector (G1315) control method section. It
contains four sub-sections: Signals, Analogs, Spectra and Time
table. Click on the required sub-section to define the
corresponding parameters that will be used during the
chromatographic run.
1100 LC Modules Control Manual
- 76 -
03-914947-30:Rev.6
Signals Control
Sample Diode Parameter Group
Define the center wavelength in the Wl field and the bandwidth in
the Bw field. The signal values contained within the bandwidth
are bunched and give one value for the center wavelength.
Reference Diode Parameter Group
The use of a reference wavelength avoids baseline drift due to
refractive index changes.
If a reference wavelength is defined, the measured signal value
is the difference between absorbance at the sample wavelength
and absorbance at the reference wavelength.
1100 LC Modules Control Manual
- 77 -
03-914947-30:Rev.6
Define the center wavelength in the Wl field and the bandwidth in
the Bw field. The signal values contained within the bandwidth
are bunched and give one value for the center wavelength.
NOTE: For more details about the reference wavelength settings, refer to your Agilent
Technologies 1100 Diode Array Detector technical documentation.
Signal Program Parameter Group
Program changes the wavelength and/or the bandwidth for each
signal and/or its reference during runs.
Use the following buttons to edit the table:
to add a line to the table.
to delete a line in the table.
to clear the entire table.
Others Parameter Group
Check Automatic Lamp Stop to stop automatically the detector
lamp at the end of the run.
Select the Peakwidth value in the scrolling list. This parameter
influences the peak detection. A response time and a data rate
are associated with each peakwidth value. The available values
are:
<0.01 min (Response Time <0.1 sec) (DataRate=20 Hz)
>0.01 min (Response Time =0.2 sec) (DataRate=20 Hz)
>0.02 min (Response Time =0.5 sec) (DataRate=10 Hz)
>0.05 min (Response Time =1 sec) (DataRate=5 Hz)
>0.1 min (Response Time =2 sec) (DataRate=2.5 Hz)
>0.2 min (Response Time =4 sec) (DataRate=1.25 Hz)
>0.4 min (Response Time =8 sec) (DataRate=0.62 Hz)
1100 LC Modules Control Manual
- 78 -
03-914947-30:Rev.6
>0.85 min (Response Time =16 sec) (DataRate=0.31 Hz)
Analogs Control
This detector has two analog outputs. For each one:
In the Offset field, enter the offset value to adjust the
baseline.
In the Attenuation scrolling list, enter the attenuation
value. The available values are: 0.97 mAU full range, 1.95 mAU,
3.90 mAU, 7.81 mAU, 15.62 mAU, 31.25 mAU, 62.50 mAU, 125
mAU, 250 mAU, 500 mAU, 1000 mAU and 2000 mAU.
In the Range scrolling list, enter the output voltage range
value. The available values are: 0.1 Volt Full Scale and 1 Volt
Full scale.
1100 LC Modules Control Manual
- 79 -
03-914947-30:Rev.6
Spectra Control
Wavelength Parameter Group
In the Wavelength Start field, enter the minimum spectra
wavelength.
In the Wavelength End field, enter the maximum spectra
wavelength.
In the Wavelength Step field, enter the wavelength step.
In the Wavelength Slit scrolling list, select the wavelength slit.
The available choices are: 1, 2, 4, 8 and 16 nm.
1100 LC Modules Control Manual
- 80 -
03-914947-30:Rev.6
Peak Detector Parameter Group
In the Peak Detector Threshold field, enter the peak detector
threshold value.
Time Table Control
Program Parameter Group
Program detector changes during the run. In the action scrolling
list, select Change Wavelength, Change PeakDetector and/or
Change Threshold and enter the corresponding time and new
value. It is also possible to launch an autozero (Process Balance
function)
Use the following buttons to edit the table:
1100 LC Modules Control Manual
- 81 -
03-914947-30:Rev.6
to add a line to the table.
to delete a line in the table.
to clear the entire table.
Control Section for the Agilent LC 1100 Fluorescence
Detector (G1321)
Click on the
button to display the Agilent Technologies
1100 Fluorescence Detector (G1321) control method section. It
contains five sub-sections: Settings, Analogs, Time table,
Phosphorescence and Others. Click on the required sub-section
to define the corresponding parameters that will be used during
the chromatographic run.
1100 LC Modules Control Manual
- 82 -
03-914947-30:Rev.6
Settings Control
Mode Parameter Group
Choose the Acquisition Mode between Fluorescence,
Phosphorescence, or Chemo-luminescence.
To work in emission or excitation Multi-wavelength mode, select
the corresponding mode in the scrolling list. When selecting the
excitation multi-wavelength mode, the wavelengths from B to D in
the emission part are not accessible and vice versa.
Select in the Peakdwidth scrolling list, the peakdwidth of the
detector influencing the peak detection. A response time and a
data rate are associated to each peakwidth values.
1100 LC Modules Control Manual
- 83 -
03-914947-30:Rev.6
Excitation Parameter Group
Check Wavelength A to Wavelength D to activate the
corresponding wavelengths in multi--wavelength mode. Enter
their values in the corresponding fields.
Check Zero Order to work at zero order.
Emission Parameter Group
Check Wavelength A to Wavelength D to activate the
corresponding wavelengths in multi--wavelength mode. Enter
their values in the corresponding fields.
Check Zero Order to work at zero order.
Acquire Spectra Parameter Group
Using the scrolling list, select the spectral Acquisition Mode.
None: no spectra are stored.
Apex: only the top of peak spectrum is stored.
All in peak: all spectra between the beginning and
the end of a peak are stored.
All: all spectra are stored during the run.
In the fields defining the Range, enter the minimum and
maximum wavelength of the spectrum. Enter then the
wavelength Step in the corresponding field. A small wavelength
step will enhance the spectrum resolution.
Enter the value of the Threshold in the corresponding field.
1100 LC Modules Control Manual
- 84 -
03-914947-30:Rev.6
Time Table Control
Program Parameter Group
Program detector changes during the run. Change the excitation
or emission wavelength, the peakdetector and/or the threshold
values.
Use the following buttons to edit the table:
to add a line to the table.
to delete a line in the table.
1100 LC Modules Control Manual
- 85 -
03-914947-30:Rev.6
to clear the entire table.
Baseline Behavior Parameter Group
Select in the scrolling list the type of Baseline Behaviour. Three
choices are available: Append, Zero and Free.
Analogs Control
Analog Parameter Group
This detector has two analog outputs. For each one:
In the Offset field, enter the offset value to adjust the
baseline.
1100 LC Modules Control Manual
- 86 -
03-914947-30:Rev.6
In the Attenuation scrolling list, select the attenuation value.
The available values are: 0.195 LU, 0.391 LU, 0.781 LU,
1.563 LU, 3.125 LU, 6.25 LU, 12.5 LU, 25 LU, 50 LU, 100
LU, 200.00 LU, 400.00 LU, 800.00 LU, 1600.00 LU.
In the Range scrolling list, enter the output voltage range
value. The available values are: 0.1 Volt Full Scale and 1
Volt Full scale.
In the Source scrolling list, select the type of the collected
signal. The available choices are: EX1/EM1, EM2/EX2,
EM3/EX3, EM4/EX4, sample w/o reference, Reference
without sample, Raw sample, Raw reference, Test
chromatogram, Analog output test, Board temperature.
Select the Polarity of the detector.
Phosphorescence Control
1100 LC Modules Control Manual
- 87 -
03-914947-30:Rev.6
Settings Parameter Group
Enter the Delay in the corresponding field.
Enter the Gate in the corresponding field.
Others Control
Fluorescence Scan Range Parameter Group
In the fields Excitation/Emission From and Excitation/Emission
To enter the minimum and maximum wavelengths of the spectra.
Enter the Excitation/Emission Step in the corresponding field. A
small wavelength step will enhance the spectrum resolution.
1100 LC Modules Control Manual
- 88 -
03-914947-30:Rev.6
Photo Multiplier Tube Parameter Group
Select the value of the Gain parameter (amplification factor).
Lamps Parameter Group
Check Require Flash Lamp if necessary.
Flash Lamp Economy Mode decreases the frequency of the lamp
flash.
Automatic Lamp Stop automatically stops the detector’s lamp at
the end of the run.
Flash Lamp Always On enables permanent flash mode.
Lamp Energy Reference On configures the signal as a reference.
Autozero At Prerun performs an autozero of the detector before
the run.
Control Section for the Agilent LC 1100 Refractive Index
Detector (G1362)
Click on the
button to display the Agilent Technologies
1100 Retention Index Detector (G1362) control method section.
It contains three sub-sections: Settings, Analogs and Time table.
Click on the required sub-section to define the corresponding
parameters that will be used during the chromatographic run.
1100 LC Modules Control Manual
- 89 -
03-914947-30:Rev.6
Settings Control
General Parameter Group
Check Heater On to turn the heater on.
In the Temperature field, enter the value of the optical unit
Temperature.
Check Polarity inverted to invert the polarity.
Check Automatic recycling to switch the recycle valve to the on
position after one analysis has been completed and to return it to
the off position before the next analysis starts.
Check Autozero at prerun to perform an autozero of the detector
just before the run.
1100 LC Modules Control Manual
- 90 -
03-914947-30:Rev.6
Automatic Purge Parameter Group
In the Purge time field, enter the time during which the
instrument is purged.
In the Wait time field, enter the time to wait after a purge.
Peaks Parameter Group
Select the Peakwidth value in the scrolling list. This parameter
influences the peak detection. A response time is associated
with each peakwidth value. The available values are:
<0.005 min (RiseTime<0.12 sec)
>0.005 min (RiseTime>0.12 sec)
>0.010 min (RiseTime>0.25 sec)
>0.025 min (RiseTime>0.5 sec)
>0.05 min (RiseTime>1 sec)
>0.1 min (RiseTime>2 sec)
>0.2 min (RiseTime>4 sec)
>0.4 min (RiseTime>8 sec)
Select the Data rate value in the scrolling list. This parameter is
associated to the previous ones. The available values are:
36.50 Pt/sec
18.25 Pt/sec
9.12 Pt/sec
4.56 Pt/sec)
2.28 Pt/sec
1.14 Pt/sec
1100 LC Modules Control Manual
- 91 -
03-914947-30:Rev.6
Analogs Control
In the Offset field, enter the offset value to adjust the baseline.
In the Attenuation scrolling list, enter the attenuation value. The
available values are: 1/1024 Full range, 1/512 Full range, 1/256
Full range, 1/128 Full range, 1/64 Full range, 1/32 Full range,
1/16 Full range, 1/8 Full range, ¼ Full range, ½ Full range, 1x
Full range and 2x Full range.
In the Range scrolling list, enter the output voltage range value.
The available values are: 0.1 Volt Full Scale and 1 Volt Full
scale.
1100 LC Modules Control Manual
- 92 -
03-914947-30:Rev.6
Time Table Control
Program Parameter Group
Program peakwidth and/or the polarity changes during the run.
Use the following buttons to edit the table:
to add a line to the table.
to delete a line in the table.
to clear the entire table.
1100 LC Modules Control Manual
- 93 -
03-914947-30:Rev.6
Starting and Viewing an
Acquisition
Quick Start and Sequence
Once the instrument control method has been correctly
programmed, an analysis can be started. The next section briefly
describes how to start an acquisition.
Quick Start (Single Acquisition)
1. Press the
button.
In the Quick Start window, select the system, the method
and optionally the project if connected in "All project" mode.
2. Press the OK button.
The following screen is displayed:
1100 LC Modules Control Manual
- 94 -
03-914947-30:Rev.6
In the Acquisition parameters tab, required fields like the Run
Name, the Run ID and the Acquisition length must be filled in
before starting an analysis. Furthermore, if the system is
equipped with an autosampler controlled by the Galaxie
Chromatography Data System, the Injection Volume, the Vial
position and the Rack number (if required) must be entered.
Other parameters associated with each acquisition channel
can be entered in the Channel X tab.
3. Click on the Start button to start the acquisition if the system
is a single-injector system or click on the Next button if the
system is a multiple injector system. In a multiple injector
system, the same parameters entered for the first injector
must be entered for the other injectors before starting the
acquisition.
1100 LC Modules Control Manual
- 95 -
03-914947-30:Rev.6
Sequence
1. To create a sequence, select the FILE / NEW SEQUENCE
menu, and complete the displayed creation wizard screen
(refer to the Galaxie Chromatography Data System User’s
Guide), by entering the system name that will perform the
analysis, the number of lines (corresponding to the number
of samples), and the sequence name.
2. The sequence is displayed. Complete the sequence
information columns (refer to the Galaxie Chromatography
Data System User’s Guide).
The Method Name, the Run Name, the Run ID, and the
Acquisition length must be filled in before starting the
analysis. All these parameters are automatically imported
from the acquisition part if defined in the method.
3. Start the sequence by clicking on the
button.
NOTE: For more details about how to start an acquisition, refer to the Galaxie
Chromatography Data System User’s Guide.
1100 LC Modules Control Manual
- 96 -
03-914947-30:Rev.6
Running Acquisition Status
Viewing a Running Acquisition
To view a running acquisition, click on the Systems tab then
select the running system. A window is activated which is
composed of two parts: the running chromatogram and the
status window where the driver modules are listed.
Status of the Agilent LC 1100 Autosampler (G1313)
Click on the
button to display the Agilent Technologies
1100 Autosampler (G1313) status screen. It contains five subsections: General, Times, Injection and Maintenance. Click on
the required sub-section to display the corresponding screen.
General Window
This window allows direct control of the autosampler.
Information about the autosampler status is displayed: Faults,
not ready parameters, etc.
1100 LC Modules Control Manual
- 97 -
03-914947-30:Rev.6
The
system.
button turns on all the modules that compose the
The
system.
button turns off all the modules that compose the
The
button reset the autosampler.
The LED gives information about the general status of the
autosampler: Communication failure, Start Up, Error, and Ready.
Times Window
This is a read-only window.
The elapsed run time and the elapsed post run time (if any) are
displayed.
1100 LC Modules Control Manual
- 98 -
03-914947-30:Rev.6
Injection Window
This is a read-only window.
The vial and the injection volume are displayed.
Maintenance Window
This window is used for maintenance operation on the
autosampler.
Select with the radio button on which part of the instrument the
button.
maintenance will be done and press the
Three choices are available: Needle, Piston and Arm.
When the maintenance is complete, press the
1100 LC Modules Control Manual
- 99 -
button.
03-914947-30:Rev.6
Overview Window
Click on the
button: the Status Overview window is
displayed and contains three tabs:
•
General: displays the synopsis of the instrument,
where some current values can be read (state of
the instrument, vial injected and volume injected).
•
Not ready: contains the not ready information
sent by the instrument.
•
Events: contains the events that have occurred
on the instrument.
Status of the Agilent LC 1100 Thermostated Autosampler
(G1329)
Click on the
button to display the Agilent Technologies
1100 Thermostated Autosampler (G1329) status screen. It
contains six sub-sections: General, Times, Injection, Thermostat,
Maintenance and Overview. Click on the required sub-section to
display the corresponding screen.
1100 LC Modules Control Manual
- 100 -
03-914947-30:Rev.6
General Window
This window allows direct control of the autosampler.
Information about the autosampler status is displayed: Faults,
not ready parameters, etc.
The
system.
button turns on all the modules that compose the
The
system.
button turns off all the modules that compose the
The
button turns on the thermostat.
The
button turns off the thermostat.
The
button reset the autosampler.
The LEDs give information about the general status of the
instrument: Communication failure, Error, Ready, etc.
1100 LC Modules Control Manual
- 101 -
03-914947-30:Rev.6
Times Window
This is a read-only window.
The elapsed run time and the elapsed post run time (if any) are
displayed.
Injection Window
This is a read-only window.
The vial and the injection volume are displayed.
1100 LC Modules Control Manual
- 102 -
03-914947-30:Rev.6
Thermostat Window
This is a read-only window.
The actual temperature and the setpoint temperature of the
heated area are displayed.
Maintenance Window
This window is used for maintenance operation on the
autosampler.
Select with the radio button on which part of the instrument the
button.
maintenance will be done and press the
Three choices are available: Needle, Piston and Arm.
When the maintenance is complete, press the
1100 LC Modules Control Manual
- 103 -
button.
03-914947-30:Rev.6
Overview Window
Click on the
button: the Status Overview window is
displayed and contains three tabs:
•
General: displays the synopsis of the instrument,
where some current values can be read (state of
the instrument, vial injected, temperature and
volume injected).
The
button turns on the thermostat.
The
button turns off the thermostat.
•
Not ready: contains the not ready information
sent by the instrument.
•
Events: contains the events that have occurred
on the instrument.
Status of the Agilent LC 1100 Well Plate Autosampler
(G1367)
Click on the
button to display the Agilent Technologies
1100 Well Plate Autosampler (G1367) status screen. It contains
five sub-sections: General, Times, Injection, Thermostat and
1100 LC Modules Control Manual
- 104 -
03-914947-30:Rev.6
Overview. Click on the required sub-section to display the
corresponding screen.
General Window
This window allows direct control of the autosampler.
Information about the autosampler status is displayed: Faults,
not ready parameters, etc.
The
system.
button turns on all the modules that compose the
The
system.
button turns off all the modules that compose the
The
button reset the autosampler.
The
button turns on the thermostat.
The
button turns off the thermostat.
The LEDs give information about the general status of the
instrument: Communication failure, Error, Ready, etc.
1100 LC Modules Control Manual
- 105 -
03-914947-30:Rev.6
Times Window
This is a read-only window.
The elapsed run time and the elapsed post run time (if any) are
displayed.
Injection Window
This is a read-only window.
The vial and the injection volume are displayed.
1100 LC Modules Control Manual
- 106 -
03-914947-30:Rev.6
Thermostat Window
This is a read-only window.
The actual temperature and the setpoint temperature of the
heated area are displayed.
Overview Window
Click on the
button: the Status Overview window is
displayed and contains three tabs:
•
1100 LC Modules Control Manual
General: displays the synopsis of the instrument,
where some current values can be read (state of
the instrument, vial injected, temperature and
volume injected).
- 107 -
03-914947-30:Rev.6
•
Not ready: contains the not ready information
sent by the instrument.
•
Events: contains the events that have occurred
on the instrument.
Status of the Agilent LC 1100 Isocratic Pump (G1310)
Click on the
button to display the Agilent Technologies
1100 Isocratic Pump (G1310) status screen. It contains six subsections: General, Times, Elution, Pressure, Bottle, and
Overview. Click on the required sub-section to display the
corresponding screen.
General Window
This window allows direct control of the pump.
Information about the pump is displayed: Faults, not ready
parameters, etc.
The
system.
1100 LC Modules Control Manual
button turns on all the modules that compose the
- 108 -
03-914947-30:Rev.6
The
system.
button turns off all the modules that compose the
The
button turns on the pump module only.
The
button turns off the pump module only.
The
button reset the pump module.
The LED’s give information about the general status of the
instrument: Communication failure, Error, Ready, etc.
By clicking on Set Flow or Set Flow Ramp, another field will
appear allowing you to modify the current values. Apply the new
values with the
button.
Times Window
This is a read-only window.
The elapsed run time and the elapsed post run time (if any) are
displayed.
1100 LC Modules Control Manual
- 109 -
03-914947-30:Rev.6
Elution Window
This is a read-only window.
The actual flow rate and the pressure evolution or the flow
evolution is displayed in this screen, according to the user
choice.
Pressure Window
This is a read-only window.
The Minimum, Actual and Maximum pressures are displayed.
The Ripple value is also displayed.
1100 LC Modules Control Manual
- 110 -
03-914947-30:Rev.6
Bottles Window
Remaining in Bottle Parameter Group
The remaining volume of the bottle is indicated in the field Bottle
A.
Refill Parameter Group
Enter the Refilling volume and click on Refill A to refill the bottle
A.
Bottle Management Parameter Group
Check Error if empty to place the Agilent 1100 in error state
when the eluent bottle is empty.
Check Not Ready Below to place the instrument in not ready
mode when the remaining volume is less than the entered value.
Overview Window
Click on the
button: the Status Overview window is
displayed and contains three tabs:
•
1100 LC Modules Control Manual
General: displays the synopsis of the instrument,
where some current values can be read (state of
the instrument, pressure, ripple and flow).
- 111 -
03-914947-30:Rev.6
The
button turns on the pump module only.
The
button turns off the pump module only.
•
Not ready: contains the not ready information
sent by the instrument.
•
Events: contains the events that have occurred
on the instrument.
Status of the Agilent LC 1100 Quaternary Pump (G1311)
Click on the
button to display the Agilent Technologies
1100 Quaternary Pump (G1311) status screen. It contains six
sub-sections: General, Times, Elution, Pressure, Bottles and
Overview. Click on the required sub-section to display the
corresponding screen.
1100 LC Modules Control Manual
- 112 -
03-914947-30:Rev.6
General Window
This window allows direct control of the pump.
Information about the pump status is displayed: Faults, not ready
parameters, etc.
The
system.
button turns on all the modules that compose the
The
system.
button turns off all the modules that compose the
The
button turns on the pump module only.
The
button turns off the pump module only.
The
button reset the pump module.
The LED’s give information about the general status of the
instrument: Communication failure, Error, Ready, etc.
1100 LC Modules Control Manual
- 113 -
03-914947-30:Rev.6
By clicking on Set Flow, Set Composition, Set Flow Ramp, Turn
Seal wash Off or Active Single Seal Wash, another field will
appear allowing you to modify the current values. Apply the new
values with the
button.
Times Window
This is a read-only window.
The elapsed run time and the elapsed post run time (if any) are
displayed.
Elution Window
This is a read-only window.
1100 LC Modules Control Manual
- 114 -
03-914947-30:Rev.6
The actual flow rate and the percentages of each solvent in the
mobile phase are displayed. According to the user choice, the
pressure or the flow evolution is plotted against time in this
screen.
Pressure Window
This is a read-only window.
The Minimum, Actual and Maximum pressures are displayed.
The Ripple value is also displayed.
Bottles Window
1100 LC Modules Control Manual
- 115 -
03-914947-30:Rev.6
Remaining in Bottle Parameter Group
The remaining volume of each bottle is indicated in the fields
Bottle A, Bottle B, Bottle C and Bottle D.
Refill Parameter Group
Enter the Refilling volume and click on Refill button to refill each
bottle.
Bottle Management Parameter Group
Check Error if empty to place the Agilent 1100 in error state
when the eluent bottle is empty.
Check Not Ready Below to place the instrument in not ready
mode when the remaining volumes are less than the values
entered.
Overview Window
Click on the
button: the Status Overview window is
displayed and contains three tabs:
•
General: displays the synopsis of the instrument,
where some current values can be read (state of
the instrument, pressure, ripple and flow).
The
button turns on the pump module only.
The
button turns off the pump module only.
1100 LC Modules Control Manual
- 116 -
03-914947-30:Rev.6
•
Not ready: contains the not ready information
sent by the instrument.
•
Events: contains the events that have occurred
on the instrument.
Status of the Agilent LC 1100 Binary Pump (G1312)
Click on the
button to display the Agilent Technologies
1100 Binary Pump (G1312) status screen. It contains six subsections: General, Times, Elution, Pressure, Bottles and
Overview. Click on the required sub-section to display the
corresponding screen.
1100 LC Modules Control Manual
- 117 -
03-914947-30:Rev.6
General Window
This window allows direct control of the pump.
Information about the pump status is displayed: Faults, not ready
parameters, etc.
The
system.
button turns on all the modules that compose the
The
system.
button turns off all the modules that compose the
The
button turns on the pump module only.
The
button turns off the pump module only.
The
button reset the pump module.
button activates the A1 channel of the Solvent
The
Selection Valve A.
The
button activates the A2 channel of the Solvent
Selection Valve A.
1100 LC Modules Control Manual
- 118 -
03-914947-30:Rev.6
The
button activates the B1 channel of the Solvent
Selection Valve B.
The
button activates the B2 channel of the Solvent
Selection Valve B.
The LED’s give information about the general status of the
instrument: Communication failure, Error, Ready, etc.
By clicking on Set Flow or Set Composition, another field will
appear allowing you to modify the current values. Validate the
new values with the
button.
Times Window
This is a read-only window.
The elapsed run time and the elapsed post run time (if any) are
displayed.
1100 LC Modules Control Manual
- 119 -
03-914947-30:Rev.6
Elution Window
This is a read-only window.
The actual flow rate and the percentages of each solvent in the
mobile phase are displayed. According to the user choice, the
pressure or the flow is plotted against time on this screen.
Pressure Window
This is a read-only window.
The Minimum, Actual and Maximum pressures are displayed.
The Ripple value is also displayed.
1100 LC Modules Control Manual
- 120 -
03-914947-30:Rev.6
Bottles Window
Remaining in Bottle Parameter Group
The remaining volume of each bottle is indicated in the fields
Bottle A and Bottle B.
Refill Parameter Group
Enter the Refilling volume and click on Refill to refill each bottle.
Bottle Management Parameter Group
Check Error if empty to place the Agilent 1100 in error state
when the eluent bottle is empty.
Check Not Ready Below to place the instrument in not ready
mode when the remaining volumes are less than the values
entered.
Overview Window
Click on the
button: the Status Overview window is
displayed and contains three tabs:
1100 LC Modules Control Manual
- 121 -
03-914947-30:Rev.6
•
General: displays the synopsis of the instrument,
where some current values can be read (state of
the instrument, pressure, ripple and flow).
The
button turns on the pump module only.
The
button turns off the pump module only.
•
Not ready: contains the not ready information
sent by the instrument.
•
Events: contains the events that have occurred
on the instrument.
Status of the Agilent LC 1100 Column Compartment
(G1316)
Click on the
button to display the Agilent Technologies
1100 Column Compartment (G1316) status screen. It contains
six sub-sections: General, Times, Thermostat, Valve, Columns
and Overview. Click on the required sub-section to display the
corresponding screen.
1100 LC Modules Control Manual
- 122 -
03-914947-30:Rev.6
General Window
This window allows direct control of the column compartments.
Information about the column compartment status is displayed:
Faults, not ready parameters, etc.
The
system.
button turns on all the modules that compose the
The
system.
button turns off all the modules that compose the
The
button turns on the column compartment heater.
The
button turns off the column compartment heater.
The
button reset the column compartment heater.
The LED’s give information about the general status of the
instrument: Communication failure, Error, Ready, etc.
1100 LC Modules Control Manual
- 123 -
03-914947-30:Rev.6
Select Set Left (or Right) temperature, then enter the desired
temperature in the Left (or Right) temperature field and click on
the
button to send the new temperature to the instrument.
Times Window
This is a read-only window.
The elapsed run time and the elapsed post run time (if any) are
displayed
Thermostat Window
This is a read-only window.
1100 LC Modules Control Manual
- 124 -
03-914947-30:Rev.6
The actual and setpoint temperatures for the right and left
compartments are displayed
Valve Window
The current valve position is displayed and can be changed from
this screen.
Column Window
The current tagID properties are displayed and can be changed from
this screen.
button. The following screen is
To program the tagID, press the
displayed that allows the user to program the tagID.
1100 LC Modules Control Manual
- 125 -
03-914947-30:Rev.6
Please note that the Injections field is automatically incremented
by one after each injection of the system.
Overview Window
Click on the
button: the Status Overview window is
displayed and contains three tabs:
•
General: displays the synopsis of the instrument,
where some current values can be read (state of
the instrument, temperatures and valve position).
The
button turns on the column compartment heater.
The
button turns off the column compartment heater.
1100 LC Modules Control Manual
- 126 -
03-914947-30:Rev.6
•
Not ready: contains the not ready information
sent by the instrument.
•
Events: contains the events that have occurred
on the instrument.
Status of the Agilent LC 1100 Variable Wavelength Detector
(G1314)
Click on the
button to display the Agilent Technologies
1100 Variable Wavelength Detector (G1314) status screen. It
contains five sub-sections: General, Times, Signal, Lamps and
Overview. Click on the required sub-section to display the
corresponding screen.
General Window
This window allows direct control of the detector.
1100 LC Modules Control Manual
- 127 -
03-914947-30:Rev.6
Information about the detector status is displayed: Faults, not
ready parameters, etc.
The
system.
button turns on all the modules that compose the
The
system.
button turns off all the modules that compose the
The
button switches on the detector lamp.
The
button switches off the detector lamp.
button defines a blank spectrum. This spectrum will be
The
subtracted from the sample spectrum.
button allows the user to define a sample spectrum. If
The
a blank spectrum has been defined, it will be subtracted to the
sample spectrum.
The
button autozeros the detector.
The
button reset the detector module.
The LED’s give information about the general status of the
instrument: Communication failure, Error, Ready, etc.
Select Set Wavelength A, then enter the desired Wavelength in
the Wavelength field and click on the
new wavelength to the instrument.
1100 LC Modules Control Manual
- 128 -
button to send the
03-914947-30:Rev.6
Times Window
This is a read-only window.
The elapsed run time and the elapsed post run time (if any) are
displayed.
Signal Window
This is a read-only window.
The current wavelength and absorbance are displayed.
1100 LC Modules Control Manual
- 129 -
03-914947-30:Rev.6
Lamps Window
This is a read-only window.
The UV Lamp Ignition and On-Time are displayed.
When the lamp is changed, reset the counters by pressing the
reset button.
Overview Window
Click on the
button: the Status Overview window is
displayed and contains three tabs:
•
General: displays the synopsis of the instrument,
where some current values can be read (state of
the instrument, wavelength and absorbance).
The
button switches on the detector lamp.
The
button switches off the detector lamp.
1100 LC Modules Control Manual
- 130 -
03-914947-30:Rev.6
•
Not ready: contains the not ready information
sent by the instrument.
•
Events: contains the events that have occurred
on the instrument.
Status of the Agilent LC 1100 Diode Array Detector (G1315)
Click on the
button to display the Agilent Technologies
1100 Diode Array Detector (G1315) status screen. It contains
five sub-sections: General, Times, Signals, Lamps and
Overview. Click on the required sub-section to display the
corresponding screen.
General Window
1100 LC Modules Control Manual
- 131 -
03-914947-30:Rev.6
This window allows direct control of the detector.
Information about the detector status is displayed: Faults, not
ready parameters, etc.
The
system.
button turns on all the modules that compose the
The
system.
button turns off all the modules that compose the
The
button switches on the detector lamp.
The
button switches off the detector lamp.
The
button reset the detector module.
The
button autozeros the detector.
The LED’s give information about the general status of the
instrument: Communication failure, Error, Ready, etc.
Times Window
This is a read-only window.
1100 LC Modules Control Manual
- 132 -
03-914947-30:Rev.6
The elapsed run time and the elapsed post run time (if any) are
displayed.
Signals Window
In the Sample Diode field are displayed the working wavelengths
(Wl) and their bandwidths (Bw) for each channel.
The Reference Diode field showing the reference wavelengths
and their bandwidths for each channel is not active.
The Absorbance field displays the current absorbance values of
each channel.
Lamps Window
This is a read-only window.
1100 LC Modules Control Manual
- 133 -
03-914947-30:Rev.6
The UV and VIS Lamp Ignition and burn are displayed.
When a lamp is changed, reset the counters by pressing the
Reset UV or Reset VIS button.
Overview Window
Click on the
button: the Status Overview window is
displayed and contains three tabs:
•
General: displays the synopsis of the instrument,
where some current values can be read (state of
the instrument, wavelength and absorbance).
The
button switches on the detector lamp.
The
button switches off the detector lamp.
1100 LC Modules Control Manual
•
Not ready: contains the not ready information
sent by the instrument.
•
Events: contains the events that have occurred
on the instrument.
- 134 -
03-914947-30:Rev.6
Status of the Agilent LC 1100 Fluorescence Detector
(G1321)
Click on the
button to display the Agilent Technologies
1100 Fluorescence Detector (G1321) status screen. It contains
four sub-sections: General, Times, Signal and Overview. Click
on the required sub-section to display the corresponding screen.
General Window
This is a read-only window.
Information about the detector is displayed: Faults, not ready
parameters, etc.
The
system.
button turns on all the modules that compose the
The
system.
button turns off all the modules that compose the
The
button switches on the detector lamp.
The
button switches off the detector lamp.
1100 LC Modules Control Manual
- 135 -
03-914947-30:Rev.6
The
button reset the detector module.
button and
button enables to take spectra. Blank
The
defines the spectrum as a baseline spectrum which will be
automatically subtracted to the other spectra (Sample button).
The
button autozeros the detector.
The LED’s give information about the general status of the
instrument: Communication failure, Error, Ready, etc.
button and the corresponding date entry area are not
The
active for this detector.
Times Window
This is a read-only window.
The elapsed run time and the elapsed post run time (if any) are
displayed.
1100 LC Modules Control Manual
- 136 -
03-914947-30:Rev.6
Signal Window
This is a read-only window.
The current Excitation and Emission wavelengths are displayed
for each channel.
Overview Window
Click on the
button: the Status Overview window is
displayed and contains three tabs:
•
General: displays the synopsis of the instrument,
where some current values can be read (state of
the instrument, wavelength and absorbance).
The
button switches on the detector lamp.
The
button switches off the detector lamp.
1100 LC Modules Control Manual
- 137 -
03-914947-30:Rev.6
•
Not ready: contains the not ready information
sent by the instrument.
•
Events: contains the events that have occurred
on the instrument.
Status of the Agilent LC 1100 Refractive Index Detector
(G1362)
Click on the
button to display the Agilent Technologies
1100 Refractive Index Detector (G1362) status screen. It
contains four sub-sections: General, Times, Actuals and
Overview. Click on the required sub-section to display the
corresponding screen.
1100 LC Modules Control Manual
- 138 -
03-914947-30:Rev.6
General Window
This is a read-only window.
Information about the detector is displayed: Faults, not ready
parameters, etc.
This window allows direct control of the detector.
The
system.
button turns on all the modules that compose the
The
system.
button turns off all the modules that compose the
The
button switches on the thermostat.
The
button switches off the thermostat.
The
button reset the detector module.
The
button autozeros the detector.
The
button switches on the purge valve.
1100 LC Modules Control Manual
- 139 -
03-914947-30:Rev.6
The
button displays the reference valve control
parameters. The available valve positions are: Sample cell only
and Reference and sample cells. This action can be infinite or
can begin at a precise time.
button allows displaying the recycle valve control
The
parameters. The available valve positions are: Cell to waste and
Cell to solvent reservoir. This action can be infinite or can begin
at a precise time.
The LED’s give information about the general status of the
instrument: Communication failure, Error, Ready, etc.
Times Window
This is a read-only window.
The elapsed run time and the elapsed post run time (if any) are
displayed.
1100 LC Modules Control Manual
- 140 -
03-914947-30:Rev.6
Actuals Window
This is a read-only window.
The current Signal parameters, the current Valves states and the
major Temperatures are displayed.
Overview Window
Click on the
button: the Status Overview window is
displayed and contains three tabs:
•
General: displays the synopsis of the instrument,
where some current values can be read (state of
the instrument, wavelength and absorbance).
The
button switches on the thermostat.
The
button switches off the thermostat.
The
button switches on the purge valve.
button displays the reference valve control
The
parameters. The available valve positions are: Sample cell only
and Reference and sample cells. This action can be infinite or
can begin at a precise time.
1100 LC Modules Control Manual
- 141 -
03-914947-30:Rev.6
The
button allows displaying the recycle valve control
parameters. The available valve positions are: Cell to waste and
Cell to solvent reservoir. This action can be infinite or can begin
at a precise time.
1100 LC Modules Control Manual
•
Not ready: contains the not ready information
sent by the instrument.
•
Events: contains the events that have occurred
on the instrument.
- 142 -
03-914947-30:Rev.6
Running Instrument
Maintenance Software
Performing Maintenance and Diagnosis
Run the separate Instrument maintenance software program.
(You must have the right to run instrument maintenance software
in the Galaxie profile under which you logged on.) Select the
system to display the diagnosis screens. It is only possible to
display the logbooks and the counters.
You must activate the maintenance mode to be able to modify
counters and to perform maintenance and diagnosis actions. So
this by right clicking on the instrument name and selecting
Maintenance On.
Systems currently in maintenance mode are preceded by the
tools symbol:
1100 LC Modules Control Manual
- 143 -
03-914947-30:Rev.6
Diagnostic Section for the Agilent
Technologies LC 1100 Modules
Maintenance of the Agilent LC 1100 Autosampler (G1313)
Click on the
button to display the Agilent Technologies
1100 Autosampler (G1313) diagnostic screen. It contains four
sub-sections: Counters, Logbook, Tests and Actions. Click on
the required sub-section to display the corresponding screen.
Counters Window
This window permits you to monitor the usage of two
components of the autosampler which is schematized at the top
of the counters tab.
The counters limits, actual and accumulated values are
displayed in the counters table:
1100 LC Modules Control Manual
- 144 -
03-914947-30:Rev.6
The Limit values correspond to the maximum allowed values for
the counters before the maintenance is needed.
The Actual column displays the incremented counter value since
the last reset of the counters.
In the Limit and Actual columns, select the current value and
modify it. Validate by pressing the
button.
The Accumulated values correspond to counter value since the
first operation of the autosampler module.
At the right of the table, a visual illustration shows the usage of
each counter. Below 75%, the usage is typified in green and
above 75% in red to alert that maintenance will be required soon.
1100 LC Modules Control Manual
- 145 -
03-914947-30:Rev.6
Each counter modification is automatically listed in the
maintenance audit trail.
Press
the maintenance audit trail.
to add the current counters table in
Counters definition
Needle Movement: Total number of needle movements into the
seat.
Valve switching: Total number of injection valve switches.
Logbook Window
Select a logbook in the scrolling list. The available logbooks are:
Error logbook
State change history
1100 LC Modules Control Manual
- 146 -
03-914947-30:Rev.6
Info event history
Limit event history
Error logbook of last analysis
State change history of last analysis
Info event history of last analysis
Limit event history of last analysis
Parameters changes during the last analysis
Run history
Maintenance history
Press
the maintenance audit trail.
to add the displayed logbooks in
Tests Window
Select a test in the scrolling list. Injector Steps and Gripper
Verification tests are available.
1100 LC Modules Control Manual
- 147 -
03-914947-30:Rev.6
To finish a test, click on the
button. The
autosampler is then automatically re-initialized.
Injector steps test
Select Injector Steps to check separately the performance of
each movement of the injection sequence.
Before performing the tests, enter the required volume and vial
number in the table header.
The following injector test stages are available:
Bypass: switches injection valve to the bypass position.
Plunger home: Moves the plunger to the home position.
Needle up: Lifts the needle arm to the upper position.
Vial to seat: Moves the selected vial to the seat position.
Needle into vial: Lowers the needle into vial.
Draw: Device draws the defined injection volume.
Needle up: Lifts the needle out of the vial.
Vial to tray: Returns the selected vial to the tray position.
Needle into seat: Lowers the needle arm into the seat.
Mainpass: Switches the injection valve to the mainpass position.
Click on a stage to perform it. At the end of a stage, the test
result is displayed in the corresponding column and the current
needle and valve states are displayed in the table header.
Results are also listed in the maintenance audit trail:
It is possible to perform only chosen stages and to perform them
several times.
For analyzing the test results, refer to the autosampler operating
manual.
1100 LC Modules Control Manual
- 148 -
03-914947-30:Rev.6
Gripper Verification test
Gripper Verification
Run the Gripper Verification procedure to verify the gripper
alignment is correct.
The test uses 4 vials position as reference positions. Select in
the scrolling list the vial to check the position.
Press
to move the gripper arm to the vial position.
Press
to lift the vial from its position.
Press
to replace the vial in the tray.
Repeat the procedure for the next vial.
Gripper Alignment
Perform a Gripper Alignment procedure if a misalignment is
noticed during the Gripper Verification test. To correct all other
vial positions within the tray, the Gripper Alignment procedure
uses two vials position as reference points.
Check Tray to begin the realignment procedure.
Press
1100 LC Modules Control Manual
to move the gripper arm to position of vial 1.
- 149 -
03-914947-30:Rev.6
Press
to close the gripper and move the fingers
as close as possible to the top of the vial.
Use the arrows keys for correcting rotational, horizontal and
vertical position.
to open the gripper and move it in such a
Press
way that the cap of the vial and rubber of gripper fingers have
the same height.
to validate the new vial 1 position.
Press
Press
and repeat the same steps to correct the vial
81 position. Once the vial 81 is aligned, press
.
Once vial 1 and 81 positions are corrected, press the
button to realign the tray. The new alignment
is stored permanently and the module is reset.
during the procedure to cancel all
Press
correction and set previous alignment.
1100 LC Modules Control Manual
- 150 -
03-914947-30:Rev.6
Actions Window
This window is used to list the autosampler maintenance actions.
Select the replaced component in the Maintenance Message
scrolling list. Enter the Operator name and press the
button.
The user is then automatically asked if he wants to reset the
counters also.
Answer
to zero or
to set the corresponding counter actual value
to not change the actual counter value.
The available choices are Injection valve seals replaced and
Needle/seat pair replaced.
Once an action is performed, it is automatically listed in the
maintenance audit trail.
1100 LC Modules Control Manual
- 151 -
03-914947-30:Rev.6
Maintenance of the Agilent LC 1100 Quaternary pump
(G1311)
Click on the
button to display the Agilent Technologies
1100 Quaternary Pump (G1311) diagnostic screen. It contains
four sub-sections: Counters, Logbook, Tests and Actions. Click
on the required sub-section to display the corresponding screen.
Counters Window
This window monitors the usage of several components of the
quaternary pump module which is schematized at the top of the
counters tab.
Two different counters tables are available: one for the pump
components and another for the valves components. Click on the
graphic to select either the pump or valve for display. A box will
be highlighted around the displayed component.
The General and Miscellaneous counters are identical for the
pump and MCGV counters tables. The Valve counters are
displayed only when selecting the MCGV in the module schema.
Select the pump in the module schema. The following counters
limits, actual and accumulated values are displayed and the
pump is bordered with a blue rectangle:
1100 LC Modules Control Manual
- 152 -
03-914947-30:Rev.6
Select the MCGV in the module schema. The following counters
limits, actual and accumulated values are then displayed and the
MCGV is bordered with a blue rectangle:
1100 LC Modules Control Manual
- 153 -
03-914947-30:Rev.6
The Limit values correspond to the maximum allowed values for
the counters before the maintenance is needed.
The Actual column displays the incremented counter value since
the last reset of the counters.
In the Limit and Actual columns, select the current value and
modify it. Validate by pressing the
button.
The counter values of the Volume pumped A to D cannot be
modified. The Limit value corresponds to the last fill bottle
volume. The Actual value is equal to the subtraction of the limit
volume by the remaining volume in bottle.
The Accumulated values correspond to counter value since the
first operation of the pump module.
At the right of the table, a visual illustration shows the usage of
each counter. Below 75%, the usage is typified in green and
above 75% in red to alert a maintenance will be required soon.
1100 LC Modules Control Manual
- 154 -
03-914947-30:Rev.6
Each counter modification is automatically listed in the
maintenance audit trail.
Press
the maintenance audit trail.
to add the current counters table in
Counters definition
Volume pumped A: total pumped volume of solvent A.
Volume pumped B: total pumped volume of solvent B.
Volume pumped C: total pumped volume of solvent C.
Volume pumped D: total pumped volume of solvent D.
Total Volume pumped: Sum of the pumped volume of each
solvent channel.
Pumped volume: Total pumped volume. It is incremented by the
stroke volume with each piston reversal.
Wear: The seal wear value is derived from system pressure and
flow, is used as an indicator of seal wear in the pump head. The
value increments continually with pump usage.
Inlet valve switches: total number of active-inlet valve switches.
The value increments by one with each pump cycle.
Outlet valve switches: total number of outlet-valve switches. The
value increments by one with each pump cycle.
Each take in phase: total number of times the plungers reached
the take-in phase state.
Each deliver phase: total number of times the plungers reached
the delivery phase state.
Solvent valve A1/A2: Total number of solvent selection valve A
switches.
Solvent valve B1/B2: Total number of solvent selection valve B
switches.
MCGV switches: Total number of interrupts for MCGV switches.
1100 LC Modules Control Manual
- 155 -
03-914947-30:Rev.6
MCGV switches A: Total number of channel A valve switches.
MCGV switches B: Total number of channel B valve switches.
MCGV switches C: Total number of channel C valve switches.
MCGV switches D: Total number of channel D valve switches.
Logbook Window
Select in the scrolling list the logbook to display. The available
logbooks are:
Error logbook
State change history
Info event history
Limit event history
Error logbook of last analysis
State change history of last analysis
Info event history of last analysis
1100 LC Modules Control Manual
- 156 -
03-914947-30:Rev.6
Limit event history of last analysis
Parameters changes during the last analysis
Run history
Maintenance history
Press
maintenance audit trail.
to add the displayed logbook in the
Tests Window
Select a test in the scrolling list and press
to
start the test. Pressure Test and Leak Test are available.
Follow the instructions and once a stage is done, press Continue
or Skip in the status column.
It is possible to stop the test at any one stage by pressing the
button.
Pressure test
1100 LC Modules Control Manual
- 157 -
03-914947-30:Rev.6
Perform the Pressure Test to demonstrate pressure–tightness up
to 400 bars. The test consists in monitoring pressure profile while
the pump is following defined stages.
After its initialization, the pump starts pumping isopropyl alcohol
with a flow rate of 510µL/min and a stroke of 100 µL. When the
system pressure reaches the 390s bar value, the pump switches
off.
Once the pressure test is finished, results are displayed on
screen and also in the maintenance audit trail:
1100 LC Modules Control Manual
- 158 -
03-914947-30:Rev.6
For analyzing the test results, refer to the pump operating
manual.
Leak test
Run the Leak Test if the pump is the source of the leak.
The test consists in monitoring pressure profile while the pump is
following defined stages, different from those of the pressure
test:
1100 LC Modules Control Manual
- 159 -
03-914947-30:Rev.6
Leak test pressure profile
Pressure (bar)
Plateau 3
400
350
Ramp 4
300
250
Plateau 1
200
Plateau 2
Ramp 3
150
Ramp 2
100
Ramp 1
50
0
0
1
2
3
4
5
6
7
Time (min)
Ramp 1: The pump is initialized and then plunger 1 delivers a
153 µL/min flow of isopropyl alcohol with a stroke length of 100
µL.
Plateau 1: Plunger 2 delivers a 2µL/min flow rate during 1
minute.
Ramp 2: Plunger 2 delivers a 153 µL/min flow and plunger 1
pumps to complete the second half of the ramp.
Plateau 2: Plunger 1 delivers a 2 µL/min flow for 1 minute.
Ramp 3: The stroke is changed to 100 µL and the flow is
increased to 220 µL/min and then to 510 µL/min.
Ramp 4: The system reaches 390 bars and the flow is stopped.
Plateau 3: The pressure drop should not exceed 2 bars/min.
The pressure should stay constant during the plateau and should
increase linearly during the ramps.
Once the leak test is finished, results are displayed on screen
and also in the maintenance audit trail:
1100 LC Modules Control Manual
- 160 -
03-914947-30:Rev.6
For analyzing the test results, refer to the pump operating
manual.
1100 LC Modules Control Manual
- 161 -
03-914947-30:Rev.6
Actions Window
This window is used to list the pump module maintenance
actions.
Select the replaced component in the Maintenance Message
scrolling list. Enter the Operator name and press the
button.
The user is then automatically asked if he wants to reset the
corresponding counters also.
Answer
to zero or
to set the corresponding counter actual value
to not change the actual counter value.
The available choices are:
Pump seals replaced: Actual Wear and Pumped volume
counters can be reset.
1100 LC Modules Control Manual
- 162 -
03-914947-30:Rev.6
Pump pistons replaced: no outcome on counters.
Purge valve frit replaced: no outcome on counters
Solvent inlet filter replaced: no outcome on counters
AIV (Active Inlet Valve): Actual Inlet valve switches counters can
be reset.
Outlet valve: Actual Inlet valve switches counters can be reset.
Pump head assembly: no outcome on counters
MCGV (Multi Channel gradient Valve) replaced: MCGV switches
counters from A to D can be reset.
Once an action is performed, it is automatically listed in the
maintenance audit trail.
Maintenance of the Agilent LC 1100 Diode Array Detector
(G1315) and Multiple Wavelength Detector (G1365)
Click on the
button to display the Agilent Technologies
1100 Diode Array Detector (G1315) and Multiple Wavelength
detector (G1365) diagnostic screen. It contains four subsections: Counters, Logbook, Tests and Actions. Click on the
required sub-section to display the corresponding screen.
Counters Window
This window monitors the usage of several components of the
detector module which is schematized at the top of the counters
tab.
The following counter limits, actual and accumulated values are
then displayed:
1100 LC Modules Control Manual
- 163 -
03-914947-30:Rev.6
The Limit values correspond to the maximum allowed values for
the counters before the maintenance is needed.
The Actual column displays the incremented counter value since
the last reset of the counters.
In the Limit and Actual columns, select the current value and
modify it. Validate by pressing the
button.
The counter values of the VIS lamp Ignition, VIS lamp Burn, UV
lamp Ignition and UV lamp Burn cannot be modified. The Actual
values are respectively equal to the Lamp Ignition and Lamp OnTime values displayed in the detector status.
The Accumulated values correspond to counter value since the
first operation of the pump module.
At the right of the table, a visual illustration shows the usage of
each counter. Below 75%, the usage is typified in green and
above 75% in red to alert that maintenance will be required soon.
1100 LC Modules Control Manual
- 164 -
03-914947-30:Rev.6
Each counter modification is automatically listed in the
maintenance audit trail.
Press
the maintenance audit trail.
to add the current counters table in
Counters definition
VIS/UV Lamp Ignition: number of ignition of the lamps.
VIS/UV Lamp Burn: Tungsten/deuterium lamp total burn time.
VIS/UV Lamp On-time: Tungsten/deuterium lamp burn time
since the last ignition.
Slit Movement: Number of movements of the slit assembly.
Filter Movement: Number of movements of the filter assembly.
1100 LC Modules Control Manual
- 165 -
03-914947-30:Rev.6
Logbook Window
Select in the scrolling list the logbook to display. The available
logbooks are:
Error logbook
State change history
Info event history
Limit event history
Error logbook of last analysis
State change history of last analysis
Info event history of last analysis
Limit event history of last analysis
Parameters changes during the last analysis
Run history
Maintenance history
Press
maintenance audit trail.
1100 LC Modules Control Manual
- 166 -
to add the displayed logbook in the
03-914947-30:Rev.6
Tests Window
Select a test in the scrolling list and press
start the test. The available tests are:
to
Self-Test
Dark Current Test
Intensity Test
Holmium Test
Cell Test
Filter Test
WL. Calibration Test
D/A Converter Test
Follow the instructions and once a stage is done, press Continue
or Skip in the status column.
It is possible to stop the test at any one stage by pressing the
button.
1100 LC Modules Control Manual
- 167 -
03-914947-30:Rev.6
Self-Test Test
The Self-Test test consists in running the following individual
tests consecutively: Filter Test, Slit Test, Dark Current Test,
Wavelength Calibration test, Intensity test, Holmium Test,
spectral flatness test and ASTM noise test if checked before
starting the Self-test.
Select Single Self-test or Repetitive Self-Test to run the test once
or repetitively. Note that if one of the tests fails for the first cycle,
the second cycle will not be started.
The ASTM noise test determines the detector baseline noise (at
254 nm). It must be performed while pumping water at 1 mL/min.
Results are displayed at screen and also in the maintenance
audit trail:
1100 LC Modules Control Manual
- 168 -
03-914947-30:Rev.6
For analyzing the test results, refer to the detector operating
manual.
Dark Current Test
Perform the Dark Current test to determine the leakage current
from each optical diode. This leakage current may cause nonlinearity or excessive noise at specific wavelengths.
When starting the test, the slit 1 nm assembly is moved to the
dark position. At the end of the dark Current test, the resulting
leakage current is measured and graphically displayed for each
diode. Results are also listed in the maintenance audit trail:
1100 LC Modules Control Manual
- 169 -
03-914947-30:Rev.6
For analyzing the test results, refer to the detector operating
manual.
Intensity Test
Perform the Intensity test to evaluate the performance of the
lamps and optics. UV and VIS lamps Intensity are measured
over the detector wavelengths range.
The test should be done with water in the flow cell.
When starting the test, the 1 nm slit is moved into the light path
and the gain is set to zero. Four spectral ranges are used to
evaluate the intensity spectrum. Results are displayed on screen
and also listed in the maintenance audit trail:
1100 LC Modules Control Manual
- 170 -
03-914947-30:Rev.6
For analyzing the test results, refer to the detector operating
manual.
Holmium Test
Perform the Holmium test to verify wavelength accuracy. Three
characteristic absorbance maxima of the holmium oxide filter are
measured.
The test should be done with water in the flow cell.
When starting the test, the 1 nm slit is moved into the light path.
Measured maxima are displayed on screen and also listed in the
maintenance audit trail:
1100 LC Modules Control Manual
- 171 -
03-914947-30:Rev.6
For analyzing the test results, refer to the detector operating
manual.
Cell Test
Perform the Cell test to check whether the flow cell window is
clean.
The deuterium and tungsten lamps intensity is measured over
the detector wavelength range with the flow cell installed and
with the flow cell removed.
The test should be done with water in the flow cell.
When starting the test, the 1 nm slit is moved into the light path
and the gain is set to zero. The resulting intensity ratio
represents the amount of light absorbed by the flow cell. It is
displayed at screen and also listed in the maintenance audit trail:
1100 LC Modules Control Manual
- 172 -
03-914947-30:Rev.6
For analyzing the test results, refer to the detector operating
manual.
Filter Test
Perform the Filter test to determine the if the filter is clean.
During the test, the filter motor is moved in specific positions and
the resulting absorbance of the holmium oxide filter is monitored.
During the filter movement, the absorbance maxima are
measured and then graphically displayed at screen and in the
maintenance audit trail:
1100 LC Modules Control Manual
- 173 -
03-914947-30:Rev.6
For analyzing the test results, refer to the detector operating
manual.
Wavelength Calibration Test
Perform the Wavelength Calibration test to check wavelength
calibration.
During the test, the alpha (656.1 nm) and beta (486 nm)
emission lines deviation of the deuterium lamp are evaluated.
The test should be done with water in the flow cell.
The 1 nm slit is moved into the light path and the gain is set to
zero. The largest emission lines deviation is displayed.
At stage 6, choose to use this result to recalibrate the detector by
clicking Yes. If the deviation is small, click on No to ignore the
results.
At the end of the re-calibration, the largest emission lines
deviation is evaluated again and displayed on screen and also in
the maintenance audit trail:
For analyzing the test results, refer to the detector operating
manual.
D/A Converter Test
Perform the D/A Converter test to check correct operation of the
digital-analog-converter.
1100 LC Modules Control Manual
- 174 -
03-914947-30:Rev.6
During the test, a theoretical analog signal of approximately 52
mV with a square wave of 10µV and a frequency of 1 cycle / 48
seconds is applied to the digital-analog-converter (DAC).
The DAC signal must be plotted on an integrator at least 5
minutes in order to measure the amplitude and the peak-to-peak
noise of the signal. The results are not directly provided by the
Instrument Maintenance Software but by the integrator.
The following performed stages are displayed on screen and
also in the maintenance audit trail:
For analyzing the test results, refer to the detector operating
manual.
1100 LC Modules Control Manual
- 175 -
03-914947-30:Rev.6
Actions Window
This window is used to list the detector module maintenance
actions.
Select the replaced component in the Maintenance Message
scrolling list. Enter the Operator name and press the
button.
The user is then automatically asked if he wants to reset the
counters also.
Answer
to zero or
to set the corresponding counter actual value
to not change the actual counter value.
The available choices are:
1100 LC Modules Control Manual
- 176 -
03-914947-30:Rev.6
UV lamp replaced: UV lamp ignition, UV lamp Burn and UV lamp
On Time counters can be reset.
VIS lamp replaced: Vis lamp ignition, Vis lamp Burn and Vis
lamp On Time counters can be reset.
Filter assembly replaced: Filter movement counter can be reset.
Optical unit replaced: no outcome on counters
Once an action is performed, it is automatically listed in the
maintenance audit trail.
1100 LC Modules Control Manual
- 177 -
03-914947-30:Rev.6
Appendix
GPIB Addresses
The 1100 Master module connected to Galaxie with the GPIB
cable must have a unique address between 0 and 31. Usually 21
is reserved for IEEE488 controller (GPIB card or 800 MIB with
GPIB card).
The address is set with an 8 bit switch located on the rear panel
of modules. Changing the position of these switches must be
done with module switched-off.
The following table shows the switch positions for each GPIB
address:
Address
Sw4
Sw5
Sw6
Sw7
Sw8
0
Down
Down
Down
Down
Down
1
Down
Down
Down
Down
Up
2
Down
Down
Down
Up
Down
3
Down
Down
Down
Up
Up
4
Down
Down
Up
Down
Down
5
Down
Down
Up
Down
Up
6
Down
Down
Up
Up
Down
7
Down
Down
Up
Up
Up
8
Down
Up
Down
Down
Down
9
Down
Up
Down
Down
Up
1100 LC Modules Control Manual
- 178 -
03-914947-30:Rev.6
10
Down
Up
Down
Up
Down
11
Down
Up
Down
Up
Up
12
Down
Up
Up
Down
Down
13
Down
Up
Up
Down
Up
14
Down
Up
Up
Up
Down
15
Down
Up
Up
Up
Up
16
Up
Down
Down
Down
Down
17
Up
Down
Down
Down
Up
18
Up
Down
Down
Up
Down
19
Up
Down
Down
Up
Up
20
Up
Down
Up
Down
Down
21
Up
Down
Up
Down
Up
22
Up
Down
Up
Up
Down
23
Up
Down
Up
Up
Up
24
Up
Up
Down
Down
Down
25
Up
Up
Down
Down
Up
26
Up
Up
Down
Up
Down
27
Up
Up
Down
Up
Up
28
Up
Up
Up
Down
Down
29
Up
Up
Up
Down
Up
30
Up
Up
Up
Up
Down
31
Up
Up
Up
Up
Up
1100 LC Modules Control Manual
- 179 -
03-914947-30:Rev.6
Configuring a Fixed IP Address
This appendix describes how to fix the IP address in the Agilent
1100 HPLC chain.
1. The Agilent 1100 HPLC must have been given a
valid IP address via the BOOTP server.
2. In a web browser (Internet explorer for example) from
the Acquisition server, type the IP address of the
HPLC chain, in the address field. If the Internet
browser is configured with a proxy server, it is
mandatory to enter the IP address of the HPLC chain
in the exceptions list. The following screen will be
displayed.
1100 LC Modules Control Manual
- 180 -
03-914947-30:Rev.6
3. Click on the
the screen.
button on the left of
4. Click on the Configuration tab.
1100 LC Modules Control Manual
- 181 -
03-914947-30:Rev.6
5. Select Manual in the TCP Configuration Type
dropdown list.
1100 LC Modules Control Manual
- 182 -
03-914947-30:Rev.6
6. Type the desired IP address, subnet mask and
Gateway in the corresponding fields.
7. Finally, scroll down to the bottom of the screen and
press the Apply button.
1100 LC Modules Control Manual
- 183 -
03-914947-30:Rev.6
8. Reboot the HPLC chain.
1100 LC Modules Control Manual
- 184 -
03-914947-30:Rev.6