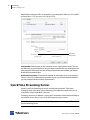
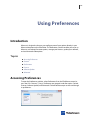
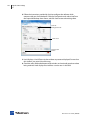
1
4.3 Windows User’s Guide May 2013 3 Contents Preface 13 Copyright and Trademark Notice 13 MPEG-2 License Requirements 13 Customer Support 14 We'd Like to Hear from You! 14 Limited Warranty and Disclaimers 14 Warranty Remedies 14 Software Updates 15 Restrictions and Conditions of Limited Warranty Limitations of Warranties 15 Introduction 17 Introduction 17 Topics 17 Editions and Options 17 Editions 17 Options 18 Tutorials 18 Two Ways to Use this Application Presenter Is Operator 19 Presenter Plus Operator 19 Using AutoLive 20 Main Window Layout 21 Preview 22 Master Audio 22 Main Shot List 23 Output Statistics 23 Layer Panel 25 Layer Windows 26 18 15 4 Contents Tutorials 27 Introduction 27 Tutorials 27 Tutorial 1: Basic Concepts 28 The Main Window 28 What Is a Shot? 29 Switching Between Shots 29 Transitions and Go Button 30 Transitions 30 Transition Speed 30 Go Button 31 Layers 31 Auto Live 35 Turn AutoLive Off 35 Multiple Changes 36 Preview 36 Tutorial 2: Editing Shots 38 Shot Editor Overview 39 Source Layers 41 Template Window 41 Titles 44 Effects/Motion 46 Positioning Objects 46 Motion for Objects 47 Changing Motion Options 48 Tutorial 3: Broadcasting 48 Flash To YouTube 49 QuickTime Streaming 51 Announce to QuickTime Streaming Server Unicast 52 Multicast 52 Record To Disk 52 Windows Media Streaming 52 Network-Push To Server 53 Network-Pull from Server 54 Flash Streaming 55 Encoder presets 55 Destination 55 Address 56 Stream 56 Open FMLE XML File 56 User Agent 56 Set Credentials 56 52 Wirecast User Guide | 104730 Contents Adding Media 57 Introduction 57 Topics 57 Images/Opacity 57 GIF and Transparency 57 Movies 58 Problems Showing Movie Types AVI Video 58 Real Media 58 Using Titles 59 Introduction 59 Topics 59 Adding Titles 60 Adding New Source 61 Configuring Titles 62 Modifying Titles 63 Title Area 63 Changing Text 63 Changing Justification 63 Changing Font 63 Changing Font Color 64 Placing Titles 64 Seminar Title 64 Interview Title 64 Creating New Templates 65 Example 65 Other Media 65 Editing XML Files 65 Using Logos 67 Introduction 67 Topics 67 Global Logos 67 Turning Layers On and Off Shot Logos 75 74 Broadcasting 81 Introduction 81 Topics 81 Canvas Size 82 Virtual Camera 83 Configuring Broadcast Settings 84 Multiple Broadcast Settings 85 Wirecast User Guide | 104730 58 5 6 Contents Configuration 85 Encoder Preset 85 Broadcast Destinations 85 Windows Media Destinations 85 QuickTime Destinations 86 Flash Log Files 86 Flash Queue (Flash Streaming) 86 Encoder Presets 87 Windows Media Settings 89 WM-Push To Server 89 Configuration Settings 90 WM-Pull From Server 90 Configuration Settings 91 QuickTime Streaming Server 92 Actions 94 QuickTime Built-in Server 94 Actions 95 QuickTime Unicast 96 QuickTime Multicast 97 How Multicast Works 98 QuickTime Record To Disk 100 Flash Media Server 101 Flash To Bambuser 102 Flash To Brightcove 103 Flash To DaCast Streaming Services 104 Flash To High School Cube 105 Flash To iNK Barrel Video 106 Flash To justin.tv 107 Flash To Limelight 108 Flash To Livebeats 109 Flash To Original Livestream 110 Flash To Sermon.net 111 Flash To ShowCaster 112 Flash To Streaming Media Hosting 113 Flash To Stretch Internet 114 Flash To TwitchTV 115 Flash To Ustream 116 Flash To YouTube 117 Flash Record To Disk 119 Annotation Settings 120 Setting Encoder Presets 121 Introduction 121 Topics 121 The Encoder Presets Window 121 Creating New Presets 122 Profile Options 122 Wirecast User Guide | 104730 Contents Windows Media 123 QuickTime Video 125 QuickTime Audio 126 Flash H.264 128 Flash VP6 129 Using the Asset Manager 133 Introduction 133 Topics 133 Documents 133 Re-assigning Media 133 User Interface 135 Introduction 135 Topics 135 File Menu 135 Edit Menu 136 Switch Menu 136 Media Menu 137 Sources Menu 138 Broadcast Menu 138 Layout Menu 139 Window Menu 139 Help Menu 140 Keyboard Short-cuts 141 Using Preferences 147 Introduction 147 Topics 147 Accessing Preferences 147 Resetting Preferences 148 General 148 Open Last Document on Startup 148 Shot Editor Checkerboard 148 Feedback Detection 149 Performance 149 Licenses 150 Serial Numbers 150 Manual Activation 150 Deactivate Serial Numbers 151 Demonstration Mode 151 Software Update 151 Automatically Check Updates 152 Check Now 152 Advanced 152 Wirecast User Guide | 104730 7 8 Contents Use High Quality Video YUV Colorspace 152 152 Using the Main Window 153 Introduction 153 Topics 153 Overview 153 Window Bar Buttons 154 Preview / Live Area 155 Countdown Clock Display 156 Transition Controls 156 Changing Transitions 156 Transition Time 157 Go Button 157 Tool Bar 157 Live Sources 158 File Sources 158 Desktop Presenter 158 Shot Graphics 158 Shot Audio 158 Shot Template 158 Shot Selection Area 159 Changing Shots 159 Moving a Shot to Another Layer 159 Growing/Shrinking the Shot Thumbnails Layers 160 What is a Layer? 160 Changing Layers 161 Moving a Shot to Another Layer 161 AutoLive 161 160 Using the Audio Inspector 163 Introduction 163 Topics 163 Overview 163 Hardware Audio and Shot Audio 164 Hardware Audio 165 Shot Audio 165 Adding Shot Audio Sources 165 Managing Audio Sources 166 Using the Source Settings 167 Introduction 167 Topics 167 Overview 167 Wirecast User Guide | 104730 Contents System Devices 168 Pipelines 169 Scoreboards 170 The Data Tab 171 The Look Tab 172 IP Cameras 173 Teradek Cube 175 LiveU 177 Using LiveU as a Source 177 Using LiveU as an Output 179 LiveU Workflow Examples 179 Desktop Presenter 180 Capture Cards 181 Show USB Devices 181 Using the Shot Editor 183 Introduction 183 Topics 183 Overview 184 The Inspector 184 Activating Changes 185 Inspector vs. Editor 185 Shot Editor Layout 186 Sources 186 Templates 187 Virtual Sets 189 Controlling Source Visibility Shot Editor Preview 191 Shot Editor Media Panel 191 Live Feed Sources 192 Media File Sources 192 Title Banner Sources 193 Shot Editor Effects 193 Opacity 194 Matte 194 Aspect Ratio 195 Reposition Buttons 195 Shot Editor Cropping 196 Shot Editor Chroma Key 196 Working Top Down 197 Selecting a Key Color 197 Key Threshold 197 Black Clip 197 White Clip 198 Getting a Good Key 198 Lighting 198 Good Camera 198 Wirecast User Guide | 104730 190 9 10 Contents High Quality Video 198 Shot Editor Motion 199 Shot Editor Playback 200 Live Playback 201 Scrubbing 201 Transport Controls 202 In and Out Points 202 When Finished Control 202 Begin Playing Control 203 Remember Position Control 203 Audio Controls 203 Making Great Presentations 205 Introduction 205 Topics 205 Overview 205 High Quality Audio 206 Good Lighting 206 Triangular Lighting 207 Broadcast Settings 207 Bandwidth 208 Motion 208 Encoder Settings 208 Hardware Recommendations 209 Introduction 209 Topics 209 FireWire 209 Bandwidth Limits 209 Bandwidth Use 210 Universal Serial Bus (USB) 210 High Definition (HDV) 210 HDV Cameras in DV Mode. 210 DV Cameras 211 Sleep Mode 211 S-Video & 2nd Display 211 Configure Devices 212 Installation 213 Introduction 213 Topics 213 Installing 213 Activating 213 Uninstalling 214 Wirecast User Guide | 104730 Contents Acknowledgements 215 Acknowledgements 215 Overview 215 Darwin streaming server FFmpeg Project 221 Wirecast User Guide | 104730 215 11 12 Contents Wirecast User Guide | 104730 13 Preface Copyright and Trademark Notice Copyright 2013 Telestream, Inc. All rights reserved. No part of this publication may be reproduced, transmitted, transcribed, altered, or translated into any languages without written permission of Telestream, Inc. Information and specifications in this document are subject to change without notice and do not represent a commitment on the part of Telestream. Telestream, Vantage, Flip4Mac, FlipFactory, Episode, ScreenFlow, Wirecast, GraphicsFactory, MetaFlip, MotionResolve, and Split-and-Stitch are registered trademarks and Pipeline, Launch, and Videocue are trademarks of Telestream, Inc. All other trademarks are the property of their respective owners. QuickTime, Mac OS X, Final Cut Pro, and Safari are trademarks of Apple, Inc. Bonjour, the Bonjour logo, and the Bonjour symbol are trademarks of Apple, Inc. All other brand, product, and company names are property of their respective owners, and are used only for identification purposes. MPEG-2 License Requirements Telestream has obtained a license from MPEG LA, to produce MPEG-2 video, to meet the following requirement on behalf of its FlipFactory and Pipeline licensees: The use of this product in any manner that complies with the MPEG-2 standard is expressly prohibited without a license under applicable patents in the MPEG-2 patent portfolio, which license is available from MPEG LA, L.L.C., 250 Steele Street, Suite 300, Denver, Colorado 80206. 14 Preface Customer Support Customer Support Telestream offers technical support through our Web site and email. Email contacts: • Sales: [email protected] • Support: [email protected] Website Links: • How to Buy: http://www.telestream.net/purchase/store.htm • Support: http://www.telestream.net/telestream-support/wire-cast/support.htm We'd Like to Hear from You! Telestream welcomes comments, feedback, and suggestions about your experience with Wirecast. You can reach us at [email protected]. If you have suggestions about improving the tutorials or this guide, other Telestream documents, or our Web site, please email us at [email protected]. Limited Warranty and Disclaimers Telestream, Inc. (the Company) warrants to the original registered end user that the product will perform as stated below for a period of one (1) year from the date of shipment from factory: Hardware and Media. The Product hardware components, including equipment supplied but not manufactured by the Company but NOT including any third party equipment that has been substituted by the Distributor for such equipment (the “Hardware”), will be free from defects in materials and workmanship under normal operating conditions and use. Software. If software is supplied as part of the product, the software will operate in substantial conformance with specifications set forth in its product user's guide. The Company does not warrant that the software will operate uninterrupted or error-free, will meet your requirements, or that software errors will be corrected. Warranty Remedies Your sole remedies under this limited warranty are as follows: Hardware and Media. The Company will either repair or replace (at its option) any defective Hardware component or part, or Software Media, with new or like new Hardware components or Software Media. Components may not be necessarily the same, but will be of equivalent operation and quality. Software. If software is supplied as part of the product and it fails to substantially confirm to its specifications as stated in the product user's guide, the Company shall, at its own expense, use its best efforts to correct (with due allowance made for the nature and complexity of the problem) such defect, error or nonconformity. Wirecast User Guide | 104730 Preface Limited Warranty and Disclaimers Software Updates If software is supplied as part of the product, the Company will supply the registered purchaser/licensee with maintenance releases of the Company’s proprietary Software Version Release in manufacture at the time of license for a period of one year from the date of license or until such time as the Company issues a new Version Release of the Software, whichever first occurs. To clarify the difference between a Software Version Release and a maintenance release, a maintenance release generally corrects minor operational deficiencies (previously non-implemented features and software errors) contained in the Software, whereas a Software Version Release adds new features and functionality. The Company shall have no obligation to supply you with any new Software Version Release of Telestream software or third party software during the warranty period, other than maintenance releases. Restrictions and Conditions of Limited Warranty This Limited Warranty will be void and of no force and effect if (i) Product Hardware or Software Media, or any part thereof, is damaged due to abuse, misuse, alteration, neglect, or shipping, or as a result of service or modification by a party other than the Company, or (ii) Software is modified without the written consent of the Company. Limitations of Warranties THE EXPRESS WARRANTIES SET FORTH IN THIS AGREEMENT ARE IN LIEU OF ALL OTHER WARRANTIES, EXPRESS OR IMPLIED, INCLUDING, WITHOUT LIMITATION, ANY WARRANTIES OF MERCHANTABILITY OR FITNESS FOR A PARTICULAR PURPOSE. No oral or written information or advice given by the Company, its distributors, dealers or agents, shall increase the scope of this Limited Warranty or create any new warranties. Geographical Limitation of Warranty. This limited warranty is valid only within the country in which the Product is purchased/licensed. Limitations on Remedies. YOUR EXCLUSIVE REMEDIES, AND THE ENTIRE LIABILITY OF TELESTREAM, INC. WITH RESPECT TO THE PRODUCT, SHALL BE AS STATED IN THIS LIMITED WARRANTY. Your sole and exclusive remedy for any and all breaches of any Limited Warranty by the Company shall be the recovery of reasonable damages which, in the aggregate, shall not exceed the total amount of the combined license fee and purchase price paid by you for the Product. Damages. TELESTREAM, INC. SHALL NOT BE LIABLE TO YOU FOR ANY DAMAGES, INCLUDING ANY LOST PROFITS, LOST SAVINGS, OR OTHER INCIDENTAL OR CONSEQUENTIAL DAMAGES ARISING OUT OF YOUR USE OR INABILITY TO USE THE PRODUCT, OR THE BREACH OF ANY EXPRESS OR IMPLIED WARRANTY, EVEN IF THE COMPANY HAS BEEN ADVISED OF THE POSSIBILITY OF THOSE DAMAGES, OR ANY REMEDY PROVIDED FAILS OF ITS ESSENTIAL PURPOSE. Further information regarding this limited warranty may be obtained by writing: Telestream, Inc. 848 Gold Flat Road Nevada City, CA 95959 You can call Telestream, Inc. via telephone at (530) 470-1300. Wirecast User Guide | 104730 15 16 Preface Limited Warranty and Disclaimers Wirecast User Guide | 104730 17 Introduction Introduction This guide is intended to help you understand how each feature of Wirecast operates and to provide you with information to help you make the best presentations possible. Topics Editions and Options Tutorials Two Ways to Use this Application Using AutoLive Main Window Layout Editions and Options Wirecast is available in multiple editions. All editions (features) of Wirecast are presented in this guide and the term Wirecast is used, generally, to describe all major features. Editions Wirecast is available in two editions: Standard and Pro. Wirecast Standard allows an unlimited number of cameras and inputs, titling overlays, chroma keys, multiple layers, shot editing, and the ability to preview shots prior to broadcast. Wirecast Pro is the professional edition of Wirecast and includes all the features of Wirecast Standard. It includes an audio inspector, advanced audio controls, virtual sets, scoreboards, and many other professional features. Features that pertain specifically to Wirecast Pro are indicated by the Pro icon (shown below): PRO 18 Introduction Tutorials Options Wirecast Standard provides support for multiple cameras and inputs, selected Blackmagic, Viewcast Osprey and Matrox Multi capture cards and LiveU video-overcellular backpack. Users can broadcast their computer desktop (including computer audio) using Desktop Presenter. Other key features include chroma key support, 3D graphics, titles, transitions and up to 35 layers of live compositing. Additionally, you can use HDV when you purchase an HDV option license. Without the license you can still experiment with HDV input, but all HDV output is water-marked. PRO Wirecast Pro provides Virtual Sets (a library of professionally designed 3D sets), a powerful Audio Inspector with synch delay, IP camera support, integration with Teradek Cube, Telestream Pipeline support, (a networked real-time encoding and decoding device). Wirecast Pro also provides live scoreboards and includes the HDV option license which adds support for HDV codec encoding. Note: If you do not have a Wirecast Pro license, Wirecast still enables you to experiment with Pro features, but all Wirecast Pro output is water-marked. Additionally, you can not save a document that has Pro features enabled. Tutorials We suggest that you first work through the tutorials in the Tutorials section. They are quick, informative, and the easiest way to become familiar with Wirecast. Wirecast provides a built-in tutorial environment that corresponds with the tutorials provided in Tutorials. The tutorials take about thirty minutes and provide a brief overview of how to set up a basic presentation and create your own broadcast. Next, we suggest that you read Making Great Presentations. This topic shows you how you can easily make changes in your setup and improves the quality of your presentations. Two Ways to Use this Application There are two different ways you can use Wirecast: • Presenter Is Operator The person conducting the presentation also operates Wirecast. • Presenter Plus Operator The presenter concentrates on the content and someone else operates Wirecast. In this mode, the presenter never needs to know in detail how Wirecast works. Wirecast User Guide | 104730 Introduction Two Ways to Use this Application Presenter Is Operator In this mode of operation, the person conducting the presentation simultaneously operates Wirecast. Here are some suggestions for using Wirecast when you are both the presenter and operator: • Keep it simple Set up Wirecast to make it easy for you to be the operator and the presenter. Set up your logo and titles so that you need to make very few changes during your presentation. Use a minimum number of shots so it’s easy for you to see which shot to choose. • Keep the AutoLive feature on This enables you to present your shots with just one click. Though this limits your ability to perform complex presentations, it is the best way when the presenter is also the operator. To turn AutoLive on or off, select it under the Switch menu. • Pre-configure your shots Make sure that all the shots are created prior to your presentation. Do not try to create or modify shots while broadcasting them. • Use hot-keys for switching shots If your shot has a number in it, you can press the Alt key plus that number’s key to immediately display the shot. For example, if you have a shot named “Me With Title 1”, press the Alt key and the 1 key to display this shot. Presenter Plus Operator In this mode of operation, an engineer (or operator) is responsible for using Wirecast, and the presenter concentrates on the content of the presentation. Here are some suggestions for using Wirecast when you have both an operator and a presenter: • Keep the AutoLive feature off This enables you to make several changes at one time before taking the changes live. However, to quickly make a shot live, press the Shift+Ctrl keys and click the shot. • Open the Preview window The operator should use Preview mode to examine everything before it becomes live. • Use the Layer Windows to make more shots available Select New Layer Window from the Window menu to open additional layer windows so you can quickly flip between shots on several layers. • Use the Inspector window to open and edit shots The Inspector window acts exactly like the edit window but always edits the last shot you changed. To open the Inspector Window, click on the Window menu and select Inspector. Wirecast User Guide | 104730 19 20 Introduction Using AutoLive Using AutoLive Some users of Wirecast may want to single-click a shot to make it become live. Other users may want to make several changes to the broadcast before making them live. You can use both methods in Wirecast. The AutoLive feature is designed to offer a single-click operation for those users who want to simply click from shot to shot. The Edit window (or other windows) is not affected by the status of AutoLive. When AutoLive is on, clicking a shot in the Main Window makes it become live. As a result, the Go button becomes inactive. Shift+Ctrl+Click loads a shot into the preview but does not make it live. When AutoLive is off, you click on a shot in the Main Window to display it in Preview, then the Go button is required to make the shot live. Click Shift+Ctrl+Click to take a shot live immediately. Sometimes you may want to temporarily turn on and off (toggle) the AutoLive state. Hold down the Shift and control keys at the same time to temporarily turn on Autolive. This enables you to quickly switch AutoLive on for one action (i.e. a mouse-click), then off again. Wirecast User Guide | 104730 Introduction Main Window Layout Main Window Layout Wirecast is designed to be immediately usable with a few mouse clicks. However, after you understand more about how Wirecast works, you’ll probably want more flexibility. Wirecast enables you to select which functions are displayed in the Main window. Most of these functions are added or removed from the main window using the Layout menu. Layout menu Wirecast User Guide | 104730 21 22 Introduction Main Window Layout Preview Preview displays what the broadcast looks like if you click the Go button. This is only useful when AutoLive is off. To display Preview, click the Layout menu and select Preview. Preview window Master Audio The Master Audio panel enables you to control the output volume level, mute audio output, and mute the line-out feed. To display Master Audio, click Layout > Master Audio. Master Volume control Master Mute button Line-Out Mute button Wirecast User Guide | 104730 Introduction Main Window Layout The Master Mute button controls the mute of the master audio (what your viewers hear). Even when you mute the output, the encoder still generates audio but it is silent. If you don’t want to broadcast audio, modify the Encoder Presets to not process audio through the encoder. The Line-Out Mute button controls what you hear locally. When line-out is mute, audio is not sent to your headphones or speakers, but your viewers still hear it. Main Shot List Normally, the Main Window displays the shot list at the bottom of the window. However, you can hide the shot list display by selecting Main Shot List from the Layout Menu. This is useful if you want to open up multiple Shot List Layer windows. Output Statistics You can display statistics about your broadcast. To display the Output Statistics panel, click Layer > Output Statistics. Output statistics panel Wirecast User Guide | 104730 23 24 Introduction Main Window Layout Wirecast displays the following statistics: • FPS Frames per second This value is controlled by the video part of your currently selected Encoder Presets. However, most encoders use this value as a target, not an exact limit. If this value consistently drops well below your target FPS, consider using a lower-quality video output to lower the bandwidth. • CPU Usage (percentage) This represents the current load on your CPU. The encoder affects the CPU usage more than any other parameter in Wirecast. If this value is high, you should use a different encoder, or modify your encoder settings. If the CPU usage is near 95%, use a lower quality video output to lower the bandwidth. • Data Rate This displays the current bandwidth used by your broadcast. This value is controlled by the video part of your currently selected Encoder Presets. Like frames per second, it is not always respected by the encoder. The encoder uses this value as a target, not an exact limit. Some encoders may (by design) exceed this limit. • Time This displays how long you have been broadcasting. This value does not reset when you start/stop the broadcast, it is cumulative. This enables you to save portions of a broadcast to disk and still know the total amount of time. Note: To avoid decrease in video quality, Wirecast should not be used at CPU usage above 80%. See the Telestream Wirecast Web site for suggested configurations. Wirecast User Guide | 104730 Introduction Main Window Layout Layer Panel To open the Layer Panel, select Layer Panel from the Layout menu at the top of the Main window. You can also open the Layer panel by hovering over the narrow grey panel on the left side of the Shot Area until Wirecast displays a double arrow, then click and drag to the right until the Layer Panel displays: Click and drag to the right Wirecast User Guide | 104730 25 26 Introduction Main Window Layout Here is what the Main Window looks like with the Layer Panel open: Layer Panel Layer Windows You can open the Shot List in a separate window. Select Window > New Layer Window to display the windows you can open. The figure below illustrates the Master Layer 1 window when you open it as a separate layer: This panel works exactly like the Shot List panel in the Main Window, but enables you to open multiple layer panels. You can change which layer is displayed on each panel – select Layout > Go To Layer, then select a different layer. Wirecast User Guide | 104730 27 Tutorials Introduction The best way to get started using Wirecast is to quickly work through all its main features. This tour presents a series of three tutorials, each designed to help you understand how to create and broadcast presentations using Wirecast. As you work through these tutorials, you will also become familiar with important Wirecast concepts and how you can use them to deliver high quality broadcasts. The more you know about Wirecast, the better it will serve your broadcasting objectives. Because each tutorial builds on the skills and knowledge you learn in the previous tutorials, it is recommended that you take the tours in succession. Working through all the tutorials takes about thirty minutes. As you gain hands-on experience creating video and audio presentations - which leads to a working knowledge of Wirecast and its components and architecture - you will gain proficiency in using Wirecast. Tutorials Tutorial 1: Basic Concepts Tutorial 2: Editing Shots Tutorial 3: Broadcasting Note: You can run all of the tutorials without a license. However, a watermark on the video and an occasional voice-over on the audio are present until a valid license is activated. Note: For licensing information, select Preferences from the File menu, then click Purchase License. Or, you can contact [email protected]. 28 Tutorials Tutorial 1: Basic Concepts Tutorial 1: Basic Concepts The goal of this tutorial is to provide you with a quick but successful experience creating and broadcasting a presentation using Wirecast. This tutorial requires that you open the tutorial document in Wirecast. To do this, select Create Document for Tutorial from the Help menu in Wirecast. A new window opens as shown below: Note: If you are running the tutorial with Wirecast in demonstration mode, the Wirecast logo appears from time to time and audio output has a periodic voice-over. The Main Window Wirecast has two main display areas: Live Broadcast and Shot List. The Live Broadcast is the large area in the upper portion of the window displaying what Wirecast broadcasts Wirecast User Guide | 104730 Tutorials Tutorial 1: Basic Concepts to your viewers (or records to disk). The Shot List, in the lower half of the window, displays the shots available for broadcast: Live Broadcast area Shot List Ripples shot What Is a Shot? Wirecast uses the concept of a shot to construct presentations. A shot contains media, along with the settings for that media. In its simplest form, a shot contains one piece of media such as a photo or a video clip. But it can also be something more complex, like a live camera with a title, and background music. A shot can be edited and its settings can be changed (See Tutorial 2: Editing Shots). Shots are important because they enable you to configure a lot of information before you broadcast your presentation. This enables you to concentrate on creating a good production during your broadcast. Switching Between Shots Individual shots are displayed in the Shot List. Click the Ripples shot in the Shot List area and the image fades into the Broadcast Area display. This is called taking a shot live. Click the shot labeled Blank Shot and the Ripples image fades to a blank screen. The Blank Shot enables you to display nothing, which is sometimes useful. Wirecast User Guide | 104730 29 30 Tutorials Tutorial 1: Basic Concepts Transitions and Go Button Transitions In the previous examples, a fade occurred when you clicked on a shot. This is because a smooth transition is the default. Transition controls are located just below the Broadcast Area where three kinds of transitions are shown: Cut, Smooth, and Bowstring. When Cut is selected, transitions are immediate. When Smooth is selected, transitions fade in (as demonstrated above). Select Bowstring to implement the transition with a wave effect (like a bow string when it is released). To see the Bowstring effect, Click the River shot to place it in the Broadcast Area. Next, click the Bowstring button. The Transition panel should look like this: Now click the Ripples shot. The Ripples shot appears using the Bowstring (wave) effect. There are more than just three kinds of transitions to choose from, but only three can be assigned to the Transition Panel. To select a different transition type, click the small arrow on the right side of the transition button. When the list appears, select a new transition to assign to this button. You can also click the transition button and drag the mouse downward until a menu of selections is displayed. For example, change the first button (Cut) to Swoop by clicking on the Cut button and dragging downward until the menu appears. Next, select Swoop from the menu. Swoop should now be selected for the first button. Now click back and forth between River and Ripples using Swoop. These three transition buttons can also be selected by using the following key combinations: Ctrl+1, Ctrl+2, and Ctrl+3. Transition Speed You can also Control how fast a transition occurs, by clicking the Clock (Transition Speed) icon: Clock icon Click on the clock icon and choose Slow from the menu. When Slow is selected, the clock icon changes to a small turtle, indicating slow mode. When you perform a Wirecast User Guide | 104730 Tutorials Tutorial 1: Basic Concepts transition in Slow mode, it occurs slower than normal. When faster transitions are selected, the icon changes to display a rabbit. Go Button The Go Button (or Ctrl+G) enables you to make a transition occur at any time. Clicking the Go button does nothing when Wirecast is in its default mode of AutoLive, except to update a live shot if you have made changes to it using the Shot Editor. Later in this tutorial you will discover how to use the Go button to transition between different shots when the AutoLive mode is off. Layers Note: Before you start this section, please select Smooth as your transition. Wirecast enables you to use several layers. Layers are different kinds of displays (shots, logos, titles, etc.) placed on top of each other so that all are seen at the same time. It is an excellent way to add and remove objects in your broadcast. Wirecast User Guide | 104730 31 32 Tutorials Tutorial 1: Basic Concepts To open the Layer Panel, select Layer Panel from the Layout menu at the top of the Main window. You can also open the Layer Panel by hovering over the narrow grey panel on the left side of the Shot list until a double arrow is displayed, then clicking and dragging to the right until the Layer Panel is displayed: Click and drag to the right Wirecast User Guide | 104730 Tutorials Tutorial 1: Basic Concepts Layers are displayed in a particular order: Master Layer 1 is on top, Master Layer 2 below it, Master Layer 3 below Layer 2, etc. This tutorial, so far, has been operating on Master Layer 3. Layer Panel Master Layer 3 Now select Master Layer 2 by clicking it. Each shot is assigned to a particular layer, so when you switch layers you only see the shots that are on that layer. For example, Ripples, River, and Blank shots are on Master Layer 3 (as seen previously in this tutorial), but Master Layer 2 has only a logo and a blank shot. Wirecast User Guide | 104730 33 34 Tutorials Tutorial 1: Basic Concepts Click on the shot named Logo. Notice that the Logo fades into the top-right corner of the Live Broadcast area: Layers can also be made invisible by unchecking the checkbox for that layer. Unchecking Master Layer 2 causes the Logo to be removed from the Broadcast area. Uncheck to make layer invisible Re-check the Master Layer 2 check box and the Logo reappears. Wirecast User Guide | 104730 Tutorials Tutorial 1: Basic Concepts Auto Live Note: Before you start this section, please make sure that all layers are visible (all layer check boxes are checked), and that you are on the Master 3 Layer, which shows Ripples and River shots. So far in this Tutorial, Wirecast has been running in AutoLive mode. What this means is that any change you make on the Main window is automatically made live in your Broadcast. This mode is very useful for those users who want to set up all of their shots at once and then single-click them as they run their presentation. But the disadvantage of this single-click method is that you can only see one shot change at a time. Once you click a shot, your viewers also see it (with no preview of how it looks on your part). Turn AutoLive Off Turn AutoLive off by unchecking AutoLive in the Switch menu. A dialog box is shown informing you that AutoLive mode is off and transitions must be made using the Go button. Click OK in the dialog box to continue. Try clicking the Ripples and River shots. Nothing happens because AutoLive mode is off. Now click the Ripples shot and click the Go Button. The Ripples shot is taken live in the Broadcast area. Click the River shot and, as expected, nothing happens. Click the Go button and River shot becomes Live. Wirecast User Guide | 104730 35 36 Tutorials Tutorial 1: Basic Concepts Note: When AutoLive is off, you must always click the Go button (or press the Ctrl+G keys) to display the selected shot in the Broadcast area. Multiple Changes The benefit of having AutoLive off is that you can make several changes first and then have them occur all at the same time. To do this, verify that AutoLive is off and click the Ripples shot (you should still see River in the Live window). Now click Master Layer 1 in the Layers Panel and click Sample Title. Click the Go button (or Ctrl+G) and notice how both the Ripples shot and the Sample Title shot become Live at the same time. Preview Note: Before proceeding, make sure Master Layer 3 is selected, and the Ripples shot is also selected. One issue you may have noticed while running this tutorial is that you cannot see the changes you are making before broadcasting them. To solve this problem, Wirecast enables you to see a Preview of what you broadcast. Wirecast User Guide | 104730 Tutorials Tutorial 1: Basic Concepts Select Preview from the Layout menu. The Left side of the Main window is the Preview area. Notice that it has a small green square with the letter P inside it. The Right side is the Live Broadcast area as before. Your Main window should now look like this: Preview window Green square with P Wirecast User Guide | 104730 37 38 Tutorials Tutorial 2: Editing Shots Turn off Master Layer 1 and Master Layer 2 by unchecking both checkboxes. This removes the logo and title from the Preview. Now click the Go button to transition the Preview into the Broadcast area: Tutorial 2: Editing Shots The first tutorial used only the Main window, and explained various ways in which you can use an existing shot. But shots can also be created and edited. This tutorial demonstrates how to edit your shots to meet your presentation needs. Shots can be configured in different ways. Some shots have only titles and some just a logo, others have only a photo. Shots are created to use in broadcast presentations. When you broadcast you are choosing, in real time, the shot you want to display. Shot editing enables you to make shots you need for your broadcast. Note: Before you start this tutorial, create a new tutorial document by selecting Create Document Tutorial from the Help menu. You should see a new Main window as shown below: Wirecast User Guide | 104730 Tutorials Tutorial 2: Editing Shots Shot Editor Overview Double click the Ripples Shot. This opens the Shot Editor window. Note: If you save a document with the Shot Editor window open, Wirecast remembers this and re-opens the edit window when the document is re-opened. Wirecast User Guide | 104730 39 40 Tutorials Tutorial 2: Editing Shots The Shot Editor window has three main areas: Shot Preview, Configuration Area, and Source Layers. Shot Preview Configuration area Source Layers Shot Preview This area shows exactly what this shot looks like to your viewers when you take this shot live. Configuration Area This is where you make changes to the content of the shot, and set its parameters. The configuration area changes appearance depending on the selected Source Layer. Click the source icon in the configuration area and it becomes invisible in the Preview. Source Layers This area enables you to add, remove, and reorder the sources in your shot. Sources are ordered visually from top to bottom. For example, the first source in the Source Layer List appears on top of all other sources in the preview. This list also controls visibility of each of the elements in the shot. Wirecast User Guide | 104730 Tutorials Tutorial 2: Editing Shots Source Layers The bottom left part of the Shot Editor window lists the sources that make up your shot. Source Click on the Logo icon (source) in the Configuration Area. Notice that the Logo is displayed in the Shot Preview area. Click the Ripples icon (source) and the Preview switches to Ripples. This is how you change the source media for this layer in the shot. Template Window The Template window icon is located in the controls bar in the middle of the window. Template icon Click on the template window icon to open the Template window. Select the Angled In template and click the Apply button: Select Angled In Click Apply Notice the Preview has changed again in the Shot Editor window, and now shows the Ripples image on the Left side. This is because the template selected has an A and a B Wirecast User Guide | 104730 41 42 Tutorials Tutorial 2: Editing Shots portion to it. Two different sources can be assigned to A and B, but for now only A is assigned (with the Ripples source): Sources in Wirecast can be assigned either A, B or C in the Source Layers list. To change the assignment, click the A (or B or C) icon and make a selection. This makes choosing a new template much simpler because Wirecast automatically positions the correct sources on screen. Wirecast User Guide | 104730 Tutorials Tutorial 2: Editing Shots For example, to change the media for the source that is identified as B, select the source identified as B, then click the River icon in the Configuration area. Your Preview should now look like this: Click on the B source Click on the River icon River source is displayed as B in Preview Wirecast User Guide | 104730 43 44 Tutorials Tutorial 2: Editing Shots Titles You can also add a title to a shot. First click the plus (+) button on the bottom of the Source list to add a new layer: Click the plus button New source layer added To add a title template, click the T button on the control panel: Click T button Wirecast User Guide | 104730 Tutorials Tutorial 2: Editing Shots Select the title template called Blue Banner 3 (items are not listed alphabetically) and your preview adds the title: Select Blue Banner 3 Blue Banner 3 displayed Next, click the T icon in the Attributes bar to enable text editing: Click T icon Wirecast User Guide | 104730 45 46 Tutorials Tutorial 2: Editing Shots Type text into lines 1 & 2 to display it in the preview window: Text lines displayed Type two lines of text Effects/Motion Positioning Objects The sources in a shot can be positioned anywhere on the screen. Make sure Blue Banner 3 is selected. Click the Effects icon in the Shot Editor. Select Blue Banner 3 Click the effects icon Though the title element is initially placed in the bottom middle of the Preview screen, it can be moved anywhere. To move the title, click and drag it to a new location. You can Wirecast User Guide | 104730 Tutorials Tutorial 2: Editing Shots also move the title to an edge, corner, or center by clicking on one of the repositioning buttons in the configuration area: Click a button to move an element You can also resize or rotate the title. To resize the title (while respecting aspect ratio), hold the Alt key down while moving the mouse vertically. To resize (independent of the aspect ratio), hold the Alt key and the shift key down while moving the mouse vertically and horizontally. The Respect Aspect Ratio checkbox in the configuration area must be unchecked. To rotate the title, hold down the Ctrl key while moving the mouse vertically and horizontally. Motion for Objects All objects (including the title) can have motion assigned to them. Click the Motion tab, to open the Build-In/Build-Out configuration panel: Click the Motion tab Build-in / Build-out configuration panel Wirecast User Guide | 104730 47 48 Tutorials Tutorial 3: Broadcasting Motion only occurs during a transition (when you click Go, or click a shot in AutoLive mode). Motion defines how to add (Build-In) or remove (Build-Out) a shot element. There are two forms of Motion: 1. Build-In (add) Build-In motion occurs when the shot is added to the Live Broadcast display. 2. Build-Out (remove) Build Out motion occurs when the shot is removed from the Live Broadcast display. Changing Motion Options Click the menu under Build-In in the configuration area and select From Left. Also check the Decelerate In checkbox: Select “From Left” Check Decelerate In To see this behavior in action, you must go back to the Main window and trigger the Build-In action. To do this, follow these steps: 1. Close the Shot Editor window (optionally) by clicking the X in the corner of the window. 2. In the Main window, make sure Smooth transition is selected. 3. Click on the Blank Shot, then click the Ripples shot (recently edited). Notice that when the Title appears it comes in from the left. Tutorial 3: Broadcasting This tutorial demonstrates how to setup and broadcast your Wirecast presentations. You can broadcast to a specific computer (Unicast), multiple viewers (Multicast), or even record your broadcast to disk. There are two main components for broadcasting your presentation (or saving it to disk): 1. Encoding You need to decide how you are going to encode the broadcast. Encoding is the type of compression used (JPEG, MPEG4, etc.). Wirecast comes configured with many common encoding options. 2. Destination A destination for the broadcast must be selected. You can send it to a server for broadcast or save it to disk. Wirecast User Guide | 104730 Tutorials Flash To YouTube Flash To YouTube Note: Custom encoders cannot be used to Stream to YouTube. They may only be used to encode a recording to disk. To stream to YouTube, follow these steps: 1. Click Authenticate to enter your email and password. Click Authenticate and enter password 2. If you are not already signed in, a browser is launched enabling you to sign into your YouTube account. Enter your account information and click Sign In. Enter email and enter password Click Sign In Wirecast User Guide | 104730 49 50 Tutorials Flash To YouTube 3. When the permission window displays, click Allow Access to authenticate your account. Click Allow Access If a success code is displayed, you can ignore it and close the window. Ignore and close this window Note: If you do not have a YouTube account, click Sign Up (or go to www.youtube.com). 1. Select your YouTube event. 2. Select the format you setup for your YouTube event. If several formats are listed, select the highest desired resolution and all lower ones will be created automatically. 3. Check (optionally) Use Backup Server to enable YouTube to simultaneously broadcast your stream to the backup server specified in the Event's configuration. 4. Click Save to save your settings. Select event Select format Check (optionally) Wirecast User Guide | 104730 Tutorials Flash To YouTube QuickTime Streaming From the encoder presets menu, select one of the H.264 (QuickTime) encoders, then select a destination. Select encoder Select Destination Wirecast provides five destinations for QuickTime streaming: 1. Announce to QuickTime Streaming Server This talks to a QuickTime Streaming Server and uses the server to send the broadcast to users who view that server. (This is the default destination.) 2. Built-in Streaming Server Wirecast includes a built-in Streaming Server which allows a small number of viewers to view your broadcast. Define the name of the SDP file and you can immediately broadcast. 3. Unicast This broadcasts directly to one single client (computer). You must define the address for the single client, then the presentation is streamed directly to that computer. 4. Multicast This is an advanced feature that broadcasts globally on a network. In a LAN environment, this option can provide the ability to broadcast to multiple users without using QuickTime Streaming Server. This feature only works over a LAN, not over the Internet. 5. Record to Disk If you want to save your broadcast, you can use this option to record the broadcast stream to disk. Wirecast User Guide | 104730 51 52 Tutorials Flash To YouTube Announce to QuickTime Streaming Server Since this is the most common method for QuickTime, you should always consider using this option for your broadcast. To use this feature, you must supply a host name and file location. You need to supply a user-name and password only if your server requires a login. This feature requires that you have access to a QuickTime Streaming Server (QTSS) or Darwin Streaming Server (DSS). Darwin Streaming Server is a free download from Apple and can be installed on many operating systems. Unicast Unicast is used for broadcast to only one computer. To set up a unicast, follow these steps: 1. Obtain the IP address of the target computer, and configure your broadcast using it. 2. Save an SDP file on the target computer. 3. Start broadcasting your presentation. 4. The viewer must open the SDP file using QuickTime Player to see your presentation. Note: If you change any setting regarding the broadcast (encoding settings, etc.), you must re-create and re-distribute the SDP file. Multicast Multicast is used for broadcast to any computer on your local network (not the internet). To use this feature, you must create and distribute an SDP file to all users on your local network who want to view the stream. The Video Address and Audio Address (and related ports) are, effectively, fake addresses that do not really exist on the local network. This information is stored in the SDP file so that client applications know where to look for the stream. The default addresses/ports that Wirecast generates are generally sufficient to use. To set up a multicast, follow the same steps given for Unicasting. (See Unicast, immediately preceding.) Record To Disk If you want to archive your stream, you can use the Record To Disk destination. The only setup information required is the filename. If you use Auto Increment Filenames, all files are saved with a sequential number appended to them. Windows Media Streaming Select any WM9 from the encoder presets menu, then select a destination. Wirecast User Guide | 104730 Tutorials Flash To YouTube Note: Windows Media options are only available when running on a Windows computer. Select encoder Select Destination There are two destinations available for Windows Media: 1. Network The stream is broadcast over the network, using either a server or your local computer. 2. Record to Disk If you want to save your broadcast you can use this option to record the stream to disk. Network-Push To Server To use the Network-Push To Server option, you must have access to a local Windows Media Server, or one located at an ISP (search the internet for Streaming Windows Media Server to find one). Using this option is a more professional way of creating a stream because it places the bandwidth strain on the remote server. All you need is a good local connection to the internet to push your presentation onto the Windows Media Server. To configure this setting, enter the Internet address of the remote server, the file name that becomes part of the URL that your users use to start the presentation, and any user name/password required by the ISP. If you check Auto Remove the file is deleted from the server when your presentation is finished. Wirecast User Guide | 104730 53 54 Tutorials Flash To YouTube Network-Pull from Server The Network-Pull from Server option turns your local computer into a mini Windows Media Server. This enables you to broadcast immediately from your computer, rather than through an ISP. There are, however, some limitations: 1. User Requirement You cannot have more than 50 users connected at any one time. 2. Bandwidth Requirement You must have enough bandwidth on your computer to supply all of your viewers. 3. CPU Requirement Since your computer is acting as a server, the CPU must be fast enough to handle all of the user connections. The largest issue is with using this method is bandwidth. If, for example, all of your viewers are on a local network (a business or school), then you should be able to use this method. However, if you have a DSL connection to the internet and you want to broadcast a 200k stream to 20 viewers, you might not have enough upload bandwidth to accommodate this. Note: Be aware that when you use Wirecast with an internet connection, the limiting factor is your upload bandwidth. Most ISP businesses offer packages that have a higher download than upload bandwidth. For example, a 512k DSL package is often limited to 256k of upload bandwidth. To use the Network-Pull from Server option, set the port number your users use to connect to your computer. They connect by using the Open URL option in Windows Media Player and enter a URL. For example, mms://192.168.1.67:8080 represents a computer IP address of 192.168.1.67 and a port number of 8080. Note: The URL "mms://" does not work with the Macintosh version of Windows Media Player, and you must use "http://" instead. Wirecast User Guide | 104730 Tutorials Flash To YouTube Flash Streaming Select an encoder from the Encoder Preset menu. Wirecast can stream to several Flash Streaming Servers, including Flash Media Server (Adobe) and Wowza Streaming Server (Wowza). Also select a destination. Select encoder Select Destination When you configure Wirecast to stream using Flash, Wirecast displays a Flash queue bar in the main window. The Flash queue shows you how much data is currently buffered on your computer, waiting to transfer to the server. Encoder presets Encoder presets enables you to select an encoder used for broadcast. If you change the preset to another encoder type, the list of destinations associated with it also change. The destinations are tied to the type of codec you are using. Destination The Destination menu lists many CDN’s and live streaming Websites. You need to have an account with the selected destination to use that service. You can also select Record to Disk as a destination for your presentation. The RTMP Flash Server is the default destination. Wirecast User Guide | 104730 55 56 Tutorials Flash To YouTube Address The address of the selected destination is obtained from your Flash Media Server administrator. Stream Each Flash stream requires that you enter the name of the stream. Open FMLE XML File Wirecast can load configuration files that have been created for Flash Media Live Encoder (FMLE). Wirecast reads the RTMP Address and Stream Name from this file, but it does not read any other configuration information from the FMLE XML file (bit rates, codec configuration, etc.). Many popular sites provide an FMLE configuration file for your stream configuration. User Agent Although rare, some streaming services require that Wirecast presents itself as FMLE when broadcasting. By default, Wirecast correctly presents itself as Wirecast/FM 1.0. Do not change this unless your provider has asked you to do so. Set Credentials Some Flash Media Servers require authentication. Wirecast offers the standard Adobe authentication method. However, if required to do so by your server, you must enter your credentials here. But if your server does not require authentication, there is no need to provide these credentials. Wirecast User Guide | 104730 57 Adding Media Introduction In addition to live video from your cameras, Wirecast enables you to work with media created outside of Wirecast. This section introduces some common media types you can use with Wirecast. There are three ways to add media to Wirecast: 1. Drag & drop into a new shot. The simplest way to add media to a shot is to drag & drop the media directly into Shot List in the Main window. 2. Drag & drop into an existing shot. To add media to an existing shot, drag & drop the media directly into the Shot Editor's media list. 3. Select directly. You can add media by selecting Import Media from the File menu, by pressing the Ctrl+Shift+I keys, or by clicking the plus (+) button in the Shot Editor. Topics Images/Opacity Movies Images/Opacity Wirecast supports a wide variety of still images types (TIFF, GIF, JPEG, PNG, etc.). Some of these formats offer some form of opacity (or transparency). This is often called an Alpha Channel. Wirecast works seamlessly with these formats making them the preferred methods for using graphics and logos, which have transparency. GIF and Transparency GIF files are a special case because they only offer transparency and not a true Alpha Channel. The GIF format enables you to define part of the image as transparent (completely invisible), but does not enable you to define it as partially transparent. 58 Adding Media Movies Some GIF images use transparency for much of the image. However, near the edges of the visible data, transparency cannot be used. This happens quite often when there is a shadow near the edges of the visible data. The author of the GIF often assumes a certain background color (white, for example) and that color becomes embedded in the actual image. When Wirecast displays these types of images, the edges of the visible data shows the background that was saved in the GIF. This is not a defect in Wirecast and, therefore, Wirecast can only present the data as it exists in the GIF. The solution is to obtain the original image and re-save the image as either TIFF or PNG. Both of these formats offer full Opacity. Movies Wirecast supports a wide variety of movie formats (MOV, AVI, WMV, etc.). Sometimes, however, you need to install a codec to use these formats. A very commonly desired codec is DivX®. Wirecast informs you if a codec is missing or if you need to install one. It is beyond the scope of this user guide to describe all of the possible codecs available on the market today, or explain the installation details. Contact the provider of the codec for details on installation. Problems Showing Movie Types Although there is always the possibility that Wirecast is at fault, please try to open the media with QuickTime player and/or Windows Media Player before contacting technical support. If these players cannot open the file, most likely the codec is not properly installed (or there is no available codec for that media). Please note that Wirecast does not currently support some file formats (.mpg, .mpeg, .m1v, .m2v). The solution is to convert the media into a different type such as MPEG-4. If QuickTime Player can play the media and Wirecast cannot, please contact Telestream at: [email protected]. AVI Video Some AVI files may play the audio but not the video. The solution is to convert the media into a different type, such as MPEG-4. Real Media Real Media Files (.RM) are not supported by Wirecast. The solution is to convert the media into a different type such as MPEG-4. Wirecast User Guide | 104730 59 Using Titles Introduction Wirecast offers a wide variety of title banner templates to use in your broadcast. Adding a professional looking title is as simple as selecting a template and adding your text. Topics Adding Titles Modifying Titles Title Area Placing Titles Creating New Templates 60 Using Titles Adding Titles Adding Titles To add a title to a shot, double-click the shot to open it the Shot Editor: Double-click a shot to edit Wirecast User Guide | 104730 Using Titles Adding Titles Wirecast displays the shot you selected in the Shot Editor window: Adding New Source To add a new source, click the plus (+) icon in the Sources Toolbar at the bottom-left corner of the Shot Editor window. Wirecast adds a new source entry, labeled [no media]. Newly added source Click plus to add new source Source Toolbar Wirecast User Guide | 104730 61 62 Using Titles Adding Titles Using the tools in the Attributes toolbar and the Media Panel, you can configure your source so it displays as requires: Change Media icon Visual Effects icon Crop icon Text icon Chroma icon Motion icon Config Media Settings Attributes toolbar T icon Configuring Titles The basic configuration for a media source is a title bar with text captions. Other attributes are optional. As you configure the media, you can view your progress in the Preview area at the top of the Shot Editor window. To configure a title, follow these steps: 1. Select the Change Media icon in the Attributes toolbar. (Each time you create a new source, the media icon is selected for you). 2. Click the T icon in the Media Panel to display titling templates. Scroll through the icons and select the banner graphic you want to use for a title. Be sure to select a title banner that is graphically designed to display the number of lines (1 to 4) you intend to use for this source. Wirecast provides many templates, but you can also create your own. 3. Click on the Visual Effects icon in the Attributes toolbar to adjust the position of the banner, control its opacity and matting, and set other visual effects. Usually, no adjustments are needed. 4. Click on the Crop icon in the Attributes toolbar to crop the banner graphic as needed. As you adjust crop values, you can see the effect in the Preview window. 5. Click the Text icon in the Attributes toolbar and enter up to 4 lines of text to display in the title. You can adjust paragraph formatting, font characteristics, and font color using the buttons to the right of each line. 6. If you plan to chroma key the title, click the Chroma icon in the Attributes toolbar to enable and set up the chroma key. See Shot Editor Chroma Key to learn how to enable and configure chroma key settings. 7. Click on the Motion icon in the Attributes toolbar to set up your builds. Note: For more detailed information on the above steps, see Edit Menu. Wirecast User Guide | 104730 Using Titles Modifying Titles Modifying Titles To modify the titles, you have to edit the shot. Double-click the shot to open the Shot Editor. Click the title attributes tool (T icon) in the Attributes toolbar. The title modification screen displays: Title Area Depending on the title source selected, you can modify up to four lines of information. Each line of text has its own justification, font, and font color settings. Font Color Font Justification Changing Text To change the text, enter the text into the text entry area for the line to be changed. Wirecast supports all text entry (even in-line entry engines for Japanese, Korean, Chinese, etc.). Changing Justification Justification is controlled by clicking on the justification icon and selecting left, center, or right from the drop-down menu. Changing Font Click the font selection icon to open a font selection window. Click the icon again to close the font selection window. The font selection window is a floating palette that changes the text as you make selections. So if you click in a different text entry area, the font panel notices this and configure itself to the settings of the new text entry area. Wirecast User Guide | 104730 63 64 Using Titles Placing Titles Note: The only items that Wirecast recognizes in the Font Panel are: Font Family, Typeface, and Size. All other settings are ignored by Wirecast Changing Font Color Click the font color icon to change the color of the font. A standard font color selection window is displayed. Choose the color you desire and click OK. Placing Titles The previous sections describe how to create and edit a title for an existing shot. However, you can also create a shot which has only title data. This is very useful if you want to place the same title over several different shots or if you want to modify the title independent of the shot you are choosing. But you must decide, based on your type of broadcast, if you want your titles tied directly to specific shots or if you want them to be independent. Wirecast seamlessly supports both methods -- even both methods at the same time. Seminar Title You may want to broadcast a seminar and have the title of the seminar appear and disappear while switching between several other shots or cameras. In this case, create a shot which has only the title in it, enabling you to move this title to a Foreground layer. In this configuration, you can bring the title in and out of your broadcast by selecting between a blank shot and the title shot from your foreground master layer. By placing the title in this separate layer, it keeps it independent of the all other shots you have created. Interview Title If you are broadcasting an interview, the shot which contains the camera for the interviewee may have a title in it. In this case, when you cut to the shot of the interviewee, the title appears. When you cut to the person asking the questions, the title does not appear because it is a different Wirecast shot. Note: Since you can turn visibility of a title on and off inside the Shot Editor, you can still turn the title on and off in the shot. To turn it off, make the shot live, then open the Shot Editor. Click the shot icon and then click Go (or press Ctrl+G). To turn it back on, click the shot icon again and click Go. shot icon Wirecast User Guide | 104730 Using Titles Creating New Templates Creating New Templates The templates that Wirecast uses are not editable within Wirecast. However, you can create new templates yourself using any graphics creation tool and an XML editor. Example Download the example custom templates from Telestream at: http://www.telestream.net/downloads/Wirecast/titles/Wirecast_User_Titles.zip. Decompress this file and copy the XML and PNG files to: C:\Users\[UserName]\My Documents\WirecastTitles. The next time you launch Wirecast, the user titles will be available. Any media used by these templates must exist in the same template folder. For example, if user_scoreboard.png is used in one of the example templates, it must be located in the WirecastTitles directory. Other Media Any media used by these templates must exist in the same template folder. For example, if user_scoreboard.png is used in one of the example templates, it must be located in the WirecastTitles directory. Editing XML Files There is an XML file called description.xml which describes all of your titles. Edit it to add, create, or delete titles. Read the header of the XML file for a list of rules and descriptions. Backup the file before editing because syntax errors cause Wirecast not to parse the file. Wirecast User Guide | 104730 65 66 Using Titles Creating New Templates Wirecast User Guide | 104730 67 Using Logos Introduction When you perform a broadcast, you may want to include a company logo in your presentation. There are two ways you can do this in Wirecast: 1. Global Logo (logo is its own shot) In this configuration, you create a shot which has only a logo in it. The benefit of this configuration is that you can show the logo independently of all other shots. For example, you can choose to always show the logo in a corner of your broadcast display. 2. Shot Logo (logo is part of another shot) In this configuration, you add a logo to an existing shot. This is useful if you want to have a shot to use in the start of your broadcast. Topics Global Logos Shot Logos Global Logos Logos are only displayed through shots. Wirecast treats logos the same as any other static media. To create a new empty shot and add your logo to it, follow these steps: 1. In the Main window, select Layout > Layer Panel. 2. Double-click Master Layer 2. Double-click 68 Using Logos Global Logos 3. When the New Name dialog box displays, you can (optionally) rename the layer. 4. Add a new shot by selecting Edit > Add Shot. Edit the new shot by double-clicking the shot named New Shot: Double-click 5. When the Template window displays, select Fullscreen View and click Apply. Select Fullscreen View Click Apply Wirecast User Guide | 104730 Using Logos Global Logos 6. To add your logo, click the Show Shots icon, Click the Add (+) button, select Add Picture from the drop-down menu, then select the image you want to use: Click Show Shots icon Click Add button Select Add Picture Wirecast User Guide | 104730 69 70 Using Logos Global Logos 7. Select the logo image that you added and it will be displayed in the Preview window: Select logo.png Wirecast User Guide | 104730 Using Logos Global Logos 8. To resize the logo, make sure the logo.png source is selected, click on the logo in the preview window while pressing the Alt key, and drag to resize the logo image. : Select the logo source Click while pressing Alt and drag to resize logo 9. To reposition the Logo, click the Position button in the Attributes Toolbar and click one of the positioning arrows: Click Position button Click a positioning arrow Wirecast User Guide | 104730 71 72 Using Logos Global Logos The logo can also be moved, resized, and rotated using these controls: • To Move: Click and drag object to a new location. • To Resize (maintaining aspect ratio): Hold the Alt key down while moving the mouse vertically. • To Resize (independent of the aspect ratio): Hold the Alt key and the Shift key down while moving the mouse vertically and horizontally. The Respect Aspect Ratio checkbox in the configuration area must be unchecked. • To Rotate: Hold down the Control key while moving the mouse vertically and horizontally. 10. To add your Logo to the broadcast, close the Shot Edit window, and click the logo shot in Master Layer 2: Click logo shot Wirecast User Guide | 104730 Using Logos Global Logos 11. Change the shot level to Master Layer 3 in the Master Layers list. Notice that changing shots does not affect the logo you have put on the Master Layer 2: Click Master Layer 3 Wirecast User Guide | 104730 73 74 Using Logos Global Logos Turning Layers On and Off One way that you can use Wirecast is to turn layers on and off. For example, Master Layer 2 can be turned off and then back on by checking and unchecking its checkbox. This is a very effective way to have a logo ready to display. Uncheck Layer Wirecast User Guide | 104730 Using Logos Shot Logos Shot Logos To create a Shot Logo, add your logo to an existing shot. To do this, follow these steps: 1. Double click a shot to open it in the Shot Editor. Double-click a shot Wirecast User Guide | 104730 75 76 Using Logos Shot Logos 2. Click the Add Source button to add a new source: Click Add Source button 3. To add your logo click the Add Shot button then click the logo icon: Click the Add button Click logo icon 4. Most likely, you will not want to display the logo in the middle of the display. To reposition it, click the Configure Visual effects icon to display the positioning controls. Wirecast User Guide | 104730 Using Logos Shot Logos The nine repositioning controls move the logo to the top, bottom, side, corner, or middle of the display: Click the Configure Visual Effects icon Repositioning controls You can also reposition the logo using the mouse: • To Move Media Click and drag using the mouse in the Preview area. • Resize (Respect Aspect) Hold the Alt key while moving the mouse in the Preview area. • Resize Media Turn off Respect Aspect Ratio. Hold the Shift-Alt keys while moving the mouse in the Preview area. • Rotate Media Hold the Control key while moving the mouse in the Preview area. Select between shots in the Main window. Wirecast User Guide | 104730 77 78 Using Logos Shot Logos 5. To change the size of the logo, select the logo source then hold the Alt key while moving the mouse over the logo in the Preview area. To move the logo to the lower-left corner, click the lower-left arrow button. Select logo source hold the Alt key while moving the mouse Repositioning controls Wirecast User Guide | 104730 Using Logos Shot Logos Close the edit window and click the River logo to take your changes live. Notice that the River shot now has the logo embedded in it: Click River shot Wirecast User Guide | 104730 79 80 Using Logos Shot Logos Wirecast User Guide | 104730 81 Broadcasting Introduction Before you can broadcast with Wirecast, you must configure your broadcast settings. Once configured, broadcasting is started by selecting Broadcast > Start/Stop Broadcasting > Start All. If you broadcast without configuring, Wirecast opens the Broadcast Settings window for you. Note: Wirecast will not prevent your computer from entering sleep mode. Therefore, to ensure uninterrupted streaming, you should disable sleep mode on your computer while using Wirecast. Note: To avoid a decrease in video quality, Wirecast should not be used at CPU usage above 80%. See the Telestream Wirecast Web site for suggested configurations. Topics Canvas Size Virtual Camera Configuring Broadcast Settings Configuration Flash Queue (Flash Streaming) Encoder Presets WM-Push To Server WM-Pull From Server QuickTime Streaming Server QuickTime Built-in Server QuickTime Unicast QuickTime Multicast QuickTime Record To Disk 82 Broadcasting Canvas Size Flash Media Server Flash To Bambuser Flash To Brightcove Flash To DaCast Streaming Services Flash To High School Cube Flash To iNK Barrel Video Flash To justin.tv Flash To Limelight Flash To Livebeats Flash To Original Livestream Flash To Sermon.net Flash To ShowCaster Flash To Streaming Media Hosting Flash To Stretch Internet Flash To TwitchTV Flash To Ustream Flash To YouTube Flash Record To Disk Annotation Settings Canvas Size The first menu item in the Broadcast menu is Canvas Size. When Broadcast > Canvas Size is selected, a drop-down menu with various canvas sizes is displayed. Select canvas size Select custom size Note: Canvas size selection 1080p Anamorphic (1440x1080) is a narrower (1440) display stretched to display as 1080. Wirecast User Guide | 104730 Broadcasting Virtual Camera There is also a Custom option that enables you to set the canvas width and height. Set width and height Wirecast can manage a wide variety of input sources, enabling you to have several live camera sources. However, really high-quality video sources can cause more harm than good. For example, an HD camera feed into a Wirecast canvas set to HD resolution, then broadcast out in HD, requires a lot of work for the graphics processor. If the frame rate starts to drop but the CPU usage stays steady, it creates a bottleneck. The solution is to reduce the frame size going through Wirecast. Therefore, there is no need to bring input video in at HD resolution if Wirecast is streaming out a lower resolution. Keep in mind that resizing down is good but resizing up reduces quality. As a rule, you should try to keep your resolution as constant as possible from source to output. There is no benefit from using an HD camera if you’re only broadcasting a low resolution stream. This only increases the work your computer must do without any increase in output quality. Virtual Camera Wirecast enables you to present the output of Wirecast as if it were a camera (a virtual camera), allowing it to be automatically detected by other applications when they are launched. To setup Wirecast as a virtual camera, select Broadcast > Virtual Camera Out, then select the output resolution to use. You can also select Match Canvas to cause the resolution to be the same as the current canvas size. Select resolution Wirecast User Guide | 104730 83 84 Broadcasting Configuring Broadcast Settings Once you have selected an output resolution, select Start to make Wirecast output available to other applications on your computer. Some of the applications Wirecast can work with using virtual camera are: • Google+ Hangouts • Skype • GoToMeeting The Virtual Camera menu also provides two additional options: DirectShow Audio and Virtual Microphone. DirectShow Audio When selected, outputs DirectShow audio. Virtual Microphone When selected, enables you to present the output of Wirecast as if it were a microphone (a virtual microphone), allowing it to be automatically detected by other applications when they are launched. Note: You must re-start Wirecast to enable Virtual Microphone operation. Configuring Broadcast Settings To configure broadcast settings select Broadcast > Broadcast Settings (or press the Ctrl+Y keys): List of broadcast settings Gear (actions) icon Wirecast User Guide | 104730 Broadcasting Configuration Multiple Broadcast Settings Wirecast enables you to specify many broadcast settings for your presentation. This means you may configure Wirecast to broadcast multiple data rates simultaneously, or even broadcast and record with different encoders at the same time. You can also broadcast to multiple Flash destinations while recording to disk in QuickTime and Windows Media formats. At the top of the Broadcast Settings window is a list of the current settings. Uncheck the checkbox of any setting you want removed from your broadcast. You can add as many broadcast settings as you need, but keep in mind that each additional destination will require more system resources. Click the Gear icon to access actions that enable you create reference movies you can distribute to your viewers. Each destination type provides a unique set of actions. Configuration There are two items to configure before broadcasting: encoder presets and destinations. Encoder Preset The Encoder Presets determines how your presentation is encoded (or compressed). There are many options available. Wirecast simplifies this process by providing several simple presets to choose from. (See Encoder Presets). Broadcast Destinations When you broadcast with Wirecast, you must pre-configure at least one destination. A destination can be a broadcast server, content distribution network or local disk recording. Each encoding preset uses a different broadcast technology (Flash, QuickTime, Windows Media, etc.). The destinations described below depend on the Encoder Presets you have chosen. Windows Media Destinations There are two destinations offered with Windows Media: • Network The stream broadcasts over the network, either using a Windows Media server or using your local machine as the server. To use a Windows Media server, you need to use the WM-Push To Server option. To use a your computer as a server, you need to use the WM-Pull From Server option. • Record to Disk You may also record your presentation to disk. You can do this whether or not you are broadcasting to a server. Wirecast User Guide | 104730 85 86 Broadcasting Flash Queue (Flash Streaming) QuickTime Destinations There are five destinations offered with QuickTime: • Announce to QuickTime Streaming Server The QuickTime Streaming Server (or Darwin Streaming Server) resides on a second computer and acts as what is called a reflector. From within Wirecast, you send your broadcast to this one server and it, in turn, sends the broadcast to the many viewers that you have. You must use the QuickTime/Darwin Streaming Server if you want to broadcast a QuickTime stream live to multiple viewers. • Built-in Streaming Server The Built-in Server enables each of your users to connect directly to your computer. • Unicast You can configure Wirecast to send a broadcast to a single second computer. This is called Unicasting. • Multicast You can configure Wirecast to broadcast so that any computer on your local network can receive the broadcast. This is called Multicasting. You cannot Multicast to the Internet, only to the local network on which your computer resides. • Record to Disk You can record your broadcast to disk. You can do this whether or not you are broadcasting to another computer. Flash Log Files Wirecast generates log files when streaming to a flash-based destination. The files are generated in a rotating fashion with file names of flash_log.txt, flash_log_1.txt, flash_log_2.txt, etc. Technical support may ask for these log files when attempting to diagnose a flash connection issue. Log file locations: • Windows 7 and Vista C:\users\$USER$\AppData\Roaming\Wirecast\flash_log.txt • Windows XP C:\Documents and Settings\$USER$\Application Data\Wirecast\flash_log.txt Flash Queue (Flash Streaming) When configuring your broadcast to use Flash streaming, Wirecast displays a Flash queue in the main window: Wirecast User Guide | 104730 Broadcasting Encoder Presets The Flash queue displays how much data is currently buffered on your computer, which is waiting to transfer to the server. The meter displays how many seconds worth of data is in the queue. When the meter is full, there are 5 seconds worth of data in the queue. The more bars, the longer the queue (less is better). It is normal to see periodic flickering in the meter, especially if you are streaming near your data limit. However, if the meter starts to go into the yellow or the red zone, then Wirecast is attempting to stream too much data. Most likely this is due to your current upstream limits. You should select a preset with a lower data rate to resolve this issue. Encoder Presets The Encoder Preset menu is located in the middle of the Broadcast Settings window. The Filter, New, and Edit buttons provide optional settings for encoder presets. The Destination menu is located below the Encoder Preset menu. The More button provides optional settings for destinations. Filter button New button Encoder Preset menu Edit button More button Destination menu Wirecast User Guide | 104730 87 88 Broadcasting Encoder Presets Filter Click the Filter button to display a check list of encoder presets. Check the presets you want to display in the Encoder presets menu. Click Save when finished. Check presets Click Save New Click the New button to create a new encoder preset. Enter a name for your new preset and click OK. (See Creating New Presets). Enter name Click OK Edit Click the Edit button to modify an encoder preset. (See Creating New Presets). Wirecast User Guide | 104730 Broadcasting WM-Push To Server More Click the More button to display a check list of destinations. Check the destinations you want to display in the Destination menu. Click Save when finished. Check destinations Click Save Windows Media Settings Wirecast offers several default presets. The first choice you need to make is whether you'll be using Flash, Windows Media, QuickTime, or some combination as the broadcast technology. This decision depends on what you expect your viewers to use. Given enough bandwidth, you can stream to combinations of Flash, QuickTime and Windows Media by adding new destinations to the broadcast settings. Windows Media can be used to broadcast WMV8, WMV9 and WMV9 Advanced. WM-Push To Server To access the WM-Push To Server window, select Broadcast > Broadcast Settings (or press the Ctrl+Y keys). From the encoder presets drop-down menu, select any of the Windows Media based presets, and check the Push to Server checkbox. To use Push To Server, you must have access to a Windows Media Server, either in your organization or hosted by an ISP (search the Internet for Streaming Windows Media Server to find one). This is the professional way of creating a stream because it places Wirecast User Guide | 104730 89 90 Broadcasting WM-Pull From Server the bandwidth strain on the remote server. All you need is a good local connection to the internet to push to the Windows Media Server. Select a Windows Media preset Check Push to Server Configuration Settings Address Enter the Internet address of the Windows Media Server you use to broadcast. Publish Point Enter the name of the file that is put on the server, and that is used as part of the URL that your users use. Wirecast cannot know the resulting URL that your users use, as this may vary depending on the installation of the Windows Media Server. Contact your Windows Media Server administrator to understand how to build a proper URL for your viewers, based on the Publish Point. Auto Remove Check Auto Remove to remove the file used as the publish point when the broadcast is over. Username/Password Enter the user name and password for the Windows Media Server. Contact your Windows Media Server administrator to obtain these. If there is no user name or password required, leave these fields empty. WM-Pull From Server To access the WM-Pull From Server window, select Broadcast > Broadcast Settings (or press the Ctrl+Y keys). From the encoder presets drop-down menu, select any of the Windows Media based presets, and check the Pull From Server checkbox. Wirecast User Guide | 104730 Broadcasting WM-Pull From Server This option turns your local computer into a mini Windows Media Server, enabling you to broadcast immediately. There are, however, some limitations: 1. User Requirement You cannot have more than 50 users connected at any one time. 2. Bandwidth Requirement You must have enough bandwidth on your Wirecast computer to supply all of your viewers. 3. CPU Requirement Since the Wirecast computer is acting as a server the CPU must be fast enough to handle all of the user connections. The largest issue is with this method is bandwidth. If, for example, all of your viewers are on a local network (a business or school), then you should be able to use this method. However, if you have a DSL connection to the internet and you want to broadcast a 200k stream to 20 viewers, you may not have enough upload bandwidth to accommodate this. Note: Be aware that when you use Wirecast with an internet connection what matters is your upload bandwidth. Most ISP businesses offer packages that have a higher download than upload bandwidth (e.g., a 512k DSL package is often only 256k upload). Configuration Settings To use the Network-Pull from Server option, set the port number that your users use to connect to your computer. They connect by using the Open URL option in Windows Wirecast User Guide | 104730 91 92 Broadcasting QuickTime Streaming Server Media Player, and enter a URL. For example, if your computer IP address is 192.168.0.24 and your port is 1755, use mms://192.168.0.24:1755. Check Pull from Server Port Number Enter the port on your computer to use as the broadcast port. This can be, effectively, any port number as long as it doesn't conflict with any existing ports on your computer. Be aware that if you have any firewall software installed, you need to enable the port entered here. Maximum Connections The maximum number of connections your server accepts is 50 users. Your CPU is affected by the number of users you have connected, therefore you may need to limit the number of connections. QuickTime Streaming Server Apple's QuickTime Streaming Server runs on Macintosh hardware. The Darwin Streaming Server is the open source streaming server offered by Apple, and runs on many flavors of Unix (OpenBSD, Linux, etc.). Streaming servers act as reflectors, so your goal is to broadcast from Wirecast directly to one of these servers that, in turn, sends the stream on to your viewers. Note: This document does not describe configuring or maintaining QuickTime/ Darwin Streaming Server. Wirecast User Guide | 104730 Broadcasting QuickTime Streaming Server To stream to a QuickTime/Darwin Streaming Server, select an H.264 encoder and select Announce to QuickTime Streaming Server as the destination: Select an H.264 encoder Select Announce to Quicktime Streaming Server. Host Name Enter the name (or IP address) of the host computer that is running your streaming server. File Location The streaming server uses a file on the server to contain the specific settings for the stream. You need to define the name of that file here. When you send your viewers the URL for them to use, this file name is a part of that URL. For example, if the File Location is my_stream and the Host Name is www.stream.com then your viewers use this URL: rtsp://www.stream.com/my_stream.sdp. This information displays in the bottom of the window as you configure the settings. Username/Password Enter the user name and password, if your streaming server requires it. Note: This password is saved as plain-text in the Wirecast document. Broadcast Over TCP Defines whether you are using UDP or TCP to send the data to the streaming server. This only defines the connection between Wirecast and the streaming server and has nothing to do with how your viewers receive the broadcast. UDP is faster, but if you are using a firewall or are behind a NAT, you may not be able to use UDP and you should use TCP. So, if Wirecast can send UDP to the server without errors, use it. It is faster. Wirecast User Guide | 104730 93 94 Broadcasting QuickTime Built-in Server Actions When you have Announce to QuickTime Streaming Server selected, the gear icon has these three actions: • Open in QuickTime Player This opens the stream in QuickTime Player. This is a handy shortcut and saves you from typing “rtsp://…” into QuickTime Player. • Save Movie This saves a QuickTime movie to disk that contains a reference to the configured stream. This Movie file is very small and tells QuickTime where to find your actual stream. It does not contain the data of your movie. When you are not streaming, this movie will not work for your users. But, you can send this movie to your users or post it on your Website so that your users can view your stream when you are broadcasting. • Save Multi-stream Reference Movie This saves a QuickTime movie to disk that contains a reference to all of your QuickTime Streaming Server streams. You can send this movie to your users, or post it on your Website, so that your users can view all your streams. QuickTime chooses which stream to use based upon the users settings. This is a very handy way to broadcast multiple bit-rates at the same time. QuickTime Built-in Server Wirecast provides the free Darwin Streaming Server from Apple. When you use the Built-in Streaming Server it is running on your local computer and uses local resources, causing Wirecast to run slower. The Built-in Server enables each of your users to connect directly to your computer. If you do not have sufficient bandwidth you won’t be able to host many viewers (one or two over DSL, perhaps up to five or ten on a local network). If you plan to have many Wirecast User Guide | 104730 Broadcasting QuickTime Built-in Server viewers, you need use a hosted QuickTime Streaming Server which is selected from Destination > Announce To Quicktime Streaming Server in Broadcast Settings: Select Built-in Streaming Server File Location Enter the name of the file used by the streaming server that contains the settings for the stream. When you send your viewers a URL to use, this file name is a part of that URL. for example, if the File Location is my_stream and the Host Name is www.stream.com, then your viewers would use rtsp://www.stream.com/my_stream.sdp. This information is display after the File Location as you configure the settings. Actions When you have Built-in Streaming Server selected, the gear icon provides three actions: • Open in QuickTime Player This opens the stream in QuickTime Player. This is a handy shortcut and saves you from typing “rtsp://…” into QuickTime Player. • Save Movie This saves a QuickTime movie to disk that contains a reference to the configured stream. This Movie file is very small and tells QuickTime where to find your actual stream. It does not contain the data of your movie. When you are not streaming, this movie will not work for your users. But, you can send this movie to your users or post it on your Website so that your users can view your stream when you are broadcasting. • Save Multi-stream Reference Movie This saves a QuickTime movie to disk that contains a reference to all of your QuickTime Streaming Server streams. You can send this movie to your users, or post it on your Website, so that your users can Wirecast User Guide | 104730 95 96 Broadcasting QuickTime Unicast view all your streams. QuickTime choose which stream to use based upon the users settings. This is a very handy way to broadcast multiple bit-rates at the same time. QuickTime Unicast Wirecast lets you broadcast to a specific computer. This is called unicast. To configure the broadcast settings for a unicast, follow these steps: 1. Select Unicast under the Destination menu. 2. Enter the address. This is the domain name or IP address of the computer receiving your unicast. 3. Enter the Video Port number. This is the video port on the computer receiving your unicast. 4. Enter the Audio Port. This is the audio port on the computer receiving your unicast. 5. Create an SDP File. You must create an SDP file every time you change any option on this page (including the encoder preset). To create an SDP file click the gear icon and select Save SDP File, navigate to the desired location, and click Save in the Save File dialog window. The SDP file must be given to the user to place on the computer that receives your broadcast. Your remote viewer must open the SDP file using QuickTime player. Note: Your unicast information is not stored in this file. Only QuickTime Streaming Server streams are saved to this file. 6. Save a Multi-stream Reference Movie (optionally present). This menu option is only available if you have other settings which use Announce To QuickTime Streaming Server. Wirecast User Guide | 104730 Broadcasting QuickTime Multicast 7. Click the Save button to save your settings. Select Unicast Enter Address Enter Video Port Enter Audio Port Save SDP file Click Save 8. Start your broadcast by selecting Broadcast > Start Broadcast in the Main window. QuickTime Multicast Wirecast lets you broadcast to your local network so that any computer on that network can view the broadcast. This is called multicast. To configure the broadcast settings for a multicast, follow these steps: 1. Select Multicast under the Destination menu. 2. Enter the Video and Audio Addresses. This is the unique address the multicast broadcast uses for video and audio. Although this looks like an internet address, it is not. This address must be unique among applications on your network that use the multicast protocol. Click the Generate button to generate random video and audio addresses. 3. Enter the Video Port number. This is the port that the multicast protocol uses for video. Normally, this is 5434. 4. Enter the Audio Port. This is the port that the multicast protocol uses for audio. Normally, this is 5432. 5. Create an SDP File. You must create an SDP file every time you change any option on this page (including the encoder preset). To create an SDP file click the gear icon and select Save SDP File, navigate to the desired location, and click Save in the Save Wirecast User Guide | 104730 97 98 Broadcasting QuickTime Multicast File dialog window. The SDP file must be given to the user to place on the computer that receives your broadcast. Your remote viewer must open the SDP file using QuickTime player. Note: Your multicast information is not stored in this file. Only QuickTime Streaming Server streams are saved to this file. 6. Save a Multi-stream Reference Movie (optionally present). This menu option is only available if you have other settings which use Announce To QuickTime Streaming Server. 7. Click the Save button to save your settings. Select Multicast Enter video and audio Address Generate Addresses Enter Video and audio Ports Save SDP file Click Save 8. Start your broadcast by selecting Broadcast > Start Broadcast in the Main window. How Multicast Works During multicast, your broadcasting computer sends data across your local network, identifying it as a broadcast that it has no specific destination. Since many applications could be doing the same thing, the broadcasting computer must have a unique way of defining the data that is being multicast. This enables clients to choose between the available multicast streams. The multicast protocol uses unique addresses, one for video and one for audio. Although these unique addresses look like TCP/IP addresses, they are not. Instead, they Wirecast User Guide | 104730 Broadcasting QuickTime Multicast provide a way to define uniqueness among all multicast data flowing over the network. Once the broadcasting computer is streaming this data through the local network, any computer on the network can receive it. The SDP file becomes the glue between your broadcast computer and the viewer computers. The SDP file contains multicast addresses, encoding format, and other important information. Wirecast User Guide | 104730 99 100 Broadcasting QuickTime Record To Disk QuickTime Record To Disk You can record your broadcast to disk at any time and you do not need to be broadcasting. This means that you can use Wirecast as a way to create movies to post on your Website. Record To Disk can be turned on or off, independent of your broadcast. To configure Record To Disk, select Broadcast > Broadcast Settings (or press Ctrl+Y), then select Destination > Record To Disk. Click Browse to navigate to the file Wirecast uses to save your broadcast to disk. If you check the Auto Increment checkbox, your filename is appended with an incremental number. This enables you to start and stop your broadcast repeatedly and save each movie segment in a uniquely named file. Click Save to save your settings: Select Record To Disk Browse to target file location Check (optionally) Auto Increment File names Save settings Note: When recording to disk, make sure it has sufficient write speed. In most cases a 7200 RPM (or faster) hard disk will yield the best results. USB2 external hard drives are not a good choice for broadcast recording. Note: When recording to disk using Quicktime with H.264 codec, Quicktime is used for encoding, and higher quality options (such as B frames) will be disabled to preserve compatibility. Wirecast User Guide | 104730 Broadcasting Flash Media Server Flash Media Server Wirecast can stream to an RTMP/H.264-compatible streaming server (Flash Media Server, Wowza Media Server, etc.). Flash Players earlier than Flash 9, Update 3 (Dec 2007), may not be able to view the H.264 based streams. To configure Flash Media Streaming, follow these steps: 1. Select a Flash preset from the encoder presets menu. 2. Select Destination > RTMP Flash Server. 3. Enter the Address to the RTMP server. (This is the same as the FMS URL in Flash Media Server.) The default RTMP port is 1935, but you may need to configure your firewall to allow connections on this port. 4. Wirecast can import a Flash Media Encoder configuration file (XML file). Click Open FMLE XML File, and navigate to the configuration file and select either version 2.5 or version 3.0. Wirecast reads the Address and Stream information from that file. Many online streaming services offer FMLE configuration files which Wirecast can use. Note: Only the Address and Stream information from the XML configuration file is used. No Encoding information is imported. 5. Click Save to save your settings: Select a Flash Preset Select a Flash Server Click More Enter the Address to the RTMP server Click and navigate to the configuration file Click Save Wirecast User Guide | 104730 101 102 Broadcasting Flash To Bambuser Flash To Bambuser To stream to Bambuser, follow these steps: 1. Select a Flash preset in Encoder Preset. 2. Select Bambuser from the Destination menu. 3. Enter your Bambuser username. 4. After you have entered your username, click Authenticate to enter your password and generate the RTMP URL. You only need to do this one time because Wirecast stores the channel information for future streams. The default RTMP port is 1935. You may need to configure your firewall to enable connections on this port. Note: If you do not have a username and password, you can sign up with Bambuser by clicking the Bambuser icon or by clicking Sign Up. 5. Select your Bambuser channel. 6. Click Save to save your settings. Select an encoder preset Select Bambuser Enter user name Click Authenticate and enter password Select Channel Wirecast User Guide | 104730 Broadcasting Flash To Brightcove Flash To Brightcove To stream to Brightcove, follow these steps: 1. Select a Flash preset from the encoder presets menu. 2. Select Brightcove from the Destination menu. 3. Enter the domain name or IP address of your server (this is provided by Brightcove). 4. Enter the stream name of your broadcast (this is provided by Brightcove). 5. Click Set Credentials to enter your authorized username and password. Note: If you do not have a username and password, you can sign up with Livestream by clicking the Livestream icon or clicking Sign Up. 6. Click Save to save your settings. Select encoder preset Select Brightcove Enter Address Enter Stream Click and enter username and password Wirecast User Guide | 104730 103 104 Broadcasting Flash To DaCast Streaming Services Flash To DaCast Streaming Services To stream to DaCast Streaming, follow these steps: 1. Select a Flash preset in Encoder Preset. 2. Select DaCast Streaming from the Destination menu. 3. Enter your DaCast Streaming username. 4. After you have entered your username, click Authenticate to enter your password and generate the RTMP URL. You only need to do this one time because Wirecast stores the channel information for future streams. The default RTMP port is 1935. You may need to configure your firewall to enable connections on this port. Note: If you do not have a username and password, you can sign up with DaCast Streaming by clicking the DaCast Streaming icon or by clicking Sign Up. 5. Select your DaCast Streaming channel. 6. Click Save to save your settings. Select an encoder preset Select DaCast Streaming Enter user name Click Authenticate and enter password Select Channel Wirecast User Guide | 104730 Broadcasting Flash To High School Cube Flash To High School Cube To stream to High School Cube, follow these steps: 1. Select a Flash preset in Encoder Preset. 2. Select High School Cube Streaming from the Destination menu. 3. Enter your High School Cube Streaming username. 4. After you have entered your username, click Authenticate to enter your password and generate the RTMP URL. You only need to do this one time because Wirecast stores the channel information for future streams. The default RTMP port is 1935. You may need to configure your firewall to enable connections on this port. Note: If you do not have a username and password, you can sign up with High School Cube by clicking the High School Cube icon or by clicking Sign Up. 5. Select your High School Cube channel. 6. Click Save to save your settings. Select an encoder preset Select High School Cube Enter user name Click Authenticate and enter password Select Channel Wirecast User Guide | 104730 105 106 Broadcasting Flash To iNK Barrel Video Flash To iNK Barrel Video To stream to Ink Barrel Video, follow these steps: 1. Select a Flash preset in Encoder Preset. 2. Select Ink Barrel Video from the Destination menu. 3. Enter your Ink Barrel Video username. 4. After you have entered your username, click Authenticate to enter your password and generate the RTMP URL. You only need to do this one time because Wirecast stores the channel information for future streams. The default RTMP port is 1935. You may need to configure your firewall to enable connections on this port. Note: If you do not have a username and password, you can sign up with Ink Barrel Video by clicking the Ink Barrel Video icon or by clicking Sign Up. 5. Select your Ink Barrel Video channel. 6. Click Save to save your settings. Select an encoder preset Select Ink Barrel Video Enter user name Click Authenticate and enter password Select Channel Wirecast User Guide | 104730 Broadcasting Flash To justin.tv Flash To justin.tv To stream to justin.tv, follow these steps: 1. Select a Flash preset in Encoder Preset. 2. Select justin.tv from the Destination menu. 3. Enter your username and click the Generate RTMP button to enter your password. Wirecast configures the RTMP Stream and address for you, enabling you to easily stream to justin.tv. Wirecast asks you for your justin.tv password. You only need to enter it once because Wirecast stores the channel information for future streams. The default RTMP port is 1935. You may need to configure your firewall to enable connections on this port. 4. If you do not have a username and password, you can sign up with justin.tv by clicking the justin.tv icon or by clicking Sign Up. 5. Click Save to save your settings. Select encoder preset Select justin.tv Enter user name Click and enter username and password Wirecast User Guide | 104730 107 108 Broadcasting Flash To Limelight Flash To Limelight To stream to Limelight, follow these steps: 1. Select a Flash preset from the encoder presets menu. 2. Select Limelight from the Destination menu. 3. Enter the domain name or IP address of your server (this is provided by Limelight). 4. Enter the stream name of your broadcast (this is provided by Limelight). 5. Click Set Credentials to enter your authorized username and password Note: If you do not have a username and password, you can sign up with Limelight logo, or by clicking More Information. 6. Click Save to save your settings. Select encoder preset Select Brightcove Enter Address Enter Stream Click and enter username and password Wirecast User Guide | 104730 Broadcasting Flash To Livebeats Flash To Livebeats To stream to Livebeats, follow these steps: 1. Select a Flash preset in Encoder Preset. 2. Select Livebeats from the Destination menu. 3. Enter your Livebeats username. 4. After you have entered your username, click Authenticate to enter your password and generate the RTMP URL. You only need to do this one time because Wirecast stores the channel information for future streams. The default RTMP port is 1935. You may need to configure your firewall to enable connections on this port. Note: If you do not have a username and password, you can sign up with Livebeats by clicking the Livebeats icon or by clicking Sign Up. 5. Select your Livebeats channel. 6. Click Save to save your settings. Select an encoder preset Select Livebeats Enter user name Click Authenticate and enter password Select Channel Wirecast User Guide | 104730 109 110 Broadcasting Flash To Original Livestream Flash To Original Livestream To stream to Original Livestream, follow these steps: 1. Select a Flash preset from the encoder presets menu. 2. Select Original Livestream from the Destination menu. 3. Enter the channel to use. The last part of the URL is your channel. For example, if your URL is http://www.livestream.com/my_channel, the channel name is my_channel. 4. Check Auto Live (optionally). If Auto Live is checked, Wirecast requests Original Livestream to start your stream automatically. 5. Enter your Original Livestream username. 6. Enter your Original Livestream password. Note: If you do not have a username and password, you can sign up with Livestream by clicking the Livestream icon or clicking Sign Up. 7. Click Save to save your settings. Select encoder preset Select Livestream Enter the channel Check Auto Live (optionally) Enter Username Enter Password Wirecast User Guide | 104730 Broadcasting Flash To Sermon.net Flash To Sermon.net To stream to Sermon.net, follow these steps: 1. Select a Flash preset in Encoder Preset. 2. Select Sermon.net from the Destination menu. 3. Enter your Sermon.net username. 4. After you have entered your username, click Authenticate to enter your password and generate the RTMP URL. You only need to do this one time because Wirecast stores the channel information for future streams. The default RTMP port is 1935. You may need to configure your firewall to enable connections on this port. Note: If you do not have a username and password, you can sign up with Sermon.net by clicking the Sermon.net icon or by clicking Sign Up. 5. Select your Sermon.net channel. 6. Click Save to save your settings. Select an encoder preset Select Sermon.net Enter user name Click Authenticate and enter password Select Channel Wirecast User Guide | 104730 111 112 Broadcasting Flash To ShowCaster Flash To ShowCaster To stream to ShowCaster, follow these steps: 1. Select a Flash preset in Encoder Preset. 2. Select ShowCaster from the Destination menu. 3. Enter your ShowCaster username. 4. After you have entered your username, click Authenticate to enter your password and generate the RTMP URL. You only need to do this one time because Wirecast stores the channel information for future streams. The default RTMP port is 1935. You may need to configure your firewall to enable connections on this port. Note: If you do not have a username and password, you can sign up with ShowCaster by clicking the ShowCaster icon or by clicking Sign Up. 5. Select your ShowCaster channel. 6. Click Save to save your settings. Select an encoder preset Select ShowCaster Enter user name Click Authenticate and enter password Select Channel Wirecast User Guide | 104730 Broadcasting Flash To Streaming Media Hosting Flash To Streaming Media Hosting To stream to Streaming Media Hosting, follow these steps: 1. Select a Flash preset in Encoder Preset. 2. Select Streaming Media Hosting from the Destination menu. 3. Enter your Streaming Media Hosting username. 4. After you have entered your username, click Authenticate to enter your password and generate the RTMP URL. You only need to do this one time because Wirecast stores the channel information for future streams. The default RTMP port is 1935. You may need to configure your firewall to enable connections on this port. Note: If you do not have a username and password, you can sign up with Streaming Media Hosting by clicking the Streaming Media Hosting icon or by clicking Sign Up. 5. Select your Streaming Media Hosting channel. 6. Click Save to save your settings. Select an encoder preset Select Streaming Media Hosting Enter user name Click Authenticate and enter password Select Channel Wirecast User Guide | 104730 113 114 Broadcasting Flash To Stretch Internet Flash To Stretch Internet To stream to Stretch Internet, follow these steps: 1. Select a Flash preset in Encoder Preset. 2. Select Stretch Internet from the Destination menu. 3. Enter your Stretch Internet username. 4. After you have entered your username, click Authenticate to enter your password and generate the RTMP URL. You only need to do this one time because Wirecast stores the channel information for future streams. The default RTMP port is 1935. You may need to configure your firewall to enable connections on this port. Note: If you do not have a username and password, you can sign up with Stretch Internet by clicking the Stretch Internet icon or by clicking Sign Up. 5. Select your Stretch Internet channel. 6. Click Save to save your settings. Select an encoder preset Select Stretch Internet Enter user name Click Authenticate and enter password Select Channel Wirecast User Guide | 104730 Broadcasting Flash To TwitchTV Flash To TwitchTV To stream to TwitchTV, follow these steps: 1. Select a Flash preset in Encoder Preset. 2. Select TwitchTV from the Destination menu. 3. Enter your TwitchTV username. 4. After you have entered your username, click Authenticate to enter your password and generate the RTMP URL. You only need to do this one time because Wirecast stores the channel information for future streams. The default RTMP port is 1935. You may need to configure your firewall to enable connections on this port. Note: If you do not have a username and password, you can sign up with TwitchTV by clicking the TwitchTV icon or by clicking Sign Up. 5. A default path is automatically provided for the RTMP Ingest URL. Use this URL unless you have received a different one from Twitch. 6. Click Save to save your settings. Select an encoder preset Select Twitch Enter user name Click Authenticate and enter username and password Wirecast User Guide | 104730 115 116 Broadcasting Flash To Ustream Flash To Ustream To stream to Ustream, follow these steps: 1. Select a Flash preset from the Encoder Preset menu. 2. Select Ustream from the Destination menu. 3. Enter your Ustream username. Note: Ustream may not yet support OpenIDs via this API. The solution is to download the FMLE configuration file from Ustream and use the Flash Media Server interface. 4. After you have entered your username, click Authenticate to enter your password and generate the RTMP URL. You only need to do this one time because Wirecast stores the channel information for future streams. The default RTMP port is 1935. You may need to configure your firewall to enable connections on this port. Note: If you do not have a username and password, you can sign up with Ustream by clicking the Ustream icon or by clicking Sign Up. 5. Select your Ustream channel. 6. Click Save to save your settings. Select an encoder preset Select Ustream Enter user name Click Authenticate and enter password Select Channel Wirecast User Guide | 104730 Broadcasting Flash To YouTube Flash To YouTube Note: Custom encoders cannot be used to Stream to YouTube. They may only be used to encode a recording to disk. To stream to YouTube, follow these steps: 1. Click Authenticate to enter your email and password. Click Authenticate and enter password 2. If you are not already signed in, a browser is launched enabling you to sign into your YouTube account. Enter your account information and click Sign In. Enter email and enter password Click Sign In Wirecast User Guide | 104730 117 118 Broadcasting Flash To YouTube 3. When the permission window displays, click Allow Access to authenticate your account. Click Allow Access If a success code is displayed, you can ignore it and close the window. Ignore and close this window Note: If you do not have a YouTube account, click Sign Up (or go to www.youtube.com). 1. Select your YouTube event. 2. Select the format you setup for your YouTube event. If several formats are listed, select the highest desired resolution and all lower ones will be created automatically. 3. Check (optionally) Use Backup Server to enable YouTube to simultaneously broadcast your stream to the backup server specified in the Event's configuration. 4. Click Save to save your settings. Select event Select format Check (optionally) Wirecast User Guide | 104730 Broadcasting Flash Record To Disk Flash Record To Disk Wirecast offers the ability to save your broadcast to disk as either a Flash or MPEG-4 file. To record your broadcast to disk, follow these steps: 1. Select an encoder preset. 2. Select Record To Disk. 3. Click Browse or enter the path to where you want your recording located. 4. Check the Auto Increment Filenames checkbox (optionally), if you want your filename to have an incremental number appended to the end of it. This causes a new file to be created every time you start recording to disk. If you do not check this checkbox, then your previous file is overwritten. 5. Select a File Type. You can choose either Flash (.F4V) or MPEG-4 (.M4V). 6. Click Save to save your settings. Select encoder preset Select Record To Disk Click Browse to locate file Click Auto Increment Filenames (optionally) Select File Type Wirecast User Guide | 104730 119 120 Broadcasting Annotation Settings Annotation Settings Media players offer a feature which enables the viewer to see details about the broadcast they are viewing. These can be seen in QuickTime Player by selecting Show Movie Properties from the Movie menu. Select Movie, then Annotations, to see the details. In Windows Media Player 10, the Title is used as the name of the broadcast in the Now Playing List. You can see the other properties by right clicking on the entry in the Now Playing List, selecting properties, then clicking the Content tab. These Annotations can be configured for your broadcast in Wirecast. When you configure annotations, they apply for all streams at the same time. This means changing your annotations is very easy when you have multiple streams. To configure the annotations, follow these steps: 1. Select Broadcast Settings from the Broadcast menu (or press the Ctrl+Y keys). Select Annotations tab. 2. Enter the title and author of the broadcast. 3. Enter any copyrights for the broadcast. 4. Enter any additional info associated with the broadcast. 5. Click Save to save your settings. Wirecast User Guide | 104730 121 Setting Encoder Presets Introduction Wirecast supports a wide variety of encoders (also known as codecs). An encoder is a program that compresses the audio and/or video output of Wirecast for broadcast. Without an encoder, the uncompressed data is too large to successfully broadcast across a network. This is why encoders are so important. The settings for encoders range from simple to very complex. Because of this, Wirecast offers presets of the most common settings for encoders. This provides a starting point, reduces complexity, and enables you to experiment and adjust settings as you test your broadcast. Note: Encoder Presets can also be edited in the Broadcast Settings window. To do this select Broadcast > Broadcast Settings, choose an Encoder Preset from the drop-down menu, then click Edit. Topics The Encoder Presets Window Windows Media QuickTime Video QuickTime Audio Flash H.264 Flash VP6 The Encoder Presets Window To open the Encoder Presets window, select Encoder Presets from the Window menu. The encoder presets menu at the top of the window provides a list of encoder presets. Select a preset to edit from this list. 122 Setting Encoder Presets The Encoder Presets Window Creating New Presets The default encoder presets cannot be changed. However, you can make a copy of any preset, modify it as needed, and save it under a new name. You can refer back to the default presets at any time since they are never modified. To create a new preset, you must make a copy of an existing preset. To do this, select an existing preset from the Encoder Presets menu that is close to what you what you need, change settings as needed, then click Save As to save the preset with a new name. Select an encoder preset change settings Save as new encoder preset You are not required to modify a copy of a default preset. You can create a new (empty) preset by clicking the New button in the Broadcast Settings window and renaming the newly created preset. (See the New button in Encoder Presets). Profile Options Many encoder presets enable you to select one of three profiles: Baseline, Main, or High. Baseline Profile (BP) Baseline profile is primarily for low-cost applications that require additional data loss robustness. This profile is used in some video conferencing and Wirecast User Guide | 104730 Setting Encoder Presets Windows Media mobile applications. It includes all features supported in the Constrained Baseline Profile, plus three additional features used for loss robustness (or for other purposes such as low-delay multi-point video stream compositing). The importance of this profile has faded somewhat since the definition of the Constrained Baseline Profile in 2009. All Constrained Baseline Profile bitstreams are also considered to be Baseline Profile bitstreams, since these two profiles share the same profile identifier code value. Main Profile (MP) The Main profile is used for standard-definition digital TV broadcasts that use the MPEG-4 format as defined in the DVB standard. It is not, however, used for high-definition television broadcasts, since the importance of this profile faded when the High Profile was developed in 2004 for that application. High Profile (HiP) The High profile is the primary profile used for broadcast and disc storage applications, particularly for high-definition television applications. For example, this profile is used by the Blu-ray Disc storage format and the DVB HDTV broadcast service. Windows Media To modify a Windows Media encoder preset, follow these steps: 1. Open the Encoder Presets window 2. Select a Windows Media preset from the Encoder Presets menu. Select a Windows Media preset Multiple Streams Panel 3. Check the Video checkbox and select the Windows Media codec version to use. 4. Check the Audio checkbox and select the Windows Media codec version to use. 5. Use the Multiple Streams Panel (left side of window) to set up multiple simultaneous streams in a single encoder. This allows the media player receiving the stream to adjust it's quality depending on the connection speed and reliability. Wirecast User Guide | 104730 123 124 Setting Encoder Presets Windows Media The plus and minus buttons at the bottom enable you add or remove additional streams to your preset. 6. Select the Audio Format. This is a pre-configured audio encoder setting. 7. Enter the Video Size. This sets the width and height of your resulting broadcast. Every stream should have the same aspect ratio. For example, if 640x480 is used, it has an aspect ratio of 4:3. Therefore, all other streams should also have a 4:3 aspect ratio. 8. Enter the broadcast frame rate in frames per second (FPS). This is a target rate and is only a goal for the encoder. It is not a guaranteed value. 9. Enter the Key Frame Interval in seconds. This controls how often the encoder makes a new keyframe. The more keyframes your broadcast has, the more bandwidth it takes (since less compression can occur). However, more keyframes means motion in your video stream is better supported. 10. Enter the bit rate in Kbits (1000 bits) per second. This is a target setting for the encoder, not a guaranteed value. Higher numbers provide better quality - lower numbers, lower quality. The connection speed of your audience is a significant factor in determining your target bit rate. 11. Set the smoothness using the slider. Video smoothness determines the trade-off between sharp images and smooth motion. Video appears smooth when objects move across the screen with non-jagged object edges. If you are dropping frames during encoding, consider decreasing video smoothness. 12. Select Complexity Some video codecs support multiple complexity levels. Complexity level does not directly affect the bit rate of a stream, but it can affect its quality. Complexity level is a measure of the processing power needed to reconstruct the compressed data. 13. Enter the buffer size. The bit rate and quality depends on the buffer size. A larger buffer size enables more bits to be allocated for complex video. For example, if you set the buffer size to 10 seconds, the codec may choose to allocate some bytes to the first 8 seconds and the rest during the last 2 seconds. Increasing the buffer typically improves overall quality. For lower bit rates, it is recommended to increase the buffer size. For higher bit rates, increasing the buffer size has less effect. Wirecast User Guide | 104730 Setting Encoder Presets QuickTime Video QuickTime Video To modify a QuickTime video preset, follow these steps: 1. Open the Encoder Presets window. 2. Select a QuickTime preset from the Encoder Presets menu. Select a QuickTime preset Note: To use a newly created preset (See Creating New Presets). Note: Select QuickTime from the Output Format menu. 3. Select the Video tab. 4. Check the Video Enabled checkbox. When checked, the video for your broadcast is encoded. When unchecked, a blank video screen is provided. This is the preferred method of producing audio-only broadcasts. 5. Select the encoder from the Encoder menu. The encoder is sometimes called a Codec or Compressor. 6. Click Options to view and/or set the encoder options. Many, but not all encoders provide optional settings. Note: If the Options button is greyed-out, no options are available. 7. Select color depth from the Depth menu. Some Encoders allow you to modify the color depth (or bits per pixel) of the broadcast. Picking a higher color depth results in larger output, but lower color quality. 8. Enter the width of your broadcast video. Wirecast User Guide | 104730 125 126 Setting Encoder Presets QuickTime Audio 9. Enter the height of your broadcast video. 10. Select the quality of your broadcast by adjusting the slider between least and best. Generally, encoders make a trade-off between higher quality (greater bandwidth) and speed (CPU usage). Note: If the Quality scale is greyed-out, quality is a fixed value. 11. Select the desired frames per second (FPS) of your broadcast. This is a target value for the encoder and is not guaranteed. 12. Check Key Frame Every checkbox (optionally) and enter the number of frames. A movie is a sequence of images and each image is called a frame. To compress video data, most encoders take a frame and make it a reference (also known as a key). This keyframe is sent as part of the broadcast, and all of the data after that keyframe is relative to it. The benefit of this is that the compressor only needs to send what has changed since the last keyframe. The main drawback of this is that over time it becomes harder for the encoder to distinguish the frame-difference information, especially if there is a lot of motion in the video. Another drawback is if your viewer’s computer misses a keyframe, the video is distorted until the next keyframe is sent. However, you can control how often the encoder makes a new keyframe by setting the number of frames. The more keyframes you broadcast, the more bandwidth required and less compression, but results in better quality video. 13. Check Average Bit Rate checkbox (optionally) and enter the average bit rate as a target setting. 14. Check Limit Peak Bit Rate checkbox to request the encoder to limit the output to a specific rate. Note: Some encoders use this as a target value, not as an absolute value. 15. Click the Packetize button to modify how the QTSS packets are created. This is an advanced feature for knowledgable users. 16. Click Save to save your settings. QuickTime Audio To modify a QuickTime audio preset, follow these steps: 1. Open the Encoder Presets window. 2. Select a QuickTime preset from the Encoder Presets menu. Wirecast User Guide | 104730 Setting Encoder Presets QuickTime Audio 3. Select the Audio tab. Select a QuickTime preset Select the Audio tab Note: To use a newly created preset (See Creating New Presets). 4. Check (optionally) the Audio Enabled checkbox. When checked, the audio for your broadcast is included. When unchecked, audio is absent from your broadcast. This is the preferred method of producing video-only broadcasts because the presence of silent audio uses bandwidth. 5. Select the encoder to use. 6. Click Options to view and/or set the encoder options. Many, but not all encoders have options that are specific to the encoder. Note: If the Options button is greyed-out, no options are available. 7. Select the audio bit rate from the Rate menu. The higher the value you choose, the better the quality, but more bandwidth is required. 8. Select Bits Per Sample. This is how much data each sample of audio uses. The higher the value, the better the quality, but more bandwidth is required. 9. Select the number of channels: Mono or Stereo. Mono uses less bandwidth than stereo, but stereo is more pleasing to the listener. 10. Click Save to save your settings. 11. Wirecast User Guide | 104730 127 128 Setting Encoder Presets Flash H.264 Flash H.264 To modify a Flash H.264 preset, follow these steps: 1. Open the Encoder Presets window. 2. Select a Flash encoder preset from the Encoder Presets menu. Select a Flash preset Note: To use a newly created preset (See Creating New Presets). 3. Check the Video Encoding checkbox. When checked, the video for your broadcast is encoded. When unchecked, a blank video screen is provided. This is the preferred method of producing audio-only broadcasts. 4. Select the H.264 encoder from the Encoder menu. 5. Enter the width of your broadcast video. 6. Enter the height of your broadcast video. 7. Select the desired frames per second (FPS) of your broadcast. This value is a target value for the encoder and the exact value is not guaranteed. 8. Enter the average bit rate in Kbits (1000 bits) per second. This is the target bit rate of your video. Higher numbers provide better quality. The connection speed of your audience is a significant factor in determining your target bit rate. The encoder compresses the video to approximate this target. However, at different times during your broadcast the bit rate may be higher lower than the target rate. 9. Select an encoder profile from the Profile menu. Two profiles are provided: Baseline and Main. The Baseline profile is commonly used in mobile applications. It is also used in other applications which operate with limited processing power, storage Wirecast User Guide | 104730 Setting Encoder Presets Flash VP6 capacity, and/or bandwidth. The Main profile is appropriate for general-purpose applications of broadcast media, such as high-bandwidth Internet broadcasting. 10. Check Key Frame (optionally) and enter the number of frames. A movie is a sequence of images and each image is called a frame. To compress video data, most encoders take a frame and make it a reference (also known as a key). This keyframe is sent as part of the broadcast, and all of the data after that keyframe is relative to it. The benefit of this is that the compressor only needs to send what has changed since the last keyframe. The main drawback of this is that over time it becomes harder for the encoder to distinguish the frame-difference information, especially if there is a lot of motion in the video. Another drawback is if your viewer’s computer misses a keyframe, the video is distorted until the next keyframe is sent. However, you can control how often the encoder makes a new keyframe by setting the number of frames. The more keyframes you broadcast, the more bandwidth required and less compression, but results in better quality video. 11. Check (optionally) the Timecode Every checkbox and enter the number of frames between timecodes. Wirecast can generate timecodes embedded in the flash stream. If a frames value of zero is entered, the timecode is never sent. Wirecast sends metadata along with the frames. This data looks like an ONFi call. Various timecodes and timestamps are also sent with the stream. 12. Check (optionally) the Audio Encoding (AAC) checkbox. When checked, the audio for your broadcast is included. When unchecked, audio is absent. This is the preferred method of producing video-only broadcasts because the presence of silent audio uses bandwidth. 13. Select the number of channels: Mono or Stereo. Mono uses less bandwidth than stereo, but stereo is more pleasing to the listener. 14. Select the audio bit rate, in Kbits (1000 bits) per second, from the Target Bit Rate menu. This is the target bit rate of your audio. Higher numbers provide better quality. The connection speed of your audience is a significant factor in determining your target bit rate. The encoder compresses the audio to approximate this target. However, at different times during your broadcast the bit rate may be higher lower than the target rate. The total broadcast bit rate is a function of video bit rate plus audio bit rate. 15. Select the audio sample rate, in kHz (1000 Hz) per second, from the Sample Rate menu. This value specifies how many thousands of times per second to sample the audio in the broadcast. Higher values provide better quality sound, but at greater bandwidth. 16. Click Save to save your settings. Flash VP6 To modify a Flash VP6 preset, follow these steps: Wirecast User Guide | 104730 129 130 Setting Encoder Presets Flash VP6 1. Open the Encoder Presets window. 2. Select a Flash preset from the Encoder Presets menu. Select a Flash preset Note: To use a newly created preset (See Creating New Presets). 3. Check the Video Encoding checkbox. When checked, the video for your broadcast is encoded. When unchecked, a blank video screen is provided. This is the preferred method of producing audio-only broadcasts. 4. Select the VP6 encoder from the Encoder menu. 5. Enter the width of your broadcast video. 6. Enter the height of your broadcast video. 7. Select the desired frames per second (FPS) of your broadcast. This is a target value for the encoder and is not guaranteed. 8. Enter the average bit rate in Kbits (1000 bits) per second. This is the target bit rate of your video. Higher numbers provide better quality. The connection speed of your audience is a significant factor in determining your target bit rate. The encoder compresses the video to approximate this target. However, at different times during your broadcast the bit rate may be higher lower than the target rate. 9. Check Key Frame (optionally) and enter the number of frames. A movie is a sequence of images and each image is called a frame. To compress video data, most encoders take a frame and make it a reference (also known as a key). This keyframe is sent as part of the broadcast, and all of the data after that keyframe is relative to it. The benefit of this is that the compressor only needs to send what has changed since the last keyframe. The main drawback of this is that over time it Wirecast User Guide | 104730 Setting Encoder Presets Flash VP6 becomes harder for the encoder to distinguish the frame-difference information, especially if there is a lot of motion in the video. Another drawback is if your viewer’s computer misses a keyframe, the video is distorted until the next keyframe is sent. However, you can control how often the encoder makes a new keyframe by setting the number of frames. The more keyframes you broadcast, the more bandwidth required and less compression, but results in better quality video. 10. Check (optionally) the Timecode Every checkbox and enter the number of frames between timecodes. Wirecast can generate a timecodes embedded in the flash stream. If a frames value of zero is entered, the timecode is never sent. Wirecast sends meta data along with the frames. This data looks like an ONFi call. Various timecodes and timestamps are also sent with the stream. 11. Check (optionally) the Audio Encoding (MP3) checkbox. When checked, the audio for your broadcast is included. When unchecked, audio is absent. This is the preferred method of producing video-only broadcasts because the presence of silent audio uses bandwidth. 12. Select the number of channels: Mono or Stereo. Mono uses less bandwidth than stereo, but stereo is more pleasing to the listener. 13. Select the audio bit rate, in Kbits (1000 bits) per second, from the Target Bit Rate menu. This is the target bit rate of your audio. Higher numbers provide better quality. The connection speed of your audience is a significant factor in determining your target bit rate. The encoder compresses the audio to approximate this target. However, at different times during your broadcast the bit rate may be higher lower than the target rate. The total broadcast bit rate is a function of video bit rate plus audio bit rate. 14. Select the audio sample rate, in kHz (1000 Hz) per second, from the Sample Rate menu. This value specifies how many thousands of times per second to sample the audio in the broadcast. Higher values provide better quality sound, but at greater bandwidth. 15. Click Save to save your settings. Wirecast User Guide | 104730 131 132 Setting Encoder Presets Flash VP6 Wirecast User Guide | 104730 133 Using the Asset Manager Introduction The Asset Manager is used to change the sources of media in your document. Topics Documents Re-assigning Media Documents Wirecast stores a path to your media in the Wirecast document. If you relocate your media, Wirecast no longer is able to find them. In this case, use the Asset Manager to reassign the new media locations. However, Wirecast does keep track of the relative path to your media. If you move both the document and media to a new position, Wirecast still finds the media. Re-assigning Media To reassign media, follow these steps: 1. To open the Asset Manager, select Show Asset Manager from the Wirecast Media menu. 2. Select the media you want to assign to another source. 3. Some media assets (i.e cameras) enable you to set the aspect ratio by displaying a Device Aspect Ratio menu. You can select an aspect ratio from this menu. 4. Select the new media from the Assign To menu, or click Browse and locate the replacement media on disk. Note: When Desktop Presenter is selected as the source, you can enter the IP address for the Desktop Presenter. This enables you to build a Wirecast presentation with place-holders and then reconfigure at a later date to accommodate a new presenter 134 Using the Asset Manager Re-assigning Media with a new Desktop Presenter as a source. Additionally, if you select a camera input source from the Media List, an additional menu to set the Device Aspect Ratio of the camera is displayed. This is useful if the image aspect ratio of your camera is not automatically picked up by Wirecast. In this case, select the correct aspect ratio from the menu, click Apply, then click the corresponding icon in the Shot Selection. 5. Click Apply to replace the existing media, then close the Reassign Media window. Select media Select an aspect ratio Select or Browse to new media Click Apply and close window Wirecast User Guide | 104730 135 User Interface Introduction These topics describe the menus, menu items, and keyboard short-cuts in Wirecast. Topics File Menu Edit Menu Switch Menu Media Menu Sources Menu Broadcast Menu Layout Menu Window Menu Help Menu Keyboard Short-cuts File Menu New Creates a new, empty Wirecast document. Open Displays the Open dialog window for opening a Wirecast document. Open Recent Displays up to fifteen of the most recently accessed documents. Every time a document is opened or saved it is entered into the this list. Import Media Enables you to import media into Wirecast. A new shot is automatically created using the new media. Save Saves the document. If the document has not already been saved, the Save As... dialog window is displayed. 136 User Interface Edit Menu Save As Displays the Save As... dialog window so that the document can be saved using a new file name. Close Window Closes the currently active Wirecast window. If the window is a document, all of its Shot Editor windows are closed as well. If Wirecast is still broadcasting, you are asked to stop the broadcast. If the document has not been saved, you are asked to save the document before closing. Preferences Opens the Preferences window. If the Preferences window is already open, it is made active. Exit Closes all documents and then exits. If the broadcast is playing, you are asked to stop the broadcast. If a document has not been saved, you are asked to save the document before exiting. Edit Menu Undo Reverses your last change in Wirecast. Undo is only available in some windows (such as the Shot Editor). Wirecast offers an unlimited number of undo actions (within computer memory limitations). Undo information is stored on a per-window basis. Also, if you close a window then reopen it, your undo information is lost. Redo Reverses your last undo action. Redo is only available in some windows (such as the Shot Editor). Wirecast offers an unlimited number of redo actions (within computer memory limitations). Redo information is stored on a per-window basis. Also, if you close a window then reopen it, your redo information is lost. Edit Shot Opens the Shot Editor. (See Using the Shot Editor). You can also double-click a shot, or right-click and select Edit Shot, to open the Shot Editor. The Inspector window is a Shot Editor window which always edits the last touched shot. (See Inspector vs. Editor.) Rename Shot Enables you to rename a shot. You can also right-click a shot and select Rename Shot. Duplicate Shot Duplicates the currently selected shot. You can also right-click a shot and select Duplicate Shot. Add Shot Creates a new empty shot. You can also right-click a shot and select Add Shot. Delete Shot Deletes the currently selected shot. You can also right-click a shot and select Delete Shot. Move To Layer Moves a shot to the selected layer. When shots are created, they are assigned to a specific layer. They exist on that layer until they are moved or deleted. You can also right-click a shot and select Move To Layer. Switch Menu Go Performs the same action as clicking the Go button. Wirecast User Guide | 104730 User Interface Media Menu Transitions Wirecast has three transition buttons that can be assigned any transitions (cut, smooth, etc.) that Wirecast supports. The Switch menu lists the currently assigned transitions by name. These three transitions can also be selected by pressing the control key and either the 1, 2, or 3 key. (See Transition Controls to modify which transitions appear in this menu.) AutoLive Toggles (turns on and off) the AutoLive feature. It can also be toggled by changing checkbox AutoLive in the Main window. AutoLive is a fundamental feature of Wirecast which enables you to control how you make shots become part of the live broadcast. (See AutoLive.) Media Menu Start Playing All Movies Starts playing any movies that are not currently playing. Pause All Movies Pauses all movies that are currently playing. Play to Next Point Play all media to the next marker (point) that is embedded in the media. Jump to Previous Point Forces all media to jump back to the previews marker (point), and then pause. New Desktop Presenter Launches the Desktop Presenter program. If Bonjour is not installed on the computer running Desktop Presenter, you may need to manually enter the TCP/IP address of that computer. If you want to add a Desktop Presenter before it is available you can use this menu option to pre-configure your document. You can also change the IP address to a Desktop Presenter in the Asset Manager dialog. Show Asset Manager Displays devices that can be configured. Some devices (cameras, etc.) may be configurable. For example, you can configure a USB camera to manually change its focus, contrast, brightness, etc. Other devices have multiple inputs you can choose (AlchemyTV Card, etc.). (See Using the Asset Manager.) Note: The Configure Devices menu selection is present only if a device is connected to Wirecast. The configuration user interface is provided by the device maker. It is beyond the scope of this document to describe all of the features available for all devices. See the documentation provided with your device on how to configure it. Wirecast User Guide | 104730 137 138 User Interface Sources Menu Sources Menu PRO New IP Camera Opens the Source Settings window with IP Camera selected as a source. Enter the IP address and frame settings to test the camera, then click Apply to create the new source. PRO New Teradek Cube Opens the Source Settings window with a new Teradek Cube selected as a source. Configure the settings and click Apply to create the new source. PRO New Scoreboard Opens the Source Settings window with a new (untitled) Scoreboard selected as a source. Configure the settings and click Apply to create the new source. New Presenter Opens the Source Settings window with a new Desktop Presenter selected as a source. Enter the IP address and check With Audio to include audio from the desktop. Click Apply to create the new source. PRO New Pipeline Opens the Source Settings window with a new (untitled) Pipeline selected as a source. Enter the IP address, select a video format, set the deinterlace video option, and click Apply to create the new source. Show Source Settings Opens the Source Settings window. (See Using the Source Settings for more detailed information on setting sources.) Show USB Devices Opens a list of all USB devices. Broadcast Menu Canvas Size Sets the canvas size aspect ratio used when broadcasting a Wirecast document. Note: You should match the output to the canvas size as close as possible to preserve video resolution and quality. For example, a 800x600 source results in significant loss of quality if an aspect ratio of 640x480 is selected. Using 720x576, which is much closer in size, helps preserve video quality. Broadcast Settings Opens the Broadcast Settings window. Start/Stop Broadcasting Starts (or stops) broadcasting to the network. Start/Stop Recording Starts (or stops) recording to disk. If you have not yet configured the Broadcast Settings for this document, you are prompted to do so. Wirecast User Guide | 104730 User Interface Layout Menu External Display Output Selects an external display for the output of Wirecast. For example, if you have a projector connected to your computer using S-Video, select it from this menu to display the output of Wirecast to the projector. If you have a dual-head graphics card, you can select the second monitor to display Wirecast Output. However, if you have two graphics cards, Wirecast may not be able to display to any devices (monitors) on the second graphics card. Virtual Camera Out Enables you to present the output of Wirecast as if it were a camera (a virtual camera), allowing it to be automatically detected by other applications when they are launched. Layout Menu Preview Shows (or hides) the Preview area in the Main window. You can also click the Preview icon in the Main window tool bar. Master Audio Shows (or hides) the Master Audio controls. Main Shot List Shows (or hides) the main shot list. Output Statistics Shows (or hides) the output statistics. Layer Panel Shows (or hides) the layer panel. Go to Layer Displays the selected layer. The currently selected layer is always highlighted in the Layout Panel. You can also press Control + Shift keys with the T, F, N, B, or A keys to select a layer. Each of these letter keys represents a layer name: Title, Foreground, Normal, Background, and Audio. Window Menu Inspector Opens the Inspector window. There is only one Inspector window for each document. The Inspector is very similar to the Shot Editor, except it always edits the last shot touched. Encoder Presets Opens the Encoder Presets window. PRO Audio Inspector Opens the Audio Inspector window. New Layer Window Opens a new Master Layer window for the layer selected. Camera Preview Shows a preview of all cameras currently connected to your computer. Click the Add Camera button to add a camera to the preview window. Use the Adjust FPS (frames per second) slider to adjust how realistically the camera image responds to motion. (Keep in mind that the greater the FPS the greater the processing power required to render the preview.) Use the Adjust Size slider to change the size of Wirecast User Guide | 104730 139 140 User Interface Help Menu the camera image. You can also right-click on any camera preview source and select Remove. Add Camera Right-click to remove source Adjust FPS Adjust Size Document Windows All open document windows are listed at the bottom of this menu. Help Menu WirecastHelp Opens the online help version of the User Guide. Open PDF User Guide Opens the PDF version of the User Guide. Open Tutorial HTML Opens the Wirecast Tutorial in your browser. To follow the tutorial, you'll need to Create a Document for the Tutorial as well. Create Document for Tutorial Creates a new Wirecast Document which contains the media necessary for following the Tutorial. Buy/Upgrade Opens Licenses in the Preferences window. This window allows you to purchase licenses and to activate or deactivate them. Report a Bug Opens the Telestream Website bug reporting page where you can report and bugs you have encountered. Please give us as much detailed information as possible about your computer, what you were doing, and any supporting material regarding the problem. Additionally, if a specific piece of media is troublesome, please set it aside so that we can possibly obtain it and look at the problem directly. In the unlikely event that Wirecast crashes, you can also send us a debug log by clicking the Upload Debug Log File button in the File > Preferences > Advanced menu. Provide Feedback Opens the Telestream Website feedback page where you can enter any feedback you may have about our product or company. Send Support Information Opens a Support Assistant dialog window. To create a new support ticket, select Create a support ticket. The information is sent to the Telestream support team for evaluation. If you have been previously issued a case number, select Link with existing support case # and enter your case number. You can also select Do not receive follow-up from Telestream. This enables you to send support information to Wirecast User Guide | 104730 User Interface Keyboard Short-cuts Telestream without receiving a response. Click Save Report to save the information to a file on your computer. Click Send Report to send the information to Telestream. Note: You must click Send Report to create a ticket. If you click Save Report, a ticket will not be created. Visit Web Site Opens the Telestream Website home page. Visit Desktop Presenter Download Page Opens the Telestream Website download page for Desktop Presenter. Acknowledgments Opens an on-line help to acknowledgments. About Displays version and copyright information about Wirecast Keyboard Short-cuts This section provides a list all of keyboard short-cuts used in Wirecast. They are arranged according to how they appear in the drop-down menus in the main window. Wirecast User Guide | 104730 141 142 User Interface Keyboard Short-cuts Table 1. File Menu Keyboard Short-cuts File Menu Keyboard Short-cut New Ctrl+N Open Ctrl+O Open Recent Import Media Ctrl+Shft+I Canvas Size Save Ctrl+S Save As Ctrl+Shft+S Close Window Preferences Ctrl+comma Exit Table 2. Edit Menu Keyboard Short-cuts Edit Menu Keyboard Short-cut Undo Ctrl+Z Redo Ctrl+Shft+Z Edit Shot Ctrl+E Rename Shot Ctrl+R Duplicate Shot Ctrl+D Add Shot Delete Shot Ctrl+Backspace Move To Layer Table 3. Switch Menu Keyboard Short-cuts Switch Menu Keyboard Short-cut Go Ctrl+G Cut Ctrl+1 Wirecast User Guide | 104730 User Interface Keyboard Short-cuts Table 3. Switch Menu Keyboard Short-cuts Switch Menu Keyboard Short-cut Smooth Ctrl+2 Bowstring Ctrl+3 AutoLive Ctrl+L Table 4. Media Menu Keyboard Short-cuts Media Menu Keyboard Short-cut Start Playing All Movies Ctrl+P Pause All Movies Ctrl+Shft+P Play to Next Point Ctrl+RightArrow Jump to Previous Point Ctrl+LeftArrow New Desktop Presenter Show Asset Manager Table 5. Sources Menu Keyboard Short-cuts Sources Menu New IP Camera New Teradek Cube New Scoreboard New Presenter New Pipeline Show Source Settings Show USB Devices Wirecast User Guide | 104730 Keyboard Short-cut 143 144 User Interface Keyboard Short-cuts Table 6. Broadcast Menu Keyboard Short-cuts Broadcast Menu Keyboard Short-cut Broadcast Settings Ctrl+Y Start/Stop Broadcasting > Start All Ctrl+B Start/Stop Recording > Start All Ctrl+K External Display Output Table 7. Layout Menu Keyboard Short-cuts Layout Menu Keyboard Short-cut Preview Master Audio Main Shot List Output Statistics Layer Panel Go to Layer Table 8. Window Menu Keyboard Short-cuts Window Menu Keyboard Short-cut Inspector Ctrl+I Encoder Presets Ctrl+Shft+E Audio Inspector New Layer Window > Master Layer 1 Ctrl+T Camera Preview Document Windows Wirecast User Guide | 104730 User Interface Keyboard Short-cuts Table 9. Help Menu Keyboard Short-cuts Help Menu Keyboard Short-cut Search Wirecast Help Open PDF User Guide Open Tutorial HTML Create Document for Tutorial Report a Bug Provide Feedback Gather Support Information Visit Web Site Visit Desktop Presenter Download Page Acknowledgments About Wirecast User Guide | 104730 Ctrl+? 145 146 User Interface Keyboard Short-cuts Wirecast User Guide | 104730 147 Using Preferences Introduction Wirecast is designed so that you can configure most of your options directly in your Wirecast document or the Shot Editor. The Preferences window enables you to set up Wirecast, set Desktop Presenter options, manage your licenses, update your software, and set advanced video options. Topics Accessing Preferences General Performance Licenses Software Update Advanced Accessing Preferences To open the Preferences window, select Preferences from the FileWirecast menu (or press the Ctrl+ Comma (“,”) keys). Preferences are grouped under four topics: General, Licenses, Software Update, and Advanced. Click one of these topics to view and change its preferences. 148 Using Preferences General Wirecast automatically saves your preferences every time you make a change. The changes are immediately applied. Resetting Preferences To reset your preferences, quit Wirecast and then delete the files located at: • Windows 7 and Vista C:\Users\USERNAME\AppData\Roaming\net.telestream.wirecast.xml • Windows XP C:\Documents and Settings\USERNAME\Application Data\net.telestream.wirecast.xml Note: You should match the output to the canvas size as close as possible to preserve video resolution and quality. For example, a 800x600 source results in significant loss of quality if an aspect ratio of 640x480 is selected. Using 720x576, which is much closer in size, helps preserve video quality. General General preferences enable you to setup the Wirecast environment. Open Last Document on Startup When checked, the last document you used is opened when Wirecast starts up. Checked is the default. Shot Editor Checkerboard When checked, a checkerboard background displays in the Shot Editor to indicate the absence of color in the area where it is displayed. Checked is the default. Wirecast User Guide | 104730 Using Preferences Performance Feedback Detection When checked, the computer audio is disabled (live feed is unaffected) whenever feedback is detected. Checked is the default. When feedback is detected, the following warning is displayed with an option to turn off feedback detection: Performance Performance preferences enable you to select the display rate used for all internal video rendering. You can select either 25/PAL or 30 fps. If using PAL sources, choosing 25 may eliminate dropped or duplicate frames. You can turn on the Live Icons feature, which makes all icons in the Shot Area display any live activity in the device it represent (cameras, streaming, etc.). You can also set the FPS of the Live Icon display using the slide bar control. Wirecast User Guide | 104730 149 150 Using Preferences Licenses Licenses Licenses preferences enable you to register and license Wirecast. Click Purchase License Serial Numbers The table in the Licenses Preference window displays the products and serial numbers that you have received for Wirecast. Note: The serial number is always composed of numbers and upper case letters (excluding upper case letter O), but it never contains quotation marks. When you receive a serial number, it may be enclosed in quotation marks (e.g., “123-456-789”). To add a valid serial number, click Purchase License below the table. When Wirecast displays the Enter Serial Number window, enter the serial number and click OK. Wirecast validates the serial number and unlocks Wirecast. If you previously purchased a copy of Wirecast and want to use that serial number, enter that serial number to unlock Wirecast. Note: If you don't want to purchase a serial number directly in Wirecast, you can also purchase a serial number from www.telestream.net Web site, or you can purchase a serial number from Telestream by phone at: 530.470.1300. Manual Activation If your computer is not on the Internet, you can use another computer to activate your license and unlock Wirecast. To manually activate your license, download the Manual Activation Guide at: www.telestream.net/telestream-support/wire-cast/support.htm and follow the steps in the guide to unlock Wirecast. Wirecast User Guide | 104730 Using Preferences Software Update Deactivate Serial Numbers Deactivating a serial number allows you to re-activate it on another computer. You can always reactivate a serial number by re-entering it. To deactivate a serial number, select an activated product serial number, and click Deactivate License. Wirecast deactivates the serial number, disables Wirecast, and adds water-marking to the video and audio. When you deactivate a serial number, it is removed from the table. Click Deactivate License Demonstration Mode When no serial number is entered or activated, Wirecast water-marks all output (both to disk and network). The video water-mark is a periodic overlay of the Wirecast logo. Audio water-mark is a periodic voice over. If you have a Wirecast serial number and are using a Wirecast Pro feature without a Pro license, that output is also water-marked. Software Update Software update preferences enable you to obtain Wirecast updates. Wirecast User Guide | 104730 151 152 Using Preferences Advanced Automatically Check Updates Check the Automatically Check For Updates checkbox to cause Wirecast to check for updates on the Telestream Web site each time Wirecast is launched. No personal information is transferred to Telestream during this action. Checked is the default. Check Now Click Check Now to immediately check for updates on the Telestream Web site (www.telestream.net). No personal information is transferred to Telestream during this action. Advanced Advanced preferences enable you make advanced settings for Wirecast. Note: Capture Device Size has been moved to the Source Settings window. Use High Quality Video Check the Use High Quality Video checkbox to increase the quality of decoding performed on your source media files. (See Output Statistics for information on output statistics.) If CPU usage is near 95%, or if the frames per second (FPS) is consistently well below your target, uncheck Use High Quality Video to remedy this. Checked is the default. YUV Colorspace If Render using YUV colorspace is checked, video frames will be rendered on the GPU using YUV rather than RGB. This will typically provide a performance advantage and save on memory. However, with some graphics cards this can result in very noticeable degradation of video quality. Performance will improve when streaming to most destinations (including Virtual Camera Out), except in combination with some graphics cards on Windows systems. The best way to know if this option is advantageous to use on your system is by trial and error, and observe the results. Wirecast User Guide | 104730 153 Using the Main Window Introduction This section describes in detail how to use Wirecast’s main window. Topics Overview Window Bar Buttons Preview / Live Area Countdown Clock Display Transition Controls Tool Bar Shot Selection Area Layers AutoLive Overview Wirecast’s main window is comprised of these display areas: • • • • Window Bar Buttons The top area with the Broadcast and Record buttons. Messaging Area The area just below the window’s tool bar. Preview/Live Area The large area in the center. Transition Controls The area with the Transition (Cut, Smooth, and Bowstring) and Go buttons. • Toolbar The toolbar containing six tools located just above the Shot Selection area. 154 Using the Main Window Window Bar Buttons • Shot Selection Area The area displaying the shot icons (available shots). Window toolbar buttons Messaging area Preview/Live area Transition controls Toolbar Shot selection area Window Bar Buttons Wirecast provides four Window Bar buttons: Broadcast, Record, Preview, and Inspector. Broadcast button Record button Inspector button Preview button • Broadcast The Broadcast button starts and/or stops the broadcast. If you have not yet configured the broadcast, clicking this button brings up the Broadcast Settings window. This button is independent of the Record button. You can turn broadcasting on and off regardless of whether you are currently recording the broadcast. • Record The Record button starts and/or stops recording. If you have not yet configured the broadcast, clicking this button brings up the Broadcast Settings window. This button is independent of the Broadcast button. You can turn Record on and off regardless of whether you are currently broadcasting. • Preview Shows or hides the Preview area. The Preview area shows what the live broadcast looks like after you click the Go button. The Preview is not very useful Wirecast User Guide | 104730 Using the Main Window Preview / Live Area unless you turn off the AutoLive feature. When Preview is open it is displayed as the left panel of the Preview/Live area, and displays a green P in the top-left corner of the preview window. • Inspector Opens the Inspector window. The inspector is very similar to the editor window, but the Inspector always shows the last shot selected. Preview / Live Area When you open a new document, only the Live area displays. The Live area shows what is broadcast to your viewers before the encoding or compression. When AutoLive is off, you can make several changes without your viewers seeing the change. This is most useful when you are using an engineer to run your broadcast. When you are making changes to your broadcast, you may want to see those changes before broadcasting them. Preview allows you to do this. To see the preview, select Preview from the Layout menu. This sets up the Main Window with Preview on the left and the live broadcast on the right. Clicking the Go button makes the Ripples shot become Live. Preview display Wirecast User Guide | 104730 Live broadcast display 155 156 Using the Main Window Countdown Clock Display Countdown Clock Display The Main window displays a countdown clock whenever a video shot is playing. Click the gear menu icon to display actions available for the output that is playing. Countdown clock Gear icon Transition Controls The transition area is in the middle of the Main Window: There are three Transition buttons, but each can be configured to present one of many possible transition types. In the image above, the three configured transitions are: Cut, Smooth, and Bowstring. Since Smooth is selected (button darkened), any transition executed by clicking Go is a smooth transition. Changing Transitions If you single-click the Bowstring button, it becomes selected and making it the current transition type: You always have three different transition types available. You can also select one of the three buttons by pressing Ctrl+1, 2, and 3 keys for the three transition types displayed. Wirecast User Guide | 104730 Using the Main Window Tool Bar If you click the down-arrow on the right side of any transition button, you can select a new transition to assign to that button. In the image below, Swoop has been assigned to the first transition button: Transition Time The duration of the transition is controlled by clicking the duration icon: This button controls the duration of all transitions, except for Cut which is immediate. For example, if you click the Duration button and select Slow from the drop-down menu, the button changes to display a turtle icon. Additionally, if Slowest is selected a bug is displayed, and if Fast is selected a rabbit is displayed. Go Button The Go button (or you can press the Ctrl+G keys) takes any changes you have made and makes them Live using the selected transition and duration. However, the Go button only becomes important when you have AutoLive turned off. This is because when AutoLive is on, every time you click a shot the Go action is automatically executed for you. (See AutoLive.) Tool Bar The Toolbar provides a way to open lives sources, file sources, the Desktop Presenter program, shot graphics, shot audio, and shot templates. Live Sources File Sources Desktop Presenter Wirecast User Guide | 104730 Shot Graphics Shot Audio Shot Templates 157 158 Using the Main Window Tool Bar Live Sources Click the Live Sources button to display a list of live sources under the categories: System Device, IP Camera, Pipeline, and Scoreboard. When a live source is selected, it is added to the Shot Selection area as a new shot. File Sources Click the File Sources button to display a list of file-based source categories: Video Shots, Picture Shots, Music (audio) Shots, or a New (empty) Shot. When selected a file selection dialog window displays enabling you to navigate to and select a file to become a shot. Select Add New Shot to add a new, untitled, generic shot without any file-based resources attached. Desktop Presenter Click the Desktop Presenter button to select one of three actions: launch Desktop Presenter, add a new Desktop Presenter shot, or configure an existing Desktop Presenter shot. You cannot configure an existing shot until the Desktop Presenter is open. Shot Graphics Click the Shot Graphics button to select one of three actions: Source A, Untitled Scoreboard, the current Desktop Presenter shot, add a picture from disk, or add a movie from disk. When a selection is made, the source selected is added to the Shot Area as a new shot. Shot Audio Click the Shot Audio button to add an audio file shot. When selected a dialog window displays enabling you to navigate to and select a file. Shot Template Select a shot in the Shot area, then click the Shot Template button to select a template to apply. Wirecast User Guide | 104730 Using the Main Window Shot Selection Area Shot Selection Area The bottom part of the Main Window contains the Shot Selection Area, also called the Shot List. Shot selection area The shot icons can be made to display any live activity in the device it represents (cameras, streaming, etc.). See Performance in the Preferences section. Changing Shots You can change shots by clicking on the one you want to activate. Above, Ripples is selected as the current shot. You can add a new empty shot by right-clicking on any existing shot displayed in the Shot Area. Delete Shot You can delete a shot by right-clicking it and selecting Delete Shot, or by selecting Delete Shot from the Edit menu. You can also delete a shot by selecting it and pressing the Ctrl+Backspace keys. Edit Shot You can edit a shot by double-clicking on it, by right-clicking it and selecting Edit Shot, or by selecting Edit Shot from the Edit menu. You can also edit a shot by selecting it and pressing the Ctrl+E keys. Duplicate Shot You can duplicate a shot by right-clicking it and selecting Duplicate Shot, or by selecting Duplicate Shot from the Edit menu. You can also duplicate a shot by selecting it and pressing the Ctrl+D keys. Rename Shot You can rename a shot by right-clicking it and selecting Rename Shot, or by selecting Rename Shot from the Edit menu. You can also rename a shot by selecting it and pressing the Ctrl+R keys. Moving a Shot to Another Layer You can move a shot to another layer by selecting Move to Layer from the Edit menu, then selecting the target layer from the drop-down menu. You can also right-click the Shot and selecting Move to Layer. When shots are created, they are assigned to a specific layer. They exist on that layer until they are moved or deleted. (See Layers.) Wirecast User Guide | 104730 159 160 Using the Main Window Layers Growing/Shrinking the Shot Thumbnails In the lower right corner of the window is a slider you can use to control the size of the shot thumbnails. Drag the slider to the left to reduce the size of the thumbnails and to the right to enlarge them. Layers Wirecast allows you to put shots on any of five different layers. Layering shots enables Wirecast to merge them together, from back (lowest layer) to front, to form a single visual image during broadcast. When Wirecast first opens, the Layer panel is not shown. To display the layer panel, select Layer Panel from the Layout menu, or click the grey strip (on the left end of the Shot Area) and drag it to the right. Layer Panel What is a Layer? Layers are, by default, named Master Layer 1 through 5. You can change the name of any layer by double-clicking it and entering a new name (i.e. Background, Camera, etc.). Layers determine the order when presenting images in the live broadcast area. The Bottom layer (Master Layer 5) is drawn first, then the other layers, in order, up to Master Layer 1. You should name your layers according to the function they serve. Examples might be: Audio, Background, Normal, Title, etc. Wirecast User Guide | 104730 Using the Main Window AutoLive Using multiple layers is a powerful way to show a company logo, a background, or a title, independent from each other. You could have a shot of your logo on a Title layer (the top layer), so that it is always visible, above all other layers placed behind (below) it. Shots (which are also in layers) have seven layers that can be used to store media assets (live cams, mics, pictures, videos). Each media asset takes up 1 layer within the shot that contains it. Changing Layers To view other layers, click in the Layer Panel on the name of the layer you want to display. When a new layer is selected, the Shot list changes to display the shots that are in that newly selected layer. Click layer name to select a layer Moving a Shot to Another Layer A shot can be moved to another layer by selecting Move to Layer from the Edit menu, or right-clicking on the shot and selecting Move to Layer. When shots are created, they are assigned to a specific layer. They exist on that layer until you move them or delete them. AutoLive The AutoLive button is located in the Transition Controls, just left of the Go button. Clicking on the AutoLive button toggles it between on and off. When AutoLive is on, the button displays a green dot. You can also select AutoLive from the Switch menu. When AutoLive is on, changes made in the Main Window automatically go to live broadcast. If you click a shot when AutoLive is on, the shot is automatically taken Live for you in the broadcast (using the current transition and duration). If you click a shot when AutoLive is off, the shot is not sent to live broadcast. In this mode you take the shot live manually, by clicking the Go button, or by pressing the Ctrl+G keys. Wirecast User Guide | 104730 161 162 Using the Main Window AutoLive Wirecast User Guide | 104730 163 Using the Audio Inspector Introduction PRO The Audio Inspector enables you to monitor and control all of the audio sources from a single control panel. This section describes in detail how to use the Audio inspector. Topics Overview Hardware Audio Shot Audio Overview To open the Audio Inspector panel, select Audio Inspector from the window menu. PRO Note: The use of the Audio Inspector requires a Wirecast Pro license. For licensing information, select Preferences from the File menu, click the Add (+) button, then click Purchase. Or, contact [email protected]. The Audio Inspector separates your audio by hardware and shot. Live Input is always the first section to the right of the Master control, and it contains all hardware audio sources you may be using. This includes microphones, audio input feeds, cameras, 164 Using the Audio Inspector Overview capture cards, Pipelines, etc. The remaining audio controls are associated with specific shots. Master Audio control panel Master Audio level control Master Audio level display Headphone Mute icon Master Mute button Hardware Audio and Shot Audio The Master control sets and displays the total audio output of your broadcast. Click the headphones icon (directly below the Master controls) to mute the local audio feed. (This has no effect on the broadcast audio output.) The Mute button, below the headphones icon, mutes all local audio and all broadcast audio. Below the name of each audio source is a white label box. You can rename this box to as appropriate for the source, to avoid confusion during a broadcast. To rename the audio source, click in the white box and enter the new name. Hardware audio sources are automatically added to the Audio Inspector whenever a new audio source is added through the Main window or through the Shot Editor. You can also manually add a hardware audio source by clicking the Live Input drop-down menu at the top of the Live Input section. Live Input control Shot control Label box Live Input drop-down menu Wirecast User Guide | 104730 Using the Audio Inspector Hardware Audio Hardware Audio Hardware audio sources are hardware devices and live sources. This includes dedicated microphones, cameras (that have audio), audio line feeds, Pipelines, capture cards, etc. Audio Delay control When you add a device to the Audio Inspector as a Live Input, it defaults to the lowest volume level, because all Live Input audio sources act as global audio sources through the Audio Inspector. Thus, any source listed in the Live Inputs section can be immediately added to a broadcast by dragging the volume slider on that source up. The horizontal slider in a Live Input controls the audio delay. Dragging the slider to the right increases delay, up to one second, to fine-tune audio in sources where the audio is ahead of the video. Note: Audio that is out of sync with video is common when running a microphone directly into your computer's audio input when using a FireWire camera as a video source. Most FireWire devices create a latency that causes the audio to be ahead of the video. Shot Audio Shot audio sources come from shots that are currently live in your Wirecast document. Any time a shot becomes live, it immediately displays in your Audio Inspector. Adding Shot Audio Sources The Shot Audio panels are always displayed to the right of the Live Input panel in the Audio Inspector. Shot audio is automatically added to your broadcast whenever a shot containing audio transitions to live broadcast. New Shot Audio controls are created as multiple shots are made live during the broadcast. For example, if you have live shots with audio sources in Master Layer 1, 2 and 3, Wirecast displays three Shot Audio panels. Each panel provides you to control the audio output of the source it controls. Wirecast User Guide | 104730 165 166 Using the Audio Inspector Shot Audio Managing Audio Sources Shot audio is most useful in controlling the audio levels during a live broadcast. You can use the sliding meters to adjust the volume levels of any source during broadcast. If a source begins contributing audio that is wrong or distorted, you can click the Mute button at any time to silence it. Its muted state is maintained even if you change shots and come back to it. Wirecast User Guide | 104730 167 Using the Source Settings Introduction These topics describe how to use the Source Settings editor. Topics Overview System Devices Pipelines Scoreboards IP Cameras Teradek Cube LiveU Desktop Presenter Capture Cards Show USB Devices Overview To open the Source Settings window, select Sources > Show Source Settings. The Source Settings window is divided into several sections: system devices, Preview window, configuration area, and button bar: • The Source List displays all the devices detected by Wirecast (USB and FireWire devices, microphones, line inputs, Webcams, etc.). Sources used are selected from this list. • The Preview window provides a preview of the video coming from a selected source. • The Configuration Area is for configuring sources. When a source is selected from the System Devices list, the configuration options for that source are displayed. 168 Using the Source Settings System Devices • The Button Bar contains two buttons. Click the plus (+) button to manually add new sources. Click the minus (-) button to remove them. Note: Audio that is out of sync with video is common when running a microphone directly into your computer's audio input when using a FireWire camera as a video source. Most FireWire devices create a latency that causes the audio to be ahead of the video. Source List Preview window Configuration Area Button Bar Note: In Wirecast versions 4.0 and above, de-interlacing has been moved from System Preferences (where it was a global setting) to the Source Settings, where it is individually controlled by each device. System Devices System devices include Firewire devices, USB cameras, and other USB devices. Click on a device to select it. Two drop-down menus and a configuration button are displayed. The Capture Device Size menu selects the device resolution from 160x120 to 1920x1080, depending on the camera. The Device Deinterlacing menu selects either None or Blend. None turns off deinterlacing enabling the video to interlace normally. Blend Wirecast User Guide | 104730 Using the Source Settings Pipelines turns deinterlacing on enabling the video to avoid interlacing problems during motion. Click Configure to configure the selected device. Select a device Select resolution Click to configure device When you click Configure, a properties window displays with two tabs. The Video Proc Amp tab enables you to set the video display properties. The Camera Control tab enables you to set camera image properties. Any properties that do not apply to the selected camera are greyed-out. Pipelines PRO Pipeline is a network-based video capture and play-out device for transferring SD and HD SDI audio and video. Wirecast can use Pipelines on your local network as video sources and bring them directly into your document. Wirecast usually detects local Pipelines automatically using Bonjour Print Services, and adds them to the Source Settings window. However, when necessary, you can add them manually by clicking the plus (+) button in the bottom left corner of the Source Settings window and then selecting Add Pipeline. This adds a new Pipeline source to the list of sources. Wirecast User Guide | 104730 169 170 Using the Source Settings Scoreboards To configure the new Pipeline source, enter the IP Address of the Pipeline source and click Apply. Select also a resolution from the Video Format drop-down men, and check the De-interlace Video checkbox if you want the video de-interlaced. Pipeline IP Address Video Format De-interlace Video (option) Apply settings Scoreboards PRO Scoreboards allow you to add a scoreboard graphic to your broadcast that can be dynamically updated. To add a new scoreboard, select New Scoreboard from the Sources menu. Multiple scoreboards can be added. Wirecast User Guide | 104730 Using the Source Settings Scoreboards When a scoreboard is opened in the Source Settings editor, it displays a preview of the scoreboard, two drop-down menus, and two configuration tabs. Preview Drop-down menus Configuration tabs Unlike most other elements in Wirecast, changes to the Scoreboard go live instantly without requiring a transition. Once the scoreboard is live, the preview image is exactly as it is seen in your broadcast. Of the two drop-down menus, the first selects the style of the scoreboard (Pipe, Shade, Corner, Wide, etc.) and the second selects the scoreboard layout (Basic, Top, Bottom, etc.). Some layouts change the number of fields surrounding the scoreboard, allowing additional live information to be added. The Data Tab The Data tab configures the information displayed inside your scoreboard. The first two lines of data hold the name and score of each team. Before broadcasting, you should enter the names of each team here. While the broadcast is live, click the “+1”, “+2” and “+3” buttons to modify the score. There are also four information fields (Field 1 through 4). Each field controls a line of text inside the scoreboard that can be seen using the various layout types. Note: Because Wirecast updates the scoreboards dynamically, It is recommended that you fill in the additional information fields while using a layout that hides them. Wirecast User Guide | 104730 171 172 Using the Source Settings Scoreboards Then, change to a layout that reveals those fields when ready, otherwise your viewers see you typing in those fields live. Information field displays Style menu Layout menu Data tab Teams names Score controls Information fields The Look Tab The Look tab controls the visual elements of your scoreboard. In the Name Options column, there are three buttons for each field. These buttons enable you to change the text alignment, font style and text color respectively. The Score Options (on the right side) provide the same three adjustments to the score. Wirecast User Guide | 104730 Using the Source Settings IP Cameras Some scoreboard styles also allow you to change the background colors of the Home and Visitor fields, to make them match their team color. This option, when displayed, is located between Name Options and Score Options. Look tab Name Options Text alignment Font style Text color IP Cameras PRO IP Cameras are devices indirectly connected to your computer, made available across a local area network connection. Most supported IP Cameras are detected automatically. However, Bonjour print services must be installed on your computer for IP cameras to be auto detected. Wirecast User Guide | 104730 173 174 Using the Source Settings IP Cameras To enable the use of an IP camera and create a shot using it, you must first add it to Wirecast. To do this select an IP camera from the Add Shot menu in the Main Shot List window: Click Add Shot menu Select an IP Camera IP Cameras are usually auto-detected by Wirecast, but if not detected they can be manually set up. To do this, select New IP Camera from the Sources menu in the Main window. Then, in the Source Settings window, select an IP camera from the list of devices, enter the IP Address of the camera, optionally check Use Audio, and click Apply: Select IP Camera Enter the IP Address Check Add Audio (optionally) Click Apply Wirecast User Guide | 104730 Using the Source Settings Teradek Cube When Use Audio is checked, audio from the camera is used if the camera has a microphone. Some supported IP Cameras also have motion controls (directional arrows) that enable you to move the camera in different directions. Note: When a IP Camera has been auto-detected, the IP Address field is greyed-out. IP cameras must be set to H264 mode, rather than Motion JPEG mode. This setting is usually performed in a Web console control panel for the IP camera. Refer the camera's documentation for how to set up the camera. Teradek Cube PRO Wirecast Pro integration with Teradek Cube™ turns any camera into a wireless camera. You can plug any HD-SDI or HDMI camera into Teradek Cube™ to encode and submit camera feeds directly over WiFi or Ethernet to Wirecast. Note: To ensure that Wirecast recognizes the Teradek Cube, you must set the Teradek Decoder Client to VCL (RSTP). Select VLC (RTSP) Wirecast User Guide | 104730 175 176 Using the Source Settings Teradek Cube To enable the use of Teradek Cube and create a shot using it, you must first add it to Wirecast. To do this select Add Teradek Cube from the Add Shot menu in the Main Shot List window: Click Add Shot menu Select Add Teradek Cube The Teradek Cube is usually auto-detected by Wirecast, but if not detected it can be manually set up. To do this, select New Teradek from the Sources menu in the Main window. Then, in the Source Settings window, select Teradek from the list of devices, Wirecast User Guide | 104730 Using the Source Settings LiveU enter the IP Address of the Teradek Cube, optionally check Deinterlace Video, enter the number of milliseconds buffered, and click Apply: Select New Teradek Enter the IP Address Check Deinterlace Video (optionally) Enter the Number of milliseconds Buffered Click Apply The Number of milliseconds Buffered adds delay to the start of the video to compensate for a network instability. Note: When a Teradek has been auto-detected, the IP Address field is disabled. LiveU LiveU is a portable, video-over-cellular, video uplink system. LiveU uses a video encoder and a series of parallel cellular modems to transmit video. LiveU uses high-profile H.264 encoding to provide uninterrupted video streaming from anywhere, directly to Wirecast as a live camera source. You can also send Wirecast output directly in to LiveU for transmission to another broadcast destination. For more information about LiveU, see www.liveu.tv. Note: LiveU can only be used with Wirecast for Windows. Using LiveU as a Source Follow these steps to set up and use LiveU as a live camera source. 1. Download and install the LiveU server software provided by LiveU. Wirecast User Guide | 104730 177 178 Using the Source Settings LiveU 2. Follow the instructions provided by LiveU to configure the software which connects with your LiveU backpack. Click the Configuration tab, select Local from the Output Media drop-down menu, and click Start to start transmitting video. Click the Configuration tab Select Local Click the Start button 3. LiveU displays a LiveU Player window without any content displayed. Do not close this window, just move it out of the way. 4. Check the status field at the bottom of the window, and wait until you observe data being received. LiveU displays Received Rate <current rate> in this field. Wirecast User Guide | 104730 Using the Source Settings LiveU 5. Start up Wirecast. The LiveU source displays in the Shot List area as liveu_[your unit name]. The audio source is named liveu_[your unit name]_audio. Add both of these sources to a single shot to begin using your LiveU backpack with Wirecast. LiveU source display Note: If you encounter issues connecting your LiveU unit to the LiveU server application, contact LiveU support at www.liveu.tv/support.html. Using LiveU as an Output Configure LiveU to stream to the destination of your choice. Connect your Wirecast computer to your LiveU backpack using a DVI, VGA, or HDMI connection. For VGA and DVI, you need to run an audio cable from your computer's audio out in to the LiveU backpack. Open Wirecast and enable External Display Output on the LiveU unit. Wirecast sends video in to LiveU as though it were a camera. The Wirecast output can be re-broadcast or sent straight to a Web destination. LiveU Workflow Examples One workflow example is making LiveU a source into Wirecast. This requires a LiveU unit that supports outputting to the LU1000 software. The LiveU models supported are LU30 and LU60 (possibly LU70). Once you configure the LiveU to send data to the LU1000 software, you can then set up the LU1000 to present a stream to your computer. Wirecast then sees the LU1000 as a source, enabling it to be added to a wirecast document. Wirecast User Guide | 104730 179 180 Using the Source Settings Desktop Presenter Another workflow is Outputting Wirecast to liveU using the external display output. This works best if your wirecast computer supports HDMI output, which is then seen by liveU as a camera source. In this workflow, the Wirecast output is sent into the liveU and broadcast to LiveU servers. An Lu1000 with Wirecast on it can act as a server. Desktop Presenter The Desktop Presenter (DTP) is a utility application that enables Wirecast to broadcast the desktop of any computer running Desktop Presenter. Desktop Presenter is normally auto-detected by Wirecast and is automatically added to the list of sources. However, if a DTP is not detected, or if you want to add one in a remote location you can manually add it by selecting Sources > New Presenter from the menu in the Main window. You can then setup the presenter in the Source Settings window by entering an IP address of the target computer, optionally checking the With Audio checkbox, and clicking Apply: Desktop Display Select Presenter Enter IP Address Check With Audio (optionally) Click Apply Note: When a Desktop Presenter has been auto-detected, the IP Address field is disabled. For more information, refer to the Telestream Desktop Presenter User Guide. Wirecast User Guide | 104730 Using the Source Settings Capture Cards Capture Cards Capture Cards are hardware extensions that enable you to bring in video from more advanced HDMI and SDI sources. Most capture cards are automatically configured to the best settings. Some cards (Blackmagic Intensity Pro, for example) require some manual adjustments. When a Capture Card is selected, you can select the Frame Format. Clicking Save causes the video to display. You can also check the De-interlacing checkbox to turn on de-interlacing. Once configured, you can add Capture Cards from the Live Source drop-down menu in the Main window. If you experience difficulty with your Capture Card, make sure you have the latest driver from the vendor and that it is installed correctly before contacting Customer Support. Frame Format De-interlacing Click Save Capture cards supported by Wirecast: • • • • • • • • Blackmagic Intensity Pro Blackmagic Intensity Shuttle Blackmagic Decklink Studio Blackmagic Decklink SDI Blackmagic Decklink Duo Blackmagic Decklink Extreme 3D Osprey 240e, 450e, 700e Matrox Multi Show USB Devices To view a list of all USB devices select Show USB Devices from the Sources menu. The list displays all connected USB devices, the USB bus on which each USB device is located, and the speed of the device. This information is helpful when troubleshooting USB bus Wirecast User Guide | 104730 181 182 Using the Source Settings Show USB Devices bandwidth issues. Click Show All Devices to display all available USB devices, otherwise only video devices are listed. Click Refresh to update the list. Wirecast User Guide | 104730 183 Using the Shot Editor Introduction The Shot Editor is used to view a shot, edit it, or create a new one. This section describes how to use the Shot Editor. Topics Overview Shot Editor Layout Sources Shot Editor Preview Shot Editor Media Panel Shot Editor Effects Shot Editor Cropping Shot Editor Chroma Key Shot Editor Motion Shot Editor Playback 184 Using the Shot Editor Overview Overview There are three ways to open the Shot Editor: select Edit Shot from the Edit menu, double-click on a shot, or right-click a shot and select Edit Shot. Double-click shot or Right-click and select Edit Shot The Inspector You can also edit a shot using the Inspector. The Inspector is opened by selecting Inspector from the Window menu. It can also be opened by clicking the blue Inspector icon (contains the letter “i”) on the far right side of the window bar at the top of the Main window. Wirecast User Guide | 104730 Using the Shot Editor Overview When the Inspector opens, if the shot you want to edit is not displayed (or no shot is displayed), single-click a shot in the Main window shot list to open one. The Inspector immediately displays the shot so you can edit it. Activating Changes Wirecast always displays your visual changes in the preview panel. However, your changes only become Live when you specifically click Go (or press the Ctrl+G keys). Note: The exception to this occurs in the Playback Panel where you can specifically make your changes become live. The AutoLive feature does not apply when using the Shot Editor. Inspector vs. Editor A shot can be edited in two ways: You can double-click on the shot and open an editor specifically for that shot, or you can open the Inspector window and then click the shot you want to edit. Both windows displays the same set of controls. The only difference is that the Editor window displays a specific shot and the Inspector window displays all the shots that can be edited. Additionally, you can display and edit shots in both the Shot Editor and the Inspector at the same time. If no shot is currently selected, Inspector buttons and other GUI elements are not functional. To select a shot for editing, single-click a shot in the Shot List panel at the bottom of the Main window. Wirecast User Guide | 104730 185 186 Using the Shot Editor Shot Editor Layout Shot Editor Layout The Shot Editor is comprised of four major sections: Preview Area, Source List, Attributes Toolbar, and the Attributes Editor Panel. Preview Area Attributes Toolbar Source List Attributes Editor Panel The preview area displays a preview of how the shot looks. As you edit a shot by changing its attributes, visual changes are displayed in the Preview area. The Source List is a list of sources (live sources, images, and title banners) currently in the shot. Wirecast enables you to put up to seven sources in each shot. You add and delete sources by clicking the plus (+) and minus (-) icons in the toolbar at the bottom of the Source List. Click a source in the list to edit it. Sources are layered in the shot, from top to bottom on the list. You can reorder sources using the up and down arrows in the toolbar below the list, or right-click the source and select Move Up or Move Down. (See Sources.) The Attributes Editor Panel displays each of the configuration panels. At the top is an Attributes toolbar for configuring each category of attributes. To view or edit a given attribute category, click the appropriate icon in the Attribute Toolbar. The attributes change depending on the type of source (live source, graphics, audio, etc.) currently selected. Sources Sources are specific resources made available to Wirecast that include configuration settings. These sources can be titles, a live camera feeds, graphics, etc., and they are Wirecast User Guide | 104730 Using the Shot Editor Sources incorporated into shots used in a broadcast. You can place up to seven sources in a shot, where they are placed as layers that reside in front or in back of each other. Templates Wirecast also provides pre-built source sets, called templates, which you can add to your source list. Templates are pre-defined configurations used for displaying the sources of a shot. The templates contain place holders, labeled A, B, and C, that define where the sources in a shot are located. For example, you can select a two-source template that displays one element in full-screen and another, superimposed in the bottom left corner. When a different template is selected for the shot, the sources stay the same but their locations are redefined. Templates provide an easy way to add several sources to a shot, all pre-arranged and organized in popular scale, angle, and position patterns (left/right, stacked, superimposed, etc.). Some templates have a single place-holder, some have two, and still others have three. To add a set of template-based sources to your shot, click the Add Presets button to the right of the Sources List title. Preview Area Attributes Toolbar Source List Wirecast User Guide | 104730 Attributes Editor Panel 187 188 Using the Shot Editor Sources Wirecast displays a Template window with two tabs: Templates and Virtual Sets. Click the Templates tab and select the template you want to use, then click Apply. Select Angled In Click Apply The Preview has changed in the Shot Editor window, and now shows the Ripples image on the Left side. This is because the template selected has an A and a B portion to it. Two different sources can be assigned to A and B: Sources in Wirecast can be assigned either A, B or C in the Source Layers list. To change the assignment, click the A (or B or C) icon and make a selection. This makes choosing a new template much simpler because Wirecast automatically positions the correct sources on screen. Wirecast User Guide | 104730 Using the Shot Editor Sources For example, to change the media for the source that is identified as B, select the source identified as B, then click the River icon in the Configuration area. Your Preview should now look like this: Click the B source Click the River icon Virtual Sets PRO In Wirecast Pro, you can also add pre-built source sets complete with graphics to simulate a news-anchor desk. These sets are appropriately called virtual sets which can be added to your source list. Virtual sets are predefined sources with graphics, available in various configurations. For example, you can select a two-source virtual set that displays three layers of decor (overhead lighting, a curved desk and a pillared background) with two live sources. Virtual sets provide you with an easy way to create a professionally looking scene with one or more live feed sources superimposed on it. These virtual sets can be used as they are, or they can be edited to suit your needs. Wirecast User Guide | 104730 189 190 Using the Shot Editor Sources To add a virtual set to your shot, click the Add Presets button to the right of the Sources list title. In the Template Chooser window, select the Virtual Sets tab, then click the virtual set you want to use. Click Apply to display it in the Shot Editor preview area. Select the Virtual Sets tab Select a Virtual Set Click Apply Select a source by clicking on the name of the source in the list. Click a source name to select it Controlling Source Visibility The condition of the icon to the left of each source name controls its visibility. You can hide or display sources in a shot by clicking its icon. When a source is hidden a red X is displayed over the icon. For example, if your shot has a title, you can turn the title off by clicking once on the icon to display the red X. All of your title data still stays within the shot, but it is just not shown. To turn the title it back on, click the icon again and the red X disappears. This can be a powerful way to use Wirecast by pre-loading your shots with titles and then turn them on and off during your broadcast. Note: The first time you select a source, its visibility is turned on (Wirecast assumes if you are clicking on it, you want to display it). Wirecast User Guide | 104730 Using the Shot Editor Shot Editor Preview Shot Editor Preview The Preview area displays, in real time, the changes you make to the static video sources in your shot. However, temporal features (fade-in, audio playback, etc.) are not portrayed in this still shot. You can also click and drag a source displayed in the Preview area, to reposition it. If you add a Virtual Set, the Preview area displays a zoom slider directly below the preview window. This enables you to adjust all of the layers in the virtual set, to zoom in on the set for a a close up or pull back for a wide-angle view. Zoom slider Shot Editor Media Panel The Shot Editor Media Panel provides a library of your shots, enabling you to easily assign media to a given source. You can assign three types of media to a source: Live Wirecast User Guide | 104730 191 192 Using the Shot Editor Shot Editor Media Panel Feeds, Media Files, and Title Banners. The Media Panel displays each category separately, making it easier to categorize and identify your media. Live Feeds button Media Files button Title Banners button Live Feed Sources Click the Movie Camera button (camera icon) to display, manage, and select your Live Feed sources. Live feeds also include the devices built in to your computer: microphone, Audio in (PC Audio Card), and any USB . To add a live feed to a selected source, follow these steps: 1. Click the movie camera icon in the media panel. 2. Click the Plus (+) icon at the bottom of the media panel and select the system device you want to use for input. Wirecast adds it to the list. 3. Click the configure button (2nd button from right in the toolbar) to configure the device as needed. 4. Click the change media button (far left in the toolbar). 5. Click the Plus (+) icon at the bottom of the media panel, and select Show Source Settings to view and configure source settings. 6. In the Source Settings panel, select the device to display and change settings as needed. 7. Click Apply to save settings and close the Source Settings window. PRO In Wirecast Pro, you can add other system devices, including Telestream Pipelines, a Scoreboard, and IP cameras. Media File Sources Click the Media Files button (document icon) to display, manage, and select your filebased media sources. Media files are recordings residing as files that can be played in QuickTime. This includes: video and audio files, video-only files, audio-only files, and Wirecast User Guide | 104730 Using the Shot Editor Shot Editor Effects raster images (TIFF, JPEG, PNG, etc.). Media files are created outside of Wirecast using media editing tools, then are added to the media list for easy access during broadcasting. To add media files that you have created (or acquired) to a selected source, follow these steps: 1. Click the Media Files button (document icon) in the media panel. 2. Click the Plus (+) icon at the bottom, and navigate to and select the file you want to add. Wirecast adds this file to the list. 3. Configure it as needed. Title Banner Sources Click the Title Banner button (T icon) to display and select a title banner source. Wirecast provides a comprehensive library of one to four line title banners from which you can choose. Title banners are graphic files with text fields that display information you provide. You can not add your own banner files. To add a title banner to a selected source, follow these steps: 1. Click the Title Banner button (T icon) in the media panel toolbar. 2. Click the Plus (+) icon at the bottom of the media panel and select the title banner file you want to use to title this shot. Wirecast adds this title to the list. 3. Configure the title as needed by entering the text strings for each title line using the Text Attributes tool (4th button from left in the toolbar). Shot Editor Effects The Effects Panel enables you to adjust the location of sources and configure opacity, matte, aspect ratio, and scaling as needed. To open the Effects Panel, click the Configure button (2nd button in the toolbar). Clicking the position buttons (arrows) enables you to quickly change the position of the media in the preview display. Configure button Position buttons You can also reposition a title using the mouse: Wirecast User Guide | 104730 193 194 Using the Shot Editor Shot Editor Effects • To Move Media Click and drag using the mouse in the Preview area. • Resize Respect Aspect Hold the Alt key while moving the mouse in the Preview area. • Resize Media Turn off Respect Aspect Ratio. Hold the Shift-Alt keys while moving the mouse in the Preview area. • Rotate Media Hold the Ctrl key while moving the mouse in the Preview area. Select between shots in the Main window Opacity The opacity control is a slider bar on the Effects Panel. Opacity controls how much you can see through the media. As an object becomes less opaque, it becomes more transparent Note: If you want to turn off the media altogether, do not set opacity to zero since this still uses CPU cycles. Instead, you should turn off the visibility of the source. Opacity control Matte A matte is an image that is used to define the opacity of another piece of media. Wirecast comes with several mattes, which are listed in the Matte drop-down menu. Wirecast User Guide | 104730 Using the Shot Editor Shot Editor Effects Any image in your shot list which has an Alpha Channel also shows up in the Matte menu. (See Images/Opacity for more information on Alpha Channel.) Matte menu Aspect Ratio The Respect Aspect Ratio is located under the Matte menu on the Effects Panel. When checked, the source retains its aspect ratio when its size is changed. Some sources do not allow you to set this option. Aspect Ratio control Reposition Buttons The are three repositioning buttons on the Effects Panel: Reset Position, Scale To Fit, and Horizontal Flip. Click the Reset Position button to reset the media to its original Wirecast User Guide | 104730 195 196 Using the Shot Editor Shot Editor Cropping position, size, and rotation. Click Horizontal Flip to mirror the media along the vertical axis. Click Scale to Fit button to scale the media to fit inside the broadcast window. Reset Position Scale To Fit Horizontal Flip Shot Editor Cropping The cropping control enables you to cut off unwanted portions of an image. To open the cropping control window, click the cropping control button.There are four sliders and four text boxes used to control cropping. Select an image, then slide the slider until the selected side of the image is cropped as needed. Notice that as the slider is moved, the value in the text box changes. This values is the number of pixels that have been cropped. You can also enter values directly. Cropping control button Cropping sliders Cropping values Shot Editor Chroma Key Wirecast enables you to perform real-time Chroma Key operations on your sources during a broadcast. Chroma keying enables you to select a color and replace all occurrences of that color in an image with some other image. Click the Chroma Key button to open the Chroma Key controls. Click the Use Chroma Key checkbox to enable Wirecast User Guide | 104730 Using the Shot Editor Shot Editor Chroma Key the controls. Use the sliders to set the Key Threshold, Black Clip, and White Clip. Click the Defaults button to restore all controls to their default state. Chroma Key button Use Chroma Key checkbox Default button Slider controls Working Top Down The key color is the color of the background you want to drop out of the resulting media. The Chroma Key configuration panel is designed to work through the configuration as a process, from top to bottom, fine tuning your key as you go. It is important to not over-adjust any one control. A good key color is obtained by finding the right balance in the controls. Selecting a Key Color To get the best key possible, select the key color using the mouse. To do this check the Pick key color with mouse checkbox. Use the mouse to click a point on the image in the preview area. As you do this watch the preview change in level of transparency, displaying the gray/white checkerboard pattern on the affected regions. Usually, clicking near the corners of the media provides the best key, but sometimes clicking near the main subject in the image is best. Key Threshold Once you have the best key by picking the color, you can adjust the key threshold to drop out the background as completely as possible. The Key Threshold parameter enables Wirecast to determine how close the color in the video is to the key color. Adjust the key threshold (0 to 100) by using the slider. Black Clip Sometimes, dark areas are keyed out, when they should not be, due to how digital cameras function. The Black Clip parameter controls how close the keying is toward black. For example, if the host has black hair, you need to increase this value slightly so that the keying effect is not seen in his hair. Adjust the Black Clip (0 to 100) by using the slider. Wirecast User Guide | 104730 197 198 Using the Shot Editor Shot Editor Chroma Key White Clip Likewise, white areas are also sometimes keyed out when they should not be. The White Clip parameter controls how close the keying is toward white. For example, if the host has a white shirt on, you need to increase this value slightly so that the keying effect is not seen in his shirt. Adjust the White Clip (0 to 100) by using the slider. Getting a Good Key Probably the most important part of getting a good key is getting good source material. Poor source material generates poor keys; no algorithm can make up for this. Lighting Assuming you have a reasonably good camera, the most important part of getting a good key is good lighting. Invest in good lights and learn how to set them up properly. Here are some basics: • The background screen (green or blue) needs to be independently lit from other items in the shot. • Light the background screen evenly, with no shadows. The more evenly lit, the better the keying. • Light people evenly with no shadows. A fill light is very important. An office white board may be helpful in accomplishing this. Good Camera You should get reasonable quality out of most cameras on the market today. Wirecast has been tested with a low-end DV cameras to verify the quality of its Chroma Keying system. However, the better the camera the better the keying. If you use a cheap USB Web-cam, it may not give you enough source quality to get a reasonable good key. But if you have excellent lighting, a USB camera works well. 3CCD is better than 1CCD. If you have the choice, a PAL camera is better than NTSC, due to how data is captured internally. High Quality Video If you are keying video from disk and not capturing it live, make sure the High Quality Video option is checked in the Advanced Preferences Panel. This forces Wirecast to decode the video from disk in the best quality possible, giving the Chroma Key the best Wirecast User Guide | 104730 Using the Shot Editor Shot Editor Motion data possible for keying. Wirecast warns you if High Quality Video is turned off when you turn on Chroma Keying. Shot Editor Motion The Motion Panel provides control over how objects (image, movie, title, etc.) are added or removed in the Broadcast window. To open the Motion Panel, click the Motion Panel button in the Toolbar. Wirecast only performs motion during a Smooth transition. If you are using any other transition, the motion settings are ignored. There are two types of motion. When an object is added to the Live broadcast it is called Build-In; When it is removed it is called Build-Out. Motion Panel button Build-In controls Build-Out controls Direction menus Motion only occurs when an object enters or leaves the broadcast window. For example, if you have two shots, each with a foreground and the media in the Wirecast User Guide | 104730 199 200 Using the Shot Editor Shot Editor Playback foreground is the same, then a Smooth transition is performed between the foregrounds. However, no motion is performed. Or, if a logo is positioned in the top left corner in an existing shot, and it is in the bottom right corner in a new shot, when you make the new shot Live the logo smoothly transitions from the top left corner to the bottom right corner. But the Build-In and Build-Out settings are ignored. However, if you have two shots with a Foreground, but the media in each is different, the Build-Out is performed for the existing shot, and the Built-In is performed for the new shot. Direction Menus These provide selections of where the Build-In comes from (top, bottom, right, etc.) when it is added, and where the Build-Out goes when it is removed. Fade In / Fade Out Checking these checkboxes causes an object to be added or removed gradually. If unchecked, the object is instantly added or removed, much like a cut transition. Spin In / Spin Out Checking these checkboxes causes an object to be added or removed in a spinning fashion. Scale In / Scale Out Checking these checkboxes causes an object to be added or removed in a scaled fashion. Decelerate In / Accelerate Out Checking these checkboxes causes all of the above actions to be performed at a slower or faster rate. Apply To All Click this button to make the Motion Settings the same for all sources in a shot. This is useful if you want to make all of your motion the same for all of the elements in the shot. Shot Editor Playback The Playback Panel enables you to control how movies and music play in Wirecast. To open the Playback Panel, click the Playback Panel button. Playback Panel button Check the Live Playback checkbox to cause your changes to be taken live in your broadcast. The four control buttons enable you to rewind, play, pause, or fast forward. In Point & Out Point sets the start and stop points in the media. Wirecast User Guide | 104730 Using the Shot Editor Shot Editor Playback Select what to do when the media is finished (loop, hold, or remove) from the dropdown menu. Check the Begin Playing checkbox to cause the media to automatically start playing when it becomes live. Check the Remember Position checkbox to cause the media to remember its position when it is not live. The vertical slider set the audio level and the two meters display it in stereo (left and right). Click the Master Audio Mute icon to mute the audio of your broadcast. Click it again to un-mute it. Click the Headphones icon to mute the local audio feed. Click it again to un-mute it. The Playback Panel only allows modification of parameters on media for which the options are possible. For example, if your media has no audio, then the audio controls are not active. Or, if your media is a still image, you are not able to set an In point or Out point nor play the image. The Playback Panel setup information is saved separately for each shot, so if a media is used in two different shots, the media settings are different in each shot. Live Playback Live Playback is a part of the Playback settings. By default, changes in the Playback Panel are like any other changes in the Shot Editor, they do not take effect until you click the Go button. However, there are times when you may want to scrub (slowly scroll and view) the video and see the scrubbing in the Live broadcast. Check the Live Playback checkbox to cause changes you make in the Playback Panel to become live. This gives you immediate control over the movie or audio in the Live broadcast. Note: If you want to pause all movies in your broadcast, you can select Pause All Movies from the Media menu. This is particularly useful if you only have just one movie and you want to quickly pause it. Scrubbing The Scrubbing slider enables you scrub (scan) back and forth through your media. The triangle icon in the scrubbing slider is called the playhead. Click and drag this triangle (playhead) left and right to view any location in your media. The primary use of scrubbing is to set the In Point and Out Point in your media. If Live Playback is checked, and the shot you are editing is live, then the scrubbing is also seen in your Live broadcast. Playhead (triangle icon) Wirecast User Guide | 104730 201 202 Using the Shot Editor Shot Editor Playback Transport Controls The Transport controls enable you to Rewind, Play, Pause, and Fast Forward. If Live Playback is checked, any changes you make using these controls are seen in your broadcast. Rewind Play Pause Fast Forward In and Out Points The In Point and Out Point controls are a part of the Playback settings. The In Point is the position in the media where playback starts. For example, if you set the In Point of a movie to 2 seconds, when the movie starts to play (or loops back to the start), it starts from the 2 second point in the movie. The Out Point is the position in the media where playback ends. if you set the Out Point of a movie to 5 minutes, when the movie reaches the 5 minute mark, it stops playing (or loop back to the beginning, depending on which When Finished option you have selected). To set the In Point, move the playhead to a place you want the media to start playing and click the first Set button. To set the Out Point, move the playhead to the place you want the media to stop playing and click the second Set button. Clicking a Jump button moves the playhead to the In Point or Out Point location. In point and Out Point times Set buttons Jump buttons When Finished Control The When Finished drop-down menu enables you to control what happens when the media finishes playing (when it reaches the Out Point). You have three options: • Loop The media loops back to the In Point. • Hold The media stops and displays the last frame. • Remove The media is removed from Live Broadcast. The remove function makes the media transparent after it is done playing. For example, if you are doing a live show with an intro video layered over your camera feed, when the intro video is finished it becomes transparent, leaving only the camera feed displayed. Wirecast User Guide | 104730 Using the Shot Editor Shot Editor Playback Note: For media without video, the Hold and Remove are effectively the same option. Begin Playing Control When checked, the Begin Playing checkbox causes the media to start playing when the shot becomes Live. Checked is the default. Remember Position Control If the Remember Position checkbox is checked, when a live shot transitions to another shot with different media, the removed shot remembers the last position where the media was played. And so, if the removed shot becomes live again it starts playing from that remembered position. Checked is the default. Audio Controls If a piece of media contains audio, the audio controls become activated. The audio in each media is independently controlled. The audio slider bar enables you to control the media audio level. Clicking the speaker icon mutes the audio of your media in the Live Broadcast. Clicking it again causes it to be heard. The stereo audio meters monitor the audio output level. Audio meters Audio slider Speaker icon Wirecast User Guide | 104730 203 204 Using the Shot Editor Shot Editor Playback Wirecast User Guide | 104730 205 Making Great Presentations Introduction These topics provide helpful information about how to prepare for creating great presentations. Topics Overview High Quality Audio Good Lighting Broadcast Settings Overview There are many ways to make a good live event even better. But this appendix focuses on two main things to remember about video streaming: • High Quality Audio Input Great looking video with poor audio input appears unprofessional. • Good Lighting Poor lighting can ruin an otherwise excellent live event. If you are doing chroma keying, this may become the most important part of your setup. When video is saved to disk or sent over the network, it needs to be compressed. The compression process is done by encoders (codecs) which are optimized to work with clean input data. This means that if the audio or video is muddy to start with, it remains muddy after compression. Some codecs may even highlight poor input because the algorithm is built to look for differences. Your goal should be to give the best possible quality audio and video to the compression process as possible. This means making sure what you see in the Live area is the best possible quality because Wirecast takes exactly what you see and sends it to the codecs. 206 Making Great Presentations High Quality Audio High Quality Audio Audio has an artistic aspect to it. You can make a great live event even better by remembering to focus on a few details. Here are some suggestions on producing clean audio. • Use a Good Microphone Though this may sound obvious, a good microphone can make a huge difference. Most DV cameras have an audio input for an external microphone. Use this, whenever possible, instead of the built-in microphone that comes with the camera. Built-in microphones are usually not good quality and tend to pick up hum from the electronics inside the camera. Even when it is not a great microphone, an external microphone almost always sound better. • Use a Microphone Splitter If you are doing an interview with one camera, you can use two microphones with a splitter (less than $5). This often gives better results than one omni-directional microphone at a distance. You can also use a dual lapel microphone with a splitter. • Position the Microphone Properly Place any microphone as close to the sound source as possible, even when using omni-directional microphones, because sound volume decreases greatly the farther away the microphone is placed. Stronger signals coming into the microphone results in better quality. • Use Lapel Microphones Even inexpensive (less than $20) lapel microphones can make a huge difference because it places the microphone much closer to the person speaking. • Control Environmental Noise If a chair squeaks, use a different one. If you have a wood floor and you can hear people shuffling their feet as they talk, put down a rug. Do whatever it takes to keep noise at a minimum. Microphones pick up everything. Good Lighting Do not underestimate the power of lighting. When an event is shot outdoors, a great deal of attention goes into lighting. For professionals, lighting is viewed as an artistic task. Many people make their living controlling lighting, so there is a lot to it. Here are a few suggestions to help you obtain reasonably good lighting: • If you are using only one lighting source, do not shine it directly on your subject. You should diffuse the light. • Avoid deep shadows. Make sure you fill all areas of your subject with light. Sometimes this requires adjusting the light to bounce off a different wall or use two lights. Placing a light low and another one high is often a good way to light evenly. • Do not light too evenly. If you evenly light a set, you may actually be worse off than not lighting the set at all. Take a sample shot and see if it looks natural. Good lighting usually has a little more light coming from above than any other direction. You should very rarely light just from below a subject. • Beware of having too much light on your subject. If your subjects are people and you must use a lot of light, use make-up to compensate for the overly bright light- Wirecast User Guide | 104730 Making Great Presentations Broadcast Settings ing. This is not necessarily a bad thing, but you must choose how much effort you want to go through to make a good live event. If your lighting balance is excellent, you will can avoid make-up on your subjects. The key in adjusting the lighting is to look at your subject and make sure they do not look washed out. • Watch professional events and learn from them. As you watch, notice the lighting instead of watching the program. Notice how they employ the suggestions listed above. These guidelines might seem to suggest subtle improvements, but good lighting can make an amateur video look professional and a professional video look fabulous. The important thing to remember is that one or two properly placed lights makes a huge difference in the quality of your live event. Triangular Lighting One advanced and very effective approach to good lighting is known as triangular lighting (or three light setup). Although this may sound complicated, it is actually quite simple. It involves setting up three lights (sometimes using natural light as one of the light sources), in a configuration that achieves a good balance. Here are the main elements of Triangular Lighting: • Main Light (Key Light) This is the strongest of your lights and does most of the work. This light normally comes from one side of the camera (the left, for example) and is slightly raised. However, using just the main light results in shadowing. • Fill Light This is a soft light placed directly in front of the subject. It removes shadows and fills in the image. It is usually direct and usually comes from the same direction as the camera (or just to the side and behind it). It could be, for example, placed on the same level as the head of a person you are lighting. If you use only a fill light, your subject might appear too dark. The only purpose of a fill light is to add to the main light by filling in shadows. If your key light comes from the left of your camera, your fill light should come from the right, and vice versa. • Back Light (Rim Light) This light is directed from behind the subject and above it. This is the hardest light to explain, but the best way is to describe it as an accent of your subject. If you look at a typical high school yearbook picture, you will notice that the top-left (or top-right) part of each head shot has a highlight of light in it. This light is the back light. It is also called a rim light because it makes a slight rim around the edge of the head of your subject. This light normally comes from behind and above the subject, and it is focused. Make sure it is not directed at the camera. Most serious lighting starts with these three basic lights. There are also some great Websites that describe these techniques in great detail. Broadcast Settings Once you have good video and audio coming into Wirecast, the final item of importance is make sure the Broadcast Settings are configured correctly for your Wirecast User Guide | 104730 207 208 Making Great Presentations Broadcast Settings presentation. Though there are many broadcast parameters to modify, there are three that are the most important: bandwidth, motion, and encoder settings. Bandwidth The first item of importance is knowing how much bandwidth is available. Bandwidth is how much data you can broadcast from your computer. This depends on the speed of your network connection and the type of connection your viewers are using. More specifically, it is the minimum speed between you and all of your viewers. For example, if you have one viewer who is using a dial-up modem, for that viewer to see good quality you must broadcast at Modem speed. Thus, you must know who your viewers are and what kind of connection they have. This may be difficult to know because you must determine if their connection is cable modem or DSL and whether or not they reside on your local network. In some situations, you are broadcasting for just your local network (in an office building, for example). In this case you should discuss your plans with your network administrator and verify that you will not disrupt the network with your broadcasts. Ask them what your upper limit bandwidth should be. Your available bandwidth is the minimum of what you can upload, combined with what your viewers can download. Motion Once you know your bandwidth, you need to decide whether or not your video contains a lot of motion. Motion is how much things move around in your video presentations. An interview is considered low motion. A sports even, however, would probably be high motion. Wirecast comes configured with defaults to help ease your configuration task. Choose a default configuration that meets your motion (and bandwidth) constraints. If your viewers have older versions of QuickTime (version 5 for example), you may want to use a different Encoder than the default. Using the Sorenson 3 Codec for version 5 of QuickTime may be the most effective solution. Encoder Settings The parameters of the encoders are quite technical and can be overwhelming. It is beyond the scope of this document to describe the delicate balance required in setting them. There are professionals who fine-tune encoders to do exactly what is required. The Wirecast default settings are generally optimal for the various network environments. (See Setting Encoder Presets for information on changing the encoder settings.) Wirecast User Guide | 104730 209 Hardware Recommendations Introduction These topics describes hardware requirements and features for use with Wirecast. Topics FireWire Universal Serial Bus (USB) High Definition (HDV) DV Cameras Sleep Mode S-Video & 2nd Display Configure Devices FireWire FireWire is a hardware protocol that you can use to connect devices (cameras, hard drives, etc.) to your computer. It is important to understand that saturating your FireWire bus (using up all available bandwidth) can lead to problems in Wirecast, resulting in choppy audio and video. Bandwidth Limits There is an absolute limit to the bandwidth available to your FireWire devices (400 or 800 megabits per second). If the sum of your devices goes over the limit, you saturate (use up) all the available bandwidth. For example, if you have a camera attached to the FireWire bus and you saturate the bus, the output contains dropped frames which produces choppy video. If you use a FireWire hub and plug several devices into the hub, you share the maximum bandwidth on the FireWire bus. Adding a hub does not add bandwidth to the bus, just more places to plug in devices. Likewise, you might have several FireWire ports on your 210 Hardware Recommendations Universal Serial Bus (USB) computer, but they are often all connected to the same bus. You have to add a separate FireWire card to increase the bandwidth. Bandwidth Use If you have a hard disk connected to a FireWire hub and also have a camera connected to the same hub, it may appear to work but the bus can still become saturated. For example, when new email arrives and your email program accesses a file on your FireWire drive, it can cause FireWire saturation. Be mindful of this limitation when connecting hardware to your computer. Just because your setup works when you first put it together does not mean it will always work. Experiment with your setup and make sure that you have enough FireWire bandwidth to share all of your devices without experiencing choppy video. Normally, a camera requires around 25 Mbps to deliver audio and video to Wirecast. However, some cameras may require 100 Mbps or more. Universal Serial Bus (USB) Many cameras use USB instead of FireWire to connect to the computer, and the same bandwidth problems apply to USB connections. Keep as few devices on the bus as possible to prevent saturation, and keep in mind that even if you have multiple USB sockets they are often attached to the same USB bus. The USB devices dialog can be used to identify devices sharing a bus or buses with available ports. Standard USB supports up to 12 Mbps and high-speed USB supports up to 480 Mbps. High Definition (HDV) Always use the best quality camera you can get. Even if your viewers are only going to see 176×144 (G3 Mobile) an HDV camera is going to give you much better quality than a USB camera. Although you can achieve extremely high quality video using HDV, there are some limitations in using it. Most of these limitations are due to resource consumption. Even if you have multiple busses, to use more than one HDV camera with Wirecast you need a high-end (fast and powerful) computer. HDV images are so large they stress all components involved in your production (memory, video memory, video fill rate, bandwidth, etc.). HDV Cameras in DV Mode. If you only have HDV cameras, and you need to use several cameras, put your secondary cameras in DV mode. This saves bandwidth. When you switch your HDV camera to DV mode, your camera acts like a DV camera. Although you do not get HDV quality, you get much higher quality than your average DV camera because most HDV cameras have very high quality CCD elements in them. Wirecast User Guide | 104730 Hardware Recommendations DV Cameras Note: When working with HDV sources, you may find there is up to two seconds of delay from the video first being captured by the camera, to it showing up in Wirecast. This is a hardware limitation of the HDV connection and cannot be corrected by Wirecast. Many HDV cameras also have a lower resolution DV mode that, when used, will not have the HDV delay. DV Cameras Generally, you should not attach more than one camera to a FireWire or USB bus, even when using high-speed busses. The main reason for this is that most cameras will conflict with other devices on the same bus. For example, on FireWire bus each camera is expected to negotiate the channel it will use to transmit. Some cameras do not negotiate at all or ignore the results of the negotiation and a conflict will result. This causes problems in Wirecast because the incoming signal is from two cameras. Also, since some cameras randomly pick a transmission channel, there is always a chance that two will choose the same channel. Sleep Mode When a computer puts a monitor in sleep mode (screen saver mode) it also turns off the video card. Since Wirecast uses your video card for streaming, your stream is interrupted when the computer enters sleep mode. Wirecast automatically tells the operating system not to put your monitor in sleep mode, but if you force your monitor into sleep mode, your stream will stop. Note: Wirecast will not prevent your computer from entering sleep mode. Therefore, to ensure uninterrupted streaming, you should disable sleep mode on your computer while using Wirecast. S-Video & 2nd Display You can select an external display for the output of Wirecast. For example, if you have a projector connected to your computer using S-Video, select that projector from the Broadcast menu to display the output of Wirecast on it. If you have a dual-head graphics card, you can select a second monitor to display Wirecast Output. Note: If you have two graphics cards, Wirecast may not be able to display to any devices (monitors) on the second graphics card. Wirecast User Guide | 104730 211 212 Hardware Recommendations Configure Devices Configure Devices Some devices (cameras, etc.) can be configured. Choose the device you want to configure from Configure Devices in the Media menu. Note: The configuration user interface is provided by the device maker. It is beyond the scope of this document to describe all of the features available for all devices. See the documentation provided with your device on how to configure it. Wirecast User Guide | 104730 213 Installation Introduction This topic guides you through installing (or upgrading) and activating Wirecast. Topics Installing Activating Uninstalling Installing To install Wirecast, follow these steps: 1. Download the installer from the Telestream Website at: http://www.telestream.net/wire-cast/overview.htm. 2. Run the installer (.exe) program and follow the instructions provided Note: During installation, you will be asked if you want to install the Virtual Microphone feature. If you do (recommended), check the displayed check box and continue the installation. Installing Virtual Microphone requires administrative rights. 3. If you have an older version of Wirecast already installed on your computer, the installer upgrades to the newer version.Agree to the license terms and follow the instructions displayed by the installer program. Activating When you purchased Wirecast a serial number was provided. This serial number must be registered in the Wirecast program to unlock the features of Wirecast. To register Wirecast follow these steps: 214 Installation Uninstalling 1. Run the Wirecast program. 2. Select Preferences from the File menu, select Licenses, then click Purchase License. Select Licenses Click Purchase License 3. Enter your serial number. (If you do not have a license, click Purchase to purchase a license on-line.) Enter your serial number Click OK 4. When the unlocked message displays, click OK. 5. Close the Preferences window. Your Wirecast program should now be fully activated. Uninstalling To uninstall Wirecast, follow these steps: 1. Run the Wirecast installer (.exe) program. 2. The installer asks if you want to repair or remove the existing version. Select Remove to uninstall the existing version of Wirecast. Wirecast User Guide | 104730 Acknowledgements Acknowledgements Acknowledgements Acknowledgements Overview Portions of this software may utilize the following copyrighted material, the use of which is hereby acknowledged: Darwin streaming server FFmpeg Project Darwin streaming server APPLE PUBLIC SOURCE LICENSE Version 2.0 - August 6, 2003 Please read this License carefully before downloading this software. By downloading or using this software, you are agreeing to be bound by the terms of this License. If you do not or cannot agree to the terms of this License, please do not download or use the software. 1. General; Definitions. This License applies to any program or other work which Apple Computer, Inc. ("Apple") makes publicly available and which contains a notice placed by Apple identifying such program or work as "Original Code" and stating that it is subject to the terms of this Apple Public Source License version 2.0 ("License"). As used in this License: 1.1 "Applicable Patent Rights" mean: (a) in the case where Apple is the grantor of rights, (i) claims of patents that are now or hereafter acquired, owned by or assigned to Apple and (ii) that cover subject matter contained in the Original Code, but only to the extent necessary to use, reproduce and/or distribute the Original Code without infringement; and (b) in the case where You are the grantor of rights, (i) claims of patents that are now or hereafter acquired, owned by or assigned to You and (ii) that cover subject matter in Your Modifications, taken alone or in combination with Original Code. 1.2 "Contributor" means any person or entity that creates or contributes to the creation of Modifications. 1.3 "Covered Code" means the Original Code, Modifications, the combination of Original Code and any Modifications, and/or any respective portions thereof. 1.4 "Externally Deploy" means: (a) to sublicense, distribute or otherwise make Covered Code available, directly or indirectly, to anyone other than You; and/or (b) to use Covered Code, alone or as part of a Larger Work, in any way to provide a service, Wirecast User Guide | 104730 215 216 Acknowledgements Acknowledgements including but not limited to delivery of content, through electronic communication with a client other than You. 1.5 "Larger Work" means a work which combines Covered Code or portions thereof with code not governed by the terms of this License. 1.6 "Modifications" mean any addition to, deletion from, and/or change to, the substance and/or structure of the Original Code, any previous Modifications, the combination of Original Code and any previous Modifications, and/or any respective portions thereof. When code is released as a series of files, a Modification is: (a) any addition to or deletion from the contents of a file containing Covered Code; and/or (b) any new file or other representation of computer program statements that contains any part of Covered Code. 1.7 "Original Code" means (a) the Source Code of a program or other work as originally made available by Apple under this License, including the Source Code of any updates or upgrades to such programs or works made available by Apple under this License, and that has been expressly identified by Apple as such in the header file(s) of such work; and (b) the object code compiled from such Source Code and originally made available by Apple under this License. 1.8 "Source Code" means the human readable form of a program or other work that is suitable for making modifications to it, including all modules it contains, plus any associated interface definition files, scripts used to control compilation and installation of an executable (object code). 1.9 "You" or "Your" means an individual or a legal entity exercising rights under this License. For legal entities, "You" or "Your" includes any entity which controls, is controlled by, or is under common control with, You, where "control" means (a) the power, direct or indirect, to cause the direction or management of such entity, whether by contract or otherwise, or (b) ownership of fifty percent (50%) or more of the outstanding shares or beneficial ownership of such entity. 2. Permitted Uses; Conditions & Restrictions. Subject to the terms and conditions of this License, Apple hereby grants You, effective on the date You accept this License and download the Original Code, a world-wide, royalty-free, non-exclusive license, to the extent of Apple's Applicable Patent Rights and copyrights covering the Original Code, to do the following: 2.1 Unmodified Code. You may use, reproduce, display, perform, internally distribute within Your organization, and Externally Deploy verbatim, unmodified copies of the Original Code, for commercial or non-commercial purposes, provided that in each instance: (a) You must retain and reproduce in all copies of Original Code the copyright and other proprietary notices and disclaimers of Apple as they appear in the Original Code, and keep intact all notices in the Original Code that refer to this License; and (b) You must include a copy of this License with every copy of Source Code of Covered Code and documentation You distribute or Externally Deploy, and You may not offer or impose any terms on such Source Code that alter or restrict this License or the recipients' rights hereunder, except as permitted under Section 6. 2.2 Modified Code. You may modify Covered Code and use, reproduce, display, perform, internally distribute within Your organization, and Externally Deploy Your Modifications and Covered Code, for commercial or non-commercial purposes, Wirecast User Guide | 104730 Acknowledgements Acknowledgements provided that in each instance You also meet all of these conditions: (a) You must satisfy all the conditions of Section 2.1 with respect to the Source Code of the Covered Code; (b) You must duplicate, to the extent it does not already exist, the notice in Exhibit A in each file of the Source Code of all Your Modifications, and cause the modified files to carry prominent notices stating that You changed the files and the date of any change; and (c) If You Externally Deploy Your Modifications, You must make Source Code of all Your Externally Deployed Modifications either available to those to whom You have Externally Deployed Your Modifications, or publicly available. Source Code of Your Externally Deployed Modifications must be released under the terms set forth in this License, including the license grants set forth in Section 3 below, for as long as you Externally Deploy the Covered Code or twelve (12) months from the date of initial External Deployment, whichever is longer. You should preferably distribute the Source Code of Your Externally Deployed Modifications electronically (e.g. download from a Web site). 2.3 Distribution of Executable Versions. In addition, if You Externally Deploy Covered Code (Original Code and/or Modifications) in object code, executable form only, You must include a prominent notice, in the code itself as well as in related documentation, stating that Source Code of the Covered Code is available under the terms of this License with information on how and where to obtain such Source Code. 2.4 Third Party Rights. You expressly acknowledge and agree that although Apple and each Contributor grants the licenses to their respective portions of the Covered Code set forth herein, no assurances are provided by Apple or any Contributor that the Covered Code does not infringe the patent or other intellectual property rights of any other entity. Apple and each Contributor disclaim any liability to You for claims brought by any other entity based on infringement of intellectual property rights or otherwise. As a condition to exercising the rights and licenses granted hereunder, You hereby assume sole responsibility to secure any other intellectual property rights needed, if any. For example, if a third party patent license is required to allow You to distribute the Covered Code, it is Your responsibility to acquire that license before distributing the Covered Code. 3. Your Grants. In consideration of, and as a condition to, the licenses granted to You under this License, You hereby grant to any person or entity receiving or distributing Covered Code under this License a non-exclusive, royalty-free, perpetual, irrevocable license, under Your Applicable Patent Rights and other intellectual property rights (other than patent) owned or controlled by You, to use, reproduce, display, perform, modify, sublicense, distribute and Externally Deploy Your Modifications of the same scope and extent as Apple's licenses under Sections 2.1 and 2.2 above. 4. Larger Works. You may create a Larger Work by combining Covered Code with other code not governed by the terms of this License and distribute the Larger Work as a single product. In each such instance, You must make sure the requirements of this License are fulfilled for the Covered Code or any portion thereof. 5. Limitations on Patent License. Except as expressly stated in Section 2, no other patent rights, express or implied, are granted by Apple herein. Modifications and/or Larger Works may require additional patent licenses from Apple which Apple may grant in its sole discretion. Wirecast User Guide | 104730 217 218 Acknowledgements Acknowledgements 6. Additional Terms. You may choose to offer, and to charge a fee for, warranty, support, indemnity or liability obligations and/or other rights consistent with the scope of the license granted herein ("Additional Terms") to one or more recipients of Covered Code. However, You may do so only on Your own behalf and as Your sole responsibility, and not on behalf of Apple or any Contributor. You must obtain the recipient's agreement that any such Additional Terms are offered by You alone, and You hereby agree to indemnify, defend and hold Apple and every Contributor harmless for any liability incurred by or claims asserted against Apple or such Contributor by reason of any such Additional Terms. 7. Versions of the License. Apple may publish revised and/or new versions of this License from time to time. Each version will be given a distinguishing version number. Once Original Code has been published under a particular version of this License, You may continue to use it under the terms of that version. You may also choose to use such Original Code under the terms of any subsequent version of this License published by Apple. No one other than Apple has the right to modify the terms applicable to Covered Code created under this License. 8. NO WARRANTY OR SUPPORT. The Covered Code may contain in whole or in part prerelease, untested, or not fully tested works. The Covered Code may contain errors that could cause failures or loss of data, and may be incomplete or contain inaccuracies. You expressly acknowledge and agree that use of the Covered Code, or any portion thereof, is at Your sole and entire risk. THE COVERED CODE IS PROVIDED "AS IS" AND WITHOUT WARRANTY, UPGRADES OR SUPPORT OF ANY KIND AND APPLE AND APPLE'S LICENSOR(S) (COLLECTIVELY REFERRED TO AS "APPLE" FOR THE PURPOSES OF SECTIONS 8 AND 9) AND ALL CONTRIBUTORS EXPRESSLY DISCLAIM ALL WARRANTIES AND/OR CONDITIONS, EXPRESS OR IMPLIED, INCLUDING, BUT NOT LIMITED TO, THE IMPLIED WARRANTIES AND/OR CONDITIONS OF MERCHANTABILITY, OF SATISFACTORY QUALITY, OF FITNESS FOR A PARTICULAR PURPOSE, OF ACCURACY, OF QUIET ENJOYMENT, AND NONINFRINGEMENT OF THIRD PARTY RIGHTS. APPLE AND EACH CONTRIBUTOR DOES NOT WARRANT AGAINST INTERFERENCE WITH YOUR ENJOYMENT OF THE COVERED CODE, THAT THE FUNCTIONS CONTAINED IN THE COVERED CODE WILL MEET YOUR REQUIREMENTS, THAT THE OPERATION OF THE COVERED CODE WILL BE UNINTERRUPTED OR ERROR-FREE, OR THAT DEFECTS IN THE COVERED CODE WILL BE CORRECTED. NO ORAL OR WRITTEN INFORMATION OR ADVICE GIVEN BY APPLE, AN APPLE AUTHORIZED REPRESENTATIVE OR ANY CONTRIBUTOR SHALL CREATE A WARRANTY. You acknowledge that the Covered Code is not intended for use in the operation of nuclear facilities, aircraft navigation, communication systems, or air traffic control machines in which case the failure of the Covered Code could lead to death, personal injury, or severe physical or environmental damage. 9. LIMITATION OF LIABILITY. TO THE EXTENT NOT PROHIBITED BY LAW, IN NO EVENT SHALL APPLE OR ANY CONTRIBUTOR BE LIABLE FOR ANY INCIDENTAL, SPECIAL, INDIRECT OR CONSEQUENTIAL DAMAGES ARISING OUT OF OR RELATING TO THIS LICENSE OR YOUR USE OR INABILITY TO USE THE COVERED CODE, OR ANY PORTION THEREOF, WHETHER UNDER A THEORY OF CONTRACT, WARRANTY, TORT (INCLUDING NEGLIGENCE), PRODUCTS LIABILITY OR OTHERWISE, EVEN IF APPLE OR SUCH Wirecast User Guide | 104730 Acknowledgements Acknowledgements CONTRIBUTOR HAS BEEN ADVISED OF THE POSSIBILITY OF SUCH DAMAGES AND NOTWITHSTANDING THE FAILURE OF ESSENTIAL PURPOSE OF ANY REMEDY. SOME JURISDICTIONS DO NOT ALLOW THE LIMITATION OF LIABILITY OF INCIDENTAL OR CONSEQUENTIAL DAMAGES, SO THIS LIMITATION MAY NOT APPLY TO YOU. In no event shall Apple's total liability to You for all damages (other than as may be required by applicable law) under this License exceed the amount of fifty dollars ($50.00). 10. Trademarks. This License does not grant any rights to use the trademarks or trade names "Apple", "Apple Computer", "Mac", "Mac OS", "QuickTime", "QuickTime streaming server" or any other trademarks, service marks, logos or trade names belonging to Apple (collectively "Apple Marks") or to any trademark, service mark, logo or trade name belonging to any Contributor. You agree not to use any Apple Marks in or as part of the name of products derived from the Original Code or to endorse or promote products derived from the Original Code other than as expressly permitted by and in strict compliance at all times with Apple's third party trademark usage guidelines which are posted at http://www.apple.com/legal/guidelinesfor3rdparties.html. 11. Ownership. Subject to the licenses granted under this License, each Contributor retains all rights, title and interest in and to any Modifications made by such Contributor. Apple retains all rights, title and interest in and to the Original Code and any Modifications made by or on behalf of Apple ("Apple Modifications"), and such Apple Modifications will not be automatically subject to this License. Apple may, at its sole discretion, choose to license such Apple Modifications under this License, or on different terms from those contained in this License or may choose not to license them at all. 12. Termination. 12.1 Termination. This License and the rights granted hereunder will terminate: (a) automatically without notice from Apple if You fail to comply with any term(s) of this License and fail to cure such breach within 30 days of becoming aware of such breach; (b) immediately in the event of the circumstances described in Section 13.5(b); or (c) automatically without notice from Apple if You, at any time during the term of this License, commence an action for patent infringement against Apple; provided that Apple did not first commence an action for patent infringement against You in that instance. 12.2 Effect of Termination. Upon termination, You agree to immediately stop any further use, reproduction, modification, sublicensing and distribution of the Covered Code. All sublicenses to the Covered Code which have been properly granted prior to termination shall survive any termination of this License. Provisions which, by their nature, should remain in effect beyond the termination of this License shall survive, including but not limited to Sections 3, 5, 8, 9, 10, 11, 12.2 and 13. No party will be liable to any other for compensation, indemnity or damages of any sort solely as a result of terminating this License in accordance with its terms, and termination of this License will be without prejudice to any other right or remedy of any party. 13. Miscellaneous. 13.1 Government End Users. The Covered Code is a "commercial item" as defined in FAR 2.101. Government software and technical data rights in the Covered Code include only Wirecast User Guide | 104730 219 220 Acknowledgements Acknowledgements those rights customarily provided to the public as defined in this License. This customary commercial license in technical data and software is provided in accordance with FAR 12.211 (Technical Data) and 12.212 (Computer Software) and, for Department of Defense purchases, DFAR 252.227-7015 (Technical Data -- Commercial Items) and 227.7202-3 (Rights in Commercial Computer Software or Computer Software Documentation). Accordingly, all U.S. Government End Users acquire Covered Code with only those rights set forth herein. 13.2 Relationship of Parties. This License will not be construed as creating an agency, partnership, joint venture or any other form of legal association between or among You, Apple or any Contributor, and You will not represent to the contrary, whether expressly, by implication, appearance or otherwise. 13.3 Independent Development. Nothing in this License will impair Apple's right to acquire, license, develop, have others develop for it, market and/or distribute technology or products that perform the same or similar functions as, or otherwise compete with, Modifications, Larger Works, technology or products that You may develop, produce, market or distribute. 13.4 Waiver; Construction. Failure by Apple or any Contributor to enforce any provision of this License will not be deemed a waiver of future enforcement of that or any other provision. Any law or regulation which provides that the language of a contract shall be construed against the drafter will not apply to this License. 13.5 Severability. (a) If for any reason a court of competent jurisdiction finds any provision of this License, or portion thereof, to be unenforceable, that provision of the License will be enforced to the maximum extent permissible so as to effect the economic benefits and intent of the parties, and the remainder of this License will continue in full force and effect. (b) Notwithstanding the foregoing, if applicable law prohibits or restricts You from fully and/or specifically complying with Sections 2 and/ or 3 or prevents the enforceability of either of those Sections, this License will immediately terminate and You must immediately discontinue any use of the Covered Code and destroy all copies of it that are in your possession or control. 13.6 Dispute Resolution. Any litigation or other dispute resolution between You and Apple relating to this License shall take place in the Northern District of California, and You and Apple hereby consent to the personal jurisdiction of, and venue in, the state and federal courts within that District with respect to this License. The application of the United Nations Convention on Contracts for the International Sale of Goods is expressly excluded. 13.7 Entire Agreement; Governing Law. This License constitutes the entire agreement between the parties with respect to the subject matter hereof. This License shall be governed by the laws of the United States and the State of California, except that body of California law concerning conflicts of law. Where You are located in the province of Quebec, Canada, the following clause applies: The parties hereby confirm that they have requested that this License and all related documents be drafted in English. Les parties ont exige que le present contrat et tous les documents connexes soient rediges en anglais. EXHIBIT A. Wirecast User Guide | 104730 Acknowledgements Acknowledgements "Portions Copyright (c) 1999-2003 Apple Computer, Inc. All Rights Reserved. This file contains Original Code and/or Modifications of Original Code as defined in and that are subject to the Apple Public Source License Version 2.0 (the 'License'). You may not use this file except in compliance with the License. Please obtain a copy of the License at http://www.opensource.apple.com/apsl/ and read it before using this. The Original Code and all software distributed under the License are distributed on an 'AS IS' basis, WITHOUT WARRANTY OF ANY KIND, EITHER EXPRESS OR IMPLIED, AND APPLE HEREBY DISCLAIMS ALL SUCH WARRANTIES, INCLUDING WITHOUT LIMITATION, ANY WARRANTIES OF MERCHANTABILITY, FITNESS FOR A PARTICULAR PURPOSE, QUIET ENJOYMENT OR NON-INFRINGEMENT. Please see the License for the specific language governing rights and limitations under the License." FFmpeg Project GNU LESSER GENERAL PUBLIC LICENSE Version 2.1, February 1999 Copyright (C) 1991, 1999 Free Software Foundation, Inc. 51 Franklin Street, Fifth Floor, Boston, MA 02110-1301 USA Everyone is permitted to copy and distribute verbatim copies of this license document, but changing it is not allowed. [This is the first released version of the Lesser GPL. It also counts as the successor of the GNU Library Public License, version 2, hence the version number 2.1.] Preamble The licenses for most software are designed to take away your freedom to share and change it. By contrast, the GNU General Public Licenses are intended to guarantee your freedom to share and change free software--to make sure the software is free for all its users. This license, the Lesser General Public License, applies to some specially designated software packages--typically libraries--of the Free Software Foundation and other authors who decide to use it. You can use it too, but we suggest you first think carefully about whether this license or the ordinary General Public License is the better strategy to use in any particular case, based on the explanations below. When we speak of free software, we are referring to freedom of use, not price. Our General Public Licenses are designed to make sure that you have the freedom to distribute copies of free software (and charge for this service if you want); that you receive source code or can get it if you want it; that you can change the software and use pieces of it in new free programs; and that you are informed that you can do these things. To protect your rights, we need to make restrictions that forbid distributors to deny you these rights or to ask you to surrender these rights. These restrictions translate to certain responsibilities for you if you distribute copies of the library or if you modify it. For example, if you distribute copies of the library, whether gratis or for a fee, you must give the recipients all the rights that we gave you. You must make sure that they, too, receive or can get the source code. If you link other code with the library, you must Wirecast User Guide | 104730 221 222 Acknowledgements Acknowledgements provide complete object files to the recipients, so that they can relink them with the library after making changes to the library and recompiling it. And you must show them these terms so they know their rights. We protect your rights with a two-step method: (1) we copyright the library, and (2) we offer you this license, which gives you legal permission to copy, distribute and/or modify the library. To protect each distributor, we want to make it very clear that there is no warranty for the free library. Also, if the library is modified by someone else and passed on, the recipients should know that what they have is not the original version, so that the original author's reputation will not be affected by problems that might be introduced by others. Finally, software patents pose a constant threat to the existence of any free program. We want to make sure that a company cannot effectively restrict the users of a free program by obtaining a restrictive license from a patent holder. Therefore, we insist that any patent license obtained for a version of the library must be consistent with the full freedom of use specified in this license. Most GNU software, including some libraries, is covered by the ordinary GNU General Public License. This license, the GNU Lesser General Public License, applies to certain designated libraries, and is quite different from the ordinary General Public License. We use this license for certain libraries in order to permit linking those libraries into nonfree programs. When a program is linked with a library, whether statically or using a shared library, the combination of the two is legally speaking a combined work, a derivative of the original library. The ordinary General Public License therefore permits such linking only if the entire combination fits its criteria of freedom. The Lesser General Public License permits more lax criteria for linking other code with the library. We call this license the "Lesser" General Public License because it does Less to protect the user's freedom than the ordinary General Public License. It also provides other free software developers Less of an advantage over competing non-free programs. These disadvantages are the reason we use the ordinary General Public License for many libraries. However, the Lesser license provides advantages in certain special circumstances. For example, on rare occasions, there may be a special need to encourage the widest possible use of a certain library, so that it becomes a de-facto standard. To achieve this, non-free programs must be allowed to use the library. A more frequent case is that a free library does the same job as widely used non-free libraries. In this case, there is little to gain by limiting the free library to free software only, so we use the Lesser General Public License. In other cases, permission to use a particular library in non-free programs enables a greater number of people to use a large body of free software. For example, permission to use the GNU C Library in non-free programs enables many more people to use the whole GNU operating system, as well as its variant, the GNU/Linux operating system. Wirecast User Guide | 104730 Acknowledgements Acknowledgements Although the Lesser General Public License is Less protective of the users' freedom, it does ensure that the user of a program that is linked with the Library has the freedom and the wherewithal to run that program using a modified version of the Library. The precise terms and conditions for copying, distribution and modification follow. Pay close attention to the difference between a "work based on the library" and a "work that uses the library". The former contains code derived from the library, whereas the latter must be combined with the library in order to run. GNU LESSER GENERAL PUBLIC LICENSE TERMS AND CONDITIONS FOR COPYING, DISTRIBUTION AND MODIFICATION This License Agreement applies to any software library or other program which contains a notice placed by the copyright holder or other authorized party saying it may be distributed under the terms of this Lesser General Public License (also called "this License"). Each licensee is addressed as "you". A "library" means a collection of software functions and/or data prepared so as to be conveniently linked with application programs (which use some of those functions and data) to form executables. The "Library", below, refers to any such software library or work which has been distributed under these terms. A "work based on the Library" means either the Library or any derivative work under copyright law: that is to say, a work containing the Library or a portion of it, either verbatim or with modifications and/or translated straightforwardly into another language. (Hereinafter, translation is included without limitation in the term "modification".) "Source code" for a work means the preferred form of the work for making modifications to it. For a library, complete source code means all the source code for all modules it contains, plus any associated interface definition files, plus the scripts used to control compilation and installation of the library. Activities other than copying, distribution and modification are not covered by this License; they are outside its scope. The act of running a program using the Library is not restricted, and output from such a program is covered only if its contents constitute a work based on the Library (independent of the use of the Library in a tool for writing it). Whether that is true depends on what the Library does and what the program that uses the Library does. 1. You may copy and distribute verbatim copies of the Library's complete source code as you receive it, in any medium, provided that you conspicuously and appropriately publish on each copy an appropriate copyright notice and disclaimer of warranty; keep intact all the notices that refer to this License and to the absence of any warranty; and distribute a copy of this License along with the Library. You may charge a fee for the physical act of transferring a copy, and you may at your option offer warranty protection in exchange for a fee. 2. You may modify your copy or copies of the Library or any portion of it, thus forming a work based on the Library, and copy and distribute such modifications or work under the terms of Section 1 above, provided that you also meet all of these conditions: a) The modified work must itself be a software library. Wirecast User Guide | 104730 223 224 Acknowledgements Acknowledgements b) You must cause the files modified to carry prominent notices stating that you changed the files and the date of any change. c) You must cause the whole of the work to be licensed at no charge to all third parties under the terms of this License. d) If a facility in the modified Library refers to a function or a table of data to be supplied by an application program that uses the facility, other than as an argument passed when the facility is invoked, then you must make a good faith effort to ensure that, in the event an application does not supply such function or table, the facility still operates, and performs whatever part of its purpose remains meaningful. (For example, a function in a library to compute square roots has a purpose that is entirely well-defined independent of the application. Therefore, Subsection 2d requires that any application-supplied function or table used by this function must be optional: if the application does not supply it, the square root function must still compute square roots.) These requirements apply to the modified work as a whole. If identifiable sections of that work are not derived from the Library, and can be reasonably considered independent and separate works in themselves, then this License, and its terms, do not apply to those sections when you distribute them as separate works. But when you distribute the same sections as part of a whole which is a work based on the Library, the distribution of the whole must be on the terms of this License, whose permissions for other licensees extend to the entire whole, and thus to each and every part regardless of who wrote it. Thus, it is not the intent of this section to claim rights or contest your rights to work written entirely by you; rather, the intent is to exercise the right to control the distribution of derivative or collective works based on the Library. In addition, mere aggregation of another work not based on the Library with the Library (or with a work based on the Library) on a volume of a storage or distribution medium does not bring the other work under the scope of this License. 3. You may opt to apply the terms of the ordinary GNU General Public License instead of this License to a given copy of the Library. To do this, you must alter all the notices that refer to this License, so that they refer to the ordinary GNU General Public License, version 2, instead of to this License. (If a newer version than version 2 of the ordinary GNU General Public License has appeared, then you can specify that version instead if you want.) Do not make any other change in these notices. Once this change is made in a given copy, it is irreversible for that copy, so the ordinary GNU General Public License applies to all subsequent copies and derivative works made from that copy. This option is useful when you want to copy part of the code of the Library into a program that is not a library. 4. You may copy and distribute the Library (or a portion or derivative of it, under Section 2) in object code or executable form under the terms of Sections 1 and 2 above provided that you accompany it with the complete corresponding machine-readable source code, which must be distributed under the terms of Sections 1 and 2 above on a medium customarily used for software interchange. Wirecast User Guide | 104730 Acknowledgements Acknowledgements If distribution of object code is made by offering access to copy from a designated place, then offering equivalent access to copy the source code from the same place satisfies the requirement to distribute the source code, even though third parties are not compelled to copy the source along with the object code. 5. A program that contains no derivative of any portion of the Library, but is designed to work with the Library by being compiled or linked with it, is called a "work that uses the Library". Such a work, in isolation, is not a derivative work of the Library, and therefore falls outside the scope of this License. However, linking a "work that uses the Library" with the Library creates an executable that is a derivative of the Library (because it contains portions of the Library), rather than a "work that uses the library". The executable is therefore covered by this License. Section 6 states terms for distribution of such executables. When a "work that uses the Library" uses material from a header file that is part of the Library, the object code for the work may be a derivative work of the Library even though the source code is not. Whether this is true is especially significant if the work can be linked without the Library, or if the work is itself a library. The threshold for this to be true is not precisely defined by law. If such an object file uses only numerical parameters, data structure layouts and accessors, and small macros and small inline functions (ten lines or less in length), then the use of the object file is unrestricted, regardless of whether it is legally a derivative work. (Executables containing this object code plus portions of the Library will still fall under Section 6.) Otherwise, if the work is a derivative of the Library, you may distribute the object code for the work under the terms of Section 6. Any executables containing that work also fall under Section 6, whether or not they are linked directly with the Library itself. 6. As an exception to the Sections above, you may also combine or link a "work that uses the Library" with the Library to produce a work containing portions of the Library, and distribute that work under terms of your choice, provided that the terms permit modification of the work for the customer's own use and reverse engineering for debugging such modifications. You must give prominent notice with each copy of the work that the Library is used in it and that the Library and its use are covered by this License. You must supply a copy of this License. If the work during execution displays copyright notices, you must include the copyright notice for the Library among them, as well as a reference directing the user to the copy of this License. Also, you must do one of these things: a) Accompany the work with the complete corresponding machine-readable source code for the Library including whatever changes were used in the work (which must be distributed under Sections 1 and 2 above); and, if the work is an executable linked with the Library, with the complete machine-readable "work that uses the Library", as object code and/ or source code, so that the user can modify the Library and then relink to produce a modified executable containing the modified Library. (It is understood that the user who changes the contents of definitions files in the Library will not necessarily be able Wirecast User Guide | 104730 225 226 Acknowledgements Acknowledgements to recompile the application to use the modified definitions.) b) Use a suitable shared library mechanism for linking with the Library. A suitable mechanism is one that (1) uses at run time a copy of the library already present on the user's computer system, rather than copying library functions into the executable, and (2) will operate properly with a modified version of the library, if the user installs one, as long as the modified version is interface-compatible with the version that the work was made with. c) Accompany the work with a written offer, valid for at least three years, to give the same user the materials specified in Subsection 6a, above, for a charge no more than the cost of performing this distribution. d) If distribution of the work is made by offering access to copy from a designated place, offer equivalent access to copy the above specified materials from the same place. e) Verify that the user has already received a copy of these materials or that you have already sent this user a copy. For an executable, the required form of the "work that uses the Library" must include any data and utility programs needed for reproducing the executable from it. However, as a special exception, the materials to be distributed need not include anything that is normally distributed (in either source or binary form) with the major components (compiler, kernel, and so on) of the operating system on which the executable runs, unless that component itself accompanies the executable. It may happen that this requirement contradicts the license restrictions of other proprietary libraries that do not normally accompany the operating system. Such a contradiction means you cannot use both them and the Library together in an executable that you distribute. 7. You may place library facilities that are a work based on the Library side-by-side in a single library together with other library facilities not covered by this License, and distribute such a combined library, provided that the separate distribution of the work based on the Library and of the other library facilities is otherwise permitted, and provided that you do these two things: a) Accompany the combined library with a copy of the same work based on the Library, uncombined with any other library facilities. This must be distributed under the terms of the Sections above. b) Give prominent notice with the combined library of the fact that part of it is a work based on the Library, and explaining where to find the accompanying uncombined form of the same work. 8. You may not copy, modify, sublicense, link with, or distribute the Library except as expressly provided under this License. Any attempt otherwise to copy, modify, sublicense, link with, or distribute the Library is void, and will automatically terminate your rights under this License. However, parties who have received copies, or rights, from you under this License will not have their licenses terminated so long as such parties remain in full compliance. 9. You are not required to accept this License, since you have not signed it. However, nothing else grants you permission to modify or distribute the Library or its derivative works. These actions are prohibited by law if you do not accept this License. Therefore, Wirecast User Guide | 104730 Acknowledgements Acknowledgements by modifying or distributing the Library (or any work based on the Library), you indicate your acceptance of this License to do so, and all its terms and conditions for copying, distributing or modifying the Library or works based on it. 10. Each time you redistribute the Library (or any work based on the Library), the recipient automatically receives a license from the original licensor to copy, distribute, link with or modify the Library subject to these terms and conditions. You may not impose any further restrictions on the recipients' exercise of the rights granted herein. You are not responsible for enforcing compliance by third parties with this License. 11. If, as a consequence of a court judgment or allegation of patent infringement or for any other reason (not limited to patent issues), conditions are imposed on you (whether by court order, agreement or otherwise) that contradict the conditions of this License, they do not excuse you from the conditions of this License. If you cannot distribute so as to satisfy simultaneously your obligations under this License and any other pertinent obligations, then as a consequence you may not distribute the Library at all. For example, if a patent license would not permit royalty-free redistribution of the Library by all those who receive copies directly or indirectly through you, then the only way you could satisfy both it and this License would be to refrain entirely from distribution of the Library. If any portion of this section is held invalid or unenforceable under any particular circumstance, the balance of the section is intended to apply, and the section as a whole is intended to apply in other circumstances. It is not the purpose of this section to induce you to infringe any patents or other property right claims or to contest validity of any such claims; this section has the sole purpose of protecting the integrity of the free software distribution system which is implemented by public license practices. Many people have made generous contributions to the wide range of software distributed through that system in reliance on consistent application of that system; it is up to the author/donor to decide if he or she is willing to distribute software through any other system and a licensee cannot impose that choice. This section is intended to make thoroughly clear what is believed to be a consequence of the rest of this License. 12. If the distribution and/or use of the Library is restricted in certain countries either by patents or by copyrighted interfaces, the original copyright holder who places the Library under this License may add an explicit geographical distribution limitation excluding those countries, so that distribution is permitted only in or among countries not thus excluded. In such case, this License incorporates the limitation as if written in the body of this License. 13. The Free Software Foundation may publish revised and/or new versions of the Lesser General Public License from time to time. Such new versions will be similar in spirit to the present version, but may differ in detail to address new problems or concerns. Wirecast User Guide | 104730 227 228 Acknowledgements Acknowledgements Each version is given a distinguishing version number. If the Library specifies a version number of this License which applies to it and "any later version", you have the option of following the terms and conditions either of that version or of any later version published by the Free Software Foundation. If the Library does not specify a license version number, you may choose any version ever published by the Free Software Foundation. 14. If you want to incorporate parts of the Library into other free programs whose distribution conditions are incompatible with these, write to the author to ask for permission. For software which is copyrighted by the Free Software Foundation, write to the Free Software Foundation; we sometimes make exceptions for this. Our decision will be guided by the two goals of preserving the free status of all derivatives of our free software and of promoting the sharing and reuse of software generally. NO WARRANTY 15. BECAUSE THE LIBRARY IS LICENSED FREE OF CHARGE, THERE IS NO WARRANTY FOR THE LIBRARY, TO THE EXTENT PERMITTED BY APPLICABLE LAW. EXCEPT WHEN OTHERWISE STATED IN WRITING THE COPYRIGHT HOLDERS AND/OR OTHER PARTIES PROVIDE THE LIBRARY "AS IS" WITHOUT WARRANTY OF ANY KIND, EITHER EXPRESSED OR IMPLIED, INCLUDING, BUT NOT LIMITED TO, THE IMPLIED WARRANTIES OF MERCHANTABILITY AND FITNESS FOR A PARTICULAR PURPOSE. THE ENTIRE RISK AS TO THE QUALITY AND PERFORMANCE OF THE LIBRARY IS WITH YOU. SHOULD THE LIBRARY PROVE DEFECTIVE, YOU ASSUME THE COST OF ALL NECESSARY SERVICING, REPAIR OR CORRECTION. 16. IN NO EVENT UNLESS REQUIRED BY APPLICABLE LAW OR AGREED TO IN WRITING WILL ANY COPYRIGHT HOLDER, OR ANY OTHER PARTY WHO MAY MODIFY AND/OR REDISTRIBUTE THE LIBRARY AS PERMITTED ABOVE, BE LIABLE TO YOU FOR DAMAGES, INCLUDING ANY GENERAL, SPECIAL, INCIDENTAL OR CONSEQUENTIAL DAMAGES ARISING OUT OF THE USE OR INABILITY TO USE THE LIBRARY (INCLUDING BUT NOT LIMITED TO LOSS OF DATA OR DATA BEING RENDERED INACCURATE OR LOSSES SUSTAINED BY YOU OR THIRD PARTIES OR A FAILURE OF THE LIBRARY TO OPERATE WITH ANY OTHER SOFTWARE), EVEN IF SUCH HOLDER OR OTHER PARTY HAS BEEN ADVISED OF THE POSSIBILITY OF SUCH DAMAGES. Wirecast User Guide | 104730 229 Index A Activation 213 Adding New Source 61 Adding Titles 60 Annotation Settings 120 Aspect Ratio 195 Asset Manager, using media 133 AutoLive 161 AVI Video 58 Creating New Templates 65 D to re-assign B Bandwidth 208 Bandwidth Use 210 Basics Concepts 28 Begin Playing Control 203 Broadcast Configuration 85, 86 Broadcast Destinations 85 Broadcast Menu 138 Broadcast Over TCP 93 Broadcasting 48 C Canadian EMC Notice of Compliance 14 Canvas Size 82 Capture Cards 181 Changing Font 63 Changing Font Color 64 Changing Justification 63 Configuring Titles 62 copyright notice 13 Countdown Clock 156 Deactivate Serial Numbers 151 Demonstration Mode 151 Desktop Presenter 158 DV Cameras 211 E Edit Menu 136 Editing Shots 38 Editing XML Files 65 Encoder Presets 87 Encoder Presets Window 121 Encoder Settings 208 F File Menu 135 File Sources 158 Flash H.264 128 Flash Log Files 86 Flash queue 86 Flash To Livestream 102 Flash To Sermon.net 49, 117 Flash To Ustream 102, 104, 105, 116 Flash VP6 129 G Global Logos 67 Go Button 157 Good Lighting 206 230 Index H O Hardware Audio 165 HDV 210 HDV Serial 151 Help Menu 140 High Quality Audio 206 High Quality Video 198 How Multicast Works 98 Opacity 194 P Pipelines 169 Placing Titles 64 Preferences, Accessing 147 Preferences, Advanced 152 Preferences, Resetting 148 Presenter Is Operator 19 Preview / Live Area 155 I Inspector 184 Inspector vs. Editor 185 Installation 213 IP Cameras 173 Q K Keyboard Short-cuts 141 L Layers 160 Layout Menu 139 license requirements, for MPEG-2 13 Licenses 150 Live Feed Sources 192 Live Icon 159 Live Icon Settings 149 Live Playback 201 Live Sources 158 LiveU 177 Look Tab 172 M Manual Activation 150 Matte 194 Media File Sources 192 Media Menu 137 media, re-assigning with Manager 133 Modifying Titles 63 Motion 208 MPEG-2, license requirements 13 Multiple Broadcast Settings 85 N notices, legal, generally 13 Asset QT Record To disk 100 QuickTime Audio 126 QuickTime Built-in Server 94 QuickTime Destinations 86 QuickTime Multicast 97 QuickTime Streaming Server 92 QuickTime Unicast 96 QuickTime Video 125 R re-assigning media with Manager 133 Remember Position Control 203 Reposition Buttons 195 Asset S Scoreboards 170 Scrubbing 201 Serial Numbers 150 Shot Audio 158, 164, 165 Shot Audio, Adding Sources 165 Shot Audio, Managing Sources 166 Shot Editor Chroma Key 196 Shot Editor Cropping 196 Shot Editor Effects 193 Shot Editor Layout 186 Shot Editor Media Panel 191 Shot Editor Motion 199 Shot Editor Playback 200 Shot Editor Preview 191 Shot Graphics 158 Shot Logos 75 Wirecast User Guide | 104730 Index Shot Selection Area 159 Shot Template 158 Shot, Moving 159 Shots, Changing 159 Sleep Mode 211 Software Update 151 Source Visibility 190 Sources 186 Sources Menu 138 S-Video 211 Switch Menu 136 T Telestream contacting 15 Templates 187 Teradek Cube 175 Title Area 63 Title Banner Sources 193 Tool Bar 157 trademark notice 13 Transition Controls 156 Transition Time 157 Transport Controls 202 Triangular Lighting 207 Turning Layers On and Off 74 U Uninstalling 214 USB 210 USB Devices 181 V Virtual Camera 83 Virtual Sets 189 W warranty 14 Warranty and Disclaimers 14 When Finished Control 202 Window Bar Buttons 154 Window Menu 139 Y YUV Colorspace 152 Wirecast User Guide | 104730 231 232 Index Wirecast User Guide | 104730