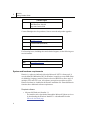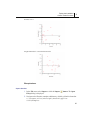
1
Getting Started
Guide
Phoenix™ WinNonlin® 6.1
Phoenix™ Connect 1.1
Phoenix™ NLME 1.0
Phoenix™
Phoenix™ WinNonlin® 6.1, Connect 1.1, and NLME 1.0 copyright ©2005-2009, Tripos, L.P. All rights
reserved. This software and the accompanying documentation are owned by Tripos, L.P. Pharsight is authorized to distribute and sublicense the material contained herein with the express written permission of Tripos,
L.P. The software and the accompanying documentation may be used only as authorized in the license agreement controlling such use. No part of this software or the accompanying documentation may be reproduced,
transmitted, or translated, in any form or by any means, electronic, mechanical, manual, optical, or otherwise,
except as expressly provided by the license agreement or with the prior written permission of Tripos, L.P.
This product may contain the following software that is provided to Tripos, L.P. under license: Actuate™ Formula One® copyright 1993-2003 Actuate Corporation. All rights reserved. Dundas Chart for ASP.NET enterprise edition 5.5.1.1700 (with custom code changes) copyright 2009 Dundas Data Visualization and others. All
rights reserved. Tab Pro ActiveX 2.0.0.45 copyright 1996-1998, FarPoint Technologies, Inc. All rights
reserved. Sentinel RMS 8.1.1 copyright 2006 SafeNet, Inc. All rights reserved. Microsoft® XML Parser version 3.0 copyright 1998-2005 Microsoft Corporation. All rights reserved. Tripos L.P. has agreement with the
following software to use and redistribute licenses: Syncfusion Essential Studio Enterprise 6.302.0.30 copyright 2001-2009 Syncfusion Inc. All rights reserved. Minimal Gnu for Windows (MingW), copyright 2007
Free Software Foundation, Inc. This product may also contain the following royalty free software: DotNetbar
1.0.0.24030 (with custom code changes) copyright 1996-2009 DevComponents LLC. All rights reserved.
Xceed zip Library 2.0.116.0 copyright 2009 Xceed Software Inc. All rights reserved. IMSL® copyright 19702008 Visual Numerics, Inc. All rights reserved.
Information in the documentation is subject to change without notice and does not represent a commitment on
the part of Pharsight Corporation or Tripos, L.P. The documentation contains information proprietary to Tripos, L.P. and is for use by Pharsight Corporation, and its affiliates' and designates' customers only. Use of the
information contained in the documentation for any purpose other than that for which it is intended is not
authorized. NONE OF PHARSIGHT CORPORATION, TRIPOS, L.P., NOR ANY OF THE CONTRIBUTORS TO THIS DOCUMENT MAKES ANY REPRESENTATION OR WARRANTY, NOR SHALL ANY WARRANTY BE IMPLIED, AS TO THE
COMPLETENESS, ACCURACY, OR USEFULNESS OF THE INFORMATION CONTAINED IN THIS DOCUMENT, NOR DO
THEY ASSUME ANY RESPONSIBILITY FOR LIABILITY OR DAMAGE OF ANY KIND WHICH MAY RESULT FROM THE
USE OF SUCH INFORMATION.
Destination Control Statement
All technical data contained in the documentation are subject to the export control laws of the United States of
America. Disclosure to nationals of other countries may violate such laws. It is the reader's responsibility to
determine the applicable regulations and to comply with them.
United States Government Rights
This software and accompanying documentation constitute "commercial computer software" and "commercial
computer software documentation" as such terms are used in 48 CFR 12.212 (Sept 1995). United States Government end users acquire the Software under the following terms: (i) for acquisition by or on behalf of civilian agencies, consistent with the policy set forth in 48 CFR 12.212 (Sept 1995); or (ii) for acquisition by or on
behalf of units of the Department of Defense, consistent with the policies set forth in 48 CFR 227.7202-1 (June
1995) and 227.7202-3 (June 1995). The manufacturer is Pharsight Corporation, 5625 Dillard Drive, Suite 205,
Cary, NC 27518.
Trademarks
Connect, AutoPilot, Drug Model Explorer, DMX, Pharsight Knowledgebase Server (PKS), PKS Reporter,
Pharsight, Phoenix, Phoenix Connect, Trial Simulator, WinNonlin and WinNonMix are trademarks or registered trademarks of Tripos, L.P. and are licensed to Pharsight Corporation as provided above. NONMEM is a
registered trademark of ICON Development Solutions. S-PLUS is a registered trademark of Insightful Corporation. SAS and all other SAS Institute Inc. product or service names are registered trademarks or trademarks
of SAS Institute Inc. in the USA and other countries. Sentinel RMS is a trademark of SafeNet, Inc. Microsoft,
MS, the Internet Explorer logo, MS-DOS, the Office logo, Microsoft Word, Microsoft Excel, Microsoft PowerPoint, Windows, Windows 2000, Windows XP, Windows Vista, the Windows logo, the Windows Start logo,
and the XL design (the Microsoft Excel logo) are trademarks or registered trademarks of Microsoft Corporation. Pentium and Pentium III are trademarks or registered trademarks of Intel Corporation. Adobe, Acrobat,
Acrobat Reader, and the Adobe PDF logo are registered trademarks of Adobe Systems Incorporated. All other
brand or product names mentioned in this documentation are trademarks or registered trademarks of their
respective companies or organizations.
Additional third party software acknowledgements
Software for Locally-Weighted Regression
The authors of this software are Cleveland, Grosse, and Shyu. Copyright © 1989, 1992 by AT&T. Permission
to use, copy, modify, and distribute this software for any purpose without fee is hereby granted, provided that
this entire notice is included in all copies of any software which is or includes a copy or modification of this
software and in all copies of the supporting documentation for such software.
THIS SOFTWARE IS BEING PROVIDED “AS IS”, WITHOUT ANY EXPRESS OR IMPLIED WARRANTY. IN PARTICULAR,
NEITHER THE AUTHORS NOR AT&T MAKE ANY REPRESENTATION OR WARRANTY OR ANY KIND CONCERNING
THE MERCHANTABILITY OF THIS SOFTWARE OR ITS FITNESS FOR ANY PARTICULAR PURPOSE.
LAPACK
Copyright © 1992-2007 The University of Tennessee. All rights reserved.
Redistribution and use in source and binary forms, with or without modification, are permitted provided that
the following conditions are met:
Redistributions of source code must retain the above copyright notice, this list of conditions and the following
disclaimer.
Redistributions in binary form must reproduce the above copyright notice, this list of conditions and the following disclaimer listed in this license in the documentation and/or other materials provided with the distribution.
Neither the name of the copyright holders nor the names of its contributors may be used to endorse or promote
products derived from this software without specific prior written permission.
THIS SOFTWARE IS PROVIDED BY THE COPYRIGHT HOLDERS AND CONTRIBUTORS "AS IS" AND ANY EXPRESS OR
IMPLIED WARRANTIES, INCLUDING, BUT NOT LIMITED TO, THE IMPLIED WARRANTIES OF MERCHANTABILITY
AND FITNESS FOR A PARTICULAR PURPOSE ARE DISCLAIMED. IN NO EVENT SHALL THE COPYRIGHT OWNER OR
CONTRIBUTORS BE LIABLE FOR ANY DIRECT, INDIRECT, INCIDENTAL, SPECIAL, EXEMPLARY, OR CONSEQUENTIAL DAMAGES (INCLUDING, BUT NOT LIMITED TO, PROCUREMENT OF SUBSTITUTE GOODS OR SERVICES; LOSS
OF USE, DATA, OR PROFITS; OR BUSINESS INTERRUPTION) HOWEVER CAUSED AND ON ANY THEORY OF LIABILITY, WHETHER IN CONTRACT, STRICT LIABILITY, OR TORT (INCLUDING NEGLIGENCE OR OTHERWISE) ARISING
IN ANY WAY OUT OF THE USE OF THIS SOFTWARE, EVEN IF ADVISED OF THE POSSIBILITY OF SUCH DAMAGE.
NLog
Copyright © 2004-2006 Jaroslaw Kowalski <[email protected]>. All rights reserved.
Redistribution and use in source and binary forms, with or without modification, are permitted provided that
the following conditions are met:
Redistributions of source code must retain the above copyright notice, this list of conditions and the following
disclaimer.
Redistributions in binary form must reproduce the above copyright notice, this list of conditions and the following disclaimer in the documentation and/or other materials provided with the distribution.
Neither the name of Jaroslaw Kowalski nor the names of its contributors may be used to endorse or promote
products derived from this software without specific prior written permission.
THIS SOFTWARE IS PROVIDED BY THE COPYRIGHT HOLDERS AND CONTRIBUTORS "AS IS" AND ANY EXPRESS OR
IMPLIED WARRANTIES, INCLUDING, BUT NOT LIMITED TO, THE IMPLIED WARRANTIES OF MERCHANTABILITY
AND FITNESS FOR A PARTICULAR PURPOSE ARE DISCLAIMED. IN NO EVENT SHALL THE COPYRIGHT OWNER OR
CONTRIBUTORS BE LIABLE FOR ANY DIRECT, INDIRECT, INCIDENTAL, SPECIAL, EXEMPLARY, OR CONSEQUENTIAL DAMAGES (INCLUDING, BUT NOT LIMITED TO, PROCUREMENT OF SUBSTITUTE GOODS OR SERVICES; LOSS
OF USE, DATA, OR PROFITS; OR BUSINESS INTERRUPTION) HOWEVER CAUSED AND ON ANY THEORY OF LIABILITY, WHETHER IN CONTRACT, STRICT LIABILITY, OR TORT (INCLUDING NEGLIGENCE OR OTHERWISE) ARISING IN
ANY WAY OUT OF THE USE OF THIS SOFTWARE, EVEN IF ADVISED OF THE POSSIBILITY OF SUCH DAMAGE.
Pharsight Corporation
1699 S. Hanley Road, St. Louis, MO 63144 USA
http://www.pharsight.com • [email protected]
Contents
Chapter 1
Installation . . . . . . . . . . . . . . . . . . . . . . . . . . . . . . . . . . . . . . . . . . . . .1
Pharsight contact information . . . . . . . . . . . . . . . . . . . . . . . . . . . . . . . . . . . . . 1
System and hardware requirements . . . . . . . . . . . . . . . . . . . . . . . . . . . . . . . . 2
Installing Phoenix . . . . . . . . . . . . . . . . . . . . . . . . . . . . . . . . . . . . . . . . . . . . . . 5
Modifying, updating, or removing a Phoenix installation . . . . . . . . . . . . . . 14
Configuring Phoenix for international use . . . . . . . . . . . . . . . . . . . . . . . . . . 15
Opening TCP ports for MPICH2 . . . . . . . . . . . . . . . . . . . . . . . . . . . . . . . . . 16
Chapter 2
Licensing . . . . . . . . . . . . . . . . . . . . . . . . . . . . . . . . . . . . . . . . . . . . .19
Phoenix Licensing Service . . . . . . . . . . . . . . . . . . . . . . . . . . . . . . . . . . . . . . 19
License key code types. . . . . . . . . . . . . . . . . . . . . . . . . . . . . . . . . . . . . . 20
Product and authorization codes. . . . . . . . . . . . . . . . . . . . . . . . . . . . . . . 20
Plug-in licenses. . . . . . . . . . . . . . . . . . . . . . . . . . . . . . . . . . . . . . . . . . . . 21
WinNonlin 5.2.1 license holders . . . . . . . . . . . . . . . . . . . . . . . . . . . . . . 24
License Activation . . . . . . . . . . . . . . . . . . . . . . . . . . . . . . . . . . . . . . . . . . . . 25
Setting up a license server. . . . . . . . . . . . . . . . . . . . . . . . . . . . . . . . . . . . . . . 30
License Management . . . . . . . . . . . . . . . . . . . . . . . . . . . . . . . . . . . . . . . . . . 31
License Server Management. . . . . . . . . . . . . . . . . . . . . . . . . . . . . . . . . . . . . 33
Chapter 3
Testing the Installation . . . . . . . . . . . . . . . . . . . . . . . . . . . . . . . . . .35
Start Phoenix and create a new project . . . . . . . . . . . . . . . . . . . . . . . . . . . . . 35
Confirm license installation . . . . . . . . . . . . . . . . . . . . . . . . . . . . . . . . . . 36
Confirm plug-in startup . . . . . . . . . . . . . . . . . . . . . . . . . . . . . . . . . . . . . 37
Import a data set . . . . . . . . . . . . . . . . . . . . . . . . . . . . . . . . . . . . . . . . . . . 37
Create a plot . . . . . . . . . . . . . . . . . . . . . . . . . . . . . . . . . . . . . . . . . . . . . . 38
Create a table . . . . . . . . . . . . . . . . . . . . . . . . . . . . . . . . . . . . . . . . . . . . . 39
v
Phoenix
Getting Started Guide
Confirm model functions. . . . . . . . . . . . . . . . . . . . . . . . . . . . . . . . . . . . . . . . 43
Noncompartmental analysis . . . . . . . . . . . . . . . . . . . . . . . . . . . . . . . . . . 43
Pharmacokinetic modeling . . . . . . . . . . . . . . . . . . . . . . . . . . . . . . . . . . . 50
Bioequivalence . . . . . . . . . . . . . . . . . . . . . . . . . . . . . . . . . . . . . . . . . . . . 55
Chapter 4
The Phoenix User Interface . . . . . . . . . . . . . . . . . . . . . . . . . . . . . .63
Phoenix User Interface . . . . . . . . . . . . . . . . . . . . . . . . . . . . . . . . . . . . . . . . . 63
Phoenix Menu Options . . . . . . . . . . . . . . . . . . . . . . . . . . . . . . . . . . . . . . . . . 64
Main menu options . . . . . . . . . . . . . . . . . . . . . . . . . . . . . . . . . . . . . . . . . 65
Toolbar buttons . . . . . . . . . . . . . . . . . . . . . . . . . . . . . . . . . . . . . . . . . . . . 65
Phoenix Panels and Tabs . . . . . . . . . . . . . . . . . . . . . . . . . . . . . . . . . . . . . . . . 67
Object Browser panel . . . . . . . . . . . . . . . . . . . . . . . . . . . . . . . . . . . . . . . 67
Diagram tab. . . . . . . . . . . . . . . . . . . . . . . . . . . . . . . . . . . . . . . . . . . . . . . 68
Setup tab . . . . . . . . . . . . . . . . . . . . . . . . . . . . . . . . . . . . . . . . . . . . . . . . . 69
Results tab . . . . . . . . . . . . . . . . . . . . . . . . . . . . . . . . . . . . . . . . . . . . . . . . 70
Verification tab . . . . . . . . . . . . . . . . . . . . . . . . . . . . . . . . . . . . . . . . . . . . 71
Information tab . . . . . . . . . . . . . . . . . . . . . . . . . . . . . . . . . . . . . . . . . . . . 72
History Tab . . . . . . . . . . . . . . . . . . . . . . . . . . . . . . . . . . . . . . . . . . . . . . . 73
Chapter 5
Phoenix Concepts . . . . . . . . . . . . . . . . . . . . . . . . . . . . . . . . . . . . . .75
Introduction . . . . . . . . . . . . . . . . . . . . . . . . . . . . . . . . . . . . . . . . . . . . . . . . . . 75
Phoenix Architectural Overview . . . . . . . . . . . . . . . . . . . . . . . . . . . . . . . . . . 75
Phoenix Terminology . . . . . . . . . . . . . . . . . . . . . . . . . . . . . . . . . . . . . . . . . . 76
Phoenix Work Concepts . . . . . . . . . . . . . . . . . . . . . . . . . . . . . . . . . . . . . . . . 80
Projects . . . . . . . . . . . . . . . . . . . . . . . . . . . . . . . . . . . . . . . . . . . . . . . . . . 80
Workflows. . . . . . . . . . . . . . . . . . . . . . . . . . . . . . . . . . . . . . . . . . . . . . . . 81
Operational Objects. . . . . . . . . . . . . . . . . . . . . . . . . . . . . . . . . . . . . . . . . 83
Templates . . . . . . . . . . . . . . . . . . . . . . . . . . . . . . . . . . . . . . . . . . . . . . . . 85
Data . . . . . . . . . . . . . . . . . . . . . . . . . . . . . . . . . . . . . . . . . . . . . . . . . . . . . 86
Index . . . . . . . . . . . . . . . . . . . . . . . . . . . . . . . . . . . . . . . . . . . . . . . . 89
vi
Chapter 1
Installation
Installing the Phoenix Platform
The Getting Started Guide contains installation and licensing instructions for
both Phoenix WinNonlin and Phoenix Connect. The generic term Phoenix is used
in this guide to simplify terminology.
This chapter contains the following topics:
» “Pharsight contact information” on page 1
» “System and hardware requirements” on page 2
» “Installing Phoenix” on page 5
» “Modifying, updating, or removing a Phoenix installation” on page 14
» “Configuring Phoenix for international use” on page 15
» “Opening TCP ports for MPICH2” on page 16
Pharsight contact information
Please consult the documentation to address questions. If further assistance is
needed, then contact Pharsight customer support.
Customer support
Email
[email protected]
Web
www.pharsight.com/support/support_sflogin.php
Phone
+1-919-852-4620
Fax
+1-919-859-6871
1
1
Phoenix
Getting Started Guide
Customer support
Post
Pharsight Corporation
5625 Dillard Drive, Suite 205
Cary, North Carolina 27518
Contact Pharsight sales for purchases, license renewals and product upgrades.
Sales
Email
[email protected]
Phone
+1-888-708-7444 (US only)
+1-919-852-4685 (International)
Fax
+1-650-314-3811
For licensing issues, including sales and technical support, use the following contact information.
Licensing sales and support
Email
[email protected]
Phone
+1-919-852-4610
System and hardware requirements
Phoenix is a software platform built on the Microsoft .NET 2.0 framework. It
uses the MinGW (Minimalist GNU for Windows) compiler to create PML (Phoenix Modeling Language) models. Phoenix also uses MPICH2 to allow usage of
multiple CPUs and CPU cores. All software prerequisites needed to use basic
Phoenix functions are included in the Phoenix installation file. Extended Phoenix
functions have additional software requirements.
Required software
» Microsoft® Windows® Installer 3.1.
– The installer can be downloaded through the Microsoft Update service or
by downloading the Windows Installer 3.1 redistributable from the
Microsoft download page.
2
Installation
System and hardware requirements
1
Supported operating systems
The following operating systems have been tested to ensure they are compatible
the Phoenix platform:
English language versions
Japanese language versions
Windows 2000 SP4
Windows 2000 SP4
Windows XP Pro SP3
Windows XP Pro SP3
Windows 2003 Citrix Server
Windows 2003 Citrix Server
Windows Vista 32 bit*
*Phoenix is not officially supported on Windows Vista 64 bit.
Supported third party software
Supported Microsoft Office versions for the Word Export and Edit in Excel features.
English language versions
Supported software version
Tested operating systems
Microsoft Office 2000
Windows 2000 SP4
Microsoft Office XP
Windows XP Pro SP3
Microsoft Office 2003
Windows XP Pro SP3
Windows 2003 Citrix Server
Microsoft Office 2007
Windows Vista 32 bit
Japanese language versions
Supported software version
Tested operating systems
Microsoft Office 2003
Windows 2003 Citrix Server
Microsoft Office XP
Windows 2000 SP4
Windows XP Pro SP3
Other supported third party software for Phoenix plug-ins:
3
1
Phoenix
Getting Started Guide
Phoenix Plug-in
Supported software
versions
Tested operating systems
NONMEM Shell
NONMEM 5
Windows 2000 SP4
Windows XP Pro SP3
NONMEM 6
Windows Vista 32 bit
SAS Shell
SAS 9.1
Windows 2000 SP4
Windows XP Pro SP3
Windows Vista 32 bit
SigmaPlot Shell
SigmaPlot 9.0.1
Windows 2003 Citrix Server
SigmaPlot 10
Windows XP Pro SP3
SigmaPlot 11.1
Windows Vista 32 bit
Windows XP Pro SP3 Japanese
version
S-PLUS 6.2
Windows 2000 SP4
S-PLUS 7.0
Windows XP Pro SP3
Windows 2003 Citrix Server
S-PLUS 8.0
Windows Vista 32 bit
Windows XP Pro SP3 Japanese
version
S-PLUS Dataframe Import
S-PLUS Script
S-PLUS Worksheet Export
Supported Pharsight software
Software
Requirements
PKS (Pharsight Knowledgebase Server)
4.0
See the PKS 4.0 Release Notes for a list of
supported and tested software and operating systems.
PKS Reporter 1.3.1*
See the PKS Reporter 1.3.1 Release
Notes for a list of supported and tested
software and operating systems.
*When used in conjunction with PKS 4.0. Phoenix does not interact directly with
PKS Reporter.
4
Installation
Installing Phoenix
1
Phoenix can coexist with all current Pharsight software, including WinNonlin
5.2.1 with or without the IVIVC Toolkit.
Hardware requirements
Minimum Hardware requirements
Item
Requirement
Processor
Intel Pentium 4 2.8 Ghz. or a CPU of
EQUIVALENT processing power
RAM
1 gigabyte RAM
Harddrive space
300 megabytes free
Installing Phoenix
The instructions for installing Phoenix WinNonlin, Phoenix Connect, and Phoenix NLME are the same.
Before installation:
The following steps are optional and only apply if S-PLUS is going to be used
with Phoenix but has not yet been installed.
1. If S-PLUS or later is not already installed then install S-PLUS according to
the instructions on the S-PLUS installation CD.
2. Add the directory path to the S-PLUS installation to the System variables
Path statement.
• For example, if S-PLUS 7.0 is installed in the default location, then the
System variable Path statement must include the line C:\Program
Files\Insightful\splus70\cmd.
3. For more on editing System variables, refer to this Microsoft Knowledgebase
article.
Installation notes:
» If Phoenix is being installed on a computer that uses Windows Vista, see
“Windows Vista installation” on page 14 for post-installation instructions.
5
1
Phoenix
Getting Started Guide
» If Phoenix is being installed on a computer that uses Windows 2003 Citrix
Server, see “Windows 2003 Citrix Server installation” on page 14 for postinstallation instructions.
» If Phoenix is being installed on a computer that does have any .NET framework or a .NET framework prior to 2.0 Service Pack 1, see “Systems without .NET 2.0 SP1 or higher” on page 6 for an important installation
warning.
Install Phoenix:
There are two ways to start the Phoenix installation process, depending on which
delivery method was used to acquire Phoenix.
1. Extract the ZIP file that contains the installation files.
2. Double-click Setup.exe to run the Phoenix Installation wizard.
Vista only: Select Allow in the User Account Control dialog.
OR
1. Insert the Phoenix CD into the computer’s CD or DVD drive.
2. If the Phoenix Installation Wizard does not start automatically:
• Double-click the My Computer icon on the desktop or select My Computer in the Start menu.
• Open the Phoenix CD to display its contents.
• Double-click Setup.exe to run the Phoenix Installation wizard.
Vista only: Select Allow in the User Account Control dialog.
Setup.exe detects the operating system and starts the appropriate executable.
Systems without .NET 2.0 SP1 or higher
A forced reboot might occur during the installation process if .NET 2.0 Service
Pack 1 is not installed. The reboot occurs before the Phoenix Setup wizard is
started.
This primarily occurs on computers running Windows 2000 and XP that do not
have any .NET framework components installed.
6
Installation
Installing Phoenix
1
If the computer reboots, start the installation process again by double-clicking
Setup.exe after the operating system restarts.
Continue the installation:
1. The Phoenix Setup wizard is started.
2. Click Next. The Sublicense Agreement screen is displayed.
7
1
Phoenix
Getting Started Guide
3. Read the license agreement. To accept its terms and proceed with the installation, select the I AGREE option button and click Next.
Note:
If there are any questions about the agreement, then contact Pharsight’s sales
department at [email protected].
The User Information screen is displayed.
8
Installation
Installing Phoenix
1
4. Enter the appropriate user information and click Next.
5. The Destination Folder screen is displayed. Accept the default installation
directory or choose a directory in which to install Phoenix. Click Next.
Vista only: If Phoenix is installed on a machine running Windows Vista 64 bit,
then Phoenix is installed in the default directory for 32 bit applications.
The Select Installation Type screen is displayed.
9
1
Phoenix
Getting Started Guide
6. Select an installation type and click Next.
» Typical is the default installation type. MPICH2 is not installed when Typical is selected.
– If Typical is selected, the Ready to Install the Application screen is
displayed.
» Complete installs the MPICH2 software for multiple- CPU and CPU core
processing.
– If Complete is selected, the MPI passphrase dialog is displayed.
» Custom allows users to make additional choices about what is installed.
– If Custom is selected, the Select Features dialog is displayed.
10
Installation
Installing Phoenix
1
• To change the passphrase from the default, click the Set button.
• In the Property Value field, enter a new passphrase and click OK to close
the dialog.
• Click Next to continue the installation.
The Ready to Install the Application screen is displayed.
Ready to Install the Application screen
11
1
Phoenix
Getting Started Guide
7. Use the Back button to return to the previous screens to make any changes to
the installation.
8. Click Next to continue the installation process.
If a WinNonlin 5.2.1 license is already installed, the Phoenix installation
process asks whether or not to use it.
9. Click Yes to use the WinNonlin license, or No to use a new license.
CAUTION: Only click Yes if the WinNonlin license is current.
» For descriptions of the Phoenix plug-ins and features that different WinNonlin licenses activate, see “WinNonlin 5.2.1 license holders” on page 24.
» For a description of where the WinNonlin license file is placed when users
select to add it, see “Adding a WinNonlin 5.2.1 license during installation”
on page 14.
12
Installation
Installing Phoenix
1
If they are not already installed, the LegacyWNL components and Microsoft
Visual C++ 2005 Redistributable are installed.
The installation finishes and the following screen is displayed:
10.Click the OK button to exit the Phoenix installation wizard
The Phoenix has been successfully installed screen is displayed.
11. Click Finish to finish the installation.
» Users are prompted to restart their computers.
» The Phoenix installation process is finished.
» If the Complete installation type was selected, then users need to open TCP
ports on their computer to use the MPICH2 software.
– See “Opening TCP ports for MPICH2” on page 16 for instructions on
opening TCP ports.
13
1
Phoenix
Getting Started Guide
Windows Vista installation
The Vista installation process is similar to the XP installation process with the
following exceptions:
» .NET Framework 2.0 Service Pack 1 must be installed before Phoenix can
be used.
» By default, Windows Vista comes with the .NET 3.0 framework already
installed. .NET 3.0 includes the .NET Framework 2.0 Service Pack 1 components necessary to run Phoenix WinNonlin.
» If the .NET Framework 2.0 Service Pack 1 is not already installed or some
of its components are missing, it can be downloaded from the Windows
Update Web site.
Note:
Vista users must use Windows Update to get .NET 2 SP 1.
Windows 2003 Citrix Server installation
If Phoenix is installed on Windows 2003 Citrix Server, then the computer must
be rebooted after the installation in order for the operating system to update the
system variables path statement to include the MinGW compiler. This step is
necessary to use the Phoenix Model object.
Adding a WinNonlin 5.2.1 license during installation
By default, the WinNonlin license file lservrc is located in C:\Program
Files\Pharsight\WinNonlin. If a user chooses to add the WinNonlin
license during the installation process, it is copied to the default Phoenix installation directory C:\Program Files\Pharsight\Phoenix\application\Services\Licensing in both Windows XP and Vista.
Modifying, updating, or removing a Phoenix installation
If Phoenix is already installed, then users can double-click the Setup.exe or
the Setup.msi file to update or modify a Phoenix installation.
• Double-click the Setup.exe or the Setup.msi file.
The Phoenix Application Maintenance screen is displayed.
Application Maintenance screen
14
Installation
Configuring Phoenix for international use
1
• Select a maintenance operation and click Next.
» Modify is the default selection type. Modify allows users to make additional choices about what is installed.
– If Modify is selected, the Select Features dialog is displayed.
» Repair reinstalls parts of Phoenix that need to be corrected or updated
– If Repair is selected, the Ready to Repair the Application screen is
displayed.
» Remove uninstalls Phoenix.
– If Remove is selected, the Phoenix Uninstall screen is displayed.
If Repair is selected, Phoenix is re-installed based on the user selections made
when Phoenix was originally installed.
Configuring Phoenix for international use
When Phoenix is installed on systems that do not use the United States region,
then some regional display information must be changed before Phoenix can be
used.
15
1
Phoenix
Getting Started Guide
CAUTION: If the settings are not changed then Phoenix cannot correctly run projects that
are created in the English (United States) region.
• In the Control Panel, open the Regional and Language Options dialog.
• In the Regional and Language Options dialog, select English (United
States) as the region.
If the region information cannot be changed, then users must set the decimal symbol to a period (.) for numbers and currency, and the list separator
symbol to a comma (,).
• Click the Customize button. The Customize Regional Options dialog is
displayed.
• In the Decimal symbol menu, change the decimal symbol to a period (.).
• In the List separator menu, select a comma (,).
• Select the Currency tab.
• In the Decimal symbol menu, change the decimal symbol to a period (.).
• Click OK and then Apply to save the changes.
Opening TCP ports for MPICH2
MPICH2 is an implementation of the Message Passing Interface (MPI) standard,
which allows users to process Phoenix models using multiple CPUs or CPUs
with multiple cores.
Note:
Phoenix’s MPI feature can be used in a networked computing environment,
where multiple computer are used to run Phoenix models. Please contact your
IT support personnel for help with opening ports in a networked computing
environment.
MPICH2 must use certain TCP ports. If TCP ports are not opened for MPICH2,
and the computer uses a software firewall, then the firewall might display alerts
each time MPICH2 is run.
The multiple alerts are displayed because the executable that uses MPICH2 is
compiled dynamically with each execution, so adding an exemption in a firewall
for MPICH2 might work only temporarily.
16
Installation
Opening TCP ports for MPICH2
1
» Users can restrict MPICH2 to use a range of ports, and open those ports in a
firewall to avoid the multiple warnings.
» Users can also set a system environment variable named
MPICH_PORT_RANGE with a value of <port range start>:<port range
end>. This restricts MPICH2 to only use the given port range.
» For example, use MPICH_PORT_RANGE=3000:3100 to restrict to the
range to 3000-3100.
Pharsight provides a batch file called mpiPortTool.bat that allows users to
automatically open and close ports for MPICH2 in Windows Firewall. Users
must be logged in as an administrator for the batch file to work correctly.
The default location of the batch file is C:\Program Files\Pharsight\MPICH2\tools\mpiPortTool.bat. The batch file is installed
only if MPICH2 is installed.
• Double-click mpiPortTool.bat. A command prompt is opened that
asks users what port range to use.
• At the prompt, enter a beginning port number, such as 3000. Press ENTER.
• Enter an ending port number such as 3100. Press ENTER.
17
1
Phoenix
Getting Started Guide
The batch file then presents three options that allow users to open ports, close
ports, or quit.
• Press 1 to add the port numbers to Windows Firewall.
– A second command prompt is opened and adds the selected port range.
– The batch file also creates a system environment variable that includes
the port numbers.
18
Chapter 2
Licensing
Installation and renewal of Phoenix software
licenses
The chapter contains the following topics:
» “Phoenix Licensing Service” on page 19
– “License key code types” on page 20
– “Plug-in licenses” on page 21
– “Product and authorization codes” on page 20
– “WinNonlin 5.2.1 license holders” on page 24
» “License Activation” on page 25
» “Setting up a license server” on page 30
» “License Management” on page 31
» “License Server Management” on page 33
Phoenix Licensing Service
The Phoenix Licensing Service is the system Phoenix uses to manage user
licenses. When a user starts Phoenix for the first time the Licensing Service is the
first Phoenix service that is initialized, and the No Framework License message
is displayed if no license is detected. The Licensing Service is integrated into the
Phoenix Preferences menu, which can be accessed by selecting Preferences in
the Edit menu.
Users have several options to install or acquire a license. Users can activate their
copy of Phoenix by using online and offline activation, or users can connect to a
license server to acquire a license for online or offline use.
19
2
Phoenix
Getting Started Guide
License key code types
Phoenix requires the installation of a license key code. There are three types of
license key codes:
1. Node - a license key code that activates the software on the machine on
which it is installed. The license agreement restricts installation of the software and license to a single personal computer (PC) per node license.
2. Floating - a license key code that enables multiple PCs in a networked environment to run Phoenix using a shared pool of software licenses. The number
of simultaneous users is limited to the total number of licenses on the license
server.
3. Commuter - a floating license key code that is retrieved from a network.
Commuter licenses give users temporary offline authorization to use Phoenix
while away from the network where their floating license server resides.
Commuter licenses can be used for a specified period of time and are subject to a hold time during which they cannot be checked out by another
user. This protects users who need to make changes to a Phoenix project
after they close Phoenix from immediately losing their license key to
another user on the network.
Customers must work with Pharsight Sales and the Licensing Administrator to determine how many of their floating licenses should contain the
commuter feature and the length of time that commuter enabled licenses are
valid after they have been checked out from the license server. The time-out
period can not be altered after the license has been installed.
Note:
The commuter license option is only available if the Sentinel™ RMS 8.x
license server is used with Phoenix.
For more on using a license server with Phoenix, see “Setting up a license server”
on page 30.
Product and authorization codes
A product code and an authorization code are included with each license or set of
licenses purchased. The primary delivery system for acquiring the Phoenix application is downloading the installation files from a Pharsight server. Pharsight’s
download and support page is located at http://www.pharsight.com/support/
support_home.php.
20
Licensing
Phoenix Licensing Service
2
When Phoenix is purchased, customers are sent an email with the five things necessary to use Phoenix:
– The application download link.
– The license server download link.
– The authorization code.
– The product code.
– The license code generation Web site link.
A CD can be ordered for users who want a physical medium. To purchase a CD,
contact Pharsight's sales department at:
E-mail:
Telephone:
[email protected]
1-888-708-7444 (US only)
+1-919-852-4685
Fax:
+1-650-314-3811
For mail shipments, the product and authorization codes are located on the packing slip shipped with the software, and on the product’s CD jewel case.
Please include the product code in all correspondence with Pharsight Corporation
about the product and its license, including license renewals, software updates,
and product upgrades.
Plug-in licenses
Phoenix uses a plug-in architecture to create system functions. Phoenix allows
users to enable, disable, configure, and create plug-ins. All Phoenix framework
functions and plug-ins require a license before they can be used.
The following table shows which framework features and plug-ins are enabled by
the different license types. Some features and plug-ins require customers to purchase one or more licenses before they can be used. The features and plug-ins
that are enabled by each license are listed in the following table.
Table 2-1. Phoenix plug-in license matrix
Feature/Plug-in
Phoenix
Connect
Phoenix
WinNonlin
Phoenix NLME
Data objects
Append Worksheets
X
X
X
21
2
Phoenix
Getting Started Guide
Table 2-1. Phoenix plug-in license matrix
Feature/Plug-in
Phoenix
Connect
Phoenix
WinNonlin
Phoenix NLME
BQL
X
X
X
Column Properties
X
X
X
Column Transformation
X
X
X
Crossproduct Worksheets
X
X
X
Filter Worksheet
X
X
X
Join Worksheets
X
X
X
Merge Worksheets
X
X
X
Pivot Worksheet
X
X
X
Rank Worksheet
X
X
X
Split Worksheet
X
X
X
Stacker
X
X
X
Bar Plot
X
X
X
Column Plot
X
X
X
Box Plot
X
X
X
Histogram
X
X
X
XY Plot
X
X
X
QQ Plot
X
X
X
Scatter Plot Matrix
X
X
X
Plotting objects
NCA and Toolbox objects
NCA
X
Bioequivalence
X
Crossover
X
Deconvolution
X
Descriptive Stats
X
Linear Mixed Effects
X
NonParametric
X
SemiCompartmental
X
WNL5 Classic Modeling objects
22
X
Licensing
Phoenix Licensing Service
2
Table 2-1. Phoenix plug-in license matrix
Feature/Plug-in
Phoenix
Connect
Phoenix
WinNonlin
Indirect Response Model
X
Linear Model
X
Michaelis-Menten Model
X
PD Model
X
PK Model
X
PK/PD Model
X
WNL5 ASCII Format model
X
Phoenix NLME
WNL-Phoenix Modeling object
Phoenix Model (individual)
X
X
Phoenix Model (population)
X
Phoenix Model Comparer
X
Reporting object
Table
X
X
NONMEM object
NONMEM Shell
X
X
NONMEM Comparer
X
X
SAS object
SAS Shell
X
SigmaPlot object
SigmaPlot Shell
X
S-PLUS object
S-PLUS Dataframe Import
X
S-PLUS Script
X
S-PLUS Worksheet Export
X
R Script object
R script
X
PKS Connectivity
X
X
23
2
Phoenix
Getting Started Guide
Table 2-1. Phoenix plug-in license matrix
Feature/Plug-in
Phoenix
Connect
Phoenix
WinNonlin
Phoenix NLME
CDISC import and export
X
ODBC Connectivity
X
Word Export
X
X
X
Edit in Excel
X
X
X
Plug-in APIs
X
X
X
Phoenix Framework
X
X
X
WinNonlin 5.2.1 license holders
Users who have WinNonlin 5.2.1 licenses can use Phoenix with no intervention
from Pharsight as long as the WinNonlin license is current.
During the installation process Phoenix looks for an existing WinNonlin license.
If it finds one, it gives the user the option of using it. If a user chooses to use the
existing license, a copy of the license file, lservrc, is written to the default
Phoenix license file location at C:\Program Files\Pharsight\Phoenix\application\Services\Licensing in Windows XP and Vista.
Users can also copy and paste the lservrc file from the WinNonlin installation
directory (C:\Program Files\Pharsight\WinNonlin by default) to
the Phoenix licensing service directory in Windows XP (C:\Program
Files\Pharsight\Phoenix\application\Services\Licensing by default) or Vista (C:\Program Files\Pharsight\Phoenix\application\Services\Licensing by default).
» A WinNonlin 5.2.1 Professional license is equivalent to the Phoenix WinNonlin license.
» A WinNonlin 5.2.1 Enterprise license is equivalent to the combination of
the Phoenix WinNonlin and Phoenix Connect licenses.
24
Licensing
License Activation
2
WinNonlin 5.2.1 floating license servers
WinNonlin license servers are not detected during the installation process on
Windows Vista. The license server IP address must be entered manually in the
License Server Management screen in the Preferences dialog.
License Activation
Phoenix must be installed before the license key code can be installed. See
“Installing Phoenix” on page 5.
When using Nodes, there are three types of Phoenix license activations: online,
offline, and manual.
Users can also visit the license code generation Web site and receive their license
code. The Web site link is emailed when Phoenix is purchased.
Note:
If a user enables PKS connectivity by activating a Phoenix Connect 1.0
license, Phoenix must be restarted to enable PKS functions.
Active a license:
1. In the Edit menu select Preferences.
2. In the Preferences dialog, click the (+) sign beside Licensing to expand the
Licensing menu.
3. Select License Activation.
4. In the License Activation screen, select either On-line activation: or Off-line
activation using a Pharsight Web site:.
» Use the On-line method if you have internet access and have the authorization and product codes that are supplied with your copy of Phoenix.
» Use the Off-line method if you do not have internet access but you do have
the license code that is supplied with your copy of Phoenix.
» Both types of license activation require internet access. If license activation
over the internet is not possible, see “Manual activation:” on page 30.
25
2
Phoenix
Getting Started Guide
On-line activation:
On-line activation allows users to activate Phoenix by connecting to Pharsight’s
licensing server from within Phoenix.
26
Licensing
License Activation
2
Online license activation
1. Select the On-line option button.
2. Enter the authorization code in the Authorization Code field.
The authorization code is contained in an email attachment named AuthorizationCode.txt that is sent by Pharsight's License Administrator.
Users can copy and paste the code.
3. Enter the product code in the Product Code field. For example, PHX_WNL
for Phoenix WinNonlin.
4. Click the Acquire License button.
Phoenix displays a message stating the license was successfully added.
A license file named lservrc is written to different locations depending on the
operating system.
27
2
Phoenix
Getting Started Guide
» In Windows XP, the default location C:\Program Files\Pharsight\Phoenix\application\Services\Licensing.
» In Windows Vista, the default location C:\Users\username>\AppData\Local\VirtualStore\Program Files\Pharsight\Phoenix\application\Services\Licensing.
If the license was not added, Phoenix displays different error messages
depending on the problem.
If the authorization code was not entered correctly, Phoenix displays the
following message:
If the network connection cannot be established, Phoenix displays the following message:
The license server settings are static and cannot be changed.
• Click the Test button to make sure the server connection can be established.
Note:
If Windows displays the error message 10019, Cannot Connect to Server, then
your network environment might be blocking Phoenix from accessing Pharsight's licensing server. This can be due to port 5094 being closed. Request
that your IT department open port 5094, or go to “Manual activation:” on
page 30.
Off-line activation using a Pharsight Web site:
Off-line activation allows users to activate Phoenix by installing a license code.
• To confirm the acquisition and installation of the license, select License
Management in the Licensing menu.
28
Licensing
License Activation
2
The purchased license is displayed in the Licenses list.
Offline license activation
1. Select the Off-line option button.
2. Go to the following Web site: http://licensing.pharsight.com/requestlicense/
default.aspx.
3. Enter the authorization code you received from Pharsight into the Authorization Code field.
4. Enter the system Locking Code from the License Activation panel in the
Preferences menu in the Locking Code field.
5. Click the Request License button and the License code is displayed in the
License Code field.
6. Save the license code to a text file by clicking the Save License button.
7. Copy the file to the computer on which Phoenix is installed.
The license file named lservrc must be written to different locations depending on the operating system.
» In Windows XP, the default location C:\Program Files\Pharsight\Phoenix\application\Services\Licensing.
29
2
Phoenix
Getting Started Guide
» In Windows Vista, the default location C:\Users\username>\AppData\Local\VirtualStore\Program Files\Pharsight\Phoenix\application\Services\Licensing.
8. In the License Code field, enter the License Code from the text file and click
the Install License button.
• To confirm license installation, select License Management in the preferences dialog.
The purchased license is displayed in the Licenses list.
If the license code was not entered correctly, Phoenix displays the following message:
Manual activation:
If you need to manually obtain a license code, then contact Pharsight by phone at
+1-919-852-4610 or by email at [email protected].
Users need their authorization and system locking codes to obtain a license over
the phone or by email.
When the license code is obtained follow the instructions under “Off-line activation using a Pharsight Web site:” on page 28 to install the license and activate
Phoenix.
Setting up a license server
The Sentinel RMS license server must be installed before the floating and commuter licenses can be used on a client machine. The license server only needs to
be installed on one computer, but the latest version of the Sentinel RMS license
server supports redundant license servers.
Note:
30
Contact Pharsight customer support ([email protected]) for suggestions
on how best to deploy a license server for Phoenix.
Licensing
License Management
2
The license server provided for Phoenix is Sentinel RMS server 8.x. It is available for download when Phoenix is purchased. The download link for the license
server is included in the email sent to new Phoenix customers.
It is also located on the Phoenix installation CD in the directory Tools\Sentinel RMS License Manager Installer.
Sentinel RMS server 8.x is backwards compatible with WinNonlin 5.2.1, and can
be used to provide floating licenses for WinNonlin 5.2.1, Phoenix WinNonlin
6.0, and Phoenix Connect 1.0.
The license server provided with WinNonlin 5.2.1 is based on Sentinel RMS
server 7.
CAUTION: Phoenix can use the older license server, but version 7 DOES NOT support
commuter licenses or redundant license servers.
Mass deployment of license configuration files
IT personnel can configure Phoenix on one system and then copy the license configuration files to every Phoenix installation. This allows IT personnel to configure one instance of Phoenix to use a local license server, and then copy the
configuration files to every Phoenix installation in the network.
The three license configuration files are:
– licensing.licenses.configuration.binconfig
– licensing.server.configuration.binconfig
– licensing.service.configuration.binconfig
By default, the files are located in C:\Documents and Settings\<username>\Application Data\Pharsight\Phoenix\Configuration in Windows XP and
C:\Users\<username>\AppData\Roaming\Pharsight\Phoenix\Configuration in Windows Vista.
License Management
The License Management screen allows users to see which license types are
available and acquired, as well as the different plug-ins they allow users to
access.
31
2
Phoenix
Getting Started Guide
Phoenix license manager
The License Management dialog has five fields:
Table 2-2. License Management fields
Field
Function
Name
Lists the names of available licenses.
Type
Lists whether the license is local (node) or network (floating or commuter).
Commuter
Lists floating licenses that are available to be commuted.
Status
Lists the status (Available, Acquired, etc.) of licenses
Expires
Lists the license expiration date.
Use the License Management dialog:
1. In the Edit menu select Preferences. The Preferences dialog is displayed.
• Expand items in the Preferences menu tree by clicking the (+) signs.
32
Licensing
License Server Management
2
2. Select Licensing>License Management in the Preferences dialog menu tree.
Node licenses
There are no options for node licenses in the License Management screen.
Floating licenses
1. To use a floating license, click a network license name in the Name column.
The license status is changed to Acquired.
2. Click the license name again to return the license. The license status is now
Available.
Commuter licenses
1. If a commuter license is available, click the Request
Commuter column.
button in the
2. If the commuter license is acquired, and its status is changed to Commuting.
3. The date the commuter license expires is listed in the Expires column.
4. To return a commuter license, click the Release
the license.
5. Click the Refresh
button to release
button to update the list of available licenses.
License Server Management
The License Server Management screen allows users to add license server IP
addresses to Phoenix. The number of available license servers is determined by
the customer. Some versions of Sentinel license servers support redundant license
servers.
The License Server Management screen has three fields: Name, IP Address, and
Status. The Name field contains the name of the license server, the IP Address
field contains the IP address of the license server, and the Status field contains the
connection status.
License Server Management screen
33
2
Phoenix
Getting Started Guide
Use the License Server Management screen:
1. To add a license server, enter the IP address of the server in the IP Address
or Host Name field beside the Add button and click the Add button.
2. To remove a floating license server, enter the IP address of the server in the
IP Address field and click the Remove button.
• Click the Refresh button to update the list of available license servers.
34
Chapter 3
Testing the Installation
Confirming proper installation of the main Phoenix
functions
The following instructions test the installation of Phoenix by using a number of
the sample files provided with the software. This chapter is not intended as a full
validation of the product. It is intended to test for proper installation of major
components of the application.
A complete validation kit is available from Pharsight Corporation. Contact the
Pharsight sales department for more information. Users interested in a validation
kit should send an e-mail to [email protected], or phone sales at 1-888-7087444 (US only) or +1-919-852-4685 (international).
Start Phoenix and create a new project
1. In the Windows Start menu, select All Programs>Pharsight>Phoenix>Phoenix to start Phoenix.
2. In the File menu select New Project to create a new project. A new project is
created in the Object Browser.
3. Name the new project Install Test.
The left panel’s default view is the Object Browser, which contains the project,
and the other folders and objects that are contained in the project. The right viewing panel’s default view is blank, unless one of the project folders or the workflow is selected.
35
3
Phoenix
Getting Started Guide
Confirm license installation
The ability to execute different Phoenix plug-ins depends on the license type
installed. Use the Preferences dialog to check the installed Phoenix license(s).
1. In the Edit menu select Preferences to access the Preferences dialog.
2. In the Preferences menu tree, select Licensing>License Management to
access the list of available licenses.
3. Confirm that the purchased license or licenses are listed in the Licenses panel.
4. Click OK to exit the Preferences dialog.
36
Testing the Installation
Start Phoenix and create a new project
3
Confirm plug-in startup
The Phoenix architecture is based on a series of plug-ins that allow different features to be enabled or disabled. Phoenix initializes these plug-ins when the application starts. The default setting is for all plug-ins to initialize when Phoenix
starts. The plug-in initialization is independent of the installed license(s).
1. In the Edit menu select Preferences. The Preferences dialog is displayed.
• Expand items in the Preferences menu tree by clicking the (+) signs.
2. In the Preferences menu tree, click the (+) sign beside Plugins to view the list
of available plug-ins.
» The Plugins menu contains three tabs: General, System, and Non-loaded.
» Each plug-in has two possible states, Started and Stopped.
» All plug-ins are started the first time Phoenix is started.
3. Select the General, System, and Non-loaded tabs to see the review the state
of each plug-in type and to confirm they are started.
4. Click OK to exit the Preferences dialog.
Import a data set
The data set Bguide1.dat is used to test key Phoenix functions.
1. In the File menu select Import or click the Import
File(s) dialog is displayed.
button. The Open
2. Navigate to the Phoenix examples subdirectory, which by default is located at
C:\Program Files\Pharsight\Phoenix\application\Examples.
3. In the Files of type menu select ASCII Data (*.csv;*.dat).
4. Select the file Bguide1.dat and click Open.
The Worksheet Import Options dialog is displayed. The dialog is used to assign
options for how the data are imported and presented.
5. Click Finish. The data set is added to the project’s Data folder.
6. View the data set by selecting it in the Data folder. The worksheet is displayed in the Grid tab, which is located in the right viewing panel.
37
3
Phoenix
Getting Started Guide
Create a plot
1. Select the workflow object
menu select Plotting>XY Plot.
in the Object Browser. In the Insert
• The XY Plot object can also be added by right-clicking the workflow object
and selecting New>Plotting>XY Plot. Any object can be added by selecting New in the workflow menu.
The XY Plot object is added to the workflow in the Object Browser.
» Objects automatically open in the right viewing panel when they are
inserted in a workflow.
» Each object’s default view is the Setup tab, which contains all the steps
necessary to set up an object.
2. Map the data set Bguide1 as the input source for the XY Plot object:
• Use the pointer to drag the Bguide1 worksheet from the Data folder to the
XY Data Mappings panel.
or
• In the XY Plot’s XY Data Mappings panel click the Select source
ton to open the Select Object dialog.
but-
• Click the (+) signs beside Install Test>Data to expand the menu tree.
• Select Bguide1 and click Select.
The Bguide1 data set is mapped to the XY Plot object.
3. Use the option buttons in the XY Data Mappings panel to map the data types
to the following contexts:
• Map Subject to the Group context.
• Map Time to the X context.
• Map Conc to the Y context.
38
Testing the Installation
Start Phoenix and create a new project
4. Click the Execute
3
button. The Results are displayed on the Results tab.
XY Plot results
• Now use the Bguide1 data set to test the Table object and its summary statistics function.
Create a table
1. Select the workflow object in the Object Browser. In the Insert menu select
Reporting>Table.
• The Table object can also be added by selecting the workflow in the Object
Browser. The workflow Diagram tab is displayed in the right viewing
panel.
• Click the Table
button in the Object toolbox. The Table object is added
to the Diagram tab.
• Select the Table object in the Object Browser to view the object’s Setup tab.
The Table object is added to the workflow in the Object Browser.
2. Map the data set Bguide1 as the input source for the Table object:
• Use the pointer to drag the Bguide1 worksheet from the Data folder to the
Table object’s Main Mappings panel.
or
• In the Table’s Main Mappings panel click the Select source
open the Select Object dialog.
button to
39
3
Phoenix
Getting Started Guide
• Click the (+) signs beside Install Test>Data to expand the menu tree.
• Select Bguide1 and click Select.
The Bguide1 data set is mapped to the Table object.
Use the Options tab to specify which table type the Table object uses. The
Options tab is located underneath the Setup tab.
Table Options tab
3. In the Table Type menu, select Table 1 - Column Summary by Row
Stratification.
4. Select the Page Break on Row Stratification check box.
5. Use the option buttons in the Main Mappings panel to map the data types to
the following contexts:
• Map Subject to the Stratification Row context.
• Leave Time mapped to None.
• Map Conc to the Data context.
6. Select the Statistics tab, which is located underneath the Setup tab.
7. Click the Select All
8. Click the Execute
40
button to select all output statistics.
button. The Results are displayed on the Results tab.
Testing the Installation
Start Phoenix and create a new project
3
The results are presented as three HTML tables. Compare the tables in the
Results tab to the tables pictured below.
Tables 1 and 2
41
3
Phoenix
Getting Started Guide
Table 3
42
Testing the Installation
Confirm model functions
3
Confirm model functions
This section tests examples of noncompartmental analysis, pharmacokinetic
modeling, bioequivalence, and population modeling.
Noncompartmental analysis
1. In the File menu select Import or click the Import
File(s) dialog is displayed.
button. The Open
2. Navigate to the Phoenix examples subdirectory, which by default is located at
C:\Program Files\Pharsight\Phoenix\application\Examples.
3. Select the Legacy WinNonlin subdirectory.
4. In the Files of type menu select WinNonlin Files
(*.cmd;*.pco;*.pmo;*.pto;*.pwo).
5. Select Profiles.pmo and click Open.
The Data Import Wizard is displayed. The wizard is used to assign options for
how the data are imported and presented.
6. Click Finish. The data set is added to the project’s Data folder.
A file in PMO (Pharsight Model Object) format is added to the Data folder as one
or more workbook objects. A .pmo file also adds one or more operational objects
to the project.
The Profiles.pmo file adds:
– A data set in workbook form (profiles).
– Data sets in workbook form for partial areas and dosing
(Profiles_sources).
– An NCA model object (model 200) named Profiles.
7. Click the (+) symbols beside profiles and Profiles_sources in the Data folder
to view the data sets’ worksheets.
8. Select the NCA model object Profiles in the Object Browser. The NCA
object’s Setup tab is displayed in the right viewing panel.
CAUTION: Models saved in PMO format contain all the necessary data mappings and
option settings. Do not change these settings.
43
3
Phoenix
Getting Started Guide
9. Select items in the NCA model object’s Setup tab list to explore the model’s
data mappings and option settings.
10.Click the Execute
button. The Results are displayed on the Results tab.
Text Output
The Core output contains the model settings and the same data as the worksheets, but presented in plain ASCII text. If there were errors in the model they
would be listed here.
44
Testing the Installation
Confirm model functions
3
Core output text file
Subject=1,Form=Capsule
Date: 4/29/2009
Time: 13:39:21
WINNONLIN NONCOMPARTMENTAL ANALYSIS PROGRAM
1.0
Core Version 04Jun2007
Settings
-------Model: Plasma Data, Extravascular Administration
Number of nonmissing observations: 12
Dose time: 0.00
Dose amount: 100.00
Calculation method: Linear Trapezoidal with Linear Interpolation
Weighting for lambda_z calculations: Uniform weighting
Lambda_z method: Find best fit for lambda_z, Log regression
Summary Table
------------Time
Conc. Pred. Residual AUC
AUMC Weight
min
ng/ml
ng/ml
ng/ml min*ng/ml min*min*ng/ml
------------------------------------------------------------------------------0.0000
0.0000
0.0000 0.0000
5.000
340.3
850.8 4254.
10.00
1914.
6487. 5.636e+004
15.00
2069.
1.644e+004 1.818e+005
20.00
1471.
2.529e+004 3.329e+005
30.00
788.8
3.659e+004 5.983e+005
45.00 * 496.4 460.9 35.54 4.623e+004 9.434e+005 1.000
60.00 * 372.8 357.2 15.63 5.275e+004 1.279e+006 1.000
90.00 * 204.3 214.6 -10.33 6.141e+004 1.890e+006 1.000
120.0 * 124.1 128.9 -4.852 6.633e+004 2.389e+006 1.000
180.0 * 39.25 46.52 -7.266 7.123e+004 3.048e+006 1.000
240.0 * 19.32 16.79 2.531 7.299e+004 3.399e+006 1.000
45
3
Phoenix
Getting Started Guide
The Settings file lists all the settings used to specify the noncompartmental analysis.
Settings text file
/********************************* Begin Mappings *********************************/
Main : install Test.Data.profiles.Sheet1
Sort : Subject, Form
Carry :
Time : Time
Concentration : Conc
Dosing : install Test.Data.Profiles_sources.Dosing
Sort : Subject, Form
Dose : Dose
Time of Dose : Time
Tau : Tau
Slopes : (Internal)
Partial Areas : install Test.Data.Profiles_sources.PartialAreas
Sort : Subject, Form
Area # : Curve
Label :
Start Time : Lower
End Time : Upper
Therapeutic Response : (Internal)
Units : (Internal)
Parameter Names : <None>
/********************************* End Mappings *********************************/
Plasma Model
Linear Trapezoidal Linear Interpolation
Sparse = False
Dose Type = Extravascular
Dose Normalization = None
Exclude Insufficient Profiles = False
46
Testing the Installation
Confirm model functions
3
Output Data
The NCA object creates seven results worksheets: Dosing Used, Exclusions,
Final Parameters, Final Parameters Pivoted, Plot Titles, Summary Table, and Partial Area Labels. Selections from the Final Parameters and Summary Table worksheets are shown below.
Final Parameters worksheet
47
3
Phoenix
Getting Started Guide
Summary Table worksheet
48
Testing the Installation
Confirm model functions
3
Plots
A total of 12 plots are generated; one for each of two formulations, for each of
the six subjects. The first two charts for subject one are shown below.
Observed Y and Predicted Y vs X for Subject 1
Observed Y and Predicted Y vs X for Subject 1
49
3
Phoenix
Getting Started Guide
Pharmacokinetic modeling
1. In the File menu select Import or click the Import
File(s) dialog is displayed.
button. The Open
2. Navigate to the Phoenix examples subdirectory, which by default is located at
C:\Program Files\Pharsight\Phoenix\application\Examples.
3. Select the Legacy WinNonlin subdirectory.
4. In the Files of type menu select WinNonlin Files
(*.cmd;*.pco;*.pmo;*.pto;*.pwo).
5. Select Exp1.pmo and click Open.
The Data Import Wizard is displayed. The wizard is used to assign options for
how the data are imported and presented.
6. Click Finish. The data set is added to the project’s Data folder.
The Exp1.pmo file adds:
– A data set in workbook form (exp1).
– Data sets in workbook form for dosing and the stripping dose
(Exp1_sources).
– A PK Model object named Exp1.
7. Click the (+) symbols beside exp1 and Exp1_sources in the Data folder to
view the data sets’ worksheets.
8. Select the PK Model object Exp1 in the Object Browser. The PK Model
object’s Setup tab is displayed in the right viewing panel.
9. Select items in the PK Model object’s Setup tab list to explore the model’s
data mappings and option settings.
The imported PK Model object uses PK Model 13, which is a two compartment
model with 1st order absorption.
10.Click the Execute
button. The Results are displayed on the Results tab.
Worksheet results
The PK Model object’s output worksheets partially include Condition Numbers,
Diagnostics, Dosing Used, Final Parameters, Initial Estimates, Secondary Param-
50
Testing the Installation
Confirm model functions
3
eters, and Summary Table. The Final Parameters, Secondary Parameters, and
Summary Table worksheets are shown below.
Final Parameters worksheet
Secondary Parameters worksheet
Summary table worksheet
51
3
Phoenix
Getting Started Guide
Text Output
The Core output text results include all model settings and iterations, including
the output from the worksheets. Any model errors would be listed here.
Core output text file
WinNonlin 6.0.0.1645, WnlPKCore Library: 1.0.5.0
Date: 04/29/2009
Time: 14:35:48
WINNONLIN NONLINEAR ESTIMATION PROGRAM
Core Version 18June2007
Listing of input commands
TITL 1
Example one - Fitting model 13 in the compiled library : single dose
TITL 2
Using Weight Command and Curve Stripping to get Initial Estimates
MODEL 13
NVAR 2
NPOI 1000
XNUM 1
YNUM 2
NCON 4
CONS 2,1,2,0
METH 2'Gauss-Newton (Levenberg and Hartley)
ITER 50
WEIG -1
MISS 'Missing'
DATA 'WINNLIN.DAT'
BEGI
Computation of initial estimates completed.
52
Testing the Installation
Confirm model functions
3
The Settings file lists all the settings used to specify the noncompartmental analysis.
Settings text file
/********************************* Begin Mappings *********************************/
Main : install Test.Data.exp1.Sheet1
Sort :
Time : Time
Concentration : Conc
Carry :
Dosing : install Test.Data.Exp1_sources.Dosing
Sort :
Time : Time
Dose : Dose
Initial Estimates : (Internal)
Units : (Internal)
Stripping Dose : install Test.Data.Exp1_sources.Stripping
Sort :
Dose : Dose
***** Other Parameters *****
/********************************* End Mappings *********************************/
PK 13 - [Exp1]
Gauss-Newton (Levenberg and Hartley)
Convergence criteria of 0.0001 used during minimization process
50 maximum iterations allowed during minimization process
Weighted analysis using WEIGHT = -1
Plots
The plot results include Observed Y and Predicted Y vs X, Partial Derivatives
Plot, Predicted Y vs Observed Y, Residual Y vs Predicted Y, Residual Y vs X,
Weighted Predicted Y vs Observed Y, Weighted Residual Y vs Weighted Predicted Y, and Weighted Residual Y vs X.
53
3
Phoenix
Getting Started Guide
Some plot results are shown below.
Observed Y and Predicted Y vs X
Predicted Y vs Observed Y
54
Testing the Installation
Confirm model functions
3
Residual Y vs X
Weighted Residual Y vs Weighted Predicted Y
Bioequivalence
Import the data:
1. In the File menu select Import or click the Import
File(s) dialog is displayed.
button. The Open
2. Navigate to the Phoenix examples subdirectory, which by default is located at
C:\Program Files\Pharsight\Phoenix\application\Examples.
55
3
Phoenix
Getting Started Guide
3. In the Files of type menu select ASCII Data (*.csv;*.dat).
4. Select the file Seq2Per4.csv and click Open.
The Worksheet Import Options dialog is displayed. The dialog is used to assign
options for how the data are imported and presented.
5. Click Finish. The data set is added to the project’s Data folder.
Set up the average bioequivalence model:
1. Select the workflow in the Object Browser. In the Insert menu select NCA
and Toolbox>Bioequivalence.
The Bioequivalence object is added to the workflow in the Object Browser.
Note:
The default settings for a new Bioequivalence model are Crossover as the
type of study and Average as the type of bioequivalence.
2. Map the data set Seq2Per4 as the input source for the Bioequivalence object:
• Use the pointer to drag the Seq2Per4 worksheet from the Data folder to the
Main Mappings panel.
or
• In the Bioequivalence Main Mappings panel click the Select source
button to open the Select Object dialog.
• Click the (+) signs beside Install Test>Data to expand the menu tree.
• Select the Seq2Per4 worksheet and click Select.
The Seq2Per4 data set is mapped to the Bioequivalence object.
3. Use the option button in the Main Mappings panel to map AUC to the
Dependent context.
» The following data types are automatically mapped to contexts when the
data set is mapped to the Bioequivalence model.
– Sequence is mapped to the Sequence context.
– Subject is mapped to the Subject context.
– Period is mapped to the Period context.
– Formulation is mapped to the Formulation context.
56
Testing the Installation
Confirm model functions
3
Use the Model tab to specify settings for Bioequivalence model options. The
Model tab is located underneath the Setup tab.
4. Ensure that Crossover is selected as the Type of study, Average is selected as
the Type of Bioequivalence, and R is selected as the Reference Formulation.
5. Select the Fixed Effects tab, which is located underneath the Setup tab.
• Ln(x) is automatically selected in the Dependent Variables Transformation menu. Do not change this setting.
6. Click the Execute
button. The Results are displayed on the Results tab.
Output Data
The bioequivalence model’s worksheet output partially includes Average
Bioequivalence, Diagnostics, Final Fixed Parameters, Final and Initial Variance
57
3
Phoenix
Getting Started Guide
Parameters, Least Squares Means, and Sequential Tests. The Diagnostics, Final
Variance Parameters, and Sequential Tests worksheets are shown below.
Diagnostics
Final Variance Parameters
Sequential Tests
Import the data:
1. In the File menu select Import or click the Import
File(s) dialog is displayed.
button. The Open
2. Navigate to the Phoenix examples subdirectory, which by default is located at
C:\Program Files\Pharsight\Phoenix\application\Examples.
3. In the Files of type menu select ASCII Data (*.csv;*.dat).
4. Select the file RTR_TRT.csv and click Open.
58
Testing the Installation
Confirm model functions
3
The Worksheet Import Options dialog is displayed. The dialog is used to assign
options for how the data are imported and presented.
5. Click Finish. The data set is added to the project’s Data folder.
Set up the population/individual bioequivalence model:
1. Select the workflow object in the Object Browser. In the Insert menu select
NCA and Toolbox>Bioequivalence.
The Bioequivalence object is added to the workflow in the Object Browser.
Note:
When multiple objects of the same type are added to a workflow they are
numbered sequentially. For example, the second Bioequivalence Model object
added to this workflow is called Bioequivalence 1.
2. Map the data set RTR_TRT as the input source for the Bioequivalence 1
object:
• Use the pointer to drag the RTR_TRT worksheet from the Data folder to
the Main Mappings panel.
or
• In the Bioequivalence 1’s Main Mappings panel click the Select source
button to open the Select Object dialog.
• Click the (+) signs beside Install Test>Data to expand the menu tree.
• Select the RTR_TRT worksheet and click Select.
The RTR_TRT data set is mapped to the Bioequivalence 1 object.
3. Use the option buttons in the Main Mappings panel to map the data types to
the following contexts:
• Map Sequence to the Sequence context.
• Map Subject to the Subject context.
• Map Period to the Period context.
• Map Trt to the Formulation context.
• Map AUC to the Dependent context.
59
3
Phoenix
Getting Started Guide
Use the Model tab to specify settings for Bioequivalence model options. The
Model tab is located underneath the Setup tab.
4. In the Model tab, select the Population/Individual option button.
Note:
Crossover is the only study type allowed for the Population/Individual
Bioequivalence model.
• R is automatically selected in the Reference Value menu. Do not change
this setting.
5. Click the Execute
60
button. The Results are displayed on the Results tab.
Testing the Installation
Confirm model functions
3
The output includes analysis settings and results, and three worksheets. The first
two worksheets are shown below.
Population/Individual worksheet
Ratios Test=T
This concludes the installation tests.
61
3
62
Phoenix
Getting Started Guide
Chapter 4
The Phoenix User Interface
Navigating the Phoenix application
This chapter presents an overview of the Phoenix user interface (UI). The different menu options, tabs, and panels that make up the Phoenix UI are described in
the sections below. This chapter also discusses the arrangement of Phoenix functions and the location of data sources.
This section includes the following topics:
» “Phoenix User Interface” on page 63
» “Phoenix Menu Options” on page 64
– “Main menu options” on page 65
– “Toolbar buttons” on page 65
» “Phoenix Panels and Tabs” on page 67
– “Object Browser panel” on page 67
– “Diagram tab” on page 68
– “Setup tab” on page 69
– “Results tab” on page 70
– “Verification tab” on page 71
– “Information tab” on page 72
– “History Tab” on page 73
Phoenix User Interface
The Phoenix interface lets users control and organize multiple projects, workflows, operational objects, and data sources. This section describes the different
parts of the Phoenix interface.
63
Phoenix
Getting Started Guide
4
Phoenix main interface
Main Menu
Verification tab
Results tab
Setup tab
Object Browser
panel
Diagram tab
Object Toolbox
Information tab
History tab
Phoenix Menu Options
The Phoenix main menu allows users to create and save projects, import data
sets, export operational objects and worksheets, and connect to databases.
64
The Phoenix User Interface
Phoenix Menu Options
Note:
4
All menu options are not always active. Inactive options are unavailable.
Some options are only available when a user selects a certain part of the interface, such as a cell in a worksheet.
For example, the Insert menu is only available when a project, workflow, or
operational object is selected. The Send To menu is only available when a worksheet is selected.
Main menu options
Phoenix menu bar
» File - create new and load existing projects, close projects, reload and save
projects, import and export data sets and models, export to and import from
a database, export to and import from S-PLUS data frames, export results to
Microsoft Word, export models to NONMEM, connect to a database, and
print results.
» Edit - undo and redo worksheet edits, cut, copy and paste worksheet cells,
insert and delete rows and columns, freeze panes, and access the Preferences dialog.
» Insert - allows users to insert operational objects into a workflow. The
Insert menu is only available when a project, a workflow object, or an operational object is selected.
» Send To - allows users to send worksheets to an operational object. The
Send To menu is only available when a worksheet is selected.
» PKS - allows users to connect to the Pharsight Knowledgebase Server
(PKS), and create and edit studies.
» Window - allows users to close the Object Browser and arrange open MDI
windows.
» Help - allows users to access Phoenix help content.
Toolbar buttons
Phoenix toolbar
» Import - allows users to import files into Phoenix. The following files
types are supported:
– ASCII Data (*.csv;*.dat)
65
4
Phoenix
Getting Started Guide
– Ascii model (*.lib)
– BQL Rule Set (*.phxruleset)
– Excel Files (*.xls)
– Image File (*.bmp;*.gif;*.jpeg;*.jpg;*.png)
– Legacy Settings (*.bql;*.tdf;*.xml)
– Legacy Workspace (*.wsp)
– LML File (*.lml)
– Phoenix Projects (*.phxproj)
– Phoenix Template (*.wnlt)
– RTF File (*.rtf)
– SAS Transport Files (*.xpt)
– Text (*;*.;*.bat;*.cmd;*.mdl;*.sas;*.ssc;*.txt;*.vbs)
– WinNonlin Files (*.cmd;*.map;*.pco;*.pmo;*.pto;*.pwo)
– All Files (*.*)
» Export - allows users to export workflows, operational objects, and worksheets.
Note:
The following options are only available when a cell in a worksheet is
selected.
» Cut - cut the value out of a cell.
» Copy - copy the value of a cell.
» Paste - paste a value into a cell.
» Freeze Panes - allows users to select a cell and “freeze” it into a fixed position. Users can then scroll up and down a worksheet relative to the frozen
cell, which acts as a scroll limiter.
» Insert Row - inserts a row into a worksheet.
» Insert Column - inserts a column into a worksheet.
» Delete - delete rows or columns from a worksheet.
Note:
66
The following options are only available when a workflow or operational
object is selected.
The Phoenix User Interface
Phoenix Panels and Tabs
4
» Verify - checks if an executable object can be run.
» Execute - executes an object or workflow, depending on which is selected
in the Object Browser.
Phoenix Panels and Tabs
Phoenix uses a series of panels and tabs that allow users to create and edit projects, and view results and project information.
Object Browser panel
The Object Browser displays all the operational objects inserted into a project or
a workflow.
Object Browser
The Object Browser contains the following items:
» Project - contains all the operational objects inserted into a project. Also
contains the Data and Library folders.
» Data folder - the Data folder contains imported data sets and user-created
worksheets and workbooks.
» Code folder - contains imported PML and legacy ASCII model code.
» Tables folder - contains imported or internally created output tables.
» BQL Rules folder - contains rules for importing data sets with uselessly
low concentration data.
67
4
Phoenix
Getting Started Guide
» Documents folder - contains any binary objects that do not belong in the
other folders.
» Workflow object - an object that allows users to group operational object
and nest workflows within a project.
» Operational object - any object that receives input, performs an operation,
and produces results. An example is the NCA (noncompartmental analysis)
object.
Object Browser toolbar buttons
Object Browser toolbar
» Show Sources - shows which data is mapped to an operational object.
» Show Dependents - shows all objects which depend on the selected object
for data input.
» Create Template - creates a template from a workflow object.
Diagram tab
Diagram tab
68
The Phoenix User Interface
Phoenix Panels and Tabs
4
» Contains the operational objects in a workflow.
» Contains the Object Toolbox, which allows users to insert objects into a
project by clicking the buttons in Object Toolbox.
» The objects in the Object Toolbox are grouped in the same way as they are
in the Insert menu.
Setup tab
NCA Setup tab
69
4
Phoenix
Getting Started Guide
» The Setup tab is the default view of any newly inserted operational object.
» The Setup tab gives users access options used to set up an operational
object.
» The Setup tab contains a list of the panels and options tabs that are used to
set up an operational object.
» The Setup tab allows users to map data sets and other worksheets to an
operational object.
Results tab
NCA Results tab
70
The Phoenix User Interface
Phoenix Panels and Tabs
4
» The Results tab displays the results of an executed object.
» Results are automatically grouped by type. Result types are text, worksheets, and graphs.
Results tab toolbar buttons
Results tab toolbar
» Do not group - does not group results.
» Group by type - groups results by type.
» Group by executable - groups results by executable object.
» Copy to Data Folder - copies results to the Data folder.
» Export - exports the results.
» Print - prints the results.
Verification tab
NCA Verification tab
71
4
Phoenix
Getting Started Guide
» The Verification tab displays operational object status and execution error
messages.
Information tab
NCA Information tab
» When a project is selected the tab displays information items in the project,
including the name, type, creation date, and project status.
» When a workflow is selected the Information tab lists all the objects that are
contained in the workflow. It also displays information about the object
type and creation time.
72
The Phoenix User Interface
Phoenix Panels and Tabs
4
» The Information tab displays information about a selected object. The
name, date created, last date modified, the version of Phoenix used to create
the object, and the status are displayed for each object.
» Imported data sets also have the Source Information displayed, which
shows the location from where they were imported.
History Tab
NCA History tab
» Displays the history of selected projects, worksheets, workflows, and
objects. Similar to the worksheet history tab in WinNonlin, but lists the history of any item selected in a project.
73
4
74
Phoenix
Getting Started Guide
Chapter 5
Phoenix Concepts
An introduction to the Phoenix platform
Introduction
This chapter provides an overview of the Phoenix architecture, definitions of
Phoenix-specific terms, and concepts used to describe work in Phoenix. Phoenix
presents several new concepts and functions that users must be aware of in order
to successfully use Phoenix. This chapter covers concepts and terminology new
to Phoenix, including projects, workflows, objects, and templates.
This section includes the following topics:
» “Phoenix Architectural Overview” on page 75
» “Phoenix Terminology” on page 76
» “Phoenix Work Concepts” on page 80
– “Projects” on page 80
– “Workflows” on page 81
– “Operational Objects” on page 83
– “Templates” on page 85
– “Data” on page 86
Phoenix Architectural Overview
» Phoenix is based on a modular, or component based, framework. This
design philosophy results in a flexible and robust application platform for
future expansion, promotes interchangeability between major and minor
system components, and permits third party development of new, specialized tools through the use of Pharsight’s API (Application Programming
Interface).
75
5
Phoenix
Getting Started Guide
» This type of architecture is called a plug-in architecture because components or plug-ins, which are discrete functional units in Phoenix, can be
added and removed without affecting the core application. Each plug-in
provides a specific function. Descriptive statistics, noncompartmental analysis, and linear mixed effects modeling are all plug-ins created for use with
the Phoenix platform.
» A plug-in is a “black box” that performs some operation on input data and
outputs the results. Plug-ins are referred to internally as operational
objects. An operational object is an object in Phoenix that performs a function, such as analysis or data manipulation. An operational object is the
smallest functional unit within Phoenix.
» Using Pharsight’s API, any developer can create new functions and add
those functions to the Phoenix platform without compromising the stability
of the application. Phoenix at its core does not carry out any useful analytic
tasks. Phoenix requires plug-ins in order to perform any meaningful analysis.
» Phoenix allows users to work in an MDI (Multiple Document Interface) or
an SDI (Single Document Interface) environment. Workflows, operational
objects, and data sets can be opened in their own window separate from the
main Phoenix interface, or users can choose to work completely within the
Phoenix user interface.
Phoenix Terminology
This section contains terms that are unique to Phoenix and are used throughout
the application.
» BQL Rules folder - contains BQL rule sets.
» Code folder - contains PML and WinNonlin ASCII code. Also contains
NONMEM, S-PLUS, and SAS scripts, as well as any imported text or rich
text format (*.rtf) files.
» Columns tab - tab used to display column headers when a worksheet is
selected. The Columns tab allows users to change column header names,
change column data types to either numeric or string, assign units to a column header, and change the way data is displayed a worksheet.
» Context associations - context associations are inputs in an operational
object. These inputs must have a data type mapped to them. Examples of
76
Phoenix Concepts
Phoenix Terminology
5
context associations include sort, concentration, time, formulation, X-axis,
Y-axis, etc.
» Data folder - contains all imported data sets, user-created data sets, and
copies of results from operational objects. Data sets in the Data folder can
be contained in workbooks or worksheets.
» Data Link - operational object that links one or more operational objects to
the same data source. A Data Link is only accessible in the Diagram tab.
Data Links allow users to create a place holder for input data that is shared
between objects or workflows in a project.
» Data Source - when data such as a data set in the Data folder or results
from an operational object are mapped to the input of an operational object,
no data are physically transferred into that operational object. Instead, the
operational object is pointed to the location of the data, whether it is in the
Data folder or an operational object’s results, and the information is directly
read from that source.
» Data type - data types in Phoenix refer to two things:
1. Study variables and output parameters.
– Study variables are the variables used in a drug trial and recorded in a
data set. These include common variables such as subject IDs, nominal
and actual sample times, concentration values, volume, treatment
formulations, etc.
– Output parameters are the results of an analysis. These include Tmax,
Cmax, AUCall, Lambda_Z, Clss, Vz, etc.
– Study variables and output parameters can be mapped to context
associations, or inputs, in an operational object.
2. Column data types.
– Numeric-type columns are considered by Phoenix to contain only
numeric values, and the application treats the values in a numeric column
as numeric data. A numeric column contains only numeric values or
substitution values such as those applied by BQL rules.
– Text-type columns in Phoenix can contain mixed numeric and text
values, but Phoenix treats values in a text-type column as non-numeric
values that cannot have certain operations performed on them, such as an
arithmetic column transformation.
» Diagram tab - only available when viewing the workflow level. The Diagram tab displays a schematic of the connections between operational
77
5
Phoenix
Getting Started Guide
objects in a project or workflow. The Diagram tab also shows the flow of
the operational procedures.
» Documents folder - contains Microsoft Word documents and templates,
images, and other binary objects that do not belong in one of the other folders.
» Global Contexts and Context Associations - Global Contexts are column
mappings that users can configure for use throughout Phoenix. Context
associations allow a user to define mappings at an operational object level.
» Grid tab - the tab in Phoenix used to display all worksheets.
» Lattice - a way to sort and display a group of plots on one panel instead of
displaying them on multiple panels. Lattice plots are sometimes referred to
as trellis plots. The maximum number of columns or rows in a latticed plot
is 15 per page.
» Mapping - a method of assigning study variables and output parameters to
inputs, or context associations, in an operational object. For example, the
nominal sample time and plasma concentration columns in a data set can be
mapped to the Time and Concentration inputs in a noncompartmental analysis object.
– When mapping values to context associations in an operational object,
users must assign the appropriate data types, or variables or parameters,
to the relevant context associations, or inputs. For example, time values
in a study can be mapped to the time context association in an
operational object.
» MDI - Multiple Document Interface. Allows users to open operational
objects and worksheets in their own windows separate from the Phoenix
main interface.
» Object level view - at the object level view, only the setup options and output results relating to a particular operational object are seen by the user.
» Operational Objects - objects that are used to perform a specific procedure such as noncompartmental analysis, descriptive statistics, data plotting, and worksheet operations such as worksheet merges.
» Phoenix Modeling Language (PML) - model coding language in Phoenix
that uses S-PLUS and C++ syntax and is comparable to NONMEM. PML
replaces the WinNonlin ASCII model language.
» Plug-ins - system functions that are made available to a user depending on
the license type purchased, such as a Connect, WinNonlin, or an NLME
78
Phoenix Concepts
Phoenix Terminology
5
license. System functions include drug modeling, statistical calculations,
and data manipulation.
» Project - a project can contain multiple workflows which can include multiple operational objects and data sets. A project is similar to a workspace in
WinNonlin and a scenario in PKS.
» Right viewing panel - the main panel in Phoenix that shows the setup
options for any item that is selected in the Object Browser. This includes
operational objects, data sets, and items contained in the Code, Tables, and
BQL folders.
» Setup tab - allows users to select from a list of options in order to set up an
operational object to perform its function.
» Tables folder - contains HTML tables created by the Table object.
» Templates - operational objects and procedures in a workflow can be saved
as a template that can be re-applied and re-run with different data sets. Templates do not save mappings to external data sets. Templates eliminate the
need to recreate a set of operational procedures each time the same type of
analysis or procedure has to be performed.
» Workbook - used to contain multiple worksheets. However, the Data
folder can contain multiple worksheets without using a workbook.
» Workflow - an object that contains operational objects. Workflows can be
set up to perform operational procedures using operational objects. In
Phoenix, a workflow is two things: a term used to describe the flow of work
in a project and an operational object used to group together other operational objects. A workflow operational object can be used to create a template.
» Workflow level view - the workflow level view provides a schematic of all
operational objects and procedures in a workflow. Selecting a workflow
allows a user to see the diagram of all objects, and the main setup panels
and results for all objects.
» Worksheet - the fundamental data container used by Phoenix, and is similar to a Microsoft® Excel worksheet. Phoenix can create internal worksheets to contain data such as dosing values. Worksheets are mapped to
operational objects as inputs and new worksheets are created to contain the
results of object calculations. Just like in Excel, multiple worksheets can be
combined into a workbook.
– Several of Phoenix’s operational objects can use external worksheets,
which must be imported into Phoenix, and internal worksheets, which
79
5
Phoenix
Getting Started Guide
are created in an operational object and can be published to the Data
folder.
Phoenix Work Concepts
Work in Phoenix involves five important organizational concepts: projects, workflows, operational objects, templates, and data. Each of these concepts are
explained in the following sections.
Projects
Projects contain all imported binary objects and all operational objects that are
used to perform an analysis. Two of the benefits of Phoenix projects is that they
allow analysis work to be easily organized and saved. Users can save projects as
Phoenix project files (*.phxproj) or save them to PKS.
Default new project view
Phoenix projects contain the following items:
– a Data folder for worksheets and other data sets
– a Code folder for PML, ASCII, and NONMEM code
– a BQL Rules folder for BQL rules
– a Documents folder for binary objects not placed in the other folders
– a Workflow object that is used to group operational objects
» A Phoenix project is the workspace in which workflows, operational
objects and worksheets are combined to perform an analysis. A Phoenix
project can contain one or more independent or connected workflows, operational objects and worksheets.
80
Phoenix Concepts
Phoenix Work Concepts
5
» Phoenix projects are designed to be easily updated and shared, which
allows for better data management. Phoenix projects can be saved locally
or to a database and transferred between multiple users.
» A Phoenix project file contains all the data sets, such as study data, that
were imported into a project. Project files can be exchanged between users
without also having to exchange external data sources.
» Sharing Phoenix projects has two main advantages:
– multiple users can review the steps and processes used in an analysis
– the amount of time needed to validate the results of an analysis is
decreased.
» In order for Phoenix projects to be easily updated, some functionality that
was present in WinNonlin is no longer directly available in Phoenix. For
example, worksheet formula support is now handled in Microsoft Excel
through a custom export feature.
» Phoenix does not automatically save projects. Users must choose to save
the project. Phoenix also prompts users to save projects when the application is closed. By default, Phoenix project files are saved in C:\Documents
and Settings\<user name>\My Documents\Pharsight Projects.
Workflows
There are two types of workflows: project and operational. The first type of
workflow, the project workflow, refers to the series of steps needed to complete
an analysis. This includes importing data, manipulating data, using model objects
to analyze data, and saving or exporting the results.
The second type of workflow is an operational object. The workflow operational
object is the root of all analysis work in Phoenix. Noncompartmental analysis,
81
5
Phoenix
Getting Started Guide
PK analysis, and any other models that Phoenix supports are added to the workflow object.
Root workflow with a sub-workflow
What in Phoenix can be considered a workflow?
» A project and all its data, models, and output, can be a workflow.
– Project workflows contain the data, models, and other objects needed to
complete an analysis, from data setup through reporting of results.
» A workflow is an operational object that is used to group other operational
objects.
– The workflow operational object is a container for operational objects.
– In a complex analysis that requires a large number of operational objects,
workflows provide a way of organizing various operational objects into
larger, more complex functional units.
Workflows as operational objects
Workflow objects can be inserted into a project like any other operational object.
Multiple workflow objects can be added to a project’s root workflow object.
Each subsequent workflow object can contain its own group of operational
objects.
What are the purposes of a workflow operational object?
» The workflow object acts as a container for other operational objects, such
as an NCA object or a PK model object.
82
Phoenix Concepts
Phoenix Work Concepts
5
» Workflow objects allow users to put together as many types of operational
objects as needed to complete an analysis.
» Workflow objects allow users to execute only a certain group of operational
objects in a project.
» They allow users to access the Diagram tab, which can be used to add operational objects, map data, and execute objects.
» They allow users to map data and code to operational objects in the workflow, and to manage the flow of data between operational objects.
What are the differences between a workflow operational object and other
operational objects?
» A workflow operational object does not perform any sort of analysis.
» All basic Phoenix operations such as NCA, NLME, or Convolution are
operational objects, but are not workflows.
» A workflow operational object is used to group basic Phoenix operations
for later use or reuse.
Operational Objects
Phoenix analysis work is done using operational objects. An operational object
contain a pointer to input data, a model, plot, or some other function, plus worksheet results, plot results, and text results.
Operational objects in a workflow
Operational
objects
83
5
Phoenix
Getting Started Guide
What are the types of operational objects?
Examples of operational objects include data manipulation objects such as Column Transformation and Pivot Worksheet, models like Semicompartmental
Modeling and PK Models, and plots like the XY Plot.
What types of data do operational objects use?
» Operational objects use two types of data: external and internal.
» An external data source for an operational object points to an imported data
set in the Data folder. The data is not contained in the object.
» Internally generated data sources include worksheets created within Phoenix. These can be created either by users or by executing an operational
object to get output results. These data are also not contained in the object.
» The output of one operational object can be connected to the input of
another operational object to perform a series of calculations based on the
other object’s results. For example, the Final Parameters worksheet from a
model can be sent to a Descriptive Stats object for further analysis.
How are operational objects used?
» All operational objects can be inserted from the Insert menu, the Object
toolbox, the Send To menu, and the workflow menu.
» Operational objects have user-defined settings and options that can be
accessed in the Setup tab list and in the option tabs located beneath the
Setup tab.
» Operational objects have results in the form of worksheets, plots, and text,
which are output from an executed operational object.
An operational object:
» is an operational function that accepts input data, has user-defined settings,
and gives output results
» has links to objects in the Data, Code, or BQL Rules folder, or has links to
other operational objects
» is added to the workflow object in a project.
84
Phoenix Concepts
Phoenix Work Concepts
5
Templates
A template in Phoenix works like a template in Microsoft® Word - it allows users
to recreate the same steps over and over, and gives users a form or fields that can
be used to automatically recreate a workflow to use with a new data set.
Workflow added from a template file
Workflow added
from template file
Templates are files that contain the settings used with a workflow or operational
object. Templates are saved as WinNonlin Template (*.wnlt) files.
Templates can be created to expedite future analysis for workflows and operational objects that are created to perform complex or specific functions. Templates contain the specific configuration of each operational object in a workflow,
but do not contain the original data input sources.
CAUTION: Templates do not save any mappings or links to external data sources, which
means templates lose data mappings to external sources.
What does a template do?
» Saves a workflow operational object, and all the operational objects it contains.
» Saves an individual operational object and its settings.
» Saves pointers to results data, such as a Final Parameters worksheet.
85
5
Phoenix
Getting Started Guide
How are templates different from workflows and objects?
» Templates do not store pointers to non-results data, such as imported worksheets.
» Workflows and objects contain pointers to data sets, but templates do not.
How are templates different from project files?
» Project files save all parts of the project - all the data sets, code, rule sets,
other information objects, and all workflows and operational objects.
» Templates save the setup information for workflow and operational objects,
and any pointers to an operational object’s results data.
What are the benefits of a template?
» A workflow can be saved as a template, in order to reapply an analysis on
new data. This allows a common analysis to be pre-defined for automated
performance of repetitive analyses.
» Users can perform the same operations on different data sets without having to recreate the original workflow that is saved in the template.
» Templates can be imported into a workflow, although templates do not save
any data sets or data mappings.
Note:
When a template is imported into a workflow, it is necessary to remap any
external data sources to objects in the template.
Data
When a data set is imported into Phoenix, whatever changes are made to those
data only affects the data that is imported into Phoenix. The actual file that contains the data is not affected.
This means that any changes made to data sets imported into Phoenix are not
reflected in the data set that is saved on a hard drive or other storage media. Users
can make as many changes as they want to a data set in Phoenix without changing the original data set.
What types of data does Phoenix use?
» Imported data sets such as worksheets and workbooks.
86
Phoenix Concepts
Phoenix Work Concepts
5
» User-created worksheets and workbooks.
» Worksheets that are the results of operational objects.
How is data used in Phoenix?
» The Data folder contains all the imported or created data sets that are used
in a project.
» All data sets used in a workflow are contained internally within Phoenix.
» Changes made to imported data sets do not change the original data set.
» Data must be mapped to an operational object before it can be used.
Data mapping
Data mapping is the process of associating a data set with an operational object
so that objects can use the data in an analysis or other function. Data mapping in
Phoenix is as simple as dragging a data set from the Data folder to an object’s
input, or using the Select Object dialog to select a data set.
There are two types of data mapping in Phoenix: mapping data to an object, and
mapping the variables or parameters in the data set to an object’s contexts.
Mapping to an object:
» Data sets can be mapped to the different panels in an object’s Setup list, or
they can be mapped to an object’s inputs in the Diagram tab.
Mapping to a context:
» Context mapping is the process of linking a specific column in a data set to
a specific context in an operational object, such as Time or Concentration.
» Phoenix can complete context mappings if a column header in a worksheet
matches the context name in an operational object.
» The Global Contexts and Context Association panels in the Preferences
dialog can be used to automatically associate columns in a data set with
contexts in an operational object.
– For example, Phoenix can be set to automatically map a concentration
column named conc to an operational object’s concentration context.
87
5
88
Phoenix
Getting Started Guide
Index
Numerics
M
10019, server error, 28
Main menu
Edit, 65
File, 65
Help, 65
Insert, 65
PKS, 65
Send To, 65
Window, 65
C
Create Template button, 68
Customer support, 1
licensing, 1
D
Diagram tab, 69
H
History tab, 73
I
Information tab, 72
Installing
WinNonlin, 5
L
Licensing
customer support, 1
O
Object Browser, 67
BQL Rules folder, 67
Code folder, 67
Data folder, 67
Documents folder, 68
Operational object, 68
Project, 67
Tables folder, 67
Workflow object, 68
P
Pharsight
contact information, 1
Phoenix menu bar, 65
Phoenix User Interface, 63
89
Phoenix
Getting Started Guide
R
Results tab, 71
S
Setup tab, 69
Show Dependents button, 68
Show Sources button, 68
T
Technical support, 1
licensing, 1
Toolbar
Copy, 66
Cut, 66
Delete, 66
Execute, 67
Export, 66
Freeze panes, 66
Import, 65
Insert Column, 66
Insert Row, 66
Paste, 66
Verify, 67
U
User interface, 63
V
Verification tab, 72
W
WinNonlin
installing, 5
90