1
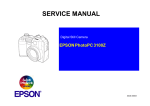
SERVICE MANUAL
Digital Still Camera
EPSON PhotoPC 3000Z
®
SEDC00001
Notice:
All rights reserved. No part of this manual may be reproduced, stored in a retrieval system, or transmitted in any form or by any means,
electronic, mechanical, photocopying, recording, or otherwise, without the prior written permission of SEIKO EPSON CORPORATION.
The contents of this manual are subject to change without notice.
All effort have been made to ensure the accuracy of the contents of this manual. However, should any errors be detected, SEIKO EPSON
would greatly appreciate being informed of them.
The above not withstanding SEIKO EPSON CORPORATION can assume no responsibility for any errors in this manual or the consequences
thereof.
EPSON is a registered trademark of SEIKO EPSON CORPORATION.
General Notice:
Other product names used herein are for identification purpose only and may be trademarks or registered trademarks of their
respective owners. EPSON disclaims any and all rights in those marks.
Copyright © 2000 SEIKO EPSON CORPORATION. Printed in Japan.
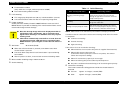
PRECAUTIONS
Precautionary notations throughout the text are categorized relative to 1) Personal injury and 2) damage to equipment.
W A R N IN G
Signals a precaution which, if ignored, could result
in serious or fatal personal injury. Great caution
should be exercised in performing procedures
preceded by a WARNING heading.
C A U T IO N
Signals a precaution which, if ignored, could result
in damage to equipment.
The precautionary measures itemized below should always be observed when performing repair/maintenance procedures.
DANGER
1. ALWAYS DISCONNECT THE PRODUCT FROM THE POWER SOURCE AND PERIPHERAL DEVICES PERFORMING ANY MAINTENANCE
OR REPAIR PROCEDURES.
2. NOWORK SHOULD BE PERFORMED ON THE UNIT BY PERSONS UNFAMILIAR WITH BASIC SAFETY MEASURES AS DICTATED FOR
ALL ELECTRONICS TECHNICIANS IN THEIR LINE OF WORK.
3. WHEN PERFORMING TESTING AS DICTATED WITHIN THIS MANUAL, DO NOT CONNECT THE UNIT TO A POWER SOURCE UNTIL
INSTRUCTED TO DO SO. WHEN THE POWER SUPPLY CABLE MUST BE CONNECTED, USE EXTREME CAUTION IN WORKING ON
POWER SUPPLY AND OTHER ELECTRONIC COMPONENTS.
WARNING
1. REPAIRS ON EPSON PRODUCT SHOULD BE PERFORMED ONLY BY AN EPSON CERTIFIED REPAIR TECHNICIAN.
2. MAKE CERTAIN THAT THE SOURCE VOLTAGES IS THE SAME AS THE RATED VOLTAGE, LISTED ON THE SERIAL NUMBER/RATING
PLATE. IF THE EPSON PRODUCT HAS A PRIMARY AC RATING DIFFERENT FROM AVAILABLE POWER SOURCE, DO NOT CONNECT IT
TO THE POWER SOURCE.
3. ALWAYS VERIFY THAT THE EPSON PRODUCT HAS BEEN DISCONNECTED FROM THE POWER SOURCE BEFORE REMOVING OR
REPLACING PRINTED CIRCUIT BOARDS AND/OR INDIVIDUAL CHIPS.
4. IN ORDER TO PROTECT SENSITIVE MICROPROCESSORS AND CIRCUITRY, USE STATIC DISCHARGE EQUIPMENT, SUCH AS ANTISTATIC WRIST STRAPS, WHEN ACCESSING INTERNAL COMPONENTS.
5. REPLACE MALFUNCTIONING COMPONENTS ONLY WITH THOSE COMPONENTS BY THE MANUFACTURE; INTRODUCTION OF
SECOND-SOURCE ICs OR OTHER NONAPPROVED COMPONENTS MAY DAMAGE THE PRODUCT AND VOID ANY APPLICABLE EPSON
WARRANTY.
PREFACE
This manual describes basic functions, theory of electrical and mechanical operations, maintenance and repair procedures of PhotoPC 3000Z. The
instructions and procedures included herein are intended for the experienced repair technicians, and close attention should be given to the
precautions on the preceding page. Chapters are organized as follows:
CHAPTER 1.
PRODUCT DESCRIPTIONS
Provides a general overview and specifications of the product.
CHAPTER 2.
OPERATING PRINCIPLES
Describes the theory of electrical and mechanical operations of the product.
CHAPTER 3.
TROUBLESHOOTING
Provides the step-by-step procedures for troubleshooting.
CHAPTER 4.
DISASSEMBLY AND ASSEMBLY
Describes the step-by-step procedures for disassembling and assembling the
product.
CHAPTER 5.
ADJUSTMENT
Provides adjusting procedures.
CHAPTER 6.
MAINTENANCE
Provides check items for maintenance.
CHAPTER 7.
APPENDIX
The appendix includes the followings;
-Circuit Board Connection Diagram
-Circuit Board Component Layout
-Circuit Diagram
-Exploded Diagram
-Siemens Star Chart
Revision Status
Revision
Date of Issue
A
April 20, 2000
Description
First Release
EPSON PhotoPC 3000Z
Revision A
Contents
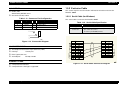
Chapter 1 Product Descriptions
1.1 Features .............................................................................................. 9
1.1.1 Exterior View ............................................................................. 10
1.2 Functional Specification ................................................................. 11
1.2.1 Image Data ................................................................................ 11
1.2.2 Optics ........................................................................................ 11
1.2.3 Shooting Mode .......................................................................... 11
1.2.4 Playback Mode .......................................................................... 14
1.2.5 Set Up Mode ............................................................................. 14
1.2.6 Video Recording Mode .............................................................. 15
1.2.7 Sound Mode .............................................................................. 15
1.2.8 Communication with PC ............................................................ 15
1.2.9 Memory ..................................................................................... 15
1.2.10 Internal Lock ............................................................................ 16
1.2.11 Miscellaneous .......................................................................... 16
1.3 Indication .......................................................................................... 17
1.3.1 Overview ................................................................................... 17
1.3.2 LCD Panel Indication ................................................................. 18
1.3.2.1 3 Digits 7 Segments -- Specification .................................. 18
1.3.2.2 ISO Sensitivity .................................................................... 19
1.3.2.3 White Balance .................................................................... 19
1.3.2.4 Battery Low Warning .......................................................... 20
1.3.2.5 Exposure Adjustment ......................................................... 20
1.3.2.6 Image Quality (Resolution) ................................................. 20
1.3.2.7 Monochrome ...................................................................... 20
1.3.2.8 Self Timer ........................................................................... 20
1.3.2.9 Flash ................................................................................... 20
1.3.3 LED Condition ........................................................................... 21
1.3.4 LCD Monitor .............................................................................. 22
1.4 Operation .......................................................................................... 23
1.4.1 Switch / Button .......................................................................... 23
1.4.1.1 Button Layout ..................................................................... 23
1.4.2 Sinking Lens Control ................................................................. 24
1.4.3 Setting Stored ............................................................................ 24
1.4.4 Processing Time .......................................................................
1.4.5 File Size and the Number of Pictures ........................................
1.4.5.1 File Size ..............................................................................
1.4.5.2 Average Number of Pictures Saved into CF Card ..............
25
25
25
25
1.5 Interface ........................................................................................... 26
1.5.1 External Connection .................................................................. 26
1.5.2 Exclusive Cable ......................................................................... 27
1.5.2.1 Serial Cable (for Windows) ................................................. 27
1.5.2.2 Mac. Serial Cable ............................................................... 28
1.5.2.3 USB Cable .......................................................................... 28
1.5.2.4 A/V Cable ........................................................................... 29
1.6 Power Supply ...................................................................................
1.6.1 Battery .......................................................................................
1.6.2 Battery Life (TBD) .....................................................................
1.6.3 Energy Saving Function ............................................................
30
30
30
30
1.7 Environment Condition ................................................................... 32
1.7.1 Performing Environment & Storing Environment ...................... 32
1.7.2 Power Supply Specification ....................................................... 32
1.7.3 Assumed Performing Environment ........................................... 32
1.8 Safety Standard & Reliability ......................................................... 33
1.8.1 EMI, Safety Standard ................................................................ 33
1.8.2 Reliability Standards ................................................................. 33
1.9 Inhibitions and Cautions ................................................................ 34
Chapter 2 Operating Principles
2.1 Board Component ........................................................................... 36
2.2 Circuit ...............................................................................................
2.2.1 CA1 Circuit Description .............................................................
2.2.1.1 Configuration ......................................................................
2.2.1.2 IC903 (CCD) .......................................................................
2.2.1.3 IC902 (H Driver) and IC904 (V Driver) ...............................
2.2.1.4 IC905 (CDS, AGC Circuit and A/D Converter) ...................
2.2.1.5 Transfer of Electric Charge by the Horizontal CCD ............
37
38
39
39
41
41
42
6
EPSON PhotoPC 3000Z
2.2.2 CA2 Circuit Description ............................................................. 43
2.2.2.1 Circuit Description .............................................................. 44
2.2.2.2 Outline of Operation ........................................................... 44
2.2.2.3 LCD Block .......................................................................... 45
2.2.2.4 Lens Drive Block ............................................................... 45
2.2.3 PW1 Circuit Description ............................................................ 46
2.2.3.1 Circuit Description .............................................................. 46
2.2.3.2 Strobe CIrcuit Description .................................................. 47
2.2.4 SY 1 Circuit Description ............................................................ 49
2.2.4.1 Configuration and Functions .............................................. 49
2.2.4.2 Internal Communication Bus .............................................. 51
2.2.4.3 Power Supply Control ......................................................... 51
Chapter 3 Troubleshooting
3.1 Overview ........................................................................................... 54
3.1.1 LED Indication on Various Conditions ....................................... 54
3.2 Troubleshooting .............................................................................. 55
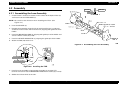
Chapter 4 Disassembly and Assembly
4.1 Overview ........................................................................................... 58
4.1.1 Caution ...................................................................................... 58
4.1.2 Tools .......................................................................................... 59
4.2 Disassembly ..................................................................................... 60
4.2.1 Cabinet Back / Front, TB2/3, ST1 Board Removal .................... 61
4.2.2 Discharging Electrolytic Capacitor ............................................. 61
4.2.3 Removal of SY1 and LCD ......................................................... 62
4.2.4 Removal of CA1/2 Board and Lens Assembly .......................... 62
4.2.5 Removal of Holder Battery and PW1 Board .............................. 63
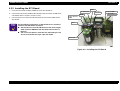
4.3 Assembly .......................................................................................... 64
4.3.1 Assembling the Lens Assembly ................................................ 64
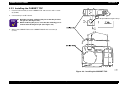
4.3.2 Installing the SY1 Board ............................................................ 65
4.3.3 Installing the CABINET TOP ..................................................... 66
4.3.4 Installing the TB1 Board ............................................................ 67
4.3.5 Installing the Board Unit ............................................................ 68
4.3.6 Installing the CABINET BACK ................................................... 69
Revision A
Chapter 5 Adjustment
5.1 Overview .......................................................................................... 71
5.1.1 Preparation for Adjustment ....................................................... 72
5.2 Adjustment ....................................................................................... 74
5.2.1 Initial Operation ......................................................................... 74
5.2.2 PW1 Board Adjustment ............................................................. 75
5.2.2.1 PW1 Board Measurement / Adjustment Points .................. 75
5.2.2.2 IC501 Oscillation Frequency Adjustment ........................... 75
5.2.2.3 5.1V (A) Voltage Adjustment .............................................. 75
5.2.2.4 13.0V (L) Voltage Adjustment ............................................ 76
5.2.3 Lens Adjustment ....................................................................... 76
5.2.4 AWB Adjustment ....................................................................... 77
5.2.5 Color Matrix Adjustment ............................................................ 78
5.2.6 CCD Defect Detect Adjustment ................................................. 79
5.2.7 LCD Panel Adjustment .............................................................. 80
5.2.7.1 LCD H AFC Adjustment ..................................................... 81
5.2.7.2 LCD Gain Adjustment ......................................................... 82
5.2.7.3 LCD RGB Offset Adjustment .............................................. 83
5.2.7.4 LCD Red Brightness Adjustment ........................................ 84
5.2.7.5 LCD Blue Brightness Adjustment ....................................... 85
5.2.8 Firmware Upload ....................................................................... 86
5.2.8.1 Firmware Version Check .................................................... 87
5.2.9 Re-installing the Expanded Functions ....................................... 87
Chapter 6 Maintenance
6.1 Overview .......................................................................................... 89
6.1.1 Check Items .............................................................................. 89
Chapter 7 Appendix
7.1 Circuit Board Connection Diagram ............................................... 91
7.2 Circuit Board Component Layout .................................................. 93
7.3 Circuit Diagram ................................................................................ 96
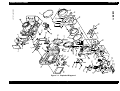
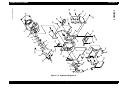
7.4 Exploded Diagram ........................................................................... 97
7.5 Siemens Star Chart ....................................................................... 100
7
CHAPTER
1
PRODUCT DESCRIPTIONS
EPSON PhotoPC 3000Z
Revision A
Continuous shooting mode, Interval shooting mode, Digital zoom,
1.1 Features
Panorama, Macro, Monochrome mode.
Video recording supported
Major features of EPSON PhotoPC 3000Z are as follows.
High Picture Quality
Using Quick Time format 3.0 or later (Motion JPEG), you can take and
play moving films.
3.34 Mega pixel color CCD
It is possible to Video Clip shooting and Playback.
Hypict output equivalent to 5 Mega pixels
Max. 25 seconds continuous shooting when taking 15 frame /sec.
Sophisticated image processing technology
(Suppose 1 frame is taken by 320 x 240 pixels)
Variety of Manual / Program shooting function will satisfy the
Synchronous sound recording and playback are available.
intention of photographers.
Appearance
Full equipment
Collapsible optical 3 times zoom lens and optical view finder
Metal body gives a high-class impression.
Hot shoe and built-in flash (Auto, Red eye reduction, Flash
High performance and compact size.
Compliant to the industry standard
compulsion, Flash prohibition, Flash slow synchro)
1.8-inch wide view LCD
DCF format
16MB Compact Flash card (Standard attachment)
DPOF file creation function.
Microphone and speaker
Exclusive software
USB, Serial I/F and AV output terminal
EPSON Photo!3
TWAIN driver, Stand alone utility, OLE server
High performance software that supports Push Function.
High-speed performance
Starting time = less than 1 second. (TBD)
EPSON File Converter
Simple playback mode reduces customers’ stress of confirming the
Covers the image on PC to EPSON DCF file.
image after taking a picture.
EPSON Photo! Print2
Abundant shooting modes
Easy print is available using Push Function. (only when USB is used.)
Full Auto shooting.
User I/F
Program shooting. (Normal, Landscape, Portrait, Sports)
GUI is further improved from PhotoPC 800 and PhotoPC 850Z.
Manual shooting (Full Auto, Aperture priority auto, Full Manual, Fixed
Easy to understand and easy to use.
settings (TBD) ).
Exposure adjustment, switching of ISO sensitivity and switching of
White Balance (Auto, Fix, Custom) are available.
Supports smooth scrolling under zoom mode.
External I/F
USB
Product Descriptions
Features
9
EPSON PhotoPC 3000Z
Serial
Revision A
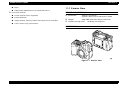
1.1.1 Exterior View
Video output (NTSC/PAL can be switched by menu.)
Print mark function
Printon and FDI service supported
Creates DPOF file.
Image selection, printing number and index print are selectable.
Can be used as easy print function.
WEIGHT AND DIMENSION
Dimension:
108mm x 89 x 65mm
(without some parts of protrusions.) (TBD)
Weight:
368g (TBD) (without batteries and strap.)
Tripod mounting holes:
JIS B7103 1/4 compliant
APPEARANCE
Figure 1-1. Exterior View
Product Descriptions
Features
10
EPSON PhotoPC 3000Z
Revision A
1.2 Functional Specification
Focus:
Auto focus / Manual focus
Focusing range:
0.2-0.5m (Macro mode)
0.5m to infinity (Normal mode)
Shutter:
Electric iris with mechanical shutter
Basic specifications of PhotoPC 3000Z is as follows.
1.2.1 Image Data
Data Type:
When flash mode is auto or compulsion:1/30 to 1/750* second
Compression: DCF (Exif)
(DCF = Design rule for camera file system)
Not compressed: DCF expansion (Tiff)
Thumbnail Image: 160 x 120 pixels
Image Size:
2544 x 1904 pixels
2544 x 952 pixels
2048 x 1936 pixels
2048 x 768 pixels
640 x 480 pixels
640 x 240 pixels
Color:
(H HyPict)
(H Panorama HyPict)
( Super Fine/ Fine)
( Panorama Super Fine/
Panorama Fine))
( Standard)
( Panorama Standard)
Full color (24bit full color)/ Monochrome
Lens:
1/2 second to 1/750* second
When flash mode is off:
1/2 -1/750* sec
*: When the aperture is open, shutter speed is up to 1/1500 sec.
C A U T IO N
When taking photos of low contrast materials or of low
illuminated materials, the automatic focusing function
may not work correctly. (Especially when flash is needed.)
When the automatic focusing function does not work
correctly (when the function fails to measure the
distance), it sets the distance at 1.5m (TBD) automatically.
1.2.3 Shooting Mode
Exposure adjustment
1.2.2 Optics
CCD:
When flash mode is slow sync.:
Polytomy photometry programmed AE
1/1.8 inch color area CCD, inter race reading,
complementary color filter
Total pixels: 3.34 Mega pixels (2140 x 1560)
Effective pixels: 3.24 Mega pixels (2088 x 1550)
(Aperture and shutter speed are variable.)
Spot measuring programmed AE
(Aperture and shutter speed are variable.)
Collapsible 3 times zoom lens
f=7-21mm
(equivalent to a 34-102mm lens on a 35 mm camera)
Brightness: F2.0 (W) - F2.5 (T)
7 elements in 9 groups (2 aspheric surface lenses)
*How to control collapsible lens is described later.
Aperture:
F2.0, F2.3, F2.8, F4.0, F5.6, F8.0 (6 apertures in total)
Viewfinder:
Real-image optical finder (view range about 83%)
AF target mark indicates a targeting are for focusing.
Visibility adjustment.
No macro frame.
Product Descriptions
Manual adjustment available
(-2EV to +2EV, 0.5EV/0.2EV step)
Fixed setting mode available
(Aperture, shutter speed, sensitivity, W/B can be fixed.)
Sensitivity:
ISO 100 (TBD) equivalent (at Normal mode)
ISO 200/400 equivalent (TBD) High sensitivity shooting mode
available
White balance
TTL auto white balance
Functional Specification
11
EPSON PhotoPC 3000Z
Revision A
Fixed mode available
Table 1-1. Quick Shooting
(only under the sun light, color temperature: 5200K)
After shooting indication
User record setting mode available
LCD shooting
TTL image play (Playback rate 1/30 sec, in dark condition: 1/10 sec)
Indicating confirming image
(2 sec)
It indicates freeze image for 2 sec. and
performs CF transfer. Then it indicates
through image which means the camera is
ready to take pictures.
Recording
After recording, it performs CF transfer
along with audio files.
Shifting to simple playback mode
After performing CF transfer, the camera
returns to simple playback display. During
the CF transfer, it indicates freeze image.
A visual field covers more than 98% of a capturing image field.
Finder shooting
Unlike previous models, PhotoPC 3000Z indicates menu on LCD if
MENU button is pressed at shooting. This new function allows user to
check and change current settings.
C A U T IO N
Note the through image will not be displayed on LCD (it
will be blue back.) and thereby, macro, panorama and
digital zoom shooting is not available since they requires
framing check.
LCD will be automatically turned off 15 seconds after the
last button operation. LCD will also be turned off when
MENU button is pressed again or when the half shutter is
used.
Self timer:
10 seconds (fixed)
When the self timer button is pressed, count down starts when
shutter button is pressed.
The count down stops wen the self timer button is pressed during
count down.
After the picture is taken, it returns back to normal shooting mode.
Macro mode: shooting range = 20cm to 50 cm.
Quick shooting
Transferring method
NOTE: When there is no restrictions, CF transfer is always performed.
Conditions that the camera does not become shooting mode after CF transfer
is completed.
Continuous shooting
Interval shooting
Hypict shooting
If the camera is set to record after shooting;
When batteries are low (when the power is supplied from batteries.)
When buffer memory becomes full.
(If the buffer memory has space even for one photo, the camera
allows the next picture taking.)
When CF card memory capacity is not enough.
When transferring the pictures taken by fixed exposure.
Any other conditions that transferring to CF should be given priority.
Continuous shooting
The camera continues taking pictures while the shutter button is
pressed.
Product Descriptions
Full-size:
approx. 1.5 images / second (TBD)
VGA:
approx. 2 images / second (TBD)
Functional Specification
12
EPSON PhotoPC 3000Z
Revision A
Sports
Continuous shooting is available up to TBD.
Flash is set Off forcibly.
Digital Zoom
Digital x2 zoom function
It stores images, adjusting the image quality to the image size of each
recording mode.
It means as follows;
:
640 x480
,,H (TIFF): 2048 x 1536
H:
2544 x 1904
Panorama
:
640 x 240
,,H (TIFF): 2048 x 768
H:
2544 x 952
Interval shooting
Shooting minimum interval; 10 seconds
Exposure adjustment (0.5EV step), ISO sensitivity and W/B selection
(At Hypict and recording setting; 20 seconds)
are available
Shooting maximum interval; 24 hours
Shooting setting interval; Setting available by 1 second in increments
Full auto shooting
The camera decides various setting automatically. User only can
change strobe setting and select pictures.
100 (TBD)
White balance:
AUTO
Exposure adjustment is not available
Program shooting
The following 4 program modes are selectable.
Normal
Normal program
Polytomy photometry
Product Descriptions
This mode is suitable for taking a human being.
It is programmed to take a picture with an aperture open so that the
back ground will be blurred. Therefore, a warning will be indicated
when it will be over exposed.
Spot photometry
Reduce sharpness of image
Changes γ. (TBD)
This mode is suitable for taking landscape.
This is programmed to give priority to aperture (narrows the aperture
as much as possible) so that the depth of the object will be deepen.
Polytomy photometry
Increase sharpness of the image.
Available at ,,,H (TIFF),H
ISO sensitivity:
Portrait
Landscape
Monochrome
Polytomy photometry
This mode is for taking a rapidly-moving object. This mode is suitable
for sports scene.
High speed shutter is used along with increased sensitivity.
Polytomy photometry
Manual shooting
Auto exposure / aperture priority / manual exposure / fixed setting
(TBD) is selectable.
Auto exposure
Exposure adjustment (0.2EV step), Photometry method,
ISO sensitivity, W/B setting and Focus (AF or manual) are selectable.
Aperture priority program AE
Aperture, Exposure adjustment, Photometry method, ISO sensitivity,
W/B setting and Focus (AF or manual) are selectable.
Manual exposure
Aperture, Shutter speed, Photometry, ISO sensitivity, W/B setting and
Focus are selectable.
In any modes, if the proper exposure cannot be set, EV warning will
be indicated.
Functional Specification
13
EPSON PhotoPC 3000Z
Revision A
Simple playback function
Choice of shutter speed (TBD)
4, 1/2, 1/3, 1/4, 1/4.5, 1/5, 1/5.5, 1/6, 1/6.5, 1/7, 1/7.5, 1/8, 1/9, 1/10, 1/11,
1/12, 1/14, 1/15, 1/16, 1/17, 1/19, 1/21, 1/23, 1/25, 1/27, 1/30, 1/32, 1/35,
1/39, 1/42, 1/45, 1/50, 1/55, 1/60, 1/65, 1/70, 1/80, 1/85, 1/90, 1/100,
1/110, 1/120, 1/130, 1/140, 1/150, 1/170, 1/180, 1/200, 1/125, 1/230,
1/250, 1/280, 1/300, 1/330, 1/360, 1/400, 1/430, 1/470, 1/500, 1/550,
1/600, 1/670, 1/750, 1/800
Choice of aperture
Video recording
F2.0, F2.3, F2.8, F4.0, F5.6, F8.0
Selection of video recording (when there are many), playback,
synchronous sound replay, deletion of video recordings are available.
(Refer to “Video Recording Mode” on page 15)
1.2.4 Playback Mode
Normal replay
1.2.5 Set Up Mode
Picture image displayed by switching.
Language selection
Split display
No split display (normal), 4 images, 9 images are selectable.
Magnification display
Japanese, English, French, German, Italian, Portuguese, Spanish,
Chinese
Date setting
Magnify an image x2. Smooth scrolling available.
01/01/2000 00:00 (default)
(Japan and China Y.M.D, others M.D.Y)
Deletion
1 image deletion, selected images deletion and all images deletion are
selectable.
Lock
Shoot mode setting
Full auto, Program and Manual are selectable.
Color / Monochrome
Selected images can be locked.
Locked images cannot be deleted until lock is cancelled.
Color shooting / Monochrome shooting are available
Date setting
Detailed information
Image No., Date, Shutter speed, Aperture, Exposure adjustment,
Flash, White balance, Photometry, Macro, Digital zoom and ISO
sensitivity are indicated.
Slide show
Image selection, image rotation, image display interval selection
(3 sec, 5 sec, shuffle, manual) and synchronous sound replay are
available.
Sound replay/ After-recording
Playback: can be stopped halfway.
After-recording: max. 10 sec is possible. (can be stopped halfway)
Product Descriptions
When the camera is on the shooting mode, it can be turned to the
playback mode temporarily. This function allows user to check the
image after shooting without stress.
Only the following functions are available for simple playback.
Normal replay, Split display, Magnification display, one image
deletion and sound replay.
01/01/2000 00:00
(Japan and China Y.M.D, others M.D.Y)
Shoot mode setting
Full auto shooting, program shooting, manual shooting are
selectable.
Camera setting
Power save function, Brightness of LCD monitor setting
Speaker volume (Hi / Low)
Beep sound setting (Always / Shutter / Never)
Functional Specification
14
EPSON PhotoPC 3000Z
Revision A
Unlike previous models, PhotoPC 3000Z requires to set the dial switch
Memory setting
Compact Flash memory Card format, DCF directory setting, expanded
functions Add / Delete
Video signal selection
to “Operation”. (Serial/ USB)
Sunk control of the lens from PC and shooting from PC is possible at
“Operation” mode.
NTSC / PAL
Communication command
TBD
1.2.6 Video Recording Mode
Serial communication speed
Recording
See “4-18interfaceaa”. TBD
Maximum 25 seconds continuous shooting
When the video recording is enabled, by pressing the shutter button,
1.2.9 Memory
Internal RAM Memory:
16 MB
Pressing shutter during video recording will end recording.
Internal ROM memory:
2 MB (Program Only)
Simultaneous voice recording
Image Memory:
the shooting will be started.
Zoom operation available during video recording. (digital zoom is not
available.)
Format: motion JPEG for QTM. PAL is 12.5 frame/ sec.
Playback
Video and sound playback are available
Compact Flash Memory Card
CF card access: up to 200MB (TBD)
PC-DOS format: 512 B/Sector
16bit FAT (Up to 64 MB) (TBD)
1.2.7 Sound Mode
Recording
Sound recording and after recording are available.
Recording time: Max. 10 sec.
Cut off amid of sound recording is available
Playback
Sound playback is available.
Volume can be adjusted. (High/ Low)
1.2.8 Communication with PC
Dial switch position at communicating with PC
Product Descriptions
Functional Specification
15
EPSON PhotoPC 3000Z
Revision A
1.2.10 Internal Lock
Internal clock
Internal clock is built-in
Record the shooting date and time on the image
(Month / Day / Year, Hour / Minute / Second)
Date is held by the super-capacitor at the battery exchange.
-When super-capacitor is charged full: date is held for about 2 hours.
-To charge super-capacitor full, at least 4 hours required by battery
connection or AC adaptor connection.
When charging the camera, you do not have to turn the camera on.
(TBD)
1.2.11 Miscellaneous
Lens cap
Removed and installed manually.
NOTE: With lens cap on, you cannot turn on the camera on the
shooting mode. Lens cap prevent the lens from veering out.
Playback and other operations are possible with the lens cover
on.
Internal flash
Auto (pre-flash method auto tone adjustment) / Off / Forced flash / Red
eye reduction / Slow synchro (for night view. user can select either
trailing or leading flash.)
Effective flash range
Normal mode: 0.5 - 2.4m
Macro mode: 0.2 - 0.5m
C A U T IO N
It causes over-exposure if you take photos with strobe for a
subject within 0.2m on macro mode.
Product Descriptions
Functional Specification
16
EPSON PhotoPC 3000Z
Revision A
Battery warning mark
1.3 Indication
View Finder (VF) side lamp
1.3.1 Overview
Green signal (On / Blink / Off)
LCD monitor
Red signal (On / Blink / Off)
1.8 type low temperature poly-silicon TFT color LCD
See “LCD Panel Indication” below.
Wide view type
1.1 M pixels: 512 x 218 pixels
A visual field covers more than 98% of the capturing image field.
Displaying taken images at the playback mode: 100% of an image
field is displayed.
Beep sound / Shutter sound
Always / Only for shooting / None are selectable
Self-timer
Front side red LED indication
-First 8 seconds: slow blinking
-Last 2 seconds: high speed blinking
Control LCD panel
Monochrome LCD
Indicates the numbers of images more can be taken. (3 digits)
Indicates aperture at half-shutter
(only for program / manual mode)
Indicates shutter speed at half-shutter
(only for program / manual mode)
Indicates exposure adjustment
Indicates resolution of image (including Monochrome and HyPict)
White balance
Sensitivity
Self timer mark
Flash mode
Product Descriptions
Indication
17
EPSON PhotoPC 3000Z
Revision A
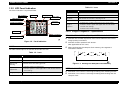
1.3.2 LCD Panel Indication
Table 1-2. Icons
Icon
The Panel indication is explained below.
ISO sensitivity
Image quality
Flash
Hyper / TIFF
White Balance
Hyper / TIFF
Hypict mode or TIFF
Monochrome
Indicated at the monochrome mode.
Self timer
Indicated at the self timer shooting mode.
Flash
Indicates the strobe setting.
3 digits 7
segments
• Indicates the number of pictures more can be taken.
• Indicates shutter speed. (Not applicable at half shutter
and full auto setting.)
• Indicates other mode settings.
Self timer
Battery low warning
Monochrome
Explanation
1.3.2.1 3 Digits 7 Segments -- Specification
3 digits 7 segments
Exposure adjustment
STILL IMAGE SHOOTING (VF, LCD, CONTINUOUS SHOOTING)
Indicates the number of pictures more can be taken on the current
image quality (resolution).
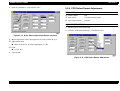
Figure 1-2. Panel Indication
Indicates shutter speed on half-shutter.
(Not applicable for full auto.)
ICONS
When writing into the compact flash memory, the segment is
indicated as follows.
The table below explains the function of the icons on LCD.
Table 1-2. Icons
Icon
Explanation
ISO sensitivity
Indicates the current level of ISO sensitivity.
White balance
Indicate the current level of white balance.
Battery low
warning
Indicated when the battery gets low.
Exposure
adjustment
• Indicates exposure adjustment.
• Indicates aperture. (Not applicable at half shutter and full
auto setting.)
Image quality
Indicates image quality (resolution).
Figure 1-3. Writing into Compact Flash Memory
INTERVAL SHOOTING
Indication is the same as still image shooting until shooting started.
Indication is the same as still image shooting while writing into the
compact flash.
Product Descriptions
Indication
18
EPSON PhotoPC 3000Z
Revision A
The figure below is the indication on the standby mode at the interval
shooting.
Figure 1-6. Recording
Figure 1-4. Interval Shooting Indication
SET UP
Indication is as shown below.
VIDEO RECORDING
Normal
Indicates the number of video recordings more can be recorded.
(25 seconds is counted as 1 film.)
Figure 1-7. Set Up
During video recording
Indicates how long you can record more. (seconds)
While writing into the compact flash memory.
Indication is the same as still image shooting.
1.3.2.2 ISO Sensitivity
The following is the ISO sensitivity indication.
Standard
PLAYBACK, EXPANSION MODE
Fine
Indication is as shown below.
Super fine
Figure 1-5. Playback and Expansion Mode
Figure 1-8. ISO Sensitivity
COMMUNICATING WITH PC
1.3.2.3 White Balance
Like EPSON previous models, scrolls.
STILL IMAGE SHOOTING / VIDEO RECORDING
RECORDING
Indication is as shown below.
White Balance = Auto
Indicates AUTO
White Balance = Custom
Indicates CUST
Product Descriptions
Indication
19
EPSON PhotoPC 3000Z
Revision A
White Balance = Fixed
NOTE: When the mode is continuous shooting, the image quality
setting skips H.
No indication.
NOTE: On the video recording, there is no indication of image quality.
OTHER SITUATIONS
1.3.2.7 Monochrome
No indication.
Monochrome icon is indicated only on the monochrome shooting mode.
1.3.2.4 Battery Low Warning
1.3.2.8 Self Timer
Battery is enough
Press the self timer button on the shooting mode to set the self timer.
No indication
Battery is low
Self timer icon will be indicated.
Battery low icon appears.
Press the shutter button.
Battery is almost out
The self timer icon will be blinking for 10 seconds.
Battery low icon blinks and then the camera will be shut down.
Other modes (not shooting mode)
No indication
1.3.2.5 Exposure Adjustment
Press the self timer button while the self timer icon is on. Self timer
icon will be off.
FULL AUTO SHOOTING
No indication.
1.3.2.9 Flash
PROGRAM / MANUAL SHOOTING
Press the flash button on the shooting mode. The icon will be switched as
shown below.
Indicates exposure adjustment value.
Full Auto Shooting
Only at half shutter, indicates aperture.
OTHER SITUATIONS
Figure 1-9. Flash Indication (Full Auto)
No indication.
Program / Manual Shooting
1.3.2.6 Image Quality (Resolution)
Image quality changes as shown below each time the image quality button is
pressed.
Figure 1-10. Flash Indication (Program / Manual)
→ →H→→
Product Descriptions
Indication
20
EPSON PhotoPC 3000Z
Continuous / Video Shooting
Flash cannot be used. The icon below is indicated.
Revision A
1.3.3 LED Condition
See the table below for the LED condition.
Table 1-3. LED Condition
Figure 1-11. Flash Forbidden Icon
Other situations
Shooting LED Shooting LED
Red
Green
Ready to shoot
ON
Focusing
Blinking
(0.2 sec)
Focus lock
ON
No indication.
Product Descriptions
CF is full
Blinking
(0.5 sec)
Battery Low
Blinking
(1.0 sec)
Error
ON
Self timer
ON
Video shooting
Blinking
(1.0 sec)
Power on
(standby)
Blinking
(0.2 sec)
With lens cap on
Blinking
(0.2 sec)
CF is not
inserted.
Blinking
(0.2 sec)
Indication
Front LED
First 8 sec: low speed blinking
(0.5 sec)
Last 2 sec: high speed blinking
(0.2 sec)
21
EPSON PhotoPC 3000Z
Revision A
1.3.4 LCD Monitor
Table 1-4. Color Frame
LCD monitor has the color frames indication according to respective functions
and these frames are indicated only on the LCD shooting mode and on the
special continuous shooting mode.
Color Frame
Mode
Note
COntinuous
Shooting
NOTE: The priority of the color frame indication is as follows.
Monochrome (Blue) < Macro (Green) < Digital zoom (Yellow) <
Continuous Shooting (Red) < Video (White)
Video
Table 1-4. Color Frame
Color Frame
Mode
Note
Standard
Macro
Monochrome
“MONOCHORME” is
indicated for seconds.
Digital zoom
(x2)
“DIGITAL ZOOM” is
indicated for seconds.
Panorama
Product Descriptions
“MACRO” is indicated for
seconds.
“PANORAMA” is indicated
for seconds.
Indication
22
EPSON PhotoPC 3000Z
Revision A
1.4 Operation
Table 1-5. Switch / Button List
Switch / Button
Indication
1 button
No indication
Select menu
2 button
No indication
Select menu
3 button
No indication
Select menu
4 button
No indication
Select menu
A button
No indication
Select menu
B button
No indication
Select menu
C button
No indication
Select menu
F button
MENU
ON/OFF
1.4.1 Switch / Button
Table 1-5. Switch / Button List
Switch / Button
Indication
Meaning / Functions
Menu
button
(Back)
Special shooting mode
LCD shooting mode
Meaning / Functions
Menu indication ON /OFF
VF shooting mode
Dial switch
1.4.1.1 Button Layout
Playback mode
Image quality button
Shutter switch
Expansion / PC connection mode
Flash button
Set up
Shutter switch
Zoom switch
Visibility adjustment dial
Power SW
Image quality
button (resolution)
Control
button
(Top)
No indication
Set up mode
Shutter
W,T
Zoom selection
No indication
Adjust visibility
POWER
Power ON / OFF
Self timer button
///H switching
Flash button
Flash function switching
Self timer button
Self timer
Zoom switch
Power switch
Dial switch
1 button
2 button
3 button
A button
B button
C button
4 button
F button
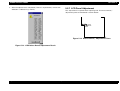
Figure 1-12. Button Layout
Product Descriptions
Operation
23
EPSON PhotoPC 3000Z
Revision A
1.4.2 Sinking Lens Control
Values on manual
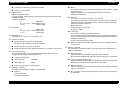
CONDITIONS TO MOVE THE LENS FORWARD
Slide show setting
When the camera is set ready to take picture with the lens sunk.
Date setting
Shutter speed / Aperture / Focus
When date is cleared: indicates date setting menu when LCD is on.
(When powering ON the camera or when mode is switched by dial
switch.)
W/B custom setting
When the camera received the command from the PC to move the
Program
lens forward.
Normal / Sports / Portrait / Landscape
H resolution
CONDITIONS TO SINK THE LENS
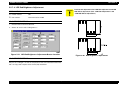
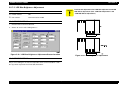
Rank C
When powering OFF the camera with the lens craned.
When the camera received the command from the PC to sink the lens.
Stored until the camera is turned off. Not including “off” of energy
saving mode.
Panorama / Macro / Digital zoom
1.4.3 Setting Stored
W/B setting
You can store setting in the camera and these data are classified into three
levels: A to C.
AUTO / Fixed / Custom
Exposure adjustment
Rank A
Data are stored in the flash ROM and remained until complete reset.
Emulation setting
Including NTSC/ PAL.
When the emulation setting is cleared:
Indicates the emulation setting menu when LCD is on.
Rank B
Data are stored until the back-up in the super capacitor becomes
invalid.
Resolution switching
Flash switching
Program / Manual
Various settings on the SETUP mode
Not including the setting command.
Photometry method
Product Descriptions
Operation
24
EPSON PhotoPC 3000Z
Revision A
1.4.4 Processing Time
1.4.5.2 Average Number of Pictures Saved into CF Card
Table 1-8. Number of Pictures Saved in CF Card (Reference)
Table 1-6. Processing Time (TBD)
Quality setting
Time required for
writing into CF
memory
Minimum time
required to be
ready to take
another picture.
Quality setting
Playback
processing time
Standard
Fine
Super fine
TIFFH
HyperH
--
NOTE: Assumption: Super fine: 1MB / Fine: 500KB / Standard: 100KB
Strobe charging time is not included in the figures above.
1.4.5 File Size and the Number of Pictures
16M CF card
Standard (640 x 480)
[TBD]
Fine (2048 x 1536)
[TBD]
Super Fine (2048 x 1536)
[TBD]
Hypict (2544 x 1904)
[TBD]
TIFF (2048 x 1536)
[TBD]
NOTE: The figures above are estimated on our measurement
conditions and assumed no other files in CF card. If CF card
stores other files, the number of pictures saved in CF card will
be smaller.
A captured image is stored with JPEG format and the image
file volume varies according to the subject. The number of
pictures saved in CF card may be smaller accordingly.
1.4.5.1 File Size
Table 1-7. File Size (Reference Value)*
Quality setting
File size
Standard (640 x 480)
about 100KB [TBD]
Fine (2048 x 1536)
about 500KB [TBD]
Super Fine (2048 x 1536)
about 1MBKB [TBD]
Hypict (2544 x 1904)
about 1.5MB [TBD]
TIFF (2048 x 1536)
9MB
NOTE: The image data is compressed with JPEG format and the file
volume varies according to the subject. The table above
shows the average value.
Product Descriptions
Operation
25
EPSON PhotoPC 3000Z
Revision A
1.5 Interface
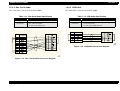
Table 1-9. Connector Pin Configuration
Pin #
Signal
I/O
1.5.1 External Connection
1
VDD3
O
Used by conversion cable for DirectPrint.
Max. 20 mA
The external connectors for PhotoPC 3000Z are as follows.
2
HSKO
O
RTS
Serial communication connector
3
HSKI
I
CTS
USB connector
4
GPI
I
Mac. serial clock input
A/V output
5
TXD-
O
Differential transmission signal output minus side
RS-232C TXD
AC adapter
6
TXD+
O
Differential transmission signal output plus side
Compact Flash
7
RXD-
I
Differential reception signal output minus side
RS-232C RXD
8
RXD+
I
Differential transmission signal output plus side
9
DINCNT
I
Cable connection detector terminal. Cable
detection at “L”.
10
GND
-
GND
SHELL
-
-
SHELL
SERIAL COMMUNICATION INTERFACE
Overview
This is the exclusive serial interface that connects the camera with
Windows / Mac. or printer. It is compatible with RS232C and exclusive
cable is used for connection.
Explanation
Specification
This is not open for users.
USB INTERFACE
Asynchronous
Application:
Standards:
Bit length:
Parity check:
Transfer rate:
For image transfer or camera control
RS-232C TXD, RXD, GND (3 lines)
8 bit
Non parity
19200 / 38400 / 57600 / 115200 / 230400 bps
Table 1-10. Connector Pin Configuration
Synchronous
Application:
Standards:
Bit length:
Parity check:
Transfer rate:
For DirectPrint
RS-422, 423
8 bit
Non parity
230 kbps to 1.8 Mbps
Pin #
Signal
I/O
1
VDD
I
2
D-
I/O
Explanation
Power
Data signal
3
D+
I/O
4
GND
-
GND
Data signal
SHELL
-
-
SHELL
NOTE: The connector is the exclusive small connector made by
MITSUMI, which uses exclusive USB cable.
Connector Pin Configuration
Product Descriptions
Interface
26
EPSON PhotoPC 3000Z
Revision A
A/V OUTPUT
1.5.2 Exclusive Cable
NTSC / PAL
This section explains the connection information of cables exclusive for
PhotoPC 3000Z.
Switched by SETUP menu
Use exclusive A/V cable
1.5.2.1 Serial Cable (for Windows)
Table 1-11. Connector Pin Configuration
Pin #
Signal
I/O
1
VOUT
O
Video output
2
AOUT
O
Sound output
3
GND
--
This serial cable is exclusive for PhotoPC 3000Z.
Explanation
Table 1-12. Serial Cable Specification
Specification
Length
GND
Connector
1.5mm
• Camera side: manufactured by HIROSE, 10
pin connector (male)
• PC side: 9 pin DSUB (female)
Camera
Figure 1-13. Connection Diagram
AC ADAPTER INPUT
AC adapter exclusive DC input terminal (7.0V)
Polarity:
Center plus
EIAJ Type2 φ4.4 mm
AC Adapter:
EU-40, 7V2.0A
COMPACT FLASH
CompactFlash Interface
Figure 1-14. Serial Cable Connection Diagram
CompactFlash Card Type1 supported
Product Descriptions
Interface
27
EPSON PhotoPC 3000Z
Revision A
1.5.2.2 Mac. Serial Cable
1.5.2.3 USB Cable
This serial cable is exclusive for PhotoPC 3000Z.
This USB cable is exclusive for PhotoPC 3000Z.
Table 1-13. Mac.Serial Cable Specification
Table 1-14. USB Cable Specification
Specification
Length
Connector
Specification
1.5mm
• Camera side: manufactured by HIROSE, 10
pin connector (male)
• PC side: 8 pin DIN (male)
Length
Connector
1.5mm
• Camera side: manufactured by HIROSE, 10 pin
connector (male)
• PC side: 9 pin DSUB (female)
Camera
Camera
Figure 1-16. USB Cable Connection Diagram
Figure 1-15. Mac. Serial Cable Connection Diagram
Product Descriptions
Interface
28
EPSON PhotoPC 3000Z
Revision A
1.5.2.4 A/V Cable
Table 1-15. A/V Cable Specification
Specification
Length
Connector
1.5mm
• Camera side: φ3.5, Stereo plug
• Video side: PCA plug (video: yellow, sound: white)
Camera
Sound
Figure 1-17. A/V Cable Connection Diagram
Product Descriptions
Interface
29
EPSON PhotoPC 3000Z
Revision A
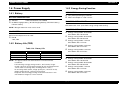
1.6 Power Supply
1.6.3 Energy Saving Function
1.6.1 Battery
APPLICATION
Only when powering by batteries
BATTERY SPECIFICATION
AA Size:
When AC adapter is used: 15 min.
4 AA size batteries are needed
Ni-HM charging battery / Ni-Cd charging battery / Alkaline battery /
Lithium battery
SHOOTING WITH LCD OFF
Shut down after 1min. apart from energy saving mode setting.
NOTE: Mangan batteries must not be used.
SHOOTING WITH LCD ON
AC ADAPTER
Energy saving mode: 10 seconds
Shut down after 10 seconds
Exclusive AC adapter must be used.
Energy saving mode: 30 seconds
EU-40
Shut down after 30 seconds
7.0V, 2.0A
Energy saving mode: 1 minute
Shut down after 1 minute
1.6.2 Battery Life (TBD)
Energy saving mode: 3 minutes
Shut down after 3 minutes
Table 1-16. Battery Life
Alkaline Battery
Ni-HM Battery (1500mAH)
Energy saving mode: 5 minutes
Shut down after 5 minutes
LCD Shooting
VF Shooting
PLAYBACK MODE
Playback
Energy saving mode: 10 seconds
NOTE: The figures above are estimated on our measurement
conditions.
LCD shooting: energy saving mode 1, 50% strobe, image
quality, when CF is full, delete images by PC, shooting interval
1 min. (after recovering LCD, shooting 10 sec. later)
VF shooting: 50% strobe, image quality , when CF is full,
delete images by PC, continuous shooting
Playback: set the energy saving mode for more than 1 min.
and switches images at 1 min. interval.
Product Descriptions
Shut down after 10 seconds
Energy saving mode: 30 seconds
Shut down after 30 seconds
Energy saving mode: 1 minute
Shut down after 1 minute
Energy saving mode: 3 minutes
Shut down after 3 minutes
Power Supply
30
EPSON PhotoPC 3000Z
Revision A
Energy saving mode: 5 minutes
Shut down after 5 minutes
SLIDE SHOW
Always shut down by after one-round of slide show.
When all image is selected, it does not shut down until the battery
runs out.
RECOVER
When shooting pictures:
Recover by half shutter or re-powering the camera.
When not shooting pictures:
Recover with pressing 7 button on the back or re-powering the
camera.
Product Descriptions
Power Supply
31
EPSON PhotoPC 3000Z
1.7 Environment Condition
Revision A
1.7.3 Assumed Performing Environment
Environment
1.7.1 Performing Environment & Storing
Environment
Home, Office, Outside
Water resistance
Not supported
TEMPERATURE
Performing
5 to 35 °C
Storing
-20 to 60 °C
HUMIDITY
Performing
30 to 80% (without condensation)
Storing
10 to 80% (without condensation)
SHOCK RESISTANCE
Storing
G (TBD)
1.7.2 Power Supply Specification
DC INPUT VOLTAGE (AC ADAPTER)
Min:
Min. DC V (TBD)
Max:
Max. DC V (TBD)
MAXIMUM DC INPUT VOLTAGE
Max:
Max. DC V (TBD)
Product Descriptions
Environment Condition
32
EPSON PhotoPC 3000Z
1.8 Safety Standard & Reliability
Revision A
1.8.2 Reliability Standards
1.8.1 EMI, Safety Standard
USA
FCC part15 subpart B class B
Canada
CSA C108.8 class B
Europe
EMC Directive 89 / 336 / EEC
EN55022 Class B
(CE - marking)
EN61000-3-2 (when AC adapter is used.)
EN61000-3-3 (when AC adapter is used.)
EN50082-1
IEC801-2
IEC801-3
IEC801-4
Europe
EN55022 (CISPR Pub.22) class B
Australia
AS/NZS 3548 class B
Taiwan
EMI: CNS13438-C6357
Japan
VCCI Class B
Korea
The rule of Electromagnetic wave in Korea
Product Descriptions
Safety Standard & Reliability
33
EPSON PhotoPC 3000Z
Revision A
1.9 Inhibitions and Cautions
Never see the sun through the view finder
Never use any AC adapters other than approved one.
Never use any batteries other than approved one.
Never insert batteries with incorrect polarity.
Remove batteries, if the camera is not used for a long time.
Product Descriptions
Inhibitions and Cautions
34
CHAPTER
2
OPERATING PRINCIPLES
EPSON PhotoPC 3000Z
Revision A
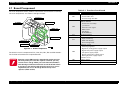
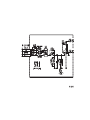
2.1 Board Component
Table 2-1. Function of each board
The main component of this product is the electric circuit and lens assembly.
The main components are shown in the figure below.
Board
CA1
CA2
Composed of RISC-CPU, ASIC, 16M bit Flash-ROM,
64M bit SDRAM.
• Control lens assembly.
• γ correction.
• Generate color signal
• USB control
• LCD driver
• Audio AMP etc.
SY1 Board
ST1 Board
TB1 Board
CA2 Board
ST1
Hot shoe terminal
SY1
8 bit micro processor
• Input control key
• Mode LCD display
• Clock management
PW1
Electric circuit
• Switching regulator
• Digital 5V, analog power supply output
• Digital 2.5V power supply output
• LCD power supply output
• Digital 3.35V power supply output
• Back light power supply output
Strobe circuit
TB1
Battery contact
TB3
Lens cover sensor
CA1 Board
PW1 Board
Lens Assembly
TB3 Board
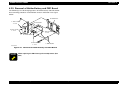
Figure 2-1. Main Component
The electric circuit is composed of CA1, CA2, SY1, TB1, TB3 and PW1 boards.
The function of each board is explained below.
W A R N IN G
Capacitor on the PW1 board is charged with strobe emission
electricity and if you touch the capacitor terminal, you may
receive electric charge. When you touch the board, handle it
with the edge of the board and never touch the board surface.
If you have to touch the board surface because of its service
requirement, be sure to discharge the electricity of the
capacitor. (Refer to Ch4.)
Operating Principles
Board Component
Functions
Inter line CCD image sensor
• Control CCD clock.
• Convert image data A/D
36
EPSON PhotoPC 3000Z
Revision A
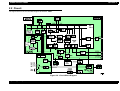
2.2 Circuit
The figure below is the circuit block diagram of PhotoPC 3000Z.
16Mbit
16Mbit
64Mbit
SDRAM1
SDRAM1
SDRAM1
16Mbit
Flash
COMPACT
FLASH
74LV273
RISC
CPU
Driver
JPEG
Controller
SDRAM
Controller
SRAM
Signal
Controller
Processor
AF/AE.AWB
JPEG
Integrator
UART
10bitA/D
CDS AGC
Artificial
Frame
SG/TG
Encoder
8bit
D/A
CLK
GEN
Driver
8bit
D/A
8bit
D/A
8bit
A/D
PIO
2088×1550
IS-CCD
Y-C
MIX
AUDIO
AMP
LCD
Driver
Video
Driver
Electoronic
Flash
LCD
Display
2
1
3
DC-DC
Converter
8bit
CPU
+
−
Figure 2-2. Circuit Block Diagram
Operating Principles
Circuit
37
EPSON PhotoPC 3000Z
Revision A
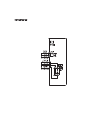
2.2.1 CA1 Circuit Description
The figure below is the CA1 circuit block diagram.
Figure 2-3. CA1 Circuit Block Diagram
Operating Principles
Circuit
38
EPSON PhotoPC 3000Z
Revision A
2.2.1.1 Configuration
The CA1 board is mainly composed of the following ICs.
IC903 (ICX252AK-B)
: CCD imager
IC902 (74ACT04MTC)
: H driver
IC904 (CXD3400N)
: V driver
IC905 (AD9842JST)
: CDS, AGC, A/D converter
10
9
8
7
6
5
4
3
2
1
11
12
13
14
15
16
17
18
19
20
2.2.1.2 IC903 (CCD)
Structure
Interline type CCD image sensor
Optical size
: 1/108 type
Effective pixels
: 2088 (H) X 1550 (V)
Pixels in total
: 2140 (H) X 1560 (V)
Optical black
Photo sensor
Horizontal (H) direction:
Vertical (V) direction:
Front 4 pixels, Rear 48 pixels
Front 8 pixels, Rear 2 pixels
Figure 2-5. CCD Block Diagram
Dummy bit number
Horizontal: 28, Vertical:1 (only even number field)
pin
pin
Figure 2-4. Optical Black Arrangement
Operating Principles
Circuit
39
EPSON PhotoPC 3000Z
Revision A
Table 2-2. CCD Pins Explanation
Pin No.
Symbol
Pin Description
Waveform
Voltage
1
V φ4
Vertical resister transfer clock
-7.5V, 0V
2, 3
V φ3A, V φ3B
Vertical resister transfer clock
-7.5V, 0V, 15V
4
V φ2
Vertical resister transfer clock
-7.5V, 0V
5, 6
V φ1A, V φ1B
Vertical resister transfer clock
-7.5V, 0V, 15V
9, 15
GND
GND
10
VOUT
Signal output
11
VDD
Circuit power supply
12
φ RG
Reset gate clock
13, 20
H φ2
Horizontal resister transfer clock
0V, 5V
14, 19
H φ1
Horizontal resister transfer clock
0V, 5V
16
φ SUB
Substrate clock
DC
17
CSUB
Substrate bias
DC
18
VL
Protection transistor bias
DC
GND
0V
-
Approx. 10V
DC
15V
12.5V, 16V
Approx. 8V
Approx. 8V
(Different in each CCD)
NOTE: “---” when sensor read-out
Operating Principles
Circuit
40
EPSON PhotoPC 3000Z
Revision A
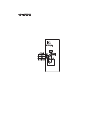
2.2.1.3 IC902 (H Driver) and IC904 (V Driver)
1
An H driver (IC902) and V driver (IC904) are necessary in order to generate the
clocks (vertical transfer clock, horizontal transfer clock and electronic shutter
clock) which drives the CCD.
VDD
Input
Buffer
2
3
IC902 is an inverter IC which drives the horizontal CCDs (H1 and H2). In
addition the XV1-XV4 signals which are output from IC102 are the vertical
transfer clocks, and the XSG1 and XSG signal which is output from IC102 is
superimposed onto XV1 and XV3 at IC904 in order to generate a ternary
pulse. In addition, the XSUB signal which is output from IC102 is used as the
sweep pulse for the electronic shutter, and the RG signal which is output from
IC102 is the reset gate clock.
4
5
6
7
8
9
10
SHT
XSHT
V3B
XV3
VL
20
19
18
XSG3B
V3A
17
XSG3A
V1B
16
XV1
VH
XSG1B
V1A
XSG1A
V4
XV4
V2
XV2
GND
15
14
13
12
11
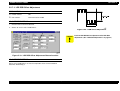
Figure 2-7. IC904 Block Diagram
2.2.1.4 IC905 (CDS, AGC Circuit and A/D Converter)
The video signal which is output from the CCD is input to Pins (30) of IC905.
There are S/H blocks inside IC905 generated from the XSHP and XSHD pulses,
and it is here that CDS (correlated double sampling) is carried out.
Figure 2-6. IC902 Block Diagram
Operating Principles
After passing through the CDS circuit, the signal passes through the AGC
amplifier. It is A/C converted internally into a 12-bit signal, and is then input to
IC102 of the CA2 circuit board. The gain of the AGC amplifier is controlled by
pin (45)-(48) serial signal which is output from IC102 of the CA2 board.
Circuit
41
EPSON PhotoPC 3000Z
Revision A
Signal Voltage
PBLK AVDD
19
27 33
AVSS
HD
VD
CLPOB
25 26 35
18
24
19
AD9842
COLOR
STEERING
4 6 dB
14 DRVSS
236 dB
CDS
30
PxGA
2:1
MUX
CCDIN
RG is turned on by the timing in (1), and the floating diffusion is charged to
the potential of PD. The RG is turned off by the timing in (2). In this condition,
the floating diffusion is floated at high impedance. The H1 potential becomes
shallow by the timing in (3), and the electric charge now moves to the floating
diffusion.
13 DRVDD
CLP
12-BIT
ADC
VGA
12
6
12
DOUT
1
CLP
Offset
DAC
10
23
CLPDM
BUF
BANDGAP
REFERENCE
Here, the electric charges are converted into voltages at the rate of V = Q/C by
the equivalent capacitance C of the floating diffusion. RG is then turned on
again by the timing in (1) when the H1 potential becomes deep.
38 VRT
39 VRB
8
36
INTERNAL
BIAS
CONTROL
REGISTERS
2:1
MUX
AUX1IN
34
AUX2IN
INTERNAL
TIMING
DIGITAL
INTERFACE
CLP
45 46 48 47
SL SCK SDATA
SEN
17
DVDD
40
Thus, the potential of the floating diffusion changes in proportion to the
quantity of transferred electric charge, and becomes CCD output after being
received by the source follower. The equivalent circuit for the output circuit is
shown in Figure 2-10.
15
DVSS
41
21 22 16
SHP SHD DATA
CLK
12V Pre-charge drain bias(PD)
Reset gate pulse
Figure 2-8. IC905 Block Diagram
2.2.1.5 Transfer of Electric Charge by the Horizontal CCD
Direction of Transfer
The transfer system for the horizontal CCD employs a 2-phase drive method.
H resistor
The electric charges sent to the final stage of the horizontal CCD are
transferred to the floating diffusion, as shown in Figure 2-9.
(1)
H1
H2
H1
H2
H1 HOG
Voltage output
Electric charge
RG
Floating diffusion gate is
floated at a high impedance.
CCD OUT
PD
C is charged
equivalently
(1) (2) (3)
Floating
Diffusion
H1
3.5V
0V
(2)
H1
H2
H1
H2
H1 HOG
RG
H2
ca1fig1-8
3.5V
0V
Figure 2-10. Theory of Signal Extraction Operation
CCD OUT
PD
13.5V
RG
(3)
H1
H2
H1
H2
H1 HOG
0V
RG
CCD OUT
CCD OUT
RG pilse leak signal
Black level
Signal voltage
ca1fig1-7
Figure 2-9. Horizontal Transfer of CCD Imager and Extraction of
Operating Principles
Circuit
42
EPSON PhotoPC 3000Z
Revision A
2.2.2 CA2 Circuit Description
The figure below is the CA2 Circuit Block Diagram.
Figure 2-11. CA2 Circuit Block Diagram
Operating Principles
Circuit
43
EPSON PhotoPC 3000Z
Revision A
PIO/PWM/SIO for LCD
2.2.2.1 Circuit Description
8-bit parallel input and output makes it possible to switch between
individual input/output and PWM input/output.
DIGITAL CLAMP
TG/SG
Extracting the average value of the optical black section of the CCD from the
subsequent data makes the black level of the CCD output data uniform for
each line. The optical black section of the CCD averaged value for each line is
taken as the sum of the value for the previous line multiplied by the
coefficient k and the value for the current line multiplied by the coefficient 1-k.
Timing generated for 3 million pixel CCD control.
Digital encoder
It generates chroma signal from color difference signal.
JPEG control
Controls the interface for the externally-connected JPEG IC.
SIGNAL PROCESSOR
2.2.2.2 Outline of Operation
γ correction circuit
This circuit performs (gamma) correction in order to maintain a linear
relationship between the light input to the camera and the light output
from the picture screen.
Color generation circuit
This circuit converts the CCD data into RGB signals.
Matrix circuit
This circuit generates the Y signals, R-Y signals and B-Y signals from
the RGB signals.
Horizontal and vertical aperture circuit
This circuit is used generate the aperture signal.
AE/AWB and AF computing circuit
The AE/AWB carries out computation based on a 64-segment screen,
and the AF carries out computations based on a 6-segment screen.
SDRAM controller
This circuit outputs address, RAS, CAS and AS data for controlling the
SDRAM. It also refreshes the SDRAM.
When the shutter opens, the reset signals (ASIC (IC102) and CPU (IC101)) and
the serial signals (“take a picture” commands) from the 4-bit microprocessor
are input and operation starts. When the TG/SG drives the CCD, picture data
passes through the A/D and CDS, and is then input to the ASIC as 10-bit data.
The AF, AE, AWB, shutter, and AGC value are computed from this data, and
three exposures are made to obtain the optimum picture. The data which has
already been stored in the SDRAM is read by the CPU and color generation is
carried out. Each pixel is interpolated from the surrounding data as being
either Ye, Cy, Mg. or B primary color data to produce R, G and B data. At this
time, correction of the lens distortion which is a characteristic of wide-angle
lenses is carried out. After AWB and γ processing are carried out, a matrix is
generated Y, R-Y and B-Y, and aperture correction is carried out for the Y
signal, and the data is then compressed by JPEG and is then written to card
memory (compact flash).
When the data is to be output to an external device, it is taken data from the
memory and output via the UART. When played back on the LCD and
monitor, data is transferred from memory to the SDRAM, and the image is
then elongated so that it is displayed over the SDRAM display area.
Communication control
USART
The RS-232C can be sued for both synchronous and asynchronous
transmission.
SIO
This is the interface for the 4-bit microprocessor.
Operating Principles
Circuit
44
EPSON PhotoPC 3000Z
Revision A
2.2.2.3 LCD Block
During monitoring, YUV conversion is carried out for the 10-bit CCD data
which is input from the A/D conversion block to the ASIC and is then
transferred to the DRAM so that the CCD data can be displayed on the LCD.
The data which has accumulated in the DRAM is passed through the NTSC
encoder, and after D/A conversion is carried out to change the data into a Y/C
signal, the data is sent to the LCD panel and displayed.
If the shutter button is pressed in this condition, the 10-bit data which is
output from the A/D conversion block of the CCD is sent to the DRAM (DMA
transfer), and after processor, it is displayed on the LCD as a freeze-frame
image.
During playback, the JPEG image data which has accumulated in the flash
memory is converted to YUV signals, and then in the same way as during
monitoring, it is passed through the NTSC encoder, and after D/A conversion
is carried out to change the data into a Y/C signal, the data is sent to the LCD
panel and displayed.
The two analog signal (Y/C signals) from the ASIC are converted into RGB
signals by the LCD driver inside panel, and these RGB signals and the LCD
driver inside the panel are used to drive the LCD panel. The RGB signals are
1H transposed so that no DC component is present in the LCD element, and
the two horizontal shift register clocks drive the horizontal shift registers
inside the LCD panel so that the 1H transposed RGB signals are applied to the
LCD panel. Because the LCD closes more as the difference in potential
between the COM (common polar voltage: fixed at DC) and the R, G and B
signals becomes greater, the display becomes darker; if the difference in
potential is smaller, the element opens and the LCD become brighter.
2.2.2.4 Lens Drive Block
Figure 2-12. Lens Drive Circuit Block Diagram
The figure below is the lens drive block diagram.
Operating Principles
Circuit
45
EPSON PhotoPC 3000Z
Revision A
The figure below is the PW1 electric circuit block diagram.
IRIS AND SHUTTER DRIVE
The iris stepping motor drive signals (IIN1, IIN2, IIN3 and IIN4) which are
output from the ASIC expansion port (IC108) are used to drive by the motor
driver (IC951), and are then used to drive the iris steps. It can be increased iris
steps by IENA control.
FOCUS DRIVE
The focus stepping motor drive signals (FIN1, FIN2, FIN3 and FIN4) which are
output from the ASIC expansion port (IC107) are used to drive by the motor
driver (IC952). Detection of the standard focusing positions is carried out by
means of the photo interrupter (PI) inside the lens block.
ZOOM DRIVE
The zoom stepping motor drive signals (ZIN1, ZIN2, ZIN3 and ZIN4) which are
output from the ASIC expansion port (IC107) are used to drive by the motor
driver (IC953). Detection of the standard zoom positions is carried out by
means of photo reflector (ZPI) inside the lens block.
2.2.3 PW1 Circuit Description
2.2.3.1 Circuit Description
OVERVIEW
The power circuit is mainly composed of the following blocks.
Switching controller (IC501)
Digital 5 V and analog system power output (T5001, Q5001)
Digital 2.5 V system power supply (Q5007)
Digital 3.35 V system power supply (Q5018)
LCD system power supply (Q5008, T5002)
Backlight power supply output (Q5013, T5003)
Operating Principles
Figure 2-13. PW1 Circuit Block Diagram
Circuit
46
EPSON PhotoPC 3000Z
Revision A
SWITCHING CONTROLLER (IC501)
SWITCHING CONTROLLER (IC503)
This is the basic circuit which is necessary for controlling the power supply
for a PWM-type switching regulator, and is provided with four built-in
channels, only CH1 (digital 5 V, analog system), CH3 (LCD system), CH2
(digital 2.5 V) and CH4 (digital 3.35) are used. Feedback from 5 V (D) (CH1), 2.5
V (D) (CH2), 3.7 V (L) (CH3) and 3.35 V (D) (CH4) power supply outputs are
received, and the PWM duty is varied so that each one is maintained at the
correct voltage setting level.
This is the basic circuit which is necessary for controlling the power supply
for a PWM-type switching regulator, and is provided with one built-in
channel, the control of backlight power supply output to be carried out.
Feedback from 7 V (L) power supply outputs are received, and the PWM duty
is varied so that each one is maintained at the correct voltage setting level.
BACKLIGHT POWER SUPPLY OUTPUT
Short-circuit protection circuit
If output is short-circuited for the length of time determined by the
condenser which is connected to Pin (17) of IC501, all output is turned
off. The control signal (P ON, P(A) ON and LCD ON) are recontrolled to
restore output.
INVERTER CONTROL
The backlight uses a 1.8-inch flat picture tube, and is illuminated by
controlling T5003 with pulses which are driven by the inverter clock.
DIGITAL 5 V AND ANALOG SYSTEM POWER OUTPUT
5.1 V (D), 15.1 V (A), -7.6 V (A) and 5.1 V (A) are output. Feedback for the 5.1 V
(D) is provided to the switching controller (Pins (29) of IC501) so that PWM
control can be carried out.
DIGITAL 2.5 V SYSTEM POWER OUTPUT
7 V (L) is output. Feedback is sent to pins (1) of the switching controller (IC503)
for PWM control to be carried out.
2.2.3.2 Strobe CIrcuit Description
The figure below is the strobe circuit block diagram.
2.5 V (D) is output. Feedback is provided to the switching controller (Pin (26)
of IC501) so that PWM control can be carried out.
LCD SYSTEM POWER OUTPUT
3.7 V (L), 13.0 V (L) and 15.5 V (L) are output. Feedback for the 3.7 V (L) is
provided to the switching controller (Pin (11) of IC501) so that PWM control
can be carried out.
DIGITAL 3.35 V POWER OUTPUT
3.35 V (D) is output. Feedback is sent to pins (7) of the switching controller
(IC501) for PWM control to be carried out.
Operating Principles
Circuit
47
EPSON PhotoPC 3000Z
Revision A
POWER SUPPLY FILTER
L5401 and C5401 constitute the power supply filter. They smooth out ripples
in the current which accompany the switching of the oscillation transformer.
OSCILLATION CIRCUIT
This circuit generates an AC voltage (pulse) in order to increase the UNREG
power supply voltage when drops in current occur. This circuit generates a
drive pulse with a frequency of approximately 50-100 kHz. Because selfexcited light omission is used, the oscillation frequency changes according to
the drive conditions.
OSCILLATION TRANSFORMER
The low-voltage alternating current which is generated by the oscillation
control circuit is converted to a high-voltage alternating current by the
oscillation transformer.
Figure 2-14. Strobe Circuit Block Diagram
RECTIFIER CIRCUIT
CHARGING CIRCUIT
The high-voltage alternating current which is generated at the secondary side
of T5401 is rectified to produce a high-voltage direct current and is
accumulated at electrolytic capacitor C5412 on the main circuit board.
When UNREG power is supplied to the charge circuit and the CHG signal
becomes High (3.3 V), the charging circuit starts operating and the main
electrolytic capacitor is charged with high-voltage direct current.
However, when the CHG signal is Low (0 V), the charging circuit does not
operate.
VOLTAGE MONITORING CIRCUIT
POWER SWITCH
When the CHG signal switches to Hi, Q5406 turns ON and the charging circuit
starts operating.
Operating Principles
This circuit is used to maintain the voltage accumulated at C5412 at a
constance level.
After the charging voltage is divided and converted to a lower voltage by
R5417 and R5419, it is output to the SY1 circuit board as the monitoring
voltage VMONIT. When this VMONIT voltage reaches a specified level at the
SY1 circuit board, the CHG signal is switched to Low and charging is
interrupted.
Circuit
48
EPSON PhotoPC 3000Z
Revision A
LIGHT EMISSION CIRCUIT
2.2.4 SY 1 Circuit Description
When RDY and TRIG signals are input from the ASIC expansion port, the
stroboscope emits light.
2.2.4.1 Configuration and Functions
For the overall configuration of the SY1 circuit board, refer to the block
diagram below.
EMISSION CONTROL CIRCUIT
When the RDY signal is input to the emission control circuit, Q5409 switches
on and preparation is made to let current flow to the light emitting element.
Moreover, when a STOP signal is input, the stroboscope stops emitting light.
TRIGGER CIRCUIT
When a TRIG signal is input to the trigger circuit, D5405 switches on, a highvoltage pulse of several kilo volts is generated inside the trigger circuit, and
this pulse is then applied to the light emitting part.
LIGHT EMITTING ELEMENT
When the high-voltage pulse form the trigger circuit is applied to the light
emitting part, current flows to the light emitting element and light is emitted.
W A R N IN G
Beware of electric shocks.
Special attention is needed because high voltage is generated
around C5412 and xenon lamp terminals.
Figure 2-15. SY1 Circuit Board Block Diagram
The configuration of the SY1 circuit board centers around a 8-bit
microprocessor (IC301). The 8-bit microprocessor handles the following
functions:1. Operation key input, 2. Mode LCD display, 3. Clock control, 4.
Power ON/OFF, 5. Strobe charge control.
Operating Principles
Circuit
49
EPSON PhotoPC 3000Z
Revision A
Table 2-3. 8bit Micro Processor Pin Configuration
Table 2-3. 8bit Micro Processor Pin Configuration
Pin
Signal
I/O
Pin
Outline
1
CHG VOL
I
Strobe charge voltage input (analog input)
2-3
NOT USED
-
--
4-7
SCAN IN 0-3
I
Key matrix input
8
AVDD
-
A/D converter analog power terminal
9
AVREF
I
A/D converter standard voltage input terminal
10
STBY (R) LED
O
Standby LED (red) ON/OFF signal
L: LED light
Signal
I/O
Outline
71
P ON
O
DC/DC converter ON/ OFF signal
H: ON
72
DIN CONNECT
I
DIN jack connect detection signal
H: Connection
73
CARD
I
Extension memory card attachment detection
signal
L: Attachment
74
AV JACK
I
Video output cable connection detection signal
H: Connection
75
SI
I
Serial communication data input (←ASIC)
Serial communication data output (→ASIC)
11
STBY (G) LED
O
Standby LED (green) ON/OFF signal
L: LED light
12
VSS
-
GND
76
SO
O
O
Self-timer LED ON/OFF signal
L: LED light
77
SCK
O
Serial communication clock output (→ASIC)
78
IC
-
Connect to VSS
79
XOUT
O
Main clock oscillation terminal (4 MHz)
80
XIN
I
Main clock oscillation terminal
81
VDD
-
Power supply terminal
82
XCIN
I
Sub clock oscillation terminal (32.768 kHz)
13
14-19
SELF LED
NOT USED
-
--
20
AVREF ON
O
A/D standard voltage ON/OFF signal
L: ON
21
NOT USED
-
--
22
CHG ON
O
Flash charge ON/ OFF signal
H: ON
83
XCOUT
O
Sub clock oscillation terminal
23-25
COM1-3
O
Model LCD common signal output
84
RESET
I
Reset input
26
NOT USED
-
--
85
BAT OFF
I
27
BIAS
-
LCD motor voltage supply terminal
Battery OFF detection signal
L: OFF
28-30
VLC0-2
-
LCD motor voltage terminal
86
RXD
I
RS-232C RXD input terminal
31
VSS
-
GND
87
SREQ
I
Serial communication request signal
L: Request
32-49
S1-18
O
Model LCD segment signal output
50-56
NOT USED
-
--
88
USB
I
USB connector connection detection signal
L: connection
57-59
SCAN IN 4-6
I
Key matrix input
89
CAP SW
I
60-63
NOT USED
-
--
Lens cap switch
L: Attachment
64
WAKE UP
O
Wake up output signal
90
NOT USED
-
--
65-69
NOT USED
-
--
91-94
SCAN OUT 0-3
O
Key matrix output
70
PA ON
O
DC/DC converter (analog) ON/ OFF signal
H: ON
95
LCD ON
O
LCD monitor power ON/ OFF signal
H: ON
96
ASIC TEST
O
ASIC reset control signal
Operating Principles
Circuit
50
EPSON PhotoPC 3000Z
Revision A
2.2.4.3 Power Supply Control
Table 2-3. 8bit Micro Processor Pin Configuration
Pin
Signal
I/O
Outline
97
ASIC RESET
O
ASIC reset signal
L: Reset output
98
MAIN RESET
O
SPARC reset signal
L: Reset output
99
AVSS
-
A/D converter GND power terminal
100
BATTERY
I
Battery voltage input (analog input)
The 8-bit microprocessor controls the power supply for the overall system.
2.2.4.2 Internal Communication Bus
The SY1 circuit board carries out overall control of camera operation by
detecting the input from the keyboard and the condition of the camera
circuits. The 8-bit microprocessor reads the signals from each sensor element
as input data and outputs this data to the camera circuits (ASIC) or to the LCD
display device as operation mode setting data. Figure 2-16 shows the internal
communication between the 8-bit microprocessor, ASIC and SPARC lite
circuits.
The following is a description of how the power supply is turned on and off.
When the battery is attached, a regulated 3.2 V is normally input to the 8-bit
microprocessor (IC301) by IC302, so that clock counting and key scanning is
carried out even when the power switch is turned off, so that the camera can
start up again. When the battery is removed, the 8-bit microprocessor
operates in sleep mode using the backup capacitor. At this time, the 8-bit
microprocessor only carries out clock counting, and waits in standby for the
battery to be attached again. When a switch is operated, the 4-bit
microprocessor supplies power to the system as required.
The 8-bit microprocessor first sets both the P ON signal at pin (71) and the PA
ON signal at pin (70) to high, and then turns on the DC/DC converter. After
this, High signals are output from pins (97) and (88) so that the ASIC and the
SPARC lite are set to the active condition. If the LCD monitor is on, the LCD
ON signal at pin (95) set to high, and the DC/DC converter for the LCD monitor
is turned on. Once SPARC lite processing is completed, the ASIC and the
SPARC lite return to the reset condition, all DC/DC converters are turned off
and the power supply to the whole system is halted.
Figure 2-16. Internal Bus Communication System
Operating Principles
Circuit
51
EPSON PhotoPC 3000Z
Revision A
Table 2-4. Camera Mode (Battery Operation)
SPARC
Lite
ASIC
memory
RS232C
Driver
CCD
8bit
CPU
MODE
LCD
LCD
MONITOR
Supply voltage
3.3V
3.3V
5V
5V(A),
+15V, -9V
3.2V
(ALWAYS)
3.2V
(ALWAYS)
5V(L)
+12V etc.
Power OFF
OFF
OFF
OFF
OFF
32KHz
ON
ON
Play back
ON
ON
ON
OFF
4MHz
ON
ON
Power SW On-Auto power down
OFF
OFF
OFF
OFF
4MHz
ON
OFF
ON
ON
ON
ON→OFF
4MHz
ON
OFF
Resolution, Flash, Self timer SW ON
OFF
OFF
OFF
OFF
4MHz
ON
OFF
LCD finder
ON
ON
ON
ON
4MHz
ON
ON
Power ON Shutter SW ON
Table 2-5. Host Mode (Battery Operation)
Power ON
SPARC
Lite
ASIC
memory
RS232C
Driver
CCD
8bit
CPU
MODE
LCD
LCD
MONITOR
Supply voltage
3.3V
3.3V
5V
5V(A),+15V,9V
3.2V(ALWAYS)
3.2V(ALWAYS)
5V(L)+12V etc.
Power OFF
OFF
OFF
OFF
OFF
32KHz
OFF
OFF
Power SW On-AUTO power
down
OFF
OFF
OFF
OFF
4MHz
ON
OFF
Take a picture
ON
ON
ON
ON→OFF
4MHz
ON
OFF
Erase image
ON
ON
ON
OFF
4MHz
ON
OFF
Download image
ON
ON
ON
OFF
4MHz
ON
OFF
Continuous image
ON
ON
ON
ON
4MHz
ON
OFF
Massage from host
ON
ON
ON
ON
4MHz
ON
OFF
NOTE: P.SAVE=Power save mode, 4MHz=Main clock operation,
32KHz=Sub clock operation.
Operating Principles
Circuit
52
CHAPTER
3
TROUBLESHOOTING
EPSON PhotoPC 3000Z
Revision A
3.1 Overview
3.1.1 LED Indication on Various Conditions
PhotoPC 3000Z does not have error indication such as LCD and LED. Perform
the following repairing method according to the symptoms. Even when the
symptoms look the same, there are various reasons for the trouble. Check the
troubleshooting points described in this chapter and perform the best
repairing method.
PhotoPC 3000Z always supervises the condition of its components and
indicates the condition by VF side lamp (red/ green LED). (See “LED Indication
on Various Conditions” on page 54.)
Table 3-1. LED Indication on Various Conditions
Conditions
W A R N IN G
Before disassembling the camera, remove the battery and
plug off the AC adapter.
The electrolytic capacitor (C5412) mounted on PW1 board
is for flash strobe and set to be charged automatically
whenever the power is ON. Due to this, it may cause
electric shock during the service procedure. When
repairing, be sure to discharge the camera, using the
cement resistance. (See Ch4 for details.)
Troubleshooting
VF side lamp
(red/green LED)
VF side lamp
(red/green LED)
Ready to take
picture
ON
Focusing
Blink
(0.2 sec. interval)
Focus lock
ON
CF writing
Blink
(0.5 sec. interval)
Battery warning
Blink
(1 sec. interval)
Error
ON
With control panel
indication
Self timer ON
ON
Video mode
Blink
(0.1 sec. interval)
Applying the
power (standby)
Blink
(0.2 sec. interval)
Lens cap on
Blink
(0.2 sec. interval)
CF is not
installed
Blink
(0.2 sec. interval)
Overview
Note
• Front side red LED
-First 8 sec: low
speed blinking
(0.5 sec. interval)
-Last 2 sec: high
speed blinking
(0.2 sec. interval)
• With control panel
indication
54
EPSON PhotoPC 3000Z
Revision A
3.2 Troubleshooting
Table 3-3. Cannot Shoot a Picture.
This section describes how to check the defective unit and parts according to
its symptoms.
Step
Check Item
Y/N
1
Press the shutter button.
After installing the battery or installing the AC adapter, if LCD is not indicated
or if the red LED continues blinking and does not move on to the standby
condition, see the following tables that give you checking points and
solutions.
2
Check pulse input of 3 or 7 pin
(SCAN IN3) of IC301.
No
Check the shutter switch, CN301,
R2023 and R3024.
3
Check pulse input of 7 or 8 pin
(PON, P(A) ON) of IC301.
Low
Check IC301, Q3005, Q3006 and
PW1.
If any errors occurred on the 8 bit micro computer on SY1
4
Check if 6, 12 or 13 pin of
IC301 all HIGH?
No
Check IC301, PW1 and CA2.
5
Is serial communication
normal?
NG
Check IC301 and CA2.
6
Check CA2.
A D J U S T M E N T
R E Q U IR E D
board, which controls the user interface, it cannot output
commands to generate the various digital and analog
power and the camera becomes “power cannot be
applied” condition.
8-bit micro computer performs serial communication with
CPU on CA2 board. Same error will be generated if any
errors occurred on CA2 board.
Step
1
Check Item
Check the pulse input of 91
pin (SCAN IN 0) of IC301.
Y/N
No
Solution
Check the harness and CN301,
R3021 including power SW.
2
Check the pulse input of 7 pin
(UP UNREG) of IC302.
Low
Check PW1, CA2.
3
Check the pulse input of 81
pin (VDD) of IC301.
Low
Check IC302.
4
Check the pulse input of 84
pin (RESET) of IC301.
Low
Check IC302 and R3051.
5
Check the pulse input of 85
pin (BAT OFF) of IC301.
6
Low
Check R3052.
Check the oscillation of 80 pin
(XIN) of IC301.
No
Check X3001.
7
Check the pulse input of 82
pin (XCIN) of IC301.
No
Check IC302, R3004, C3001 and
C3002.
8
Check IC301.
Troubleshooting
--
--
--
--
Table 3-4. Cannot Take in Pictures
Table 3-2. Cannot Apply Power.
Step
--
Solution
Check Item
Y/N
Solution
1
Is the system drive clock
(72MHz) input to the 280 pin
(CLK IN1) of IC102?
Yes
Check X1101 and IC111.
2
Is CLK (36MHz) input to the
132 pin (CLK IN) of IC101?
No
Check 278 pin of IC102.
3
Check 61 pin (ZAS) of IC101.
NG
This signal always appears when
CPU accesses to the memories.
CPU may not read program from
IC121. Check address / data bus
with IC121.
4
Check 52 pin (ZBREQ) of
IC101.
NG
Request for use o data bus form
ASIC to CPU. No DMA transmission
if this signal is absent.
--
Troubleshooting
55
EPSON PhotoPC 3000Z
Revision A
Table 3-4. Cannot Take in Pictures
Step
Check Item
Y/N
Solution
5
Check 56 pin (ZBGRNT) of
IC101.
NG
This signal appears when CPU
receives ZBREQ and gives
permission to ASIC for use of data
bus. No DMA transmission if this
signal is absent.
6
Check the signal of 118 and
119 pin (IRL1, 2) of IC101.
NG
Hand-shaking between 8 bit micro
computer and RS-232C is defective.
Check each interface.
7
Check soldering of CPU and
memories.
--
Troubleshooting
--
Troubleshooting
56
CHAPTER
4
DISASSEMBLY AND ASSEMBLY
EPSON PhotoPC 3000Z
Revision A
4.1 Overview
Table 4-1. 1st / 2nd Level Maintenance
No.
This chapter describes disassembling and assembling procedure for each
components. Usually assembling can be done by the reverse order of the
disassembling procedure, but this manual has the assembling section as
assembling of PhotoPC 3000Z is complicated.
4.1.1 Caution
Replacing Parts
C A U T IO N
Remove the batteries and plug off the AC adapter before
disassembling the camera.
The electrolytic capacitor (C5412) mounted on PW1 board
is for flash strobe and set to be charged automatically
whenever the power is ON. Due to this, it may cause
electric shock during the service procedure. When
repairing, be sure to discharge the camera, using the
cement resistance. (See Figure 4-2, "Discharging
Electrolytic Capacitor".)
1
CA1 Board
2
CA2 Board
Same as CA1 Board.
2nd maintenance
3
Lens
1. Lens adjustment
2. AWB adjustment
3. Color matrix adjustment
4. CCD defect detect adjustment
Note: Observe the order except for
the lens adjustment.
2nd maintenance
4
CCD
Same as lens adjustment.
2nd maintenance
5
LCD
LCD panel adjustment
1st maintenance
SY1 Board
Note: When replacing the terminals
on SY1 board, perform the following
adjustment. (2nd maintenance)
Observe the order except for the
lens adjustment.
1. Lens adjustment
2. AWB adjustment
3. Color matrix adjustment
4. CCD defect detect adjustment
1st maintenance
For this product, there are two repair levels; first
maintenance and 2nd maintenance. The service for
second maintenance is allowed to be done only by the
service center equipped with special instruments for
adjustment. We do not guarantee the repair result
performed by the others.
See Table 4-1 to categorize between the 1st maintenance
and the 2nd maintenance.
Use the special package for transportation.
Disassembly and Assembly
Category
1. Initial operation
2. AWB adjustment
3. Color matrix adjustment
4. CCD defect detect adjustment
5. LCD panel adjustment
6. Lens adjustment
Note: Observe the order except for
the lens adjustment.
Read the following cautions before disassembling and assembling the
camera.
W A R N IN G
Adjustment Items
6
Overview
2nd maintenance
58
EPSON PhotoPC 3000Z
Revision A
4.1.2 Tools
Table 4-1. 1st / 2nd Level Maintenance
No.
7
Replacing Parts
PW1 Board
Adjustment Items
Note: When replacing the terminals
on PW1 board, perform the
following adjustment. (2nd
maintenance)
Observe the order except for the
lens adjustment.
1. IC501 oscillation frequency
adjustment
2. IC502 oscillation frequency
adjustment
3. 5.0V (D) voltage adjustment
4. 3.3V (D) A voltage adjustment
5. 3.4V (D) B voltage adjustment
6. 12.4V (L) voltage adjustment 1
7. 12.4V (L) voltage adjustment 2
8. 5.8V (L) voltage adjustment
9. Lens adjustment
10. AWB adjustment
11. Color matrix adjustment
12. CCD defect detect adjustment
Category
The following tables explain the tools needed for repairing service.
Table 4-2. Equipment
Name
Note
Oscilloscope
100MHz or more
Digital multi meter
-Win95 or 98 environment
Following devices are required.
• CD-ROM drive
• 3.5 inch FD drive
• Standard RS-232C (serial transmission speed:
19200 bps or more)
• RAM: 8MB or more
• HDD drive: 15 MB or more
• VGA or AVGA monitor with at least 256-color
display.
1st maintenance
Host computer
Direct current stabilizing
power supply
--
Frequency counter
--
AC adapter
--
Table 4-3. Tools
No.
Name
Note
1
Color Viewer 5100 K
X
103058400
2
DscCal V122 (TBD)
adjustment program
X
Issued with this manual.
3
Fine driver (+)
{
4
Siemens star chart
X
Attached on this manual
appendix.
5
Color adjustment chart
{
104268100
7
Soldering device
{
B740200100
7
Tweezers
{
B741000100
{: available in the market, X: not available in the market.
Disassembly and Assembly
Overview
59
EPSON PhotoPC 3000Z
C A U T IO N
Revision A
Adjustment can be done by PC/AT compatible machine
with 80486 mounted: Not by Mac. PC.
AWB adjustment for PhotoPC 3000Z may take time and
host PC time out error may be occurred accordingly.
Adjustment program DscCaliDi124 is made to counter this
problem. You can also adjust other previous models by
this program.
4.2 Disassembly
The flowchart below shows the disassembling procedure.
START
Remove the cabinet back.
Discharge the capacitor.
Remove the cabinet front.
Remove the
SY1 Board.
Remove the
ST1 Board.
Remove the TB2 Board.
Remove the
TB3 Board.
Remove the
LCD.
Remove the CA2 Board.
Remove the lens assembly.
Remove the PW1 Board.
Flowchart 4-1. Disassembling Flowchart
Disassembly and Assembly
Disassembly
60
EPSON PhotoPC 3000Z
Revision A
4.2.1 Cabinet Back / Front, TB2/3, ST1 Board
Removal
W A R N IN G
This section explains the disassembling of the cabinet (front / back), TB2/3
board and ST1 board. Disassembling procedure should follow numbers
indicated in the figure below.
8. Cabinet back
4. Three screws
1.7 x 5
4. Two screws
1.7 x 5
13. Screw 1.7 x 5
9.FPC
A
14. Connector
10. Three
screws
1.7 x 3
15. Connector
1. Open the cover battery.
4.2.2 Discharging Electrolytic Capacitor
The following is the discharging process of main electrolytic capacitor
(C5412) on PW1. If you skip this operation, there is a great possibility of
electric shock during the disassembling procedure.
18. Unit dial
17. FPC
The electrolytic capacitor (C5412) mounted on PW1 board is for
flash strobe and set to be charged automatically whenever the
power is ON. Due to this, it may cause electric shock during
the service procedure. When repairing, be sure to discharge
C5412, using the cement resistance. (See Figure 4-2,
"Discharging Electrolytic Capacitor".)
24. ST1
board
1.
Prepare the cement resistance with more than 560Ω/10W.
2.
Contact 2 lead wires to the soldering cotton on the both poles of
electrolytic capacitor. (No polarity at this stage.)
11. TB2 board
13. Three screws
1.7 x 5
16. Cabinet front
23. Screw
2.0 x 5
7. Four screws
1.7 x 5
20. Holder
switch
12. Holder
terminal
19. Screw
1.7 x 5
22. TB3 board
Protect from the electric shock
with insulation tape.
6. Open the
cover jack.
21. Screw 1.7 x 3
3. Screw
1.7 x 4
5. Screw
2. Three screws 1.7 x 4
4. Three screws
1.7 x 5
1.7 x 5
No polarity
SX321/JEP-1
Figure 4-1. Removal of Cabinet Back, Cabinet Front, TB2 Board,
TB3 Board and ST1 Board
Cement resistance should be about
560Ω/10W.
Figure 4-2. Discharging Electrolytic Capacitor
Disassembly and Assembly
Disassembly
61
EPSON PhotoPC 3000Z
Revision A
4.2.3 Removal of SY1 and LCD
4.2.4 Removal of CA1/2 Board and Lens Assembly
The following is the discharging process of SY1 and LCD. Disassembling
procedure should follow numbers indicated in the figure below.
The following is the discharging process of CA1 Board, CA2 Board and Lens
assembly. Disassembling procedure should follow numbers indicated in the
figure below.
1. Screw 1.7 x 4
2. Two screws
1.7 x 5
10. LCD
4. Connector
5. SY1 board
3. Connector
6. Screw
1.7 x 4
8. Connector
A
9. FPC
7. Three screws
1.7 x 5
11. Holder monitor
Figure 4-4. Removal of CA1, CA2 and Lens Assembly
Figure 4-3. Removal of SY1 and LCD
A D J U S T M E N T
R E Q U IR E D
A D J U S T M E N T
R E Q U IR E D
When replacing the CA1 board, CA2 board, or lens assembly,
perform the adjustment. (See Ch5.)
C A U T IO N
Be careful at its direction when installing the optical filter of
the lens assembly. (See “Assembly” on page 64.)
When replacing the LCD, perform the LCD panel adjustment.
(See Ch5.)
Disassembly and Assembly
Disassembly
62
EPSON PhotoPC 3000Z
Revision A
4.2.5 Removal of Holder Battery and PW1 Board
The following is the discharging process of holder battery and PW1 board.
Disassembling procedure should follow numbers indicated in the figure
below.
8. Holder lens
1. Two screws
1.7 x 4
3. Connector
2. Two screws
1.7 x 4
4. Two screws
1.7 x 4
6. Holder flash
5. Three screws
1.7 x 5
7. PW1 board
SX321/JEP-4
Figure 4-5. Removal of Holder Battery and PW1 Board
A D J U S T M E N T
R E Q U IR E D
When replacing the PW1 Board, perform adjustment. (See
Ch5.)
Disassembly and Assembly
Disassembly
63
EPSON PhotoPC 3000Z
Revision A
4.3 Assembly
Lens side
Thin side
4.3.1 Assembling the Lens Assembly
1.
CCD side
Check if there is no dust or scratch on the surface of the Optical Filter (2)
and install it toe the LENS ASSY (1).
NOTE: Be careful at the direction when installing the Filter. (See
Figure 4-7.)
2.
Insert the SPACER (3).
3.
Remove the protective sheet of CCD (4) and check if there is no dust or
scratches on the surface and install the CCD, aligning with guide rib of the
holder.
4.
Install the MOUNTING LENS (5), aligning with guide pin of the holder and
secure it with 3 screws (6) (1.7x6).
5.
Install the SPACER INSULATOR (7), aligning the guide pin of the holder.
6.
Attach the PAD (10) to the Lens.
Figure 4-7. Assembling the Lens Assembly
Attaching position
Attaching position
Figure 4-6. Installing the PAD
7.
Install the CA1 (8) holder, aligning with the guide pin and the CCD
terminal and secure it to the MOUNTING LENS with 2 screws (9) (1.7x2.5).
8.
Solder the CCD terminal to the CA1.
Disassembly and Assembly
Assembly
64
EPSON PhotoPC 3000Z
Revision A
4.3.2 Installing the SY1 Board
CN301
1.
Insert the connector of ASSY, WIRE (2) to the SY1 board (1).
2.
Connect the connector CN303 of SY1 board to the connector CN106 of the
CA2 board. Secure it with 2 screws (1.7x5).
3.
Connect the harness from the TB1 board to the connector CN301 of the
SY1 board.
(1) SY1 board
(3) screw
(2) ASSY, WIRE
CN302
(3) screw
Super capacitor
C3001
Core
C H E C K
P O IN T
Do the following preparation so that the harnesses would not
interfere with the shutter operation.
Set the harness from the TB1 board to the same height
with connector CN302 of the SY1 board and strain it a
little bit.
The core of the harness from the TB1 should be pressed
and secured under the super capacitor C3001.
TB1 Board
Figure 4-8. Installing the SY1 Board
Disassembly and Assembly
Assembly
65
EPSON PhotoPC 3000Z
Revision A
4.3.3 Installing the CABINET TOP
1.
Install the ST1 board (1) to the CABINET TOP and secure it with 1 screw
(2) (2.0x5).
2.
Connect the pin to ST1 board.
pin
C H E C K
P O IN T
Hold the pin when soldering the pin so that the pin does
Solder the pin within the length of the pi
not get off. (See Figure 4-9.)
When soldering the pin, be sure that the soldering part is
shorter than the length of pin. (See Figure 4-9.)
3.
Secure the CABINET TOP to the CABINET FRONT with 3 screws (3)
(1.7x5).
Figure 4-9. Installing the CABINET TOP
Disassembly and Assembly
Assembly
66
EPSON PhotoPC 3000Z
Revision A
4.3.4 Installing the TB1 Board
1.
Install the TB3 board (2) to the HOLDER SW(1) and secure it with a screw
(3) (1.7x3).
C H E C K
P O IN T
Install the HOLDER SW to the CABINET FRONT so that the
lever part of the LEVER SW goes between the HOLDER SW and
TB3 board.
2.
Install the HOLDER SW to the CABINET FRONT and secure it with a screw
(4) (1.7x5).
3.
Connect the ASSY. WIRE (5) to the connector CN545 of the ST1 board.
Insert the end of the HOLDER SW.
Looked from
point A.
Figure 4-10. Installing the TB1 Board
Disassembly and Assembly
Assembly
67
EPSON PhotoPC 3000Z
Revision A
4.3.5 Installing the Board Unit
Harness from the ST1 board Insulation
tube
1.
Install the STAND (1) to the board unit and secure it with 1 screw (2)
(1.5x5).
2.
Connect the harness from the SY1 board to the connector of the TB3.
3.
Install the board unit to the CABINET FRONT.
4.
Connect the harness of the ST1 board to the connector CN104 of the CA2
board.
5.
Secure the HOLDER LENS to the CABINET FRONT with 3 screws (3)
(1.7x5).
Connector of the TB3 board
Let the harness through between the
LENS and the HOLDER FLASH.
C A U T IO N
Make sure that the CABINET FRONT has the insulation tube. If
there is no tube, the strobe voltage will be leaked out to the
conductive plastic CABINET and may result in the strobe
failure.
C H E C K
P O IN T
Be sure to latch the hooks (2 points) of the HOLDER FLASH to
the SY1 board as shown below.
SY1 board
When installing the board unit, make sure the
board would not come against the button.
Hook of the HOLDER FLASH
Figure 4-11. Installing the Board Unit
Disassembly and Assembly
Assembly
68
EPSON PhotoPC 3000Z
Revision A
4.3.6 Installing the CABINET BACK
1.
Install the LENS FPC to the CA2 board.
2.
Connect the FPC from the CABINET BACK to the connector CN116 of the
CA2 board and install the CABINET BACK to the CABINET FRONT.
3.
Secure the CABINET BACK with 2 screws (1) (1.7x5).
Figure 4-12. Installing the CABINET BACK
Disassembly and Assembly
Assembly
69
CHAPTER
5
ADJUSTMENT
EPSON PhotoPC 3000Z
Revision A
5.1 Overview
Table 5-1. 1st / 2nd Level Maintenance (at Board Replacement)
No.
Replacing Parts
Adjustment Items
Category
LCD (monitor)
LCD panel adjustment
• LCD H AFC adjustment
• LCD Gain adjustment
• LCD RGB Offset adjustment
• LCD Red Brightness adjustment
• LCD Blue Brightness adjustment
1st maintenance
SY1 Board
Note: When replacing the terminals
on SY1 board, perform the
following adjustment. (2nd
maintenance)
Observe the order except for the
LCD panel adjustment.
1. Lens adjustment
2. AWB adjustment
3. Color matrix adjustment
4. CCD defect detect adjustment
1st maintenance
PW1 Board
Note: When replacing the terminals
on PW1 board, perform the
following adjustment. (2nd
maintenance)
Observe the order except for the
LCD panel adjustment.
1. IC501 oscillation frequency
adjustment
2. 5.1V (D) voltage adjustment
3. 13.0V (L) voltage adjustment 1
4. Lens adjustment
5. AWB adjustment
6. Color matrix adjustment
7. CCD defect detect adjustment
1st maintenance
This chapter describes various adjustments required for PhotoPC 3000Z.
Refer to the table below and perform the appropriate adjustment whenever
needed.
5
C A U T IO N
For this product, there are two repair levels; first maintenance
and 2nd maintenance. The service for second maintenance is
allowed to be done only by the service center equipped with
special instruments for adjustment. We do not guarantee the
repair result performed by the others.
Table 5-1 shows adjustment items required after replacing the parts and the
repairing range accepted in the general field.
6
Table 5-1. 1st / 2nd Level Maintenance (at Board Replacement)
No.
Replacing Parts
Adjustment Items
Category
1
CA1 Board
1. Initial operation
2. Lens adjustment
3. AWB adjustment
4. Color matrix adjustment
5. CCD defect detect adjustment
6. LCD panel adjustment
Note: Observe the order.
2
CA2 Board
Same as CA1 Board.
2nd maintenance
3
Lens assembly
1. Lens adjustment
2. AWB adjustment
3. Color matrix adjustment
4. CCD defect detect adjustment
Note: Observe the order.
2nd maintenance
4
CCD
Same as lens assembly.
2nd maintenance
Adjustment
2nd maintenance
7
Overview
71
EPSON PhotoPC 3000Z
Revision A
5.1.1 Preparation for Adjustment
This section describes how to set up the camera and PC before adjustment.
Follow the procedures below and complete setting up. Prepare PC with
Windows95 or later. (See the caution below.)
W A R N IN G
To COM1 or COM2 serial port
Remove the battery and plug off the AC adapter before
disassembling the camera.
The electrolytic capacitor (C5412) mounted on PW1 board
Serial cable
is for flash strobe and set to be charged automatically
whenever the power is ON. Due to this, it may cause
electric shock during the service procedure. When
repairing, be sure to discharge the camera, using the
cement resistance. (See Figure 4-2, "Discharging
Electrolytic Capacitor".)
AC adaptor
C A U T IO N
Host computer should meet the following specifications.
PC/AT compatible PC with more than 486 CPU
FD drive for 3.5 inch 2HD
Standard RS-232C
RAM: 8MB or more
HDD drive: 15 MB or more
VGA or AVGA monitor with at least 256-color display.
If you try to boot the program with the camera off, the
program indicates “Camera is not connected.” and becomes
error condition.
Adjustment
Figure 5-1. Set-up Before Adjustment
1.
Turn off both camera and computer.
2.
Locate the port cover on the side of the camera. Press on the arrows and
slide the cover down to open it.
3.
Line up the arrow on the cable connector with the notch on the camera’s
serial port. Insert the connector.
4.
Locate a serial port on the back of your computer. You may have two
serial ports labeled COM1 and COM2, or the ports may be labeled with
icons. If you have two serial ports available, use port 1 to connect your
camera.
5.
Line up the serial connector on the cable with one of the serial ports on
your computer, and insert the connector.
6.
Turn on the camera and your computer system.
7.
Insert the attached FD which has the adjustment program into your PC.
8.
Double-click “DSCCalDi.exe” The program will be automatically started.
Overview
72
EPSON PhotoPC 3000Z
C A U T IO N
Revision A
If you try to boot the program with the camera off, the
program indicates “Camera is not connected.” and
becomes error condition.
To stabilize the brightness, let the color viewer alone for
30 minutes (idling) before usage after power is turned on.
Figure 5-2. Adjustment Program Initial UI
Adjustment
Overview
73
EPSON PhotoPC 3000Z
Revision A
5.2 Adjustment
4.
for 20 seconds. (This period may vary according to the image data size
currently stored. The timing that the mark on the camera starts moving
lags behind the timing that the program indicates its completion. When
the program indicates it is completed, you can take off AC cable and serial
communication cable.)
5.2.1 Initial Operation
This section explains the initial operation required before the adjustment.
Unlike EPSON previous models, the various settings will not be cleared by
initialization for PhotoPC 3000Z. Initialization only clears the memory (image
storage field).
C A U T IO N
mark on the camera, which indicates the resolution selection, moves
5.
Click OK on the screen.
Perform initialization before uploading the firmware. If you
upload the firmware when the memory is full of data (taken
images), error may be indicated.
1.
Complete set-up before the adjustment. (See “Preparation for
Adjustment”.)
2.
Press the initialize button on the program. The confirmation screen will
appear.
Figure 5-4. Program Screen When Initialization is Completed.
Figure 5-3. Program Screen When Initial Operation is Selected.
3.
Select “Y” and perform initialization.
Adjustment
Adjustment
74
EPSON PhotoPC 3000Z
Revision A
5.2.2 PW1 Board Adjustment
5.2.2.2 IC501 Oscillation Frequency Adjustment
Adjustment is necessary when you replaced certain parts on the PW1 board,
which is described in this section, but not required when you replaced PW1
board.
5.2.2.1 PW1 Board Measurement / Adjustment Points
C5037
SETTING
Measuring point:
CL501 or CL502
Measuring equipment:
Frequency counter
Adjustment location:
VR501
Adjustment value:
±200 1kHz
C5053
ADJUSTMENT METHOD
VR502
Adjust with VR501 to 200 ±1 kHz.
VR501
CL502
NOTE: If this adjustment value is out of the range, radiation noise
may increase.
CL501
5.2.2.3 5.1V (A) Voltage Adjustment
VR504
SETTING
Measuring point:
CL5037
Measuring equipment:
Digital voltmeter
Adjustment location:
VR502
PREPARATION
Adjustment value:
5.10±0.05V
1.
Remove the SY1 board and holder battery.
ADJUSTMENT METHOD
2.
Connect the SY1 board again.
Figure 5-5. Measurement Points / Adjustment Points
Adjust with VR502 to 5.10 ±0.05 V.
NOTE: The harness connecting SY1 board and TB1 board may not be
connected.
3.
Insert the CompactFlash card.
4.
Turn on the power switch, and then set to the LCD mode.
(To indicate the through image on the LCD.)
Adjustment
NOTE: Analog voltage 15.1V(A), -7.6V(A), 3.85V(A) also adjusted at
the same time.
Adjustment
75
EPSON PhotoPC 3000Z
Revision A
5.2.2.4 13.0V (L) Voltage Adjustment
5.2.3 Lens Adjustment
This is LCD panel voltage adjustment.
PREPARATION
Power switch: ON
SETTING
Measuring point:
C5053
Measuring equipment:
Digital voltmeter
Adjustment location:
VR505
Adjustment value:
13.00±0.05V
Dial switch: Communication mode
ADJUSTMENT METHOD
Adjust with VR507 to 13.00 ±0.05 V.
NOTE: 15.5V(L) and 3.7V(L) are also adjusted at the same time.
Figure 5-6. Lens Adjustment
ADJUSTMENT CONDITION
Siemens star chart (A3)
Fluorescent light illumination with no flicker (incandescent light
cannot be used.)
Illumination above the subject should be 400 lux ± 10%
Adjustment
Adjustment
76
EPSON PhotoPC 3000Z
Revision A
ADJUSTMENT METHOD
5.2.4 AWB Adjustment
1.
Set the siemens star chart 150 cm ± 3 cm so that it becomes center of the
screen.
PREPARATION
2.
Double-click on the DscCalDi124.
3.
Click the “Focus”, and Click the “Yes”.
Power switch: ON
Dial switch: Communication mode
Figure 5-7. Lens Adjustment Button Location
4.
Adjustment value will appear on the screen.
Adjustment level
Figure 5-8. AWB Adjustment
STD.AFOPS=0
Error: If STD.AFOPS is not “0”, it is an error.
Error example
STD.AFPOS=1: failure in detecting lens unit home position.
5.
ADJUSTMENT METHOD
1.
When setting the camera in place, set it to an angle so that nothing
appears in any part of the color viewer except the white section. (Do not
enter any light.)
2.
Double-click on the DscCalDi124.
Click the OK.
Adjustment
Adjustment
77
EPSON PhotoPC 3000Z
3.
Click the “AWB”, and click the “Yes”.
Revision A
5.2.5 Color Matrix Adjustment
When adjusting the color matrix, it is also checking the aperture operation.
PREPARATION
Power switch: ON
Serial Cable
シリアルケーブル
Figure 5-9. AWB Adjustment Button Location
4.
AWB adjustment value will appear on the screen. WC=Y, U, V
Adjustment Value
Camera
カメラ
Y=128 ± 20
U=128 ± 20
カラービューアー(5100K)
Color
Viewer (5100K) and
および色調整用チャート
Color
Matrix Adjustment Chart
adj03
V=140 ± 20
5.
15cm±1cm
Figure 5-10. Color Matrix Adjustment
Click the OK.
ADJUSTMENT METHOD
Adjustment
1.
Set the color adjustment chart to the color viewer. (Do not enter any
light.)
2.
Set the color adjustment chart so that it becomes center of the screen.
3.
Double-click on the DscCalDi124.
Adjustment
78
EPSON PhotoPC 3000Z
4.
Click the “UV Matrix”, and Click the “Yes”.
Revision A
5.2.6 CCD Defect Detect Adjustment
PREPARATION
Power switch:
ON
Dial switch:
Communication mode
Lens cover switch:
Closed
ADJUSTMENT METHOD
1.
Double-click on the DscCalDi124.
2.
Click the “CCD Defect Detection”, and click the “Yes”.
Figure 5-11. Color Matrix Adjustment Button Location
5.
Matrix adjustment values will appear on the screen. UD=A, B, C, D
Adjustment level
When all of A, B, C, D show 3 digit figure, it is OK.
Error
A, B, C, D=1
6.
Click the OK.
Figure 5-12. CCD Defect Detect Adjustment
Adjustment
Adjustment
79
EPSON PhotoPC 3000Z
3.
Revision A
After the adjustment is completed, if there is any defection, at most 512
defection is indicated x, y matrix.)
5.2.7 LCD Panel Adjustment
This adjustment is required when replacing LCD. The measurement /
adjustment points of CA2 board is shown below.
Figure 5-14. Measurement / Adjustment Points
Figure 5-13. CCD Defect Detect Adjustment Result
Adjustment
Adjustment
80
EPSON PhotoPC 3000Z
Revision A
5.2.7.1 LCD H AFC Adjustment
LCD screen
LCD adjustment frame
PREPARATION
Power switch:
ON
Dial switch:
Communication mode
ADJUSTMENT METHOD
1.
Double-click on the DscCalDi124.
2.
Select “0” on the LCD “H AFC”.
Figure 5-16. LCD H AFC Adjustment
Figure 5-15. LCD H AFC Adjustment Button Location
3.
While looking at the LCD monitor, adjust “H AFC” so that the edge of the
LCD adjustment frame are the same distance from the left and right edge
of the LCD screen. (A= B)
Adjustment
Adjustment
81
EPSON PhotoPC 3000Z
Revision A
5.2.7.2 LCD Gain Adjustment
PREPARATION
Power switch:
ON
Dial switch:
Communication mode
ADJUSTMENT METHOD
1.
Double-click on the DscCalDi124.
2.
Select “0” on the LCD “Gain”.
CL415 waveform
Figure 5-18. Gain Adjustment
Figure 5-17. LCD Gain Adjustment Button Location
ADJUSTMENT METHOD
Adjust LCD “Gain” so that the amplitude of the CL415 waveform becomes
1.0V±0.1Vp-p.
Adjustment
Adjustment
82
EPSON PhotoPC 3000Z
Revision A
5.2.7.3 LCD RGB Offset Adjustment
PREPARATION
Power switch:
ON
Dial switch:
Communication mode
ADJUSTMENT METHOD
1.
Double-click on the DscCalDi124.
2.
Select “0” on the LCD “RGB Offset”.
CL415 waveform
Figure 5-20. RGB Offset Adjustment
C A U T IO N
Perform LCD RGB Offset adjustment after LCD Gain
adjustment. (See “LCD Gain Adjustment” on page 82)
Figure 5-19. LCD RGB Offset Adjustment Button Location
ADJUSTMENT METHOD
Adjust LCD “RGB Offset” so that the amplitude of the CL415 waveform
becomes 4.6V±0.1Vp-p.
Adjustment
Adjustment
83
EPSON PhotoPC 3000Z
Revision A
5.2.7.4 LCD Red Brightness Adjustment
C A U T IO N
PREPARATION
Power switch:
ON
Dial switch:
Communication mode
Perform this adjustment after LCD Gain adjustment and LCD
RGB Offset adjustment. (See “LCD Gain Adjustment” and
“LCD RGB Offset Adjustment”)
ADJUSTMENT METHOD
1.
Double-click on the DscCalDi124.
2.
Select “0” on the LCD “R Brightness”.
CL415 waveform
CL414 waveform
Figure 5-21. LCD Red Brightness Adjustment Button Location
Figure 5-22. Red Brightness Adjustment
ADJUSTMENT METHOD
Adjust LCD “R Bright” so that the amplitude of the CL414 waveform becomes
VG ± 0.1 Vp-p with respect to the CL415 (VG) waveform.
Adjustment
Adjustment
84
EPSON PhotoPC 3000Z
Revision A
5.2.7.5 LCD Blue Brightness Adjustment
C A U T IO N
PREPARATION
Power switch:
ON
Dial switch:
Communication mode
Perform this adjustment after LCD Gain adjustment and LCD
RGB Offset adjustment. (See “LCD Gain Adjustment” and
“LCD RGB Offset Adjustment”)
ADJUSTMENT METHOD
1.
Double-click on the DscCalDi124.
2.
Select “0” on the LCD “B Brightness”.
CL415 waveform
Figure 5-23. LCD Blue Brightness Adjustment Button Location
CL413 waveform
Figure 5-24. Blue Brightness Adjustment
ADJUSTMENT METHOD
Adjust LCD “B Bright” so that the amplitude of the CL413 waveform is VG ±
0.1 Vp-p with respect to the CL415 (VG) waveform.
Adjustment
Adjustment
85
EPSON PhotoPC 3000Z
Revision A
5.2.8 Firmware Upload
1.
Complete the setup for the adjustment. (See “Preparation for
Adjustment” on page 72.)
2.
Copy the firmware provided by EPSON to the hard disk. (Firmware is
usually compressed with bin file.)
3.
Set the dial switch to “Communication mode”.
4.
Select “Firmware” of upload.
5.
File open dialog will appear for you to select the place file is stored.
C A U T IO N
8.
if the serial communication cable is taken off, it may result
in the defective flash memory. Never perform other
operation until “Complete” is indicated.
When performing the firmware upload, Hyper function,
direct print function and print mark function will be
deleted at the same time. After completing the upload, reinstall these 3 functions by using “Uploader” attached
with the product.
When it comes close to the Upload completion, the camera beeps once
and notifies you that the camera finishes read-in operation and starts
writing into Flash Memory operation.
C A U T IO N
9.
During the firmware upload, if the power is shut down or
Be careful not to confound this beep sounds that notifies you
that the starts writing into Flash Memory operation with the
one at the end. Check if the indication on the camera says
“Completion”.
After a few seconds (1-2 seconds), the writ-in operation is completed and
the camera beeps once again. “Complete” is indicated on the program
screen to show upload is completed.
10. Press OK button.
Figure 5-25. Program Screen of Firmware Upload
6.
Select the latest firmware and click “open”.
7.
LED on the front side of the camera will blink for 20 seconds and notifies
you that the upload is being normally performed. (You cannot check this
LED when you removed SY1 board.)
Adjustment
Adjustment
86
EPSON PhotoPC 3000Z
Revision A
5.2.8.1 Firmware Version Check
5.2.9 Re-installing the Expanded Functions
You can check the firmware version by the following procedure.
This section explains how to re-install the expanded functions that is deleted
when uploading firmware such as Hyper.
1.
Pull out CF card.
2.
Turn the dial switch to “SETUP” mode.
3.
Tune on the power switch while pressing the shutter switch.
4.
FIrmware version will be appeared on the LCD monitor.
1.
Create “op-prog” folder on the PC desktop. (PC must have PCMCIA card
slot.)
2.
Put the expanded function program in this folder.
3.
Insert the PCMCIA adapter with PCMCIA CF card inserted. Adapter is
defined as the removal disk.
4.
Copy “op-prog” to the Dcim folder in the PCMCIA adapter, using explore.
5.
Take the CF card out f PCMCIA and insert it to PhotoPC 3000Z.
6.
Turn the power on and turn the dial switch to the “SETUP mode”.
7.
Select “install / uninstall the expanded program” on the memory setting
screen.
8.
Select “install” on “install / uninstall the expanded program” .
9.
Press the “Return” switch and get off from the installation screen.
Firmware Version
C A U T IO N
When CF card without expanded function is inserted, “install /
uninstall the expanded program” screen of the expanded
function will not be appeared.
Figure 5-26. Firmware Version Check
Adjustment
Adjustment
87
CHAPTER
6
MAINTENANCE
EPSON PhotoPC 3000Z
Revision A
6.1 Overview
Table 6-1. Check Items
No.
PhotoPC 3000Z requires no specific maintenance (lubrication / adhesion /
cleaning).
Check Item
OK / NG
1
OK
NG
Camera should be cleaned according to its necessity, however, such as for
dust incoming at the repairing service or fingerprint. The following table lists
the check items before sending the camera back to users.
Check the lens viewer inside / outside if it is dirty with
fingerprints etc.
Check if any cable such as power supply cable is visible.
2
Is the operation of the rotary switch smooth?
Can you feel it clicked when you click the switch?
OK
NG
6.1.1 Check Items
3
Are there any dust or cables visible inside / outside of the
flash window?
OK
NG
4
Is there any fingerprints or dust on the LCD panel surface
glass on SY1 board or inside / outside of the acrylic plate of
rear cabinet?
OK
NG
5
Is there any fingerprint or dust on the lens surface?
OK
NG
6
Is there any fingerprint or dust inside / outside of the LCD
monitor window?
OK
NG
7
Does the battery cover open and close normally?
OK
NG
8
Is the compact flash card inserted normally?
OK
NG
9
Is the rubber cover that covers various connectors and serial
connectors properly secured to the rear cabinet?
OK
NG
10
Is the various panel switch operation done properly?
OK
NG
11
Is the appearance clean?
OK
NG
Check the camera with the following table. If you find any dust or dirt, clean
the camera, referring to Ch4. Certain dirt such as dust and fingerprints can be
removed by tapping the cellophane tape.
Maintenance
Overview
89
CHAPTER
7
APPENDIX
EPSON PhotoPC 3000Z
Revision A
7.1 Circuit Board Connection Diagram
The next page is the circuit board connection diagram.
Appendix
Circuit Board Connection Diagram
91
EPSON PhotoPC 3000Z
Revision A
7.2 Circuit Board Component Layout
This section shows the following circuit board component layout for PhotoPC
3000Z.
CA1/2 Circuit Board
PW1, TB1/2/3, ST1, SY1 Circuit Board
Appendix
Circuit Board Component Layout
93
EPSON PhotoPC 3000Z
Revision A
7.3 Circuit Diagram
This section shows the following circuit diagrams for PhotoPC 3000Z.
CA1 Circuit Diagram
CA2 Circuit Diagram
SY1 Circuit Diagram
PW1 Circuit Diagram
ST1 Circuit Diagram
TB1 Circuit Diagram
TB2 Circuit Diagram
TB3 Circuit Diagram
Appendix
Circuit Diagram
96
EPSON PhotoPC 3000Z
Revision A
7.4 Exploded Diagram
This section shows the following exploded diagrams.
Exploded Diagram 1
Exploded Diagram 2
Appendix
Exploded Diagram
97
18
20
107
101
CABINET 1
19
17
A
SX321/JEP Parts List-1
26
23
6
27
108
22
21
11
9
101
10
101
102
106
101
3
28
103
103
102
101
5
4
103
29
32
39
33
A
101
101
102
25
14
13
102
101
8
24
4 5
30
102 31
2
101
7
2
1
42
104
43
38
34
41
40 101
37
36
16
105
101
35
102
15
101
12
98
Exploded Diagram
Appendix
Revision A
EPSON PhotoPC 3000Z
Figure 7-1. Exploded Diagram 1
11
10
101
107
107
CABINET 2
107
107
107
101
SX321/JEP Parts List-2
107
15
101
101
101 9
1
3
2
107
5
7
101
14
12
6
4
107
23
107
8
24
16
101
13
22
101
109
101
107
101
101
18 19
101
20
17
110
109
21
99
Exploded Diagram
Appendix
Revision A
EPSON PhotoPC 3000Z
Figure 7-2. Exploded Diagram 2
EPSON PhotoPC 3000Z
Revision A
7.5 Siemens Star Chart
The next page is the siemens star chart used for adjustment.
Appendix
Siemens Star Chart
100