1
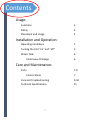
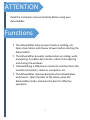
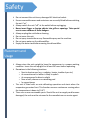
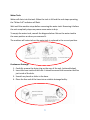
DaeWoo Dehumidifier Use and Care Manual Model #: DHC-250, DHC-400, DHC-600 Please read this manual thoroughly before operating the unit. Keep away from children. If any other issues arise, please consult your dealer or Daewoo Electronics for help. Keep this manual away from harmful substances and do not dispose of it. JAKE HOWARD, ZACH WALLIN, EMILY WEEDEN Limited Warranty DAEWOO ELECTRONICS AMERICA, INC. warrants the enclosed dehumidifier against defective material and workmanship. Daewoo agrees to remedy any defective material or workmanship at the Company’s expense under the condition that normal installation, use and service disclosed such defect. The customer must deliver the unit to either the store or dealer where it was purchased or a Daewoo authorized Service Center. To establish and receive warranty service at our store, our authorized service center, or our authorized dealer, a sales receipt or bill of sale is required as proof of purchase. This warranty does not extend to any products that fall under the following conditions: misuse, neglect, accident, incorrect wiring not completed by Daewoo, improper installation, unauthorized modification, or violation of instructions furnished by us. Daewoo also refuses to provide a warranty for any units have been repaired or altered outside of our factory or for any units where the serial number has been removed, defaced, or changed. This warranty supersedes all warranties, expressed or implied, and none of our representative are authorized to assume any liability connected with the sales of our electronic products. We provide over the counter exchange for units that are initially defective. We define “initially defective” as the dealer opening the unit and finding that it is inoperable or an individual customer opening a new unit and finding that it is inoperable. The defective unit may be returned to the factory by the dealer only for exchange. Under no circumstances will an individual customer be permitted to return a defective unit directly to the factory. The customer must make the exchange with the dealer. When this unit is returned to dealer, a copy of the purchase documentation, containing the date of purchase, is to be put in and individual box for the dealer’s further contact with the factory. Model Parts Labor Compressor DHC- 250 DHC-400 DHC-600 1 year 1 year 1 year 1 year 1 year 1 year 5 years 5 years 5 years Note: The warranty service center list is constantly updating with the addition of new, qualified service centers. If there isn’t an adequate or local service facility, the individual customer should call DAEWOO on their toll free number 1-800-DAEWOO8 (1-800-323-9668) for further information 1 Contents Usage: Functions 3 Safety 4 Placement and Usage 4 Installation and Operation: Operating Conditions 5 Turning the Unit “on” and “off” 5 Water Tank 6 Continuous Drainage 6 Care and Maintenance: Parts 7-8 Control Panel 7 Care and Troubleshooting 9-10 Technical Specifications 11 2 ATTENTION Read this instruction manual carefully before using your dehumidifier. Functions The dehumidifier helps prevent mold on clothing, etc. Open closet doors and dresser drawers before starting the dehumidifier. The dehumidifier prevents condensation on ceiling, walls, and glazing. To obtain best results, refrain from opening and closing the windows. Dehumidifying is effective on moisture sensitive items like musical instruments, cameras, computers, etc. The dehumidifier removes dampness from bookshelves and closets. Open the door of the closet, place the dehumidifier inside, and close the door for effective operation. 3 Safety Do not connect the unit to any damaged AC electrical socket. Ensure removable covers and containers are correctly fitted before switching the unit “on”. Always switch the unit “off” at the outlet before unplugging. Never insert finger or foreign objects into grills or openings. Take special care to warn children of these dangers. Always unplug the unit before cleaning. Do not cover the unit. Do not spray insecticides or any flammable sprays on the machine. Do not spray water on the dehumidifier. Empty the water tank before moving the dehumidifier. Placement and Usage Always store the unit upright to keep the compressor in a proper working condition. Leave the unit upright for at least 24 hours before operating. Do not use in the following locations: o Next to heat source (e.g. a radiator, heater, tumble dryer etc.) o An area where oil or water is likely to splash o An area exposed to direct sunlight o Near a bath, shower or a swimming pool o ln a greenhouse The unit is fitted with an auto defrosting operation and starts when the evaporator generates frost. This function ensures continuous running when the temperature is down to 55.4°F There are no user serviceable parts. Should the unit or supply cord become damaged, the unit must be returned to the manufacturer or service agent. 4 Operation Installation Install the mobile dehumidifier in a flat and spacious location. Do not cover up air vents. Do not install underneath desks or inside cupboards because this restricts air flow. Maintain a clearance of approximately 8 in. in front of and behind the unit to maintain optimal air flow. Operation Operating Conditions: This unit is designed to operate between 55°F and 95°F. Allow approximately 3 minutes after switching unit “on” for the correct operation to resume. Do not connect the dehumidifier to a socket that is being used for other electrical appliances. Select a location with easy access to an electrical outlet. Use a 115V- 60Hz earthed outlet. Ensure the Water Tank is correctly fitted otherwise the unit will not operate properly. Turning the unit ON or OFF: 1. Plug the cord into an electrical outlet with the proper specifications (see Operating Instructions). The unit computer system will do a self-check. If the check comes back normal, the POWER indicator will flash at 0.5Hz. Press ON/OFF button at this time. The unit will start operating under factory settings – 60% humidity. Change this by pressing the HUMIDITY up and down buttons. 2. By pressing the CONTINUE button, the HUMIDITY up and down buttons will be disabled and the unit will enter “continuous dehumidifying” mode. 3. Press the ON/OFF button to turn the unit off. (You do not need to unplug the power cord unless the unit will not be in use for extended periods of time.) 5 Water Tank: Water will drain into the tank. When the tank is full and the unit stops operating, the “Water Full” indicator will flash. Wait until the machine stops before removing the water tank. Removing it before the unit completely stops may cause some water to drip. To empty the water tank, consult the diagram below. Return the water tank to the same position as when you removed it. The machine will restart when the water tank is replaced in the correct position. Continuous Drainage: 1. Carefully remove the drain plug on the rear of the unit. (pictured below) 2. Insert the hose inside of the hole. It should surround the connector that lies just inside of the hole. 3. Smooth any bends or kinks in the hose. 4. Place the free end of the hose into a suitable drainage facility. 6 Parts CONTROL PANEL A. ON/OFF Button: When the unit is connected to power, the POWER indicator will flash slowly. Press the On/Off Button and the unit will go directly into dehumidifying operation with the original factory humidity setting (60% RH). Press the On/Off button to stop operation. B. CONT button: When the unit is in operation, pressing the “Cont.” Button will start “Continuous Dehumidifying” mode. 7 Parts C. FAN Button: By pressing the “Fan” button, the fan speed will change. Push the button once for “High Fan” mode. Press again for “Low Fan”. Pressing the button again will return the unit to “High Fan” mode. D. POWER Indicator: Once connected to a power source, this will flash slowly indicating the unit is “on”. If this indicator doesn’t blink, it indicates that the unit is “off”. E. CONT Indicator: This lights up when the unit is in “Continuous Dehumidifying” mode. F. WATER FULL Indicator: This button lights up when the water tank is full and the unit stops operating. G. HUMIDITY ↑ Button: When pressed, the setting humidity will go up. The range adjusts between 35% Room Humidity and 80% Room Humidity. H. HUMIDITY ↓ Button: When pressed, the setting humidity will go down. Range adjustment is from 35% Room Humidity – 80% Room Humidity. I. HIGH FAN Indicator: Lights up when “High Fan” setting is selected. J. LOW FAN Indicator: Lights up when “Low Fan” setting is selected. K. ROOM HUMIDITY Display Displays room humidity percentage chosen by humidity up/down buttons. 8 Care Be sure to unplug the unit before cleaning. The use of petrol, thinners, or other chemical agents while cleaning may damage the unit. Do not clean under running water. Doing so may damage the internal electrical components causing the unit to become unsafe to operate. Air Filter: Cleaning the air filter at least every two weeks will prevent impaired performance of the unit. To Clean: - Remove the water tank as shown in Figure A. Remove the air filter as shown in Figure B. - Wash the air filter with clean water and carefully dry. - Replace the clean filter as shown Figure C. Then replace the water tank into the unit. Unit Enclosure: Use a soft, clean, and dry cloth to wipe the surface. Using water may cause an electrical fault or shock hazard. Water Tank: Wash the tank using warm water with neutral detergent. Rinse and dry. Replace tank when dry. 9 Troubleshooting Unit fails to operate: Possible Issue Corrective Action Power may be off Switch power “on” Power cord may be Restore power cord unplugged Water tank may not be Reposition water tank fitted correctly Water tank may be full Empty water tank Defrosting After defrosting, unit will continue to dehumidifying again. Performance decreased: Possible Issue Blocked air filter Windows and doors open Obstacles in air inlet or air outlet Corrective Action Wash nylon filter Close windows and doors Remove obstacles Unit noisy: Possible Issue Unstable setting of unit Blocked air filter Corrective Action Reposition unit Wash nylon filter 10 Technical Specifications Model Dehumidifying Capacity 7.4 gallons/d Power Current Supply 115V - 6.3A 60Hz Working Environment 730W DHC400 DHC250 6.3 gallons /d 115V - 4.5A 60Hz 115V - 3.7A 60Hz 510W Model Water tank volume 2.1 gallons DHC600 DHC600 3.2 gallons /d DHC400 2.1 gallons DHC250 2.1 gallons Net weight 55.11 pounds 350W Dimensions H- 25 inches W 13.8 inches D 16.7 inches 52.9 pounds H- 25 inches W 13.8 inches D 16.7 inches 52.9 pounds H- 25 inches W 13.8 inches D 16.7 inches 11