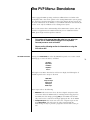
1
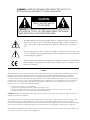
Owner’s Manual
PVP
Progressive
Video Processor
WARNING: TO REDUCE THE RISK OF FIRE OR ELECTRIC SHOCK, DO
NOT EXPOSE THIS APPLIANCE TO RAIN OR MOISTURE.
CAUTION
RISK OF ELECTRIC SHOCK
DO NOT OPEN
CAUTION: TO REDUCE THE RISK OF ELECTRICAL SHOCK, DO
NOT REMOVE COVER. NO USER-SERVICEABLE PARTS INSIDE.
REFER SERVICING TO QUALIFIED PERSONNEL.
The lightning flash with arrowhead symbol, within an equilateral triangle, is intended to
alert the user to the presence of uninsulated “dangerous voltage” within the product’s enclosure that may be of sufficient magnitude to constitute a risk of electric shock to persons.
The exclamation point within an equilateral triangle is intended to alert the user to the
presence of important operating and maintenance (servicing) instructions in the literature
accompanying the appliance.
Marking by the “CE” symbol (shown left) indicates compliance of this device with the EMC
(Electromagnetic Compatibility) and LVD (Low Voltage Directive) standards of the
European Community.
NOTICES
This equipment has been tested and found to comply with the limits for a Class B digital device, pursuant to Part 15 of the
FCC Rules. These limits are designed to provide reasonable protection against harmful interference in a residential
installation. This equipment generates, uses and can radiate radio frequency energy and, if not installed and used in
accordance with the instructions, may cause harmful interference to radio communications. However, there is no guarantee
that interference will not occur in a particular installation. If this equipment does cause interference to radio or television
reception, which can be determined by turning the equipment on and off, the user is encouraged to try to correct the
interference by one or more of the following measures:
•
•
•
•
Reorient or relocate the receiving antenna;
Increase the separation between the equipment and the receiver;
Connect the equipment into an outlet on a circuit different from that to which the receiver is connected;
Consult the dealer or an experienced radio/TV technician for help.
CAUTION: Changes or modifications to this equipment not expressly approved by the manufacturer could void the user’s
authority to operate the equipment.
This product incorporates copyright protection technology that is protected by method claims of certain U.S. patents and
other intellectual property rights owned by Macrovision Corporation and other rights owners. Use of this copyright
protection technology must be authorized by Macrovision Corporation, and is intended for home and other limited viewing
uses only unless otherwise authorized by Macrovision Corporation. Reverse engineering or disassembly is prohibited.
The information contained in the manual is subject to change without notice. The most current version of this manual will
be posted on our web site at http://www.madrigal.com.
Important Safety Instructions
Please read all instructions and precautions carefully and completely before operating your Proceed Progressive
Video Processor.
1.
ALWAYS disconnect your entire system from the AC mains before connecting or disconnecting
any cables, or when cleaning any component.
2.
The product into which the PVP is installed is equipped with a three-conductor AC mains power
cord which includes an earth ground connection. To prevent shock hazard, all three connections
must ALWAYS be used. If your electrical outlets will not accept this type of plug, an adapter may
be purchased. If an adapter is necessary, be sure it is an approved type and is used properly, supplying an earth ground. If you are not sure of the integrity of your home electrical system, contact
a licensed electrician for assistance.
3.
AC extension cords are not recommended for use with this product. If an extension cord must be
used, be sure it is an approved type and has sufficient current-carrying capacity to power this
product.
4.
NEVER use flammable or combustible chemicals for cleaning audio components.
5.
NEVER operate this product with any covers removed.
6.
NEVER wet the inside of this product with any liquid.
7.
NEVER pour or spill liquids directly onto this unit.
8.
NEVER block air flow through ventilation slots or heatsinks.
9.
NEVER bypass any fuse.
10. NEVER replace any fuse with a value or type other than those specified.
11. NEVER attempt to repair this product. If a problem occurs, contact your Proceed® retailer.
12. NEVER expose this product to extremely high or low temperatures.
13. NEVER operate this product in an explosive atmosphere.
14. ALWAYS keep electrical equipment out of the reach of children.
15. ALWAYS unplug sensitive electronic equipment during lightning storms.
From all of us at Madrigal Audio Laboratories, thank you for choosing this
Proceed product.
4
A great deal of effort went into the design and construction of this precision
device. Used properly, it will give you many years of enjoyment.
Table of Contents
Unpacking and Preparation ....................................................................... 6
Unpacking the PVP ............................................................................................ 6
Installing the PVP ................................................................................................ 6
Operating Voltage & Frequency ................................................................ 7
Voltage label ............................................................................................... 7
Special Design Features ............................................................................. 8
Deinterlacing (“Line Doubling”) ........................................................................ 8
the PVP 480p output .......................................................................................... 9
video inputs ........................................................................................................ 9
a system solution ................................................................................................ 9
Rear Panels, PVP ......................................................................................... 11
The PVP Menu: Standalone ....................................................................... 13
the main PVP menu .........................................................................................
changes to the PMDT menus ...........................................................................
video preferences .....................................................................................
user preferences ........................................................................................
PVP settings that are input-specific ................................................................
13
14
14
14
15
The PVP Menus: with AVP ........................................................................... 17
the system concept .......................................................................................... 17
automatic aspect ratio conversion ................................................................ 18
changes to the PMDT menus ........................................................................... 19
video preferences ..................................................................................... 19
user preferences ........................................................................................ 19
PVP settings that are AVP input-specific ........................................................ 19
Troubleshooting .......................................................................................... 21
U.S. and Canadian Warranty .................................................................... 22
90-Day Limited Warranty .................................................................................. 22
Five Year Extended Warranty ........................................................................... 22
Obtaining Service ..................................................................................... 23
Specifications ............................................................................................ 24
5
Unpacking and Preparation
Unpacking the PVP
Unpack your PVP Progressive Video Processor from the carton.
The carton includes:
• a video input board (in an electrostatically protected bag)
• a progressive video output board (also in an electrostatically protected bag)
Important!
Do not open the plastic bags in which your PVP circuit boards
are shipped!
These are specially designed to protect the sensitive circuitry
on the boards from ESD (ElectroStatic Discharges) that can
easily destroy modern electronics.
They should be opened only by a qualified and properly
grounded service technician, when installing the circuit
boards inside a PMDT.
6
Installing the PVP
The PVP may be installed only into a Proceed PMDT modular DVD transport,
and must be done by an authorized Proceed dealer or service center. While
simple to do, proper ESD (ElectroStatic Discharge) precautions must be observed
to prevent damage to the circuitry being installed as well as that already within
the PMDT.
• All work should be performed in a clean, well-lit area.
• All work should be performed on anti-static surfaces.
• The technician doing the installation should wear a properlygrounded anti-static strap at all tims during the installation.
Operating Voltage
& Frequency
The PMDT is set at the factory (internally) for 100V, 120V, 200V, 220V, or 240V AC
mains operation as appropriate for the country in which it is to be sold. (230V/
50Hz only in European Union countries, in compliance with CE regulations.)
Make sure that the label on the rear panel of the PMDT (beside the AC input receptacle) indicates the correct AC operating voltage for your location. Attempting
to operate the PMDT at an incorrect voltage can damage the unit.
The PMDT Modular DVD Transport is also set at the factory for operation on either 50 or 60 Hz AC line frequencies, as appropriate for the country in which it is
to be sold. It will not operate if it senses an incorrect line frequency.
Neither the voltage nor the line frequency setting may be changed by the user.
Voltage label
WARNING: BEFORE ATTEMPTING TO OPERATE THIS
DEVICE, REFER TO OWNER'S MANUAL FOR PROPER
OPERATING INSTRUCTIONS AND SAFETY PRECAUTIONS.
HAZARDOUS VOLTAGE AVAILABLE INSIDE; DISCONNECT
AC ~ MAINS CABLE BEFORE OPENING UNIT.
modular DVD transport
S/N
designed and manufactured in USA
www.madrigal.com
Apparatus Claims of U.S. Patent Nos. 4,631,603; 4,577,216;
4,819,098 and 4,907,093 licensed for limited viewing uses only.
No User Serviceable Components Inside. For service, contact Madrigal Audio
Laboratories or an Authorized Dealer. Any modifications to this equipment will void all warranties.
If the AC mains voltage or frequency indicated on your PMDT is incorrect, please
contact your local, authorized Proceed dealer or distributor.
The PMDT can easily be powered by a normal 15-ampere AC mains line. If other
devices are also powered from the same AC line, their additional power consumption should be taken into account.
7
Special Design Features
Digital television (DTV) has given us greatly improved pictures and sound with
which we may entertain ourselves. However, most of us still have significant legacies of existing videos and programs we like to watch that have not yet benefitted
from the performance advantages DTV offers. The PVP fills that gap by converting normal, “interlaced” video to 480p “progressive” video, a DTV standard.
But with new technology inevitably comes new terminology. A brief introduction
to the new jargon is probably in order.
Deinterlacing (“Line Doubling”)
Many people mistakenly assume that a line doubler “doubles” the number of
lines in the video signal, perhaps through some sort of interpolation. Given the
name, this is a reasonable assumption. Unfortunately, it happens to be wrong.
A better name for a line doubler would be a “deinterlacer” or perhaps a “line accumulator.” The main task of a line doubler is to buffer up the odd and even
lines, reassembling them in the correct order.
8
Simple (read “cheap”) line doublers do just that. They put all the first field (the
odd numbered lines of information) into memory, then the second field (all the
even numbered lines), and then “reshuffle the deck” to put them back into sequential, progressive order. Having done so, they pass along the entire frame to
the video display. In fact, they do so twice: once for the time that each field
would otherwise have been displayed, so as to avoid flicker. This is precisely what
the unsophisticated progressive outputs built into MPEG decoder chips do.
Thus a line doubler reads out entire frames of information as often as individual
fields are normally displayed. (This is where the misleading name comes from.)
Since you are now displaying twice as much information in each unit of time, the
TV has to work faster to keep up. Specifically, normal NTSC uses a “horizontal
rate” of about 15.75 kHz. This means that the electron beam in a CRT is turning
on and off 15,750 times per second (roughly).
To display a line doubled signal, it must turn on and off twice as fast to display
all those extra pixels: about 31.5 kHz. “Regular” televisions cannot do this—this is
one of the things you pay extra for with DTV designs.
Problem: what if the interlaced camera used to shoot the video in the first place
was pointed at something that was moving? During fast action, the subject would
have moved between one field and the next. If you simply reassemble field into
frame in a simplistic way, you get jagged edges of moving objects because the
fields don’t line up. This is where motion compensation comes in. It uses sophisticated analysis to compensate for such problems, ensuring that objects stay together despite the motion between one field and the next. Good line doublers
handle this sort of thing much better than simple ones do.
Another problem: video today comes from a variety of sources, including:
• film at 24 frames per second, progressively scanned during conversion to video ;
• video cameras, running at an interlaced 30 frames per second;
• computer-generated effects and such, running at a progressive 60
frames per second
Despite their origins, what you have coming in from your cable company or on
that rental tape is plain, interlaced NTSC video. The conversions from computerand film-originated material to “make it fit” normal video are quite different.
One of the hallmarks of a great line doubler is its ability to quickly detect patterns in the incoming video that indicate where the signal originally came from,
and to switch to the most appropriate method for reconstructing the progressive
signal for each source. There are big differences between deinterlacers (line doublers) in this area.
the PVP 480p output
The PVP Progressive Video Processor option for your PMDT provides a progressive component “480p” video signal to your display device. Rather than relying on
the unsophisticated progressive output modes of many MPEG decoders used in
modern DVD players, the PVP uses high-performance, purpose-designed circuitry
to realize truly outstanding progressive video performance.
Specifically, the PVP is based on a third-generation deinterlacing device that accepts the digital video signal directly from the output of the PMDT’s MPEG decoder. Because this signal has never been converted to analog prior to being
deinterlaced, the deinterlacing circuitry can work with the “original bits” and do a
superlative job of rendering the most accurate picture possible from the information stored on your DVD.
As described above, the PVP has three different modes, depending on the source
of the video footage being reproduced. It also includes advanced adaptive motion
compensation to minimize interlace artifacts. Its sophistication goes far beyond
the progressive outputs found on most DVD players. In short, it does everything
you would expect of a state of the art deinterlacer, with even greater precision
due to the direct digital video connection used within the PMDT, between the
MPEG decoder and the deinterlacer.
video inputs
Having gone to the trouble of “doing it right” with the deinterlacing in the PVP, it
seemed wrong to then send you back to the world of poorly-implemented
deinterlacing for the rest of the “legacy” components in your system.
Instead, the PVP includes a high quality video inputs board that receives interlaced video (either NTSC or PAL), decodes it, and forwards a digital component
video version of the signal to the deinterlacer and video output board. Using the
“PVP menu” in the PMDT, you can easily select from the component, S-video, and
composite inputs on the video inputs card, or select the PMDT itself for watching
a DVD.
In this way, several outboard components can benefit from the exacting implementation of the deinterlacer used in the PVP, rather than limiting those benefits
to the playing of DVDs only.
a system solution
If you also own a Proceed AVP audio video preamplifier, the system becomes
significantly more powerful and flexible, while at the same time being even easier
to use.
9
By connecting a communications cable between the PVP-equipped PMDT and
the AVP (and making sure that each is running its latest system software) and
making a few other connections, you can automatically route all of the composite
and S-video signals coming into the AVP to the appropriate inputs of the PVP
video inputs board for deinterlacing and high quality output.
In addition, the component input on the PVP now becomes available for any
other normal, interlaced signal in your system—perhaps a satellite dish. This effectively adds component video switching to the AVP, since there are now two
component video sources available to the system: the internal, digital component
connection between the PMDT and the PVP; and the external, analog component
connection on the video inputs board.
Thus the PMDT/PVP/AVP system has the following input complement:
•
•
•
•
four composite inputs
four S-video inputs
one digital component input (direct, within the PMDT itself)
one analog component input (on the video input board of the PVP)
The addition of the PVP to a PMDT/AVP system effectively allows the PMDT to
be your DVD player, and the system’s video processor, and an expansion video
switcher. Better still, because the products can “talk” to each other, everything
happens transparently to the user. Simply select the input you want as you always
have on the AVP, adjust the volume, and relax to enjoy outstanding audio and
video performance.
10
햲
햳
audio outputs progressive out
Y/BS video
Pb/R
Y/R
s-video
Pb
232
Pr/B
composite
composite
s video composite
Pr/G
composite/S
Pb/G
Pr
control ports
PHASTLink compatable
composite
Y
digital
trigger remote
in
ir
~ ac
mains
video
inputs
video
video
out
video
WARNING: BEFORE ATTEMPTING TO OPERATE THIS
DEVICE, REFER TO OWNER'S MANUAL FOR PROPER
OPERATING INSTRUCTIONS AND SAFETY PRECAUTIONS.
HAZARDOUS VOLTAGE AVAILABLE INSIDE; DISCONNECT
AC ~ MAINS CABLE BEFORE OPENING UNIT.
modular DVD transport
S/N
designed and manufactured in USA
www.madrigal.com
Apparatus Claims of U.S. Patent Nos. 4,631,603; 4,577,216;
4,819,098 and 4,907,093 licensed for limited viewing uses only.
CLASS 1
LASER PRODUCT
No User Serviceable Components Inside. For service, contact Madrigal Audio
Laboratories or an Authorized Dealer. Any modifications to this equipment will void all warranties.
햴 햵
Rear Panels, PVP
1
PROGRESSIVE COMPONENT OUTPUTS
These three BNC connectors provide a progressive component video signal.
In order from top to bottom, they are Pb, Y, Pr. If your display device or
video processor can accept a progressive component video input, we recommend using these outputs for your critical viewing. The improvement in
image dynamic range, clarity, and realism can be quite remarkable, since
using this connection bypasses a great deal of circuitry, both in the PMDT,
and in your video processor and/or display device.
Most televisions that are capable of displaying a progressive signal will automatically “lock” to the output frequency of the PVP. If yours requires
manual setup, select the “480p” or the “31.5 kHz” setting of your television.
(Please see your television’s owner’s manual for more information.)
2
COMPONENT VIDEO INPUT
If you have either an NTSC or a PAL interlaced component video output on
another source (perhaps a satellite dish receiver), connect its Y, Pb, Pr outputs to this inputs taking care to connect them in the proper order (Y, Pb,
Pr from top to bottom).
In a standalone configuration, you may access this input using the PVP
menu on the PMDT.
With the addition of the communication link cable between the AVP and
the PMDT, and a software update to each component, the PMDT and AVP
will work together to automatically select this input on the PVP video inputs card when you select a source on the AVP that is defined to use video
input “Aux Component” in the AVP Define Button menu.
11
3
S-VIDEO INPUT
In a standalone configuration, you may access this input using the PVP
menu on the PMDT. The signal will be received, converted to digital component video, and routed to the deinterlacer automatically.
If you have a PMDT/PVP/AVP system, connect the main S-video output of
the AVP to this S-video input on the PVP video inputs card. With the addition of the communication link cable between the AVP and the PMDT, and
a software update to each component, the PMDT and AVP will work together to automatically select this input on the PVP video inputs card
whenever you have selected an S-video source on the AVP.
4
COMPOSITE VIDEO INPUT
In a standalone configuration, you may access this input using the PVP
menu on the PMDT. The signal will be received, converted to digital component video, and routed to the deinterlacer automatically.
If you have a PMDT/PVP/AVP system, connect the main composite output
of the AVP to this composite input on the PVP video inputs card. With the
addition of the communication link cable between the AVP and the PMDT,
and a software update to each component, the PMDT and AVP will work
together to automatically select this input on the PVP video inputs card
whenever you have selected a composite source on the AVP.
12
The PVP Menu: Standalone
A PVP-equipped PMDT operating without an additional Proceed audio video
preamplifier adds a few menu options to the existing PMDT menu system, giving
you control over PVP functions. This section of the manual will not reiterate all
the menu information on the PMDT; see your PMDT manual for that. Instead, this
section covers only the additions to the existing menu system.
This section assumes basic understanding of the PMDT menu system, and is intended as a supplement to the PMDT manual. If you are unfamiliar with the
PMDT, please begin with that product’s manual.
Note:
This section of the manual describes what you see when you
use the PVP in a PMDT without linking it to a compatible
Proceed processor such as the AVP.
Please see the following section for information on using the
PVP with an AVP.
the main PVP menu
Pressing the menu button on either the PMDT front panel or its remote control
will bring up a “menu of menus,” as follows:
Disc Menu
Player Menu
PVP Menu
Help Menu
About…
Selecting the PVP Menu from this list will in turn display the following list of
available inputs that are unique to the PVP:
PMDT DVD
Composite Input
S-Video Input
YPbPr Input
SCART Input
These inputs refer to the following:
• PMDT DVD: This menu item selects the direct digital component video
connection within the PMDT itself, for watching DVDs being played in
the PMDT. Note that simply pressing play on the PMDT will automatically switch to this connection and begin playing the disc in the PMDT.
• Composite Input: This menu item selects the composite input on the
PVP video inputs card, and routes the video signal through the
deinterlacing circuitry to provide a progressive version of the same picture.
13
• S-Video Input: This menu item selects the S-video input on the PVP
video inputs card, and routes the video signal through the deinterlacing
circuitry to provide a progressive version of the same picture.
• YPbPr Input: This menu item selects the interlaced, analog component
video input on the PVP video inputs card, and routes the video signal
through the deinterlacing circuitry to provide a progressive version of
the same picture.
• SCART Source: A European standard, a SCART sources requires the PVP
to receive RGB plus composite sync on four wires. When you select
SCART Input on the main PVP menu, it will receive the four signals on
the four RCA connectors of the video inputs card in order as follows
from top to bottom: R, G, B, Sc (skipping the S-video connector).
Note:
When using the PVP to receive a SCART input, both the
component and composite inputs are used to receive the
four-wire signal. This effectively leaves you with two inputs:
SCART and S-video.
The PMDT will “remember” what input had been selected and return to it after a
standby/operate cycle.
changes to the PMDT menus
In addition to the PVP menu itself, several items have changed in the PMDT
menus. In summary:
14
video preferences
The output levels of the progressive output card conform to SMPTE standards for
progressive component output levels, etc. Since this will be your main connection
to the display, the correct way of adjusting the system will be to optimize black
level, white level, etc. at the display.
You still have independent settings for the composite/S-video output card, since
these signals may be directed to a component that does not have such adjustments (perhaps a VCR, or a multiroom video distribution system). These settings
are now referred to as “Interlaced” settings, to make it clearer that they have no
effect on the progressive output.
The default settings are technically correct; adjust them only to solve installationspecific problems.
user preferences
There is one addition to the user preferences menu. A seventh link option has
been added to the menu, labeled “Input: On/Off.”
This menu item allows you to turn on the communication between the AVP and
the PVP-equipped PMDT. The only time this feature would be turned off is if you
needed to use the PVP-equipped PMDT in a standalone mode, without the AVP.
Turning it off when there is no AVP with which to communicate saves it from
unnecessary efforts at impossible communication, and improves response time to
other commands.
When on and connected to the AVP, turning this link option on engages the automatic switching between inputs on the PVP, according to the needs of the AVP. It
also displays the name of the selected AVP source in the front panel display of
the PMDT.
PVP settings that are
input-specific
The PMDT/PVP will record specific video adjustment settings for each input on
the video input card. This allows you to optimize the picture quality of each
video source, even when some of them are not technically “correct” in terms of
level or phase.
In most systems, the only setting you may want to adjust is the “pre-shrink” setting described above, as most of your source components will be reasonably accurate. If, however, you notice that one or more source components seem “off” as
compared to the output of the PMDT itself when playing movies or video test
materials, you have the ability to adjust the other component(s) to match the
PMDT.
To adjust any particular input in a linked AVP/PMDT/PVP system:
1
SELECT THE INPUT YOU WANT TO ADJUST ON THE PVP MENU
Wait for the input to switch and for your television to resync on the new
signal (some video projectors may take a few seconds to do this).
2
PRESS THE PMDT’S “MENU” BUTTON
You may do this from either the front panel or the remote control of the
PMDT. You will see the PMDT’s front panel display change: the word Input
becomes Black:0. At this point, you can adjust the black level setting for
your chosen source, in steps from 0-18. (Note that the system will “time-out”
after a few seconds if no buttons are pushed, requiring you to start over
again.)
3
TO CYCLE THROUGH THE AVAILABLE ADJUSTMENTS, PRESS EITHER THE
UP OR DOWN ARROW BUTTONS BEFORE THE SYSTEM “TIME-OUTS” AND
REVERTS TO NORMAL OPERATION
The settings that can be remembered for any given input are:
•
•
•
•
•
Black Level
White Level
Chroma
Tint:
Pre-shrink
“Black”
“White”
“Chrma”
“Tint”
“Shrnk”
0-18 steps
75-125%
75-125%
±20 steps
Yes/No
(brightness)
(contrast)
(color)
(also called hue)
(see next chapter)
Each item can be adjusted to suit the needs of your system, and will be
automatically recalled whenever that particular input is selected.
4
REPEAT THE PROCESS WITH AS MANY SOURCES ON THE AVP AS
NECESSARY
Note that if you need to change the “Shrink” feature temporarily, you can always
enter the menu system described above and make a change. This might occur, for
example, if your satellite service plays almost everything in 4:3, except for the occasional pay-per-view or premium channel. If a 16:9 anamorphically-squeezed
15
program comes on, you do not need the PVP to squeeze it yet again; set the preshrink feature to off for the duration of the movie, then turn it back to on for normal programming.
16
The PVP Menus: with AVP
A PVP-equipped PMDT operating with a Linked Proceed AVP audio/video
preamplifier adds a few menu options to the existing AVP menu system, giving
you control over PVP functions. This section of the manual will not reiterate all
the menu information on the PMDT; see your PMDT manual for that. Instead, this
section covers only the additions to the existing menu system.
This section assumes basic understanding of the PMDT menu system, and is intended as a supplement to the PMDT manual. If you are unfamiliar with the
PMDT, please begin with that product’s manual.
Note:
This section of the manual describes what you see when you
use the PVP in a PMDT that is linked to a compatible Proceed
processor such as the AVP.
Please see the previous section for information on using the
PMDT/PVP as a standalone video processor.
the system concept
When you use the PVP in the context of a linked AVP/PMDT system, the entire
system becomes much more powerful and simpler to use. This is because the
AVP and the PMDT can “share” important information with one another that is
relevant to the optimal settings for the PVP.
Two simple examples: once you have connected the main composite and S-video
outputs of the AVP to the corresponding inputs of the PVP, the AVP can “tell” the
PVP which of its inputs its should switch to, based on the input that you have
selected on the AVP. Thus, having selected a VHS VCR, the AVP can tell the PVP
to look to its composite input, as the AVP is sending a signal there for further
processing. When you switch the AVP to an S-video input, the PVP will be told to
switch accordingly to find the desired input.
The interlaced component input on the PVP is also “aliased” (made available) to
the AVP as another video input. Thus when you are defining input buttons on
the AVP, you will have an additional, component video input available in addtion
to the four composite and four S-video inputs.
Note:
You do not need this component input for the PMDT to
function as a DVD player: it always uses a dedicated, digital
component video path within the PMDT/PVP system for the
best possible picture. This “extra,” analog component input is
for another component source—perhaps a satellite receiver
or a second DVD player.
Having said this, you may still elect to connect a “redundant” video connection
(composite or S-video) for the PMDT and AVP that can be used to route the out-
17
put of the PMDT to a remote zone or record output.
automatic aspect
ratio conversion
Many (but not all) telelvisions that are capable of accepting the 480p output of
the PMDT falsely assume that all progressive signals are also anamorphically
squeezed. This ridiculous assumption (which appears to stem from not having
read the HDTV specification very closely) means that 4:3 progressive video signals ends up grossly distorted, with short & fat people everywhere. This is because they start out “correct,” and are then inappropriately “corrected” for anamorphic squeezing by the television.
Fortunately, the PVP can compensate for this deficiency of the television’s, by
“pre-shrinking” 4:3 signals before they are routed to the television. The PVP does
so without losing any picture information, presenting the best possible picture on
these somewhat feature-limited televisions. (Technically, for those interested: in
“pre-shrink” mode, the PVP is actually running its horizontal clock at a higher
rate so as to display all available picture information within a smaller, centered
area; it fills the now-empty side areas in with new, black pixels. In this fashion, the
active picture area is “squeezed” without losing any picture detail. The television
then stretches it back out to normal.)
18
Whether or not it makes sense to engage this “pre-shrink” mode in the PVP is
decided on an input-by-input basis, depending on the likelihood of ever seeing
an anamorphically-squeezed signal on a given video source. Since DVD players
and the occasional pay-per-view movie on satellite are the only likely sources of
anamorphically-shrunk video, it probably makes sense to leave pre-shrink on for
most things (if you have one of these televisions with the aformentioned problem). Of course, you can always change it “on the fly” to accommodate unusual
situations as they arise.
In the special case of the PMDT playing DVDs, we of course know for a fact
whether or not any given disc is anamorphically squeezed. We can therefore
switch the PVP automatically, based on the disc you are playing: 4:3 material can
be “pre-shrunk” to suit your television’s false assumptions about progressive video,
while anamorphic signals are passed along “as is” for your television to
“unsqueeze.” This automatically occurs when using the 16:9 TV Type as selected
in the Player Menu.
To summarize the “pre-shrink” feature of the PVP:
• If your 480p-capable television allows you to change aspect ratios
at will, based on the needs of the program material, leave the
“Shrink” feature off on all inputs. Doing so will give you the greatest flexibility in displaying 4:3 pan and scan, 4:3 letterbox, and 16:9
anamorphic material.
• If your 480p-capable television automatically goes to horizontal
stretch (anamorphic unsqueeze) mode when it sees a progressive
video signal (as many do), set the “Shrink” feature to Yes for all
sources that are likely to be 4:3 most or all of the time; set “Shrink”
to No for any sources that are likely to be 16:9 anamorphic most or
all of the time.
• The PMDT in which the PVP resides can take care of itself, automatically turning pre-shrink on and off as needed by the disc being played when the TV Type 16:9 is selected in the Player Menu
To summarize all the changes in the PMDT menus:
changes to the PMDT menus
video preferences
Several items have changed in the PMDT menus when the PVP is installed and
the system software updated. In summary:
The output levels of the progressive output card conform to SMPTE standards for
progressive component output levels, etc. Since this will be your main connection
to the display, the correct way of adjusting the system will be to optimize black
level, white level, etc. at the display.
You still have independent settings for the composite/S-video output card, since
these signals may be directed to a component that does not have such adjustments (perhaps a VCR, or a multiroom video distribution system). These settings
are now referred to as “Interlaced” settings, to make it clearer that they have no
effect on the progressive output.
The default settings are technically correct; adjust them only to solve installationspecific problems.
user preferences
There is one addition to the user preferences menu. A seventh link option has
been added to the menu, labeled “Input: On/Off.”
This menu item allows you to turn on the communication between the AVP and
the PVP-equipped PMDT. The only time this feature would be turned off is if you
needed to use the PVP-equipped PMDT in a standalone mode, without the AVP.
Turning it off when there is no AVP with which to communicate saves it from
unnecessary efforts at impossible communication, and improves response time to
other commands somewhat.
When on and connected to the AVP, turning this link option on engages the automatic switching between inputs on the PVP, according to the needs of the AVP. It
also displays the name of the selected AVP source in the front panel display of
the PMDT.
PVP settings that are
AVP input-specific
The PMDT/PVP will record specific video adjustment settings for each defined
input on the Proceed linked audio/video preamplifier being used. This allows
you to optimize the picture quality of each video source, even when some of
them are not technically “correct” in terms of level or phase.
In most systems, the only setting you may want to adjust is the “pre-shrink” setting described above, as most of your source components will be reasonably accurate. If, however, you notice that one or more source components seem “off” as
compared to the output of the PMDT itself when playing movies or video test
materials, you have the ability to adjust the other component(s) to match the
PMDT.
To adjust any particular input in a linked AVP/PMDT/PVP system:
19
1
SELECT THE INPUT YOU WANT TO ADJUST ON THE AVP
Wait for the input to switch and for your television to resync on the new
signal (some video projectors may take a few seconds to do this). You
should see the name of the selected source in the front panel displays of
both the AVP and the PMDT.
2
PRESS THE PMDT’S “MENU” BUTTON
You may do this from either the front panel or the remote control of the
PMDT. You will see the PMDT’s front panel display change: the word Input
becomes Black:0. At this point, you can adjust the black level setting for
your chosen source, in steps from 0-18. (Note that the system will “time-out”
after a few seconds if no buttons are pushed, requiring you to start over
again.)
3
TO CYCLE THROUGH THE AVAILABLE ADJUSTMENTS, PRESS EITHER THE
UP OR DOWN ARROW BUTTONS BEFORE THE SYSTEM “TIME-OUTS” AND
REVERTS TO NORMAL OPERATION
The settings that can be remembered for any given input are:
•
•
•
•
•
Black Level
White Level
Chroma
Tint:
Pre-shrink
“Black”
“White”
“Chrma”
“Tint”
“Shrnk”
0-18 steps
75-125%
75-125%
±20 steps
Yes/No
(brightness)
(contrast)
(color)
(also called hue)
(see above)
Each item can be adjusted to suit the needs of your system, and will be
automatically recalled whenever that particular input is selected.
20
4
REPEAT THE PROCESS WITH AS MANY SOURCES ON THE AVP AS
NECESSARY
Note that if you need to change the “Shrink” feature temporarily, you can always
enter the menu system described above and make a change. This might occur, for
example, if your satellite service plays almost everything in 4:3, except for the occasional pay-per-view or premium channel. If a 16:9 anamorphically-squeezed
program comes on, you do not need the PVP to squeeze it yet again; set the preshrink feature to off for the duration of the movie, then turn it back to on for normal programming.
Troubleshooting
In general, refer any service problems to your local authorized Proceed dealer.
Before contacting your dealer, however, check to see if the problem is listed here.
If it is, try the suggested solutions. If none of these solves the problem, contact
your Proceed dealer.
1.
NO VIDEO OUTPUT FROM EXTERNAL VIDEO SOURCES
✓
Verify that the PMDT is on.
✓
Verify that the selected source is itself on.
✓
Verify that the correct video input is selected, either manually in
a standalone system or by checking the Define Button menu
screen on tyhe AVP in a linked system.
✓
Verify that the Link is established between the PMDT/PVP and
the AVP (assuming you have a linked system) by changing the
display intensity on either—if the Intensity Link is on, the displays on both units should track with one another.
2.
THE PMDT WON’T FUNCTION, AND THE DISPLAY IS DARK.
✓
The PMDT isn’t plugged into the AC mains.
✓
The power button has not been engaged.
✓
The wall socket (or extension cord, if used) is faulty, or the wall
socket has a tripped circuit breaker or blown fuse.
✓
A fuse is blown in your PMDT (contact your Proceed dealer).
3.
I HAVE LINKED THE PMDT TO MY AVP BUT THE LINKS DON’T SEEM TO BE
WORKING.
✓
Check to make sure your Link cable is seated properly, connecting the Control ports (PHASTLink compatible) of the two products, and that the PMDT’s input name on the AVP is “PMDT” (no
quotation marks).
✓
Check to make sure you have the latest version of software installed in your AVP. Please consult with your dealer for more information on your AVP software version.
✓
Your AVP may need the PHAST™ daughtercard installed. Please
contact your dealer for details.
21
U.S. and Canadian Warranty
90-Day Limited Warranty
This Proceed® product is warranted to be free from defects in material and workmanship under normal use for a period of ninety (90) days from the date of purchase. To extend the warranty of this Proceed product, return the warranty registration card along with a copy of the original receipt of purchase to Madrigal Audio
Laboratories, Inc., P. O. Box 781, Middletown, CT 06457.
Five Year Extended Warranty
The extended warranty for this Proceed product is five (5) years from the date of
purchase. During the warranty period, any Proceed component exhibiting defects
in materials and/or workmanship will be repaired or replaced, at our option,
without charge for either parts or labor, at our factory. The warranty will not apply
to any Proceed component that has been misused, abused or altered.
Any Proceed component not performing satisfactorily may be returned to the factory for evaluation. Return authorization must first be obtained by either calling
or writing the factory prior to shipping the component. The factory will pay for
return shipping charges only in the event that the component is found to be defective as mentioned above. There are other stipulations that may apply to shipping charges.
22
There is no other express warranty on this component. Neither this warranty nor
any other warranty, express or implied, including any implied warranties of merchantability or fitness, shall extend beyond the warranty period. No responsibility
is assumed for any incidental or consequential damages. Some states do not allow limitations on how long an implied warranty lasts and other states do not
allow the exclusion or limitation of incidental or consequential damages, so that
the above limitation or exclusion may not apply to you.
This warranty gives you specific legal rights, and you may also have other rights
which vary from state to state. This warranty is applicable in the United States and
Canada only. Outside of the U.S. and Canada, please contact your local, authorized Proceed distributor for warranty and service information.
Obtaining Service
We take great pride in our dealers. Experience, dedication, and integrity make
these professionals ideally suited to assist with our customers’ service needs.
If your Proceed component must be serviced, please contact your dealer. Your
dealer will then decide whether the problem can be remedied locally, or whether
to contact Madrigal for further service information or parts, or to obtain a Return
Authorization. The Madrigal Technical Services Department works closely with
your dealer to solve your service needs expediently.
Important!
Return authorization must be obtained from Madrigal’s
Technical Services Department BEFORE a unit is shipped for
service.
It is extremely important that information about a problem be explicit and complete. A specific, comprehensive description of the problem helps your dealer and
the Madrigal Technical Services Department locate and repair the difficulty as
quickly as possible.
A copy of the original bill of sale will serve to verify warranty status. Please include it with the unit when it is brought in for warranty service.
23
Warning!
All returned units must be properly packaged (preferably in
their original packing material), and the proper return
authorization numbers must be marked on the outer carton
for identification. If the packaging to protect the unit is, in our
opinion or that of our dealer, inadequate to protect the unit,
we reserve the right to repackage it for return shipment at the
owner’s expense. Neither Madrigal nor your dealer can be
responsible for shipping damage due to improper (that is,
non-original) packaging.
Your dealer can order a new set of shipping materials for you if you need to ship
your component and no longer have the original materials. There will be a
charge for this service. We strongly recommend saving all packing materials in
case you need to ship your unit some day.
Specifications
■
■
■
■
■
■
■
■
■
■
■
■
■
■
Horizontal scan frequency:
31.5 kHz
Equivalent interlaced NTSC bandwidth:
6.75 MHz
Video frequency response:
±0.5 dB up to 5.5 MHz
Video signal to noise ratio:
better than –60 dB
Video differential phase:
better than 0.5°
Video differential gain:
better than 0.1 dB
Video output impedance:
75Ω
Video output complement:
progressive YPbPr on 75Ω BNC
Progressive YPbPr standard:
EIA 770.2 and SMPTE 293M-1996
Y signal levels:
-300 mV embedded sync, 700 mV peak (ref. blanking)
Pb signal levels:
±350 mV (ref. blanking)
Pr signal levels:
±350 mV (ref. blanking)
Video input formats supported:
NTSC, PAL
Video aspect ratios:
anamorphic, 16:9
letterboxed, 4:3
pan&scan, 4:3
“pre-shrunk” 4:3 video
(designed to display 4:3 on an anamorphic display)
For more information, see your Proceed dealer, or contact:
24
Madrigal Audio Laboratories, Inc.
P.O. Box 781
2081 South Main Street (Route 17)
Middletown, Connecticut 06457 USA
Telephone (860) 346-0896
FAX
(860) 346-1540
Internet
http://www.madrigal.com/
Madrigal provides an owner-transferable, five year extended warranty on all
Proceed products within the U. S. and Canada ONLY. Warranty and service
policies outside the U. S. and Canada are set by the local, authorized
distributor and are applicable in the country of purchase ONLY. Madrigal
products are designed to operate at set voltages appropriate for the country
of sale and may be damaged if operated at the wrong voltage.contact your
local dealer or distributor.
25
m
Madrigal Audio Laboratories, Inc.
2081 South Main Street, P.O. Box 781
Middletown, Connecticut 06457 USA
Telephone: (860) 346-0896
Fax: (860) 346-1540
http://www.madrigal.com/
is a registered trademark of Madrigal Audio Laboratories, Inc.
a Harman International company
630446
© 5/2001 Madrigal Audio Laboratories, Inc. All rights reserved.
Printed in U.S.A.