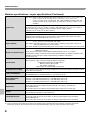
1
MODEL: MX-4100N
MX-4101N
MX-5000N
MX-5001N
DIGITAL FULL COLOUR MULTIFUNCTIONAL SYSTEM
Safety Guide
Before installing this product, be sure to read the
"CAUTIONS" and "INSTALLATION
REQUIREMENTS" sections.
CAUTIONS
INSTALLATION REQUIREMENTS
SUPPLIES
SPECIFICATIONS
INFORMATION ON DISPOSAL
Keep this manual close at hand for reference
whenever needed.
TO THE ADMINISTRATOR OF THE MACHINE
Please see opposite side to access
to "Software Setup Guide" and "Sharpdesk
Installation Guide".
Caution!
For complete electrical disconnection, pull out the main plug.
The socket-outlet shall be installed near the equipment and shall be easily accessible.
Shielded interface cables must be used with this equipment to maintain compliance with EMC regulations.
The equipment should be installed near an accessible socket outlet for easy disconnection.
Notice for users in the UK
MAINS PLUG WIRING INSTRUCTIONS
The mains lead of this equipment is already fitted with a mains plug which is either a non-rewireable
(moulded) or a rewireable type. Should the fuse need to be replaced, a BSI or ASTA approved fuse
to BS1362 marked
or
and of the same rating as the one removed from the plug must
be used.
Always refit the fuse cover after replacing the fuse on the moulded plug. Never use the plug without
the fuse cover fitted.
In the unlikely event of the socket outlet in your home not being compatible with the plug supplied
either cut-off the moulded plug (if this type is fitted) or remove by undoing the screws if a rewireable
plug is fitted and fit an appropriate type observing the wiring code below.
DANGER: The fuse should be removed from the cut-off plug and the plug destroyed immediately
and disposed of in a safe manner. Under no circumstances should the cut-off plug be inserted
elsewhere into a 13A socket outlet as a serious electric shock may occur.
To fit an appropriate plug to the mains lead, follow the instructions below:
IMPORTANT: The wires in this mains lead are coloured in accordance with the following code:
GREEN-AND-YELLOW: Earth
BLUE:
Neutral
BROWN:
Live
As the colours of the wires in this mains lead may not correspond with coloured markings
identifying the terminals in your plug, proceed as follows:
The wire which is coloured GREEN-AND-YELLOW must be connected to the terminal in the plug
which is marked with the letter E, or by the safety earth symbol
, or coloured green or greenand-yellow.
The wire which is coloured BLUE must be connected to the terminal which is marked with the letter
N or coloured black.
The wire which is coloured BROWN must be connected to the terminal which is marked with the
letter L or coloured red.
If you have any doubt, consult a qualified electrician.
WARNING: THIS APPARATUS MUST BE EARTHED.
➣➢➣➢➣➢➣➢➣➢➣➢➣➢➣➢➣➢➣➢➣➢➣➢➣➢➣➢➣➢➣➢➣➢➣➢➣➢➣➢➣➢➣➢➣➢➣➢➣➢➣➢➣➢➣
➢➣➢➣➢➣➢➣➢➣➢➣➢➣➢➣➢➣➢➣➢➣➢➣➢➣➢➣➢➣➢➣➢➣➢➣➢➣➢➣➢➣➢➣➢➣➢➣➢➣➢
➢➣➢➣➢➣➢➣➢➣➢➣➢➣➢➣➢➣➢➣➢➣➢➣➢➣➢➣➢➣➢➣➢➣➢➣➢➣➢➣➢➣➢➣➢➣➢➣➢➣➢➣➢➣➢
➢➣➢➣➢➣➢➣➢➣➢➣➢➣➢➣➢➣➢➣➢➣➢➣➢➣➢➣➢➣➢➣➢➣➢➣➢➣➢➣➢➣➢➣➢➣➢➣➢➣➢➣➢➣➢➣
EMC (this machine and peripheral devices)
Warning:
This is a Class A product. In a domestic environment this product may cause radio interference in which case the user may be
required to take adequate measures.
This machine contains the software having modules developed by Independent JPEG Group.
This product includes Adobe® Flash® technology of Adobe Systems Incorporated.
Copyright© 1995-2007 Adobe Macromedia Software LLC. All rights reserved.
For the users of the fax function
FAX interface cable and Line cable:
These special accessories must be used with the device.
The Declaration of Conformity can be viewed at the following URL address.
http://www.sharp.de/doc/MX-FXX2.pdf
1
Contents
CAUTIONS . . . . . . . . . . . . . . . . . . . . . . . . . . . . . . . . 3
Saddle stitch finisher specifications . . . . . . . . . . . 15
Laser information . . . . . . . . . . . . . . . . . . . . . . . . . . 4
Punch module specifications (for finisher) . . . . . . 16
INSTALLATION REQUIREMENTS . . . . . . . . . . . . . 5
Punch module specifications
(for saddle stitch finisher) . . . . . . . . . . . . . . . . . . . 14
SUPPLIES. . . . . . . . . . . . . . . . . . . . . . . . . . . . . . . . . 6
Keyboard specifications . . . . . . . . . . . . . . . . . . . . 17
Storage of supplies. . . . . . . . . . . . . . . . . . . . . . . . . 6
Printer specifications . . . . . . . . . . . . . . . . . . . . . . 17
Supply of spare parts and consumables . . . . . . . . 6
Network scanner / Internet Fax specifications . . . 18
SPECIFICATIONS . . . . . . . . . . . . . . . . . . . . . . . . . . 7
Machine specifications / copier specifications . . . . 7
Pull scan function (TWAIN) specifications . . . . . . 18
Facsimile specifications . . . . . . . . . . . . . . . . . . . . 19
Continuous copying speeds . . . . . . . . . . . . . . . . . . 9
INFORMATION ON DISPOSAL . . . . . . . . . . . . . . . 20
Ambient environment . . . . . . . . . . . . . . . . . . . . . . . 9
A. Information on Disposal for Users (private
households) . . . . . . . . . . . . . . . . . . . . . . . . . . . . . 20
Acoustic noise emission (measurement according to
ISO7779) . . . . . . . . . . . . . . . . . . . . . . . . . . . . . . . 10
Automatic document feeder specifications. . . . . . 10
Exit tray unit (right tray) specifications . . . . . . . . . 11
Stand/1x500 sheet paper drawer specifications. . 11
B. Information on Disposal for Business Users. . . . . .20
TO THE ADMINISTRATOR OF THE MACHINE . . 22
Factory default passwords . . . . . . . . . . . . . . . . . . 22
Stand/2x500 sheet paper drawer specifications. . 12
Forwarding all transmitted and received data to the
administrator (document administration function). . . .22
Large capacity tray specifications . . . . . . . . . . . . 12
For the users of the fax function . . . . . . . . . . . . . . . . .22
Finisher specifications . . . . . . . . . . . . . . . . . . . . . 13
Trademark acknowledgments . . . . . . . . . . . . . . . 23
Finisher (large stacker) specifications . . . . . . . . . 14
Note:
• Considerable care has been taken in preparing this manual. If you have any comments or concerns about the manual, please
contact your dealer or nearest authorised service representative.
• This product has undergone strict quality control and inspection procedures. In the unlikely event that a defect or other problem is
discovered, please contact your dealer or nearest authorised service representative.
• Aside from instances provided for by law, SHARP is not responsible for failures occurring during the use of the product or its
options, or failures due to incorrect operation of the product and its options, or other failures, or for any damage that occurs due
to use of the product.
• This manual contains references to the fax function. However, please note that the fax function is not available in some countries
and regions.
Products that have earned the ENERGY STAR® are designed to protect the environment
through superior energy efficiency.
The products that meet the ENERGY STAR® guidelines carry the logo shown above.
The products without the logo may not meet the ENERGY STAR® guidelines.
Warranty
While every effort has been made to make this document as accurate and helpful as possible, SHARP Corporation makes no
warranty of any kind with regard to its content. All information included herein is subject to change without notice. SHARP is not
responsible for any loss or damages, direct or indirect, arising from or related to the use of this operation manual.
©Copyright SHARP Corporation 2008. All rights reserved. Reproduction, adaptation or translation without prior written permission is
prohibited, except as allowed under copyright laws.
2
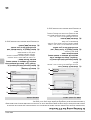
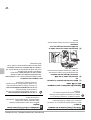
CAUTIONS
1. Do not touch the transfer belt. Scratches or smudges on the transfer belt will
cause dirty prints.
2. The fusing unit is extremely hot. Exercise care in this area.
3. Do not look directly at the light source. Doing so may damage your eyes.
4. When the machine is installed, the adjusters (4) must be lowered to the floor
Fusing unit
to secure the machine (prevent it from moving).
Rotate the adjusters in the locking direction until they are in firm contact with
the floor.
If you find it necessary to reposition the machine due to rearrangement of
your office layout or other reason, retract the adjusters from the floor, turn off
the power, and then move the machine.
(After moving the machine, lower the adjusters again to secure the machine.)
5. Do not make any modifications to this machine. Doing so may result in
personal injury or damage to the machine.
6. The machine is heavy. To prevent injury when moving the machine, it is
recommended that it be moved by four or more persons.
7. Do not make copies of anything which is prohibited from copying by law. The
following items are normally prohibited from printing by national law. Other
items may be prohibited by local law.
● Money ● Stamps ● Bonds ● Stocks
Adjuster
● Bank drafts ● Checks ● Passports ● Driver's licences
8. Do not use a flammable spray to clean the machine. If gas from the spray
Lock
Release
comes in contact with hot electrical components or the fusing unit inside the
machine, fire or electrical shock may result.
9. Do not throw toner, a toner container (toner cartridge), or a waste toner box into a fire. Toner may fly and cause
burns.
10. Store toner, toner containers (toner cartridges), and waste toner boxes out of the reach of children.
The machine includes the document filing function, which stores document image data on the machine's hard drive. Stored
documents can be called up and printed or transmitted as needed. If a hard drive failure occurs, it will no longer be possible to call
up the stored document data. To prevent the loss of important documents in the unlikely event of a hard drive failure, keep the
originals of important documents or store the original data elsewhere.
With the exception of instances provided for by law, Sharp Corporation bears no responsibility for any damages or loss due to the
loss of stored document data.
"BATTERY DISPOSAL"
THIS PRODUCT CONTAINS A LITHIUM PRIMARY MEMORY BACK-UP BATTERY THAT MUST BE DISPOSED OF PROPERLY.
PLEASE CONTACT YOUR LOCAL SHARP DEALER OR AUTHORISED SERVICE REPRESENTATIVE FOR ASSISTANCE IN
DISPOSING OF THIS BATTERY.
Each instruction also covers the optional units used with these products.
3
CAUTIONS
Laser information
Wave length
790 nm ±10 nm
Pulse times
(North America and Europe)
MX-4100N/MX-4101N:
3.5 µs ±3.5 ns /7 mm Heavy Paper 3.2 µs ±3.2 ns /7 mm
MX-5000N/MX-5001N:
2.8 µs ±2.8 ns /7 mm Heavy Paper 3.2 µs ±3.2 ns /7 mm
Output power
Max 0.6 mW (LD1+LD2)
Caution
Use of controls or adjustments or performance of procedures other than those specified herein may result in hazardous radiation exposure.
This Digital Equipment is CLASS 1 LASER PRODUCT (IEC 60825-1 Edition 1.2-2001)
For North America:
SAFETY PRECAUTIONS
This Digital Equipment is rated Class 1 and complies with 21 CFR 1040.10 and 1040.11 of the CDRH standards. This means that
the equipment does not produce hazardous laser radiation. For your safety, observe the precautions below.
• Do not remove the cabinet, operation panel or any other covers.
• The equipment's exterior covers contain several safety interlock switches. Do not bypass any safety interlock by inserting wedges
or other items into switch slots.
For Europe:
CLASS 1 LASER PRODUCT
LASER KLASSE 1
LUOKAN 1 LASERLAITE
KLASS 1 LASERAPPARAT
4
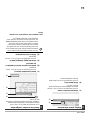
INSTALLATION REQUIREMENTS
Improper installation may damage this product. Please note the following during initial installation and whenever the
machine is moved.
1. The machine should be installed near an accessible
power outlet for easy connection.
2. Be sure to connect the power cord only to a power
outlet that meets the specified voltage and current
requirements. Also make certain the outlet is properly
grounded.
• For the power supply requirements, see the name
plate in the lower left corner of the left side of the
machine.
Connect the machine to a power outlet which is not
used for other electric appliances. If a lighting fixture is
connected to the same outlet, the light may flicker.
3. Do not install the machine in areas that are:
• damp, humid, or very dusty
• exposed to direct sunlight
• poorly ventilated
• subject to extreme temperature or humidity
changes, e.g., near an air conditioner or heater.
4. Be sure to allow the required space around the
machine for servicing and proper ventilation.
5. The machine includes a built-in hard drive. Do not
subject the machine to shock or vibration. In
particular, never move the machine while the power is
on.
30cm
(11-13/16")
30cm
(11-13/16")
45cm
(17-23/32")
A small amount of ozone is produced within the printer during operation. The emission level is insufficient to cause any health
hazard.
NOTE:
The present recommended long term exposure limit for ozone is 0.1 ppm (0.2 mg/m3) calculated as an 8 hr. time-weighted average
concentration.
However, since the small amount that is emitted may have an objectionable odor, it is advisable to place the copier in a ventilated
area.
5
SUPPLIES
Standard supplies for this product that can replaced by the user include paper, toner cartridges, and staple cartridges for
the finisher.
Be sure to use only SHARP-specified products for the toner cartridges, finisher staple cartridge, saddle stitch finisher
staple cartridge, and transparency film.
For best copying results, be sure to use only Sharp Genuine Supplies which are designed,
engineered, and tested to maximize the life and performance of Sharp products. Look for the
Genuine Supplies label on the toner package.
GENUINE SUPPLIES
Storage of supplies
Proper storage
1. Store the supplies in a location that is:
• clean and dry,
• at a stable temperature,
• not exposed to direct sunlight.
2. Store paper in the wrapper and lying flat.
3. Paper stored in packages standing up or out of the wrapper may curl or become damp, resulting in paper misfeeds.
Storing toner cartridges
Store a new toner cartridge box horizontally. Do not store it standing on end. If stored standing on end, the toner may not
distribute well even after shaking the cartridge vigorously, and will remain inside the cartridge without flowing out.
Staple cartridge
The finisher and saddle stitch finisher require the following staple cartridge:
MX-SCX1 (for finisher and saddle stitch finisher)
Approx. 5000 per cartridge x 3 cartridges
AR-SC2 (for finisher (large stacker))
Approx. 5000 per cartridge x 3 cartridges
AR-SC3 (for saddle stitch finisher only)
Approx. 2000 per cartridge x 3 cartridges
Supply of spare parts and consumables
The supply of spare parts for repair of the machine is guaranteed for at least 7 years following the termination of
production. Spare parts are those parts of the machine which may break down within the scope of the ordinary use of
the product, whereas those parts which normally exceed the life of the product are not to be considered as spare parts.
Consumables too, are available for 7 years following the termination of production.
6
SPECIFICATIONS
Machine specifications / copier specifications
Name
Digital Full Colour Multifunctional System MX-4100N/MX-4101N/MX-5000N/MX-5001N
Type
Desktop
Photoconductive type
OPC drum
Printing method
Electrophotographic system (laser)
Developer system
Dry-type two-component magnetic brush development
Fusing system
Heat rollers
Document glass
Scanning resolution
Black and white scanning: 600 x 300 dpi (factory default values),
600 x 400 dpi, 600 x 600 dpi
Colour scanning:600 x 600 dpi (factory default values)
Reversing single pass Black and white scanning: 600 x 400 dpi (factory default values), 600 x 600 dpi
feeder (automatic
Colour scanning:600 x 600 dpi (factory default values)
document feeder)
Printing resolution
600 x 600 dpi
Scanning gradation
256 levels
Printing gradation
Equivalent to 256 levels
Original sizes / types
Max. A3 (11" x 17") / sheets, bound documents
Copy sizes
Maximum: A3W (12" x 18") Minimum: A5R (5-1/4" x 5-3/4")
Print margins
Leading edge / trailing edge: total 8 mm (21/64") or less,
near edge / far edge: total 4 mm ±2 mm (11/64" ±3/32") or less
Warm-up time
MX-4100N/MX-4101N: 120 seconds or less
MX-5000N/MX-5001N: 140 seconds or less
(at room temperature of 73.4°F (23°C) and rated voltage)
First-copy time*
MX-4100N/MX-4101N Colour copy time: 6.7 seconds or less
Black and white copy time: 4.7 seconds or less
MX-5000N/MX-5001N Colour copy time: 5.9 seconds or less
Black and white copy time: 4.1 seconds or less
(Portrait feeding of 8-1/2" x 11" (A4) sheets from 1st paper tray, without auto colour selection and
auto colour mode. Excluding the first page output after the power is turned on.)
Copy ratios
Variable: 25% to 400% in increments of 1%, total 376 increments (25% to 200% when the automatic
document feeder is used)
Fixed presets: 25%, 50%, 70%, 81%, 86%, 100%, 115%, 122%, 141%, 200% and 400% for AB sizes;
25%, 50%, 64%, 77%, 100%, 121%, 129%, 200% and 400% for inch sizes.
Two reduction ratios and two enlargement ratios can be stored.
Continuous copy
999 copies
Automatic document
feeder
See "Automatic document feeder specifications".
Paper sizes:
Tray 1 / Tray 2
A3, B4, A4, A4R, B5, B5R, A5R, 11" x 17", 8-1/2" x 14", 8-1/2" x 13-1/2",
8-1/2" x 13-2/5", 8-1/2" x 13", 8-1/2" x 11", 8-1/2" x 11"R, 7-1/4" x 10-1/2"R,
5-1/2" x 8-1/2"R, 8K, 16K, 16KR
Paper weight: Plain paper (60 g/m2 to 105 g/m2 (16 lbs. to 28 lbs.)), heavy paper (106 g/m2 to
209 g/m2 (28 lbs. bond to 110 lbs. index))
Paper capacity: Plain paper (80 g/m2 (21 lbs.)) 500 sheets, heavy paper 200 sheets
Paper types:
SHARP-recommended plain paper, recycled paper, coloured paper, and heavy paper
* First copy out time is measured with original on the document glass in full ready condition with fuser at operating temperature and
mirror motor at operating speed in each of black and white mode and colour mode, actual time may vary based on environment
conditions.
7
SPECIFICATIONS
Machine specifications / copier specifications (Continued)
Paper sizes: A3W, A3, B4, A4, A4R, B5, B5R, A5R, envelopes, 12" x 18", 11" x 17", 8-1/2" x 14",
8-1/2" x 13-1/2", 8-1/2" x 13-2/5", 8-1/2" x 13", 8-1/2" x 11", 8-1/2" x 11"R,
7-1/4" x 10-1/2"R, 5-1/2" x 8-1/2"R, 8K, 16K, 16KR (Includes automatic paper size
detection function. Entry of paper sizes up to 297 mm x 432 mm (11-5/8" x 17") is
possible.)
Bypass tray
Paper weights:
Thin paper (55 g/m2 to 59 g/m2 (15 lbs. to 16 lbs.)), plain paper (60 g/m2 to 105 g/m2 (16 lbs. to
28 lbs.)), heavy paper (106 g/m2 to 256 g/m2 (28 lbs. bond to 140 lbs. index)),
envelopes (75 g/m2 to 90 g/m2 (20 lbs. to 24 lbs.))
Paper capacity: Standard paper 100 sheets
Paper types:
SHARP-recommended plain paper, recycled paper, coloured paper, heavy paper, thin paper,
transparency film, envelopes (Monarch, Com-10, DL, C5)
Duplex module
Paper sizes: A3, B4, A4, A4R, B5, B5R, A5R, 11" x 17", 8-1/2" x 14", 8-1/2" x 13", 8-1/2" x 11",
8-1/2" x 11"R, 5-1/2" x 8-1/2"R, 8K, 16K, 16KR
Paper weight: Plain paper (60 g/m2 to 105 g/m2 (16 lbs. to 28 lbs.)), heavy paper (106 g/m2 to
209 g/m2 (28 lbs. bond to 110 lbs. index))
Paper types: SHARP-recommended plain paper, recycled paper, coloured paper, and heavy paper
Output method: Face-down output (A3W and 12" x 18" paper can be output to right tray, finisher, or
saddle stitch finisher)
Output capacity: 500 sheets (using SHARP-recommended A4 or 8-1/2" x 11" paper)
1
Output tray (Center tray)*
(The maximum number of sheets that can be held varies depending on ambient conditions in the
installation location, the type of paper, and the storage conditions of the paper.)
Tray full sensor: Yes
Interface port
LAN connectivity: 10Base-T / 100Base-TX / 1000Base-T
USB connectivity: Type A connector supports USB 2.0 (Hi speed)*2
Compatibility requirements of USB memory
Memory capacity : Max. 32 GB
Disk Format : FAT32 only
Type B connector supports USB 2.0 (Hi speed)
Required power supply
Local voltage ±10% (For the power supply requirements, see the name plate in the lower corner of
the left side of the machine.)
Power consumption
MX-4100N/MX-4101N: 1.84 kW (220-240 V) / 1.44 kW (100-127 V)
MX-5000N/MX-5001N: 1.84 kW (220-240 V) / 1.92 kW (100-127 V)
Typical Electricity
Consumption
MX-4100N: 12.96 kWh/week (220-240 V) / 12.95 kWh/week (100-127 V)
MX-4101N: 13.39 kWh/week (220-240 V) / 13.68 kWh/week (100-127 V)
MX-5000N: 13.69 kWh/week (220-240 V) / 13.60 kWh/week (100-127 V)
MX-5001N: 14.13 kWh/week (220-240 V) / 13.89 kWh/week (100-127 V)
Dimensions
MX-4100N/MX-5000N:
645 mm (W) x 695 mm (D) x 950mm (H) (25-25/64" (W) x 27-3/8" (D) x 37-25/64" (H))
MX-4101N/MX-5001N:
645 mm (W) x 695 mm (D) x 960 mm (H) (25-25/64" (W) x 27-3/8" (D) x 37-51/64" (H))
Weight
MX-4100N/MX-5000N: Approx. 119 kg (262.4 lbs.)
MX-4101N/MX-5001N: Approx. 128 kg (282.2 lbs.)
Overall dimensions
MX-4100N/MX-5000N:
995 mm (W) x 695 mm (D) (39-11/64" (W) x 27-3/8" (D)) (when bypass tray is extended)
MX-4101N/MX-5001N:
995 mm (W) x 695 mm (D) (39-11/64" (W) x 27-3/8" (D)) (when bypass tray is extended)
*1 Output tray (Center tray) cannot be used when the finisher or saddle stitch finisher is installed.
*2 Type A connectors are located on the front of the machine and on the right side of the machine at the back (total of two
connectors); however, the connectors cannot be used simultaneously. Only one of the connectors can be used.
8
SPECIFICATIONS
Continuous copying speeds*
Model
MX-4100N/MX-4101N
Copy ratio
MX-5000N/MX-5001N
100% / Reduced / Enlarged
Copy mode
Colour copying
Black and white copying
Colour copying
Black and white copying
11" x 17", A3, 8K
19 copies/min.
19 copies/min.
22 copies/min.
22 copies/min.
8-1/2" x 14", 8-1/2" x 13",
B4
22 copies/min.
22 copies/min.
25 copies/min.
25 copies/min.
8-1/2" x 11", A4, B5, 16K
41 copies/min.
41 copies/min.
50 copies/min.
50 copies/min.
8-1/2" x 11"R,
7-1/4" x 10-1/2"R, A4R,
B5R, 16KR
26 copies/min.
26 copies/min.
30 copies/min.
30 copies/min.
* Copy speed during output of the second copy and following copies when performing continuous one-sided copying of the same
page (excluding offset output) using plain one-sided paper from a tray other than the bypass tray.
Ambient environment
(Humidity)
85%
60%
20%
10˚C
(54˚F)
30˚C 35˚C (Temperature)
(86˚F) (91˚F)
9
SPECIFICATIONS
Acoustic noise emission (measurement according to ISO7779)
MX-4100N/MX-4101N
MX-5000N/MX-5001N
Printing mode (continuous printing)
Colour: 6.8B Black and white: 6.9B
Colour: 7.0B Black and white: 7.0B
Standby mode
5.1 B
5.3 B
Bystander positions
Colour: 53 dB (A)
Black and white: 53 dB (A)
Colour: 54 dB (A)
Black and white: 53 dB (A)
Operator positions
Colour: 53 dB (A)
Black and white: 52 dB (A)
Colour: 52 dB (A)
Black and white: 52 dB (A)
Bystander positions
36 dB (A)
38 dB (A)
Sound power level LwA
Sound pressure level LpA (actual measurement)
Printing mode
Standby mode
Automatic document feeder specifications
Model
MX-4100N/MX-5000N
MX-4101N/MX-5001N
Original sizes
A3 to A5, 11" x 17" to 5-1/2" x 8-1/2", long paper
(max. width 297 mm (11-5/8") x max. length 1000 mm*1 (39-23/64"), scanning in mono 2 mode of
one side only is possible in fax and image scan modes)
Original weight
One-sided 35 g/m2 to 128 g/m2 (9 lbs. to 32 lbs.) One-sided 35 g/m2 to 128 g/m2 (9 lbs. to 32 lbs.)
Two-sided 50 g/m2 to 105 g/m2 (13 lbs. to 28 lbs.) Two-sided 50 g/m2 to 128 g/m2 (13 lbs. to 32 lbs.)
Capacity
100 sheets (80 g/m2 (21 lbs.))
Maximum stack height of 13 mm (33/64")
150 sheets (80 g/m2 (21 lbs.))
Maximum stack height of 13 mm (33/64")
*1 Scanning in mono 2 mode of one side only is possible in fax and scan send modes. However, when the resolution is 600 x 600 dpi
in Internet fax mode, the maximum length is 800 mm (31-31/64"). When the resolution is 400 x 400 dpi or 600 x 600 dpi in scan
mode, a long original cannot be scanned.
*2 Paper weights from 35 g/m2 (9 lbs.) to 49 g/m2 (13 lbs.) require the use of slow scan mode.
10
SPECIFICATIONS
Exit tray unit (right tray) specifications
Model
MX-TRX2
Output method
Face-down output
Output capacity*
100 sheets (using SHARP-recommended A4 or 8-1/2" x 11" paper)
Dimensions
When tray is folded up:
289 mm (W) x 405 mm (D) x 52 mm (H) (11-3/8" (W) x 15-61/64" (D) x 2-3/64" (H))
When tray is extended:
419 mm (W) x 405 mm (D) x 52 mm (H) (16-1/2" (W) x 15-61/64" (D) x 2-3/64" (H))
Weight
Approx. 0.93 kg (2 lbs.)
* The maximum number of sheets that can be held varies depending on ambient conditions in the installation location, the type of
paper, and the storage conditions of the paper. Envelopes, tab paper, and glossy paper cannot be output.
Stand/1x500 sheet paper drawer specifications
Model
MX-DEX8
Paper sizes
A3, B4, A4, A4R, B5, B5R, 11" x 17", 8-1/2" x 14", 8-1/2" x 13-1/2", 8-1/2" x 13-2/5", 8-1/2" x 13",
8-1/2" x 11", 8-1/2" x 11"R, 7-1/4" x 10-1/2"R, 8K, 16K, 16KR
Paper weight
Plain paper (60 g/m2 to 105 g/m2 (16 lbs. to 28 lbs.)), heavy paper (106 g/m2 to 209 g/m2 (28 lbs.
bond to 110 lbs. index))
Paper capacity
500 sheets (80 g/m2 (21 lbs.)) x 1 tray
Paper types
SHARP-recommended plain paper, recycled paper, and coloured paper
Automatic paper size
detection
When "Auto-AB" detection is selected:
A3, B4, A4, A4R, B5, B5R, 216 mm x 330 mm (8-1/2" x 13")
When "Auto-Inch" detection is selected:
11" x 17", 8-1/2" x 14", 8-1/2" x 11", 8-1/2" x 11"R, 7-1/4" x 10-1/2"R
Power supply
Supplied from the machine
Dimensions
720 mm (W) x 670 mm (D) x 303 mm (H) (28-11/32" (W) x 26-3/8" (D) x 11-15/16" (H))
(including adjuster)
Weight
Approx. 20 kg (44.1 lbs.)
11
SPECIFICATIONS
Stand/2x500 sheet paper drawer specifications
Model
MX-DEX9
Paper sizes
A3, B4, A4, A4R, B5, B5R, 11" x 17", 8-1/2" x 14", 8-1/2" x 13-1/2", 8-1/2" x 13-2/5", 8-1/2" x 13",
8-1/2" x 11", 8-1/2" x 11"R, 7-1/4" x 10-1/2"R, 8K, 16K, 16KR
Paper weight
Plain paper (60 g/m2 to 105 g/m2 (16 lbs. to 28 lbs.)), heavy paper (106 g/m2 to 209 g/m2 (28 lbs.
bond to 110 lbs. index))
Paper capacity
500 sheets (80 g/m2 (21 lbs.)) x 2 tray
Paper types
SHARP-recommended plain paper, recycled paper, and coloured paper
Automatic paper size
detection
When "Auto-AB" detection is selected:
A3, B4, A4, A4R, B5, B5R, 216 mm x 330 mm (8-1/2" x 13")
When "Auto-Inch" detection is selected:
11" x 17", 8-1/2" x 14", 8-1/2" x 11", 8-1/2" x 11"R, 7-1/4" x 10-1/2"R
Power supply
Supplied from the machine
Dimensions
720 mm (W) x 670 mm (D) x 303 mm (H) (28-11/32" (W) x 26-3/8" (D) x 11-15/16" (H))
(including adjuster)
Weight
Approx. 23.5 kg (51.9 lbs.)
Large capacity tray specifications*
Model
MX-LCX1
Paper sizes
A4, 8-1/2" x 11" (paper size change must be performed by a service technician)
Paper weight
Plain paper (60 g/m2 to 105 g/m2 (16 lbs. to 28 lbs.))
Paper capacity
3500 sheets (80 g/m2 (21 lbs.))
Paper types
SHARP-recommended plain paper, recycled paper, and coloured paper
Power supply
Supplied from the machine
Dimensions
370 mm (W) x 550 mm (D) x 520 mm (H) (14-9/16" (W) x 21-21/32" (D) x 20-15/32" (H))
Weight
Approx. 29 kg (63.9 lbs.)
* A stand/1x500 sheet paper drawer or stand/2x500 sheet paper drawer is required to connect the large capacity tray to the machine.
12
SPECIFICATIONS
Finisher specifications
Model
MX-FNX9
Paper sizes
A3W, A3, B4, A4, A4R, B5, B5R, A5R, envelopes, 12" x 18", 11" x 17", 8-1/2" x 14",
8-1/2" x 13-1/2", 8-1/2" x 13-2/5", 8-1/2" x 13", 8-1/2" x 11", 8-1/2" x 11"R, 7-1/4" x 10-1/2"R,
5-1/2" x 8-1/2"R, 8K, 16K, 16KR
Paper weight
Thin paper (55 g/m2 to 59 g/m2 (15 lbs. to 16 lbs.)) plain paper (60 g/m2 to 105 g/m2 (16 lbs. to 28 lbs.))
heavy paper (106 g/m2 to 256 g/m2 (28 lbs. bond to 140 lbs. index)) , envelopes (75 g/m2 to 90 g/m2
(20 lbs. to 24 lbs.))
Modes
Non-staple, staple
Allowed paper sizes for
offset
A3, B4, A4, A4R, B5, 11" x 17", 8-1/2" x 14", 8-1/2" x 13-1/2", 8-1/2" x 13-2/5", 8-1/2" x 13",
8-1/2" x 11", 8-1/2" x 11"R, 8K, 16K
Offset distance
30 mm (1-3/16")
Tray capacity*1
Non-stapling*2:
500 sheets*3 (A4, A4R, B5, B5R, A5R,
8-1/2" x 11", 8-1/2" x 11"R, 7-1/4" x 10-1/2"R,
5-1/2" x 8-1/2"R, 16K, 16KR)
250 sheets*4 (A3W, A3, B4, 12" x 18", 11" x 17",
8-1/2" x 14", 8-1/2" x 13-1/2", 8-1/2" x 13-2/5",
8-1/2" x 13", 8K)
Power supply
Supplied from the machine
Dimensions
640 mm (W) x 595 mm (D) x 205 mm (H) (25-3/16" (W) x 23-27/64" (D) x 8-5/64" (H))
(When tray is extended)
Weight
Approx. 13 kg (28.7 lbs.)
Stapling*5:
30 sets or 500 sheets*3 (A4, A4R, B5,
8-1/2" x 11", 8-1/2" x 11"R, 16K, 16KR)
30 sets or 250 sheets*4 (A3, B4, 11" x 17",
8-1/2" x 14", 8-1/2" x 13-1/2", 8-1/2" x 13-2/5",
8-1/2" x 13", 8K)
Stapler section
Allowed paper sizes for
stapling
A3, B4, A4, A4R, B5, 11" x 17", 8-1/2" x 14", 8-1/2" x 13-1/2", 8-1/2" x 13-2/5", 8-1/2" x 13",
8-1/2" x 11", 8-1/2" x 11"R, 8K, 16K, 16KR
(Three stapling positions: one staple at bottom left corner, one staple at top left corner, and two
staples.)
Maximum number of
sheets for stapling*5
50 sheets (A4, A4R, B5, 8-1/2" x 11", 8-1/2" x 11"R, 16K, 16KR)
30 sheets (A3, B4, 11" x 17", 8-1/2" x 14", 8-1/2" x 13-1/2", 8-1/2" x 13-2/5", 8-1/2" x 13", 8K)
(30 sheets when the sheets are the same width but different lengths.)
*1 The maximum number of sheets that can be held varies depending on ambient conditions in the installation location, the type of
paper, and the storage conditions of the paper.
*2 Up to 10 envelopes can be output.
*3 The height of the sheets must not exceed 71 mm (2-51/64").
*4 The height of the sheets must not exceed 35.5 mm (1-13/32").
*5 The maximum number of sheets for stapling assumes a paper weight of 90 g/m2 (24 lbs.) and includes two cover sheets of
106 g/m2 to 256 g/m2 (28 lbs. bond to 140 lbs. index).
Note:
Special media such as transparency film and label sheets cannot be stapled or punched.
13
SPECIFICATIONS
Finisher (large stacker) specifications*1
Model
MX-FN11
Paper sizes
A3W, A3, B4, A4, A4R, B5, B5R, A5R, envelopes, 12" x 18", 11" x 17", 8-1/2" x 14",
8-1/2" x 13-1/2", 8-1/2" x 13-2/5", 8-1/2" x 13", 8-1/2" x 11", 8-1/2" x 11"R, 7-1/4" x 10-1/2"R,
5-1/2" x 8-1/2"R, 8K, 16K, 16KR
Paper weight
Thin paper (55 g/m2 to 59 g/m2 (15 lbs. to 16 lbs.)) plain paper (60 g/m2 to 105 g/m2 (16 lbs. to 28 lbs.))
heavy paper (106 g/m2 to 256 g/m2 (28 lbs. bond to 140 lbs. index)) , envelopes (75 g/m2 to 90 g/m2
(20 lbs. to 24 lbs.))
Modes
Non-staple, staple
Allowed paper sizes for
offset
A3, B4, A4, A4R, B5, 11" x 17", 8-1/2" x 14", 8-1/2" x 13-1/2", 8-1/2" x 13-2/5", 8-1/2" x 13",
8-1/2" x 11", 8-1/2" x 11"R, 8K, 16K
Offset distance
30 mm (1-3/16")
Upper tray
Non-stapling*3:
1550 sheets (A4, B5, A5R, 8-1/2" x 11",
5-1/2" x 8-1/2"R, 16K)
650 sheets (A3W, A3, B4, A4R, B5R, 12" x 18",
11" x 17", 8-1/2" x 14", 8-1/2" x 13-1/2,
8-1/2 x 13-2/5, 8-1/2" x 13", 8-1/2" x 11"R,
7-1/4" x 10-1/2"R, 8K, 16KR)
Stapling*4:
100 sets or 1550 sheets (A4, B5, 8-1/2" x 11",
16K)
50 sets or 650 sheets (A3, B4, A4R, 11" x 17",
8-1/2" x 14", 8-1/2" x 13-1/2, 8-1/2 x 13-2/5,
8-1/2" x 13", 8-1/2" x 11"R, 8K)
Lower tray
Non-stapling*3:
2450 sheets (A4, B5, 8-1/2" x 11", 16K)
1700 sheets (A5R, 5-1/2" x 8-1/2"R)
650 sheets (A3W, A3, B4, A4R, B5R, 12" x 18",
11" x 17", 8-1/2" x 14", 8-1/2" x 13-1/2,
8-1/2 x 13-2/5, 8-1/2" x 13", 8-1/2" x 11"R,
7-1/4" x 10-1/2", 8K, 16KR)
Stapling*4:
100 sets or 1550 sheets (A4, B5, 8-1/2" x 11",
16K)
50 sets or 650 sheets (A3, B4, A4R, 11" x 17",
8-1/2" x 14", 8-1/2" x 13-1/2, 8-1/2 x 13-2/5,
8-1/2" x 13", 8-1/2" x 11"R, 8K)
Tray
capacity*2
Power supply
Supplied from the machine
Dimensions
645 mm (W) x 645 mm (D) x 1100 mm (H) (25-25/64" (W) x 25-25/64" (D) x 43-19/64" (H))
(When tray is extended)
Weight
Approx. 45 kg (99.3 lbs.)
Stapler section
Allowed paper sizes for
stapling
A3, B4, A4, A4R, B5, 11" x 17", 8-1/2" x 14", 8-1/2" x 13-1/2", 8-1/2" x 13-2/5", 8-1/2" x 13",
8-1/2" x 11", 8-1/2" x 11"R, 8K, 16K, 16KR
(Three stapling positions: one staple at bottom left corner, one staple at top left corner, and two
staples.)
Maximum number of
sheets for stapling*5
50 sheets (A4, B5, 8-1/2" x 11", 16K)
30 sheets (A3, B4, A4R, 11" x 17", 8-1/2" x 14", 8-1/2" x 13-1/2", 8-1/2" x 13-2/5", 8-1/2" x 13",
8-1/2" x 11"R, 8K)
(30 sheets when the sheets are the same width but different lengths.)
*1 Paper pass unit and stand/1x500 sheet paper drawer or stand/2x500 sheet paper drawer are required to connect the finisher (large
stacker) to the machine.
*2 The maximum number of sheets that can be held varies depending on ambient conditions in the installation location, the type of
paper, and the storage conditions of the paper.
*3 Up to 100 sheets of non-standard size paper, envelopes, and transparency film (A4 (8-1/2" x 11")) can be loaded.
*4 The maximum number of sheets for stapling assumes a paper weight of 90 g/m2 (24 lbs.) and includes two cover sheets of
106 g/m2 to 256 g/m2 (28 lbs. bond to 140 lbs. index).
Note:
Special media such as transparency film and label sheets cannot be stapled or punched.
14
SPECIFICATIONS
Saddle stitch finisher specifications*1
Model
MX-FN10
Paper sizes
A3W, A3, B4, A4, A4R, B5, B5R, A5R, envelopes, 12" x 18", 11" x 17", 8-1/2" x 14", 8-1/2" x 13-1/2",
8-1/2" x 13-2/5", 8-1/2" x 13", 8-1/2" x 11", 8-1/2" x 11"R, 7-1/4" x 10-1/2"R, 5-1/2" x 8-1/2"R, 8K, 16K,
16KR
Paper weight
Thin paper (55 g/m2 to 59 g/m2 (15 lbs. to 16 lbs.)) plain paper (60 g/m2 to 105 g/m2 (16 lbs. to 28 lbs.)) heavy
paper (106 g/m2 to 256 g/m2 (28 lbs. bond to 140 lbs. index)), envelopes (75 g/m2 to 90 g/m2 (20 lbs. to 24 lbs.))
Modes
Non-staple, staple, saddle stitch, half fold (Output is folded in half one sheet at a time.)
Allowed paper sizes for offset
A3, A4, A4R, B4, B5, B5R, 11" x 17", 8-1/2" x 14", 8-1/2" x 13-1/2", 8-1/2" x 13-2/5", 8-1/2" x 13",
8-1/2" x 11", 8-1/2" x 11"R, 7-1/4" x 10-1/2"R, 8K, 16K, 16KR
Offset distance
When paper width is 196 mm(7-23/32") or more : 30 mm (1-3/16")
When paper width is less than 196 mm (7-23/32") : 20 mm (25/32") or more
Tray capacity*2
Non-stapling*3:
1000 sheets*4 (A4, A4R, B5, B5R, 8-1/2" x 11",
8-1/2" x 11"R, 7-1/4" x 10-1/2"R, 16K, 16KR)
500 sheets*5 (A3W, A3, B4, A5R, 12" x 18",
11" x 17", 8-1/2" x 14", 8-1/2" x 13-1/2",
8-1/2" x 13-2/5", 8-1/2" x 13", 5-1/2" x 8-1/2"R,
8K)
Power supply
Supplied from the machine
Dimensions
656 mm (W) x 631 mm (D) x 988 mm (H) (25-53/64" (W) x 24-27/32" (D) x 38-57/64" (H))
(When tray is extended)
Weight
Approx. 40 kg (88.2 lbs.)
Stapling*6:
50 sets or 1000 sheets*4 (A4, A4R, B5, B5R,
8-1/2" x 11", 8-1/2" x 11"R, 16K, 16KR)
50 sets or 500 sheets*5 (A3, B4, 11" x 17",
8-1/2" x 14", 8-1/2" x 13-1/2", 8-1/2" x 13-2/5",
8-1/2" x 13", 8K)
Stapler section
Allowed paper sizes for
stapling
A3, B4, A4, A4R, B5, B5R, 11" x 17", 8-1/2" x 14", 8-1/2" x 13-1/2", 8-1/2" x 13-2/5", 8-1/2" x 13",
8-1/2" x 11", 8-1/2" x 11"R, 8K, 16K, 16KR
(Three stapling positions: one staple at bottom left corner, one staple at top left corner, and two staples.)
Maximum number of
sheets for stapling*6
50 sheets (A4, A4R, B5, B5R, 8-1/2" x 11", 8-1/2" x 11"R, 16K, 16KR)
25 sheets (A3, B4, 11" x 17", 8-1/2" x 14", 8-1/2" x 13-1/2", 8-1/2" x 13-2/5", 8-1/2" x 13", 8K)
(25 sheets when the sheets are the same width but different lengths.)
Saddle stitch section
Stapling method
Fold in half and staple in two places on centreline
Folding position
Fold at centreline (can be adjusted with [Saddle Stitch Position Adjust] in the System Settings)
Allowed paper sizes for
saddle stitch stapling
A3, B4, A4R, 11" x 17", 8-1/2" x 14", 8-1/2" x 11"R, 8K, 16KR
Allowed paper weights for 55 g/m2 to 209 g/m2 (15 lbs. bond to 110 lbs. index)*7
saddle stitch stapling
Maximum: 15 sheets (80 g/m2 (21 lbs.) x 14 sheets + 209 g/m2 (110 lbs. index) x 1 sheet) / 10 sets
Number sheets for saddle
stitch stapling / Number of sets (11 to 15 sheets), 15 sets (6 to 10 sheets), 20 sets (1 to 5 sheets)
*1 Paper pass unit and stand/1x500 sheet paper drawer or stand/2x500 sheet paper drawer are required to connect the finisher
(large stacker) to the machine.
*2 The maximum number of sheets that can be held varies depending on ambient conditions in the installation location, the type of
paper, and the storage conditions of the paper.
*3 Up to 30 envelopes can be output.
*4 The height of the sheets must not exceed 175 mm (6-57/64").
*5 The height of the sheets must not exceed 94 mm (3-45/64").
*6 The maximum number of sheets for stapling assumes a paper weight of 90 g/m2 (24 lbs.) and includes two cover sheets of
106 g/m2 to 256 g/m2 (28 lbs. bond to 140 lbs. index).
*7 Allowed paper weights for saddle stitch stapling of plain paper include heavy paper (106 g/m2 to 209 g/m2 (28 lbs. bond to 110 lbs. index)).
Note:
Special media such as transparency film and label sheets cannot be stapled or punched.
15
SPECIFICATIONS
Punch module specifications (for finisher)
Model
MX-PNX1A
MX-PNX1B
MX-PNX1C
MX-PNX1D
Hole punching
2 holes
2 holes or 3 holes
4 holes
4 holes, broad width
2 holes:
8-1/2" x 14",
8-1/2" x 13-1/2",
8-1/2" x 13-2/5",
8-1/2" x 13",
8-1/2" x 11"R,
7-1/4" x 10-1/2"
3 holes:
11" x 17", 8-1/2" x 11",
A3, A4
A3, A4
Allowed paper sizes for
punching
A3, B4, A4, A4R, B5,
B5R, 11" x 17",
8-1/2" x 14",
8-1/2" x 13-1/2",
8-1/2" x 13-2/5",
8-1/2" x 13",
8-1/2" x 11",
8-1/2" x 11"R,
7-1/4" x 10-1/2", 8K,
16K, 16KR
A3, B4, A4, A4R, B5,
B5R, 11" x 17",
8-1/2" x 14",
8-1/2" x 13-1/2",
8-1/2" x 13-2/5",
8-1/2" x 13",
8-1/2" x 11",
8-1/2" x 11"R,
7-1/4" x 10-1/2"
Punchable paper weights 55 g/m2 to 128 g/m2 (16 lbs. to 32 lbs.)
Power supply
Supplied from finisher
Dimensions
105 mm (W) x 518 mm (D) x 170 mm (H) (4-9/64" (W) x 20-25/64" (D) x 6-45/64" (H))
Weight
Approx. 3.5 kg (7.7 lbs.)
Punch module specifications (for finisher (large stacker))
Model
MX-PNX6A
MX-PNX6B
MX-PNX6C
MX-PNX6D
Hole punching
2 holes
2 holes or 3 holes
4 holes
4 holes, broad width
2 holes:
8-1/2" x 14",
8-1/2" x 13-1/2",
8-1/2" x 13-2/5",
8-1/2" x 13",
8-1/2" x 11"R,
7-1/4" x 10-1/2"
3 holes:
11" x 17", 8-1/2" x 11",
A3, A4
A3, A4
Allowed paper sizes for
punching
A3, B4, A4, A4R, B5,
B5R, 11" x 17",
8-1/2" x 14",
8-1/2" x 13-1/2",
8-1/2" x 13-2/5",
8-1/2" x 13",
8-1/2" x 11",
8-1/2" x 11"R,
7-1/4" x 10-1/2", 8K,
16K, 16KR
A3, B4, A4, A4R, B5,
B5R, 11" x 17",
8-1/2" x 14",
8-1/2" x 13-1/2",
8-1/2" x 13-2/5",
8-1/2" x 13",
8-1/2" x 11",
8-1/2" x 11"R,
7-1/4" x 10-1/2"
Punchable paper weights 55 g/m2 to 256 g/m2 (16 lbs. Bond to 140 lbs.index)
Power supply
Supplied from finisher
Dimensions
115 mm (W) x 600 mm (D) x 995 mm (H) 4-17/32" (W) x 23-5/8" (D) 39-11/64"
Weight
Approx. 8 kg (17.7 lbs.)
16
SPECIFICATIONS
Punch module specifications (for saddle stitch finisher)
Model
MX-PNX5A
MX-PNX5B
MX-PNX5C
MX-PNX5D
Hole punching
2 holes
2 holes or 3 holes
4 holes
4 holes, broad width
2 holes:
8-1/2" x 14",
8-1/2" x 13-1/2",
8-1/2" x 13-2/5",
8-1/2" x 13",
8-1/2" x 11"R,
7-1/4" x 10-1/2"
3 holes:
11" x 17", 8-1/2" x 11",
A3, A4
A3, A4
Allowed paper sizes for
punching
A3, B4, A4, A4R, B5,
B5R, 11" x 17",
8-1/2" x 14",
8-1/2" x 13-1/2",
8-1/2" x 13-2/5",
8-1/2" x 13",
8-1/2" x 11",
8-1/2" x 11"R,
7-1/4" x 10-1/2", 8K,
16K, 16KR
A3, B4, A4, A4R, B5,
B5R, 11" x 17",
8-1/2" x 14",
8-1/2" x 13-1/2",
8-1/2" x 13-2/5",
8-1/2" x 13",
8-1/2" x 11",
8-1/2" x 11"R,
7-1/4" x 10-1/2"
Punchable paper weights 55 g/m2 to 128 g/m2 (16 lbs. to 32 lbs.)
Power supply
Supplied from saddle stitch finisher
Dimensions
122 mm (W) x 604 mm (D) x 248 mm (H) (4-13/16" (W) x 23-25/32" (D) x 9-49/64" (H))
Weight
Approx. 3.5 kg (7.7 lbs.)
Note:
Special media such as transparency film and label sheets cannot be stapled or punched.
Keyboard specifications
Model
MX-KBX2
Power supply
Supplied from the machine
Printer specifications
Type
Built-in
Continuous printing speed
Same as continuous copying speed (When printing same document continuously on A4
(8-1/2" x 11") plain paper in non-offset mode, excluding processing time.)
Printing resolution
600 x 600 dpi / 1200 x 1200 dpi
Printer driver type
PCL5c, PCL6, PostScript 3 compatible*1, XPS*2
Supported protocols
TCP/IP, IPX/SPX, NetBEUI, EtherTalk
Supported client PC
operating systems
See "VERIFYING SYSTEM REQUIREMENTS" in the Software Setup Guide.
Fonts
PCL5c, PCL6
80 European fonts, 28 barcode fonts*3, 1 bitmap font
PostScript 3 compatible*1
136 European fonts
Interface port
LAN connectivity: 10Base-T / 100Base-TX / 1000Base-T
USB connectivity: Supports USB 2.0 (Hi speed)*4
Memory
Standard system memory: 1 GB
Expansion memory: 1 GB*5
Print area
Entire page excluding margin of 4.2 mm (11/64") at each edge. The actual print area may vary
depending on the printer driver and the software application.
*1
*2
*3
*4
*5
When the PS3 expansion kit is installed and the machine is used as a PostScript printer.
When the XPS expansion kit is installed.
Barcode font kit is required.
Supported operating systems are Windows 2000/XP/Vista.
To install the XPS expansion kit, an expansion memory board is required.
17
SPECIFICATIONS
Network scanner / Internet Fax*1 specifications
Type
Built-in
100 x 100, 200 x 200, 300 x 300, 400 x 400, 600 x 600
Scanning resolution (dpi) Internet Fax: 200 x 100, 200 x 200, 200 x 400, 400 x 400, 600 x 600 (200 x 100, 200 x 200 when file
type is TIFF-S) Halftone can be selected for resolutions other than 200 x 100 dpi.
Scanning speed
MX-4100N/MX-5000N:
Colour (A4 / 8-1/2" x 11")One-sided: 50 pages/min. (200 x 200 dpi),
Two-sided: 16 pages/min. (200 x 200 dpi)
Black and white (A4 / 8-1/2" x 11") One-sided: 50 pages/min. (200 x 200 dpi),
Two-sided: 16 pages/min. (200 x 200 dpi)
MX-4101N/MX-5001N:
Colour (A4 / 8-1/2" x 11")One-sided: 70 pages/min. (200 x 200 dpi),
Two-sided: 70 pages/min. (200 x 200 dpi)
Black and white (A4 / 8-1/2" x 11") One-sided: 70 pages/min. (200 x 200 dpi),
Two-sided: 70 pages/min. (200 x 200 dpi)
Interface port
LAN connectivity: 10Base-T / 100Base-TX / 1000Base-T
Supported protocols
TCP/IP (IPv4)
File formats
Remarks
Colour
(including greyscale)
File types: TIFF, JPEG, PDF, Encrypted PDF, XPS, Compact
PDF*2
Compression ratio: High / Medium / Low
Black and white
File types: TIFF, PDF, Encrypted PDF, XPS
Compression modes: None / Medium (G3) / High (G4)
Internet Fax
(black and white only)
File types: TIFF-FX (TIFF-F, TIFF-S)
Compression modes: Medium (G3) / High (G4)
Number of one-touch keys for
storing destinations*3
Maximum number of keys: 999
Number of destinations that can be Maximum number of destinations in one group (1 key): 500
stored in a group (1 key)*3
Scan destinations
Scan to E-mail / Scan to FTP / Scan to Desktop / Scan to
Network Folder
*1 Internet fax expansion kit is required.
*2 Enhanced compression kit is required.
*3 Total number of all destinations (Scan to E-mail, Scan to FTP, Scan to Desktop, Scan to Network folder, Internet Fax, Fax, and
Group)
Pull scan function (TWAIN) specifications
Supported protocol
TCP/IP (IPv4)
Supported client PC
operating systems
Windows 98 / Me / 2000 / XP / Server 2003 / Vista / Server 2008
Colour modes
Full Colour, Greyscale, Mono Diffusion, Mono 2 gradation
Resolution settings
75 dpi, 100 dpi, 150 dpi, 200 dpi, 300 dpi, 400 dpi, 600 dpi
(The resolution can be specified by entering a numerical value from 50 to 9600 dpi. However, when
a high resolution is specified, it is necessary to reduce the scanning area.)
Scanning area
Maximum: A3 (11" x 17")
18
Facsimile specifications
Model
MX-FXX2
Applicable telephone line Public switched telephone network, PBX
Scanning resolution
(supports ITU-T
standards)
8 x 3.85 lines/mm (Standard), 8 x 7.7 lines/mm (Fine, Fine-Halftone), 8 x 15.4 lines/mm (Super Fine,
Super Fine - Halftone), 16 x 15.4 lines/mm (Ultra Fine, Ultra Fine - Halftone)
Transmission speed
33.6 kbps down to 2.4 kbps Automatic fallback
Compression method
MH / MR / MMR / JBIG
Transmission modes
Super G3, G3 (the machine can only send faxes to and receive faxes from machines that support G3
or Super G3)
Input document size
AB sizes: A3, B4, A4, A4R, B5, B5R, A5, 216 mm x 340 mm, 216 mm x 343 mm
Inch sizes: 11" x 17", 8-1/2" x 14", 8-1/2" x 13-2/5", 8-1/2" x 13", 8-1/2" x 11", 8-1/2" x 11"R,
5-1/2" x 8-1/2"
Long originals (max. width 297 mm (11-45/64") x max. length 1000 mm (39-23/64") can be
transmitted using the automatic document feeder. Scanning one side is possible.)
Paper sizes
A3, B4, A4, A4R, B5, B5R, A5R (11" x 17", 8-1/2" x 14", 8-1/2" x 13-2/5", 8-1/2" x 13", 8-1/2" x 11",
8-1/2" x 11"R, 5-1/2" x 8-1/2"R)
Transmission time *1
Approx. 2 seconds (Super G3 mode/33.6 kbps, JBIG)
Approx. 6 seconds (G3 ECM mode/14.4 kbps)
Power supply
Supplied from the machine
Dimensions
192 mm (W) x 52 mm (D) x 215 mm (H) (7-9/16" (W) x 2-3/64" (D) x 8-15/32" (H))
Weight
Approx. 1.0 kg (2.2 lbs.)
Extension telephone connection
Possible (1 telephone)
Number of one-touch keys for storing
destinations*2
Maximum number of keys: 999
Number of destinations that can be stored in a Maximum number of destinations in one group
(1 key): 500
group (1 key)*2
Remarks
Timer transmission
Yes
Program function
Yes (48 programs)
F-code transmission
Supported (SUB/SEP (sub-address) and SID/PWD
(passcode) signals can be transmitted / received)
Image memory
8 MB standard
*1 Transmission speed is for an A4 or 8-1/2" x 11" document with approximately 700 characters at standard resolution (8 x 3.85
lines/mm) sent in high speed mode (33.6 kbps (JBIG) or 14.4 kbps). This is only the time required to transmit the image
information; the time required to send protocol signals is not included. Actual transmission times will vary depending on the
contents of the document, the receiving machine type, and telephone line conditions.
*2 Total number of all destinations (Scan to E-mail, Scan to FTP, Scan to Desktop, Scan to Network folder, Internet Fax, Fax and
Group)
19
INFORMATION ON DISPOSAL
A. Information on Disposal for Users (private households)
1. In the European Union
Attention: If you want to dispose of this equipment, please do not use the
ordinary dust bin!
Used electrical and electronic equipment must be treated separately and in
accordance with legislation that requires proper treatment, recovery and
recycling of used electrical and electronic equipment.
Following the implementation by member states, private households within the
EU states may return their used electrical and electronic equipment to
designated collection facilities free of charge*. In some countries* your local
retailer may also take back your old product free of charge if you purchase a
similar new one.
*) Please contact your local authority for further details.
If your used electrical or electronic equipment has batteries or accumulators,
please dispose of these separately beforehand according to local
requirements.
By disposing of this product correctly you will help ensure that the waste
undergoes the necessary treatment, recovery and recycling and thus prevent
potential negative effects on the environment and human health which could
otherwise arise due to inappropriate waste handling.
Attention: Your product is
marked with this symbol. It
means that used electrical
and electronic products
should not be mixed with
general household waste.
There is a separate
collection system for these
products.
2. In other Countries outside the EU
If you wish to discard this product, please contact your local authorities and ask for the correct method of disposal.
For Switzerland: Used electrical or electronic equipment can be returned free of charge to the dealer, even if you don't
purchase a new product. Further collection facilities are listed on the homepage of www.swico.ch or www.sens.ch.
B. Information on Disposal for Business Users.
1. In the European Union
If the product is used for business purposes and you want to discard it:
Please contact your SHARP dealer who will inform you about the take-back of the product. You might be charged for the
costs arising from take-back and recycling. Small products (and small amounts) might be taken back by your local
collection facilities.
For Spain: Please contact the established collection system or your local authority for take-back of your used products.
2. In other Countries outside the EU
If you wish to discard of this product, please contact your local authorities and ask for the correct method of disposal.
✂
Administrator
Name:
Contact at:
Information that the administrator of the machine requires is printed on
the back of this page.
(Separate this page from the manual and keep it in a safe place. In
addition, fill in the name of the administrator and the administrator's
contact information in the left hand margin.)
21
TO THE ADMINISTRATOR OF THE MACHINE
(Separate this page from the manual and keep it in a safe place.)
Factory default passwords
When accessing the system settings, the administrator password is required to log in with administrator
rights. The system settings can be configured in the Web pages as well as on the operation panel. To
access the system settings using the Web pages, a password is also required.
Factory default administrator password
Factory default setting: admin
Store a new administrator password as soon as the machine is installed.
Once the administrator password has been changed, the new password is required to restore the factory
default password. Take care to remember the new password.
Factory default passwords (Web pages)
Factory default account
Factory default password
User
users
users
Administrator
admin
admin
Forwarding all transmitted and received data to the administrator
(document administration function)
This function is used to forward all data transmitted and received by the machine to a specified destination (Scan
to E-mail address, Scan to FTP destination, Scan to Network Folder destination, or Scan to Desktop destination).
This function can be used by the administrator of the machine to archive all transmitted and received data.
To configure the document administration settings, click [Application Settings] and then [Document
Administration Function] in the Web page menu. (Administrator rights are required.)
Note:
• The format, exposure, and resolution settings of transmitted and received data remain in effect when the data is forwarded.
• When forwarding is enabled for data sent in fax mode,
• The [Direct TX] key does not appear in the touch panel.
• Quick online transmission and dialling using the speaker cannot be used.
For the users of the fax function
Important safety instructions
• If any of your telephone equipment is not operating properly, you should immediately remove it from your telephone
line, as it may cause harm to the telephone network.
• The AC power outlet shall be installed near the equipment and shall be easily accessible.
• Never install telephone wiring during a lightning storm.
• Never install telephone jacks in wet locations unless the jack is specifically designed for wet locations.
• Never touch uninsulated telephone wires or terminals unless the telephone line has been disconnected at the network
interface.
• Use caution when installing or modifying telephone lines.
• Avoid using a telephone (other than a cordless type) during an electrical storm. There may be a remote risk of electric
shock from lightning.
• Do not use a telephone to report a gas leak in the vicinity of the leak.
• Do not install or use the machine near water, or when you are wet. Take care not to spill any liquids on the machine.
• Save these instructions.
22
✂
There are two factory default accounts: "Administrator" and "User". A person who logs in as an
"Administrator" can configure all settings in the Web pages. In addition, an administrator can restrict access
to other settings by enabling "User" accounts.
The factory default passwords are shown below.
TO THE ADMINISTRATOR OF THE MACHINE
Trademark acknowledgments
The following trademarks and registered trademarks are used in conjunction with the machine and its peripheral devices and
accessories.
• Microsoft®, Windows®, Windows® 98, Windows® Me, Windows NT® 4.0, Windows® 2000, Windows® XP, Windows Server®
2003, Windows Vista®, Windows Server® 2008 and Internet Explorer® are registered trademarks or trademarks of Microsoft
Corporation in the U.S.A. and other countries.
• PostScript is a registered trademark of Adobe Systems Incorporated.
• Adobe and Flash are registered trademarks or trademarks of Adobe Systems Incorporated in the United States and other
countries.
• Adobe, the Adobe logo, Acrobat, the Adobe PDF logo, and Reader are registered trademarks or trademarks of Adobe Systems
Incorporated in the United States and other countries.
• Macintosh, Mac OS, AppleTalk, EtherTalk and LaserWriter are trademarks of Apple Inc., registered in the U.S. and other countries.
• Netscape Navigator is a trademark of Netscape Communications Corporation.
• Mozilla® and Firefox® are registered trademarks or trademarks of the Mozilla Foundation in the U.S.A. and other countries.
• PCL is a registered trademark of the Hewlett-Packard Company.
• IBM, PC/AT, and PowerPC are trademarks of International Business Machines Corporation.
• Sharpdesk is a trademark of Sharp Corporation.
• Sharp OSA is a trademark of Sharp Corporation.
• RealVNC is a trademark of RealVNC Limited.
• All other trademarks and copyrights are the property of their respective owners.
Candid and Taffy are trademarks of Monotype Imaging, Inc. registered in the United States Patent and Trademark Office and may
be registered in certain jurisdictions. CG Omega, CG Times, Garamond Antiqua, Garamond Halbfett, Garamond Kursiv,
Garamond and Halbfett Kursiv are trademarks of Monotype Imaging, Inc. and may be registered in certain jurisdictions. Albertus,
Arial, Coronet, Gill Sans, Joanna and Times New Roman are trademarks of The Monotype Corporation registered in the United
States Patent and Trademark Office and may be registered in certain jurisdictions. Avant Garde, ITC Bookman, Lubalin Graph,
Mona Lisa, Zapf Chancery and Zapf Dingbats are trademarks of International Typeface Corporation registered in the United
States Patent and Trademark Office and may be registered in certain jurisdictions. Clarendon, Eurostile, Helvetica, Optima,
Palatino, Stempel Garamond, Times and Univers are trademarks of Heidelberger Druckmaschinen AG, which may be registered
in certain jurisdictions, exclusively licensed through Linotype Library GmbH, a wholly owned subsidiary of Heidelberger
Druckmaschinen AG. Apple Chancery, Chicago, Geneva, Monaco and New York are trademarks of Apple Computer Inc. and
may be registered in certain jurisdictions. HGGothicB, HGMinchoL, HGPGothicB and HGPMinchoL are trademarks of Ricoh
Company, Ltd. and may be registered in some jurisdictions. Wingdings is a registered trademark of Microsoft Corporation in the
United States and other countries. Marigold and Oxford are trademarks of Arthur Baker and may be registered in some
jurisdictions. Antique Olive is a trademark of Marcel Olive and may be registered in certain jurisdictions. Hoefler Text is a
trademark of Johnathan Hoefler and may be registered in some jurisdictions. ITC is a trademark of International Typeface
Corporation registered in the United States Patent and Trademark Office and may be registered in certain jurisdictions. Agfa is a
trademark of the Agfa-Gevaert Group and may be registered in certain jurisdictions. Intellifont, MicroType and UFST are
trademarks of Monotype Imaging, Inc. registered in the United States Patent and Trademark Office and may be registered in
certain jurisdictions. Macintosh and TrueType are trademarks of Apple Computer Inc. registered in the United States Patent and
Trademark Office and other countries. PostScript is a trademark of Adobe Systems Incorporated and may be registered in some
jurisdictions. HP, PCL, FontSmart and LaserJet are trademarks of Hewlett-Packard Company and may be registered in some
jurisdictions. The Type 1 processor resident in Monotype Imaging's UFST product is under license from Electronics For Imaging,
Inc. All other trademarks are the property of their respective owners.
SHARP ELECTRONICS (Europe) GmbH
Sonninstraße 3, D-20097 Hamburg
23
Sharpdesk CD-ROM (for Windows)
Installing SHARP TWAIN AR/DM
SHARP TWAIN AR/DM cannot be used in Windows Vista.
Insert the "Disc 1" CD-ROM into your CD-ROM drive.
2
Quit any software applications and/or resident programs that are running on your
computer.
1
3
4
5
6
● If
the Sharpdesk installation window appears, click "Cancel" to exit the setup procedure.
Click the "start" button and then click "My Computer" (
● In
).
Windows 98/Me/2000, double click "My Computer".
Click the CD-ROM icon (
) and select "Open" from the "File" menu.
Double-click the "Twain" folder, and then double-click the "Setup" ( ).
Follow the instructions on the screen.
Uninstalling the Software Program
To remove the software, follow the steps below.
● When Sharpdesk is uninstalled, Network Scanner Tool is also uninstalled. Note that if Network Scanner Tool is
uninstalled, you will no longer be able to directly receive image data from the Digital Laser Copier/Printer.
● If a user-created file is saved in the Sharpdesk desktop folder, the Sharpdesk desktop folder will not be deleted when
Sharpdesk is uninstalled.
● If you uninstall Sharpdesk Imaging in Windows 98/Me/2000, you will not be able to open image files unless you re-install
the Windows accessory Imaging for Windows.
SHARP TWAIN AR/DM will not delete the spooler folder which stores image data.
● Removing
Uninstalling the software program from the Control Panel
1
2
Click "Control Panel" in the "start" menu.
● In
Windows 98/Me/2000, click "Start", "Settings", and then "Control Panel".
Click "Uninstall a program".
●
In
Windows
XP, double click "Add or Remove Programs".
Windows 98/Me/2000, double click "Add/Remove Programs".
● In
3
Select the application that you wish to delete ("Sharpdesk" or "SHARP TWAIN AR/
DM") from the list and uninstall the application.
47
Sharpdesk CD-ROM (for Windows)
6
When the "Customer Information" window appears, enter the serial number that
appears on the cover of the this manual, and click the "Next" button.
Follow the instructions on the screen.
● If you select "Typical" in the Setup Type selection screen, Network Scanner Tool will also be installed. If
you only wish to install Network Scanner Tool, select "Custom" in the Setup Type selection screen and
then check only Network Scanner Tool.
● Sharpdesk Imaging* is installed together with Sharpdesk. If Imaging for Windows was previously installed,
Sharpdesk Imaging will overwrite Imaging for Windows.
● If Eastman Software's "Imaging for Windows Professional Edition" has already been installed on your
computer, Sharpdesk Imaging will not be installed.
● "Imaging for Windows Professional Edition" and Sharpdesk Imaging use common registry entries, and
installing "Imaging for Windows Professional Edition" after Sharpdesk lmaging has been installed may
result in abnormal operation. In this case, uninstall Sharpdesk and Sharpdesk Imaging, and then install
"Imaging for Windows Professional Edition". After that, reinstall Sharpdesk.
● When Network Scanner Tool setup is finished, the "Search Setup Wizard" appears. Follow the on-screen
instructions to create an index database. For detailed information, see the Sharpdesk Installation Guide
and Sharpdesk User's Guide.
* Sharpdesk Imaging is a version of Eastman Software's Imaging for Windows Professional Edition that has
been customized by the Sharp Corporation.
46
Sharpdesk CD-ROM (for Windows)
Installing the Software Program
Note the following when installing the software program from the CD-ROM:
● Be sure to check the system requirements for installation of each of the software programs in the user's guides and on
the Information screen during installation.
● The user's guides give detailed instructions for installing and setting up the programs. Be sure to read the user's guides
before installing the programs. In particular, if you are going to use Network Scanner Tool, be sure to carefully read the
instructions regarding network preparation and setup procedures before installing the program. The network
administrator should verify that network preparation has been carried out correctly.
● If you are going to send an original scanned with the Digital Laser Copier/Printer to a computer (Scan to Desktop),
Network Scanner Tool must be installed.
● If you perform a standard installation of Sharpdesk (select "Typical" in the Setup Type selection screen), Network
Scanner Tool will be also be installed, alternatively you can also select "Custom" installation and install only Network
Scanner Tool.
● If Internet Explorer 6.0 or later is not installed on your computer, see the installation procedure for Internet Explorer in
the Readme file (Readme.txt) in the root folder of the "Disc 2" CD-ROM.
● If you intend to install SHARP TWAIN AR/DM, install Network Scanner Tool first. SHARP TWAIN AR/DM cannot be
installed alone.
● The contents of the Information screens that appear during installation can also be found in the ReadMe files on the
same CD-ROM. The ReadMe file for Sharpdesk is located in the root folder of the CD-ROM, and the ReadMe file for
SHARP TWAIN AR/DM is located in the Twain folder.
Installing Sharpdesk and Network Scanner Tool
Insert the "Disc 1" CD-ROM into your CD-ROM drive.
2
Quit any software applications and/or resident programs that are running on your
computer.
1
● The
● If
3
Sharpdesk installation screen appears. Proceed to step 5.
the screen does not appear, proceed to step 3.
Click the "Start" button (
● In
● In
4
5
) and then click "Computer".
Windows XP, click the "start" button and then click "My Computer".
Windows 98/Me/2000, double click "My Computer".
Double click the CD-ROM icon (
● The
).
Sharpdesk installer starts.
Follow the instructions on the screen.
● In
Windows Vista, if a message screen appears asking you for confirmation, click "Allow".
45
Sharpdesk CD-ROM (for Windows)
User's Guides for Software Programs
The Manual folder in the CD-ROM contains user's guides (in PDF format) for each of the software programs.
●
Sharpdesk
Installation Guide
●
Sharpdesk
User's Guide
●
Network
Scanner Tool User's Guide
TWAIN AR/DM User's Guide
● SHARP
In addition to explaining how to use the programs, the user's guides also give detailed instructions for installing and
setting up the programs. Be sure to read the user's guides before installing the programs.
44
Sharpdesk CD-ROM (for Windows)
The CD-ROM contains the following software programs:
● Sharpdesk* (Desktop Document Management Software)
● Network Scanner Tool
● SHARP TWAIN AR/DM (Twain driver)
* Sharpdesk can only be installed on the number of computers indicated in "Sharpdesk Serial Numbers" on the cover of
this manual. If you need to install Sharpdesk on additional computers, please purchase the optional license kit.
(If the version of the software on the CD-ROM in the license kit is different from the version of the software on the CDROM that accompanies the machine, it is recommended that you use the newest version of the software.)
Software Programs
For detailed information on each of the software programs, please refer to the user's guides on the CD-ROM. To view
the manuals in PDF format, Adobe® ReaderTM or Acrobat® Reader of Adobe Systems Incorporated is required. If
neither program is installed on your computer, the programs can be downloaded from the following URL:
http://www.adobe.com/
Sharpdesk (Desktop Document Management Software)
Sharpdesk lets you manage a variety of electronic information such as scanned image data from a Digital Laser Copier/
Printer or documents created using word processing or spreadsheet application software. Some of the important features
of Sharpdesk are:
● Sharpdesk works with your scanner to let you read paper documents into your computer using a full-featured set of
scanning controls and options.
● Sharpdesk makes editing of your images and documents quick and easy.
● A text image scanned into Sharpdesk can be converted into editable text for use with your favorite word processor.
Sharpdesk uses an advanced Optical Character Recognition (OCR) engine that even preserves your document
layouts.
● Distributing documents by e-mail or printing a hard copy is as easy as dragging a file onto an icon on the Sharpdesk
OutputZone.
● Multiple files can be combined together into a single new file. After creating a combination file, the page order can be
changed or new pages added.
● You can search for an image or text file using a single word, phrase, or list of words. You can also perform a detailed
search by specifying the file type, modified data, or a keyword.
colour image scanned on the machine can be saved as a PDF file using a high compression ratio to reduce the file
size. (To view a PDF file saved using a high compression ratio, the latest version of Adobe Reader is required.)
●A
Network Scanner Tool
This is a utility that helps you use Scan to Desktop. It configures the necessary settings in the Digital Laser Copier/Printer
and client computer to receive data. In addition, Network Scanner Tool will automatically start Sharpdesk upon receiving
image data.
The scanned image received by your computer can automatically be:
●
Saved
in
a
folder.
●
Passed
to
the application set in Network Scanner Tool.
●
Sent
as
e-mail.
in Sharpdesk.
● Saved
SHARP TWAIN AR/DM
SHARP TWAIN AR/DM imports image data from a Twain interface into a Twain-compliant application. SHARP TWAIN
AR/DM has the following features:
selected range of the image data can be imported.
image can be rotated when imported.
●A
● The
43
Sharpdesk Installation Guide
Please read
● The explanations in this manual assume that the person who will install the product and the users of the product have
a working knowledge of Microsoft Windows.
● For detailed information on the software in the CD-ROM, please view the user's guide (PDF format) that is included on
the CD-ROM.
● For information on the operating system, please refer to your operating system manual or the online Help function.
explanations of screens and procedures in this manual are for Windows Vista. The screens may vary depending
on your Windows version and settings.
● The
Warranty
While every effort has been made to make this operation manual as accurate and helpful as possible, SHARP
Corporation makes no warranty of any kind with regard to its content. All information included herein is subject to change
without notice. SHARP is not responsible for any loss or damages, direct or indirect, arising from or related to the use of
this operation manual.
Table of Contents
Sharpdesk CD-ROM (for Windows) ..............................................................................................43
Software Programs ...................................................................................................................................................43
Sharpdesk (Desktop Document Management Software).......................................................................................43
Network Scanner Tool ...........................................................................................................................................43
SHARP TWAIN AR/DM .........................................................................................................................................43
User's Guides for Software Programs ....................................................................................................................44
Installing the Software Program ..............................................................................................................................45
Installing Sharpdesk and Network Scanner Tool ...................................................................................................45
Installing SHARP TWAIN AR/DM ..........................................................................................................................47
Uninstalling the Software Program .........................................................................................................................47
Uninstalling the software program from the Control Panel ....................................................................................47
42
REMOVING THE SOFTWARE
To remove the printer driver or software installed using the installer, follow the steps below.
Windows
1
Click the [start] button and then click
[Control Panel].
Mac OS X
1
Click [Uninstall a program].
2
• In Windows XP/Server 2003, click [Add or Remove
Programs].
Select the program or driver that you
wish to delete.
Restart your computer.
Delete the printer that uses the
machine's PPD file from the printer list.
To show the printer list, see step 11 and 12 of "MAC OS
X" (page 31).
In Windows 98/Me/NT 4.0/2000, click the [Start] button,
point to [Settings], and click [Control Panel].
2
Delete the PPD file.
The PPD file has been copied to the following folder on
the startup disk.
[Library] - [Printers] - [PPDs] - [Contents] - [Resources] [en.lproj]
Delete the PPD file of the machine from this folder.
• In Windows 98/Me/NT 4.0/2000, double-click the
[Add/Remove Programs] icon.
3
3
Delete the installation information.
The installation information file has been copied to the
following folder on the startup disk.
[Library] - [Receipts]
Delete the [MX-PBX1.pkg] file from this folder.
For more information, see the manual for the operating
system or Help.
4
Mac OS 9.0 - 9.2.2
After deleting the icon of the printer that uses the
machine's PPD file from the desktop, follow the steps
below.
1
Insert the "Software CD-ROM" into your
CD-ROM drive.
Insert the "Software CD-ROM" that shows "Disc 2" on the
front of the CD-ROM.
Select [Remove] in the Install menu and
click the [Remove] button.
4
).
Double-click the [Installer] icon (
3
) on
Double-click the [CD-ROM] icon (
the desktop and double-click the
[MacOS] folder.
2
41
WHEN INSTALLATION WAS NOT SUCCESSFUL
Problem
The printer driver is
not installed correctly
by plug and play (USB
connection in
Windows).
Point to check
Did you connect the machine to your
computer before installing the printer
driver?
Solution
In Windows 2000/XP/Server 2003/Vista/Server 2008, if
the machine was connected to your computer with a
USB cable before the printer driver was installed from
the installer, check if information on the unsuccessful
installation remains in "Device Manager". (For
information on "Device Manager", see Help in
Windows.)
If the model name of the machine appears in "Other
devices" in "Device Manager", delete it, restart your
computer, and install the printer driver again.
X The printer driver cannot be installed (Windows 2000/XP/Server 2003)
If the printer driver cannot be installed on Windows 2000/XP/Server 2003, follow the steps below to check your
computer settings.
1
Click the [start] button and then click
[Control Panel].
4
In Windows 2000, click the [Start] button, point to
[Settings], and click [Control Panel].
2
Check the settings in "What action do
you want Windows to take?" ("File
signature verification" in Windows 2000).
Click [Performance and Maintenance]
and then [System].
In Windows 2000, double-click the [System] icon.
3
Click the [Hardware] tab and then the
[Driver Signing] button.
If [Block] is selected, the printer driver cannot be installed.
Select [Warn] and install the printer driver again.
40
Problem
The machine is not
detected (when
connected to a
network).
The plug and play
screen does not
appear (USB
connection in
Windows).
Point to check
Is the machine power on?
WHEN INSTALLATION WAS NOT SUCCESSFUL
Solution
If the machine is powered off, it will not be detected.
Switch on the main power switch and the [POWER] key
( ) in that order. (In Windows, search again after
powering on the machine.)
When a USB cable is connected, make sure the power
of the machine is "ON" and then connect a USB cable to
the machine. When the machine is not powered on,
switch on the main power switch and the [POWER] key
( ) in that order.
Is the machine power on?
Make sure that the cable is connected securely to the
LAN connectors on your computer and the machine.
Check the connections at the hub as well.
☞ CONNECTING TO A NETWORK (page 7)
Is your computer connected correctly to
the machine?
Can your computer use a USB
connection?
Check your computer whether or not a USB interface
can be used on the Device Manager in your computer.
(For information on "Device Manager", see Help in
Windows.)
If USB can be used, your controller chipset type and
root hub will appear in "Universal Serial Bus controllers"
in "Device Manager". (The items that appear will vary
depending on your computer.)
If these two items appear, USB should be useable. If a
yellow exclamation point appears next to "Universal
Serial Bus controllers" or the two items do not appear,
refer to your computer manual or check with the
manufacturer of your computer to enable USB and then
reinstall the printer driver.
39
4
TROUBLESHOOTING
WHEN INSTALLATION WAS NOT
SUCCESSFUL
This section provides solutions to possible installation problems. See the following table of contents to locate the
appropriate page for your question or problem.
• The software cannot be installed. . . . . . . . . . . . . . . . . . . . . . . . . . . . . . . . . . . . . . . . . . . . . . . . . . . . . . 38
• The machine is not detected (when connected to a network). . . . . . . . . . . . . . . . . . . . . . . . . . . . . . . . 38
• The plug and play screen does not appear (USB connection in Windows). . . . . . . . . . . . . . . . . . . . . . 39
• The printer driver is not installed correctly by plug and play (USB connection in Windows). . . . . . . . . 40
• The printer driver cannot be installed (Windows 2000/XP/Server 2003) . . . . . . . . . . . . . . . . . . . . . . . 40
Problem
The software cannot
be installed.
The machine is not
detected (when
connected to a
network).
Point to check
Solution
If the IP address of the machine is not configured, the
machine will not be detected. Make sure that the IP
address is configured correctly in "Network Settings" in
the machine's system settings (administrator).
➞ System Settings (Administrator) > "Network Settings"
Is the IP address of the machine
configured?
Make sure that the software can run on your operating
system.
For detailed information on installation requirements for
each software program in Windows, click the [Display
Readme] button in the installer.
In a Macintosh environment, this can be checked in
"ReadMe First" in the [English] folder in the [Readme]
folder of the "Software CD-ROM".
Are you using an operating system that
is not supported?
Delete any unneeded files and applications to increase
free space on your hard drive.
Is there sufficient free space on your
hard drive?
Is your computer connected to the same
network as the machine?
Windows:
If the machine and your computer are not connected
to the same local area network, the machine will not
be detected. If the two are connected to different
sub-networks, click the [Specify condition] button and
enter the machine's name (host name) or IP address
to search for the machine.
Macintosh:
If multiple AppleTalk zones exist, select the zone to
which the machine is connected from the menu.
38
10
Select the PPD file.
13
MAC OS 9.0 - 9.2.2
Select the machine configuration.
(2)
(1)
(1)
(3)
(2)
(1) Select the options that are installed on
the machine.
(2) Select [Options 2] from the menu to
change the screen and continue
selecting the options that have been
installed on the machine.
(1) Click the PPD file for your model.
(2) Click the [Select] button.
(3) Click the [OK] button.
• If the above dialog box does not appear and you
return to the "Chooser" dialog box, follow these
steps to select the PPD file manually.
(1) Make sure that the machine is selected in the
"Select a PostScript Printer" list, and then click
the [Setup] button followed by the [Select PPD]
button.
(2) Select the PPD file for your model and click the
[Open] button.
(3) Click the [OK] button.
• The PPD file is installed in the [Printer Descriptions]
folder in the [Extensions] folder.
Click the [Configure] button.
12
Make sure that the machine is selected
in the "Select a PostScript Printer" list
and then click the [Setup] button.
11
You can check the options that are installed on the
machine by printing out the "All Custom Setting List" in
the system settings. (However, note that "Input Tray
Options" must be set to the number of trays on the
machine.) Follow these steps to print out the "All
Custom Setting List": Press the [SYSTEM SETTINGS]
key, touch the [List Print (User)] key, and then touch
the [Print] key of "All Custom Setting List".
14
15
Click the [OK] button in the window of
step 12 to close the window.
Click the close box (
"Chooser".
) to close the
This completes the configuration of the printer
driver.
To automatically configure the settings based on the
installed machine options that are detected, click the
[Auto Setup] button.
Installing the screen fonts
The screen fonts for Mac OS 9.0 - 9.2.2 are contained in
the [Font] folder of the "PRINTER UTILITIES" CD-ROM
that accompanies the PS3 expansion kit. Copy the fonts
that you wish to install to the [System Folder] of the
startup disk.
If you experience problems that may be due to the
installed screen fonts, immediately delete the installed
fonts from the system.
37
MAC OS 9.0 - 9.2.2
If you are using Mac OS 9.0 to 9.2.2, make sure that "LaserWriter 8" has been installed and that the "LaserWriter 8"
checkbox is selected
in "Extensions Manager" in "Control Panels". If not, install it from the system CD-ROM supplied with
your Macintosh computer.
1
Insert the "Software CD-ROM" into your
computer's CD-ROM drive.
Insert the "Software CD-ROM" that shows "Disc 2" on the
front of the CD-ROM.
8
9
Select [Chooser] from the Apple Menu.
Create a printer.
(1)
Double-click the [MacOS] folder.
3
Double-click the [CD-ROM] icon (
the desktop.
2
(2)
) on
Before installing the software, be sure to read "ReadMe
First". "ReadMe First" is in the [English] folder in the
[Readme] folder.
(3)
(1) Click the [LaserWriter 8] icon.
Read the message in the window that
appears and click the [Continue]
button.
7
The License Agreement window will
appear. Make sure that you understand
the contents of the license agreement
and then click the [Yes] button.
6
Click the [Install] button.
5
Double-click the [Installer] icon (
4
).
If multiple AppleTalk zones are displayed, select the
zone that includes the printer.
(2) Click the machine's model name.
The machine's model name usually appears as
[SCxxxxxx]. ("xxxxxx" is a sequence of characters
that varies depending on your model.)
(3) Click the [Create] button.
Installation of the PPD file begins.
After the installation, a message prompting you to restart
your computer will appear. Click the [OK] button and
restart your computer.
This completes the installation of the software. Next,
configure the printer driver settings.
36
MAC OS X
X Printing using the IPP function
The machine can print using the IPP function. When the machine is in a remote location, this function can be used in
place of the fax function to print a higher quality image than a fax. If you wish to use the IPP function, follow these steps
to select the PPD file when configuring the printer driver (step 14 on page 33).
v10.4.11, v10.5 - 10.5.1
v10.2.8, v10.3.9
(1)
(1)
(2)
(2)
(3)
(3)
(4)
(4)
(1) Click the [IP Printer] icon.
If you are using Mac OS X v10.5 to 10.5.1, click the
[IP] icon.
(2) Select [Internet Printing Protocol] in
"Protocol". Enter the address of the
machine (IP address or domain name)
and the queue name.
Enter "ipp" in "Queue".
(1) Select [IP Printing].
(2) Select [Internet Printing Protocol] in
"Printer Type". Enter the address of the
machine (IP address or domain name)
and the "Queue Name".
• If you are using Mac OS X v10.2.8, enter the
address of the machine (IP address or domain
name) in "Printer's Address".
• Enter "ipp" in "Queue Name".
(3) Select [Sharp] in "Printer Model" and
click the PPD file of your model.
(3) Select [Sharp] in "Print Using" and
click the PPD file of your model.
If you are using Mac OS X v 10.5 to 10.5.1, select
[Select a driver to use] from "Print Using" and click
the PPD file for your model.
(4) Click the [Add] button.
☞ Checking the IP address of the machine (page 7)
(4) Click the [Add] button.
If you are using Mac OS X v 10.5 to 10.5.1, the
"Installable Options" screen will appear. Make sure
that the settings are correct and click the [Continue]
button.
☞ Checking the IP address of the machine (page 7)
35
MAC OS X
15
Display printer information.
16
Select the machine configuration.
If you selected [Auto Select] in (3) of step 14, the
machine configuration is detected and automatically
configured. Check the configured settings to make sure
they are correct.
(2)
(1)
(4)
(1)
(1) Click the machine's name.
If you are using Mac OS X v10.5 to 10.5.1, click the
[Options & Supplies] button, click the [Driver] tab
and go to step 16.
(2)
(2) Click [Show Info].
If you are using Mac OS X v10.2.8, select [Show
Info] from the [Printers] menu.
(3)
(1) Select [Installable Options].
If you are using Mac OS X v10.5 to 10.5.1, it does
not appear.
(2) Select the options that are installed on
the machine.
(3) Click the [Apply Changes] button.
If you are using Mac OS X v10.5 to 10.5.1, click the
[OK] button.
(4) Click to close the window.
You can check the options that are installed on the
machine by printing out the "All Custom Setting List" in
the system settings. (However, note that "Input Tray
Options" must be set to the number of trays on the
machine.) Follow these steps to print out the "All
Custom Setting List": Press the [SYSTEM SETTINGS]
key, touch the [List Print (User)] key, and then touch
the [Print] key of "All Custom Setting List".
This completes the configuration of the printer
driver.
34
MAC OS X
+
14
Configure the printer driver.
• The procedure for configuring the printer driver varies depending on the operating system version. The procedure for versions
10.4.11 and 10.5 - 10.5.1 and the procedure for other versions are explained separately below.
• The machine can print using the IPP function. If you wish to use the IPP function, see "Printing using the IPP function"
(page 35) to configure the printer driver settings.
v10.4.11, v10.5 - 10.5.1
v10.2.8, v10.3.9
(1)
(1)
(2)
(2)
(3)
(4)
(3)
(4)
(1) Select [AppleTalk].
If multiple AppleTalk zones are displayed, select the
zone that includes the printer from the menu.
(2) Click the machine's model name.
(1) Click the [Default Browser] icon.
• If multiple AppleTalk zones are displayed, select
the zone that includes the printer from the menu.
• If you are using Mac OS X v10.5 to 10.5.1, click
the [Default] icon.
(2) Click the machine's model name.
• The machine's model name usually appears as
[SCxxxxxx]. ("xxxxxx" is a sequence of
characters that varies depending on your model.)
• The PPD file of the machine is automatically
selected.
(3) Make sure that the PPD file of your
model is selected.
The machine's model name usually appears as
[SCxxxxxx]. ("xxxxxx" is a sequence of characters
that varies depending on your model.)
(3) Select the PPD file of the machine.
• If you are using Mac OS X v10.3.9, select [Auto
Select].
• If you are using Mac OS X v10.2.8, select [Sharp]
and click the PPD file of your model.
(4) Click the [Add] button.
If you are using Mac OS X v10.3.9, the PPD file of
the machine is automatically selected and the
peripheral devices installed on the machine are
detected and automatically configured.
(4) Click the [Add] button.
The PPD file of the machine is automatically
selected and the peripheral devices installed on the
machine are detected and automatically configured.
The PPD file is installed in the following folders on the startup disk.
[Library] - [Printers] - [PPDs] - [Contents] - [Resources] - [en.lproj]
33
MAC OS X
7
The License Agreement window will
appear. Make sure that you understand
the contents of the license agreement
and then click the [Continue] button.
11
Select [Utilities] from the [Go] menu.
• If you are using Mac OS X v10.5 to 10.5.1, click
[System Preferences] in the Apple menu ( ) and
select [Print & Fax] ( ). When the screen for adding a
printer appears, click the
button and go to step 14.
A message will appear asking you if you agree to the
terms of the license. Click the [Agree] button.
• If you are using Mac OS X v10.2.8, select
[Applications] from the [Go] menu.
If the license appears in the different language,
change the language in the language menu.
8
Select the hard drive where the PPD file
will be installed and click the [Continue]
button.
Be sure to select the hard drive on which your operating
system is installed.
12
Double-click the [Printer Setup Utility]
icon ( ).
If you are using Mac OS X v10.2.8, double-click the
[Utilities] folder and then double-click the [Print Center]
icon.
If this is the first time you are installing a printer driver
on your computer, a confirmation message will
appear. Click the [Add] button.
9
Click the [Install] button.
Installation begins.
13
Click [Add].
If the "Authenticate" window appears, enter the
password and click the [OK] button.
10
When the message "The software was
successfully installed" appears in the
installation window, click the [Close]
button.
This completes the installation of the software. Next,
configure the printer driver settings.
32
3
SETUP IN A MACINTOSH
ENVIRONMENT
This chapter explains how to install the PPD file to enable printing from a Macintosh and how to configure the printer
driver settings.
☞ MAC OS X: this page
(v10.2.8, v10.3.9, v10.4.11, v10.5 - 10.5.1)
☞ MAC OS 9.0 - 9.2.2: page 36
• The PS3 expansion kit is required to use the machine as a printer in a Macintosh environment. In addition, the
machine must be connected to a network. A USB connection cannot be used.
• The scanner driver and PC-Fax driver cannot be used in a Macintosh environment.
MAC OS X
The explanations of screens and procedures are primarily for Mac OS X v10.4. The screens may vary in other versions of the
operating system.
1
Insert the "Software CD-ROM" into your
computer's CD-ROM drive.
5
Insert the "Software CD-ROM" that shows "Disc 2" on the
front of the CD-ROM.
Double-click the [MacOSX] folder.
3
Double-click the [CD-ROM] icon (
the desktop.
2
) on
Double-click the [MX-PBX1] icon (
).
If the "Authenticate" window appears in Mac OS X
v10.2.8, enter the password and click the [OK] button.
6
Click the [Continue] button.
Before installing the software, be sure to read "ReadMe
First". "ReadMe First" is in the [English] folder in the
[Readme] folder.
4
Double-click the folder corresponding
to the versions of the operating system.
v10.5 10.5.1
v10.4.11
v10.3.9
v10.2.8
31
4
Select [SC2 TCP/IP Port] and then click
the [New Port] button.
5
Create the new port.
In Windows 98/Me, select [Other], [SC2 TCP/IP Port],
and then click the [OK] button.
• The "SC2 TCP/IP Port" is added when the printer
driver is installed using a "Standard installation", or
a "Custom installation" with "LPR Direct Print
(Specify Address/Auto Search)" selected.
• If the printer driver is installed using a "Custom
installation" with "IPP" selected, the [SC-Print2005
Port] is added. If you need to change the printer port
when the machine is connected to an intranet or a
wide area network (WAN) using the IPP function,
select [SC-Print2005 Port], click the [New Port]
button (the [OK] button in Windows 98/Me), and
follow the on-screen instructions to create the port
again.
(1) (2)
(3)
(4)
(1) Enter the machine's IP address.
☞ Checking the IP address of the machine
(page 7)
(2) Make sure that [LPR] is selected.
(3) Make sure that [lp] is entered.
(4) Click the [OK] button.
6
Click the [Close] button in the screen of
step 4.
In Windows 98/Me, this step is not required. Go to the
next step.
7
Make sure the created printer port is
selected in the printer properties
window and then click the [Apply]
button.
X When using a port created with "Standard TCP/IP Port"
When using a port created using "Standard TCP/IP Port" in Windows 2000/XP/Server 2003/Vista/Server 2008, in
the screen that appears after you click the [Configure Port] button in the screen of step 3, make sure the [SNMP
Status Enabled] checkbox is not selected ( ). If the [SNMP Status Enabled] checkbox is selected ( ), it may not
be possible to print correctly.
30
CHANGING THE PORT
When using the machine in a Windows environment, follow the steps below to change the port when you have changed
the IP address of the machine or have installed the PC-Fax driver when the machine is connected with a USB cable.
1
Click the [Start] button ( ), click
[Control Panel], and then click [Printer].
3
Adding or changing a port.
• In Windows XP/Server 2003, click the [start] button
and then click [Printers and Faxes].
• In Windows 98/Me/NT 4.0/2000, click the [Start]
button, select [Settings], and then click [Printers].
If [Printers and Faxes] does not appear in the [start]
menu in Windows XP, click the [start] button, click
[Control Panel], click [Printers and Other Hardware],
and then click [Printers and Faxes].
2
Open the printer properties window.
(2)
(1) Right-click the printer driver icon of the
machine.
(1)
(1) Click the [Ports] tab.
In Windows 98/Me, click the [Details] tab.
(2) Select [Properties].
(2) Click the [Add Port] button.
To change to a previously created port such as USB
port, select the desired port (USB001, etc.) from the
list and click the [Apply] button. This changes the port.
29
INSTALLING THE PS DISPLAY FONTS
Fonts that can be used by the PS printer driver are contained on the "PRINTER UTILITIES" CD-ROM that accompanies
the PS3 expansion kit. Install these fonts as needed for the PS printer driver.
Click the [Start] button ( ), click
[Computer], and then double-click the
[CD-ROM] icon ( ).
2
Insert the "PRINTER UTILITIES"
CD-ROM that accompanies the PS3
expansion kit into your computer's
CD-ROM drive.
1
6
Click the [PS Display Font] button.
• In Windows XP/Server 2003, click the [start] button,
click [My Computer], and then double-click the
[CD-ROM] icon.
• In Windows 98/Me/NT 4.0/2000, double-click [My
Computer], and then double-click the [CD-ROM] icon.
3
4
Double-click the [Setup] icon (
).
8
The "SOFTWARE LICENSE" window
will appear. Make sure that you
understand the contents of the license
agreement and then click the [Yes]
button.
7
In Windows Vista/Server 2008, if a message screen
appears asking you for confirmation, click [Allow].
Follow the on-screen instructions.
Click the [Close] button in the screen of
step 6.
You can show the "SOFTWARE LICENSE" in a
different language by selecting the desired language
from the language menu. To install the software in the
selected language, continue the installation with that
language selected.
5
Read the message in the "Welcome"
window and then click the [Next]
button.
28
7
INSTALLING THE SCANNER DRIVER
Select the IP address of the machine
from the "Address" menu and click the
[OK] button.
• Be sure to ask your system administrator (network
administrator) for the IP address of the machine.
• The name (host name) or IP address of the machine
can be directly entered in "Address".
• If the port number used by the scanner function of the
machine has been changed, enter a colon ":" following
the IP address and then enter the port number.
(Normally the port number does not need to be
entered.)
8
Click the [OK] button.
This completes the configuration of the scanner
driver.
27
INSTALLING THE SCANNER DRIVER
The scanner driver (TWAIN driver) can only be used when the machine is connected to a network. When the scanner
driver is installed, PC scan mode of the image send function can be used.
Supported operating systems: Windows 98/Me/2000*/XP*/Server 2003*/Vista*/Server 2008*
* Administrator's rights are required to install the software.
After performing step 1 through step 5 of "OPENING THE SOFTWARE SELECTION SCREEN (FOR ALL
SOFTWARE)" (page 8), continue the steps below.
Follow the on-screen instructions.
2
Click the [Scanner Driver (TWAIN)]
button.
1
This completes the installation. Next, configure the
IP address of the machine in the scanner driver.
When the scanner driver is installed, the "Select Device"
utility is also installed.
The IP address of the machine is configured in the
scanner driver using "Select Device".
Click the [Search] button.
6
Click the [start] button, select [All
Programs] ([Programs] in Windows
98/Me/2000), select [SHARP MFP
TWAIN K], and then select [Select
Device].
5
If you know the IP address, you can click the [Input] key
and enter the IP address without searching.
Read the message in the window that appears and click
the [Next] button.
Click the [Close] button in the window
of step 1.
4
When the finish setup window appears,
click the [OK] button.
3
After the installation, a message prompting you to
restart your computer may appear. If this message
appears, click the [Yes] button to restart your
computer.
26
INSTALLING THE PRINTER STATUS
MONITOR
Printer Status Monitor is a printer utility that allows general users to check the current status of the machine on their
computer screen, such as whether or not the machine is ready to print. The Printer Status Monitor shows error
information such as paper misfeeds, printer configuration information (whether or not a finisher is installed, etc.) as an
image, the paper sizes that can be used, and the amount of paper remaining.
The Printer Status Monitor cannot be used in the following situations:
• When the machine is connected by a USB cable.
• When printing to the machine using the IPP function.
Supported operating systems: Windows 98/Me/NT 4.0*/2000*/XP*/Server 2003*/Vista*/Server 2008*
* Administrator's rights are required to install the software.
When the software selection screen appears in step 6 of "OPENING THE SOFTWARE SELECTION SCREEN (FOR
ALL SOFTWARE)" (page 8), perform the steps below.
Follow the on-screen instructions.
2
Click the [Printer Status Monitor] button.
1
3
When the installation completed screen
appears, click the [Finish] button.
To have the Printer Status Monitor start automatically
when your computer is started, select the [Add this
program to your Startup folder] checkbox
and click
the [Finish] button.
4
Click the [Close] button in the window
of step 1.
After the installation, a message prompting you to
restart your computer may appear. If this message
appears, click the [Yes] button to restart your
computer.
This completes the installation.
For the procedures for using the Printer Status Monitor, see the Help file. Follow these steps to view the Help file:
Click the Windows [start] button, select [All Programs] ([Programs] in Windows 98/Me/NT 4.0/2000), select [SHARP
Printer Status Monitor] and then select [Help].
25
INSTALLING THE PRINTER DRIVER / PC-FAX DRIVER
X When the PPD driver is installed
1
Click the [Start] button ( ), click
[Control Panel], and then click [Printer].
3
• In Windows XP/Server 2003, click the [start] button
and then click [Printers and Faxes].
Configure the printer driver for the
options installed on the machine.
(1)
• In Windows 98/Me/NT 4.0/2000, click the [Start]
button, select [Settings], and then click [Printers].
If [Printers and Faxes] does not appear in the [start]
menu in Windows XP, click the [start] button, click
[Control Panel], click [Printers and Other Hardware],
and then click [Printers and Faxes].
2
Open the printer properties window.
(1) Right-click the printer driver icon of the
machine.
(2) Select [Properties].
(2)
(3)
(1) Click the [Device Settings] tab.
In Windows 98/Me, click the [Device Options] tab.
(2) Configure each item based on the
machine configuration.
The items and the procedures for configuring the
items vary depending on the operating system
version.
(3) Click the [OK] button.
You can check the options that are installed on the
machine by printing out the "All Custom Setting List" in
the system settings. (However, note that "Input Tray
Options" must be set to the number of trays on the
machine.) Follow these steps to print out the "All
Custom Setting List": Press the [SYSTEM SETTINGS]
key, touch the [List Print (User)] key, and then touch
the [Print] key of "All Custom Setting List".
24
5
INSTALLING THE PRINTER DRIVER / PC-FAX DRIVER
Configure the image of the machine.
An image of the machine is formed in the printer driver
configuration window based on the options that are
installed.
(1)
(2)
(1) Select the options that are installed on
the machine.
(2) Click the [OK] button.
To cancel the image settings, click the [Cancel]
button.
6
Click the [OK] button in the printer
properties window.
If automatic configuration fails, configure the settings manually.
• You can check the options that are installed and the tray settings by printing out the "All Custom Setting List" in the system
settings of the machine. (However, note that "Input Tray Options" must be set to the number of trays on the machine.)
Follow these steps to print out the "All Custom Setting List": Press the [SYSTEM SETTINGS] key, touch the [List Print
(User)] key, and then touch the [Print] key of "All Custom Setting List".
• Click the [Set Tray Status] button, the [Paper Type Name] button, and the [Set Tandem Print]* button to check the settings
of each.
Set Tray Status: The "Tray Settings" in "Paper Tray Settings" in system settings of the machine are reflected in the
settings shown here. Specify the size and type of paper loaded in each tray.
Paper Type Name: The "Paper Type Registration" settings in "Paper Tray Settings" in the system settings of the machine
are reflected in the settings shown here. If a user type name (1 to 7) was changed, enter the changed
name.
Set Tandem Print*: Enter the setting (the IP address of the slave machine) in "Tandem Connection Setting" in the system
settings (administrator) of the machine.
* "Set Tandem Print" can only be configured when the printer driver is installed using a "Standard installation" or a "Custom
installation" with "LPR Direct Print (Specify Address/Auto Search)" selected.
23
INSTALLING THE PRINTER DRIVER / PC-FAX DRIVER
CONFIGURING THE PRINTER DRIVER FOR THE
OPTIONS INSTALLED ON THE MACHINE
After installing the printer driver, you must configure the printer driver settings appropriately for the options that have
been installed and the size and type of paper loaded in the machine. Follow the steps below to configure the printer
driver.
If the PPD driver is installed, see "When the PPD driver is installed" (page 24).
X When the PCL printer driver or PS printer driver is installed
1
Click the [Start] button ( ), click
[Control Panel], and then click [Printer].
3
Click the [Configuration] tab.
In Windows 98/Me, click the [Setup] tab and then click
the [Configuration] tab in the window that appears.
• In Windows XP/Server 2003, click the [start] button
and then click [Printers and Faxes].
• In Windows 98/Me/NT 4.0/2000, click the [Start]
button, select [Settings], and then click [Printers].
4
Click the [Auto Configuration] button.
The settings are automatically configured based on the
detected machine status.
If [Printers and Faxes] does not appear in the [start]
menu in Windows XP, click the [start] button, click
[Control Panel], click [Printers and Other Hardware],
and then click [Printers and Faxes].
2
Open the printer properties window.
(1) Right-click the printer driver icon of the
machine.
(2) Select [Properties].
22
INSTALLING THE PRINTER DRIVER / PC-FAX DRIVER
USING THE STANDARD WINDOWS PS PRINTER
DRIVER (Windows 98/Me/NT 4.0)
If the PS3 expansion kit is installed on the machine and you wish to use the standard Windows 98/Me/NT 4.0 PS printer
driver, follow the steps below to install the PPD driver using the Add Printer Wizard.
• The CD-ROM does not include software for Windows 98/Me/NT 4.0.
Contact your dealer or nearest authorised service representative if you want software for Windows 98/Me/NT 4.0.
• If you are using Windows 2000/XP/Server 2003/Vista/Server 2008, you can install the PPD driver from the installer.
• Be sure to view the Readme file (Readme.txt) before installing the PPD driver. The Readme file will be in the [English]
folder inside the folder that contains the extracted files after you get the software.
Double-click the [Add printer] icon.
3
Click the [Start] button, select
[Settings] and then click [Printers].
2
Download the software and save the
extracted files in any folder.
1
4
Follow the on-screen instructions.
When you are asked to specify the path of the PPD file,
enter the path as follows.
Operating system
PPD file path
(Folder containing extracted
files)\English\PPD\NT40
Windows NT 4.0
(Folder containing extracted
files)\English\PPD\9XME
Windows 98/Me
The "Add Printer Wizard" will appear.
After installation, see "CONFIGURING THE PRINTER
DRIVER FOR THE OPTIONS INSTALLED ON THE
MACHINE" (page 22) to configure the printer driver settings.
X Installing the resident font information (Windows 98/Me)
If you have installed the PPD driver on Windows 98/Me and will be using the resident fonts in the machine, you must
install the resident font information. Follow the procedure below to install the resident font information.
• Before installing the resident font information, be sure to install the PPD driver.
• In the event that a resident font cannot be selected in a software application, install the resident font information again.
1
Double-click the folder where the
extracted files are saved when you
installed the PPD driver.
2
3
Double-click the [English] folder, the
[PPD] folder, the [9XME] folder, and
then [PFMSetup.exe].
Follow the on-screen instructions.
After the resident font information has been installed,
restart your computer.
21
INSTALLING THE PRINTER DRIVER / PC-FAX DRIVER
USING THE MACHINE AS A SHARED PRINTER
If you are going to use the machine as a shared printer on a Windows network with the printer driver or the PC-Fax driver
installed on a print server, follow the steps below to install the printer driver or the PC-Fax driver on the client computers.
• Ask your network administrator for the server name and printer name of the machine on the network.
• For the procedure for configuring settings on the print server, see the operation manual or the Help file of the operating
system. The "print server" explained here is a computer that is connected directly to the machine, and "clients" are other
computers connected to the same network as the print server.
• Install the same printer driver on client computers as the printer driver that is installed on the print server.
• If the PPD driver is installed on the print server and the client computers are running Windows 98/Me/NT 4.0, see "USING
THE STANDARD WINDOWS PS PRINTER DRIVER (Windows 98/Me/NT 4.0)" (page 21) to install the printer driver using
the Add Printer Wizard.
When the software selection screen appears in step 6 of "OPENING THE SOFTWARE SELECTION SCREEN (FOR
ALL SOFTWARE)" (page 8), perform the steps below.
1
Click the [Printer Driver] button.
4
To install the PC-Fax driver, click the [PC-Fax Driver]
button on the "Disc 2" CD-ROM.
Select the printer name (configured as a
shared printer).
(1)
Click the [Custom installation] button.
2
(2)
(1) Select the printer name (configured as
a shared printer on a print server) from
the list.
* The above screen appears when using the
"Disc 1" CD-ROM.
Select [Shared Printer] and click the
[Next] button.
3
If you are using Windows 98/Me/NT 4.0/2000/XP/
Server 2003, you can also click the [Add Network
Port] button displayed below the list and select the
printer to be shared by browsing the network in the
window that appears.
(2) Click the [Next] button.
If the shared printer does not appear in the list, check
the settings on the print server.
5
Perform steps 5 through 12 on page 13
to continue the installation.
In the printer driver selection screen, be sure to select the
same type of printer driver as the printer driver installed
on the print server.
This completes the installation.
If you installed the PS printer driver or the PPD driver, the PS
display fonts can be installed from the "PRINTER UTILITIES"
CD-ROM that accompanies the PS3 expansion kit. See
"INSTALLING THE PS DISPLAY FONTS" (page 28).
20
6
Select whether or not you wish the
printer to be your default printer and
click the [Next] button.
INSTALLING THE PRINTER DRIVER / PC-FAX DRIVER
11
If you are installing multiple drivers, select the printer
driver to be used as the default printer.
If you do not wish to set one of the printer drivers as the
default printer, select [No].
7
When the printer name window
appears, click the [Next] button.
If you wish to change the printer name, enter the desired
name.
8
When you are asked if you wish to
install the display fonts, select [No] and
click the [Next] button.
When the PC-Fax driver is being installed, this screen
does not appear. Go to the next step.
9
Follow the on-screen instructions.
Read the message in the window that appears and click
the [Next] button.
Installation begins.
Click the [Close] button in the window
of step 1.
After the installation, a message prompting you to
restart your computer may appear. If this message
appears, click the [Yes] button to restart your
computer.
This completes the installation.
• After installation, see "CONFIGURING THE PRINTER
DRIVER FOR THE OPTIONS INSTALLED ON THE
MACHINE" (page 22) to configure the printer driver
settings.
• Make sure that the port of the installed driver is the
same as the port used by the PCL6 printer driver.
The port used by the printer driver of the machine is
indicated by a checkmark on the [Ports] tab of the
printer driver properties window. (In Windows 98/Me,
this is the port selected in [Print to the following port]
on the [Details] tab.)
☞ CHANGING THE PORT (page 29)
• If you installed the PS printer driver or the PPD driver,
the PS display fonts can be installed from the
"PRINTER UTILITIES" CD-ROM that accompanies
the PS3 expansion kit. See "INSTALLING THE PS
DISPLAY FONTS" (page 28).
• If you are using Windows Vista/Server 2008
If a security warning window appears, be sure to click
[Install this driver software anyway].
• If you are using Windows 2000/XP/Server 2003
If a warning message regarding the Windows logo
test or digital signature appears, be sure to click the
[Continue Anyway] or [Yes] button.
10
When the installation completed screen
appears, click the [OK] button.
19
INSTALLING THE PRINTER DRIVER / PC-FAX DRIVER
When installing the PCL5c printer driver, PS printer driver, PPD driver, or PC-Fax driver
Installation is possible even after the USB cable has been connected. When the software selection screen appears in
step 6 of "OPENING THE SOFTWARE SELECTION SCREEN (FOR ALL SOFTWARE)" (page 8), perform the steps
below.
1
Click the [Printer Driver] button.
3
To install the PC-Fax driver, click the [PC-Fax Driver]
button on the "Disc 2" CD-ROM.
4
* The above screen appears when using the
"Disc 1" CD-ROM.
2
Click the [Custom installation] button.
5
When you are asked how the printer is
connected, select [Connected to this
computer] and click the [Next] button.
When the port selection window
appears, select the port that the PCL6
printer driver is using (USB001, etc.)
and click the [Next] button.
When the printer driver selection
window appears, remove the [PCL6]
checkmark and select the printer driver
to be installed, and then click the [Next]
button.
Click the checkbox of the printer driver to be installed so
that a checkmark (
) appears.
• When the PC-Fax driver is being installed, this
screen does not appear. Go to the next step.
• The PS3 expansion kit is required to use the PS
printer driver or the PPD driver.
• The [PPD] checkbox only appears if you are using
Windows 2000/XP/Server 2003/Vista/Server 2008.
18
6
INSTALLING THE PRINTER DRIVER / PC-FAX DRIVER
8
When the "Found New Hardware Wizard" appears,
select [Install the software automatically
(Recommended)], click the [Next] button, and follow the
on-screen instructions.
When a message appears prompting you to connect the
machine to your computer, click the [OK] button.
Installation of the PCL6 printer driver
begins.
Click the [Close] button in the window
of step 1.
After the installation, a message prompting you to
restart your computer may appear. If this message
appears, click the [Yes] button to restart your
computer.
7
• If you are using Windows Vista/Server 2008
If a security warning window appears, be sure to click
[Install this driver software anyway].
• If you are using Windows 2000/XP/Server 2003
If a warning message regarding the Windows logo
test or digital signature appears, be sure to click the
[Continue Anyway] or [Yes] button.
Connect the machine to your computer
with a USB cable.
(1) Make sure that the machine is powered
on.
(2) Connect the cable to the USB
connector (B type) on the machine.
The USB interface on the machine complies with
the USB 2.0 (Hi-Speed) standard. Please purchase
a shielded USB cable.
This completes the installation.
• After installing the printer driver, see "CONFIGURING
THE PRINTER DRIVER FOR THE OPTIONS
INSTALLED ON THE MACHINE" (page 22) to
configure the printer driver settings.
• If you are using the machine as a shared printer, see
"USING THE MACHINE AS A SHARED PRINTER"
(page 20) to install the printer driver on each of the
client computers.
(3) Connect the other end of the cable to
the USB connector (A type) on your
computer.
The machine is found and a Plug and Play window
appears.
17
INSTALLING THE PRINTER DRIVER / PC-FAX DRIVER
WHEN THE MACHINE WILL BE CONNECTED WITH A
USB CABLE
Supported operating systems: Windows 98/Me/2000*/XP*/Server 2003*/Vista*/Server 2008*
* Administrator's rights are required to install the software.
• Make sure that a USB cable is not connected to your computer and the machine.
If a cable is connected, a Plug and Play window will appear. If this happens, click the [Cancel] button to close the window
and disconnect the cable.
• The PS3 expansion kit is required to use the PS printer driver or the PPD driver.
• To install the PPD driver when Windows 98/Me is used, see "USING THE STANDARD WINDOWS PS PRINTER DRIVER
(Windows 98/Me/NT 4.0)" (page 21) and install the driver using the Add Printer Wizard.
• To use the port created when the printer driver is installed for fax data transfer, install the printer driver first and then install
the PC-Fax driver.
When the software selection screen appears in step 6 of "OPENING THE SOFTWARE SELECTION SCREEN (FOR
ALL SOFTWARE)" (page 8), perform the steps below.
Click the [Custom installation] button.
2
Click the [Printer Driver] button.
1
3
4
5
When you are asked how the printer is
connected, select [Connected to this
computer] and click the [Next] button.
When you are asked if you wish to
install the display fonts, select an
answer and click the [Next] button.
Follow the on-screen instructions.
Read the message in the window that appears and click
the [Next] button.
When the installation completed screen appears, click
the [OK] button.
• If you are using Windows Vista/Server 2008
If a security warning window appears, be sure to click
[Install this driver software anyway].
• If you are using Windows 2000/XP/Server 2003
If a warning message regarding the Windows logo
test or digital signature appears, be sure to click the
[Continue Anyway] or [Yes] button.
16
5
INSTALLING THE PRINTER DRIVER / PC-FAX DRIVER
Enter the machine's URL and click the
[Next] button.
Enter the URL in the following format:
Normal format:
http://<the machine's domain name or IP address>:631*1/ipp
*1 Normally "631" should be entered for the port number.
If the IPP port number has been changed on the
machine, enter the new port number.
When SSL is used:
https://< the machine's domain name or IP address>:<port number*2>/ipp
*2 Normally the port number and the colon ":"
immediately preceding the port number can be
omitted. If the IPP port number for SSL has been
changed on the machine, enter the new port number.
If your computer and the machine are connected to
the same local area network, you can click the
[Search] button to search for the machine. The
machine's URL will appear. Select the URL and click
the [OK] button. You will return to the above screen
and the machine's URL will be automatically entered.
6
Perform steps 5 through 12 on page 13
to continue the installation.
This completes the installation.
• After installation, see "CONFIGURING THE PRINTER
DRIVER FOR THE OPTIONS INSTALLED ON THE
MACHINE" (page 22) to configure the printer driver
settings.
• If you installed the PS printer driver or the PPD driver,
the PS display fonts can be installed from the
"PRINTER UTILITIES" CD-ROM that accompanies
the PS3 expansion kit. See "INSTALLING THE PS
DISPLAY FONTS" (page 28).
15
INSTALLING THE PRINTER DRIVER / PC-FAX DRIVER
X Printing using the IPP function and the SSL function
The IPP function can be used to print to the machine over a network using HTTP protocol.
When the machine is in a remote location, this function can be used in place of the fax function to print a higher quality
image than a fax. The IPP function can also be used in combination with the SSL (encrypted communication) function to
encrypt the print data. This enables secure printing with no concern that the data will be leaked to others.
To use the SSL function, configure the "SSL Settings" in the system settings (administrator) of the machine. To configure the
settings, see "7. SYSTEM SETTINGS" in the Operation Guide.
When the software selection screen appears in step 6 of "OPENING THE SOFTWARE SELECTION SCREEN (FOR
ALL SOFTWARE)" (page 8), perform the steps below.
1
Click the [Printer Driver] button.
3
To install the PC-Fax driver, click the [PC-Fax Driver]
button on the "Disc 2" CD-ROM.
4
* The above screen appears when using the
"Disc 1" CD-ROM.
2
When you are asked how the printer is
connected, select [IPP] and click the
[Next] button.
If a proxy server is used, specify the
proxy server and click the [Next]
button.
To specify a proxy server, select [Print via the proxy
server] and then enter the [Address] and [Port number].
Click the [Custom installation] button.
14
When the printer driver selection
window appears, select the printer
driver to be installed and click the
[Next] button.
6
When the model selection window
appears, select the model name of your
machine and click the [Next] button.
5
Click the checkbox of the printer driver to be installed so
that a checkmark (
) appears.
INSTALLING THE PRINTER DRIVER / PC-FAX DRIVER
9
When you are asked if you wish to
install the display fonts, select an
answer and click the [Next] button.
• When the PC-Fax driver is being installed, this screen
does not appear. Go to the next step.
• If you are not installing the PCL printer driver (you are
installing the PS printer driver or the PPD driver),
select [No] and click the [Next] button.
10
Follow the on-screen instructions.
Read the message in the window that appears and click
the [Next] button.
Installation begins.
• If you are using Windows Vista/Server 2008
If a security warning window appears, be sure to click
[Install this driver software anyway].
• If you are using Windows 2000/XP/Server 2003
If a warning message regarding the Windows logo
test or digital signature appears, be sure to click the
[Continue Anyway] or [Yes] button.
• When the PC-Fax driver is being installed, this
screen does not appear. Go to the next step.
11
• The PS3 expansion kit is required to use the PS
printer driver or the PPD driver.
• The [PPD] checkbox only appears if you are using
Windows 2000/XP/Server 2003/Vista/Server 2008.
7
12
Select whether or not you wish the
printer to be your default printer and
click the [Next] button.
If you are installing multiple drivers, select the printer
driver to be used as the default printer.
If you do not wish to set one of the printer drivers as the
default printer, select [No].
8
When the printer name window
appears, click the [Next] button.
If you wish to change the printer name, enter the desired
name.
When the installation completed screen
appears, click the [OK] button.
Click the [Close] button in the window
of step 1.
After the installation, a message prompting you to
restart your computer may appear. If this message
appears, click the [Yes] button to restart your
computer.
This completes the installation.
• After installation, see "CONFIGURING THE PRINTER
DRIVER FOR THE OPTIONS INSTALLED ON THE
MACHINE" (page 22) to configure the printer driver
settings.
• If you installed the PS printer driver or the PPD driver,
the PS display fonts can be installed from the
"PRINTER UTILITIES" CD-ROM that accompanies
the PS3 expansion kit. See "INSTALLING THE PS
DISPLAY FONTS" (page 28).
13
INSTALLING THE PRINTER DRIVER / PC-FAX DRIVER
X Installation by specifying the machine's address
When the machine cannot be found because it is not powered on or otherwise, installation is possible by entering the
name (host name) or IP address of the machine.
When the software selection screen appears in step 6 of "OPENING THE SOFTWARE SELECTION SCREEN (FOR
ALL SOFTWARE)" (page 8), perform the steps below.
1
Click the [Printer Driver] button.
3
To install the PC-Fax driver, click the [PC-Fax Driver]
button on the "Disc 2" CD-ROM.
4
* The above screen appears when using the
"Disc 1" CD-ROM.
2
When you are asked how the printer is
connected, select [LPR Direct Print
(Specify Address)] and click the [Next]
button.
Enter the name (host name) or IP
address of the machine and click the
[Next] button.
☞ Checking the IP address of the machine
(page 7)
Click the [Custom installation] button.
12
6
When you are asked whether or not you
want the printer to be your default
printer, make a selection and click the
[Next] button.
INSTALLING THE PRINTER DRIVER / PC-FAX DRIVER
9
Click the [Close] button in the window
of step 1.
After the installation, a message prompting you to
restart your computer may appear. If this message
appears, click the [Yes] button to restart your
computer.
If you are installing multiple drivers, select the printer
driver to be used as the default printer.
If you do not wish to set one of the printer drivers as the
default printer, select [No].
If you clicked the [Custom installation] button in step 2,
the following windows will appear.
• Printer name window
If you wish to change the printer name, enter the
desired name and click the [Next] button.
• Window confirming installation of the display
fonts
To install the display fonts for the PCL printer driver,
select [Yes] and click the [Next] button.
• When the PC-Fax driver is being installed, this
screen does not appear. Go to the next step.
• If you are not installing the PCL printer driver (you
are installing the PS printer driver or the PPD
driver), select [No] and click the [Next] button.
7
This completes the installation.
• After installation, see "CONFIGURING THE PRINTER
DRIVER FOR THE OPTIONS INSTALLED ON THE
MACHINE" (page 22) to configure the printer driver
settings.
• If you installed the PS printer driver or the PPD driver,
the PS display fonts can be installed from the
"PRINTER UTILITIES" CD-ROM that accompanies
the PS3 expansion kit. See "INSTALLING THE PS
DISPLAY FONTS" (page 28).
• If you are using the machine as a shared printer, see
"USING THE MACHINE AS A SHARED PRINTER"
(page 20) to install the printer driver on each of the
client computers.
Follow the on-screen instructions.
Read the message in the window that appears and click
the [Next] button.
Installation begins.
• If you are using Windows Vista/Server 2008
If a security warning window appears, be sure to click
[Install this driver software anyway].
• If you are using Windows 2000/XP/Server 2003
If a warning message regarding the Windows logo
test or digital signature appears, be sure to click the
[Continue Anyway] or [Yes] button.
8
When the installation completed screen
appears, click the [OK] button.
11
INSTALLING THE PRINTER DRIVER / PC-FAX DRIVER
2
Click the [Standard installation] button.
4
5
A confirmation window appears. Check
the contents and then click the [Next]
button.
When the printer driver selection
window appears, select the printer
driver to be installed and click the
[Next] button.
Click the checkbox of the printer driver to be installed so
that a checkmark (
) appears.
When [Custom installation] is selected, you can change
any of the items below. When [Standard installation] is
selected, the installation will take place as indicated below.
• Machine connection method: LPR Direct Print (Auto
Search)
• Set as default printer: Yes (excluding the PC-Fax driver)
• Printer driver name: Cannot be changed
• PCL printer display fonts: Installed
If you selected [Custom installation], select [LPR
Direct Print (Auto Search)] and click the [Next] button.
If you selected other than [LPR Direct Print (Auto
Search)], see the following pages:
• LPR Direct Print (Specify Address): page 12
• IPP: page 14 • Shared printer: page 20
• Connected to this computer: page 16
3
• When the PC-Fax driver is being installed, this
screen does not appear. Go to the next step.
• The PS3 expansion kit is required to use the PS
printer driver or the PPD driver.
• The [PPD] checkbox only appears if you are using
Windows 2000/XP/Server 2003/Vista/Server 2008.
Printers connected to the network are
detected. Select the machine and click
the [Next] button.
• If the machine is not found, make sure that the
machine is powered on and that the machine is
connected to the network, and then click the
[Re-search] button.
• You can also click the [Specify condition] button and
search for the machine by entering the machine's
name (host name) or IP address.
☞ Checking the IP address of the machine (page 7)
10
INSTALLING THE PRINTER DRIVER /
PC-FAX DRIVER
To install the printer driver or the PC-Fax driver, follow the appropriate procedure in this section depending on whether
the machine is connected to a network or connected by USB cable.
☞ WHEN THE MACHINE WILL BE CONNECTED WITH A USB CABLE (page 16)
WHEN THE MACHINE IS CONNECTED TO A NETWORK
This section explains how to install the printer driver and the PC-Fax driver when the machine is connected to a
Windows network (TCP/IP network).
Supported operating systems: Windows 98/Me/NT 4.0*/2000*/XP*/Server 2003*/Vista*/Server 2008*
* Administrator's rights are required to install the software.
• The PS3 expansion kit is required to use the PS printer driver or the PPD driver.
• To install the PPD driver when Windows 98/Me/NT 4.0 is used, see "USING THE STANDARD WINDOWS PS PRINTER
DRIVER (Windows 98/Me/NT 4.0)" (page 21) and install the driver using the Add Printer Wizard.
• To use the machine as a network printer in Windows NT 4.0, "TCP/IP Protocol" must be installed on your computer. If this
is not installed, see Windows NT 4.0 Help to install "TCP/IP Protocol".
• To print to the machine over the Internet using the IPP function when the machine is installed in a remote
location, or to print using the SSL (encrypted communication) function, see "Printing using the IPP function and
the SSL function" (page 14) and install the printer driver or the PC-Fax driver.
• The installation procedure in this section is for both the printer driver and the PC-Fax driver, although the explanations are
centred on the printer driver.
X Standard installation
When the software selection screen appears in step 6 of "OPENING THE SOFTWARE SELECTION SCREEN (FOR
ALL SOFTWARE)" (page 8), perform the steps below.
1
Click the [Printer Driver] button.
To install the PC-Fax driver, click the [PC-Fax Driver]
button on the "Disc 2" CD-ROM.
* The above screen appears when using the
"Disc 1" CD-ROM.
9
2
SETUP IN A WINDOWS
ENVIRONMENT
This section explains how to install the software and configure settings so that the printer and scanner function of the
machine can be used with a Windows computer.
For users of Windows 98/Me/NT 4.0
The CD-ROM does not include software for Windows 98/Me/NT 4.0.
Contact your dealer or nearest authorised service representative if you want software for Windows 98/Me/NT 4.0.
OPENING THE SOFTWARE SELECTION
SCREEN (FOR ALL SOFTWARE)
1
Insert the "Software CD-ROM" into your
computer's CD-ROM drive.
• If you are installing the printer driver or printer status
monitor, insert the "Software CD-ROM" that shows
"Disc 1" on the front of the CD-ROM.
• If you are installing the PC-Fax driver or scanner
driver, insert the "Software CD-ROM" that shows
"Disc 2" on the front of the CD-ROM.
2
5
6
Read the message in the "Welcome"
window and then click the [Next]
button.
The software selection screen appears.
Before installing the software, be sure to click the
[Display Readme] button and view the detailed
information on the software.
Click the [Start] button ( ), click
[Computer], and then double-click the
[CD-ROM] icon ( ).
• In Windows XP/Server 2003, click the [start] button,
click [My Computer], and then double-click the
[CD-ROM] icon.
• In Windows 2000, double-click [My Computer] and
then double-click the [CD-ROM] icon.
3
Double-click the [Setup] icon (
).
* The above screen appears when using the
"Disc 1" CD-ROM.
In Windows Vista/Server 2008, if a message screen
appears asking you for confirmation, click [Allow].
4
The "SOFTWARE LICENSE" window will
appear. Make sure that you understand
the contents of the license agreement
and then click the [Yes] button.
You can show the "SOFTWARE LICENSE" in a
different language by selecting the desired language
from the language menu. To install the software in the
selected language, continue the installation with that
language selected.
For the steps that follow, see the appropriate page below
for the software that you are installing.
INSTALLING THE PRINTER DRIVER / PC-FAX DRIVER
• WHEN THE MACHINE IS CONNECTED TO A NETWORK
- Standard installation: page 9
- Installation by specifying the machine's address:
page 12
- Printing using the IPP function and the SSL
function: page 14
• WHEN THE MACHINE WILL BE CONNECTED WITH A
USB CABLE: page 16
• USING THE MACHINE AS A SHARED PRINTER: page 20
INSTALLING THE PRINTER STATUS MONITOR: page 25
INSTALLING THE SCANNER DRIVER: page 26
8
CONNECTING THE MACHINE
CONNECTING TO A NETWORK
To connect the machine to a network, connect the LAN cable to the machine's network connector. Use a shielded LAN
cable.
After connecting the machine to a network, be sure to configure the IP address and other network settings before
installing the software. (The factory default setting for the IP address is to receive the IP address automatically when the
machine is used in a DHCP environment.)
Network settings can be configured using "Network Settings" in the system settings (administrator) on the machine.
• If the machine is used in a DHCP environment, the IP address of the machine may change. If this happens, printing will not
be possible. This problem can be avoided by using a WINS server or by assigning a permanent IP address to the machine.
• This manual explains how to set up the software in a Windows network environment and in a Macintosh network
environment.
X Checking the IP address of the machine
You can check the IP address of the machine by printing out the "All Custom Setting List" in the system settings. Follow
these steps to print out the "All Custom Setting List".
Press the [SYSTEM SETTINGS] key, touch the [List Print (User)] key, and then touch the [Print] key of "All Custom
Setting List".
CONNECTING THE MACHINE WITH A USB CABLE
(Windows)
The machine can be connected to a computer using a USB cable if the computer is a Windows computer. (The USB
interface on the machine cannot be used in a Macintosh environment.)
The machine and computer should be connected while the printer driver is being installed. If a USB cable is connected
before the printer driver is installed, the printer driver will not be installed correctly. For the procedure for connecting a
USB cable, see "WHEN THE MACHINE WILL BE CONNECTED WITH A USB CABLE" (page 16).
7
VERIFYING SYSTEM REQUIREMENTS
SOFTWARE REQUIREMENTS
The following requirements must be met to use the software described in this manual.
Operating
system
environment*1
Windows
Software
Required expansion kits
Facsimile expansion kit*3
PC-Fax driver*2
PS3 expansion kit
PS printer driver,
PPD driver
Can be used in the standard
configuration.
PCL6 printer driver,
PCL5c printer driver
Type of connection*1
Network/ USB
Scanner driver
Printer Status Monitor
Can be used in the standard
configuration.
Printer Administration Utility
Macintosh
Macintosh PPD file
Network only (cannot be
used with a USB connection)
PS3 expansion kit
*1 For the types of computers and operating systems that can run the software, see "SYSTEM REQUIREMENTS" (page 5).
*2 To use the PC-Fax driver, Internet Explorer 4.0 or later must be installed on your computer.
*3 When the Internet fax expansion kit is installed, the PC-Fax driver can be updated using the "PRINTER UTILITIES"
CD-ROM to enable the driver to be used as a PC-I-Fax driver. In this case, the driver can be used without the
facsimile expansion kit.
6
VERIFYING SYSTEM REQUIREMENTS
SYSTEM REQUIREMENTS
Before installing the software described in this manual, make sure that your computer satisfies the following
requirements.
Windows
Macintosh*4
An environment that allows any of the above operating
systems to fully operate.
Other hardware
requirements
An environment in which any
of the operating systems
listed above can fully operate
(including Macintosh
computers with an Intel
processor).
1024 x 768 dots resolution and 16-bit colour or higher is
recommended.
Display
IBM PC/AT compatible computer
Equipped with a 10Base-T/100Base-TX/1000Base-T LAN
board or equipped standard with a USB 2.0*2/1.1*3 port.
Computer type
Mac OS 9.0 to 9.2.2,
Mac OS X v10.2.8,
Mac OS X v10.3.9,
Mac OS X v10.4.11,
Mac OS X v10.5 to 10.5.1
Windows 98, Windows Me,
Windows NT Workstation 4.0 (Service Pack 5 or later)*1,
Windows 2000 Professional, Windows XP Professional,
Windows XP Home Edition, Windows 2000 Server,
Windows Server 2003, Windows Vista, Windows Server 2008
Operating system
*1 USB is not supported. The scanner driver cannot be installed.
*2 The machine's USB 2.0 port will transfer data at the speed specified by the USB2.0 (Hi-Speed) standard only if the
Microsoft USB 2.0 driver is preinstalled in the computer, or if the USB 2.0 driver for Windows 2000
Professional/XP/Vista that Microsoft provides through "Windows Update" is installed.
*3 Compatible with models preinstalled with Windows 98, Windows Me, Windows 2000 Professional, Windows XP
Professional, Windows XP Home Edition, Windows 2000 Server, Windows Server 2003, Windows Vista, or Windows
Server 2008, and which are equipped standard with a USB interface.
*4 Cannot be used when the machine is connected with a USB cable. The PC-Fax driver and scanner driver cannot be
used.
• For users of Windows 98/Me/NT 4.0
The CD-ROM does not include software for Windows 98/Me/NT 4.0.
Contact your dealer or nearest authorised service representative if you want software for Windows 98/Me/NT 4.0.
• For users of Windows NT 4.0/2000/XP/Server 2003/Vista/Server 2008
To perform the procedures described in this manual such as installing the software and configuring settings after
installation, administrator authority is required.
5
CD-ROMS AND SOFTWARE
OTHER CD-ROMS
X "PRINTER UTILITIES" CD-ROM that accompanies the PS3 expansion kit
(for Windows/Macintosh)
This contains the display fonts that are used with the PS printer driver.
(Install the PS printer driver and Macintosh PPD file from the "Software CD-ROM".)
☞ INSTALLING THE PS DISPLAY FONTS (page 28)
X "PRINTER UTILITIES" CD-ROM that accompanies the Internet fax
expansion kit (for Windows)
This CD-ROM is used to update the PC-Fax driver on the "Software CD-ROM" so that it can be used to send
Internet faxes (PC-I-Fax function).
If you wish to use the PC-I-Fax function, first install the PC-Fax driver from the "Software CD-ROM" and then run the
installer on this CD-ROM. If the PC-Fax driver is already installed, run only the installer. (There is no need to reinstall
the PC-Fax driver.)
☞ INSTALLING THE PRINTER DRIVER / PC-FAX DRIVER (page 9)
X "Sharpdesk/Network Scanner Utilities" CD-ROM (for Windows)
This contains software that helps you get the most out of the images that you scan on the machine. The software
includes "Sharpdesk", a desktop document management application that enables integrated management of
scanned images and files created using a variety of applications. To use the "Scan to Desktop" scanner function, the
"Network Scanner Tool" must be installed from the CD-ROM.
For the system requirements of the software, see the manual (PDF format) in the "Manual" folder or the Readme file
on the CD-ROM. For the procedures for installing the software, see the "Sharpdesk Installation Guide".
4
CD-ROMS AND SOFTWARE
Disc 2
Software for Windows
• PC-Fax driver
This enables you to send a file from your computer as a fax using the same procedure as when printing the file.
(When the fax option is installed.)
Even if the fax function is not installed, the PC-Fax driver can be updated using the CD-ROM in the Internet fax
expansion kit to enable you to send a file from your computer as an Internet fax in the same way as you print a file.
☞ INSTALLING THE PRINTER DRIVER / PC-FAX DRIVER (page 9)
The following software can be used only when the machine is connected to a network.
• Scanner driver (TWAIN driver)
This allows you to use the scanner function of the machine from a TWAIN-compliant software application.
☞ INSTALLING THE SCANNER DRIVER (page 26)
• Printer Administration Utility
This allows the administrator to monitor the machine and configure machine settings from a computer. To install
and use the Printer Administration Utility, see the Readme file and the manual in PDF format on the "Software
CD-ROM" (Disc 2). The Readme file and manual are in the following folder on the CD-ROM. (Substitute the
letter of your CD-ROM drive for "R" in the following path.)
R:\Sadmin\Documents\English
Software for Macintosh
• PPD file
This is the printer description file which enables the machine to be used as a PostScript 3 compatible printer.
The PS3 expansion kit is required to use the machine in a Macintosh environment.
☞ MAC OS X (page 31)
☞ MAC OS 9.0 - 9.2.2 (page 36)
• The PS3 expansion kit is required to use the machine as a printer in a Macintosh environment. In addition,
the machine must be connected to a network. A USB connection cannot be used.
• The scanner driver and PC-Fax driver cannot be used in a Macintosh environment.
3
1
BEFORE INSTALLING THE
SOFTWARE
This chapter describes the software programs that allow you to use the printer and scanner functions of the machine,
the CD-ROMs that contain the software, and the pages where the installation procedures can be found.
CD-ROMS AND SOFTWARE
The software that can be used with the machine is on the CD-ROMs that accompany the machine and the expansion kits.
Before installing the software, make sure that your computer and the machine meet the system requirements described
in "VERIFYING SYSTEM REQUIREMENTS" (page 5).
SOFTWARE CD-ROM
The "Software CD-ROM" that accompanies the machine contains the printer driver and other software. The "Software
CD-ROM" consists of 2 discs.
For users of Windows 98/Me/NT 4.0
The CD-ROM does not include software for Windows 98/Me/NT 4.0.
Contact your dealer or nearest authorised service representative if you want software for Windows 98/Me/NT 4.0.
Disc 1
Software for Windows
• Printer driver
These allow the machine to be used as a printer.
- PCL6 and PCL5c printer driver
The machine supports the Hewlett-Packard PCL6 and PCL5c printer control languages. It is recommended
that you use the PCL6 printer driver. If you have a problem printing from older software using the PCL6
printer driver, use the PCL5c printer driver.
- PS printer driver
The PS printer driver supports the PostScript 3 page description language developed by Adobe Systems
Incorporated.
- PPD driver
The PPD driver enables the machine to use the standard Windows PS printer driver.
☞ WHEN THE MACHINE IS CONNECTED TO A NETWORK (page 9)
☞ WHEN THE MACHINE WILL BE CONNECTED WITH A USB CABLE (page 16)
• Printer Status Monitor (can only be used when the machine is connected to a network)
This allows you to monitor the status of the machine on your computer screen.
☞ INSTALLING THE PRINTER STATUS MONITOR (page 25)
2
TABLE OF CONTENTS
1
BEFORE INSTALLING THE
SOFTWARE
CD-ROMS AND SOFTWARE. . . . . . . . . . . . . . . . . . . . 2
• SOFTWARE CD-ROM . . . . . . . . . . . . . . . . . . . . . . 2
• OTHER CD-ROMS. . . . . . . . . . . . . . . . . . . . . . . . . 4
VERIFYING SYSTEM REQUIREMENTS . . . . . . . . . . . 5
• SYSTEM REQUIREMENTS. . . . . . . . . . . . . . . . . . 5
• SOFTWARE REQUIREMENTS . . . . . . . . . . . . . . . 6
CONNECTING THE MACHINE . . . . . . . . . . . . . . . . . . 7
• CONNECTING TO A NETWORK. . . . . . . . . . . . . . 7
• CONNECTING THE MACHINE WITH A USB
CABLE (Windows) . . . . . . . . . . . . . . . . . . . . . . . . . 7
2
3
SETUP IN A MACINTOSH
ENVIRONMENT
MAC OS X . . . . . . . . . . . . . . . . . . . . . . . . . . . . . . . . . 31
MAC OS 9.0 - 9.2.2. . . . . . . . . . . . . . . . . . . . . . . . . . . 36
4
TROUBLESHOOTING
WHEN INSTALLATION WAS NOT SUCCESSFUL. . 38
REMOVING THE SOFTWARE . . . . . . . . . . . . . . . . . . 41
SETUP IN A WINDOWS
ENVIRONMENT
OPENING THE SOFTWARE SELECTION
SCREEN (FOR ALL SOFTWARE). . . . . . . . . . . . . . . . 8
INSTALLING THE PRINTER DRIVER / PC-FAX
DRIVER. . . . . . . . . . . . . . . . . . . . . . . . . . . . . . . . . . . . . 9
• WHEN THE MACHINE IS CONNECTED TO A
NETWORK . . . . . . . . . . . . . . . . . . . . . . . . . . . . . . . 9
• WHEN THE MACHINE WILL BE
CONNECTED WITH A USB CABLE . . . . . . . . . . 16
• USING THE MACHINE AS A SHARED
PRINTER . . . . . . . . . . . . . . . . . . . . . . . . . . . . . . . 20
• USING THE STANDARD WINDOWS PS
PRINTER DRIVER (Windows 98/Me/NT 4.0) . . . 21
• CONFIGURING THE PRINTER DRIVER FOR
THE OPTIONS INSTALLED ON THE
MACHINE . . . . . . . . . . . . . . . . . . . . . . . . . . . . . . . 22
INSTALLING THE PRINTER STATUS MONITOR . . 25
INSTALLING THE SCANNER DRIVER . . . . . . . . . . . 26
INSTALLING THE PS DISPLAY FONTS . . . . . . . . . . 28
CHANGING THE PORT . . . . . . . . . . . . . . . . . . . . . . . 29
1
Thank you for purchasing this product. This manual explains how to install and configure the software that allows the
machine to be used as a printer or scanner for a computer.
This manual also explains how to install the printer drivers and software that are used when the expansion kits are
installed, and how to install the scanner driver.
If the software is not installed correctly or you need to remove the software, see "4. TROUBLESHOOTING" (page 38).
Please note
•
•
•
•
•
•
•
•
The explanations in this manual assume that you have a working knowledge of your Windows or Macintosh computer.
For information on your operating system, please refer to your operating system manual or the online Help function.
The explanations of screens and procedures in this manual are primarily for Windows Vista® in Windows® environments, and
Mac OS X v10.4 in Macintosh environments. The screens may vary depending on the version of the operating system.
Wherever "MX-xxxx" appears in this manual, please substitute your model name for "xxxx".
This manual contains references to the fax function. However, please note that the fax function is not available in some
countries and regions.
Considerable care has been taken in preparing this manual. If you have any comments or concerns about the manual, please
contact your dealer or nearest authorised service representative.
This product has undergone strict quality control and inspection procedures. In the unlikely event that a defect or other problem
is discovered, please contact your dealer or nearest authorised service representative.
Aside from instances provided for by law, SHARP is not responsible for failures occurring during the use of the product or its
options, or failures due to incorrect operation of the product and its options, or other failures, or for any damage that occurs due
to use of the product.
Warning
• Reproduction, adaptation or translation of the contents of the manual without prior written permission is prohibited, except as
allowed under copyright laws.
• All information in this manual is subject to change without notice.
Illustrations and the operation panel and touch panel shown in this manual
The peripheral devices are generally optional, however, some models include certain peripheral devices as standard equipment.
The explanations in this manual assume that a right tray and stand/2 x 500 sheet paper drawer are installed on the machine.
For some functions and procedures, the explanations assume that devices other than the above are installed.
The display screens, messages, and key names shown in the manual may differ from those on the actual machine
due to product improvements and modifications.
SOFTWARE LICENSE
The SOFTWARE LICENSE will appear when you install the software from the CD-ROM. By using all or any portion of the
software on the CD-ROM or in the machine, you are agreeing to be bound by the terms of the SOFTWARE LICENSE.
For users of Windows 98/Me/NT 4.0
The CD-ROM does not include software for Windows 98/Me/NT 4.0.
Contact your dealer or nearest authorised service representative if you want software for Windows 98/Me/NT 4.0.
The scanner driver cannot be installed on Windows NT 4.0.
MODEL: MX-4100N
MX-4101N
MX-5000N
MX-5001N
DIGITAL FULL COLOUR MULTIFUNCTIONAL SYSTEM
Software Setup Guide
BEFORE INSTALLING
THE SOFTWARE
SETUP IN A WINDOWS
ENVIRONMENT
Please keep this manual as the information mentioned
below is very important.
SETUP IN A MACINTOSH
ENVIRONMENT
Sharpdesk Serial Numbers
TROUBLESHOOTING
Sharpdesk
Installation Guide
This product can only be installed on a number of
computers equal to the number of licenses. Any
additional computers will require additional licenses.
Keep this manual close at hand for reference
whenever needed.
PRINTED IN FRANCE
TINSE4336GHZZ
Please see opposite side to access
to "Safety Guide".
These manuals are combined for environmental protection.