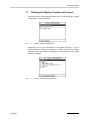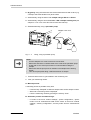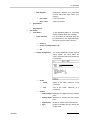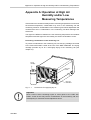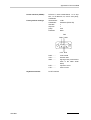
1
'ALILEO 'ALILEI -EASURE
WHAT IS MEASURABLE
AND MAKE MEASURABLE
THAT WHICH IS NOT
Instruction Manual
DMA 4500/5000
Density/Specific Gravity/Concentration Meter
Software Version: V5.012.c
Instruction Manual
DMA 4500/5000
Density/Specific Gravity/Concentration Meter
Software Version: V5.012.c
While every precaution has been taken in the preparation of this document, Anton Paar GmbH assumes
no responsibility for technical or printing errors or omissions.
Nor is any liability assumed for damages resulting from the use of the information contained in this
instruction manual.
Anton Paar GmbH does not make a commitment to update the information in this manual. Specifications
are subject to change without notice.
All rights reserved (including translation). No part of this document may be translated, reproduced or
distributed in any form (print, photocopy, microfilm or any other process) without the prior written
permission of Anton Paar GmbH.
Trade marks may be used in this instruction manual without being marked as such. These are the
property of their respective owners and are legally protected.
Published by Anton Paar GmbH. Printed in Austria.
Copyright © 2005 Anton Paar GmbH, Graz, Austria
Contact:
Anton Paar GmbH
Anton-Paar-Str. 20
A-8054 Graz / Austria - Europe
Tel: +43 316 257-0
Fax: +43 316 257-257
E-mail: [email protected]
Web: www.anton-paar.com
Date: 04.05.2005
Document number: XDLIB07Q.fm
Contents
1 Introduction ...................................................................................................................................... 7
2 Safety Instructions........................................................................................................................... 8
3 Symbols in the Instruction Manual .............................................................................................. 10
4 Supplied Items ............................................................................................................................... 11
5 Putting into Operation ................................................................................................................... 13
6 Functional Components................................................................................................................ 17
6.1
Display and Keypad............................................................................................................... 17
6.2
Front View.............................................................................................................................. 19
6.3
Rear View .............................................................................................................................. 20
7 General Settings ............................................................................................................................ 21
7.1
Display Contrast .................................................................................................................... 21
7.2
Setting Date and Time ........................................................................................................... 21
7.3
Setting the Language ............................................................................................................ 21
7.4
Defining a Method.................................................................................................................. 21
7.5
Setting the Temperature ........................................................................................................ 22
7.6
Selecting the Output Data for Display, Printer and Memory .................................................. 22
7.7
Defining the Display Contents and Layout............................................................................. 23
7.8
Defining the Printout Contents and Layout ............................................................................ 24
7.9
Storing Measurement Values in the Memory......................................................................... 25
7.10 Settings for the Sample Changer/Handling Unit .................................................................... 25
7.11 Settings for the Measuring Procedure ................................................................................... 26
8 Checking Procedure, Adjustment and Calibration ..................................................................... 28
8.1
Definitions .............................................................................................................................. 28
8.2
Checking Procedure: Density Check ..................................................................................... 28
8.3
Adjustment............................................................................................................................. 30
8.3.1
Adjustment with Air and Water at 20°C .................................................................. 30
8.3.2
Adjustment with Air and Water for the Entire Temperature Range
(Full Range Adjustment)......................................................................................... 32
8.3.3
8.4
Special Adjustment................................................................................................. 34
Calibration.............................................................................................................................. 36
9 Measurements................................................................................................................................ 37
10 Cleaning and Drying the Measuring Cell ..................................................................................... 42
11 Operation ........................................................................................................................................ 44
11.1 Menu Operation ..................................................................................................................... 44
11.1.1
Using the Keys on the Keypad ............................................................................... 44
11.1.2
Using an External Keyboard (Optional).................................................................. 45
11.2 Menu Structure and Description ............................................................................................ 45
XDLIB07
11.2.1
"Logoff user "xxx"" .................................................................................................. 45
11.2.2
"audit trail" .............................................................................................................. 45
5
11.2.3
"temperature setting".............................................................................................. 46
11.2.4
"adjustment" ........................................................................................................... 47
11.2.5
"measurement settings" ......................................................................................... 50
11.2.6
"instrument settings"............................................................................................... 54
11.2.7
"method settings" ................................................................................................... 57
11.2.8
"sample changer configuration".............................................................................. 67
11.2.9
"user functions" ...................................................................................................... 68
11.2.10 "custom function verification" ................................................................................. 75
11.2.11 "data memory"........................................................................................................ 75
11.2.12 External Cell ........................................................................................................... 76
11.2.13 "testmode" .............................................................................................................. 76
11.2.14 "service testmode".................................................................................................. 76
11.3 "Sample#" .............................................................................................................................. 77
11.3.1
Automatic Set Temperature Change via "sample#" ............................................... 78
12 Audit Trail ....................................................................................................................................... 80
12.1 Introduction ............................................................................................................................ 80
12.2 Activating / Deactivating Audit Trail ....................................................................................... 80
12.2.1
Activating Audit Trail............................................................................................... 80
12.2.2
Deactivating Audit Trail .......................................................................................... 82
12.3 Audit Trail Main Menu............................................................................................................ 83
12.4 Viewing the Audit Trail Log File ............................................................................................. 83
12.5 Printing the Audit Trail Log File.............................................................................................. 84
12.6 Exporting the Audit Trail Log File........................................................................................... 84
12.6.1
Verifying the Exported Log File .............................................................................. 86
12.7 Clear Audit Trail ..................................................................................................................... 88
12.8 General Settings .................................................................................................................... 89
12.9 User Management ................................................................................................................. 89
12.9.1
Adding a New User ................................................................................................ 90
12.9.2
Removing a User.................................................................................................... 90
12.9.3
Changing User Settings ......................................................................................... 91
12.9.4
Print All User Settings ............................................................................................ 91
12.10 User Privileges....................................................................................................................... 91
Appendix A:
Operation at High Air Humidity and/or Low Measuring Temperatures ................ 93
Appendix B:
Technical Data ........................................................................................................... 95
Appendix C:
Commands for Communication between PC and DMA 4500/5000 ....................... 98
Appendix D:
Density Tables ......................................................................................................... 102
Appendix E:
Possible Adjustment Errors, Adjustment Report................................................. 107
Appendix F:
Software Versions ................................................................................................... 110
Appendix G:
Wetted Parts............................................................................................................. 112
Appendix H:
Menu Tree ................................................................................................................ 113
Index................................................................................................................................................... 117
6
XDLIB07
1 Introduction
1 Introduction
Thank you for buying the DMA 4500 or DMA 5000 density/specific gravity/
concentration meter for gases and liquids. We greatly appreciate your trust and
will do everything we can to ensure that your instrument provides you with years
of trouble-free operation.
The DMA 4500/5000 is the first oscillating U-tube density meter which measures
highest accuracy in wide viscosity and temperature ranges.
A unique reference oscillator, in addition to the U-tube oscillator, provides
extraordinary long-term stability and makes adjustments at temperatures other
than 20°C virtually unnecessary.
By measuring the damping of the U-tube’s oscillation caused by the viscosity of
the filled-in sample, the DMA 4500/5000 automatically corrects viscosity related
errors.
Two integrated Pt 100 platinum thermometers provide the highest accuracy of
temperature control, and are traceable to national standards.
To perform a measurement, select one out of a total of 10 individual measuring
methods, and fill the sample into the measuring cell. An acoustic signal will inform
you when the measurement is finished. Results are automatically converted
(including temperature compensation where necessary) into concentration,
specific gravity or other density-related units using the built-in conversion tables
and functions.
The density results, including sample number or name, can be shown on the
programmable LC display, printed out or transferred to the data memory.
For fully automatic measurements, the DMA 4500/5000 can be connected to the
automatic sample changers SP-1m or SP-3m.
The automatic SH-1 or SH-3 sample handling unit is another option for the density
meters DMA 4500/5000.
Some software features like temperature scan and adjustment at high density or
viscosity are only available in the DMA 5000.
XDLIB07
7
2 Safety Instructions
2 Safety Instructions
8
•
This instruction manual does not claim to address all of the safety issues
associated with the use of the DMA 4500/5000 and samples. It is the
responsibility of the user to establish health and safety practices and
determine the applicability of regulatory limitations prior to use.
•
Before using the DMA 4500/5000, read this instruction manual completely.
•
Anton Paar GmbH only warrants the proper functioning of the DMA 4500/
5000 if no unauthorized adjustments have been made to mechanical parts,
electronic parts and software, and the following points are adhered to.
•
Follow all hints, warnings and instructions in the instruction manual to ensure
the correct and safe functioning of the DMA 4500/5000.
•
Do not use the DMA 4500/5000 for any purpose other than described in the
instruction manual. Anton Paar GmbH is not liable for damages caused by
incorrect use of the DMA 4500/5000.
•
Do not use any accessories other than those supplied or approved by Anton
Paar GmbH.
•
The installation procedure should only be carried out by authorized
personnel who are familiar with the installation instructions.
•
Do not operate the DMA 4500/5000 if a malfunction is suspected, or
damages, injuries or loss of life cannot be excluded under all circumstances.
•
The DMA 4500/5000 is not an explosion-proof instrument and therefore
must not be operated in areas where there is a risk of explosion.
•
Service and/or maintenance procedures which involve removing outside
covers and working with the power switched on may only be performed by
authorized service personnel.
•
Ensure that all operators are fully trained to use the DMA 4500/5000
correctly and safely.
•
Due to the nature of the measurement, the measuring results not only
depend on the correct use and functioning of the DMA 4500/5000, but may
also be influenced by other factors. We therefore recommend that the
analysis results are plausibility tested before consequential actions are
taken.
•
Repair and service procedures may only be carried out by authorized
personnel or by Anton Paar GmbH.
•
To lift the DMA 4500/5000, take the instrument with one hand on the front
side and one hand on the rear. Keep the instrument in front and close to your
body.
XDLIB07
2 Safety Instructions
•
Follow the precautions below for the handling and measurement of
inflammable samples and cleaning materials:
-
Do not store inflammable material near the instrument.
Do not leave sample containers uncovered.
Clean all spillages immediately.
Ensure that the DMA 4500/5000 is located in a sufficiently ventilated area,
free from inflammable gases and vapors.
Connect the DMA 4500/5000 to mains power via a safety switch located a
safe distance from the instrument. In an emergency, turn off the power
using this switch. Do not use the DMA 4500/5000 power switch.
Keep a fire extinguisher at hand.
Do not leave the DMA 4500/5000 unattended while in use.
Do not touch areas marked with this symbol when the power is turned
on.
XDLIB07
9
3 Symbols in the Instruction Manual
3 Symbols in the Instruction Manual
The following symbols are used in the instruction manual:
Warning:
The "Warning" sign indicates a hazard to the operator.
It calls attention to an operating procedure, practice, etc. which, if not correctly
performed or adhered to, could result in injury or loss of life.
Do not proceed beyond a "Warning" sign until the indicated conditions are
fully understood and met.
Important:
The "Important" sign indicates a hazard to the equipment.
It calls attention to an operating procedure, practice, etc. which, if not correctly
performed or adhered to, could result in damage or destruction of the
instrument or parts of it.
Do not proceed beyond an "Important" sign until the indicated conditions are
fully understood and met.
Hint:
The "Hint" sign calls attention to any additional information which might be
of use to the operator.
10
XDLIB07
4 Supplied Items
4 Supplied Items
Hints:
• The DMA 4500/5000 has been tested and packed carefully before
shipment. However, damage may occur during transport.
• If the DMA 4500/5000 or a supplied item has been damaged during
transport, contact the transport firm as well as your local Anton Paar
representative. Keep the packing material for examination by the transport
firm or an insurance representative.
• If a part is missing, please contact your local Anton Paar representative.
Pcs.
1
DMA 4500
Cat.No. 75846
DMA 5000
Cat.No. 70244
1
Power cord
Europe: Cat.No. 65146
USA:
Cat.No. 52656
UK:
Cat.No. 61865
1
Instruction manual
English: Cat.No. 75747
German: Cat.No. 75746
French: Cat.No. 13688
1
Density standard,
"Ultra pure water", 5 x 10 ml
Cat.No. 78169
1
Accessory kit
Cat.No. 70248
containing:
2m
7
XDLIB07
Item/Cat.No.
Hose 3 x 5 mm silicone
Cat.No. 50814
Syringe 2 ml Luer
Cat.No. 51974
11
4 Supplied Items
Pcs.
12
Item/Cat.No.
2
Injection adapter Luer
Cat.No. 12225
2
Male Luer plug PTFE
Cat.No. 63865
2
Adapter Luer cone
Cat.No. 63863
1
Screwdriver
Cat.No. 75030
1
Waste vessel
Cat.No. 6210
XDLIB07
5 Putting into Operation
5 Putting into Operation
Hints:
• The DMA 4500/5000 does not require any special installation conditions.
The installation conditions should correspond to conditions in a typical
laboratory.
• However, to guarantee temperature stability, do not place the
DMA 4500/5000
- near a heater
- near an air conditioner
- in direct sunlight.
Important:
A strong built-in cooling fan dissipates heat through the bottom and the rear of
the DMA 4500/5000. Ensure that the airflow is not blocked.
Preparing the DMA 4500/5000 for the first start-up
1. Take 2# injection adapters Luer from the accessory box.
2
1
Fig. 5 - 1
3
Mounting the injection adapters Luer
2. Carefully insert the injection adapters Luer (1) into the openings (2) of the
filling device until the tips of the adapters reach the openings of the
measuring cell.
3. With moderate force, push the adapters towards the measuring cell.
XDLIB07
13
5 Putting into Operation
4. Insert the screws (3) into the bore holes of the adapters and tighten the
screws until some resistance against further turning can be felt.
Important:
Do not screw in the screws (3) too tightly. The gap between the holding plate
and the adapter (1) where the thread of the screw (3) becomes visible has to
be 3 to 4 mm (approx. 1/8"). If the screws are screwed in too tightly, the
measuring cell may be damaged.
5. Check the connection of the adapters to the measuring cell for leak
tightness:
•
•
•
Close one adapter tightly with a finger.
Fill air under moderate pressure through the other adapter using a 2 ml
plastic syringe from the accessory box.
Release the plunger of the syringe.
If the connections are leak tight, the plunger of the syringe will be slowly
pushed back by the pressure in the measuring cell.
If the connections are leaking, no pressure was built up in the measuring
cell and the plunger will not move. Repeat step 2 to 5.
6. Cut a piece of approx. 250 mm length from the silicone hose contained in the
accessory box.
7. Attach the silicone hose to the air pump outlet (see Fig. 5 - 2).
Fig. 5 - 2
Attaching the hose to the air pump
8. Attach an adapter Luer cone (from the accessory box) to the other end of the
silicone hose (see Fig. 5 - 3).
Fig. 5 - 3
14
Attaching the adapter Luer cone to the hose
XDLIB07
5 Putting into Operation
9. If a printer will be used, plug the interface cable into the COM 2 connector at
the rear of the DMA 4500/5000.
10. Check the operating voltage.
Important:
• Before switching the DMA 4500/5000 on, make sure that the correct line
voltage is available (AC 85 to 260 V, 48 to 62 Hz). If large voltage
fluctuations are to be expected, the use of a constant voltage source
(UPS) is recommended.
• The non fused earth conductor of the power cord (or power inlet) has to
be connected to earth.
11. Connect the power inlet of the DMA 4500/5000 to the mains using the power
cord.
12. Turn on the DMA 4500/5000 using the "POWER" switch at the rear of the
instrument. The green light on the front indicates that the power is on. After
the start-up procedure the cell light is on continuously.
Hints:
• After turning on the power, the DMA 4500/5000 needs approx. 20 minutes
for attemperating and additionally 5 to 10 minutes for internal temperature
adjustments. During this time "attemperating" is displayed. If the desired
measuring temperature is already set, do not touch any key during this
time as this will considerably increase the waiting period.
• In case of high air humidity or low measuring temperatures see
appendix A.
13. As soon as the attemperating of the DMA 4500/5000 to 20°C is finished,
perform a density check measurement, as described below.
Important:
The DMA 4500/5000 is factory adjusted and this control measurement should
be performed to check if the adjustment is still valid after transport.
14. Press the menu" soft key and select "adjustment" in the main menu. Select
density check" and activate "density check settings".
15. Enter the appropriate density value according to the water table in appendix
D.
16. Place the supplied waste vessel below the rear adapter (see Fig. 5 - 4) and
connect the adapter to the waste vessel with an appropriate hose (from the
accessory box).
XDLIB07
15
5 Putting into Operation
Fig. 5 - 4
Placing of the waste vessel
17. Open one bottle of the supplied liquid density standards (ultra pure water)
and immediately introduce the liquid into the measuring cell of the DMA
4500/5000. Use the supplied syringes and ensure there are no air bubbles in
the substance. Press OK.
18. When the measurement is finished, either "density check: OK" or "density
check: not OK" appears on the display; additionally the measured density
and the deviation from the set value are displayed.
•
•
If "density check: OK" is displayed, the instrument is ready for routine
measurements.
If "density check: not OK" is displayed, clean the measuring cell thoroughly
(see chapter 10) and repeat the density check.
Hint:
The density of (ultra pure) water is 0.99820 g/cm3 at 20°C.
19. If the result is still "density check: not OK", perform an air/water adjustment
at 20°C.
Hint:
The "density check" function can also be used when performing routine
measurements in order to check the validity of the adjustment. Other density
calibration liquids or standardized samples can be used.
16
XDLIB07
6 Functional Components
6 Functional Components
6.1
Display and Keypad
After turning on the DMA 4500/5000, the instrument carries out a self-test and
initialisation procedure (approx. 2 minutes) and then the following display is
shown:
Hint:
It may be necessary to adjust the contrast of the display using the "UP" and
"DOWN" keys (see Fig. 6 - 2). Save the contrast setting in the instrument
settings" menu.
A
a
b
B
c
d
C
Fig. 6 - 1
The display of the DMA 5000 at the first start-up
A Headline
Pump
"Pump" blinks, if the air pump is switched on.
Density
Name of selected method.
-Osc-
"-Osc-" in the right-hand corner indicates that the density cell
is not oscillating. No density or related value will be displayed
or printed, the display and printout show "------------".
B Measuring window (example)
Hint:
The size and sequence of the displayed items can be changed in "Menu",
"method settings", "display configuration". Density and density-dependent
values are only shown after the measuring temperature has been adjusted.
XDLIB07
17
6 Functional Components
a)
b)
c)
d)
Date and time
Density with automatic viscosity correction
Specific gravity with automatic viscosity
Measuring cell temperature, state of the measurement
C Bottom line
The bottom line specifies the functions of the soft keys positioned on the keypad
below. The functions change depending on the menu displayed.
In the measuring mode the following soft key functions are available:
Menu
Selects menus for settings and configurations. Access to a
menu can be restricted by a password.
Print
Starts a printout
Sample#
For entering a sample text and/or number
Method
Selects a measuring method (see chapter 7.4)
Start
•
•
•
•
18
Starts an automatic measuring procedure. Depending on
the settings, the automatic measuring procedure includes
waiting for a stable measurement, printing the results and
storing them in the memory, freezing the display and
increasing the sample number.
Starts the temperature scan, if activated (DMA 5000 only).
If a sample changer SP-1m or SP-3m is connected and
activated, this soft key is not available. Use the "Start " key
on the sample changer.
If an SH-1 or SH-3 sample handling unit is installed and
activated, this soft key is named "S-Start".
XDLIB07
6 Functional Components
6.2
Front View
B
A
H
I
C
Fig. 6 - 2
A
B
C
D
E
F
G
H
I
XDLIB07
D
E
F
G
Front view and keypad
LC display
Inspection window for the measuring cell
Soft keys
"UP" and "DOWN" keys
"↵" key
"PUMP" key for switching on the air pump
"LIGHT" key for lighting up the display
"HELP" key
Green light indicates power-on
19
6 Functional Components
6.3
Rear View
M
L
K
J
I
H
G
F
A
Fig. 6 - 3
B
E
C
D
Rear view
A "DRY AIR PUMP" nozzle for connecting a desiccator (see appendix A)
B "DRY AIR INTERNAL" nozzle for supplying the interior of the DMA 4500/5000
with dry air in order to prevent condensations on the cell block at low
measuring temperatures (see appendix A)
C Power inlet
D Fuse holder
E Power switch
F Keyboard/bar code reader interface
G Computer interface (COM 1)
H Printer interface (COM 2)
I Memory card drive (PCMCIA) for software updates
J S-BUS interfaces for connecting a sample changer SP-1m or SP-3m or a
density measuring cell DMA HP
K Type plate
L Technical data shield
M Cooling fins
20
XDLIB07
7 General Settings
7 General Settings
7.1
Display Contrast
•
Make sure that the instrument is set to the measuring mode.
•
The display contrast is adjusted by pressing the "UP" or "DOWN" keys.
•
Save the setting of the display contrast permanently in the "instrument
settings", "save display contrast" menu (see chapter 11.2.6).
7.2
Setting Date and Time
Date and time are set in the "instrument settings", "date & time" menu. Different
formats can be selected.
7.3
Setting the Language
Select the language (English or German) in the menu "instrument settings",
"language" (see chapter 11.2.6).
7.4
XDLIB07
Defining a Method
•
A method consists of the following settings: measuring temperature, display
settings, printer and memory configuration, measurement settings and
control settings for the optional sample changer. These are all stored under a
unique method name.
•
By defining and storing a method you can set all parameters according to
your requirements. 10 different methods can be assigned.
•
The 10 methods are factory preset, covering the most common measuring
tasks. However, every method can be individually changed, adapted or
renamed.
•
To activate a method, press the "Method" soft key and select a method from
the list.
•
To rename the method select "method settings", "edit method name".
•
The factory setting for each method can be recalled by selecting "reset
method" in the menu "method settings" (see chapter 11.2.7).
•
To change or adapt the method, follow chapter 7.5 to chapter 7.11 in the
given order.
21
7 General Settings
7.5
Setting the Temperature
Set the temperature to degrees Celsius or Fahrenheit in "temperature setting"
(see chapter 11.2.3).
7.6
•
Selecting the Output Data for Display, Printer
and Memory
Select the output data for the display, printer and memory from 7 general
domains in the "method settings", "output selection" menu.
Fig. 7 - 1
•
Select items by highlighting them and switching to "Y" (= Yes, activated). Use
"↵" to toggle between "Y" and "N" (= No, not activated).
Fig. 7 - 2
22
Screen: Output selection
Screen: System + Temperature
•
Items set to "N" in the left-hand column are not assigned for output and will
not appear in the configuration lists for the display, printer and memory.
•
Each method has its own output data selection.
XDLIB07
7 General Settings
7.7
•
Defining the Display Contents and Layout
Select the items to be displayed and their size in "method settings", "display
configuration", "edit configuration".
Fig. 7 - 3
•
Determine the size of the information on the display using the "↵" key to
toggle between "S" (small), "M" (medium) "L" (large), and "N" (not selected).
Example for the "edit display configuration" menu (depends on the "output
selection" settings):
Fig. 7 - 4
XDLIB07
Screen: Display configuration
Screen: Edit display configuration
23
7 General Settings
•
To list the selected items in your preferred order, highlight an item and move
it up or down using the "Mov Up" and "Mov Dn" soft keys.
The above selection leads to the following display:
Fig. 7 - 5
7.8
•
Defining the Printout Contents and Layout
Select the items to be printed in "method settings", "printer configuration",
"edit configuration".
Fig. 7 - 6
24
Screen: OIML w/w
Screen: Printer configuration
XDLIB07
7 General Settings
•
Use "↵" to toggle between "Y" (yes, selected) and "N" (no, not selected).
Example for the "edit printer configuration" menu (depends on the "output
selection" settings):
Fig. 7 - 7
Screen: Edit printer configuration
•
To have the selected items in your preferred order, highlight an item and
move it up or down using the "Mov Up" and "Mov Dn" soft keys.
•
In "method settings", "printer configuration", "printer mode", select the mode
of printout start, e.g. "manual" for the manual start using the "Print" soft keys
or "meas. valid (after start)" for automatic printing after the "Start" soft key
has been pressed.
7.9
Storing Measurement Values in the Memory
•
Select the items to be stored in the memory in "method settings", "memory
configuration", "edit configuration". Use "↵" to toggle between "Y" (yes,
selected) and "N" (no, not selected) (see chapter 11.2.7).
•
To list the selected items in your preferred order, highlight an item and move
it up or down using the "Mov Up" and "Mov Dn" soft keys.
•
In "method settings", "memory configuration", "memory mode", select the
mode of data storage, e.g. "meas. valid (after start)". Data are then stored
after pressing the "Start" or the "S-Start" soft key when the measuring results
are valid.
7.10 Settings for the Sample Changer/Handling Unit
XDLIB07
•
The "sample changer configuration" menu will only be displayed if a sample
changer/handling unit is connected and switched on.
•
Select "sample changer configuration", "sample changer parameter" to enter
the control parameters according to the instruction manual for the sample
changers SP-1m and SP-3m.
25
7 General Settings
•
Select "sample changer configuration", "edit SHx/SCx mode" to enter the
filling and cleaning parameters for the SH-1/SH-3 sample handling units,
according to the SH-1/SH-3 instruction manual.
•
Select "measurement settings", "sample filling mode: sample changer" and
"method settings", "printer configuration", "printer mode", "mode: meas. valid
(after start)" and if required also: "memory configuration", "memory mode",
"mode: meas.valid (after start)".
7.11 Settings for the Measuring Procedure
•
The parameters for the measuring procedure are set in "measurement
settings" (see chapter 11.2.5).
Fig. 7 - 8
Screen: Measurement settings
DMA 4500:
Measurement finished by predetermination:
For the fastest results (approx. 1 minute), set this parameter. The DMA 4500
calculates the density before complete temperature equilibrium has been
reached.
Measurement finished by equilibrium:
For the highest accuracy results, set this parameter. The DMA 4500 determines
the density and concentration after complete temperature equilibrium has been
reached.
DMA 5000:
Measurement finished by predetermination:
For the fastest results (approx. 1 minute), set this parameter. The DMA 5000
calculates the density before complete temperature equilibrium has been
reached.
For higher accuracy 3 methods can be selected: Equilibrium fast, Equilibrium
medium, Equilibrium slow. The highest accuracy is achieved by using Equilibrium
slow.
26
XDLIB07
7 General Settings
DMA 4500/5000:
•
•
•
•
•
•
XDLIB07
Sample filling mode:
This parameter is only displayed, if a sample changer/sample handling unit
is connected. "Manual" filling using a syringe or filling by "sample changer"
is possible.
Pump terminates measurement:
If "yes" is selected, activating the air pump will interrupt the measurement.
Pump switch off mode:
If "time" is selected the air pump will be switched off automatically after the
specified "pump switch off time". Otherwise the air pump has to be
switched off manually.
Select the type of sample identification in "type of sample identif.". Options:
number with text, text only or a list, in which a sample identification is given
for each sample.
"reset sample identif.":
Select if the entered sample identification shall be deleted after the
measurement.
API input:
Select the kind of density for calculating the API functions.
27
8 Checking Procedure, Adjustment and Calibration
8 Checking Procedure, Adjustment and
Calibration
8.1
Definitions
Adjustment of the density meter:
•
The process of bringing the instrument into a state suitable for use, by setting
or adjusting the density instrument constants.
•
The adjustment of DMA 4500/5000 is performed with air and bi-distilled
water. For adjustments with other substances, see chapter 8.3.3.
Calibration of the density meter:
•
Various processes for establishing the relationship between the reference
density of measurement standards and the corresponding density reading of
the instrument.
•
Calibrations are performed to determine the deviation of the displayed
density values from the reference values of density standards.
8.2
Checking Procedure: Density Check
The "density check” function allows you either to check the validity of the factory
adjustment after transport or the validity of your own adjustments.
•
To check the factory adjustment, pure water is used as calibration fluid.
•
To check your own adjustments either degassed, bi-distilled water or
different density calibration fluids or standardized samples can be used.
•
Before each series of measurements check the validity of the adjustment
using degassed, bi-distilled water or an appropriate density standard.
•
The density check should be performed once every day.
Hint:
Preparation of degassed, bi-distilled water:
1. Boil fresh, bi-distilled water for several minutes to remove dissolved air.
2. Fill a clean glass flask full with the boiled water and cover it.
3. Wait until the water has cooled down to the approx. measuring
temperature.
Performing the density check:
1. Select "adjustment", "density check", "density check settings".
28
XDLIB07
8 Checking Procedure, Adjustment and Calibration
Fig. 8 - 1
Screen: Density check settings
2. Make the settings corresponding to the density-calibration fluid.
Hint:
For water the following settings are recommended:
density: 0.99820 (DMA 4500); 0.998203 (DMA 5000)
max. dens. dev.: 0.00010 g/cm3 (DMA 4500); 0.00005 g/cm3 (DMA 5000)
temperature: +20.00°C
check interval: 1 day
check density: on
Switching on the "check density" activates a memory function: Depending on
the setting of the "check interval" a flashing "Density Check Needed" in the
headline of the measuring window will appear to remind the user to perform a
density check. The check interval can be set between 1 to 999 days.
3. Press the "Esc" key to return to the "density check" menu. Select "check
density” to start the density check (the corresponding steps are shown on the
display).
4. •
•
If the measured density is within the permitted range, the display shows
"density check: OK". Routine measurements can be carried out.
If the measured density is out of range, the display shows "density check:
NOT OK". Clean and dry the measuring cell and repeat the density check.
If the result is still "density check: NOT OK”, perform a new adjustment (see
chapter 8.3).
Hint:
In each case ("density check: OK" or "density check: NOT OK") the measured
density and the deviation from the set density are displayed.
5. Up to 50 density checks can be stored with date and time. The activated
density check or all stored density checks can be printed out.
XDLIB07
29
8 Checking Procedure, Adjustment and Calibration
8.3
Adjustment
•
An adjustment has to be performed if deviations between the displayed
values and reference values of density standards exceed the specifications
of the DMA 4500/5000 or the specifications of the standard.
•
Air and bi-distilled, freshly degassed water are used for normal adjustment.
•
The density values of water and dry air at a specific atmospheric pressure
are stored in the memory of the DMA 4500/5000 for the complete
temperature range.
•
A factory setting allows density measurements in the entire temperature
range, although adjustment is usually only performed at 20°C.
•
If measurements at different temperatures indicate deviations between the
displayed values on the DMA 4500/5000 and reference values of density
standards, then an air and water adjustment for the whole temperature range
is necessary (see chapter 8.3.2).
•
It is not recommended and does not improve the performance of the DMA
4500/5000 to adjust if calibrations with suitable density standards indicate no
deviations from the reference values.
8.3.1
Adjustment with Air and Water at 20°C
•
Normal adjustment is performed using dry air (see appendix A) and bidistilled, freshly degassed water at 20°C.
•
The complete adjustment procedure takes 5 to 10 minutes, if the DMA 4500/
5000 is set at 20°C before the adjustment procedure is started.
Adjustment procedure at 20°C:
1. Before adjustment thoroughly clean and dry the measuring cell (see chapter
10).
2. Press the "Menu" key and select the menus "adjustment", "adjust" and
"density (air, water)" using the "UP", "DOWN" and "↵" keys.
Hint:
If the DMA 4500/5000 is set to any other temperature, it will automatically be
switched to 20°C when the adjustment procedure is started.
3. Start the adjustment by pressing the "OK" key.
4. Press the "↵" key and enter the current air pressure using the "UP",
"DOWN", "Left", "Right" and "↵" keys or the keyboard.
30
XDLIB07
8 Checking Procedure, Adjustment and Calibration
Hints:
• For air adjustment, the current air pressure must be entered, as it
influences the air density.
• The density values of water and air at a specific atmospheric pressure for
the complete temperature range are stored in the memory.
• If the current on-site barometric pressure is not available, enter the
average air pressure (depending on the altitude above sea level)
according to the following table:
Altitude above sea level
Air pressure
[m]
[ft]
[mbar]
0
0
1013
400
1312
966
800
2625
921
1200
3937
877
1600
5249
835
2000
6562
795
2400
7874
756
2800
9186
719
3200
10499
683
3600
11811
649
5. Wait until the air adjustment is finished.
6. Note down the current Q value of air in the adjustment report (appendix E).
7. Fill the measuring cell with bi-distilled, freshly degassed water, checking for
the presence of bubbles through the inspection window.
Hint:
For the degassing of water, see chapter 8.2.
8. Start the water adjustment by pressing the "OK" key.
9. Wait until the water adjustment is finished. Note down the current Q value of
water in the adjustment report (appendix E). After pressing the "OK" key the
deviation of the new adjustment from the last adjustment performed is
displayed at a density of 1 g/cm3.
10.•
XDLIB07
The adjustment is saved by selecting "SAVE" after "recommendation:
SAVE" is displayed. The adjustment data are stored and can be printed, if
a printer is connected and activated.
31
8 Checking Procedure, Adjustment and Calibration
•
By selecting "REPEAT" after "recommendation: REPEAT" is displayed, the
adjustment is repeated (if the deviation is ≥ 0.00005 g/cm3). Clean the
measuring cell first (chapter 10). If the deviation remains unchanged, the
adjustment can be stored by selecting "SAVE".
Hint:
If an SH-1 or SH-3 sample handling unit is installed and activated, see chapter
4.4.1 or 5.4.1 of the SH-1/SH-3 instruction manual.
8.3.2
Adjustment with Air and Water for the Entire
Temperature Range (Full Range Adjustment)
•
If measurements at different temperatures indicate deviations between the
displayed values on the DMA 4500/5000 and reference values of density
standards, then an air and water adjustment for the whole temperature range
is necessary. Dry air (appendix A) and bi-distilled, freshly degassed water
are used.
•
The adjustment procedure is performed as follows:
-
•
Air adjustment at 40°C
Air adjustment at 60°C
Water adjustment at 40°C
Water adjustment at 60°C.
The air and water adjustment for the entire temperature range takes approx.
2 hours.
Full range adjustment procedure:
1. Perform an air and water adjustment at 20°C (see chapter 8.3.1).
2. Thoroughly clean and dry the measuring cell (see chapter 10).
3. Press the "Menu" key and select the menus "adjustment", "adjust" and
"density (temperature range)" using the "UP", "DOWN" and "↵" keys.
4. Start the full range adjustment by pressing the "OK" key.
5. Press the "↵" key and enter the current air pressure using the "UP",
"DOWN", "Left", "Right" and "↵" keys or the keyboard.
32
XDLIB07
8 Checking Procedure, Adjustment and Calibration
Hints:
• For air adjustment, the current air pressure must be entered, as it
influences the air density.
• The density values of water and air at a specific atmospheric pressure are
stored in the memory of the DMA 4500/5000 for the complete temperature
range.
• If the current on-site barometric pressure is not available, enter the
average air pressure (depending on the altitude above sea level)
according to the table in chapter 8.3.1.
6. The temperature of the measuring cell ("set temperature") is automatically
set to 40°C and the air adjustment is performed.
7. After air adjustment at 40°C is finished, the temperature of the measuring
cell ("set temperature") is automatically switched to 60°C and an air
adjustment at 60°C is performed.
8. Wait until the air adjustment is finished.
9. Degas bi-distilled water by boiling and let it cool down to approx. 60 to 65°C.
Inject the water into the measuring cell of the DMA 4500/5000 and check
whether the cell is free of any bubbles.
Hint:
For the degassing of water, see chapter 8.2.
10. Start the water adjustment by pressing the "OK" key.
11. The cell temperature ("set temperature") is automatically set to 40°C and the
water adjustment performed.
12. After water adjustment at 40°C is finished, the temperature of the measuring
cell ("set temperature") is automatically switched to 60°C and a water
adjustment at 60°C is performed.
13. Wait until the water adjustment is finished and the deviation to the last
adjustment performed at a density of 1 g/cm3 is displayed.
14. The adjustment is saved by selecting "SAVE" after "recommendation: SAVE"
is displayed. The adjustment data are stored and can be printed, if a printer
is connected and activated.
By selecting "REPEAT" after "recommendation: REPEAT" is displayed, the
adjustment is repeated. Clean the measuring cell first (chapter 10). If the
deviation remains unchanged, the adjustment can be stored by selecting
"SAVE".
XDLIB07
33
8 Checking Procedure, Adjustment and Calibration
8.3.3
Special Adjustment
•
Special adjustments are user-specific adjustments for special density units,
concentrations and temperatures.
•
Five different special adjustments can be stored. For each special
adjustment name, unit and format of the output can be specified.
•
During special adjustment density coefficients are calculated from the
oscillation period of two liquids of known density, according to:
ρ = A x Q2 - B
ρ ........
A, B ....
Q ........
•
density
density coefficients
period of oscillation
The densities of the two liquids that are used for special adjustment have to
differ by at least ∆ρ = 0.01 g/cm3.
34
•
The Q-values of the adjustment media have to differ by at least 0.0001.
•
Special adjustments can be performed at any set temperature within the
specified temperature range (0 to 90°C or 32 to 194°F).
•
If the instrument is operated using a special adjustment, the set measuring
temperature must be the same as the temperature at which the special
adjustment was performed. Otherwise no results will be obtained.
•
No viscosity correction is available if the instrument is operated using a
special adjustment.
•
Only the user functions "user table" and "polynomial" can be used if the
instrument is operated using a special adjustment.
•
No adjustment history is available for special adjustments.
•
The deviation of the B-values with reference to the first B-value of a specific
special adjustment cannot be graphically displayed.
•
The density coefficients of a special adjustment can only be used for
measurements, if the corresponding special adjustment 0, ..., 4 is selected in
the menu "method settings", "output selection", "user functions" and "special
adjustment".
•
As for any other "user function", the special adjustment must be activated in
the menu "display configuration", "printer configuration" and "memory
configuration".
XDLIB07
8 Checking Procedure, Adjustment and Calibration
Special adjustment procedure:
1. The special adjustment is performed at the current set temperature.
2. Press the "Menu" key and select the menu "user functions", "special
adjustment" and "special adjustment X" (X = 0, ..., 4).
3. In the menu "output configuration" the name, unit and format of the output
can be specified for each special adjustment (see chapter 11.2.9).
4. Select the menu "adjust" and perform the special adjustment as described
below.
5. Thoroughly clean and dry the measuring cell (see chapter 10).
6. Fill the density standard 1 into the measuring cell of the DMA 4500/5000 and
check whether the cell is free of air bubbles. Continue by pressing the "OK"
key.
7. Enter the density or concentration of the density standard 1 in the unit, which
you have defined in the menu "output configuration" and start the special
adjustment with density standard 1 by pressing the "OK" key.
8. After the special adjustment using density standard 1 is finished, thoroughly
clean and dry the measuring cell (chapter 10).
9. Fill the density standard 2 into the measuring cell of the DMA 4500/5000 and
check whether the cell is free of air bubbles. Continue by pressing the "OK"
key.
10. Enter the density or concentration of density standard 2 in the unit, which
you have defined in the menu "output configuration" and start the special
adjustment with density standard 2 by pressing the "OK" key.
11. After the special adjustment is finished, the deviation from the last special
adjustment performed is displayed.
12. Save the special adjustment by selecting "SAVE". The special adjustment
data are stored and can be printed, if a printer is connected and activated. By
selecting "REPEAT" the special adjustment is repeated, if necessary. Clean
the measuring cell first (chapter 10).
13. Activate the "special adjustment X" (X = 0, ..., 4) in the menu "method
settings", "output selection", "user functions" and "special adjustment".
XDLIB07
35
8 Checking Procedure, Adjustment and Calibration
8.4
Calibration
•
Calibrations are checking procedures which are carried out using certified
liquid density standards.
•
The displayed density value on the DMA 4500/5000 is compared to the
reference value indicated in the calibration certificate of the liquid density
standard, in order to check and document the accuracy of the method.
•
The physical properties (density, viscosity) of the liquid density standards
should be similar to those of the samples.
•
The frequency of calibrations with certified liquid density standards depends
on the requirements and the user’s judgement. Recommendation: 1 to 2
calibrations per year.
•
Notes on the liquid density standards, supplied with the DMA 4500/5000:
-
With the DMA 4500/5000 five small bottles containing ultra pure water
(density standard) and the corresponding calibration certificate are
supplied with the DMA 4500/5000.
The density of the ultra pure water is given at different temperatures with
an uncertainty of 0.00001 g/cm3 at a confidence level of 95%.
The listed densities are valid for the time at which the liquids were filled.
The calibration liquids should be stored in a cool and dark place!
The calibration liquids must be used immediately and only once after the
container has been opened!
Calibration procedure:
1. Perform a density check (see chapter 8.2) with water and carry out an
adjustment at 20°C (see chapter 8.3.1), if necessary.
2. Thoroughly clean and dry the measuring cell (see chapter 10).
3. Immediately after opening the bottle, inject the liquid density standard
without any bubbles into the measuring cell of the DMA 4500/5000.
4. After the measurement is finished, print the result (density at given
temperature).
5. Document the calibration procedure in a calibration protocol, which contains
the operator’s name, date, place, description of the calibration procedure,
results and the calibration certificate of the liquid density standard.
36
XDLIB07
9 Measurements
9 Measurements
1. Activate the required method using the "Method" soft key.
•
A method consists of the measuring temperature, display, printer and
memory configurations, and measurement settings, all stored under an
individual method name.
•
Method "Density" and a measuring temperature of 20°C are factory default
settings.
•
9 more preset methods (display, memory, printout) are already stored in the
DMA 4500/5000, covering the most common measuring tasks. Each of these
methods can still easily be altered, renamed and adapted according to your
needs.
•
List of the pre-set methods:
Fig. 9 - 1
XDLIB07
Screen: Actual method
- Density:
Measurement of density and specific gravity including
viscosity correction. This method is suitable for highly
accurate measurements of the true density of liquids
regardless of their viscosity.
- Density nc:
Measurement of density and specific gravity not
viscosity corrected. This method is suitable for
samples with a viscosity around 1 mPa.s (dilute
aqueous samples) and for comparison measurements
with old U-tube density meters not offering viscosity
correction.
- Brix:
Measurement of Brix concentration at 20°C, density
with viscosity correction and apparent density with
viscosity correction. This method is suitable for
measurement of soft drinks and other sugary.
37
9 Measurements
- OIML w/w:
Measurement of ethanol concentration in % by weight
at 20°C according to the OIML table ITS-90, and
density with viscosity correction. Suitable for
measuring the alcohol concentration of distillates.
- OIML v/v:
Measurement of ethanol concentration in % by volume
at 20°C according to the OIML table ITS-90, and
density with viscosity correction. Suitable for
measuring the alcohol concentration of distillates.
- AOAC PROOF:
Measurement of ethanol concentration in % by volume
at 60°F according to the AOAC table, and Proof
degrees (USA). Measurement performed at 20°C.
Suitable for measurement of alcohol concentration in
distillates.
- Crude oil:
Measurement of density viscosity corrected, API
density, API number and SG API of the product group
crude oil at any temperature corrected to 15°C. For
selecting 60°F or 20°C, see chapter 11.2.7.
- Fuel oil:
Measurement of density viscosity corrected, API
density, API number and SG API of the product group
fuel to heating oil at any temperature corrected to
15°C. For selecting 60°F or 20°C, see chapter 11.2.7.
- Lubricants:
Measurement of density viscosity corrected, API
density, API number and SG API of the product group
lubricants at any temperature corrected to 15°C. For
selecting 60°F or 20°C, see chapter 11.2.7.
- Blank meth:
This method does not contain any settings.
2. Ensure that the measuring cell is clean and dry.
3. Fill the sample into the measuring cell.
Important:
• Before filling any sample into the DMA 4500/5000,
- make sure that all wetted parts made of PTFE (adapters) and
borosilicate glass (measuring cell) are resistant to the sample.
Borosilicate glass is not resistant to samples containing hydrofluoric
acid, even in traces.
- have suitable cleaning fluids at hand for cleaning the measuring cell (see
chapter 10).
• If a sample changer SP-1m or SP-3m is connected, check the resistance
of the wetted parts. Material information is contained in the instruction
manuals for SP-1m and SP-3m.
• Samples with a moderate tendency to corrode borosilicate glass such as
strong alkali solutions (e.g. caustic soda) can be measured with the DMA
4500/5000. However, take care to remove such samples immediately
after measurement and rinse the measuring cell properly. Check the
validity of the adjustment more frequently than generally recommended.
Perform a new adjustment, if necessary. The measuring temperature for
strong alkali solutions should not be higher than 20°C. Higher
temperatures dramatically increase the speed of corrosion.
38
XDLIB07
9 Measurements
Hints:
• The sample must be homogeneous and free of gas bubbles. Suspensions
or emulsions may tend to separate in the measuring cell, giving incorrect
results. Such samples should remain in the measuring cell as briefly as
possible. It is therefore recommended to pre-thermostat them before
filling. It may help to put spacers below the left legs of the DMA 4500/
5000, thus putting it at an angle to counter balance the separation force
generated by the oscillation of the measuring cell.
• In order to get fast measuring results, activate "predetermin." in the
measurement settings" menu.
• Pre-thermostating the sample reduces the measuring time.
• When the DMA 4500/5000 is in the first harmonic oscillation (high-pitched
sound), do not fill the sample as this might create bubbles during the filling
procedure. Wait until the high-pitched sound (approx. 10 seconds) cannot
be heard any more or press "Menu", "Esc" before filling.
• If the sample to be measured tends to form bubbles the substance should
be degassed before the measurement. If this is not possible then
introduce the sample at a temperature higher than the measuring
temperature. Another remedy may be to put the density meter at a slight
angle by means of proper spacers below the right side of the DMA 4500/
5000 to allow the bubbles to escape (due to buoyancy).
There are several options for filling the samples into the measuring cell:
A. By syringe with Luer tip, see Fig. 9 - 2.
Adapter Luer cone
Waste
Fig. 9 - 2
Filling, using a syringe
Hints:
• Make sure that there is a waste bottle at the outlet of the measuring cell.
• Never fill the samples without the injection adapters Luer (see chapter 5)
in order to avoid glass breakage of the measuring cell.
• Attach the syringe to the injection adapter Luer and fill the sample in the
measuring cell by pushing the plunger of the syringe slowly and
continuously until a drop emerges from the other nozzle.
• The filling of the measuring cell can be observed through the inspection
window. Take care that the entire measuring cell is filled with sample. A
sample amount of approx. 1.5 ml is necessary.
• Leave the syringe in the filling position, in order to prevent sample
leakage.
XDLIB07
39
9 Measurements
B. By gravity, using a funnel and a hose at the inlet and a hose with a valve (e.g.
a clamp to block the flexible hose) at the outlet.
C. Automatically, using the Anton Paar sample changer SP-1m or SP-3m.
D. Automatically, using the Anton Paar SH-1 or SH-3 sample handling unit (see
chapter 4.4.2 or 5.4.2 of the SH-1/SH-3 instruction manual).
E. Semiautomatically, using a peristaltic pump
Adapter Luer cone
Sample
Fig. 9 - 3
Waste
Filling, using a peristaltic pump
Hints:
• Use two adapter Luer cone for the hose connections.
• Make sure that there is a waste bottle at the outlet of the peristaltic pump.
• A flow rate of 10 to 25 ml per minute is recommended for filling the
sample.
• Make sure that the pump hose is resistant to all samples and cleaning
liquids.
• Turn off the pump after filling a sufficient amount of sample.
4. Ensure that there are no gas bubbles in the measuring cell.
5. Print your measuring results.
A. Manual printout:
A manually printout is possible at any time:
•
•
•
Press soft key "Sample#" to define a sample name and/or sample number.
Wait until a measuring result is displayed.
Print the measuring results by pressing the soft key "Print".
B. Automatic printout and data storage:
•
40
If "mode" in the menu "method settings", "printer configuration", "printer
mode" is set to "measurement valid" and if "mode" in the menu "method
settings", "memory configuration", "memory mode" is set to "measurement
valid":
XDLIB07
9 Measurements
•
-
-
Press soft key "Sample#" to define a sample name and/or sample number.
Measuring results are printed and stored automatically as soon as they are
valid.
If "mode" in the menu "method settings", "printer configuration", "printer
mode" is set to "meas. valid (after start)" and if "mode" in the menu "method
settings", "memory configuration", "memory mode" is set to "meas.valid
(after start)":
Press soft key "Start" or "S-Start". The sample number assigned via
"Sample#" is displayed. An acoustic signal and the flashing display indicate
that the measurement results are valid. The measuring results are
automatically stored and/or printed.
Press soft key "Esc" to interrupt the measurement or soft key "Cont." to
start the next measurement. The numerical part of the sample number is
increased automatically, or the next sample number from the list is
selected.
Examples for DMA 5000 printouts:
----------------------------------------We 06.Aug.2003 13:20:05
method:Density
sample:0001
act.cell temp.:20.038 C
density :1.29927 g/cm3
SG :1.30161
condition:pre-determined
------------------------------------------------------------------------------------We 06.Aug.2003 13:26:43
method:Density
sample:0001
act.cell temp.:20.000 C
density :1.299325g/cm3
SG :1.30166
condition:valid
-------------------------------------------6. Fill in the next sample or clean and dry the measuring cell in-between, if
necessary.
Hints:
• Clean and dry the measuring cell after each measurement if samples with
different chemical compositions are to be measured. For similar samples
(similar chemical composition and similar density) replace the previous
sample by rinsing the measuring cell with a sufficient amount (10 ml or
more) of the new sample.
• Do not leave samples in the measuring cell longer than absolutely
necessary. Clean and dry the measuring cell as soon as possible.
XDLIB07
41
10 Cleaning and Drying the Measuring Cell
10 Cleaning and Drying the Measuring
Cell
Hint:
Cleaning should be performed with 2 cleaning liquids. Cleaning liquid 1
dissolves and removes residues, cleaning liquid 2 removes cleaning liquid 1
and is easily evaporated by a stream of dry air, in order to accelerate drying in
the cell.
1. Fill the measuring cell with cleaning liquid 1 using a syringe with Luer tip.
Move the plunger of the syringe in and out several times. This creates gas
bubbles which improve the cleaning action. Instead of a syringe, any other
suitable device such as a peristaltic pump can be used.
Important:
• Find a suitable cleaning liquid 1 before the first measurement.
• Cleaning liquid 1 should dissolve residues in the measuring cell.
• Cleaning liquid 1 must be selected so that no chemical reactions with the
sample and cleaning liquid 2 are to be expected.
• For water-soluble residues water can be used.
• Do not use highly concentrated alcohol as cleaning liquid 1 for proteins,
sugar or similar organic residues, because insoluble residues may form in
the measuring cell.
2. Remove cleaning liquid 1 from the measuring cell.
3. Fill the measuring cell with cleaning liquid 2 using a syringe with Luer tip.
Move the plunger of the syringe several times in and out.
Important:
• Cleaning liquid 2 should be volatile at measuring temperature.
• Cleaning liquid 2 must be selected so that no chemical reactions with
cleaning liquid 1 are to be expected.
4. Remove cleaning liquid 2 from the measuring cell.
5. Attach the air hose (see chapter 5) to the injection adapter Luer.
Hint:
Check that the air humidity does not exceed the limits given in appendix A and
use a desiccator if necessary.
6. Turn on the air pump using the "PUMP" key.
7. Let dry air blow through the measuring cell for approx. 10 minutes.
42
XDLIB07
10 Cleaning and Drying the Measuring Cell
8. Turn off the air pump.
9. Remove the air hose from the injection adapter Luer.
XDLIB07
43
11 Operation
11 Operation
11.1 Menu Operation
Fig. 11 - 1
11.1.1
44
Main menu, audit trail function deactivated
Using the Keys on the Keypad
•
To select the main menu press the "Menu" soft key.
•
To select menu items use the "UP" or "DOWN" keys and press "↵".
•
In the menus found under "method settings", "output selection" and "memory
configuration" and "printer configuration" toggle between "Y" (yes, selected)
and "N" (no, not selected) using the "↵" key. Move to the next item using the
"UP" and "DOWN" keys.
•
In the menus found under "method settings", "display configuration" toggle
between "N" (no, not selected), "S" (small size), "M" (medium size) and "L"
(large size) using the "↵" key. Move to the next item using the "UP" and
"DOWN" keys.
•
In the other menus, to select a menu item
- press "↵" to activate the item,
- move the cursor to the desired position using the "Left" or "Right" soft keys,
- decrease or increase the numerical value of a digit by using the "UP" or
"DOWN" keys,
- select letters and numbers by using the "UP" or "DOWN" keys,
- conclude the setting by pressing "↵".
•
To return to the previous display press the "Esc" soft key.
•
To save changed data press the "Yes" soft key upon the question "Save
changes?".
•
To return to the measuring mode press the "Exit" soft key.
XDLIB07
11 Operation
11.1.2
Using an External Keyboard (Optional)
•
Connect a standard PC keyboard to the keyboard connector (PC/AT
interface) at the rear of the DMA 4500/5000. If necessary, use an adapter
plug (from e.g. PS/2 interface to PC/AT interface). This connector can also
be used to plug in a bar code reader for sample ID. With adapters,
simultaneous operation of keyboard and bar code reader is possible.
•
Set the keyboard type (US or German) in the "instrument settings" menu.
•
Execute the same commands as the soft keys by simultaneously pressing
"Alt" and the underlined letter of the soft keys on the DMA 4500/5000 display
(example: "Alt"+p activates the air pump).
•
The "Esc", "UP", "DOWN", "LEFT" and "RIGHT", the "↵" and "BACKSPACE"
keys of the keyboard have the same function as on the DMA 4500/5000
keypad.
•
Delete characters with "SPACE".
•
The F1 key activates the help function.
11.2 Menu Structure and Description
Hint:
For a graphic overview, see the menu tree in the appendix.
11.2.1
"Logoff user "xxx""
This menu is only available if the audit trail function (see chapter 12) is activated.
The current user can log off using this menu. The software activates the login
window (see chapter 12.2.1) where a user is asked to login with a user name and
a password.
11.2.2
"audit trail"
This menu is only available if the audit trail function (see chapter 12) is activated.
XDLIB07
→
view audit trail
All logged operation steps can be
displayed (see chapter 12.4).
→
print audit trail
All logged operation steps can be
sent to a connected printer (see
chapter 12.5).
45
11 Operation
→
export audit trail
The log file can be transferred to a
connected PC (see chapter 12.6).
→
clear audit trail
The log file can be deleted (see
chapter 12.7).
→
general settings
→
→
audit trail: on/off
The audit trail function can be
activated/deactivated.
→
automatic logoff
An automatic logout after 0 to 1440
minutes can be set. If the DMA 4500/
5000 is not in use within the set logoff
time, the login window will be
displayed asking the user for a new
login.
user management
→
add new user
The
administrator
can
install
additional users (see chapter 12.9.1).
→
remove user
The administrator can remove
installed users (see chapter 12.9.2).
→
change user settings
The settings for installed users can
be changed (for details, see chapter
12.9.3 and 12.10)
→
print user settings
The settings for all installed users are
printed (see chapter 12.9.4).
11.2.3
"temperature setting"
Any temperature from 0 to 90°C or 32 to 194°F can be set.
→
set temperature (°C)
Temperature unit in degree Celsius.
→
set temperature (°F)
Temperature
Fahrenheit.
unit
in
degree
Hint:
Automatic set temperature change see chapter 11.3.1.
46
XDLIB07
11 Operation
11.2.4
→
→
"adjustment"
adjust
→
density (air, water)
Adjustment at 20°C using air and
water, detailed description see chapter
8.3.1.
→
density (temperature
range)
Air and water adjustment over the
whole temperature range, detailed
description see chapter 8.3.2.
→
high density, viscosity
(only DMA 5000)
Adjusting the viscosity correction: The
viscosity correction is pre-set at the
factory. It is usually not necessary to
perform this adjustment on-site.
However, if a calibration with suitable
standards at known density and high
viscosity indicates a measuring error,
an adjustment of the viscosity
correction can be carried out with
density standards of a known density
and viscosity. The density standards
which are used can also be density
standards with a considerably higher
density than the density of water.
Follow the directions given on the
display.
→
temperature
(both sensors)
A service password is required for this
menu. To adjust the measuring
temperature an external thermometer
(CKT 100 or MKT 100) is necessary.
Please contact your local Anton Paar
representative.
view adjustment data
The adjustment data of temperature
and density sensors for all types of
adjustment can be displayed for
service and documentation purposes.
→
temperature
The sensor data of both built-in Pt 100
temperature sensors are displayed.
→
measuring sensor:
→
R0:
Resistance at 0°C.
→
a:
Linear constant.
→
b:
Quadratic constant.
control sensor:
XDLIB07
→
R0:
Resistance at 0°C.
→
a:
Linear constant.
→
b:
Quadratic constant.
47
11 Operation
→
density
The density coefficients used for
calculating the density from the period
of oscillation are displayed.
→
KA:
Density coefficients for determination
of the viscosity uncorrected density.
→
TKA1:
→
TKA2:
→
KB:
→
TKB1:
→
TKB2:
→
KC:
→
KAK:
→
TKA1K:
→
TKA2K:
→
KBK:
→
TKB1K:
→
TKB2K:
→
KCK:
→
VIS1:
Coefficient 1 for viscosity correction.
→
VIS2:
Coefficient 2 for viscosity correction.
→
Q air:
→
Q H2O:
→
DO air:
Damping numberair of the adjustment
for air.
→
TK DO air:
Temperature
damping air.
→
DO H2O:
Damping
Density coefficients for determination
of the density with viscosity correction.
coefficient
numberwater
adjustment
of
the
before
air
adjustment for water.
48
→
air pressure:
Air pressure
adjustment.
→
KAOW:
→
KBOW:
Adjustment constants for the viscosity
correction.
→
KCOW:
→
TKAOW1:
→
TKAOW2:
→
TKBOW1:
→
TKBOW2:
→
ETAK0:
→
ETAK1:
→
ETAK2:
entered
XDLIB07
11 Operation
→
deviation KB
•
•
•
•
→
→
→
XDLIB07
Graphically displays the offsets of
the KB-values with reference to
the first KB-value displayed. The
deviation of KB-values is plotted
on the vertical axis, the lines on
the horizontal axis represent the
25 most recent adjustments,
increasing from left to right
For the DMA 4500 a different scale
is used on the vertical axis.
Move along the vertical axis using
the "UP" and "DOWN" keys.
For examples and explanations of
deviation KB-values see appendix
E.
print adjustment data
For documentation purposes, all
adjustment data of the temperature
sensors and the density coefficients
can be printed.
→
temperature
Printout of the latest adjustment data
of the temperature sensors.
→
density
Printout of the
adjustment data.
latest
density
print adjustment history
Sequential printout of the 25 most
recently performed adjustments.
→
temperature
Printout of the 25 most
temperature adjustment data.
→
density
Printout of the 25 most recent density
adjustment data.
recent
activate factory adjustment
This function can be used to reactivate
the
original
factory
adjustment. Hereby the present
adjustment data are replaced by the
factory adjustment data.
→
temperature
Activates the
adjustment.
→
density
Activates
the
adjustment.
temperature
density
factory
factory
49
11 Operation
→
density check
→
check density
This function is used either to check
the transport or to check the validity of
your own adjustments in routine
measurements.
→
density check settings
Input of following parameters: fluid,
density, max. density deviation,
temperature, check interval, check
density (on/off).
→
print last density check
→
print density check history
11.2.5
Fig. 11 - 2
→
50
"measurement settings"
Screen: Measurement settings
meas. finished by:
→
predetermin.
Pre-calculated density results to 5
decimal places (DMA 5000) or 4
decimal places (DMA 4500) before
temperature equilibrium is reached.
→
equilibrium fast/medium/
slow
(only DMA 5000)
Valid density result to 6 decimal
places (DMA 5000) or 5 decimal
places (DMA 4500) after temperature
equilibrium is reached.
→
timeout:
Measurement
is
interrupted
if
equilibrium is not reached after a
preset time of 60 to 7200 sec.
→
sample filling mode:
Menu only displayed if a sample
changer/sample handling unit is
connected.
→
Sample filling by syringe or other
manual filling device.
manual
XDLIB07
11 Operation
→
→
→
XDLIB07
sample changer
Automatic sample filling by sample
changer/handling unit. If a sample
changer is used the "Start" soft key
disappears from the bottom line of the
display. When using a sample
handling unit the "S-Start" soft key
appears at the bottom of the display
and is used for starting the
measurement.
pump terminates meas.:
→
yes
Measurement is interrupted while the
air pump is turned on.
→
no
Measurement is not interrupted
although the air pump is turned on.
pump switch off mode:
→
manual
The air pump has to be switched off
manually.
→
time
After the specified "pump switch off
time" the air pump is switched off
automatically.
→
pump switch off time:
→
type of sample identif.:
The air pump is switched off
automatically after a preset time
between 30 and 3600 sec.
→
number
The sample identification for printout,
display and storage in the memory is
the number entered via the
"Sample#" soft key. A pre-text and
post-text can be defined. This menu
is available with and without sample
changer/sample handling unit.
→
position
This menu is only displayed if a
sample changer/handling unit is
connected and activated.
The sample identification for printout,
display and storage in the data
memory is the position transferred
automatically from the sample
changer SP-1m/SP-3m or the sample
number when using a sample
handling unit.
51
11 Operation
→
→
52
→
text
The sample identification for printout,
display and storage in the data
memory is the text entered via the
"Sample#" soft key or a bar code
reader. This menu is available with
and without sample changer/handling
unit.
→
lst by nr.
The sample identification is entered
into a list via the "Sample#" soft key
or a bar code reader. 60 individual
samples can be listed.
→
lst by pos.
The menu is only displayed if a
sample changer/sample handling unit
is connected and activated. The
sample identification per position of
the magazine or per number of
measurement is entered into the list
via the "Sample#" soft key or a bar
code reader.
reset sample identif.:
→
yes
The entered sample identification is
automatically deleted after the
completion of the measurement.
→
no
The entered sample identification
remains
unchanged
after
the
completion of the measurement.
API input:
→
density (not viscosity
correct.)
The density value without viscosity
correction is used for calculating the
API functions.
→
density
The density value after viscosity
correction is used for calculating the
API functions.
→
special adjustment 0
The density value determined with a
special adjustment is used for
calculating the API functions. No
viscosity correction is available if the
instrument is operated using a
special adjustment.
→
special adjustment 4
→
external density
(only if an external cell is
connected and activated)
The density value determined with an
external cell is used for calculating
the API functions.
XDLIB07
11 Operation
→
temperature scan:
(only DMA 5000)
This function can be used to increase
or
decrease
the
measuring
temperature automatically in variable
increments.
At each defined temperature step
within the start/stop temperature a
density measurement is performed
automatically.
Hints:
• In order to prevent gas bubbles, it is recommended to change the set
temperature to the start temperature of the temperature scan (see chapter
11.2.3).
- scan from high to low temperature.
- pre-thermostat the sample to the start temperature before filling.
• For automatic printout/storage select "meas. valid (after start)" in the
menu "method settings", "printer/memory configuration", "printer/memory
mode".
• Predetermination mode is not supported.
• Set the "timeout" to 3600 sec.
• The temperature scan function does not support sample changers/sample
handling units.
• The sample identification will remain unchanged during a scan.
XDLIB07
→
on
Activates the temperature scan
function. To start the temperature
scan, press the "Start" soft key in the
measuring window.
→
off
Deactivates the temperature scan
function.
→
start temperature
Enter a temperature between 0°C
and 90°C.
→
stop temperature
Enter a temperature between 0°C
and 90°C.
→
temperature step
Enter the temperature step in °C.
53
11 Operation
11.2.6
→
"instrument settings"
display illumination
→
switch off time:
→
save display contrast
The display contrast adjusted in the
measuring mode using the "UP" and
"DOWN" keys is saved using this
menu. After turning on the DMA
4500/5000
the
setting
is
automatically loaded.
→
print instrument information
A list of hardware, software and
system information for maintenance
and software upgrades is printed
using this menu.
→
printer interface configuration
If your printer is different from the
Anton Paar standard printer, please
consult your printer instruction
manual for details. For the printer
supplied by Anton Paar, all settings
are already undertaken at the factory.
→
line delimiter:
The line delimiter separates each
data string from the next.
→
<CR><LF>
Carriage return and line feed after
each data string.
→
<CR>
Carriage return after each data string.
→
<LF>
Line feed after each data string.
→
→
→
→
→
handshake:
→
hardware (RTS/CTS)
→
software (XON/XOFF)
→
none
data bits:
→
7
→
8
stop bits:
→
1
→
2
parity:
→
no
→
odd
→
even
baudrate:
→
54
Screen
saving
mode
(display
illumination switches off) after a
preset time of 1 to 9 hours after the
last key was pressed.
1200
XDLIB07
11 Operation
→
2400
→
4800
→
9600
computer interface
configuration
If the DMA 4500/5000 is connected
to a PC via COM1, the computer
interface has to be adjusted
depending on the software used for
the data transfer from DMA 4500/
5000 to the PC.
→
line delimiter:
The line delimiter separates each
data string from the next.
→
<CR><LF>
Carriage return and line feed after
each data string.
→
<CR>
Carriage return after each data string.
→
<LF>
Line feed after each data string.
→
→
→
→
→
→
→
→
data delimiter:
→
, (comma)
→
; (semicolon)
handshake:
→
hardware (RTS/CTS)
→
software (XON/XOFF)
→
none
data bits:
→
7
→
8
stop bits:
→
1
→
2
parity:
→
no
→
odd
→
even
baudrate:
→
1200
→
2400
→
4800
→
9600
date & time
→
Using this menu, the local date and
time and the time format can be set
as required.
setting
→
XDLIB07
The data delimiter separates each
data within a string from the next.
year
55
11 Operation
→
→
month
→
day
→
hour
→
minute
→
second
format
→
date format:
→ dd.mm.yyyy
→ mm/dd/yyyy
→ yyyy-mm-dd
→
weekday:
→ yes
→ no
→
name of month:
Either the initial letters of the English
month or the number are used.
→ yes
→ no
→
time format:
→ 12h
→ 24h
→
→
language
→
english
Menu in English language.
→
Deutsch
Menu in German language.
external keyboard type
→
→
→
type:
→
us
→
german
A German keyboard can be
connected to the DMA 4500/5000.
change password
Activate or change a password for
access to the main menu. To disable
a password, delete the first character
of the former password using
"SPACE".
→
new password:
Key in a new password with a
maximum of 10 characters.
→
verify:
Key in the same password to activate
it.
audit trail
The audit trail function (see chapter
12) can be activated.
Hints:
• After activating the audit trail function, the login window is displayed. The
user is asked to login with his user name and password.
• After logging in, the sub-menus "change password" and "audit trail" are
not available.
56
XDLIB07
11 Operation
11.2.7
Fig. 11 - 3
→
"method settings"
Screen: Method settings
output selection
•
•
•
From each listed menu you can
select the items you require for
output to the display, printer and
data memory.
Only items selected here will be
available in the configuration
menus for display, printer and
data memory.
Each item can be activated
separately in the corresponding
menu for display, printer and
memory configuration.
Hint:
"external cell" is only displayed if an external cell is connected.
→
XDLIB07
system + temperature
→
headline
Headline "DMA4500" or "DMA5000".
→
date & time
Date and time for printout.
→
date
Date for display.
→
time
Time for display.
57
11 Operation
→
method
Method name for display, printout
and memory.
→
serial number
Serial number
printout.
→
sample number
Sample
number
entered
via
"Sample#" or a bar code reader for
printout and memory.
→
actual Q
Quotient of the currently measured
period of oscillation of the U-tube
divided by the current period of
oscillation of the reference oscillator.
The DMA 4500/5000 uses this
information to calculate the density
using the density coefficients.
→
actual cell
temperature (°C)
Temperature in the measuring cell in
°Celsius measured by the Pt 100
measuring sensor for display, printout
and memory.
→
set temperature (°C)
Set temperature in °Celsius.
→
damping 1
Damping represents the energy loss
during oscillation caused by sample
viscosity, and is used for viscosity
correction of the density.
→
density 1
Density determined in the harmonic
for
display
and
oscillation of 1st order.
→
Q1
Quotient of the currently measured
period of oscillation of 1st order of the
U-tube divided by the current period
of oscillation of the reference
oscillator.
→
e
Viscosity correction factor.
→
period 1
Period of oscillation of the U-tube in
the harmonic oscillation of 1st order.
→
period
Period of oscillation of the U-tube in
the harmonic oscillation of 0th order.
→
58
→
actual cell
temperature (°F)
Temperature in the measuring cell in
°Fahrenheit measured by the Pt 100
measuring sensor.
→
set temperature (°F)
Set temperature in °Fahrenheit.
→
line
Separating line for display or printout.
A maximum of 5 separating lines is
available.
→
empty row
Line feed for printer; a maximum of 3
line feeds is available.
density
XDLIB07
11 Operation
XDLIB07
→
Q
Final quotient of the period of
oscillation of the U-tube divided by
the period of oscillation of the
reference
oscillator
when
the
measurement is finished. Q is used
by the DMA 4500/5000 to calculate
the density using the adjustment
coefficients.
→
density (not
viscosity correct.)
Density value without viscosity
correction. The density is correct for
samples with a viscosity at around 1
mPa.s (water). Noticeable high
readings for samples of higher
viscosity.
→
density
Density
value
correction.
→
d (not viscosity
corrected)
(only DMA 5000)
Density number without viscosity
correction. The density number is
calculated by subtracting the density
of water from the measured density
and dividing by the density of water
at measuring temperature.
→
d (only DMA 5000)
Density number
correction.
→
condition
Actual status of the measurement:
• "measuring"
• "valid"
• "pre-determined"
• "attemperating".
"Valid" appears when the measuring
temperature has been reached and
the measurement taken. "Predetermined" appears before the
exact measuring temperature has
been reached, when the instrument
can produce a pre-determined result.
→
Apparent SG
Apparent specific gravity: This is
apparent density divided by the
apparent density of water at the
specified temperature. Apparent
density is the weight in air (not
mass!) divided by the volume. SG
results are reported to 5 decimal
places (DMA 5000) or 4 decimal
places (DMA 4500).
after
after
viscosity
viscosity
59
11 Operation
→
→
App. density brass
Apparent density referring to scales,
which are adjusted with brass
weights.
Apparent density results are reported
with 5 decimal places (DMA 5000) or
4 decimal places (DMA 4500).
→
App. density steel
Apparent density referring to scales,
which are adjusted with steel
weights.
Apparent density results are reported
with 5 decimal places (DMA 5000) or
4 decimal places (DMA4500).
→
SG (not viscosity
corrected)
Specific gravity without viscosity
correction. Specific gravity is the
density of the sample at measuring
temperature divided by the density of
water at a measuring temperature.
SG results are reported with 5
decimal places (DMA 5000) or 4
decimal places (DMA 4500).
→
SG
Specific gravity after viscosity
correction. SG results are reported
with 5 decimal places (DMA 5000) or
4 decimal places (DMA 4500).
user functions
Special adjustment, user tables and
polynomials can be selected.
→ special adjustment 0
User-specific adjustment for special
density units or concentrations, see
chapter 8.3.3.
...
→ special adjustment 4
→
polynomial 0 (2D)
→
polynomial 1 (2D)
2D-polynomial formulas with 2 freely
selectable input parameters to
calculate density-related values.
...
→
polynomial 9 (2D)
→
user formula
Result of the user formula.
→
user formula
parameter
Parameter p of the user formula.
→
polynomial 0
Polynomial formulas with 1 freely
selectable
input
parameter
to
calculate density-related values.
→
polynomial 1
...
→
60
polynomial 4
XDLIB07
11 Operation
→
→
user table 0
→
user table 1
→
user table 2
→
high/low limits
ethanol tables
User-specified
table
converting
density to concentration or any other
related value.
Limit monitoring of a measuring
result.
A variety of tables for the
determination
of
alcohol
concentration
of
alcohol/water
mixtures using density is available.
The range of all tables is 0 to 100%
ethanol.
A density change of 1E-5 g/cm3
corresponds to a concentration
change of approx. 0.007%.
XDLIB07
→
OIML (%v/v)
Alcohol concentration in percentage
by volume according to the
International Alcoholometric Tables
issued
by
the
International
Organisation of Legal Metrology
(OIML), temperature according to ITS
68, based on true density at 20°C.
→
OIML (%w/w)
Alcohol concentration in percentage
by
weight
according
to
the
International Alcoholometric Tables
issued
by
the
International
Organisation of Legal Metrology
(OIML), temperature according to ITS
68, based on true density at 20°C.
→
OIML-ITS90 (%v/v)
Alcohol concentration in percentage
by volume according to the
International Alcoholometric Tables
issued
by
the
International
Organisation of Legal Metrology
(OIML), temperature according to ITS
90, based on true density at 20°C.
→
OIML-ITS90 (%w/w)
Alcohol concentration in percentage
by
weight
according
to
the
International Alcoholometric Tables
issued
by
the
International
Organisation of Legal Metrology
(OIML), temperature according to ITS
90, based on true density at 20°C.
61
11 Operation
62
→
IUPAC (%v/v)
Alcohol concentration in percentage
by volume according to the
International Union of Pure and
Applied Chemistry, based on true
density at 20°C. The measuring
temperature must be 20°C (68°F).
→
IUPAC (%w/w)
Alcohol concentration in percentage
by
weight
according
to
the
International Union of Pure and
Applied Chemistry, based on true
density at 20°C. The measuring
temperature must be 20°C (68°F).
→
KAEMPF (%v/v)
Alcohol concentration in percentage
by volume according to W. KAEMPF,
based on true density at 20°C.
→
KAEMPF (%w/w)
Alcohol concentration in percentage
by weight according to W. KAEMPF,
based on true density at 20°C.
→
AOAC 60°F (%v/v)
Alcohol concentration in percentage
by volume at 15.56°C (60°F)
according to the AOAC (American
Organization of Analytical Chemists)
Tables, based on true density at
20°C. The measuring temperature
must be 20°C (68°F).
→
AOAC (nc) 60°F
(%v/v)
Alcohol concentration in percentage
by volume at 15.56°C (60°F)
according to the AOAC (American
Organization of Analytical Chemists)
Tables, based on true density without
viscosity correction at 20°C. The
measuring temperature must be
20°C (68°F).
→
Proof 60°F
Alcohol concentration in Proof
degrees at 15.56°C (60°F), based on
true density at 20°C.
→
Proof (nc) 60°F
Alcohol concentration in Proof
degrees at 15.56°C (60°F), based on
true
density
without
viscosity
correction at 20°C.
→
HM C&E (%v/v)
Alcohol concentration in percentage
by volume according to the HM C&E
Table at 20°C.
→
HM C&E (%w/w)
Alcohol concentration in percentage
by weight according to the HM C&E
Table at 20°C.
XDLIB07
11 Operation
→
extract/sugar tables
2 tables for the determination of
saccharose/extract concentration of
sugar in water using density are
available. The range of both tables is
0 to 100%.
A density change of 1E-5 g/cm3
corresponds to a concentration
change of approx. 0.002%.
→
XDLIB07
→
concentration
(°Brix)
Saccharose
concentration
in
percentage by weight according to
the NBS Table 113, based on true
density at 20°C.
→
concentration
(°Plato)
Extract concentration in percentage
by weight according to the Plato
table, based on true density at 20°C.
→
concentration
(°Baumé)
Concentration unit according to the
given formulas below, based on
specific gravity at set temperature (t).
For liquids heavier than water:
°Be = (145 x SGt/t - 145) / SGt/t
For liquids lighter than water:
°Be = (140 - 130 x SGt/t) / SGt/t
acid/base tables
A variety of acid/base concentration
equations are stored in the DMA
4500/5000, many more are available
on request.
→
hydrochloric acid
(HCl) (%w/w)
Aqueous
hydrochloric
acid
concentration in percentage by
weight according to the CRC
Handbook of Chemistry and Physics,
based on true density at 20°C, range
0 to 40%. Accuracy approx. 0.02%.
→
sodium hydroxide
(NaOH) (%w/w)
Aqueous
sodium
hydroxide
concentration in percentage by
weight
according
to
LandoltBoernstein, based on true density at
20°C, range 0 to 50%. Accuracy
approx. 0.04%.
→
phosphoric acid
(H3PO4) (%w/w)
Aqueous
phosphoric
acid
concentration in percentage by
weight
according
to
LandoltBoernstein, based on true density at
20°C, range 0 to 100%. Accuracy
approx. 0.06%.
63
11 Operation
→
64
→
nitric acid (HNO3)
(%w/w)
Aqueous nitric acid concentration in
percentage by weight according to
Landolt-Boernstein, based on true
density at 20°C, range 0 to 100%.
Accuracy approx. 0.07%.
→
sulfuric acid
(H2SO4) (%w/w)
Aqueous sulfuric acid concentration
in percentage by weight according to
the CRC Handbook of Chemistry and
Physics, based on true density at
20°C, range 0 to 94%. Accuracy
approx. 0.05%.
API functions
The API functions automatically
convert the density values of
petroleum samples measured at any
temperature to density, API gravity or
specific gravity at 15°C or 60°F,
according to ASTM D1250-80 and
DIN 51757. Additionally the same
API functions are available for a
reference temperature of 20°C
according to the "IP Petroleum
Measurement Paper No. 3, 1988". In
the menu " measurement settings"
the density input value for the API
function can be selected. The
samples are divided into the groups
crude oil (group A), fuel to heating oil
(group B) and lubricants (group D).
→
dens. API 15°C-C
(crude oil)
Conversion of crude oil density at
measuring temperature to density at
15°C.
→
dens. API 60°F-C
(crude oil)
Conversion of crude oil density at
measuring temperature to density at
60°F.
→
dens. API 20°C-C
(crude oil)
Conversion of crude oil density at
measuring temperature to density at
20°C.
→
dens. API 15°C-L
(lubricating oil)
Conversion of lubricating oil density
at measuring temperature to density
at 15°C.
→
dens. API 60°F-L
(lubricating oil)
Conversion of lubricating oil density
at measuring temperature to density
at 60°F.
→
dens. API 20°C-L
(lubricating oil)
Conversion of lubricating oil density
at measuring temperature to density
at 20°C.
XDLIB07
11 Operation
XDLIB07
→
dens. API 15°C-F
(fuel, heating oil)
Conversion of fuel density at
measuring temperature to density at
15°C.
→
dens. API 60°F-F
(fuel, heating oil)
Conversion of fuel density at
measuring temperature to density at
60°F.
→
dens. API 20°C-F
(fuel, heating oil)
Conversion of fuel density at
measuring temperature to density at
20°C.
→
API 15°C-C
(crude oil)
API gravity of crude oil converted to
15°C.
→
API 60°F-C
(crude oil)
API gravity of crude oil converted to
60°F.
→
API 20°C-C
(crude oil)
API gravity of crude oil converted to
20°C.
→
API 15°C-L
(lubricating oil)
API gravity of
converted to 15°C.
lubricating
oil
→
API 60°F-L
(lubricating oil)
API gravity of
converted to 60°F.
lubricating
oil
→
API 20°C-L
(lubricating oil)
API gravity of
converted to 20°C.
lubricating
oil
→
API 15°C-F
(fuel, heating oil)
API gravity of fuel converted to 15°C.
→
API 60°F-F
(fuel, heating oil)
API gravity of fuel converted to 60°F.
→
API 20°C-F
(fuel, heating oil)
API gravity of fuel converted to 20°C.
→
SG API 15°C-C
(crude oil)
Specific gravity of crude oil converted
to 15°C.
→
SG API 60°F-C
(crude oil)
Specific gravity of crude oil converted
to 60°F.
→
SG API 20°C-C
(crude oil)
Specific gravity of crude oil converted
to 20°C.
→
SG API 15°C-L
(lubricating oil)
Specific gravity of lubricating oil
converted to 15°C.
→
SG API 60°F-L
(lubricating oil)
Specific gravity of lubricating oil
converted to 60°F.
→
SG API 20°C-L
(lubricating oil)
Specific gravity of lubricating oil
converted to 20°C.
→
SG API 15°C-F
(fuel, heating oil)
Specific gravity of fuel converted to
15°C.
→
SG API 60°F-F
(fuel, heating oil)
Specific gravity of fuel converted to
60°F.
→
SG API 20°C-F
(fuel, heating oil)
Specific gravity of fuel converted to
20°C.
65
11 Operation
→
→
→
reset output selection
display configuration
The display of the DMA 4500/5000
can be easily custom-designed.
→
edit configuration
"S" (small), "M" (medium), "L" (large)
size, "N" (not selected). Only items
activated in "output selection" are
listed. A maximum of 20 data can be
activated.
→
reset configuration
Resets the display configuration to
the factory default setting.
→
edit method name
Issues or changes an individual
name for the activated method.
printer configuration
The printout can be easily customdesigned.
→
edit configuration
Selection of items to be printed, "Y"
(yes), "N" (no). Only items activated
in "output selection" are listed.
A maximum of 30 data can be
activated.
→
reset configuration
Resets the printer configuration to the
factory default setting.
→
printer mode
→
→
→
66
Resets the complete output selection
to the factory default setting. Display,
printer and memory settings will be
influenced.
mode:
→
manual
→
interval
→
measurement valid
→
meas. valid after start
interval:
Interval for automatic printout, 15 to
65535 sec.
memory configuration
A total of 100 measurements can be
stored in the memory. When the
memory
is
full,
the
oldest
measurement is replaced by the new
one. Data in the memory can be
recalled, printed, transmitted to a PC,
and statistically evaluated.
→
Selection of items to be saved in the
data memory, "Y" (yes), "N" (no).
Only items chosen in "output
selection" will be listed. A maximum
of 5 items per measurement result
can be stored. In addition date and
time are automatically stored.
edit configuration
XDLIB07
11 Operation
→
reset configuration
→
memory mode
→
→
mode:
→
switched off
→
interval
→
measurement valid
→
meas. valid after start
interval:
Interval for automatic data storage,
15 to 65535 sec.
→
edit method name
Issues or changes an individual
name for the activated method.
→
select method
Selects the measuring method.
→
copy method
The complete configuration of the
activated method is copied to the
selected target method.
→
reset method
The complete configuration of the
activated method is reset to the
factory setting.
→
clear method
The complete configuration of the
activated method is deleted.
11.2.8
"sample changer configuration"
•
This menu is only available if a sample changer/handling unit is connected.
•
If an SH-1 or SH-3 sample handling unit is used the measurement is started
by pressing the "S-Start" soft key. For detailed information about SH-1 and
SH-3 cleaning and filling parameters, see the SH-1/SH-3 instruction manual.
•
If an SP-1m or SP-3m sample changer is connected, the measurement is
started by pressing the "Start" key on the SP-1m or SP-3m. The "Start" soft
key of the DMA 4500/5000 is not available.
→
XDLIB07
Resets the memory configuration to
the factory default setting.
sample changer configuration
Selects all filling parameters for the
sample changers SP-1m or SP-3m.
→
sample changer
parameter
A 7-digit number controls the filling
procedure. Refer to the instruction
manual of the SP-1m or SP-3m.
→
measurement:
If an SP-3m is connected, each
sample from one vial can be
measured either once or twice.
→
single
→
double
67
11 Operation
11.2.9
"user functions"
•
1 user-specified formula, 3 user-specified tables, 5 user-specified polynomial
equations and 10 user-specified 2D-polynomial equations can be defined to
calculate density-related values.
•
The formula result can be used as an input value either for the polynomial or
the user table. The polynomial result can be used as an input value either for
a further polynomial or a user-table.
•
5 user-specific adjustments for special density units, concentrations and
temperatures can be performed (see chapter 8.3.3). No adjustment history
and no viscosity correction are available for this function.
•
A high/low limits function is available for limit monitoring measuring results.
Depending on the measuring results and on the specified limits, "too low/OK/
too high" will be reported.
•
Activates the user formula, user table, polynomial, special adjustment or limit
monitoring in the "method settings", "output selection", "user functions" menu
to make them available for display, printer and memory configurations.
→
special adjustment
→
Adjustments for special density units,
concentrations and temperatures, see
chapter 8.3.3. No viscosity correction
or adjustment history is available if the
instrument is operated using a special
adjustment.
special adjustment 0
→
output configuration
→
→
For each special adjustment, name,
unit and format of the output can be
specified.
terms
→
name
Name of the special adjustment,
maximum of 20 characters.
→
unit
Unit of the result, maximum of 5
characters.
format
→ leading digits: Maximum of 3 digits before the decimal
point.
→ trailing digits: Maximum of 6 digits after the decimal
point.
68
→ exponential:
Enable or disable exponential format.
→ sign:
Enable or disable the sign before the
output result.
XDLIB07
11 Operation
→
adjust
Adjustment at "set temperature", using
two density standards of your choice.
For adjustment to special density units
or single temperatures, using air and
water is recommended.
→
view special
adjustment data
Display of special adjustment data.
→
coef A:
Coefficient A
→
coef B:
Coefficient B
→
temp:
Temperature
→
→
print special
adjustment data
Printout of special adjustment data.
special adjustment 1
...
→
→
special adjustment 4
polynomials (2D)
→
polynomial 0 (2D)
10# 2D-polynomial formulas are
provided to calculate density-related
values.
→
The first input value (x) for the
polynomial (2D) can be selected from
the displayed list.
first input selection
→
actual Q
→
actual cell temperature (°C)
.....
→
→
SG
second input
selection
The second input value (y) for the
polynomial (2D) can be selected from
the displayed list.
→
actual Q
→
actual cell temperature (°C)
.....
→
→
SG
output configuration
→
→
For each polynomial formula, name,
unit and format of the output can be
specified.
terms
→
name
Name of the polynomial, maximum of
20 characters.
→
unit
Unit of the result, maximum of 5
characters.
format
→ leading digits: Maximum of 4 digits before the decimal
point.
XDLIB07
69
11 Operation
→ trailing digits: Maximum of 6 digits after the decimal
point.
→ exponential:
Enable or disable exponential format.
→ sign:
Enable or disable the sign before the
output result.
→
clear polynomial
Deletes all polynomial coefficients,
name and settings.
→
edit coefficients
For each polynomial a maximum of 10
coefficients can be entered.
Polynomial formula:
Output = Coeff 00 + Coeff 01 * y +
Coeff 02 * y2 + Coeff 03 * y3 +
Coeff 10 * x + Coeff 11 * x * y +
Coeff 12 * x * y2 + Coeff 20 * x2 +
Coeff 21 * x2 * y + Coeff 30 * x3
x ........first selected input value
y ........second selected input value
Coefficients can be calculated from
density/concentration data.
→
[0,0]:
→
[0,1]:
Coefficients can be entered in decimal
or exponential format, including the
sign.
...
→
→
→
[3,0]:
print coefficients
Printout of all coefficients.
polynomial 1 (2D)
...
→
→
user formula
→
70
polynomial 9 (2D)
first input selection
The first input value for the user
formula can be selected from the
displayed list. The most frequently
used value is "density".
XDLIB07
11 Operation
→
second input selection
→
output configuration
→
→
→
→
→
terms
→
name
Name of the formula, maximum of 20
characters.
→
unit
Unit of the result, maximum of 5
characters.
format
→
leading digits:
Maximum of 4 digits before the decimal
point.
→
trailing digits:
Maximum of 6 digits after the decimal
point.
→
exponential:
Enable or disable exponential format.
→
sign:
Enable or disable the sign before the
output result.
edit user formula
The formula can be edited by two input
values, parameter, operators and
constants.
→
input value x:
This value is chosen in the user
formula menu "first input selection".
→
input value y:
This value is chosen in the user
formula menu "second input selection".
→
parameter p:
The parameter p has to be entered as
an external value by pressing ENTER
before the measurement.
→
operators:
+, -, *, /, (, ) can be used.
→
constants:
any number
print user formula
Printout of the user formula and the
parameter p.
polynomials
→
XDLIB07
The second input value for the user
formula can be selected from the
displayed list.
polynomial 0
5 fourth order polynomial formulas are
provided to calculate density-related
values.
71
11 Operation
→
input selection
For each polynomial an individual input
can be selected from the displayed
listing. The most common input is
density.
→
actual Q
→
actual cell temperature (°C)
.....
→
→
SG
output configuration
→
→
For each polynomial formula, name,
unit and format of the output can be
specified.
terms
→
name
Name of the polynomial, maximum of
20 characters.
→
unit
Unit of the result, maximum of 5
characters.
format
→ leading digits: Maximum of 4 digits before the decimal
point.
→ trailing digits: Maximum of 6 digits after the decimal
point.
→ exponential:
Enable or disable exponential format.
→ sign:
Enable or disable the sign before the
output result.
→
clear polynomial
Deletes all polynomial coefficients,
name and settings.
→
edit coefficients
For each polynomial a maximum of 5
coefficients can be entered.
Polynomial formula:
Output = coef 0 + coef 1 x (input) +
coef 2 x (input)2 + coef 3 x (input)3 +
coef 4 x (input)4
Coefficients can be calculated from
density/concentration data. Coefficient
0 always must be accompanied by at
least one other coefficient to allow
correct calculation.
→
coef 0:
→
coef 1:
Coefficients can be entered in decimal
or exponential format, including the
sign.
...
→
→
72
coef 4:
print coefficients
Printout of all coefficients.
XDLIB07
11 Operation
→
→
data diagram
Graphically displays the polynomial
function within two input values (e.g.
density).
→
min. value:
Lower input value.
→
max. value:
Upper input value.
polynomial 1
...
→
→
polynomial 4
user tables
→
user table 0
3 user-specified tables for converting
density-related values are available.
→
For each table an individual input can
be selected from the displayed listing.
The most common input is density.
input selection
→
actual Q
→
actual cell temperature (°C)
...
→
→
SG
output configuration
→
→
The result calculated from the input is
called output. For each table, the
name, unit and format of the output can
be specified.
terms
→
name
Name of the table, maximum of 20
characters.
→
unit
Unit of the result, maximum of 5
characters.
format
→ leading digits: Maximum of 4 digits before the decimal
point.
→ trailing digits: Maximum of 6 digits after the decimal
point.
XDLIB07
→ exponential:
Enable or disable exponential format.
→ sign:
Enable or disable the sign before the
output result.
73
11 Operation
→
clear table
Deletes all table values, name and
settings.
→
edit table data
The table data are entered in data
pairs. A maximum of 100 data pairs
can be entered into one table. Table
data can be entered in random
sequence and will be automatically put
in order.
→
print table data
Printout of all data pairs.
→
data diagram
Graphically displays the table data.
Correct table data.
→
→
user table 1
→
user table 2
high / low limits
Incorrect table data due to e.g. typing
error
Limit monitoring at a measuring result.
The high/low limits are factory preset to
0.99825 g/cm3 and 0.99815 g/cm3, and
are used in the "Dens Check" method
in order to verify the validity of the
actual adjustment. The preset high/low
limits can be changed according to
your preference.
74
→
input selection
Selects the measuring result to be
supervised from the displayed listing.
→
edit limits
Defines the lower and upper limit.
XDLIB07
11 Operation
→
→
→
low limit:
Lower limit
→
high limit:
Upper limit
print limits
user formula parameter
Printout of the lower and upper limit.
Enters the parameter p for the user
formula
11.2.10 "custom function verification"
•
The DMA 4500/5000 can be used to calculate concentrations and other
density related results from manually entered density values using the builtin custom functions, tables or polynomials.
•
Only items selected in the display configuration are available. Tables,
formulas or functions not selected in "method settings", "display
configuration" cannot be used for custom function verification.
•
Select the table, polynomial formula or function from the list, and enter the
required input value.
•
Press "Calc" to perform the calculation.
•
If API functions or SG functions are selected, the measuring temperature is
also required.
•
If results cannot be calculated, "------------" appears on the display (out of
range).
11.2.11 "data memory"
→
XDLIB07
browser
Display of stored data.
• Browse through the stored
measurements using the "UP"
and "DOWN" keys. Only stored
data of the currently activated
method will be displayed.
• Select the data to be used for
statistical analysis using the
"Stat." soft key.
• Display the oldest stored value
using the "Oldest" soft key,
display the latest stored value
using the "Newest" soft key.
• Delete all stored data using the
"Clear" soft key. The information
"fetched by host computer: Y/N"
shows whether the displayed
stored data has been transmitted
to a PC.
75
11 Operation
Hint:
"Clear" deletes all data of all methods in the memory.
→
print
Printout of all stored data. Stop the
printout using the "Abort" soft key.
→
statistics
Calculation of mean value and
standard deviation of the data
selected in "browser", "Stat.". Print
the results using the "Print" soft key.
11.2.12 External Cell
The external cell DMA HP (or the former models DMA 512 or DMA 602) can be
connected to the DMA 4500/5000. For detailed information, refer to the
corresponding instruction manual of the external cell.
11.2.13 "testmode"
To check instrument functions, basic measuring data of the DMA 4500/5000 can
be displayed or printed. Toggle between the harmonic oscillation of 0th and 1st
order using the "Mode" soft key. Toggle between the phase-shifted and not phaseshifted oscillation using the "Phase" soft key.
Fig. 11 - 4
Screen: Testmode
11.2.14 "service testmode"
Basic measuring data of the DMA 4500/5000 can be displayed or printed for
service and maintenance purposes. The instrument switches automatically from
harmonic oscillation of 1st order to 0th order.
76
XDLIB07
11 Operation
11.3 "Sample#"
According to the settings in "measurement settings", "type of sample identif.", this
soft key has different functions.
•
-
For sample identification by "number" a sample number and text before
and after the number can be entered.
This sample number is available with or without sample changer/sample
handling unit.
Entry of the sample number can be done through the soft keys, a PC
keyboard or a bar code reader.
Hint:
A bar code reader replaces a keyboard. Therefore, the terminator of an entry
must be ENTER.
-
•
→
number
A 4-digit number can be entered.
→
pre-text
Text with a maximum 8 characters can be entered
before the sample number.
→
post-text
Text with a maximum of 8 characters can be
entered after he sample number.
-
The sample identification mode by "position" is only available if a sample
changer/handling unit is connected and activated.
For sample identification, the sample position is transferred from the
sample changer SP-1m or SP-3m to the DMA 4500/5000.
Using an SH-1 or SH-3 sample handling unit, the "position" number is
automatically increased by 1, when a new measurement is started by
pressing the "S-Start" soft key on the display.
→
position
→
pre-text
Text with a maximum of 8 characters can be
entered before the sample number.
→
post-text
Text with a maximum of 8 characters can be
entered after the sample number.
•
For sample identification by "text", a text of a maximum of 20 characters can
be entered.
→
XDLIB07
After pressing the "Start" or "S-Start" soft key the sample number will be
displayed.
Pressing the "Cont." soft key will automatically increase the number by 1.
text
Sample name.
77
11 Operation
•
For sample identification by "list by number", a list of up to 60 individually
selected numbers or texts can be entered in 5 sequential tables. When a
series of measurements is started by "Start" and continued with "Cont", the
numbers or texts are assigned to each sample in the given sequence. This
mode is available only without sample changer/sample handling unit.
→
actual text:
Current position in the list. When the measurement
is started by "Start", this number or text will be
assigned to the first sample.
→
text 1:
Key in number or text of sample.
→
text 2:
...
→
•
-
-
text 60:
For sample identification by "list by position", a list of up to 60
individually selected numbers or texts can be entered in 5 sequential
tables.
This menu is only available if a sample changer/handling unit is connected
and activated.
Each position of the SP-1m or SP-3m sample changer magazine is
assigned with a number or text from the list.
→
actual text:
Current position of the SP-1m or SP-3m sample
changer magazine or current sample number when
using a sample handling unit.
→
text 1:
Key in number or text of sample.
→
text 2:
...
→
text 60:
Hint:
The menu "measurement settings" offers the possibility to delete the sample
identification automatically after the completion of the measurement (see
chapter 11.2.5).
11.3.1
Automatic Set Temperature Change via "sample#"
For some purposes it is useful to have an automated change in the measuring
temperature. It is therefore possible to enter the appropriate temperature together
with the name of the sample to be measured. This is done using the "sample#" key.
78
XDLIB07
11 Operation
Automatic activation:
The appropriate measuring temperature for each sample can be pre-defined in
the sample identification using "%nn.nn" at any position, where "nn.nn" defines
the measuring temperature. The selected temperature will be activated
automatically when starting the next measurement.
If no measuring temperature has been entered, the DMA 4500/5000 will change
to the temperature which has been entered in the menu "temperature setting",
"set temperature".
Hint:
The temperature has to be entered in °C.
Measuring temperature: 30°C
Set temperature
Measuring temperature: 15°C
Fig. 11 - 5
XDLIB07
Screen: Sample number text
79
12 Audit Trail
12 Audit Trail
12.1 Introduction
The "audit trail" function electronically documents all operating steps carried out
by a user (which may lead to a change in the measuring value) and stores these
in a tamper-proof log file. "audit trail" therefore guarantees the traceability of all
procedures.
The tamper-proof documentation of operating procedures is especially important
for applications with safety requirements (pharmacy, food technology,
biotechnology).
12.2 Activating / Deactivating Audit Trail
12.2.1
Activating Audit Trail
To activate "audit trail", select "audit trail" in the menu "instrument settings" and
confirm with "↵".
Fig. 12 - 1
Menu: Instrument settings
Switch "audit trail" to "on" and press the "Esc" key. Answer the question "Save
changes?" with "Yes".
80
XDLIB07
12 Audit Trail
Fig. 12 - 2
Menu: Instrument settings/audit trail
The following window is shown. Log in with your user name and password:
Fig. 12 - 3
Audit trail: Login
Hints:
• The first time you log in, there are 3 options available:
a) Login as administrator with the user name "admin" and the password
"admin".
b) Login as main user with the user name "user" and the password "user".
c) Login as user with the user name "guest" and the password "guest".
• The different privileges associated with these options are described in
chapter 12.10.
After login, the measuring window appears. The "audit trail" function is now
activated.
Hint:
• After logging in as the administrator for the first time with user name
"admin" and password "admin", we recommend changing the password to
protect your data.
• If needed, the administrator can define other administrators with other
user names and passwords (see also chapter 12.9.3).
XDLIB07
81
12 Audit Trail
12.2.2
Deactivating Audit Trail
Press the "Menu" key to enter the main menu.
Fig. 12 - 4
Main menu
Select "audit trail" to enter the audit trail menu.
Fig. 12 - 5
Menu: Audit trail
Select "general settings" and set "audit trail" to "off". Save the changes.
82
XDLIB07
12 Audit Trail
12.3 Audit Trail Main Menu
To enter the audit trail main menu, press the "Menu" key and select "audit trail".
Fig. 12 - 6
Menu: Audit trail
Hint:
Depending on your privileges as a user (administrator, main user or user),
some menu items may not be available (see chapter 12.10).
12.4 Viewing the Audit Trail Log File
In the audit trail main menu, select "view audit trail".
All documented operating steps can be shown on the display. Press the "Right"
key to show the right side of the display and the "Left" key to show the left side of
the display.
Browse to the next page with "Pg Dn" and the previous page with "Pg Up".
Fig. 12 - 7
XDLIB07
Menu: Audit trail/view audit trail
83
12 Audit Trail
12.5 Printing the Audit Trail Log File
In the audit trail main menu, select "print audit trail".
All documented operating steps can be sent to a connected printer.
Each operating step is defined as one "section" and can be printed separately.
If several (or all) sections should be printed out, enter which sections to be printed
(section "from xx" "to xx").
12.6 Exporting the Audit Trail Log File
In the audit trail main menu, select "export audit trail" to send the documented
operating steps to a PC. You can export the audit trail log file at any time. You
must export the log file when the internal memory of the DMA is full (after 2000
entries or 100 KB).
Hints:
• Before the memory of the DMA 4500/5000 is full, the message "please
login as administrator and export audit trail" is given. Press "OK" and
export the file as described above.
• If this message is ignored several times, it is impossible to store further
data. The message "log entry cannot be written, disc is full" is given.
Press "OK" and export the log file as described above.
Hint:
Only administrators have the right to export the log file.
To export the log file, proceed as follows:
1. Connect the COM1 interface of the DMA 4500/5000 to the COM1 interface
of the PC using a suitable interface cable.
2. Start an appropriate terminal program (e.g. Hyperterminal).
3. Carry out the following interface settings:
•
•
•
•
•
84
Baudrate: 9600
Data bits: 8
Parity: none
Stop bits: 1
Handshake: none
XDLIB07
12 Audit Trail
Hint:
In the following example, Hyperterminal is used as terminal program.
4. In the audit trail main menu, select "export audit trail" and press "↵".
The following display appears:
Fig. 12 - 8
Menu: Audit trail/export audit trail
5. In Hyperterminal, select "Transfer", "Receive file" and enter the desired
directory.
6. For "Use receiving protocol:" select "Ymodem".
XDLIB07
85
12 Audit Trail
7. Click on "Receive". The log file is transferred to the PC.
8. After exporting the file, "Export finished" appears on the DMA display.
Confirm with "OK".
The exported log file (text file) can now be viewed on the PC.
Exported files are automatically incremented (e.g. the first file as "log-001",
the second file as "log-002", etc.).
12.6.1
Verifying the Exported Log File
To make the text file tamper-proof, a corresponding MD5 file is created together
with the exported file. The MD5 file contains a checksum which can be used to
check if the text file has been changed after export.
The MD5 checksum of the last exported file is stored in the current audit trail log
file. Therefore a complete tamper-proof documentation is guaranteed.
Verification with an MD5 checksum program:
An MD5 checksum program is used to compare the checksum of the text file with
the checksum of the MD5 file. Any MD5 checksum program can be used.
Hint:
The following example uses the program "MD5summer" (Version 1.1.0.24).
This program can be downloaded free of charge under www.md5summer.org/
download.html.
86
XDLIB07
12 Audit Trail
How to use "md5summer":
1. Start "md5summer.exe".
2. When asked "please select the root folder", select the directory where the log
files (the md5 file and txt file) are saved.
3. Click on the button "verify sums".
The following window is displayed:
XDLIB07
87
12 Audit Trail
4. Select the md5 file which should be checked an press "Open".
5. The check status and the result are displayed. A green light (OK/Done)
means the checksums are OK, a red light (Error) means there is an error.
The checked checksums appear under "CRC".
6. Quit the program by pressing "Close".
12.7 Clear Audit Trail
In the audit trail main menu, select "clear audit trail".
Fig. 12 - 9
Audit trail: clear audit trail
When answering the request "Clear all log entries in audit trail. Are you sure?"
with "Yes", the complete log file will be deleted.
88
XDLIB07
12 Audit Trail
Fig. 12 - 10
For the new log file, the entry "audit trail cleared" will automatically be created.
This entry contains the date, the time, and the person who deleted the last log file.
Hint:
The menu "clear audit trail" is only available for users with administrator
privileges.
12.8 General Settings
In the audit trail main menu, select "general settings":
-
Audit trail can be switched on/off.
The automatic logout time can be set between 0 and 1440 minutes.
If the DMA 4500/5000 is not in use within the set logout time, the login window
appears and the user has to log in again (see also chapter 12.2.1).
Hints:
• If the automatic logout time is set to 0 minutes, no automatic logout will be
carried out.
• During sample changer operation or during a measurement (if it has been
started with the "Start" or "Cont" key) no automatic logout will be carried
out.
12.9 User Management
Settings for different users can be defined in the user management menu. To
enter this menu, select "user management" in the audit trail main menu.
XDLIB07
89
12 Audit Trail
Fig. 12 - 11 Menu: Audit trail/user management
12.9.1
Adding a New User
Select "add new user" to add new users (as many as required).
user:
Enter the name of the user.
comment:
Enter any extra comments here.
password:
Enter the password for the user.
verify:
Enter the password again to confirm.
privileges:
The new user can be assigned certain privileges (user,
main user or administrator).
active (yes/no):
To allow the user to log in, "active" has to be set to
"yes".
pwd.change at
next login (no/yes):
The administrator can set this function for a "main user"
or "user". When the user logs in, he/she can change the
password. The following window is displayed:
enter new password for "user (or the name of the user)"
password:
verify:
The new password must be entered twice (for
confirmation).
Afterwards, in "audit trail -> change user settings" the
function "pwd.change at next login" is automatically
changed from "yes" to "no".
12.9.2
Removing a User
Select "remove user". A user with administrator privileges can remove all users
except himself/herself.
90
XDLIB07
12 Audit Trail
12.9.3
Changing User Settings
Hint:
Only administrators can change the user settings of other users (see chapter
12.10).
Select "change user settings".
Select the user and press "↵".
The same window appears as for "add new user". Change and save the settings.
12.9.4
Print All User Settings
Select "print all user settings".
The following settings are printed for all users:
user, comment, privileges, active (yes/no), pwd.change at next login (no/yes).
12.10 User Privileges
There are 3 types of users available. These have different privileges.
The table below contains an overview of the privileges of the 3 user types.
Administrator
Main user
User
View audit trail
yes
yes
no
Print audit trail
yes
no
no
Export audit trail
yes
no
no
Clear audit trail
yes
no
no
Switch audit trail on/off
yes
no
no
Change autom. logout time
yes
no
no
Add new users and change their
settings (except the user name)
yes
no
no
Change own user name
no
no
no
Change own comment
yes
yes
yes
Change own password
yes
yes
yes
Change own privileges
no
no
no
Set own user to active/inactive
no
no
no
yes
(for other users)
no
no
Change password at login
XDLIB07
91
12 Audit Trail
Remove users
Print user settings
Administrator
Main user
User
yes
(except himself/
herself)
no
no
yes
no
no
Hints:
• Users with administrator or main user privileges have access all menus
besides the menus listed above.
• Users with user privileges have only access to the menus "logoff user xxx"
and "audit trail", "user management" after pressing the "Menu" key.
92
XDLIB07
Appendix A: Operation at High Air Humidity and/or Low Measuring Temperatures
Appendix A: Operation at High Air
Humidity and/or Low
Measuring Temperatures
If the ambient air contains humidity and the measuring temperature is lower than
the ambient temperature, condensation may occur in the measuring cell and
measuring cell block. Condensation in the measuring cell causes adjustment and
measurement errors. Condensation in the measuring cell block damages the
electronics.
The higher the difference between the set measuring temperature and ambient
temperature and the higher the air humidity, the easier condensation occurs.
Preventing condensation in the measuring cell
To prevent condensation in the measuring cell, use a drying cartridge connected
to the "DRY AIR PUMP" nozzle at the rear of the DMA 4500/5000. The drying
cartridge provides dry air for a thoroughly drying of the measuring cell (see
chapter 10).
Drying
cartridge
DRY AIR
PUMP
DRY AIR
INTERNAL
Fig. A - 1
Connections for supplying dry air
Important:
Never connect hoses containing liquids or moist gases to the "DRY AIR
PUMP" nozzle as this may lead to condensations in the measuring cell and
subsequently to measurement and adjustment errors.
XDLIB07
93
Appendix A: Operation at High Air Humidity and/or Low Measuring Temperatures
For a measuring temperature of 20 °C, a drying cartridge must be used under the
following conditions:
Ambient temperature
Relative air humidity (RH)
20 °C
> 70%
25 °C
> 50%
30 °C
> 38%
The drying cartridge contains beaded ruby gel, a non-toxic drying agent. When
active, the color of the drying agent is red. Ruby gel which has absorbed liquid
turns orange.
Moist ruby gel can be regenerated:
Pour the ruby gel into a glass bowl and blow hot, dry air (max. 130°C) through it
for approx. 5 hours or place it in a laboratory oven for a few hours (or over night)
until it is red again.
Important:
Do not use higher drying temperatures than 130°C, otherwise the indicator
function of the ruby gel is spoiled.
Preventing condensation in the measuring cell block
To prevent condensation in the measuring cell block, connect a dry air supply to
the "DRY AIR INTERNAL" nozzle at the rear of the DMA 4500/5000 (see Fig. A 1).
Important:
Never connect hoses containing liquids or moist gases to the "DRY AIR
INTERNAL" nozzle as this may lead to damage of the electronics.
The dry air supply must be used additionally to the drying cartridge, if the
measuring temperature is more than 5°C lower than the ambient temperature.
Following specifications of the applied air are required:
-
94
0.2 to 0.3 bar (2.9 to 4.4 psi)
Class 5 from ISO 8573-1
Max. particle size: 40 µm
Max. pressure dew point: +7°C (44.6 °F)
Max. oil content: 25 mg/m3
XDLIB07
Appendix B: Technical Data
Appendix B: Technical Data
Measuring range:
0 to 3 g/cm3
Repeatability, s. d.:
Density:
DMA 4500:
DMA 5000:
1 x 10⁻⁵ g/cm3
1 x 10⁻⁶ g/cm3
Temperature:
DMA 4500:
DMA 5000:
0.01°C
0.001°C
Measuring temperature:
0°C to +90°C (32 to 194°F)
Pressure range:
0 to 10 bar (0 to 150 psi)
Environmental conditions
(EN 61010):
Indoor use only
Ambient temperature:
+15 to +35°C
(+59 to +95°F)
Air humidity:
10 to 90% relative humidity,
non-condensing
Pollution degree:
2
Over voltage category:
II
Amount of sample
measuring cell:
in
the
approx. 1 ml
Typical measuring time per
sample:
DMA 4500:
DMA 5000:
XDLIB07
approx. 30 seconds
approx. 40 seconds
Sample throughput:
10 to 30/hour
Dimensions (L x W x H):
440 x 315 x 220 mm
Weight:
approx. 21 kg
Power:
50 VA;
mains voltage according to technical data
shield on the rear of the DMA 4500/5000
Fuses:
glass tube fuses 5 x 20 mm; DIN 41662;
230 V, T 800 mA
95
Appendix B: Technical Data
Important:
All interfaces are designed to comply with SELV (Separated Extra-Low
Voltage) requirements according to EN 60950. Interfaces, which do not
comply to SELV requirements must not be connected.
Computer interface (COM1):
RS 232 C; 1200 to 9600 Baud; 1 or 2 stop
bits; 7 or 8 data bits; no, odd or even parity;
handshake
Factory default settings:
line delimiter:
data delimiter:
handshake:
data bits:
stop bits:
parity:
baudrate:
<CR> <LF>
, (comma)
software (XON/XOFF)
8
1
no
9600
DTR TXD
GND
RXD
CTS
DSR
RTS
RXD .........
TXD .........
DTR .........
GND .........
DSR .........
RTS .........
CTS .........
96
receive data
transmit data
data terminal ready
signal ground (connected to
earth in the DMA 4500/
5000)
data set ready
request to send
clear to send
XDLIB07
Appendix B: Technical Data
Printer interface (COM2):
RS 232 C; 1200 to 9600 Baud; 1 or 2 stop
bits; 7 or 8 data bits; no, odd or even parity;
handshake
Factory default settings:
line delimiter:
handshake:
data bits:
stop bits:
parity:
baudrate:
<CR>
hardware (RTS/CTS)
7
1
even
9600
TXD
GND
RXD
CTS RTS
RXD .........
TXD .........
GND .........
RTS .........
CTS .........
Keyboard interface:
XDLIB07
receive data
transmit data
signal ground (connected to
earth in the DMA 4500/
5000)
request to send
clear to send
PC/AT interface
97
Appendix C: Commands for Communication between PC and DMA 4500/5000
Appendix C: Commands for
Communication between PC
and DMA 4500/5000
•
Via the interface COM1 data stored in the memory can be transferred to a
PC. In addition a limited remote control of the DMA 4500/5000 is possible
(e.g. changing temperature or changing measurement settings).
•
Connect COM1 on the DMA 4500/5000 and the RS 232 C interface at the
PC, using a proper interface cable1 (see also appendix B).
•
Synchronize the interface settings of DMA 4500/5000 and PC (see chapter
11.2.6).
•
The communication can be tested using a simple interface program, e.g.
Windows Terminal, Procomm or Hyper Terminal.
•
When the login window of "audit trail" is displayed, the instrument cannot be
controlled by the PC.
•
Commands consisting of several words can be entered with or without
blanks (e.g. getdata ↵ or get data ↵).
•
Commands refer to the currently activated method. In addition all "get..."
commands can be extended by a method number.
Example: get data head 3 ↵ ... data head of method 3 will be transmitted,
independent of the activated method.
•
Each set of measuring results transferred by "get data ↵" will be marked (see
chapter 11.2.11) in the memory by "fetched by host computer: y".
•
The DMA can also be remote-started with the built-in and activated sample
handling units SH-1 or SH-3. If a sample changer SP-1m or SP-3m is
connected and activated, the DMA cannot be remote-started.
•
For data communication software please contact your local distributor or
Anton Paar GmbH.
1. Interface cable DMA 4500/5000 - PC
98
XDLIB07
Appendix C: Commands for Communication between PC and DMA 4500/5000
Interface cable
PC-Serial Port
(9-pin) RX232
2...RXD
4...DTR
6...DSR
8...CTS
3...TXD
5...GND
7...RTS
RS232
2...RXD
3...TXD
5...GND
PC command
DMA 4500/5000 response
Comments
help ↵
commands:
GetDataHead [0...9]
GetDataUnit [0...9]
GetData [0...9]
ResetData [0...9]
ClearData
GetMethodName [0...9]
SelectMethod 0...9
GetRawData
GetId
Start
Finished
Continue
Abort
If the command "help" is sent from
the PC, the DMA 4500/5000
responds with a list of available
commands.
get data head ↵
data head: date,time,sample number,
ready
This is the response, if no items are
selected in method settings",
"memory configuration".
data head: date,time,sample number,
ready,actual cell temperature,density,
SG,condition
Response, if items are selected,
e.g. factory default for method 0.
get data unit ↵
data unit:,,,,°C,g/cm3,,
The unit of the selected items is
transferred, separated by the
selected delimiter.
get data ↵
no new data available
No new data available.
data:Mo 21.Feb.2005,13:39:12,0001,
1,20.001,0.00117,0.00117,valid
Transfer of the
measuring result.
XDLIB07
first
available
99
Appendix C: Commands for Communication between PC and DMA 4500/5000
PC command
DMA 4500/5000 response
Comments
get raw data ↵
actual Q, actual temperature, set
temperature, sample identification
These raw data can be transferred
at
any
time,
even
during
measurement.
reset data ↵
reset data successful
Resets read data to "not fetched"
status, e.g. for second data transfer
(see chapter 11.2.11).
clear data ↵
clear data successful
Deletes the complete data memory
(see chapter 11.2.11).
get method name ↵
method name: Density, 0
Name and number of the activated
method.
select method ↵
number out of range
No number has been entered.
select method 3 ↵
selected method 3 OIML w/w
Method 3 is activated.
select method 3 ↵
measurement is started
This is the response, if a
measurement has been started.
get id ↵
serial number:xxxxxx
DMAxxxx v.5.012.c
Readout of serial number, DMA
version (4500 or 5000) and
software version.
start ↵
measurement started
Remote start of measurement.
measurement already started
A measurement has already been
started.
measurement started
Remote start of a measurement
with a measuring temperature input
xx.xx (e.g. 20.50). The entered
measuring temperature [°C] is valid
for one single measurement.
measurement already started
A measurement has already been
started.
measurement not started
A measurement has not been
started.
measurement not finished
A measurement is already under
progress.
start xx.xx ↵
finished ↵
measurement finished
100
XDLIB07
Appendix C: Commands for Communication between PC and DMA 4500/5000
PC command
DMA 4500/5000 response
Comments
continue xx.xx ↵
measurement not started
No measurement has been started.
measurement not finished
Previous measurement has not
been finished.
measurement continued
Remote start of a further
measurement with a measuring
temperature input xx.xx (e.g.
20.50). The entered measuring
temperature [°C] is valid for one
single measurement.
measurement not started
No measurement has been started.
measurement not finished
Previous measurement has not
been finished.
measurement continued
The measurement is continued
measurement not started
No measurement has been started.
measurement aborted
This
aborts
measurement.
continue ↵
abort ↵
XDLIB07
the
started
101
Appendix D: Density Tables
Appendix D: Density Tables
Density of Dry Air
At the temperature t in [°C] and the pressure p in [mbar] or [hPa] the density ρ of
air in [g/cm3] is calculated using the following formula2:
0.0012930
p
ρ = --------------------------------------- × --------------------1 + 0.00367 × t 1013.25
The numbers are valid for a CO2 content in air of 0.03% by volume; the numbers
change by ±1/19000 for every change in CO2 volume content of ±0.0001.
2. Literature: Kohlrausch. Praktische Physik, Bd. 3, Tafeln, 22. Auflage (1968), pg. 39, B.G
Teubner Stuttgart
102
XDLIB07
Appendix D: Density Tables
Density of Dry Air (-10°C to +90°C)3
Composition of dry air in [v/v]: 78.110% N2; 20.938% O2; 0.916% Ar;
0.033% CO2; 0.002% Ne
Meas.
temp.
in °C
900
920
940
960
980
1000
1013.25
1050
-10
0.001192
0.001219
0.001245
0.001272
0.001298
0.001325
0.001342
0.001391
-5
0.001170
0.001196
0.001222
0.001248
0.001274
0.001300
0.001317
0.001365
0
0.001148
0.001174
0.001200
0.001225
0.001251
0.001276
0.001293
0.001340
5
0.001128
0.001153
0.001178
0.001203
0.001228
0.001253
0.001270
0.001316
10
0.001108
0.001132
0.001157
0.001182
0.001206
0.001231
0.001247
0.001293
15
0.001088
0.001113
0.001137
0.001161
0.001185
0.001210
0.001226
0.001270
20
0.001070
0.001094
0.001117
0.001141
0.001165
0.001189
0.001205
0.001248
25
0.001052
0.001075
0.001099
0.001122
0.001145
0.001169
0.001184
0.001227
30
0.001035
0.001058
0.001081
0.001104
0.001127
0.001150
0.001165
0.001207
35
0.001018
0.001040
0.001063
0.001086
0.001108
0.001131
0.001146
0.001187
40
0.001001
0.001024
0.001046
0.001068
0.001090
0.001113
0.001127
0.001168
45
0.000986
0.001008
0.001029
0.001051
0.001073
0.001095
0.001110
0.001150
50
0.000970
0.000992
0.001014
0.001035
0.001057
0.001078
0.001093
0.001132
55
0.000956
0.000977
0.000998
0.001019
0.001041
0.001062
0.001076
0.001115
60
0.000941
0.000962
0.000983
0.001004
0.001025
0.001046
0.001060
0.001098
65
0.000927
0.000948
0.000968
0.000989
0.001010
0.001030
0.001044
0.001082
70
0.000914
0.000934
0.000954
0.000975
0.000995
0.001015
0.001029
0.001066
75
0.000901
0.000921
0.000941
0.000961
0.000981
0.001001
0.001014
0.001051
80
0.000888
0.000908
0.000927
0.000947
0.000967
0.000986
0.000999
0.001036
85
0.000875
0.000895
0.000914
0.000934
0.000953
0.000973
0.000986
0.001021
90
0.000863
0.000882
0.000902
0.000921
0.000940
0.000959
0.000972
0.001007
Density in g/cm3 at the pressure in mbar (=hPa)
3. Literature: DIN 51 757 (04.1994): Testing of mineral oils and related materials; determination
of density
XDLIB07
103
Appendix D: Density Tables
Density of Water (0°C to 100°C)4
t °C
0.0
0.1
0.2
0.3
0.4
0.5
0.6
0.7
0.8
0.9
0
.999840
.999846
.999853
.999859
.999865
.999871
.999877
.999883
.999888
.999893
1
.999899
.999903
.999908
.999913
.999917
.999921
.999925
.999929
.999933
.999937
2
.999940
.999943
.999946
.999949
.999952
.999954
.999956
.999959
.999961
.999962
3
.999964
.999966
.999967
.999968
.999969
.999970
.999971
.999971
.999972
.999972
4
.999972
.999972
.999972
.999971
.999971
.999970
.999969
.999968
.999967
.999965
5
.999964
.999962
.999960
.999958
.999956
.999954
.999951
.999949
.999946
.999943
6
.999940
.999937
.999934
.999930
.999926
.999923
.999919
.999915
.999910
.999906
7
.999901
.999897
.999892
.999887
.999882
.999877
.999871
.999866
.999860
.999854
8
.999848
.999842
.999836
.999829
.999823
.999816
.999809
.999802
.999795
.999788
9
.999781
.999773
.999766
.999758
.999750
.999742
.999734
.999725
.999717
.999708
10
.999699
.999691
.999682
.999672
.999663
.999654
.999644
.999635
.999625
.999615
11
.999605
.999595
.999584
.999574
.999563
.999553
.999542
.999531
.999520
.999508
12
.999497
.999486
.999474
.999462
.999450
.999438
.999426
.999414
.999402
.999389
13
.999377
.999364
.999351
.999338
.999325
.999312
.999298
.999285
.999271
.999258
14
.999244
.999230
.999216
.999202
.999187
.999173
.999158
.999144
.999129
.999114
15
.999099
.999084
.999069
.999053
.999038
.999022
.999006
.998991
.998975
.998959
16
.998942
.998926
.998910
.998893
.998876
.998860
.998843
.998826
.998809
.998792
17
.998774
.998757
.998739
.998722
.998704
.998686
.998668
.998650
.998632
.998613
18
.998595
.998576
.998558
.998539
.998520
.998501
.998482
.998463
.998443
.998424
19
.998404
.998385
.998365
.998345
.998325
.998305
.998285
.998265
.998244
.998224
20
.998203
.998182
.998162
.998141
.998120
.998099
.998077
.998056
.998035
.998013
21
.997991
.997970
.997948
.997926
.997904
.997882
.997859
.997837
.997815
.997792
22
.997769
.997747
.997724
.997701
.997678
.997654
.997631
.997608
.997584
.997561
23
.997537
.997513
.997490
.997466
.997442
.997417
.997393
.997369
.997344
.997320
24
.997295
.997270
.997246
.997221
.997196
.997170
.997145
.997120
.997094
.997069
25
.997043
.997018
.996992
.996966
.996940
.996914
.996888
.996861
.996835
.996809
26
.996782
.996755
.996729
.996702
.996675
.996648
.996621
.996594
.996566
.996539
27
.996511
.996484
.996456
.996428
.996400
.996373
.996344
.996316
.996288
.996260
28
.996232
.996203
.996174
.996146
.996117
.996088
.996059
.996030
.996001
.995972
29
.995943
.995913
.995884
.995854
.995825
.995795
.995765
.995735
.995705
.995675
30
.995645
.995615
.995584
.995554
.995523
.995493
.995462
.995431
.995401
.995370
31
.995339
.995307
.995276
.995245
.995214
.995182
.995151
.995119
.995087
.995056
32
.995024
.994992
.994960
.994928
.994895
.994863
.994831
.994798
.994766
.994733
33
.994700
.994667
.994635
.994602
.994569
.994535
.994502
.994469
.994436
.994402
34
.994369
.994335
.994301
.994268
.994234
.994200
.994166
.994132
.994097
.994063
35
.994029
.993994
.993960
.993925
.993891
.993856
.993821
.993786
.993751
.993716
4. Literature: Spieweck, F. & Bettin, H.: Review: Solid and liquid density determination.
Technisches Messen 59 (1992), pp. 285-292.
104
XDLIB07
Appendix D: Density Tables
t °C
0.0
0.1
0.2
0.3
0.4
0.5
0.6
0.7
0.8
0.9
36
.993681
.993646
.993610
.993575
.993540
.993504
.993468
.993433
.993397
.993361
37
.993325
.993289
.993253
.993217
.993181
.993144
.993108
.993072
.993035
.992998
38
.992962
.992925
.992888
.992851
.992814
.992777
.992740
.992703
.992665
.992628
39
.992591
.992553
.992515
.992478
.992440
.992402
.992364
.992326
.992288
.992250
40
.992212
.992174
.992135
.992097
.992058
.992020
.991981
.991942
.991904
.991865
41
.991826
.991787
.991748
.991708
.991669
.991630
.991590
.991551
.991511
.991472
42
.991432
.991392
.991353
.991313
.991273
.991233
.991193
.991152
.991112
.991072
43
.991031
.990991
.990950
.990910
.990869
.990828
.990787
.990747
.990706
.990665
44
.990623
.990582
.990541
.990500
.990458
.990417
.990375
.990334
.990292
.990250
45
.990208
.990167
.990125
.990083
.990040
.989998
.989956
.989914
.989871
.989829
46
.989786
.989744
.989701
.989658
.989616
.989573
.989530
.989487
.989444
.989401
47
.989358
.989314
.989271
.989228
.989184
.989141
.989097
.989053
.989010
.988966
48
.988922
.988878
.988834
.988790
.988746
.988702
.988657
.988613
.988569
.988524
49
.988480
.988435
.988390
.988346
.988301
.988256
.988211
.988166
.988121
.988076
50
.988030
.987985
.987940
.987894
.987849
.987804
.987758
.987712
.987667
.987621
51
.987575
.987529
.987483
.987437
.987391
.987345
.987298
.987252
.987206
.987159
52
.987113
.987066
.987020
.986973
.986926
.986879
.986833
.986786
.986739
.986692
53
.986644
.986597
.986550
.986503
.986455
.986408
.986360
.986313
.986265
.986217
54
.986170
.986122
.986074
.986026
.985978
.985930
.985882
.985833
.985785
.985737
55
.985688
.985640
.985591
.985543
.985494
.985446
.985397
.985348
.985299
.985250
56
.985201
.985152
.985103
.985054
.985004
.984955
.984906
.984856
.984807
.984757
57
.984708
.984658
.984608
.984558
.984509
.984459
.984409
.984359
.984308
.984258
58
.984208
.984158
.984107
.984057
.984007
.983956
.983905
.983855
.983804
.983753
59
.983702
.983652
.983601
.983550
.983499
.983448
.983396
.983345
.983294
.983242
60
.983191
.983140
.983088
.983036
.982985
.982933
.982881
.982829
.982778
.982726
61
.982674
.982621
.982569
.982517
.982465
.982413
.982360
.982308
.982255
.982203
62
.982150
.982098
.982045
.981992
.981939
.981886
.981834
.981780
.981727
.981674
63
.981621
.981568
.981515
.981461
.981408
.981354
.981301
.981247
.981194
.981140
64
.981086
.981032
.980979
.980925
.980871
.980817
.980763
.980708
.980654
.980600
65
.980546
.980491
.980437
.980382
.980328
.980273
.980219
.980164
.980109
.980054
66
.980000
.979945
.979890
.979835
.979780
.979724
.979669
.979614
.979559
.979503
67
.979448
.979392
.979337
.979281
.979226
.979170
.979114
.979058
.979002
.978946
68
.978890
.978834
.978778
.978722
.978666
.978610
.978553
.978497
.978441
.978384
69
.978328
.978271
.978214
.978158
.978101
.978044
.977987
.977930
.977874
.977816
70
.977759
.977702
.977645
.977588
.977531
.977473
.977416
.977358
.977301
.977243
71
.977186
.977128
.977070
.977012
.976955
.976897
.976839
.976781
.976723
.976665
72
.976607
.976548
.976490
.976432
.976374
.976315
.976257
.976198
.976140
.976081
73
.976022
.975963
.975905
.975846
.975787
.975728
.975669
.975610
.975551
.975492
74
.975432
.975373
.975314
.975255
.975195
.975136
.975076
.975017
.974957
.974897
75
974838
.974778
.974718
.974658
.974598
.974538
.974478
.974418
.974358
.974298
76
.974237
.974177
.974117
.974056
.973996
.973935
.973875
.973814
.973753
.973693
XDLIB07
105
Appendix D: Density Tables
t °C
0.0
0.1
0.2
0.3
0.4
0.5
0.6
0.7
0.8
0.9
77
.973632
.973571
.973510
.973449
.973388
.973327
.973266
.973205
.973144
.973083
78
.973021
.972960
.972899
.972837
.972776
.972714
.972653
.972591
.972529
.972468
79
.972406
.972344
.972282
.972220
.972158
.972096
.972034
.971972
.971910
.971847
80
.971785
.971723
.971660
.971598
.971535
.971473
.971410
.971348
.971285
.971222
81
.971159
.971096
.971034
.970971
.970908
.970844
.970781
.970718
.970655
.970592
82
.970528
.970465
.970402
.970338
.970275
.970211
.970148
.970084
.970020
.969956
83
.969893
.969829
.969765
.969701
.969637
.969573
.969509
.969445
.969380
.969316
84
.969252
.969188
.969123
.969059
.968994
.968930
.968865
.968800
.968736
.968671
85
.968606
.968541
.968477
.968412
.968347
.968282
.968216
.968151
.968086
.968021
86
.967956
.967890
.967825
.967760
.967694
.967629
.967563
.967497
.967432
.967366
87
.967300
.967234
.967169
.967103
.967037
.966971
.966905
.966838
.966772
.966706
88
.966640
.966574
.966507
.966441
.966374
.966308
.966241
.966175
.966108
.966042
89
.965975
.965908
.965841
.965774
.965707
.965640
.965573
.965506
.965439
.965372
90
.965305
.965238
.965170
.965103
.965036
.964968
.964901
.964833
.964765
.964698
91
.964630
.964562
.964495
.964427
.964359
.964291
.964223
.964155
.964087
.964019
92
.963951
.963882
.963814
.963746
.963677
.963609
.963541
.963472
.963404
.963335
93
.963266
.963198
.963129
.963060
.962991
.962922
.962854
.962785
.962716
.962646
94
.962577
.962508
.962439
.962370
.962300
.962231
.962162
.962092
.962023
.961953
95
.961884
.961814
.961744
.961675
.961605
.961535
.961465
.961395
.961325
.961255
96
.961185
.961115
.961045
.960975
.960905
.960834
.960764
.960694
.960623
.960553
97
.960482
.960412
.960341
.960271
.960200
.960129
.960058
.959988
.959917
.959846
98
.959775
.959704
.959633
.959562
.959490
.959419
.959348
.959277
.959205
.959134
99
.959062
.958991
.958920
.958848
.958776
.958705
.958633
.958561
.958489
.958418
100
.958346
.958273
.958201
.958129
.958057
.957985
.957913
.957840
.957768
.957696
106
XDLIB07
Appendix E: Possible Adjustment Errors, Adjustment Report
Appendix E: Possible Adjustment Errors,
Adjustment Report
XDLIB07
Cause
Correction
Direct sunlight on the DMA 4500/
5000.
Make sure that the DMA 4500/5000
is not exposed to direct sunlight.
The measuring cell is not clean.
Make sure that the measuring cell is
perfectly cleaned before adjustment.
The measuring cell was not perfectly
dry before air adjustment. There are
drops
of
liquid
or
humidity
condensations in the measuring cell
(check through the window).
Clean the measuring cell again
according to chapter 10, and dry it
carefully.
If condensation is still visible through
the visual control of the measuring
cell, then the atmospheric humidity is
too high. Connect a drying cartridge
(desiccator) to the "DRY AIR PUMP"
nozzle (see appendix A).
There are gas
measuring cell.
the
Slowly inject the adjustment liquid
into the measuring cell.
The temperature of the adjustment
liquid must be equal to or slightly
above the measuring temperature.
The adjustment is not finished after
10 minutes.
The measuring cell is not sufficiently
dry.
There are gas bubbles in the
measuring cell.
bubbles
in
107
Appendix E: Possible Adjustment Errors, Adjustment Report
Examples and explanations of KB-value deviations:
Built-up deposits inside the U-tube
oscillator are indicated by the steeply
increasing deviation KB.
Abrasion of glass from the U-tube
oscillator is indicated by the steeply
decreasing deviation KB.
•
Slight variations of the KB-value are
normal. However, after transport a
higher offset of the first KB-value with
reference to the original KB-value
(factory adjustment) is sometimes
observed.
•
108
Randomly fluctuating KB-values
are caused by:
- insufficient drying prior to air
adjustment
- the presence of gas bubbles or
impurities in the adjustment
water
Fluctuations within 5 x 10⁻⁵ g/cm3
are most probably caused by
variations in the air density due to
varying weather conditions. Such
fluctuations can be avoided by
entering the current barometric
pressure before air adjustment.
XDLIB07
XDLIB07
Date
Temperature
Adjustment Report
Air
Q
Water
Q
Apparatus Constants
KA
KB
Signature
Serial number of the DMA 4500/5000:...................
Appendix E: Possible Adjustment Errors, Adjustment Report
109
Appendix F: Software Versions
Appendix F: Software Versions
Software version
Date of
release
Document
number
Comments
V 2.004.b
30.03.1998
XDLIB07A
Software failure "not corrected density full range
adjustment" eliminated.
V 2.004.g
24.09.1998
XDLIB07B
XDLIB07C
•
•
API calculation at low temperatures
corrected.
Printout problems with polynomials
corrected.
V 2.004.h
25.02.1999
XDLIB07C
SP-3m stops corrected.
V 3.003.b
17.03.1999
XDLIB07D
SH-3 support, API 20°C, API-switch, °Baumé,
graph for tables and polynomials.
V 3.003.c (old DCC)
V 4.003.c (new DCC)
01.04.1999
XDLIB07D
•
•
V 3.004.a (old DCC)
V 4.004.a (new DCC)
10.06.1999
XDLIB07D
XDLIB07E
°Brix, ° Plato and °Baumé display format
changed (only DMA 5000).
V 4.503.d
29.02.2000
XDLIB07F
SH-1 support, density check, user formula,
support for external cells, German menu
navigation available, extended equilibrium
criterions (only for DMA 5000).
V 4.510.d
19.02.2001
XDLIB07G
•
•
•
•
•
V 4.600.b
04.01.2002
XDLIB07H
•
•
•
•
V 4.600.e
110
21.01.2003
XDLIB07I
•
Storing the display contrast corrected.
Invalid CRC calib.dat corrected.
Remote Start of DMA 4500/5000 with SH-1/
SH-3 possible.
Readout of serial number, instrument
version and software version by PC.
API-limits for product group B: 0.5 to 1.2 g/
cm3
For each position of the sample changer a
certain measuring temperature can be
defined.
Trailing digits for Brix and Plato have been
increased to 3 (only DMA 5000).
10# 2-dimensional polynomial functions
(new user function).
User formula with 2 input values.
Max. automatic pump switch off time: 3600
seconds.
Temperature scan: will be continued after
storing 100 data (only DMA 5000).
Viscosity adjustment improved.
XDLIB07
Appendix F: Software Versions
Software version
V 5.003.b
Date of
release
03.09.2003
Document
number
XDLIB07J
Comments
•
•
"density" replaces the previous densities
"density (viscosity <700 mPa.s)" and
"density (viscosity >500 mPa.s)". Fully
automatic viscosity correction for the entire
temperature range.
Audit trail function: Electronic logging of
each operation step that could lead to a
change of the measuring result and tamperproof saving of the log file.
Remote start with measuring temperature
input possible ("start xx.xx", "continue
xx.xx").
New remote command "clear data".
•
•
V5.003.c
08.03.2004
XDLIB07K
•
Communication with SP-3m improved.
V5.006.b
02.08.2004
XDLIB07L
•
Extended "Audit trail" function: "clear audit
trail".
Optimized communication with the sample
changer SP-3m.
•
V5.006.c
01.09.2004
XDLIB07M
•
Boot sequence improved.
V5.009.a
21.12.2004
XDLIB07N
•
•
Supports the DMA HP density measuring
cell.
Extended measurement settings: Automatic
deletion of the sample identification after the
completion of the measurement possible.
V5.009.b
17.02.2005
XDLIB07O
XDLIB07P
•
Improved fan control of the DMA HP.
V5.012.c
05.04.2005
XDLIB07Q
•
DMA HP: improved temperature control for
ultimate safety.
XDLIB07
111
Appendix G: Wetted Parts
Appendix G: Wetted Parts
The following materials are in contact with the samples to be measured and with
the cleaning agents:
DMA 4500/5000:
112
Material
Part
Borosilicate glass
Measuring cell
PTFE
Filling adapter
XDLIB07
Menu
XDLIB07
measurement settings
temperature setting
adjust
logoff user "admin" 1)
audit trail 1)
view adjustment data
temp. scan 2)
temp. step
start temp.
stop temp.
meas. finished by:
timeout
sample filling mode 3)
pump terminates meas.
pump switch off mode
pump switch off time
type of sample identif.
reset sample identif.
API input
density check
print adjustment data
print adjustment history
activate factory adjustment
density (temperature range)
high density, viscosity 2)
temperature (both sensors)
temperature
media, density, max.deviation, temperature,
check interval, check density
measuring sensor: R0, a, b
control sensor: R0, a, b
KA, TKA1, TKA2, ..., DO H2O, air pressure
1) Menu is only available if audit trail is activated
2) Only valid for DMA 5000
3) Only if a sampe changer SP-1m/SP-3m or
a sample handling unit SH-1/SH-3 is connected/installed
on, off
print last density check
print density check history
predetermination, equilibrium (fast/medium/slow only for DMA 5000)
max. measuring time
manual, sample changer
ves, no
manual, time
30, ..., 3600 sec
number, position, text, lst by nr., lst by pos.
yes, no
density (not viscosity correct.), density, special adjustment 0, ...,
special adjustment 4, external density
density
deviation KB
temperature, density
temperature, density
temperature
density
check density
density check settings
density (air, water)
audit trail: on/off
automatic logoff: 1 ... 1440 min
add new user
remove user
change user settings
print all user settings
set temperature °C, °F
adjust
user management
view audit trail
print audit trail
export audit trail
clear audit trail
general settings
Appendix H: Menu Tree
Appendix H: Menu Tree
113
114
method settings
instrument settings
display configuration
language
external keyboard type
change password 4)
audit trail 4)
output selection
date & time
computer interface
configuration
display illumination
save display contrast
print instrument information
printer interface configuration
external cell
reset output selection
edit configuration
reset configuration
edit method name
ethanol tables
extract/sugar tables
acid/base tables
API functions
date
time
english, Deutsch
type
new password, verify
on, off
system + temperature
density
user functions
baudrate
setting
format
data bits
stop bits
parity
line delimiter
handshake
data bits
stop bits
parity
baudrate
line delimiter
data delimiter
handshake
switch off time
4) Only available if audit trail is deactivated
headline, date & time, ..., empty row
Q, density, ..., SG
special adjustment 0 ... 4
polynomial 0 (2D) ... 9 (2D)
user formula
user formula parameter
polynomial 0 ... 4
user table 0 ... 2
high/low limits
OIML (%v/v), OIML (%w/w), ..., HM C&E (%w/w)
concentration (°Brix), concentration (°Plato), Baumé (°Baumé)
hydrochloric acid (HCL) (%w/w), ..., sulphuric acid (H2SO4) (%w/w)
dens. API 15°C-C (crude oil), ..., SG API 20°C -F (fuel, heating oil)
actual period external, ..., external cell condition
us, german
<CR><LF>, <CR>, <LF>
hardware (RTS/CTS), software (XON/XOFF), none
7, 8
1, 2
no, odd, even
1200, 2400, 4800, 9600
<CR><LF>, <CR>, <LF>
, (comma) ; (semicolon)
hardware (RTS/CTS), software (XON/XOFF), none
7, 8
1, 2
no, odd, even
1200, 2400, 4800, 9600
year, month, day, hour, minute, second
format, weekday, name of month
format
Appendix H: Menu Tree
XDLIB07
XDLIB07
special adjustment 0, ..., 4
polynomials 0 (2D), ...,
polynomials 9 (2D)
first input selection
second input selection
output configuration
edit user formula
print user formula
polynomial 0, ..., 4
special adjustment
polynomials (2D)
user formula
user functions
5) Only if a sample changer/sample handling unit is connected
For a detailed SH-1/SH-3 menu, see the SH-1/SH-3 instruction manual
6) Only if a sample changer SP-1m/SP-3m is connected
7) Only if a sample changer SP-3m is connected
polynomials
single, double
mode
interval
sample changer
configuration 5)
edit configuration
reset configuration
memory mode
memory configuration
mode
interval
edit method name
select method
copy method
reset method
clear method
sample changer parameter 6)
measurement 7)
edit configuration
reset configuration
printer mode
printer configuration
input selection
output configuration
clear polynomial
edit coefficients
print coefficients
data diagram
output configuration
adjust
view special adjustment data
print special adjustment data
first input selection
second input selection
output configuration
clear polynomial
edit coefficients
print coefficients
actual Q, ..., SG
actual Q, ..., SG
terms, format
first value, last value
act. Q, ..., SG
terms, format
act. Q, ..., SG
act. Q, ..., SG
terms, format
coef A, coef B, temp.
terms, format
manual, interval, measurement valid,
meas. valid (after start)
manual, interval, measurement valid,
meas. valid (after start)
Appendix H: Menu Tree
115
116
browser
print
statistics
8) Only if an external density measuring cell is connected
For a detailed menu, see the corresponding instruction manual
external cell 8)
testmode
service testmode
custom function verification
data memory
input selection
edit limits
print limits
high/low limits
user formula parameter
user table 0, ..., 2
user tables
input selection
output configuration
clear table
print table data
data diagram
actual Q, ..., SG
low limit, high limit
act. Q, ..., SG
terms, format
Appendix H: Menu Tree
XDLIB07
Index
Index
Symbols
D
, (comma 55
; (semicolon) 55
<CR><LF> 55
d 59
d (not viscosity corrected) 59
Damping 7
Data delimiter 55, 96
Data diagram 73, 74
Date and time 18, 21, 55, 57
Density 18, 28, 36, 37, 58, 59, 64
Density (not viscosity correct.) 52, 59
Density check 15, 16, 28, 50
Density coefficients 48, 58
Density of dry air 102, 103
Density of water 16, 104
Desiccator 20, 42, 107
Display 17, 19
Display configuration 23, 66
Display contrast 17, 21, 54
Display illumination 54
A
Acid/base tables 63
Adjustment 16, 28, 30, 47, 69, 108
Adjustment coefficients 59
Adjustment data 31, 33, 35, 47, 49, 69
Adjustment error 107
Adjustment history 34, 68
Adjustment report 31, 107
Air adjustment 31, 32, 33
Air bubbles 16, 35
Air humidity 15, 42, 95
Air pressure 31, 33, 48
Air pump 14, 17, 27, 42, 51
Alcohol concentration 61, 62
AOAC 38, 62
API density 38
API functions 52, 64, 75
API gravity 65
API number 38
Apparent density 37
Apparent specific gravity 59
Audit trail 45, 56, 80, 81, 82, 83, 85, 89
B
Bar code reader 20, 45, 52
Baumé 63
Brix 37, 63
E
Equilibrium 26
Ethanol concentration 38
Ethanol tables 61
External cell 52, 57, 76
Extract/sugar tables 63
F
Factory default settings 67, 96, 97
Filling 39, 51
Fuel 38, 65
Full range adjustment 32
G
C
Calibration 28, 36
Caustic soda 38
Cell light 15
Clean and dry 30, 32, 36, 38, 41
Commands 98
Computer interface 20, 96
Computer interface configuration 55
Concentration 34, 37, 63, 64, 68, 75
Condensation 93
Control measurement 15
Crude oil 38, 64
Gas bubbles 39, 40, 42, 53, 107, 108
H
H2SO4 64
H3PO4 63
HCl 63
High/low limits 68, 74
HM C&E 62
HNO3 64
Hydrochloric acid 63
I
Interface cable 15, 98
XDLIB07
117
Index
IUPAC 62
K
KAEMPF 62
KB-value 49, 108
Keyboard 45, 56
Keyboard interface 97
Keypad 44
L
Language 21, 56
Line delimiter 54, 55, 96, 97
Log file 83, 84, 86
Low measuring temperatures 15, 20, 93
Lubricants 38, 64
Polynomial 60, 68, 71
Polynomial (2D) 60, 68, 69
Power switch 20
Predetermination 26
Pre-set methods 37
Print 18
Printer configuration 24, 66
Printer interface 20, 97
Printer interface configuration 54
Printout 40, 76
Proof 62
Q
Q 58, 59
Q value 31
R
M
Main menu 44
Measurement settings 26, 50
Measuring cell 38
Measuring cell temperature 18, 58
Measuring method 18, 21
Measuring mode 21, 44, 54
Measuring range 95
Measuring result 41, 98
Measuring temperature 37, 38, 47, 75, 78, 95
Measuring window 17
Memory 25, 30, 76
Memory configuration 66
Menu 18, 45, 56
Method 37, 67
Method settings 57
N
NaOH 63
Nitric acid 64
O
OIML 38, 61
Operating voltage 15
-Osc- 17
Oscillation period 34, 48, 58, 59
Output data 22
Reference oscillator 7, 58, 59
Repeatability 95
Residues 42
S
Sample amount 39, 95
Sample changer 18, 20, 38, 40, 50, 52, 67, 77
Sample changer configuration 25, 67
Sample handling unit 18, 27, 40, 50, 52, 77
Sample identification 27, 51, 77, 78
Sample number 58, 77
Sample# 18, 77
S-BUS interface 20
Serial number 58
Set temperature 53
SG 60
SG API 65
SH-1 26, 32, 40, 67, 77, 98, 113
SH-3 26, 32, 40, 67, 77, 98, 113
Sodium hydroxide 63
Soft keys 19
SP-1m 20, 25, 38, 40, 67, 77, 78, 98
SP-3m 20, 25, 38, 40, 67, 77, 78, 98
Special adjustment 34, 52, 60, 68
Specific gravity 18, 37, 60
Start 18
State of the measurement 18
Status 59
Suspension 39
P
Password 18, 47, 56
PC/AT interface 45, 97
Peristaltic pump 40, 42
Phosphoric acid 63
Plato 63
118
T
Temperature 22
Temperature scan 18, 53
Temperature setting 46
Temperature unit 46
XDLIB07
Index
Testmode 76
True density 37
U
User formula 60, 68, 70
User privileges 91
User settings 46, 91
User table 61, 68, 73
U-tube 7, 58, 59, 108
V
Viscosity 36
Viscosity correction 37, 47, 48, 52, 59
W
Water adjustment 31, 32, 33
Wetted parts 38, 112
XDLIB07
119