1
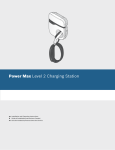
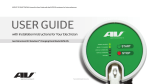
Power Max Level 2 Charging Station
en Installation and Operating Instructions
This equipment has been tested and found to comply with the limits for a Class B digital device, pursuant to part 15
of the FCC Rules. These limits are designed to provide reasonable protection against harmful interference in a residential installation. This equipment generates, uses and can radiate radio frequency energy and, if not installed and
used in accordance with the instructions, may cause harmful interference to radio communications. However, there
is no guarantee that interference will not occur in a particular installation. If this equipment does cause harmful interference to radio or television reception, which can be determined by turning the equipment off and on, the user
is encouraged to try to correct the interference by one or more of the following measures:
—Reorient or relocate the receiving antenna.
—Increase the separation between the equipment and receiver.
—Connect the equipment into an outlet on a circuit different from that to which the receiver is connected.
—Consult the dealer or an experienced radio/TV technician for help.
Installation and Operating Instructions | Power Max Level 2 Charging Station | 1 | en
Table of Contents
Bosch Automotive Service Solutions
1
Introduction
1.1 Applications
2
2
2
Important Safety Warnings and Instructions
2
3
Features and Specifications
3.1 Front View
3.2 Package Contents
3.3 Specifications
3
3
3
4
4
Installation
4.1 Important SAFETY WARNINGS and Instructions
4.2 Grounding Instructions
4.3 Recommended Tools
4.4 Installing the Power Max Level 2 Charging Station
5
5
5
5
6
5
Maintenance
10
6
Operations and Troubleshooting
6.1 Charging
6.2 Charging Status Indicators
6.3 Troubleshooting
11
11
13
14
7
Important Notices
7.1 Limited Warranty
7.2 Disclaimer
7.3 Limitation of Liability
7.4 Copyrights, Trademarks
7.5 Technical Support
15
15
15
15
15
16
569217 | REV. A | 05.22.2013
en | 2 | Installation and Operating Instructions | Power Max Level 2 Charging Station
1
Introduction
The Bosch Power Max Level 2 Charging Station is designed for the U.S. market to charge plug-in electric vehicles
(PHEV) and battery electric vehicles (BEV). It provides AC Level 2 Charging that effectively shortens charging time
for typical electric vehicles (EVs) when compared to the Level 1 Cordset.
1.1
}
}
}
}
}
Applications
Residential
Private and public parking facilities
Fleet
Shopping malls and retailers
Workplace
Please read and follow these safety warnings and operating instructions carefully before operating the Bosch Power
Max Level 2 Charging Station. Failure to follow these instructions may result in serious injury or property damage.
2
Important Safety Warnings and Instructions
IMPORTANT SAFETY INSTRUCTIONS. SAVE THESE INSTRUCTIONS.
}
}
}
}
}
}
}
}
}
}
WARNING
Disconnect electrical power to the Power Max Level 2 Charging Station before installation. Failure to do
so may cause physical injury or damage to the electrical system and charging unit.
CAUTION
To reduce the risk of fire, connect only to a circuit provided with 20 amperes (EL-51245) or 40 amperes
(EL-51253, EL-51254) maximum branch circuit overcurrent protection in accordance with the National
Electrical Code, ANSI/NFPA 70.
Read all the instructions before using this product.
Children should be supervised when this product is used around children.
Do not put fingers into the EV connector.
Do not use this product if the EV cable is frayed, has broken insulation, or displays any other indication of
damage.
Do not use this product if the enclosure or the EV connector is broken, cracked, open, or show any other
indication of damage.
This product should be installed only by a qualified approved technician.
Make sure that the materials used and the installation procedures follow local building codes and safety
standards.
The information provided in this manual in no way exempts the user of responsibility to follow all applicable
codes or safety standards.
Bosch is not responsible for physical injury, damage to property or equipment caused by the installation of this
product.
This document provides instructions for the wall-mounted Power Max Level 2 Charging Station and should not be
used for any other product. Before installation or use of this product, you should review this manual carefully and
consult with a licensed contractor, licensed electrician, or trained installation expert to make sure of compliance
with local building codes and safety standards.
569217 | REV. A | 05.22.2013
Bosch Automotive Service Solutions
Installation and Operating Instructions | Power Max Level 2 Charging Station | 3 | en
3
Features and Specifications
3.1
Front View
3
1
2
4
5
1. STOP button
2. Charging plug and cable
`` SAE J1772 compliant
3. Status indicator
`` Ready (green LED on)
`` Charging (green LED flashing)
`` Fault (red LED on)
`` Warning (red LED flashing)
4. ON/OFF switch
5. Plug dock
3.2
}
}
}
}
Package Contents
Power Max Level 2 Charging Station
Installation and Operating Instructions
Mounting bracket
Three (3) Torx T30 screws
Bosch Automotive Service Solutions
569217 | REV. A | 05.22.2013
en | 4 | Installation and Operating Instructions | Power Max Level 2 Charging Station
3.3
Specifications
Model
Power Input
EL-51245
EL-51253
EL-51254
Input Rating
208-240 Vac, 16 A
208-240 Vac, 30 A
208-240 Vac, 30 A
Connections & Wiring
L1, L2, and Ground, hardwired w/ terminal block
Standby Power
<5W
Output Rating
208-240 Vac, 16 A
Cold-Load Pickup
Randomized delay before charge resume after power failure
208-240 Vac, 30 A
208-240 Vac, 30 A
Power Output
Internal Residual
Current Detection
20 mA CCID per UL 2231
2-pole 20 A breaker
Upstream Breaker
non-GFCI type
Protection
Output Protection
Electrical Protection
User Interface &
Control
Status Indicators
Buttons/Switches
Operating
Environmental
on dedicated circuit,
Temperature
Humidity
plug-out
Over current, short circuit, over voltage, under voltage, ground
fault, surge protection, over temperature
Standby (solid green), charging (flashing green), fault (solid red),
warning (flashing red)
ON/OFF switch, stop button
-22oF to +122oF (-30oC to +50oC)
95% relative humidity, non-condensing
Ingress Protection
Type 3R
Mounting Type
Wall-Mount
Dimension (W x H x D)
non-GFCI type
Power output is terminated upon detection of charging connector
Charging Cable Length 12 ft, straight cable
Mechanical
2-pole 40 A breaker on dedicated circuit,
18 ft, straight cable
25 ft, straight cable
13.8 x 15.7 x 5.0 inch (350 x 400 x 126 mm), excluding charging
cable and support bracket
Net Weight
15.4 lb (7 kg)
Certificate
UL, cUL
Charging Interface
SAE J1772 compliant charging plug
Regulation
569217 | REV. A | 05.22.2013
Bosch Automotive Service Solutions
Installation and Operating Instructions | Power Max Level 2 Charging Station | 5 | en
4
Installation
4.1
Important SAFETY WARNINGS and Instructions
IMPORTANT SAFETY INSTRUCTIONS. SAVE THESE INSTRUCTIONS.
WARNING
Danger of electrical shock or injury. Turn OFF power at the panelboard or load center before working
inside the equipment or removing any component. Do not remove circuit protective devices or any
other component until the power is turned OFF.
The Power Max Level 2 Charging Station should be installed only by a licensed contractor, and/or a licensed
electrician or trained installation expert in accordance with all applicable state, local and national electrical codes
and standards.
Before installing the Power Max Level 2 Charging Station, review this manual carefully and consult with a licensed
contractor, licensed electrician, or trained installation expert to ensure compliance with local building practices,
climate conditions, safety standards, and state and local codes.
4.2
Grounding Instructions
This product must be connected to a grounded, metal, permanent wiring system; or an equipment grounding conductor must be run with the circuit conductors and connected to the equipment grounding terminal or lead on the
product.
4.3
Recommended Tools
The following tools are recommended for the Power Max Level 2 Charging Station installation:
``
``
``
Supplied accessories and components:
–– Level 2 Charging Station mounting bracket
–– Three (3) Torx T30 screws for securing the Level 2 Charging Station to the mounting bracket
Installer-supplied components:
–– Conduit of appropriate trade size for power wire
–– Two (2) screws for securing the main body mounting bracket to the wall
Recommended tools:
–– Torx T30 screwdriver
Bosch Automotive Service Solutions
569217 | REV. A | 05.22.2013
en | 6 | Installation and Operating Instructions | Power Max Level 2 Charging Station
4.4
Installing the Power Max Level 2 Charging Station
1. See Figure 4-1. Secure the Level 2 Charging Station mounting bracket to the wall using appropriate screws and
bracket holes, as shown in Figure 4-1. Thread 1/4-in. expansion bolts through bracket offset holes into masonry
walls as shown and torque to 78 lb·in (8.8 N·m). Thread 2-in., or longer, No. 8 wood screws through bracket
inline holes into finished walls supported by wood studs and torque to 26 lb·in (3 N·m).
Note:
The Level 2 Charging Station must be mounted at a sufficient height from grade such that the height of the plug
dock is located between 24–48 in. (0.6–1.2 m) from grade per NEC Article 625.
Figure 4-1. Mounting bracket use on masonry wall (left) and finished wall (right)
2. See Figure 4-2. Choose appropriate conduit in accordance with all applicable state, local, and national electrical
codes and standards. Use flexible conduit when connecting to the rear of the Level 2 Charging station to
faciliate rotation and installation on mounting bracket (Figure 4-4).
1
2
1.
2.
Flexible conduit
Rigid conduit
Figure 4-2. Conduit use
569217 | REV. A | 05.22.2013
Bosch Automotive Service Solutions
Installation and Operating Instructions | Power Max Level 2 Charging Station | 7 | en
3. See Figure 4-3. Drill a hole of an appropriate size to accommodate the conduit system fitting in the bottom of
the plastic housing as shown.
CAUTION
Drill the hole carefully to avoid punching through the housing and damaging internal components
Place the Level 2 Charging Station on a soft surface during drilling to avoid damage.
Figure 4-3. Drilling hole for conduit
4. See Figure 4-4. Install ring terminal eyelets on each wire end and connect each to the correct terminal input
block connector. Use copper wire of the appropriate size to operate the EVSE at its rated amperage output.
Replace the compartment cover and torque to 4.6 lb·in (0.5 N·m).
G L2 L1
Figure 4-4. Electrical wiring with detail of input terminal block
Bosch Automotive Service Solutions
569217 | REV. A | 05.22.2013
en | 8 | Installation and Operating Instructions | Power Max Level 2 Charging Station
5. See Figure 4-5. Align the screw holes of the mounting bracket with the Level 2 Charging Station.
Figure 4-5. Alignment of charging station on mounting bracket
6. See Figure 4-6. Install and secure the charging station to the mounting bracket with the three (3) screws
supplied.
Figure 4-6. Installation screw locations
569217 | REV. A | 05.22.2013
Bosch Automotive Service Solutions
Installation and Operating Instructions | Power Max Level 2 Charging Station | 9 | en
7. See Figure 4-7. Secure the charging plug to the Level 2 Charging Station.
Figure 4-7. Plug attachment with detail of plug dock
Bosch Automotive Service Solutions
569217 | REV. A | 05.22.2013
en | 1 0 | Installation and Operating Instructions | Power Max Level 2 Charging Station
5
Maintenance
The exterior of the Power Max Level 2 Charging Station is designed to be waterproof and dust proof with an ingress
protection rating of Type 3R.
To ensure proper maintenance of the Level 2 Charging Station, follow these guidelines:
}
}
}
}
}
Keep the exterior clean at all times.
Do not spray water directly at the Level 2 Charging Station.
Replace the charging plug in the plug dock after charging to avoid damage.
Store the power cable on the Level 2 Charging Station after use to avoid damage.
If the power cable or the charging plug is damaged, contact the charging station provider.
569217 | REV. A | 05.22.2013
Bosch Automotive Service Solutions
Installation and Operating Instructions | Power Max Level 2 Charging Station | 11 | en
6
Operations and Troubleshooting
6.1
Charging
1. See Figure 6-1. Turn the Power Max Level 2 Charging Station power switch to ON. Wait 3 seconds for the green
indicator light.
Figure 6-1. Powering on the Power Max Level 2 Charging Station and removing the charging plug
2. See Figure 6-2. Release the charging plug from the plug dock and connect it to the EV to start the charging
process.
Figure 6-2. Connecting the charging plug to the EV
Bosch Automotive Service Solutions
569217 | REV. A | 05.22.2013
en | 1 2 | Installation and Operating Instructions | Power Max Level 2 Charging Station
3. See Figure 6-3. To stop charging before charging is complete, disconnect the charging plug from the EV or press
the “Stop” button. Remove and reconnect the charging plug with the EV to start charging again.
Figure 6-3. Stop charging
4. See Figure 6-4. When charging is complete, disconnect charging plug from the EV and place it in the plug dock
to store the charging cable properly.
Figure 6-4. Place the charging plug in the plug dock
569217 | REV. A | 05.22.2013
Bosch Automotive Service Solutions
Installation and Operating Instructions | Power Max Level 2 Charging Station | 13 | en
6.2
Charging Status Indicators
LED Status
Description
Definition
Power is off.
Off
Use the ON/OFF switch on the side of
the Level 2 Charging Station to turn on
the power.
Level 2 Charging Station is ON; charging
not in process.
Solid green
Connect the charging cable to begin
charging.
Charging in process.
Flashing green
LED status returns to solid green
(above) when charging is complete.
Level 2 Charging Station fault.
Solid red
Stop using the Level 2 Charging Station
and contact the Level 2 Charging Station
provider.
Level 2 Charging Station is recovering
from a minor fault.
Flashing red
Stop using the Level 2 Charging Station
until the LED turns solid green.
Note:
Minor clicking noises are normal during startup (powering on the Power Max Level 2 Charging Station and
connecting to EV).
Bosch Automotive Service Solutions
569217 | REV. A | 05.22.2013
en | 1 4 | Installation and Operating Instructions | Power Max Level 2 Charging Station
6.3
Troubleshooting
Situation
Status indicator is not green
after the Level 2 Charging
Station is powered on
Action
1. Make sure the AC power input is connected correctly.
2. Turn OFF the Level 2 Charging Station and then back ON using the
ON/OFF switch.
3. If the problem persists, contact Technical Support.
1. Unplug the charging plug and reconnect it fully to the receptacle on
Status indicator does not
the EV.
flash green when the Level 2
2. Inspect the cable and plug for damage.
Charging Station is connected
3. Inspect the EV and its receptacle for damage
to the EV
4. Try to charge with the portable cord set that came with the vehicle;
contact Technical Support.
1. There is a temporary error.
2. Wait until the temporary error is resolved and the Level 2 Charging
Status indicator flashes red
while charging
Station returns to normal condition. It usually takes less than 10
seconds.
3. If the status indicator doesn’t return to green, turn OFF the Level 2
Charging Station and then back ON using the ON/OFF switch.
4. If the situation persists, contact Technical Support.
1. There is a critical error.
2. Unplug the charging plug from the EV immediately.
Status indicator is solid red
3. Turn OFF the Level 2 Charging Station and then back ON using the
ON/OFF switch.
4. If the situation persists, contact Technical Support.
569217 | REV. A | 05.22.2013
Bosch Automotive Service Solutions
Installation and Operating Instructions | Power Max Level 2 Charging Station | 15 | en
7
Important Notices
7.1
Limited Warranty
THIS WARRANTY IS EXPRESSLY LIMITED TO THE ORIGINAL PURCHASER OF THE POWER MAX LEVEL 2 CHARGING
STATION (“POWER MAX”).
} Power Max is warranted against defects in materials and workmanship for one year from the date of delivery.
} Power Max Cables and Connectors are warranted against defects in materials and workmanship for 90 days from
the date of delivery.
This warranty is only valid to the original purchaser of the unit and is not transferable. All warranty claims must be
made within the warranty period and proof of purchase must be supplied. This warranty does not cover the cost of
freight to return the unit to Bosch.
The sole and exclusive remedy for any unit found to be defective is repair or replacement, at the option of Bosch.
The existence of a defect shall be determined by Bosch in accordance with procedures established by Bosch. No
one is authorized to make any statement or representation altering the terms of this warranty. This warranty covers
only those defects that arise as a result of normal use of the unit and does not cover any other problems including
those that arise as a result of abuse, neglect, improper maintenance, care or modification, operation outside of the
unit‘s specifications or in a manner inconsistent with instructions regarding use. Bosch does not make any
representation or warranty regarding the continuous availability of electrical service to the unit.
This warranty gives the original purchaser specific legal rights. The original purchaser may also have other rights
which vary from state to state. To the extent that this warranty is inconsistent with applicable law, this warranty will
be deemed modified to be consistent with such local law.
7.2
Disclaimer
TO THE EXTENT PERMITTED BY APPLICABLE LAW AND EXCEPT AS EXPRESSLY PROVIDED IN THE LIMITED
WARRANTY, BOSCH MAKES NO WARRANTY WITH RESPECT TO THE EQUIPMENT OR THE SERVICES, WHETHER
EXPRESS, IMPLIED, STATUTORY OR OTHERWISE. BOSCH EXPRESSLY DISCLAIMS ALL OTHER WARRANTIES,
INCLUDING, BUT NOT LIMITED TO, THE IMPLIED WARRANTIES OF NON-INFRINGEMENT OF THIRD PARTY RIGHTS,
MERCHANTABILITY AND FITNESS FOR A PARTICULAR PURPOSE. BOSCH DOES NOT WARRANT UNINTERRUPTED OR
ERROR FREE OPERATION OF THE EQUIPMENT.
The unit should be installed only by a licensed electrician and in accordance with all local and national codes and
standards.
All information, illustrations, and specifications contained in this User Guide are based on the latest information
available at the time of publication. The right is reserved to make changes at any time without obligation to notify
any person or organization of such revisions or changes. Further, this User Guide is provided “as is” and BOSCH
shall not be liable for errors contained herein.
7.3
Limitation of Liability
TO THE FULLEST EXTENT PERMITTED BY APPLICABLE LAW, IN NO EVENT SHALL BOSCH OR ITS SUPPLIERS BE
LIABLE FOR ANY, INDIRECT, SPECIAL, INCIDENTAL, OR CONSEQUENTIAL DAMAGES, WHETHER BASED ON
CONTRACT, TORT, OR ANY OTHER LEGAL THEORY EVEN IF BOSCH AND ITS SUPPLIERS HAVE BEEN ADVISED OF
THE POSSIBILITY OF SUCH DAMAGES.
Some states do not allow the exclusion or limitation of incidental or consequential damages for some products, so
the limitations or exclusions contained herein may not apply.
7.4
Copyrights, Trademarks
No part of this manual may be reproduced, stored in a retrieval system, or transmitted, in any form or by any means,
electronic, mechanical, photocopying, recording, or otherwise, without the prior written permission of Bosch. Bosch
is a registered trademark of Bosch Corporation. All third party trademarks are the property of their respective
owners.
Bosch Automotive Service Solutions
569217 | REV. A | 05.22.2013
en | 1 6 | Installation and Operating Instructions | Power Max Level 2 Charging Station
7.5
Technical Support
If technical support is required, contact Bosch at:
1-877-805-EVSE (3873)
www.pluginnow.com
569217 | REV. A | 05.22.2013
Bosch Automotive Service Solutions
Bosch
Automotive Service Solutions
28635 Mound Road
Warren, MI 48092 USA
Phone: (877) 805-EVSE (3873)
www.pluginnow.com