1
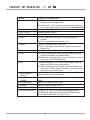
Internet Radio RM50
User Guide
English
Introduction
WELCOME
Dear customer:
Thank you for purchasing a SAGEMCOM WiFi IP Radio; we appreciate your trust in us.
This product was manufactured with the upmost care, should you encounter any
difficulties during its use, we recommend that you refer to this user guide. You can also
find information on the following site:
http://www.sagemcom.com/faq
The new material is guaranteed (parts and labour) by SAGEMCOM under the conditions
and according to procedures defined on the site www.sagemcom.com heading support.
In the event of a technical problem, please refer to the table at the end of this user guide
for a list of incidents and the way to solve them.
The SAGEMCOM site (www.sagemcom.com assistance section) also provides information
on how your IP Radio works and how to solve any problems you may encounter. You can
also contact our assistance service by E-mail. If the problem persists, you should contact
our call centre (see the table below). They will offer an expert appraisal of your material
remotely to determine the cause as well as the type of repair required.
For your comfort and safety, please read carefully the paragraphs below on safety
recommendations and instructions.
2
Introduction
Recommendations and safety instructions
Do not install your IP Radio in a humid room (bathroom, laundry, kitchen, etc.), or within 1.50mof a tap
or water source, or outside. Your IP Radio should be used at an ambient temperature of between 15 °C
and 35 °C for optimum sound results.
Do not set up your IP Radio in a dusty environment as dust deposits might adversely affect the sound
quality.
Avoid objects or liquids getting into the unit.
Unplug the power lead if the unit will not be used for a long period.
Do not handle your AC cord with wet hands. If liquid spills on your product, unplug immediately and
contact your dealer for cleaning instructions.
Only the power supply provided with the IP Radio should be used. Connect this to the mains in
accordance with the installation instructions in this user guide and the information on the
identification label affixed to the power supply (voltage, current, mains frequency). As a precaution, in
case of danger, the main adapters act as a disconnecting mechanism for the 230 V power supply. They
should be placed near the device and should be easily accessible.
!
Do not attempt to use force to plug a connector into the audio jack. If the connector cannot be plugged
into the jack easily, the connector is incompatible.
Do not attempt to remove any screws or open the unit. No user serviceable parts are inside.
The length of the USB cables used on this product shall not exceed 3m.
This terminal was designed for private use inside a building (CPE customer premises equipment) in the
European Free Trade association (EFTA). It has been tested in accordance with the technical provisions
for radio equipment (EN 300328).
The radio frequency bands authorized for Wireless transmission depend on national
regulations.The installation of this terminal operating in the 2.4 GHz band is covered by the European
recommendation ERC 70-03.
Before use, make sure that the gateway with which you establish a wireless connection from your
terminal is set up in accordance with this regulation and with the national regulations where it is used.
SAGEMCOM accepts no liability if the regulations in force on the installation site are notcomplied with.
Some sensitive medical equipment and safety equipment may be affected by the radio-frequency
transmissions of your radio. In all cases, we ask that you respect the safety recommendations.
The device shall not permanently be installed or used closer than 20cm from the human body.
The CE marking certifies that the product meets the essential requirements of Directive 1999/5/CE of
the European Parliament and of the Council pertaining to microwave radio equipment and
telecommunication terminal equipment, for the safety and health of users, for electromagnetic
interference. Furthermore, it efficiently uses the frequency spectrum attributed to ground and spatial
communication to prevent damaging
interference.
The declaration of compliance may be looked up on the www.sagemcom.com site or can
be obtained from the following address:
SAGEMCOM
Customer relations department
250, route de l'Empereur, 92500 Rueil
Malmasion - FRANCE
3
Table of Contents
1. Your IP Radio
6
Main Features
Unpacking
Front Panel
Rear Panel
Remote Control
Menu Structure 2. Getting Started
6
6
7
8
8
10
11
Turning On The Device for The First Time
Adjusting The Volume
Text Entry
Standby Mode
11
16
16
17
3. Listening To Music
18
Listening To Internet Radio
Listening To FM Radio Listening To The Music In Your Computer (UPnP)
Listening To Podcast
Favorite List 18
21
23
25
26
4. Setup
27
Audio Profile
Time Setup
Sleep Timer
Snooze Timer
Alarm 1&2
Advanced Setup
27
28
28
28
29
30
Language
Time Zone
Clock
Radio Scan
Reset To Default
F/W Version
Demo Mode
30
30
31
31
31
32
32
4
Table of Contents
ECO
Backlight
Brightness
Volume limitation
Network Config
Scan For Networks
View Config
Edit Config
5. Appendix
33
33
33
34
34
34
34
35
37
Care And Maintenance Problems 37
37
6. Specifications
40
7. Environment
41
Packaging
Batteries The Product 5
41
41
41
Your IP Radio
1. Your IP Radio
This product is an IP Radio that, once connected to an Internet gateway, will allow
you to access worldwide Internet radio stations and to listen to your digital music files
stored on your PC, or on a multimedia UPnP server. It can also be used as an alarm
clock for wake-up and important appointments.
1.1 Main Features
111
222
333
444
555
666
WiFi 802.11 b/g
Software update through USB
Internet Radio
FM RDS
Audio Codec : MP3 / WMA / WAV
Output Connector : Line-out
1.2 Unpacking
• 1 x IP Radio Device
• 1 x Power Adapter (DC 5V / 2A)
• 1 x Remote Control
• 1 x CD / User Manual
• 1 x Quick Guide
• 1 x Quick Warranty Guide
6
Your IP Radio
1.3 Front Panel
1
2
3
4
5
6
12
12
9
7
8
10
11
11
1. Display Screen
2. PRESETS
3. MODE
4. VOL.
5. MENU
6. STATIONS
7. Navigation Wheel
8. C
9. INFO
10. SMART RANDOM
SWITCH
11. SMART RANDOM
THEME
12. Speakers
Displays contents on the screen.
[1] Press and hold to display a list of available FM stations.
[2] Press to activate auto/manual scan.
Displays the Mode menu.
Enables volume control on the Wheel.
Displays the submenu.
[1]Press to displays the Favorite List
[2] Press and hold to add/remove stations to/from the
Favorite List.
[1] In playback screen, rotate to increase/decrease the
volume. Press to mute the audio volume.
[2] Navigate in the menu list. Press to enter or confirm the
highlighted item in the menu list.
Act as the BACK/CANCEL button in all display screen.
[1] While listening to an IP Radio music source, press to
switch the display the music information.
[2] While listening to the IP Radio, press and hold to set
“auto tune”, which allows you to set a tuned station to
play again at a certain time.
Switch randomly to a new station.
Displays a list of all existing themes defined by Internet
Radio.
Provides music sound output.
7
Your IP Radio
1.4 Rear Panel
1
2
3
4
R
AUDIO
5
L
5V DC
1. POWER
2. USB Port
3. 5V DC Power Jack
4. Audio Line Out Jack
Left/Right
5. Headset Jack
[1] Press to shut off the music source currently playing and
put the device into the Standby mode.
[2] Press and hold to put the device in the Power off mode.
Connection to USB devices.
Plug in the power adaptor.
Plug in external speakers.
Plug in an external headset. Speakers do not function while
headset is plugged in.
1.5 Remote Control
1
8
2
9
3
10
13
4
14
15
16
5
13
6
11
7
12
8
Your IP Radio
1. Mode
Displays the Mode menu.
2. Snooze/Sleep Timer [1] Snooze - When the alarm is on, press to shut the alarm
3. Back
4. VOL +/VOL 5. Mute
6. Presets
7. Stations
8. Menu
9. On/Off
10. Info
11. Smart Random
SWITCH
12. Smart Random
THEME
13. UP and DOWN
14. Previous
15. Next
16. Play/Pause/Select
off and reactivate again later.
[2] Sleep Timer - Set a screen off period of time and stop
the current music source then enter the Standby mode.
Act as the BACK/CANCEL button.
Enables volume control.
Mute all the sound.
[1] Press and hold to display a list of available FM
stations.
[2] Press to activate auto/manual scan.
[1]Press to displays the Favorite List
[2] Press and hold to add/remove stations to/from the
Favorite List.
Displays the submenu.
[1] Press to shut off the music source currently playing
and put the device in standby mode.
[2] When the alarm goes off, presses this button to turn it
off and go to the Standby mode.
[1] While listening to an IP radio music source, press to
switch the display music information.
[2] While listening to the IP Radio, press and hold to set
“auto tune”, which allows you to set a tuned station to
play again at a certain time.
Switch randomly to a new station.
Displays a list of all existing themes defined by Internet
Radio.
Move to the previous/next item.
Menu list: go to the top of list.
Menu List: go to next list.
[1] Menu List: confirm or enter the highlighted item.
[2] FM Radio: stop music and go back to Mode menu.
[3] IP radio/UPnP/Podcast: Play/ Pause
9
Your IP Radio
1.6 Menu Structure
Press MODE to enter the menu:
(1) Internet radio, (2) FM radio, (3) UPnP, (4) Podcast.
Mode
Internet Radio
> Search by theme
> Search by name
> Search by region
> FM Internet radio
FM Radio
UPnP
Podcast
> Search by theme
> Search by region
Press MENU to enter the submenu:
(1) Audio profile, (2) Time setup, (3) Advanced setup, (4) ECO, (5) Network config.
Menu
Audio Profile Time Setup
> Off
> Classical
> Rock
> Pop
> Jazz
> Customized
> Sleep Timer
> Snooze Timer
> Alarm 1
> Alarm 2
Advanced Setup ECO
> Language
> Time Zone
> Clock
> Radio Scan
> Reset to Default
> F/W Version
> Demo Mode
10
> Backlight
> Brightness
> Volume Limitation
Network Config.
> Scan for Networks
> View Config.
> Edit Config.
Getting Started
2. Getting Started
2.1 Turning On The Device for The First Time
2.1.1 Network Environment
Please confirm that your wireless router or Access Point (AP) is connected to
the broadband network. The diagram below describes the network
environment that should be established to use your IP Radio.
Internet
Wireless
Router
DSL/ Cable Modem
2.1.2 Setting Up The device
R
AUDIO
5V DC
L
5V DC
(1) Plug the included power adapter into a wall outlet.
(2) Connect the power adapter to the power jack on the rear panel of the
device.
(3) Press and hold the Power button on the rear panel to turn on the device.
11
Getting Started
After the device is turned on, a welcome screen appears.
Note: Turning on the device for the first time will require you to set up the
Network, Language and Time Zone for your device. Please follow the setup guide
for proper setup.
The device will scan for network connection automatically.
2.1.3 After A Network Is Found
After scanning and a network connection is found, a Scan for networks menu
displays:
Rotate the Wheel to select the desired network connection method.
12
Getting Started
AP List
(1) Press the Wheel to select the AP list menu.
(2) Select a desired network from the list.
Note: If you have selected a network with a lock icon at the front, you must
enter the password for the selected network.
On the text entering screen, rotate the Wheel to choose the characters or
numbers from the list at the bottom of the screen. Press the Wheel to select
the character.
Rotate the Wheel to select End to quit the edit screen and start connecting to
the network.
WPS
The IP Radio supports WPS (WiFi Protected Setup). If your AP supports WPS
as well, you can choose this network connecting method.
WPS PBC (Push Button Configuration):
(1) Press the WPS button on your AP.
(2) Select WPS PBC on the menu within the time limit (AP dependent) to
establish a connection.
13
Getting Started
WPS PIN (Personal Identification Number): Use the PIN code to connect to the
AP.
(1) Select WPS PIN on the menu.
(2) The PIN code is generated automatically or you can choose Refresh if you
need to change the PIN code.
(3) Open the WPS configuration page of your AP on your computer, and then
enter the PIN code to establish a connection.
2.1.4 Connection Established
If the network connection is established, continue adjusting the following
settings:
Language
The device will automatically set up the local language. If you need to set up
your own preferred display language on the device see step (1).
Choose YES to confirm the language selection.
(1) Choose NO to continue the Language setting.
(2) Rotate the Wheel to choose the desired Language.
(3) Press the Wheel to activate the setting.
14
Getting Started
Time Zone
Select your time zone in the device to synchronize the date and time with the
Internet. The device will automatically set up the local Time one.
Choose YES to confirm the Time zone selection.
(1) Choose NO to continue the Time zone setting.
(2) Rotate the Wheel to choose your time zone.
(3) Press the Wheel to activate the setting.
After the Network, Language and Time Zone settings are set, the menu screen
will be displayed.
2.1.5 If The Network Is Not Found
After scanning, if no network connection is found, a network error message
appears for a few seconds and then the Network Config. menu will be
displayed.
Please refer to Setup → Network Config. section in the
manual for more details.
15
Getting Started
2.1.6 Demo Mode
If no action has been taken from the Network Configuration menu for 5 minutes,
the device will display the Demo Mode with music. Press any button on the
device, except the Wheel for volume adjustment, to quit the demo mode.
2.2 Adjusting the Volume
While the device is playing music from any source, press the VOL. button and
rotate the Wheel to the right will increase the volume and rotate it to the left will
decrease the volume.
Warning: Always start playing music with volume setting farthest to the left to
protect hearing. Or you can set up a limitation for volume, refer to Volume
Limitation chapter for details.
2.3 Text Entry
For certain settings you will need to enter text. Follow the procedures below:
(1) Rotate the Wheel to select the desired letters, numbers or symbols.
(2) Press the Wheel to choose the highlighted item.
(3) Rotating to select End to quit the edit screen.
Or, pressing the Back button on the remote control to delete the input. Press and
hold the Back button to quit the edit screen.
16
Getting Started
2.4 Standby Mode
While the device is playing from any music source, press Power on the device
or On/Off on the remote control to stop playing from the music source and
enter the Standby mode.
In the Standby mode, rotate the Wheel or press SELECT on the remote
control will have no effects on the status of the device.
If the alarm has been set, the standby screen will display an alarm icon.
When the alarm is ringing, press POWER on the device or On/Off on remote
control to turn alarm off.
If Snooze has been set, press SNOOZE on the remote control to shut the
alarm off temporarily and it will automatically reactivate after few minutes
(according to your settings in the Setup → Time Setup → Snooze Timer
section.)
17
Listening to Music
3. Listening To Music
This IP Radio device is a high-performance audio player that can play music from
various types of sources. You can use it to listen to Internet radio from all over the
world, local FM broadcasting services, and music files in your computer.
The following explains how to listen to music using this IP Radio device.
3.1 Listening To Internet Radio
With the Internet radio function, you can listen to music or programs from
Internet radio stations.
Rotate the Wheel to select and press the Wheel to activate the Internet Radio
function in the main menu.
3.1.1 Search For A Station
When using this function for the first time, you will be asked to set your preferred
display method by theme, name, region or FM Internet radio station. If you want
to adjust the settings, press PRESETS on the device.
1. Search by theme:
(1) Rotate the Wheel to choose a theme from the available theme list.
(2) Press the Wheel to start loading the related stations.
(3) Rotate the Wheel to choose from the station list.
(4) Press the Wheel to start playing the selected station.
18
Listening to Music
2. Search by name:
When you choose to search by name, a text edit screen will appear.
(1) Rotate the Wheel to choose characters or numbers from the list at the
bottom of the screen. Press the Wheel to select the character.
(2) Choose End to quit the edit screen.
(3) Press the Wheel to start loading the available stations.
(3) Rotate the Wheel to select from the station list.
(4) Press the Wheel to start playing the selected station.
3. Search by region:
(1) Rotate the Wheel to choose a region and press the Wheel to select Region
→ Country → City lists.
(2) Press the Wheel to start loading the available stations.
(3) Rotate the Wheel to select from the station list.
(4) Press the Wheel to start playing the selected station.
4. FM Internet radio:
If you do not want to search the stations, choose FM Internet radio to listen
to FM radio stations that are broadcast via the Internet.
(1) Press the Wheel to start loading the available stations.
(2) Rotate the Wheel to select from the station list.
(3) Press the Wheel to start playing the selected station.
19
Listening to Music
3.1.2 The Playback Screen
The playback screen of the Internet Radio (see diagram below).
Press the INFO button to display the program information you are listening to,
the start time, the ending time and the program content.
Press and hold to set auto tune, which allows you to set a tuned station to play
again at a certain time.
3.1.3 Key (and remote control) command on the playback screen
Power (
)
PRESETS
C( )
Wheel
SMART RANDOM
SWITCH
STATIONS
SMART RANDOM
THEME
INFO
1. Press to stop the music source currently playing and
enter the Standby Mode.
2. Press and hold to connect to the AP automatically
and then start to play the last tuned station.
Press to see the Internet Radio list or search engines.
Return to the Mode Menu.
1. Rotate to adjust the volume.
2. Press to mute the audio volume.
Press to switch randomly to a new station base on your
theme settings.
1. Press to view your Favorites List.
2. Press and hold to add/remove current station in the
Favorites List.
Press to view the list of all existing themes defined by
the Internet radio station.
1. Press to switch the playback screen display.
2. Press and hold to set auto tune.
3.1.4 Adding A Station To The Favorite List
Please refer to the Favorite List chapter to add a station to the Favorite List.
20
Listening to Music
3.2 Listening To FM Radio
With the FM Radio function, you can listen to music or programs broadcast
from FM radio stations.
Rotate the Wheel to choose and press the Wheel to activate the FM Radio
function in the main menu.
3.2.1 Search For A Station
(1) Press PRESETS on the device to start AUTO/MANUAL scan. Or press and
hold it to scan all the stations available.
(2) Press the Wheel to switch between AUTO and MANUAL.
If the Auto-scan function is selected, rotate the Wheel to the left to auto-scan
down, or to the right to auto-scan up the frequencies.
If the Manual-scan function is selected, rotate the Wheel to the left to scan
down, rotate to the right to scan up the frequencies.
3.2.2 The Playback Screen
The playback screen of the FM Radio (see diagram below).
The screen displays the frequency of the FM radio channel you are listening
to. If the FM station supports RDS information you will be able to read its
RDS, such as station or the program name, on the screen.
21
Listening to Music
3.2.3 Key (and remote control) command on the playback screen
Power (
PRESETS
Wheel
STATIONS
)
1. Press to stop the music source currently playing and put the
device in the Standby Mode.
2. Press and hold to connect to the AP automatically and then
start to play the last tuned station.
1. Press to start AUTO/MANUAL scan.
2. Press and hold to scan and display a list of available FM Radio
stations.
1. Rotate to adjust the volume.
2. Press to mute the audio volume.
1. Press to view your Favorites List.
2. Press and hold to add/remove current station in the Favorites
List.
3.2.4 Adding A Station To The Favorite List
Please refer to the Favorite List chapter to add a station to the Favorite List.
22
Listening to Music
3.3 Listening To The Music In Your
Computer (UPnP)
With the UPnP function, you can listen to music or programs that are stored
in your computer.
Rotate the Wheel to select and then press the Wheel to activate the UPnP
function in the main menu.
3.3.1 Search For A Media Source
With the UPnP function, you can listen to music or programs that are stored
in your local area network (LAN).
When entering this function, the device will automatically detect media files
from neighborhood servers.
(1) A list of your UPnP server will be displayed. Rotate the Wheel to select a
server.
(2) Press the Wheel to activate the chosen server and choose the music
source you would like to play.
If scanning cannot find any server, you will need to scan again or check the
network settings.
23
Listening to Music
3.3.2 The Playback Screen
The playback screen of the UPnP (see the diagram below).
The screen displays the artist name, album name, the playing time and
duration time.
3.3.3 Key (and remote control) command on the playback screen
Power (
Wheel
STATIONS
)
1. Press to stop the music source currently playing and enter the
Standby Mode.
2. Press and hold to connect to the AP automatically and then
start to play the last played music file.
1. Rotate to adjust the volume.
2. Press to mute the audio volume.
1. Press to view your Favorites List.
2. Press and hold to add/remove current station to the Favorites
List.
3.3.4 Adding A Station To The Favorite List
Please refer to the Favorite List chapter to add a station to the Favorite List.
24
Listening to Music
3.4 Listening To Podcast
With the Podcast function, you can listen to music or programs that
broadcast from Podcast.
Rotate the Wheel to choose and press the Wheel to activate the Podcast
function in the main menu.
3.4.1 Search For A Station
Before listening to programs, you will need to search for the stations first.
There are two search methods, chosen by rotating the Wheel:
1. Search by theme:
(1) Select a theme from the available theme list.
(2) Press the Wheel to start loading the stations.
(3) Rotate the Wheel to choose from the station list.
(4) Press the Wheel to start playing the selected station.
2. Search by region:
(1) Rotate the Wheel to choose a region and press the Wheel to select from
the Region → Country → City lists.
(2) Press the Wheel to start loading the available stations.
(3) Rotate the Wheel to choose from the station list.
(4) Press the Wheel to start playing the selected station.
25
Listening to Music
3.4.2 The Playback Screen
The playback screen of the Podcast (see diagram below).
The screen displays the program type, show description, Show format/
language and country.
3.4.3 Key (and remote control) command on the playback screen
PRESETS
C( )
Wheel
Press to see the Podcast list or search engines.
Return to the Mode Menu.
1. Rotate to adjust the volume.
2. Press to mute the audio volume.
3.5 Favorite list
3.5.1 Adding A Station To The Favorite List
(1) In the playback screen, press STATIONS on the device or on the remote
control to view the favorite list. From the list you can have access to your favorite
stations easily.
(2) Press and hold STATIONS to save the currently playing station in the favorite
list.
The
icon will appear on the screen when the station has been added
successfully.
3.5.2 Removing A Station From The Favorite List
Press and hold STATIONS again to remove the station from the favorite list.
26
Setup
4. Setup
In this menu, you can adjust IP Radio settings according to your own preferences.
See sections below for more setting details.
Press Menu on the device to access this menu.
4.1 Audio profile
In this section, you can set up an Audio profile.
In the Audio Profile list, rotate the Wheel to choose a setting and then press
the Wheel to select an item.
Note: The default Audio Profile is set to Off.
Rotate the Wheel to choose Customized for equalizer adjustments and then
press the Wheel to select.
27
Setup
Rotate the Wheel to adjust the equalizer value and then press the Wheel to
confirm the adjustments.
4.2 Time setup
In this section, you can set up the Sleep timer or Alarm.
4.2.1 Sleep Timer
Sleep Timer function is used to set a screen off period of time and allows the
device to enter the Standby mode.
Adjust the Sleep Timer setting by rotating the Wheel to choose a time and then
press the Wheel to select or select Off to disable this function. The Sleep Timer
choices are on “minutes” basis (15 mins, 30 mins, 45 mins, 60mins).
4.2.2 Snooze Timer
The Snooze Timer function is used to set the alarm sound options to Off, 1, 3, 5
or 10 minutes.
.
28
Setup
4.2.3 Alarm 1&2
Alarm function is for you to set up wake-up Alarms or to remind you of
important dates or times. You can set up 2 Alarms.
Both Alarm 1 and Alarm 2 have the same set up method. Alarm 1 settings are
as follows:
Time settings:
(1) Rotate the Wheel to choose, and then press the Wheel to select On.
(2) Rotate the Wheel to set Hours and Minutes.
Repeat settings:
(3) After the time is set, press the Wheel to bring up the Repeat setting page.
(4) Rotate the Wheel to choose, and then press the Wheel to select an alarm
repeat setting “Once,” “Everyday,” “Weekly,” “Weekdays,” or “Weekend.”
Note: When the alarm time has been set in another alarm already, you will
see an “Alarm already set” message and the screen will go back to the first
setting page to reset a time.
Sound settings:
(5) After the Repeat setting is set, press the Wheel to bring up the Sound
setting page.
(6) Rotate the Wheel to choose and press the Wheel to select an alarm sound
source from “FM,” “Internet radio,” or “ UPnP.” If you do not want to choose
sound source, you can simply select “Buzzer” as your Alarm sound.
Note: If the sound source that you have selected is no longer available, the
device will play a “Buzzer” sound instead.
29
Setup
4.3 Advanced Setup
The IP Radio provides more detailed settings for you to adjust according to your
preferences.
Press Menu on the device to access this menu.
4.3.1 Language
The IP Radio supports different languages. Select your preferred display
language on the device.
(1) Rotate the Wheel to choose the desired language.
(2) Press the Wheel to activate the setting.
4.3.2 Time Zone
Set up the Time Zone for your IP Radio to display the correct time and allow
the device to synchronize the date and time with the Internet.
(1) Rotate the Wheel to choose your time zone.
(2) Press the Wheel to activate the setting.
30
Setup
4.3.3 Clock
You can choose whether to set the clock manually or synchronize
automatically with your IP Radio . The default method is Auto snyc (NTP).
Please confirm that you have the correct time zone set (refer to Time Zone
section for settings).
Set Manually:
(1) Rotate the Wheel to choose Hours and Minutes on the Set Time page.
(2) Press the Wheel to bring up the Set Date page.
(3) Rotate the Wheel to choose the date.
4.3.4 Radio Scan
Rotate the Wheel to choose whether to scan the radio stations manually or
automatically while you are using the Internet Radio or FM Radio functions.
4.3.5 Reset To Default
This section allows you to return all your settings to default settings. If you
choose Yes, you will lose all the personalized settings you have in Audio Profile, Time, and Advance setup.
31
Setup
4.3.6 F/W Version
This section displays F/W version information of your device.
4.3.7 Demo Mode
This section allows you to set the Demo Mode to On or Off.
Rotate the Wheel to choose, and then press the Wheel to select an option.
Note: Refer to Getting Started chapter for Demo Mode details.
32
Setup
4.4 ECO
In this menu, you can select energy saving related (ECO) settings for your IP
Radio.
Press Menu on the device to access this menu.
4.4.1 Backlight
This section allows you to adjust the backlight duration time for your device.
(1) Rotate the Wheel to choose whether to adjust for Playback screen or
Standby screen.
(2) Press the Wheel to activate.
(3) Rotate the Wheel to choose a duration time period for the backlight.
4.4.2 Brightness
This section allows you to adjust the LCD Brightness based on your needs for
best viewing.
(1) Rotate the Wheel to choose low brightness or high brightness.
(2) Press the Wheel to activate.
33
Setup
4.4.3 Volume limitation
If you select volume limitation to On, when you adjust the volume, it will not
increase till the loudest but to a certain volume limit. This helps to prevent a
sudden loud sound.
Rotate the Wheel to choose On or Off and press the Wheel to activate.
4.5 Network config
As mentioned in the chapter Turning On The Device For The First Time, the
device will automatically connect to the set network each time the device is
turned on.
However, if you need to configure the network settings for your IP Radio, you will
be able to do that in this section.
4.5.1 Scan For Networks
Please refer to the chapter Turning On The Device For The First Time for details.
4.5.2 View Config
In this section, you can view your network information. If you need to configure
the settings, please refer to Edit config. section for details.
34
Setup
4.5.3 Edit Config
This section allows you to adjust your network settings manually.
Rotate the Wheel to select Edit config.
You will be asked to choose whether to enable auto DHCP or not. DHCP
allows the network connection to establish itself automatically each time you
use your IP Radio.
When you choose YES, the device will start to find a gateway automatically.
When you choose NO, you will need to setup the network according to your
needs. Contact your network service provider for the IP address, network
mask, gateway address and DNS server information.
(1) Rotate the Wheel to select the numbers, and then press the Wheel to go
through the settings.
→
→
35
→
Setup
After setting up the network manually, you will be asked “Auto (DHCP)?” again.
Rotate the Wheel to select No, and then press the Wheel to activate the new
settings.
36
Appendix
5. Appendix
5.1 Care and Maintenance
Turn off your IP Radio. Use a smooth and dry cloth to wipe. Do not use a
rough cloth, powerful liquid cleaners, thinner painting, alcohol nor other
solvents to clean. These products can damage your IP Radio.
5.2 Problems
Refer to the table presented below in case of an operational malfunction:
Problems
Remedies
The Remote Control does • Confirm that the batteries are correctly
not function.
installed.
• Confirm that you are not too far from the
Radio (7 meters are the maximum recommended)
and that the infra-red sensor is not blocked.
• Make sure that the remote control is well
pointed towards the Radio sensor.
The screen is switched off. Confirm that :
• The power adapter is properly connected to a
power socket.
• The power connector is properly plugged into
the Radio.
Chosen station can not be • To hear a station, you must confirm your
heard.
selection by pressing the Wheel.
• Make sure that your Radio is not set to the
MUTE mode.
• Adjust the volume level.
• Confirm the network configuration.
37
Appendix
Access denied to the Internet
Access denied to the Radio
from a personal computer as
an access point (Media
Server).
The alarm does not ring.
Confirm the WiFi router, Livebox or the line
connections.
Check that your Radio is not encoded or you
must have the encoding key to access.
Check that the alarm source is configured well
(for example: the mp3 player is disconnected,...).
Problem of the connection to • No DHCP server enabled. Please confirm
the router.
router settings.
• Incorrect WiFi encryption key is entered.
Please double confirm the key and re-enter.
• Trouble in the RJ45 port or WiFi module.
Not able to get IP Address.
• DNS has no response. Please ping the IP
address of the DNS to confirm that it is the
case.
• DNS doesn’t have a record of the Internet
Radio server or radio station that you are trying
to connect.
The connection between the
• Traffic jam for the Internet access. Please try
radio and the Internet Radio later.
station is not
• Internet Radio server is out of service or to
OK.
heavily loaded to reply in time.
• The authorization process has failed. Internet
Radio server rejects the access request.
• The streaming service of the radio station is
unavailable or too heavily loaded.
• The IP Radio doesn’t support the service type
of the radio station.
• There is some buffering trouble on the
Internet. The available bandwidth is not good
enough to provide a stable stream from the
radio station.
The IP Radio is booted
• No DHCP server enabled. Please confirm the
normally but it doesn’t get an setting of your router.
IP address.
• Incorrect WiFi encryption key is entered.
Please double confirm the key and re-enter.
• The network interface has difficulty.
38
Appendix
In case of non receiving on the Internet, refer to the table here under:
What has been done with success
The IP Radio is booted normally.
BUT
NO SIGNAL BAR ON THE SCREEN.
What could be the trouble ?
The IP Radio does not obtain an IP
address.
1. No DHCP server enabled. Please
confirm the setting of your router.
2. Incorrect WiFi encryption key is
entered. Please double confirm the key
and re-enter.
3. The network interface has difficulty.
1. The network interface of the IP 1. Cannot access the Internet radio
Radio is good.
server.
2. The connection between IP
2. The DNS lookup for the IP address of
Radio and router was OK.
the radio station failed.
3. The IP Radio already obtained 3. Cannot obtain access to the router or
an IP address.
Internet.
BUT
ONLY ONE BAR SHOWED.
Connection between IP Radio and 1. Cannot obtain access to the radio
Internet radio server is OK.
station.
BUT
2. The radio station rejected the
ONLY TWO BARS SHOWED
connection request.
Connection between IP Radio and 1. The streaming service of the radio
radio station is OK.
station is unavailable or too heavily
BUT
loaded.
ONLY THREE BARS SHOWED.
2. The IP Radio does not support the
service type of the radio station.
The connection between IP Radio There is some buffering difficulty on the
and the radio station was OK.
internet. The available bandwidth is not
BUT
good enough to obtain a stable stream
ONLY FOUR BARS SHOWED.
from the radio station.
39
Specifications
6. Specifications
Dimensions
Unit Weight
CPU Memory
Front Panel Display
Remote Control
Audio Jack
USB Port
Input Power
Hardware and Port Characteristic
31(H) x 200(W) x 69(T)mm
470gm
128MB NAND flash embedded
32MB SDRAM embedded
128x64 Graphic-based & Back-lighted LCD
IR function remote control
2x 3.5mm mini-jack Audio output jack
1x mini Type B
DC 5V/2A
Environment, Certification and Reliability
Operating Temperature -5~+45 °C
Storage Temperature
-20~+60 °C
EMC/Safety
CE, CB
40
Environment
7. Environment
7.1 Packaging
Preservation of the environment is an essential concern of SAGEMCOM. The
desire of SAGEMCOM is to operate systems observing the environment and
consequently it has decided to integrate environmental performances in the
life cycle of its products, from manufacturing to commissioning, use and
elimination.
7.2 Batteries
The presence of the logo (green dot) means that a contribution is
paid to an approved national organisation to improve packaging
recovery and recycling infrastructures.
To facilitate recycling, please respect the sorting rules set up
locally for this kind of waste.
7.3 The Product
The crossed-out waste bin stuck on the product or its
accessories means that the product belongs to the family of
electrical and electronic equipment.
In this respect, the European regulations ask you to dispose
of it selectively:
• "At sales points in the event of the purchase of similar
equipment.
• "At the collection points made available to you locally
(drop-off centre, selective collection, etc.).
In this way you can participate in the re-use and upgrading of Electrical and
Electronic Equipment Waste, which can have an effect on the environment
and human health.
41