1
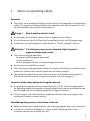
bremer VIVA
Operating Instructions
Automatic Coffee & Cappuccino/Espresso Machine
Franke Coffee Systems
Dear customer,
before putting your coffee machine into operation, please read the operating
instructions carefully. In this way, you protect yourself and you avoid damages to
the device.
They contain important information on the correct use of your machine and will
enable you to use the coffee machine with the necessary handling.
Always keep these operating instructions to hand.
The coffee machine enables you to prepare
− brewed coffee, coffee specialities without milk
− machine with milk frother as additional feature: for coffee products with milk
− special coffee by adding the ground coffee to the coffee chute
− tea / dispensing of hot water or steam depends on the unit type
− for the commercial use only.
Please use the coffee machine for the preparation of coffee only. Improper use can
result in damage to persons and objects.
How does the coffee machine work ?
After a button is pressed, the coffee machine fully automatically brews coffee or
coffee specialities cup for cup. The coffee beans are freshly ground for each brewing
operation.
After brewing, the dry coffee grounds are scraped off into the grounds container or
container ejector.
Key to symbols
. Activities to be carried out
Notes, functional sequences
Reference to other instructions
Contents
Page
1.
Notes on operating safety . . . . . . . . . . . . . . . . . . . . . . . . . . . . . . 5
2.
Familiarise yourself with the bremer VIVA Coffee Machine . . . 6
2.1
Set the language for the menue . . . . . . . . . . . . . . . . . . . . . . . . . 7
3.
Switch on the unit . . . . . . . . . . . . . . . . . . . . . . . . . . . . . . . . . . . . 8
3.1
Top up coffee beans . . . . . . . . . . . . . . . . . . . . . . . . . . . . . . . . . . . 8
3.2
Provide milk (bremer VIVA with milk frother) . . . . . . . . . . . . . . . 10
3.3
Prepare and take coffee . . . . . . . . . . . . . . . . . . . . . . . . . . . . . . . . 12
3.3.1
Preparing single portions (factory setting) . . . . . . . . . . . . . . . . 12
3.3.2
Set the number of portions − Multiple Selection . . . . . . . . . . . . 13
3.4
Manual ground coffee metering . . . . . . . . . . . . . . . . . . . . . . . . . 14
3.5
Manually add milk or milk froth (bremer VIVA with
milk frother) . . . . . . . . . . . . . . . . . . . . . . . . . . . . . . . . . . . . . . . . . 15
3.6
Emptying the grounds container . . . . . . . . . . . . . . . . . . . . . . . . . 16
4.
Take hot water (additional Feature) . . . . . . . . . . . . . . . . . . . . . . 17
5.
Take steam (additional feature) . . . . . . . . . . . . . . . . . . . . . . . . . 18
6.
Cleaning and care . . . . . . . . . . . . . . . . . . . . . . . . . . . . . . . . . . . . 19
6.1
Cleaning the milk system (bremer VIVA with milk frother) . . . . 20
6.2
Cleaning the brewing unit . . . . . . . . . . . . . . . . . . . . . . . . . . . . . . 22
6.3
Cleaning the coffee dispenser . . . . . . . . . . . . . . . . . . . . . . . . . . 24
6.4
Deliming and cleaning the hot water / steam outlet
(add. feature) . . . . . . . . . . . . . . . . . . . . . . . . . . . . . . . . . . . . . . . . 27
6.5
Clean coffee bean container and housing . . . . . . . . . . . . . . . . . 28
7.
Switch off / End of operation . . . . . . . . . . . . . . . . . . . . . . . . . . . 29
3
Contents
Page
8.
Adjustment, programming . . . . . . . . . . . . . . . . . . . . . . . . . . . . . 30
8.1
Overview of the adjustment possibilities . . . . . . . . . . . . . . . . . 30
8.2
Display or delete the summing counter . . . . . . . . . . . . . . . . . . . 31
8.3
Assigning bean container to the article key . . . . . . . . . . . . . . . . 32
8.4
Adjusting metering quantities for article . . . . . . . . . . . . . . . . . . 33
8.5
Adjusting the metering quantity hot water" . . . . . . . . . . . . . . . 34
8.6
Assigning article names to the article key or blocking a key . . 35
8.7
Adjusting article control (multiple selection) . . . . . . . . . . . . . . 36
8.8
Changing to turbo operation" . . . . . . . . . . . . . . . . . . . . . . . . . . 37
8.9
Enter a secret code (PIN) to change settings . . . . . . . . . . . . . . . 38
8.10
Setting the dispensing sequence . . . . . . . . . . . . . . . . . . . . . . . . 39
9.
Faults and remedies . . . . . . . . . . . . . . . . . . . . . . . . . . . . . . . . . . 40
10.
Technical data . . . . . . . . . . . . . . . . . . . . . . . . . . . . . . . . . . . . . . . 43
11.
Setting up and connecting (customer service) . . . . . . . . . . . . . 44
11.1
Setting up . . . . . . . . . . . . . . . . . . . . . . . . . . . . . . . . . . . . . . . . . . . 44
11.2
Remove protection / Inserting beans container . . . . . . . . . . . . 46
11.3
Connecting the water supply . . . . . . . . . . . . . . . . . . . . . . . . . . . 47
11.4
Connecting the water outlet . . . . . . . . . . . . . . . . . . . . . . . . . . . . 47
11.5
Connecting the mains cable . . . . . . . . . . . . . . . . . . . . . . . . . . . . 48
12.
Rating plate data / Maintenance . . . . . . . . . . . . . . . . . . . . . . . . 49
12.1
Maintenance notes . . . . . . . . . . . . . . . . . . . . . . . . . . . . . . . . . . . 50
13.
Dismantling, disposal . . . . . . . . . . . . . . . . . . . . . . . . . . . . . . . . . 54
EU Conformity declaration . . . . . . . . . . . . . . . . . . . . . . . . . . . . . . . . . . . . . . . 55
4
1.
Notes on operating safety
Operation
D The unit is not a working substance in the sense of the regulations for operating
safety. The operator is responsible for the operation, the risk assessment, and
for the repeated tests by authorized persons.
Danger !
Risk of death by electric shock!
D Do not spray the unit with a water hose or high-pressure cleaner.
D Do not allow any liquids to flow into the ventilation slits and filling openings.
D In the event of operating faults, refer chapter 9. "Faults, remedy" section.
Attention ! If the following notes are not observed, slight injuries or
property damage might result.
D The unit may only be operated
− by trained staff (assigned personnel)
− under supervision
− for the purpose outlined in the operating instructions.
D Do not cover the ventilation vents !
D The unit may only be operated outdoors if covered and if there is sufficient wind
protection. Protect the unit from moisture and direct sunlight.
D The ambient temperature around the unit must not fall below freezing point.
This would cause the water to freeze inside the unit and damage it.
Inspection of the safety equipment in regular intervals
D According to the pressure vessel regulations 97/23/EG and to the regulations
for operating safety the operator is responsible for the careful maintenance and
for the inspection of the safety equipment in regular intervals.
D For this reason, the unit should be inspected and serviced once a year by the
authorised Franke customer service.
Extended operating pauses or shut−down of the unit
D Before extended shut−down periods, the cleaning program has to be carried out.
D In order to avoid frost damages or in case of risk of freezing, the Franke
customer service has to empty the unit.
5
2.
Familiarise yourself with the bremer VIVA Coffee
Machine
Cover for manual ground coffee metering
and cleaning agent metering (lockable)
Cover, bean container
*Bean container, left
*Bean container, right
Bean container, center
Keypad cover (lockable)
*Milk cooling box
(add. feature)
Hot water button
Hot water outlet
Coffee dispenser:
Swivelable and
height-adjustable
*Steam
button
*Steam
outlet
Drip grill
Drip tray
*Suction
hose for milk
Grounds drawer
with handle
* = Additional feature
Display and Input Panel
Scroll backwards in the main menu
*Air nozzle
Display panel
Scroll forwards in the main menu
Making the settings / *adding milk
froth / *clean the milk suction hose
Unit switch On / OFF (STANDBY)
Start cleaning program
Change settings / *adding milk
Delete summing counters
Confirm loading cleaning tablet /
dosage ground coffee
Opening and closing menus
COFFEE
SCHÜMLI
Article keys:
1 cup
ESPRESSO
Article keys:
2 cups
CAPPUCCINO
Indicator lamps
6
* = Additional feature
2.1 Set the language for the menue
!!! STANDBY !!!
− before switching on
− in STANDBY Mode
− at the machine
Example: set the language to German
START
. Press the upper article key on the left hand
side continuously, press at the same time
key
START
Country code
081 STANDBY
or
till the requested country
code apears in the display panel
Country code
031
033
044
049
081
095
Language
Dutch
French
English
German
Japanese
Russian (add. feature)
. Confirm set country code with key
Summenzähler
Menü
verlassen
D Subsequently the setted language is shown
(Summenzähler" = Summing counter) in
the display.
. Go to Menü verlassen" (= Exit menu) with
key
. Confirm the setting with key
D The desired language is set.
!!! STANDBY !!!
D The machine goes into the STANBY Mode
and stores the new setting.
D In case of power failure or incorrect setting
procedure it is possible to loose applied
data.
7
3.
Switch on the unit
. Open the water valve.
. Switch on the electrical mains switch.
!!! STANDBY !!!
D !!! STANDBY !!! appears in the display panel.
. Unlock and open keypad cover with key.
. Switch on the coffee machine by pressing
the on−off
switch.
D Rinsing process runs and boiler is heated up
(approx. 5 minutes).
keypad
lock
open
close
D The coffee machine is ready for operation
when the green indicator lamps on the
buttons light up and when "Ready" is
displayed in the display panel.
. Close the keypad cover and remove the key.
3.1 Top up coffee beans
D Top up with only the amount required for the day, because the coffee beans lose
their aroma if they are in the hopper for too long.
D Ensure that no foreign bodies enter the hopper.
8
Cover, beans container
Lock (option)
Top up coffee beans
. Unlock the hopper cover with the key and
open it.
. Fill the empty hopper with the required type
of coffee beans.
D If the appliance is equipped with 2 grinders,
it will be possible to use two different sorts
of coffee beans.
. Close the hopper after filling it so that the
aroma is preserved.
Display when a hopper is empty
Example:
D If the beans container becomes empty
during operation, this is indicated in the
display panel, e.g.: "Refil coffee container to
centre".
Refill centre
ground container
D The corresponding article keys
blocked.
Example:
Beans container
left
(1 kg)
are
centre
(1.5 kg)
right
(1 kg)
D If this message appears during a brewing
operation, it is possible that this brewing
operation took place without a sufficient
amount of ground coffee. Refill the bean
container with coffee beans and repeat the
brewing operation.
Confirmation of filling
. Press blocked article key for approx. 5
seconds.
D When the green indicator lamp lights up
again, the coffee machine is ready for
brewing.
9
3.2 Provide milk (bremer VIVA with milk frother)
Food poisoning by bad milk!
CAUTION
If off milk is used, there will be the risk of food poisoning. For
hygienic reasons, the milk has to be replaced in time. Off milk has a
foul smell and must not be used.
Observe the hygienic instructions and use only pre−cooled long−life
milk.
NOTE
Fresh milk has to be kept away from light, in cooled conditions at 4 to
8°C, and closed. The life of milk is guaranteed by the indication of
the consumption date on the packing.
Please observe that no foreign bodies must come into the milk tank.
Non−cooled milk will be very hot when being doses, this can result in
dosage fluctuations and form a skin (clogging). Moreover, there is a
risk of burning when tasting.
Suction hose
Suction nozzle
bremer VIVA with Milk Fridge (add. feature)
D Milk with a fat content of 3,5% is best suited
for frothing.
. Immerse the suction hose for milk into the
milk.
D Make sure that the suction nozzle at the
suction hose stands on the bottom of the
milk container. Do not bend the suction
hose.
. Close the cooling compartment.
D Clean the suction hose two times a day, see
page 20.
10
example:
Number of possible
milk dosages
Ready
Milk 1 emty 05
Milk container
Suction hose
Milk Coolbox
(add. feature)
Display at bremer VIVA with Milk Fridge and
level sensor detection (add. feature)
D The sensors transmit a signal, after the
minimum supply level is fallen below in the
milk container. In the display appears the
message.
D If "... empty 00 " is shown in the display the
bremer VIVA proportions no more milk.
Coffee products with milk dosage are closed
or not selectable.
bremer VIVA with Milk Coolbox (add. feature)
. Immerse the suction hose for milk into the
milk.
D Make sure that the suction nozzle at the
suction hose stands on the bottom of the
milk container. Do not bend the suction
hose.
D Clean the suction hose two times a day, see
page 20.
When preparing Cappuccino or coffee with milk, milk or milk froth is metered
automatically.
Filling milk container, see operating instructions bremer VIVA Milk Fridge.
For the milk quantity settings, see the Chapter "Adjust metering quantities
for article", see page 33.
11
3.3 Prepare and take coffee
Risk of scalding by hot coffee !
After completion of the brewing process, the machine automatically
serves hot coffee.
CAUTION
Deposit and leave the cup during the process. Do not handle below
the coffee outlet.
NOTE
During coffee production do not pull out the coffee ground tank or
the coffee outlet (outlet head), as otherwise malfunction might
result.
Set the outlet height of the coffee dispenser
To adapt to various vessel sizes:
Coffee
dispensing
Outlet
rocker
Height max.
185 mm
. To adjust the height of the coffee dispenser,
fold away the outlet rocker or push the coffee
dispenser up or down.
D When using coffee pots fold the outlet rocker
to the rear till stop (engages).
3.3.1Preparing single portions (factory setting)
. Place cup under the coffee dispenser.
D The coffee machine is ready for operation when the green indicator lamps on
the buttons light up and when "Ready" is displayed in the display panel.
. Start the required brewing process by pressing the corresponding article key
D The brewing process is displayed in the display panel, e.g.:
Preparation
Coffee cup 1x
D After each withdrawal of a coffee milk product or of milk, the coffee machine
automatically rinses the coffee dispenser.
To change the coffee type and settings, see Page 30, Chapter 8.
12
3.3.2Set the number of portions − Multiple Selection
D The standard factory setting of the coffee machine is the preparing of single
portions, see page 12.
D The customer service may adjust the bremer VIVA coffee machine by starting up,
so you can set the number of portions, like following example.
Example: Brewing a pot of coffee − 9 cups
. Place a lot of empty cups under the coffee
dispenser by time.
Preparation
Coffee cups 9x
Number of portions
. Press the article key
as often as is
necessary until the required number of
portions is displayed in the display panel, for
example 9 times.
D The number of portions is shown in the
display panel and will be counted down
during operation / preparation.
Notes for multiple selection
D The first brewing operation begins immediately when the first portion is
selected.
D The display returns to 1" after more than 9" portions are selected.
D An already commenced brewing operation is completed.
D The number of multiple selection should not exceed the number of possible
dosages during the adjusting in that case.
D You can set the "Multiple selection" see Adjusting article control" on page 36,
if the message- and entry field / main menu is not blocked, see page 38.
13
3.4 Manual ground coffee metering
D This is for preparing single portions only.
. Place the cup under the coffee dispenser.
Cover for ground
coffee chute (1)
Press here to open
. Unlock and open the cover for ground coffee
chute (1)and keypad (2).
Lock (option)
Keypad cover (2)
. Press the manual ground coffee metering
key.
D The following command appears in the
display:
Put in ground
−>Press prd. key
Cover for ground
coffee chute
Lock
. Add metered amounts of ground coffee to
the coffee chute
− for 1 cup approx. 9 gr.,
− for 2 cups approx. 14 gr.
− VIVA Barista: for 3 cups approx. 20 gr.
. Start the required brewing process by
pressing the corresponding article key
Key, manual ground
coffee metering
Keypad cover
D The brewing process is displayed in the
display panel, e.g.:
Preparation
Coffee cup 1x
. Close both covers and remove the key.
"Manual ground coffee metering" can
also be programmed on the article
keys, see Chapter "Assigning bean
containers to the article key", Page 32.
14
3.5 Manually add milk or milk froth (bremer VIVA
with milk frother)
. Open keypad cover.
D The coffee maker is ready for operation when the green indicator lamps on the
buttons light up.
Manual metering:
− Key
for milk froth
− Key
for milk
. Keep key
dispensed.
or
pressed until desired quantity of milk or milk froth is
D Consider the time of approx. 5 seconds for milkdosage after releasing the key.
D After each additional dosage of milk or milk foam, the bremer VIVA
automatically rinses the coffee dispenser.
Adjust the milk quantity in the Chapter "Adjusting metering quantities for
article", see Page 33.
15
3.6 Emptying the grounds container
The bremer VIVA coffee machine counts the number of ejected portions of ground
coffee. After the set number of portions is reached, the display signals that the
grounds container must be emptied.
The number of portions can be changed by the Franke bremer Customer Service
representative (factory setting 80 to 100 portions).
If "Empty grounds container" appears in the
display panel,
− preparing coffee is no longer possible.
. Remove, empty and clean the grounds
container.
D NOTE: The grounds container must have
been removed for at least 10 seconds so that
clearing can occur.
Handle
Grounds container
. Insert the grounds container.
D The message "Insert grounds container"
disappears.
If required, the coffee grounds can also
be ejected into a container, see table
opening for container ejection (add.
feature).
Risk of being crushed by the brewing unit !
D Never reach into the open mount after
removing the grounds container.
Caution
Mount
for grounds
container
D Always switch off the machine via the mains
or master switch
before cleaning it.
D The mount should only be wiped with a
damp sponge (do not use a cloth).
D Refit the grounds container after cleaning.
16
4.
Take hot water (additional Feature)
Risk of scalding by hot water!
After pressing the hot water button, the machine automatically
dispenses hot water.
CAUTION
Proceed with care. Place cup under Hot water dispenser wait until
operation is finished. Do not handle below the hot water outlet.
Hold the hot water outlet pipe at the protective handle (add. feature).
Metered hot water dispensing
D The "metered hot water dispensing" is set at
the factory. If you wish to reset this setting to
"unmetered hot water dispensing", inform
your Customer Service representative.
. Place the cup under the hot water dispenser.
Hot
water
key
Hot water
dispenser
. Press the
hot water key.
D Hot water is dispensed metered and stops
automatically.
To adjust the metering quantity for
metered hot water dispensing, see
Page 34, Chapter 8.5.
Unmetered hot water dispensing
. Press the
hot water key, the output
the hot water key
starts - press the
again, dispensing stops.
17
5.
Take steam (additional feature)
Risk of scalding by steam!
After pressing the steam button, the machine automatically doses
steam.
CAUTION
Proceed with care. Do not handle below the steam outlet. Avoid
contact. First, let it cool.
NOTE
Depending on the adjustment in the service menu (to be adjusted by
the Franke bremer customer service):
Steam is distributed as long as you keep the steam button pressed
(factory setting) or steam is distributed until steam distribution is
disabled by pressing the steam button repeatedly.
Heating beverages
. Immerse the steam dispenser deep into the
beverage to be heated.
. Place the cup on the drip grille and release
the steam dispenser.
Steam key
. Press the
steam key till the beverage is
heated up or hot enough.
Steam
dispensing
After heating beverages
. Take out the vessel. Remove steam pipe from
vessel.
. Press the
steam key, to blow out the
steam outlet.
. Wipe off the steam dispenser with a damp
cloth.
Note
18
After heating up the beverage it’s necessarily to blow out the steam
outlet to prevent a coustipation !
6.
Cleaning and care
Risk of death if spraying the unit with water!
DANGER
The machine is connected to electric voltage. For this reason, never
spray the unit with a water hose or high−pressure cleaner. Water
could penetrate the unit, cause an electric shock and damage the
unit.
Risk of scalding during the mechanical cleaning with hot water!
CAUTION
The machine rinses the coffee output with hot water in order to clean
it. During the automatic cleaning, do not handle below the coffee
outlet.
Before starting the cleaning program, pull the coffee dispenser /
outlet downward to the drip grill. After the cleaning cycle, the coffee
dispenser is hot. Avoid contact. First, let it cool.
NOTE
During the cleaning program do not pull out the grounds container
and coffee outlet (dispenser block), otherwise malfunctions may
happen.
Clean the bremer VIVA coffee machine
− daily after the end of operation
− depending on degree of pollution
− after long interruptions or company vacation
− by starting the cleaning program.
Do not use any scouring or abrasive cleaning agents !
We recommend to keep a second coffee dispenser to hand in order to
avoid operational interruptions.
Cleaning and care agents
Designation
Bremalux
Bremaut
Bremex
Cleaning tablets for coffee machines
Special Cleaner
Use
for stainless steel care
for removing coffee residues
for removing lime residues
Cleaning tablets for automatic cleaning of the brewing unit
VIVA KM with milk frother: for cleaning the milk system (add. feature)
You can obtain cleaning agents from your Franke Customer Service agent.
19
6.1 Cleaning the milk system (bremer VIVA with
milk frother)
NOTE
Clean the milk system
− for hygiene reasons
− at least two times a day
− with Special cleaner and hot water
− especially prior to longer pauses between milk drawings
− to avoid disturbances in milk dosage.
Clean the milk suction hose with a damp lint−free cloth.
keypad cover
key
Rinse out milk residue
. Immerse the suction hose into the pot with
approx. 300 ml hot water.
. Unlock the keypad cover with the key and
open it.
. Press the
key and keep it pressed until
the cup is completely empty.
Preparation for the automatic cleaning program
of the milk pipes
special cleaner
. Fill special cleaner / cleaning liquid into a
container. If the liquid cleaner is used from a
dispenser you have to push about
− VIVA KM: 5 times
− VIVA KM au lait and −McD: 7 times
− 4 ml special cleaner cleaning liquid per
100 ml water, max. 28 ml.
. Fill in the vessel approx. 600 ml warm Water.
Stir the cleaning liquid.
20
bremer VIVA coffee machine with milk fridge
(add. feature)
. Place the vessel into the milk fridge.
suction
hose
. Insert the suction pipe to the vessel.
. Close the door of the milk fridge.
D For rinsing the pipe, prepare a clean vessel
with approx. 0,6 Liter cold clear water.
Go on with cleaning the brewing unit",
see page 22.
suction
hose
bremer VIVA coffee machine with milk coolbox /
Tetrapack (add. feature)
. Place the vessel on the drip tray.
. Insert the suction pipe to the vessel.
D Be sure that the pipe can not slip out of the
vessel.
D For rinsing the pipe, prepare a clean vessel
with approx. 0,6 Liter cold clear water.
Go on with cleaning the brewing unit",
see page 22.
21
6.2 Cleaning the brewing unit
D The brewing unit is cleaned by the automatic cleaning program (duration
approx. 10 minutes).
D The command to execute milk cleaning is also displayed by the additional
feature Milk frother". Use a special cleaner to rinse the milk system (duration
approx. 15 minutes).
Start cleaning program
. Open the chute cover and keypad cover.
. Press the Cleaning Program key
.
bremer VIVA without milk froth :
Go on with Cleaning the brewing unit",
see Page 23."
D The following command appears in the
display if milk metering is adjusted.
Press + to Clean
Milk Tube
Select Cleaning
= Brewing unit only (see page23 for
subsequent procedure)
= Include milk tubes
Indicates the
first cleaning
step to be
executed.
Rinsing the milk pipe with special cleaner
(bremer VIVA with Milk frother)
. Press key
Cleaning Tube
1 13 Time Remain
Indicates how many rinsing
intervals are yet to be executed.
suction
hose
D Interval rinsing starts − duration approx. 3
minutes. After that there is to rinse the milk
pipe with clear water.
Rinsing the milk pipe with clear water
(bremer VIVA with Milk frother)
. Fill a clean vessel with approx. 0.6 litre cold
clean water. Place it on the drip tray or into
the Milk fridge.
. Insert the suction pipe to the vessel.
vessel
22
Press + To Rinse
2 Tube
Instruction for second cleaning
cycle (rinsing cycle)
Rinsing Tube
Please wait
Add tablet press
Spoon Symbol
Chute for cleaning tablets
. After this message press key
a second time.
D Rinsing runs from approx. 1 minute. An
instruction appears in the message field.
After the rinsing the milk system is cleaned.
D After rinsing is complete (second cleaning
step) the following command appears in the
display to put a cleaning tablet into the
chute of the machine.
Cleaning the brewing unit
D The following command appears on the
display:
Add Tablet Press
Spoon Symbol
. Put a cleaning tablet for coffee machines into
the chute.
. Confirm the tablet has been inserted − press
Key: Confirmation that cleaning
tablet has been inserted
!!! STANDBY !!!
Neutralisation
D The automatic cleaning program is starting.
D After the cleaning program is finished the
coffee machine switches off itself.
STANDBY" is displayed.
D When the coffee machine is switched on
again, a brewing operation is
automatically performed to neutralise the
brewing unit and parts supplying the coffee,
Page 8.
D Clean the coffee dispenser in order to avoid
disturbances and blockages, see Page 24.
23
6.3 Cleaning the coffee dispenser
− for hygiene reasons
− with a cleaning brush
− bremer VIVA with milk frother: clean the coffee dispenser several times a day
with a special cleaner for milk systems.
Pull out the coffee dispenser
2
3
Risk of scalding! The dispenser block may
be hot.
. Pull the dispenser block down as far as it will
go (1).
1
. Press and hold catch (2). Pull out the
dispenser block (3).
Verriegelung
Remove the coffee dispenser
Cover for
dispenser block
Brush for
dispenser
block
Dispenser
block
. Remove the cover from the dispenser block
(only with bremer VIVA with milk frother).
. Remove the dispenser rocker from the
dispenser block.
Dispenser
rocker
2
3
1
cleaning
brush for
nozzles
24
Precleaning the dispenser block
. Clean the dirty parts of the removed coffee
dispenser individually under flowing warm
water with the provided brush.
. Clean with the cleaning brush for nozzles
− all drillings or openings at the nozzles
of the dispenser block
− the outlet openings of the dispenser
rocker.
Insert all removed parts in a cleaning bath
− only bremer VIVA with milk foamer
− several times a day
− approx. 20 minutes
Cover
Dispenser block
. Proportion cleaning agent special cleaner in
a container, push the dispenser 5 times and
add approx. 1 litres of hot water.
Dispenser
rocker
. Insert the dispenser block, cover, dispenser
rocker into the cleaning bath
− depending on degree of pollution.
D Put the cover for dispenser block in the
cleaning solution over night and allow to
react.
. After the cleaning always rinse the cover,
dispenser block and dispenser rocker, dry it
with a lint free cloth.
Cleaning the nozzles of the guidance
. Clean thoroughly all plug−in connections of
the guidance
− with Bremaut and a damp cloth to
remove the coffee residues
− dry it with a lint free cloth.
. Clean carefully the drillings of the nozzles
− with the clean end of the cleaning
brush for nozzles.
D NOTE
With cleaning the drillings in the plug−in
connections, do not press the cleaning brush
or other articles with force, otherwise a
customer service employment may become
necessary.
25
Cover
Dispenser block
Dispenser rocker
Assemble the coffee dispenser and connect it to
the coffee machine
. Press the cover into the dispenser block until
the stopper is reached (bremer VIVA with
milk froth).
D If the cover is not closed completely the milk
will be heated up too much.
. Please put the dispenser rocker onto the
dispenser block on both sides.
. Assemble all parts and attach the dispenser
block the coffee machine − press till stop.
26
6.4 Deliming and cleaning the hot water / steam
outlet (add. feature)
− only in case of lime deposits and furring
Risk of scalding in case of unintentional hot water outlet!
Before decalcifying the hot water outlet, switch off the VIVA KM via
CAUTION
the on−off switch
Screw off the cone and nozzle only if the machine is switched off and
cooled.
hot water
dispenser
steam dispenser
. Remove clockwise manually
− on the left hand side : cone with hot
water nozzle, outlet with screen, gasket
− on the right hand side : steam nozzle
O-ring
steam
nozle
cone
hot water nozzle
. Remove these parts manually.
D Use a needle−nosed pliers to remove the hot
water nozzle.
. Except the gasket and O−rings put all
removed parts into a solution with Bremex
and water for approx. 10 minutes.
. After that rinse thorougly with clear water.
. Assemble and screw all parts tightly.
outlet with
screen and
gasket
. Clean the hot water and steam dispenser
with a damp cloth. Use hot water and steam
to remove cleaning residues.
27
6.5 Clean coffee bean container and housing
. Switch off the VIVA coffee machine
− before cleaning
− so that the grinder or brewing unit cannot start automatically (avoid risk of
crushed fingers)
− via the main switch
Clean the coffee bean container
Note
When cleaning the container, ensure that impurities do not enter the
coffee bean container or grinder. Any impurities which have dropped
in must be removed, as they may otherwise lead to malfunctions.
. Wipe the coffee bean container thoroughly
− to remove coffee oil and fats
− whenever necessary or once per week
− when empty
− inside
− using a damp − not wet − lintfree cloth (e.g. microfibre cloth).
. Thoroughly dry the coffee bean container
− whenever it has been wiped with a damp cloth
− so that condensation cannot form
− for instance, with an absorbent household towel or kitchen roll.
Clean housing
. Remove coffee residues with a cleaning agent and a soft cloth.
. Use a damp cloth to wipe plastic parts, painted covers and stainless steel
surfaces.
. Dry all cleaned surfaces.
. Remove the drip grill and clean the drip tray.
. After cleaning, insert the drip grill.
. Clean stainless steel surfaces with a stainless steel care agent.
. Empty and clean the grounds container.
28
7.
Switch off / End of operation
. Clean the coffee machine daily before switching off.
. Switch off the unit with the on−off switch
D !!! STANDBY !!!" appears in the display panel.
NOTE
The coffee machine or things may be damaged, if you do not follow
the references below:
. Close the water valve, if an electronic water monitor is not
installed to guard against water damage.
. Switch off the electrical mains switch, if the coffee machine will
not be used for a longer time.
. Check the water softener after the end of operation daily. Change
it if it is necessary.
D To prevent calcification of the coffee machines, Britta Waterfilters
are placed into the water supply of the coffee machines.
D Call the Franke customer service if you get a message in the
display panel to change the water filter.
29
8.
Adjustment, programming
8.1 Overview of the adjustment possibilities
Ready
NOTE: The setting is possible only, if the main menu is
not blocked by a secret code.
Access to the main menu / Enter a secret code number, see page 38.
Access to the submenu
Summing counter
Coffee cup
Total:0000000013
Displaying or deleting the adding counter
(Page 31)
Exit submenu
Select grinder
Coffee cup
Grinder: centre
Assigning bean containers to the article
key (Page 32)
Adjust dosage
quantity
Coffee cup
Ground cof.: 245
Adjusting metering quantities per article
(Page 33) and hot water key (Page 34)
Article
designation
Key 1
Coffee cup
Assigning article names to the article key
or blocking keys (Page 35)
Article prices
Coffee cup
Price1:000000.00
Adjusting article prices (no longer available starting from software version 6.12)
Article control
Coffee cup
Release key: ON
PIN
00000
dosage
order
Exit menu
30
Coffee cup
Brewing: 1
Switching external billing systems on or off (Page
36). Making adjustment for portion selection: Up
to 9 portions can then be preselcted for each article (Page 36). Turbo operation − changing the brewing sequence − Only VIVA KM.
Entering PIN = Personal identification number (secret access code) (Page 38).
Setting dispensing sequence, for brewing,
milk, foam − Only VIVA KM and VIVA KM au
lait.
IMPORTANT!
If the machine is switched off before the function Exit
menu" adjustments which have been made are lost!
8.2 Display or delete the summing counter
All output articles are counted in the summing counter. These totals can be
displayed or deleted.
Ready
Summing counter
Coffee cup
Total:0000000012
Select the required article by pressing the
corresponding article key.
Exit menu
E. g. 1 Espresso selected
Confirm and
execute delete
Request delete
1 espresso
Total:0000000023
1 espresso
Del. Sum. count.
Display next summing counter
Abort the delete procedure
1 espresso
Total:0000000000
Display next summing
counter
31
8.3 Assigning bean container to the article key
Ready
Select grinder
Coffee cup
Grinder: centre
Select the required article by pressing the corresponding article key
Exit menu
The article "Cup of coffee", related to this key, is used for neutralization after
automatic cleaning. Therefore, do not use this article for manual dosage of
coffee powder, if possible!
E. g. 1 Espresso selected
1 espresso
Grinder: left
32
Selection possibilities, coffee grinder
Left
Additional feature
Centre
Right
Additional feature
Manual = Manual ground coffee metering
8.4 Adjusting metering quantities for article
Ready
Coffee cup
Ground coff.:245
Select required article by pressing the
corresponding article key
Adjust dosage
quantity
E. g. 1 Espresso selected
1 espresso
Ground Cof.: 290
Exit menu
1 espresso
Water quant.: 120
Ground coffee quantity − grinder
running time
Adjustment range: 0 to 999
in 1/100 sec.
Brewed water quantity
Adjustment range: 0 to 999
1 impulse => approx. 0,5 ml
120 impulses => approx. 60 ml.
1 espresso
Brew. press. ON_
Brewing with or without pump pressure
Adjustment range: OFF/ON
Depending on the article
1 espresso
Milk foam: 000
Suction time for milk foam
Adjustment range: 0 to 999
Value 100 = aprrox. 6 sec.
1 espresso
Milk: 000
Suction time for milk
Adjustment range: 0 to 999
Value 100 = aprrox. 6 sec.
Change to other article
33
8.5 Adjusting the metering quantity hot water"
This setting is only effective if the "metered hot water dispensing" is activated.
Adjustment to "metered/unmetered hot water dispensing" can be performed by
Customer Service. "Metered hot water dispensing" is activated at the factory.
Ready
Adjust dosage
quantity
Coffee cup
Ground cof.: 245
Coffee cup
Water quant.:265
Press the Hot Water key
Exit menu
Water
Water quant.:60_
34
Water quantity
Adjustment range: 0 to 999
8.6 Assigning article names to the article key or
blocking a key
Ready
Article
designation
Key: 1
Coffee cup
Select required article by pressing the
corresponding article key
Exit menu
Key 1
Key 2
Key 3
Key 4
Key 5
Key 6
Key 7
Key 8
Key 7 und 8 (no articles) not
for VIVA KM Barista
e.g. key 2 selected
Key: 2
Coffee pot
Select required article by pressing the
corresponding article key
Selection possibilities:
*VIVA KM with milk frother
and VIVA KM au lait
Coffee cup
Coffee pot
1 espresso
2 espresso
1 cafe creme
2 cafe creme
*1 cappuccino
*2 cappuccino
*Latte macchiato
2 Coffee cup
1 Ristretto
2 Ristretto
1 Schümli
2 Schümli
*Milk
*Espresso macchiato
*1 Coffee + milk
*2 Coffee + milk
*1 Cafe Latte
*2 Cafe Latte
Hot water
Steam
No product =
Article key
blocked
35
8.7 Adjusting article control (multiple selection)
The possibility for multiple selection can be switched off and on. If you have
switched on multiple selection, you can preselect up to 9 portions during one
brewing operation, e.g. for brewing in a pot. The article keys can be assigned to an
external billing system. If an article is paid for in the coin checker, the
corresponding article key is released by the coin checker (Setting multiple selection
= 0).
Ready
Coffee cup
Release key: ON
Select the required article by pressing the
corresponding article key.
Article control
E. g. 1 Espresso selected
1 espresso
Release key: ON
With external billing system
OFF = Article key must be released by
external billing system
ON = Release article key, no billin via
external billing system
Exit menu
1 espresso
Mult. select.: 0
Turbomode
36
Without external billing system
OFF = Article key blocked
ON = Article key released
Switch portion selected OFF/ON
0 = Only single-portions can be dispensed.
1 = Up to max. 9 portions can be
preselected for each button.
2−9 = The preselected number of
cups will be dispensed cup by cup
after pressing the button once.
Turbomode only for VIVA KM
and VIVA 24
8.8 Changing to turbo operation"
By changing to turbo operation", the waiting time for a brewing cycle
isshortened.In this setting, a grinding cycle follows every brewing cycle. The
coffeefor the next brewing cycle is then ground already.
This function can only be set for one item key. This setting blocks allother item
keys.
Ready
Coffee cup
Release key: ON_
Coffee cup
Mult.select: 0
Articel control
Turbomode
Select required item by pressing
corresponding item key, i.e.
selected, 1cup of coffee.
Exit menu
After turbo operation entry, a grinding cycle follows automatically
whenthis message disappears.
Turbomode
Coffee cup
Clear the turbo operation entry
with the Clear" key
37
8.9 Enter a secret code (PIN) to change settings
You can block the message- and entry field against unwanted operation by entering
a secret code / PIN = personal identification number .
The factory setting is 5 zeros. When this code (5 zeros) is entered, themessage- and
entry field are not blocked.
Select the digits 0-9.
Ready
00000
Move the cursor
to the left or
right
The whole secret code is displayed at this menu point.
Remember the digits well. After
entering the secret code, there is
noaccess to the main menu without entering the right code!
If the secret code gets lost, it can
only be deleted by Client Services
Save PIN
PIN
Acess/Signing on after entering secret code:
Ready
Exit Menu
PIN
0XXXX
Select the digits 0-9
Only the number is shown at the cursor
Move the cursor to the left or right (Scrolling)
Confirm entered secret code with this key
PIN
Scolling the menue is possible now.
38
8.10 Setting the dispensing sequence
VIVA KM with milk frother, VIVA KM au lait and VIVA 24: By means of the dispensing
sequence you can for instance decide whethermilk foam or the brewing cycle starts
first. Both of these can also run simultaneously.
Ready
Coffee cup
brewing: 1
Select required item by pressing
the corresponding item key
dosage
order
i.e. 1 Cappuccino selected
1 Cappuccino
brewing: 1
Menu
Exit
1 Cappuccino
Milk: Off_
1 Cappuccino
Milk foam: 1
Select required item by pressing
the corresponding item key
Guarantee the function for the indicator lights of
the product keys with milk/milk foam
During attitude of the dosing quantity milk or milk
foam on "0" (chapter 7.4) adjust with the appropriate product under menu dosing sequence milk
or milk foam "off".
Setting dispensing sequence, for
brewing, milk, foam
1., 2., 3. or Off
Example
Coffee and milk or foam can be
dispensed simultaneously = Brewing on 1, milk foam on 1.
Milk and foam cannot be dispensed simultaneously = Brewing on
1, milk on 1, set foam on 2.
Dispensing sequence
Latte Macchiato"
brewing (Coffee):
milk:
milk foam:
Dispensing sequence
Cappuccino"
brewing (Coffee):
milk:
milk foam:
3
1
2
1
2
0
39
9.
Faults and remedies − Troubleshooting
If faults arise with this unit, please investigate them using the following table:
Faults with indication of the error code
Example:
Error
code
01
Fault / Error
Brewing not possible
Indicator lamps on the article keys do not
light up
*02
Brewing plunger has not
reached its position
Indicator lamp on the steam key does
not light up.
Filling level of the steam
boiler not reached.
No steam dispensing possible.
Large pressure variations in the water supply
Display of the error code in STANDBY
mode.
*03
Possible cause
Indicator lamp on the Hot Water or Steam
key does not light up.
system may cause the
boilerelement to be
switched off for safety
reasons.
Hot water/steam boiler
switched off.
No hot water or steam dispensing and
milk or milk froth possible.
04
05
06
Display of the error code in STANDBY
mode.
Indicator lamps on the article keys do not
light up
Remedy
Switch the coffee machine off and
on.
If the error code is still displayed,
inform Customer Service.
Check water pressure.
Switch off VIVA KM. Press key "−"
to relieve pressure in steam boiler.
Switch on VIVA KM.
If the error code is still displayed,
inform Customer Service.
Switch the coffee machine off and
on.
If the fault is still present,
− inform Customer Service,
− coffee brewing without milk or
milk froth is possible.
No water is delivered.
Open the water valve.
Brewing is not possible.
Switch the coffee machine off and
on.
Indicator lamps on the article keys do not
light up.
If the error code is still displayed,
inform the Customer Service.
Switch the coffee machine off and
on.
Brewing is not possible.
*07
*08
01
Indicator lamp on the Hot Water or Steam
key does not light up.
No hot water or steam dispensing and
milk or milk froth possible.
Temperature sensor for
brewed water boiler reports a fault.
Temperature sensor for
hot water/steam boiler
reports a fault.
Display of the error code in STANDBY
mode.
If the error code is still displayed,
inform the Customer Service.
Switch the coffee machine off and
on.
If the fault is still present,
− inform the Customer Service,
− brewing coffee without milk or
milk froth is possible.
37
The temperature in the hot water/steam
boiler is higher than 135°C. It switched off
itself for safety reasons.
The temperature sensor or
pressure switch is defect.
Switch off the unit.
Call the Franke customer service.
41
LON communication interfered
no apb" is indicated −
only VIVA KM with
accounting system
The Franke customer service will
load the apb−file.
* = These error codes are only shown in Standby−Mode. If the fault is still present after switching off and on the machine
call the Franke customer service.
40
Faults with indication text
Example:
Indication of failt
Insert grounds container
Dispenser block is missing
Grinder left (centre or right) is empty
Display only with VIVA KM au lait:
Milk A or B empty
"Change filter!" appears on the display.
Faults without indication text
Insert grounds container
Possible cause
It is not inserted into
the machine.
It is not inserted into the
machine.
The bean container (left,
centre or right) is empty
Milk container A or B is
empty.
The water filter (softener) is exhausted.
Remedy
Clean and insert it into the
machine.
Insert a clean dispenser block into
the machine.
Fill up the coffee container with
fresh coffee beans.
Fill up the milk container with fresh
cooled milk.
The cartridge for the water filter
(e.g. Brita) must be replaced.
Example:
Fault
No display in the display field (display)
The VIVA KM au lait is not percolating coffee
products with milk or milk foam.
Possible cause
Remedy
Main switch upstream of
the unit not switched on.
Switch on main switch.
The mains fuse has
switched off.
Have any faults in the wiring
system inspected by an approved
specialist electrician. Switch the
mains fuse back on.
The entire power supply
is missing.
Inform your electricity supply
company.
The operating temperature in the steam boiler is
not reached or is falling
short of.
Wait till steam boiler is heated up
automtically.
Milk container is empty.
Fill up the milk container.
Risk of death by electric shock when touching the energized
components !
Warnung
Never open the casing to carry out repairs by yourself. The machine is
connected to electric voltage.
Repairs must be carried out only by qualified specialized personnel.
41
Note
If you cannot remedy the fault and error code is still present after
switching off and on the machine
. Switch off the coffee machine with
the on−off switch and
disconnect it from the electrical mains with the mains switch.
. Close the water valve.
. Call the Franke customer service and quote the error message,
unit type, machine no. and the year of construction, see page.
42
10. Technical data
Professional coffee maker
Number/capacity, bean container
Coffee grinders
Capacity, grounds container
bremer VIVA KM
230
bremer VIVA KM
400
1 − 3 bean containers, depending on configuration
left and right approx. 1 kg, centre approx. 1.5 kg,
total approx. 3.5 kg
1 − 3, depending on configuration
approx. 100 portions set at the factory
Ground coffee scales
0 to max. 20 grams
Metering quantity
Mains voltage
Total connected load
Fuses
Dimensions in mm (WxHxD)
Weight
Noise level in dB (A)
Ambient temperature during operation
Inlet
Outlet
0 to 500 ml
230VAC 1N 50/60Hz
400VAC 3N 50Hz
3.5 kW
6.8 kW /
9.5 kW for higher output of
steam and hot water (5.6 kW
hot−water/steam boiler)
1 x 16 ampere
3 x 16 ampere
360 x 690 x 560 mm
with 1 grinder approx. 44 kg
with 2 grinders approx. 51 kg
with 3 grinders approx. 58 kg
less than 70 dB (A)
5 to 35° C
Fabric hose, inside diameter approx. 6 mm
Hose, inside diameter approx. 22 mm
We reserve the right to make technical modifications.
43
11. Setting up and connecting (Customer Service)
D Setting up, installation, putting into operation for the first time and instruction
are performed by the Franke bremer Customer Service.
D On the building site, the connections must be up to 1 m to the installation
location.
D Manual transport: Pay attention to the weight of the unit. Wear gloves.
11.1 Setting up
D Do not set up the unit in rooms in which work is carried out with a water hose or
high-pressure cleaners.
D There must be at least 4 cm clearance at the side between the coffeemachine
and the wall. Leave sufficient space above in order to be able to fill with coffee
beans.
D Do not set up next to source of heat! Maintain a sufficient safety distance.
D Set up the coffeemachine on a stable horizontal surface. Balance out
unevenness with the screw-type feet!
D VIVA Barista: Make sure the unit is at least approx. 10 cm from the front edge of
the supporting surface, so that the steam tap does not project over it.
Routing through supply lines / container ejector (add. feature)
Downwards (table openings):
92
At the side:
360
124
80
120
80
235
560
Table opening
for supply lines
Table opening
for container
ejector
185
Opening possible on both sides.
174
44
Setting up the bremer VIVA KM /−au lait with Milk Fridge (add. feature)
Table opening for supply lines
water outlet / waste
water supply
connection for
equipotenitial
bonding system
( 468 )
setting up
on the left or
the right side
56
1055
360
176
560
80
466
92
80
mains cable
impactable door
on the left or
the right side
240
45
11.2 Remove protection / Inserting beans container
Keypad cover
Lock
D The beans container may be inserted by
authorized servicemen only!
. Unlock keypad cover with key and open.
. Remove 2 screws.
. Pull front panel forth to the limit stop
(approx. 5 mm).
Screw
. Remove the beans container.
Protection
(Styropor-piece)
Beans container
Bolt
. Remove the protection (Styropor-piece).
. Open the bolt.
. Insert beans container into the rubber bands
of the grinders.
. Push beans container to the back.
. Close the front panel.
. While closing the front panel, move the
beans container up and down slightly in
order to engage the catch.
. Fix front panel with 2 screws.
46
11.3 Connecting the water supply
D Observe the national guidelines for the water connection.
D For a water hardness of over 5° dkH (carbonate hardness), we recommend that
you have to install a water softener in the water inlet line. Observe the
instructions on installing and using the water softener.
D We recommend to install an electronic water monitor to guard against water
damage.
D A water tap and water filter must be installed in an easily accessible position
upstream of the water inlet hose.
D Use a fabric pressure hose which does not corrupt taste to extend the supply
hose. The diameter must not be smaller than the supply hose fitted at the
factory.
D Before connecting, rinse through the water line and the fabric pressure hose so
that no dirt particles enter the coffeemachine.
D Check all connections for leaks.
D Maximum water line pressure: 1.0 MPa (10 bar).
D Minimum flow pressure: 0.3 MPa (3 bar).
D Water temperature: up to approx. 40° C.
11.4 Connecting the water outlet
D Install a stench trap on the drainage hose (siphon).
D Lay the hose with a gradient to the drain.
D Seal and secure the hose at the drainage pipe.
D The inlet and drainage hoses must not be bent or squashed.
47
11.5 Connecting the mains cable
D An approved electrician must make the electrical connections
− with the applicable national regulations
− and in accordance with the regulations of the responsible electricity supply
company.
D The mobile mains connection line must be at least a rubber hose line in
accordance with national standards H05 RN-F / 227 IEC 53 or in accordance
with national regulations.
D An electrical mains switch
− must be connected in series on the installation side in an easily accessible
place.
− The switch must disconnect the unit from the mains effectively and at all
poles.
− The contact opening must be at least 3 mm in this case.
D Connect the coffee machine to the
equipotential bonding system.
D Refer to the data on the rating plate for the
electrical connection.
Rating plate
Equipotential bonding system
48
bremer VIVA KM − 230 V version
. Insert the mains plug into a correctly
installed grounding outlet (230 V).
D The mains connector must be easily
accessible.
12. Rating plate data / Maintenance
Entering the rating plate data
. Transfer the data fom the unit’s rating plate
into these operating instructions.
Type No.:
Rating plate
Unit No.:
Year of construction:
Please quote this data if you require service for
the coffee machine. It will help us deal with the
matter more quickly.
Risk of electrical shock !
Disconect equipment from electrical power before servicing.
CAUTION
For continued protection against electric shock replace only with
same type and rating of fuse.
Maintenance
D Installation, maintenance and repair work may only be carried out by authorised
Customer Service representatives.
D Have your bremer VIVA coffee machine serviced regularly
− after every 60.000 products
− at least once per year
− by an authorized Franke bremer Customer Service.
D According to the pressure vessel regulations 97/23/EG and to the regulations
for operating safety the operator is responsible for the careful maintenance and
for the inspection of the safety equipment in regular intervals.
D Regular servicing will ensure troublefree operation of the machine.
D Worn parts will be replaced during such service, and all assemblies and safety
mechanisms checked to ensure they function correctly.
D Conclude a service contract with the Customer Service. Have your Customer
Service representative explain to you the advantages of a service contract.
D Use only original accessories and original spare parts.
49
12.1 Maintenance notes
Datum
50
Name des Kundendienstes
Bemerkungen
Datum
Name des Kundendienstes
Bemerkungen
51
Datum
52
Name des Kundendienstes
Bemerkungen
Datum
Name des Kundendienstes
Bemerkungen
53
13. Dismantling, disposal
Dismantling
. Before disassembling:
− Remove remaining coffee beans from the bean hopper.
− Remove coffee grounds from the grounds drawer and clean the drawer.
D For safety reasons, the following steps should be carried out by a Franke
customer service engineer before disposing of the old machine:
− Empty the boilers.
− Disconnect the hoses.
− Disconnect the machine from the mains supply (only machines with 400 V
fixed connection)
Marking on the rating plate:
WARNING ! Beware of electric shocks !
Disposal of used electrical appliances (for
Europe only)
Franke Kaffeemaschinen AG provides for the
return and recycling of used electrical
appliances:
− at the end of the appliance’s life cycle
− in cooperation with its contract partner
− in the framework of European Directive
2002/96/EC (WEEE).
The customer is responsible for waste disposal:
− after termination of use
− if the supplied goods are passed on to a third
party
− if there is no written agreement to the
contrary.
Should you have any questions concerning
disposal, please contact Franke
Kaffeemaschinen AG, Aarburg, Switzerland.
54
Franke Coffee Systems
Franke bremer GmbH
Lindenweg 36-42
D-97999 Igersheim
Telefon +49 7931 992 0
Telefax +49 7931 51700
www.franke−cs.com
EU Conformity
declaration
EWG-Konformitätserklärung
Déclaration de conformité européenne
We hereby declare that the design of
the machines stated below and the
actual models sold by us meet the
relevant safety and health requirements as outlined in EU guidelines.
This declaration shall cease to be
valid if modifications not authorised
by us are made to the machines.
Hiermit erklären wir, daß die nachfolgend bezeichneten Maschinen aufgrund ihrer Konzipierung und Bauart,
sowie in den von uns in Verkehr gebrachten Ausführungen den einschlägigen Sicherheits- und Gesundheitsanforderungen der EWG-Richtlinien
entsprechen. Bei nicht mit uns abgestimmten Änderungen der Maschinen
verliert diese Erklärung ihre Gültigkeit.
Nous déclarons, par la présente,
que la conception et le type, de
même que les versions mises en
circulation, des machines décrites
ci-après sont conformes aux directives européennes en vigueur en
matière de sécurité et de santé.
Cette déclaration perd toute validité
en cas de modification des machines effectuée sans notre accord.
Machine types
Maschinentypen
Types de machines
Fully automatic coffee machine
bremer
Type VIVA KM,
Type VIVA XXL,
Type VIVA 24
Gewerblicher Kaffeebereiter
bremer
Type VIVA KM,
Type VIVA XXL,
Type VIVA 24
Automate intégral à café
bremer
Type VIVA KM,
Type VIVA XXL,
Type VIVA 24
EU guidelines
EWG-Richtlinien
Directives européennes
EU low voltage guideline
73/23/EU, 93/68/EU
EWG-Niederspannungsrichtlinie
73/23/EWG, 93/68/EWG
EU electromagnetic compatibility
guidelines
89/336/EU, 92/31/EU,
93/68/EU
EWG-Richtlinien Elektromagnetische
Verträglichkeit
89/336/EWG, 92/31/EWG,
93/68/EWG
Directives européennes sur les basses tensions 73/23/CEE,
93/68/CEE
Directives européennes sur la compatibilité électromagnétique
89/336/CEE, 92/31/CEE,
93/68/CEE
Harmonised EU standards
applied
EN60335-1: 2001−08
EN60335-1: 94 +A1+A2+A11
−A16:2001
EN60335-2-75: 2003−04
EN 60335−2−75: 2002
Angewandte harmonisierte
EN-Normen
EN60335-1: 2001−08
EN60335-1: 94 +A1+A2+A11
−A16:2001
EN60335-2-75: 2003−04
EN60335−2−75: 2002
Normes européennes
harmonisées appliquées
EN60335-1: 2001−08
EN60335-1: 94 +A1+A2+A11
−A16:2001
EN60335-2-75: 2003−04
EN 60335−2−75: 2002
Igersheim, den 2003−11−20
ppa. Hansdieter Greiwe
Entwicklung / Konstruktion
i. A. Herbert Sann
Qualitätswesen
55
Operating Instructions
bremer VIVA KM
Rev.
06.06−C
Print: 2006−08
Art.no. 659800
Franke Kaffeemaschinen AG
Franke−Strasse 9
CH−4663 Aarburg
Switzerland
Phone +41 62 787 37 37
Fax +41 62 787 30 10
www.franke−cs.com