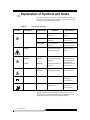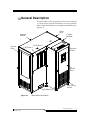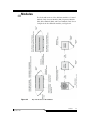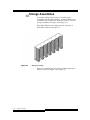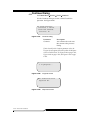
1
/PERATOR'UIDE/PERATOR'UIDE/PERATOR'UIDE/PERATOR'UIDE/PERATOR'UIDE 6FDODU.7DSH/LEUDU\ 6FDODU. $ Scalar 10K Tape Library Operator Guide, 6-00058-05 Rev. A, September 2007, Product of USA. Quantum Corporation provides this publication “as is” without warranty of any kind, either express or implied, including but not limited to the implied warranties of merchantability or fitness for a particular purpose. Quantum Corporation may revise this publication from time to time without notice. COPYRIGHT STATEMENT Copyright 2007 by Quantum Corporation. All rights reserved. Your right to copy this manual is limited by copyright law. Making copies or adaptations without prior written authorization of Quantum Corporation is prohibited by law and constitutes a punishable violation of the law. TRADEMARK STATEMENT Quantum, the Quantum logo, Scalar, DLT, DLTtape, and the DLTtape logo are registered trademarks of Quantum Corporation in the U.S.A. and other countries. LTO and Ultrium are trademarks of HP, IBM and Quantum in the U.S.A. and other countries. Other trademarks are the property of their respective companies. Contents 1 About This Guide About This Guide . . . . . . . . . . . . . . . . . . . . . . . . . . . . . . . . . . . . . . . . . . . . . . . . . . . . . . . . 1-3 Product Safety Statements . . . . . . . . . . . . . . . . . . . . . . . . . . . . . . . . . . . . . . . . . . . . . . . . . 1-3 GS Mark (Germany Only) . . . . . . . . . . . . . . . . . . . . . . . . . . . . . . . . . . . . . . . . . . . . . . 1-3 Mechanical Locks . . . . . . . . . . . . . . . . . . . . . . . . . . . . . . . . . . . . . . . . . . . . . . . . . . . . . 1-4 Main Power Switch . . . . . . . . . . . . . . . . . . . . . . . . . . . . . . . . . . . . . . . . . . . . . . . . . . . 1-4 Barcode Scanner . . . . . . . . . . . . . . . . . . . . . . . . . . . . . . . . . . . . . . . . . . . . . . . . . . . . . . 1-4 Disposal of Electrical and Electronic Equipment . . . . . . . . . . . . . . . . . . . . . . . . . . . . . . 1-5 Product Model Number . . . . . . . . . . . . . . . . . . . . . . . . . . . . . . . . . . . . . . . . . . . . . . . . . . . 1-5 Explanation of Symbols and Notes . . . . . . . . . . . . . . . . . . . . . . . . . . . . . . . . . . . . . . . . . . 1-6 Other Documents you Might Need . . . . . . . . . . . . . . . . . . . . . . . . . . . . . . . . . . . . . . . . . 1-8 Getting More Information or Help . . . . . . . . . . . . . . . . . . . . . . . . . . . . . . . . . . . . . . . . . . 1-8 2 System Description General Description . . . . . . . . . . . . . . . . . . . . . . . . . . . . . . . . . . . . . . . . . . . . . . . . . . . . . . 2-3 Contents 1-iii Capacity-On-Demand Configuration . . . . . . . . . . . . . . . . . . . . . . . . . . . . . . . . . . . . 2-4 Customer-Specific Configuration . . . . . . . . . . . . . . . . . . . . . . . . . . . . . . . . . . . . . . . 2-4 Dual Aisle Configuration . . . . . . . . . . . . . . . . . . . . . . . . . . . . . . . . . . . . . . . . . . . . . . 2-4 Modules . . . . . . . . . . . . . . . . . . . . . . . . . . . . . . . . . . . . . . . . . . . . . . . . . . . . . . . . . . . . . . . . 2-5 Control Module . . . . . . . . . . . . . . . . . . . . . . . . . . . . . . . . . . . . . . . . . . . . . . . . . . . . . . 2-6 Accessor Module . . . . . . . . . . . . . . . . . . . . . . . . . . . . . . . . . . . . . . . . . . . . . . . . . . . . . 2-6 Expansion Module . . . . . . . . . . . . . . . . . . . . . . . . . . . . . . . . . . . . . . . . . . . . . . . . . . . . 2-6 Drive Module . . . . . . . . . . . . . . . . . . . . . . . . . . . . . . . . . . . . . . . . . . . . . . . . . . . . . . . . 2-7 Tower Module . . . . . . . . . . . . . . . . . . . . . . . . . . . . . . . . . . . . . . . . . . . . . . . . . . . . . . . 2-7 Internal Components . . . . . . . . . . . . . . . . . . . . . . . . . . . . . . . . . . . . . . . . . . . . . . . . . . . . . 2-8 Tape Drives . . . . . . . . . . . . . . . . . . . . . . . . . . . . . . . . . . . . . . . . . . . . . . . . . . . . . . . . . . 2-8 Storage Assemblies . . . . . . . . . . . . . . . . . . . . . . . . . . . . . . . . . . . . . . . . . . . . . . . . . . 2-10 Cartridge Accessor . . . . . . . . . . . . . . . . . . . . . . . . . . . . . . . . . . . . . . . . . . . . . . . . . . . 2-12 Tape Cartridges . . . . . . . . . . . . . . . . . . . . . . . . . . . . . . . . . . . . . . . . . . . . . . . . . . . . . 2-13 Insert/Eject Station . . . . . . . . . . . . . . . . . . . . . . . . . . . . . . . . . . . . . . . . . . . . . . . . . . 2-14 Connectivity . . . . . . . . . . . . . . . . . . . . . . . . . . . . . . . . . . . . . . . . . . . . . . . . . . . . . . . . . . . . 2-16 SAN Connectivity . . . . . . . . . . . . . . . . . . . . . . . . . . . . . . . . . . . . . . . . . . . . . . . . . . . 2-16 SCSI Connectivity . . . . . . . . . . . . . . . . . . . . . . . . . . . . . . . . . . . . . . . . . . . . . . . . . . . 2-18 Scalar DLC . . . . . . . . . . . . . . . . . . . . . . . . . . . . . . . . . . . . . . . . . . . . . . . . . . . . . . . . . . . . . 2-19 Single Server . . . . . . . . . . . . . . . . . . . . . . . . . . . . . . . . . . . . . . . . . . . . . . . . . . . . . . . . 2-19 Redundant Servers . . . . . . . . . . . . . . . . . . . . . . . . . . . . . . . . . . . . . . . . . . . . . . . . . . . 2-20 Remote Library Management . . . . . . . . . . . . . . . . . . . . . . . . . . . . . . . . . . . . . . . . . . . . . 2-22 3 Operation Overview . . . . . . . . . . . . . . . . . . . . . . . . . . . . . . . . . . . . . . . . . . . . . . . . . . . . . . . . . . . . . . . 3-3 Using the Operator Panel . . . . . . . . . . . . . . . . . . . . . . . . . . . . . . . . . . . . . . . . . . . . . . . . . . 3-3 Starting the Scalar 10K . . . . . . . . . . . . . . . . . . . . . . . . . . . . . . . . . . . . . . . . . . . . . . . . . . . . 3-7 Shutting Down the Scalar 10K . . . . . . . . . . . . . . . . . . . . . . . . . . . . . . . . . . . . . . . . . . . . . . 3-8 Normal Shutdown . . . . . . . . . . . . . . . . . . . . . . . . . . . . . . . . . . . . . . . . . . . . . . . . . . . . 3-8 Emergency Shutdown . . . . . . . . . . . . . . . . . . . . . . . . . . . . . . . . . . . . . . . . . . . . . . . . . 3-9 Restarting the Scalar 10K . . . . . . . . . . . . . . . . . . . . . . . . . . . . . . . . . . . . . . . . . . . . . . . . . 3-10 Using the Remote Management Unit . . . . . . . . . . . . . . . . . . . . . . . . . . . . . . . . . . . . . . . 3-10 Supported Browsers . . . . . . . . . . . . . . . . . . . . . . . . . . . . . . . . . . . . . . . . . . . . . . . . . 3-11 RMU Prerequisites . . . . . . . . . . . . . . . . . . . . . . . . . . . . . . . . . . . . . . . . . . . . . . . . . . . 3-11 Setting up the RMU . . . . . . . . . . . . . . . . . . . . . . . . . . . . . . . . . . . . . . . . . . . . . . . . . 3-12 1-iv Contents 6-00058-05 Rev A Accessing and Logging Into the RMU . . . . . . . . . . . . . . . . . . . . . . . . . . . . . . . . . . 3-13 Checking Status and General Information . . . . . . . . . . . . . . . . . . . . . . . . . . . . . . . 3-14 Configuring Network Parameters . . . . . . . . . . . . . . . . . . . . . . . . . . . . . . . . . . . . . . 3-15 Configuring SNMP . . . . . . . . . . . . . . . . . . . . . . . . . . . . . . . . . . . . . . . . . . . . . . . . . . 3-15 Downloading the SNMP MIB File . . . . . . . . . . . . . . . . . . . . . . . . . . . . . . . . . . 3-16 Configuring RMU Users . . . . . . . . . . . . . . . . . . . . . . . . . . . . . . . . . . . . . . . . . . . . . . 3-17 Adding/Removing Users . . . . . . . . . . . . . . . . . . . . . . . . . . . . . . . . . . . . . . . . . 3-17 Changing a Password . . . . . . . . . . . . . . . . . . . . . . . . . . . . . . . . . . . . . . . . . . . . . 3-18 Configuring the Time and Date . . . . . . . . . . . . . . . . . . . . . . . . . . . . . . . . . . . . . . . . 3-18 Synchronizing with an NTP Server . . . . . . . . . . . . . . . . . . . . . . . . . . . . . . . . . 3-19 Updating Firmware . . . . . . . . . . . . . . . . . . . . . . . . . . . . . . . . . . . . . . . . . . . . . . . . . . 3-19 Viewing Diagnostic Files . . . . . . . . . . . . . . . . . . . . . . . . . . . . . . . . . . . . . . . . . . . . . . 3-20 Using the Operator Panel (via the RMU) . . . . . . . . . . . . . . . . . . . . . . . . . . . . . . . . 3-20 Viewing Logs . . . . . . . . . . . . . . . . . . . . . . . . . . . . . . . . . . . . . . . . . . . . . . . . . . . . . . . 3-21 Getting Help . . . . . . . . . . . . . . . . . . . . . . . . . . . . . . . . . . . . . . . . . . . . . . . . . . . . . . . . 3-21 Rebooting the RMU . . . . . . . . . . . . . . . . . . . . . . . . . . . . . . . . . . . . . . . . . . . . . . . . . . 3-21 4 Menus and Commands Overview . . . . . . . . . . . . . . . . . . . . . . . . . . . . . . . . . . . . . . . . . . . . . . . . . . . . . . . . . . . . . . . 4-5 Using the Operator Panel . . . . . . . . . . . . . . . . . . . . . . . . . . . . . . . . . . . . . . . . . . . . . . . . . . 4-5 Operator Panel Buttons . . . . . . . . . . . . . . . . . . . . . . . . . . . . . . . . . . . . . . . . . . . . . . . . 4-5 Special Characters or Cursors . . . . . . . . . . . . . . . . . . . . . . . . . . . . . . . . . . . . . . . . . . 4-6 Help Button . . . . . . . . . . . . . . . . . . . . . . . . . . . . . . . . . . . . . . . . . . . . . . . . . . . . . . . . . . 4-7 Operator Intervention Message . . . . . . . . . . . . . . . . . . . . . . . . . . . . . . . . . . . . . . . . . 4-7 Operator Panel Menu Tree Structure . . . . . . . . . . . . . . . . . . . . . . . . . . . . . . . . . . . . . . . . 4-8 Main Menu . . . . . . . . . . . . . . . . . . . . . . . . . . . . . . . . . . . . . . . . . . . . . . . . . . . . . . . . . . . . . . 4-9 Mode Dialog . . . . . . . . . . . . . . . . . . . . . . . . . . . . . . . . . . . . . . . . . . . . . . . . . . . . . . . . . . . . 4-10 Status Menu . . . . . . . . . . . . . . . . . . . . . . . . . . . . . . . . . . . . . . . . . . . . . . . . . . . . . . . . . . . . 4-12 Library Submenu . . . . . . . . . . . . . . . . . . . . . . . . . . . . . . . . . . . . . . . . . . . . . . . . . . . . 4-12 SCSI Submenu . . . . . . . . . . . . . . . . . . . . . . . . . . . . . . . . . . . . . . . . . . . . . . . . . . . 4-13 Mode Parms Dialog . . . . . . . . . . . . . . . . . . . . . . . . . . . . . . . . . . . . . . . . . . . 4-13 Element Address . . . . . . . . . . . . . . . . . . . . . . . . . . . . . . . . . . . . . . . . . 4-14 Mixed-Media Support. . . . . . . . . . . . . . . . . . . . . . . . . . . . . . . . . . . . . 4-15 Parity . . . . . . . . . . . . . . . . . . . . . . . . . . . . . . . . . . . . . . . . . . . . . . . . . . . 4-17 LCD . . . . . . . . . . . . . . . . . . . . . . . . . . . . . . . . . . . . . . . . . . . . . . . . . . . . 4-18 Reservations Dialog . . . . . . . . . . . . . . . . . . . . . . . . . . . . . . . . . . . . . . . . . . . 4-19 System Dialog . . . . . . . . . . . . . . . . . . . . . . . . . . . . . . . . . . . . . . . . . . . . . . . . . . . 4-21 Element Dialog . . . . . . . . . . . . . . . . . . . . . . . . . . . . . . . . . . . . . . . . . . . . . . . . . . 4-22 Logs Submenu . . . . . . . . . . . . . . . . . . . . . . . . . . . . . . . . . . . . . . . . . . . . . . . . . . . 4-25 September 2007 Contents 1-v Command Log Dialog . . . . . . . . . . . . . . . . . . . . . . . . . . . . . . . . . . . . . . . . . 4-26 Error Log Dialog . . . . . . . . . . . . . . . . . . . . . . . . . . . . . . . . . . . . . . . . . . . . . . 4-26 Print Log Dialog . . . . . . . . . . . . . . . . . . . . . . . . . . . . . . . . . . . . . . . . . . . . . . 4-27 Print Inventory Dialog . . . . . . . . . . . . . . . . . . . . . . . . . . . . . . . . . . . . . . . . . 4-28 Firmware Submenu . . . . . . . . . . . . . . . . . . . . . . . . . . . . . . . . . . . . . . . . . . . . . . 4-29 Drives Submenu . . . . . . . . . . . . . . . . . . . . . . . . . . . . . . . . . . . . . . . . . . . . . . . . . . . . . 4-30 Drive State Dialog . . . . . . . . . . . . . . . . . . . . . . . . . . . . . . . . . . . . . . . . . . . . . . . . 4-31 Media Info Dialog . . . . . . . . . . . . . . . . . . . . . . . . . . . . . . . . . . . . . . . . . . . . . . . . 4-35 Drive Log Dialog . . . . . . . . . . . . . . . . . . . . . . . . . . . . . . . . . . . . . . . . . . . . . . . . . 4-36 Firmware Dialog . . . . . . . . . . . . . . . . . . . . . . . . . . . . . . . . . . . . . . . . . . . . . . . . . 4-37 Towers Submenu . . . . . . . . . . . . . . . . . . . . . . . . . . . . . . . . . . . . . . . . . . . . . . . . . . . . 4-38 IE Stations Dialog . . . . . . . . . . . . . . . . . . . . . . . . . . . . . . . . . . . . . . . . . . . . . . . . . . . . 4-39 Commands Menu . . . . . . . . . . . . . . . . . . . . . . . . . . . . . . . . . . . . . . . . . . . . . . . . . . . . . . . 4-40 Park . . . . . . . . . . . . . . . . . . . . . . . . . . . . . . . . . . . . . . . . . . . . . . . . . . . . . . . . . . . . . . . 4-40 Move Submenu . . . . . . . . . . . . . . . . . . . . . . . . . . . . . . . . . . . . . . . . . . . . . . . . . . . . . . 4-41 Position Gripper Dialog . . . . . . . . . . . . . . . . . . . . . . . . . . . . . . . . . . . . . . . . . . . 4-42 Position Scanner Dialog . . . . . . . . . . . . . . . . . . . . . . . . . . . . . . . . . . . . . . . . . . . 4-44 Move Media Dialog . . . . . . . . . . . . . . . . . . . . . . . . . . . . . . . . . . . . . . . . . . . . . . 4-46 Inventory Dialog . . . . . . . . . . . . . . . . . . . . . . . . . . . . . . . . . . . . . . . . . . . . . . . . . . . . 4-49 Insert/Eject Submenu . . . . . . . . . . . . . . . . . . . . . . . . . . . . . . . . . . . . . . . . . . . . . . . . 4-51 Insert Screen . . . . . . . . . . . . . . . . . . . . . . . . . . . . . . . . . . . . . . . . . . . . . . . . . . . . . 4-52 Insert Clean Tape Dialog . . . . . . . . . . . . . . . . . . . . . . . . . . . . . . . . . . . . . . . . . . 4-53 Eject Dialog . . . . . . . . . . . . . . . . . . . . . . . . . . . . . . . . . . . . . . . . . . . . . . . . . . . . . 4-56 Eject Clean Tape Dialog . . . . . . . . . . . . . . . . . . . . . . . . . . . . . . . . . . . . . . . . . . . 4-58 Database Menu . . . . . . . . . . . . . . . . . . . . . . . . . . . . . . . . . . . . . . . . . . . . . . . . . . . . . . . . . 4-60 Media Dialog . . . . . . . . . . . . . . . . . . . . . . . . . . . . . . . . . . . . . . . . . . . . . . . . . . . . . . . . 4-60 Element Dialog . . . . . . . . . . . . . . . . . . . . . . . . . . . . . . . . . . . . . . . . . . . . . . . . . . . . . . 4-61 Config Dialog . . . . . . . . . . . . . . . . . . . . . . . . . . . . . . . . . . . . . . . . . . . . . . . . . . . . . . . 4-63 Setup Menu . . . . . . . . . . . . . . . . . . . . . . . . . . . . . . . . . . . . . . . . . . . . . . . . . . . . . . . . . . . . 4-64 Library Submenu . . . . . . . . . . . . . . . . . . . . . . . . . . . . . . . . . . . . . . . . . . . . . . . . . . . . 4-64 Trace Submenu . . . . . . . . . . . . . . . . . . . . . . . . . . . . . . . . . . . . . . . . . . . . . . . . . . 4-65 SCSI Submenu . . . . . . . . . . . . . . . . . . . . . . . . . . . . . . . . . . . . . . . . . . . . . . . . . . . 4-66 Target ID Dialog . . . . . . . . . . . . . . . . . . . . . . . . . . . . . . . . . . . . . . . . . . . . . . 4-67 Parity Dialog . . . . . . . . . . . . . . . . . . . . . . . . . . . . . . . . . . . . . . . . . . . . . . . . . 4-68 Ports Dialog . . . . . . . . . . . . . . . . . . . . . . . . . . . . . . . . . . . . . . . . . . . . . . . . . . 4-69 Host Dialog . . . . . . . . . . . . . . . . . . . . . . . . . . . . . . . . . . . . . . . . . . . . . . . . . . . . . 4-70 Security Submenu . . . . . . . . . . . . . . . . . . . . . . . . . . . . . . . . . . . . . . . . . . . . . . . . 4-71 User Security . . . . . . . . . . . . . . . . . . . . . . . . . . . . . . . . . . . . . . . . . . . . . . . . . 4-72 I/E Security. . . . . . . . . . . . . . . . . . . . . . . . . . . . . . . . . . . . . . . . . . . . . . . . . . 4-74 Reset Passwords . . . . . . . . . . . . . . . . . . . . . . . . . . . . . . . . . . . . . . . . . . . . . . 4-76 Media Dialog . . . . . . . . . . . . . . . . . . . . . . . . . . . . . . . . . . . . . . . . . . . . . . . . . . . . 4-77 Capacity Submenu . . . . . . . . . . . . . . . . . . . . . . . . . . . . . . . . . . . . . . . . . . . . . . . 4-79 Storage Dialog . . . . . . . . . . . . . . . . . . . . . . . . . . . . . . . . . . . . . . . . . . . . . . . . 4-80 RMU Submenu . . . . . . . . . . . . . . . . . . . . . . . . . . . . . . . . . . . . . . . . . . . . . . . . . . 4-82 Host Dialog . . . . . . . . . . . . . . . . . . . . . . . . . . . . . . . . . . . . . . . . . . . . . . . . . . 4-83 IP Dialog. . . . . . . . . . . . . . . . . . . . . . . . . . . . . . . . . . . . . . . . . . . . . . . . . . . . . 4-83 More Submenu . . . . . . . . . . . . . . . . . . . . . . . . . . . . . . . . . . . . . . . . . . . . . . . . . . 4-84 1-vi Contents 6-00058-05 Rev A Advanced Dialog . . . . . . . . . . . . . . . . . . . . . . . . . . . . . . . . . . . . . . . . . . . . . 4-84 Inventory Dialog . . . . . . . . . . . . . . . . . . . . . . . . . . . . . . . . . . . . . . . . . . . . . . 4-86 Drives Submenu . . . . . . . . . . . . . . . . . . . . . . . . . . . . . . . . . . . . . . . . . . . . . . . . . . . . . 4-87 ID Dialog . . . . . . . . . . . . . . . . . . . . . . . . . . . . . . . . . . . . . . . . . . . . . . . . . . . . . . . 4-88 Tape Alert Notification Dialog . . . . . . . . . . . . . . . . . . . . . . . . . . . . . . . . . . . . . 4-91 Tape Alert Notify Configuration Dialog . . . . . . . . . . . . . . . . . . . . . . . . . . . . . 4-92 Logical Serial Number . . . . . . . . . . . . . . . . . . . . . . . . . . . . . . . . . . . . . . . . . . . . 4-94 Cleaning Submenu . . . . . . . . . . . . . . . . . . . . . . . . . . . . . . . . . . . . . . . . . . . . . . . . . . . 4-94 IE Station Submenu . . . . . . . . . . . . . . . . . . . . . . . . . . . . . . . . . . . . . . . . . . . . . . . . . . 4-95 Drives Dialog . . . . . . . . . . . . . . . . . . . . . . . . . . . . . . . . . . . . . . . . . . . . . . . . . . . . 4-96 Media Dialog . . . . . . . . . . . . . . . . . . . . . . . . . . . . . . . . . . . . . . . . . . . . . . . . . . . . 4-97 View Dialog . . . . . . . . . . . . . . . . . . . . . . . . . . . . . . . . . . . . . . . . . . . . . . . . . . . . . 4-98 Utils Menu . . . . . . . . . . . . . . . . . . . . . . . . . . . . . . . . . . . . . . . . . . . . . . . . . . . . . . . . . . . . . 4-99 Library Submenu . . . . . . . . . . . . . . . . . . . . . . . . . . . . . . . . . . . . . . . . . . . . . . . . . . . . 4-99 Screen Dialog . . . . . . . . . . . . . . . . . . . . . . . . . . . . . . . . . . . . . . . . . . . . . . . . . . . 4-100 Audio Dialog . . . . . . . . . . . . . . . . . . . . . . . . . . . . . . . . . . . . . . . . . . . . . . . . . . . 4-102 Time Dialog . . . . . . . . . . . . . . . . . . . . . . . . . . . . . . . . . . . . . . . . . . . . . . . . . . . . 4-103 Snap Shot Screen . . . . . . . . . . . . . . . . . . . . . . . . . . . . . . . . . . . . . . . . . . . . . . . . 4-104 Date Dialog . . . . . . . . . . . . . . . . . . . . . . . . . . . . . . . . . . . . . . . . . . . . . . . . . . . . 4-104 Speed Dialog . . . . . . . . . . . . . . . . . . . . . . . . . . . . . . . . . . . . . . . . . . . . . . . . . . . 4-105 Lights Dialog . . . . . . . . . . . . . . . . . . . . . . . . . . . . . . . . . . . . . . . . . . . . . . . . . . . 4-105 Drives Submenu . . . . . . . . . . . . . . . . . . . . . . . . . . . . . . . . . . . . . . . . . . . . . . . . . . . . 4-106 Status Change Submenu . . . . . . . . . . . . . . . . . . . . . . . . . . . . . . . . . . . . . . . . . 4-106 Initialize Dialog . . . . . . . . . . . . . . . . . . . . . . . . . . . . . . . . . . . . . . . . . . . . . . 4-107 Activate Dialog . . . . . . . . . . . . . . . . . . . . . . . . . . . . . . . . . . . . . . . . . . . . . . 4-108 Vary Off Dialog . . . . . . . . . . . . . . . . . . . . . . . . . . . . . . . . . . . . . . . . . . . . . . 4-109 Vary On Dialog . . . . . . . . . . . . . . . . . . . . . . . . . . . . . . . . . . . . . . . . . . . . . . 4-110 Operations Submenu . . . . . . . . . . . . . . . . . . . . . . . . . . . . . . . . . . . . . . . . . . . . 4-111 Update Microcode Dialog . . . . . . . . . . . . . . . . . . . . . . . . . . . . . . . . . . . . . 4-112 Clean Drives Dialog . . . . . . . . . . . . . . . . . . . . . . . . . . . . . . . . . . . . . . . . . . 4-114 Unload Drives Dialog . . . . . . . . . . . . . . . . . . . . . . . . . . . . . . . . . . . . . . . . 4-116 Dismount Drives Dialog . . . . . . . . . . . . . . . . . . . . . . . . . . . . . . . . . . . . . . 4-118 Towers Submenu . . . . . . . . . . . . . . . . . . . . . . . . . . . . . . . . . . . . . . . . . . . . . . . . . . . 4-120 Status Change Dialog . . . . . . . . . . . . . . . . . . . . . . . . . . . . . . . . . . . . . . . . . . . . 4-120 Initialize Dialog . . . . . . . . . . . . . . . . . . . . . . . . . . . . . . . . . . . . . . . . . . . . . . . . . 4-122 Service Menu . . . . . . . . . . . . . . . . . . . . . . . . . . . . . . . . . . . . . . . . . . . . . . . . . . . . . . . . . . 4-123 Start Dialog . . . . . . . . . . . . . . . . . . . . . . . . . . . . . . . . . . . . . . . . . . . . . . . . . . . . . . . . 4-123 Diags Submenu . . . . . . . . . . . . . . . . . . . . . . . . . . . . . . . . . . . . . . . . . . . . . . . . . . . . . 4-125 Accessor Submenu . . . . . . . . . . . . . . . . . . . . . . . . . . . . . . . . . . . . . . . . . . . . . . 4-126 Move Dialog . . . . . . . . . . . . . . . . . . . . . . . . . . . . . . . . . . . . . . . . . . . . . . . . 4-127 Step . . . . . . . . . . . . . . . . . . . . . . . . . . . . . . . . . . . . . . . . . . . . . . . . . . . . . . . . 4-128 Trace . . . . . . . . . . . . . . . . . . . . . . . . . . . . . . . . . . . . . . . . . . . . . . . . . . . . . . . 4-129 Gripper Submenu . . . . . . . . . . . . . . . . . . . . . . . . . . . . . . . . . . . . . . . . . . . . . . . 4-129 Get/Put Storage Dialog . . . . . . . . . . . . . . . . . . . . . . . . . . . . . . . . . . . . . . . 4-130 Get/Put Drives Dialog. . . . . . . . . . . . . . . . . . . . . . . . . . . . . . . . . . . . . . . . 4-133 Step Dialog. . . . . . . . . . . . . . . . . . . . . . . . . . . . . . . . . . . . . . . . . . . . . . . . . . 4-135 Test Dialog . . . . . . . . . . . . . . . . . . . . . . . . . . . . . . . . . . . . . . . . . . . . . . . . . . 4-136 Scanner Submenu . . . . . . . . . . . . . . . . . . . . . . . . . . . . . . . . . . . . . . . . . . . . . . . 4-136 September 2007 Contents 1-vii Verify Dialog . . . . . . . . . . . . . . . . . . . . . . . . . . . . . . . . . . . . . . . . . . . . . . . . 4-137 Trigger Dialog . . . . . . . . . . . . . . . . . . . . . . . . . . . . . . . . . . . . . . . . . . . . . . . 4-138 Fiducial Test Dialog . . . . . . . . . . . . . . . . . . . . . . . . . . . . . . . . . . . . . . . . . . 4-139 Tower Submenu . . . . . . . . . . . . . . . . . . . . . . . . . . . . . . . . . . . . . . . . . . . . . . . . 4-140 Home Dialog . . . . . . . . . . . . . . . . . . . . . . . . . . . . . . . . . . . . . . . . . . . . . . . . 4-140 Step Dialog. . . . . . . . . . . . . . . . . . . . . . . . . . . . . . . . . . . . . . . . . . . . . . . . . . 4-142 DI/DO Submenu . . . . . . . . . . . . . . . . . . . . . . . . . . . . . . . . . . . . . . . . . . . . . . . 4-143 Loopback Dialog . . . . . . . . . . . . . . . . . . . . . . . . . . . . . . . . . . . . . . . . . . . . . 4-143 Sensors Submenu . . . . . . . . . . . . . . . . . . . . . . . . . . . . . . . . . . . . . . . . . . . . 4-145 Wrap Dialog . . . . . . . . . . . . . . . . . . . . . . . . . . . . . . . . . . . . . . . . . . . . 4-146 Real Time . . . . . . . . . . . . . . . . . . . . . . . . . . . . . . . . . . . . . . . . . . . . . . 4-147 Locks Dialog . . . . . . . . . . . . . . . . . . . . . . . . . . . . . . . . . . . . . . . . . . . . . . . . 4-150 Self Test Dialog . . . . . . . . . . . . . . . . . . . . . . . . . . . . . . . . . . . . . . . . . . . . . . . . . 4-151 P/S Submenu . . . . . . . . . . . . . . . . . . . . . . . . . . . . . . . . . . . . . . . . . . . . . . . . . . . 4-152 Library Power . . . . . . . . . . . . . . . . . . . . . . . . . . . . . . . . . . . . . . . . . . . . . . . 4-152 UDS Power. . . . . . . . . . . . . . . . . . . . . . . . . . . . . . . . . . . . . . . . . . . . . . . . . . 4-153 Library Submenu . . . . . . . . . . . . . . . . . . . . . . . . . . . . . . . . . . . . . . . . . . . . . . . 4-154 Storage Move. . . . . . . . . . . . . . . . . . . . . . . . . . . . . . . . . . . . . . . . . . . . . . . . 4-154 Corner Moves . . . . . . . . . . . . . . . . . . . . . . . . . . . . . . . . . . . . . . . . . . . . . . . 4-155 Teach Submenu . . . . . . . . . . . . . . . . . . . . . . . . . . . . . . . . . . . . . . . . . . . . . . . . . . . . 4-156 New Dialog . . . . . . . . . . . . . . . . . . . . . . . . . . . . . . . . . . . . . . . . . . . . . . . . . . . . 4-156 Continue Dialog . . . . . . . . . . . . . . . . . . . . . . . . . . . . . . . . . . . . . . . . . . . . . . . . 4-158 Current Dialog . . . . . . . . . . . . . . . . . . . . . . . . . . . . . . . . . . . . . . . . . . . . . . . . . . 4-159 Bays Dialog . . . . . . . . . . . . . . . . . . . . . . . . . . . . . . . . . . . . . . . . . . . . . . . . . . . . 4-162 Drive Dialog . . . . . . . . . . . . . . . . . . . . . . . . . . . . . . . . . . . . . . . . . . . . . . . . . . . . 4-164 Gripper Dialog . . . . . . . . . . . . . . . . . . . . . . . . . . . . . . . . . . . . . . . . . . . . . . . . . . 4-166 Tape Dialog . . . . . . . . . . . . . . . . . . . . . . . . . . . . . . . . . . . . . . . . . . . . . . . . . . . . 4-168 SAC Dialog . . . . . . . . . . . . . . . . . . . . . . . . . . . . . . . . . . . . . . . . . . . . . . . . . . . . . . . . 4-168 Demo Dialog . . . . . . . . . . . . . . . . . . . . . . . . . . . . . . . . . . . . . . . . . . . . . . . . . . . . . . . 4-169 Verify Submenu . . . . . . . . . . . . . . . . . . . . . . . . . . . . . . . . . . . . . . . . . . . . . . . . . . . . 4-171 All Dialog . . . . . . . . . . . . . . . . . . . . . . . . . . . . . . . . . . . . . . . . . . . . . . . . . . . . . . 4-171 Report Dialog . . . . . . . . . . . . . . . . . . . . . . . . . . . . . . . . . . . . . . . . . . . . . . . . . . . 4-172 Advanced Submenu . . . . . . . . . . . . . . . . . . . . . . . . . . . . . . . . . . . . . . . . . . . . . . . . 4-172 About Screen . . . . . . . . . . . . . . . . . . . . . . . . . . . . . . . . . . . . . . . . . . . . . . . . . . . . . . . . . . 4-173 5 Processing Media Overview . . . . . . . . . . . . . . . . . . . . . . . . . . . . . . . . . . . . . . . . . . . . . . . . . . . . . . . . . . . . . . . 5-3 Tape Cartridge Maintenance . . . . . . . . . . . . . . . . . . . . . . . . . . . . . . . . . . . . . . . . . . . . . . . 5-3 Inspecting Tape Cartridges . . . . . . . . . . . . . . . . . . . . . . . . . . . . . . . . . . . . . . . . . . . . . 5-3 Handling Tape Cartridges . . . . . . . . . . . . . . . . . . . . . . . . . . . . . . . . . . . . . . . . . . . . . 5-4 Storing Tape Cartridges . . . . . . . . . . . . . . . . . . . . . . . . . . . . . . . . . . . . . . . . . . . . . . . 5-4 1-viii Contents 6-00058-05 Rev A Acclimating Tape Cartridges . . . . . . . . . . . . . . . . . . . . . . . . . . . . . . . . . . . . . . . . . . . 5-5 Transporting Tape Cartridges . . . . . . . . . . . . . . . . . . . . . . . . . . . . . . . . . . . . . . . . . . 5-5 Inserting Tape Cartridges . . . . . . . . . . . . . . . . . . . . . . . . . . . . . . . . . . . . . . . . . . . . . . . . . 5-6 Inserting Tape Cartridges Using the Insert/Eject Station . . . . . . . . . . . . . . . . . . . 5-6 Manually Bulk Loading Tape Cartridges . . . . . . . . . . . . . . . . . . . . . . . . . . . . . . . . . 5-7 Standard Bulk Loading . . . . . . . . . . . . . . . . . . . . . . . . . . . . . . . . . . . . . . . . . . . . 5-7 TM Bulk Loading . . . . . . . . . . . . . . . . . . . . . . . . . . . . . . . . . . . . . . . . . . . . . . . . . 5-7 Ejecting Tape Cartridges . . . . . . . . . . . . . . . . . . . . . . . . . . . . . . . . . . . . . . . . . . . . . . . . . 5-11 Understanding Barcodes . . . . . . . . . . . . . . . . . . . . . . . . . . . . . . . . . . . . . . . . . . . . . . . . . 5-12 Barcode Labels . . . . . . . . . . . . . . . . . . . . . . . . . . . . . . . . . . . . . . . . . . . . . . . . . . . . . . 5-12 Applying Labels . . . . . . . . . . . . . . . . . . . . . . . . . . . . . . . . . . . . . . . . . . . . . . . . . . . . . 5-13 Barcode Label Restrictions . . . . . . . . . . . . . . . . . . . . . . . . . . . . . . . . . . . . . . . . . . . . 5-14 Cleaning Drives . . . . . . . . . . . . . . . . . . . . . . . . . . . . . . . . . . . . . . . . . . . . . . . . . . . . . . . . . 5-16 Typical Cleaning Operation . . . . . . . . . . . . . . . . . . . . . . . . . . . . . . . . . . . . . . . . . . . 5-16 Non-typical Cleaning . . . . . . . . . . . . . . . . . . . . . . . . . . . . . . . . . . . . . . . . . . . . . . . . . 5-16 Inserting and Ejecting Cleaning Cartridges . . . . . . . . . . . . . . . . . . . . . . . . . . . . . . 5-17 Insert a Cleaning Cartridge . . . . . . . . . . . . . . . . . . . . . . . . . . . . . . . . . . . . . . . . 5-19 Eject a Cleaning Cartridge . . . . . . . . . . . . . . . . . . . . . . . . . . . . . . . . . . . . . . . . . 5-21 AutoClean . . . . . . . . . . . . . . . . . . . . . . . . . . . . . . . . . . . . . . . . . . . . . . . . . . . . . . . . . . 5-22 6 Error Messages Overview . . . . . . . . . . . . . . . . . . . . . . . . . . . . . . . . . . . . . . . . . . . . . . . . . . . . . . . . . . . . . . . 6-3 Understanding Error Messages . . . . . . . . . . . . . . . . . . . . . . . . . . . . . . . . . . . . . . . . . . . . . 6-3 Operator Intervention Messages . . . . . . . . . . . . . . . . . . . . . . . . . . . . . . . . . . . . . . . . . . . . 6-4 Service Action Codes . . . . . . . . . . . . . . . . . . . . . . . . . . . . . . . . . . . . . . . . . . . . . . . . . . . . 6-11 Understanding Service Action Codes and Modifiers . . . . . . . . . . . . . . . . . . . . . . 6-11 Service Action Code Table . . . . . . . . . . . . . . . . . . . . . . . . . . . . . . . . . . . . . . . . . . . . 6-15 Resolving a Stuck Accessor . . . . . . . . . . . . . . . . . . . . . . . . . . . . . . . . . . . . . . . . . . . . . . . 6-40 Error Log Form . . . . . . . . . . . . . . . . . . . . . . . . . . . . . . . . . . . . . . . . . . . . . . . . . . . . . . . . . 6-41 Frequently Asked Questions . . . . . . . . . . . . . . . . . . . . . . . . . . . . . . . . . . . . . . . . . . . . . . 6-42 Index September 2007 Contents 1-ix 1-x Contents 6-00058-05 Rev A Figures Figure 1-1 Laser Safety Label . . . . . . . . . . . . . . . . . . . . . . . . . . . . . . . . . . . . . . . . . . 1-5 Figure 2-1 Basic Scalar 10K System . . . . . . . . . . . . . . . . . . . . . . . . . . . . . . . . . . . . . 2-3 Figure 2-2 Top View of Scalar 10K Modules . . . . . . . . . . . . . . . . . . . . . . . . . . . . . 2-5 Figure 2-3 Module Cell Locations and Internal View of Library . . . . . . . . . . . . 2-9 Figure 2-4 Storage Assembly . . . . . . . . . . . . . . . . . . . . . . . . . . . . . . . . . . . . . . . . . 2-10 Figure 2-5 Five Storage Assemblies per Rack (Top and Side View of EM) . . . 2-11 Figure 2-6 Cartridge Accessor . . . . . . . . . . . . . . . . . . . . . . . . . . . . . . . . . . . . . . . . 2-12 Figure 2-7 I/E Station Magazines . . . . . . . . . . . . . . . . . . . . . . . . . . . . . . . . . . . . . 2-15 Figure 2-8 Indirect Fibre Channel Attachment . . . . . . . . . . . . . . . . . . . . . . . . . . 2-17 Figure 2-9 Direct SCSI Attachment . . . . . . . . . . . . . . . . . . . . . . . . . . . . . . . . . . . . 2-18 Figure 2-10 Scalar DLC Network Attachments . . . . . . . . . . . . . . . . . . . . . . . . . . . 2-20 Figure 2-11 Scalar DLC Network Attachments with Redundant Robotics . . . . 2-21 Figure 3-1 Operator Panel Components . . . . . . . . . . . . . . . . . . . . . . . . . . . . . . . . . 3-4 Figure 3-2 Main Screen . . . . . . . . . . . . . . . . . . . . . . . . . . . . . . . . . . . . . . . . . . . . . . . 3-8 Figure 3-3 Reboot Screen . . . . . . . . . . . . . . . . . . . . . . . . . . . . . . . . . . . . . . . . . . . . . . 3-8 Figure 3-4 RMU Location (CM Front View—Service Door Open) . . . . . . . . . . 3-22 Figure 4-1 Operator Panel Menu Tree Structure . . . . . . . . . . . . . . . . . . . . . . . . . . 4-8 Figure 4-2 Main Menu . . . . . . . . . . . . . . . . . . . . . . . . . . . . . . . . . . . . . . . . . . . . . . . . 4-9 Figure 4-3 Mode Dialog . . . . . . . . . . . . . . . . . . . . . . . . . . . . . . . . . . . . . . . . . . . . . . 4-10 Figure 4-4 Ready Screen . . . . . . . . . . . . . . . . . . . . . . . . . . . . . . . . . . . . . . . . . . . . . 4-10 Figure 4-5 Not Ready Screen . . . . . . . . . . . . . . . . . . . . . . . . . . . . . . . . . . . . . . . . . 4-11 Figure 4-6 Shutdown Screen . . . . . . . . . . . . . . . . . . . . . . . . . . . . . . . . . . . . . . . . . . 4-11 2-xi 2-xii Figures Figure 4-7 Status Menu . . . . . . . . . . . . . . . . . . . . . . . . . . . . . . . . . . . . . . . . . . . . . . 4-12 Figure 4-8 Library Submenu . . . . . . . . . . . . . . . . . . . . . . . . . . . . . . . . . . . . . . . . . . 4-12 Figure 4-9 SCSI Submenu . . . . . . . . . . . . . . . . . . . . . . . . . . . . . . . . . . . . . . . . . . . . 4-13 Figure 4-10 Mode Parms Dialog. . . . . . . . . . . . . . . . . . . . . . . . . . . . . . . . . . . . . . . . 4-13 Figure 4-11 Element Address Screen . . . . . . . . . . . . . . . . . . . . . . . . . . . . . . . . . . . . 4-14 Figure 4-12 Mixed-Media Screen . . . . . . . . . . . . . . . . . . . . . . . . . . . . . . . . . . . . . . . 4-15 Figure 4-13 Parity Screen. . . . . . . . . . . . . . . . . . . . . . . . . . . . . . . . . . . . . . . . . . . . . . 4-17 Figure 4-14 LCD Screen . . . . . . . . . . . . . . . . . . . . . . . . . . . . . . . . . . . . . . . . . . . . . . . 4-18 Figure 4-15 Reservation Dialog . . . . . . . . . . . . . . . . . . . . . . . . . . . . . . . . . . . . . . . . 4-19 Figure 4-16 Reservation Response Screen. . . . . . . . . . . . . . . . . . . . . . . . . . . . . . . . 4-20 Figure 4-17 System Dialog . . . . . . . . . . . . . . . . . . . . . . . . . . . . . . . . . . . . . . . . . . . . 4-21 Figure 4-18 Continuation Screen . . . . . . . . . . . . . . . . . . . . . . . . . . . . . . . . . . . . . . . 4-21 Figure 4-19 Continuation Screen . . . . . . . . . . . . . . . . . . . . . . . . . . . . . . . . . . . . . . . 4-22 Figure 4-20 Element Dialog. . . . . . . . . . . . . . . . . . . . . . . . . . . . . . . . . . . . . . . . . . . . 4-22 Figure 4-21 Response Dialog . . . . . . . . . . . . . . . . . . . . . . . . . . . . . . . . . . . . . . . . . . 4-23 Figure 4-22 Continuation Screen . . . . . . . . . . . . . . . . . . . . . . . . . . . . . . . . . . . . . . . 4-24 Figure 4-23 Continuation Screen . . . . . . . . . . . . . . . . . . . . . . . . . . . . . . . . . . . . . . . 4-24 Figure 4-24 Logs Submenu . . . . . . . . . . . . . . . . . . . . . . . . . . . . . . . . . . . . . . . . . . . . 4-25 Figure 4-25 Command Log Dialog. . . . . . . . . . . . . . . . . . . . . . . . . . . . . . . . . . . . . . 4-26 Figure 4-26 Error Log Dialog . . . . . . . . . . . . . . . . . . . . . . . . . . . . . . . . . . . . . . . . . . 4-26 Figure 4-27 Print Log Screen. . . . . . . . . . . . . . . . . . . . . . . . . . . . . . . . . . . . . . . . . . . 4-27 Figure 4-28 Response Screen. . . . . . . . . . . . . . . . . . . . . . . . . . . . . . . . . . . . . . . . . . . 4-27 Figure 4-29 Print Inventory Screen . . . . . . . . . . . . . . . . . . . . . . . . . . . . . . . . . . . . . 4-28 Figure 4-30 Response Screen. . . . . . . . . . . . . . . . . . . . . . . . . . . . . . . . . . . . . . . . . . . 4-28 Figure 4-31 Firmware Submenu. . . . . . . . . . . . . . . . . . . . . . . . . . . . . . . . . . . . . . . . 4-29 Figure 4-32 Drives Submenu . . . . . . . . . . . . . . . . . . . . . . . . . . . . . . . . . . . . . . . . . . 4-30 Figure 4-33 Drive State Dialog . . . . . . . . . . . . . . . . . . . . . . . . . . . . . . . . . . . . . . . . . 4-31 Figure 4-34 Drive State Continuation Dialog . . . . . . . . . . . . . . . . . . . . . . . . . . . . . 4-31 Figure 4-35 SCSI Drive Screen . . . . . . . . . . . . . . . . . . . . . . . . . . . . . . . . . . . . . . . . . 4-32 Figure 4-36 Fibre Channel Drive Screen (Dual Port). . . . . . . . . . . . . . . . . . . . . . . 4-32 Figure 4-37 Fibre Channel Continuation Screen (Dual Port) . . . . . . . . . . . . . . . . 4-33 Figure 4-38 Element Dialog. . . . . . . . . . . . . . . . . . . . . . . . . . . . . . . . . . . . . . . . . . . . 4-35 Figure 4-39 Response Screen. . . . . . . . . . . . . . . . . . . . . . . . . . . . . . . . . . . . . . . . . . . 4-35 6-00058-05 Rev A September 2007 Figure 4-40 Drive Log Dialog . . . . . . . . . . . . . . . . . . . . . . . . . . . . . . . . . . . . . . . . . . 4-36 Figure 4-41 Firmware Dialog . . . . . . . . . . . . . . . . . . . . . . . . . . . . . . . . . . . . . . . . . . 4-37 Figure 4-42 Selected Drive Firmware Revision . . . . . . . . . . . . . . . . . . . . . . . . . . . 4-37 Figure 4-43 Towers Submenu . . . . . . . . . . . . . . . . . . . . . . . . . . . . . . . . . . . . . . . . . . 4-38 Figure 4-44 IE Stations Dialog . . . . . . . . . . . . . . . . . . . . . . . . . . . . . . . . . . . . . . . . . 4-39 Figure 4-45 Commands Menu . . . . . . . . . . . . . . . . . . . . . . . . . . . . . . . . . . . . . . . . . 4-40 Figure 4-46 Response Dialog . . . . . . . . . . . . . . . . . . . . . . . . . . . . . . . . . . . . . . . . . . 4-40 Figure 4-47 Response Dialog . . . . . . . . . . . . . . . . . . . . . . . . . . . . . . . . . . . . . . . . . . 4-40 Figure 4-48 Move Submenu . . . . . . . . . . . . . . . . . . . . . . . . . . . . . . . . . . . . . . . . . . . 4-41 Figure 4-49 Position Gripper Dialog . . . . . . . . . . . . . . . . . . . . . . . . . . . . . . . . . . . . 4-42 Figure 4-50 Response Screen. . . . . . . . . . . . . . . . . . . . . . . . . . . . . . . . . . . . . . . . . . . 4-43 Figure 4-51 Response Screen. . . . . . . . . . . . . . . . . . . . . . . . . . . . . . . . . . . . . . . . . . . 4-43 Figure 4-52 Position Scanner Dialog . . . . . . . . . . . . . . . . . . . . . . . . . . . . . . . . . . . . 4-44 Figure 4-53 Response Screen. . . . . . . . . . . . . . . . . . . . . . . . . . . . . . . . . . . . . . . . . . . 4-45 Figure 4-54 Response Screen. . . . . . . . . . . . . . . . . . . . . . . . . . . . . . . . . . . . . . . . . . . 4-45 Figure 4-55 Move Media Dialog. . . . . . . . . . . . . . . . . . . . . . . . . . . . . . . . . . . . . . . . 4-46 Figure 4-56 Target Dialog . . . . . . . . . . . . . . . . . . . . . . . . . . . . . . . . . . . . . . . . . . . . . 4-47 Figure 4-57 Response Screen. . . . . . . . . . . . . . . . . . . . . . . . . . . . . . . . . . . . . . . . . . . 4-48 Figure 4-58 Response Screen. . . . . . . . . . . . . . . . . . . . . . . . . . . . . . . . . . . . . . . . . . . 4-48 Figure 4-59 Error Screen . . . . . . . . . . . . . . . . . . . . . . . . . . . . . . . . . . . . . . . . . . . . . . 4-48 Figure 4-60 Error Screen . . . . . . . . . . . . . . . . . . . . . . . . . . . . . . . . . . . . . . . . . . . . . . 4-49 Figure 4-61 Inventory Dialog . . . . . . . . . . . . . . . . . . . . . . . . . . . . . . . . . . . . . . . . . . 4-49 Figure 4-62 Ending Inventory Dialog . . . . . . . . . . . . . . . . . . . . . . . . . . . . . . . . . . . 4-50 Figure 4-63 Response Screen. . . . . . . . . . . . . . . . . . . . . . . . . . . . . . . . . . . . . . . . . . . 4-51 Figure 4-64 Response Screen. . . . . . . . . . . . . . . . . . . . . . . . . . . . . . . . . . . . . . . . . . . 4-51 Figure 4-65 Insert/Eject Submenu . . . . . . . . . . . . . . . . . . . . . . . . . . . . . . . . . . . . . . 4-51 Figure 4-66 Insert Screen . . . . . . . . . . . . . . . . . . . . . . . . . . . . . . . . . . . . . . . . . . . . . . 4-52 Figure 4-67 Response Screen. . . . . . . . . . . . . . . . . . . . . . . . . . . . . . . . . . . . . . . . . . . 4-52 Figure 4-68 Insert Clean Tape Dialog . . . . . . . . . . . . . . . . . . . . . . . . . . . . . . . . . . . 4-53 Figure 4-69 Insert Range Screen . . . . . . . . . . . . . . . . . . . . . . . . . . . . . . . . . . . . . . . . 4-54 Figure 4-70 Target Screen . . . . . . . . . . . . . . . . . . . . . . . . . . . . . . . . . . . . . . . . . . . . . 4-54 Figure 4-71 Usage Screen . . . . . . . . . . . . . . . . . . . . . . . . . . . . . . . . . . . . . . . . . . . . . 4-55 Figure 4-72 Response Screen. . . . . . . . . . . . . . . . . . . . . . . . . . . . . . . . . . . . . . . . . . . 4-55 Figures 2-xiii 2-xiv Figures Figure 4-73 Eject Dialog. . . . . . . . . . . . . . . . . . . . . . . . . . . . . . . . . . . . . . . . . . . . . . . 4-56 Figure 4-74 Eject Screen . . . . . . . . . . . . . . . . . . . . . . . . . . . . . . . . . . . . . . . . . . . . . . . 4-57 Figure 4-75 Response Screen. . . . . . . . . . . . . . . . . . . . . . . . . . . . . . . . . . . . . . . . . . . 4-57 Figure 4-76 Eject Clean Tape Dialog . . . . . . . . . . . . . . . . . . . . . . . . . . . . . . . . . . . . 4-58 Figure 4-77 Eject Clean Tape Screen . . . . . . . . . . . . . . . . . . . . . . . . . . . . . . . . . . . . 4-59 Figure 4-78 Response Screen. . . . . . . . . . . . . . . . . . . . . . . . . . . . . . . . . . . . . . . . . . . 4-59 Figure 4-79 Database Menu . . . . . . . . . . . . . . . . . . . . . . . . . . . . . . . . . . . . . . . . . . . 4-60 Figure 4-80 Media Dialog . . . . . . . . . . . . . . . . . . . . . . . . . . . . . . . . . . . . . . . . . . . . . 4-60 Figure 4-81 Response Screen. . . . . . . . . . . . . . . . . . . . . . . . . . . . . . . . . . . . . . . . . . . 4-61 Figure 4-82 Element Dialog. . . . . . . . . . . . . . . . . . . . . . . . . . . . . . . . . . . . . . . . . . . . 4-61 Figure 4-83 Element Response Screen . . . . . . . . . . . . . . . . . . . . . . . . . . . . . . . . . . . 4-62 Figure 4-84 Continuation Screen . . . . . . . . . . . . . . . . . . . . . . . . . . . . . . . . . . . . . . . 4-63 Figure 4-85 Config Screen . . . . . . . . . . . . . . . . . . . . . . . . . . . . . . . . . . . . . . . . . . . . . 4-63 Figure 4-86 Setup Menu . . . . . . . . . . . . . . . . . . . . . . . . . . . . . . . . . . . . . . . . . . . . . . 4-64 Figure 4-87 Library Submenu . . . . . . . . . . . . . . . . . . . . . . . . . . . . . . . . . . . . . . . . . . 4-64 Figure 4-88 Trace Submenu . . . . . . . . . . . . . . . . . . . . . . . . . . . . . . . . . . . . . . . . . . . 4-65 Figure 4-89 Serial Port Screen . . . . . . . . . . . . . . . . . . . . . . . . . . . . . . . . . . . . . . . . . . 4-65 Figure 4-90 Aux Board Screen . . . . . . . . . . . . . . . . . . . . . . . . . . . . . . . . . . . . . . . . . 4-66 Figure 4-91 SCSI Submenu . . . . . . . . . . . . . . . . . . . . . . . . . . . . . . . . . . . . . . . . . . . . 4-66 Figure 4-92 Target ID Dialog . . . . . . . . . . . . . . . . . . . . . . . . . . . . . . . . . . . . . . . . . . 4-67 Figure 4-93 Parity Dialog. . . . . . . . . . . . . . . . . . . . . . . . . . . . . . . . . . . . . . . . . . . . . . 4-68 Figure 4-94 Ports Screen . . . . . . . . . . . . . . . . . . . . . . . . . . . . . . . . . . . . . . . . . . . . . . 4-69 Figure 4-95 Host Dialog. . . . . . . . . . . . . . . . . . . . . . . . . . . . . . . . . . . . . . . . . . . . . . . 4-70 Figure 4-96 Security Submenu . . . . . . . . . . . . . . . . . . . . . . . . . . . . . . . . . . . . . . . . . 4-71 Figure 4-97 Host Dialog. . . . . . . . . . . . . . . . . . . . . . . . . . . . . . . . . . . . . . . . . . . . . . . 4-72 Figure 4-98 Password Dialog . . . . . . . . . . . . . . . . . . . . . . . . . . . . . . . . . . . . . . . . . . 4-72 Figure 4-99 Host Dialog. . . . . . . . . . . . . . . . . . . . . . . . . . . . . . . . . . . . . . . . . . . . . . . 4-73 Figure 4-100 Invalid Password . . . . . . . . . . . . . . . . . . . . . . . . . . . . . . . . . . . . . . . . . . 4-73 Figure 4-101 Change Password Dialog . . . . . . . . . . . . . . . . . . . . . . . . . . . . . . . . . . . 4-73 Figure 4-102 Password Changed Screen . . . . . . . . . . . . . . . . . . . . . . . . . . . . . . . . . . 4-73 Figure 4-103 I/E Security . . . . . . . . . . . . . . . . . . . . . . . . . . . . . . . . . . . . . . . . . . . . . . 4-74 Figure 4-104 Password Dialog . . . . . . . . . . . . . . . . . . . . . . . . . . . . . . . . . . . . . . . . . . 4-74 Figure 4-105 Change Password Dialog . . . . . . . . . . . . . . . . . . . . . . . . . . . . . . . . . . . 4-75 6-00058-05 Rev A September 2007 Figure 4-106 Password Changed Screen . . . . . . . . . . . . . . . . . . . . . . . . . . . . . . . . . . 4-75 Figure 4-107 Security is OFF Screen. . . . . . . . . . . . . . . . . . . . . . . . . . . . . . . . . . . . . . 4-75 Figure 4-108 Security is ON Screen . . . . . . . . . . . . . . . . . . . . . . . . . . . . . . . . . . . . . . 4-75 Figure 4-109 Reset Password . . . . . . . . . . . . . . . . . . . . . . . . . . . . . . . . . . . . . . . . . . . 4-76 Figure 4-110 Reset Password Dialog . . . . . . . . . . . . . . . . . . . . . . . . . . . . . . . . . . . . . 4-76 Figure 4-111 Media Dialog . . . . . . . . . . . . . . . . . . . . . . . . . . . . . . . . . . . . . . . . . . . . . 4-77 Figure 4-112 Capacity Submenu . . . . . . . . . . . . . . . . . . . . . . . . . . . . . . . . . . . . . . . . 4-79 Figure 4-113 Storage Dialog . . . . . . . . . . . . . . . . . . . . . . . . . . . . . . . . . . . . . . . . . . . . 4-80 Figure 4-114 Enter Capacity Dialog . . . . . . . . . . . . . . . . . . . . . . . . . . . . . . . . . . . . . . 4-81 Figure 4-115 Enter Authorization Code Dialog . . . . . . . . . . . . . . . . . . . . . . . . . . . . 4-81 Figure 4-116 Acceptance Screen . . . . . . . . . . . . . . . . . . . . . . . . . . . . . . . . . . . . . . . . . 4-81 Figure 4-117 Authorization Failed . . . . . . . . . . . . . . . . . . . . . . . . . . . . . . . . . . . . . . . 4-82 Figure 4-118 RMU Submenu. . . . . . . . . . . . . . . . . . . . . . . . . . . . . . . . . . . . . . . . . . . . 4-82 Figure 4-119 Host Dialog. . . . . . . . . . . . . . . . . . . . . . . . . . . . . . . . . . . . . . . . . . . . . . . 4-83 Figure 4-120 IP Dialog . . . . . . . . . . . . . . . . . . . . . . . . . . . . . . . . . . . . . . . . . . . . . . . . . 4-83 Figure 4-121 More Submenu. . . . . . . . . . . . . . . . . . . . . . . . . . . . . . . . . . . . . . . . . . . . 4-84 Figure 4-122 Advanced Dialog . . . . . . . . . . . . . . . . . . . . . . . . . . . . . . . . . . . . . . . . . . 4-84 Figure 4-123 Inventory Dialog . . . . . . . . . . . . . . . . . . . . . . . . . . . . . . . . . . . . . . . . . . 4-86 Figure 4-124 Drives Submenu . . . . . . . . . . . . . . . . . . . . . . . . . . . . . . . . . . . . . . . . . . 4-87 Figure 4-125 SCSI Drive Selection . . . . . . . . . . . . . . . . . . . . . . . . . . . . . . . . . . . . . . . 4-88 Figure 4-126 Drive Parameters (Fibre Drive Example). . . . . . . . . . . . . . . . . . . . . . 4-88 Figure 4-127 Continuation Screen . . . . . . . . . . . . . . . . . . . . . . . . . . . . . . . . . . . . . . . 4-89 Figure 4-128 Drive Parameters Screen (Port 2) . . . . . . . . . . . . . . . . . . . . . . . . . . . . 4-90 Figure 4-129 Continuation Screen (Port 2) . . . . . . . . . . . . . . . . . . . . . . . . . . . . . . . . 4-90 Figure 4-130 Tape Alert Notification Dialog . . . . . . . . . . . . . . . . . . . . . . . . . . . . . . 4-91 Figure 4-131 Tape Alert Notify Configuration Dialog . . . . . . . . . . . . . . . . . . . . . . 4-92 Figure 4-132 Logical Serial Number Dialog . . . . . . . . . . . . . . . . . . . . . . . . . . . . . . . 4-94 Figure 4-133 Cleaning Submenu . . . . . . . . . . . . . . . . . . . . . . . . . . . . . . . . . . . . . . . . 4-94 Figure 4-134 IE Station Submenu . . . . . . . . . . . . . . . . . . . . . . . . . . . . . . . . . . . . . . . 4-95 Figure 4-135 Drives Dialog . . . . . . . . . . . . . . . . . . . . . . . . . . . . . . . . . . . . . . . . . . . . . 4-96 Figure 4-136 Media Dialog . . . . . . . . . . . . . . . . . . . . . . . . . . . . . . . . . . . . . . . . . . . . . 4-97 Figure 4-137 Usage Dialog . . . . . . . . . . . . . . . . . . . . . . . . . . . . . . . . . . . . . . . . . . . . . 4-97 Figure 4-138 View Dialog . . . . . . . . . . . . . . . . . . . . . . . . . . . . . . . . . . . . . . . . . . . . . . 4-98 Figures 2-xv 2-xvi Figures Figure 4-139 Utils Menu . . . . . . . . . . . . . . . . . . . . . . . . . . . . . . . . . . . . . . . . . . . . . . . 4-99 Figure 4-140 Library Submenu . . . . . . . . . . . . . . . . . . . . . . . . . . . . . . . . . . . . . . . . . . 4-99 Figure 4-141 Screen Dialog . . . . . . . . . . . . . . . . . . . . . . . . . . . . . . . . . . . . . . . . . . . . 4-100 Figure 4-142 Timeout Value Dialog. . . . . . . . . . . . . . . . . . . . . . . . . . . . . . . . . . . . . 4-100 Figure 4-143 Password Dialog . . . . . . . . . . . . . . . . . . . . . . . . . . . . . . . . . . . . . . . . . 4-101 Figure 4-144 Password Change Dialog . . . . . . . . . . . . . . . . . . . . . . . . . . . . . . . . . . 4-101 Figure 4-145 Invalid Password Dialog . . . . . . . . . . . . . . . . . . . . . . . . . . . . . . . . . . 4-101 Figure 4-146 Audio Dialog . . . . . . . . . . . . . . . . . . . . . . . . . . . . . . . . . . . . . . . . . . . . 4-102 Figure 4-147 Time Dialog . . . . . . . . . . . . . . . . . . . . . . . . . . . . . . . . . . . . . . . . . . . . . 4-103 Figure 4-148 Snapshot Response Screen . . . . . . . . . . . . . . . . . . . . . . . . . . . . . . . . . 4-104 Figure 4-149 Date Dialog . . . . . . . . . . . . . . . . . . . . . . . . . . . . . . . . . . . . . . . . . . . . . . 4-104 Figure 4-150 Accessor Speed Screen . . . . . . . . . . . . . . . . . . . . . . . . . . . . . . . . . . . . 4-105 Figure 4-151 Lights Screen . . . . . . . . . . . . . . . . . . . . . . . . . . . . . . . . . . . . . . . . . . . . 4-105 Figure 4-152 Drives Submenu . . . . . . . . . . . . . . . . . . . . . . . . . . . . . . . . . . . . . . . . . 4-106 Figure 4-153 Status Change Submenu. . . . . . . . . . . . . . . . . . . . . . . . . . . . . . . . . . . 4-106 Figure 4-154 Initialize Dialog . . . . . . . . . . . . . . . . . . . . . . . . . . . . . . . . . . . . . . . . . . 4-107 Figure 4-155 Command Complete Screen . . . . . . . . . . . . . . . . . . . . . . . . . . . . . . . 4-107 Figure 4-156 Activate Dialog . . . . . . . . . . . . . . . . . . . . . . . . . . . . . . . . . . . . . . . . . . 4-108 Figure 4-157 Activate Drive . . . . . . . . . . . . . . . . . . . . . . . . . . . . . . . . . . . . . . . . . . . 4-108 Figure 4-158 Vary Off Dialog . . . . . . . . . . . . . . . . . . . . . . . . . . . . . . . . . . . . . . . . . . 4-109 Figure 4-159 Vary On Dialog . . . . . . . . . . . . . . . . . . . . . . . . . . . . . . . . . . . . . . . . . . 4-110 Figure 4-160 Operations Submenu . . . . . . . . . . . . . . . . . . . . . . . . . . . . . . . . . . . . . 4-111 Figure 4-161 Update Microcode Dialog . . . . . . . . . . . . . . . . . . . . . . . . . . . . . . . . . 4-112 Figure 4-162 Starting Drive . . . . . . . . . . . . . . . . . . . . . . . . . . . . . . . . . . . . . . . . . . . . 4-113 Figure 4-163 Ending Drive . . . . . . . . . . . . . . . . . . . . . . . . . . . . . . . . . . . . . . . . . . . . 4-113 Figure 4-164 Update Microcode Screen . . . . . . . . . . . . . . . . . . . . . . . . . . . . . . . . . 4-113 Figure 4-165 Clean Drives Dialog . . . . . . . . . . . . . . . . . . . . . . . . . . . . . . . . . . . . . . 4-114 Figure 4-166 Progress Screen . . . . . . . . . . . . . . . . . . . . . . . . . . . . . . . . . . . . . . . . . . 4-115 Figure 4-167 Response Screen. . . . . . . . . . . . . . . . . . . . . . . . . . . . . . . . . . . . . . . . . . 4-115 Figure 4-168 Unload Drives Dialog . . . . . . . . . . . . . . . . . . . . . . . . . . . . . . . . . . . . . 4-116 Figure 4-169 Progress Dialog . . . . . . . . . . . . . . . . . . . . . . . . . . . . . . . . . . . . . . . . . . 4-117 Figure 4-170 Response Dialog . . . . . . . . . . . . . . . . . . . . . . . . . . . . . . . . . . . . . . . . . 4-117 Figure 4-171 Starting Drive . . . . . . . . . . . . . . . . . . . . . . . . . . . . . . . . . . . . . . . . . . . . 4-118 6-00058-05 Rev A September 2007 Figure 4-172 Ending Drive . . . . . . . . . . . . . . . . . . . . . . . . . . . . . . . . . . . . . . . . . . . . 4-119 Figure 4-173 Progress Dialog . . . . . . . . . . . . . . . . . . . . . . . . . . . . . . . . . . . . . . . . . . 4-119 Figure 4-174 Response Dialog . . . . . . . . . . . . . . . . . . . . . . . . . . . . . . . . . . . . . . . . . 4-119 Figure 4-175 Towers Submenu . . . . . . . . . . . . . . . . . . . . . . . . . . . . . . . . . . . . . . . . . 4-120 Figure 4-176 Set Status Dialog . . . . . . . . . . . . . . . . . . . . . . . . . . . . . . . . . . . . . . . . . 4-120 Figure 4-177 Tower Mode Change. . . . . . . . . . . . . . . . . . . . . . . . . . . . . . . . . . . . . . 4-121 Figure 4-178 Tower Return Dialog. . . . . . . . . . . . . . . . . . . . . . . . . . . . . . . . . . . . . . 4-121 Figure 4-179 Inventory Tower . . . . . . . . . . . . . . . . . . . . . . . . . . . . . . . . . . . . . . . . . 4-121 Figure 4-180 Initialize Dialog . . . . . . . . . . . . . . . . . . . . . . . . . . . . . . . . . . . . . . . . . . 4-122 Figure 4-181 Command Complete . . . . . . . . . . . . . . . . . . . . . . . . . . . . . . . . . . . . . . 4-122 Figure 4-182 Inventory Tower . . . . . . . . . . . . . . . . . . . . . . . . . . . . . . . . . . . . . . . . . 4-122 Figure 4-183 Service Menu . . . . . . . . . . . . . . . . . . . . . . . . . . . . . . . . . . . . . . . . . . . . 4-123 Figure 4-184 Preventive Maintenance Due Dialog . . . . . . . . . . . . . . . . . . . . . . . . 4-123 Figure 4-185 Confirm Change Dialog . . . . . . . . . . . . . . . . . . . . . . . . . . . . . . . . . . . 4-124 Figure 4-186 Start Dialog with No Errors . . . . . . . . . . . . . . . . . . . . . . . . . . . . . . . . 4-124 Figure 4-187 Start Dialog with Errors . . . . . . . . . . . . . . . . . . . . . . . . . . . . . . . . . . . 4-125 Figure 4-188 Diags Submenu . . . . . . . . . . . . . . . . . . . . . . . . . . . . . . . . . . . . . . . . . . 4-125 Figure 4-189 Accessor Submenu . . . . . . . . . . . . . . . . . . . . . . . . . . . . . . . . . . . . . . . 4-126 Figure 4-190 Move Dialog . . . . . . . . . . . . . . . . . . . . . . . . . . . . . . . . . . . . . . . . . . . . . 4-127 Figure 4-191 Response Dialog . . . . . . . . . . . . . . . . . . . . . . . . . . . . . . . . . . . . . . . . . 4-127 Figure 4-192 Step Screen . . . . . . . . . . . . . . . . . . . . . . . . . . . . . . . . . . . . . . . . . . . . . . 4-128 Figure 4-193 Movement Screen . . . . . . . . . . . . . . . . . . . . . . . . . . . . . . . . . . . . . . . . 4-128 Figure 4-194 Accessor Trace Screen . . . . . . . . . . . . . . . . . . . . . . . . . . . . . . . . . . . . . 4-129 Figure 4-195 Gripper Submenu . . . . . . . . . . . . . . . . . . . . . . . . . . . . . . . . . . . . . . . . 4-129 Figure 4-196 Get/Put Storage Dialog . . . . . . . . . . . . . . . . . . . . . . . . . . . . . . . . . . . 4-130 Figure 4-197 Continuation Dialog . . . . . . . . . . . . . . . . . . . . . . . . . . . . . . . . . . . . . . 4-130 Figure 4-198 Number of Elements Dialog . . . . . . . . . . . . . . . . . . . . . . . . . . . . . . . 4-131 Figure 4-199 Response Dialog . . . . . . . . . . . . . . . . . . . . . . . . . . . . . . . . . . . . . . . . . 4-131 Figure 4-200 Get/Put Drives Dialog . . . . . . . . . . . . . . . . . . . . . . . . . . . . . . . . . . . . 4-133 Figure 4-201 Continuation Dialog . . . . . . . . . . . . . . . . . . . . . . . . . . . . . . . . . . . . . . 4-133 Figure 4-202 Number of Drives Dialog . . . . . . . . . . . . . . . . . . . . . . . . . . . . . . . . . . 4-134 Figure 4-203 Response Dialog . . . . . . . . . . . . . . . . . . . . . . . . . . . . . . . . . . . . . . . . . 4-135 Figure 4-204 Step Screen . . . . . . . . . . . . . . . . . . . . . . . . . . . . . . . . . . . . . . . . . . . . . . 4-135 Figures 2-xvii 2-xviii Figures Figure 4-205 Test Screen . . . . . . . . . . . . . . . . . . . . . . . . . . . . . . . . . . . . . . . . . . . . . . 4-136 Figure 4-206 Scanner Submenu . . . . . . . . . . . . . . . . . . . . . . . . . . . . . . . . . . . . . . . . 4-136 Figure 4-207 Verify Dialog . . . . . . . . . . . . . . . . . . . . . . . . . . . . . . . . . . . . . . . . . . . . 4-137 Figure 4-208 Response Screen. . . . . . . . . . . . . . . . . . . . . . . . . . . . . . . . . . . . . . . . . . 4-138 Figure 4-209 Fiducial Test Dialog. . . . . . . . . . . . . . . . . . . . . . . . . . . . . . . . . . . . . . . 4-139 Figure 4-210 Tower Submenu. . . . . . . . . . . . . . . . . . . . . . . . . . . . . . . . . . . . . . . . . . 4-140 Figure 4-211 Home Dialog . . . . . . . . . . . . . . . . . . . . . . . . . . . . . . . . . . . . . . . . . . . . 4-140 Figure 4-212 Tower Homing. . . . . . . . . . . . . . . . . . . . . . . . . . . . . . . . . . . . . . . . . . . 4-141 Figure 4-213 Initialize Dialog . . . . . . . . . . . . . . . . . . . . . . . . . . . . . . . . . . . . . . . . . . 4-141 Figure 4-214 Command Complete . . . . . . . . . . . . . . . . . . . . . . . . . . . . . . . . . . . . . . 4-141 Figure 4-215 Wrong Tower Mode . . . . . . . . . . . . . . . . . . . . . . . . . . . . . . . . . . . . . . 4-141 Figure 4-216 Home Dialog . . . . . . . . . . . . . . . . . . . . . . . . . . . . . . . . . . . . . . . . . . . . 4-142 Figure 4-217 Position Tower . . . . . . . . . . . . . . . . . . . . . . . . . . . . . . . . . . . . . . . . . . . 4-142 Figure 4-218 Wrong Tower Mode . . . . . . . . . . . . . . . . . . . . . . . . . . . . . . . . . . . . . . 4-143 Figure 4-219 DI/DO Submenu . . . . . . . . . . . . . . . . . . . . . . . . . . . . . . . . . . . . . . . . . 4-143 Figure 4-220 Loopback Dialog . . . . . . . . . . . . . . . . . . . . . . . . . . . . . . . . . . . . . . . . . 4-143 Figure 4-221 Response Dialog . . . . . . . . . . . . . . . . . . . . . . . . . . . . . . . . . . . . . . . . . 4-144 Figure 4-222 Sensors Submenu. . . . . . . . . . . . . . . . . . . . . . . . . . . . . . . . . . . . . . . . . 4-145 Figure 4-223 Wrap Dialog . . . . . . . . . . . . . . . . . . . . . . . . . . . . . . . . . . . . . . . . . . . . . 4-146 Figure 4-224 Response Dialog . . . . . . . . . . . . . . . . . . . . . . . . . . . . . . . . . . . . . . . . . 4-146 Figure 4-225 Real Time Screen . . . . . . . . . . . . . . . . . . . . . . . . . . . . . . . . . . . . . . . . . 4-147 Figure 4-226 LSC SENSORS Real Time Results (LMC 6) . . . . . . . . . . . . . . . . . . . 4-147 Figure 4-227 LSC SENSORS Real Time Results (LMC 4) . . . . . . . . . . . . . . . . . . . 4-148 Figure 4-228 TCL SENSORS Real Time Results. . . . . . . . . . . . . . . . . . . . . . . . . . . 4-148 Figure 4-229 I/E SENSORS Real Time Results . . . . . . . . . . . . . . . . . . . . . . . . . . . 4-148 Figure 4-230 LGR SENSORS Real Time Results . . . . . . . . . . . . . . . . . . . . . . . . . . 4-149 Figure 4-231 LMC 6 SENSORS Real Time Results . . . . . . . . . . . . . . . . . . . . . . . . 4-149 Figure 4-232 LMC 4 SENSORS Real Time Results . . . . . . . . . . . . . . . . . . . . . . . . 4-150 Figure 4-233 Locks Dialog . . . . . . . . . . . . . . . . . . . . . . . . . . . . . . . . . . . . . . . . . . . . . 4-150 Figure 4-234 Self \Test Dialog . . . . . . . . . . . . . . . . . . . . . . . . . . . . . . . . . . . . . . . . . 4-151 Figure 4-235 Response Dialog . . . . . . . . . . . . . . . . . . . . . . . . . . . . . . . . . . . . . . . . . 4-151 Figure 4-236 P/S Submenu . . . . . . . . . . . . . . . . . . . . . . . . . . . . . . . . . . . . . . . . . . . . 4-152 Figure 4-237 Library Power . . . . . . . . . . . . . . . . . . . . . . . . . . . . . . . . . . . . . . . . . . . 4-152 6-00058-05 Rev A September 2007 Figure 4-238 UDS Power Status Screen. . . . . . . . . . . . . . . . . . . . . . . . . . . . . . . . . . 4-153 Figure 4-239 Library Submenu . . . . . . . . . . . . . . . . . . . . . . . . . . . . . . . . . . . . . . . . . 4-154 Figure 4-240 Storage Moves Dialog . . . . . . . . . . . . . . . . . . . . . . . . . . . . . . . . . . . . . 4-154 Figure 4-241 Corner Moves Dialog . . . . . . . . . . . . . . . . . . . . . . . . . . . . . . . . . . . . . 4-155 Figure 4-242 Teach Submenu . . . . . . . . . . . . . . . . . . . . . . . . . . . . . . . . . . . . . . . . . . 4-156 Figure 4-243 Teach New Dialog . . . . . . . . . . . . . . . . . . . . . . . . . . . . . . . . . . . . . . . . 4-156 Figure 4-244 Progress Screen . . . . . . . . . . . . . . . . . . . . . . . . . . . . . . . . . . . . . . . . . . 4-157 Figure 4-245 Response Screen. . . . . . . . . . . . . . . . . . . . . . . . . . . . . . . . . . . . . . . . . . 4-157 Figure 4-246 Failed Screen. . . . . . . . . . . . . . . . . . . . . . . . . . . . . . . . . . . . . . . . . . . . . 4-157 Figure 4-247 Continue Dialog. . . . . . . . . . . . . . . . . . . . . . . . . . . . . . . . . . . . . . . . . . 4-158 Figure 4-248 Progress Screen . . . . . . . . . . . . . . . . . . . . . . . . . . . . . . . . . . . . . . . . . . 4-158 Figure 4-249 Response Screen. . . . . . . . . . . . . . . . . . . . . . . . . . . . . . . . . . . . . . . . . . 4-158 Figure 4-250 Failed Screen. . . . . . . . . . . . . . . . . . . . . . . . . . . . . . . . . . . . . . . . . . . . . 4-159 Figure 4-251 Teach Current Dialog . . . . . . . . . . . . . . . . . . . . . . . . . . . . . . . . . . . . . 4-159 Figure 4-252 Starting and Ending Dialog . . . . . . . . . . . . . . . . . . . . . . . . . . . . . . . . 4-160 Figure 4-253 Progress Screen . . . . . . . . . . . . . . . . . . . . . . . . . . . . . . . . . . . . . . . . . . 4-160 Figure 4-254 Response Screen. . . . . . . . . . . . . . . . . . . . . . . . . . . . . . . . . . . . . . . . . . 4-161 Figure 4-255 Failed Screen. . . . . . . . . . . . . . . . . . . . . . . . . . . . . . . . . . . . . . . . . . . . . 4-161 Figure 4-256 Bays Dialog. . . . . . . . . . . . . . . . . . . . . . . . . . . . . . . . . . . . . . . . . . . . . . 4-162 Figure 4-257 Continue Dialog. . . . . . . . . . . . . . . . . . . . . . . . . . . . . . . . . . . . . . . . . . 4-162 Figure 4-258 Progress Screen . . . . . . . . . . . . . . . . . . . . . . . . . . . . . . . . . . . . . . . . . . 4-162 Figure 4-259 Response Screen. . . . . . . . . . . . . . . . . . . . . . . . . . . . . . . . . . . . . . . . . . 4-163 Figure 4-260 Failed Screen. . . . . . . . . . . . . . . . . . . . . . . . . . . . . . . . . . . . . . . . . . . . . 4-163 Figure 4-261 Drive Dialog . . . . . . . . . . . . . . . . . . . . . . . . . . . . . . . . . . . . . . . . . . . . . 4-164 Figure 4-262 Continuation Screen . . . . . . . . . . . . . . . . . . . . . . . . . . . . . . . . . . . . . . 4-164 Figure 4-263 Progress Screen . . . . . . . . . . . . . . . . . . . . . . . . . . . . . . . . . . . . . . . . . . 4-164 Figure 4-264 Response Screen. . . . . . . . . . . . . . . . . . . . . . . . . . . . . . . . . . . . . . . . . . 4-165 Figure 4-265 Failed Screen. . . . . . . . . . . . . . . . . . . . . . . . . . . . . . . . . . . . . . . . . . . . . 4-165 Figure 4-266 Gripper Dialog . . . . . . . . . . . . . . . . . . . . . . . . . . . . . . . . . . . . . . . . . . . 4-166 Figure 4-267 Progress Screen . . . . . . . . . . . . . . . . . . . . . . . . . . . . . . . . . . . . . . . . . . 4-166 Figure 4-268 Response Screen. . . . . . . . . . . . . . . . . . . . . . . . . . . . . . . . . . . . . . . . . . 4-166 Figure 4-269 Teach Marginal Screen . . . . . . . . . . . . . . . . . . . . . . . . . . . . . . . . . . . . 4-167 Figure 4-270 Failed Screen. . . . . . . . . . . . . . . . . . . . . . . . . . . . . . . . . . . . . . . . . . . . . 4-167 Figures 2-xix 2-xx Figures Figure 4-271 Teach Tape Dialog . . . . . . . . . . . . . . . . . . . . . . . . . . . . . . . . . . . . . . . . 4-168 Figure 4-272 SAC Dialog . . . . . . . . . . . . . . . . . . . . . . . . . . . . . . . . . . . . . . . . . . . . . . 4-168 Figure 4-273 Enter Password Dialog . . . . . . . . . . . . . . . . . . . . . . . . . . . . . . . . . . . . 4-169 Figure 4-274 Demo Dialog . . . . . . . . . . . . . . . . . . . . . . . . . . . . . . . . . . . . . . . . . . . . 4-169 Figure 4-275 Include Drives Dialog . . . . . . . . . . . . . . . . . . . . . . . . . . . . . . . . . . . . . 4-170 Figure 4-276 Response Dialog . . . . . . . . . . . . . . . . . . . . . . . . . . . . . . . . . . . . . . . . . 4-170 Figure 4-277 Verify Submenu . . . . . . . . . . . . . . . . . . . . . . . . . . . . . . . . . . . . . . . . . . 4-171 Figure 4-278 All Dialog . . . . . . . . . . . . . . . . . . . . . . . . . . . . . . . . . . . . . . . . . . . . . . . 4-171 Figure 4-279 Report Screen . . . . . . . . . . . . . . . . . . . . . . . . . . . . . . . . . . . . . . . . . . . . 4-172 Figure 4-280 Response Screen. . . . . . . . . . . . . . . . . . . . . . . . . . . . . . . . . . . . . . . . . . 4-172 Figure 4-281 Advanced Submenu . . . . . . . . . . . . . . . . . . . . . . . . . . . . . . . . . . . . . . 4-172 Figure 4-282 About Screen . . . . . . . . . . . . . . . . . . . . . . . . . . . . . . . . . . . . . . . . . . . . 4-173 Figure 5-1 Towers Submenu . . . . . . . . . . . . . . . . . . . . . . . . . . . . . . . . . . . . . . . . . . . 5-7 Figure 5-2 Set Status Dialog . . . . . . . . . . . . . . . . . . . . . . . . . . . . . . . . . . . . . . . . . . . 5-8 Figure 5-3 Tower Mode Change. . . . . . . . . . . . . . . . . . . . . . . . . . . . . . . . . . . . . . . . 5-8 Figure 5-4 Set Status Dialog . . . . . . . . . . . . . . . . . . . . . . . . . . . . . . . . . . . . . . . . . . . 5-8 Figure 5-5 Set Status Dialog . . . . . . . . . . . . . . . . . . . . . . . . . . . . . . . . . . . . . . . . . . . 5-9 Figure 5-6 Tower Mode Change In Progress . . . . . . . . . . . . . . . . . . . . . . . . . . . . . 5-9 Figure 5-7 Inventory Tower . . . . . . . . . . . . . . . . . . . . . . . . . . . . . . . . . . . . . . . . . . 5-10 Figure 5-8 Tower Inventory In Progress . . . . . . . . . . . . . . . . . . . . . . . . . . . . . . . . 5-10 Figure 5-9 Requested Command Complete . . . . . . . . . . . . . . . . . . . . . . . . . . . . . 5-10 Figure 5-10 Barcode Label Application (LTO Example). . . . . . . . . . . . . . . . . . . . 5-13 Figure 5-11 Barcode Label Examples. . . . . . . . . . . . . . . . . . . . . . . . . . . . . . . . . . . . 5-14 Figure 5-12 Media Dialog . . . . . . . . . . . . . . . . . . . . . . . . . . . . . . . . . . . . . . . . . . . . . 5-17 Figure 5-13 Usage Dialog . . . . . . . . . . . . . . . . . . . . . . . . . . . . . . . . . . . . . . . . . . . . . 5-18 Figure 5-14 View Dialog . . . . . . . . . . . . . . . . . . . . . . . . . . . . . . . . . . . . . . . . . . . . . . 5-18 Figure 5-15 Insert Clean Tape Dialog . . . . . . . . . . . . . . . . . . . . . . . . . . . . . . . . . . . 5-19 Figure 5-16 Range Dialog . . . . . . . . . . . . . . . . . . . . . . . . . . . . . . . . . . . . . . . . . . . . . 5-19 Figure 5-17 Enter Target Dialog . . . . . . . . . . . . . . . . . . . . . . . . . . . . . . . . . . . . . . . . 5-19 Figure 5-18 Current Dialog . . . . . . . . . . . . . . . . . . . . . . . . . . . . . . . . . . . . . . . . . . . . 5-20 Figure 5-19 Command Complete Dialog . . . . . . . . . . . . . . . . . . . . . . . . . . . . . . . . 5-20 Figure 5-20 Insert Clean Tape Dialog . . . . . . . . . . . . . . . . . . . . . . . . . . . . . . . . . . . 5-21 Figure 5-21 Eject In Progress. . . . . . . . . . . . . . . . . . . . . . . . . . . . . . . . . . . . . . . . . . . 5-21 6-00058-05 Rev A September 2007 Figure 5-22 Complete Dialog . . . . . . . . . . . . . . . . . . . . . . . . . . . . . . . . . . . . . . . . . . 5-21 Figure 5-23 Cleaning Submenu . . . . . . . . . . . . . . . . . . . . . . . . . . . . . . . . . . . . . . . . 5-22 Figure 5-24 AutoClean Dialog . . . . . . . . . . . . . . . . . . . . . . . . . . . . . . . . . . . . . . . . . 5-22 Figure 6-1 UDS Full and Half-Height Drive Bay/Drive Location Numbering . . . . . . . . . . . . . . . . . . . . . . . . . . . . . . . . . . . . . . . . . . . . . . . 6-13 Figure 6-2 3590 and 3592/TS11210 Drive Bay/Drive Location Numbering . . 6-14 Figures 2-xxi 2-xxii Figures 6-00058-05 Rev A Tables Table 1-1 Hazard Alert Message . . . . . . . . . . . . . . . . . . . . . . . . . . . . . . . . . . . . . . 1-6 Table 3-1 Operator Panel Indicators . . . . . . . . . . . . . . . . . . . . . . . . . . . . . . . . . . . 3-5 Table 3-2 Operator Panel Push Buttons. . . . . . . . . . . . . . . . . . . . . . . . . . . . . . . . . 3-5 Table 3-3 Insert/Eject Station Indicators. . . . . . . . . . . . . . . . . . . . . . . . . . . . . . . . 3-6 Table 4-1 Operating State and Mode . . . . . . . . . . . . . . . . . . . . . . . . . . . . . . . . . . 4-11 Table 4-1 Tape Alerts . . . . . . . . . . . . . . . . . . . . . . . . . . . . . . . . . . . . . . . . . . . . . . . 4-92 Table 6-1 Operator Intervention Messages . . . . . . . . . . . . . . . . . . . . . . . . . . . . . . 6-4 Table 6-2 Service Action Codes . . . . . . . . . . . . . . . . . . . . . . . . . . . . . . . . . . . . . . 6-15 Table 6-3 Error Log Reporting . . . . . . . . . . . . . . . . . . . . . . . . . . . . . . . . . . . . . . . 6-41 3-xxiii 3-xxiv Tables 6-00058-05 Rev A 1 About This Guide About This Guide . . . . . . . . . . . . . . . . . . . . . . . . . . . . . . . . . . . . . . . . . . . . . . . . . . . . . . . . 1-3 Product Safety Statements . . . . . . . . . . . . . . . . . . . . . . . . . . . . . . . . . . . . . . . . . . . . . . . . . 1-3 GS Mark (Germany Only) . . . . . . . . . . . . . . . . . . . . . . . . . . . . . . . . . . . . . . . . . . . . . . 1-3 Mechanical Locks . . . . . . . . . . . . . . . . . . . . . . . . . . . . . . . . . . . . . . . . . . . . . . . . . . . . . 1-4 Main Power Switch . . . . . . . . . . . . . . . . . . . . . . . . . . . . . . . . . . . . . . . . . . . . . . . . . . . 1-4 Barcode Scanner . . . . . . . . . . . . . . . . . . . . . . . . . . . . . . . . . . . . . . . . . . . . . . . . . . . . . . 1-4 Product Model Number . . . . . . . . . . . . . . . . . . . . . . . . . . . . . . . . . . . . . . . . . . . . . . . . . . . 1-5 Explanation of Symbols and Notes . . . . . . . . . . . . . . . . . . . . . . . . . . . . . . . . . . . . . . . . . . 1-5 Other Documents you Might Need . . . . . . . . . . . . . . . . . . . . . . . . . . . . . . . . . . . . . . . . . 1-7 Getting More Information or Help . . . . . . . . . . . . . . . . . . . . . . . . . . . . . . . . . . . . . . . . . . 1-8 1-2 About This Guide 6-00058-05 Rev A 1- About This Guide This manual contains information and instructions necessary for the safe operation of the Scalar 10K 1 library. This guide is intended for Scalar 10K operators, trained customer specialists, and service partner maintenance personnel. Be sure to read all operating instructions in this manual and in the System, Safety, and Regulatory Information Guide before operating this product. Product Safety Statements This product is designed for data storage and retrieval using magnetic tape. Any other application is not considered the intended use. Quantum will not be held liable for damage arising from unauthorized use of the product. The user assumes all risk in this aspect. This unit is engineered and manufactured to meet all safety and regulatory requirements. Be aware that improper use may result in bodily injury, damage to the equipment, or interference with other equipment. Caution Warning Do not obstruct the top or bottom airflow by placing objects above or below the library. Do not cover ventilation areas on the library. Before powering on or using this equipment, read the System, Safety, and Regulatory Information Guide. Keep the Guide for future reference. GS Mark (Germany Only) The Scalar 10K noise level does not exceed 85db(A) in accordance with EN292-2+A1. Der Laermpegel des Scalar 10K ueberschreitet 85db(A) nicht, dies ist in Einklang mit EN292-2+A1. 1. Scalar 10K is a trademark of Quantum Corporation. Throughout the remainder of this document the Scalar 10K library is referred to as Scalar 10K or library. September 2007 About This Guide 1-3 Mechanical Locks The access and service doors can only be opened with a key. The key should be kept by an authorized person at your company. Access to the interior of the library is both a dataintegrity and safety issue. Main Power Switch Switching off the Main Power Switch removes all power and causes the movement electronics to shut off. All movements of the accessor stop immediately. In case of danger to personnel or property, immediately switch off the Main Power Switch. For the location of the Main Power Switch, see Figure 2-1 on page 2-3. Caution Except in emergencies, stop the library with the normal shutdown procedure before switching off the Main Power Switch. Quantum is not responsible for damage caused by improper use of the Main Power Switch. Such risk lies entirely with the user. Warning Movements of mechanical components in the library can cause serious injury. Before turning the Main Power Switch on and restarting the library, confirm that no danger exists to personnel or property. Warning Look into the aisle to make sure there are no obstructions or personnel present prior to applying library power. Movements of mechanical components in the library can cause serious injury. Barcode Scanner The Scalar 10K laser barcode scanner reads barcode labels during inventory and teach operations. The barcode scanner produces light radiation that can be harmful to your eyes. You should avoid direct exposure to the scanning beam and should never stare directly into the beam aperture. The barcode scanner is a Class II laser product that produces 1.0 milliwatt maximum @ 670 nm wavelength. 1-4 About This Guide 6-00058-05 Rev A The safety label is mounted inside each Scalar 10K module access door. See Figure 1-1. Figure 1-1 Laser Safety Label There is no barcode scanner adjustment procedures in this guide. Only trained Quantum service personnel can perform this type of procedure. Disposal of Electrical and Electronic Equipment This symbol on the product or on its packaging indicates that this product should not be disposed of with your other waste. Instead, it should be handed over to a designated collection point for the recycling of electrical and electronic equipment. The separate collection and recycling of your waste equipment at the time of disposal will help to conserve natural resources and ensure that it is recycled in a manner that protects human health and the environment. For more information about where you can drop off your waste equipment for recycling, please visit our website at: www.quantum.com/AboutUs/ weee/Index.aspx or contact your local government authority, your household waste disposal service or the business from which you purchased the product. Product Model Number The Scalar 10K model number is: SC10K. September 2007 Disposal of Electrical and Electronic Equipment 1-5 Explanation of Symbols and Notes Quantum classifies hazards in several categories. Table 1-1 shows the relationship of the symbols, signal words, actual hazards, and possible consequences. Table 1-1 Symbol Hazard Alert Message Damage to ... Persons Signal Word Definition Consequence DANGER Imminent hazardous situation Death or serious injury WARNING Potential hazardous situation Possible death or serious injury CAUTION Less hazardous situation Possible minor or moderate injury Imminent hazardous electrical situation Death or serious injury Persons Material Caution Potential damaging situation Person Warning Potential hazardous situation Possible damage to the product or environment Possible death or serious injury Material Static Sensitive Potential electronic damaging situation Possible damage to the product Note Tips for operators No hazardous or damaging consequences Important or useful information No hazardous or damaging consequences Specially emphasized paragraphs in this guide warn of danger or draw attention to important information. These paragraphs and their associated symbols include: 1-6 About This Guide 6-00058-05 Rev A The danger exists of a fatal electric shock. At places designated with this symbol, electrical current can be present. Before starting any work, always confirm that all electrical connections are free of electrical current. Caution This symbol indicates the presence of a laser. Caution - use of controls or adjustments or performance of procedures other than those specified herein may result in hazardous radiation exposure. Warning When used with the signal word Warning, this symbol warns of a dangerous situation that threatens personnel with serious injury or death. Caution When used with the signal word Caution, this symbol means that specific regulations, rules, notices, and working procedures must be observed. Ignoring this symbol can lead to equipment damage or destruction or to other property damage. STATIC SENSITIVE Note This symbol indicates that the risk of equipment damage exists due to static discharge. This symbol indicates that you should refer to the “Electrostatic discharge (ESD)” section of the System, Safety, and Regulatory Information Guide. This symbol draws attention to user tips. No dangerous or damaging consequences for personnel or property are associated with this symbol. This symbol indicates important or useful information. No dangerous or damaging consequences for personnel or property are associated with this symbol. Other documentation conventions: <1> + <2> Press these keys simultaneously. Italics Headline, for example, Chapter 2, Description File name, for example, AMUINST.EXE Bold Operator panel menu selections, for example: Main Menu Status Drives Firmware Y to accept changes N to reject changes September 2007 Explanation of Symbols and Notes 1-7 Courier Operator panel menu text, for example: > Mode... Status Commands Database Setup Utils Service About... Other Documents you Might Need The following documents are also available for this product. These documents can be found on the product CD or at www.quantum.com/ServiceandSupport/ SoftwareandDocumentationDownloads/S10K/Index.aspx. • Scalar 10K Maintenance Guide (6-00059-xx) • Scalar 10K Planning Guide (6-01337-xx) • Scalar 10K SCSI Reference Guide (6-01338-xx) • System, Safety, and Regulatory Information Guide (6-00618-xx) Release Notes are also available for this product. The Release Notes describe changes to your system or firmware since the last release, provide compatibility information, and discuss any known issues and workarounds. The Release Notes can be found in the product box or at www.quantum.com/ ServiceandSupport/ SoftwareandDocumentationDownloads/S10K/Index.aspx. Getting More Information or Help More information about this product is available on the Service and Support website at www.quantum.com/support. The Service and Support Website contains a collection of information, including answers to frequently asked questions (FAQs). You can also access software, firmware, and drivers through this site. For further assistance, or if training is desired, contact Quantum: Quantum Technical Assistance Center in the USA: 800-2845101 For additional contact information: www.quantum.com/ support 1-8 About This Guide 6-00058-05 Rev A To open a Service Request: www.quantum.com/support For the most updated information on Quantum Global Services, please visit: www.quantum.com/support . For the most up to date information on Quantum Global Services, please visit: www.quantum.com/support. September 2007 Getting More Information or Help 1-9 1-10 About This Guide 6-00058-05 Rev A 2 System Description General Description . . . . . . . . . . . . . . . . . . . . . . . . . . . . . . . . . . . . . . . . . . . . . . . . . . . . . . 2-3 Capacity-On-Demand Configuration . . . . . . . . . . . . . . . . . . . . . . . . . . . . . . . . . . . . 2-4 Customer-Specific Configuration . . . . . . . . . . . . . . . . . . . . . . . . . . . . . . . . . . . . . . . 2-4 Dual Aisle Configuration . . . . . . . . . . . . . . . . . . . . . . . . . . . . . . . . . . . . . . . . . . . . . . 2-4 Modules . . . . . . . . . . . . . . . . . . . . . . . . . . . . . . . . . . . . . . . . . . . . . . . . . . . . . . . . . . . . . . . . 2-5 Control Module . . . . . . . . . . . . . . . . . . . . . . . . . . . . . . . . . . . . . . . . . . . . . . . . . . . . . . 2-6 Accessor Module . . . . . . . . . . . . . . . . . . . . . . . . . . . . . . . . . . . . . . . . . . . . . . . . . . . . . 2-6 Expansion Module . . . . . . . . . . . . . . . . . . . . . . . . . . . . . . . . . . . . . . . . . . . . . . . . . . . . 2-6 Drive Module . . . . . . . . . . . . . . . . . . . . . . . . . . . . . . . . . . . . . . . . . . . . . . . . . . . . . . . . 2-7 Tower Module . . . . . . . . . . . . . . . . . . . . . . . . . . . . . . . . . . . . . . . . . . . . . . . . . . . . . . . 2-7 Internal Components . . . . . . . . . . . . . . . . . . . . . . . . . . . . . . . . . . . . . . . . . . . . . . . . . . . . . 2-8 Tape Drives . . . . . . . . . . . . . . . . . . . . . . . . . . . . . . . . . . . . . . . . . . . . . . . . . . . . . . . . . . 2-8 Storage Assemblies . . . . . . . . . . . . . . . . . . . . . . . . . . . . . . . . . . . . . . . . . . . . . . . . . . 2-10 Cartridge Accessor . . . . . . . . . . . . . . . . . . . . . . . . . . . . . . . . . . . . . . . . . . . . . . . . . . . 2-12 Tape Cartridges . . . . . . . . . . . . . . . . . . . . . . . . . . . . . . . . . . . . . . . . . . . . . . . . . . . . . 2-13 Insert/Eject Station . . . . . . . . . . . . . . . . . . . . . . . . . . . . . . . . . . . . . . . . . . . . . . . . . . 2-14 Connectivity . . . . . . . . . . . . . . . . . . . . . . . . . . . . . . . . . . . . . . . . . . . . . . . . . . . . . . . . . . . . 2-16 SAN Connectivity . . . . . . . . . . . . . . . . . . . . . . . . . . . . . . . . . . . . . . . . . . . . . . . . . . . 2-16 SCSI Connectivity . . . . . . . . . . . . . . . . . . . . . . . . . . . . . . . . . . . . . . . . . . . . . . . . . . . 2-18 Scalar DLC . . . . . . . . . . . . . . . . . . . . . . . . . . . . . . . . . . . . . . . . . . . . . . . . . . . . . . . . . . . . . 2-19 Single Server . . . . . . . . . . . . . . . . . . . . . . . . . . . . . . . . . . . . . . . . . . . . . . . . . . . . . . . . 2-19 Redundant Servers . . . . . . . . . . . . . . . . . . . . . . . . . . . . . . . . . . . . . . . . . . . . . . . . . . . 2-20 Remote Library Management . . . . . . . . . . . . . . . . . . . . . . . . . . . . . . . . . . . . . . . . . . . . . 2-22 2-2 System Description 6-00058-05 Rev A 2- General Description The Scalar 10K is a tape storage library that can be configured as a single-media or mixed-media library. It can be expanded from a single-module library to a multiple-module library. See Figure 2-1. Access Door Accessor Module Service Door Control Module I/E Station 2 I/E Station 1 Operator Panel Service Door Main Power Switch Problem Box Figure 2-1 September 2007 Basic Scalar 10K System General Description 2-3 The Scalar 10K automates the storage, retrieval, and control of the following tape cartridges: • LTO-1 • LTO-2 • LTO-3 • LTO-4 • DLT • Super DLT (SDLT) • 8 mm • 1/2-inch tape cartridges Cartridges are mounted and unmounted in tape drives using application software from the host without operator intervention. The Scalar 10K can be configured as a Capacity-on-Demand (COD), Customer-Specific, or Dual Aisle configuration. Capacity-On-Demand Configuration In a COD configuration, you receive a fully-populated library but do not use all storage slots. This gives you room to expand in the future. To enable the unused storage slots, contact Quantum to obtain a software key. The COD configuration can be configured for 700 to 5,403 tape slots. Customer-Specific Configuration In a Customer-Specific configuration, the library is built to customer specifications. This type of configuration can contain up to 15,000 tape slots and up to 624 tape drives. Dual Aisle Configuration The Dual Aisle configuration includes redundant controllers, redundant accessors, redundant control paths, and redundant shared tower storage, making the configuration a highly-available system. If one aisle goes down, the other aisle remains available. The Dual Aisle configuration can be configured for up to 22,938 tape slots and up to 624 tape drives. 2-4 System Description 6-00058-05 Rev A Modules The Scalar 10K consists of five different modules: a Control Module (CM), Accessor Module (AM), Expansion Module (EM), Drive Module (DM), and Tower Module (TM). For an example of the five different modules, see Figure 2-2. Figure 2-2 September 2007 Top View of Scalar 10K Modules Modules 2-5 Control Module The CM is one of the fundamental building blocks required in every library. The CM contains an operator panel, AC and DC power supplies, robot control electronics, and host interfaces. Note 3590 and 3592-J1A tape drives are not supported in a CM.3592-J1A/ TS1120 Each CM drive bay has the space equivalent of 60 LTO, 50 DLT/SDLT, 75 8 mm, or 50 1/2-inch cartridges. Each drive bay accommodates from 1–6 DLT/SDLT or LTO tape drives, or 1–12 AIT tape drives. In a Dual Aisle configuration, CMs are used with the primary aisle and secondary aisle. Accessor Module The AM is another fundamental building block that is required in every library. The AM contains the robotics system (one per single aisle, two per dual aisle). The AM has two doors, a service door on one end and an access door on the other end. If one or more EMs are attached to the AM, the access door is relocated to the last EM. The AM requires a CM, a minimum of one Insert/Eject (I/E) station, and storage assemblies. A minimum Dual Aisle configuration includes two AMs, two CMs, and two inside TMs. The AM contains attachment areas for feature modules or storage assemblies. In a Dual Aisle configuration, a safety barrier is included that allows for concurrent maintenance by trained service personnel. Expansion Module The EM is a feature module and is added as requirements change. The EM extends the length of the aisle and allows the library to be expanded to accommodate additional drive and cartridge requirements. A Scalar 10K maximum configuration includes three EMs. These modules extend the X-rails (top and bottom) which allow the accessor to travel the length of the library. Each EM has four attachment areas (racks) that can be used to attach feature modules or storage assemblies as shown in Figure 2-2 on page 2-5. When EMs are used in a Dual Aisle configuration, two inside TMs attach to each EM, leaving two attachment areas (racks) that can be used to attach feature modules or storage assemblies. A maximum Dual Aisle configuration includes six EMs. 2-6 System Description 6-00058-05 Rev A Drive Module The DM is also a feature module and is added as requirements change. The DM is attached to an AM or EM. The DM contains its own AC power compartment and drive communication electronics. It can be configured with one to four drive bays. Each drive bay accommodates from 1–6 DLT/SDLT or LTO tape drives, 1–12 AIT tape drives, 1–2 3590 tape drives, and 1– 4 3592-J1A/TS1120 tape drives. Different types of drives can be intermixed in a DM with the exception of 3592-J1A/TS1120 drives. 3592-J1A/TS1120 drives require a special DM that is only compatible with 3592J1A/TS1120 drives. In a Dual Aisle configuration, DMs can be attached to the EMs of primary aisle and secondary aisle. Tower Module The TM is a feature module and is also added as requirements change. The TM is attached to an AM or EM. The TM contains a storage tower and control electronics and is configured for only one media type. TMs can be bulk loaded or unloaded through the TM service door. Maximum TM capacity depends on the media type loaded. See Table 2-1. Table 2-1 TM Capacity Media Type Cartridge Capacity LTO 660 DLT/SDLT 552 8 mma 1,104 1/2-inchb 552 a. The 8 mm media type is used in AIT tape drives. b. The 1/2-inch media type is used in 3590 and 3592-J1A/ TS1120 tape drives. In a Dual Aisle configuration, two TMs are required between each AM or EM. Optionally, TMs can be attached to the EMs on the primary aisle and secondary aisle. September 2007 Modules 2-7 Internal Components Figure 2-3 on page 2-9 shows the inside of a Scalar 10K. The Scalar 10K consists of the following functional units: • Tape Drives • Storage Assemblies • Cartridge Accessor • Tape Cartridges • I/E Station Tape Drives Note Quantum SDLT supports SDLT media and DLT Type IV media. The Scalar 10K supports the following tape drives: • IBM LTO-1 LVD - SCSI • IBM LTO-1 FC Multimode • IBM LTO-2 LVD - SCSI • IBM LTO-2 FC Multimode • IBM LTO-3 FC Multimode • IBM LTO-4 FC Multimode • Quantum DLT 8000 LVD - SCSI • Quantum SDLT 220 LVD - SCSI • Quantum SDLT 320 LVD-SCSI • Sony AIT-2 LVD - SCSI • Sony AIT-3 LVD - SCSI Drive firmware 0201_CY12 and later supports both re-writable and Write Once Read Many (WORM) cartridges. Earlier versions of drive firmware support only re-writable cartridges. • IBM Magstar 3590 • IBM 3592-J1A/TS1120 Drive firmware supports both re-writable and Write Once Read Many (WORM) cartridges. • IBM TS1120 The Universal Drive Sled (UDS) tape drives are enclosed in a UDS chassis. The UDS contains control electronics, a cooling fan, and is equipped with a self-docking connector through which it receives library power (+5 VDC and +12 VDC) and signal communications. For information on drive bay and drive location numbering, see Figure 6-2 on page 7-14. 2-8 System Description 6-00058-05 Rev A Draft Outside Tower Module Drive Module Control Module Storage Cells I/E Stations Internal Components Tape Drive Bays 2-9 Figure 2-3 Module Cell Locations and Internal View of Library Storage Assemblies A storage assembly (Figure 2-4) is a modular storage assembly that holds tape cartridges. An AM or EM has four attachment areas called racks. Each rack contains a series of storage assemblies. See Figure 2-5 on page 2-11. Each AM or EM rack can support total slot capacities as indicated in Table 2-2 on page 2-11. Figure 2-4 Storage Assembly Each rack is divided into five sections counting from top to bottom as shown in Figure 2-5 on page 2-11. 2-10 System Description 6-00058-05 Rev A Top View of EM Rack Rack Rack Rack Side View of EM Figure 2-5 Storage Assembly Storage Assembly Storage Assembly Storage Assembly Storage Assembly Storage Assembly Storage Assembly Storage Assembly Storage Assembly Storage Assembly Five Storage Assemblies per Rack (Top and Side View of EM) Table 2-2 Rack Capacity Media Type Cartridge Capacity per Rack LTO 330 DLT/SDLT 276 8 mma 414 1/2-inchb 276 a. The 8 mm media type is used in AIT tape drives. b. The 1/2-inch media type is used in 3590 and 3592-J1A/ TS1120 tape drives. September 2007 Internal Components 2-11 Cartridge Accessor The cartridge accessor (Figure 2-6) identifies and moves cartridges between the storage cells, tape drives, and I/E Stations. The cartridge accessor has: • A gripper assembly containing a cartridge gripper and the barcode scanner. The gripper is designed to pivot horizontally 180º, get and put cartridges in storage cells, tape drives, or the I/E station. The gripper fingers are designed to have full range control for open/close to handle different media types. The barcode scanner reads the external barcode labels on the cartridges. It is also used during the inventory process to locate and categorize all storage arrays, drive bays, and drives installed in the library. • An X-axis drive for moving the gripper assembly the length of the rails in the AM and EM(s). • A Y-axis drive for moving the gripper assembly vertically in the CM, AM, and EM(s). In a Dual Aisle configuration, the primary aisle and secondary aisle each have their own cartridge accessor. Top X-Axis Gripper Assembly Barcode Scanner Bottom X-Axis Y-Axis Figure 2-6 2-12 System Description Cartridge Accessor 6-00058-05 Rev A Tape Cartridges A tape cartridge is identified by an attached operator and machine readable barcode label. This label, depending on the operating mode, has a minimum of 5 and a maximum of 16 barcode characters. The Scalar 10K operates in one of three modes: • Default Mode - six characters • Mixed Media Mode - six characters, plus a media identifier • Extended Mode - 5 to 16 characters, may include media identifiers and checksum values The barcode is composed of uppercase A to Z characters and numeric 0 to 9 characters. The Scalar 10K currently supports Code 39 type labels. In Mixed Mode, the seventh or eighth characters on the label identify the cartridge type. The additional characters (listed below) are added to the end of the standard barcode label: • C = DLT CompacTape III • D = DLT CompacTape IV • S = SDLT CompacTapeIVXT (The C, D, or S characters are included on the same label in addition to the six character barcode.) • E = 3590E • J = 3590 • JA, JJ, JR, or JW = 3592-J1A/TS1120 • JB, JX = TS1120 • L1 = LTO-1 • L2 = LTO-2 • L3, LT = LTO-3 • L4 = LTO-4 The 8 mm media barcode labels do not support a media identifier at this time. However, the Scalar 10K designates the character A as a media identifier for reporting purposes. Caution Cartridges can be inserted incorrectly (upside down) in a storage location or in the I/E station. The barcode reader reads the barcode label correctly and the gripper operates normally, but the system fails when the gripper attempts to put the cartridge into a drive. For additional information on barcode labels, refer to Barcode Labels on page 6-12. September 2007 Internal Components 2-13 Insert/Eject Station The I/E Station allows you to move a cartridge without interrupting normal library operation. The I/E Stations are installed on the AM as shown in Figure 2-2 on page 2-5. In the S10K COD configuration, one pair of I/E stations is included. In the S10K Customer-Specific configuration, one pair of I/E stations is included and an additional pair is optional. In a Dual Aisle configuration, each aisle includes one pair of I/E stations and an additional pair is optional for each aisle. Each I/E station has three removable cartridge magazines. See Figure 2-7 on page 2-15. Each I/E station also includes an area designated as the Problem Box where the gripper can deposit a problem cartridge to be retrieved by the operator. This is required for continuous operation. The Problem Box is designed to accommodate any cartridge size that Scalar 10K supports. 2-14 System Description 6-00058-05 Rev A Figure 2-7 September 2007 I/E Station Magazines Internal Components 2-15 Connectivity The Scalar 10K offers several different connectivity options, allowing the library to support a wide range of backup topologies and applications. Flexible library connectivity delivers active support for loop and switched fabric Fibre Channel protocols, along with SCSI. SAN Connectivity The Scalar 10K can be connected to a Fibre Channel Storage Area Network (SAN) via the Storage Network Controller (SNC). See Figure 2-8 on page 2-17. The SNC provides four SCSI bus connections, one ethernet, and two Fibre Channel connections. The SNC allows native SCSI devices (for example: library controller and tape drives) to be seen by any hosts that are attached to the SAN. The library controller and the tape drives access the SAN via the SNCs, which can be installed in a Scalar 10K CM or a DM. LTO drives can also attach to the SAN through the Native Fibre Channel interface available. For Dual Aisle configurations, the Scalar DLC controls the cartridge accessors and the SNC controls the tape drives. 2-16 System Description 6-00058-05 Rev A Figure 2-8 September 2007 Indirect Fibre Channel Attachment Connectivity 2-17 SCSI Connectivity The Scalar 10K library can be directly connected to one or two SCSI buses. See Figure 2-9. Because each SCSI bus is independent, it can be Single Ended or Differential. Both ends of each bus must be terminated. A terminator is shipped with each SCSI adapter card ordered. The minimum configuration of a Scalar 10K library requires one SCSI adapter. The SCSI type (Single Ended or Differential) must be specified at the time of order. Although the Scalar 10K can be attached to a wide SCSI bus, it is not a wide SCSI device and its SCSI ID must be in the range of 0 to 7. Figure 2-9 2-18 System Description Direct SCSI Attachment 6-00058-05 Rev A Scalar DLC The Scalar 10K, through its Scalar Distributed Library Control (Scalar DLC) interface, provides the industry’s most advanced combination of management and diagnostics. It creates and maintains the Scalar 10K configuration, the physical location of the cartridge accessor, and the inventory of cartridges. The database is kept in flash memory of the Library control hardware. The Scalar DLC attaches to the library SCSI bus. The host continues to directly attach to the drives via a SCSI or an SNC Interface. Refer to the Scalar DLC documentation for detailed description of the interfaces supported. Scalar DLC is optional in COD and Customer-Specific configurations. A single server is the typical Scalar DLC option for these configurations. Refer to Single Server for more information. Scalar DLC is required in a Dual Aisle configuration. Redundant servers are the typical Scalar DLC option for the Dual Aisle configuration. Refer to Redundant Servers on page 2-20. Single Server The Scalar DLC Integrated Controller for the Scalar 10K Dual Aisle library consists of Scalar DLC 2.5 or later software loaded on a rack mountable server. The server has dual SCSI drives connected to an embedded RAID controller, a LVD SCSI card for library connection, and redundant AC power supplies. The system also ships with a rack mountable flat panel LCD monitor/keyboard/mouse. See Figure 2-10 on page 2-20. September 2007 Scalar DLC 2-19 Figure 2-10 Scalar DLC Network Attachments Redundant Servers The redundant Scalar DLC Integrated Controller for the Scalar 10K Dual Aisle library consists of Scalar DLC 2.5 or later software loaded on two rack-mountable servers. Each Server has Dual SCSI drives that are connected to an embedded RAID controller, 512MB memory, an LVD SCSI card for library connection, and redundant AC power supplies. In addition, each server operates with Windows Advanced Server with Microsoft Cluster Server (MSCS). With MSCS, a cluster is a configuration of two nodes, each of which is an independent computer system. 2-20 System Description 6-00058-05 Rev A Together, these independent servers create a "server cluster." The cluster appears to users as a single server. Should the primary server fail, the secondary (passive) server automatically takes over all Scalar DLC functions. The systems also ships with a rack-mountable flat panel LCD monitor/keyboard/mouse, a rack-mountable KVM switch, a rack-mountable external RAID subsystem, and required system cabling. See Figure 2-11. Figure 2-11 September 2007 Scalar DLC Network Attachments with Redundant Robotics Scalar DLC 2-21 Remote Library Management The factory installed Remote Management Unit (RMU) in each system uses a standard web browser for remote library access. The supported browsers are: • Microsoft Internet Explorer version 5.0 and above • Netscape Navigator version 4.01 for Unix and 4.7X for other environments With an RMU, you are able to do the following: • Update RMU firmware • Access the library status • Make configuration changes • Access the library operator panel • Retrieve library command and error logs • Use the Quantum Web site to access Scalar 10K documentation The RMU supports Simple Network Management Protocol (SNMP) version 2.0 and acts as an SNMP-server. The RMU acquires Tape Alert 2.1 compatibility information from the library over the serial interface port and sends that information to a SNMP server. The RMU also detects a power loss and generates a SNMP trap for notification. For additional information, refer to Using the Remote Management Unit on page 4-10. 2-22 System Description 6-00058-05 Rev A 3 Operation Overview . . . . . . . . . . . . . . . . . . . . . . . . . . . . . . . . . . . . . . . . . . . . . . . . . . . . . . . . . . . . . . . 3-3 Using the Operator Panel . . . . . . . . . . . . . . . . . . . . . . . . . . . . . . . . . . . . . . . . . . . . . . . . . . 3-3 Starting the Scalar 10K . . . . . . . . . . . . . . . . . . . . . . . . . . . . . . . . . . . . . . . . . . . . . . . . . . . . 3-7 Shutting Down the Scalar 10K . . . . . . . . . . . . . . . . . . . . . . . . . . . . . . . . . . . . . . . . . . . . . . 3-8 Normal Shutdown . . . . . . . . . . . . . . . . . . . . . . . . . . . . . . . . . . . . . . . . . . . . . . . . . . . . 3-8 Emergency Shutdown . . . . . . . . . . . . . . . . . . . . . . . . . . . . . . . . . . . . . . . . . . . . . . . . . 3-9 Restarting the Scalar 10K . . . . . . . . . . . . . . . . . . . . . . . . . . . . . . . . . . . . . . . . . . . . . . . . . 3-10 Using the Remote Management Unit . . . . . . . . . . . . . . . . . . . . . . . . . . . . . . . . . . . . . . . 3-10 Supported Browsers . . . . . . . . . . . . . . . . . . . . . . . . . . . . . . . . . . . . . . . . . . . . . . . . . 3-11 RMU Prerequisites . . . . . . . . . . . . . . . . . . . . . . . . . . . . . . . . . . . . . . . . . . . . . . . . . . . 3-11 Setting up the RMU . . . . . . . . . . . . . . . . . . . . . . . . . . . . . . . . . . . . . . . . . . . . . . . . . 3-12 Accessing and Logging Into the RMU . . . . . . . . . . . . . . . . . . . . . . . . . . . . . . . . . . 3-13 Checking Status and General Information . . . . . . . . . . . . . . . . . . . . . . . . . . . . . . . 3-14 Configuring Network Parameters . . . . . . . . . . . . . . . . . . . . . . . . . . . . . . . . . . . . . . 3-15 Configuring SNMP . . . . . . . . . . . . . . . . . . . . . . . . . . . . . . . . . . . . . . . . . . . . . . . . . . 3-15 Downloading the SNMP MIB File . . . . . . . . . . . . . . . . . . . . . . . . . . . . . . . . . . 3-16 Configuring RMU Users . . . . . . . . . . . . . . . . . . . . . . . . . . . . . . . . . . . . . . . . . . . . . . 3-17 Adding/Removing Users . . . . . . . . . . . . . . . . . . . . . . . . . . . . . . . . . . . . . . . . . 3-17 Changing a Password . . . . . . . . . . . . . . . . . . . . . . . . . . . . . . . . . . . . . . . . . . . . . 3-18 Configuring the Time and Date . . . . . . . . . . . . . . . . . . . . . . . . . . . . . . . . . . . . . . . . 3-18 Synchronizing with an NTP Server . . . . . . . . . . . . . . . . . . . . . . . . . . . . . . . . . 3-19 Updating Firmware . . . . . . . . . . . . . . . . . . . . . . . . . . . . . . . . . . . . . . . . . . . . . . . . . . 3-19 Viewing Diagnostic Files . . . . . . . . . . . . . . . . . . . . . . . . . . . . . . . . . . . . . . . . . . . . . . 3-20 Using the Operator Panel (via the RMU) . . . . . . . . . . . . . . . . . . . . . . . . . . . . . . . . 3-20 Viewing Logs . . . . . . . . . . . . . . . . . . . . . . . . . . . . . . . . . . . . . . . . . . . . . . . . . . . . . . . 3-21 Getting Help . . . . . . . . . . . . . . . . . . . . . . . . . . . . . . . . . . . . . . . . . . . . . . . . . . . . . . . . 3-21 Rebooting the RMU . . . . . . . . . . . . . . . . . . . . . . . . . . . . . . . . . . . . . . . . . . . . . . . . . . 3-21 3-2 System Description 6-00058-05 Rev A 4- Overview This chapter describes the Scalar 10K library operator panel, the library startup and shutdown procedures, and the Remote Management Unit (RMU). Using the Operator Panel The operator panel provides an interactive path between the operator and the Scalar 10K. See Figure 3-1 on page 3-4. The Scalar 10K operator functions are listed below: • Starting the Scalar 10K • Shutting down the Scalar 10K • Handling media Refer to Inserting Tape Cartridges on page 6-6 for media handling procedures. In the case of equipment failures, the operator can perform manual media processing. Warning September 2007 Look into the aisle to make sure there are no obstructions or personnel present prior to applying library power. Movements of mechanical components in the library can cause serious injury. Overview 3-3 MAIN SCREEN Display 02/02/01 13:54:35 Idle Online. . . . . . . Ready Indicators Speaker Push Buttons Figure 3-1 3-4 System Description Operator Panel Components 6-00058-05 Rev A Table 3-1 illustrates and describes operator panel indicators. Table 3-1 Operator Panel Indicators Indicator Description The Ready indicator is lit whenever Power is available in the aisle and the library is ready to perform motion commands from the host. The Power On indicator is lit whenever the Control Module is connected to an AC power source, the Control Module switch, and the AC Power Compartment circuit breakers are ON. Table 3-2 describes operator panel push buttons. Table 3-2 Operator Panel Push Buttons Push button Description Use Up Arrow to: • scroll the display to show the previous line. • move the cursor (>) up from selection to selection. • increment the current value in a numerical entry field. Use Down Arrow to: • scroll the display to show the next line. • move the cursor (>) down from selection to selection. • decrement the current value in a numerical entry field. Use Enter to: • select the option indicated by the cursor (>) as the next action to be performed by the library. • act as a TAB button to the next required entry field when multiple field entries are being entered. In this case, the button cycles through all the entry locations until the Accept option is chosen (with Y). September 2007 Using the Operator Panel 3-5 Table 3-2 Operator Panel Push Buttons (Continued) Push button Description Use Escape to: • leave the current menu and returns to the previous menu, if it exists. • move back one menu item. • exit Help and return to the previous menu. Use Help to display help text for the current selected item if available. In this mode, the Arrow buttons scroll through the help text and the Escape button is used to exit Help. Use Ready to transition the library from a Ready state to NotReady, or NotReady to the Ready state. Holding down the push buttons cycles through the options. The longer the push button is held down, the faster it cycles. Table 3-3 provides an illustration and description of the visual indicators on the operator panel. Table 3-3 Indicator Insert/Eject Station Indicators Description The Locked indicator is On whenever the I/E station is locked. One of the following conditions locks the I/E station: • The host issues a SCSI PREVENT/ALLOW MEDIUM REMOVAL command and locks the I/E station. • The Scalar 10K is accessing the I/E station. The Attention indicator can be in one of the following three states: • Off: All cartridge magazines are present and do not contain an ejected tape cartridge. • On: One or more magazines is missing, or a magazine contains an ejected tape cartridge. • Blinking: A lock command is pending and the I/E station door is not closed, or a lock command failed. 3-6 System Description 6-00058-05 Rev A Starting the Scalar 10K Use the following procedure to start the Scalar 10K. Caution With the RMU installed, power up must be delayed by one minute after a power down condition to allow the RMU to properly reset. Step 1 Make sure that all doors are closed and mechanically locked on the Control Module (CM), Accessor Module (AM), and Expansion Modules (EMs). Step 2 Locate the Power Switch at the lower right corner of the DM door. Step 3 Set the Power Switch on the DM to on. Step 4 Repeat the process for each DM. Step 5 Locate the Main Power Switch at the lower right corner of the CM service door. Step 6 Set the Main Power Switch on the CM to on. Text appears on the operator panel. If text does not appear, power cycle the AC power or check the library fuse or circuit breaker. Warning Movements of mechanical components in the library can cause serious injury. Before turning the Main Power Switch on, confirm that no danger exists to personnel or property. Warning Look into the aisle to make sure there are no obstructions or personnel present prior to applying library power. Movements of mechanical components in the library can cause serious injury. Power is applied to the Scalar 10K. The CM embedded software starts the boot process. The Power On indicator illuminates and the Main Menu displays status. After all firmware procedures complete, the LCD screen on the operator panel displays the Main Screen. See Figure 3-2 on page 3-8. September 2007 Starting the Scalar 10K 3-7 MAIN SCREEN MM/DD/YY HH/MM/SS Idle Online.........Ready Figure 3-2 Main Screen Shutting Down the Scalar 10K The Scalar 10K may be shut down normally or by the Emergency Shutdown method. Warning Use the method described in Emergency Shutdown in cases of emergency only. Normal Shutdown Proceed as follows to shutdown the Scalar 10K: Caution With the RMU installed, power up must be delayed by one minute after a power down condition to allow the RMU to properly reset. Step 1 If necessary, use the button to return to the Main Menu. The cursor defaults to the Mode selection. Press the button. From the Mode screen, use the button to select the Shutdown mode. Press the button. The Accessor completes the current task and returns to the home position. The reboot message appears. See Figure 3-3. The library may now be rebooted. Figure 3-3 3-8 System Description Reboot Screen 6-00058-05 Rev A Step 2 Locate the Main Power Switch at the lower right corner of the CM. Step 3 Set the Main Power Switch to off. Power is removed from the CM. Step 4 Repeat Step 2 and Step 3 for each Drive Module. Emergency Shutdown Use the following procedure if an emergency situation arises. Warning Except in emergencies, stop the Scalar 10K with the normal shutdown procedure before switching off the Main Power Switch. Quantum is not responsible for damage caused by improper use of the Main Power Switch. All risk lies entirely with the user. Caution With the RMU installed, power up must be delayed by one minute after a power down condition to allow the RMU to properly reset. Step 1 Locate the Main Power Switch at the lower right corner of the CM. Step 2 Set the Main Power Switch to off. Power is removed from the Scalar 10K CM. All Accessor movement stops immediately and the gripper descends. Step 3 September 2007 Repeat Step 1 and Step 2 for each DM. Shutting Down the Scalar 10K 3-9 Restarting the Scalar 10K Use the following procedure to restart the Scalar 10K. Caution With the RMU installed, power up must be delayed by one minute after a power down condition to allow the RMU to properly reset. Warning Look into the aisle to make sure there are no obstructions or personnel present prior to applying library power. Movements of mechanical components in the library can cause serious injury. Step 1 If applicable, correct the situation that required the Scalar 10K shutdown. Step 2 Refer to Starting the Scalar 10K on page 4-7 for instructions on the Scalar 10K start procedure. Using the Remote Management Unit The RMU is a component in the library that provides remote access to the library by means of a Web browser. All functions listed here are available without the need of a dedicated server (or separate software). The RMU performs the following functions: 3-10 System Description • Provides remote operation of all library operator panel functions by means of a Web browser. • Allows you to check the status of the system, firmware levels, and other useful information. • Updates RMU firmware. • Supports Simple Network Management Protocol (SNMP) version 2.0 and acts as an SNMP-server, generating SNMP traps and responding to SNMP requests. • Supports ADIC Library Management Information Base (MIB) version 2.0. • Acquires Tape Alert 2.1 information from the library and sends that information to an SNMP manager. • Detects a power loss and generates an SNMP trap for notification. • Enables the retrieval of library logs, and drive and RMU diagnostic files. 6-00058-05 Rev A • Allows RMU configuration changes such as network, users, and date/time. • Provides online access to documentation. The following screen is the opening screen of the RMU. Supported Browsers The RMU supports the following browsers: • Microsoft Internet Explorer version 5.0 and above • Netscape Navigator version 4.01 for Unix and 4.7x for other environments RMU Prerequisites The RMU requires a network address that consists of an Internet Protocol (IP) address, subnet mask, and gateway IP Address. Once you have this information, input it to the RMU by means of the operator panel. For more information, see the instructions that follow. September 2007 Using the Remote Management Unit 3-11 Setting up the RMU Once you have obtained a network address for the RMU, enter this information into the RMU by means of the library operator panel. Step 1 Starting from the operator panel Main Menu, go to the RMU Submenu (Main Menu Setup Library RMU). The RMU Submenu is shown. >Host... IP... Step 2 Select Host. The Host Dialog is shown. Host : Accept : N Step 3 Enter the host name using the Up, Down, and Next buttons. Step 4 Select Y to accept the changes. Step 5 Select IP. The IP Dialog is shown. IP : 100<100.100.100 Sub: 225.225.225.001 Gat: 100.100.100.100 Accept: N 3-12 System Description 6-00058-05 Rev A Step 6 Enter the IP address, subnet mask, and gateway IP address using the Up, Down, and Next buttons. Step 7 Select Y to accept the changes. Accessing and Logging Into the RMU Before you begin using the RMU, make certain you have configured your RMU with the correct network address. Step 1 Open a Web browser. Step 2 Point your browser to the RMU IP address, excluding any leading zeros. For example, if your IP address is 182.073.056.205 on the library operator panel LCD, go to the following address: http://182.73.56.205. Note For information on determining or setting your RMU IP address, see Setting up the RMU on page 4-12. The RMU user interface displays. Some of the features of the RMU require you to log in. Continue with Step 3 to log into the RMU. Step 3 Note The default user login and password are admin and secure, respectively. September 2007 Log into the RMU when prompted. Enter your user name into the User Name field and password into the Password field. The user name and password are case sensitive. Using the Remote Management Unit 3-13 Checking Status and General Information You can use the RMU to remotely check the status of a library and obtain general information about the library. For example, you can check drive status or get the firmware level of your library. Step 1 Click the Status tab. The following information appears: 3-14 System Description • Library Status - Indicates whether the library is online or offline. • Drive Status - Indicates the type and quantity of tape drives in the library. • RMU User - Indicates the user name and IP address of the current user. • Hostname - Indicates the hostname of the RMU. • IP Address - Indicates the IP address for the RMU connection. • MAC Address - Indicates the Media Access Control (MAC) address of the RMU. This is also the serial number of the RMU. • Library Serial # - Indicates the library serial number. • SNMP - Indicates whether SNMP requests and alerts are enabled or disabled. • SNMP Alerts - Indicates whether the SNMP Alert notification feature is enabled or disabled. • Library Firmware - Indicates the current level of library firmware. • RMU Firmware - Indicates the current level of RMU firmware. 6-00058-05 Rev A Configuring Network Parameters You can reconfigure the hostname, IP address, subnet mask, and gateway address through the RMU. This feature requires you to log in to the RMU. Refer to Accessing and Logging Into the RMU on page 4-13 for more information. Step 1 Click the Configuration tab. Step 2 In the Network Configuration area, enter the new hostname, IP address, subnet mask, and gateway address. Step 3 Click Submit and review your changes (indicated in red). Step 4 Enter your password and click Confirm to complete the procedure. The new values are saved. Note that you may need to redirect your Web browser if you are logged out. Configuring SNMP Simple Network Management Protocol (SNMP) is a set of protocols used to manage nodes on an IP network. You can configure the RMU to send alerts to and respond to requests from an SNMP management application. To ensure event capturing and reporting, you must enable SNMP and enable the SNMP alerts. September 2007 Step 1 Click the Configuration tab. Step 2 In the SNMP Configuration area, do the following: • To enable or disable the feature, select ON or OFF in the SNMP Enabled drop-down. • To enable or disable SNMP alerts, select ON or OFF in the Alerts Enabled drop-down. SNMP must be enabled if you want SNMP alerts enabled. • In Manager, enter the SNMP server address. Using the Remote Management Unit 3-15 • In Public Name, enter the name of the readonly SNMP community. • In Private Name, enter the name of the read/write SNMP community. Step 3 Click Submit and review your changes (indicated in red). Step 4 Enter your password and click Confirm to complete the procedure. The new values are saved. Note that you may need to redirect your Web browser if you are logged out. Step 5 Click Done. You may be instructed to reboot the RMU. Refer to Rebooting the RMU on page 4-21 for more information. Downloading the SNMP MIB File The SNMP Management Information Base (MIB) file allows an SNMP management application to understand the SNMP database and alerts generated by the RMU. If you are running an SNMP management application and need the library MIB, you can download it by means of the RMU. Step 1 Click SNMP MIB in the left pane of the RMU interface. Step 2 Right-click Download SNMP MIB and click Save Target As. Step 3 Browse to your SNMP management server and click Save. You will need to load the MIB file into the SNMP management application. 3-16 System Description 6-00058-05 Rev A Configuring RMU Users You can add unique users to the RMU. However, only one administrator-level user is allowed, and it is automatically given the user name admin. Adding/Removing Users Only the admin account can add or remove users. Step 1 When prompted, log in as admin. Step 2 Click the Configuration tab. Step 3 In the User Configuration area, do one of the following: • If you are adding a user: a. In the Management Action drop-down, click Create User. b. In Edit New, enter the new user name. c. In Password, enter the new user’s password and then confirm it in Re-enter Password. • If you are deleting a user: a. In the Management Action drop-down, click Delete User. b. In Select One, select the user you want to remove. September 2007 Step 4 Click Submit and review your changes (indicated in red). Step 5 Enter the admin password and click Confirm to complete the procedure. Using the Remote Management Unit 3-17 Changing a Password At any time, you can change your RMU password. If you are the administrator, you can also change other users’ passwords. Note Only the admin can modify another user’s password. Step 1 Click the Configuration tab. Step 2 In the User Configuration area, select Change User Password from the Management Action drop-down. Step 3 If not already selected, select the appropriate user account from the Select One drop-down. Step 4 Click Submit and review your changes (indicated in red). Step 5 Enter your password and click Confirm to complete the procedure. Configuring the Time and Date You can configure the date and time for the RMU. The date and time will be used in the RMU log file to report when events occurred. 3-18 System Description Step 1 Click the Configuration tab. Step 2 Enter the date and time in the Date and Time area. Step 3 Click Submit and review your changes (indicated in red). Step 4 Enter your password and click Confirm to complete the procedure. 6-00058-05 Rev A Synchronizing with an NTP Server Note If using a time server, the Scalar 10K synchronizes with the RMU. You can connect the RMU to a network time (NTP) server to automatically set the time. Step 1 Click the Configuration tab. Step 2 In the Date and Time area, select ON from the Synchronization with NTP Server drop-down menu. Step 3 In the NTP Server IP Address field, enter the IP address of the NTP server. Step 4 In the Timezone field, enter the time zone deviation for the NTP server. To get a list of timezone offsets, click list of timezones. Step 5 Click Submit and review your changes (indicated in red). Step 6 Enter your password and click Confirm to complete the procedure. Updating Firmware You can update firmware for the RMU. Before you update firmware, you need to have the firmware file in a location that is accessible from the RMU interface. Firmware updates can be found on www.quantum.com. Note Downloading firmware can take several minutes. September 2007 Step 1 Click the Firmware tab. Step 2 Select the firmware you would like to update. Step 3 Click Browse and browse to the location of the firmware update file. Step 4 Click Update Firmware. The firmware updates. If the RMU was selected for a firmware update, the RMU will reboot. Using the Remote Management Unit 3-19 Viewing Diagnostic Files From the RMU, you can view the diagnostic information for the attached library and RMU. This information can assist technical support personnel when diagnosing problems. Step 1 Click the Diagnostics file tab. Step 2 Select the file you would like to view. The available options are: Step 3 • Library Command Log - Provides an event (command, errors, etc.) log for the library. • Library Error Log - Use the Library Command Log. • RMU Support Log - Provides support logs for the RMU. • RMU Error Log - Provides error logs for the RMU. Click Retrieve selected file. The file loads. Step 4 Click Display File to view the file in a separate browser window. Using the Operator Panel (via the RMU) The RMU provides access to the library by means of a virtual operator panel. • Click the Operator Panel tab. A graphical representation of the operator panel appears. You can click the softkeys and control the library the same way that you would from the front of the library. For more information on the operator panel, refer to Using the Operator Panel on page 4-3. 3-20 System Description 6-00058-05 Rev A Viewing Logs You can view the most current entries in the library command log without downloading the entire log file. • Click the Logs tab. The command log appears with the most recent entry at the top of the list. Getting Help The RMU provides access to help for the following items: • Contents - Provides a description of each of the tabs on the RMU interface. • Documentation - Provides a link to the user documentation for the library. • SNMP MIB - Provides information on the SNMP MIB file. For more information, see Configuring SNMP on page 4-15. • Support - Provides information on contacting technical support. • Version - Provides the current revision level of the RMU firmware. To get help • Click on the item in the left pane of the RMU interface. The information appears in a separate browser window. Rebooting the RMU Reboot the RMU when instructed by an operator panel message, a service action code (SAC) repair action, or the GCH. See Figure 3-4 for the location of components referenced in this procedure. September 2007 Step 1 Open the CM service door. Step 2 Unscrew the captive screw that holds the RMU in place. For the location of the captive screw, see Figure 3-4 on page 3-22. Step 3 Slide the RMU out approximately 3 inches for approximately 15 seconds. Using the Remote Management Unit 3-21 Step 4 Slide the RMU back into place and tighten the captive screw. Step 5 Close the CM service door. RMU Figure 3-4 3-22 System Description Captive Screw RMU Location (CM Front View—Service Door Open) 6-00058-05 Rev A 4 Menus and Commands Overview . . . . . . . . . . . . . . . . . . . . . . . . . . . . . . . . . . . . . . . . . . . . . . . . . . . . . . . . . . . . . . . 4-5 Using the Operator Panel . . . . . . . . . . . . . . . . . . . . . . . . . . . . . . . . . . . . . . . . . . . . . . . . . . 4-5 Operator Panel Buttons . . . . . . . . . . . . . . . . . . . . . . . . . . . . . . . . . . . . . . . . . . . . . . . . 4-5 Special Characters or Cursors . . . . . . . . . . . . . . . . . . . . . . . . . . . . . . . . . . . . . . . . . . 4-6 Help Button . . . . . . . . . . . . . . . . . . . . . . . . . . . . . . . . . . . . . . . . . . . . . . . . . . . . . . . . . . 4-7 Operator Intervention Message . . . . . . . . . . . . . . . . . . . . . . . . . . . . . . . . . . . . . . . . . 4-7 Operator Panel Menu Tree Structure . . . . . . . . . . . . . . . . . . . . . . . . . . . . . . . . . . . . . . . . 4-8 Main Menu . . . . . . . . . . . . . . . . . . . . . . . . . . . . . . . . . . . . . . . . . . . . . . . . . . . . . . . . . . . . . . 4-9 Mode Dialog . . . . . . . . . . . . . . . . . . . . . . . . . . . . . . . . . . . . . . . . . . . . . . . . . . . . . . . . . . . . 4-10 Status Menu . . . . . . . . . . . . . . . . . . . . . . . . . . . . . . . . . . . . . . . . . . . . . . . . . . . . . . . . . . . . 4-12 Library Submenu . . . . . . . . . . . . . . . . . . . . . . . . . . . . . . . . . . . . . . . . . . . . . . . . . . . . 4-13 SCSI Submenu . . . . . . . . . . . . . . . . . . . . . . . . . . . . . . . . . . . . . . . . . . . . . . . . . . . 4-13 Mode Parms Dialog . . . . . . . . . . . . . . . . . . . . . . . . . . . . . . . . . . . . . . . . . . . 4-14 Element Address . . . . . . . . . . . . . . . . . . . . . . . . . . . . . . . . . . . . . . . . . 4-15 Mixed-Media Support. . . . . . . . . . . . . . . . . . . . . . . . . . . . . . . . . . . . . 4-15 Parity . . . . . . . . . . . . . . . . . . . . . . . . . . . . . . . . . . . . . . . . . . . . . . . . . . . 4-17 LCD . . . . . . . . . . . . . . . . . . . . . . . . . . . . . . . . . . . . . . . . . . . . . . . . . . . . 4-17 Reservations Dialog . . . . . . . . . . . . . . . . . . . . . . . . . . . . . . . . . . . . . . . . . . . 4-18 System Dialog . . . . . . . . . . . . . . . . . . . . . . . . . . . . . . . . . . . . . . . . . . . . . . . . . . . 4-19 Element Dialog . . . . . . . . . . . . . . . . . . . . . . . . . . . . . . . . . . . . . . . . . . . . . . . . . . 4-21 Logs Submenu . . . . . . . . . . . . . . . . . . . . . . . . . . . . . . . . . . . . . . . . . . . . . . . . . . . 4-23 Command Log Dialog . . . . . . . . . . . . . . . . . . . . . . . . . . . . . . . . . . . . . . . . . 4-24 Error Log Dialog . . . . . . . . . . . . . . . . . . . . . . . . . . . . . . . . . . . . . . . . . . . . . . 4-24 Print Log Dialog . . . . . . . . . . . . . . . . . . . . . . . . . . . . . . . . . . . . . . . . . . . . . . 4-25 Print Inventory Dialog . . . . . . . . . . . . . . . . . . . . . . . . . . . . . . . . . . . . . . . . . 4-26 Firmware Submenu . . . . . . . . . . . . . . . . . . . . . . . . . . . . . . . . . . . . . . . . . . . . . . 4-27 Drives Submenu . . . . . . . . . . . . . . . . . . . . . . . . . . . . . . . . . . . . . . . . . . . . . . . . . . . . . 4-28 Drive State Dialog . . . . . . . . . . . . . . . . . . . . . . . . . . . . . . . . . . . . . . . . . . . . . . . . 4-28 Media Info Dialog . . . . . . . . . . . . . . . . . . . . . . . . . . . . . . . . . . . . . . . . . . . . . . . . 4-31 Drive Log Dialog . . . . . . . . . . . . . . . . . . . . . . . . . . . . . . . . . . . . . . . . . . . . . . . . . 4-33 Firmware Dialog . . . . . . . . . . . . . . . . . . . . . . . . . . . . . . . . . . . . . . . . . . . . . . . . . 4-33 Towers Submenu . . . . . . . . . . . . . . . . . . . . . . . . . . . . . . . . . . . . . . . . . . . . . . . . . . . . 4-34 IE Stations Dialog . . . . . . . . . . . . . . . . . . . . . . . . . . . . . . . . . . . . . . . . . . . . . . . . . . . . 4-35 Commands Menu . . . . . . . . . . . . . . . . . . . . . . . . . . . . . . . . . . . . . . . . . . . . . . . . . . . . . . . 4-36 Park . . . . . . . . . . . . . . . . . . . . . . . . . . . . . . . . . . . . . . . . . . . . . . . . . . . . . . . . . . . . . . . 4-36 Move Submenu . . . . . . . . . . . . . . . . . . . . . . . . . . . . . . . . . . . . . . . . . . . . . . . . . . . . . . 4-37 Position Gripper Dialog . . . . . . . . . . . . . . . . . . . . . . . . . . . . . . . . . . . . . . . . . . . 4-37 Position Scanner Dialog . . . . . . . . . . . . . . . . . . . . . . . . . . . . . . . . . . . . . . . . . . . 4-39 Move Media Dialog . . . . . . . . . . . . . . . . . . . . . . . . . . . . . . . . . . . . . . . . . . . . . . 4-40 Inventory Dialog . . . . . . . . . . . . . . . . . . . . . . . . . . . . . . . . . . . . . . . . . . . . . . . . . . . . 4-43 Insert/Eject Submenu . . . . . . . . . . . . . . . . . . . . . . . . . . . . . . . . . . . . . . . . . . . . . . . . 4-45 Insert Screen . . . . . . . . . . . . . . . . . . . . . . . . . . . . . . . . . . . . . . . . . . . . . . . . . . . . . 4-46 Insert Clean Tape Dialog . . . . . . . . . . . . . . . . . . . . . . . . . . . . . . . . . . . . . . . . . . 4-47 Eject Dialog . . . . . . . . . . . . . . . . . . . . . . . . . . . . . . . . . . . . . . . . . . . . . . . . . . . . . 4-50 Eject Clean Tape Dialog . . . . . . . . . . . . . . . . . . . . . . . . . . . . . . . . . . . . . . . . . . . 4-51 Database Menu . . . . . . . . . . . . . . . . . . . . . . . . . . . . . . . . . . . . . . . . . . . . . . . . . . . . . . . . . 4-53 Media Dialog . . . . . . . . . . . . . . . . . . . . . . . . . . . . . . . . . . . . . . . . . . . . . . . . . . . . . . . . 4-53 Element Dialog . . . . . . . . . . . . . . . . . . . . . . . . . . . . . . . . . . . . . . . . . . . . . . . . . . . . . . 4-54 Config Dialog . . . . . . . . . . . . . . . . . . . . . . . . . . . . . . . . . . . . . . . . . . . . . . . . . . . . . . . 4-56 Setup Menu . . . . . . . . . . . . . . . . . . . . . . . . . . . . . . . . . . . . . . . . . . . . . . . . . . . . . . . . . . . . 4-57 Library Submenu . . . . . . . . . . . . . . . . . . . . . . . . . . . . . . . . . . . . . . . . . . . . . . . . . . . . 4-57 Trace Submenu . . . . . . . . . . . . . . . . . . . . . . . . . . . . . . . . . . . . . . . . . . . . . . . . . . 4-58 SCSI Submenu . . . . . . . . . . . . . . . . . . . . . . . . . . . . . . . . . . . . . . . . . . . . . . . . . . . 4-59 Target ID Dialog . . . . . . . . . . . . . . . . . . . . . . . . . . . . . . . . . . . . . . . . . . . . . . 4-60 Parity Dialog . . . . . . . . . . . . . . . . . . . . . . . . . . . . . . . . . . . . . . . . . . . . . . . . . 4-61 Ports Dialog . . . . . . . . . . . . . . . . . . . . . . . . . . . . . . . . . . . . . . . . . . . . . . . . . . 4-62 Host Dialog . . . . . . . . . . . . . . . . . . . . . . . . . . . . . . . . . . . . . . . . . . . . . . . . . . . . . 4-63 Security Submenu . . . . . . . . . . . . . . . . . . . . . . . . . . . . . . . . . . . . . . . . . . . . . . . . 4-63 User Security . . . . . . . . . . . . . . . . . . . . . . . . . . . . . . . . . . . . . . . . . . . . . . . . . 4-64 I/E Security. . . . . . . . . . . . . . . . . . . . . . . . . . . . . . . . . . . . . . . . . . . . . . . . . . 4-66 Reset Passwords . . . . . . . . . . . . . . . . . . . . . . . . . . . . . . . . . . . . . . . . . . . . . . 4-68 Media Dialog . . . . . . . . . . . . . . . . . . . . . . . . . . . . . . . . . . . . . . . . . . . . . . . . . . . . 4-69 Capacity Submenu . . . . . . . . . . . . . . . . . . . . . . . . . . . . . . . . . . . . . . . . . . . . . . . 4-71 Storage Dialog . . . . . . . . . . . . . . . . . . . . . . . . . . . . . . . . . . . . . . . . . . . . . . . . 4-71 RMU Submenu . . . . . . . . . . . . . . . . . . . . . . . . . . . . . . . . . . . . . . . . . . . . . . . . . . 4-73 Host Dialog . . . . . . . . . . . . . . . . . . . . . . . . . . . . . . . . . . . . . . . . . . . . . . . . . . 4-74 IP Dialog. . . . . . . . . . . . . . . . . . . . . . . . . . . . . . . . . . . . . . . . . . . . . . . . . . . . . 4-74 Advanced Dialog . . . . . . . . . . . . . . . . . . . . . . . . . . . . . . . . . . . . . . . . . . . . . . . . 4-75 Drives Submenu . . . . . . . . . . . . . . . . . . . . . . . . . . . . . . . . . . . . . . . . . . . . . . . . . . . . . 4-76 ID Dialog . . . . . . . . . . . . . . . . . . . . . . . . . . . . . . . . . . . . . . . . . . . . . . . . . . . . . . . 4-77 Cleaning Submenu . . . . . . . . . . . . . . . . . . . . . . . . . . . . . . . . . . . . . . . . . . . . . . . . . . . 4-80 Drives Dialog . . . . . . . . . . . . . . . . . . . . . . . . . . . . . . . . . . . . . . . . . . . . . . . . . . . . 4-81 Media Dialog . . . . . . . . . . . . . . . . . . . . . . . . . . . . . . . . . . . . . . . . . . . . . . . . . . . . 4-82 View Dialog . . . . . . . . . . . . . . . . . . . . . . . . . . . . . . . . . . . . . . . . . . . . . . . . . . . . . 4-83 Utils Menu . . . . . . . . . . . . . . . . . . . . . . . . . . . . . . . . . . . . . . . . . . . . . . . . . . . . . . . . . . . . . 4-84 Library Submenu . . . . . . . . . . . . . . . . . . . . . . . . . . . . . . . . . . . . . . . . . . . . . . . . . . . . 4-84 Screen Dialog . . . . . . . . . . . . . . . . . . . . . . . . . . . . . . . . . . . . . . . . . . . . . . . . . . . . 4-85 4-2 Menus and Commands 6-00058-05 Rev A Audio Dialog . . . . . . . . . . . . . . . . . . . . . . . . . . . . . . . . . . . . . . . . . . . . . . . . . . . . 4-87 Snap Shot Screen . . . . . . . . . . . . . . . . . . . . . . . . . . . . . . . . . . . . . . . . . . . . . . . . . 4-87 Time Dialog . . . . . . . . . . . . . . . . . . . . . . . . . . . . . . . . . . . . . . . . . . . . . . . . . . . . . 4-88 Date Dialog . . . . . . . . . . . . . . . . . . . . . . . . . . . . . . . . . . . . . . . . . . . . . . . . . . . . . 4-89 Speed Dialog . . . . . . . . . . . . . . . . . . . . . . . . . . . . . . . . . . . . . . . . . . . . . . . . . . . . 4-90 Drives Submenu . . . . . . . . . . . . . . . . . . . . . . . . . . . . . . . . . . . . . . . . . . . . . . . . . . . . . 4-90 Status Change Submenu . . . . . . . . . . . . . . . . . . . . . . . . . . . . . . . . . . . . . . . . . . 4-91 Initialize Dialog . . . . . . . . . . . . . . . . . . . . . . . . . . . . . . . . . . . . . . . . . . . . . . . 4-91 Activate Dialog . . . . . . . . . . . . . . . . . . . . . . . . . . . . . . . . . . . . . . . . . . . . . . . 4-92 Vary Off Dialog . . . . . . . . . . . . . . . . . . . . . . . . . . . . . . . . . . . . . . . . . . . . . . . 4-93 Vary On Dialog . . . . . . . . . . . . . . . . . . . . . . . . . . . . . . . . . . . . . . . . . . . . . . . 4-94 Operations Submenu . . . . . . . . . . . . . . . . . . . . . . . . . . . . . . . . . . . . . . . . . . . . . 4-95 Update Microcode Dialog . . . . . . . . . . . . . . . . . . . . . . . . . . . . . . . . . . . . . . 4-95 Clean Drives Dialog . . . . . . . . . . . . . . . . . . . . . . . . . . . . . . . . . . . . . . . . . . . 4-97 Unload Drives Dialog . . . . . . . . . . . . . . . . . . . . . . . . . . . . . . . . . . . . . . . . . 4-99 Dismount Drives Dialog . . . . . . . . . . . . . . . . . . . . . . . . . . . . . . . . . . . . . . 4-100 Towers Submenu . . . . . . . . . . . . . . . . . . . . . . . . . . . . . . . . . . . . . . . . . . . . . . . . . . . 4-102 Status Change Dialog . . . . . . . . . . . . . . . . . . . . . . . . . . . . . . . . . . . . . . . . . . . . 4-102 Initialize Dialog . . . . . . . . . . . . . . . . . . . . . . . . . . . . . . . . . . . . . . . . . . . . . . . . . 4-104 Service Menu . . . . . . . . . . . . . . . . . . . . . . . . . . . . . . . . . . . . . . . . . . . . . . . . . . . . . . . . . . 4-105 Start Dialog . . . . . . . . . . . . . . . . . . . . . . . . . . . . . . . . . . . . . . . . . . . . . . . . . . . . . . . . 4-105 Diags Submenu . . . . . . . . . . . . . . . . . . . . . . . . . . . . . . . . . . . . . . . . . . . . . . . . . . . . . 4-107 Accessor Submenu . . . . . . . . . . . . . . . . . . . . . . . . . . . . . . . . . . . . . . . . . . . . . . 4-108 Move Dialog . . . . . . . . . . . . . . . . . . . . . . . . . . . . . . . . . . . . . . . . . . . . . . . . 4-108 Step . . . . . . . . . . . . . . . . . . . . . . . . . . . . . . . . . . . . . . . . . . . . . . . . . . . . . . . . 4-109 Trace . . . . . . . . . . . . . . . . . . . . . . . . . . . . . . . . . . . . . . . . . . . . . . . . . . . . . . . 4-110 Gripper Submenu . . . . . . . . . . . . . . . . . . . . . . . . . . . . . . . . . . . . . . . . . . . . . . . 4-111 Get/Put Storage Dialog . . . . . . . . . . . . . . . . . . . . . . . . . . . . . . . . . . . . . . . 4-111 Get/Put Drives Dialog. . . . . . . . . . . . . . . . . . . . . . . . . . . . . . . . . . . . . . . . 4-114 Step Dialog. . . . . . . . . . . . . . . . . . . . . . . . . . . . . . . . . . . . . . . . . . . . . . . . . . 4-116 Test Dialog . . . . . . . . . . . . . . . . . . . . . . . . . . . . . . . . . . . . . . . . . . . . . . . . . . 4-116 Scanner Submenu . . . . . . . . . . . . . . . . . . . . . . . . . . . . . . . . . . . . . . . . . . . . . . . 4-117 Verify Dialog . . . . . . . . . . . . . . . . . . . . . . . . . . . . . . . . . . . . . . . . . . . . . . . . 4-117 Trigger Dialog . . . . . . . . . . . . . . . . . . . . . . . . . . . . . . . . . . . . . . . . . . . . . . . 4-118 Fiducial Test Dialog . . . . . . . . . . . . . . . . . . . . . . . . . . . . . . . . . . . . . . . . . . 4-118 Tower Submenu . . . . . . . . . . . . . . . . . . . . . . . . . . . . . . . . . . . . . . . . . . . . . . . . 4-119 Home Dialog . . . . . . . . . . . . . . . . . . . . . . . . . . . . . . . . . . . . . . . . . . . . . . . . 4-119 Step Dialog. . . . . . . . . . . . . . . . . . . . . . . . . . . . . . . . . . . . . . . . . . . . . . . . . . 4-121 DI/DO Submenu . . . . . . . . . . . . . . . . . . . . . . . . . . . . . . . . . . . . . . . . . . . . . . . 4-122 Loopback Dialog . . . . . . . . . . . . . . . . . . . . . . . . . . . . . . . . . . . . . . . . . . . . . 4-122 Sensors Submenu . . . . . . . . . . . . . . . . . . . . . . . . . . . . . . . . . . . . . . . . . . . . 4-124 Wrap Dialog . . . . . . . . . . . . . . . . . . . . . . . . . . . . . . . . . . . . . . . . . . . . 4-124 Real Time . . . . . . . . . . . . . . . . . . . . . . . . . . . . . . . . . . . . . . . . . . . . . . 4-125 Locks Dialog . . . . . . . . . . . . . . . . . . . . . . . . . . . . . . . . . . . . . . . . . . . . . . . . 4-129 Self Test Dialog . . . . . . . . . . . . . . . . . . . . . . . . . . . . . . . . . . . . . . . . . . . . . . . . . 4-129 P/S Submenu . . . . . . . . . . . . . . . . . . . . . . . . . . . . . . . . . . . . . . . . . . . . . . . . . . . 4-130 Library Power . . . . . . . . . . . . . . . . . . . . . . . . . . . . . . . . . . . . . . . . . . . . . . . 4-131 UDS Power. . . . . . . . . . . . . . . . . . . . . . . . . . . . . . . . . . . . . . . . . . . . . . . . . . 4-131 Library Submenu . . . . . . . . . . . . . . . . . . . . . . . . . . . . . . . . . . . . . . . . . . . . . . . 4-132 September 2007 4-3 Storage Move. . . . . . . . . . . . . . . . . . . . . . . . . . . . . . . . . . . . . . . . . . . . . . . . 4-133 Corner Moves . . . . . . . . . . . . . . . . . . . . . . . . . . . . . . . . . . . . . . . . . . . . . . . 4-134 Teach Submenu . . . . . . . . . . . . . . . . . . . . . . . . . . . . . . . . . . . . . . . . . . . . . . . . . . . . 4-135 New Dialog . . . . . . . . . . . . . . . . . . . . . . . . . . . . . . . . . . . . . . . . . . . . . . . . . . . . 4-135 Continue Dialog . . . . . . . . . . . . . . . . . . . . . . . . . . . . . . . . . . . . . . . . . . . . . . . . 4-136 Current Dialog . . . . . . . . . . . . . . . . . . . . . . . . . . . . . . . . . . . . . . . . . . . . . . . . . . 4-137 Bays Dialog . . . . . . . . . . . . . . . . . . . . . . . . . . . . . . . . . . . . . . . . . . . . . . . . . . . . 4-140 Drive Dialog . . . . . . . . . . . . . . . . . . . . . . . . . . . . . . . . . . . . . . . . . . . . . . . . . . . . 4-141 Gripper Dialog . . . . . . . . . . . . . . . . . . . . . . . . . . . . . . . . . . . . . . . . . . . . . . . . . . 4-143 Tape Dialog . . . . . . . . . . . . . . . . . . . . . . . . . . . . . . . . . . . . . . . . . . . . . . . . . . . . 4-144 SAC Dialog . . . . . . . . . . . . . . . . . . . . . . . . . . . . . . . . . . . . . . . . . . . . . . . . . . . . . . . . 4-145 Demo Dialog . . . . . . . . . . . . . . . . . . . . . . . . . . . . . . . . . . . . . . . . . . . . . . . . . . . . . . . 4-146 Verify Submenu . . . . . . . . . . . . . . . . . . . . . . . . . . . . . . . . . . . . . . . . . . . . . . . . . . . . 4-148 All Dialog . . . . . . . . . . . . . . . . . . . . . . . . . . . . . . . . . . . . . . . . . . . . . . . . . . . . . . 4-148 Report Dialog . . . . . . . . . . . . . . . . . . . . . . . . . . . . . . . . . . . . . . . . . . . . . . . . . . . 4-149 Advanced Submenu . . . . . . . . . . . . . . . . . . . . . . . . . . . . . . . . . . . . . . . . . . . . . . . . 4-149 About Screen . . . . . . . . . . . . . . . . . . . . . . . . . . . . . . . . . . . . . . . . . . . . . . . . . . . . . . . . . . 4-150 4-4 Menus and Commands 6-00058-05 Rev A 5- Overview This chapter describes the Scalar 10K operator panel menus and commands. Note The information menus are not dynamically updated. To view changes, reselect the menu that was changed. The operator panel is a menu-driven interface that provides library status and current operating parameters to the Scalar 10K Library. Through the operator panel you can select, view, or change many library parameters. For a complete list of the operator panel menu items, see Figure 4-1 on page 4-8. Using the Operator Panel Use the operator panel push-buttons to access each menu or menu option. All menus and their respective options are grouped according to function. Operator Panel Buttons Proceed as follows to use the operator panel menu buttons to select menu options: Step 1 Press the (Up arrow) button or the (Down arrow) button to scroll through the current selection, or to move the cursor to a new option. Step 2 Press the selection. Step 3 Press the (Escape) button to return to the previous option. (Enter) button to activate your Each time you press the Escape button, you move back one step in the menu. If you continue to press Escape, you return to the Main Menu. September 2007 Overview 4-5 Special Characters or Cursors A menu option can be preceded or followed by one or more of the following special characters or cursors: When this character follows the option, additional menus are available under the selected option. ... When these characters follow the option, additional options or status displays are presented after the selected option. > When this cursor precedes the option, the option is available for selection. Press the button to select the option. Press the button to view information about the option. Press the or button to select between the previous or next options. < When this cursor follows the option, you can scroll predefined values with the and buttons for the selected option. ^ When this cursor appears below the option, you can scroll predefined values with the and buttons for the selected option. Refer to Using the Operator Panel on page 3-3 for detailed information. 4-6 Menus and Commands 6-00058-05 Rev A Help Button Help is common to all menus, submenus, dialogs, and screens. Using Help while the cursor (< or >) is at a desired location provides information about that entry. To use Help proceed as follows: Step 1 Press the selection. (Help) button to view help on a menu The help text appears for the current selection. Step 2 Press the (Up arrow) button or the (down arrow) button to move the cursor to a menu selection. Step 3 Press the (Escape) button to return to the previous selection. Each time you press the Escape button, you move back one step in the menu. If you continue to press Escape, you return to the Main Menu. Operator Intervention Message If an error condition causes an operator intervention message to appear, refer to Operator Intervention Messages on page 6-4 for a complete list of messages. September 2007 Using the Operator Panel 4-7 Operator Panel Menu Tree Structure Figure 4-1 4-8 Menus and Commands Operator Panel Menu Tree Structure 6-00058-05 Rev A Main Menu Path: Main Menu Note The button can always be used to escape to the previous menu. The Main Menu is the first available menu after the Main Menu displays. Refer to Starting the Scalar 10K on page 3-7 for information about the Main Menu. All subsequent menus and options are selectable from the Main Menu. See Figure 4-2. > Mode... Status Commands Database Figure 4-2 September 2007 Setup Utils Service About... Main Menu Main Menu 4-9 Mode Dialog Path: Main Menu Mode Dialog Use the Mode Dialog to change the library operating mode and/or state. For example, you can set the library to Online or Offline. See Figure 4-3. Online ...........Ready >Online Ready Accept: N Figure 4-3 Mode Dialog Depending on your selection, one of the following appears (Ready Screen, NotReady Screen, or Shutdown Screen). Warning Look into the aisle to make sure there are no obstructions or personnel present prior to selecting the Ready state. Movements of mechanical components in the library can cause serious injury. Note If Shutdown is selected for the Mode parameter, Shutdown is automatically displayed for the State parameter. Parameters Description Mode Online - host accessible Offline - maintenance or administrator accessible only Shutdown - prepares the library for shutdown State Ready - accessor is available for use NotReady - accessor is not available Accept Y to accept changes N to reject changes When Ready is selected, the Ready Screen appears. See Figure 4-4. Changing state to: >READY< Figure 4-4 4-10 Menus and Commands Ready Screen 6-00058-05 Rev A When the library is in the Ready state for the first time after the library is powered on, the gripper goes through a sequence of moves in the reach axis. The sequence is as follows: ten fast moves back and forth to heat up themotor to a stable temperature followed by various back and forth moves that gradually increase in speed. When NotReady is selected, the NotReady Screen appears. See Figure 4-5. Changing state to: >NOT READY< Figure 4-5 Not Ready Screen When Shutdown is selected, the Shutdown Screen appears. See Figure 4-6. The library can now be rebooted Figure 4-6 Shutdown Screen Table 4-1 details the state and mode descriptions available under the Mode screen. Table 4-1 State Ready NotReady Shutdown September 2007 Operating State and Mode Mode Description Online The normal host controlling condition. Host commands are processed. Aisle power is present. Offline The normal operator controlling condition. Operator commands are processed. Most host commands are not processed. Aisle power is present. Online Host commands not involving the accessor are processed. Aisle power is present. Offline Most operator and host commands are not processed. Aisle power is present. Shutdown Allows the operator to properly shutdown the library. All commands issued by the host are completed and no other commands are accepted. Aisle power is not present. Mode Dialog 4-11 Status Menu Path: Main Menu Status Use the Status Menu to access views of your library operating statistics. See Figure 4-7. > Library Drives Towers... IE Stations... Figure 4-7 Status Menu Depending on your selection, refer to: • Library Submenu on page 4-12 • Drives Submenu on page 4-30 • Towers Submenu on page 4-38 • IE Stations Dialog on page 4-39 Library Submenu Path: Main Menu Status Library Use the Library Submenu to access SCSI, System, Element, Log files for viewing history or print, and Firmware information. See Figure 4-8. The Library Submenu defaults to the SCSI selection. > SCSI Firmware... System... Element... Figure 4-8 Library Submenu Depending on your selection, refer to: 4-12 Menus and Commands • SCSI Submenu below • System Dialog on page 4-21 • Element Dialog on page 4-22 • Logs Submenu on page 4-25 • Firmware Submenu on page 4-29 6-00058-05 Rev A SCSI Submenu Path: Main Menu Status Library SCSI Use the SCSI Submenu to view different SCSI parameters. See Figure 4-9. > Mode Parms... Reservations... Figure 4-9 SCSI Submenu Depending on your selection, refer to: • Mode Parms Dialog on page 4-13 • Reservations Dialog on page 4-19 Mode Parms Dialog Path: Main Menu Status Library SCSI Mode Parms Use Mode Parms to view the current, default, or saved Mode Parameter pages. For example, you can view an individual element address or see if the library has Mixed-Media Support enabled. When Mode Parms is selected, the Mode Parms Dialog is displayed. See Figure 4-10. Refer to the Scalar 10K SCSI Reference Manual for additional information about the Scalar 10K Mode Parameters. Select Mode Parms: ELEMENT ADDRESS< and Type: CURRENT Accept: N Figure 4-10 September 2007 Mode Parms Dialog Parameters Description Mode Parms Element Address Mixed-Media Support Parity LCD Type Current - selected parameter Default - factory setting Saved - selected and saved to memory Status Menu 4-13 Accept Y to accept changes N to reject changes If Y is selected, one of twelve response screens appears. Otherwise, the changed parameters continue to display but no action is taken. Element Address Use Element Address to check current, default, or saved addresses of the accessor, storage cell, I/E station, or tape drives. See Figure 4-11. Base Base Base Base Figure 4-11 4-14 Menus and Commands MT ST IE DT : : : : 00001 04096 00016 00256 Element Address Screen Parameter Description Base MT Current, default, or saved base accessor address Base ST Current, default, or saved base Storage Cell address Base IE Current, default, or saved base Insert/Eject station address Base DT Current, default, or saved base tape drive address 6-00058-05 Rev A Mixed-Media Support Use Mixed-Media Support to determine the following. See Figure 4-12. • If the library is processing barcode media identifiers (Media ID) • If the extended read element status is enabled (Ext RES) • If vendor unique additional sense code qualifiers are currently enabled (Ext ASCQ) • If extended barcode is enabled (Ext BC) • If mixed mode is enabled (Mixed) Media ID: NMixed: N Ext RES: N Ext ASCQ: N Ext BC: N Figure 4-12 September 2007 Mixed-Media Screen Status Menu 4-15 Note When the library is not operating in mixed-media mode, the Extended RES, Extended ASCQ, and Extended BC are not applicable. Note For Dual Aisle systems, mixed mode is automatically enabled and cannot be changed. 4-16 Menus and Commands Parameter Description Media ID Yes indicates that the library is processing barcode media identifiers No indicates that the library is not processing barcode media identifiers. Ext RES Yes indicates that Extended Read Element Status is enabled to show element and media domains/types No indicates that Extended Read Element Status is disabled Ext ASCQ Yes indicates that Vendor Unique Additional Sense Code Qualifiers are currently enabled No indicates that Vendor Unique Additional Sense Qualifiers are currently disabled Ext BC Yes indicates that reported barcode includes the media type identifier No indicates that reported barcode does not include the media type identifier Mixed Yes indicates that the library is operating in mixed mode and allows for non-installed devices which are addressable by the SCSI host No indicates that the library is not operating in mixed mode and all non-installed devices/ cells are not addressable by the SCSI host 6-00058-05 Rev A Parity Use Parity to view the current, default, or saved parity. This view also displays the retries that are allowed in each selection. See Figure 4-13. Parity : Yes Retries: 001 Figure 4-13 September 2007 Parity Screen Parameters Description Parity Yes indicates that current, default, or saved SCSI parity is enabled No indicates that current, default, or saved SCSI parity is is disabled Retries Indicates the number of transmission retries allowed (000–999) due to SCSI parity errors Status Menu 4-17 LCD Use LCD to view current, default, or saved library security. See Figure 4-14. Security: Disabled Line: 1< MAIN SCREEN (default) Figure 4-14 Note Press the LCD Screen Parameter Description Security Disabled indicates that LCD security is disabled Enabled indicates that LCD security is enabled Line Indicates the current, default, or saved displayed text line (1–4) Text Corresponding line of main screen text with up to 20 characters default Indicates which of the 3 modes (current, default, or saved) is being displayed button or the button to toggle between the line number parameter values. 4-18 Menus and Commands 6-00058-05 Rev A Reservations Dialog Path: Main Menu Status Library SCSI Reservations Use the Reservations Dialog to view a specific element, or the entire library. See Figure 4-15. This reservation remains in effect until: • The initiator that made the reservation sends another command with the same Reservation Identification number (this supersedes any previous reservation). • The initiator that made the reservation sends a RELEASE command. • A reset, or a power-on of the library is preformed. Bus : 0 <Host ID : 0 Reservation ID: Any Found : 0000 Accept: N Figure 4-15 Reservation Dialog Parameters Description Bus Displays the SCSI Bus ID number (0–1) Host ID Displays the Host ID number (0–7) Reservation ID Displays the host’s reservation identifier (0x00–0xFF, Any) Found The value of the Found parameter in the Reservation Dialog is supplied by the library firmware and cannot be changed Accept Y accept changes N reject changes If Y is selected, the Response Screen appears. See Figure 4-16 on page 4-20. Otherwise, the selected parameters continue to display but no action is taken. September 2007 Status Menu 4-19 Bus: 0 <Host ID : 0 Reservation ID: Any Found : 0109 Accept : N Figure 4-16 4-20 Menus and Commands Reservation Response Screen Parameters Description Found Indicates the number of reserved elements which match the Bus, Host ID, and Reservation ID parameters Accept Y to accept N to reject 6-00058-05 Rev A System Dialog Path: Main Menu Status Library System Use the System Dialog to view the library operating statistics. For example, the number of installed cartridges, number of free cells, or the number of gets performed by the library. See Figure 4-17. Cartridges Free cells Total gets Figure 4-17 :0122 :0036 :00000137 [more] System Dialog Parameters Description Cartridges Displays the number of cartridges in the library Free cells Displays the number of free cells in the library Total gets The total number of gets from elements performed by the library [more] More information on the Continuation Screen When [more] is selected the Continuation Screen appears. See Figure 4-18 on page 4-21. Moves: 000013225 X meters: 000005187 Y meters: 000011148 [more] Figure 4-18 September 2007 Continuation Screen Parameters Description Moves Total move media commands that have been executed X meters Total meters traveled by the accessor in the horizontal direction Status Menu 4-21 Y meters Total meters traveled by the accessor in the vertical direction [more] More information on the Continuation Screen When [more] is selected the Continuation Screen appears. See Figure 4-19. Get retries: 000008 Put retries: 000010 Scan Retries: 000009 I/E Closes: 000050 Figure 4-19 Continuation Screen Parameters Description Get retries Total recovered get operations Put retries Total recovered put operations Scan retries Total recovered barcode scan operations I/E Closes Total times the I/E station has been closed Element Dialog Path: Main Menu Status Library Element Use the Element Dialog to display the barcode and source of a cartridge at an element address. See Figure 4-20. Enter Desired Coord: S< 01 1 A 01 Index : 00000 Accept: N Figure 4-20 4-22 Menus and Commands Element Dialog 6-00058-05 Rev A Parameters Description Coord The first field indicates the type of cell (I for I/E Station, D for Drive, S for Storage cell) The second field indicates the rack number (01–16) The third field indicates the storage cell section (1–5) The fourth field indicates the column of the section (A–P) The fifth field indicates the row of the column (01–15) Index The device address associated with the selected coordinate parameter: DT = data transfer device IE = insert/eject device ST = storage device Accept Y to accept N to reject If Y is selected, the Response Dialog appears. See Figure 4-21 on page 4-23. Otherwise, the changed parameters continue to display but no action is taken. Status: Full BC : 010116 Source: 0000 Valid : Yes[more] Figure 4-21 September 2007 Response Dialog Parameters Description Status Full indicates that a cartridge is present in the element Empty indicates that the cartridge is not present in the element BC Indicates the barcode label as found on the cartridge when the Status indicates Full Status Menu 4-23 Source Indicates the original location from which this cartridge came Valid Yes indicates that the results shown are based on an inventory of the elements No indicates that the results shown are not based on an inventory of the elements [more] More information on the Continuation Screen When [more] is selected the Continuation Screen appears. See Figure 4-22. Total Puts : 0000011 Put Retries: 0000000 Get Retries: 0000000 [more] Figure 4-22 Continuation Screen Parameters Description Total Puts Indicates the total number of puts that occurred at the element Put Retries Indicates the total number of put retries that occurred at this element Get Retries Indicates the total number of get retries that occurred at this element [more] More information on the Continuation Screen When [more] is selected the Continuation Screen appears. See Figure 4-23. Reserved :No Reserve ID : N/A Reserved by: N/A Figure 4-23 4-24 Menus and Commands Continuation Screen 6-00058-05 Rev A Note When not reserved, Reserve ID and Reserved by parameters are not applicable. Parameters Description Reserved Yes indicates the element is reserved by a SCSI host No indicates the element is not reserved Reserve ID Indicates the reserve ID of the element Reserved by Indicates the ID of the reserving host Logs Submenu Path: Main Menu Status Library Logs Use the Logs Submenu to view command or error log history, or to print out the history logs. See Figure 4-24. >Command Log... Error Log... Print Log... Print Inventory... Figure 4-24 Logs Submenu Depending on your selection, one of the following dialogs appears: September 2007 • Command Log Dialog below • Error Log Dialog on page 4-26 • Print Log Dialog on page 4-27 • Print Inventory Dialog on page 4-28 Status Menu 4-25 Command Log Dialog Path: Main Menu Log Status Library Logs Command Use the Command Log Dialog to view a running history log of library operations. A service representative retrieves this data for problem analysis. See Figure 4-25. 11/10/99 18:25:24.88 SCSIDONE INQ : Status good Figure 4-25 Command Log Dialog Error Log Dialog Path: Main Menu Status Library Logs Error Log Use the Error Log Dialog to view a running history of events that have occurred. See Figure 4-26. 02/19/97 18:25:24.88 Type: SW Temp Error: 0X02040000 Modifier:0X00000000 Figure 4-26 4-26 Menus and Commands Error Log Dialog Parameters Description Type Indicates the type of error. Record the error type in Error Log Form on page 6-41. Error Indicates the error identifier. Record the error identifier in Error Log Form on page 6-41. Modifier Indicates the error modifier. Record the error modifier in Error Log Form on page 6-41. 6-00058-05 Rev A Print Log Dialog Path: Main Menu Status Library Logs Print Log Before selecting this option, make sure to connect a serial cable between the top LSC port and the laptop serial port. When the Print Log Dialog is selected, the Print Log Screen is displayed. See Figure 4-27. Connect Serial Cable Between Nearest LSC Port and PC Serial Port Continue: N Figure 4-27 Print Log Screen If Y is selected for the Continue parameter value, the Response Screen appears. See Figure 4-28 on page 4-27. Otherwise, the changed parameter continues to display but no action is taken. Requested command is now in progress... Figure 4-28 September 2007 Response Screen Status Menu 4-27 Print Inventory Dialog Path: Main Menu Inventory Note If the library Trace value is set to Serial, the library also prints the tape cartridge count and inventory to the log. Status Library Logs Print Use the Print Inventory Dialog to print the library tape cartridge count and inventory to the serial port. Before selecting this option, make sure to connect a serial cable between the top LSC port and the laptop serial port. When Print Inventory is selected, the Print Inventory screen is displayed. See Figure 4-29. Connect Serial Cable Between Top LSC Port and PC Serial Port Continue: N Figure 4-29 Print Inventory Screen If Y is selected for the Continue parameter value, the Response Screen appears. See Figure 4-30. Otherwise, the changed parameter continues to display but no action is taken. Requested command is now in progress... Figure 4-30 4-28 Menus and Commands Response Screen 6-00058-05 Rev A Firmware Submenu Path: Main Menu Status Library Firmware Use Firmware Submenu to view the library controller, boot or control firmware revisions. See Figure 4-31. LBI FIRMWARE...< RACK:04 BOOT:110A.00001 Ctrl:130A.00004 Figure 4-31 Firmware Submenu Parameters Description FIRMWARE This toggles between the firmware types: LSC - Library SCSI Controller LGR - Library Gripper Controller LBI - Library Box Interface TCL - Tower Controller RMU - Remote Management Unit RACK Indicates the corresponding rack number BOOT Indicates the corresponding boot code level Ctrl Indicates the corresponding application code level Note When LSC displays, Rack is not reported. September 2007 Status Menu 4-29 Drives Submenu Path: Main Menu Status Drives Use the Drives Submenu to view drive, media, or firmware information. See Figure 4-32. >Drive State... Media Info... Drive Log... Firmware... Figure 4-32 Drives Submenu Depending on your selection, refer to: 4-30 Menus and Commands • Drive State Dialog below • Media Info Dialog on page 4-35 • Drive Log Dialog on page 4-36 • Firmware Dialog on page 4-37 6-00058-05 Rev A Drive State Dialog Path: Main Menu Status Drives Drive State Use the Drive State Dialog to view the current state of the selected drive. See Figure 4-33. Note: If you change any drive settings, you must Vary Off and Vary On the drive to apply the new settings. Enter SOURCE Coord: D< 01 1 A 01 Index :DT 00001 Accept: N Figure 4-33 Drive State Dialog Parameters Description Coord The first field indicates the type of cell (D for Drive) The second field indicates the rack number (01–16) The third field indicates the drive bay section (1–4) The fourth field indicates the column of the section (A–B) The fifth field indicates the row of the column (01–6) Index Indicates the number corresponding with the coordinate parameter Accept Y to accept N to reject When accepted, the following screen appears. See Figure 4-34. Drive: DT 00001< State: Loaded Clean Required: No [more] Figure 4-34 September 2007 Drive State Continuation Dialog Status Menu 4-31 Parameters Description Drive Displays the element address of the desired drive State Displays the state of the drive (UNINSTALLED, VARIED OFF, NO RESPONSE, UNKNOWN, OFFLINE, DRIVE ERROR, LOADED, LOADED, UNLOADED, LOADING, UNLOADING, REWINDING, SEEKING, READING, WRITING, ERASING, CLEANING, CALIBRATING, EMPTY) Clean Required Indicates if the drive requires cleaning (Yes, No) [more] More information on the Continuation Screen When [more] is selected and you are using SCSI drives, Figure 4-35 appears. For SCSI drive users, this is the last screen for Drive State Dialog. Note For 3590 tape drives, the Ser #, LSN, ID, and LED fields do not display information. Ser #: 6811002084 LSN : F0000CF009 ID : 3 LED : N/A Figure 4-35 SCSI Drive Screen When [more] is selected and you are using fibre channel drives, Figure 4-36 appears. Note For 3592-J1A/ TS1120 drives, the serial number on this screen is library-specific and for Quantum use only. This number is different from the number physically located on the 3592J1A/TS1120 drive, which is an IBMspecific serial number. 4-32 Menus and Commands Ser #: 6811002084 LSN : F0000CF009 ID : 0 : 1 LED : N/A Figure 4-36 Fibre Channel Drive Screen (Dual Port) 6-00058-05 Rev A Parameters Description Ser Num Displays the drive serial number For LTO only: The last six digits 3592-J1A/TS1120on the operator panel should match the last six digits of the serial number on the drive label. The first four digits are vendor specific and may not match. LSN Displays the logical serial number. The logical serial number is the last 9 digits of the world wide name assigned to the drive slot, preceded by the character “F”. ID Displays the current SCSI/loop ID of the drive. If the fibre channel drive has dual ports, a second ID field appears. LED Displays the error code listed on the front panel of the drive. [more] More information on the Continuation Screen (for fibre channel drive only). When [more] is selected, the Continuation Screen appears. See Figure 4-37. WWN: 500308C000068000 Speed :1GB :1GB Topology:Loop :Loop Figure 4-37 September 2007 Fibre Channel Continuation Screen (Dual Port) Status Menu 4-33 Parameters Description WWN Displays the current drive world wide name. Each drive has a unique WWN based on the library ID number and the drive position, not the manufacturer assigned drive WWN. If you replace a fibre channel drive in the same position of the same library, the WWN remains the same. Speed Data rate (Auto, 1 GB, 2 GB) Auto: The library auto negotiates the data transfer rate. 1 GB: 1 Gigabit/sec 2 GB: 2 Gigabit/sec 4 GB: 4 Gigabit/sec If the fibre channel drive has dual ports, a second Speed field appears. Topology 4-34 Menus and Commands Method of connecting to fibre (Auto, Loop, Nport). If the fibre channel drive has dual ports, a second Topology field appears. 6-00058-05 Rev A Media Info Dialog Path: Main Menu Note Library must be Offline. Status Drives Media Info Use the Media Info Dialog to display media information in loaded drive elements. See Figure 4-38. Enter SOURCE Coord: D 01< 1 A 01 Index: DT 01200 Accept: N Figure 4-38 Element Dialog Parameters Description Coord The first field displays the type of cell (D for drive) The second field displays the rack number (01–16) The third field displays the storage cell section (1–5) The fourth field displays the column of the section (A–B) The fifth field displays the row of the column (01–6) Index The device address associated with the selected coordinate parameter is DT = data transfer device Accept Y to accept N to reject If Y is selected, the Response Screen appears. See Figure 4-39 on page 4-35. Otherwise, the changed parameters continue to display but no action is taken. Type: 100GB LTO Free: 00000000 MB Write Protected: ON Figure 4-39 September 2007 Response Screen Status Menu 4-35 Parameters Description Type Indicates the type of media Free Indicates the amount of free space in MB remaining on the media in the drive Write Protected On indicates that the cartridge is write protected Off indicates that the cartridge is not write protected Drive Log Dialog Path: Main Menu Status Drives Drive Log Use the Drive Log Dialog to view drive information (type of drive and location). See Figure 4-40. This function is not yet available. Press Escape Figure 4-40 4-36 Menus and Commands Drive Log Dialog 6-00058-05 Rev A Firmware Dialog Path: Main Menu Status Drives Firmware Use the Firmware Submenu to view the drive and drive controller, boot or control firmware revisions. See Figure 4-41. Enter Desired Coord: D 01< 1 A 01 Index: DT 01200 Accept: N Figure 4-41 Firmware Dialog Parameters Coord Description The first field displays the type of cell (D for Drive) The second field displays the rack number (01–16) The third field displays the drive bay section (1–4) The fourth field displays the column of the section (A –B) The fifth field displays the row of the column (01–6) Index The device address associated with the selected coordinate parameter DT = data transfer device Accept Y to accept N to reject If Y is selected, the Response Screen appears. See Figure 4-42. Otherwise, the changed parameters continue to display but no action is taken. Note Press the button or the button to scroll between drives. Drive: DT 0006< Brick: 18N2 Boot: 120A.0002 Ctrl: 130A.0002 Figure 4-42 September 2007 Selected Drive Firmware Revision Status Menu 4-37 Towers Submenu Path: Main Menu Status Towers Use the Towers Submenu to view the tower configuration. See Figure 4-43. Tower: COMM: State: Mode: Figure 4-43 4-38 Menus and Commands 01 LTO < OK READY LIBRARY Towers Submenu Parameters Description Tower Displays the tower rack number (01–16), media type of the installed towers (LTO, DLT, 8mm, HALF), and ”DUAL“ if the tower is shared. COMM Displays the communication status of the between the LSC and the tower State Displays the state of the tower (READY, NOT READY) Mode Displays the mode of the tower (LIBRARY, USER, SERVICE) 6-00058-05 Rev A IE Stations Dialog Path: Main Menu Status I/E Stations Use the IE Stations Dialog to view the station position if a magazine is loaded and what media type it contains. See Figure 4-44. IE Station: 01 Media: LTO Access: USER Figure 4-44 September 2007 IE Stations Dialog Parameters Description IE Station Indicates the I/E Station position number (01–04) Magazine Indicates the type of cartridge (8mm, LTO, DLT, 1/2, or N/A if magazines are not present) Access Indicates library access or user access (USER, LIBRARY) Status Menu 4-39 Commands Menu Path: Main Menu Commands Use the Commands Menu to access library action commands that perform a motion within the library. > Park Move Inventory... Insert/Eject Figure 4-45 Commands Menu Depending on your selection, refer to: • Park below • Move Submenu on page 4-41 • Inventory Dialog on page 4-49 • Insert/Eject Submenu on page 4-51 Park Path: Main Menu Commands Park Use Park to retract the gripper and return the accessor to the home position. If you select Park the following Response Dialogs appear. See Figure 4-46 and Figure 4-47. Requested command is now in progress ... Figure 4-46 Response Dialog Requested command is now complete. Figure 4-47 4-40 Menus and Commands Response Dialog 6-00058-05 Rev A Move Submenu Path: Main Menu Note The Scalar 10K must be Offline and Ready to use the commands under the Move Menu. Note September 2007 Move Use the Move Submenu to position the gripper, scanner, or to move media. See Figure 4-48. > Position Gripper... Position Scanner... Move Media... Figure 4-48 The gripper or scanner do not move to the I/E station if there are no magazines in the I/E station. Commands Move Submenu Depending on your selection, refer to: • Position Gripper Dialog below • Position Scanner Dialog on page 4-44 • Move Media Dialog on page 4-46 Commands Menu 4-41 Position Gripper Dialog Path: Main Menu Commands Move Position Gripper Use the Position Gripper Dialog to move the gripper to a specific element. See Figure 4-49. Enter TARGET Coord: S< 01 1 A 01 Index: ST 00001 Accept: N Figure 4-49 Note The Coord: S cannot be changed to Coord: I if magazines are not installed in the I/E station. Position Gripper Dialog Parameters Description Coord The first field indicates the type of cell (I for I/E Station, D for Drive, S for Storage cell) The second field indicates the rack number (01–16) The third field indicates the storage cell section (1–5) The fourth field indicates the column of the section (A–P) The fifth field indicates the row of the column (01–15) Index The device address associated with the selected coordinate parameter: DT = data transfer device IE = insert/eject device ST = storage device Accept Y to accept N to reject If Y is selected, two Response Screens appear. See Figure 4-50 and Figure 4-51. Otherwise, the changed parameters continue to display but no action is taken. 4-42 Menus and Commands 6-00058-05 Rev A Requested command is now in progress ... Figure 4-50 Response Screen The gripper positions itself in front of the specific element. Requested command is now complete. Figure 4-51 September 2007 Response Screen Commands Menu 4-43 Position Scanner Dialog Path: Main Menu Commands Move Position Scanner Use the Position Scanner to move the scanner to a specific element. See Figure 4-52. Enter TARGET Coord: S< 01 1 A 01 Index : ST 00001 Accept: N Figure 4-52 Note Position Scanner Dialog Parameters Description Coord The first field indicates the type of cell (I for I/E Station, D for Drive, S for Storage cell) The Coord: S cannot be changed to Coord: I, if magazines are not installed in the I/E station. The second field indicates the rack number (01–16) The third field indicates the storage cell section (1– 5) The fourth field indicates the column of the section (A–P) The fifth field indicates the row of the column (01–15) Index The device address associated with the selected coordinate parameter: DT = data transfer device IE = insert/eject device ST = storage device Accept Y to accept N to reject If Y is selected, two Response Screens appear. See Figure 4-53 on page 4-45 and Figure 4-54 on page 4-45. Otherwise, the changed parameters continue to display but no action is taken. 4-44 Menus and Commands 6-00058-05 Rev A Requested command is now in progress ... Figure 4-53 Response Screen The scanner positions itself in front of the specific element. Requested command is now complete. Figure 4-54 September 2007 Response Screen Commands Menu 4-45 Move Media Dialog Path: Main Menu Commands Move Move Media Use the Move Media Dialog to move cartridges between elements without host intervention. See Figure 4-55. Caution If your library is host partitioned or a COD configuration, do not use the operator panel to move a cartridge. The library does not know the partition limits and could move a cartridge outside of the partitioned area, making that cartridge inaccessible to the host. Enter SOURCE Coord: S< 01 1 A 01 Index: ST 00001 Accept : N Figure 4-55 4-46 Menus and Commands Move Media Dialog 6-00058-05 Rev A Parameters Description Coord The first field indicates the type of cell (I for I/E Station, D for Drive, S for Storage cell) The second field indicates the rack number (01–16) The third field indicates the storage cell section (1–5) The fourth field indicates the column of the section (A–P) The fifth field indicates the row of the column (01–15) Index The device address associated with the selected coordinate parameter: DT = data transfer device IE = insert/eject device ST = storage device Accept Y to accept N to reject If Y is selected, the Target Dialog appears. See Figure 4-56. Otherwise, the changed parameters continue to display but no action is taken. Enter TARGET Coord: I< 01 1 A 01 Index: 15949 Accept : N Figure 4-56 Target Dialog Parameters Description Coord The first field indicates the type of cell (I for I/E Station, D for Drive, S for Storage cell) The second field indicates the rack number (01–16) The third field indicates the storage cell section (1– 5) September 2007 Commands Menu 4-47 The fourth field indicates the column of the section (A–P) The fifth field indicates the row of the column (01–15) Index The device address associated with the selected coordinate parameter: DT = data transfer device IE = insert/eject device ST = storage device Accept Y to accept N to reject If Y is selected, the Response Screens appear. See Figure 4-57 and Figure 4-58. Otherwise, the changed parameters continue to display but no action is taken Requested command is now in progress ... Figure 4-57 Response Screen The accessor moves the cartridge from the selected Source, to the selected Target element. Requested command is now complete. Figure 4-58 Response Screen If an empty source element is selected, the Error Screen appears. See Figure 4-59. -=> ERROR <=The Source element is empty. Figure 4-59 4-48 Menus and Commands Error Screen 6-00058-05 Rev A If a target element that is already occupied by a cartridge is selected, the Error Screen appears. See Figure 4-60. -=> ERROR <=The target element is full. Figure 4-60 Error Screen Inventory Dialog Path: Main Menu Commands Inventory Use the Inventory Dialog to inventory specific elements. See Figure 4-61. Starting Inventory Coord: S 01 1< A 01 Index: ST 00001 Accept : N Figure 4-61 Inventory Dialog Parameters Description Coord The first field indicates the type of cell (I for I/E Station, D for Drive, S for Storage cell) The second field indicates the rack number (01–16) The third field indicates the storage cell section (1– 5) The fourth field indicates the column of the section (A–P) The fifth field indicates the row of the column (01–15) Index September 2007 The device address associated with the selected coordinate parameter: DT = data transfer device IE = insert/eject device ST = storage device Commands Menu 4-49 Accept Y to accept N to reject If Y is selected, the Ending Inventory Dialog appears. See Figure 4-62 on page 4-50. Otherwise, the changed parameters continue to display but no action is taken. Ending Inventory Coord: D< 03 2 A 01 Index: DT 00013 Accept : N Figure 4-62 Ending Inventory Dialog Parameters Description Coord The first field indicates the type of cell (I for I/E Station, D for Drive, S for Storage cell) The second field indicates the rack number (01–16) The third field indicates the storage cell section (1– 5) The fourth field indicates the column of the section (A–P) The fifth field indicates the row of the column (01–15) Index The device address associated with the selected coordinate parameter: DT = data transfer device IE = insert/eject device ST = storage device Accept Y to accept N to reject If Y is selected, the Response Screens appear. See Figure 4-63 and Figure 4-64 on page 4-51. Otherwise, the changed parameters continue to display but no action is taken. 4-50 Menus and Commands 6-00058-05 Rev A Requested command is now in progress ... Figure 4-63 Response Screen The barcode scanner inventories the specified storage cells. Requested command is now complete. Found : 100 Figure 4-64 Response Screen Parameter Description Found Indicates the total number of cartridges detected Insert/Eject Submenu Path: Main Menu Note Use this option to insert or eject cartridge(s) without host intervention. Commands Insert/Eject Use the Insert/Eject Submenu to insert or eject a clean tape in or out of the library. See Figure 4-65. >Insert Insert Clean Tape... Eject... Eject Clean Tape... Figure 4-65 Insert/Eject Submenu Depending on your selection, refer to: September 2007 • Insert Screen below • Insert Clean Tape Dialog on page 4-53 • Eject Dialog on page 4-56 • Eject Clean Tape Dialog on page 4-58 Commands Menu 4-51 Caution If your library is host partitioned, do not use the operator panel to move a cartridge. The library does not know the partition limits and could move a cartridge outside of the partitioned area, making that cartridge inaccessible to the host. Insert Screen Path: Main Menu Commands Insert/Eject Insert Use the Insert Screen to move all cartridges found in the Insert/Eject stations to the first available empty storage cells. See Figure 4-66. Insert in progress Source: IE 00010 Target: ST 00471 Figure 4-66 Insert Screen The Current Source and Target elements are updated. After completion, the response screen shows how many cartridges are in the Insert/Eject stations. See Figure 4-67 on page 4-52. Requested command is now complete. Tapes inserted: 010 Figure 4-67 Response Screen If no tapes are installed, Tapes inserted indicates 000. If one tape is installed, Tapes inserted indicates 001. 4-52 Menus and Commands 6-00058-05 Rev A Insert Clean Tape Dialog Path: Main Menu Tape Commands Insert/Eject Insert Clean Use the Insert Clean Tape Dialog to move the selected cleaning cartridge from the Insert/Eject station to the designated empty storage cells. See Figure 4-68. Caution It is possible to manually insert a cleaning tape into an unauthorized storage area. The use of Insert Clean is not recommended or intended for host initiated cleaning. If you use host initiated cleaning, the cleaning tape may not be accessible and your drives may not be cleaned. Enter SOURCE Coord: I 01< 1 A 01 Index: IE 00001 Accept: N Figure 4-68 Insert Clean Tape Dialog Parameters Description Coord The first field indicates the type of cell (I for I/E Station, D for Drive, S for Storage cell) The second field indicates the rack number (01–16) The third field indicates the storage cell section (1–5) The fourth field indicates the column of the section (A–P) The fifth field indicates the row of the column (01–15) Index The device address associated with the selected coordinate parameter: DT = data transfer device IE = insert/eject device ST = storage device Accept Y to accept N to reject If Y is selected, the Insert Range screen appears. Select the number of cleaning tapes to insert. See Figure 4-69. September 2007 Commands Menu 4-53 Insert Range: 01< Accept : N Figure 4-69 Insert Range Screen Parameters Description Insert Range Indicates the number of elements for the insert operation Accept Y accept changes N reject changes If Y is selected, the Target Screen appears. See Figure 4-70. Otherwise, the changed actions continue to display but no action is taken. Enter TARGET Coord: S 01 1< A 01 Index: ST 00001 Accept : N Figure 4-70 Note The starting address is indicated by the Coordinate and index parameters. If several cleaning tapes are inserted, the Coordinate and Index is specified for the first empty cell in a group of consecutive empty cells. Target Screen Parameters Description Coord The first field indicates the type of cell (I for I/E Station, D for Drive, S for Storage cell) The second field indicates the rack number (01–16) The third field indicates the storage cell section (1–5) The fourth field indicates the column of the section (A–P) The fifth field indicates the row of the column (01–15) 4-54 Menus and Commands 6-00058-05 Rev A Index The device address associated with the selected coordinate parameter: DT = data transfer device IE = insert/eject device ST = storage device Accept Y to accept N to reject If Y is selected, the Usage Screen appears. See Figure 4-71. If N is selected, the changed parameters continue to display but no action is taken. CurrentUse: 000< MaxUse: 000 Accept: N Figure 4-71 Usage Screen Parameters Description Current Usage Indicates the number of times the cleaning cartridge has been used (000–511) Maximum Usage Indicates the maximum number of allowable uses for the cleaning cartridge (000–511) Accept Y accept changes N reject changes If Y is selected, the accessor moves the number of cleaning cartridges to the designated storage cells. When the operation completes, the Response Screen appears. See Figure 4-72. If N is selected, the changed parameters continue to display but no action is taken. Requested command is now complete. Tapes inserted: 001 Figure 4-72 September 2007 Response Screen Commands Menu 4-55 Eject Dialog Path: Main Menu Commands Insert/Eject Eject Use the Eject Dialog to remove cartridges without opening the service or access doors, or without host intervention. The final destination is a slot in the Insert/Eject station. See Figure 4-73. Caution If your library is host partitioned, do not use the operator panel to move a cartridge. The library does not know the partition limits and could move a cartridge outside of the partitioned area, making that cartridge inaccessible to the host. Enter SOURCE Coord: S< 01 1 A 01 Index :ST 00001 Accept: N Figure 4-73 Eject Dialog Parameters Description Coord The first field indicates the type of cell (I for I/E Station, D for Drive, S for Storage cell) The second field indicates the rack number (01–16) The third field indicates the storage cell section (1–5) The fourth field indicates the column of the section (A–P) The fifth field indicates the row of the column (01–15) Index Indicates the number corresponding with the coordinate parameter Accept Y to accept N to reject If Y is selected, the Eject Screen appears. See Figure 4-74. Otherwise, the changed actions continue to display but no action is taken. 4-56 Menus and Commands 6-00058-05 Rev A Eject in progress Source: 04096 Target: 00016 Figure 4-74 Eject Screen The cartridge is ejected to the first available empty cell in the Insert/Eject station. The Response Screen appears. See Figure 4-75. Requested command is now complete. Figure 4-75 September 2007 Response Screen Commands Menu 4-57 Eject Clean Tape Dialog Path: Main Menu Tape Commands Insert/Eject Eject Clean Use the Eject Clean Tape Dialog to remove a cleaning cartridge without opening the service or access door, or without host intervention. See Figure 4-76. Enter SOURCE Coord: S 01 1< A 01 Index: ST 00001 Accept: N Figure 4-76 Eject Clean Tape Dialog Parameters Description Coord The first field indicates the type of cell (I for I/E Station, D for Drive, S for Storage cell) The second field indicates the rack number (01–16) The third field indicates the storage cell section (1–5) The fourth field indicates the column of the section (A–P) The fifth field indicates the row of the column (01–15) Index The device address associated with the selected coordinate parameter: DT = data transfer device IE = insert/eject device ST = storage device Accept Y to accept N to reject If Y is selected, the Clean Media Eject Screen appears. See Figure 4-77. Otherwise, the changed actions continue to display but no action is taken. 4-58 Menus and Commands 6-00058-05 Rev A Eject in progress Source : 00000 Target : 00788 Figure 4-77 Eject Clean Tape Screen The cartridge is ejected to the first available empty cell in the Insert/Eject station. The Response Screen appears. See Figure 4-78. Requested command is now complete. Figure 4-78 September 2007 Response Screen Commands Menu 4-59 Database Menu Path: Main Menu Database Use the Database Menu to access information about the type of media, elements, or configuration of your library. See Figure 4-79. > Media... Element... Config... Figure 4-79 Database Menu Depending on your selection, refer to: • Media Dialog below • Element Dialog on page 4-61 • Config Dialog on page 4-63 Media Dialog Note If in extended mode, the space value (^) erases the remaining values and the wildcard value (*) is used to indicate that any volume label that includes the preceding values will be selected. Path: Main Menu Database Media Use the Media Dialog to obtain information about a specific cartridge based on the barcode label. In default or mixed mode, six characters are required. In extended mode five characters are required. However, up to sixteen characters may be entered. Figure 4-80 shows the Media Dialog. Enter volume label: AAAAAA ^ Accept : N Figure 4-80 4-60 Menus and Commands Media Dialog Parameters Description AAAAA Indicates the volume label (A–Z, 0–9) Accept Y accept changes N reject changes 6-00058-05 Rev A If Y is selected, the Response Screen appears. See Figure 4-81 on page 4-61. Otherwise, the changed parameters continue to display but no action is taken. BC: 000389 Type: SDLT Home: 0060 Current: 0060 Figure 4-81 Response Screen Parameters Description BC Indicates the value specified in the Media Screen Type Indicates the cartridge media type Home Indicates the home location of the cartridge Current Indicates the current location of the cartridge Element Dialog Path: Main Menu Database Element Use the Element Dialog to select specific element information from the database. See Figure 4-82. Enter Desired Coord: S 01< 1 A 01 Index: ST 00001 Accept: N Figure 4-82 Element Dialog Parameters Description Coord The first field indicates the type of cell (I for I/E Station, D for Drive, S for Storage cell) The second field indicates the rack number (01–16) September 2007 Database Menu 4-61 The third field indicates the storage cell section (1–5) The fourth field indicates the column of the section (A–P) The fifth field indicates the row of the column (01–15) Index The device address associated with the selected coordinate parameter: DT = data transfer device IE = insert/eject device ST = storage device Accept Y to accept N to reject If Y is selected, the Element Response Screen appears. See Figure 4-83 on page 4-62. Otherwise, the changed actions continue to display but no action is taken. Type: LTO STOR Coord: S 01 1 A 01 Index : ST 00001 Addr:0X1000[more] Figure 4-83 Element Response Screen Parameters Description Type Indicates the element type (DRIVE, IE, STOR) Coord Indicates the element coordinate location Index Indicates the database element index Address Indicates the current SCSI element address When [more] is selected the Continuation Screen appears. See Figure 4-84. 4-62 Menus and Commands 6-00058-05 Rev A X position: 0091.9 Y position: 1502.1 Z position: 1097 Figure 4-84 Continuation Screen Parameters Description X position Indicates the horizontal coordinate in millimeters Y position Indicates the vertical coordinate in millimeters Z position Indicates the depth coordinate Config Dialog Path: Main Menu Database Config Use the Config Dialog to view the current library configuration. See Figure 4-85. Serial#: 201100001 Racks: 04 Storage Cells : 680 Drive Cells: 12 Figure 4-85 September 2007 Config Screen Parameters Description Serial The serial number of the accessor module Racks The number of racks Storage Cells Total number of storage cells Drive Cells Total number of drives Database Menu 4-63 Setup Menu Path: Main Menu Setup Use the Setup Menu to change the physical or logical operational characteristics of the Library. See Figure 4-86. > Library Drive Cleaning IE Station. Figure 4-86 Setup Menu Depending on your selection, refer to: • Library Submenu on page 4-64 • Drives Submenu on page 4-87 • Cleaning Submenu on page 4-94 • IE Station Submenu on page 4-95 Library Submenu Path: Main Menu Setup Library Use the Library Submenu to change the library defaults. See Figure 4-87. > Trace SCSI Host... Security Figure 4-87 Media... Capacity RMU More Library Submenu Depending on your selection, refer to: 4-64 Menus and Commands • Trace Submenu on page 4-65 • SCSI Submenu on page 4-66 • Host Dialog on page 4-70 • Security Submenu on page 4-71 • Media Dialog on page 4-77 • Capacity Submenu on page 4-79 • RMU Submenu on page 4-82 • More Submenu on page 4-84 6-00058-05 Rev A Trace Submenu Path: Main Menu Setup Library Trace Use the Trace Submenu to define or enable the serial service port. See Figure 4-88. > Serial Port... Aux Board Trace... Figure 4-88 Trace Submenu If Serial Port is selected the Serial Port Screen appears. See Figure 4-89. Trace output Use: SERIAL Accept: N Figure 4-89 Note Serial Port Screen Parameters Description Use SERIAL indicates information is returned via the serial port RMU is the default to allow the port to be used for RMU communication VCONSOL is used for development only Accept Y to accept changes N to reject changes If the RMU is not installed, this option must be set to SERIAL in order to prevent a SAC from being posted. If Y is selected, the screen updates to reflect the changes. Otherwise, the changed parameters continue to display but no action is taken. If Aux Board Trace is selected and Serial Port trace output is set to Serial, the Aux Board Trace Screen appears. See Figure 4-90 on page 4-66. September 2007 Setup Menu 4-65 Aux Trace Reporting: Board:All Aux Status:Off Accept: N Figure 4-90 Aux Board Screen Parameters Description Board All Aux sets trace information for all boards LGR # displays gripper traces LBI # displays the selected LBI rack traces (# = the selected rack number) Status On enables trace Off disables trace Accept Y to accept changes N to reject changes If Y is selected, the screen updates to reflect the changes. Otherwise, the changed parameters continue to display but no action is taken. SCSI Submenu Path: Main Menu Setup Library SCSI Use the SCSI Submenu to set the library SCSI ID, SCSI bus type, and parity. See Figure 4-91. > Target ID... Parity... Ports... Figure 4-91 SCSI Submenu Depending on your selection, refer to: 4-66 Menus and Commands • Target ID Dialog on page 4-67 • Parity Dialog on page 4-68 • Ports Dialog on page 4-69 6-00058-05 Rev A Target ID Dialog Path: Main Menu Note The Scalar 10K defaults to SCSI ID 6. Setup Library SCSI Target ID Use the Target ID Dialog to set the library SCSI ID. See Figure 4-92. Changes do not take effect until library power is cycled. Note: In Dual Aisle configurations, make sure that each aisle (primary and secondary) has a unique SCSI ID. Target ID: Bus 1:6< Bus 2: 6 Accept: N Figure 4-92 NextNow 6 6 Target ID Dialog Parameters Description Bus 1: Next Next indicates the SCSI ID address that takes effect for bus port 1 after power is cycled (0–7) Bus 1: Now Now the SCSI ID address that is currently in effect (0–7) for bus port 1 Bus 2: Next Next indicates the SCSI ID address that takes effect for bus port 2 after power is cycled (0–7) Bus 2: Now Now the SCSI ID address that is currently in effect (0–7) for bus port 2 Accept Y to accept changes N to reject changes If Y is selected, the screen updates to reflect the changes. Otherwise, the changed parameters continue to display but no action is taken. September 2007 Setup Menu 4-67 Parity Dialog Path: Main Menu Setup Library SCSI Parity Use the Parity Dialog to set the SCSI bus parity. Changes do not take effect until library power is cycled. See Figure 4-93. Next Parity Retries Accept: N Figure 4-93 Now Yes<Yes 001001 Parity Dialog Parameters Description Parity: Next YES to enable SCSI parity NO to disable SCSI parity Parity: Now YES indicates parity dialog is supplied by the library firmware NO ignores the Retries parameter Retries: Next Set the number of retries (000–255) allowed when a SCSI parity error is detected Retries: Now YES indicates parity dialog is supplied by the library firmware NO indicates the current number of retries allowed (000–255) when a SCSI parity error is detected Accept Y to accept changes N to reject changes If Y is selected, the screen updates to reflect the changes. Otherwise, the changed parameters continue to display but no action is taken. 4-68 Menus and Commands 6-00058-05 Rev A Ports Dialog Path: Main Menu Ports Setup Library SCSI Submenu Use the Ports Dialog to indicate the current SCSI bus type and usage. See Figure 4-94. Bus 0: Bus 1: Figure 4-94 September 2007 INSTALLEDTYPE YES LVD YESHVD Ports Screen Parameters Description Bus 0: INSTALLED YES indicates the port is active NO indicates the port is not active Bus 0: TYPE HVD indicates the bus is high voltage differential LVD indicates the bus is low voltage differential SE indicates the bus is single ended Bus 1: INSTALLED YES indicates the port is active NO indicates the bus is not active. Bus 1: TYPE HVD indicates the bus is high voltage differential LVD indicates the bus is low voltage differential SE indicates the bus is single ended Setup Menu 4-69 Host Dialog Path: Main Menu Setup Library Host Use the Host Dialog to set the type of host control. See Figure 4-95. Host Type:SCSI< Emulation: NATIVE Accept: N Figure 4-95 Note At present, only SCSI control is supported. Host Dialog Parameters Description Host type SCSI indicates SCSI control Emulation Select Library Type (NATIVE, STK 9710, EXB 480, AML/S or Scalar1K) Accept Y to accept changes N to reject changes If Y is selected, the screen updates to reflect the changes. Otherwise, the changed parameters continue to display but no action is taken. 4-70 Menus and Commands 6-00058-05 Rev A Security Submenu Path: Main Menu Note Refer to your host application documentation for security information. Setup Library Security Use the Security Submenu to change the operator panel LCD Security mode or the password that protects it. The operator panel can also be secured by the host. The method used to secure the operator panel must be the same method used to release the security. See Figure 4-96. User Security ... I/E Security ... Reset Passwords ... Figure 4-96 Security Submenu Depending on your selection, refer to: September 2007 • User Security on page 4-72 • I/E Security on page 4-74 • Reset Passwords on page 4-76 Setup Menu 4-71 User Security Path: Main Menu Security Setup Library Security User Use User Security to set the user security, or change the user password for the operator panel. This security feature password-protects the operator panel. If User Security is not enabled, the Host Dialog appears. See Figure 4-97. Security Enabled: N< Change Password: Y Accept: N Figure 4-97 Host Dialog Parameters Description Security Y to enable User security N to disable User security Change Password Y to change the current password N to keep the current password Accept Y to accept changes N to reject changes If User Security is enabled, the Password Dialog appears. See Figure 4-98. Enter password : [0000] ^ Accept : Y Figure 4-98 Password Dialog After you enter the correct password, the Host Dialog appears. See Figure 4-99 on page 4-73. 4-72 Menus and Commands 6-00058-05 Rev A Security Enabled: N< Change Password: Y Accept: N Figure 4-99 Host Dialog If you enter an incorrect password, Invalid Password appears. See Figure 4-100. You must go back and enter the correct password. You did not enter a valid password. Figure 4-100 Invalid Password If you wish to change the password and if Change Password is Y, the Change Password dialog appears. See Figure 4-101. Change Password: Old[0000] New[0000] ^ Accept: N Figure 4-101 Change Password Dialog If you enter the old password and a new password, Password Changed appears. See Figure 4-102. The password has changed. Figure 4-102 September 2007 Password Changed Screen Setup Menu 4-73 I/E Security Path: Main Menu Security Note I/E Security may or may not have the same password as User Security. Setup Library Security I/E Use I/E Security to set the I/E security or change the password for the I/E stations. This security feature passwordprotects all I/E stations. If I/E Security is not enabled, I/E Security appears. See Figure 4-103. I/E Security On: N< Change Password: Y Accept: N Figure 4-103 I/E Security Parameters Description Security Y to enable I/E Security N to disable I/E Security Change Password Y to change the current password N to keep the current password Accept Y to accept changes N to reject changes If I/E Security is enabled, the Password Dialog appears. See Figure 4-104. Enter password : [0000] ^ Accept : N Figure 4-104 Password Dialog If you wish to change the password and if Change Password is Y, the Change Password dialog appears. See Figure 4-105 on page 4-75. 4-74 Menus and Commands 6-00058-05 Rev A Change Password: Old[0000] New[0000] ^ Accept: N Figure 4-105 Change Password Dialog Enter the old and new passwords and the Password Changed Screen appears. See Figure 4-106 The password has changed. Figure 4-106 Password Changed Screen If you disable security, the Security is Off screen appears. See Figure 4-107. Security is now OFF. Figure 4-107 Security is OFF Screen If you enable security, the Security is On Screen appears. See Figure 4-108. Security is now ON. Figure 4-108 September 2007 Security is ON Screen Setup Menu 4-75 Reset Passwords Path: Main Menu Passwords Note To reset passwords to default, contact GCH. Setup Library Security Reset Use Reset Password to reset all passwords to factory default. See Figure 4-109. Reset all passwords back to defaults? Accept: N Figure 4-109 Reset Password Parameters Note Description To Reset to default Y to reset passwords N to leave the password as it is The password default is factory setting. Accept Y to accept changes N to reject changes If Y is selected for the Accept parameter and the password parameter, the Reset Password Screen appears. See Figure 4-110 User password reset to original defaults. Figure 4-110 4-76 Menus and Commands Reset Password Dialog 6-00058-05 Rev A Media Dialog Path: Main Menu Setup Library Media Use the Media Dialog to control the settings for media handling and reporting. The host software must support device gaps if the library is operating in mixed mode. For example: uninstalled drive, cartridge, or I/E locations. See Figure 4-111. For additional information, refer to the Scalar 10K SCSI Reference Manual. Volser:Media ID< ID: POSTMixed :Y Extend: YASCQ :Y CODE39: NAccept: N Figure 4-111 Note If the value of the Media ID parameter is changed, an inventory is required. Media Dialog Parameters Description+ Volser MEDIA ID Media Identifier support is enabled. The library shall scan barcode media identifiers. This mode requires the use of sixcharacter barcodes with 1 or 2 byte media identifiers. DEFAULT indicates that the library supports six-character barcode labels, or mixed mode labels that have an additional seventh or eighth media ID character. The barcode is stored and reported as a sixcharacter barcode (ignoring any mixed-media IDs). EXTENDED indicates that the library supports five to sixteen character barcode labels, which may indicate any mixed-media IDs and/or checksums. ID PRE indicates that the media identifier is added to the front of the barcode label for RES and RVEA. POST indicates that the media Note In order for a Scalar DLC to work properly in a Dual Aisle configuration, the Volser parameter must be set to Media ID, Mixed must be set to Y, Extend must be set to Y, and ASCQ must be set to Y. Note If Media ID is not selected, Extend and ASCQ are set to N and ID is set to NONE. September 2007 Setup Menu 4-77 identifier is added to the end of the barcode label for RES and RVEA. NONE indicates that the media identifier is not used. Extend Y indicates that extended (Extend_RES) element descriptor status is enabled. Extended status is reported for RES and RVEA commands. N indicates that extended element descriptor status is disabled. CODE39 Y indicates the library supports Code 39 labels. N indicates the library does not support Code 39 labels. Mixed Y presents device gaps. Device elements are reported as consecutive element addresses regardless of being installed or not. N collapses device gaps. Not installed devices are not reported, and element addresses are only assigned to installed device elements. ASCQ Y use Quantum-specific ASC/ ASCQs. N use standard SCSI-2 ASC/ ASCQs. Accept Y to accept changes. N to reject changes. If Y is selected, the screen updates to reflect the changes. Otherwise, the changed parameters continue to display but no action is taken. 4-78 Menus and Commands 6-00058-05 Rev A Capacity Submenu Path: Main Menu Note Contact GCH to receive the authorization code. Setup Library Capacity Use the Capacity Submenu to view and change the authorized storage cells and drive limits for the library. See Figure 4-112. > Storage ... Figure 4-112 Capacity Submenu Refer to Storage Dialog below. September 2007 Setup Menu 4-79 Storage Dialog Path: Main Menu Setup Library Capacity Storage Use the Storage Dialog to view the authorized storage cell limits for each media type in the library. See Figure 4-113. LTO < Used:00123 Licensed:00700 Not Licensed: 00881 Change ? N Figure 4-113 Note The library only displays installed media types when you are toggling through the list of storage types. Storage Dialog Parameters Description Media Type Toggles through the installed media types (LTO, DLT, 8MM, Half Inch). Used Number of used cells in license. Licensed Displays the number of library storage cells that are currently accessible. Not licensed Displays the number of library storage cells that are not currently accessible. Change ? When the media type is selected for change, the library automatically displays the Enter Capacity Dialog. Proceed as follows to view the authorized storage cell limits: Step 1 Press Up arrow or Down arrow to toggle through the media types. As each media type appears, the authorized and remaining storage cells for that media type are displayed. 4-80 Menus and Commands Step 2 To change the number of authorized storage cells, press Enter to move the cursor to Change? Step 3 Select Y, press Return, and the Enter Capacity dialog appears. See Figure 4-114. 6-00058-05 Rev A Enter Capacity: [00000] ^ Accept: N Figure 4-114 Note The Up and Down arrows change a digit from 0 to 9. Enter accepts the changed digit then moves the cursor to the next digit. Continue until the new capacity has been entered. Enter Capacity Dialog Step 4 Enter the new capacity (enter leading zeros if necessary), and press Return. Step 5 To accept the new capacity select Y, press Return, and the Enter Authorization Code dialog appears. See Figure 4-115. Enter Code: [00000] ^ Accept: N Figure 4-115 Enter Authorization Code Dialog Step 6 Enter the five digit authorization code and press Return. Step 7 Select Y to Accept, press Return, and the Acceptance Screen appears. See Figure 4-116 on page 4-81. Size accepted. Figure 4-116 Acceptance Screen If the authorization code is inaccurate the Authorization Failed screen appears. See Figure 4-117. September 2007 Setup Menu 4-81 Authorization code failed. Figure 4-117 Step 8 Authorization Failed After the size is accepted, Go to Storage Dialog on page 4-80 to display the new library storage cell capacity. RMU Submenu Path: Main Menu Setup Library RMU The Scalar 10K is equipped with a Remote Management Unit (RMU) to access web-based library management via the Ethernet port. Use the RMU Submenu to set the initial values of the RMU network parameters for remote access. See Figure 4-118. >Host... IP... Figure 4-118 RMU Submenu Depending on your selection, refer to: 4-82 Menus and Commands • Host Dialog below • IP Dialog on page 4-83 6-00058-05 Rev A Host Dialog Path: Main Menu Setup Library RMU Host Use Host Dialog to define the host name for the RMU. See Figure 4-119. Host : webfoot20 Accept : N Figure 4-119 Host Dialog IP Dialog Path: Main Menu Setup Library RMU IP Use the IP Dialog to set the Internet Protocol (IP), Subnet and Gateway network addresses for library communication with the RMU. See Figure 4-120. IP : 100<100.100.100 Sub: 225.225.225.001 Gat: 100.100.100.100 Accept: N Figure 4-120 IP Dialog Parameters Description IP Indicates the IP address (four sets of numbers 0–255) Sub Indicates the Subnet address (four sets of numbers 0–255) Gat Indicates the Gateway (four sets of numbers 0–255) Accept Y to accept changes N to reject changes If Y is selected, the screen updates to reflect the changes. Otherwise, the changed parameters continue to display but no action is taken. September 2007 Setup Menu 4-83 More Submenu Path: Main Menu Setup Library More Use the More Submenu to view and change the advanced configuration, calibration, or cartridge parameters and the inventory parameters for the library. See Figure 4-121. >Advanced... Inventory... Figure 4-121 More Submenu Depending on your selection, refer to: • Advanced Dialog below • Inventory Dialog on page 4-86 Advanced Dialog Path: Main Menu Setup Library More Advanced Use the Advanced Dialog to enable or disable the automatic configuration, calibration, or cartridge scan when the library power has been cycled. See Figure 4-122 on page 4-84. If Auto Inventory is disabled, the element status is not known until the host issues an Initialize Status command or an Inventory is performed via the operator panel. If Auto Inventory is enabled, an automatic cartridge inventory is executed on each power cycle. Any changes in the Operating Mode parameter value should be made by authorized Service Personnel. The default is set to 2. Auto Teach :Y< Auto Inventory:N Operating Mode:00 Accept: N Figure 4-122 4-84 Menus and Commands Advanced Dialog 6-00058-05 Rev A Parameters Description Auto Teach Y to enable Auto Teach for automatic configuration and calibration on each power cycle. N to disable Auto Teach on each power cycle. Auto Inventory Y to enable Auto Inventory for automatic cartridge scanning inventory on each power cycle. N to disable Auto Inventory on each power cycle. Operating Mode 0 to select Normal mode of operation. In this mode, the library does not wait after a drive is reported to be ejected, and the library does not issue and EJECT command (these commands must be issued by the host application). 1 to select a 3 second delay before a Get operation is performed on a drive after detecting that a tape was ejected. 2 to allow the Scalar 10K to issue an UNLOAD command to the drive if the cartridge is not ejected by the host. This is the default setting. 3 to activate options 1 and 2. 4 to disable automatic cartridge recovery on PUT failures. 5 to activate options 1 and 4. 6 to activate options 2 and 4. 7 to activate options 3 and 4. Accept Y to accept changes. N to reject changes. If Y is selected, the screen updates to reflect the changes. Otherwise, the changed parameters continue to display but no action is taken. September 2007 Setup Menu 4-85 Inventory Dialog Path: Main Menu Setup Library More Inventory Use the Inventory Dialog to enable or disable the normal or enhanced inventory settings. See Figure 4-123 on page 4-86. The enhanced selection improves the inventory method for reverse printed labels. Inv Method : Enhanced < Accept : N Figure 4-123 Inventory Dialog Parameters Description Normal Y to enable Normal method. N to disable Normal method. Enhanced Y to enable Enhanced method. N to disable Enhanced method. Accept Y to accept changes. N to reject changes. If Y is selected to accept changes, the inventory method is saved and the previous screen displays. Otherwise, the changed parameters continue to display but no action is taken. 4-86 Menus and Commands 6-00058-05 Rev A Drives Submenu Path: Main Menu Setup Drives Use the Drives Submenu to modify a drive SCSI/loop ID, change the Tape Alert Notification setting, use the Tape Alert Notify Configuration Dialog, or view the Logical Serial Number. See Figure 4-124. ID... TA Notification... > TA Notify Config... Logical SN... Figure 4-124 September 2007 Drives Submenu Setup Menu 4-87 ID Dialog Path: Main Menu Setup Drives ID Use the ID Dialog to change a SCSI/loop ID of a new or current drive. See Figure 4-125. Note: If you change any settings, you must Vary Off and Vary On the drive to apply the new settings. Enter SOURCE Coord: D 08< 4 B 01 Index: DT 00038 Accept:N Figure 4-125 SCSI Drive Selection Parameters Description Coord The first field indicates the type of cell, D for Drive The second field indicates the rack number (01–16) The third field indicates the drive section (1–4) The fourth field indicates the column of the section (A or B) The fifth field indicates the row of the column (01–06) Index The device address associated with the selected coordinate parameter. DT = data transfer device. Accept Y to accept N to reject If Y is selected, the Drive Parameters appear. See Figure 4-126. Drive: DT 00001< [08-1-A-01] ID: 001 New ID: 001 Port : 1 Accept: N Figure 4-126 4-88 Menus and Commands Drive Parameters (Fibre Drive Example) 6-00058-05 Rev A Note Drive changes do not take place until the drive is activated. Parameters Description Drive Drive number and coordinate position ID Current SCSI/Loop ID of the drive New ID New SCSI/Loop ID of the drive Port Fibre channel port number. Not applicable for SCSI drives. Accept Y to accept changes N to reject changes If Y is selected and you are using SCSI drives, the SCSI Drive Selection screen reappears. If Y is selected and you are using fibre channel drives, the Continuation Screen appears. See Figure 4-127. Drive: DT00010 Speed: Auto Topology: Auto Port : 1 Accept:N Figure 4-127 Continuation Screen Parameters Description Drive Drive number and coordinate position Speed Data rate (Auto, 1 GB, 2 GB) Auto: The library auto negotiates the data transfer rate. 1 GB: 1 Gigabit/sec 2 GB: 2 Gigabit/sec Topology Method of connecting to fibre (Auto, Loop, Nport) Port Fibre channel port number Accept Y to accept changes N to reject changes If Y is selected and you are using single port fibre channel drives, the Fibre Drive Selection screen reappears. September 2007 Setup Menu 4-89 If Y is selected and you are using dual port fibre channel drives, the Continuation Screen appears for the second fibre channel port. See Figure 4-128 on page 4-90. Drive: DT 00001< [08-1-A-01] ID: 000 New ID: 000 Port : 2 Accept: N Figure 4-128 Note Drive changes do not take place until the drive is activated. Drive Parameters Screen (Port 2) Parameters Description Drive Drive number and coordinate position ID Current SCSI/Loop ID of the drive New ID New SCSI/Loop ID of the drive Port Fibre channel port number Accept Y to accept changes N to reject changes If Y is selected, the Continuation Screen appears for the second fibre channel port. See Figure 4-127. Drive: DT00010 Speed: Auto Topology: Auto Port : 2 Accept:N Figure 4-129 Continuation Screen (Port 2) Parameters Description Drive Drive number and coordinate position Speed Data rate (Auto, 1 GB, 2 GB) Auto: The library auto negotiates the data transfer rate. 1 GB: 1 Gigabit/sec 2 GB: 2 Gigabit/sec 4-90 Menus and Commands 6-00058-05 Rev A Topology Method of connecting to fibre (Auto, Loop, Nport) Port Fibre channel port number Accept Y to accept changes N to reject changes Tape Alert Notification Dialog Path: Main Menu Setup Drives TA Notification Use the TA Notification Dialog to disable or enable the reporting of tape alerts. See Figure 4-130. TA Notification: Y< . Accept: Figure 4-130 N Tape Alert Notification Dialog Parameters Description TA Notification Y to enable the reporting of tape alerts N to disable the reporting of tape alerts Accept September 2007 Y to accept changes N to reject changes Setup Menu 4-91 Tape Alert Notify Configuration Dialog Path: Main Menu Setup Drives TA Notify Config Use the TA Notify Configuration Dialog to disable or enable specific tape alerts. See Figure 4-131. 1 Read Warning N 2 Write Warning N 3 Hard Error N Deflt :N Save :N Sel < Figure 4-131 Tape Alert Notify Configuration Dialog Parameters Description TA Notification Y to enable the reporting of the selected tape alert N to disable the reporting of the selected tape alert Deflt Y to accept default settings N to reject default settings Save Y to save settings N to reject settings Use the Enter key to select a tape alert or save option and the arrow keys to toggle between Y and N. Table 4-1 lists the specific tape alerts that can be disabled or enabled for posting to the operator panel. Tape alert names with an asterisk (*) indicate the default tape alerts posted to the operator panel by the library unless changed. Table 4-1 Tape Alerts TA 4-92 Name TA Name 1 Read Warning 2 Write Warning 3 Hard Error 4 * Media 5 * Read Failure 6 * Write Failure 7 Media Life 8 Not Data Grade 9 * Write Protect 10 No Removal 11 Cleaning Media 12 Unsupported Format 13 Recoverable Snapped Tape 14 * Unrecoverable Snapped Tape Menus and Commands 6-00058-05 Rev A Table 4-1 Tape Alerts TA September 2007 Name TA Name 15 Memory Chip in Cartridge Failure 16 Forced Eject 17 Read Only Format 18 Tape Directory Corrupted on Load 19 Nearing Media Life 20 * Clean Now 21 Clean Periodic 22 * Expired Cleaning Media 23 Invalid Cleaning Tape 24 Retention Requested 25 Dual-Port Interface Error 26 * Cooling Fan Failure 27 Power Supply 28 Power Consumption 29 Drive Maintenance 30 * Hardware A 31 * Hardware B 32 Interface 33 * Eject Media Failure 34 Download Fail 35 Drive Humidity 36 Drive Temperature 37 * Drive Voltage 38 * Predictive Failure 39 Diagnostics Required 40 Library Hardware A 41 Library Stray Tape 42 Library Hardware B 43 Library Door 44 Library Hardware C 45 Library Cartridge 46 Library Predictive Failure 47 Not Used 48 Not Used 49 Not Used 50 Lost Statistics 51 Tape Directory Invalid at Unload 52 * Tape System Area Write Failure 53 * Tape System Area Read Failure 54 No Start of Data 55 * Load Failure 56 Unrecoverable Unload Failure 57 Library Interface Failure 58 Firmware Failure 59 WORM Medium Integrity Check Failed 60 WORM Medium Overwrite Attempted 61 Not Used 62 Not Used 63 Not Used 64 Not Used Setup Menu 4-93 Logical Serial Number Path: Main Menu Note When enabling or disabling the logical serial number, the library must be power cycled before the change is reflected in the library. Setup Drives Logical SN Use the Logical SN Dialog to enable or disable the assignment of a logical serial number to a drive that will always be the same for that drive position in the library. The logical serial number is the last 9 digits of the world wide name assigned to the drive slot, preceded by the character “F”. LTO-1, LTO-2, LTO-3, and LTO-4 drives support logical serial numbers. Logical SN: Y< . Accept: Figure 4-132 Note N Logical Serial Number Dialog Parameters Description Logical SN Y to assign a logical serial number. When enabled, the logical serial number replaces the manufacturer’s serial number. N to disable the logical serial number assignment. Cleaning Submenu Path: Main Menu Setup Cleaning Use the Cleaning Submenu to select how and when you want to clean your drive. See Figure 4-133. > Drives... Media... View... Figure 4-133 Cleaning Submenu Depending on your selection, refer to: 4-94 Menus and Commands • Drives Dialog on page 4-96 • Media Dialog on page 4-97 6-00058-05 Rev A • View Dialog on page 4-98 IE Station Submenu Path: Main Menu Setup IE Station. Use this option to enable or disable the Touch Teach setting at the I/E stations, if necessary. See Figure 4-134. IE Touch Teach: Y< Accept: N Figure 4-134 IE Station Submenu Parameters Description IE Touch Teach Y to enable the Touch Teach option at IE stations. N to disable the Touch Teach option at IE stations. September 2007 Setup Menu 4-95 Drives Dialog Path: Main Menu Setup Cleaning Drives Use the Drives Dialog to select automatic, or scheduled (specifying a time) for cleaning your drives. See Figure 4-135. AutoClean:Y< Schedule: Delayed Hours: 00Min :00 Accept:: N Figure 4-135 Note Drives Dialog Parameters Description AutoClean Y to enable automatic drive cleaning N to reject automatic drive cleaning Schedule Immediate to allow drive cleaning when requested by the drive Delayed to schedule drive cleaning for requesting drives at the specified time Hours Hour (00–23) that cleaning should start Min Minute (0–59) that cleaning should start Accept Y to accept changes N to reject changes If Immediate cleaning is selected, no time values can be entered. If Y is selected, the screen updates to reflect the changes. Otherwise, the changed parameters continue to display but no action is taken. 4-96 Menus and Commands 6-00058-05 Rev A Media Dialog Path: Main Menu Setup Cleaning Media Use the Media Dialog to specify the barcode number to choose a cleaning tape of a specific media in the library. See Figure 4-136 on page 4-97. A BC mask is a valid, partial barcode label that can be followed by a wildcard character (*). barcode labels that match the mask are moved as cleaning tapes. The BC mask must not match more than a maximum of 127 cleaning tapes. Media Type: LTO BC : AAAAAA ^ Continue: N Figure 4-136 Media Dialog Parameters Description Media Type Selects the medium type BC Indicates the BC mask of the cleaning cartridge(s) Continue Y to accept changes N to reject changes If Y is selected for the Continue parameter value, the Usage Dialog appears. See Figure 4-137. Otherwise, the changed parameters continue to display but no action is taken. Current Use: 000< Maximum Use: 000 Accept: N Figure 4-137 Note If the BC mask selects more than one cleaning tape, the current and maximum usage parameter values are applied to each cleaning tape. September 2007 Usage Dialog Parameters Description Current Usage Specifies the number of times the cleaning cartridge has been used (000–511) Maximum Usage Specifies the number of times the cleaning cartridge can be used (000–511) Setup Menu 4-97 Accept Y to accept changes N to reject changes If Y is selected, the screen updates to reflect the changes. Otherwise, the changed parameters continue to display but no action is taken. View Dialog Path: Main Menu Setup Cleaning View Use the View Dialog to see how much a specific cleaning tape has been used. See Figure 4-138. BC: CLN001 Status: Reset Max: 000 Count: 000 Index: 001<RESET: N Figure 4-138 View Dialog Parameters Description BC Indicates the cleaning tape barcode label Status Expired: Cleaning tape has expired Missing: Configured cleaning tape is not present within the library Reset: Cleaning tape not configured Valid: Cleaning tape is configured and is usable Max Indicates the maximum allowed usage count (000–511) Count Indicates the current usage count Index Indicates the current cleaning tape database index RESET Y to accept changes N to reject changes If Y is selected for the Reset parameter value, the changed parameter values are accepted. Otherwise, the changed parameters continue to display but no action is taken. 4-98 Menus and Commands 6-00058-05 Rev A Utils Menu Path: Main Menu Utils Use the Utils Menu to perform library utilities. For example, set screen controls or date and time. See Figure 4-139. >Library Drives Towers Figure 4-139 Utils Menu Depending on your selection, refer to: • Library Submenu below • Drives Submenu on page 4-106 • Towers Submenu on page 4-38 Library Submenu Path: Main Menu Utils Library Use the Library Submenu to set your operator panel parameters, change passwords, enable the audio alarm, or set the time and date. See Figure 4-140. > Screen... Audio... Time... Snap Shot Figure 4-140 Date... Speed... Lights... Library Submenu Depending on your selection, refer to: September 2007 • Screen Dialog on page 4-100 • Audio Dialog on page 4-102 • Time Dialog on page 4-103 • Snap Shot Screen on page 4-104 • Date Dialog on page 4-104 • Speed Dialog on page 4-105 • Lights Dialog on page 4-105 Utils Menu 4-99 Screen Dialog Path: Main Menu Utils Library Screen Use the Screen Dialog to control the operator panel LCD screen. See Figure 4-141. Backlight Enable: Y< Use Screen Saver: N Accept: N Figure 4-141 Screen Dialog Parameters Description Backlight Enable Y to enable LCD backlighting N to disable LCD backlighting Use Screen Saver Y to enable the screen saver N to disable the screen saver Accept Y to accept changes N to reject changes If Y is selected for Use Screen Saver and Accept parameters, the Timeout Value Dialog appears. See Figure 4-142. Otherwise, the screen returns to the Library Submenu. See Figure 4-140 on page 4-99. Timeout Value: 30< Password Enable: N Accept: N Figure 4-142 Note Password enable can change from Y to N only if a password was previously set. 4-100 Menus and Commands Timeout Value Dialog Parameters Description Timeout Value 10–60 minutes (default = 30) Password enable Y to enable a screen saver password N to disable a screen saver password Accept Y to accept changes N to reject changes If Password enable changes from N to Y or Y to N and Accept changes to Y, the Password Dialog appears. See 6-00058-05 Rev A Figure 4-143. Otherwise, the screen returns to the Library Submenu. See Figure 4-140 on page 4-99. Enter password: [0000] ^ Accept: N Figure 4-143 Password Dialog Parameters Description Password Selects the password (0000–9999) Accept Y to accept changes N to reject changes If Y is selected while the Password enable is set to Y, the password is changed. See Figure 4-144. The password has been changed. Figure 4-144 Password Change Dialog Otherwise, if Y is selected while the Password enable is set to N, the password protection is removed. If the password is entered incorrectly, the following Invalid Dialog appears. See Figure 4-145. You did not enter a valid password Figure 4-145 Invalid Password Dialog Press the September 2007 button to return to the Password Dialog. Utils Menu 4-101 Audio Dialog Path: Main Menu Utils Library Audio Use the Audio Dialog to enable or disable the audio alarm. See Figure 4-146. Audio Enabled: Y< Accept: Figure 4-146 N Audio Dialog Parameters Description Audio Enable Y to enable audio N to disable audio Accept Y to accept changes N to reject changes If Y is selected, the screen updates to reflect the changes. Otherwise, the changed parameters continue to display but no action is taken. 4-102 Menus and Commands 6-00058-05 Rev A Time Dialog Path: Main Menu Utils Library Time Dialog Use the Time Dialog to set the library 24 hour time format. See Figure 4-147. The library does not automatically adjust for Daylight Savings Time. Hour:23< Min :24 Sec :25 Accept: N Figure 4-147 Time Dialog Parameters Description Hour Displays the hour of the day (00–23) Min Displays the minute of the hour (00–59) Sec Displays the second of the minute (00–59) Accept Y to accept changes N to reject changes If Y is selected, the screen updates to reflect the changes. Otherwise, the changed parameters continue to display but no action is taken. September 2007 Utils Menu 4-103 Snap Shot Screen Path: Main Menu Utils Library Snap Shot Use Snap Shot to capture the current operating state of the library to include, database, log, parameter, and trace information. The Snap Shot may be retrieved by a SCSI READ BUFFER command. See Figure 4-148. The Code Snap Shot is now completed. Figure 4-148 Snapshot Response Screen Date Dialog Path: Main Menu Utils Library Date Use the Date Dialog set the library date. See Figure 4-149. Year :01< Month:02 Day: 16 Accept: N Figure 4-149 Date Dialog Parameters Description Year Displays the last two digits of the year (00–99) Month Displays the two digits of the month (01–12) Day Displays the two digits of the day (01–31) Accept Y to accept changes N to reject changes If Y is selected, the screen updates to reflect the changes. Otherwise, the changed parameters continue to display but no action is taken. 4-104 Menus and Commands 6-00058-05 Rev A Speed Dialog Path: Main Menu Utils Library Speed Use the Speed Dialog to change the current operating speed of the accessor. The accessor speed automatically increases or decreases as the frequency of motion commands is greater than or less than certain thresholds. See Figure 4-150. Accessor Speed : NORM< Accept: N Figure 4-150 Accessor Speed Screen Parameters Description Accessor Speed NORM to run at the normal speed MED to run at 90% of normal SLOW to run at a slower speed Accept Y to accept changes N to reject changes Lights Dialog Path: Main Menu Utils Library Lights Use the Lights Dialog to change the time setting for the aisle lights. See Figure 4-151. Aisle Light Time On Duration: 2 Hrs Accept: Y< Figure 4-151 September 2007 Lights Screen Parameters Description Duration Value Indicates how many hours the lights are to be on. (2, 4 , 6, 8, or Always). 2 hours is the default value. Accept Y to accept changes N to reject changes Utils Menu 4-105 Drives Submenu Path: Main Menu Utils Drives Use the Drives Submenu to change drive status or operations. See Figure 4-152. Status Change Operations Figure 4-152 Drives Submenu Depending on your selection, refer to: • Status Change Submenu on page 4-106 • Operations Submenu on page 4-111 Status Change Submenu Path: Main Menu Utils Drives Status Change Use the Status Change Submenu to prepare the drive for use or to remove the drive from service. See Figure 4-153. > Initialize Activate... Vary Off... Vary On... Figure 4-153 Status Change Submenu Depending on your selection, refer to: 4-106 Menus and Commands • Initialize Dialog below • Activate Dialog on page 4-108 • Vary Off Dialog on page 4-109 • Vary On Dialog on page 4-110 6-00058-05 Rev A Initialize Dialog Path: Main Menu Initialize Utils Drives Status Change Use the Initialize Dialog to prepare the drive for use. This dialog checks all drives for power and SCSI IDs. See Figure 4-154 and Figure 4-155. Requested command is now in progress. Figure 4-154 Initialize Dialog Requested command is now complete. Figure 4-155 September 2007 Command Complete Screen Utils Menu 4-107 Activate Dialog Path: Main Menu Activate Utils Drives Status Change Use the Activate Dialog to select and use any drive in the library. See Figure 4-156. Enter SOURCE Coord:D 03 1 A01< Index:DT 00001 Accept: N Figure 4-156 Activate Dialog Parameters Description Coord The first field indicates the type of cell (D for Drive) The second field indicates the rack number (01–4) The third field indicates the drive bay section (1–4) The fourth field indicates the column of the section (A–B) The fifth field indicates the row of the column (01–6) Index The device address associated with the selected coordinate parameter Accept Y to accept N to reject The Activate Drive Screen appears. See Figure 4-157. Refer to Initialize Dialog on page 4-107, Vary Off Dialog on page 4-109, or Vary On Dialog on page 4110. Drive:DT00001 [03-1-A-01] Status:PRESENT Activate:SKIP< Figure 4-157 4-108 Menus and Commands Activate Drive 6-00058-05 Rev A Parameters Description Drive The device address associated with the selected coordinate Status PRESENT, OFFLINE, ONLINE, or NOT PRESENT Activate ON to activate OFF to deactivate SKIP to skip the drive Vary Off Dialog Path: Main Menu Off Note Power off the drive to change the drive. Utils Drives Status Change Vary Use the Vary Off Dialog to notify the library that the selected drive is not available for use. See Figure 4-158. Enter SOURCE Coord: D 08< 4 B 01 Index: DT 00038 Accept:N Figure 4-158 Note When a Vary Off command is performed on a drive that is not working properly, the library might post a SAC A4 error. This is an indication of a sled that has stopped communicating. See Table 6-2 on page 6-15 for more information on the SAC A4 error. September 2007 Vary Off Dialog Parameters Description Coord The first field indicates the type of cell (D for Drive) The second field indicates the rack number (01–16) The third field indicates the drive bay section (1–4) The fourth field indicates the column of the section (A–B) The fifth field indicates the row of the column (01–6) Index The device address associated with the selected coordinate parameter Accept Y to accept N to reject Utils Menu 4-109 Vary On Dialog Path: Main Menu On Utils Drives Status Change Vary The Vary On dialog appears only if a drive has been varied off previously. The Status is always OFFLINE. If multiple drives are varied off, you can scroll to choose which drive to Vary On. Otherwise, the only choice is to accept or reject the status of the drive. Use the Vary On Dialog to notify the library that the selected drive is available for use. The library scans, teaches, and activates the selected drive. See Figure 4-159. Drive:DT00001< [03-1-A-01] Status:OFFLINE Accept:N Figure 4-159 4-110 Menus and Commands Vary On Dialog Parameters Description Drive The device address associated with the selected coordinate parameter Status PRESENT, OFFLINE, ONLINE, or NOT PRESENT Accept Y to accept N to reject 6-00058-05 Rev A Operations Submenu Path: Main Menu Utils Drives Operations Use the Operations Submenu to update the microcode or perform various drive functions. See Figure 4-160. > Update Microcode... Clean... Unload... Dismount... Figure 4-160 Operations Submenu Depending on your selection, refer to: September 2007 • Update Microcode Dialog on page 4-112 • Clean Drives Dialog on page 4-114 • Unload Drives Dialog on page 4-116 • Dismount Drives Dialog on page 4-118 Utils Menu 4-111 Update Microcode Dialog Path: Main Menu Microcode Utils Drives Operations Update Use the Update Microcode Dialog to initiate a drive firmware update. See Figure 4-161. The operator must determine the location coordinate and index of the firmware update tape prior to following this procedure. Enter SOURCE Coord: S 01< 1 A 01 Index: ST 00001 Accept : N Figure 4-161 Update Microcode Dialog Parameters Description Coord The first field indicates the type of cell (D for Drive) The second field indicates the rack number (01–16) The third field indicates the drive bay section (1–4) The fourth field indicates the column of the section (A–B) The fifth field indicates the row of the column (01–6) Index The device address associated with the selected coordinate parameter Accept Y to accept N to reject If Y is selected, the Starting Drive and Ending Drive screens appear. See Figure 4-162 on page 4-113 and Figure 4-163 on page 4-113. 4-112 Menus and Commands 6-00058-05 Rev A Enter Starting Drive Coord: D 03< 1 A 01 Index: ST 00001 Accept : N Figure 4-162 Starting Drive Enter Ending Drive Coord: D 03< 1 A 01 Index: ST 00001 Accept : N Figure 4-163 Ending Drive If Y is selected, the Update Microcode screen appears and shows the drive location of the drive being updated. See Figure 4-164. Otherwise, the changed actions continue to display but no action is taken. -UPDATE MICROCODEDrive: D31A1 Status: Running Cancel: N< Figure 4-164 Update Microcode Screen Parameters Description Status Running indicates that the current command is in progress Completed indicates the firmware on all the drives in the cycle has been updated. Canceled indicates the cycle has been canceled ERROR! indicates an error has occurred Cancel Y to cancel the cycle N to continue the cycle If Y is selected for the Cancel parameter, the cycle is canceled and the Cancel parameter does not appear. September 2007 Utils Menu 4-113 Clean Drives Dialog Path: Main Menu Drives Utils Drives Operations Clean Use the Clean Drives Dialog to initiate a drive cleaning operation. See Figure 4-165. Enter TARGET Coord: D< 03 1 A 05 Index: DT 00009 Accept: N Figure 4-165 Clean Drives Dialog Parameters Description Coord The first field indicates the type of cell (D for Drive) The second field indicates the rack number (01–4) The third field indicates the storage cell section (1–4) The fourth field indicates the column of the section (A–B) The fifth field indicates the row of the column (01–6) Index The device address associated with the selected coordinate parameter Accept Y to accept N to reject If Y is selected, the Progress Screen appears, followed by the Response Screen. See Figure 4-166 on page 4-115 and Figure 4-167 on page 4-115. Otherwise, the changed actions continue to display but no action is taken. 4-114 Menus and Commands 6-00058-05 Rev A Requested command is now in progress ... Figure 4-166 Progress Screen Requested command is now complete. Figure 4-167 September 2007 Response Screen Utils Menu 4-115 Unload Drives Dialog Path: Main Menu Drives Utils Drives Operations Unload Use the Unload Drives dialog to eject a tape from the specified drive. See Figure 4-168. Enter SOURCE Coord: D 04< 1 A 03 Index: 00063 Accept: N Figure 4-168 Unload Drives Dialog Parameters Description Coord The first field indicates the type of cell (D for Drive) The second field indicates the rack number (01–16) The third field indicates the drive bay section (1–4) The fourth field indicates the column of the section (A–B) The fifth field indicates the row of the column (01–6) Index The device address associated with the selected coordinate parameter Accept Y to accept N to reject If Y is selected, the Progress Dialog followed by the Response Dialog appears. See Figure 4-169 on page 4117 and Figure 4-170 on page 4-117. Otherwise, the changed actions continue to display but no action is taken. 4-116 Menus and Commands 6-00058-05 Rev A Requested command is now in progress. Accepted: N Figure 4-169 Progress Dialog Requested command is now complete. Figure 4-170 September 2007 Response Dialog Utils Menu 4-117 Dismount Drives Dialog Path: Main Menu Drives Utils Drives Operations Dismount Use the Dismount Drives dialog to eject a tape from the specified drive and bring it back to its home position. See Figure 4-171. Enter Starting Drive Coord: D 04< 1 A 03 Index: DT 00063 Accept: N Figure 4-171 Starting Drive Parameters Description Coord The first field indicates the type of cell (D for Drive) The second field indicates the rack number (01–16) The third field indicates the drive bay section (1–4) The fourth field indicates the column of the section (A–B) The fifth field indicates the row of the column (01–6) Index The device address associated with the selected coordinate parameter Accept Y to accept N to reject If Y is selected, the Ending Drive Dialog, Progress Dialog, and Response Dialog appear. See Figure 4-172, Figure 4-173, and Figure 4-174. Otherwise, the changed actions continue to display but no action is taken. 4-118 Menus and Commands 6-00058-05 Rev A Enter Ending Drive Coord: D 04< 1 A 03 Index: DT 00063 Accept: N Figure 4-172 Ending Drive --DISMOUNTING DRIVES-Drive: 41A3 Status: Running Cancel: N Figure 4-173 Progress Dialog --DISMOUNTING DRIVES-Count: xx Status: Completed Figure 4-174 September 2007 Response Dialog Utils Menu 4-119 Towers Submenu Path: Main Menu Utils Towers Use the Towers Submenu to initialize or change the status of the selected tower. See Figure 4-175. > Status Change... Initialize... Figure 4-175 Towers Submenu Depending on your selection, refer to: • Status Change Dialog below • Initialize Dialog on page 4-122 Status Change Dialog Path: Main Menu Utils Towers Status Change Use the Status Change to change who has access to the tower, the library or the user. See Figure 4-176. Tower: 01 LTO< Mode: LIBRARY State: READY Accept: N Figure 4-176 4-120 Menus and Commands Set Status Dialog Parameters Description Tower Displays the tower rack number, media type of the installed towers (01–16), and ”DUAL“ if the tower is shared on a dual aisle system. Mode Displays the mode of the tower (LIBRARY, SERVICE, USER) State Displays the state of the tower (READY, NOT READY) Accept Y to accept the changes N to reject the changes 6-00058-05 Rev A If Y is selected, the current parameter values are accepted. Otherwise the changed parameter values continue to be displayed, and no action is taken. If SERVICE or USER mode is selected, TOWER MODE CHANGE appears. See Figure 4-177. TOWER MODE CHANGE This selection will prevent host access. Continue: N < Figure 4-177 Tower Mode Change If Continue is accepted the following displays appear. Otherwise the changed parameter values continue to be displayed, and no action is taken. See Figure 4-178 and Figure 4-179. Requested command is now in progress. Figure 4-178 Tower Return Dialog Inventory Tower: 01? Accept: N < Figure 4-179 Inventory Tower If Y is selected, the tower inventory begins. Otherwise the changed parameter values continue to be displayed, and no action is taken. September 2007 Utils Menu 4-121 Initialize Dialog Path: Main Menu Utils Towers Initialize Use the Initialize Dialog to provide power to all towers and send the towers to the home position. See Figure 4-180, Figure 4-181, and Figure 4-182. Requested command is now in progress. Figure 4-180 Initialize Dialog Requested command is now complete. Figure 4-181 Command Complete Inventory Towers? Accept: N < Figure 4-182 Inventory Tower If Y is selected, the tower inventory begins. 4-122 Menus and Commands 6-00058-05 Rev A Service Menu Path: Main Menu Service Use the Service Menu to select library diagnostics or exercisers. These options should only be used by trained service representatives or administrators. See Figure 4-183. > Start... Diags Teach SAC... Figure 4-183 Demo... Advanced Service Menu Depending on your selection, refer to: • Start Dialog below • Diags Submenu on page 4-125 • Teach Submenu on page 4-156 • SAC Dialog on page 4-168 • Demo Dialog on page 4-169 • Verify Submenu on page 4-171 • Advanced Submenu on page 4-172 Start Dialog Path: Main Menu Note You can press escape to display the last SAC code. Service Start Use the Start dialog to check and reset Preventative Maintenance (PM) SAC codes. The Dialog flow is either Start Dialog with No Errors or Start Dialog with Errors (displays the last SAC Code). See Figure 4-184. PM Due: 01/06/01 X Remain: 000499974 Y Remain: 000499879 Reset PM values?N< Figure 4-184 Preventive Maintenance Due Dialog Parameters Description Reset PM values Y to reset PM values N to keep PM values If Y is selected for the Reset PM values parameter value, the Confirm Change Dialog is displayed. September 2007 Service Menu 4-123 See Figure 4-185. Otherwise, the flow continues with either the Start Dialog with No Errors, see Figure 4186, or the Start Dialog with Errors, see Figure 4-187. Confirm change?N< Figure 4-185 Note Confirm Change Dialog Parameters Description Confirm change Y to accept changes to PM values N to reject changes to PM values If Y is selected for the Confirm Change parameter value and no errors were present, the Start Dialog with No Errors is displayed. See Figure 4-186. Press the button or the button to If Y is selected for the Confirm Change parameter value and recent errors were present, the Start Dialog with Errors is displayed. See Figure 4-187 on page 4-125. This option provides information for a service call. scroll between SAC values. The Service Action Code (SAC) is based on the displayed error code. Refer to Service Action Codes on page 6-11 for additional information. Refer to document number 600418, Scalar 10K Maintenance Manual for a course of action related to the displayed SAC. If N is selected for the Confirm Change parameter value, the Preventative Maintenance Due is displayed. There are no more SACs to report Figure 4-186 4-124 Menus and Commands Start Dialog with No Errors 6-00058-05 Rev A Found SAC at: 02/05/01 14:04:38.68 SAC : E1 Error: 0x07110301 Figure 4-187 Start Dialog with Errors Diags Submenu Path: Main Menu Note Diagnostics are grouped according to functional areas. Service Diags Use the Diags Submenu to run library diagnostics. See Figure 4-188. > Accessor Gripper Scanner Tower Figure 4-188 DI/DO SelfTest... P/S Diags Submenu Depending on your selection, refer to: September 2007 • Accessor Submenu on page 4-126 • Gripper Submenu on page 4-129 • Scanner Submenu on page 4-136 • Tower Submenu on page 4-140 • DI/DO Submenu on page 4-143 • Self Test Dialog on page 4-151 • P/S Submenu on page 4-152 Service Menu 4-125 Accessor Submenu Path: Main Menu Service Diags Accessor Use the Accessor Submenu to move the accessor. See Figure 4-189. >Move... Step... Trace... Figure 4-189 Accessor Submenu Depending on your selection, refer to: 4-126 Menus and Commands • Move Dialog below • Step on page 4-128 • Trace on page 4-129 6-00058-05 Rev A Move Dialog Path: Main Menu Service Diags Accessor Move Use the Move dialog to move the accessor in a figure eight pattern without accessing cartridges. See Figure 4-190. The accessor test does corner moves. Cycles to run:009< Accept: N Figure 4-190 Move Dialog Parameters Description Cycles to Run Indicates the desired cycle count (001–999) Accept Y to accept changes N to reject changes If Y is selected, the Response Screen appears. See Figure 4-191 on page 4-127. Otherwise, the changed parameters continue to display but no action is taken. DIAGS ACCESSOR TEST Cycle :006 of 009 Status:Running Cancel: N< Figure 4-191 Note If the operation stops, the Cancel parameter no longer displays. Response Dialog Parameters Description Cancel Y to cancel the test. N to continue running the test. Cycle Displays the number of completed test cycles of the requested cycles Status Displays the status of the selected cycle (Running, completed, Error, Cancelled) Cancel Y to cancel the test. N to continue running the test. If Y is selected for the Cancel parameter value, the test is canceled. Otherwise, the test continues. September 2007 Service Menu 4-127 Step Path: Main Menu Service Diags Accessor Step Use Step to provide low level accessor control. The option should be used only by trained service personnel. See Figure 4-192. This test should be used by trained personnel ONLY! Continue: N< Figure 4-192 Note There is a .3mm tolerance for each x-axis or y-axis step.The Step screen display does not show the exact step movement. Step Screen Parameters Description Continue Y to continue the test. N to cancel the test If Y is selected for the Continue parameter value, the Response Screen appears. See Figure 4-193. Use Arrows to Move X axis : 1057.9mm< Y axis : 0000.0mm Amount : 001.0mm Figure 4-193 4-128 Menus and Commands Movement Screen Parameters Description X axis Displays X axis location Y axis Displays Y axis location Amount Displays the move step distance (1, 10–100 mm) 6-00058-05 Rev A Trace Path: Main Menu Service Diags Accessor Trace Use Trace to monitor the following error of the accessor motors and print the error information to the library trace. The option should be used only by trained service personnel. See Figure 4-194. DIAGS ACCESSOR TRACE Speed: NORMAL< Accept: N Figure 4-194 Accessor Trace Screen Parameters Description Speed NORMAL, MEDIUM, or SLOW. The speed cannot be faster than the system setting Gripper Submenu Path: Main Menu Service Diags Gripper Use the Gripper Submenu to select Get/Put actions for storage or a drive. See Figure 4-195. > Get/Put Storage... Get/Put Drives... Step... Test... Figure 4-195 Gripper Submenu Depending on your selection, refer to: September 2007 • Get/Put Storage Dialog below • Get/Put Drives Dialog on page 4-133 • Step Dialog on page 4-135 • Test Dialog on page 4-136 Service Menu 4-129 Get/Put Storage Dialog Path: Main Menu Storage Service Diags Gripper Get/Put Use the Get/Put Storage Dialog to start an in place get and put of all cartridges in a specified range. No element to element movements are allowed. See Figure 4-196. The gripper test will get/put media Cycles to run:009< [more] Figure 4-196 Get/Put Storage Dialog Parameters Description Cycles to run Displays the number of cycles to run (1–999) [more] More selections on the Continuation Dialog When [more] is selected, the Continuation Dialog appears. See Figure 4-197 on page 4-130. Enter SOURCE Coord: S 01< 1 A 01 Index: DT 00001 Accept: N Figure 4-197 Continuation Dialog Parameters Description Coord The first field indicates the type of cell (D for Drive) The second field indicates the rack number (01–16) The third field indicates the storage cell section (1–4) 4-130 Menus and Commands 6-00058-05 Rev A The fourth field indicates the column of the section (A–B) The fifth field indicates the row of the column (01–6) Index The device address associated with the selected coordinate parameter Accept Y to accept N to reject If Y is selected, the Number of Elements Dialog appears. See Figure 4-198. Otherwise, the changed parameters continue to display but no action is taken. Number of Elements to Get/Put :0100 Accept : N Figure 4-198 Number of Elements Dialog Parameters Description Get/Put Selects the number of elements where get/put operations are applied (0000–1181) Accept Y to accept changes N to reject changes If Y is selected, the Response Dialog appears. See Figure 4-199. Otherwise, the changed parameters continue to display but no action is taken. DIAGS GRIPPER TEST Cycle :006 of 009 Status:Running Cancel: N< Figure 4-199 September 2007 Response Dialog Service Menu 4-131 Note If the operation stops, the Cancel parameter no longer displays. 4-132 Menus and Commands Parameters Values Cycle The number of completed test cycles of the requested cycles Status Shows the status of the indicated cycle (Running, Completed, Error, Canceled) Cancel Y to cancel the test. N to continue running the test. If Y is selected for the Cancel parameter value, the test is canceled. Otherwise, the test continues. 6-00058-05 Rev A Get/Put Drives Dialog Path: Main Menu Drives Service Diags Gripper Get/Put Use the Get/Put Drives dialog to perform a get and put of all cartridges in a specified range to a specific drive. See Figure 4200. Drives to be tested must have a cartridge loaded. If no cartridge is loaded in the drive, the drive will be skipped during the test. The gripper test will get/put media Cycles to run:009< [more] Figure 4-200 Get/Put Drives Dialog Parameters Description Cycles to run Displays the number of cycles to run (1–999) [more] More selections on the Continuation Dialog When [more] is selected, the Continuation Dialog appears. See Figure 4-201. Enter SOURCE Coordinate : D 01 1< A 01 Index : 00001 Accept : N Figure 4-201 Continuation Dialog Parameters Description Coord The first field indicates the type of cell (I for I/E Station, D for Drive, S for Storage cell) The second field indicates the rack number (01–16) The third field indicates the storage cell section (1–5) September 2007 Service Menu 4-133 The fourth field indicates the column of the section (A–P) The fifth field indicates the row of the column (01–15) Index The device address associated with the selected coordinate parameter: DT = data transfer device IE = insert/eject device ST = storage device Accept Y to accept N to reject If Y is selected, the Number of Drives Dialog appears. See Figure 4-202. Otherwise, the changed parameters continue to display but no action is taken. Number of Drives to Get/Put :0010< Accept : N Figure 4-202 Number of Drives Dialog Number of Drives refers to possible drive slot locations, not the actual number of drives that exist. If the source coordinate is D 01 1 A 01, and 12 is entered at the Number of Drives screen, any drives that are present in drive bay 1 and loaded with a cartridge will be included in the test. Twelve is the maximum number of drive slots available in drive bay 1. Note Counts forward from the selected drive position to the last drive position. Does not count any drives prior to the selected drive position. 4-134 Menus and Commands Parameters Description Get/Put Selects the number of drives to apply the Get/Put operation (0000–0648 for all drives) Accept Y to accept changes N to reject changes If Y is selected, the Response Dialog appears. See Figure 4-203. Otherwise, the changed parameters continue to display but no action is taken. 6-00058-05 Rev A DIAGS GRIPPER TEST Cycle :006 of 009 Status:Running Cancel: N< Figure 4-203 Note If the operation stops, the Cancel parameter no longer displays. Response Dialog Parameters Description Cycle The number of completed test cycles of the requested cycles Status Shows the status of the indicated cycle (Running, Completed, Error, Canceled) Cancel Y to cancel the test N to continue running the test If Y is selected for the Cancel parameter value, the test is canceled. Otherwise, the test continues. Step Dialog Path: Main Menu Service Diags Gripper Step Use Step to set low level control of Gripper functions. Only trained service personnel should use this function. See Figure 4-204. This test should be used by trained personnel ONLY! Continue: N< Figure 4-204 September 2007 Step Screen Service Menu 4-135 Test Dialog Path: Main Menu Service Diags Gripper Test Use Test to perform various tests of Gripper functions (reach, pivot, and Gripper fingers). Only trained service personnel should use this function. See Figure 4-205. This test should be used by trained personnel ONLY! Continue: N< Figure 4-205 Test Screen Scanner Submenu Path: Main Menu Service Diags Scanner Use the Scanner Submenu to verify and test the barcode scanner. See Figure 4-206. >Verify... Trigger... Fiducial Test... Figure 4-206 Scanner Submenu Depending on your selection, refer to: 4-136 Menus and Commands • Verify Dialog on page 4-137 • Trigger Dialog on page 4-138 • Fiducial Test Dialog on page 4-139 6-00058-05 Rev A Verify Dialog Path: Main Menu Service Diags Scanner Verify Use the Verify Dialog to confirm that the barcode scanner is level. This function should be used by trained service personnel. Refer to the Scalar 10K Maintenance Guide for the step-by-step procedure to adjust the scanner. See Figure 4-207. DIAGS SCANNER VERIFY Verify scanner beam is level. Y Position : 0818.9< Figure 4-207 September 2007 Verify Dialog Parameters Description Y Position Displays the returned vertical position value of the scanner Service Menu 4-137 Trigger Dialog Path: Main Menu Service Diags Scanner Trigger Use the Trigger Dialog to trigger the barcode scanner to read, decode, and display whatever barcode label is within the range of the beam. See Figure 4-208. SCANNER TRIGGER Pressing Enter will trigger scanner BC :000389 Figure 4-208 4-138 Menus and Commands Response Screen Parameters Description BC Returns the barcode label information for the storage cartridge. 6-00058-05 Rev A Fiducial Test Dialog Path: Main Menu Test Service Diags Scanner Fiducial Use the Fiducial Test dialog to test the scanner for proper operation. See Figure 4-209. Loops:00 Test: 1 Xcnt:000000 Ycnt:000000 Continue: Y< Figure 4-209 Fiducial Test Dialog Parameters Description Test 1 reads the Insert/Eject Station 1 fiducial and displays the found edge coordinates. 2 reads the Insert/Eject Station 2 and displays the found edge coordinates. Xcnt Displays the x edge position count in tenths of a mm Ycnt Displays the Y edge position count in tenths of a mm Continue Y to continue running the test. N to cancel the test Run this test several times to ensure the X and Y position counts are within 10 tenths of a mm each time the test is run. September 2007 Service Menu 4-139 Tower Submenu Path: Main Menu Service Diags Tower Use the Tower Submenu to step it through each position or to send the tower to the Home position. See Figure 4-210. > Home Step Figure 4-210 Tower Submenu Depending on your selection, refer to: • Home Dialog below • Step Dialog on page 4-142 Home Dialog Path: Main Menu Service Diags Tower Home Use the Home Dialog to send the tower to the home position. See Figure 4-211. This test should be used by trained personnel ONLY! Continue: N < Figure 4-211 Home Dialog Parameters Description Continue Y to continue the test N to cancel the test If Y is selected for the Continue parameter value, Tower Homing appears. See Figure 4-212. 4-140 Menus and Commands 6-00058-05 Rev A Tower Homing Tower :01 LTO Accept : N Figure 4-212 Tower Homing If you are in SERVICE mode and Y is selected, the following displays appear and the tower goes to the homing position. See Figure 4-213 and Figure 4-214. If you are not in SERVICE mode and Y is selected, the WRONG TOWER MODE display appears, select Accept to change to SERVICE mode. See Figure 4-215. Requested command is now in progress. Figure 4-213 Initialize Dialog Requested command is now complete. Figure 4-214 Command Complete WRONG TOWER MODE Set mode for TCL (01) to SERVICE. Accept: N < Figure 4-215 September 2007 Wrong Tower Mode Service Menu 4-141 Step Dialog Path: Main Menu Service Diags Tower Step Use the Step Dialog to move the tower through each position. See Figure 4-216. This test should be used by trained personnel ONLY! Continue: N < Figure 4-216 Home Dialog Parameters Description Continue Y to continue the test N to cancel the test If you are in SERVICE mode and Y is selected for the Continue, the following display appears and the tower is ready to position. See Figure 4-217. If you are not in SERVICE mode and Y is selected for Continue, the WRONG TOWER MODE display appears, select Accept to change to SERVICE mode. See Figure 4-218. Position Tower Tower: 01 LTO Column:UNKNOWN < Amount: 01 Figure 4-217 4-142 Menus and Commands Position Tower Parameters Description Tower Tower to be moved (01–14, 8mm, DLT, LTO, HALF) Column Column number 01A–12L for DLT, LTO, HALF 01A–16P for 8mm Amount The step width depending on the media type 6-00058-05 Rev A WRONG TOWER MODE Set mode for TCL (01) to SERVICE. Accept: N < Figure 4-218 Wrong Tower Mode DI/DO Submenu Path: Main Menu Note Service Diags DI/DO Use the DI/DO to run loopback tests, or sensor or lock tests. See Figure 4-219. Use these tests to isolate problems in the system. > Loopback... Sensors Locks... Figure 4-219 DI/DO Submenu Depending on your selection, refer to: • Loopback Dialog below • Sensors Submenu on page 4-145 • Locks Dialog on page 4-150 Loopback Dialog Path: Main Menu Service Diags DI/DO Loopback Use the Loopback Dialog to send test signals from the main control card to other system cards and return. See Figure 4-220. Device:LMC Number:01 Results: Accept: N Figure 4-220 September 2007 Loopback Dialog Service Menu 4-143 Parameters Description Device Displays the loopback tests to run (LMC, LIE, LPN)) Number Displays which device number should be tested. This field is always set to 01 because there is only one of each device to be tested in the Scalar 10K Accept Y to accept changes N to reject changes If Y is selected, the Response Screen appears. See Figure 4-221. Otherwise, the changed parameters continue to display but no action is taken. Device:LMC Number:01 Results:PASSED Accept: N Figure 4-221 4-144 Menus and Commands Response Dialog Parameters Description Results Passed indicates that the test executed successfully Failed indicates that the test did not execute successfully Accept Y to accept change N to reject changes 6-00058-05 Rev A Sensors Submenu Path: Main Menu Service Diags DI/DO Sensors Use the Sensors Submenu to test the system sensors and to view the changes in real time. See Figure 4-222. > Wrap ... Real Time ... Figure 4-222 Sensors Submenu Depending on your selection, refer to: September 2007 • Wrap Dialog below • Real Time on page 4-147 Service Menu 4-145 Wrap Dialog Path: Main Menu Wrap Service Diags DI/DO Sensors Use the Wrap Dialog to test the ability of the system sensors to report state changes. See Figure 4-223. Device: Number: Result: ALL SENSORS< 01 Accept: N Figure 4-223 Wrap Dialog Parameters Description Device Indicates the list of sensors to test (TCL_HOME, IE_LOCKED, IE_CLOSED, LGR_TOUCH, LGR_P_RIGHT, LGR_P_HOME, LGR_R_RIGHT, LGR_R_MID, LGR_R_HOME, Y_HOME, X_HOME_BOT, X_HOME_TOP, TCL_SENSORS, LGR_SENSORS, LSC_SENSORS) Accept Y to accept changes N to reject changes If Y is selected, the Response Screen appears. See Figure 4-224. Otherwise, the changed parameters continue to display but no action is taken. Device:All Sensors Number:01 < Result:Passed Accept: N Figure 4-224 4-146 Menus and Commands Response Dialog 6-00058-05 Rev A Parameters Description Results Passed indicates that the test executed successfully Failed indicates that the test did not execute successfully Accept Y to accept changes N to reject changes Real Time Path: Main Menu Real Time Service Diags DI/DO Sensors Use Real Time to select a sensor to test and to view the sensors state changes in real time. See Figure 4-225. Device: LSC SENSORS< Number: 01 Result: Accept: N Figure 4-225 Real Time Screen Parameters Description Device Indicates the list of sensors to test (LSC SENSORS, TCL SENSORS, I/E SENSORS, LGR SENSORS, LMC SENSORS) Number Location of the sensor (01–14) Accept Y to accept changes N to reject changes If Y is selected, the selected sensor response screen appears. See Figure 4-226 through Figure 4-232 on page 4-150. OP_DOOR = 0 ANY_DOOR= 0 X_HOME_TOP= 0 X_HOME_BOTTOM= 0 Y_HOME= 0 Figure 4-226 September 2007 LSC SENSORS Real Time Results (LMC 6) Service Menu 4-147 SV_DOOR = 0 ANY_DOOR= 0 X_HOME_TOP= 0 X_HOME_BOTTOM= 0 Y_HOME= 0 Figure 4-227 LSC SENSORS Real Time Results (LMC 4) Parameters Description OP_DOOR 0 indicates an ON state 1 indicates an OFF state ANY_DOOR 0 indicates an ON state 1 indicates an OFF state SV_DOOR 0 indicates an ON state 1 indicates an OFF state X_HOME_TOP 0 indicates an ON state 1 indicates an OFF state X-HOME-BOTTOM 0 indicates an ON state 1 indicates an OFF state Y-HOME 0 indicates an ON state 1 indicates an OFF state T_HOME= 0 T_DOOR_OPEN= 0 Figure 4-228 TCL SENSORS Real Time Results Parameters Description T_HOME 0 indicates an ON state 1 indicates an OFF state T_DOOR_OPEN 0 indicates an ON state 1 indicates an OFF state IE_LOCKED = 0 IE_CLOSED = 0 Figure 4-229 4-148 Menus and Commands I/E SENSORS Real Time Results 6-00058-05 Rev A Parameters Description IE_LOCKED 0 indicates an ON state 1 indicates an OFF state IE_CLOSED 0 indicates an ON state 1 indicates an OFF state G_HOME = G_TOUCH= P_HOME = P_RIGHT= Figure 4-230 1 R_MID= 0 0 R_RIGHT= 0 1 0 LGR SENSORS Real Time Results Parameters Description G_HOME 0 indicates an ON state 1 indicates an OFF state G_TOUCH 0 indicates an ON state 1 indicates an OFF state P_HOME 0 indicates an ON state 1 indicates an OFF state P_RIGHT 0 indicates an ON state 1 indicates an OFF state R_MID 0 indicates an ON state 1 indicates an OFF state R_RIGHT 0 indicates an ON state 1 indicates an OFF state SV_DOOR = 0 ANY_DOOR= 0 Figure 4-231 September 2007 LMC 6 SENSORS Real Time Results Parameters Description SV_DOOR 0 indicates an ON state 1 indicates an OFF state ANY_DOOR 0 indicates an ON state 1 indicates an OFF state Service Menu 4-149 SV_DOOR = 0 OP_DOOR= 0 Figure 4-232 LMC 4 SENSORS Real Time Results Parameters Description SV_DOOR 0 indicates an ON state 1 indicates an OFF state OP_DOOR 0 indicates an ON state 1 indicates an OFF state Locks Dialog Path: Main Menu Service Diags DI/DO Locks Use the Locks dialog to exercise the I/E station lock without having to open and close the I/E station. See Figure 4-233. If media removal has been prevented by the host, the I/E station cannot be unlocked. IE Station:01< State:Unlocked [toggle] Figure 4-233 4-150 Menus and Commands Locks Dialog Parameters Description IE Station I/E Station number (01–04) State Locked indicates that the Insert/Eject station is locked Unlocked indicates that the Insert/Eject station is unlocked 6-00058-05 Rev A Self Test Dialog Path: Main Menu Service Diags Self Test Use the Self Test Dialog to run a predetermined sequence of diagnostics and exercisers. See Figure 4-234. The self test runs a sequence of diags. Cycles to run:009< Accept: N Figure 4-234 Self \Test Dialog Parameters Description Cycles to Run Indicates the desired cycle count (001–999) Accept Y to accept changes N to reject changes If Y is selected, the Response Dialog appears. See Figure 4-235. Otherwise, the changed parameters continue to display but no action is taken. DIAGS SELF TEST Cycle :006 of 009 Status:Running Cancel: N< Figure 4-235 Note If the operation stops, the Cancel parameter no longer displays. September 2007 Response Dialog Parameters Description Cycle The number of completed test cycles of the requested cycles Status Shows the status of the indicated cycle (Running, Completed, Error, Canceled) Cancel Y to cancel the test N to continue running the test If Y is selected for the Cancel parameter value, the test is canceled. Otherwise, the test continues. Service Menu 4-151 P/S Submenu Path: Main Menu Service Diags P/S Use the P/S Submenu to test the Library and universal drive sled (UDS) power supplies. See Figure 4-236. Library Power ... UDS Power ... Figure 4-236 P/S Submenu Library Power Path: Main Menu Service Diags P/S Library Power Use Library Power to test the installed DC power supply status with respect to AC input and DC output. The function indicates whether the power supplies are functioning properly. See Figure 4-237. P/S:1 2 3 4 5 6 7 8 AC:Y Y Y Y Y Y Y Y DC:Y Y Y Y Y Y Y Y Y=OK,N=ERROR Figure 4-237 4-152 Menus and Commands Library Power Parameters Description P/S Power supply selected for test. AC AC power output. Y = Test Ok N = Test error DC DC power supply output Y = Test Ok N = Test error 6-00058-05 Rev A UDS Power Path: Main Menu Service Diags P/S UDS Power Use UDS Power to view the status of the installed UDS power supplies. See Figure 4-238. P/S:B1 B2 B3 B4 DC :Y Y Y Y Dual:Y Y Y Y Rack:04 Figure 4-238 UDS Power Status Screen Parameters Description P/S Drive bay power supply DC DC output from at least one power supply Y= N= -= x= Dual Status Ok No DC output Drive bay not present Invalid power supply There are two power supplies to provide power supply redundancy Y= Both power supplies are functioning normally N= One or both power supplies failed - = Drive bay not present x = Invalid power supply Rack September 2007 Rack number. Only racks that contain UDS drives (CM, DM) are displayed Service Menu 4-153 Library Submenu Path: Main Menu Service Diags Library Use the Library Submenu to perform move tests. See Figure 4239. > Storage Move... Corner Moves... Figure 4-239 Library Submenu Storage Move Path: Main Menu Move Service Diags Library Storage Use Storage Moves to move a cartridge through every storage cell in a given range. The cartridge is moved to or from the I/ E station and then to the specified cells. This test requires a service-level password. After a password is provided, the system prompts for the I/E station where the source cartridge is located. Then, the system prompts for the beginning and ending storage location. The test can be cancelled at any. See Figure 4-240. STORAGE MOVE TEST Cell: 01 A 2 10 Status: Running Cancel: N Figure 4-240 Note If the operation stops, the Cancel parameter no longer displays. 4-154 Menus and Commands Storage Moves Dialog Parameters Description Cell Beginning and ending storage locations Status Shows the status of the test (Running, Canceled) Cancel Y to cancel the test N to continue running the test 6-00058-05 Rev A Corner Moves Path: Main Menu Moves Service Diags Library Corner Use Corner Moves to move cartridges from the I/E station to each corner of each storage section for all media types. There must be three cartridges of the same type, in a row, present in the I/E station for the test to work properly. Additionally, the test will only exercise the corners in the library that are empty. See Figure 4-241. CORNER MOVE TEST Cell: 01 A 2 10 Status: Running Cancel: N Figure 4-241 Note If the operation stops, the Cancel parameter no longer displays. September 2007 Corner Moves Dialog Cell Beginning and ending storage locations Status Shows the status of the test (Running, Canceled) Cancel Y to cancel the test N to continue running the test Service Menu 4-155 Teach Submenu Path: Main Menu Service Teach Use the Teach Submenu to reset and re initialize the library configuration. See Figure 4-242. > New... Drive... Continue... Gripper... Current... Tape... Bays... Figure 4-242 Teach Submenu Depending on your selection, refer to: • New Dialog below • Continue Dialog on page 4-158 • Current Dialog on page 4-159 • Bays Dialog on page 4-162 • Drive Dialog on page 4-164 • Gripper Dialog on page 4-166 • Tape Dialog on page 4-168 New Dialog Path: Main Menu Note The New operation clears all cell statistics. Service Teach New Use the New Dialog to reset and re-initialize the library configuration and calibration information. All previous information is destroyed and then an inventory is automatically performed. See Figure 4-243. A teach new will clear and reset the complete database. Continue: N Figure 4-243 4-156 Menus and Commands Teach New Dialog 6-00058-05 Rev A Parameters Description Continue Y to continue the teach new N to return to the previous submenu If Y is selected for the Continue parameter value, the Progress Screen followed by either the Response Screen or Failed Screen appears. See Figure 4-244, Figure 4-245, and Figure 4-246. The requested teach is in progress... Figure 4-244 Progress Screen The requested teach completed OK. Figure 4-245 Response Screen Teach Failed: Hardware Failed. Figure 4-246 September 2007 Failed Screen Service Menu 4-157 Continue Dialog Path: Main Menu Service Teach Continue Use the Continue dialog to resume a failed Teach New operation. See Figure 4-247. A Teach Continue continues a failed Teach New Command. Continue: N< Figure 4-247 Continue Dialog Parameters Description Continue Y to continue the teach new N to return to the previous Dialog If Y is selected for the Continue parameter value, the Progress Screen appears followed by either the Response Screen or Failed Screen. See Figure 4-248 on page 4-158, Figure 4-249 on page 4-158, and Figure 4-250 on page 4-159. The requested teach is in progress... Figure 4-248 Progress Screen The requested teach completed OK. Figure 4-249 4-158 Menus and Commands Response Screen 6-00058-05 Rev A Teach Failed: Hardware Failed. Figure 4-250 Failed Screen Current Dialog Path: Main Menu Service Teach Current Use the Current Dialog to re-calibrate the library coordinate information. All previous configuration and inventory information is retained. See Figure 4-251. A teach current will reset the positional information only. Continue: N Figure 4-251 September 2007 Teach Current Dialog Service Menu 4-159 Note Teach Bays removes drives which have been previously varied off and removed from the library configuration. Parameters Description Continue Y to continue the teach current N to return to the previous Dialog If Y is selected for the Continue parameter value, the Starting and Ending Dialog appears. See Figure 4-252. Starting Rack: 01 Ending Rack: 02 Accept: N Figure 4-252 Starting and Ending Dialog Parameters Description Starting Rack Indicates which rack to begin the Teach Current operation. (1–16 depending on the number of expansion modules) Ending Rack Indicates which rack to end the Teach Current operation. (1–16 depending on the number of expansion modules) Accept Y to accept changes N to reject changes If Y is selected, the Progress Screen appears followed by either the Response Screen or Failed Screen. See Figure 4-253 on page 4-160, Figure 4-254 on page 4-161, and Figure 4-255 on page 4-161. The requested teach is now in progress... Figure 4-253 4-160 Menus and Commands Progress Screen 6-00058-05 Rev A The requested teach completed OK. Figure 4-254 Response Screen Teach Failed: Hardware Failed. Figure 4-255 September 2007 Failed Screen Service Menu 4-161 Bays Dialog Path: Main Menu Service Teach Bays Use the Bays Dialog to reteach drive locations in a specified rack. See Figure 4-256. A Teach Bays clears and reteaches drive locations in a rack. Continue: N< Figure 4-256 Note Teach Bays removes drives which have been previously varied off and removed from the library configuration. Bays Dialog Parameters Description Continue Y to continue the teach new N to return to the previous Dialog If Y is selected for the Continue parameter value, Continue Dialog appears. See Figure 4-257. When you choose Accept, the Progress Screen appears followed by either the Response Screen or Failed screen. See Figure 4258 on page 4-162, Figure 4-259 on page 4-163, and Figure 4-259 on page 4-163. Starting Rack:01 Ending Rack:04 Accept: N< Figure 4-257 Continue Dialog The requested teach is in progress... Figure 4-258 4-162 Menus and Commands Progress Screen 6-00058-05 Rev A The requested teach completed OK. Figure 4-259 Response Screen Teach Failed: Hardware Failed. Figure 4-260 September 2007 Failed Screen Service Menu 4-163 Drive Dialog Path: Main Menu Service Teach Drive Use the Drive Dialog to clear and reteach a drive location. See Figure 4-261. A Teach Drive will clear and reteach a drive location. Continue: N< Figure 4-261 Drive Dialog Parameters Description Continue Y to continue the teach new N to return to the previous Dialog If Y is selected for the Continue parameter value, Continuation Screen appears. See Figure 4-262 on page 4-164. When you choose Accept, the Progress Screen appears followed by either the Response Screen or Failed Screen. See Figure 4-263 on page 4-164, Figure 4-264 on page 4-165, and Figure 4-264 on page 4-165. Enter Drive Coord:D 03 1 A01< Index:DT 00001 Accept: N Figure 4-262 Continuation Screen The requested teach is in progress... Figure 4-263 4-164 Menus and Commands Progress Screen 6-00058-05 Rev A The requested teach completed OK. Figure 4-264 Response Screen Teach Failed: Hardware Failed. Figure 4-265 September 2007 Failed Screen Service Menu 4-165 Note Perform a teach gripper after replacing the gripper FRU. If a teach gripper is only marginally successful, the library will post a message advising you to perform a teach current. Gripper Dialog Path: Main Menu Service Teach Gripper Use the Gripper Dialog to reteach the gripper to match the scanner geometry. See Figure 4-266. A Teach Gripper will reteach the gripper to scanner geometry. Continue: N< Figure 4-266 Gripper Dialog Parameters Description Continue Y to continue the teach new. N to return to the previous Dialog If Y is selected for the Continue parameter value, the Progress Screen appears followed by either the Response Screen, Teach Marginal screen, or the Failed screen. See Figure 4-267, Figure 4-268, Figure 4-269, or Figure 4270. The requested teach is in progress... Figure 4-267 Progress Screen The requested teach completed OK. Figure 4-268 4-166 Menus and Commands Response Screen 6-00058-05 Rev A Teach marginal Teach Current recommended. Figure 4-269 Teach Marginal Screen Teach Failed: Hardware Failed. Figure 4-270 September 2007 Failed Screen Service Menu 4-167 Tape Dialog Path: Main Menu Service Teach Tape Use the Tape Dialog to refine teach positions and improve get and put functions for LTO linear storage. This feature is for Quantum use only. See Figure 4-271. A Teach Cartridge will adjust storage cell positions Continue:N Figure 4-271 Teach Tape Dialog Refer to Teach Tape Instructions, 6-01319-01, for information on how to perform a Teach Tape. SAC Dialog Path: Main Menu Service SAC Use the SAC Dialog to see an explanation of the displayed Service Action Code (SAC). See Figure 4-272. Enter SAC to lookup: SAC: E1 XX YY I/E station door is not closed Figure 4-272 Note Press the SAC Dialog For additional information on the SACs, refer to Service Action Codes on page 6-11. button or the button to scroll between SAC values. 4-168 Menus and Commands 6-00058-05 Rev A Demo Dialog Path: Main Menu Note At least one storage element for each media type must be empty for the Demo to run. Service Demo Use the Demo Dialog to move cartridges randomly from storage element to storage element. You can also select Demo to move cartridges to tape drives. See Figure 4-273 and Figure 4-274. Enter password: [0000] ^ Accept: N Figure 4-273 Caution Enter Password Dialog If your library is host partitioned, do not use the operator panel to move a cartridge. The library does not know the partition limits and could move a cartridge outside of the partitioned area, making that cartridge inaccessible to the host. Demo will randomly move the media. Moves: 001< Accept: N Figure 4-274 Note The Demo is limited to 100 moves. Demo Dialog Parameters Description Moves Indicates the desired cartridge move (001–100) Accept Y to accept changes N to reject changes If Y is selected for the Accept parameter, the Include Drives Dialog appears. See Figure 4-275 on page 4-170. Otherwise, the changed parameters continue to display but no action is taken. September 2007 Service Menu 4-169 Include drives: Y Accept: Y Figure 4-275 Note The Demo feature does not work with 3590 drives. If your library contains 3590 drives, do not include drives in the Demo. Include Drives Dialog Parameters Description Include Drives Y indicates that the drives are included in the moving of the cartridges N indicates that the drives are not included in the moving of the cartridges Accept Y to accept the changed N to reject the changes If Y is selected, the Response Dialog appears. See Figure 4-276. Otherwise, the changed parameters continue to display but no action is taken. Demo with Drives Move :5 of 9 Status:Running Cancel: N< Figure 4-276 Note If the operation stops, the Cancel parameter no longer displays. Response Dialog Parameters Description Cancel Y to cancel the test N to continue running the test The value of the Move parameter in the Response Dialog is supplied by the library firmware and cannot be changed. The Move parameter indicates the number of completed moves. The value of the Status parameter in the Response Dialog is supplied by the library firmware and cannot be changed. The Status parameter shows the status of the indicated move (Running, Completed, Error, Canceled). If Y is selected for the Cancel parameter value, the test is canceled. Otherwise, the test continues. 4-170 Menus and Commands 6-00058-05 Rev A Verify Submenu Path: Main Menu Service Verify Use the Verify Dialog to perform and get a report of the installation verification test. See Figure 4-277. > All... Report... Figure 4-277 Verify Submenu Depending on your selection, refer to: • All Dialog on page 4-171 • Report Dialog on page 4-172 All Dialog Path: Main Menu Service Verify All This is for Quantum use only. Enter password: [0000] ^ Accept: N Figure 4-278 September 2007 All Dialog Service Menu 4-171 Report Dialog Path: Main Menu Service Verify Report Use the Report Dialog to generate a print of the installation verification test. See Figure 4-279. Before selecting this option, make sure that a serial print cable is connected to a serial port, before you generate a print. When the Report is selected, the Report Screen is displayed. See Figure 4-279. Connect Serial Cable Between Top LSC Port and PC Serial Port Continue: N Figure 4-279 Report Screen If Y is selected for the Continue parameter value, the Response Screen appears. See Figure 4-279. Otherwise, the changed parameter continues to display but no action is taken. Requested command is now in progress... Figure 4-280 Response Screen Advanced Submenu Path: Main Menu Service Advanced For Quantum use only. > Status Mounts... Other... Figure 4-281 4-172 Menus and Commands Advanced Submenu 6-00058-05 Rev A About Screen Path: Main Menu About The About Screen displays your library firmware information (embedded software). For example, version and serial number. See Figure 4-282. LIBRARY FIRMWARE Version 300A.xxxxx (c) Copyright 2005 Serial# 202000012 Figure 4-282 September 2007 About Screen Parameter Description Version Displays the current version of the library firmware (library controller firmware only). About Screen 4-173 4-174 Menus and Commands 6-00058-05 Rev A 5 Processing Media Overview . . . . . . . . . . . . . . . . . . . . . . . . . . . . . . . . . . . . . . . . . . . . . . . . . . . . . . . . . . . . . . . 5-3 Tape Cartridge Maintenance . . . . . . . . . . . . . . . . . . . . . . . . . . . . . . . . . . . . . . . . . . . . . . . 5-3 Inspecting Tape Cartridges . . . . . . . . . . . . . . . . . . . . . . . . . . . . . . . . . . . . . . . . . . . . . 5-3 Handling Tape Cartridges . . . . . . . . . . . . . . . . . . . . . . . . . . . . . . . . . . . . . . . . . . . . . 5-4 Storing Tape Cartridges . . . . . . . . . . . . . . . . . . . . . . . . . . . . . . . . . . . . . . . . . . . . . . . 5-4 Acclimating Tape Cartridges . . . . . . . . . . . . . . . . . . . . . . . . . . . . . . . . . . . . . . . . . . . 5-5 Transporting Tape Cartridges . . . . . . . . . . . . . . . . . . . . . . . . . . . . . . . . . . . . . . . . . . 5-5 Inserting Tape Cartridges . . . . . . . . . . . . . . . . . . . . . . . . . . . . . . . . . . . . . . . . . . . . . . . . . 5-6 Inserting Tape Cartridges Using the Insert/Eject Station . . . . . . . . . . . . . . . . . . . 5-6 Manually Bulk Loading Tape Cartridges . . . . . . . . . . . . . . . . . . . . . . . . . . . . . . . . . 5-7 Standard Bulk Loading . . . . . . . . . . . . . . . . . . . . . . . . . . . . . . . . . . . . . . . . . . . . 5-7 TM Bulk Loading . . . . . . . . . . . . . . . . . . . . . . . . . . . . . . . . . . . . . . . . . . . . . . . . . 5-7 Ejecting Tape Cartridges . . . . . . . . . . . . . . . . . . . . . . . . . . . . . . . . . . . . . . . . . . . . . . . . . 5-11 Understanding Barcodes . . . . . . . . . . . . . . . . . . . . . . . . . . . . . . . . . . . . . . . . . . . . . . . . . 5-12 Barcode Labels . . . . . . . . . . . . . . . . . . . . . . . . . . . . . . . . . . . . . . . . . . . . . . . . . . . . . . 5-12 Applying Labels . . . . . . . . . . . . . . . . . . . . . . . . . . . . . . . . . . . . . . . . . . . . . . . . . . . . . 5-13 Barcode Label Restrictions . . . . . . . . . . . . . . . . . . . . . . . . . . . . . . . . . . . . . . . . . . . . 5-14 Cleaning Drives . . . . . . . . . . . . . . . . . . . . . . . . . . . . . . . . . . . . . . . . . . . . . . . . . . . . . . . . . 5-16 Typical Cleaning Operation . . . . . . . . . . . . . . . . . . . . . . . . . . . . . . . . . . . . . . . . . . . 5-16 Non-typical Cleaning . . . . . . . . . . . . . . . . . . . . . . . . . . . . . . . . . . . . . . . . . . . . . . . . . 5-16 Inserting and Ejecting Cleaning Cartridges . . . . . . . . . . . . . . . . . . . . . . . . . . . . . . 5-17 Insert a Cleaning Cartridge . . . . . . . . . . . . . . . . . . . . . . . . . . . . . . . . . . . . . . . . 5-19 Eject a Cleaning Cartridge . . . . . . . . . . . . . . . . . . . . . . . . . . . . . . . . . . . . . . . . . 5-21 AutoClean . . . . . . . . . . . . . . . . . . . . . . . . . . . . . . . . . . . . . . . . . . . . . . . . . . . . . . . . . . 5-22 5-2 Processing Media 6-00058-05 Rev A 6- Overview This chapter includes information on processing media and is organized as follows: • Tape Cartridge Maintenance below • Inserting Tape Cartridges on page 5-6 • Ejecting Tape Cartridges on page 5-11 • Understanding Barcodes on page 5-12 • Cleaning Drives on page 5-16 Tape Cartridge Maintenance The library uses magnetic tape cartridge technology to collect, backup, and archive data. Magnetic tape is made of flexible plastic that is coated with ferromagnetic material on one side. Simple care and handling will protect your cartridges. Tape cartridges can survive years of use in a library environment, but cartridges wear out over time. Worn media can also cause damage to drives and potentially lead to a loss of data. Refer to the media manufacturer's specifications for tape cartridge life. To reduce the chance of problems with your tape cartridges or damage to your tape drive, follow these guidelines: • Inspecting Tape Cartridges below • Handling Tape Cartridges on page 5-4 • Storing Tape Cartridges on page 5-4 • Acclimating Tape Cartridges on page 5-5 • Transporting Tape Cartridges on page 5-5 Inspecting Tape Cartridges Before inserting new cartridges into the library, inspect them for damage caused by shipping or mishandling. For specific instructions about data recovery when media has been damaged, refer to the drive or tape cartridge manufacturer’s specifications. September 2007 Overview 5-3 Inspect tape cartridges in the following situations: • If a cartridge has been dropped from a height greater than three feet. • If the tape drive becomes inoperable after loading a tape cartridge. • If the cartridge has been stored in a dusty environment without a case. Do not use the tape cartridges in the following situations: • If there is condensation in or on the tape cartridge. • If the cartridge has cracks or other physical damage. • If the cartridge casing is split at the seams. • If the leader pin is broken, loose, or dislodged from its housing. Handling Tape Cartridges The Scalar 10K provides extra IE station magazines and dust covers for storing and handling purposes. This allows for easy removing, handling, storing, and inserting of cartridges to and from the library without library disruption. Use the following tips when handling cartridges: • Remove dust on the outside of the cartridges with a damp cloth. • Do not touch the tape leader. • Do not expose cartridges to moisture or direct sunlight. • Do not expose cartridges to magnetic fields. • Avoid unnecessary opening of the cartridge door because this can expose the cartridge to contamination or physical damage. • Do not drop cartridges or subject cartridges to physical shock. Storing Tape Cartridges Use the following tips when storing cartridges: 5-4 Processing Media • While cartridges are not in the library, store them in either their protective cases, the IE station magazines with dust covers, or in individual protective cases. • The storage environment should not exceed temperature and humidity requirements as described in the drive manufacturer specifications. 6-00058-05 Rev A • When tape cartridges are stored in an extended archival environment, always orient the cases so that the reel axis is horizontal. Use protective cases if storage containers are accommodating. • Never stack cartridges in a stack of more than five. • Do not place cartridges on or near devices that may produce magnetic fields such computer monitors or motors. Such exposure can alter or erase data on the cartridge. Acclimating Tape Cartridges When media is introduced to a new environment, the media must acclimate to the new environment prior to usage. • Unpack media if in shipping containers and allow media to acclimate to new environment for 24 hours in protective cases. • Make sure that there is not any condensation in or on the tape cartridge. • Make sure that the environmental temperature and humidity is within levels specified per the tape drive specifications. Transporting Tape Cartridges The following tips will help you move your tapes from one location to another: September 2007 • If you are shipping tape cartridges, ship them in a jewel case or equivalent. • Place cartridges in plastic wrap to protect them from moisture, dust, and other contaminants. • When carrying cartridges or shipping them, always orient the cases so that the reel axis is horizontal within the case and shipping box. • Pack cartridges snugly so that the cartridges do not rattle around. • Use a rigid box surrounded by adequate shock-absorbent material. • Clearly mark the box with the proper orientation. Tape Cartridge Maintenance 5-5 Inserting Tape Cartridges Use the Insert/Eject (I/E) station to insert tape cartridges into the library. You can also manually bulk load cartridges directly into an aisle. Inserting Tape Cartridges Using the Insert/Eject Station When using the I/E Station to insert tape cartridges, library operations are not disrupted. Proceed as follows to insert cartridges through the I/E station: Step 1 Remove an I/E magazine from the I/E station. Step 2 Insert the cartridges into the I/E magazine. Step 3 Place the I/E magazine back into the I/E station. The library locks the I/E station. The accessor scans the I/E station for new cartridges, then the library unlocks the I/E station. Step 4 Move the cartridge to the desired storage cell with the SCSI MOVE MEDIUM command from the host application. — or — Issue the Insert command from the operator panel. Refer to Insert Screen on page 4-52. The Accessor moves all cartridges from the I/E station to storage cell locations, beginning with the first available storage cell location. 5-6 Processing Media 6-00058-05 Rev A Manually Bulk Loading Tape Cartridges You can manually bulk load tape cartridges directly into licensed storage locations (cells). This process is faster than loading a few cartridges at a time through the I/E station and is the normal process for loading a new library. Warning Movements of mechanical components in the library can cause serious injury. Make sure that all power to the library is off before entering the library through the access door. Standard Bulk Loading Note Make sure to bulk load cartridges only in licensed storage locations. Note Use the Expansion Module access door to reach additional cartridge storage locations. Proceed as follows to bulk load your library: Step 1 Shut down the main library power. Step 2 Enter the aisle through the service door on the AM. Step 3 Load the cartridges, starting with rack 1 and continuing through each rack in succession (for example rack 2, rack 3, rack 4), until you have reached the limit of your licensed storage. Step 4 When you have completed your bulk load, make sure the aisle is free of obstructions and the service and access doors are closed. Step 5 Turn on the library power and inventory the library. TM Bulk Loading Proceed as follows to bulk load an outside Tower Module (TM): Step 1 Set the TM that you are going to bulk load to USER Mode (Main Menu Utils Towers Status Change). See Figure 5-1 on page 5-7. > Status Change... Initialize... Figure 5-1 September 2007 Towers Submenu Inserting Tape Cartridges 5-7 Step 2 Select Status Change. The Set Status Dialog appears. See Figure 5-2. Tower : 01 LTO < Mode : LIBRARY State : READY Accept: N Figure 5-2 Set Status Dialog Step 3 Select the TM to change. Step 4 Change the Mode field to USER. The State automatically changes to NOT READY. Step 5 Change Accept to Y. TOWER MODE CHANGE appears. See Figure 5-3. TOWER MODE CHANGE This selection will prevent host access. Continue: N < Figure 5-3 Step 6 Tower Mode Change Change Continue to Y. The tower changes the State to NOT READY. Tower : 01 LTO < Mode : USER State : NOT READY Accept: N Figure 5-4 Note Use two hands to manually rotate the tower. 5-8 Processing Media Set Status Dialog Step 7 Open the TM service door. Step 8 Grasp the tower firmly at the top of the columns or where the racks are joined (where the sheet metal is visible) to rotate to the column that you want to load. 6-00058-05 Rev A Step 9 Continue bulk loading your cartridges. When your bulk load completes, proceed as follows: Step 1 Close the TM service door. Step 2 Set the Mode field to LIBRARY. See Figure 5-5. Tower : 01 LTO < Mode : LIBRARY State : READY Accept: N Figure 5-5 Set Status Dialog If Y is selected for the Accept parameter value, Tower Mode Change in Progress appears. See Figure 5-6. If N is selected for the Accept parameter value, the display returns to USER mode and no action is taken. Requested command is now in progress. Figure 5-6 September 2007 Tower Mode Change In Progress Inserting Tape Cartridges 5-9 Step 3 Inventory Tower screen appears when the requested command completes. See Figure 5-7. Inventory Tower: 01? Accept: N < Figure 5-7 Inventory Tower If Y is selected for the Accept parameter value, Tower Inventory In Progress appears. See Figure 5-8 on page 5-10. If N is selected for the Accept parameter value, Requested Command Complete appears and no action is taken. See Figure 5-9 on page 510. Requested command is now in progress. Figure 5-8 Tower Inventory In Progress Requested command is now complete. Figure 5-9 5-10 Processing Media Requested Command Complete 6-00058-05 Rev A Ejecting Tape Cartridges Use the I/E station to remove tape cartridges from the library. Using the I/E station to remove cartridges does not disrupt library operations. To remove tape cartridges from the library, do the following: Step 1 Issue a SCSI MOVE MEDIUM command from the host with the source storage cell and the destination I/E cell. — or — Execute the Eject command from the operator panel. Refer to Eject Dialog on page 4-56. The library locks the I/E station, puts cartridges in the the I/E station, then unlocks the I/E station. September 2007 Step 2 Wait until the I/E station lock light is off, then rotate the I/E station door open and remove the I/E magazine, or cartridges from the I/E station. Step 3 Put the I/E magazine into the I/E station if you removed it in the previous step. Step 4 Rotate the I/E station door closed. The door locks and the accessor scans the I/E station. Ejecting Tape Cartridges 5-11 Understanding Barcodes Each tape cartridge in the Scalar 10K must have an external label that is operator and machine readable to identify the barcode number. A barcode must use only uppercase letters A to Z and/or numeric values 0 to 9. The Scalar 10K currently supports Code 39 type barcode labels. Note The 6 character 8 mm barcode labels contain a seventh character checksum that is reported as A in MIXED media mode and interpreted as part of the barcode in EXTENDED mode. The seventh character is ignored in DEFAULT media mode. The labels may have five to sixteen characters (library in EXTENDED media mode), or six characters plus a possible media identifier character (library in DEFAULT media mode), or six characters with an additional media identifier character (library in mixed-media mode). An additional seventh or eighth character may be used to identify the cartridge type. The cartridge type is a separate single character that follows the barcode label or a single character that is included with the six character barcode. The two additional characters, for example L1, identifies LTO cartridges. Barcode Labels For customers who want to print the barcode labels, the individual media labels are supported if the labels meet the ANSI MH10.8M-1983 standard and other additional requirements. The requirements are: • ANSI MH10.8M-1983 Standard • Number of digits: • • • • • • • • Additional Requirements • • • • 5-12 Processing Media five to sixteen in extended mode six (up to eight including media characters) in default and mixed media mode Background reflection: at least 25 percent Print contrast: at least 75 percent Ratio: at least 2.2 Module: 250 mm Print tolerance: ± 57 mm Length of the rest zones: 5.25 mm ± 0.25 mm No black marks can be present in the intermediate spaces or rest zones. No white areas may be present on the bars. A nine digit barcode must not match the serial number of the unit, otherwise it is ignored. 6-00058-05 Rev A • • • Bars should read in a uniform direction. Nonuniform reading directions are feasible in principle, but have a detrimental effect on performance. Each label should be applied in the upper right corner of the tape cartridge recess (when oriented vertically). Quality Testing Compliance with these specifications can be checked and documented with the Ergilaser 3000 High Density barcode measuring device that is manufactured by the Laetus Company. Applying Labels All barcode labels are applied to the front of a tape cartridge. Depending on the media type, barcode labels are either stickers that adhere to the front of the cartridge or are cutouts that slide into an indentation on the front of the cartridge. See Figure 5-10 on page 5-13 for more information on applying a barcode label. Caution Do not place a barcode label on top of a cartridge. Placing a barcode label on top of a cartridge can cause a library inventory operation to fail. Do not place a barcode label on top of a cartridge Figure 5-10 September 2007 Barcode Label Application (LTO Example) Understanding Barcodes 5-13 Barcode Label Restrictions The Scalar 10K supports a range of media labels. With mixed media enabled, some additional restrictions apply. Note Duplicate barcodes are not supported even if different media labels are used. All labels are restricted to sixteen character (in extended mode) and six character (in default and mixed media mode) barcodes. In default and mixed media mode, for specific SDLT media labels which contain an embedded seventh or eighth character in the label, the additional characters are stripped off by firmware. AIT (8 mm) labels contain an embedded checksum character that, in default and mixed media mode, is stripped off by the firmware. In extended mode, all media characters, and checksums are saved. For examples of supported barcode labels, see Figure 5-11. Apply the label so that the characters are on top and the barcode is on the bottom. 1 - DLT 2 - SDLT Characters Barcode 3 - AIT 4 - LTO 5 - IBM 3590 6 - IBM 3590 7 - IBM 3592 Figure 5-11 5-14 Processing Media Barcode Label Examples 6-00058-05 Rev A In Figure 5-11 on page 5-14, the numeric listing above each label type identifies the restriction associated with the label. September 2007 1 This is a six-character Code 39 forward printed label for a DLT cartridge. The Scalar 10K supports only CompacTape IV DLT cartridges. 2 This is a six character Code 39 forward printed label for a SDLT cartridge. 3 This is a six character forward printed label for an 8 mm cartridge. 4 This is a six character Code 39 backward printed label. The embedded additional seventh and eighth characters identify the LTO cartridge media type. 5 This is a six character Tri-Optic forward printed label for a IBM 3590 cartridge. This label can be used only when media ID is disabled. 6 This is a six character Tri-Optic forward printed label with one additional character media identifier for a IBM 3590 cartridge. This label can be used in both media ID enabled and media ID disabled applications. 7 This is a six character Code 39 backward printed label. The embedded additional seventh and eighth characters identify the 3592 cartridge media type. Understanding Barcodes 5-15 Cleaning Drives Note Cleaning cartridges have white labels and the first three letters for the Volser number are CLN. Most tape drives require occasional cleaning. The cleaning cartridge cleans accumulated debris from the tape drive and the read/write head. Listed below are three methods for cleaning cartridge drives: • Host application software (default) • Scalar 10K firmware (selected from the operator panel) • Manual operation (performed by the operator) Typical Cleaning Operation Note Be aware that most cleaning cartridges are abrasive and burnish the heads of the drive they are cleaning. Burnishing causes wear on the tape drive heads. Cleaning too frequently can reduce the life of a tape drive. Typically during normal operation, the host system moves the data cartridges to and from drives. During a move from a drive to a storage location in the library, the application checks drive status. If the drive reports that it requires cleaning, the system puts the cartridge it is moving into storage, but does not notify the host that the move is complete. The system selects the cleaning cartridge, and inserts it into the drive. After the cleaning is complete, the cartridge is ejected from the tape drive and moved back to storage. The library reports to the host that the move is complete. Non-typical Cleaning Listed below are several instances when a typical cleaning operation cannot be performed. Note To avoid this event, adjust the system wait time. If the system wait time cannot be adjusted to allow cleaning to complete, clean the drive manually or use the library firmware. • Drive cleaning takes several minutes to complete. If the host system does not wait for the cleaning to complete, it reports an error. • If the library is set to delayed cleaning, the library waits until a specified time before it performs the cleaning operation. • If the drive type does not support drive communication to the library, the library cannot automatically clean the drive. The drive must be cleaned using application software. There are common items which are used for either Scalar 10K firmware or host controlled drive cleaning. The following items refer to several operator panel menus. All menu information is detailed in Menus and Commands on page 4-1. 5-16 Processing Media 6-00058-05 Rev A Inserting and Ejecting Cleaning Cartridges Before cleaning a drive, make sure that a cleaning cartridge is in the library inventory, know the status of any cleaning cartridge in the library, and know how to insert or eject a cleaning cartridge. Caution If your library is host partitioned, do not use the operator panel to move a cartridge. The library does not know the partition limits and could move a cartridge outside of the partitioned area, making that cartridge inaccessible to the host. Make sure that a slot is available for the cleaning cartridge and then manually insert it into the library using the I/E station and operator panel. If the Scalar 10K library controls the cleaning operation, you cannot share a cleaning cartridge between the primary aisle and secondary aisle in a Dual Aisle configuration. You must insert the cleaning cartridge into the aisle containing the tape drive that requires cleaning. For example, if you need to clean a tape drive located in the secondary aisle, insert the cleaning cartridge using the secondary aisle I/E station and operator panel. The following procedures use the operator panel to check cleaning cartridge status, and move cleaning cartridges in and out of the library. Media Dialog Use this method after you manually insert a cleaning cartridge into the library. For further information refer to Media Dialog on page 4-77. Step 1 From the operator panel Main Menu, select Setup Cleaning Media. The Media Dialog appears. See Figure 5-12. Media Type: BC : AAAAAA ^ LTO Continue: N Figure 5-12 September 2007 Media Dialog Cleaning Drives 5-17 Step 2 Enter the Media Type and BC (number of the cleaning cartridge you want to insert), and then select Y in the Continue field. The Usage Dialog appears. See Figure 5-13 on page 5-18. Current Use: Max Use: 000< 000 Accept: N Figure 5-13 Step 3 Usage Dialog Enter Current Use (how many times the cleaning cartridge has been used), and Maximum Use (how many times the cleaning cartridge can be used), and then select Y in the Accept field. View Dialog Check to see status of your cleaning cartridges. For further information refer to View Dialog on page 4-98. Step 1 From the operator panel Main Menu, select Setup Cleaning View. The View Dialog appears and displays the BC number, Status (reset, expired, missing, or valid), Max (times you can use the tape), Count (how many times the tape has been used), Index (device address). See Figure 5-14. BC: CLN001 Status: Reset Max: 000 Count: 000 Index: 001<RESET: N Figure 5-14 5-18 Processing Media View Dialog 6-00058-05 Rev A Insert a Cleaning Cartridge Note It is possible to use the I/E station as storage for cleaning media but is not recommended. This procedure describes how to insert a cleaning cartridge. For more information, refer to Insert Clean Tape Dialog on page 4-53. Step 1 From the operator panel Main Menu, select Commands Insert/Eject Insert Clean Tape. The Insert Clean Tape Dialog appears. See Figure 5-15 on page 5-19. Enter SOURCE Coord: I 01< 1 A 01 Index: IE 00001 Accept: N Figure 5-15 Step 2 Insert Clean Tape Dialog Enter the source Coord, Index, and Accept. The Insert Range Dialog appears. See Figure 5-16. Insert Range: 01< Accept : N Figure 5-16 Step 3 Range Dialog Enter the number of cleaning cartridges in the I/E station (Insert Range), and Accept. The Target Dialog appears. See Figure 5-17. Enter TARGET Coord: S 01 1< A 01 Index: ST 00001 Accept : N Figure 5-17 Step 4 September 2007 Enter Target Dialog Enter the Target Coord (the starting address for inserting cleaning cartridges), Index, and Accept. Cleaning Drives 5-19 The Current Dialog appears. See Figure 5-18. Current Max Use: 000< Use: 000 Accept: N Figure 5-18 Note Maximum used: SDLT/DLT = 20 LTO = 20 AIT = 10 Step 5 Current Dialog Enter Current (how many times the cleaning cartridge has been used), Max (how many time the cleaning cartridge can be used before it must be ejected), and Accept. When the insert operation completes the Command Complete Dialog appears. See Figure 5-19. Requested command is now complete. Tapes inserted: 001 Figure 5-19 5-20 Processing Media Command Complete Dialog 6-00058-05 Rev A Eject a Cleaning Cartridge This procedure describes how to eject a cleaning tape. For more information, refer to Eject Clean Tape Dialog on page 4-58. Step 1 From the operator panel Main Menu, select Commands Insert/Eject Eject Clean Tape. The Insert Clean Tape Dialog appears. See Figure 5-20. Enter SOURCE Coord: S 01 1< A 01 Index: ST 00001 Accept: N Figure 5-20 Step 2 Insert Clean Tape Dialog Enter the source Coord, Index, and Accept. The Eject In Progress appears. See Figure 5-21. Eject in progress Source : 00001 Target : 00788 Figure 5-21 Step 3 Eject In Progress The cleaning cartridge is ejected to the first available slot in the I/E station. The Complete Dialog appears. See Figure 5-22. Requested command is now complete. Figure 5-22 September 2007 Complete Dialog Cleaning Drives 5-21 AutoClean The host should not share Scalar 10K controlled cleaning media. If a host does share the Scalar 10K firmware controlled cleaning media, the Scalar 10K firmware does not change or update cleaning media usage information. Use this procedure to set autoclean. For more information, refer to Drives Dialog on page 4-96. Step 1 From the operator panel Main Menu, select Setup Cleaning. The Cleaning Submenu appears. See Figure 5-23. >Drives... Media... View... Figure 5-23 Step 2 Cleaning Submenu Select Drives. The AutoClean dialog appears. See Figure 5-24. AutoClean: Schedule: Start Time: Figure 5-24 Step 3 Y< Delayed 10:45 Accept: N AutoClean Dialog Select AutoClean, set the schedule (immediate or delayed), Hours, Min (time to start the cleaning), Accept. Immediate - every dismount causes the firmware to check for a cleaning request from the drive and cleans the drive immediately. Note The Delayed option should be initiated during routine or normal downtime because the Scalar 10K goes NOT READY for the duration of the cleaning operation. 5-22 Processing Media Delayed - sets the cleaning process time by setting the Hour and Min option values. If the firmware receives a clean drive request, the dismount response holds until the cleaning process is complete. It is recommended that the host extend the timeout period normally associated with waiting for a dismount response. 6-00058-05 Rev A 6 Error Messages Overview . . . . . . . . . . . . . . . . . . . . . . . . . . . . . . . . . . . . . . . . . . . . . . . . . . . . . . . . . . . . . . . 6-3 Understanding Error Messages . . . . . . . . . . . . . . . . . . . . . . . . . . . . . . . . . . . . . . . . . . . . . 6-3 Operator Intervention Messages . . . . . . . . . . . . . . . . . . . . . . . . . . . . . . . . . . . . . . . . . . . . 6-4 Service Action Codes . . . . . . . . . . . . . . . . . . . . . . . . . . . . . . . . . . . . . . . . . . . . . . . . . . . . 6-11 Understanding Service Action Codes and Modifiers . . . . . . . . . . . . . . . . . . . . . . 6-11 Service Action Code Table . . . . . . . . . . . . . . . . . . . . . . . . . . . . . . . . . . . . . . . . . . . . 6-15 Resolving a Stuck Accessor . . . . . . . . . . . . . . . . . . . . . . . . . . . . . . . . . . . . . . . . . . . . . . . 6-40 Error Log Form . . . . . . . . . . . . . . . . . . . . . . . . . . . . . . . . . . . . . . . . . . . . . . . . . . . . . . . . . 6-41 Frequently Asked Questions . . . . . . . . . . . . . . . . . . . . . . . . . . . . . . . . . . . . . . . . . . . . . . 6-42 6-2 Error Messages 6-00058-05 Rev A 7- Overview This chapter contains information on error messages, how to resolve a stuck accessor, and frequently asked questions. This chapter is organized as follows: • Understanding Error Messages below • Operator Intervention Messages on page 6-4 • Service Action Codes on page 6-11 • Resolving a Stuck Accessor on page 6-40 • Error Log Form on page 6-41 • Frequently Asked Questions on page 6-42 Understanding Error Messages When a failure occurs, the Scalar 10K firmware performs error recovery and reporting. The Scalar 10K reports two types of error messages: operator panel intervention messages and Service Action Codes (SACs). An operator intervention message is generated and displayed on the operator panel when operator intervention is required. For more information on operator intervention messages, refer to Operator Intervention Messages on page 6-4. A SAC is generated and displayed on the operator panel for a failure that might require a service call. Depending on the SAC, operator intervention and/or a service call is required. For more information on SACs, refer to Service Action Codes on page 6-11. September 2007 Overview 6-3 Operator Intervention Messages Table 6-1 describes the operator intervention messages. Each message may contain up to four lines of information, including variable information that is specific to the message. For SAC indications, refer to Service Action Codes on page 611. Table 6-1 Operator Intervention Messages Message Lines Variables MOTION PROHIBITED! Safety flag is reset when aisle door is opened. None. Alert not found. Press Enter. None -=>ERROR!<=Initialization Error Code: 0x%Y %Y = 0x(8 digits) error modifier -=>PERM ERROR!<=CALL FOR SERVICE SAC: %X %R %B %E Code:0x%Y %X %R %B %E = = = = 2-digit hex 2-digit decimal 2-digit decimal 1-digit hex (not always present) %Y = 8-digit hex -=>PERM ERROR!<=SYSTEM WILL REBOOT SAC: %X %R %B %E Code:0x%Y %X %R %B %E = = = = ->SYSTEM REBOOTED<NEW CODE LOADED 2-digit hex 2-digit decimal 2-digit decimal 1-digit hex (not always present) %Y = 8-digit hex XXX = major revision YYYY = minor revision Version %XXXA.%YYYYY For example: 224A.00001 XXXA = 224A YYYYY = 00001 6-4 Error Messages 6-00058-05 Rev A Table 6-1 Operator Intervention Messages (Continued) Message Lines September 2007 Variables ->SYSTEM REBOOTED<RECOVERED FROM ERROR SAC: %X %R %B %E Code:0x%Y %X %R %B %E = = = = 2-digit hex 2-digit decimal 2-digit decimal 1-digit hex (not always present) %Y = 8-digit hex ->SYSTEM REBOOTED<CALL FOR SERVICE SAC: %X %R %B %E Code:0x%Y %X %R %B %E = = = = ->TOO MANY ERRORS!<CALL FOR SERVICE SAC: %X %R %B %E Code:0x%Y %X %R %B %E = = = = INTERVENTION NEEDED! Unexpected door open detected for IE Station %X %X = 2-digit decimal INTERVENTION NEEDED! Unexpected door open detected. Check all doors for closure. None INTERVENTION NEEDED! SE device detected on first differential SCSI bus. None INTERVENTION NEEDED! SE device detected on second differential SCSI bus. None INTERVENTION NEEDED! Check connection and/or termination on first SCSI bus. None 2-digit hex 2-digit decimal 2-digit decimal 1-digit hex (not always present) %Y = 8-digit hex code 2-digit hex 2-digit decimal 2-digit decimal 1-digit hex (not always present) %Y = 8-digit hex Operator Intervention Messages 6-5 Table 6-1 Operator Intervention Messages (Continued) Message Lines Variables INTERVENTION NEEDED! Check connection and/or termination on second SCSI bus. None INTERVENTION NEEDED! Remove cartridge in gripper, place back into [%Y %Z %A %B]. %Y %Z %A %B INTERVENTION NEEDED! Storage may be full, or IE magazine types may be incorrect. None INTERVENTION NEEDED! Cartridge extended in front of gripper. Reseat into %X [%Y %Z %A %B] %X %Y %Z %A %B INTERVENTION NEEDED! Unexpected door open detected for rack position %X %X = 2-digit decimal SERVICE MODE Cannot go online = = = = = = = = = rack number section number column letter row number index rack number section number column letter row number None Replace Terminator 6-6 BAD MEDIA Cannot get type. Please label media. %X [%Y %Z %A %B] %X %Y %Z %A %B = = = = = index number rack number section number column letter row number INTERVENTION NEEDED! Cartridge recovered too many options! %X [%Y %Z %A %B] %X %Y %Z %A %B = = = = = index number rack number section number column letter row number UPSIDE DOWN MEDIA Ensure cartridge is in cell properly. %X [%Y %Z %A %B] %X %Y %Z %A %B = = = = = index number rack number section number column letter row number Error Messages 6-00058-05 Rev A Table 6-1 Operator Intervention Messages (Continued) Message Lines September 2007 Variables CELL IS OBSTRUCTED Please check to see if cell is empty. %X [%Y %Z %A %B] %X %Y %Z %A %B = = = = = index number rack number section number column letter row number CELL IS EMPTY Please check to see if cell is full. %X [%Y %Z %A %B] %X %Y %Z %A %B = = = = = index number rack number section number column letter row number DRIVE COMM FAILED Please verify drive communication path. %X [%Y %Z %A %B] %X %Y %Z %A %B = = = = = index number rack number bay number column letter row number SCSI/LOOP ID MISSING ID set to %I for drive %X at [%Y %Z %A %B] %I %X %Y %Z %A %B = = = = = = ID number index number rack number bay number column letter row number TAPE STUCK IN DRIVE Drive disabled until tape is removed. DT %X %YY %X = drive index %YY = library coordinate TAPE PUSH FAILED Please remove tape from drive. %X [%Y %Z %A %B] %X %Y %Z %A %B = = = = = index number rack number bay number column letter row number CLEAN TAPE MISSING A previously defined tape is missing %X %X = volser number CLEAN TAPE EXPIRED Please remove the cleaning tape number %X volser %Y %X = tape number %Y = volser number Operator Intervention Messages 6-7 Table 6-1 Operator Intervention Messages (Continued) Message Lines Variables INTERVENTION NEEDED! Locate dropped cartridge and insert into [%Y %Z %A %B] %Y %Z %A %B = = = = rack number section number column letter row number DRIVE INIT FAILED Please correct drive initialization for %X [%Y %Z %A %B] %X %Y %Z %A %B = = = = = index number rack number bay number column letter row number DRIVE CLEAN FAILED A cleaning operation failed to clean. %X [%Y %Z %A %B] %X %Y %Z %A %B = = = = = index number rack number bay number column letter row number UCODE UPDATE FAILED A firmware update failed for %X at [%Y %Z %A %B] %X %Y %Z %A %B = = = = = index number rack number bay number column letter row number POWER Please of 24V number SUPPLY ERROR check status power supply %X %X = power supply number POWER Please of 48V number SUPPLY ERROR check status power supply %X %X = power supply number POWER SUPPLY ERROR Check AC box and AC connection to 24V PS number %X %X = power supply number or POWER SUPPLY ERROR Check AC box and AC connection to 48V PS number %X 6-8 Error Messages 6-00058-05 Rev A Table 6-1 Operator Intervention Messages (Continued) Message Lines Variables TOWER INIT FAILED Please correct tower initialization for tower %Y %Y = rack number TOWER NOT ONLINE Please correct the tower status for tower %Y %Y = rack number TOWER WRONG MODE Please set mode to %X for tower %Y %X = mode %Y = rack number INVALID LABEL Please check cart for valid label. %X [%Y %Z %A %B] %X %Y %Z %A %B = = = = = index number rack number section number column letter row number DUPLICATE LABEL Please check cells %X1 [%Y1 %Z1 %A1 %B1] %X2 [%Y2 %Z2 %A2 %B2] %X %Y %Z %A %B = = = = = index number rack number section number column letter row number TEACH FAILURE If the teach failure was with a drive: Please correct teach at drive location at %Y, %Z %Y = rack number %Z = either drive number (1 to 48) for drive location within rack or or If the teach failure was with a storage element: Please correct teach at storage location at %Y, %Z INTERVENTION NEEDED! Magazine configuration incorrect for IE station %X September 2007 section number (1 to 5) for storage location. %X = 2-digit decimal Operator Intervention Messages 6-9 Table 6-1 Operator Intervention Messages (Continued) Message Lines 6-10 Variables WARNING! The inventory may not be current. [OK] None INTERVENTION NEEDED! Cartridge was either dropped or is in %X [%Y %Z %A %B] %X %Y %Z %A %B = = = = = index number rack number section number column letter row number DRIVE UNLOAD FAILED An unload or eject operation failed for %X [%Y %Z %A %B] %X %Y %Z %A %B = = = = = index number rack number bay number column letter row number BAD FIRMWARE MEDIA Media not detected as a firmware tape. %X [%Y %Z %A %B] %X %Y %Z %A %B = = = = = index number rack number section number column letter row number DEMO CLEANUP FAILED Please move media in %X1 [%Y1 %Z1 %A1 %B1] to %X2 [%Y2 %Z2 %A2 %B2] %X %Y %Z %A %B = = = = = index number rack number section number column letter row number DRIVE TAPE ALERT %C CALL FOR SERVICE %X [%Y %Z %A %B] %C %X %Y %Z %A %B = = = = = = tape alert number index number rack number bay number column letter row number Error Messages 6-00058-05 Rev A Service Action Codes This section contains information on SACs and is organized as follows: • Understanding Service Action Codes and Modifiers on page 611 • Service Action Code Table on page 6-15 Understanding Service Action Codes and Modifiers SACs are used to help define the cause of the problem. If a failure occurs that requires operator intervention and/or a service call, a SAC is generated and displayed on the operator panel. A SAC is the result of the Scalar 10K firmware analyzing all pertinent system information available at the time of a failure, such as sense data, the operation in progress, error and threshold data, and any data returned from diagnostic routines invoked by the firmware to isolate the failure. When a SAC is displayed on the operator panel, make sure to write down all of the SAC information displayed, including the 10-character code (for example, 0x02110000) that follows the SAC. This information can be used to help diagnose the problem. Each SAC consists of three bytes (nn xx yy) or four bytes (nn xx yy z) as described below: • nn: SAC. • xx yy z: SAC modifier. For most SACs, the modifier has a value of 00 00 but for some SACs, this value is used to further identify the physical location of the failing FRU or component as described for xx yy. The additional z byte is the single digit character error code displayed by tape drives. The z byte provides tape drive information that may or may not be useful in determining the problem. • xx is the rack where the failing FRU or component is located. xx has value ranging from 01 to 16: • • • 01-16: rack number from 1 to 16 yy has a number of values depending on the SAC: • September 2007 00: do not care condition 00: do not care condition Service Action Codes 6-11 • 01-48: For drive failures, this value indicates drive location, with 01 being the bottom right drive location (viewing from the back of the module) and 48 being the top left drive location (for UDS half-height). Drives are counted from right to left and bottom to top. For information on drive location numbering for all drive types, see Figure 6-1 on page 6-13 and Figure 6-2 on page 614. — or — • 01-04: For I/E Station failures, the value indicates the Insert/Eject station number from 1 to 4. — or — • 01-04: For UDS Power Supply failures, this value indicates drive bay number from 1 to 4 with 1 being the bottom drive bay and 4 being the top drive bay. For more information on drive bay numbering for each drive type, see Figure 6-1 on page 6-13 and Figure 6-2 on page 6-14. — or — • 01-05: For Storage Assembly failures, this value indicates section numbers within a rack from 1 to 5, with 1 being the top section and 5 being the bottom section. • 6-12 Error Messages z is the single digit character error code displayed by certain tape drives on a SAC 96. 6-00058-05 Rev A UDS Control Module With Two Drive Bays First UDS Drive Module With Four Drive Bays Control Module With 2 Drive Bays Drive Location Numbering for UDS Half and Full-Height Drive Location 39 Drive Location 38 Drive Location 37 Drive Location 36 Drive Location 35 Drive Location 34 Drive Location 33 Drive Location 32 Drive Location 31 Drive Location 30 Drive Location 29 Drive Location 28 Drive Location 27 Drive Location 26 Drive Location 25 Drive Location 23 Drive Location 24 Drive Location 21 Drive Location 22 Drive Location 21 Drive Location 20 Drive Location 19 Drive Location 20 Drive Location 19 Drive Location 18 Drive Location 17 Drive Location 18 Drive Location 17 Drive Location 16 Drive Location 15 Drive Location 16 Drive Location 15 Drive Location 14 Drive Location 13 Drive Location 14 Drive Location 13 Drive Location 12 Drive Location 11 Drive Location 12 Drive Location 11 Drive Location 10 Drive Location 09 Drive Location 10 Drive Location 09 Drive Location 08 Drive Location 07 Drive Location 08 Drive Location 07 Drive Location 06 Drive Location 05 Drive Location 06 Drive Location 05 Drive Location 04 Drive Location 03 Drive Location 04 Drive Location 03 Drive Location 02 Drive Location 01 Drive Location 02 Drive Location 01 Drive Bay 2 UDS Power Supplies Drive Bay 1 UDS Power Supplies Drive Bay 2 Drive Location 23 Drive Bay 4 UDS Power Supplies Drive Bay 3 UDS Power Supplies Drive Bay 2 UDS Power Supplies Drive Bay 1 UDS Power Supplies Drive Bay 4 Drive Location 41 Drive Location 40 Drive Bay 3 Drive Location 42 Drive Bay 2 Drive Location 43 Drive Location 22 Figure 6-1 September 2007 Drive Location 45 Drive Location 44 Drive Location 24 Drive Bay 1 Drive Location Numbering for UDS Half-Height Drive Location 47 Drive Location 46 Drive Bay 1 Drive Location 48 UDS Full and Half-Height Drive Bay/Drive Location Numbering Service Action Codes 6-13 First 3590 Drive Module with Four Drive Bays Drive Location 14 Drive Location 13 Drive Location 02 Drive Location 01 Figure 6-2 6-14 Error Messages Drive Bay 4 Drive Location 25 Drive Bay 3 Drive Location 26 Drive Bay 2 Drive Location 37 Drive Bay 1 Drive Location 38 First 3592 Drive Module with Four Drive Bays 3590 and 3592/TS11210 Drive Bay/Drive Location Numbering 6-00058-05 Rev A Service Action Code Table Table 6-2 lists all SACs and their corresponding SACresolution actions. For each SAC, always perform the actions in the order presented, starting with Action 1 and continuing down the list until the problem is resolved or you are instructed to call the GCH. Table 6-2 Service Action Codes Reported SAC Perform these actions 01 00 00 Type 1 Software errors including Microcode and Operating System errors. Action 1 Power Off and On the Scalar 10K library to recover from the error. Refer to Shutting Down the Scalar 10K on page 3-8 and Starting the Scalar 10K on page 3-7. Wait at least one minute between powering Off and On the library. Action 2 If the problem is not corrected or persists, contact GCH. For GCH contact information, refer to Getting More Information or Help on page 1-8. 02 00 00 Type 2 Software errors including Microcode logic errors during Get/Put operations. Action 1 Power Off and On the Scalar 10K library to recover from the error. Refer to Shutting Down the Scalar 10K on page 3-8 and Starting the Scalar 10K on page 3-7. Wait at least one minute between powering Off and On the library. Action 2 If the problem is not corrected or persists, contact GCH. For GCH contact information, refer to Getting More Information or Help on page 1-8. 03 00 00 Type 3 Software errors resulting from unexpected hardware conditions. These errors are primarily generated when it is not safe to move the accessor). Action 1 Power Off and On the Scalar 10K library to recover from the error. Refer to Shutting Down the Scalar 10K on page 3-8 and Starting the Scalar 10K on page 3-7. Wait at least one minute between powering Off and On the library. Action 2 If the problem is not corrected or persists, contact GCH. For GCH contact information, refer to Getting More Information or Help on page 1-8. September 2007 Service Action Codes 6-15 Table 6-2 Reported SAC 04 00 00 Service Action Codes (Continued) Perform these actions Type 4 Software errors (inter Processor) including Microcode and Operating System errors. Action 1 Power Off and On the Scalar 10K library to recover from the error. Refer to Shutting Down the Scalar 10K on page 3-8 and Starting the Scalar 10K on page 3-7. Wait at least one minute between powering Off and On the library. Action 2 If the problem is not corrected or persists, contact GCH. For GCH contact information, refer to Getting More Information or Help on page 1-8. 05 00 00 A permanent Operating System error occurred. Action 1 Power Off and On the Scalar 10K library to recover from the error. Refer to Shutting Down the Scalar 10K on page 3-8 and Starting the Scalar 10K on page 3-7. Wait at least one minute between powering Off and On the library. Action 2 If the problem is not corrected or persists, contact GCH. For GCH contact information, refer to Getting More Information or Help on page 1-8. 10 00 00 Barcode scanner communications failed. Action 1 Power Off and On the Scalar 10K library to recover from the error. Refer to Shutting Down the Scalar 10K on page 3-8 and Starting the Scalar 10K on page 3-7. Wait at least one minute between powering Off and On the library. Action 2 If the problem is not corrected or persists, contact GCH. For GCH contact information, refer to Getting More Information or Help on page 1-8. 11 00 00 Barcode scanner communication is OK, data received from the barcode scanner is bad. Action 1 Contact GCH. For GCH contact information, refer to Getting More Information or Help on page 1-8. 12 00 00 Barcode scanner communication is OK, barcode scanner reports that data is bad. Action 1 Contact GCH. For GCH contact information, refer to Getting More Information or Help on page 1-8. 6-16 Error Messages 6-00058-05 Rev A Table 6-2 Reported SAC 13 00 00 Service Action Codes (Continued) Perform these actions Cannot read barcode label or the label is bad. Action 1 Check the barcode label to verify that it: • meets the specifications listed Barcode Labels on page 5-12 and Barcode Label Restrictions on page 5-14. • is applied correctly as described in Applying Labels on page 5-13. In addition, verify that the barcode label is not: • damaged or dirty. • too short (less than 5 characters) or too long (more than 16 characters). The cell in question is displayed with the SAC. Run Start Option from the operator panel to retrieve this information (Main Menu Service Start). Action 2 Make sure that scan beam is not obstructed. Action 3 If the problem is not corrected or persists, contact GCH. For GCH contact information, refer to Getting More Information or Help on page 1-8. 14 00 00 Cannot read the Serial Number label during a Teach operation. Action 1 Check the Serial Number label to ensure that it is installed properly and not damaged or dirty. The Serial Number label is located in the middle of the top storage assembly in the Control Module. The Serial Number label contains a barcode and readable serial number such as 2021 00031. Action 2 Contact GCH. For GCH contact information, refer to Getting More Information or Help on page 1-8. 15 00 00 The barcode scanner is not capable of fully supporting all different labels in the Scalar 10K library. Action 1 Contact GCH. For GCH contact information, refer to Getting More Information or Help on page 1-8. 20 00 00 Serial port Connection failures. Action 1 Contact GCH. For GCH contact information, refer to Getting More Information or Help on page 1-8. September 2007 Service Action Codes 6-17 Table 6-2 Service Action Codes (Continued) Reported SAC 21 00 00 Perform these actions NVRAM failures. Action 1 Power Off and On the Scalar 10K library to recover from the error. Refer to Shutting Down the Scalar 10K on page 3-8 and Starting the Scalar 10K on page 3-7. Wait at least one minute between powering Off and On the library. Action 2 If the problem is not corrected or persists, contact GCH. For GCH contact information, refer to Getting More Information or Help on page 1-8. 22 00 00 Fail to communicate with the operator panel. Action 1 Contact GCH. For GCH contact information, refer to Getting More Information or Help on page 1-8. 23 00 00 An unexpected interrupt is received. Action 1 Contact GCH. For GCH contact information, refer to Getting More Information or Help on page 1-8. 30 00 00 A fatal error is detected in SCSI port 1. Action 1 Verify that the SCSI bus connected to Library Port 1 is properly terminated and powered. Action 2 Verify that the SCSI ID is unique for the SCSI cable. Action 3 Verify that the Library SCSI Port 1 is properly configured by using the operator panel (Main Menu Setup Library SCSI Ports). Action 4 If the problem is not corrected or persists, contact GCH. For GCH contact information, refer to Getting More Information or Help on page 1-8. 6-18 Error Messages 6-00058-05 Rev A Table 6-2 Reported SAC 31 00 00 Service Action Codes (Continued) Perform these actions A fatal error is detected in SCSI port 2. Action 1 Verify that the SCSI bus connected to Library Port 2 is properly terminated and powered. Action 2 Verify that the SCSI ID is unique for the SCSI cable. Action 3 Verify that the Library SCSI Port 2 is properly configured by using the operator panel (Main Menu Setup Library SCSI Ports). Action 4 If the problem is not corrected or persists, contact GCH. For GCH contact information, refer to Getting More Information or Help on page 1-8. 32 00 00 Wrong SCSI bus connection is detected. A Single Ended SCSI bus is connected to the Library Port 1 Differential Adapter. Action 1 Verify that the Host SCSI bus is the same type as the Library SCSI Adapter card in Port 1. Action 2 If the problem is not corrected or persists, contact GCH. For GCH contact information, refer to Getting More Information or Help on page 1-8. 33 00 00 Wrong SCSI bus connection is detected. A Single Ended SCSI bus is connected to the Library Port 2 Differential Adapter. Action 1 Verify that the Host SCSI bus is the same type as the Library SCSI Adapter card in Port 2. Action 2 If the problem is not corrected or persists, contact GCH. For GCH contact information, refer to Getting More Information or Help on page 1-8. 34 00 00 A general SCSI failure is detected. Action 1 Verify that the SCSI host is working properly. Action 2 If the problem is not corrected or persists, contact GCH. For GCH contact information, refer to Getting More Information or Help on page 1-8. September 2007 Service Action Codes 6-19 Table 6-2 Reported SAC 35 00 00 Service Action Codes (Continued) Perform these actions A fatal SCSI error is detected but the port is unknown. Action 1 Verify that the SCSI busses connected to both Library Ports (if applicable) are properly terminated and powered. Action 2 Verify that the SCSI ID is unique for the SCSI cable. Action 3 Verify that both Library SCSI Ports are properly configured (if applicable) by using the operator panel (Main Menu Setup Library SCSI Ports). Action 4 If the problem is not corrected or persists, contact GCH. For GCH contact information, refer to Getting More Information or Help on page 1-8. 39 00 00 An external network error was detected by the Remote Management Unit (RMU). Action 1 Ensure the network cable is properly connected to the RMU. Action 2 Verify that the network the RMU is connected to is working properly. Action 3 If the problem is not corrected or persists, contact GCH. For GCH contact information, refer to Getting More Information or Help on page 1-8. 40 00 00 The Library Aisle power cannot be enabled. Action 1 Verify that the aisle doors are closed. Action 2 Check the door fuses or reset the circuit breaker, as applicable. Action 3 If the problem is not corrected or persists, contact GCH. For GCH contact information, refer to Getting More Information or Help on page 1-8. 41 00 00 The Library Aisle power cannot be disabled, failures are detected in the Digital In/Digital Out (DI/DO) circuitries. Action 1 Contact GCH. For GCH contact information, refer to Getting More Information or Help on page 1-8. 6-20 Error Messages 6-00058-05 Rev A Table 6-2 Reported SAC 42 00 00 Service Action Codes (Continued) Perform these actions A wrong library configuration is detected, the data reporting the number of racks installed is different than expected. Action 1 Run Teach New from the operator panel (Main Menu Teach New). Service Teach Action 2 If the problem is not corrected or persists, contact GCH. For GCH contact information, refer to Getting More Information or Help on page 1-8. 43 00 00 An unknown library configuration is detected, the barcode scanner is unable to read the fiducial label located on a storage assembly during a Teach operation. Action 1 Contact GCH. For GCH contact information, refer to Getting More Information or Help on page 1-8. 44 00 00 An unknown fiducial label is detected during a Teach operation. This problem can be caused if a magazine containing cartridges not supported in the Library is inserted in the I/E Station. Action 1 Check for a dirty, damaged, missing, or wrong fiducial label where the gripper is positioned. The fiducial label can be on a storage assembly, drive, or I/E magazine. Action 2 Contact GCH. For GCH contact information, refer to Getting More Information or Help on page 1-8. 46 xx yy During a Get or Put operation, the calculated X position exceeded the allowable limits. Action 1 Note the location of the storage assembly or the magazine as indicated in the SAC modifiers xx and yy: • xx: rack number (1 to 16) • yy: section number within a rack or I/E Station (1 to 5) For more information on SAC modifiers, refer to Service Action Codes on page 6-11. Action 2 Contact GCH. For GCH contact information, refer to Getting More Information or Help on page 1-8. September 2007 Service Action Codes 6-21 Table 6-2 Service Action Codes (Continued) Reported SAC 47 xx yy Perform these actions During a Get or Put operation, the calculated Y position exceeded the allowable limits. Action 1 Note the location of the storage assembly or magazine as indicated in the SAC modifiers xx and yy: • xx: rack number (1 to 16) • yy: section number within a rack or I/E Station (1 to 5) For more information on SAC modifiers, refer to Service Action Codes on page 6-11. Action 2 Contact GCH. For GCH contact information, refer to Getting More Information or Help on page 1-8. 48 00 00 Aisle Fuse has opened. Action 1 Contact GCH. For GCH contact information, refer to Getting More Information or Help on page 1-8. 49 00 00 Top and bottom X-axis motors are different types Action 1 The top X-axis motor and bottom X-axis motor are required to be the same type. The library firmware verifies that both motors are the same type. If they are not the same type, a SAC 49 is posted and the library will not go ready. Action 2 Contact GCH. For GCH contact information, refer to Getting More Information or Help on page 1-8. 50 00 00 A cartridge is not properly seated in the storage cell. Action 1 Do the following: 1. Check the location of the gripper. 2. Make the library not ready. 3. Open the service door. 4. Verify the location of the cartridge and check it for damage. - If the cartridge is not damaged, put the cartridge in the storage cell and check for correct seating. - If the cartridge is damaged, remove the cartridge from the system. 5. Inspect the storage location or drive for visible damage. 6. Contact GCH. For GCH contact information, refer to Getting More Information or Help on page 1-8. 6-22 Error Messages 6-00058-05 Rev A Table 6-2 Reported SAC 60 xx yy Service Action Codes (Continued) Perform these actions Cannot complete the Lock/Unlock Insert/Eject station commands. Action 1 Use the modifier xx yy to locate the Insert/Eject station: • xx = rack number (1 to 16) • yy = Insert/Eject station number (1 to 4) For more information on SAC modifiers, refer to Service Action Codes on page 6-11. Action 2 Make sure that the door (identified by xx yy) is properly closed. For the location of Insert/Eject stations, see Figure 2-1 on page 2-3. Action 3 If the problem is not corrected or persists, contact GCH. For GCH contact information, refer to Getting More Information or Help on page 1-8. 61 xx yy The Insert/Eject Station Closed Sensor error threshold is exceeded. Action 1 Use the modifier xx yy to locate the Insert/Eject station: • xx = rack number (1 to 16) • yy = Insert/Eject station number (1 to 4) For more information on SAC modifiers, refer to Service Action Codes on page 6-11. Action 2 Contact GCH. For GCH contact information, refer to Getting More Information or Help on page 1-8. 62 xx yy A down level LIE card was detected by the library firmware when a newer version is required for this library configuration to operate. Action 1 Use the modifier xx yy to locate the Insert/Eject station: • xx = rack number (1 to 16) • yy = Insert/Eject station number (1 to 4) For more information on SAC modifiers, refer to Service Action Codes on page 6-11. Action 2 Contact GCH. For GCH contact information, refer to Getting More Information or Help on page 1-8. September 2007 Service Action Codes 6-23 Table 6-2 Reported SAC 70 00 00 Service Action Codes (Continued) Perform these actions Failures detected in the Gripper Assembly Finger Open/Close operations. Action 1 Contact GCH. For GCH contact information, refer to Getting More Information or Help on page 1-8. 71 00 00 Failures detected in the Gripper Assembly Pivot operation. Action 1 Contact GCH. For GCH contact information, refer to Getting More Information or Help on page 1-8. 72 00 00 A Get command was issued but the sensor indicated that a cartridge is already present in the Gripper Assembly. Action 1 Look into the Gripper Assembly and see if a cartridge is present. Then, do one of the following: • If a cartridge is found, perform the actions in SAC 02 00 00. • If no cartridge is found in the Gripper Assembly, contact GCH. For GCH contact information, refer to Getting More Information or Help on page 1-8. 73 00 00 Failures detected in the Gripper Assembly Touch Tip operation. Action 1 Contact GCH. For GCH contact information, refer to Getting More Information or Help on page 1-8. 6-24 Error Messages 6-00058-05 Rev A Table 6-2 Reported SAC 74 00 00 Service Action Codes (Continued) Perform these actions A Get command was issued but the sensor indicated that the source location is empty. Action 1 This error can be caused by a cartridge not fully inserted in the storage cell above the failing cell. Check to see if this condition exists, if it does, push the cartridge into its cell and re-inventory the entire column containing the cell (Main Menu Commands Inventory). Action 2 If a cartridge is present, do the following: 1. If the source is a drive element, make sure that the drive sled is completely seated into the drive slot. 2. If the source is an IE element, make sure that the magazine is completely seated and the IE door is completely closed. 3. If the source is a storage element or if the above actions do not help, contact GCH. For GCH contact information, refer to Getting More Information or Help on page 1-8. If a cartridge is not present, the source cell is automatically inventoried by the library after the failed Get. 75 00 00 A failure is detected in the Gripper Assembly. Action 1 Contact GCH. For GCH contact information, refer to Getting More Information or Help on page 1-8. 76 00 00 A Teach failure was detected. Action 1 Contact GCH. For GCH contact information, refer to Getting More Information or Help on page 1-8. 77 00 00 Failures detected in the Gripper Assembly during a Reach/Retract operation. Action 1 Verify that there is nothing obstructing the Gripper Assembly from reaching its target. Action 2 If the problem is not corrected or persists, contact GCH. For GCH contact information, refer to Getting More Information or Help on page 1-8. September 2007 Service Action Codes 6-25 Table 6-2 Reported SAC 7A 00 00 Service Action Codes (Continued) Perform these actions Failures detected in the Gripper Assembly Retract operations. Action 1 Contact GCH. For GCH contact information, refer to Getting More Information or Help on page 1-8. 7B 00 00 Failure detected in a Teach Master operation. This failure occurs most likely when a Teach operation is executed as part of the Installation process. Action 1 Contact GCH. For GCH contact information, refer to Getting More Information or Help on page 1-8. 7C 00 00 Failures detected in the Gripper Assembly Reach operation. Action 1 Check for an object blocking operation in the cell. An obstruction can be any of the following: • an unlabeled cartridge • a cartridge in the cell during a Put operation • the DLT drive door is stuck during a Put operation Remove the obstruction, then close the aisle door and retry the failing operation. Action 2 If the problem is not corrected or persists, contact GCH. For GCH contact information, refer to Getting More Information or Help on page 1-8. 7E 00 00 Failure detected while pushing a cartridge into a tape drive feed slot. Action 1 Check the cartridge for any physical damage, and verify that the cartridge label is correct. Action 2 Check the front of the drive sled to make sure no physical obstructions are preventing the tape from being inserted. Action 3 If the problem is not corrected or persists, contact GCH. For GCH contact information, refer to Getting More Information or Help on page 1-8. 6-26 Error Messages 6-00058-05 Rev A Table 6-2 Reported SAC 80 00 00 Service Action Codes (Continued) Perform these actions Failures detected in the X-axis servo system. Action 1 Contact GCH. For GCH contact information, refer to Getting More Information or Help on page 1-8. 81 00 00 Failures detected in the Y-axis servo system. Action 1 Contact GCH. For GCH contact information, refer to Getting More Information or Help on page 1-8. 82 00 00 An unexpected Motor Control condition was received. Action 1 Contact GCH. For GCH contact information, refer to Getting More Information or Help on page 1-8. 83 00 00 The Locate Fiducial Command failed with no target found. This failure happens most likely during an initial installation of the Library Subsystem. Action 1 Run Teach New from the operator panel (Main Menu Teach New). Service Teach Action 2 If the problem is not corrected or persists, contact GCH. For GCH contact information, refer to Getting More Information or Help on page 1-8. 84 00 00 Y-axis failed to reach target. Action 1 Contact GCH. For GCH contact information, refer to Getting More Information or Help on page 1-8. 85 00 00 X-axis failed to reach target. Action 1 Contact GCH. For GCH contact information, refer to Getting More Information or Help on page 1-8. September 2007 Service Action Codes 6-27 Table 6-2 Reported SAC 86 00 00 Service Action Codes (Continued) Perform these actions The first full speed move command issued when the accessor is at home position failed. Action 1 Press the Ready button on the operator panel and observe the accessor to see which axis (X or Y) fails to move. Action 2 Contact GCH. For GCH contact information, refer to Getting More Information or Help on page 1-8. 87 00 00 The accessor cannot move away from X-axis home position. Action 1 Contact GCH. For GCH contact information, refer to Getting More Information or Help on page 1-8. 88 00 00 The accessor cannot move away from Y-axis home position. Action 1 Contact GCH. For GCH contact information, refer to Getting More Information or Help on page 1-8. 90 00 00 A down level LSC card was detected by the library firmware when a newer version one is required for this library configuration to operate. Action 1 Contact GCH. For GCH contact information, refer to Getting More Information or Help on page 1-8. 91 00 00 A down level LMC card was detected by the library firmware when a newer version one is required for this library configuration to operate. Action 1 Contact GCH. For GCH contact information, refer to Getting More Information or Help on page 1-8. 6-28 Error Messages 6-00058-05 Rev A Table 6-2 Reported SAC 92 xx yy Service Action Codes (Continued) Perform these actions A down level LBI card was detected by the library firmware when a newer version is required for this library configuration to operate. Action 1 Use the modifier xx yy to locate the card: • xx = rack number (1 to 16) • yy = 00 do not care condition See Service Action Codes on page 6-11 for more information. Action 2 Contact GCH. For GCH contact information, refer to Getting More Information or Help on page 1-8. 93 xx yy A failure was detected in the drive communication hardware within the Library. The Library cannot communicate with one or more drives. Action 1 Use the modifier xx yy to locate the failing tape drive: • xx = rack number (1 to 16) • yy = drive location (1 to 48) Where 1 is the bottom right drive location (viewing from the back of the module) and 48 being the top left drive location. Drives are counted from right to left and bottom to top. Refer to Service Action Codes on page 6-11 for more information on SAC modifiers. Action 2 If the accompanying message indicated that the Library cannot communicate with one specific tape drive, do the following to power cycle the drive: 1. Vary Off the drive (Main Menu Utils Drives Status Change Vary Off). 2. Reseat the drive. Wait for the following green LED blink pattern: Blink, blink, blink, pause. 3. Vary on the drive (Main Menu Utils Drives Status Change Vary On). 4. Retry the operation that failed. 5. If the problem is not corrected or persists, contact GCH. For GCH contact information, refer to Getting More Information or Help on page 1-8. If the Library cannot communicate with any drive in this module, then contact GCH. September 2007 Service Action Codes 6-29 Table 6-2 Reported SAC 94 xx yy Service Action Codes (Continued) Perform these actions Communication was established between the Library and the tape drive but the Library cannot determine the status of a particular Tape drive. Action 1 Use the modifier xx yy to locate the failing tape drive: • xx = rack number (1 to 16) • yy = drive location (1 to 48) Where 1 is the bottom right drive location (viewing from the back of the module) and 48 being the top left drive location. Drives are counted from right to left and bottom to top. Refer to Service Action Codes on page 6-11 for more information on SAC modifiers. Action 2 Do the following to power cycle the drive: 1. Vary Off the drive (Main Menu Utils Drives Status Change Vary Off). 2. Reseat the drive. Wait for the following green LED blink pattern: Blink, blink, blink, pause. 3. Vary on the drive (Main Menu Utils Drives Status Change Vary On). 4. Retry the operation that failed. Action 3 If the problem is not corrected or persists, contact GCH. For GCH contact information, refer to Getting More Information or Help on page 1-8. 6-30 Error Messages 6-00058-05 Rev A Table 6-2 Reported SAC 95 xx yy Service Action Codes (Continued) Perform these actions An error was detected and reported by the drive sled. Action 1 Use the modifier xx yy to locate the failing tape drive: • xx = rack number (1 to 16) • yy = drive location (1 to 48) Where 1 is the bottom right drive location (viewing from the back of the module) and 48 being the top left drive location. Drives are counted from right to left and bottom to top. Refer to Service Action Codes on page 6-11 for more information on SAC modifiers. Action 2 Do the following to power cycle the drive: 1. Vary Off the drive (Main Menu Utils Drives Status Change Vary Off). Note that the SAC modifier xx yy coordinate system is not used to Vary Off a drive. A different coordinate system is used to Vary Off a drive. For more information, refer to Vary Off Dialog on page 4-109. 2. Open the CM or DM service door. 3. Reseat the drive sled by pulling it out an inch and inserting back into the 2pack. Do not remove the drive sled all the way. Wait for the following green LED blink pattern: Blink, blink, blink, pause. 4. Vary on the drive (Main Menu Utils Drives Status Change Vary On). Note that the SAC modifier xx yy coordinate system is not used to Vary On a drive. A different coordinate system is used to Vary On a drive. For more information, refer to Vary On Dialog on page 4-110. 5. Close the CM or DM service door. 6. Retry the original operation that failed. Action 3 If the problem is not corrected or persists, contact GCH. For GCH contact information, refer to Getting More Information or Help on page 1-8. September 2007 Service Action Codes 6-31 Table 6-2 Reported SAC 96 xx yy or 96 xx yy z Service Action Codes (Continued) Perform these actions Library detected a tape drive hardware failure. Action 1 Use the modifier xx yy z to locate the failing tape drive: • xx = rack number (1 to 16) • yy = drive location (1 to 48) • z = character error displayed on some tape drive types For the yy modifiers, 1 is the bottom right drive location (viewing from the back of the module) and 48 being the top left drive location. Drives are counted from right to left and bottom to top. Refer to Service Action Codes on page 6-11 for more information on SAC modifiers. Action 2 For UDS Drives: 1. Contact GCH and provide them with the SAC and modifier information. For GCH contact information, refer to Getting More Information or Help on page 1-8. For 3590 Drives: 1. Read the error code on the drive panel and record it for later use. 2. Vary Off the tape drive. (Main Menu Utils Drives Status Change Vary Off). 3. Power off the tape drive using the drive power switch. 4. Check the cabling. 5. Power on the tape drive using the drive power switch. 6. Vary On the tape drive. (Main Menu Utils Drives Status Change Vary On). 7. If the problem is not corrected or persists, contact GCH. For GCH contact information, refer to Getting More Information or Help on page 1-8. 97 xx yy The Library detected that the firmware level of one of its Controllers (LSC, LGR, TCL, LBI, LDC) is different than the firmware level of the rest of the library. Note: If the Library is running firmware version 210A or earlier and has patch code installed, a SAC 97 is anticipated. Action 1 If firmware levels are incorrect, contact GCH. For GCH contact information, refer to Getting More Information or Help on page 1-8. 6-32 Error Messages 6-00058-05 Rev A Table 6-2 Reported SAC 99 xx yy Service Action Codes (Continued) Perform these actions Incorrect tape drive product ID. Note: This error has no impact on library operations. Action 1 This problem does not require any action to continue library operations. However, contact GCH to correct this improper product ID problem. For GCH contact information, refer to Getting More Information or Help on page 18. 9B xx yy A failure occurred in response to a Load command. Action 1 Use the modifier xx yy z to locate the failing tape drive: • xx = rack number (1 to 16) • yy = drive location (1 to 48) For the yy modifiers, 1 is the bottom right drive location (viewing from the back of the module) and 48 being the top left drive location. Drives are counted from right to left and bottom to top. Refer to Service Action Codes on page 6-11 for more information on SAC modifiers. Action 2 • If possible, move the cartridge to another drive of the same type. If this resolves the problem, then the drive may be bad. Contact GCH. For GCH contact information, refer to Getting More Information or Help on page 1-8. • If moving the cartridge to another drive does not resolve the error, insert a different cartridge of the same type into the original drive. If this resolves the problem, the cartridge may be bad. 9C xx yy A failure occurred in a 3592-J1A tape drive. Action 1 Use the modifier xx yy to locate the failing tape drive: • xx = rack number (1 to 16) • yy = drive location (1 to 40) For the yy modifiers, 1 is the bottom right drive location (viewing from the back of the module) and 48 being the top left drive location. Drives are counted from right to left and bottom to top. Refer to Service Action Codes on page 6-11 for more information on SAC modifiers. Action 2 Leave the tape drive in the failing state, record all SAC modifier information, and contact GCH. For GCH contact information, refer to Getting More Information or Help on page 1-8. September 2007 Service Action Codes 6-33 Table 6-2 Service Action Codes (Continued) Reported SAC A0 00 00 Perform these actions A failure was detected when the LSC attempts to communicate with the Remote Management Unit (RMU). Action 1 Verify that the RMU is connected. Action 2 Verify that the Serial Port is set to RMU (Main Menu Trace Serial Port). Setup Library Action 3 Reboot the RMU. Refer to Rebooting the RMU on page 3-21. Action 4 If the problem is not corrected or persists, contact GCH. For GCH contact information, refer to Getting More Information or Help on page 1-8. A1 00 00 Time out expires on the LSC card waiting for response from the RMU. Action 1 Reboot the RMU. Refer to Rebooting the RMU on page 3-21. Action 2 If the problem is not corrected or persists, contact GCH. For GCH contact information, refer to Getting More Information or Help on page 1-8. A2 xx yy A failure was detected when the LSC card attempted to communicate with the LGR card or a controller in a rack (LBI or TCL). Action 1 Do one of the following: • If xx yy = 00 00, communication failure occurred with the LGR card. Power down the Library to re-initialize the LGR card, then check the LED on the LGR card to see if it is flashing. Refer to Shutting Down the Scalar 10K on page 3-8 and Starting the Scalar 10K on page 3-7. • If xx yy is not 00 00, xx indicates the rack where the communication failure occurred, which could be a TCL card or an LBI card. Contact GCH. Action 2 If the problem is not corrected or persists, contact GCH. For GCH contact information, refer to Getting More Information or Help on page 1-8. 6-34 Error Messages 6-00058-05 Rev A Table 6-2 Reported SAC A3 xx yy Service Action Codes (Continued) Perform these actions Time out expires on the LSC card waiting for response from one of the auxiliary controllers (LGR, LBI, or TCL). Action 1 Contact GCH. For GCH contact information, refer to Getting More Information or Help on page 1-8. A4 xx yy A failure was detected when the LSC attempts to communicate with one of the tape drives. Action 1 Use the xx yy modifiers to locate the failing tape drive: • xx = rack number (1 to 16) • yy = drive location (1 to 48) For the yy modifiers, 1 is the bottom right drive location (viewing from the back of the module) and 48 being the top left drive location. Drives are counted from right to left and bottom to top. Refer to Service Action Codes on page 6-11 for more information on SAC modifiers. Action 2 Isolate the failure by requesting drive status from another drive within the rack. Perform this task using the operator panel (Main Menu Status Drives Drive State). Action 3 Note whether the status comes back OK or fails to come back, then contact GCH. For GCH contact information, refer to Getting More Information or Help on page 1-8. A5 xx yy Time out expires on the LSC card waiting for response from one of the tape drives. Action 1 Contact GCH. For GCH contact information, refer to Getting More Information or Help on page 1-8. B0 xx 00 A home sensor failure was detected in the Tower Module located in rack xx. Action 1 Contact GCH. For GCH contact information, refer to Getting More Information or Help on page 1-8. B1 xx 00 A motion failure was detected in the Tower Module located in rack xx. Action 1 Contact GCH. For GCH contact information, refer to Getting More Information or Help on page 1-8. September 2007 Service Action Codes 6-35 Table 6-2 Reported SAC B2 xx 00 Service Action Codes (Continued) Perform these actions A Power Amplifier failure was detected in the Tower Module located in rack xx. Action 1 Contact GCH. For GCH contact information, refer to Getting More Information or Help on page 1-8. B5 xx 00 A general tower failure was detected in the Tower Module located in rack xx. Action 1 Contact GCH. For GCH contact information, refer to Getting More Information or Help on page 1-8. D0 00 00 The Library detected that one of its DC Power Supplies has failed. Action 1 Use the operator panel to retrieve additional information to determine the failing Power Supply (Main Menu Service Diags P/S Submenu Library Power). The DC output and AC input of each Power Supply is shown: P/S: 1 2 3 4 5 6 7 8 AC : Y Y Y Y Y Y Y Y DC : Y Y Y Y Y Y Y Y Y=OK, N=ERRORS Power Supplies 1 through 4 are N (Standard) configuration, and Power Supplies 5 through 8 are redundant Power Supplies. Y indicates that The DC output and/or AC input of each Power Supply is in good status, while N indicates a failing status. Action 2 If a Power Supply’s DC output or AC input has a failing status, contact GCH. For GCH contact information, refer to Getting More Information or Help on page 1-8. D1 00 00 The Library detected that AC input to one bank of the DC Power Supplies is missing. Action 1 Contact GCH. For GCH contact information, refer to Getting More Information or Help on page 1-8. 6-36 Error Messages 6-00058-05 Rev A Table 6-2 Reported SAC D2 xx yy Service Action Codes (Continued) Perform these actions A failure was detected in one of the UDS Power Supplies. Action 1 Use the modifier xx yy to locate the failing Power Supply: • xx = rack number (1 to 16) • yy = UDS Power Supply location (1 to 4) Refer to Service Action Codes on page 6-11 for more information on SAC modifiers. Action 2 Use the operator panel to retrieve additional information to determine the failing UDS Power Supply (Main Menu Service Diags P/S Submenu UDS Power). The screen shows: P/S: B1 B2 B3 B4 DC : Y Y Dual: Y N Rack: 04 Select the rack containing the UDS Power Supply in question: • B1 through B4 indicates the Drive bays 1 through 4. • DC indicates the output of each UDS bay: Y=Good, N=Fail. • Dual indicates the status of the UDS P/S: Y=Both P/S’s are working, N=One of the UDS P/S supply failed. • A dash (-) indicates the UDS bay is not installed. Locate the rack and the drive bay containing the failing UDS power supply, then contact GCH. For GCH contact information, refer to Getting More Information or Help on page 1-8. F0 00 00 Failures were detected while running the diagnostic loop test from the LSC card to the LMC card. Action 1 Contact GCH. For GCH contact information, refer to Getting More Information or Help on page 1-8. F1 00 00 Failures were detected while running the diagnostic loop test from the LSC card to the LPN card. Action 1 Contact GCH. For GCH contact information, refer to Getting More Information or Help on page 1-8. September 2007 Service Action Codes 6-37 Table 6-2 Reported SAC F2 00 00 Service Action Codes (Continued) Perform these actions Failures were detected while running the diagnostic loop test from the LSC card to the LGR card. Action 1 Contact GCH. For GCH contact information, refer to Getting More Information or Help on page 1-8. F3 00 00 Failures were detected while running the diagnostic loop test from the LSC card to all the sensors on the Gripper assembly. Action 1 Contact GCH. For GCH contact information, refer to Getting More Information or Help on page 1-8. F4 xx yy Failures were detected while running the diagnostic loop test from the LSC card to all the sensors on the Insert/Eject station. Action 1 Contact GCH. For GCH contact information, refer to Getting More Information or Help on page 1-8. F5 00 00 Failures were detected while running the diagnostic loop test from the LSC card to the X-axis home sensors. Action 1 Contact GCH. For GCH contact information, refer to Getting More Information or Help on page 1-8. F6 00 00 Failures were detected while running the diagnostic loop test from the LSC card to the Y-axis home sensor. Action 1 Contact GCH. For GCH contact information, refer to Getting More Information or Help on page 1-8. F7 00 00 Failures detected in the LSC card during Power On Self Test. Action 1 Contact GCH. For GCH contact information, refer to Getting More Information or Help on page 1-8. F8 00 00 Failures detected in the LMC card during Power On Self Test. Action 1 Contact GCH. For GCH contact information, refer to Getting More Information or Help on page 1-8. 6-38 Error Messages 6-00058-05 Rev A Table 6-2 Reported SAC F9 00 00 Service Action Codes (Continued) Perform these actions Failures detected in the LGR card during Power On Self Test. Action 1 Contact GCH. For GCH contact information, refer to Getting More Information or Help on page 1-8. FA 00 00 Failures detected in the LAM1 card during Power On Self Test. Action 1 Contact GCH. For GCH contact information, refer to Getting More Information or Help on page 1-8. FB 00 00 Preventive maintenance is required. Action 1 Contact GCH to schedule a Preventive Maintenance. For GCH contact information, refer to Getting More Information or Help on page 1-8. September 2007 Service Action Codes 6-39 Resolving a Stuck Accessor If the accessor is stuck, do the following: Step 1 Open the AM service door. Aisle power is disabled. Note When pushing/ pulling the accessor, place your hands near the bottom of the accessor to avoid torque on the top and bottom bearings. 6-40 Error Messages Step 2 Slightly pull down on the Y-axis belt (to relieve pressure on the gripper) and slide the gripper away from the cartridge slot. If needed, remove the cartridge. Step 3 Release the Y-axis belt. Step 4 Push/pull the accessor to the home position (AM service door). Step 5 Using the operator panel, place the library in Ready state (Main Menu Mode Ready). 6-00058-05 Rev A Error Log Form In the event of an error, record the error information from the Error Log screen for any future reference. Refer to Error Log Dialog on page 4-26. Table 6-3 Type September 2007 Error Log Reporting Error Modifier Date Error Occurred Error Log Form 6-41 Frequently Asked Questions This section provides a reference of commonly asked questions and their answers. 6-42 Error Messages Question: How do I set the SCSI ID of the Scalar 10K? Answer: The SCSI ID of the Scalar 10K can be set via the operator panel. Refer to SCSI Submenu on page 466. Question: How do I get a password to use Capacity On Demand? Answer: Contact GCH to receive a password, and refer to Capacity Submenu on page 4-79. Question: What is the Element Addressing scheme for the Scalar 10K? Answer: The host references source and target designations with element addresses within the Scalar 10K library. Each element within the library has a unique address. For further information refer to Element Addressing on page 2-5 of the Scalar 10K SCSI Reference Manual. Question: What is the difference between Default mode, Extended mode, and Multi Media mode? Answer: The Scalar 10K can recognize different types of barcode labels, depending on what mode it is operating in. Refer to Understanding Barcodes on page 5-12. Question: How do I upgrade the library firmware? Answer: The Scalar 10K library firmware may only be upgraded by trained personnel. Contact GCH. Question: What do I do if I lose my password? Answer: Contact GCH. They can tell you how to reset the password. Question: What are the barcode limitations/restrictions? Answer: Barcode labels must be printed according to certain specifications. Refer to Barcode Labels on page 5-12. 6-00058-05 Rev A Question: How do I remove a tape? Answer: There are several ways to remove tapes from the Scalar 10K. Refer to Inserting Tape Cartridges on page 5-6. Question: Where are the drives located? Answer: Drives are located in the Control Module or in the Drive Module. Refer to Control Module on page 26, Drive Module on page 2-7, Figure 2-3 on page 2-9, Figure 6-1 on page 7-13, and Figure 6-2 on page 7-14. Question: How do I set the SCSI/Loop ID’s on the Universal Drive Sled (UDS) drives? The default ID is set for each drive during the installation but can be changed if needed. It is recommended that you keep the default ID’s. September 2007 Answer: SCSI/Loop ID’s can be set via the operator panel. Refer to ID Dialog on page 4-88. Question: Where are the Error Messages defined? Answer: The Error Messages are defined in the last chapter in this guide. Refer to Service Action Codes on page 6-11, Error Log Form on page 6-41, and Error Log Form on page 6-41. Question: How do I get help? Answer: Refer to Getting More Information or Help on page 1-8. Frequently Asked Questions 6-43 6-44 Error Messages 6-00058-05 Rev A Index -33590 drive location numbering . . . . . . . . . . . 6-14 3592 drive location numbering . . . . . . . . . . . 6-14 -Aabout screen . . . . . . . . . . . . . . . . . . . . . . . . . . 4-173 accessor cartridge . . . . . . . . . . . . . . . . . . . . . . . . . . . 2-12 Accessor Module . . . . . . . . . . . . . . . . . . . . . . . . 2-6 accessor submenu . . . . . . . . . . . . . . . . . . . . . 4-126 acclimating cartridges . . . . . . . . . . . . . . . . . . . . 5-5 activate dialog . . . . . . . . . . . . . . . . . . . . . . . . 4-108 adjust dialog . . . . . . . . . . . . . . . . . . . . . . . . . . 4-137 advanced dialog . . . . . . . . . . . . . . . . . . . . . . . . 4-84 all dialog . . . . . . . . . . . . . . . . . . . . . . . . . . . . . 4-171 applying barcode labels . . . . . . . . . . . . . . . . . 5-13 associated documents Scalar 10K Maintenance Guide . . . . . . . . . 1-8 Scalar 10K Planning Guide . . . . . . . . . . . . 1-8 Scalar 10K SCSI Reference Manual . . . . . 1-8 audio dialog . . . . . . . . . . . . . . . . . . . . . . . . . . 4-102 autoclean drives . . . . . . . . . . . . . . . . . . . . . . . . . . . . . 5-22 -Bbarcode label applying . . . . . . . . . . . . . . . . . . . . . . . . . . . 5-13 examples . . . . . . . . . . . . . . . . . . . . . . . . . . 5-15 requirements . . . . . . . . . . . . . . . . . . . . . . . 5-12 restrictions . . . . . . . . . . . . . . . . . . . . . . . . . 5-13 standards . . . . . . . . . . . . . . . . . . . . . . . . . . 5-12 understanding . . . . . . . . . . . . . . . . . . . . . . 5-12 barcode number . . . . . . . . . . . . . . . . . . . . . . . .2-13 bays dialog . . . . . . . . . . . . . . . . . . . . . . . . . . . .4-162 bulk loading cartridges . . . . . . . . . . . . . . . . . . .5-7 -Ccartridge accessor . . . . . . . . . . . . . . . . . . . . . . .2-12 cartridges acclimating . . . . . . . . . . . . . . . . . . . . . . . . . .5-5 ejecting . . . . . . . . . . . . . . . . . . . . . . . . . . . .5-11 handling . . . . . . . . . . . . . . . . . . . . . . . . . . . .5-4 inserting . . . . . . . . . . . . . . . . . . . . . . . . . . . .5-6 inspecting . . . . . . . . . . . . . . . . . . . . . . . . . . .5-3 maintenance . . . . . . . . . . . . . . . . . . . . . . . . .5-3 manually bulk loading . . . . . . . . . . . . . . . .5-7 processing . . . . . . . . . . . . . . . . . . . . . . . . . .5-12 storing . . . . . . . . . . . . . . . . . . . . . . . . . . . . . .5-4 transporting . . . . . . . . . . . . . . . . . . . . . . . . .5-5 clean drives dialog . . . . . . . . . . . . . . . . . . . . .4-114 cleaning drives . . . . . . . . . . . . . . . . . . . . . . . . .5-16 cleaning submenu . . . . . . . . . . . . . . . . . . . . . . .4-94 commands menu . . . . . . . . . . . . . . . . . . . . . . .4-40 config dialog . . . . . . . . . . . . . . . . . . . . . . . . . . .4-63 continue dialog . . . . . . . . . . . . . . . . . . . . . . . .4-158 Control Module . . . . . . . . . . . . . . . . . . . . . . . . . .2-6 current dialog . . . . . . . . . . . . . . . . . . . . . . . . .4-159 -Ddatabase menu . . . . . . . . . . . . . . . . . . . . . . . . .4-60 date dialog . . . . . . . . . . . . . . . . . . . . . . . . . . . .4-104 demo dialog . . . . . . . . . . . . . . . . . . . . .4-169, 4-171 description help . . . . . . . . . . . . . . . . . . . . . . . . . . . . . . . .4-7 operator panel . . . . . . . . . . . . . . . . . . . . . . .4-5 RMU . . . . . . . . . . . . . . . . . . . . . . . . . . . . . . 2-22 diags submenu . . . . . . . . . . . . . . . . . . . . . . . . 4-125 directory structure operator panel . . . . . . . . . . . . . . . . . . . . . . . 4-5 dismount drives dialog . . . . . . . . . . . . . . . . . 4-118 drive dialog . . . . . . . . . . . . . . . . . . . . . . . . . . . 4-164 drive location numbering 3590 tape drives . . . . . . . . . . . . . . . . . . . . 6-14 3592 tape drives . . . . . . . . . . . . . . . . . . . . 6-14 UDS tape drives . . . . . . . . . . . . . . . . . . . . 6-13 Drive Module . . . . . . . . . . . . . . . . . . . . . . . . . . . 2-7 drive state dialog . . . . . . . . . . . . . . . . . . . . . . . 4-31 drives autoclean . . . . . . . . . . . . . . . . . . . . . . . . . . 5-22 cleaning . . . . . . . . . . . . . . . . . . . . . . . . . . . 5-16 drives dialog . . . . . . . . . . . . . . . . . . . . . . . . . . . 4-96 drives submenu . . . . . . . . . . . . . . . . . . . 4-30, 4-87 -Eeject clean tape dialog . . . . . . . . . . . . . . . . . . . 4-58 eject cleaning cartridge I/E station . . . . . . . . . . . . . . . . . . . . . . . . . 5-21 eject dialog . . . . . . . . . . . . . . . . . . . . . . . . . . . . 4-56 ejecting cartridges . . . . . . . . . . . . . . . . . . . . . . 5-11 element dialog . . . . . . . . . . . . . . . . . . . . 4-22, 4-61 emergency shutdown . . . . . . . . . . . . . . . . . . . . 3-9 enu . . . . . . . . . . . . . . . . . . . . . . . . . . . . . . . . . . . 4-29 error log form . . . . . . . . . . . . . . . . . . . . . . . . . . 6-41 error messages . . . . . . . . . . . . . . . . . . . . . . . . . . 6-1 Expansion Module . . . . . . . . . . . . . . . . . . . . . . . 2-6 -Ffiducial test dialog . . . . . . . . . . . . . . . . . . . . . 4-139 firmware LBI version . . . . . . . . . . . . . . . . . . . . . . . . . 4-29 LGR version . . . . . . . . . . . . . . . . . . . . . . . . 4-29 library version . . . . . . . . . . . . . . . . . . . . . 4-173 LSC version . . . . . . . . . . . . . . . . . . . . . . . . 4-29 RMU version . . . . . . . . . . . . . . . . . . . . . . . 4-29 tape drive version . . . . . . . . . . . . . . . . . . 4-112 TCL version . . . . . . . . . . . . . . . . . . . . . . . . 4-29 frequently asked questions . . . . . . . . . . . . . . . 6-42 -GGCH contact information . . . . . . . . . . . . . . . . . 1-8 get/put drives dialog . . . . . . . . . . . . . . . . . . 4-133 get/put storage dialog . . . . . . . . . . . . . . . . . 4-130 getting help . . . . . . . . . . . . . . . . . . . . . . . . . . . . . 1-8 in-2 Index gripper dialog . . . . . . . . . . . . . . . . . . . . . . . . .4-166 -Hhandling cartridges . . . . . . . . . . . . . . . . . . . . . .5-4 help . . . . . . . . . . . . . . . . . . . . . . . . . . . . . . . .1-8, 4-7 home dialog . . . . . . . . . . . . . . . . . . . . . . . . . . .4-140 Host Dialog . . . . . . . . . . . . . . . . . . . . . . . . . . . .4-83 host dialog . . . . . . . . . . . . . . . . . . . . . . . . . . . . .4-70 -II/E security . . . . . . . . . . . . . . . . . . . . . . . . . . . .4-74 I/E station . . . . . . . . . . . . . . . . . . . . . . . . . . . . . .5-6 ejecting cleaning cartridge . . . . . . . . . . . .5-21 inserting cartridges . . . . . . . . . . . . . . . . . . .5-6 I/E stations dialog . . . . . . . . . . . . . . . . . . . . . .4-39 indicators operator panel . . . . . . . . . . . . . . . . . . . . . . .3-5 initialize dialog . . . . . . . . . . . . . . . . . .4-107, 4-122 insert clean tape screen . . . . . . . . . . . . . . . . . .4-53 insert screen . . . . . . . . . . . . . . . . . . . . . . . . . . . .4-52 insert/eject station . . . . . . . . . . . . . . . . . . . . . .2-14 insert/eject submenu . . . . . . . . . . . . . . . . . . . .4-51 eject clean tape dialog . . . . . . . . . . . . . . . .4-58 inserting cartridges . . . . . . . . . . . . . . . . . . . . . . .5-6 internal components . . . . . . . . . . . . . . . . . . . . . .2-8 inventory dialog . . . . . . . . . . . . . . . . . . .4-49, 4-86 IP dialog . . . . . . . . . . . . . . . . . . . . . . . . . . . . . . .4-83 -Llibrary firmware version . . . . . . . . . . . . . . . .4-173 library microcode version . . . . . . . . . . . . . . .4-173 library submenu . . . . . . . . . . . . . .4-12, 4-64, 4-99 locks dialog . . . . . . . . . . . . . . . . . . . . . . . . . . .4-150 logs submenu . . . . . . . . . . . . . . . . . . . . . . . . . .4-25 loopback dialog . . . . . . . . . . . . . . . . . . . . . . . .4-143 -Mmain menu . . . . . . . . . . . . . . . . . . . . . . . . . . . . . .4-9 main power switch . . . . . . . . . . . . . . . . . . . . . . .1-4 maintenance cartridges . . . . . . . . . . . . . . . . . . . . . . . . . . .5-3 manually bulk loading cartridges . . . . . . . . . .5-7 media acclimating . . . . . . . . . . . . . . . . . . . . . . . . . .5-5 ejecting . . . . . . . . . . . . . . . . . . . . . . . . . . . .5-11 handling . . . . . . . . . . . . . . . . . . . . . . . . . . . .5-4 inserting . . . . . . . . . . . . . . . . . . . . . . . . . . . .5-6 inspecting . . . . . . . . . . . . . . . . . . . . . . . . . . .5-3 6-00058-05 Rev A maintenance . . . . . . . . . . . . . . . . . . . . . . . . . 5-3 manually bulk loading . . . . . . . . . . . . . . . . 5-7 processing . . . . . . . . . . . . . . . . . . . . . . . . . 5-12 storing . . . . . . . . . . . . . . . . . . . . . . . . . . . . . . 5-4 transporting . . . . . . . . . . . . . . . . . . . . . . . . . 5-5 media dialog . . . . . . . . . . . . . . . . . 4-60, 4-77, 4-97 media info dialog . . . . . . . . . . . . . . . . . . 4-35, 4-36 menu about screen . . . . . . . . . . . . . . . . . . . . . . . 4-173 commands menu . . . . . . . . . . . . . . 4-40, 4-58 insert/eject submenu . . . . . . . . . . . . 4-51 eject dialog . . . . . . . . . . . . . . . . . . 4-56 insert clean tape dialog . . . . . . . 4-53 insert screen . . . . . . . . . . . . . . . . . 4-52 inventory dialog . . . . . . . . . . . . . . . . 4-49 move submenu . . . . . . . . . . . . . . . . . . 4-41 move media dialog . . . . . . . . . . . 4-46 position gripper dialog . . . . . . . 4-42 position scanner dialog . . . . . . . 4-44 park . . . . . . . . . . . . . . . . . . . . . . . . . . . 4-40 database menu . . . . . . . . . . . . . . . . . . . . . 4-60 config dialog . . . . . . . . . . . . . . . . . . . . 4-63 element dialog . . . . . . . . . . . . . . . . . . 4-61 media dialog . . . . . . . . . . . . . . . . . . . . 4-60 drives submenu . . . . . . . . . . . . . . . . . . . . . 4-30 element dialog . . . . . . . . . . . . . . . . . . . . . . 4-22 logs submenu . . . . . . . . . . . . . . . . . . . . . . 4-25 main screen . . . . . . . . . . . . . . . . . . . . . . . . . 4-9 mode dialog . . . . . . . . . . . . . . . . . . . . . . . . 4-10 service menu . . . . . . . . . . . . . . . . . . . . . . 4-123 demo dialog . . . . . . . . . . . . . 4-169, 4-171 diags submenu . . . . . . . . . . . . . . . . . 4-125 accessor submenu . . . . . . . . . . . 4-126 move dialog . . . . . . . . . . . . 4-127 step . . . . . . . . . . . . . . . . . . . 4-128 DI/DO submenu . . . . . . . . . . . 4-143 locks dialog . . . . . . . . . . . . 4-150 loopback dialog . . . . . . . . . 4-143 sensors submenu . . . . . . . . 4-145 real time screen . . . . . . 4-147 wrap dialog . . . . . . . . . 4-146 gripper submenu . . . . . . . . . . . 4-129 get/put drives dialog . . . . 4-133 get/put storage dialog . . . 4-130 step dialog . . . . . . . . . . . . . 4-135 test dialog . . . . . . . . . . . . . . 4-136 library submenu . . . . . . . . . . . . 4-154 corner moves dialog . . . . . 4-155 storage moves dialog . . . . 4-154 September 2007 P/S submenu . . . . . . . . . . . . . . .4-152 library power . . . . . . . . . . .4-152 UDS power . . . . . . . . . . . . .4-153 scanner submenu . . . . . . . . . . .4-136 adjust dialog . . . . . . . . . . . .4-137 fiducial test dialog . . . . . . .4-139 trigger dialog . . . . . . . . . . .4-138 self test submenu . . . . . . . . . . . .4-151 tower submenu . . . . . . . . . . . . .4-140 home dialog . . . . . . . . . . . .4-140 step dialog . . . . . . . . . . . . . .4-142 SAC dialog . . . . . . . . . . . . . . . . . . . .4-168 start dialog . . . . . . . . . . . . . . . . . . . . .4-123 teach submenu . . . . . . . . . . . . . . . . .4-156 bays dialog . . . . . . . . . . . . . . . . .4-162 continue dialog . . . . . . . . . . . . .4-158 current dialog . . . . . . . . . . . . . .4-159 drive dialog . . . . . . . . . . . . . . . .4-164 gripper dialog . . . . . . . . . . . . . .4-166 new dialog . . . . . . . . . . . . . . . . .4-156 tape dialog . . . . . . . . . . . . . . . . .4-168 verify submenu . . . . . . . . . . . . . . . . .4-171 all dialog . . . . . . . . . . . . . . . . . . .4-171 report dialog . . . . . . . . . . . . . . .4-172 setup menu . . . . . . . . . . . . . . . . . . . . . . . . .4-64 library submenu . . . . . . . . . . . . . . . . .4-64 advanced dialog . . . . . . . . . . . . .4-84 cleaning submenu . . . . . . . . . . . .4-94 drives dialog . . . . . . . . . . . . .4-96 media dialog . . . . . . . . . . . . .4-97 view dialog . . . . . . . . . . . . . .4-98 drives submenu . . . . . . . . . . . . . .4-87 scsi dialog . . . . .4-88, 4-91, 4-92 host dialog . . . . . . . . . . . . . . . . . .4-70 inventory dialog . . . . . . . . . . . . .4-86 media dialog . . . . . . . . . . . . . . . .4-77 RMU submenu . . . . . . . . . . . . . .4-82 IP dialog . . . . . . . . . . . . . . . .4-83 scsi submenu . . . . . . . . . . . . . . . .4-66 security submenu . . . . . . . . . . . .4-71 I/E security . . . . . . . . . . . . . .4-74 reset passwords . . . . . . . . . .4-76 user security . . . . . . . . . . . . .4-72 trace dialog . . . . . . . . . . . . . . . . . .4-65 more submenu . . . . . . . . . . . . . . . . . .4-84 status menu . . . . . . . . . . . . . . . . . . . . . . . .4-12 drives submenu . . . . . . . . . . . . . . . . .4-30 drive state dialog . . . . . . . . . . . . .4-31 media info dialog . . . . . . .4-35, 4-36 Index in-3 I/E stations dialog . . . . . . . . . . . . . . . 4-39 library submenu . . . . . . . . . . . . . . . . . 4-12 scsi submenu . . . . . . . . . . . . . . . . 4-13 system dialog . . . . . . . . . . . . . . . 4-21 towers submenu . . . . . . . . . . . . . . . . 4-38 utils menu . . . . . . . . . . . . . . . . . . . . . . . . . 4-99 drives submenu . . . . . . . . . . . . . . . . 4-106 operations submenu . . . . . . . . 4-111 clean drives dialog . . . . . . 4-114 dismount drives dialog . . 4-118 unload drives dialog . . . . . 4-116 update microcode dialog . 4-112 status change submenu . . . . . . 4-106 activate dialog . . . . . . . . . . 4-108 initialize dialog . . . . . . . . . 4-107 vary off dialog . . . . . . . . . . 4-109 vary on dialog . . . . . . . . . . 4-110 towers submenu . . . . . . . . . . . . 4-120 initialize dialog . . . . . . . . . 4-122 status change dialog . . . . . 4-120 library submenu . . . . . . . . . . . . . . . . . 4-99 audio dialog . . . . . . . . . . . . . . . 4-102 date dialog . . . . . . . . . . . . . . . . . 4-104 screen dialog . . . . . . . . . . . . . . . 4-100 snap shot screen . . . . . . . . . . . . 4-104 speed dialog . . . . . . . . . . . . . . . 4-105 time dialog . . . . . . . . . . . . . . . . . 4-103 messages error . . . . . . . . . . . . . . . . . . . . . . . . . . . . . . . 6-1 operator intervention . . . . . . . . . . . . . . . . . 6-4 microcode LBI version . . . . . . . . . . . . . . . . . . . . . . . . . 4-29 LGR version . . . . . . . . . . . . . . . . . . . . . . . . 4-29 library version . . . . . . . . . . . . . . . . . . . . . 4-173 LSC version . . . . . . . . . . . . . . . . . . . . . . . . 4-29 RMU version . . . . . . . . . . . . . . . . . . . . . . . 4-29 tape drive version . . . . . . . . . . . . . . . . . . 4-112 TCL version . . . . . . . . . . . . . . . . . . . . . . . . 4-29 mode dialog . . . . . . . . . . . . . . . . . . . . . . . . . . . 4-10 modules . . . . . . . . . . . . . . . . . . . . . . . . . . . . . . . . 2-5 more submenu . . . . . . . . . . . . . . . . . . . . . . . . . 4-84 move dialog . . . . . . . . . . . . . . . . . . . . . . . . . . 4-127 move media dialog . . . . . . . . . . . . . . . . . . . . . 4-46 move submenu . . . . . . . . . . . . . . . . . . . . . . . . . 4-41 -Nnew dialog . . . . . . . . . . . . . . . . . . . . . . . . . . . . 4-156 normal shutdown . . . . . . . . . . . . . . . . . . . . . . . . 3-8 in-4 Index -Oopening service requests . . . . . . . . . . . . . . . . . .1-8 operations submenu . . . . . . . . . . . . . . . . . . . .4-111 operator intervention messages . . . . . . . . . . . .6-4 operator panel . . . . . . . . . . . . . . . . . . . . . . .3-3, 4-5 directory structure . . . . . . . . . . . . . . . . . . . .4-5 indicators . . . . . . . . . . . . . . . . . . . . . . . . . . .3-5 push buttons . . . . . . . . . . . . . . . . . . . . . . . . .3-5 -Ppark . . . . . . . . . . . . . . . . . . . . . . . . . . . . . . . . . . .4-40 position gripper dialog . . . . . . . . . . . . . . . . . .4-42 position scanner dialog . . . . . . . . . . . . . . . . . .4-44 Problem Box . . . . . . . . . . . . . . . . . . . . . . . . . . .2-14 protective devices main power switch . . . . . . . . . . . . . . . . . . .1-4 push buttons . . . . . . . . . . . . . . . . . . . . . . . . . . . .3-5 -Rreal time screen . . . . . . . . . . . . . . . . . . . . . . . .4-147 remote management unit description . . . . . . . . . . . . . . . . . . . . . . . . .2-22 report dialog . . . . . . . . . . . . . . . . . . . . . . . . . .4-172 reset passwords . . . . . . . . . . . . . . . . . . . . . . . . .4-76 RMU description . . . . . . . . . . . . . . . . . . . . . . . . .2-22 RMU submenu . . . . . . . . . . . . . . . . . . . . . . . . .4-82 -SSAC dialog . . . . . . . . . . . . . . . . . . . . . . . . . . . .4-168 SACs modifiers . . . . . . . . . . . . . . . . . . . . . . . . . . .6-11 table . . . . . . . . . . . . . . . . . . . . . . . . . . . . . . .6-15 understanding . . . . . . . . . . . . . . . . . . . . . .6-11 Scalar 10K restart . . . . . . . . . . . . . . . . . . . . . . .3-10 Scalar 10K shutdown . . . . . . . . . . . . . . . . . . . . .3-8 Scalar 10K startup . . . . . . . . . . . . . . . . . . . . . . . .3-7 Scalar DLC . . . . . . . . . . . . . . . . . . . . . . . . . . . . .2-19 screen dialog . . . . . . . . . . . . . . . . . . . . . . . . . .4-100 SCSI Attachment . . . . . . . . . . . . . . . . . . . . . . . .2-18 SCSI dialog . . . . . . . . . . . . . . . . . . .4-88, 4-91, 4-92 SCSI submenu . . . . . . . . . . . . . . . . . . . . .4-13, 4-66 sensors submenu . . . . . . . . . . . . . . . . . . . . . .4-145 service action codes modifiers . . . . . . . . . . . . . . . . . . . . . . . . . . .6-11 table . . . . . . . . . . . . . . . . . . . . . . . . . . . . . . .6-15 understanding . . . . . . . . . . . . . . . . . . . . . .6-11 service menu . . . . . . . . . . . . . . . . . . . . . . . . . .4-123 6-00058-05 Rev A service requests, opening . . . . . . . . . . . . . . . . . 1-8 setup menu . . . . . . . . . . . . . . . . . . . . . . . . . . . . 4-64 shutdown . . . . . . . . . . . . . . . . . . . . . . . . . . . . . . 3-8 snap shot screen . . . . . . . . . . . . . . . . . . . . . . . 4-104 speed dialog . . . . . . . . . . . . . . . . . . . . . . . . . . 4-105 start dialog . . . . . . . . . . . . . . . . . . . . . . . . . . . 4-123 startup . . . . . . . . . . . . . . . . . . . . . . . . . . . . . . . . . 3-7 status change dialog . . . . . . . . . . . . . . . . . . . 4-120 status change submenu . . . . . . . . . . . . . . . . . 4-106 status menu . . . . . . . . . . . . . . . . . . . . . . . . . . . . 4-12 step . . . . . . . . . . . . . . . . . . . . . . . . . . . . . . . . . . 4-128 step dialog . . . . . . . . . . . . . . . . . . . . . . 4-135, 4-142 storing cartridges . . . . . . . . . . . . . . . . . . . . . . . . 5-4 symbols and notes . . . . . . . . . . . . . . . . . . . . . . . 1-6 system dialog . . . . . . . . . . . . . . . . . . . . . . . . . . 4-21 -Xxx . . . . . . . . . . . . . . . . . . . . . . . . . . . . . . . . . . . . .6-11 -Yyy . . . . . . . . . . . . . . . . . . . . . . . . . . . . . . . . . . . . .6-11 -Zz . . . . . . . . . . . . . . . . . . . . . . . . . . . . . . . . . . . . . .6-12 -Ttape cartridges overview . . . . . . . . . . . . . . . . . . . . . . . . . . . 2-13 tape dialog . . . . . . . . . . . . . . . . . . . . . . . . . . . . 4-168 tape drive, updating firmware (microcode) 4-112 technical support . . . . . . . . . . . . . . . . . . . . . . . . 1-8 test dialog . . . . . . . . . . . . . . . . . . . . . . . . . . . . 4-136 time dialog . . . . . . . . . . . . . . . . . . . . . . . . . . . 4-103 Tower Module . . . . . . . . . . . . . . . . . . . . . . . . . . 2-7 towers submenu . . . . . . . . . . . . . . . . . . . . . . . . 4-38 trace dialog . . . . . . . . . . . . . . . . . . . . . . . . . . . . 4-65 transporting cartridges . . . . . . . . . . . . . . . . . . . 5-5 trigger dialog . . . . . . . . . . . . . . . . . . . . . . . . . 4-138 -UUDS drive location numbering . . . . . . . . . . . 6-13 unload drives dialog . . . . . . . . . . . . . . . . . . . 4-116 update microcode dialog . . . . . . . . . . . . . . . 4-112 user security . . . . . . . . . . . . . . . . . . . . . . . . . . . 4-72 utils menu . . . . . . . . . . . . . . . . . . . . . . . . . . . . . 4-99 -Vvary off dialog . . . . . . . . . . . . . . . . . . . . . . . . 4-109 vary on dialog . . . . . . . . . . . . . . . . . . . . . . . . . 4-110 verify submenu . . . . . . . . . . . . . . . . . . . . . . . 4-171 view dialog . . . . . . . . . . . . . . . . . . . . . . . . . . . . 4-98 -WWORM tape cartridges . . . . . . . . . . . . . . . . . . . 2-8 wrap dialog . . . . . . . . . . . . . . . . . . . . . . . . . . . 4-146 Write Once Read Many (WORM) . . . . . . . . . . 2-8 September 2007 Index in-5 in-6 Index 6-00058-05 Rev A