1
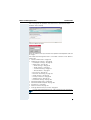
'5
$)
7
+L3DWK#633328333#560
+L3DWK#6333#9613
+L3DWK#7333#9413
RSWL3RLQW 743
$GPLQLVWUDWRU#0DQXDO
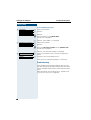
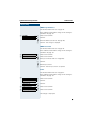
Important Notes
Note! (for U.S.A and Canada only)
This equipment has been tested and found to comply with the limits for a Class B
digital device, pursuant to Part 15 of the FCC Rules. These limits are designed to provide reasonable protection against harmful interference when the equipment is operated in a residential installation. This equipment generates, uses, and can radiate
radio frequency energy and, if not installed and used in accordance with the instructions, may cause harmful interference to radio communications. However, there is
no guarantee that interference will not occur in a particular installation. If this equipment does cause harmful interference to radio or television reception, which can be
determined by turning the equipment off and on, the user is encouraged to try to
correct the interference by one or more of the following measures:
• Reorient or relocate the receiving antenna.
• Increase the separation between the equipment and receiver.
• Connect the equipment into an outlet on a circuit different from that to which the
receiver is connected.
• Consult the dealer or an experienced radio/TV technician for help.
This product is a UL Listed Accessory, I.T.E., in U.S.A. and Canada.
The device conforms to the EU guideline 1999/5/EG, as attested by the
CE mark.
This device has been manufactured in accordance with our certified environmental management system (ISO 14001). This process ensures that energy
consumption and the use of primary raw materials are kept to a minimum,
thus reducing waste production.
2
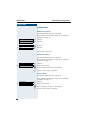
Safety Precautions
For Your Safety
The IP telephone optiPoint 410 complies with the European standard EN 60 950 which
deals with the safety of information technology appliances including electronic office
equipment. This device has been designed with safety in mind, thus protecting both individuals and objects.
There is always the danger of small objects being swallowed by young children. In the case
of the optiPoint 410, this applies in particular to the connecting cord clip.
Please make sure that such items are not accessible to children.
• Use only the enclosed power supply together with the special LAN cable.
• Never open the power supply enclosure.
Protection of the Telephone
•
•
The telephone must not be used in bathrooms, etc. as it is not splashproof.
Before connecting or disconnecting the LAN cable or the headset cord, pull the power
plug out of the plug receptacle first..
Location of the Telephone
•
•
•
•
•
The telephone should be operated in a controlled environment with an ambient temperature between 5 °C and 40 °C (40 °F and 104 °F).
To ensure good handsfree talking quality (not available with optiPoint 410 entry/basic),
the area in front of the microphone (front right) should be kept clear. The optimum
handsfree distance is 20 in (50 cm).
Do not install the telephone in a room where large quantities of dust accumulate; this
can considerably reduce the service life of the telephone.
Do not expose the telephone to direct sunlight or any other source of heat, as this is
liable to damage the electronic equipment and the plastic casing.
Do not operate the telephone in damp environments such as bathrooms.
3
Table of Contents
Important Notes . . . . . . . . . . . . . . . . . . . . . . . . . . . . . . 2
Safety Precautions. . . . . . . . . . . . . . . . . . . . . . . . . . . . 3
For Your Safety . . . . . . . . . . . . . . . . . . . . . . . . . . . . . . . . . . . . . . . . . . . . 3
Protection of the Telephone . . . . . . . . . . . . . . . . . . . . . . . . . . . . . . . . . . 3
Location of the Telephone. . . . . . . . . . . . . . . . . . . . . . . . . . . . . . . . . . . . 3
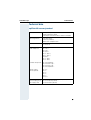
General Information. . . . . . . . . . . . . . . . . . . . . . . . . . . 7
About the Manual . . . . . . . . . . . . . . . . . . . . . . . . . . . . . . . . . . . . . . . . . .
Product Identification. . . . . . . . . . . . . . . . . . . . . . . . . . . . . . . . . . . . . . . .
Echo Effect . . . . . . . . . . . . . . . . . . . . . . . . . . . . . . . . . . . . . . . . . . . . . . .
Notes and Symbols . . . . . . . . . . . . . . . . . . . . . . . . . . . . . . . . . . . . . . . . .
Safety. . . . . . . . . . . . . . . . . . . . . . . . . . . . . . . . . . . . . . . . . . . . . . . . .
Reference to operation steps . . . . . . . . . . . . . . . . . . . . . . . . . . . . . .
Operating the telephone . . . . . . . . . . . . . . . . . . . . . . . . . . . . . . . . . .
7
7
7
8
8
8
9
Setting Up the Telephone . . . . . . . . . . . . . . . . . . . . . 10
Installing the Telephone . . . . . . . . . . . . . . . . . . . . . . . . . . . . . . . . . . . .
Starting up the optiPoint 410 . . . . . . . . . . . . . . . . . . . . . . . . . . . . . .
Preparing for Operation . . . . . . . . . . . . . . . . . . . . . . . . . . . . . . . . . . . . .
optiPoint 410 economy/standard . . . . . . . . . . . . . . . . . . . . . . . . . . .
Troubleshooting . . . . . . . . . . . . . . . . . . . . . . . . . . . . . . . . . . . . . . . .
optiPoint 410 entry . . . . . . . . . . . . . . . . . . . . . . . . . . . . . . . . . . . . .
Error handling. . . . . . . . . . . . . . . . . . . . . . . . . . . . . . . . . . . . . . . . . .
10
11
12
12
14
15
17
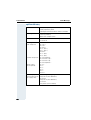
Administration . . . . . . . . . . . . . . . . . . . . . . . . . . . . . . 18
optiPoint 410 economy/standard. . . . . . . . . . . . . . . . . . . . . . . . . . . . . .
Configurations . . . . . . . . . . . . . . . . . . . . . . . . . . . . . . . . . . . . . . . . .
Diagnostics . . . . . . . . . . . . . . . . . . . . . . . . . . . . . . . . . . . . . . . . . . .
Downloads/Uploads. . . . . . . . . . . . . . . . . . . . . . . . . . . . . . . . . . . . .
Restart . . . . . . . . . . . . . . . . . . . . . . . . . . . . . . . . . . . . . . . . . . . . . . .
Error Messages . . . . . . . . . . . . . . . . . . . . . . . . . . . . . . . . . . . . . . . .
optiPoint 410 entry . . . . . . . . . . . . . . . . . . . . . . . . . . . . . . . . . . . . . . . .
Entering the administration area . . . . . . . . . . . . . . . . . . . . . . . . . . .
Restart . . . . . . . . . . . . . . . . . . . . . . . . . . . . . . . . . . . . . . . . . . . . . . .
Reset factory settings . . . . . . . . . . . . . . . . . . . . . . . . . . . . . . . . . . .
Error Messages . . . . . . . . . . . . . . . . . . . . . . . . . . . . . . . . . . . . . . . .
4
19
20
40
44
46
47
49
49
50
50
51
Table of Contents
Web-based Management Tool . . . . . . . . . . . . . . . . . . . . . . . . . . . . . . .
General . . . . . . . . . . . . . . . . . . . . . . . . . . . . . . . . . . . . . . . . . . . . . .
Preparation. . . . . . . . . . . . . . . . . . . . . . . . . . . . . . . . . . . . . . . . . . . .
General Information . . . . . . . . . . . . . . . . . . . . . . . . . . . . . . . . . . . . .
Administrator settings . . . . . . . . . . . . . . . . . . . . . . . . . . . . . . . . . . .
Download application. . . . . . . . . . . . . . . . . . . . . . . . . . . . . . . . . . . .
Download LDAP template . . . . . . . . . . . . . . . . . . . . . . . . . . . . . . . .
Diagnostics . . . . . . . . . . . . . . . . . . . . . . . . . . . . . . . . . . . . . . . . . . .
Restart terminal . . . . . . . . . . . . . . . . . . . . . . . . . . . . . . . . . . . . . . . .
Change administrator password . . . . . . . . . . . . . . . . . . . . . . . . . . .
The optiPoint 410 Display Module. . . . . . . . . . . . . . . . . . . . . . . . . . . . .
LDAP configuration . . . . . . . . . . . . . . . . . . . . . . . . . . . . . . . . . . . . .
54
54
54
56
56
60
60
61
61
61
62
62
Alphabetical Reference . . . . . . . . . . . . . . . . . . . . . . 66
Description of functions . . . . . . . . . . . . . . . . . . . . . . . . . . . . . . . . . . . . 66
Abbreviations and Specialized Terms . . . . . . . . . . . . . . . . . . . . . . . . . . 83
Administration scenarios. . . . . . . . . . . . . . . . . . . . . 88
Setting up the FTP server . . . . . . . . . . . . . . . . . . . . . . . . . . . . . . . . . . .
Installation and configuration . . . . . . . . . . . . . . . . . . . . . . . . . . . . . .
Check handset functionalities . . . . . . . . . . . . . . . . . . . . . . . . . . . . . . . .
Start up not successful . . . . . . . . . . . . . . . . . . . . . . . . . . . . . . . . . . . . .
Check LAN connection . . . . . . . . . . . . . . . . . . . . . . . . . . . . . . . . . . . . .
Determine the software version . . . . . . . . . . . . . . . . . . . . . . . . . . . . . .
Improve speech quality . . . . . . . . . . . . . . . . . . . . . . . . . . . . . . . . . . . . .
88
89
90
90
90
90
91
Editors . . . . . . . . . . . . . . . . . . . . . . . . . . . . . . . . . . . . . 92
Number Editor . . . . . . . . . . . . . . . . . . . . . . . . . . . . . . . . . . . . . . . . . . . .
Password Editor . . . . . . . . . . . . . . . . . . . . . . . . . . . . . . . . . . . . . . . . . .
Text Editor . . . . . . . . . . . . . . . . . . . . . . . . . . . . . . . . . . . . . . . . . . . . . . .
IP Number Editor . . . . . . . . . . . . . . . . . . . . . . . . . . . . . . . . . . . . . . . . . .
Date and time editor . . . . . . . . . . . . . . . . . . . . . . . . . . . . . . . . . . . . . . .
92
92
93
94
94
Factory Default Settings . . . . . . . . . . . . . . . . . . . . . . 95
Standard value . . . . . . . . . . . . . . . . . . . . . . . . . . . . . . . . . . . . . . . . . . . .
Passwords Functions . . . . . . . . . . . . . . . . . . . . . . . . . . . . . . . . . . . . . .
Programmable Keys optiPoint 410 economy/standard . . . . . . . . . . . . .
Key-Layout . . . . . . . . . . . . . . . . . . . . . . . . . . . . . . . . . . . . . . . . . . . .
95
96
97
97
Data Visualisation (optiPoint 410 entry only) . . . . 98
Status Messages. . . . . . . . . . . . . . . . . . . . . . . . . . . . . . . . . . . . . . . . . . 98
Binary encoded ASCII table . . . . . . . . . . . . . . . . . . . . . . . . . . . . . . . . . . 98
5
Table of Contents
Technical data . . . . . . . . . . . . . . . . . . . . . . . . . . . . . . 99
optiPoint 410 economy/standard . . . . . . . . . . . . . . . . . . . . . . . . . . . 99
optiPoint 410 entry . . . . . . . . . . . . . . . . . . . . . . . . . . . . . . . . . . . . 100
Operation Codes Summary. . . . . . . . . . . . . . . . . . . 101
optiPoint 410 economy/standard. . . . . . . . . . . . . . . . . . . . . . . . . . . . .
Administration State . . . . . . . . . . . . . . . . . . . . . . . . . . . . . . . . . . .
Configurations . . . . . . . . . . . . . . . . . . . . . . . . . . . . . . . . . . . . . . . .
Diagnostics . . . . . . . . . . . . . . . . . . . . . . . . . . . . . . . . . . . . . . . . . .
Downloads/Uploads. . . . . . . . . . . . . . . . . . . . . . . . . . . . . . . . . . . .
Further functions . . . . . . . . . . . . . . . . . . . . . . . . . . . . . . . . . . . . . .
optiPoint 410 entry . . . . . . . . . . . . . . . . . . . . . . . . . . . . . . . . . . . . . . .
Administration area . . . . . . . . . . . . . . . . . . . . . . . . . . . . . . . . . . . .
Configurations . . . . . . . . . . . . . . . . . . . . . . . . . . . . . . . . . . . . . . . .
Further functions . . . . . . . . . . . . . . . . . . . . . . . . . . . . . . . . . . . . . .
101
101
101
103
103
104
104
104
104
104
Menu structure . . . . . . . . . . . . . . . . . . . . . . . . . . . . . 105
optiPoint 410 standard . . . . . . . . . . . . . . . . . . . . . . . . . . . . . . . . . . . . 105
optiPoint 410 economy . . . . . . . . . . . . . . . . . . . . . . . . . . . . . . . . . . . . 107
Index. . . . . . . . . . . . . . . . . . . . . . . . . . . . . . . . . . . . . . 109
6
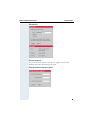
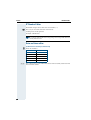
About the Manual
General Information
General Information
About the Manual
The instructions within this manual will help you in administering and maintaining the optiPoint 410. The instructions contain important information
for safe and proper operation of the optiPoint 410. Follow them carefully to
avoid improper operation and get the most out of your multi-function telephone in a network environment.
These instructions describe administration through the operation of
optiPoint 410. In addition, you can administer optiPoint 410 with the help
of a web interface Æ page 54 or through a deployment tool (see instruction on administration with deployment tool).
There is a separate manual for the operators. A quick reference guide contains a fast and reliable explanation corresponding to frequently used functions.
Product Identification
The identification details of your telephone are given on the nameplate
containing the exact product designation and serial number on the bottom
of the base unit. Please have these ready whenever you call our service
department because of trouble with or defects on the unit itself.
Echo Effect
In some cases, while using the telephone you may hear an echo, which
can be quite strong. This is not due to any design defect or other fault with
your IP telephone, but caused by the other client.
For example, if the echo occurs during a teleconference, it may be that the
loudspeakers and microphones need to be repositioned.
7
General Information
About the Manual
Notes and Symbols
Safety
Information that is important for preventing injury or damages is marked
specially, as they are important instructions for correct use of the unit.
This symbol indicates a hazard. Failure to follow the instructions given may result in injury or in damage to the unit.
Key information important for the proper use of the unit is marked
with this symbol.
Reference to operation steps
The following symbols are used to indicate the different operation-related
sequence descriptions:
Operation of the optiPoint 410 entry.
Operation of the optiPoint 410 economy/standard.
Operation through the web-based management tool.
8
About the Manual
General Information
Step by Step
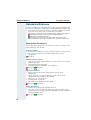
Operating the telephone
J
P
O
K
Q or R
Lift the handset (off-hook).
Replace the handset (on-hook).
Conduct a call.
Enter a telephone number or code.
Increase or reduce the value depending on the current
operating mode.
optiPoint 410 economy/standard
!
Continue?
>
2=Configuration?
>
ã The option appears on the screen.
Press the ã key to confirm your selection.
ã Look for the select option.
Press the á ! keys,
until the option appears on the screen.
Then press the ã key to confirm your selection.
optiPoint 410 entry
Changing and viewing the configuration data in the
optiPoint 410 entry is done by entering different reference numbers.
For description of viewing data values on the LEDs of
the optiPoint 410 entry see Æ page 98.
9
Setting Up the Telephone
Installing the Telephone
Setting Up the Telephone
This chapter describes how to connect the individual elements of the
optiPoint 410 with each other (Æ Installing the Telephone) and how to set
up the optiPoint 410 ready for operation (Æ Preparing for Operation).
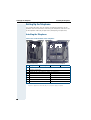
Installing the Telephone
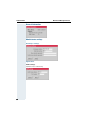
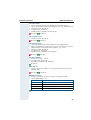
Connectors on the bottom of the telephone
1
3
2
7
optiPoint 410 entry
entry
2
8
optiPoint 410 economy/standard
economy
standard
1
Ethernet port for LAN connection (optional with PoL1)
2
Handset connector
3
Connector for a local power supply unit (optional1)
4
-
Module connector
5
-
Ethernet port for PC
6
-
Headset connector
7
-
Adapter 1
8
-
Adapter 2
1
10
6
3
5
1
4
Power over LAN:
If power is supplied over the LAN cable, no local power supply is required.
Installing the Telephone
Setting Up the Telephone
Starting up the optiPoint 410
Only use switches in the LAN, to which the optiPoint 410 is connected. An operation at hubs can cause serious malfunctions in the
hub and in the whole network.
The Western plugs of all cable connections must audibly snap into
place.
•
•
•
•
•
Plug the short end of the handset cable into the handset and the other
end into the connector 7 at the bottom of the telephone and feed the
cable through the guide channel in the base unit.
Using the headset connector:
Plug the jack of the headset cable into connector 6 at the bottom of the
telephone and feed the cable through the guide channel in the base
unit.
Using optiPoint modules (4):
Mount this device following the instructions in the installation guide
(A31003-H8400-B934-*-6ZD1).
Using adapter (7, 8):
Mount this device following the instructions in the installation guide
(A31003-H8400-B934-*-6ZD1).
Using a LAN connection to PC:
Plug the jack of the connection cable into the connector 5 at the bottom
of the telephone.
Only if power not supported by LAN:
Use only the plug-in power supply unit fitting the optiPoint 410:
– GER/IM: AUL:06D1284
– GBR: AUL:06D1287
– USA: AUL:51A4827
– Plug the plug-in power supply unit into the mains.
– Plug the connector 3 at the bottom of the telephone into the plug-in
power supply unit.
•
•
Plug the jack of the LAN cable into the connector 4 at the bottom of the
telephone and connect the cable with LAN.
Feed the cables through the relief on the back of the housing and fix
them by means of the cable clip.
11
Setting Up the Telephone
Installing the Telephone
Step by Step
Preparing for Operation
For the optiPoint 410 economy/standard, follow the sequence described below. The sequence for the
optiPoint 410 entry is described from Æ page 15.
The start up process sequence describes a standard case of configuration. Network configurations that deviate from the standard case may require additional entries.
optiPoint 410 economy/standard
If problems are encountered during the initial start up,
or if you have queries on individual specifications, the
following chapters will be of help:
• For specialized information on the administration of
the optiPoint 410 see "Alphabetical Reference"
Æ page 66.
• o For descriptions of different configuration-related
situations, see "Administration scenarios"
Æ page 88.
• For error messages in the display of the
optiPoint 410 see "Error Messages" Æ page 47.
Entering the administration area
01=Configuration?
>
ã Confirm to enter the Configuration Menu.
K Enter admin password
(default: 123456 Æ page 92).
ã Confirm.
12
Installing the Telephone
Setting Up the Telephone
Step by Step
Only if no DHCP server:
01=Network?
>
01=DHCP IP assign?
>
!
off?
>
!
02=Terminal IP addr.?
>
Change?
>
ã Confirm.
ã Confirm.
ã Confirm to switch the DHCP IP assign off.
The change is displayed.
ã Choose and confirm.
ã Confirm.
K Enter IP address of the optiPoint 410
(to edit see Æ page 94).
!
03=Terminal mask?
>
Change?
>
ã Confirm. The IP address is displayed.
ã Choose and confirm.
ã Confirm.
K Enter terminal mask of the optiPoint 410
(to edit see Æ page 94).
!
00=End?
>
ã Confirm. The terminal mask is displayed.
ã Choose and confirm to go to the top level of the configuration menu.
13
Setting Up the Telephone
Installing the Telephone
Step by Step
In all configuration types:
!
02=System?
>
01=PBX Address?
>
Change?
>
ã Choose and confirm.
ã Confirm.
ã Confirm.
K Enter IP address of the HiPath PBX
(to edit see Æ page 94).
!
02=Subscriber number? >
Change?
>
ã Confirm. The IP address is displayed.
ã Choose and confirm.
ã Confirm.
K Enter the subscriber number of the optiPoint 410
(to edit see Æ page 92).
!
00=End?
>
ã Confirm. The subscriber number is displayed.
ã Choose and confirm twice to end the configuration
menu.
Restart?
>
ã Confirm to restart the optiPoint 410.
After the restart finished the phone is in idle state.
Troubleshooting
If the optiPoint 410 economy/standard does not function after making the described configuration, the failure
can be attributed to peculiarities of the network environment.
More information on error detection is available in the
"Start up not successful" Æ page 90.
14
Installing the Telephone
Setting Up the Telephone
Step by Step
optiPoint 410 entry
If problems are encountered during the initial start up,
or if you have queries on individual specifications, the
following chapters will be of help:
• For specialized information on the administration of
the optiPoint 410 see "Alphabetical Reference"
Æ page 66.
• For descriptions of different configuration-related
situations, see "Administration scenarios"
Æ page 88.
• For error messages in the display of the
optiPoint 410 see "Error Messages" Æ page 47.
Entering the administration area
A @ C Press the keys simultaneously
K Enter admin password
(default: 123456 Æ page 92).
N Terminate the operation.
You are now in the Administration Area (all LEDs
flash).
The top two function keys take over the following functions in this area:
1st Function key
<PROG>
Press key to make settings.
2nd Function key
<VIEW>
Press key to view settings.
15
Setting Up the Telephone
Installing the Telephone
Step by Step
Only if no DHCP server:
<PROG>
Press key.
@@@ Enter code to switch the DHCP IP assign off.
N Terminate the operation.
<PROG>
Press key.
@A Enter code.
K Enter IP address of the optiPoint 410
(to edit see Æ page 94).
N Terminate the operation.
<PROG>
Press key.
@B Enter code.
K Enter terminal mask of the optiPoint 410
(to edit see Æ page 94).
N Terminate the operation.
<PROG>
Press key.
@C Enter code.
K Enter the default Route of the optiPoint 410
(to edit see Æ page 94).
N Terminate the operation.
Only if you are working in a Virtual LAN (VLAN):
<PROG>
Press key.
BE@ Input the code to define the manual configuration of
the VLAN Discovery Mode.
N Terminate the operation.
<PROG>
Press key.
BD Enter code.
K Enter (0 - 4095) for the Virtual LAN ID Æ page 81
(to edit see Æ page 92).
N Terminate the operation.
16
Installing the Telephone
Setting Up the Telephone
Step by Step
Other settings
All other settings of your optiPoint 410 entry must be
made through the "Web-based Management Tool"
Æ page 54.
Open the "System"page in your browser and enter the
following parameters:
• PBX address Æ page 72
• Participant No. Æ page 80
• Participant password Æ page 80
• System type Æ page 80
Confirm your entries and start the telephone:
<PROG>
Press key.
II Enter the code.
N Confirm the entry.
After the start, the telephone is silent and you can make
the other settings Æ page 49 .
Error handling
If the optiPoint 410 entry does not function after making
the described configuration, the failure can be attributed to peculiarities of the network environment.
More information on error detection is available in the
"Start up not successful" Æ page 90.
17
Administration
Administration
The following pages describe how to make administration settings for the
optiPoint 410 in a HiPath 3000/5000 / HiPath 4000 system.
There are different ways to make settings:
• Locally on the telephone:
– optiPoint 410 economy/standard Æ page 19
– optiPoint 410 entry Æ page 49
• Remote maintenance through LAN:
– Web-based Management Tool Æ page 54.
– Deployment Tool (for further information see "Administration Manual
Deployment Tool").
A few functions of the optiPoint 410 Display Module are administered directly on the Display Module Æ page 62.
The execution of the configuration and diagnostics jobs described below
require good knowledge of network technology as well as of network protocols, and they are normally carried out by network administrators.
For your support you will find some background information in the chapter
"Alphabetical Reference" , Æ page 66.
The administration of an optiPoint 410 (locally or through remote
maintenance) is possible only if no conversation is being conducted
over this telephone.
18
optiPoint 410 economy/standard
Administration
Step by Step
optiPoint 410 economy/standard
In optiPoint 410 economy, the menu numbers
deviate partially from the representation given
here.
In this context, see the menu structure of
optiPoint 410 economy Æ page 107.
Access to the Administration Menu
If you are in the Administration Menu, then the
optiPoint 410 cannot be accessed ("offline").
All configuration and diagnostic operations are protected against illegal accesses by the Administrator password.
A @ C Press keys simultaneously.
03=Start Phone?
> ã Confirm to start the phone.
> ã Choose and confirm to enter the Configuration Menu.
! 01=Configuration?
!
or
02=Diagnostics?
>
ã Choose and confirm to enter the Diagnostics Menu.
K Enter admin password (default: 123456 Æ page 92).
ã Confirm.
The first entry of the selected menu is displayed.
19
Administration
optiPoint 410 economy/standard
Step by Step
Configurations
DHCP IP Assignment
For detailed information see Æ page 69.
Enter "Administration Menu" and go to the Configuration Menu Æ page 19.
!
01=Network?
>
01=DHCP IP assign?
>
ã Confirm.
ã Confirm.
Off?
>
ã Confirm.
On?
>
ã Confirm.
or
The change is displayed.
Terminal IP Address
For detailed information see Æ page 80.
Enter "Administration Menu" and go to the Configuration Menu Æ page 19.
!
01=Network?
>
02=Terminal IP addr.?
>
ã Confirm.
ã Choose and confirm.
K Enter IP address (to edit see Æ page 94).
ã Confirm. The change is displayed.
Terminal Mask
For detailed information see Æ page 80.
Enter "Administration Menu" and go to the Configuration Menu Æ page 19.
!
01=Network?
>
03=Terminal mask?
>
ã Confirm.
ã Choose and confirm.
K Enter IP address (to edit see Æ page 94).
ã Confirm. The change is displayed.
20
optiPoint 410 economy/standard
Administration
Step by Step
Default Route
For detailed information see Æ page 68.
Enter "Administration Menu" and go to the Configuration Menu Æ page 19.
!
01=Network?
>
04=Default route?
>
ã Confirm.
ã Choose and confirm.
K Enter IP address (to edit see Æ page 94).
ã Confirm. The change is displayed.
IP Routing
For detailed information see Æ page 73.
Enter "Administration Menu" and go to the Configuration Menu Æ page 19.
!
!
01=Network?
>
05=IP Routing?
>
ã Confirm.
ã Choose and confirm.
01=Route 1?
>
ã Confirm.
02=Route 2
>
ã Choose and confirm.
01=IP route?
>
ã Confirm.
or
K Enter IP address (to edit see Æ page 94).
!
02=Gateway ?
>
ã Confirm. The change is displayed.
ã Choose and confirm.
K Enter IP address (to edit see Æ page 94).
!
03=Mask ?
>
ã Confirm. The change is displayed.
ã Choose and confirm.
K Enter IP address (to edit see Æ page 94).
ã Confirm. The change is displayed.
21
Administration
optiPoint 410 economy/standard
Step by Step
QoS Layer Options
For detailed information see Æ page 78.
Enter "Administration Menu" and go to the Configuration Menu Æ page 19.
01=Network?
>
06=QoS?
>
01=QoS L2/L3?
>
ã Confirm.
ã Choose and confirm.
ã Confirm.
L2Off/L3Off
>
ã Confirm.
!
L2Off/L3On
>
ã Choose and confirm.
!
L2On/L3Off
>
ã Choose and confirm.
!
L2On/L3Onf
>
ã Choose and confirm.
!
or
or
or
The change is displayed.
Layer 3 Voice
For detailed information see Æ page 74.
Enter "Administration Menu" and go to the Configuration Menu Æ page 19.
01=Network?
!
!
>
06=QoS?
>
02=L3 Voice?
>
ã Confirm.
ã Choose and confirm.
ã Choose and confirm.
K Enter value (to edit see Æ page 92).
ã Confirm. The change is displayed.
Layer 3 Signalling
For detailed information see Æ page 74.
Enter "Administration Menu" and go to the Configuration Menu Æ page 19.
!
!
01=Network?
>
06=QoS?
>
03=L3 Signalling?
>
ã Confirm.
ã Choose and confirm.
ã Choose and confirm.
K Enter value (to edit see Æ page 92).
ã Confirm. The change is displayed.
22
optiPoint 410 economy/standard
Administration
Step by Step
Layer 2 Voice
For detailed information see Æ page 74.
Enter "Administration Menu" and go to the Configuration Menu Æ page 19.
!
!
01=Network?
>
06=QoS?
>
04=L2 Voice?
>
ã Confirm.
ã Choose and confirm.
ã Choose and confirm.
K Enter value (to edit see Æ page 92).
ã Confirm. The change is displayed.
Layer 2 Signalling
For detailed information see Æ page 74.
Enter "Administration Menu" and go to the Configuration Menu Æ page 19.
!
!
01=Network?
>
06=QoS?
>
05=L2 Signalling?
>
ã Confirm.
ã Choose and confirm.
ã Choose and confirm.
K Enter value (to edit see Æ page 92).
ã Confirm. The change is displayed.
Layer 2 Default
For detailed information see Æ page 74.
Enter "Administration Menu" and go to the Configuration Menu Æ page 19.
01=Network?
>
!
06=QoS?
>
!
06=L2 Default?
>
ã Confirm.
ã Choose and confirm.
ã Choose and confirm.
K Enter IP address (to edit see Æ page 94).
ã Confirm. The change is displayed.
23
Administration
optiPoint 410 economy/standard
Step by Step
VLAN Method
For detailed information see Æ page 81.
Enter "Administration Menu" and go to the Configuration Menu Æ page 19.
01=Network?
>
!
06=QoS?
>
!
07=VLAN method?
>
ã Confirm.
ã Choose and confirm.
ã Choose and confirm.
Manual
>
ã Confirm.
DHCP
>
ã Choose and confirm.
!
or
Confirm. The change is displayed.
VLAN ID
For detailed information see Æ page 81.
Enter "Administration Menu" and go to the Configuration Menu Æ page 19.
!
!
01=Network?
>
06=QoS?
>
08=VLAN id?
>
ã Confirm.
ã Choose and confirm.
ã Confirm.
K Enter value (to edit see Æ page 92).
ã Confirm. The change is displayed.
24
optiPoint 410 economy/standard
Administration
Step by Step
LAN Port Settings
For detailed information see Æ page 75.
Enter "Administration Menu" and go to the Configuration Menu Æ page 19.
ã Confirm.
01=Network?
>
07=Port mode?
>
01=LAN port 1 mode
>
ã Choose and confirm.
ã Confirm.
02=LAN port 2 mode?
>
ã Choose and confirm.
10 Mbit/s half dup
>
ã Confirm.
!
10 Mbit/s full dup
>
ã Choose and confirm.
!
100 Mbit/s half dup
>
ã Choose and confirm.
!
100 Mbit/s full dup
>
ã Choose and confirm.
!
Auto?
>
ã Choose and confirm.
!
!
or
or
or
or
or
The change is displayed.
DNS IP Address
For detailed information see Æ page 69.
Enter "Administration Menu" and go to the Configuration Menu Æ page 19.
!
01=Network?
>
08=DNS IP addr.?
>
ã Confirm.
ã Choose and confirm.
K Enter IP address (to edit see Æ page 94).
ã Confirm. The change is displayed.
25
Administration
optiPoint 410 economy/standard
Step by Step
Domain Name
For detailed information see Æ page 69.
Enter "Administration Menu" and go to the Configuration Menu Æ page 19.
!
01=Network?
>
09=Domain name?
>
Change?
>
ã Confirm.
ã Choose and confirm.
ã Confirm.
K Enter value (to edit see Æ page 93).
ã Confirm. The change is displayed.
System Type
For detailed information see Æ page 80.
!
Enter "Administration Menu" and go to the Configuration Menu Æ page 19.
02=System?
>
01=System type?
>
ã Choose and confirm.
ã Confirm.
K Enter System type (to edit see Æ page 93).
ã Confirm. The change is displayed.
PBX address
For detailed information see Æ page 72.
!
Enter "Administration Menu" and go to the Configuration Menu Æ page 19.
02=System?
>
02=PBX Address?
>
ã Choose and confirm.
ã Choose and confirm.
K Enter IP address (to edit see Æ page 94).
ã Confirm. The change is displayed.
26
optiPoint 410 economy/standard
Administration
Step by Step
Subscriber Number
For detailed information see Æ page 80.
!
!
Enter "Administration Menu" and go to the Configuration Menu Æ page 19.
02=System?
>
03=Subscriber number? >
ã Choose and confirm.
ã Choose and confirm.
K Enter value (to edit see Æ page 92).
ã Confirm. The change is displayed.
Subscriber Password
For detailed information see Æ page 80.
!
!
Enter "Administration Menu" and go to the Configuration Menu Æ page 19.
02=System?
>
04=Subscriber password?>
ã Choose and confirm.
ã Choose and confirm.
K Enter password (to edit see Æ page 92).
ã Confirm.
K Reenter password.
ã Confirm. The new password is accepted.
LDAP Server Address
For detailed information see Æ page 72.
"LDAP Server Address" cannot be configured for
the optiPoint 410 economy.
!
Enter "Administration Menu" and go to the Configuration Menu Æ page 19.
03=Appl.?
>
01=LDAP?
>
01=LDAP server address? >
ã Choose and confirm.
ã Confirm.
ã Confirm.
K Enter IP address (to edit see Æ page 94).
ã Confirm. The change is displayed.
27
Administration
optiPoint 410 economy/standard
Step by Step
LDAP Server Port
For detailed information see Æ page 71.
"LDAP Server Port" cannot be configured for the
optiPoint 410 economy.
!
!
Enter "Administration Menu" and go to the Configuration Menu Æ page 19.
03=Appl.?
>
01=LDAP?
>
02=LDAP server port?
>
ã Choose and confirm.
ã Confirm.
ã Choose and confirm.
K Enter value (to edit see Æ page 92).
ã Confirm. The change is displayed.
WAP Mode
For detailed information see Æ page 82.
"WAP Mode" cannot be configured for the
optiPoint 410 economy.
!
!
!
Enter "Administration Menu" and go to the Configuration Menu Æ page 19.
02=WAP?
>
01=WAP mode?
>
ã Choose and confirm.
ã Choose and confirm.
ã Confirm.
HTTP
>
ã Confirm.
WSP
>
ã Choose and confirm.
03=Appl.?
>
or
The change is displayed.
28
optiPoint 410 economy/standard
Administration
Step by Step
WAP Server Address
For detailed information see Æ page 82.
"WAP Server Address" cannot be configured for
the optiPoint 410 economy.
!
!
!
Enter "Administration Menu" and go to the Configuration Menu Æ page 19.
03=Appl.?
>
02=WAP?
>
02=WAP server address?>
ã
ã
ã
K
ã
Choose and confirm.
Choose and confirm.
Choose and confirm.
Enter IP address (to edit see Æ page 94).
Confirm. The change is displayed.
WAP Server Port Number
For detailed information see Æ page 82.
"WAP Server Port Number" cannot be configured
for the optiPoint 410 economy.
!
!
!
Enter "Administration Menu" and go to the Configuration Menu Æ page 19.
03=Appl.?
>
02=WAP?
>
03=WAP server port?
>
ã
ã
ã
K
ã
Choose and confirm.
Choose and confirm.
Choose and confirm.
Enter value (to edit see Æ page 94).
Confirm. The change is displayed.
Help Internet URL Base
For detailed information see Æ page 73.
"Help Internet URL Base" cannot be configured
for the optiPoint 410 economy.
Enter "Administration Menu" and go to the Configuration Menu Æ page 19.
03=Appl.?
!
>
03=Help internet URL? >
ã
ã
K
ã
Confirm.
Choose and confirm.
Enter value (to edit see Æ page 92).
Confirm. The change is displayed.
29
Administration
optiPoint 410 economy/standard
Step by Step
Help Intranet URL Base
For detailed information see Æ page 73.
"Help Internet URL Base" cannot be configured
for the optiPoint 410 economy.
Enter "Administration Menu" and go to the Configuration Menu Æ page 19.
03=Appl.?
!
>
04=Help intranet URL? >
ã
ã
K
ã
Confirm.
Choose and confirm.
Enter value (to edit see Æ page 93).
Confirm. The change is displayed.
External Access
For detailed information see Æ page 71.
"External Access" cannot be configured for the
optiPoint 410 economy.
!
!
Enter "Administration Menu" and go to the Configuration Menu Æ page 19.
03=Appl.?
>
05=Canonical dialling? >
01=External Access?
>
ã
ã
ã
K
ã
Choose and confirm.
Choose and confirm.
Confirm.
Enter value (to edit see Æ page 92).
Confirm. The change is displayed.
International Prefix
For detailed information see Æ page 73.
"International Prefix" cannot be configured for the
optiPoint 410 economy.
!
!
!
30
Enter "Administration Menu" and go to the Configuration Menu Æ page 19.
03=Appl.?
>
05=Canonical dialling? >
02=International Prefix? >
ã
ã
ã
K
ã
Choose and confirm.
Choose and confirm.
Confirm.
Enter value (to edit see Æ page 92).
Confirm. The change is displayed.
optiPoint 410 economy/standard
Administration
Step by Step
Local Country Code
For detailed information see Æ page 77.
"Local Country Code" cannot be configured for
the optiPoint 410 economy.
!
!
!
Enter "Administration Menu" and go to the Configuration Menu Æ page 19.
03=Appl.?
>
05=Canonical dialling? >
03=Local Country Code?>
ã
ã
ã
K
ã
Choose and confirm.
Choose and confirm.
Confirm.
Enter value (to edit see Æ page 92).
Confirm. The change is displayed.
National Dial Prefix
For detailed information see Æ page 77.
"National Dial Prefix" cannot be configured for the
optiPoint 410 economy.
!
!
!
Enter "Administration Menu" and go to the Configuration Menu Æ page 19.
03=Appl.?
>
05=Canonical dialling? >
04=National Dial Prefix? >
ã
ã
ã
K
ã
Choose and confirm.
Choose and confirm.
Confirm.
Enter value (to edit see Æ page 92).
Confirm. The change is displayed.
Local Area Code
For detailed information see Æ page 77.
"Local Area Code" cannot be configured for the
optiPoint 410 economy.
!
!
!
Enter "Administration Menu" and go to the Configuration Menu Æ page 19.
03=Appl?
>
05=Canonical dialling? >
05=Local Area Code?
>
ã
ã
ã
K
ã
Choose and confirm.
Choose and confirm.
Confirm.
Enter value (to edit see Æ page 92).
Confirm. The change is displayed.
31
Administration
optiPoint 410 economy/standard
Step by Step
Local District Code
For detailed information see Æ page 77.
"Local District Code" cannot be configured for the
optiPoint 410 economy
!
!
!
Enter "Administration Menu" and go to the Configuration Menu Æ page 19.
03=Appl.?
>
05=Canonical dialling? >
06=Local District Code? >
ã Choose and confirm.
ã Choose and confirm.
ã Confirm.
K Enter value (to edit see Æ page 92).
ã Confirm. The change is displayed.
Language
For detailed information see Æ page 75.
"Language" cannot be configured for the
optiPoint 410 economy.
!
!
Enter "Administration Menu" and go to the Configuration Menu Æ page 19.
03=Appl.?
>
06=Language?
>
ã Choose and confirm.
ã Choose and confirm.
ã Confirm.
English
The change is displayed.
Download Server Address
For detailed information see Æ page 71.
!
!
Enter "Administration Menu" and go to the Configuration Menu Æ page 19.
04=File Transfer?
>
04=DL server address? >
ã Choose and confirm.
ã Choose and confirm.
K Enter IP address (to edit see Æ page 94).
ã Confirm. The change is displayed.
32
optiPoint 410 economy/standard
Administration
Step by Step
FTP Account Name
For detailed information see Æ page 72.
!
!
Enter "Administration Menu" and go to the Configuration Menu Æ page 19.
04=File Transfer?
>
05=FTP account name? >
ã Choose and confirm.
ã Choose and confirm.
K Enter value (to edit see Æ page 93).
ã Confirm. The change is displayed.
FTP Username
For detailed information see Æ page 72.
!
!
Enter "Administration Menu" and go to the Configuration Menu Æ page 19.
04=File Transfer?
>
06=FTP username?
>
ã Choose and confirm.
ã Choose and confirm.
K Enter value (to edit see Æ page 93).
ã Confirm. The change is displayed.
FTP Password
For detailed information see Æ page 72.
!
!
Enter "Administration Menu" and go to the Configuration Menu Æ page 19.
04=File Transfer?
>
07=FTP password?
>
ã Choose and confirm.
ã Choose and confirm.
K Enter password (to edit see Æ page 92).
ã Confirm.
K Reenter password.
ã Confirm. The new password is accepted.
33
Administration
optiPoint 410 economy/standard
Step by Step
Application Filename
For detailed information see Æ page 66.
!
!
Enter "Administration Menu" and go to the Configuration Menu Æ page 19.
04=File Transfer?
>
08=App. filename?
>
ã Choose and confirm.
ã Choose and confirm.
K Enter value (to edit see Æ page 93).
ã Confirm. The change is displayed.
LDAP Template Filename
For detailed information see Æ page 76.
"LDAP Template Filename" cannot be configured
for the optiPoint 410 economy.
!
!
Enter "Administration Menu" and go to the Configuration Menu Æ page 19.
04=File Transfer?
>
09=LDAP filename?
>
ã Choose and confirm.
ã Choose and confirm.
K Enter value (to edit see Æ page 93).
ã Confirm. The change is displayed.
DSM Application Download Filename
For detailed information see Æ page 71.
"DSM Application Download Filename" cannot be
configured for the optiPoint 410 economy.
!
!
Enter "Administration Menu" and go to the Configuration Menu Æ page 19.
04=File Transfer?
>
10=DSM filename?
>
ã Choose and confirm.
ã Choose and confirm.
K Enter value (to edit see Æ page 93).
ã Confirm. The change is displayed.
34
optiPoint 410 economy/standard
Administration
Step by Step
SNMP Trap IP Address
For detailed information see Æ page 79.
!
Enter "Administration Menu" and go to the Configuration Menu Æ page 19.
05=SNMP?
>
01=SNMP trap address? >
ã Choose and confirm.
ã Confirm.
K Enter IP address (to edit see Æ page 94).
ã Confirm. The change is displayed.
SNMP Password
For detailed information see Æ page 79.
!
!
Enter "Administration Menu" and go to the Configuration Menu Æ page 19.
05=SNMP?
>
02=SNMP password?
>
ã Choose and confirm.
ã Choose and confirm.
K Enter password (to edit see Æ page 92).
ã Confirm.
K Reenter password.
ã Confirm. The new password is accepted.
Codec
For detailed information see Æ page 67.
!
Enter "Administration Menu" and go to the Configuration Menu Æ page 19.
06=Speech?
>
01=Codec?
>
ã Choose and confirm.
ã Confirm.
HiQal preferred
>
ã Confirm.
!
LoBand preferred
>
ã Choose and confirm.
!
LoBand only
>
ã Choose and confirm.
or
or
The change is displayed.
35
Administration
optiPoint 410 economy/standard
Step by Step
Compression
For detailed information see Æ page 67.
Enter "Administration Menu" and go to the Configuration Menu Æ page 19.
!
06=Speech?
>
!
02=Compression?
>
ã Choose and confirm.
ã Choose and confirm.
G.729
>
ã Confirm.
G.723
>
ã Choose and confirm.
!
or
The change is displayed.
Silence Suppression
For detailed information see Æ page 79.
!
!
Enter "Administration Menu" and go to the Configuration Menu Æ page 19.
03=Silence Suppression>
ã Choose and confirm.
ã Confirm.
On
>
ã Confirm.
Off
>
ã Choose and confirm.
06=Speech?
>
or
The change is displayed.
SNTP Server IP Address
For detailed information see Æ page 79.
Enter "Administration Menu" and go to the Configuration Menu Æ page 19.
!
07=Date/Time?
>
01=SNTP IP addr?
>
ã Choose and confirm.
ã Confirm.
K Enter IP address (to edit see Æ page 94).
ã Confirm. The change is displayed.
36
optiPoint 410 economy/standard
Administration
Step by Step
Time Zone Offset
For detailed information see Æ page 81.
Enter "Administration Menu" and go to the Configuration Menu Æ page 19.
!
!
07=Date/Time?
>
02=Timezone offset?
>
ã Choose and confirm.
ã Choose and confirm.
K Enter value (to edit see Æ page 92).
ã Confirm. The change is displayed.
Daylight Saving
For detailed information see Æ page 68.
Enter "Administration Menu" and go to the Configuration Menu Æ page 19.
!
!
!
07=Date/Time?
>
03=Daylight saving?
>
ã Choose and confirm.
ã Choose and confirm.
On
>
ã Confirm.
Off
>
ã Choose and confirm.
or
The change is displayed.
Date Format
For detailed information see Æ page 68.
Enter "Administration Menu" and go to the Configuration Menu Æ page 19.
!
!
07=Date/Time
>
04=Date Format
ã Choose and confirm.
ã Choose and confirm.
YY-MM-DD
>
ã Confirm.
!
MM/DD/YY
>
ã Choose and confirm.
!
DD.MM.YY
>
ã Choose and confirm.
or
The change is displayed.
37
Administration
optiPoint 410 economy/standard
Step by Step
Date
For detailed information see Æ page 68.
Enter "Administration Menu" and go to the Configuration Menu Æ page 19.
!
!
07=Date/Time?
>
05=Date
>
ã Choose and confirm.
ã Choose and confirm.
K Enter value (to edit see Æ page 92).
ã Confirm. The change is displayed.
Time
For detailed information see Æ page 80.
Enter "Administration Menu" and go to the Configuration Menu Æ page 19.
!
!
07=Date/Time
>
06=Time
>
ã Choose and confirm.
ã Choose and confirm.
K Enter value (to edit see Æ page 94).
ã Confirm. The change is displayed.
Administration Password
For detailed information see Æ page 66.
Enter "Administration Menu" and go to the Configuration Menu Æ page 19.
!
08=Phone Administration?>
01=Admin password?
>
Change?
>
ã Choose and confirm.
ã Confirm.
ã Confirm.
K Enter password (to edit see Æ page 92).
ã Confirm.
K Reenter password.
ã Confirm. The new password is accepted.
38
optiPoint 410 economy/standard
Administration
Step by Step
Factory Reset
For detailed information see Æ page 71.
Enter "Administration Menu" and go to the Configuration Menu Æ page 19.
Resetting can lead to the failure of all the functions of the optiPoint 410. Ensure that you have
all the required information for start up
Æ page 12.
!
!
08=Phone Administration?>
02=Factory Reset?
>
Yes
>
ã Choose and confirm.
ã Choose and confirm.
ã Choose and confirm.
Clear User Data
For detailed information see Æ page 67.
Enter "Administration Menu" and go to the Configuration Menu Æ page 19.
!
!
08=Phone Administration?>
03=Clear user data?
>
Yes
>
ã Choose and confirm.
ã Choose and confirm.
ã Choose and confirm.
Application Version
For detailed information see Æ page 66.
Enter "Administration Menu" and go to the Configuration Menu Æ page 19.
!
09=General Info?
>
01=Applic. Versn.?
>
ã Choose and confirm.
ã Confirm. The information is displayed.
MAC Address
For detailed information see Æ page 77.
Enter "Administration Menu" and go to the Configuration Menu Æ page 19.
!
!
09=General Info?
>
02=MAC address?
>
ã Choose and confirm.
ã Choose and confirm. The information is displayed.
39
Administration
optiPoint 410 economy/standard
Step by Step
Diagnostics
Display Test
For detailed information see Æ page 69.
Enter "Administration Menu" and go to the Diagnostics
Menu Æ page 19.
01=Display test?
>
ã Confirm.
ABCDEFGHIJKLMNOPQRSTUVWX
YZ
!
!
!
abcdefghijklmnopqrstuvwx
yz
0123456789!"#$%&’()*+,-.
/:;<=>?[¥]^_{|}ËÁ <>
„„„„„„„„„„„„„„„„„„„„„„„„
„„„„„„„„„„„„„„„„„„„„„„„„
!
Press key to show the next display.
Press key to show the next display.
Press key to show the next display.
Press key to show the next display.
ã Confirm to end the test.
LED Test
For detailed information see Æ page 76.
Enter "Administration Menu" and go to the Diagnostics
Menu Æ page 19.
!
02=LED test?
>
ã Choose and confirm.
All LEDs are flashing.
The LED test takes place in 10 stages (á 5 sec..) automatically successively:
• Stage 1: all LEDs off
• Stage 2: all LEDs on
• Stage 3-10: LEDs flash in different combinations
40
optiPoint 410 economy/standard
Administration
Step by Step
Key Test
For detailed information see Æ page 74.
Enter "Administration Menu" and go to the Diagnostics
Menu Æ page 19.
!
03=Key test?
>
Please press key
>
ã Choose and confirm.
e.g. !, Q or D Press any key (except ã) and read the display.
ã Confirm to end the test.
Audio Loop Test
For detailed information see Æ page 67.
!
Enter "Administration Menu" and go to the Diagnostics
Menu Æ page 19.
04=Audio loop test?
>
ã Choose and confirm.
Execute test:
ã Confirm to end the test.
Continue?
RAM Test
For detailed information see Æ page 78.
!
Enter "Administration Menu" and go to the Diagnostics
Menu Æ page 19.
05=RAM test?
>
ã Choose and confirm.
Continue?
>
ã Confirm to end the test.
Wait until the result is displayed.
ROM Test
For detailed information see Æ page 79.
!
Enter "Administration Menu" and go to the Diagnostics
Menu Æ page 19.
06=ROM test?
>
ã Choose and confirm.
Wait until the result is displayed.
Continue?
>
ã Confirm to end the test.
41
Administration
optiPoint 410 economy/standard
Step by Step
PING Test
For detailed information see Æ page 78.
!
Enter "Administration Menu" and go to the Diagnostics
Menu Æ page 19.
07=Ping Test?
>
ã Choose and confirm.
01=User specified IP?
>
ã Confirm.
02=Gateway?
>
ã Choose and confirm.
03=DL server address? >
ã Choose and confirm.
04=Default Router IP?
>
ã Choose and confirm.
05=Route 1 Gateway IP?>
ã Choose and confirm.
06=Route 2 Gateway IP?>
ã Choose and confirm.
07=SNMP trap address? >
ã Choose and confirm.
08=Terminal IP addr.?
>
ã Choose and confirm.
09=DNS Server?
>
ã Choose and confirm.
or
or
or
or
or
or
or
or
Execute test:
Ping?
>
ã Confirm to start pinging.
The result appears on the display after a few seconds.
or PING change target:
!
Change?
>
ã Choose and confirm.
K Enter IP address (to edit see Æ page 94).
ã Confirm. The change is displayed.
On changing the IP addresses of the entries
"02=..." to "09=..." the IP addresses actually entered in the optiPoint 410 are changed. This can
lead to the limiting of functions.
42
optiPoint 410 economy/standard
Administration
Step by Step
Line Status
For detailed information see Æ page 76.
!
!
Enter "Administration Menu" and go to the Diagnostics
Menu Æ page 19.
08=Line test?
>
Off?
>
ã Choose and confirm.
ã Confirm.
On?
>
ã Choose and confirm.
or
The change is displayed.
43
Administration
optiPoint 410 economy/standard
Step by Step
Downloads/Uploads
Download Application
For detailed information see Æ page 70.
Enter "Administration Menu" and go to the Configuration Menu Æ page 19.
!
04=File Transfer?
>
01=DL application?
>
ã Choose and confirm.
ã Confirm.
If no file name were defined Æ page 34, you have to
browse to the file Æ page 45.
After the download is completed, the phone restarts.
Download LDAP Template
For detailed information see Æ page 70.
"Download LDAP Template" cannot be configured
for the optiPoint 410 economy.
Enter "Administration Menu" and go to the Configuration Menu Æ page 19.
!
04=File Transfer?
>
02=DL LDAP template? >
ã Choose and confirm.
ã Choose and confirm.
If no file name were defined Æ page 34, you have to
browse to the file Æ page 45.
Download DSM Application
For detailed information see Æ page 70.
"Download DSM Application" cannot be configured for the optiPoint 410 economy.
Enter "Administration Menu" and go to the Configuration Menu Æ page 19.
!
04=File Transfer?
>
03=DL DSM?
>
ã Choose and confirm.
ã Choose and confirm.
If no file name were defined Æ page 34, you have to
browse to the file Æ page 45.
44
optiPoint 410 economy/standard
Administration
Step by Step
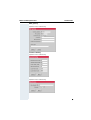
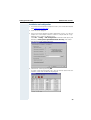
Browse interface on optiPoint 410 economy
If no filename was specified for the data transfer during
a download/upload operation from the telephone, a directory and file selection menu appears in the
optiPoint 410 economy.
Main_Directory
Ipphone.app
8
3
Example: The top line of the display shows the directory
name (if known) and the total number of elements in
the current directory (i.e. 8). These elements can be a
mixture of files and/or directories.
The second line shows the current selected element
and to the right the index of this element in the current
directory (i.e. 3).
The display "." (one point) ) represents the current directory, the display ".." (two points) represents the sub-directory.
During the selection, the keys of the
optiPoint 410 economy have the following meanings:
Q If a directory is selected, press key to move into that directory (one directory level deeper).
R Press key to move up one level in the directory hierarchy.
á ! Press keys to move up/down through the list of files/directories in the current directory.
ã Confirm to start file transfer.
If up/download has been activated successfully, the file
transfer is indicated by a progress indicator in the second line (in case of application download and configuration upload).
The name of the file being transferred is displayed in the
top line.
Ipphone.app
……………
Ipphone.app
1254
In case of configuration download a progress indicator
is not used, instead the number of bytes transferred is
shown.
After validation of the received data the received
data will overwrite the existing data.
45
Administration
optiPoint 410 economy/standard
Step by Step
Restart
By entering code
A @ C Press keys simultaneously to enter "Administration
Menu".
J Lift handset.
AIM Press keys simultaneously.
P Replace handset.
or
RQMB Press these keys in sequence.
Restart?
>
ã Confirm.
By pulling the power plug
Disconnect the red Western plug of the power supply
unit cable (Pos. 3 Æ page 10) or, if "Power over LAN",
disconnect the LAN cable (Pos. 1 Æ page 10) from the
optiPoint 410 for a few seconds.
Then reconnect the plug.
Nach Neustart
On normal restart the following displays come in sequence:
Warning: Restarting
User request
NETBOOT - 1.10
optiPoint 410
4:28PM
1228
46
16.07.03
>
Basic display after finished restart.
optiPoint 410 economy/standard
Administration
Step by Step
Error Messages
No IP address
No IP address
The DHCP server cannot assign any terminal IP address
Æ page 80.
Possible solution:
Check the DHCP server.
No LAN connection
No Network
The telephone is unable to find a network.
Possible solution:
Check the network cable.
No valid registration password
No HiPath password error
The PBX No. Æ page 72, Participant No. Æ page 80,
and/or the participant password Æ page 80 are invalid.
No System
Possible solution:
No System
Change the PBX address Æ page 72.
Change the Participant No. Æ page 80.
Change the participant password Æ page 80.
FTP error message
Error:
<Error string>
FTP parameter missing
EXIT?
Error during file upload/download:
An error occurred during data transfer. An appropriate
error message can be viewed in the display.
Not all necessary FTP parameters are set.
Possible solution:
Enter the FTP account name Æ page 72.
Enter the FTP password Æ page 72.
Enter the FTP path Æ page 72.
Enter the FTP username Æ page 72.
47
Administration
optiPoint 410 economy/standard
Step by Step
Other error messages
No Database
The connection or login to the database failed.
PABX not found
No IP connection to the gateway.
Client not registered
The telephone is not correctly arranged through
HiPath Manager E.
Reject cause unknown
No client licenses exist in the gateway.
(Empty display) No connection to the power supply
Æ page 10.
48
optiPoint 410 entry
Administration
Step by Step
optiPoint 410 entry
After integrating the optiPoint 410 entry entry into your
network successfully Æ page 15, you can make all other settings through the "Web-based Management Tool"
Æ page 54.
Entering the administration area
If you are in the administration area, you cannot
reach the optiPoint 410 ("offline").
All configuration and diagnostic operations are protected against illegal accesses by the Administrator password.
A@C Press keys simultaneously to enter "administration area".
K Enter admin password
(default: 123456 Æ page 92).
N Terminate the operation.
You are now in the administration area (all LEDs flash).
View settings
You can make the system display the important settings
of your optiPoint 410 entry.
Making changes in the administration area (see above).
<VIEW>
Press the 2nd function key from the top.
K Enter the 2-digit code (Table Æ page 101) for the desired function.
N Confirm the entry.
The settings are displayed through different illuminations of the LEDs. The table on Æ page 98 describes
the meaning of the LEDs.
49
Administration
optiPoint 410 entry
Step by Step
Restart
Making changes in the administration area Æ page 49.
ADG Press keys simultaneously.
or
CEN Press keys simultaneously.
K Enter the Administrator password
(default: 123456 Æ page 92).
During start-up the LEDs momentarily illuminate in succession.
Reset factory settings
The resetting can lead to the failure of all the
functions of the optiPoint 410. Ensure that you
have all the necessary information for start up
Æ page 15.
For standard values, see Æ page 95.
Disconnect the red Western plug of the power supply
unit cable (Pos. 3 Æ page 10) or, if "Power over LAN",
disconnect the LAN cable (Pos. 1 Æ page 10) from the
optiPoint 410 for a few seconds.
J Lift handset.
BHI Press keys simultaneously.
KUT Enter the reset password (124816).
N Confirm the entry.
P Replace the handset.
50
optiPoint 410 entry
Administration
Step by Step
Error Messages
The LEDs flash till you switch to the Administration
Mode Æ page 49.
LEDs on the phone: No IP address
The DHCP server cannot assign a terminal IP address
Æ page 80.
Possible solution
Check the DHCP server.
No terminal screen
The DHCP server cannot assign a terminal screen
Æ page 80.
Possible solution
Check the DHCP server.
No Default Route
The DHCP server cannot assign a default route
Æ page 68.
Possible solution
Check the DHCP server.
No IP Address is set
The DHCP IP assignment Æ page 69 is switched off
and no terminal IP address is configured.
Possible solution
Activate the DHCP IP assignment Æ page 16.
Enter the terminal IP adress Æ page 16.
51
Administration
optiPoint 410 entry
Step by Step
No terminal screen is set
The DHCP IP assignment Æ page 69 is switched off
and no terminal screen is configured.
Possible solution
Activate the DHCP IP assignment Æ page 16.
Enter the terminal IP address Æ page 16.
No Default Route is set
The DHCP IP assignment Æ page 69 66 is switched off
and no default route is configured.
Possible solution
Activate the DHCP IP assignment Æ page 16.
Enter the default route eingeben Æ page 16.
No Participant No. / password
The number Æ page 80 and/or password Æ page 80
are not configured.
Possible solution
Enter the Participant No. Æ page 17.
Enter the participant password Æ page 17.
No network
The telephone cannot find the network.
Possible solution
Check the network cable.
52
optiPoint 410 entry
Administration
Step by Step
No PBX address
No PBX address Æ page 72 is configured.
Possible solution
Enter the PBX address Æ page 17.
The PBX does not react
The telephone cannot find the PBX Æ page 85.
Possible solution
Check the PBX.
Log in failed
The PBX No. Æ page 72, Participant No. Æ page 80,
and/or the participant password Æ page 80 are invalid.
Possible solution
Change the PBX address Æ page 72.
Change the Participant No. Æ page 80.
Change the participant password Æ page 80.
53
Administration
Web-based Management Tool
Step by Step
Web-based Management Tool
General
The optiPoint 410 is equipped with an HTTP web server
that permits the mapping of the telephone's content on
the web browser of a PC integrated in the LAN ("Webbased Management Tool").
For this, the IP data of the optiPoint 410
Æ page 101 and the PC must be arranged correctly.
The web-based management tool contains the following formula elements:
Administration To go to the corresponding page, click on the link.
To take over the changes in the current form, click on
the button. This operation transfers the changes to the
optiPoint 410.
Click on the button to reset the changes in the current
form to the earlier values in the optiPoint 410.
Click on the button to execute an action (such as "Save",
"Download", "Invoke" and "Restart"). A message is displayed if there is an error.
Select an option in the List field.
To activate/deactivate a function, click on the checkbox.
Preparation
Open web-based management tool
To invoke the interface, open a web browser and enter
the following URL:
http://[IP of the telephone]:8085
where [IP of the telephone] represents the IP address
of the optiPoint 410 that you wish to match.
54
Web-based Management Tool
Administration
The start page of the optiPoint 410 web server is displayed (example
optiPoint 410 standard).
Click on "Administration".
Enter the administrator password for this optiPoint 410 telephone and click
on "Login".
The web-based management tool is structured as follows in the administration area:
• "General Information" Æ page 56
• "Administrator settings" Æ page 56
– "Gatekeeper settings" Æ page 56
– "Applications" Æ page 56
– "LDAP settings" Æ page 56
– "WAP gateway" Æ page 57
– "Canonical dialling" Æ page 57
– "Miscellaneous" Æ page 57
– "File transfer" Æ page 58
– "Network and routing" Æ page 58
– "Audio settings" Æ page 59
– "Quality of Service" Æ page 59
– "SNMP settings" Æ page 59
– "Date/Time settings" Æ page 60
• "Download application" Æ page 60
• "Download LDAP template" Æ page 60
• "Diagnostics" Æ page 61
• "Restart terminal" Æ page 61
• "Change administrator password" Æ page 61
Click on the required field to see a description for each parameter.
55
Administration
Web-based Management Tool
General Information
Administrator settings
Gatekeeper settings
Applications
LDAP settings
(optiPoint 410 standard only)
56
Web-based Management Tool
Administration
WAP gateway
(optiPoint 410 standard only)
Canonical dialling
(optiPoint 410 standard only)
Miscellaneous
(optiPoint 410 standard only)
57
Administration
Web-based Management Tool
File transfer
(„LDAP template filename“ and „DSM filename“ only at
optiPoint 410 standard)
Network and routing
(„LAN Port 2 Mode“ only at optiPoint 410 standard)
58
Web-based Management Tool
Administration
Audio settings
Quality of Service
SNMP settings
59
Administration
Web-based Management Tool
Date/Time settings
Download application
The "Download application" Æ page 70 link leads to the concerned download page on which more information is provided.
Download LDAP template
The "Download LDAP template" Æ page 70 link leads to the concerned
download page on which more information is provided.
60
Web-based Management Tool
Administration
Diagnostics
Restart terminal
This link leads to the page on which you can trigger a restart of the
optiPoint 410. Other information on this page.
Change administrator password
61
Administration
The optiPoint 410 Display Module
The optiPoint 410 Display Module
LDAP configuration
The following preconditions must be fulfilled to use the corporate telephone directory:
• An LDAP server is available and the server data is entered in the Display Module (see below).
• The LDAP template matching the server configuration was installed
Æ page 63.
The LDAP configuration area is protected against unauthorized access
through a password.
Configure LDAP server
To start the application, click the symbol on the start page.
LDAP
Open the context menu and select "Server Settings".
abc
OK
Open the display keyboard and enter the administrator password.
Confirm.
Settings
Server Settings
abc
?
Server:
137.128.15.230
IP address of the LDAP server
Port:
389|
Port No. of the LDAP server
Save
C
x
Enter the IP No. and the Port for the LDAP server. The standard Port No. is
"389".
Save
62
Save the configuration.
The optiPoint 410 Display Module
Administration
Install LDAP template
To start the application, click on the symbol on the start page.
LDAP
Open the context menu and select "LDAP template".
abc
OK
Open the display keyboard and enter the administrator password.
Confirm.
Settings 1/2
abc
FTP Parameters
?
Server:
137.128.15.230
IP address of the FTP server
User:
guest|
FTP username
Password:
FTP password
Account:
FTP account
C
Next
x
If this has not already been done, enter the parameters for the FTP server
from which the LDAP template is to be loaded.
Save
Go to the next step.
Settings 2/2
abc
FTP Parameters
File:
LDAP.txt
Filename of the LDAP template
Folder:
/templ/ldap|
Name of the directory in which the
template is located
Download
Download
?
C
x
Start the download operation.
63
Administration
The optiPoint 410 Display Module
LDAP template example
Template-String
declaration
SEARCHBASIC "O=SIEMENS COMM, C=GB"
organisation and specification of country
SEARCHFILTER1 = "surnameNational,Surname" search criterion
(fast and advanced)
SEARCHFILTER2 =
"givenNameNational,First-name"
search criterion
(fast and advanced)
SEARCHFILTER3 = "department,Department"
search criterion
(advanced)
SEARCHFILTER4 = "localityShortCode,Location" search criterion
(advanced)
SEARCHFILTER5 = "ou,Org. Unit"
search criterion
(advanced)
SEARCHATTRIB1 =
"commonNameNational,Name,0"
cannot be selected
SEARCHATTRIB2 =
"telephoneNumber,Telephone,1"
selectable field
SEARCHATTRIB3 =
"alternatePhone,Telephone 2,1"
selectable field
SEARCHATTRIB4 =
"mobileTelephoneNumber,Mobile,1"
selectable field
SEARCHATTRIB5 = "ou,Organisational Unit,0"
non-selectable field
SEARCHATTRIB6 = "localityNational,Location,0" non-selectable field
SEARCHATTRIB7 = "department,Department,0" non-selectable field
64
SEARCHATTRIB8 = "mainFunction,Function,0"
non-selectable field
EOF
end of file
The optiPoint 410 Display Module
Administration
65
Alphabetical Reference
Description of functions
Alphabetical Reference
This glossary offers basic information that can be used by the administrator
to carry out configuration- and diagnostics-related jobs in the optiPoint 410.
• The Chapter “Description of functions“ explains alphabetically sorted
terms that, for instance, you will encounter in the menus.
The symbols lead to the concerned operational sequence descriptions:
Operating the optiPoint 410 economy/standard/advance
Operating the optiPoint 410 entry
Operating with the help of the web-based management tool
• This is followed by the Chapter “Abbreviations and Specialized Terms“.
Description of functions
You will find more information in the relevant literature on the topics "Network Technology" and "Æ VoIP".
Action On Submit
• You can select, whether an action will be executed by clicking on "Submit". The actions are also executable by download functions
Æ page 60.
Æ page 57
Administration password
• Here you can change the password that is necessary for accessing the
administrator area.
• Standard password Æ page 95.
• Password editor in the optiPoint 410 Æ page 92.
Æ page 38
Æ page 61
Application Filename
• Specify the name of the file containing the software of the
optiPoint 410.
• The file must exist in a defined directory on the Æ FTP server
(Æ Download Server Address, Æ FTP Path).
• Valid values: 1 ... 24 characters
• Standard name Æ page 95.
• Text editor in the optiPoint 410 Æ page 93.
Æ page 34
Æ page 58
Application Version
• Displays the version of the telephone software.
• This value can give an indication about the range of functions of the
optiPoint 410 and it changes when the telephone software is updated
(Æ Download Firmware).
Æ page 39
66
Æ page 56
Description of functions
Alphabetical Reference
Audio Loop Test
• The test activates the microphone and the loudspeaker in the handset.
• You can check these components by speaking and listening.
Æ page 41
Audio Mode
• “Codec“ Æ page 67
Autodiscovery Server Address
• Further description ... (entry)
Autodiscovery Server Port
• Further description ... (entry)
Clear User Data
• With this function you can delete all the entries made by the user in the
optiPoint 410.
Æ page 39
Æ page 59
Codec
• Here you can select the audio transfer principle that should be used.
•
Codec
Audio Mode
Use of
HiQual
preferred
Uncompressed audio
transmission
Uncompressed audio transmission use (Æ G.711). Suitable for
broadband Internet connections.
LoBand
preferred
Use preferred comSuitable for connections with
pressed audio transmis- different bandwidths.
sion.
LoBand
only
Use compressed audio Suitable for connections with
transmission exclusively. low bandwidth.
Standard value Æ page 95.
Æ page 35
Æ page 59
Compression
• Here, you can select one of the two compression processes that
should be used if the "LoBand" Æ Codec was selected: Æ G.723 or
Æ G.729.
• Standard value Æ page 95.
Æ page 36
Æ page 59
67
Alphabetical Reference
Description of functions
Configuration Filename
• Specify the name of the file containing the configuration data of the
optiPoint 410 enthält.
• The file must exist in a defined directory on the Æ FTP server
(Æ Download Server Address, Æ FTP Path).
• Valid values: 1 ... 24 characters and corresponding to the DOS conventions (8.3).
• Standard name Æ page 95.
• Text editor in the optiPoint 410 Æ page 93.
Æ page 58
Date
• Manual definition is necessary only if this information is not transmitted
automatically (e.g., by the Æ PBX or by a Æ DHCP server).
• Define the date format here and enter the current date.
• Date/Time editor in the optiPoint 410 Æ page 94.
Æ page 38
Æ page 60
Date Format
• Manual definition is necessary only if this information is not transmitted
automatically (e.g., by the Æ PBX or by a Æ DHCP server).
• Define the date format here.
Æ page 37
Æ page 60
Daylight Saving
• Manual definition is necessary only if this information is not transmitted
automatically (e.g., by the Æ PBX or by a Æ DHCP server).
• Activate this switch if a time shift should be considered in relation to
the summer period.
Æ page 37
Æ page 60
Default Route
• Enter the Æ IP address that was assigned to your Æ PBX if no
Æ DHCP server assigns this value dynamically (Æ DHCP IP Assignment).
• If the value was assigned dynamically, it can only be read.
• A restart is necessary after the change.
• Standard value Æ page 95.
• IP editor in the optiPoint 410 Æ page 94.
Æ page 68
68
Æ page 16
Æ page 58
Description of functions
Alphabetical Reference
DHCP IP Assignment
• Activate this option if the required IP data of the telephone should be
assigned dynamically by a Æ DHCP server.
• If no DHCP server is available in the IP network, please deactivate this
option. In this case, the data corresponding to the Æ Terminal IP Address, Æ Terminal Mask and Æ Default Route must be defined manually.
• A restart is necessary after the change.
• Standard value Æ page 95.
Æ page 20
Æ page 16
Æ page 58
Display Test
• Conduct this test to check the function of the Æ LCD display in the Display telephone.
• Different display contents are displayed with the á and ! keys.
Æ page 40
DNS IP Address
• Enter the Æ IP address of the Æ DNS server here only if no Æ DHCP
server assigns this value dynamically (Æ DHCP IP Assignment) and the
optiPoint 410 is operated on a Æ PBX through Æ HFA.
• Standard address Æ page 95.
• IP editor in optiPoint 410 Æ page 94.
Æ page 25
Æ page 58
Domain Name
• Enter the name of the associated domain only if the optiPoint 410 is not
operated in a Æ PBX through Æ HFA.
• Standard name Æ page 95.
• Text editor in optiPoint 410 Æ page 93.
Æ page 26
Æ page 58
Download Configuration
• Use this function to download a configuration for the optiPoint 410
stored on the Æ FTP server.
• The following parameters must be set before undertaking the download operation:
– Æ Download Server Address, Æ FTP Path, Æ Configuration Filename
– Æ FTP account Name
– Æ FTP Username, Æ FTP Password
Æ page 60
69
Alphabetical Reference
Description of functions
Download DSM Application
• Can be configured only for optiPoint 410 standard/advance and is required only if an optiPoint 410 Display Module is used.
• Use this function to download an updated software version for the
optiPoint 410 Display Module from the Æ FTP server.
• The following parameters must be set before undertaking the download operation:
– Æ Download Server Address, Æ FTP Path, Æ Application Filename
– Æ FTP account Name
– Æ FTP Username, Æ FTP Password
– Detailed description: Æ page 88.
Æ page 44
Æ page 60
Download Firmware
• Use this function to download an updated software version for the
optiPoint 410 from the Æ FTP server.
• The following parameters must be set before undertaking the download operation:
– Æ Download Server Address, Æ FTP Path, Æ Application Filename
– Æ FTP account Name
– Æ FTP Username, Æ FTP Password
– Detailed description: Æ page 88.
Æ page 44
Æ page 60
Download Hold Music
• Use this function to download a hold music for the optiPoint 410 from
the Æ FTP server.
• The following parameters must be set before undertaking the download operation:
– Æ Download Server Address, Æ FTP Path, Æ Hold music Filename
– Æ FTP account Name
– Æ FTP Username, Æ FTP Password
Æ page 60
Download LDAP Template
• Can be configured only for the optiPoint 410 , and is meaningful only if
an Æ LDAP server is used.
• Use this function to load an LDAP template file in the optiPoint 410.
• The following parameters must be set before the load operation:
– Æ Download Server Address, Æ FTP Path, Æ Application Filename
– Æ FTP account Name
– Æ FTP Username, Æ FTP Password
– Detailed description: Æ page 88.
Æ page 44
Æ page 60
Display Module Æ page 63
70
Description of functions
Alphabetical Reference
Download Server Address
• Enter the Æ IP address of the Æ FTP server to upload and download
files from and to the optiPoint 410.
• Standard value Æ page 95.
• IP editor in optiPoint 410 Æ page 94.
Æ page 32
Æ page 58
DSM Application Filename
• Can be configured only for optiPoint 410 standard/advance, and is required only if an optiPoint 410 Display Module is used.
• Enter the name of the file containing the software of the optiPoint 410
Display Module.
• The file must exist in a defined directory on the Æ FTP server
(Æ Download Server Address, Æ FTP Path).
• Valid values: 1 ... 24 characters
• Standard name Æ page 95.
• Text editor in optiPoint 410 Æ page 93.
Æ page 34
Æ page 58
E.164 Address
• “Subscriber Number“ Æ page 80
External Directory Access Allowed
• Further description... (DSM)
External Access
• Can be configured only for the optiPoint 410 standard/advance.
• Specify the number that must be prefixed to access an external telephone number , e.g., "0".
• Standard value Æ page 95.
• Number editor in optiPoint 410 Æ page 94.
Æ page 30
Æ page 57
Factory Reset
• With this function you can reset all administration parameters to the
original settings at the time of delivery.
Resetting can lead to the failure of all functions of the optiPoint 410.
Ensure that you have all the information necessary for the start up
Æ page 12.
Æ page 39
Æ page 50
Æ page 59
File Transfer Status
• Displays the status of the possibly executed upload and download operation, such as for instance Æ Download Configuration.
Æ page 56
71
Alphabetical Reference
Description of functions
Firmware Download Filename
• “Application Filename“ Æ page 66.
FTP account Name
• Valid values: 1 ... 24 characters
• Standard value Æ page 95.
• Text editor in optiPoint 410 Æ page 93.
Æ page 33
Æ page 58
FTP Password
• Enter the password defined in the Æ FTP server as password for accessing this server.
• The password must match the Æ FTP Username.
• Valid values: 1 ... 24 characters.
• Standard password Æ page 95.
• Password editor in optiPoint 410 Æ page 92.
Æ page 33
Æ page 58
FTP Path
• Enter the path of the directory defined in the Æ FTP server for uploading and downloading files here.
• The path can be up to 255 characters long.
• Standard path Æ page 95.
• Text editor in optiPoint 410 Æ page 93.
Æ page 58
FTP Username
• Enter the name defined in the Æ FTP server as user for accessing the
server.
• The name must match the Æ FTP Password.
• Valid values: 1 ... 24 characters.
• Standard name Æ page 95.
• Text editor in optiPoint 410 Æ page 93.
Æ page 33
Æ page 58
Gatekeeper Address
• Further description...
Æ page 26
72
Æ page 56
Description of functions
Alphabetical Reference
Gatekeeper Identifier
• Further description... (entry)
H.235 Security Profile
• Further description ... (entry)
Help Internet URL Base
• Can be configured only for the optiPoint 410 standard/advance.
• Enter the domain name of the server that provides the online help for
the optiPoint 410 on the Internet here.
• Standard name Æ page 95.
• Text editor in optiPoint 410 Æ page 93.
Æ page 29
Æ page 57
Help Intranet URL Base
• Can be configured only for the optiPoint 410 standard/advance.
• Enter the filename of the Online Help for the optiPoint 410 in the Intranet.
• Standard name Æ page 95.
• Text editor in optiPoint 410 Æ page 93.
Æ page 30
Æ page 58
Hold music Filename
• Enter the name of the file containing the hold music.
• The file must exist in a defined directory on the Æ FTP server
(Æ Download Server Address, Æ FTP Path).
• Standard name Æ page 95.
• Text editor in optiPoint 410 Æ page 93.
International Prefix
• Can be configured only for the optiPoint 410 standard/advance.
• Specify the number that must be prefixed while dialling an international
telephone number, e.g., "00".
• Standard value Æ page 95.
• Number editor in optiPoint 410 Æ page 94.
Æ page 30
Æ page 57
IP Routing
• To have constant access to network subscribers of other domains, you
can enter a total of two more network destinations.
• An Æ IP address of the domain and gateway, and a Æ Subnet Mask
must be entered for each further domain you wish to use.
• Standard values Æ page 95.
• IP editor in optiPoint 410 Æ page 94.
Æ page 21
Æ page 58
73
Alphabetical Reference
Description of functions
Jitter Buffer
• Select the duration of the intermediate storage here (number of data
packets) that changes the effect of the Æ Jitter.
•
•
•
Short
2 packets
Medium
4 packets
Long
6 packets
The more stable the network connection, the shorter the selected buffer time (less voice delay).
Depending on the frequency at which the data packets are sent by the
terminal devices (e.g., 20 ms or 120 ms), this setting has a markedly
different effect.
Standard value Æ page 95.
Æ page 59
Key Test
• Test to check the functions of the telephone keys.
• If you press a function key, the associated LED glows.
• In display telephones, the corresponding name is displayed in the
Æ LCD display when you press a key (exception: ã terminates the
test.
Æ page 41
L2 Default
• Further description ...(standard)
Æ page 23
Æ page 59
L2/L3 Voice/Signalling
• Can be defined only if the Æ Layer 3 support is activated (Æ QoS L2/
L3). The value describes in each case the place in the value of
Æ Layer 2.
• Valid values: 0 ... 63.
• Standard values Æ page 95.
Æ page 22
74
Æ page 59
Description of functions
Alphabetical Reference
LAN Port Settings
• The PC port settings can be configured only for the optiPoint 410 standard/advance.
• Here you must define the bandwidth at which the optiPoint 410 should
be run. The required value depends on the bandwidth that the switch
or router supports in the network.
Bandwith
Possible application
10 Mbit/s half dup
in 10 Mbit networks with half dup1 process
10 Mbit/s full dup
in 100 Mbit networks in full dup2 process
100 Mbit/s half dup in 10 Mbit networks with half dup1 process
100 Mbit/s full dup in 100 Mbit networks in full dup2 process
Automatic
1
2
•
in standard case
Up to a date, the data can only be transmitted or received.
Up to a date, the data can be simultaneously transmitted and received.
A restart is necessary after the change.
Æ page 25
Æ page 58
Language
• Can be configured only for the optiPoint 410 standard/advance.
• Select the language that should be used for local applications here.
• Standard value Æ page 95.
Æ page 32
Æ page 57
Layer 2 Priority
• Can be defined only if the Æ Layer 2 support is activated (Æ QoS L2/
L3).
• A priority value between 0 and 7 can be entered for each of the 64
places (priority 7: highly, 0: low).
• This additional information decide during communication with a
Æ Switch about the priority forwarding.
• Standard value Æ page 95.
Æ page 22
Æ page 58
LDAP Server IP Address
• Can be configured only for the optiPoint 410 standard/advance.
• If an Æ LDAP server is being used, enter the Æ IP address of this server here.
• IP editor in optiPoint 410 Æ page 94.
Æ page 27
Æ page 56
75
Alphabetical Reference
Description of functions
LDAP or XML
• Further description ... (DSM)
LDAP server Port
• Can be configured only for the optiPoint 410 standard/advance.
• If an Æ LDAP server is being used, enter the Æ Port number here for
communication with this server.
• Valid values: 1 ... 65535.
• Number editor in optiPoint 410 Æ page 92.
Æ page 28
Æ page 56
LDAP Template Filename
• Can be configured only for the optiPoint 410 standard/advance.
• If an Æ LDAP server is used, enter the name of the LDAP template file
that is used in connection with this server.
• The file must exist in a defined directory on the Æ FTP server
(Æ Download Server Address, Æ FTP Path).
• Standard name Æ page 95.
• Text editor in optiPoint 410 Æ page 93.
Æ page 34
Æ page 58
LED Test
• Conduct this test to check the function of the Æ LED in the
optiPoint 410 zu prüfen.
• All the LEDs blink during the test.
Æ page 40
Line Status
• Activate the display to view the functions and values used to run the
Æ LAN connections in the optiPoint 410.
• Bit rate, activity, half / full duplex, as well as the status of the used network or the manual setting in the optiPoint 410.
• The display takes place through the four Æ LEDs of the left row (for
LAN Port1) as well through the top four LEDs of the right row (for PC
Port1):
Function
•
Speed
10 Mbit/s
100 Mbit/s
-
Activity
-
not activ
activ
Duplex
Half-Duplex
Full-Duplex
-
Status
OK
not available
Error
The status monitor remains active even during the normal operation of
the optiPoint 410. However, it does not affect the operation of the function keys.
Æ page 43
1.
76
LEDs on optiPoint 410
See Æ page 10.
Description of functions
Alphabetical Reference
Local Area Code
• Can be configured only for the optiPoint 410 standard/advance.
• Specify the local area code of your company here, e.g., "89" for Munich.
• Canonical format Æ page 83.
• Standard value Æ page 95.
• Number editor in optiPoint 410 Æ page 92.
Æ page 31
Æ page 57
Local Country Code
• Canonical format Æ page 83.
Æ page 31
Æ page 57
Local District Code
• Can be configured only for the optiPoint 410 standard/advance.
• Specify the number of the local district of your company here, (the telephone number without the branch numbers, e.g., "722").
• Canonical format Æ page 83.
• Standard value Æ page 95.
• Number editor in optiPoint 410 Æ page 92.
Æ page 32
Æ page 57
Location Identifier
• Further description ... (entry)
• Standard name Æ page 95.
• Text editor in optiPoint 410 Æ page 93.
Æ page 54
MAC Address
• Displays the Æ MAC address of a network terminal device (e.g., the
optiPoint 410).
Æ page 39
Æ page 56
MIB-II Error Count
• Displays the number of error messages according to Æ MIB.
• The used MIB objects are:
MIB-Objects
Explanation
ifInDiscards
Discarded ingoing packets
iflnErrors
Non-valid ingoing packets
ifOutDiscards
Discarded outgoing packets
ifOutErrors
Non-valid outgoing packets
Æ page 61
77
Alphabetical Reference
Description of functions
National Dial Prefix
• Canonical format Æ page 83.
Æ page 31
Æ page 57
Number Field Format Information
• Further description ... (DSM)
PBX Address
• Enter the Æ IP address of the Æ PBX which operates with the
optiPoint 410.
• IP editor in optiPoint 410 Æ page 93.
Æ page 26
Æ page 56
PC Port Settings
• “LAN Port Settings“ Æ page 75
PING Test
• Conduct a Æ PING test to check whether a server or another terminal
device (e.g., the optiPoint 410) can be reached in the network.
• For this, enter an Æ IP address as the test target, the connection to
which you wish to test.
Æ page 42
Æ page 61
QoS L2/L3
• The settings relate to the Æ Layer 2 and Æ Layer 3 areas of the
Æ QoS, that regulate the prioritisation of the transferred data.
• For Layer 2, the Æ VLAN Discovery Mode and the Æ Virtual LAN ID can
be changed. For Layer 3, the Æ L2/L3 Voice/Signalling can be changed.
• The activation of Layer 2 and / or Layer 3 support is meaningful only if
the used Æ Switch can interpret this information (e.g., "Layer 2
Switch").
• Standard value Æ page 95.
Æ page 22
Æ page 59
RAM Test
• Here you can test the Æ RAM memory of your optiPoint 410.
• The results are displayed after the test is over.
Æ page 41
Æ page 61
Registration Time to Live
• Further description ... (entry)
Æ page 54
78
Description of functions
Alphabetical Reference
ROM Test
• You can test the Æ ROM memory of your optiPoint 410.
• The results are displayed after the test is over.
Æ page 41
Æ page 61
Search Fields Presented
• Further description ... (DSM)
Security Time Window
• Further description ... (entry)
Silence Suppression
• With this switch you can define whether the suppression of background noise should be activated during silence (no conversation).
• Standard value Æ page 95.
Æ page 36
Æ page 59
SNMP Password
• Specify the password that was defined in the Æ SNMP server as the
password for accessing this server.
• The password should be 1 to 24 characters long.
• Standard password Æ page 95.
• Password editor in optiPoint 410 Æ page 92.
Æ page 35
Æ page 59
SNMP Trap IP Address
• If an Æ SNMP server exists in the network, enter the Æ IP address of
this server here.
• Standard address Æ page 95.
• IP editor in optiPoint 410 Æ page 94.
Æ page 35
Æ page 59
SNMP Trap Port
• Define the Æ Port here through which the Æ SNMP error messages
should be transmitted.
Æ page 54
SNTP Server IP Address
• If an Æ SNTP server exists in the network, enter the Æ IP address of
this server here.
• Standard address Æ page 95.
• IP editor in optiPoint 410 Æ page 94.
Æ page 36
Æ page 60
79
Alphabetical Reference
Description of functions
Subscriber Number
• Enter the subscriber number for the optiPoint 410 here.
• The number can be 1 to 24 characters long.
• This number is used as the internal telephone number.
• Number editor in optiPoint 410 Æ page 94.
Æ page 27
Æ page 56
Subscriber Password
• Further description ...
• Password editor Æ page 92.
Æ page 27
Æ page 56
System Type
• Select the type of the used communication platform here.
Æ page 26
Æ page 54
Terminal IP Address
• Enter the Æ IP address for the optiPoint 410 here, provided no
Æ DHCP server assigns this value dynamically (Æ DHCP IP Assignment).
• If the value was assigned dynamically, it can only be read.
• A restart is necessary after the change.
• Standard value Æ page 95.
• IP editor in optiPoint 410 Æ page 94.
Æ page 20
Æ page 16
Æ page 58
Terminal Mask
• Enter the Æ Subnet Mask for the optiPoint 410 here, provided that no
Æ DHCP server assigns this value dynamically (Æ DHCP IP Assignment).
• If the value was assigned dynamically, it can only be read.
• A restart is necessary after the change.
• Standard value Æ page 95.
• IP editor in optiPoint 410 Æ page 94.
Æ page 20
Æ page 16
Æ page 58
Time
• The manual definition is necessary only if this information is not transmitted automatically (e.g., by the Æ PBX or by a Æ DHCP server).
• Define the time format here and enter the current time.
• Date/Time editor in optiPoint 410 Æ page 94.
Æ page 38
80
Æ page 54
Description of functions
Alphabetical Reference
Time Zone Offset
• Make an entry here only if an Æ SNTP server provides time zone information.
• The specification describes the shift in hours corresponding to the time
zone information of the SNTP server.
• Standard value Æ page 95.
• Integer editor in optiPoint 410 Æ page 94.
Æ page 37
Æ page 60
Upload Configuration
• Use this function to load (back up) an optiPoint 410 configuration on the
Æ FTP server.
• The following parameters must be set before the upload operation:
– Æ Download Server Address, Æ FTP Path, Æ Configuration Filename
– Æ FTP account Name
– Æ FTP Username, Æ FTP Password
• Quick entry into the optiPoint 410 Æ page 103.
Æ page 60
Upload/Download Status
• “File Transfer Status“ Æ page 71
Virtual LAN ID
• Can be defined only if the Æ Layer 2 support is activated (Æ QoS L2/
L3).
• Enter a value from 0 to 4095 here. This value describes the association
with a certain VLAN, if a Æ VLAN is used.
Æ page 24
Æ page 16
Æ page 59
VLAN Discovery Mode
• Can be defined only if the Æ Layer 2 support is activated (Æ QoS L2/
L3).
• Here you must define the location from where the Æ Virtual LAN ID
should be fetched, if Æ VLAN is used.
Manual
The ID entered in Æ Virtual LAN ID is used.
DHCP
If a Æ DHCP server is used, then the ID delivered by
this server is applied.
Æ page 24
Æ page 16
Æ page 59
81
Alphabetical Reference
Description of functions
WAP Access Password
• Further description ... (DSM)
WAP Access User Name
• Further description ... (DSM)
WAP Gateway/Proxy IP Address
• Further description ... (DSM)
WAP Connection Type/Mode
• Can be configured only for the optiPoint 410 standard/advance.
• Choose the protocol over which the data transfer should take place for
WAP applications: Æ HTTP or Æ WSP.
Æ page 28
Æ page 57
WAP Server Address
• Can be configured only for the optiPoint 410 standard/advance.
• If a Æ WAP server exists, enter the Æ IP address of this server here.
• Standard address Æ page 95.
• IP editor in optiPoint 410 Æ page 94.
Æ page 29
Æ page 54
WAP Server Port Number
• Can be configured only for the optiPoint 410 standard/advance.
• If a Æ WAP server exists, enter the Æ Port number for communication
with this server here.
• Standard value Æ page 95.
Æ page 29
82
Æ page 57
Abbreviations and Specialized Terms
Alphabetical Reference
Abbreviations and Specialized Terms
You will find more information in the relevant literature on the Network
Technology and Æ VoIP.
Canonical Format
The canonical format is an international standardisation of call numbers. In
order for to be able to dial these numbers correctly, the dialing rules (conversion information) must be defined.
Example of a station number in canonical format:
Local District Code
Extension number
+49 (89) 72212345
Station number
Local Area Code
Local Country Code
DHCP
Abbreviation for "Dynamic Host Configuration Protocol".
The dynamic assignment of IP addresses to the subscribers of an IP network with the help of a central DHCP server.
DNS
Abbreviation for "Domain Name System".
Internet service for the conversion of voice address names into Æ IP address.
E.164
Standardization of telephone numbers according to the International Telephone Number Plan of ITU with a maximum of 15 digits. Usually assembled from the following components: Country Reference Number (CC,
Country Code), Place Reference Number (NDC, National Destination
Code) and Subscriber Number (SN, Subscriber Number).
FTP
Abbreviation for "File Transfer Protocol".
Is used for transferring files in networks, e.g., to update telephone software (Æ Download Firmware).
G.711
Audio protocol for uncompressed voice transmission. Requires a bandwidth of 64 kbit/s.
83
Alphabetical Reference
Abbreviations and Specialized Terms
G.723
Audio protocol for compressed voice transmission. The quality is worse
than in Æ G.711 and Æ G.729. Requires a bandwidth of about 6 kbit/s.
G.729
Audio protocol for compressed voice transmission. The quality is worse
than in Æ G.711 and better than in Æ G.723. Uses a bandwidth of about 8
kbit/s.
Gateway
Mediation components between two different network types, e.g., Æ IP
network and ISDN network.
HFA
Abbreviation for "Hicom Feature Access".
Sets up the connection between Æ IP telephony and a Æ PBX with the
help of a gateway (e.g., HG 1500 or HG 3530) .
HTTP
Abbreviation for "Hypertext Transfer Protocol".
Protocol for the transfer of data in Æ IP networks.
IP
Abbreviation for "Internet Protokoll".
IP address
Also called "Æ IP" in short. The unique address of a terminal device in the
network. It consists of four number blocks of 0 to 255 each, separated by
a point. To simplify the notation, voice names can be released from a
Æ DNS into the IP addresses.
Jitter
Runtime fluctuations in data transmission in Æ IP networks.
LAN
Abbreviation for "Local Area Network".
Layer 2
2nd layer (Data Link Layer) of the 7-layer OSI model for describing data
transmission interfaces.
84
Abbreviations and Specialized Terms
Alphabetical Reference
Layer 3
3rd layer (Network Layer) of the 7-layer OSI model for describing the data
transmission interfaces.
LDAP
Abbreviation for "Lightweight Directory Access Protocol".
Simplified protocol for accessing standardized directory systems, e.g., a
company telephone directory.
LCD
Abbreviation for "Liquid Crystal Display".
Display of numbers, text or graphics with the help of liquid crystal technology.
LED
Abbreviation for "Light Emitting Diode".
Cold light illumination in different colours at low power consumption.
MAC
Abbreviation for "Medium Access Control Address".
A 48-bit address with the help of which a terminal device (e.g., Æ IP telephone or Network card) identifies itself uniquely in a network all over the
world.
MIB
Abbreviation for "Management Information Base".
Database containing descriptions of error messages of the devices and
functions in a network.
PBX
Abbreviation for "Private Branch eXchange".
Private telephone system that connects the different internal devices to
the ISDN network
PING
Abbreviation for "Packet Internet Groper".
A program to test whether a connection can be made to a defined
Æ IP target. Data is sent to the target and returned from there during the
test. The result of the test displays the success / failure of the transmission
and possible additional information such as the transmission time.
Port
Ports are used in Æ IP networks to permit several communication connections simultaneously. Different services often have different port numbers.
85
Alphabetical Reference
Abbreviations and Specialized Terms
QoS
Abbreviation für „Quality of Service".
Describes the subjectively ascertainable quality (service quality) of a voice
connection through Æ IP networks. Properties of QoS are packet loss rate,
packet delay, delay deviation, reserved bandwidth, type and bit rate (variable, constant or unspecified).
RAM
Abbreviation for "Random Access Memory".
Memory with read / write access.
ROM
Abbreviation for "Read Only Memory".
Memory with read only access.
SIP
Abbreviation for "Session Initiation Protocol".
Protocol standard for initialising calls in Æ IP networks.
VLAN
Abbreviation for "Virtual Local Area Network".
Subdivision of an Æ IP network into autonomous administration groups
(domains). A possibility of characterizing the association with a VLAN is using a Æ Virtual LAN ID.
SNMP
Abbreviation for "Simple Network Management Protocol".
The protocol is used for communication with servers that takeover network management functions. This includes for example, protocolling errors that occur in network components (SNMPTrap).
SNTP
Abbreviation for "Simple Network Time Protocol".
The protocol is used between timeservers and terminal devices of a network to synchronize the time of the terminal device.
Subnet Mask
Classifies networks in A-, B- and C networks. Each class has a subnet
mask that demasks the relevant bits. 255.0.0.0 for Class A, 255.255.0.0 for
Class B and 255.255.255.0 for Class C. In a Class C network, for instance,
there are 254 Æ IP addresss.
Switch
Transmission position in a star-shaped network.
86
Abbreviations and Specialized Terms
Alphabetical Reference
VoIP
Abbreviation for "Voice over IP".
E.g., voice transmission through Æ IP technology.
WAP
Abbreviation for "Wireless Application Protocol".
Synonym for graphical applications on mobile telephones, organizers and
other suitable terminal devices, transferred in accordance with the protocol by the same name.
WSP
Abbreviation for "Wireless Session Protocol".
Protocol for transferring data to Æ WAP-enabled terminal devices.
87
Administration scenarios
Setting up the FTP server
Administration scenarios
Setting up the FTP server
There are several possibilities of performing upload and download operations for the optiPoint 410.
• By operating the telephone,
Æ page 44.
• With the help of a web interface in an Internet browser (e.g., Internet
Explorer 5.5),
Æ page 54.
• By using the "Deployment Tool" program (integral component of the
HiPath Manager E).
Meaningful while supplying several telephones simultaneously. For
this, see the Administration Instructions on Deployment Tool.
A correctly configured FTP server is necessary in all the cases, with the
help of which, the data is exchanged through Æ FTP. The server program
must run on the same computer (e.g., PC) in the Æ LAN in which the
optiPoint 410 is run.
The installation of the "3Cserver" server program of the "3Com" company
is described below as an example.
88
Setting up the FTP server
Administration scenarios
Installation and configuration
1. Install the software (in the example "3Cserver", that can be downloaded
from http://www.3com.com).
2. Start the server program.
3. You can set up user profiles or permit anonymous access, as in this example. This is the simpler variant in which it is not possible to assign
different access rights to different users.
Go to File → Config → FTP configuration in the menu and specify the
directory in Anonymous Upload/Download directory, with which
the data exchange should take place.
4. Confirm the action by pressing OK.
As soon as the data exchange starts, you can see the data of the connections in the main window of the program.
89
Administration scenarios
Setting up the FTP server
Check handset functionalities
•
•
•
Check whether the plugs at the two ends of the handset cable are inserted correctly (handset engaged) Æ page 10.
Carry out an Audio Loop test.
– More information on “Audio Loop Test“ Æ page 67.
–
Æ page 41
Ensure that the handset microphone is not switched off.
– For more information, see the operating instructions of the
optiPoint 410.
Start up not successful
Check whether one or more of the mentioned questions are valid for your
configuration:
Is the optiPoint 410 being run in a Æ VLAN ?
• Enter the VLAN ID manually, or, if a Æ DHCP server is being used, set
the “VLAN Discovery Mode“ Æ page 81 on "DHCP" , so that the VLAN
ID transferred from the DHCP server is used.
– More information on “Virtual LAN ID“ Æ page 81.
–
Æ page 24
Æ page 59
Is the optiPoint 410 being run behind a Æ Gateway?
• Enter the Æ IP address of the Gateway in Æ Default Route.
–
Æ page 21
Æ page 58
Other configuration possibilities ...
Check LAN connection
•
•
Check whether the plugs at the two ends of the LAN cable are correctly inserted (handset engaged) Æ page 10.
Check the connection with the help of the PING test.
– More information on “PING Test“ Æ page 78.
–
Æ page 42
Æ page 61
Determine the software version
You can determine the version of the software that is running the
optiPoint 410, e.g., during a pending software update.
•
Æ page 39
Æ page 54
90
Setting up the FTP server
Administration scenarios
Improve speech quality
•
•
•
•
Change the QoS parameters.
– More information on “QoS L2/L3“ Æ page 78.
–
Æ page 22
Æ page 61
Increase the "Jitter" buffer time for the optiPoint 410 entry.
– More information on “Jitter Buffer“ Æ page 74..
Change the voice compression.
– More information on “Audio Mode“ Æ page 67,
“Codec“ Æ page 67, “Compression“ Æ page 67.
–
Æ page 35 Æ page 36 .
Activate the suppression of the background noise during silence, for
the optiPoint 410 economy/standard/advance.
– More information on “Silence Suppression“ Æ page 79.
–
Æ page 36.
91
Editors
Number Editor
Editors
optiPoint 410 entry only:
The edited characters are displayed binary coded on the LEDs of the
optiPoint 410 entry Æ page 98.
Number Editor
Permitted: Numeric values.
K Specify the numbers.
á Press this key to delete one character at a time to the left.
Q R In case of negative numbers, press this key to change the prefixed sign.
Example: 2235
optiPoint 410 entry only:
It is not possible to edit an existing string. The string will be overwritten by the new text.
Password Editor
The password editor is used in authorisation and storage mode.
Authorisation
Permitted: Stored passwords.
Storage
Password
Permitted values Length min. Length max. Default
Subscriber
alphanumeric
6
20
-
Administration numeric
6
9
123456
Reset
6
6
124816
alphanumeric
FTP
alphanumeric
0
24
123abc
SNMP
alphanumeric
0
24
Public
optiPoint 410 entry only:
It is not possible to edit an existing string. The string will be overwritten by the new text.
92
Number Editor
Editors
Text Editor
Character entry is performed by multiple presses of the keypad keys according to the following tables. This also applies to entry of alphanumeric
passwords Æ page 92.
Example: "+" = press the N key 17 times.
Key 1x
A
B
C
D
E
F
G
H
I
@
M
N
2x
3x
4x
a
b
c
2
d
e
f
3
g
h
i
4
j
k
l
5
5x
6x
7x
8x
9x
10x 11x 12x
%
/
(
)
=
1
m
n
o
6
p
q
r
s
t
u
v
8
w
x
y
z
(1)
.
-
0
.
\
_
7
9
(2)
#
$
[
]
Key 13x 14x 15x 16x 17x 18x 19x 20x 21x 22x 23x
N {
}
@
~
+
;
:
"
’
!
?
(1) Space.
(2) The next character to be entered will be interpreted as upper case.
optiPoint 410 economy/standard only
á Press key to delete to the left.
ã Press key to advance to the next character.
optiPoint 410 entry only
Q Press key to advance to the next character.
It is not possible to edit an existing string. The string will be overwritten by the new text.
93
Editors
Number Editor
IP Number Editor
Permitted: Integer values from 0 to 255 and dots (".").
M Press key to write dots between the IP fields.
Leading zeros will be ignored.
Example: 192.168.1.50
optiPoint 410 entry only:
It is not possible to edit an existing string. The string will be overwritten by the new text.
Date and time editor
optiPoint 410 economy/standard only
K Enter the numbers.
Field
Permitted Value
Day
01 ... 31
Month
01 ... 12
Year
00 .. 99
Hour
00 ... 23
Minute
00 ... 59
á ! Press these keys to switch between fields within an editor, or between the
date and time editors.
94
Standard value
Factory Default Settings
Factory Default Settings
Standard value
Function
standard value
Administration password
Æ Passwords Functions
123456
Application DL filename (1)
ipphone.app
Audio mode
G.711 always
Configuration DL filename
OP400-28069
Default route
0.0.0.0
DHCP IP assign
on
DL server IP address
0.0.0.0
Domain name
E164 address
null
FTP account name
guest
FTP password
Æ Passwords Functions
123abc
FTP path
null
FTP username
guest
Gatekeepers (1)
0.0.0.0
Gateway
0.0.0.0
H323 ID
null
HiPath password
Æ Passwords Functions
null
HiPathGK
on (not for HiPath 3000/5000)
Hold music filename
MoHFile
IP routing
0.0.0.0 (all)
Jitter buffer
normal
Mobility
On
QoS L2/L3
On/On
QoS Layer 2 Priority
Pos. 12: 6, Pos. 18: 3
QoS Layer 3 Signalling
18
QoS Layer 3 Voice
12
Security
Reduced Security
SNMP password
Æ Passwords Functions
public
SNMP trap ID address
0.0.0.0
95
Factory Default Settings
Standard value
Function
standard value
SNTP IP address
0.0.0.0
Terminal IP address
0.0.0.0
Terminal mask
0.0.0.0
Time to live
3
Time zone offset
+0
TimeWindow
10
User password
Æ Passwords Functions
null
(1) Filename is postfixed by a letter a, b, c or d for the various language packages.
Passwords Functions
96
Password
Function setting
User Password
Protects the user-specific settings of the
optiPoint 410.
Administrator Password
Protects the administration area from unauthorized access („Configuration" and „Diagnostics").
FTP Password
Protects the FTP server from unauthorized
access for data transmission (e.g., Downloading of firmware).
HiPath Password
Protects the settings for communication
with other HiPath devices.
SNMP Password
Protects the SNMP server from unauthorized access for error assessment.
Standard value
Factory Default Settings
Programmable Keys optiPoint 410 economy/standard
Taste
Funktion HiPath 3000/5000
Funktion HiPath 4000
1
Program/Service
Program/Service
2
Redial
Redial
3
Mute
Mailbox
4
Speaker
Speaker
5
-
Call pickup
6
-
Call park
7
-
Release
8
-
Show used line
9
-
Ringer cutoff
10
-
Privacy
11
-
Hold
12
Release
Exclusive hold
Key-Layout
economy/standard
1
5
2
6
3
7
4
8
9
10
11
12
97
Data Visualisation (optiPoint 410 entry only)
Status Messages
Data Visualisation (optiPoint 410 entry only)
For error messages on the optiPoint 410 entry see Æ page 51.
Status Messages
Quiescent
State
Administration
State
Download File
Complete
Binary encoded ASCII table
The table illustrates in which way characters are displayed on the LEDs of
the optiPoint 410 entry.
.
98
0 1 2 3 4 5 6 7 8 9
Status Messages
Technical data
Technical data
optiPoint 410 economy/standard
Protocols
H.323, H.225, H.245,
TCP/IP, FTP, DHCP, SNTP
Gatekeeper routed and direct routed call model
Voice algorithms
G.711 (64 kbit/s),
G.723.1 (6,4 kbit/s)
Room echo compensation
Interfaces
IEEE 802.3 Fast Ethernet (10/100 Mbit/s)
2 x RJ 45 TP
Pin assignment:
LAN receptacle
Pin 1 TX +
Pin 2 TX Pin 3 RX +
Pin 4 -- (DC+)
Pin 5 -- (DC+)
Pin 6 RX Pin 7 -- (DC-)
Pin 8 -- (DC-)
Handset receptacle Pin 1 microphone Pin 2 receiver cap +
Pin 3 receiver cap Pin 4 microphone +
Power supply
unit receptacle
Pin 1 V Pin 2 -Pin 3 -Pin 4 -Pin 5 -Pin 6 V +
Power supply
EU-variant, grounding plug (230 V, 50 Hz)
(external plug-in po- UK-variant (230 V, 50 Hz)
wer supply unit)
US-variant (110 V, 60 Hz)
99
Technical data
Status Messages
optiPoint 410 entry
Protocols
H.323, H.225, H.245,
TCP/IP, FTP, DHCP, SNTP
Gatekeeper routed and direct routed call model
Voice algorithms
G.711 (64 kbit/s),
G.723.1 (6,4 kbit/s)
Room echo compensation
Interfaces
IEEE 802.3 Fast Ethernet (10/100 Mbit/s)
2 x RJ 45 TP
Pin assignment:
LAN receptacle
Pin 1 TX +
Pin 2 TX Pin 3 RX +
Pin 4 -- (DC+)
Pin 5 -- (DC+)
Pin 6 RX Pin 7 -- (DC-)
Pin 8 -- (DC-)
Handset receptacle Pin 1 microphone Pin 2 receiver cap +
Pin 3 receiver cap Pin 4 microphone +
Power supply
unit receptacle
Pin 1 V Pin 2 -Pin 3 -Pin 4 -Pin 5 -Pin 6 V +
Power supply
EU-variant grounding plug
(external plug-in po- 230 V, 50 Hz (AUL:06D1284)
wer supply unit)
UK-variant
230 V, 50 Hz (AUL:06D1287)
US-variant
110 V, 60 Hz (AUL:51A4827)
100
optiPoint 410 economy/standard
Operation Codes Summary
Operation Codes Summary
In the following pages you will find a list of the reference numbers corresponding to the
administration and diagnostics functions in the optiPoint 410 economy/standard and the
optiPoint 410 entry in the alphabetical order.
optiPoint 410 economy/standard
Administration State
Operation
optiPoint 410 economy
optiPoint 410 standard
Refer to
Configurations
A@C (simult.) ã K ã
A@C (simult.) K N
Æ page 19
Diagnostics
A@C (simult.) ! ã K ã A@C (simult.) K N
Æ page 49
Configurations
Operation
optiPoint 410 economy
(Æ Administration State)
optiPoint 410 standard
(Æ Administration State)
Refer to
Admin. Password
@G ã K ã K ã
@H ã K ã K ã
Æ page 66
@D @H K ã
Æ page 66
Application Filename @C @F K ã
Application Version
@ Hã
@I ã
Æ page 66
Codec
@E @A ! ã
@F @A ! ã
Æ page 67
Clear User Data
@G @C ã
@H @C ã
Æ page 67
Compressing
@E @B ! ã
@F @B ! ã
Æ page 67
Date
@F @E K ã
@G @E K ã
Æ page 68
Date Format
@F @D ! ã
@G @D ! ã
Æ page 68
Daylight Saving
@F @C ! ã
@G @C ! ã
Æ page 68
Default Route
ã @D ã K ã
ã @D ã K ã
Æ page 68
ãã!ã
Æ page 69
DHCP IP Assignment ã ã ! ã
DNS IP Address
ã @H K ã
ã @H K ã
Æ page 69
Domain Name
ã @I K ã
ã @I K ã
Æ page 69
Downl. Server Addr.
@C @B ãU UT K ã
@D @D ãU UT K ã
Æ page 71
DSM Appl. Filename -
@D A@ UT K ã
Æ page 71
External Access
-
@C @E ãU UT K ã
Æ page 71
Factory Reset
@G @B ã
@H @B ã
Æ page 71
FTP Account Name
@C @C K ã
@D @E K ã
Æ page 72
FTP Password
@C @E K ã K ã
@D @G K ã K ã
Æ page 72
101
Operation Codes Summary
optiPoint 410 economy/standard
Operation
optiPoint 410 economy
(Æ Administration State)
optiPoint 410 standard
(Æ Administration State)
Refer to
FTP Username
@C @D UT K ã
@D @F UT K ã
Æ page 72
Help Internet URL
-
@C @C K ã
Æ page 73
Help Intranet URL
-
@C @D K ã
Æ page 73
International Prefix
-
@C @E @B UT K ã
Æ page 73
Language
-
@C @F UT ! ã
Æ page 75
Layer 2 Default
ã @F @FUUT K ã
ã @F @FUUT K ã
Æ page 74
Layer 2 Signalling
ã @F @EUUT K ã
ã @F @EUUT K ã
Æ page 74
Layer 2 Voice
ã @F @DUUT K ã
ã @F @DUUT K ã
Æ page 74
Layer 3 Signalling
ã @F @CUUT K ã
ã @F @CUUT K ã
Æ page 74
Layer 3 Voice
ã @F @BUUT K ã
ã @F @BUUT K ã
Æ page 74
LDAP Server Addr.
-
@C ã ãU UT K ã
Æ page 75
LDAP Server Port
-
@C ã @B K ã
Æ page 76
LDAP Tmpl. Filename -
@D @I K ã
Æ page 76
Local Area Code
-
@C @E @E UT K ã
Æ page 77
Local Country Code
-
@C @E @C K ã
Æ page 77
Local District Code
-
@C @E @F K ã
Æ page 77
MAC Address
@H @B
@I @B
Æ page 77
National Dial Prefix
-
@C @E @D K ã
Æ page 78
PBX address
@B @B K ã
@B @B K ã
Æ page 72
LAN port 1 mode
ã @G ã ! ã
ã @G ã ! ã
Æ page 75
LAN port 2 mode
ã @G @B ! ã
ã @G @B ! ã
Æ page 75
QoS Layer Options
ã @F ã UT ! ã
ã @F ã UT ! ã
Æ page 78
Route 1 Gateway
ã @E ã @B ã K ã
ã @E ã @B ã K ã Æ page 73
Route 1 IP Address
ã @E ã ã K ã
ã @E ã ã K ã
Æ page 73
Route 1 Mask
ã @E ã @C K ã
ã @E ã @C K ã
Æ page 73
Route 2 Gateway
ã @E @B @B K ã
ã @E @B @B K ã
Æ page 73
Route 2 IP Address
ã @E @B ã ã K ã
ã @E @B ã ã K ã
Æ page 79
Route 2 Mask
ã @E @B @C K ã
ã @E @B @C K ã
Æ page 79
Silence Suppression
@E @C ! ã
@F @C ! ã
Æ page 79
SNMP Password
@D @B K ãU UT K ã
@E @B K ãU UT K ã
Æ page 79
SNMP Trap Address
@D ã K ã
@E ã K ã
Æ page 79
102
optiPoint 410 economy/standard
Operation
optiPoint 410 economy
(Æ Administration State)
SNTP Server Address @F ã K ã
Subscriber number
@B @C K ã
Subscriber password @B @D K ãU UT K ã
Operation Codes Summary
optiPoint 410 standard
(Æ Administration State)
Refer to
@G ã K ã
Æ page 79
@B @C K ã
Æ page 80
@B @D K ãU UT K ã
Æ page 80
System Type
@B ã K ã
@B ã K ã
Æ page 80
Terminal IP Address
ã @B K ã
ã @B K ã
Æ page 80
Terminal Mask
ã @C K ã
ã @C K ã
Æ page 80
Time
@F @F K ã
@G @F K ã
Æ page 80
Time Zone Offset
@F @B K ã
@G @B K ã
Æ page 81
VLAN id
ã @F @HUTU K ã
ã @F @HUTU K ã
Æ page 81
VLAN Method
ã @F @GUTU K ã
ã @F @GUTU K ã
Æ page 81
WAP Mode
-
@C @B ã ! ã
Æ page 82
WAP Server Address -
@C @B @BU UT K ã
Æ page 82
WAP Server Port
-
@C @B @CU UT K ã
Æ page 82
Operation
optiPoint 410 economy
(Æ Administration State)
optiPoint 410 standard
(Æ Administration State)
Refer to
Audio Loop Test
@D O
@D O
Æ page 67
Display Test
ã!ã
ã!ã
Æ page 69
Key Test
@C K ã
@C K ã
Æ page 74
LED Test
@B ã
@B ã
Æ page 76
LineTest
@H ã
@H ã
Æ page 76
PING Test
@G ! ã
@G ! ã
Æ page 78
RAM Test
-@E ã
-@E ã
Æ page 78
ROM Test
@F ã
@F ã
Æ page 79
Diagnostics
Downloads/Uploads
Operation
optiPoint 410 economy
(Æ Administration State)
optiPoint 410 standard
(Æ Administration State)
Refer to
Dwnl. Appl.
@C ã ã
@D ãU ã
Æ page 70
Dwnl. DSM Appl.
-
@D @C ã
Æ page 70
Dwnl. LDAP Tpl.
-
@D @B ã
Æ page 70
103
Operation Codes Summary
optiPoint 410 entry
Further functions
Operation
optiPoint 410 economy
(Æ Administration State)
optiPoint 410 standard
(Æ Administration State)
Restart
QBH (simult.)
QBH (simult.)
J AIM (simult.) P ã or
RQMB (in sequence) ã
J AIM (simult.) P ã or
RQMB (in sequence) ã
Refer to
optiPoint 410 entry
Administration area
Operation
optiPoint 410 entry
Refer to
Configurations
A@C (simult.) K N
Æ page 19
Operation
optiPoint 410 entry
Refer to
Default Route
<PROG>
@C K N
Æ page 68
DHCP IP Assignment <PROG>
@@ K N
Æ page 69
Configurations
Æ page 71
Factory Reset
BHI (simult.) K N
Terminal IP Address
<PROG>
@A K N
Æ page 80
Terminal Mask
<PROG>
@B K N
Æ page 80
VLAN id
<PROG>
BD K N
Æ page 81
VLAN Method
<PROG>
BE K N
Æ page 81
Further functions
Operation
optiPoint 410 entry
Restart
ADG (simult.)
or
C EN (simult.)
K(Administrationpassword) N
Start phone
104
<PROG>
II N
Refer to
optiPoint 410 standard
Menu structure
Menu structure
The following table shows a concerned overview of the menu structure of
the optiPoint 410 standard and optiPoint 410 economy (Æ page 107).
optiPoint 410 standard
Menu
|--- Administration?
| |--- 01=Configuration?
| | |--- 01=Network?
| | | |--- 01=DHCP IP assign?
| | | |--- 02=Terminal IP addr.?
| | | |--- 03=Terminal mask?
| | | |--- 04=Default route?
| | | |--- 05=IP routing?
| | | | |--- 01=Route 1?
| | | | | |--- 01=IP route?
| | | | | |--- 02=Gateway?
| | | | | |--- 03=Mask?
| | | | | |--- 00=End?
| | | | |--- 02=Route 2?
| | | |
|--- 01=IP route?
| | | |
|--- 02=Gateway?
| | | |
|--- 03=Mask?
| | | |
|--- 00=End?
| | | |--- 06=QoS?
| | | | |--- 01=QoS L2/L3?
| | | | |--- 02=L3 Voice?
| | | | |--- 03=L3 Signalling?
| | | | |--- 04=L2 Voice?
| | | | |--- 05=L2 Signalling?
| | | | |--- 06=L2 Default?
| | | | |--- 07=VLAN method?
| | | | |--- 08=VLAN id?
| | | | |--- 00=End?
| | | |--- 07=Port mode?
| | | | |--- 01=LAN port 1 mode?
| | | | |--- 02=LAN port 2 mode?
| | | | |--- 00=End?
| | | |--- 08=DNS IP addr.?
| | | |--- 09=Domain name?
| | | |--- 00=End?
| | |--- 02=System?
| | | |--- 01=System type?
| | | |--- 02=PBX address?
| | | |--- 03=Subscriber number?
| | | |--- 04=Subscriber password?
| | | |--- 00=End?
Operation steps Explanation
Æ page 20
Æ page 20
Æ page 20
Æ page 21
Æ page 21
Æ page 69
Æ page 80
Æ page 80
Æ page 68
Æ page 73
Æ page 22
Æ page 22
Æ page 22
Æ page 23
Æ page 23
Æ page 23
Æ page 24
Æ page 24
Æ page 78
Æ page 74
Æ page 74
Æ page 74
Æ page 74
Æ page 74
Æ page 81
Æ page 81
Æ page 25
Æ page 75
Æ page 25
Æ page 26
Æ page 69
Æ page 69
Æ page 26
Æ page 26
Æ page 27
Æ page 27
Æ page 80
Æ page 72
Æ page 80
Æ page 80
105
Menu structure
optiPoint 410 standard
Menu
| |
| |
| |
| |
| |
| |
| |
| |
| |
| |
| |
| |
| |
| |
| |
| |
| |
| |
| |
| |
| |
| |
| |
| |
| |
| |
| |
| |
| |
| |
| |
| |
| |
| |
| |
| |
| |
| |
| |
| |
| |
| |
| |
| |
| |
| |
| |
| |
| |
| |
| |
| |
| |
| |
| |
| |
| |
| |
| |
| |
| |
| |
| |
106
Operation steps Explanation
|--- 03=Appl.?
| |--- 01=LDAP?
| | |--- 01=LDAP server address?
| | |--- 02=LDAP server port?
| | |--- 00=End?
| |--- 02=WAP mode?
| | |--- 01=WAP mode?
| | |--- 02=WAP server address?
| | |--- 03=WAP server port?
| | |--- 00=End?
| |--- 03=Help Internet URL?
| |--- 04=Help Intranet URL?
| |--- 05=Canonical dialling?
| | |--- 01=External Access?
| | |--- 02=International Prefix?
| | |--- 03=Local Country Code?
| | |--- 04=National Dial Prefix?
| | |--- 05=Local Area Code?
| | |--- 06=Local District Code?
| | |--- 00=End?
| |--- 06=Language?
| |--- 00=End?
|--- 04=File transfer?
| |--- 01=DL application?
| |--- 02=DL LDAP template?
| |--- 03=DL DSM App?
| |--- 04=DL server address?
| |--- 05=FTP account name?
| |--- 06=FTP username?
| |--- 07=FTP password?
| |--- 08=App. filename?
| |--- 09=LDAP filename?
| |--- 10=DSM App filename?
| |--- 00=End?
|--- 05=SNMP?
| |--- 01=SNMP trap address?
| |--- 02=SNMP password?
| |--- 00=End?
|--- 06=Speech?
| |--- 01=Codec?
| |--- 02=Compression?
| |--- 03=Silence Suppression?
| |--- 00=End?
|--- 07=Date/Time?
| |--- 01=SNTP IP addr?
| |--- 02=Timezone offset?
| |--- 03=Daylight saving?
| |--- 04=Date Format?
| | |--- YY-MM-DD?
| | |--- MM/DD/YY?
| | |--- DD.MM.YY?
| |--- 05=Date?
| |--- 06=Time?
| |--- 00=End?
|--- 08=Phone Administration?
| | 01=Admin password?
| | 02=Factory Reset?
| | 03=Clear User Data?
| |--- 00=End?
|--- 09=General Info?
| 01=Applic. Versn.?
| 02=MAC address?
|--- 00=End?
Æ page 27
Æ page 27
Æ page 28
Æ page 75
Æ page 75
Æ page 76
Æ page 28
Æ page 28
Æ page 29
Æ page 29
Æ page 82
Æ page 82
Æ page 82
Æ page 82
Æ page 29
Æ page 30
Æ page 73
Æ page 73
Æ page 30
Æ page 30
Æ page 31
Æ page 31
Æ page 31
Æ page 32
Æ page 71
Æ page 73
Æ page 77
Æ page 78
Æ page 77
Æ page 77
Æ page 32
Æ page 75
Æ page 44
Æ page 44
Æ page 44
Æ page 32
Æ page 33
Æ page 33
Æ page 33
Æ page 34
Æ page 34
Æ page 34
Æ page 70
Æ page 70
Æ page 70
Æ page 71
Æ page 72
Æ page 72
Æ page 72
Æ page 66
Æ page 76
Æ page 71
Æ page 35
Æ page 35
Æ page 79
Æ page 79
Æ page 35
Æ page 36
Æ page 36
Æ page 67
Æ page 67
Æ page 79
Æ page 36
Æ page 37
Æ page 37
Æ page 37
Æ page 79
Æ page 81
Æ page 68
Æ page 68
Æ page 38
Æ page 38
Æ page 68
Æ page 80
Æ page 38
Æ page 39
Æ page 39
Æ page 66
Æ page 71
Æ page 67
Æ page 39
Æ page 39
Æ page 66
Æ page 77
optiPoint 410 standard
Menu
| |--- 02=Diagnostics?
| | |--- 01=Display test?
| | |--- 02=LED test?
| | |--- 03=Key test?
| | |--- 04=Audio loop test?
| | |--- 05=RAM test?
| | |--- 06=ROM test?
| | |--- 07=Ping Test?
| | | |--- 01=User specified IP
| | | |--- 02=Gateway?
| | | |--- 03=DL server address?
| | | |--- 04=Default Router IP?
| | | |--- 05=Route 1 Gateway IP?
| | | |--- 06=Route 2 Gateway IP?
| | | |--- 07=SNMP trap address?
| | | |--- 08=Terminal IP addr.?
| | | |--- 09=DNS Server?
| | | |--- 00=End?
| | |--- 08=Line test?
| | |--- 00=End?
| |--- 03=Start Phone?
|--- Telephony?
Menu structure
Operation steps Explanation
Æ page 40
Æ page 40
Æ page 41
Æ page 41
Æ page 41
Æ page 41
Æ page 42
Æ page 69
Æ page 76
Æ page 74
Æ page 67
Æ page 78
Æ page 79
Æ page 78
Æ page 43
Æ page 76
optiPoint 410 economy
Menu numbers deviating from the optiPoint 410 standard are displayed in
bold letters.
Menu
|--- Administration?
| |--- 01=Configuration?
| | |--- 01=Network?
| | | |--- 01=DHCP IP assign?
| | | |--- 02=Terminal IP addr.?
| | | |--- 03=Terminal mask?
| | | |--- 04=Default route?
| | | |--- 05=IP routing?
| | | | |--- 01=Route 1?
| | | | | |--- 01=IP route?
| | | | | |--- 02=Gateway?
| | | | | |--- 03=Mask?
| | | | | |--- 00=End?
| | | | |--- 02=Route 2?
| | | |
|--- 01=IP route?
| | | |
|--- 02=Gateway?
| | | |
|--- 03=Mask?
| | | |
|--- 00=End?
| | | |--- 06=QoS?
| | | | |--- 01=QoS L2 L3?
| | | | |--- 02=L3 Voice?
| | | | |--- 03=L3 Signalling?
| | | | |--- 04=L2 Voice?
| | | | |--- 05=L2 Signalling?
| | | | |--- 06=L2 Default?
| | | | |--- 07=VLAN method?
| | | | |--- 08=VLAN id?
| | | | |--- 00=End?
| | | |--- 07=Port mode?
| | | | |--- 01=LAN port 1 mode?
| | | | |--- 02=LAN port 2 mode?
| | | | |--- 00=End?
| | | |--- 08=DNS IP addr.?
| | | |--- 09=Domain name?
| | | |--- 00=End?
Operation steps Explanation
Æ page 20
Æ page 20
Æ page 20
Æ page 21
Æ page 21
Æ page 69
Æ page 80
Æ page 80
Æ page 68
Æ page 73
Æ page 22
Æ page 22
Æ page 22
Æ page 23
Æ page 23
Æ page 23
Æ page 24
Æ page 24
Æ page 78
Æ page 74
Æ page 74
Æ page 74
Æ page 74
Æ page 74
Æ page 81
Æ page 81
Æ page 25
Æ page 75
Æ page 25
Æ page 26
Æ page 69
Æ page 69
107
Menu structure
optiPoint 410 standard
Menu
| | |--- 02=System?
| | | |--- 01=System type?
| | | |--- 02=PBX address?
| | | |--- 03=Subscriber number?
| | | |--- 04=Subscriber password?
| | | |--- 00=End?
| | |--- 03=File transfer?
| | | |--- 01=DL application?
| | | |--- 02=DL server address?
| | | |--- 03=FTP account name?
| | | |--- 04=FTP username?
| | | |--- 05=FTP password?
| | | |--- 06=App. filename?
| | | |--- 00=End?
| | |--- 04=SNMP?
| | | |--- 01=SNMP trap address?
| | | |--- 02=SNMP password?
| | | |--- 00=End?
| | |--- 05=Speech?
| | | |--- 01=Codec?
| | | |--- 02=Compression?
| | | |--- 03=Silence Suppression?
| | | |--- 00=End?
| | |--- 06=Date/Time?
| | | |--- 01=SNTP IP addr?
| | | |--- 02=Timezone offset?
| | | |--- 03=Daylight saving?
| | | |--- 04=Date Format?
| | | | |--- YY-MM-DD?
| | | | |--- MM/DD/YY?
| | | | |--- DD.MM.YY?
| | | |--- 05=Date?
| | | |--- 06=Time?
| | | |--- 00=End?
| | |--- 07=Phone Administration?
| | | | 01=Admin password?
| | | | 02=Factory Reset?
| | | | 03=Clear User Data?
| | | |--- 00=End?
| | |--- 08=General Info?
| |
| 01=Applic. Versn.?
| |
| 02=MAC address?
| |
|--- 00=End?
| |--- 02=Diagnostics?
| | |--- 01=Display test?
| | |--- 02=LED test?
| | |--- 03=Key test?
| | |--- 04=Audio loop test?
| | |--- 05=RAM test?
| | |--- 06=ROM test?
| | |--- 07=Ping Test?
| | | |--- 01=User specified IP
| | | |--- 02=Gateway?
| | | |--- 03=DL server address?
| | | |--- 04=Default Router IP?
| | | |--- 05=Route 1 Gateway IP?
| | | |--- 06=Route 2 Gateway IP?
| | | |--- 07=SNMP trap address?
| | | |--- 08=Terminal IP addr.?
| | | |--- 09=DNS Server?
| | | |--- 00=End?
| | |--- 08=Line Test?
| | |--- 00=End?
| |--- 03=Start Phone?
|--- Telephony?
108
Operation steps Explanation
Æ page 26
Æ page 26
Æ page 27
Æ page 27
Æ page 80
Æ page 72
Æ page 80
Æ page 80
Æ page 44
Æ page 32
Æ page 33
Æ page 33
Æ page 33
Æ page 34
Æ page 70
Æ page 71
Æ page 72
Æ page 72
Æ page 72
Æ page 66
Æ page 35
Æ page 35
Æ page 79
Æ page 79
Æ page 35
Æ page 36
Æ page 36
Æ page 67
Æ page 67
Æ page 79
Æ page 36
Æ page 37
Æ page 37
Æ page 37
Æ page 79
Æ page 81
Æ page 68
Æ page 68
Æ page 38
Æ page 38
Æ page 68
Æ page 80
Æ page 38
Æ page 39
Æ page 39
Æ page 66
Æ page 71
Æ page 67
Æ page 39
Æ page 39
Æ page 66
Æ page 77
Æ page 40
Æ page 40
Æ page 41
Æ page 41
Æ page 41
Æ page 41
Æ page 42
Æ page 69
Æ page 76
Æ page 74
Æ page 67
Æ page 78
Æ page 79
Æ page 78
Æ page 43
Æ page 76
Index
Index
The colored page numbers lead in each
case to the description of the operation at
the following device/surface
•
optiPoint 410 economy/standard
•
optiPoint 410 entry
•
Web-based Management Tool
• Bold: Explanations in Glossar
A
Abbreviations
Administration area
Administration Password
Administration scenarios
Administrationszustand
Application Filename
Application Version
Audio Loop Test
optiPoint 410 eco/stand
Audio Mode
Autodiscovery Server Address
Autodiscovery Server Port
83
49
38, 66
88
19
34, 66
39, 66
67
41
67
67
67
C
Check
LAN connection
Check handset functionalities
Clear User Data
Codec
Compression
Configuration
Configuration Filename
Configurations
optiPoint 410 eco/stand
90
90
39, 67
35, 67
36, 67
88
68
20
D
Data Visualisation on optiPoint 410 entry
98
Date
38, 68
Date Format
37, 68
Daylight Saving
37, 68
Default Route
68
optiPoint 410 eco/stand
21
DHCP IP assignment
optiPoint 410 eco/stand
Diagnostics
optiPoint 410 eco/stand
Display Test
optiPoint 410 eco/stand
DNS IP Address
Domain Name
Download
Configuration
DSM Application
Firmware
Hold Music
LDAP Template
Server Address
Download Application
optiPoint 410 eco/stand
Downloads/Uploads
optiPoint 410 eco/stand
DSM Application Filename
69
20
40
69
40
25, 69
26, 69
69
44, 70
70
70
44, 63, 70
32, 71
44
44
71
E
E.164 (Subscriber Number)
Echo effect
Error Messages
optiPoint 410 entry
optiPoint 410 eco/stand
Explanations to specialized terms
External Access
80
7
51
47
83
71
F
Factory Default Settings
password, function
programmable keys
Standard value
Factory Reset
File Transfer Status
FTP
Account Name
Password
Path
setting up FTP server
Username
95
96
97
95
39, 71
71
33, 72
33, 72
72
88
33, 72
109
Index
G
Gatekeeper Identifier
73
H
H.235 Security Profile
Handsfree distance
Help Internet URL Base
Help Intranet URL Base
Hold Music Filename
73
3
73
73
73
I
Improve speech quality
IP Routing
optiPoint 410 eco/stand
91
73
21
J
Jitter Buffer
74
76
Template Filename
LDAP or XML
76
LED
Test
76
Visualisation on optiPoint 410 entry 98
LED Test
40
optiPoint 410 eco/stand
Line Status
43
Line Status/Monitor
76
Local Area Code
77
Local Country Code
31, 77
Local District Code
77
Location Identifier
77
M
MAC Address
Menu structure
optiPoint 410 economy
optiPoint 410 standard
MIB-II Error Count
39, 77
107
105
77
K
Key Test
optiPoint 410 eco/stand
N
41
L
LAN connection checking
LAN Port Settings
Layer 2
Default
Priority
Signalling
Voice
Layer 3
Signalling
Voice
Layer 3 Signalling
optiPoint 410 eco/stand
Layer 3 Voice
optiPoint 410 eco/stand
LDAP
configuring on Display Module
install Template
Server Address
Server Port
template example
110
90
25, 75
23, 74
75
23
23
74
74
22
22
62
63
27, 75
28, 76
64
Nameplate
National Dial Prefix
Number Field Format Information
7
31, 78
78
O
Operation Codes Summary
optiPoint 410 entry
optiPoint 410 eco/stand
101
49
19
P
Password
PBX address
PC Port Settings
PING Test
optiPoint 410 eco/stand
Precautions
Programmable Keys
38, 66
26
25, 75
78
42
3
97
Q
QoS Layer Options
78
Index
optiPoint 410 eco/stand
22
RAM Test
optiPoint 410 eco/stand
Registration Time to Live
Restart
optiPoint 410 entry
optiPoint 410 eco/stand/
ROM Test
optiPoint 410 eco/stand
78
41
78
R
50
46
79
41
100
80
20
80
20
38, 80
37, 81
U
Upload Configuration
81
V
S
Search Fields Presented
Security Time Window
Serial number
Silence
SNMP Password
SNMP Trap Address
SNMP Trap IP Address
SNMP Trap Port
SNTP Server Address
SNTP Server IP Address
Software-Version, determine
Specialized terms
Start up not successful
Subscriber Number
Subscriber Password
Suppression
Symbole
System Type
optiPoint 410 entry
Terminal IP Address
optiPoint 410 eco/stand
Terminal Mask
optiPoint 410 eco/stand
Time
Time Zone Offset
79
79
7
36, 79
35, 79
35
79
79
36
79
90
83
90
27, 80
27, 80
36
66
26, 80
VLAN
Discovery Mode
ID
Method
81
24, 81
24
W
WAP
Access Allowed
Access User Name
Gateway Port Number
Gateway/Proxy IP address
Mode
Server Address
WAP Gateway Address
WAP Gateway Port Number
WAP Mode
Web-based Management Tool
82
82
82
82
82
82
29, 30
82
28
54
T
Technical data
optiPoint 410 economy/standard
99
111
'5
$)
7
ZZZ1VLHPHQV1FRP2KLSDWK
‹#6LHPHQV#$*#5337
,QIRUPDWLRQ#DQG#&RPPXQLFDWLRQ#1HWZRUNV
+RIPDQQVWU1#84#‡#'0;468<#0XQLFK
%HVWHOO01U1=#$643360$53890%7480840:9$<
7KH#LQIRUPDWLRQ#SURYLGHG#LQ#WKLV#GRFXPHQW#FRQWDLQV#PHUHO\#JHQHUDO#GH0
VFULSWLRQV#RU#FKDUDFWHULVWLFV#RI#SHUIRUPDQFH#ZKLFK#LQ#FDVH#RI#DFWXDO#XVH#
GR#QRW#DOZD\V#DSSO\#DV#GHVFULEHG#RU#ZKLFK#PD\#FKDQJH#DV#D#UHVXOW#RI#
IXUWKHU#GHYHORSPHQW#RI#WKH#SURGXFWV1#
$Q#REOLJDWLRQ#WR#SURYLGH#WKH#UHVSHFWLYH#FKDUDFWHULVWLFV#VKDOO#RQO\#H[LVW#LI#
H[SUHVVO\#DJUHHG#LQ#WKH#WHUPV#RI#FRQWUDFW1
6XEMHFW#WR#DYDLODELOLW\1#5LJKW#RI#PRGLILFDWLRQ#UHVHUYHG1
3ULQWHG#LQ#WKH#)HGHUDO#5HSXEOLF#RI#*HUPDQ\1
3<13415337