1
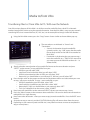
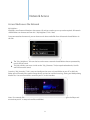
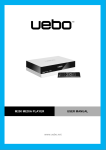
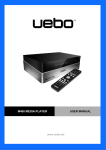
MvixUltio User Guide Solutions for the HD Planet Mvix Ultio User Guide 0 Federal Communication Commission Interference Statement This equipment has been tested and found to comply with the limits for a Class B digital device, pursuant to Part 15 of the FCC Rules. These limits are designed to provide reasonable protection against harmful interference in a residential installation. This equipment generates uses and can radiate radio frequency energy and, if not installed and used in accordance with the instructions, may cause harmful interference to radio communications. However, there is no guarantee that interference will not occur in a particular installation. If this equipment does cause harmful interference to radio or television reception, which can be determined by turning the equipment off and on, the user is encouraged to try to correct the interference by one of the following measures: • Reorient or relocate the receiving antenna. • Increase the separation between the equipment and receiver. • Connect the equipment into an outlet on a circuit different from that to which the receiver is connected. • Consult the dealer or an experienced radio/TV technician for help. • FCC Caution: Any changes or modifications not expressly approved by the party responsible for compliance could void the user’s authority to operate this equipment. Country Code Statement For product available in the USA/Canada market, only channel 1~11 can be operated. Other channel Selections are not possible. To maintain compliance with FCC RF exposure requirements, use only belt-clips, holsters or similar accessories that do not contain metallic components in its assembly. The use of accessories that do not satisfy these requirements may not comply with FCC RF exposure requirements, and should be avoided. CAUTION: Any changes or modifications not expressly approved by the grantee of this device could void the user’s authority to operate the equipment. This transmitter must not be co-located or operating in conjunction with any other antenna or transmitter. Federal Communication Commission (FCC) Radiation Exposure Statement This EUT is compliance with SAR for general population/uncontrolled exposure limits in ANSI/IEEE C95.11999 and had been tested in accordance with the measurement methods and procedures specified in OET Bulletin 65 Supplement C. This equipment should be installed and operated with minimum distance 2.5cm between the radiator & your body. CE Statement: This device is in compliance with the essential requirement and other relevant provisions of the R&TTE Driective 1999/5/EC. 1 Safety Precautions Do’s 1. Unplug the player during lightning storms or when unused for long periods of time. 2. Do not defeat the safety purpose of the polarized or grounding-type plug. A polarized plug has two blades with one wider than the other. The wide blade is provided for your safety. If the provided plug does not fit into your outlet, consult an electrician for replacement of the obsolete outlet. 3. Protect the power cord from being walked on or pinched, particularly at plugs, or at the point where they exit from the player. 4. Read all safety information carefully. 5. Read and follow all instructions in this user manual. 6. Clean the unit with a soft, dry cloth 7. Visit mvixusa.com for additional product information & for troubleshooting. Don’t s 1. 2. 3. 4. 5. 6. Don’t expose your MVIX unit to heat sources or high temperatures. Don’t expose your MVIX unit to water, oil, dust or magnetic materials. Don’t block the vents. Free airflow should be maintained around the unit. Don’t attempt disassembling or remodeling the unit. Don’t drop the MVIX unit. This might cause irreversible damage to the unit and the hard drive. Do not touch the power plug with wet hands or use defective power cables & electric outlets. Doing so might result in electric shock or fire. Only use attachments / accessories specified by the manufacturer. 7. Do not mix batteries (old and new or carbon and alkaline, etc.) in your remote. Remove batteries when the unit is not used for a long time. 2 Contents I INTRODUCTION 5 6 7 II PRODUCT DETAILS 8 9 10 11 III UPnP Access Media over the Network FILE MANAGEMENT FUNCTIONS 33 34 VI Usage Precautions Installing a Hard Drive Formatting the Hard Drive Getting Started Network Connections: Wired Network Connections: Wireless File Sharing with Windows XP File Sharing with Windows Vista USB Host Interface Connect to a PC via USB 2.0 Transferring Files to/ from Ultio to PC via USB-Host Transferring Files to /from Ultio to PC / NAS over the Network NETWORK ACCESS 30 31 V Front View Back View Remote Control User Interface INITIAL SETUP 13 14 15 16 20 21 22 23 25 26 27 28 IV Overview & Features Specifications Media Codec and Format Support Renaming and Deleting Media Files Copying and Moving Media Files MEDIA PLAYBACK 35 36 37 38 39 40 Media Playback Digital Vide File / Movie Playback DVD / ISO File Playback Digital Audio / Music File Playback Digital Photo / Image File Playback Playlist 3 Contents VII TORRENT FUNCTIONS 41 42 VIII. UPDATING ULTIO 44 IX. XV. Trademarks and Legal Attributions COPYRIGHT MEDIA 52 XIV. Warranty TRADEMARKS AND LEGAL ATTRIBUTIONS 50 XIII. Notice of Free & Open Source Software Licenses and Source Code WARRANTY 49 XII. Maintenance notice Frequently Asked Questions GPL CODE AVAILABILITY 48 XI. Firmware Upgrade TROUBLESHOOTING 45 46 X. Installing Bittorrent module Using Torrent Functionality Use of Copyright Media GLOSSARY 53 Glossary 54 Index INDEX 4 Introduction Mvix Ultio is a Hard-Disk Based media player capable of HD digital media playback with video output as high as 1080p. Its high-end video processing (playback of H.264 / MKV formats), allows you to enjoy BluRay quality video. Store your entire Hi-Definition media on its internal hard drive, plug it into your TV via a HDMI or Component Cable and enjoy all your movies, digital music and family photos on large LCD or Plasma. The flexibility and scalability of Ultio makes it the easy to play HD movies or home videos, listen to digital music or enjoy a themed slideshow of your family photos on your TV. It also works with popular digital cameras, camcorders, and external storage devices. Full 1080p Media Decoding Technology Supports popular 1080p HD video codecs, including H.264, MKV, Dixv HD, MPEG 2-TS, VC-1, WMV9. Enjoy playback from over a dozen video formats and codecs on your HD LCD or Plasma via HDMI interface. Flexibility, Scalability and Portability For movies, TV shows, camcorder footage and more, the Mvix Ultio is capable of playing dozens of digital media files and formats including DivX® (3/4/5/6), Xvid, MPEG 1/2/4, WMV-9, MOV, MKV, DVD(IFO, VOB), ISO, MP3, WMA, AAC, OGG, FLAC, AC3. The Media Center is completely Scalable – you decide what HDD-size suits you! Built-In Torrent Client Built-in Torrent Client, combined with NAS features provides an idea setup for digital media acquisition, storage and sharing. Home-theater PC Experience Combined with spectacular picture quality of HD video and crystal clear sound clarity of digital audio, the Ultio provides a complete HTPC experience. Ability to install an internal SATA hard drive allows versatile applications. Network Media Playback Network media streaming from a shared, password-protected folder of a PC or NAS or a server over Ethernet (RJ45) connection or a wireless-N network (optional). Complete Universal Plug and Play (UPnP) support with embedded Samba Client. UPnP allows for seamless integration with services like PlayOn® or Tversity® (stream video content from Netflix, Hulu, CBS, Youtube, CNN, ESPN and much more) File Management via Remote Control Manage your entire media collection from the comfort of your living room. The media center is equipped for enabling complete file management features directly from the remote control - no need of a PC for its operations. Provides features like formatting hard-drive, Copy, Delete, Rename of files and even physical transfer of files between USB storage, Network shares, PC and its internal HDD simply via the hand-held remote) 5 Introduction Specifications Model No: Mvix Ultio (MX-800HD ) HD UPnP Media Player HDD Compatibility Supports 3.5 SATA hard disk (capacity up to 1.5TB), HDD not included HDD Format FAT32, EXT3 or NTFS format External Storage Via USB Host (for external CD ROM / DVD ROM / Portable HDD / USB storage) Video Resolution H.264, MKV, WMV9, MOV, RM/RMVB, TS and HD Divx supported up to 1920 x 1080p TV System PAL, NTSC, Auto Compatibility Networking LAN RJ45 10/100M or Wi-Fi 802.11N (via USB dongle, sold seperately) Network Protocols Embedded uPnP Client, Samba Client Codec: H.264, MKV, WMV9, MPEG 1/2/4, HD Divx , Xvid, FLV, RM/RMVB, AVCHD Video Playback Container: mkv, ts, m2ts, mts, tp, trp, wmv, Ifo, iso, vob, dat, avi, mpg, mp4, mov, rm, rmvb, divx, xvid, flv Codec: MP3, WMA, WAV, OGG, AAC, LPCM, FLAC, AC3 Audio Playback Container: WAV [.wav, .pcm], ADIF, ADTS [.aac], M4A [.m4a], OGG [.ogg], ASF/WMA [.asf, .wma], FLAC [.flac] Image Playback JPG, JPEG, BMP, PNG, GIF Subtitle Playback sub, smi, ssa, srt, idx + sub Audio Video Out HDMI1.3 (digital video and audio signals), Component (Y Pb Pr), Composite Video, Optical SPDIF (5.1Ch Dolby Digital), Stereo audio output (Audio R/L), USB2.0 Host (for connecting external DVD ROM / Portable HDD / USB storage / USB WIFI), I / O Ports USB2.0 Slave to transfer Media from PC. 10/100Mbps Ethernet port (Media Transfer and Sharing across network Torrent Client Embedded Torrent Client File Management HDD Format, Copy, Delete, Rename, File Transfer via hand-held Remote Power Input Universal AC 100 ~230V 50Hz, DC Power DC 12V 2A, 30-W Language English, German, Spanish, Italian, French, Portuguese, Dutch, Hebrew 6 Introduction Media Codec and Format Support VIDEO MPEG-1 DAT MPG 320×240 720×576 MPEG-2 VOB M-JPEG MPG TS M2TS TP 720×576 640×480P 1920×1080p 1920×1080p 1920x1080p 1920x 1080p MPEG-4, DIVX, XVID AVI MP4 MKV 1920×1080p 1920×1080p 1920×1080p VC-1 WMV 1920×1080p H.264 AVI MP4 / AVCHD MKV MOV RM / RMVB 1920×1080p 1920×1080p 1920×1080p 1920x 1080p 1920x 1080p AUDIO MP3 WMA WAV AAC OGG AC3 (Dolby Digital) FLAC REAL AUDIO PICTURE JPG/JPEG BMP PNG GIF 7 Product Details Front view ① ② ③ ④ ⑤ ⑥ ⑦ ⑧ ⑨ MENU SETUP ■ OK Power LED Press to return the main menu Press to enter the setup menu Press to stop current operation Press to move the cursor left Press to move the cursor right Press to confirm or select the current operation Press to move the cursor up Press to move the cursor down Press to switch on/off the power Blue light when switch / power is on, Red light when Ultio is in stand-by. 8 Product Details Back View ① ② ③ ④ ⑤ ⑥ ⑦ ⑧ DC IN 12V AV-OUT COMPONENT OPTICAL HDMI LAN USB DEVICE USB HOST Power Cable Connection Composite (R-W-Y) Video Out Component (YPbPr) Video Out Optical Audio Out (5.1Ch) High definition Video Out 10/100 Network Port USB2.0 (to connect to PC for file Transfer) USB Host (to connect to external Storage) 9 Product Details Remote control POWER MUTE TV SYSTEM 0-9 GOTO GUIDE FR FF RETURN SETUP OK PREV NEXT VOLVOL+ OPTION STOP PLAY/PAUSE REPEAT COPY SELECT CONFIRM INFO SUBTITLE SLOW AUDIO ZOOM ALL MUSIC PHOTO MOVIES Turn on and off in the stand-by mode Turn on or shut audio output Toggle between NTSC, PAL, 480p, 576p, 720p 50HZ, 720P 60Hz, 1080i 50Hz ,1080i 60Hz, 1080p 50Hz,1080p 60Hz Number Keys for Selection and Renaming Video / Movie Chapter Selection Switch and Return to Main Navigation Menu (Home Page) Fast rewind, Toggle to Set Rewind Speed Fast Forward, Toggle to Set Forward Speed Return to the previous menu Enter Setup menu Confirm or Select Return to previous file / PG UP Go to next file / PG DOWN Decrease the volume Increase the volume Option Navigation Bar for Rename/Edit Files. Stop Playback Play / Pause Media File Playback Set Repeat Option: (e.g. Chapter, Title) Enter the File copy mode Select a file and then press “confirm” to add / delete files in the playlist. Select Files / Folders in Copy Mode. Add or delete option in playlist Display time, title, information of chapter of Media File Switch subtitle files Slow motion:(1X, 3/4X 1/2X, 1/4X, 1/8X, 1/16X) Press PLAY to resume regular play mode. Toggle Audio Outputs Zoom Video or Image Display on Screen Photo zoom levels: 1X, 2X,4X,8X,16X Video zoom levels: 1X, 2X,3X,4X,8X Show all files Display Audio Files Only. Display Picture / Image Files Only. Display Video Files Only 10 Product Details The User Interface Main Menu Provides Access to Media locations and Setup Menu Local HDD: Media location on Internal HDD USB Device: Media located on a connected USB drive, if connected External DVD: Playback from External DVDROM UPnP: Access to UPnP Shares over the Network Network: Access Media located over the Network Playlist: Create and Playback Playlists Setup: Access to Setup Menu Setup Menu Provides Access to Settings for System Media Playback & Network System: Configure System Settings Video: Configure Video Playback Settings Audio: Configure Audio Playback Settings Photo: Configure Image Playback Settings Network: Configure Network Settings Systems Settings Menu Provides Access to System-wide Settings Menu Language: Select Menu Languages Text Encoding: Select Text Encoding languages for Subtitles etc. Screen Saver: Turn Screen Saver ON / OFF Login Control: Turn Login Control ON / OFF BT / Samba Info: Install services like torrent client, samba etc. System Update: Update Firmware DVD AutoPlay: Auto-Play DVD once connected and powered ON. HDD Format: Format HDD option (Caution: Erases All Data on HDD) Restore Default: Perform Soft Reset and Revert to Factory Settings 11 Product Details The User Interface Video Settings Provides Access to Configuration of Video Playback Settings Movie Preview: Turn Preview ON / OFF when browsing over titles Resume Playback: Turn “Resume Playback” feature ON / OFF Aspect Ratio: Select Display Aspect Ratio: 4:3 vs 16:9 Brightness: Select Video Output Brightness Contrast: Select Video Output Contrast TV System: Select TV System (PAL / NTSC / AUTO, 1080p, HDMI) Audio Settings Provides Access to Configuration of Audio Playback Settings Night Mode: Select Night Mode Off / On or Comfort level Digital Output: Select Digital Audio-out Settings HDMI LPCM: Ultio decoded Audio Output via HDMI, HDMI RAW: Raw Audio Stream Output via HDMI SPDIF LPCM: Ultio decoded Audio Output via Optical Out SPDIF RAW: Raw Audio Stream Output via Optical Out Photo Settings Provides Access to Configuration of Image Playback Settings Slide Show Timing: Select Time Interval between Image Slide Show. Transition Effect: Select Transition Effects between Image Playback Background Music: Select background music with SlideShow. 12 Initial Setup Usage Precautions Ensure the power is off when you connect the A/V cable between the Mvix player and the TV. If using an older hard drive, ensure that you backup all necessary data and files. As a part of its normal operation, Mvix Ultio will format and erase all old files. When cleaning the device, disconnect the power and then wipe the unit with a soft piece of dry cloth. When connected to the computer through the USB cable Mvix Ultio works like an external USB storage device (During this operation, there is no video/audio playback). To resume playback mode, disconnect the USB cable connected to your PC and turn on the Mvix player. The supplied cables and accessories are recommended for customized best performance of the Mvix Media Player. Using any other (after-market) cables or accessories may not provide best performance. DO NOT use any power adapter with Mvix Ultio, other than the one supplied with your unit. In order to unplug your Mvix Media Player, press the STOP button before removing cables or turning off power. Remember, Mvix Ultio is NOT a recorder. Do not plug any AV input into its AV out ports (Component, Composite, HDMI etc.) 13 Initial Setup Hard Drive (HDD) Installation Remove 3 screws • • • • • • • IMPORTANT: Unplug the device from the power source and unplug all cables. Remove 3 screws from the back Panel of the device Slide the Tray out from the enclosure (black metal sleeve) Install a SATA HDD using the SATA Cables available on the board Flip the board and locate the 2 holes for securing HDD with screws. Insert the Tray back in the enclosure and install the 3 screws on the back of the device. Once the HDD is physically installed. Format the HDD using Mvix Ultio (in-built) utility Caution: Do not install a HDD containing data/files. Ultio will format the HDD upon first use and erase all current data. ATTENTION Observe Precaution when handling Electrostatic Sensitive Devices 14 Initial Setup Formatting Hard Drive Press SETUP button on the Remote Select “System” Settings label / link On the Systems Menu, scroll down and select “HDD Format” Navigate to the right, select HDD Format and press “OK” on your Mvix Remote. The Warning page informs you that the HDD inside your Ultio is about to be formatted and that all data will be erased from that disk. Note: Formatting is an irreversible process. Always backup your data before formatting a HDD. 15 Initial Setup Getting Started To get started you need to : Connect audio and video cables to Mvix Ultio and your widescreen TV or home theater receiver Connect Mvix Ultio to a Power Outlet Connect Mvix Ultio to your wireless or wired network via your router or switch Before you begin, look at the back of your TV or receiver and locate the AV ports. Ensure you have the appropriate cables for your setup. Audio-Video Connection to your TV The Mvix Ultio is designed for video-output via a variety of AV connections , such as composite(AV),component(YPbPr) and HDMI. Depending on your current AV setup, you can decide which mechanism is most suitable for you. The Mvix Ultio is configured such that it can detect video output automatically, making the AV link to TV hassle-free. If choosing a Composite (RCA-type: Red, Yellow and White) cable: Plug the yellow connector into the AV output of Mvix Ultio and AV input of TV, and plug the red and white connector into the audio input of TV or Stereo amplifier / receiver. Turn on the TV and select AV mode. Power on the Mvix Player and it should display the Home Screen of Mvix Ultio. 16 Initial Setup If choosing a Component (YPbPr) Cable: Plug the Component YPbPr cable into the output of Mvix Ultio and input of TV. Since Component cables are for video signal only, you will need to connect another AV (RedWhite) cable connector of AV cable into the audio output of Ultio and audio input of TV or amplifier / AV receiver. Turn on your LCD or Plasma and select YPbPr video input mode. If choosing a HDMI Cable HDMI output provides the highest quality of video output. For your convenience, a HDMI cable is included with Ultio. HDMI output offers the composite of digital audio and video signal upto 1080p resoution. Connect the HDMI cable to output of Ultio and the display device (TV, LCD, projector etc.) with HDMI input. Select HDMI mode in TV. Always connect the HDMI cable before usage. Once connected, adjust your TV mode to HDMI and requisite resolution (720p, 1080i or 1080p), depending on your viewing preferences. 17 Initial Setup If choosing, Optical (Audio-only) Cable Optical output:Connect the product Optical connector with the other one from video or audio device by Optical cable. Then enter the product's audio interface, select the Digital Output option "SPDIF LPCM" or "SPDIF RAW". It is available to enjoy 5.1 high quality sounds through a multi channel decoder/amplifier with optical input. The first time you use Mvix Ultio the display (TV / LCD) screen will flicker and adjust the resolution. This is a normal process, where the device is self-configuring itself to work with your setup. If you see just a black screen the first time you use Mvix Ultio TV, make sure the input you’ve selected on your TV matches the input you’ve plugged the cables into on your TV or receiver. If the input matches, you might need to select a screen resolution that your TV supports. Power connection Connect the power adapter (supplied with your Mvix Ultio) to the back of the device and plug the power onto a wall jack. Mvix Ultio is compatible with 110 or 220V and is suitable for worldwide use. 18 Initial Setup Network Connection and Setup Mvix Ultio is a Networkable Media Player with UPnP and Samba Client. It can connect to your local area network via a router or switch and allow you to share media files from your PC or NAS. Mvix Ultio comes pre-equipped with a RJ45 Network Jack for use with wired Ethernet cable. Wireless-N Adapters / Dongles are optional and sold separately. Once your TV is setup and displays the main home page of Mvix Ultio. Press “setup” key on the Mvix Remote or select “setup” menu in the initiation interface. Select “Network” option in the setup window and press “OK” to confirm. Network configuration allows for either automatic or manual IP setup via Wired or Wireless setup. Follow the on-screen instructions to complete the network setup. If you connect to a wired Ethernet network using DHCP, Mvix Ultio automatically detects your network. Else, you may have to enter your IP address, subnet mask, router, and DNS addresses 19 Initial Setup Network Connections: Wired In order to utilize the network features of Mvix Ultio, Connect the Media Player to the network (router) via a Wired Network Cable (RJ45 Cat 5). This will allow fast network access to the media files and folders shared on your PC or other Network Storage devices. Using your Mvix Remote control, Press the SETUP button and enter the SETUP menu. Select NETWORK and then select WIRED LAN SETUP. Depending on your router and network configuration, you can choose between two options: o DHCP IP (AUTO) Choose this option if you want your router to assign a dynamic IP address to Mvix Ultio. This option is easy to use and recommended for normal users. o FIX IP (MANUAL) This option allows you to assign a static IP address to Mvix Ultio. This option requires modifying network settings of Mvix Ultio and is recommended for advanced users. If setting Static IP for your Mvix Ultio, enter the information (IP Address, Subnet Mast and Gateway) as relevant to your router as in the screen below. The IP address, Gateway information shown above is for reference purposes only. Do NOT copy these in your Mvix Ultio. Kindly refer to the User Manual of your router for setting Static IP addresses. 20 Initial Setup Network Connections: Wireless In situations where network connection cannot be established over a wired network, Mvix Ultio can also be connected to a Wireless Network. Note: Wireless Network functionality is an optional feature and requires a Wireless USB Adapter (not included). Mvix Ultio is compatible with 802.11 b/g/n adapters of approved brands. In order to install the Wireless Adapter, simply plug-in, an approved Wireless Adapter / Dongle through the USBHost port. Once the device is recognized by the media player a confirmation (“WiFi Plug In”) will pop-up on the top of your LCD / Plasma screen. If you have already installed and setup your wireless connection earlier, you can simply test to ensure that you are connected and the network is operational. Using your Mvix Remote, navigate to the “NETWORK” label and press “OK”. You will be see atleast two links/folders labeled as “/My_Shortcuts/” and “/My_Neighbors/”.This confirms that you are successfully connected to a wireless network and can now browse and stream media content from a shared folder of PC or NAS. All wireless adapters which use the RTL8187b chipset are compatible with Mvix Ultio. Check out our online store: www.mvixusa.com/store for information on such adapters. 21 Initial Setup Network Connections: Wireless Once the Wireless Adapter is successfully installed on your Mvix Ultio. Using your Mvix Remote control, Press the SETUP button to enter the settings menu. Select NETWORK and then select WIRELESS SETUP and press “OK”. For the initial setup of wireless configuration, a profile configuration is required. While one profile configuration (“Connection 1”) is enough to establish a Wireless connection, Mvix Ultio provides the flexibility of having multiple profiles for use across multiple wireless networks. In order to configure “Connection 1” Profile: Browse and select “Connection 1” and then select “Infrastructure (AP)” Mvix Ultio performs a scan of wireless networks and displays “SSIDs” of available networks in its range along with their security protocols (WEP / WPA / WPA2) and signal strength. Select the your preferred wireless network and press “OK”. If your preferred network requires an access key (WEP / WPA / WPA2 key), then a keyboard pops up. Enter the network access key and select OK on the onscreen keyboard. Press “OK” Mvix Ultio enters into a “Connection Testing” Mode to evaluate and acquire IP from your wireless network / router Once the IP is successfully acquired, the “Test OK” confirmation screen is displayed along with the IP address, Subnet mask etc. You are now connected to your local wireless network. 22 Initial Setup File Sharing Configurations (with Windows XP) The following two conditions are necessary for Configuring File Sharing Protocols on your (Windows-based) PC. Folder sharing and Security Settings. Configuring Mvix Ultio and the Windows-based PC to be on the same Network Gateway and Subnet. File sharing involves making the media content of one or more files / folders (on your PC) available through the network. By “enabling” this file sharing, you can view these files / folders (on your PC) to be accessed / viewed on your Mvix Ultio (on the same network). Caution: File sharing may lead to security problems since, by definition, it gives other users access to the content of a part of the hard drive. As a result, it is essential that you share only folders for which it would not be extremely important if their content were revealed (or destroyed), Furthermore, you are strongly advised against sharing a whole partition of your hard drive. This operation is specifically discouraged if you do not trust the other network users! Enable “Simple File Sharing” under Windows-XP Double-click on My Computer icon on the desktop. On the Tools menu, click Folder Options. Click the View tab, and then select the Use Simple File Sharing (Recommended) Check box to turn on Simple File Sharing. Note: Windows XP Home Edition-based computers always have File Sharing enabled by default. Once the “Simple File Sharing” is enabled in Windows-XP, Open Windows Explorer (or My Computer). Navigate to the file, folder or drive folder to be shared, and select it. Right Click on the file or folder and choose the "Sharing and Security..." option. A new Properties window will appear. Click on the Network tab in the Properties window. Click the “Share This Folder” option in the Properties window to enable sharing. This will allow all other computers on the local network to access file(s) but not modify, delete or rename them. In order to allow Mvix Ultio to rename or delete these files, click the "Allow Network Users to Change My Files”. Click Apply or OK to save these settings. 23 Initial Setup File Sharing Configurations (With Windows Vista) File sharing involves making the media content of one or more files / folders (on your PC) available through the network. By “enabling” this file sharing, you can view these files / folders (on your PC) to be accessed / viewed on your Mvix Ultio (on the same network). Caution: File sharing may lead to security problems since, by definition, it gives other users access to the content of a part of the hard drive. As a result, it is essential that you share only folders for which it would not be extremely important if their content were revealed (or destroyed), Furthermore, you are strongly advised against sharing a whole partition of your hard drive. This operation is specifically discouraged if you do not trust the other network users! Enable “File Sharing” under Windows Vista On your PC, Click Start, right-click Network, and then click Properties.. A new Window titled “Network and Sharing Center” pops up. In the “Sharing and Discovery” section of the Network and Sharing Center window, click the down arrow next to File sharing. Within the File sharing settings, click Turn on file sharing, and then click Apply. To enable public folder sharing, do the following: o In the Sharing and Discovery section of the Network and Sharing Center window, click the down arrow next to Public folder sharing. o Within the Public folder sharing settings, click “Turn on sharing so anyone with network access can open, change, and create files”. o Click Apply.. Once the “File Sharing” is enabled in Windows-Vista, Click Start, and then click Computer. In the Computer window, navigate to the folder containing the folder that you want to share. Right-click the folder that you want to share, and then click Share. The File Sharing window is displayed. Use the File Sharing window to select the Guest or Everyone account. This is equivalent to simple file sharing in Windows XP. When complete, click Share, and then click Done.. 24 Initial Setup USB HOST interface Mvix Ultio comes with two USB-Host Ports to expand its media storage capacity. You can not only store all your digital media on Ultio’s internal HDD but also on external storage devices such as portable HDDs, USB drives, DVD ROM etc. The USB-host port is built upon a full speed USB-compliant host/function processor for most optimal performance. It is compatible with all standard, external mobile hard disk drives, Flash / thumb drives, digital cameras, card readers and other data storage devices. • • Turn off your Mvix Ultio before connecting your external device to the player. Some 2.5” external-HDD may require additional power to the external HDD to be recognized. Use the AC-adapter included with your 2.5” external HDD to enable its use with the Mvix player. Mvix Ultio is also compatible with external USB-DVD drives . Simply connect the USB-DVD drive to the USBhost port of Ultio and you can play the contents from the DVD disk directly. At the same time, you can copy contents from your DVD-ROM discs to the internal hard drive (inside Mvix Ultio) for backup. This backup functionality will not work for encrypted or copy-protected DVDs. From the main home section of Ultio, select "External DVD". If, in your System Setup, "DVD Auto Play" is turned on, the drive will automatically identify and begin to play DVD. Use your Ultio remote to navigate the playback from the device. During the playback, press the "stop" to stop playback, press the "return" to return to Ultio’s main menu page. Once on the main menu page, press “stop” to eject the DVD from the drive. 25 Initial Setup Connect to a PC via USB 2.0 This HDD-based Media Player can also be used as a external USB storage device. After you have successfully installed an internal HDD inside Ultio, connect to the power supply to Mvix Ultio. (Your PC will not recognize the Ultio if power supply is not connected) Connect the Mvix Ultio to your PC using a USB2.0 cable. Once the PC has recognized this external storage device, simply drag and drop (transfer) files and folders from your PC to Mvix Ultio’s internal HDD. Upon completion of data transfer, remove the USB cable from the PC by disconnecting the storage device safely (click the USB device icon, lower right bottom corner on your PC, to stop the USB device) Note: If your PC does not recognize Mvix Ultio as an external storage device, disconnect the USB cable, reboot the PC, and then connect again. Caution: Do NOT disconnect power when connected to the PC. 26 Media to/from Ultio Transferring Files to / from Ultio to PC via USB-Host In order to have a smooth playback and have localized storage, it is recommended to store media on the local, internal drive of Mvix Ultio. The easiest ways of transferring files to the internal HDD of Ultio is via the USB-cable. Power-off your Mvix Ultio, by pressing the Power button on the Mvix Ultio or on your remote. Connect the USB 2.0 A-B cable (included) to the USB Host port located to the right of the Ethernet port on Mvix Ultio. Connect the other end of the Cable to your PC. Power-On the Mvix Ultio Media Player. Your computer will recognize the Mvix Ultio and will attach the player as an external USB Hard Drive. Simply Drag and Drop your media files from your PC to the Mvix Ultio Hard Drive. Use as many folders and subfolders to organize your media collection on Ultio’s storage. 27 Media to/from Ultio Transferring Files to / from Ultio to PC / NAS over the Network One of the unique features of Mvix Ultio is its ability to transfer media files from a local PC or Networkattached storage (NAS) device using the network connection. Once the Mvix Ultio is setup on your network, transferring files across network devices (PC, NAS, etc.) can be accomplished simply via the Mvix Remote. Using the Mvix Ultio remote, press the “Copy” button. Screen similar to the one below pops up: The two columns are indicated as “Source” and “Destination” o Source is the location where the media file currently resides. (e.g. “USB” means that the media file currently resides on the USB-Drive attached to Mvix Ultio) o Destination is the location that you want to copy / move the media file. (e.g. “TRASH CAN” means that you want to move the media file to the trash – i.e. delete the file) Simply select the source location of your media file. Browse to the source location and press “SELECT” on the remote. To copy media files from your: o USB Drive you will select “USB” o Local Hard Drive (inside Mvix Ultio) you will select “HDD” o DVD drive (connected to Ultio via USB), you will select “DVD” o Network (e.g. a shared folder on your network, PC, NAS etc.) you will select “NET” Press the right arrow on the remote to move to the Destination column and select where you want to copy / move your media file. To copy / move media files to your: o USB Drive attached to your Mvix Ultio, select “USB” o Local hard drive installed on your Mvix Ultio, select “HDD” o Networked PC, NAS or a shared folder on your network, select “NET” o Trash (i.e. Delete files from the source), select “SOURCE” Next, browse for media files on the source and SELECT the one you want to copy / move. Press the “Select” button on the remote to select media files. You can also select entire directories or multiple files in a single directory. Next, browse the destination - where you want to copy/move the media files. Press the RIGHT arrow button. An option to copy or move is provided. CAUTION: Moving files will remove them from the source. Depending on your network speeds and file size, it may take few minutes or more to complete the copy or move process. 28 Media to/from Ultio Transferring Files to / from Ultio to PC / NAS over the Network Mvix Ultio not only allows you to transfer files / folder to Ultio (using your Mvix Remote), it is also configured to work as a Network Attached Storage. That is, you can drag and drop files from you PC to Ultio over the network. Required: Install the (optional) Samba module (refer: SETUP –SYSTEM SETTINGS) (Files required for Samba module setup are available for download from MvixUSA’s Support Center) Once the Samba (server) module is installed on Mvix Ultio, it makes it a Network-attached storage device: On your PC, open your “Windows Explorer” or click on “My Computer” and navigate to the folder labeled “Network” o If your PC is connected to the same network and workgroup as the Mvix Ultio, your PC will immediately recognize it as a Network Drive. o The Mvix Ultio shows up as a Network drive labeled as: “Venus” o Double-click on this network drive and you will be able to access the HDD inside Mvix Ultio. Simply drag and drop all your media from your PC to this network drive on your Ultio. Troubleshooting: When trying to access the Network Drive (Ultio HDD from your PC) and if asked for a UserID and Password, then your Login Control is turned on. Turn it off to gain direct access to the system. Navigate the System Settings Menu under Setup on Mvix Ultio. Scroll down and click on LOGIN CONTROL. RIGHT CLICK, Select OFF and Press “OK”. 29 Network Access UPnP UPnP (Universal Plug and Play) allows you to connect UPnP-enabled devices (available on the network) seamlessly with Mvix Ultio and share their content with the media player. In most situations, small, freelyavailable applications can be installed on your PC to make it UPnP-enabled. Amongst others, applications such as like TVersity® (http://www.tversity.com) or PlayOn® (http://www.themediamall.com/playon) allow you to share your media over your network. Using Mvix Ultio, you can connect to your PC over the network and stream media / content to your TV. These applications will also allow you to connect to online video services such as YouTube, Joost, Hulu and many more. Using a combination of an application such as Tversity® or PlayOn®, you can access large number of online video channels on to your LCD or Plasma. Install a UPnP AV server (such as Tversity® or PlayOn®) on your PC. Follow instructions provided in these applications for installation. Connect both the PC and the Mvix player to the network, over a router or network-switch. In the main menu screen of Mvix Ultio. Select the “UPNP” option and press ok. All UPnP-enabled devices, available on your local network, will be displayed. Simply select the device which contains the preferred media. Browse to your media content / file and press “Play” on your remote. The playback of the video or audio file should start momentarily as it is streamed across your network. 30 Network Access Access Media over the Network Amongst other valuable features of Mvix Ultio, its ability to stream media content over the network. Fundamentally, there are two ways to access the media files available (shared) on your local network. From the main screen of Ultio, select the “NETWORK” label. My Shortcuts Shortcuts are like bookmarks. You can bookmark you favorite network locations (e.g. “My Pictures” folder on your laptop or say “Home Videos” on your NAS). These bookmarks / shortcuts not only store the direct path / location of these network folders but also the access information (userid and password). Shortcuts eliminate the hassle of browsing to your favorite folders and entering userid and passwords repeatedly. Once on the “My Shortcuts” link, Press OPTION key to enter the setup interface. You can Add, Modify, or Delete Used ID and passwords of individual shortcut locations. To Add, Press Add button on your remote to enter a new User ID, Password for the specific Shortcut. Select YES to complete the setup. Now you can access the media files located on the network folder. Browse, select and play the media files. 31 Network Access Access Media over the Network My Neighbors Neighbors are all network locations where access ID and password may or may not be required. All network shared folders can be accessed from this “/My Neighbors/” link / label. Once connected to the network, you can browse and select media files from all network shared folders via this link. The “/My_Neighbors/” link can also be used to access network shared folders that are protected by user id and password. This link provides you access similar to the “/My_Shortcuts/” link, except that bookmarks, UserIDs and PW cannot be stored. Once the “/My_Networks/” link is setup and configured to access a shared folder on your PC or NAS, the folder will work exactly like a media storage device and can be used for Accessing, Storing and Manipulating Media Files. You can also edit files stored on your PC via this interface. Note: If no network folders are shown under this link, Please check the Network Setting on the Player and ensure that your PC is setup to share files and folders. 32 File Management Functions Renaming and Deleting Media Files Ultio not only allows for direct playback of video files but also offers a comprehensive media file editing mechanism. Media files can be easily edited – renamed and deleted – directly from the Video playback interface using the remote. Navigate to the media file that you wish to edit (Rename / Delete) Press “OPTION” on your remote and a small menu popup box is displayed. Choose options o Return: Return to Playback or Preview Mode o Rename: Rename File Name o Delete: Delete File from the storage location (USB or HDD) If you intend to Rename the file, choose Rename and press “OK” An On-Screen Keyboard is displayed for entering the new file name Enter the desired File name and choose OK (on the onscreen keyboard) 33 File Management Functions Copying and Moving Media Files One of the unique features of Mvix Ultio is its unique capability of copying and moving media files across several storage devices. Mvix Ultio is pre-equipped with a robust File Explorer interface which allows you to copy and move files from one storage device (say HDD) to another storage location (Shared Folder on a Networked PC). Using your remote, simply click the “COPY” button (located in the lower-half of the remote) The File explorer interface (similar to the one shown) on the left pops up. There are 2 columns on this interface. The Left column represents the source location of the file. The Right column represents the destination where you will like to copy/move the file. Using your remote, navigate to the left column and select the source of your file. With the source (HDD, USB etc.) highlighted, Press the right arrow on the remote to move to the Destination column and select where you want to copy / move your media file. Next, browse for media files on the source and SELECT the one you want to copy / move. Press the “Select” button on the remote to select media files. You can also select entire directories or multiple files in a single directory. Browse the destination - where you want to copy/move the media files. Press the RIGHT arrow button. An option to copy or move is provided. CAUTION: Moving files will remove them from the source. 34 Media Playback Media Playback Mvix Ultio is a full-feature media center that allows you to browse and play music, photo and movie files stored on its internal Hard-disk drive, external USB device , or even from the Network . Ultio is equipped with the latest, state-of-the-art video decoding chipset which supports Full HD (1080p) video playback and navigation. It delivers spectacular picture quality of HD video and crystal clear sound clarity of digital audio via HDMI1.3 Video Out interface. Movie viewing Simple Playback, Fast forward, Rewind, Pause and Zoom. View subtitles, reposition subtitles on the screen Create Video playlists DVD / ISO File Playback Photo viewing Create custom slide shows with a variety of transitions and background music Zoom and Rotate Pictures Music playback Fast forward, Rewind, Pause, and Repeat Music Playback In order to enable easier file browsing, Mvix Ultio is configured to display media files based on “type” (i.e. “Music”, “Photo” and “Movie”). You can switch to any type by pressing “All”, “Music”, “Photo” and “Movies” using the four (color) buttons on the remote control. 35 Media Playback Digital Video File / Movie Playback Playing Movies and Videos on Mvix Ultio is as simple as watching a movie using your DVD Player. Once you have the video or Movie accessible by Mvix Ultio (i.e. on its internal HDD, on a USB-stick or a network share, it is easy to play it using a one button playback on your remote. Navigate to the Main Menu of Mvix Ultio Press the MOVIES button on the remote control to enter the Movie Playback Mode. Using the arrow keys on your remote, navigate and select the files / folder(s) containing the preferred video / movie files. Once the movie/video file is selected (highlighted), its preview is shown on the right Press “OK” or Play on the remote control to Play the video or movie on full screen. Like a standard DVD player, you can Fast Forward or Rewind the Video Playback. Press MUTE on Remote to mute the audio, Press PAUSE to pause the video playback. Playback with Subtitles Ultio also features supports video playback with subtitles. Subtitle file formats such as SSA, SMI, SRT and SUB are supported. Put the Video File and the Subtitle file in the same folder. Using the remote, Press “Subtitle” to select subtitle, and then select video file. Press “OK” to start movie play mode. When playing video, press “Subtitle” to toggle (show/hide) subtitles. During playback, you can use the arrow keys on your remote to adjust the size and position of subtitles on the TV screen. Use the UP/DOWN arrow keys to change the location of subtitles on the display screen. Use the LEFT / RIGHT arrow keys to change the size of text subtitles. 36 Media Playback DVD / ISO File Playback Mvix Ultio also supports the popular ISO file playback. ISO files are (DVD) disk images and contain all the attributes and information from a standard disk. It is an exact clone or replica of a DVD, contained in a file. Making an ISO file is an excellent method for digitizing and archiving your entire DVD/movie collection. ISO files are capable of archiving and restoring the entire DVD Menu structure – which may include Audio, Language and Subtitle Information. It also allows you to preserve the Chapter and Scene selection Menu. Note: Refer MvixUSA Support Center for help on “How to create an ISO file from a DVD” Playing DVD-ISO files is exactly the same as playing any other video file on Mvix Ultio. Navigate to the Main Menu of Mvix Ultio Using the arrow keys on your remote, navigate and select the files / folder(s) containing the preferred ISO files. Once the file is highlighted, Press “OK” on the Remote to start file playback. If your ISO file contains the “Menu” structure of DVD, then the playback will start with that DVD Menu and allow you to select Chapters, Scenes, Audio or Language types etc. The playback of ISO files replicates a standard DVD playback in its entirety. During playback, you can Fast Forward, Rewind, Pause or Mute your playback as you would do on a standard DVD playback. 37 Media Playback Digital Audio/Music File Playback Ultio supports nearly half-dozen audio file formats, making it a convenient and versatile music player. Playing Music and audio files on Mvix Ultio is as simple as a simply stand-alone audio / mp3 player. Navigate to the Main Menu of Mvix Ultio Press the MUSIC button on the remote control to enter the AUDIO Playback Mode. Using the arrow keys on your remote, navigate and select the files / folder(s) containing the preferred audio or music files. Once the music / audio file is selected (highlighted), a preview panel shows the music file’s tag information (e.g. Artist information, Title, Album etc.) Press “OK” or Play on the remote control to Play the Audio or Music file. You can Fast Forward or Rewind the Audio Playback. Press MUTE on Remote to mute the audio, Press PAUSE to pause the playback. Use Volume button to increase/decrease volume output. Repeat Mode During an audio or music file playback, Press the “Repeat” button on your remote to put the file in repeat mode. Toggle the “Repeat” button on the remote to place the entire folder in “Repeat” mode or to turn the mode off. 38 Media Playback Digital Photo / Image File Playback Navigate to the Main Menu of Mvix Ultio Press the PHOTO button on the remote control to enter the PHOTO Playback Mode. Using the arrow keys on your remote, navigate and select the files / folder(s) containing the preferred image files. Once the photo/image file is selected (highlighted), a preview panel shows the thumbnail of the photo along with its ID3 tag information (if available). Press “OK” or Play on the remote control to Play the Image or Photo file in full screen. You can Fast Forward or Rewind the Audio Playback. Use Zoom button to increase/decrease display size and toggle between Zoom IN / OUT. If the “Slideshow Timing” is activated in “Photo Setup Settings”, then all subsequent photos in the folder will play sequentially like a Slideshow. Slideshow Playback with Background Music While viewing a slideshow you can also have music playing in the background. There are three alternative ways: o Direct Play : Browse and play the music file that you would like to play as background music. Navigate to the folder containing Photos and press ENTER to start slideshow. (For Single Audio File Only) o Folder Play: Load all the Images and Music in one folder. Navigate to that folder, select the first file and press “OK” on the Remote. The Images will play sequentially with the music files playing simultaneously in the background. o Playlist Play : Create a playlist (refer “How to Create a Playlist” in this Guide) of your music files. Navigate to the folder containing Photos and press “OK” to start Slideshow. (For Multiple Audio Files) 39 Media Playback Playlist Playlist allows you select a sequence of music, photo and video files stored on the HDD. You can configure any sequence of music, photos and video files to create a playlist. NOTE: If partitioning your HDD, please ensure that the first partition on your HDD is a “primary partition”. Playlist feature may not work optimally, if the first partition on the HDD is classified as “primary” Creating Playlists Browse the media on your Mvix Ultio or on your network. Using the remote, “Select” (ref: SELECT button on Remote) files that you would like to include in your playlist. Once a file is selected successfully, you will see a checkmark beside the files you have selected. You can select and add as many files the playlist at a time. Press “CONFIRM” on your remote and the files will be added to the playlist. Now, you can navigate to other folders to select more files and confirm the selection to add to the playlist. Note: Playlists can only be created from files located on Ultio’s internal HDD. Playing Playlists Using your remote, select “Playlist” in the main menu of your Mvix Ultio. With the Playlist file selected, press “OK” or PLAY on your remote. Ultio will play the files in the playlist in sequential order. Deleting files from Playlists Browse to the playlist and press the “SELECT” button on the remote. Navigate to the file you want to remove and press “CONFIRM” on the remote. Select other files accordingly to remove from playlist. 40 Torrent Functions Installing Bittorrent Module Bittorrent is a protocol allowing you to download large files quickly by enabling people downloading the file to upload (distribute) parts of it at the same time. BitTorrent is often used for distribution of very large popular files, that are available for free, as it is a lot cheaper, faster and more efficient to distribute files using this protocol. There is a community of over 160million users worldwide who adopt this protocol. Bittorrent functionality is provided as an optional feature for Mvix Ultio. The files required for this module are not installed on Ultio by default. The optional package can be downloaded from MvixUSA Support Center Installation of BitTorrent Module Download the optional firmware from MvixUSA Support Center http://support.mvixusa.com Unzip the package and transfer the FOUR files to a root directory of a USB drive. Ensure that the USB drive does not contain any other files of any sort. Plug the USB drive into the USB-host port of your Mvix Ultio. Navigate to Mvix Ultio SETUP section. Click “System”. Scroll down to “BT/Samba Info”, press “OK” Install both, BTPD and UNICGI. Once these have been installed, RUN these services (refer on-screen instructions). Please refer to our Support Center for updates on new versions and installation procedures Caution: It is illegal to download something that is being distributed without the owner’s permission. This covers most music, film, movies, and programs for a computer. Also remember that P2P type file sharing program (like the one available on Mvix Ultio) can cause you to accidentally download viruses and malware. Use this Torrent Module at your own risk. Mvix Ultio or any of its accessories must not be used for any unauthorized functionalities or for downloading, distributing any other works protected by copyright. No license to infringe copyright is granted by the sale or use of this equipment. 41 Torrent Functions Using Torrent Functionality Accessing the Torrent interface Mvix Ultio features a web-based torrent client and administrative interface. To access this interface, simply enter the local IP Address of the Ultio in your preferred browser (e.g. 192.168.xx.xx) Note: Default username and password are: Username: admin Password: 123 Account Management Upon successful login, click on the Account Management tab. Account management allows you to change the administrative login password to access the Torrent client. Visit Neighbor Click on the Visit Neighbor tab to review the status of theTorrent client, System and Storage that is installed / connected to your Mvix Ultio 42 Torrent Functions Using Torrent Functionality BitTorrent Download This page illustrates the status of all Torrent downloads. Start : Starts a just added or previously stopped torrent Stop : Stops the selected torrents Delete : Deletes the selected torrents Down Arrow : Moves the selected torrent down in priority Up Arrow : Moves the selected torrent up in priority Settings : Torrent Module settings page Add new torrent : Add a new torrent file for download Settings Menu Rate (Max download rate) : Sets the maximum download speed (in kilobytes / second, 0 = no limit, default = 0) Max upload (Maximum upload speed,): Sets the maximum upload (in kilobytes / second, 0 = no limit, default = 20) Seed Setting (Seeding Time) : Amount of time you want to seed/upload after you have acquired / downloaded the torrent file (0 = disable uploading, default 24 hours) Delete torrent automatically: Once the file has downloaded, the torrent file (“.torrent”) will be deleted. (Default = No) Simultaneous Setting Simultaneous downloads : Max amount of downloads to run at a simultaneously (default = 4) Click “Save Setting” to confirm your settings changes Adding a New Torrent Browse for a torrent file (“.torrent”) that is located on your PC. YES : Confirms and adds (uploads) the torrent file (“.torrent”). NO : Cancels Upload of Torrent file and Returns you to the BitTorrent download page 43 Updating Ultio Firmware Upgrade New Firmware upgrades are launched from time-to-time which add new features/functionalities to Mvix Ultio and also eliminate any known bugs. Firmware updates for Mvix Ultio are available at http://support.mvixusa.com Download the Mvix Ultio’s firmware update from the MvixUSA Support Center (http://support.mvixusa.com) Firmware update files from Support Center are generally compressed into a ZIP file. Unzip these files. Transfer these files to a blank USB drive. Do NOT put these files in any FOLDER. Ensure that you have copied ALL files related to firmware update. Caution: Do NOT install firmware over the network! On your Mvix Ultio, go to the main menu and select “Setup” and then select “System” In System settings, Scroll down to “System Update” and press “OK” Firmware Upgrade process will start. Reboot the player AFTER the upgrade is completed. Full reboot requires unplugging power cable. Caution: Do NOT power off the Media Player during Firmware Upgrade Process. Contact MvixUSA Support Center for troubleshooting tips if Firmware Upgrade Fails or Looses Power 44 Troubleshooting Maintenance notice To protect the normal use of all accessories, please kindly make sure understand and pay attention to following points. Power input AC100~240V, Output DC 12V/3A. Using power of any other specification may damage the device beyond repair. Under normal working status, power adapter will be warm. Keep the Mvix Ultio and its power adapter in well ventilated area. Do not put the device in bed, sofa, or similar area with sub-optimal cooling effect. Do NOT place anything on top of Mvix Ultio. Objects placed on top may cause operational interference with the device. Do not try to repair the unit yourself by opening its electronic components. Observe Precaution when handling Electrostatic Sensitive Devices. If the power cable is broken or stripped or if the device comes in contact with any liquid, it is strongly advised to power down the device and remove the power cable immediately. Always disconnect power cable when rebooting your media player. Firmware Upgrade Failure Recovery Process Shut down the Player and Remove the power cable from Mvix Ultio. Download a fresh copy of the latest firmware to USB drive, and connect the USB drive to the player. Press Power button (on Mvix Ultio), at the same time insert the power cable at back. (Note: Please press power button for 10 seconds before plugging in the power cable. Always use COMPOSITE VIDEO OUTPUT during firmware upgrade and failure recovery 45 Troubleshooting Frequent Asked Questions Mvix output is B&W!? I cannot view any picture in Color? This is a common problem associated with the Television Broadcast Standards compatibility. You would notice B&W pictures or video, If your TV runs on PAL and the AV channel is running on NTSC, or vice-versa. To troubleshoot, go to the setup menu and change the AV Channel to the same system as that of your TV. My Mvix says 'File format not supported'? Is it defective?? If the Mvix player fails to play a certain media file, one of the following is a likely cause: • Media Format is not supported by Mvix Player. • Please check Mvix specifications • Your Media file is corrupted or has a non-standard structure. • Your Media file is not encoded properly • Mvix Player is defective. In order to test the functionality of your Mvix player, simply download the MEDIA TEST FILES from our website. Navigate to play and ensure that your player decodes these files completely and that you are able to view these videos. If your Mvix player is able to play these files, then your player is not defective. Please check your source video files to eliminate any inconsistency in their encoding. I accidentally changed my video output settings and now I cant see anything on TV? Simply use the following steps to change your Video output Settings on your Mvix player. • Power On your TV and set the channel to the video input connected to Mvix player. • Power on your Mvix player. Wait for 10 seconds. • Press TVOUT button on your Mvix remote to change the Video Output options (Component, NTSC, HDMI, etc.) • Continue to change the options till you see a video / image on the TV screen. Remember to wait a few seconds between each change. • If this does not work, you will need to perform a firmware upgrade on your Mvix. Pls. contact our Technical Support Center for details. As the Mvix starts up, the TV screen flashes, has blue screen or reverts to screensaver? Is this normal? Yes, This is normal. As the Mvix system initializes, it will setup corresponding parameters so it can output the correct video signal to the TV, during the initializing stage, the TV will receive transient signals or the signals which are incomplete and will cause the TV screen to flash. Some TVs will treat it as no signal, and will display a blue screen or screensaver. 46 GPL Code Availability Notice of Free & Open Source Software Licenses and Source Code The firmware included with Mvix Ultio contains programs licensed under various free and open source software licenses, which give users the right to freely copy, modify, and distribute the programs. The free and open source licenses which apply to software on this device are: Linux Kernel uClibc tinyxml udftools ntfsprogs busybox diethotplug lrzsz dosfstools wireless_tools bridge-utils tcpdump libpcap iperf yaffs2 mtd gdb freetype jpeg-6b neon Http client libpng miniupnpc SubtitleParser zlib ebase database mplib qDecoder samba sqlite upnp wpa_supplicant http://www.kernel.org http://www.uclibc.org http://tinyxpath.sourceforge.net http://linux-udf.sourceforge.net http://sourceforge.net/projects/linux-ntfs http://www.busybox.net/ http://linux-hotplug.sourceforge.net http://www.ohse.de/uwe/software/lrzsz.html http://www.hpl.hp.com/personal/Jean_Tourrilhes/Linux/Tools.html http://linux-net.osdl.org/index.php/Bridge http://www.tcpdump.org http://www.tcpdump.org http://sourceforge.net/projects/iperf http://www.yaffs.net http://www.linux-mtd.infradead.org http://www.gnu.org/software/gdb http://download.savannah.gnu.org/releases/freetype http://www.ijg.org http://www.webdav.org/neon http://www.libpng.org http://miniupnp.free.fr http://www.zlib.org http://sourceforge.net/projects/ebase http://sourceforge.net/projects/mplib http://www.qdecoder.org http://samba.org http://www.sqlite.org http://software.intel.com/ http://hostap.epitest.fi/wpa_supplicant/ Some licenses, such as the GNU General Public License (GPL), require us to provide the source code for certain programs to users who request it. For the convenience of our users, we have chosen to provide the source code for all free and open source programs on the Mvix Ultio at the following address: www.mvixusa.com/support In addition, you may contact us to request a CD containing the source code for the free and open source programs on the product, for a charge no more than our cost of physically providing it: Mvix(USA), Inc. 4229 Lafayette Center Dr., Suite 1700 Chantilly, VA 20151 (USA) Fax: 866.614.3880 47 Warranty The Mvix Ultio MX-800HD 1080p UPnP Media Player comes with a full 1-yr manufacturer’s warranty on parts and labor. The Warranty coverage on this player begins the day you buy your product. This warranty covers defects in manufacturing only, and expressly excludes coverage for excessive wear and tear, physical or accidental abuse, loss and theft. Kindly contact your local distributor for the warranty and service procedures. Warranty service is available in all countries where the product is officially distributed. The warranty covers any service or exchange required for a defective unit during the coverage period. The service / exchange opportunity ends one year after the date of purchase. The replacement product is covered only for the warranty period of the original product. When the warranty on the original product expires, the warranty on all replaced products also expires. When it is necessary for you to ship the product to distributor / service center for service / exchange, you will pay the shipping costs for shipment to the distributor. The distributor will pay the shipping costs when returning the product to you. To receive warranty service, please be sure to have your proof of purchase and a barcode from the product's packaging. Warranty requests cannot be processed without proof of purchase. In no event shall MvixUSA’s (or its distributors’) liability exceed the price paid for the product from direct, indirect, special, incidental, or consequential damages resulting from the use of the product, its software, or its documentation. MvixUSA does not offer refunds for any product. As a part of our warranty service, we offer to repair or replace the product. We offer cross shipments, a faster process for processing and receiving your replacement. MvixUSA and its distributor pay for ground shipping only. Please contact MvixUSA’s Distributor in your country for more details. Specifically, your warranty does not cover the following: • Shipping charges to return defective product. • Labor charges for installation or setup of the product, adjustment of customer controls on the product, and installation or repair of systems outside of the product. • Product repair and/or part replacement because of improper installation, connections to improper voltage supply, abuse, neglect, misuse, accident, unauthorized repair or other cause not within our control. • Damage occurring to product during shipping when improperly packaged or cost associated with packaging. • Incidental or consequential damages resulting from the product. Some states do not allow the exclusion of incidental or consequential damages, so the above exclusion may not apply to you. This includes, but is not limited to, prerecorded material, whether copyrighted or not.) Mvix(USA), Inc. and its other partners and distributors DO NOT assume any responsibility in any way for how you choose to use this product, associated firmware and this manual. By purchasing or receiving this product, you automatically agree to this disclaimer, and eliminate this company and any affiliates of any responsibility in this matter. MvixUSA or ITS DISTRIBUTORS ARE NOT LIABLE UNDER ANY CIRCUMSTANCES FOR ANY DIRECT, INDIRECT, SPECIAL, INCIDENTAL, OR CONSEQUENTIAL DAMAGES, HOWSOEVER INCURRED, EVEN IF NOTIFIED OF THE POSSIBILITY OF SUCH DAMAGES. TO THE EXTENT PERMITTED BY LOCAL LAW, THE REMEDIES PROVIDED IN THIS WARRANTY STATEMENT ARE YOUR SOLE AND EXCLUSIVE REMEDY. THIS LIMITED WARRANTY GIVES YOU SPECIFIC LEGAL RIGHTS AND YOU MAY ALSO HAVE OTHER RIGHTS WHICH VARY FROM STATE/PROVINCE TO STATE/PROVINCE. Please record below the model and serial numbers found on the product. MODEL # _______________________________ SERIAL # _______________________________ 48 Trademarks and Legal Attributions The trademarks of Mvix® and MvixUSA® are used in connection with products and services to signify the quality and excellence for which MvixUSA® is known. Mvix® and MvixUSA® are trademarks or registered trademarks of Mvix(USA), Inc. in the United States. You may use a Mvix® trademark or product name to refer specifically to such Mvix® product in marketing and promotional materials, books, conferences, applications, demonstrations, and so on. You are permitted to use a Mvix® trademark referentially provided that: * You adhere to these Mvix™ Trademark Usage Guidelines. * You do not disparage Mvix(USA), Inc. or its products and services. * You display your name or logo more prominently than any Mvix™ trademark. * You include a disclaimer that Mvix™ does not sponsor, affiliate, or endorse your product, and/or services. All other textual references, brands, logos or product names are the copyrights, trademarks or registered trademarks of their respective owners /holders. Use of these trademarks on our website, products, literature, communications, manuals, advertising material, press releases, etc. do not represent endorsements by the respective companies for Mvix(USA), Inc.'s products, services or brand, but merely reflect their possible compatibility with our products. • • • • • • • • Google is a trademark of Google Technology, Inc. HDMI is a trademark of HDMI Licensing LLC. iPod® is a registered trademark of Apple Computer, Inc. PSP™ (PlayStation Portable) is a trademark of Sony Computer Entertainment Inc. Java and all Java-based trademarks are trademarks of Sun Microsystems, Inc. in the United States, other countries, or both. Microsoft, Windows, Vista are trademarks of Microsoft Corporation. UNIX is a registered trademark of The Open Group in the United States and other countries. WI-FI, WPA, WPA2 and WMM are registered trademarks of Wi-Fi Alliance. REFERENCES TO CORPORATIONS, THEIR SERVICES, PRODUCTS and BRANDS WITHOUT WARRANTY OF ANY KIND, EITHER EXPRESSED OR IMPLIED. IN NO EVENT SHALL MVIX(USA), INC. BE LIABLE FOR ANY SPECIAL, INCIDENTAL, INDIRECT OR CONSEQUENTIAL DAMAGES OF ANY KIND, OR ANY DAMAGES WHATSOEVER, INCLUDING, WITHOUT LIMITATION, THOSE RESULTING FROM LOSS OF USE, DATA OR PROFITS, WHETHER OR NOT ADVISED OF THE POSSIBILITY OF DAMAGE, AND ON ANY THEORY OF LIABILITY, ARISING OUT OF OR IN CONNECTION WITH THE USE OR PERFORMANCE OF THIS INFORMATION. MVIX Products are not officially licensed or certified by DivX® Networks or Wifi Alliance. Any MvixUSA, Inc. publication may include technical inaccuracies or typographical errors. The information presented here is intended for general information only and is subject to change without notice. ALL INFORMATION IS PROVIDED "AS IS" WITHOUT WARRANTY OF ANY KIND, EITHER EXPRESSED OR IMPLIED, INCLUDING BUT NOT LIMITED TO THE IMPLIED WARRANTIES OR CONDITIONS OF MERCHANTABILITY OR FITNESS FOR A PARTICULAR PURPOSE, OR NONINFRINGEMENT. SOME JURISDICTIONS DO NOT ALLOW THE EXCLUSION OF IMPLIED WARRANTIES, SO THE ABOVE EXCLUSION MAY NOT APPLY TO YOU. 49 Use of Copyright Media Federal law provides severe civil and criminal penalties for the unauthorized reproduction, distribution, rental or digital transmission of copyrighted video and audio files. (Title 17, United States Code, Sections 501 and 506). Mvix players are designed to assist you in backing up, storing and reproducing material which you own the copyright for or for which you have obtained permission from the copyright owner. UNLESS YOU OWN THE COPYRIGHT OR HOLD PERMISSION TO COPY FROM THE COPYRIGHT OWNER, YOU MAY BE VIOLATING COPYRIGHT LAW AND BE SUBJECT TO PAYMENT OF DAMAGES AND OTHER REMEDIES. Mvix Ultio or any of its accessories must not be used for unauthorized duplication of DVDs/CDs or any other works protected by copyright. No license to infringe copyright is granted by the sale of this equipment. Recording and playback of material may require permission of the media owner. IF YOU ARE UNCERTAIN ABOUT YOUR RIGHTS, YOU SHOULD CONTACT YOUR LEGAL AHDMISOR. YOU ASSUME FULL RESPONSIBILITY FOR THE LEGAL AND RESPONSIBLE USE OF THE MVIX MULTIMEDIA PLAYER. Use of Mvix Players, its accessories and software/firmware for illegal purposes is strictly prohibited. 50 Glossary Aspect Ratio Used to describe the distribution of pixels in a digital image. Increasing the aspect ratio of an image lowers the efficiency of the use of the pixels. The image will have less detail than an image with the same amount of pixels, but with a lower aspect ratio. Bandwidth The range of signal frequencies that a piece of audio or video equipment can encode or decode; the difference between the limiting frequencies of a continuous frequency band. Video uses higher frequency that audio, this requires a higher bandwidth Composite Video A picture signal combined with synchronization and (possibly) color information. It is a composite of three source signals called Y, U and V (together referred to as YUV). Digital Rights Management (DRM) Technology used by publishers to control access to and usage of hardware and digital data, such as software, music and movies. Divx® Created by Divx® Inc., a video codec that is able to compress large video segments into smaller sizes while maintaining a high visual quality. Dolby Digital® Audio compression technology developed by Dolby laboratories. The technology contains up to 6 channels of sound, five channels for normal range speakers, which include Right front, Center, Left Front, Right Rear and Left Rear, as well as one channel for the subwoofer. Mono and Stereo usages are also supported by this format. HDMI HDMI (High-Definition Multimedia Interface) is a compact audio/video interface for transmitting uncompressed digital data. It connects digital audio/video sources such as set-top boxes, Blu-ray Disc players, personal computers (PCs), game consoles to compatible digital AV devices such as monitors, LCDs, Plasmas, or High Definition Projectors. ISO An ISO image is an archive file (also known as a disk image) of an optical disc in a format defined by the International Organization for Standardization (ISO). Nomrally, ISO image includes all the data of files contained on the archived CD/DVD in an uncompressed format. In addition to data of the files it also contains all the file system structures, and attributes, allowing Mvix to playback these files as if you are playing a regular CD or DVD. UPnP Universal Plug and Play (UPnP) is a set of networking protocols that allow devices to connect seamlessly over the network. The UPnP protocol simplifies the implementation of networks in the home (data sharing, communications, and entertainment). This feature allows Mvix to seamlessly connect to your home PCs and servers and enabling browsing experience (via Playon service) to common video portals such as hulu.com, youtube.com, dailymotion.com, Netflix etc. MVIX(USA), Inc. MAKES THIS DOCUMENT AVAILABLE ON AN "AS IS" BASIS AND MAKES NO WARRANTY, EXPRESS OR IMPLIED, AS TO THE ACCURACY, CAPABILITY, EFFICIENCY, MERCHANTABILITY, OR FUNCTIONING OF THIS DOCUMENT. IN NO EVENT WILL MVIX(USA), Inc. BE LIABLE FOR ANY GENERAL, CONSEQUENTIAL, INDIRECT, INCIDENTAL, EXEMPLARY, OR SPECIAL DAMAGES, EVEN IF MVIX(USA), Inc. HAS BEEN AHDMISED OF THE POSSIBILITY OF SUCH DAMAGES. 51 Index 0–9 1080p 110 / 220 V 1920 x 1080 802.11 b/g/n G 05, 06, 10 18 07 21 GIF GNU GPL Code 05, 06, 07 16, 17, 18 12, 54 06, 07 H.264 HDD - Installation HDMI A AAC Amplifier / AV Receiver Aspect Ratio AVCHD H B Background Music Bit-torrent Brightness BMP Infrastructure (AP) Interference Statement IP Address ISO LAN LPCM MKV MOV MPEG 1 /2 /4 Mute 05, 06, 07 05, 06, 07 05, 06, 07 10, 36, 37 N 33 11, 47 23, 29, 34 NAS Network File Transfer NTSC F File Transfer FLAC FLV FOSS 06, 09, 20 06, 12, 18 M 19, 20 06, 51, 54 06, 07, 54 37 E Edit File Encoding Explorer 22 01 19, 20, 22 06, 37, 54 L 06, 13, 54 12 09, 20, 28 42, 50, 53 D DHCP Divx Dolby DVD Playback 05,06,07 14 06,12,14 I 12, 39 41, 44 12 06, 07 C Component Video Contrast Copy File Copyright 06, 07 49 49 05 19, 28 04, 07, 10 O 06, 09 05, 06 06 49 OGG Optical Audio (SPDIF) 52 05, 06, 07 06, 12 Index P PAL Playlist PlayON® Preview V 06, 12, 46 11, 39, 40 30 12, 36 View – Front / Back VOB R Real Audio Rename File Restore RM / RMV / RMVB W 07 23, 33 11 06, 07 Warranty WEP / WPA / WPA2 Wireless / WiFi WMV / WMA S Samba Setup – System Settings Slideshow Subtitles 08, 09 05, 06, 07 49 22 22 05, 06, 07 X 11, 29 10, 11, 15 39 36 Xvid 05, 06, 07 Y YPbPr T Torrent, Bittorrent Trademark Troubleshooting Tversity® 09, 16, 17 05, 06, 41 51 03, 29, 46 05, 30 Z Zoom U Upgrade Firmware UPnP USB Host 11, 41, 45 05, 30 06, 27 53 39 Mvix(USA), Inc. www.mvixusa.com Tel. Fax 866 . 310 . 4923 866 . 614 . 3880 [email protected] Technical Support: http://support.mvixusa.com 54 © Mvix(USA), Inc. Copyright 2009 Mvix(USA), Inc. All rights reserved. No part of this publication may be reproduced in any form or by any means or used to make any derivative (such as translation, transformation or adaptation) without the express written consent of Mvix(USA), Inc. as stipulated by the United States Copyright Act of 1976. 55 www.mvixusa.com