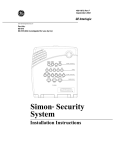
1
SECURITY AND HOME AUTOMATION
OWNER’S MANUAL
466-1040-01-ITI Rev. F (Text)
Contents
Welcome. . . . . . . . . . . . . . . . . . . . . . . . . . viii
Section 1:
Working with Your New
Security System. . . . . . . . . . . . . . . . . . . . . 1
What You Need to Do . . . . . . . . . . . . . . . . . . . . . . . . . . . . . . . .
What Your Security System Can Do . . . . . . . . . . . . . . . . . . . .
Automatic Lighting . . . . . . . . . . . . . . . . . . . . . . . . . . . . . . .
Heating & Air Control . . . . . . . . . . . . . . . . . . . . . . . . . . . . .
Sensor Groups . . . . . . . . . . . . . . . . . . . . . . . . . . . . . . . . . . .
Courtesy Features . . . . . . . . . . . . . . . . . . . . . . . . . . . . . . . .
What Happens in an Emergency? . . . . . . . . . . . . . . . . . . . . . .
Using Your System When You’re Away . . . . . . . . . . . . . . . . .
What if There’s a System Problem? . . . . . . . . . . . . . . . . . . . .
Security System Basics . . . . . . . . . . . . . . . . . . . . . . . . . . . . . . .
What You Need to Know About This Manual . . . . . . . . . . . .
1
1
2
2
2
3
4
4
5
5
7
TOUCHPAD OPERATIONS . . . . . . . 11
Touchpad Overview . . . . . . . . . . . . . . . . 12
Section 2:
Using the Touchpad for Emergencies. . 13
Using Panic Alarms:
Police, Fire, and Auxiliary . . . . . . . . . . . . . . . . . . . . . . . . . . .
Sending a Panic Alarm . . . . . . . . . . . . . . . . . . . . . . . . . . .
Resetting Smoke Detectors . . . . . . . . . . . . . . . . . . . . . . . .
Preventing Accidental Alarms . . . . . . . . . . . . . . . . . . . . . . . .
Canceling Accidental Alarms. . . . . . . . . . . . . . . . . . . . . . . . .
iii
13
14
15
16
17
Section 3:
Basic Touchpad Operations . . . . . . . . . . 19
Turning Security Protection On. . . . . . . . . . . . . . . . . . . . . . . 19
When You Stay In—
Arming to Level 2-Stay . . . . . . . . . . . . . . . . . . . . . . . . . . . 19
When You Go Away—
Arming to Level 3-Away . . . . . . . . . . . . . . . . . . . . . . . . . . 22
Arming with a Window or Door Open . . . . . . . . . . . . . . . . 24
Opening a Door or Window When
Protection Is On . . . . . . . . . . . . . . . . . . . . . . . . . . . . . . . . . 25
Instant Arming with No Exit/Entry Delay Time. . . . . . . . . . 26
Turning Security Protection Off . . . . . . . . . . . . . . . . . . . . . . 27
Checking Your System Status . . . . . . . . . . . . . . . . . . . . . . . . 28
Section 4:
Additional Touchpad Features . . . . . . . . 33
Setting and Changing Access Codes. . . . . . . . . . . . . . . . . . . . 33
Using the Energy Saver Feature. . . . . . . . . . . . . . . . . . . . . . . 36
Turning Energy Saver On and Off . . . . . . . . . . . . . . . . . . . 37
Setting Energy Saver Temperatures . . . . . . . . . . . . . . . . . . 37
Controlling Lights and Appliances . . . . . . . . . . . . . . . . . . . . 40
Individual Light and Appliance Control . . . . . . . . . . . . . . 41
Using the Quiet Mode Feature . . . . . . . . . . . . . . . . . . . . . . . . 42
Using the Chime Feature. . . . . . . . . . . . . . . . . . . . . . . . . . . . . 44
Adjusting the Touchpad Display Brightness. . . . . . . . . . . . . 45
The No Activity Feature . . . . . . . . . . . . . . . . . . . . . . . . . . . . . 45
The Touchpad Tamper Feature . . . . . . . . . . . . . . . . . . . . . . . 46
Opening and Closing Reports Feature. . . . . . . . . . . . . . . . . . 47
System Tests . . . . . . . . . . . . . . . . . . . . . . . . . . . . . . . . . . . . . . . 47
Automatic Test Features . . . . . . . . . . . . . . . . . . . . . . . . . . . 47
Manual Tests . . . . . . . . . . . . . . . . . . . . . . . . . . . . . . . . . . . 52
iv
PHONE OPERATIONS. . . . . . . . . . . 57
Phone Overview. . . . . . . . . . . . . . . . . . . . 58
Using a Phone in Your Home . . . . . . . . . . . . . . . . . . . . . . . . .
Calling Your System from a Remote Phone . . . . . . . . . . . . .
With Answering Machine or Voice Mail . . . . . . . . . . . . .
No Answering Machine or Voice Mail . . . . . . . . . . . . . . .
Receiving a Call While Operating Your System . . . . . . . . .
58
58
58
59
59
Section 5:
Using the Phone for Emergencies . . . . . 61
Using Panic Alarms:
Police, Fire, and Auxiliary . . . . . . . . . . . . . . . . . . . . . . . . . . .
Sending a Panic Alarm . . . . . . . . . . . . . . . . . . . . . . . . . . .
Canceling a Panic Alarm . . . . . . . . . . . . . . . . . . . . . . . . . .
Resetting Smoke Detectors . . . . . . . . . . . . . . . . . . . . . . . .
Preventing Accidental Alarms . . . . . . . . . . . . . . . . . . . . . . . .
Canceling Accidental Alarms. . . . . . . . . . . . . . . . . . . . . . . . .
61
61
62
62
63
63
Section 6:
Basic Phone Operations . . . . . . . . . . . . . 65
Turning Security Protection On . . . . . . . . . . . . . . . . . . . . . .
When You Stay In—
Arming to Level 2-Stay . . . . . . . . . . . . . . . . . . . . . . . . . . .
When You Go Away—
Arming to Level 3-Away . . . . . . . . . . . . . . . . . . . . . . . . . .
Arming with a Window or Door Open . . . . . . . . . . . . . . .
Opening a Door or Window When
Protection Is On . . . . . . . . . . . . . . . . . . . . . . . . . . . . . . . . .
Instant Arming with No Exit/Entry Delay Time . . . . . . . . .
Turning Security Protection Off . . . . . . . . . . . . . . . . . . . . . .
Checking Your System Status . . . . . . . . . . . . . . . . . . . . . . . .
v
65
65
66
66
67
67
68
69
Section 7:
Additional Phone Features . . . . . . . . . . . 71
Setting and Changing Access Codes. . . . . . . . . . . . . . . . . . . . 71
Using the Energy Saver Feature. . . . . . . . . . . . . . . . . . . . . . . 73
Turning Energy Saver On and Off . . . . . . . . . . . . . . . . . . . 73
Setting Energy Saver Temperatures . . . . . . . . . . . . . . . . . . 73
Controlling Lights and Appliances . . . . . . . . . . . . . . . . . . . . 74
Individual Light and Appliance Control . . . . . . . . . . . . . . 75
Using the Quiet Mode Feature . . . . . . . . . . . . . . . . . . . . . . . . 75
Using the Chime Feature. . . . . . . . . . . . . . . . . . . . . . . . . . . . . 76
The No Activity Feature . . . . . . . . . . . . . . . . . . . . . . . . . . . . . 76
The Touchpad Tamper Feature . . . . . . . . . . . . . . . . . . . . . . . 77
Using Your Phone with Electronic Banking and
Voice Mail. . . . . . . . . . . . . . . . . . . . . . . . . . . . . . . . . . . . . . . . . 78
Opening and Closing Reports Feature. . . . . . . . . . . . . . . . . . 78
System Tests . . . . . . . . . . . . . . . . . . . . . . . . . . . . . . . . . . . . . . . 79
Automatic Test Features . . . . . . . . . . . . . . . . . . . . . . . . . . . 79
Manual Tests . . . . . . . . . . . . . . . . . . . . . . . . . . . . . . . . . . . 82
KEYCHAIN OPERATIONS. . . . . . . . 87
Keychain Overview . . . . . . . . . . . . . . . . . 88
Section 8:
Basic Keychain Operations. . . . . . . . . . . 89
Using Panic Alarms:
Police, Silent, and Auxiliary . . . . . . . . . . . . . . . . . . . . . . . . . . 89
Sending a Panic Alarm . . . . . . . . . . . . . . . . . . . . . . . . . . . . 90
Canceling a Panic Alarm . . . . . . . . . . . . . . . . . . . . . . . . . . 90
Turning Security Protection On. . . . . . . . . . . . . . . . . . . . . . . 90
Turning Security Protection Off . . . . . . . . . . . . . . . . . . . . . . 93
Using the Energy Saver Feature. . . . . . . . . . . . . . . . . . . . . . . 94
Turning Energy Saver On and Off . . . . . . . . . . . . . . . . . . . 95
Controlling Lights and Appliances . . . . . . . . . . . . . . . . . . . . 95
vi
TROUBLESHOOTING . . . . . . . . . . . . . 99
Section 9:
Troubleshooting . . . . . . . . . . . . . . . . . . 100
Security System Sounds . . . . . . . . . . . . . . . . . . . . . . . . . . . . 100
Silencing Trouble Beeps . . . . . . . . . . . . . . . . . . . . . . . . . . . . 104
Troubleshooting Problems . . . . . . . . . . . . . . . . . . . . . . . . . . 104
REFERENCES . . . . . . . . . . . . . . . . 107
Appendix A:
Equipment Considerations. . . . . . . . . . 108
Appendix B: Touchpad Shortcuts . . . . 115
Appendix C: Planning
for Emergencies . . . . . . . . . . . . . . . . . . 117
Emergency Planning . . . . . . . . . . . . . . . . . . . . . . . . . . . . . . . 117
Floor Plan Example. . . . . . . . . . . . . . . . . . . . . . . . . . . . . . . . 117
Your Floor Plan. . . . . . . . . . . . . . . . . . . . . . . . . . . . . . . . . . . 119
Glossary . . . . . . . . . . . . . . . . . . . . . . . . . 121
Index . . . . . . . . . . . . . . . . . . . . . . . . . . . . 131
FCC Notices . . . . . . . . . . . . . . . . . . . . . . 136
vii
Welcome
You have taken an important first step in protecting your home by installing a security system. Now it’s time to take the next step: Learning
to use your system so it provides you with the best possible protection
from intrusion, fire, furnace failure, and medical and other emergencies.
Your security system offers a remarkably high level of protection. But
high-level protection does not mean hard-to-use protection. In fact, using your security system is as easy as using a microwave oven. Just
take a little time to review the user material and familiarize yourself
with the features and functions of your security system.
These basic steps will help make learning and using your system more
enjoyable:
Step 1
Watch your Owner’s Video. It’s a good idea for your
family, neighbors, or others who will use the system to
also watch this easy-to- follow instructional video.
Step 2
Have your installer demonstrate how to use your security
system and then watch as you practice using the system.
Step 3
Take some time to read through this manual. Pay particular attention to anything from the video or your installer’s demonstration that raised a question in your mind.
Some users find this manual most effective by reading it
cover to cover. Others simply locate specific topics as
needed in the Contents and/or Index.
After you have completed these steps keep this manual handy in case
you have any questions about using your security system.
Note
This is a UL Grade A (supervised) security system.
viii
Section 1:
Working with Your New
Security System
What You Need to Do
You may have installed this security system simply to prevent breakins and theft. However, your new security system can protect you and
your home from many other emergencies. Plus, this security system
lets you monitor and control conditions in your home or business even
when you are away.
As with any new relationship, life with your new security system may
seem a bit awkward at first. To effectively use your security system,
you need to develop a few simple habits:
•
•
•
•
Check for open doors and windows before leaving.
Remember to arm your system and then gather your things and
exit before the exit delay time expires.
Remember to disarm your system within the entry delay time
when you return.
Respond to beeps, light indicators, and voice announcements
from your system, which may indicate some kind of problem.
You will quickly become aware of the benefits these few simple habits
will bring you and will incorporate your security system seamlessly
into your everyday life.
What Your Security System Can Do
Your security system provides several options for creating the security
and control environment you need in your home. How you use the system is up to you. Regardless of the features you choose, you will find
that your security system dramatically enhances your lifestyle.
Here are just a few of the ways you can use the features of your security system.
Special Note:
Some features of this security system are optional and are available
from your security consultant.
1
Automatic Lighting
You can control the lights inside and outside of your home by plugging
them into wireless devices called lamp modules. For example, the system turns selected lights on when you enter, allowing you to see your
way to the telephone or touchpad to disarm the system. After you arm
your system, selected lights remain on for awhile and then automatically turn off after 5 minutes. During a fire, selected lights turn on and
stay on to help you safely exit. During an intrusion, lights flash to scare
off the intruder and draw attention from the outside.
Heating & Air Control
If you have installed the energy saver feature, you can monitor and
control the temperature of your home. For example, using a touch-tone
telephone, you can call your system and adjust the temperature before
you leave work. By the time you arrive home, your house will be at a
comfortable temperature. You can also set high and low temperature
limits. If your heating or air conditioning unit malfunctions while you
are away, your security system notifies the central station when the
temperature has reached either limit, before pipes freeze or pets are
harmed by extreme heat. You can call to check the temperature of your
home or even your lake cabin when you aren’t there to make sure the
temperature is where you want it.
Sensor Groups
The sensors in your system make up different “groups,” and various
sensor groups react differently depending on how they are programmed. Certain sensors automatically trigger a call to the central
monitoring station immediately after being set off, or “tripped.” Other
sensors trigger a call to the central monitoring station only after being
tripped twice within a certain time period. Some sensors react silently
and other sensors allow you to set entry and exit delays. And, there are
“local-only” sensors that sound sirens at your home, but do not send a
call for help. Following are some of the useful ways you can use various sensor groups in your home.
Monitor “Off-Limits” Areas of Your Home
Many areas in your home can be hazardous to children. Using localonly sensors, you can monitor certain areas such as liquor, gun, and
medicine cabinets and even your swimming pool. If the pool gate or
monitored cabinet door is opened, a siren beeps. The beeping stops
when the gate or door is closed. You can also use this sensor group to
alert you to cars approaching your home from the driveway, to monitor
2
your mailbox so you know when the mail arrives, and as a wireless
doorbell.
Protect Private Business Information
You can control accessibility to private documents or money drawers.
For example, sensors could be set to beep any time the safe door is
opened during business hours. You can also assign up to 16 different
system access codes to users. Then, if you choose to receive opening
and closing reports from your central monitoring station, you can
check employee arming and disarming procedures. If your system is
not properly armed, you can be called. And, if normal opening procedures aren’t followed, the police can be sent.
If your home has a security gate covering the front door and windows,
you may choose to put a sensor on the gate to sound a local siren if
someone shakes the gate to scare them away but not to call the central
station. If the intruder continues to break in, other sensors protecting
the front door and windows would call the central monitoring station.
Set Doors/Windows for Entry/Exit
Entry and exit door sensors can be set to one of three delays, depending
on how accessible your doors are to your touch-tone telephone or
touchpad. The delays should be set to give you enough time to get in
and out of your house, but not allow an intruder to sneak in behind you.
You may want a short delay on the door leading from the garage to the
house and a little longer delay on the overhead garage door. You can
have an even longer delay on the driveway gate. Door/window sensors
can also be bypassed, so you can arm the rest of your system and leave
an open second-floor window unarmed.
Courtesy Features
The buttons on your hardwire touchpads light up when you first push
a button and stay on for 15 seconds after the last button is pushed. This
makes it easy to correctly operate your system, even in a dimly lit entrance area. You can control the brightness of the display and dim the
light to darken a touchpad in a bedroom while someone is sleeping.
You can also operate your system in the “quiet mode.” With this option on, you can arm or disarm your system quietly and not disturb others.
3
What Happens in an Emergency?
Your security has three fixed panic alarms—police, fire, and auxiliary—that call for help immediately. They are activated by pressing the
appropriate button. Even very young children can learn how to quickly
send for emergency help. Police and firefighters will know the exact
location and nature of the emergency.
When an alarm is triggered, several combinations of very loud exterior
and interior sirens sound and a very realistic voice calls out one of several messages, for example, Fire or Intrusion.
Your security system can also monitor the normal activity in your
home and call for help automatically if normal activities are not detected. For example, if someone falls and can’t move, the system notices
that normal activities, such as placing outgoing calls or opening doors
and windows, have not occurred for a certain length of time. Your system sounds a low-volume siren for 5 minutes to let you know there
may be a problem. If all is well, you can stop the siren by disarming
your system. If nobody disarms the system during the 5 minutes, your
system calls for help.
If an attempted robbery should occur while you are in your home, you
can use the Alarm Verification Module*, which allows the central
monitoring station to listen and talk to you after it receives your alarm.
* - Not employed in UL listed installations.
Note
Refer to “Planning for Emergencies” in appencix C for emergency planning details.
Using Your System When You’re Away
Off-site operations allow you to control and monitor most of your system’s features even while you are away from your home. If you are on
vacation, for example, you can check the temperature, turn lights on
and off, check for any trouble conditions, and even bypass the sensor
on a door to let in a neighbor, delivery person, or service person.
4
What if There’s a System Problem?
Your system has been designed to keep false alarms and system problems to a minimum. If there is a problem, your security system can diagnose it and then sound trouble beeps to let you know about it. In
some instances, your system can alert your central monitoring station
of the problem as well.
Your system has a backup battery that will secure your home even during a power failure. An optional feature allows your system to alert the
central monitoring station if the power is off for more than 15 minutes.
It reports again when power has been restored.
Your system has some precautionary features that allow alarms to be
validated or canceled before calling the central station. For example,
when an intruder is detected, your system sounds an alarm immediately in an attempt to scare off the intruder. If the alarm verification feature* is on, your system will not initiate a call to the central monitoring
station unless a second sensor is tripped within 4 minutes. You can
also choose to delay the sounding of exterior sirens for up to 15 seconds, giving you time to correct an arming mistake before your neighbors are alerted.
* - Not available in UL listed installations.
Security System Basics
There are several devices you can use to operate your security system.
You can choose one or more full-function touchpads to control your
system. You can operate your system using a phone in your home; and,
for most features, you can operate your system from any phone away
from your home. Finally, you can control most basic operations using
a keychain touchpad.
This manual is divided into separate sections for touchpad, phone, and
keychain touchpad operation of your system. Each method of operation is slightly different from the others, so use the tabs to locate the
appropriate section each time you look up a feature.
5
Your security system has three basic protection levels (see page number listed):
Touchpad
Page No.
Phone
Page No.
Keychain
Page No.
•
Level 1-Off leaves
all protection off.
27
68
93
•
Level 2-Stay is for
when you stay in.
The system detects
activity at outside
doors and windows but not inside
your home or business.
19
65
90
•
Level 3-Away is
for when you go
away. The system
detects activity outside as well as
inside your home
or business.
22
66
90
In addition to the basic protection levels, your security system gives
you the following options (see page number listed):
Touchpad
Page No.
Phone
Page No.
Keychain
Page No.
•
Sending emergency
alarms (fire, police,
or auxiliary).
13
61
89
•
Turning lights on or
off during arming
or independent of
arming.
40
74
95
Touchpad
Page No.
Phone
Page No.
Keychain
Page No.
6
•
Leaving windows
or doors open or
opening them after
setting protection
to on.
24
66
92
•
Controlling your
furnace or air conditioner using
energy-saving settings.
36
72
94
•
Canceling the exit
delay time which
lets you leave after
turning protection
on.
26
67
91
•
Checking for system activity or
recent alarms.
28
69
N/A
•
Changing access
codes which allow
you and others to
use your system.
33
71
N/A
•
Setting your system
to touchpad quiet
mode, which
silences beeps and
messages from
interior speakers.
42
75
N/A
What You Need to Know About This Manual
This manual describes how to operate your security system. Before attempting a procedure for the first time, read through the entire procedure. Operating errors, including false alarms, are often prevented by
carefully following the operating instructions step by step.
Basic Terms
Many terms are located in the full glossary at the end of this manual,
7
but these are some of the basics to get you started.
Access Code
A code that allows you and others to access and
control your system. If necessary, up to 16 different codes can be programmed for different users.
Bypassing
Allows you to turn off protection for selected areas of your system only.
Arming
Turning system protection on. Level 2-Stay turns
on protection to the outside areas while allowing
you to walk around inside. An alarm sounds if
anyone enters. Level 3-Away turns on all sensors, and an alarm sounds if anyone moves
around inside or enters from the outside.
Central
Monitoring
Station
If you choose to have your home monitored, your
system can communicate with this station to report alarms or other problems with your system.
During an emergency, the central monitoring station sends police or fire personnel.
Control
Panel
The electronic “brains” of your system.
Entry Delay
The number of seconds your system will delay
sounding an alarm when you enter your armed
home or business. This delay provides ample
time to enter and disarm your system before setting off an alarm. The programmed entry delay
is _______seconds.
Exit Delay
The number of seconds your system will delay
arming to level 2 or 3 when you exit your home.
This delay allows you to arm your system and
exit without setting off an alarm. The programmed exit delay is _______seconds.
No Delay
Use to instantly arm your system to level 2 or 3
without an exit delay.
Panic Buttons
Police, fire, and auxiliary buttons on a touchpad.
When activated (press and hold for at least 2 full
seconds), they send an immediate alarm to the
central monitoring station.
8
Sensors
These are the devices such as smoke detectors,
motion detectors, glass break detectors, and
door/window sensors that monitor conditions
and report to the control panel.
You’re now ready to move on to the basic touchpad operations. The
following sections guide you through disarming and arming your system and using all other features from the various touchpads. Subsequent sections guide you through the use of the touch-tone telephone
and keychain touchpad.
9
10
Touchpad Overview 12
•
Section 2:
Using the Touchpad for Emergencies 13
•
Section 3:
Basic Touchpad Operations 19
•
Section 4:
Additional Touchpad Features 33
Phone Operations
•
Touchpad Operations
Touchpad Operations
Keychain Touchpad
Operations
Troubleshooting
References
11
Touchpad Overview
Several different touchpads are available to operate your security system. All touchpads are operated in the same way, although some do
not have a message display. Use the voice messages from internal
speakers if you have them and/or beeps from the touchpad’s speaker,
if available, to verify your entries. Touchpads with a display allow you
to see and hear messages. All touchpads activate the appropriate alarm
to signal trouble and emergency situations.
A touchpad operation pocket guide is included in the owner’s material provided by your installer. Use this card for quick reference once
you are familiar with the operations of your security system.
You can also operate your system using the phone, for example, when
you are away or are in a room without a touchpad. Using the phone to
operate your security system is slightly different from touchpad operations, so you’ll need to turn to the “Phone Operations” section of this
manual for phone instructions. (We have also included a phone operation pocket guide for quick reference when operating your system
from a phone.)
12
Touchpad Operations
Section 2:
Using the Touchpad
for Emergencies
Using Panic Alarms:
Police, Fire, and Auxiliary
8557104A.DS4
If your system is monitored, panic alarms call the central monitoring
station, but each alarm sounds and reacts differently when activated.
•
•
Emergency panic alarms are armed in all security levels if your installer has turned them on.
References
13
Troubleshooting
The order of alarm priority is as follows: fire, police, auxiliary. A
higher priority alarm will cause the lower priority alarm sound to
change.
Keychain Touchpad
Operations
•
The police panic alarm is a slow on-off-on-off sound from interior and exterior sirens to scare off an intruder and alert neighbors
to your trouble. The central monitoring station responds by calling the police.
The fire panic alarm is a loud, steady tone sounding from all
interior and exterior sirens to alert neighbors and anyone in your
home or office to a fire. The central monitoring station responds
by calling the fire department.
The auxiliary panic alarm is a fast on-off-on-off sound from
interior sirens only to signal a medical or other type of emergency. The central monitoring station responds by calling the service or agency you have designated, such as an ambulance.
Phone Operations
Panic buttons are used to quickly alert the central monitoring station to
an emergency in your home. You have three panic button options.
When one is pressed, the central monitoring station knows within seconds what your emergency is. This information helps emergency personnel respond appropriately.
Sending a Panic Alarm
To send a panic alarm:
Do this
Display, if
available, will
read
You will hear
•
(POLICE,
FIRE, or
AUXILIARY)
ALARM
A loud alarm,
then HELP
HELP...sensor (81 or
82).
or
FIRE
FIRE...sensor 80.
Press the appropriate panic
button, POLICE, FIRE, or
AUXILIARY, for 2 full
seconds.
Sn (81, 80, or
82)
(POLICE,
FIRE, or
AUXILIARY)
PANIC
To cancel a panic alarm:
Do this
Display, if
available, will
read
You will hear
1. Within 15 seconds of activating a police or auxiliary
alarm, enter your access
code + 1. (No call is sent to
the central monitoring station.)
1-OFF
REPORT
CANCELED
One long
beep, then
Alarm system
is off.
If canceled,
Alarm bypassed.
2. If 15 seconds have already
passed or if the alarm was
a fire alarm, call the central monitoring station to
cancel the alarm. (Entering
your access code + 1 after a
fire alarm only turns off the
sirens. It does not cancel
the alarm.)
14
To reset hardwire smoke detectors after an alarm:
You will hear
1. Turn sirens off by entering
your access code + 1.
1-OFF
One long
beep, then
Alarm system
is off.
1-OFF
One long
beep, then
Alarm system
is off.
2. If you wish, check which
hardwire smoke detectors
caused the alarm by locating those with a light on.
3. To reset hardwire smoke
detectors, enter your access
code + 1 a second time.
4. Verify that hardwire smoke
detectors are reset by
checking to see that the
lights are off.
To reset wireless smoke detectors:
Keychain Touchpad
Operations
Display, if
available, will
read
Phone Operations
Do this
Touchpad Operations
Resetting Smoke Detectors
Wireless smoke detectors automatically reset themselves after all
smoke has cleared.
Troubleshooting
References
15
Help!
WARNING! Call your central monitoring station if a fire alarm was
sent accidentally.
Can I stop an accidental panic alarm?
If you cancel police and auxiliary alarms within the 15-second dialing delay, the alarm is not reported to the central monitoring station and police will not be sent. Fire alarm sirens can be silenced,
but the call to the central monitoring station cannot be stopped by
disarming your system to level 1. You must call the central monitoring station and follow their assigned procedures to prevent a
false dispatch.
If I’m not home, how long will the sirens ring?
If your system is not disarmed after an alarm begins, the sirens turn
off after 4 minutes. However, any lights connected to your system
remain on. The fire department may
arrive after the sirens stop.
Do panic alarms work when security protection is turned off?
Yes; 24-hour sensors like the police, fire, and auxiliary panic
alarms are always armed, regardless of protection level. Some special 24-hour interior sensors can be turned off by bypassing them;
however, fire sensors cannot be bypassed.
Preventing Accidental Alarms
Your security system is engineered with advanced technology that
eliminates accidental alarms caused by technical problems. This technology also prevents other wireless devices, such as garage door openers, ham radios, television remote controls, and cellular phones, from
interfering with your security system in any way.
One of the most important things to remember about your security system is that most accidental alarms occur during entry and exit delays.
For example, if you arm the system and then run upstairs for something you forgot, the exit delay time will expire. As soon as an armed
door is opened or the motion detector is tripped, an alarm will sound.
Another point to consider is that pets can sometimes climb higher than
you think. Thus, they may pass in front of a motion detector and actu16
Below are some ways to prevent accidental alarms. You may need to
contact your installer to help you correct certain problems.
References
17
Troubleshooting
The most common cause of an accidental alarm is unintentionally tripping sensors like those on an armed window or door. You can turn the
sirens off by canceling the alarm. In some cases, canceling will silence
the sirens and stop the call to the central monitoring station. (If the dialing delay is installed, the alarm must be canceled within 15 seconds
to stop the call.) In other instances, as with the fire panic alarm, canceling silences the sirens but does not stop the call to the central monitoring station.
Keychain Touchpad
Operations
Canceling Accidental Alarms
Phone Operations
To prevent accidental alarms:
1. Always enter and exit within the proper delay time.
2. Make sure all doors leading outside have delay times. If your system is armed to level 2 and doors have been set to arm instantly,
an alarm will sound if you open the door to let a pet out.
3. Be aware of the devices your system has and how they operate.
4. Motion detectors operate by detecting a change in temperature
when something passes in front of them. Motion detectors that
have been turned upside down to avoid pet movement may be
tripped by rising heat. If you have pets, you may want to eliminate motion detectors or ask your installer to put “pet lenses” in
your motion detectors.
5. Check the location of your smoke detectors. Keep in mind that
smoke detectors near bathrooms can be tripped by steam from a
shower and smoke detectors near your kitchen can be tripped by
smoke from cooking.
Touchpad Operations
ally set off the alarm when you are away.
To cancel an alarm:
Do this
Display, if
available, will
read
You will hear
•
1-OFF
One long
beep, then
Alarm system is off.
Enter your access code + 1.
Help!
Can I cancel all accidental alarms?
Most, but not all, accidental alarms can be canceled. If you accidentally cause an alarm by opening an armed window, for example, you
can stop a call to the central monitoring station by canceling the
alarm within the 15-second dialing delay. Police and auxiliary panic
alarms can also be stopped within the 15-second dialing delay. A fire
panic alarm, however, cannot be canceled. Fire alarm sirens may be
silenced, but the call cannot be stopped. If an accidental fire alarm
has sounded, follow the procedures of your central monitoring station to prevent a false dispatch.
18
ON
Turning Security Protection On
Turning security protection on means you are arming your system.
Your security system gives you two arming levels of protection to
choose from.
•
Level 2-Stay turns on protection for exterior entrances like doors
and windows but doesn’t arm interior sensors like motion detectors. You might use Level 2-Stay at night when everyone is sleeping or anytime you want the freedom to move around inside your
home with outside doors and windows protected.
Level 3-Away turns on protection for all security sensors, including exterior doors and interior doors and motion detectors. Use
Level 3-Away for complete security protection when no one is in
your home.
When You Stay In—
Arming to Level 2-Stay
Note
The exit delay is the period defined by your installer for you to exit after turning
security protection on.
Keychain Touchpad
Operations
You can also arm your system with a door or window open. While the
rest of your home is armed, a second-floor window, for example, can
be “bypassed” and left open and unarmed.
Phone Operations
•
Touchpad Operations
Section 3:
Basic Touchpad Operations
To turn security protection on when you stay in:
Display, if
available, will
read
You will hear
1. Enter your access code + 2.
2-STAY
Two short
beeps, then
Alarm system
is on level 2.
References
19
Troubleshooting
Do this
Do this
2. Additional options:
• To turn off lights, press
0 within 5 seconds.
• To cancel the exit delay,
press 4 within 5 seconds.
Display, if
available, will
read
You will hear
2-STAY
DELAY
No delay.
NO
3. If entering or exiting, do so
during the delay period or
an alarm will sound.
One beep every 4 seconds
for most of
the delay,
then one beep
every second
for the last 10
seconds of
the delay.
Two short
beeps indicating the end of
the exit delay.
The programmed exity delay is _______ seconds.
Note
If an alarm sounds, cancel it by pressing your access code + 1. Then see the
help box.
20
What if I receive the protest message Sensor nn is open?
What if the 2 on the display is flashing?
The most likely problem is an open door or window. Press the STATUS button for a display message of the problem. If it is something
other than an open door or window and you’re not sure how to fix
the problem, refer to section 9, “Troubleshooting.”
Twenty-four-hour sensors including fire, police, and auxiliary are always on.
To activate, press the proper panic button and hold for 2 full seconds.
If the quiet mode feature is on and you are using a touchpad with a display
(alphanumeric), no voice message will sound as you arm, and exit beeps
will sound only from the touchpad, not from interior speakers. Quiet mode
has no affect on touchpads that do not have a display (wireless).
References
21
Troubleshooting
CAUTION
If open doors or windows caused the protest beeps and they are left open,
they will not be protected.
Keychain Touchpad
Operations
Notes
If you arm your system, exit, and accidentally leave the door open, then
when the exit delay time expires, the police alarm will sound and the central
monitoring station will be notified of an exit fault. Check with your central
monitoring station for its procedures following this alarm.
Phone Operations
This means the system detects an open window, door, or other sensor. You can close the window or other open sensor, and then repeat
the procedure to turn on security protection. If you prefer to leave
the window or other sensor open, cancel turning protection on by
entering your access code + 1, and then use the procedure entitled
“Arming with a Window or Door Open” later in this section.
Touchpad Operations
Help!
When You Go Away—
Arming to Level 3-Away
Note
The exit delay is the time set by your installer for you to exit after turning security protection on.
To turn security protection on when you go away:
Do this
Display, if
available, will
read
You will hear
1. Enter your access code + 3.
3-AWAY
Three short
beeps, then
Alarm system
is on level 3.
Several slow
beeps during
the exit delay.
2. Additional options:
• To turn off lights, press
0 within 5 seconds.
• To cancel the exit delay,
press 4 within 5 seconds.
3-AWAY NO
DELAY
3. Exit before the end of the
delay period or an alarm
will sound.
No delay.
One beep every 4 seconds
for most of
the delay,
then one beep
every second
for the last 10
seconds of
the delay.
Three short
beeps indicating the
end of the
exit period.
22
Help!
Touchpad Operations
Note
If an alarm sounds, cancel it by pressing your access code + 1. Then see the
help box.
What if I receive the protest message Sensor nn is open?
What if the 3 on the display is flashing?
Notes
If you arm your system, exit, and accidentally leave the door open, then
when the exit delay time expires, the police alarm will sound and the central
monitoring station will be notified of an exit fault. Check with your central
monitoring station for its procedures following this alarm.
Twenty-four-hour sensors including fire, police, and auxiliary are always on.
To activate, press the proper panic button and hold for 2 full seconds.
CAUTION
If open doors or windows caused the protest beeps and they are left open,
they will not be protected.
References
23
Troubleshooting
If the quiet mode feature is on and you are using a touchpad with a display
(alphanumeric), no voice message will sound as you arm, and exit beeps
will sound only from the touchpad, not from interior speakers. Quiet mode
has no affect on touchpads that do not have a display (wireless).
Keychain Touchpad
Operations
The most likely problem is an open door or window. Press the STATUS button for a display message of the problem. If it is something
other than an open door or window and you’re not sure how to fix
the problem, refer to section 9, “Troubleshooting.”
Phone Operations
This means the system detects an open window, door, or other sensor. You can close the window or other open sensor, and then repeat
the procedure to turn on security protection. If you prefer to leave
the window or other sensor open, cancel turning protection on by
entering your access code + 1, and then use the procedure entitled
“Arming with a Window or Door Open.”
Arming with a Window or Door Open
Use this procedure to tell your system to ignore (bypass) sensors, perhaps like those on open windows and doors, while security protection
is being turned on. Bypassed windows, doors, or other sensors are not
protected.
Note
This procedure shall not be used in UL listed installations. (See “Opening a
Door or Window When Protection is On.”)
To turn security protection on with a window or door open:
Do this
Display, if
available, will
read
You will hear
•
nn BYPASSED
2-STAY
Alarm system is on level 2. Sensor
nn bypassed.
If you are staying in, enter
your access code + 2 +
BYPASS.
or
nn BYPASSED
3-AWAY
If you are going away, enter
your access code + 3 + BYPASS.
The arming
level (1, 2, or 3)
blinks when a
sensor is bypassed.
Alarm system is on level 3. Alarm
system is on.
Sensor nn bypassed.
CAUTION
If open doors or windows caused the protest beeps and they are left open,
they will not be protected.
24
Before opening a door or window when security protection is already on:
Display, if
available, will
read
You will hear
•
Enter your access code +
BYPASS + two-digit sensor number + COMMAND.
BYPASS Sn-OK
Sensor nn bypassed.
You can now open selected
doors and/or windows without setting off an alarm.
(Repeating the entry
removes the sensor bypass.)
The arming
level (1, 2, or 3)
blinks when a
sensor is bypassed.
What if I get the message Invalid or FAIL?
You must enter the sensor number within 5 seconds. If you still get
this message, the sensor you’re trying to bypass may already be bypassed. To check this, press the STATUS button, and then listen for
the sensor number in the Sensor nn bypassed message.
What if I change protection levels while a sensor is bypassed?
If, for example, you go to protection Level 2-Stay from Level 3Away, previously bypassed sensors will no longer be bypassed.
25
References
Note
When sensors are bypassed, the protection level on the display (2 or 3) will
flash.
Troubleshooting
If that isn’t the problem, the sensor you’re trying to bypass may not
be active in the current protection level or the sensor number is in a
“group” of sensors that cannot be bypassed (like fire alarm sensors).
It may also be possible that the sensor you’re trying to bypass is not
programmed into your system.
Keychain Touchpad
Operations
Help!
Phone Operations
Do this
Touchpad Operations
Opening a Door or Window When
Protection is On
Instant Arming with No
Exit/Entry Delay Time
Your security system has built-in exit and entry delay times. The delays give you time to arm the system and get out of your home without
setting off an alarm or to get in and disarm before sounding an alarm.
Entry and exit delays are set to meet your needs and lifestyle.
There may be times, however, when you don’t need an entry or exit
delay and want to arm your system instantly. For example, if everyone
is home and inside for the night, arm your system to level 2 immediately by choosing no delay. You can also use no delay if, for example,
you are arming your system from the outside, using a wireless touchpad, and you are the last one to leave. When no delay is chosen, sensors arm immediately, allowing no time to enter or exit.
To turn on security protection with no entry/exit delay time:
Do this
Display, if
available, will
read
You will hear
•
2-STAY NO
DELAY
Two short
beeps, then
Alarm system
is on level 2,
no delay.
3-AWAY NO
DELAY
Three short
beeps, then
Alarm system is on level 3, no delay.
If you are staying in, enter
your access code + 2 + 4.
or
If you are going away, enter
your access code + 3 + 4.
Note
Changing the protection level will set the sensors back to their normal delay
times unless 4 is again pressed after entering your access code + new protection level.
26
OFF
To turn security protection off:
Display, if
available, will
read
You will hear
•
1-OFF
One long
beep, then
Alarm system is off.
Enter your access code + 1.
References
27
Troubleshooting
WARNING!
If you enter your home and controlled lights that are normally off are on
and/or you hear alarm sirens, an intruder may be inside or another emergency may have occurred. The same may be true if you enter a door with
an entry delay and instead of the normal entry delay beeps (two beeps
every 2 seconds) you hear faster beeping (three beeps every 2 seconds).
The alarm sirens may have “timed-out” and these faster beeps indicate
that an alarm occurred. Leave immediately, and call for emergency help
from a neighbor’s phone.
Keychain Touchpad
Operations
Do this
Phone Operations
Turning security protection off means you are disarming your system.
When you disarm to Level 1-Off, you turn off all protection to doors,
windows, and motion detectors. However, your security system is not
completely off in level 1. Some features, like smoke detectors and police, fire, and auxiliary panic buttons, are still on. You might use Level
1-Off when you enter or when you want to go in and out of your home
freely and do not wish to have any intrusion sensors on. Level 1-Off is
also used to cancel most alarms (see “Canceling Accidental Alarms”
in section 2).
Touchpad Operations
Turning Security Protection Off
Help!
What if the 1 on the display is flashing?
The most likely problem is an open door or window. Press the STATUS button for a display and/or voice message of the problem. If it
is something other than an open door or window and you’re not sure
how to fix the problem, refer to section 9, “Troubleshooting.”
What if pulsing beeps sound after I turn protection off?
This indicates an alarm occurred while the system protection was
on. To cancel the beeps, repeat the procedure to turn protection off.
Press COMMAND + STATUS
to find out what alarm occurred.
CAUTION
If an alarm occurred while you were away, an intruder may still be in your
home. You should have emergency personnel check out the situation before you enter.
Notes
Twenty-four-hour sensors like smoke detectors and police, fire, and auxiliary panic alarms are always armed. To activate, press the proper panic button and hold for 2 full seconds.
Checking Your System Status
The status feature allows you to quickly check the operations of your
system anytime. It’s a good idea to check your system status whenever
you see a blinking arming level number on a touchpad display. A
blinking number indicates situations like an open door or a low backup
battery. Checking the status will tell you what is going on with your
system.
A short status check tells you what arming level you’re in and indicates open windows or doors and system problems, if any, like a low
battery or power failure. For a more detailed system report, you can do
a full status check to check arming level, to check for open windows
and doors, to hear the temperature, and to check for any system troubles, such as a low backup battery, power failure, or other problem.
Both the short and full status checks will tell you about the most recent
alarm condition. For example, if an alarm goes off while you are away,
28
When an alarm condition is stored in the alarm memory, it will be announced the first time you do a short or full status check. Doing a short
or full status check a second time will show the system status including
any trouble conditions.
To check the current arming level (short status check):
Display, if
available, will
read
You will hear
•
The system displays:
One, two, or
three short
beeps, indicating the
current arming level.
Press the STATUS button.
•
•
Messages as
described in
the
display column.
Note
See section 9 for an explanation of status check messages.
Keychain Touchpad
Operations
•
SYSTEM
OK
or
system
troubles if
any
or
any recent
alarms
Phone Operations
Do this
Touchpad Operations
you can find out which sensor caused the alarm.
Troubleshooting
References
29
To review recent activity in your home (full status check):
Do this
Display, if
available, will
read
You will hear
•
The system displays:
One, two, or
three short
beeps, indicating the
current arming level.
Press the STATUS button
twice. (After pressing STATUS once, be sure to press
it again within 5
seconds.)
•
•
•
SYSTEM
OK
or
system
troubles if
any, battery
status and
power status, and
whether or
not the
energy
saver is on
and the
current
temperature (if
energy
saver is
installed)
or
any recent
alarms
Messages as
described in
the
display column.
Note
See section 9 for an explanation of status check messages.
30
Display, if
available, will
read
You will hear
•
The system displays:
One, two, or
three short
beeps, indicating the
current arming level.
Then, messages about
alarms.
or
Enter your access code +
STATUS + 5.
•
any recent
alarms
or
•
ALARM
MEMORY
OK
Alarm memory is OK.
Keychain Touchpad
Operations
Note
See section 9 for an explanation of status check messages.
Phone Operations
Do this
Touchpad Operations
To check for the most recent alarms (alarm memory):
Troubleshooting
References
31
32
Setting and Changing Access Codes
It is important to remember your primary access code because it is the
key to your system. Keep access codes confidential and delete extra
codes as soon as they are no longer needed.
Keychain Touchpad
Operations
When setting or changing access codes:
• A “6” should not be used in any part of an access code. The
“6” is reserved for bypassing sensors.
• The first digit of an access code should not be a “4” or “0”
since this may interfere with system disarming.
• It is recommended that obvious codes such as 1234 or 1111
not be used.
Phone Operations
An access code must be entered to begin most operations with your security system. Your primary access code is the main code for your
system and lets you control all functions, including changing all access
codes. Therefore, your primary access code should be given to only a
few trusted users. You can give temporary users, such as house guests,
one of four secondary codes that controls most system operations and
then delete it when they leave. Nineteen additional codes limited to
arming and disarming, can be used by service people such as baby-sitters and then deleted when no longer needed.
Touchpad Operations
Section 4:
Additional Touchpad Features
To set or change an access code:
You will hear
1. Set the system to level 1
(disarm) by entering your
access code + 1.
1-OFF
One long
beep, then
Alarm system is off.
2. Enter change settings mode
by entering your primary
access code + STATUS + 8.
SYSTEM SETTINGS
System
memory
open.
33
References
Display, if
available, will
read
Troubleshooting
Do this
References
Do this
Display, if
available, will
read
3. Enter 00 for a primary
access code, 01 to 04 for
secondary access codes, or
any number from 05 to 23
for arm/disarm only codes.
Press COMMAND (or wait
5 seconds and this happens
automatically).
## - ARM
CODE XXXX
4. Press COMMAND.
____
5. Within 60 seconds, enter the
new four-digit code you
want to use + COMMAND.
(Once you begin entering
the new code, you have 5
seconds to enter each number.)
OK
You will hear
## - ARM
CODE XXXX
If the system displays/
announces fail, refer to the
help box that follows.
Repeat steps 4 and 5.
6. Repeat steps 3 through 5 to
set or change additional
access codes.
## - ARM
CODE XXXX
7. Exit change settings mode
by entering 99 + COMMAND.
99-EXIT
8. Press COMMAND again.
1-OFF
Goodbye.
Notes
## represents the numbers 00–23 and XXXX represents an existing code. The
first time you enter a code the display reads **** (blank code) instead of numbers (XXXX) of an existing code. If you do not complete a step within 60 seconds your system announces Goodbye and exits change settings mode. If this
happens, repeat steps 2–5.
34
To delete an access code:
Do this
1.
Follow steps 1 through 4
on the previous page.
## - ARM
CODE ****
3. Follow the rest of the steps
to delete additional codes or
to exit change settings
mode.
Keychain Touchpad
Operations
Note
You cannot delete your primary access code.
Phone Operations
2. At step 5, enter your primary access code as the
four-digit code you want to
delete.
Touchpad Operations
If you are using a touchpad without a display (wireless) you will get voice
prompts instead of display prompts.
Troubleshooting
References
35
Help!
What if the system displays FAIL?
First, check to see that you have entered a four-digit code. Next,
make sure your new code is not the same as an existing access code.
Then, make sure the last two digits of the new code are not the same.
And, if you already have a code such as 1234, you cannot enter 1243
(reverse the last two digits) as an additional code. You may want to
try a different code.
What if I enter more than four digits?
The last four digits entered become the new access code.
Can I use all access codes for all operations?
No. Your primary access code can be used to operate all features of
your security system. A secondary access code can be substituted
for the primary code in most functions, except when
1. bypassing a sensor to open a window or door when the system
is armed (see the section entitled “Opening a Door or Window
When Protection Is On”);
2. entering the change settings mode.
Arm/disarm codes can be used only for arming and disarming functions. If a sensor is open when arming with these codes, the sensor
can be bypassed.
Using the Energy Saver Feature
The energy saver feature can override your normal heating and air
conditioning temperature settings if you have this option installed.
This allows you to use more energy-efficient settings when you are
away from home. For example, if your heating system at home is usually set at 68°F, you can turn the energy saver on and set the temperature to 55°F while you are away. You can call your system from work
to check the temperature and turn the energy saver off to give temperature control back to your furnace thermostat. Your house then heats
to your furnace temperature setting, in this case 68°F. You control
your air conditioning temperatures the same way.
36
Turning Energy Saver On and Off
To override your normal heating or air conditioning settings, turn on
the energy saver feature. When you are ready to return to your normal
temperature control settings, turn the feature off. You use the same
steps for turning the feature on and off.
Display, if
available, will
read
You will hear
•
ENERGY SAVER ON
Energy saver
is on, then
one short
beep.
Enter your access code + 5.
or
ENERGY SAVER OFF
or
Energy saver
is off, then
one short
beep.
Setting Energy Saver Temperatures
References
37
Troubleshooting
Initially, you must set the energy saver to the desired high and low
temperatures. You don’t need to reset them again, unless you want to
change temperature settings.
Keychain Touchpad
Operations
Do this
Phone Operations
To turn the energy saver feature on or off:
Touchpad Operations
In addition to controlling temperature, the energy saver feature notifies
the central monitoring station if your heating or air conditioning unit
fails, before pipes freeze or pets are harmed by extreme heat or cold.
To set high and low energy saver temperatures:
Do this
Display, if
available, will
read
You will hear
1. If not done already, set the
system to level 1 (disarm)
by entering your access
code + 1.
1-OFF
One long
beep, then
Alarm system is off.
2. Get into change settings
mode by entering your
access code + STATUS +
8.
SYSTEM SETTINGS
System
memory
open.
3. Enter 53 + COMMAND.
53 - ES LOW
nn (nn = current setting)
4. Press COMMAND.
__
5. Within 60 seconds, enter
the desired low temperature (45°F or higher) +
COMMAND. (Once you
begin entering the new
code, you have 5 seconds to
enter each number.)
OK
53 - ES LOW
nn (nn = new
setting)
If the system displays/
announces fail, repeat steps
4 and 5.
6. Enter 54 + COMMAND.
54 - ES HIGH
nn (nn = current setting)
7. Press COMMAND.
__
38
8. Within 60 seconds, enter
the desired high temperature (90°F or lower) +
COMMAND. (Once you
begin entering the new
code, you have 5 seconds to
enter each number.)
OK
You will hear
54 -ES HIGH
nn (nn = new
setting)
If the system displays/
announces fail, repeat steps
7 and 8.
Note
If you do not complete a step within 60 seconds your system announces
Goodbye and exits change settings mode. If this happens, repeat steps 2–8.
9. Exit change settings mode
by entering 99 + COMMAND.
99-EXIT
10. Press COMMAND again
to return the panel to level 1
(disarm).
1-OFF
You will hear
Goodbye.
Troubleshooting
Display, if
available, will
read
Keychain Touchpad
Operations
Do this
Phone Operations
Display, if
available, will
read
Touchpad Operations
Do this
References
39
Help!
What if the system displays FAIL and I hear Invalid?
You may have entered a new temperature setting that is out of
range. Retry the entry using valid set point numbers. The low temperature range is 45°F to 1 degree below the high temperature setting. The high temperature range is 1 degree above the low
temperature setting to 90°F.
Example:
If low temperature is set at 50°F, then the high temperature
range is 51°F to 90°F.
If high temperature is set at 88°F, then the low temperature
range is 45°F to 87°F.
What if I enter more than two digits?
The last two digits entered become the new temperature setting.
Note
You must enter each digit of the new temperature setting within 5 seconds
or the entry will fail. After 1 minute without an entry the system will exit the
change settings mode.
Controlling Lights and
Appliances
Your security system can be used to control various lights and appliances in your home when they are plugged into special wireless lamp
or appliance modules. These modules connect your lights or appliances to your security system, allowing you to turn them on and off using
touchpads or your telephone. You have the option of turning all lamps
plugged into lamp modules on or off at the same time, turning all appliances off, or controlling individual lights and appliances. (Appliance modules turn off when the all off command is entered but will not
respond to the all on command).
The lights connected to your security system play an important role in
emergency situations. For example, all lights connected to your security system automatically turn on during alarms. Some lights turn on
when you enter or exit and remain on for 5 minutes, giving you ample
light and time to see your way.
40
Do this
Display, if
available, will
read
You will hear
•
LIGHTS ON,
displayed for 1
second.
On (if lights
are off), then
one short
beep.
Enter your access code + 0.
LIGHTS OFF,
displayed for 1
second.
Off (if lights
are on), then
one short
beep.
Individual Light and Appliance Control
Display, if
available, will
read
You will hear
•
LIGHT nn ON
or
nn on, then
one short
beep.
If lights are already on,
LIGHT nn OFF
nn off, then
one short
beep.
Press BYPASS, then within
3 seconds, press the light or
appliance number you wish
to turn on or off. (Your
installer has these numbers.)
References
41
Troubleshooting
Do this
Keychain Touchpad
Operations
To turn individual lights and devices on and off:
Phone Operations
or
Touchpad Operations
To turn all lights on or off:
Help!
How do lights connected to my security system react during an
alarm?
Alarm sirens automatically stop ringing after 4 minutes, however,
lights caused by an alarm will stay on until the system is reset by disarming.
•
•
•
•
During both fire and auxiliary alarms, lights turn on and remain
on with no flashing until 5 minutes after the system is disarmed
or armed to a new security level.
During a police alarm, lights flash on and off until the siren is
canceled or after 4 minutes. After 4 minutes, lights remain on
steadily until 5 minutes after your system is disarmed.
During an intrusion alarm, lights flash on and off until the siren
is canceled or after 4 minutes. After 4 minutes, lights remain on
steadily until 5 minutes after your system is disarmed.
During entry and exit delay times, selected lights turn on and
remain on for 5 minutes.
Notes
Lamp operation in an alarm condition is supplementary to the alarm siren.
Lamps plugged into lamp modules set to unit setting 1 turn on during entry
or exit delays. Lamps plugged into lamp modules set to unit setting 2 flash
one, two, or three times when the arming level is changed to level 1, 2, or
3. Appliance modules will turn off when all lights are turned off. Appliance
modules should never be set to unit number 1 or 2.
Using the Quiet Mode Feature
Your security system sounds beeps and voice messages in response to
your commands. There may be times, however, when you do not want
these sounds emitted through your interior speakers. For example, if
you arm your system while everyone is sleeping, you can use the quiet
mode feature to silence any beeps or messages from the interior speakers.
If you are using a touchpad with display (alphanumeric) with the quiet
mode on, the usual voice messages for most commands are silenced.
Many beeps will only sound from the touchpad, not from internal
speakers. (Exit beeps and arming level beeps when you turn security
42
When the quiet mode feature is off, all audio responses to commands
will be announced through the internal speakers.
Note
The touchpad quiet mode must be left off in UL listed installations.
Touchpad Operations
protection on or off are heard from internal speakers.) Quiet mode has
no affect on touchpads that do not have a display (wireless). See the
“Phone Operations” section for using quiet mode from a phone.
To turn the touchpad quiet feature on or off:
You will hear
1. Turn security protection off
by entering your access
code + 1.
1-OFF
Alarm system is off.
2. Enter your access code
again and press STATUS +
8.
SYSTEM SETTINGS
System
memory
open.
3. Enter 77 + COMMAND.
77-QUIET ON
or
77-QUIET
OFF
OK
Note
If you do not complete the preceding entry within 3 seconds your system exits
change settings mode. If this happens, repeat steps 2–5.
References
43
Troubleshooting
4. Press COMMAND to
switch touchpad quiet to the
opposite setting (on or off).
Keychain Touchpad
Operations
Display, if
available, will
read
Phone Operations
Do this
Do this
Display, if
available, will
read
5. Exit the change settings
mode by entering 99 +
COMMAND.
99-EXIT
6. Press COMMAND again.
1-OFF
You will hear
Goodbye.
Using the Chime Feature
When you have security protection turned off (disarmed to Level 1Off), you can turn on the chime feature to let you know if anyone enters or leaves, even though your doors and windows are not armed.
When on, the chime feature causes the system to sound chime beeps
whenever a monitored perimeter door or window is opened. This
works well for keeping an eye on children going in and out of your
house.
To turn the chime feature on and off:
Do this
Display, if
available, will
read
You will hear
1. Turn security protection off
by entering your access
code + 1.
1-OFF
Alarm system is off.
2. Enter your access code
again and press 7.
1-OFF
CHIME ON
On, then one
short beep.
or
or
1-OFF
Off, then one
short beep.
44
If you have a touchpad with a display (alphanumeric), you can adjust
the display brightness. For example, if you have a touchpad in a bedroom, you may want to dim the display at night so it won’t disturb your
sleep.
After dimming the display, pressing any button momentarily returns
the display to full
brightness. After 15 seconds of no touchpad activity, the display returns to the set dimmed level. If an alarm occurs while the display is
dimmed, it automatically returns to the full brightness level and stays
that way until you disarm your system.
Phone Operations
Your touchpad has four brightness levels from 1 (dim) to 4 (bright).
Touchpad buttons 1 through 4 are used to adjust the display brightness.
Touchpad Operations
Adjusting the Touchpad
Display Brightness
To change the touchpad display brightness:
•
Press and hold the 1, 2, 3, or 4 touchpad button to set the
desired brightness level.
The No Activity Feature
?
References
45
Troubleshooting
Your security system monitors normal activities in your home or business. When your system is in level 1 or level 2, it expects that under
normal circumstances you will open and close doors, place telephone
calls, change arming levels, and turn lights on and off. If none of these
activities occurs within a set time frame, your system will sound the
auxiliary alarm from your internal sirens. If all is well, just stop the
alarm by disarming to level 1 within 5 minutes. If someone inside is in
trouble—perhaps a family member has fallen or someone is tied up in
a robbery—and can’t cancel the alarm, a call will be sent to the central
monitoring station and it will send emergency personnel to check out
the situation.
Keychain Touchpad
Operations
Do this
What happens when the no activity feature activates:
Do this
Display, if
available, will
read
You will hear
1. If no activity is recorded for
the set time frame:
AUXILIARY
ALARM Sn79NO ACTIVITY
Help, help
sensor 7 9.
2. If alarm is not canceled
within 5 minutes, the central monitoring station is
called and emergency personnel are sent. Sirens will
stop once the message has
reached the central monitoring station.
Auxiliary
alarms will
sound only
from interior
sirens.
3. Cancel alarm within 5 minutes if there is no emergency by entering your
access code + 1.
One long
beep, then
Alarm system
is off, alarm
bypassed.
Note
The no activity feature is only available if your installer has turned it on.
The Touchpad Tamper Feature
The touchpad tamper feature monitors the number of keys pressed on
a touchpad or phone in your home or business. If approximately 40 or
more keys are pressed without hitting a valid code, a police siren will
sound. For example, if an intruder tries to figure out your access code,
your security system sounds an alarm when too many wrong keys are
pressed.
46
Display, if
available, will
read
You will hear
•
POLICE
ALARM Sn77TOUCHPAD
TAMPER
Help, help,
sensor 7 7.
If approximately 40 or
more keys are pressed without hitting a valid code:
Note
An incorrect key press is defined as any number key that is not part of a valid
access code.
Opening and Closing Reports
Feature
If the opening and closing reports feature is installed:
After you arm or disarm your security system, your phone line will be
briefly tied up when your system reports to the central monitoring station.
Automatic Test Features
47
References
Your security system is able to automatically test itself and alert you if
it discovers any system problems. The system performs ongoing tests
to check for problems like power failures, low batteries, sensors that
aren’t working, and communication trouble with the central monitoring station. When your system detects a problem, trouble beeps sound
to alert you. In many cases, your system will notify the central monitoring station of system problems.
Troubleshooting
System Tests
Keychain Touchpad
Operations
If you want to monitor the use of your security system, the opening
and closing reports feature, set up by your installer, sends details of
the arming and disarming activities of your system to the central monitoring station. These reports track which users arm and disarm the
system and at what time.
Phone Operations
Do this
Touchpad Operations
What happens when the touchpad tamper feature is activated:
You can find and fix most system troubles yourself (see section 9,
“Troubleshooting”); however, some system troubles may require you
to call your security system dealer for assistance.
Possible Trouble Signals
When your security system detects a problem, interior sirens sound
trouble beeps rapidly six times, and then again in 60 seconds, continuing this pattern until the trouble condition is fixed. If your system is in
level 2 or 3 and a problem occurs, most trouble beeps won’t start until
you disarm your system to level 1. If you do a status check (see
“Checking Your System Status”) or change the arming level, beeps
and voice messages will stop. If the problem is not corrected, beeps
and voice messages start again 10 hours later.
Trouble Messages
AC Power Failure
Your system may have been accidentally unplugged from AC power
or there may be an AC power outage. The backup battery will take
over. If AC power is not restored within 15 minutes, the system will
alert you (and the central monitoring station if your installer enabled
this feature).
AC Power Failure
Display, if
available, will
read
1. As soon as the power goes
out or your system is accidently
unplugged:
Arming level
(1, 2, or 3) will
blink.
2. If you press the STATUS
button to find out why arming level is blinking:
AC POWER
FAIL
48
You will hear
One long
beep, then
Alarm system
is off, AC
power failure.
You will hear
3. If the power isn’t restored
within 15 minutes:
• 90-TROUBLE AC
POWER is reported to
the central monitoring
station if your installer
has turned this feature
on.
• If you have the energy
saver feature on, it will
shut down to conserve
battery power and control will be returned to
your furnace thermostat.
• If AC power failure
lasts long enough to
drain the backup battery to the “low battery” level, the system
will tell you that you
have a low battery
problem.
Touchpad display goes
blank. The
display comes
on when a key
is pressed.
Six trouble
beeps in a
row, every 60
seconds.
Phone Operations
Display, if
available, will
read
Touchpad Operations
AC Power Failure
Keychain Touchpad
Operations
System Battery Failure
References
49
Troubleshooting
This means that the emergency backup battery has been drained and
must be recharged or replaced. If your AC power is not working, your
security system may shut down once the battery is drained. When AC
power is restored, your security system will recharge its
battery.
System Battery Failure
Display, if
available, will
read
You will hear
•
CPU LOW
BATTERY
Six trouble
beeps.
91 TROUBLE CPU LOW
BATTERY is reported to the
central monitoring station.
Sensor Failure
The sensor indicated is not communicating with the system.
Sensor Failure
Display, if
available, will
read
You will hear
1. If your system is set up to
sound immediate trouble
beeps, or if the sensor with
the problem is a hardwire
sensor, trouble beeps start
immediately.
Arming level
(1, 2, or 3)
blinks
2. If you press the STATUS
button to find out why arming level is blinking:
NN SUPERVISORY (if sensor is wireless),
or NN TROUBLE (if sensor
is a hardwire)
Six trouble
beeps, then
Sensor nn
failure (if
sensor is
wireless), or
Sensor nn
trouble (if
sensor is a
hardwire).
3. If your system is not set up
to sound immediate beeps,
and the troubled sensors are
wireless, beeps begin after
10 hours if the problem is
not corrected.
50
The sensor indicated has an internal problem. The battery may be low
or the sensor cover may be off. The sensor may still be working.
Display, if
available, will
read
You will hear
1. If the problem is a low battery:
NN TROUBLE
Sensor nn
low battery.
or
2. If the sensor cover is open:
NN Open
Sensor nn
trouble.
3. If the problem is not corrected within seven days
trouble beeps begin.
A fire or smoke sensor has not been properly reset after activation or
on some sensors, the sensing chamber is dirty or covered.
Display, if
available, will
read
You will hear
1. If sirens are still on, turn
them off by entering your
access code + 1.
NN OPEN
One long
beep, then
Alarm system
is off.
1-OFF
2. If you wish, check which
hardwire smoke detectors
are open by locating those
with a light on.
3. To reset hardwire smoke
detectors, enter your access
code + 1 again.
51
References
One long
beep, then
Alarm system
is off.
Troubleshooting
Fire Sensor Trouble
Keychain Touchpad
Operations
Fire Sensor Trouble
Phone Operations
Sensor Trouble
Touchpad Operations
Sensor Trouble
4. Wireless smoke detectors
automatically reset themselves when all smoke
clears.
5. If the sensor chamber is
dirty or covered.
NN TROUBLE
Six short
beeps then
Sensor NN
Trouble.
Fail-to-Communicate
Your security system cannot communicate an alarm to the central
monitoring station. Your system will try to report to the central monitoring station three times before it tells you there is a fail-to-communicate problem. It will then try five more times.
Fail-to-Communicate
Display, if
available, will
read
You will hear
96 ALARM
PHONE FAILURE
Phone failure trouble.
If you discovered the fail-to-communicate while attempting to send
an auxiliary or silent alarm, the system will change to a police siren.
Once the siren shuts off, trouble beeps begin.
Manual Tests
The tests your security system automatically performs provide continuing reassurance that it is working properly. There are also system
tests you can do yourself on a regular basis as an added safeguard. Taking time to do regular manual tests will familiarize you with your system and alert you to anything unusual, such as cut phone lines or
sensors that have been tampered with.
It is recommended that you test your system on a weekly basis.
Testing Sensors
The sensor test checks all sensors, including panic buttons and motion
detectors. Part of the sensor test requires you to walk through your
home and open, or trip, each sensor. (See following table.)
52
Display, if
available, will
read
You will hear
1. Set the system to level 1
(disarm) by entering your
access code + 1.
1-OFF
One beep,
then Alarm
system is off.
2. Then, enter your access
code + 9.
9-SENSOR
TEST
One beep,
then Sensor
test is on.
Note
The 9 on the display will flash during the test. During sensor testing, tripping a
sensor will not cause an alarm.
Now, walk through your home or business, tripping sensors as indicated in the following table.
Sensor Test Tripping Instructions
Door/window sensor
Open the secured door or window.
Freeze sensor
Apply ice to the sensor. Do not allow
the sensor to get wet.
Glass guard sensor
Tap the glass 3 or 4 inches from the
sensor.
Motion detector
Avoid the motion detector’s view for 5
minutes, then enter its view.
Rate-of-rise heat detector
Rub your hands together until warm,
then place one hand on the detector for
30 seconds.
53
References
Do this
Troubleshooting
Sensor
Keychain Touchpad
Operations
The 15-minute test is started and the alarm memory is cleared. Every
60 seconds the system will sound a short beep and announce sensor
test is on.
Phone Operations
Do this
Touchpad Operations
To perform the sensor test:
Sensor
Do this
Shock sensor
Tap the glass twice, away from the
sensor. Wait at least 30 seconds before
testing again.
Smoke detector
Press and hold the test button until the
system sounds transmission or two
short beeps.
Emergency panic button
Press and hold the appropriate panic
button(s) for 3 full seconds.
Do this
Display, if
available, will
read
You will hear
1. As you trip each sensor following the tripping instructions:
(If the control panel does
not receive the signal from
a sensor you won’t hear
anything. This is how you
tell if a sensor is bad.)
NN OK (If sensor is working
properly.)
One beep as
each sensor is
tripped, then
Sensor nn
OK is announced after
the sensor is
tripped if
sensor is
working
properly.
2. Press the STATUS button
when you think all sensors
have been tested.
NN TEST
The system
announces
untested sensor numbers.
3. After 15 minutes the system
will exit test to level 1.
Press your access code + 9
while the system is still in
sensor test if you need more
time to trip sensors. The
system will stay in sensor
test for an additional 15
minutes.
54
You will hear
4. After all sensors have been
tested, press the STATUS
button.
ALL SENSOR
OK
Sensor test is
on, then All
sensor test
OK.
5. To exit sensor test enter
your access code + 1.
1-OFF
Alarm system is off.
Testing Communication with the Central
Monitoring Station
Note
If your system is not connected to a central monitoring station, you won’t need
to do this test.
Keychain Touchpad
Operations
One of the most important benefits of your security system is the ability to react to emergency situations and call for help immediately. To
do this, your system talks to a central monitoring station through your
telephone line. Test the communication ability regularly to make sure
you have the proper telephone link between your system and the central monitoring station. Some central monitoring stations require you
to call them before starting this test. Remember to check with them
first.
Phone Operations
Display, if
available, will
read
Touchpad Operations
Do this
Troubleshooting
References
55
Performing a Phone Communication Test
Do this
Display, if
available, will
read
You will hear
1. Set the system to level 1
(disarm) by entering your
access code + 1.
1-OFF
One beep,
then Alarm
system is off.
8-PHONE
TEST
One beep,
then Phone
test is on.
2. Then, enter your access
code + 8.
•
•
The number 8
flashes
The system returns
to level 1
when the
phone test
is complete
Phone test is
OK, alarm
system is off.
(If the test
didn’t fail.)
Note
The arming level can be changed to level 1 then to level 2 or 3 if you wish, anytime after the test has started. (If you change arming level, you will not hear
Phone test is OK, alarm system is off at the end of the test.) The phone test
will continue whether or not the display reads PHONE TEST. Most phone tests
take less than 15 minutes. However, your system will try for up to 15 minutes
to establish communication with the central monitoring station. Some central
monitoring stations may require that you call them before performing a phone
test. Check with yours before you start this test.
If service is required, contact:
_______________________________
_______________________________
56
57
58
Phone Operations
Phone Overview 58
•
Section 5:
Using the Phone for Emergencies 61
•
Section 6:
Basic Phone Operations 65
•
Section 7:
Additional Phone Features 71
57
Phone Operations
•
Phone Overview
You can operate your security system from any touch-tone phone in
your home, and you can control most features using a phone at a remote location such as in your office or car or at a pay phone. Use the
procedures in this section only when operating the system from a
phone. Phone operations are only slightly different from touchpad operation, so you’ll need to turn to the “Touchpad Operations” section of
this manual for complete feature summaries, “Help!” box information, and detailed touchpad instructions. (See the “Keychain Touchpad
Operations” section for keychain touchpad instructions.)
A phone operation pocket guide is included in the owner’s material
provided by your installer. Use this card for quick reference once you
are familiar with the operations of your security system. (We have
also included a touchpad operation pocket guide for quick reference
when operating your system from a touchpad.)
Use the basic principles below and on the following page when controlling your security system by phone.
Note
Local and remote phone control are optional features. See your installer for
details.
Using a Phone in Your Home
Lift the receiver and simply enter the information given in the instructions. Begin all phone operations with the # key. This tells your system
that you are not dialing a phone number. Please also note that the first
command used must include your primary access code. Listen for the
messages described in the procedures after each entry.
Calling Your System from a Remote Phone
With Answering Machine or Voice Mail
Ring/Pause/Ring Answer—If you have an answering machine or
voice message system, you need to dial your home or business number
and let the phone ring twice. Hang up and wait for 10 to 40 seconds,
and then call a second time. Your security system will answer by the
second ring. Once you’re connected to your system, begin all com58
mands by pressing the # key. Use your primary access code to control
your system from a remote phone.
No Answering Machine or Voice Mail
Toll Saver—If you do not have an answering machine or voice message system and you have this feature on, when you call your security
system while you’re away, it picks up on the eighth ring if there has
been an alarm or other trouble has occurred. If your system hasn’t
picked up on the eighth ring, you can hang up after the ninth ring,
knowing there have been no alarms, without completing the call and
incurring long distance charges.
12-Ring Method—If you do not have an answering machine or voice
message system and the toll saver feature is off, your security system
picks up on the twelfth ring. Your system picks up on the eighth ring
if there has been an alarm or other trouble has occurred. Once you’re
connected to your security system, begin all commands by pressing the
# key and entering your primary access code.
Check with your installer to find out if your toll saver feature is on or
off.
Receiving a Call While Operating Your System
If you receive a phone call while using a phone to operate your security
system, you will hear two long beeps for each ring from interior speakers and phones. If you wish to answer the call, simply hang up to disconnect the phone from your security system, and then answer the call
as you normally would.
If you wish to access your security system after finishing the call, you
need to start over from the beginning of the phone operation.
59
60
Using Panic Alarms:
Police, Fire, and Auxiliary
8557104A.DS4
Sending a Panic Alarm
Note
This can only be done from a phone located at your home or business. Panic
alarms cannot be activated from a remote phone.
Do this
You will hear
•
Help Help ... sensor nn.
Police panic alarm—press # and
then press 8 at least five times or
press # at least six times.
Fire panic alarm—press # and
then press 7 at least five times.
Fire Fire ... sensor nn.
Help Help ... sensor nn.
Note
When sending a panic alarm, do not wait more than 1 second between key
presses.
Troubleshooting
Auxiliary panic alarm—press #
and then press 9 at least five times.
References
61
Keychain Touchpad
Operations
To send a panic alarm:
Phone Operations
Panic alarms are used to quickly alert the central monitoring station to
an emergency in your home. You have three panic alarm options.
When one is activated, the central monitoring station knows within
seconds what your emergency is. This information helps emergency
personnel respond appropriately.
Touchpad Operations
Section 5:
Using the Phone for Emergencies
Canceling a Panic Alarm
To cancel a panic alarm:
Do this
You will hear
1. Within 15 seconds of activating
the police or auxiliary alarm,
enter # + your access code + 1.
Alarm system is off.
If canceled in time, Alarm
bypassed.
2. If 15 seconds have already passed
or if the alarm was a fire alarm,
call the central monitoring station
to cancel the alarm. (Entering
your access code + 1 after a fire
alarm only turns off the sirens. It
does not cancel the alarm.)
Resetting Smoke Detectors
To reset hardwire smoke detectors after an alarm:
Do this
You will hear
1. Turn sirens off by entering # +
your access code + 1.
Alarm system is off.
2. If you wish, check which hardwire smoke detectors are open by
locating those with a light on.
3. To reset hardwire smoke detectors, enter # + your access code +
1 again.
4. Verify that hardwire smoke detectors are reset by checking to see
that the lights are off.
62
Alarm system is off.
Wireless smoke detectors automatically reset themselves after all
smoke has cleared.
Preventing Accidental Alarms
Canceling Accidental Alarms
The most common cause of an accidental alarm is unintentionally tripping sensors like those on an armed window or door.
Do this
Display, if
available, will
read
You will hear
•
1-OFF
Alarm system is off.
Enter # + your access code
+ 1.
Keychain Touchpad
Operations
To cancel an alarm:
Phone Operations
One of the most important things to remember about your security system is that most accidental alarms occur during entry and exit delays.
For example, if you arm the system and then run upstairs for something you forgot, the exit delay time will expire. As soon as an armed
door is opened or the motion detector is tripped, an alarm will sound.
Touchpad Operations
To reset wireless smoke detectors:
Troubleshooting
References
63
64
Turning Security Protection On
ON
Turning security protection on means you are arming your system.
Note
The exit delay is the period defined by your installer for you to exit after turning
security protection on.
To turn security protection on when you stay in:
You will hear
1. Enter # + your access code + 2.
Alarm system is on level
2.
2. Additional options:
• To turn off lights, press 0 within 5
seconds.
• To cancel the exit delay, press 4
within 5 seconds.
3. If entering or exiting, do so during the delay period or an alarm
will sound.
No delay.
Two short beeps indicating the end of the exit delay.
Note
If an alarm sounds, cancel it by entering # + your access code + 1.
References
65
Troubleshooting
One beep every 4 seconds
for most of the delay, then
one beep every second for
the last 10 seconds of the
delay.
Keychain Touchpad
Operations
Do this
Phone Operations
When You Stay In—Arming to
Level 2-Stay
Touchpad Operations
Section 6:
Basic Phone Operations
When You Go Away—
Arming to Level 3-Away
Note
The exit delay is the period defined by your installer for you to exit after turning
security protection on.
To turn security protection on when you go away:
Do this
You will hear
1. Enter # + your access code + 3.
Alarm system is on level
3.
2. Additional options:
• To turn off lights, press 0
within 5 seconds.
• To cancel the exit delay, press
4 within 5 seconds.
No delay.
3. If anyone is exiting, do so during
the exit period.
Note
If an alarm sounds, cancel it by entering # + your access code + 1.
Arming with a Window or Door Open
Use this procedure to tell your system to ignore (or bypass) certain
sensors.
Note
This procedure shall not be used in UL listed installations. (See “Opening a
Door or Window When Protection is On.”)
66
Do this
You will hear
•
Alarm system is on level
2. Sensor nn bypassed.
If you are staying in, enter # +
your access code + 2 + 6.
or
If you are going away, enter # +
your access code + 3 + 6.
Alarm system is on level
3. Sensor nn bypassed.
CAUTION
If open doors or windows caused the protest beeps and they are left open, they
will not be protected.
Opening a Door or Window When
Protection Is On
You will hear
Press # + your access code + 6 +
the two-digit sensor number.
After 5 seconds, Sensor
nn bypassed.
Instant Arming with No
Exit/Entry Delay Time
67
References
Your security system has built-in exit and entry delay times.
Troubleshooting
You can now open selected doors
and/or windows without setting
off an alarm. (Repeating the entry
removes the sensor bypass.)
Keychain Touchpad
Operations
Before opening a door or window when security protection is already on:
Phone Operations
Note
If an alarm sounds, cancel by entering # + your access code + 1.
Do this
Touchpad Operations
To turn security protection on with a window or door open:
To turn on security protection with no entry/exit delay time:
Do this
You will hear
•
Alarm system is on level
2, no delay.
If you are staying in, enter # +
your access code + 2 + 4.
or
If you are going away, enter # +
your access code + 3 + 4.
or
Alarm system is on level
3, no delay.
Note
Changing the protection level will set the sensors back to their normal delay
times unless 4 is again pressed after entering # + your access code + new
protection level.
Turning Security Protection Off
OFF
Turning security protection off means you are disarming your system.
Level 1-Off is also used to cancel most alarms (see “Canceling Accidental Alarms” in section 5).
To turn security protection off:
Do this
You will hear
•
Alarm system is off.
Enter # + your access code + 1.
WARNING!
If you enter your home and controlled lights that are normally off are on
and/or you hear alarm sirens, an intruder may be inside or another emergency may have occurred. The same may be true if you enter a door with
an entry delay and instead of the normal entry delay beeps (two beeps
every 2 seconds) you hear faster beeping (three beeps every 2 seconds).
The alarm sirens may have “timed-out” and these faster beeps indicate
that an alarm occurred. Leave immediately, and call for emergency help
from a neighbor’s phone.
68
The status feature allows you to quickly check the operations of your
system anytime. It’s a good idea to check your system status whenever
you see a blinking arming level number on a touchpad display.
Touchpad Operations
Checking Your System Status
To check the current arming level (short status check):
You will hear
•
The system announces:
Press # + *.
•
•
Note
See section 9 for an explanation of status check messages.
Keychain Touchpad
Operations
the arming level (1Off, 2-Stay, or 3Away) and system
troubles if any
or
any recent alarms
(This is only indicated the first status
check after an alarm.)
Phone Operations
Do this
Troubleshooting
References
69
To review recent activity in your home (full status check):
Do this
You will hear
•
The system announces:
Press # + your access code + * +
1.
•
•
•
•
the arming level (1Off, 2-Stay, or 3Away)
system troubles if
any, battery status,
and power status
whether or not the
energy saver is on
and the current temperature (if energy
saver is installed)
or
any recent alarms
(This is only indicated the first check
after an alarm.)
Note
See section 9 for an explanation of status check messages.
To check for the most recent alarms (alarm memory):
Do this
You will hear
•
The system announces:
Enter # + your access code +
* + 5.
•
any recent alarms
or
Alarm memory is OK.
Note
See section 9 for an explanation of status check messages.
70
Setting and Changing
Access Codes
Touchpad Operations
Section 7:
Additional Phone Features
An access code must be entered to begin most operations with your security system.
Do this
You will hear
1. Set the system to level 1 (disarm)
by entering # + your access code
+ 1.
Alarm system is off.
2. Get into change settings mode by
entering # + your primary access
code + * + 8.
System memory open.
4. Wait 5 seconds.
System XX.
71
References
5. Within 5 seconds, enter the new
four-digit code you want to use.
(Once you begin entering the new
code, you have 5 seconds to enter
each number.)
Troubleshooting
3. Enter 00 for the primary access
code, from 01 to 04 for secondary
access codes, or from 05 to 23 for
arm/disarm codes.
Keychain Touchpad
Operations
To set or change an access code:
Phone Operations
When setting or changing access codes:
• A “6” should not be used in any part of an access code. The
“6” is reserved for bypassing sensors.
• The first digit of an access code should not be a “4” or “0”
since this may interfere with system disarming.
• It is recommended that obvious codes such as 1234 or 1111
not be used.
Do this
You will hear
6. Wait 5 seconds.
XXXX OK.
If the system announces fail, refer
to the help box that follows.
Repeat steps 3 through 6.
7. Repeat steps 3 through 5 to set or
change additional access codes.
8. Exit change settings mode by
entering 99.
After 5 seconds, System
99.
After 5 seconds, Goodbye.
Note
If you do not complete a step within 60 seconds your system announces
Goodbye and exits change settings mode. If this happens, repeat steps 2–5.
To delete an access code:
Do this
You will hear
1. Follow steps 1 through 4 in the
previous procedure.
2. At step 5, enter your primary
access code as the four-digit code
you want to delete.
3. Follow the rest of the steps to
delete additional codes or to exit
change settings mode.
Note
You cannot delete your primary access code.
72
OK
The energy saver feature can override your normal heating and air
conditioning temperature settings if you have this option installed.
Touchpad Operations
Using the Energy Saver
Feature
Turning Energy Saver On and Off
To turn the energy saver feature on or off:
Do this
You will hear
•
Energy saver is on.
Enter # + your access code + 5.
Phone Operations
To override your normal heating or air conditioning settings, turn on
the energy saver feature. When you are ready to return to your normal
temperature control settings, turn the feature off.
or
Setting Energy Saver Temperatures
Initially, you must set the energy saver to the desired high and low
temperatures. You don’t need to reset them again, unless you want to
change temperature settings.
To set high and low energy saver temperatures:
You will hear
1. If not done already, set the system
to level 1 (disarm) by entering # +
your access code + 1.
Alarm system is off.
2. Get into change settings mode by
entering # + your access code + *
+ 8.
System memory open.
Troubleshooting
Do this
Keychain Touchpad
Operations
Energy saver is off.
3. Enter 53.
System 53.
73
References
4. Wait 5 seconds.
Do this
You will hear
5. Within 5 seconds of the message,
enter the desired low temperature (45°F or higher).
6. Wait 5 seconds.
nn OK.
If the system announces invalid,
retry your entry from step 3.
(nn = new setting)
7. Enter 54.
8. Wait 5 seconds.
System 54.
9. Within 5 seconds of the message,
enter the desired high temperature (90°F or lower).
10. Wait 5 seconds.
nn OK.
If the system announces invalid,
retry your entry from step 7.
11. Exit change settings mode by
entering 99.
(nn = new setting)
After 5 seconds, System
99.
After 5 seconds, Goodbye.
Controlling Lights and
Appliances
Your security system can be used to control various lights and appliances in your home when plugged into special wireless lamp or appliance modules.
To turn all lights on or off:
Do this
You will hear
•
On (if lights are off).
Enter # + your access code + 0.
Off (if lights are on).
74
To turn individual lights and devices on and off:
Do this
You will hear
•
nn on (if lights/devices
are off), then one short
beep.
nn off (if lights/devices
are on), then one short
beep.
Using the Quiet Mode Feature
When the quiet mode feature is off, all audio responses to commands
will be announced through the internal speakers.
Note
The touchpad quiet mode must be left off in UL listed installations.
Keychain Touchpad
Operations
If you are using your home phone with the quiet mode on, the usual
voice messages for most commands are announced over the phone
only. Many beeps will be silenced. (Exit beeps and arming level beeps
when you turn security protection on or off are heard from internal
speakers.) Quiet mode has no affect on touchpads that do not have a
display (wireless). See the “Touchpad Operations” section for using
quiet mode from a touchpad with display (alphanumeric).
Phone Operations
Press # + #, then within 3 seconds, enter the light or appliance
number you wish to turn on or off.
(Your installer has these numbers.)
Touchpad Operations
Individual Light and Appliance Control
To turn the touchpad quiet feature on or off:
1. Turn security protection off by
entering # + your access code +
1.
Alarm system is off.
2. Enter # + your access code again
and press * + 8.
System settings.
3. Enter * + 7 7.
System 7 7.
75
References
You will hear
Troubleshooting
Do this
Do this
You will hear
4. Wait 5 seconds.
On (if touchpad quiet was
off).
or
Off (if touchpad quiet was
on).
5. Exit the change settings mode by
entering 9 9.
After 5 seconds, System 9
9.
After 5 seconds, Goodbye.
Using the Chime Feature
When you have security protection turned off (disarmed to Level 1Off), you can turn on the chime feature to let you know if anyone enters or leaves, even though your doors and windows are not armed.
To turn the chime feature on and off:
Do this
You will hear
1. Turn security protection off by
entering # + your access code +
1.
Alarm system is off.
2. Enter # + your access code + 7.
On.
or
Off.
The No Activity Feature
Your security system monitors normal activities in your home.
76
?
Do this
You will hear
1. If no activity is recorded for the
set time frame:
Help, help sensor 7 9.
3. Cancel alarm within 5 minutes if
there is no emergency by entering
# + your access code + 1.
One long beep, then
Alarm system is off, alarm
bypassed.
The Touchpad Tamper Feature
The touchpad tamper feature monitors the number of keys pressed on
a touchpad or phone in your home or business.
Keychain Touchpad
Operations
Note
The no activity feature is only available if your installer has turned it on.
Phone Operations
2. If alarm is not canceled within 5
minutes, the central monitoring
station is called and emergency
personnel are sent. Sirens will
stop once the message has
reached the central monitoring
station.
Auxiliary alarms will
sound only from interior
sirens.
Touchpad Operations
What happens when the no activity feature activates:
What happens when the touchpad tamper feature is activated:
You will hear
•
Help, help, sensor 7 7.
If approximately 40 or more keys
are pressed without hitting a valid
code:
Note
An incorrect key press is defined as any number key that is not part of a valid
access code.
References
77
Troubleshooting
Do this
Using Your Phone with Electronic Banking
and Voice Mail
Your security system can be connected to the central monitoring station through your phone line. Certain types of calls can confuse your
system and cause an accidental alarm or interfere with a real emergency. To avoid any problems, you should temporarily disable security
system phone commands from your phone line if
•
•
the call you place requires the use of the # and/or * keys, as with
electronic banking or voice mail;
you call to operate another security system from your home.
To temporarily disable security system phone commands from
your phone line:
Do this
You will hear
1. Press # + your access code + * +
6.
2. You can now place a call and your
security system will ignore the
use of the # and * keys. Once you
hang up, your security system will
again recognize the tones of the #
and * keys.
Opening and Closing Reports
Feature
If you want to monitor the use of your security system, the opening
and closing reports feature, set up by your installer, sends details of
the arming and disarming activities of your system to the central monitoring station.
If the opening and closing reports feature is installed:
After you arm or disarm your security system, your phone lines will be
briefly tied up when your system reports to the central monitoring station.
78
Automatic Test Features
Your security system is able to automatically test itself and alert you if
it discovers any system problems. You can find and fix most system
troubles yourself (see section 9, “Troubleshooting”); however, some
system troubles may require you to call your security system dealer for
assistance.
When your security system detects a problem, interior sirens sound
trouble beeps rapidly six times, and then again in 60 seconds, continuing this pattern until the trouble condition is fixed. If your system is in
level 2 or 3 and a problem occurs, most trouble beeps won’t start until
you disarm your system to level 1. If you do a status check (see
“Checking Your System Status”) or change the arming level, beeps
and voice messages will stop. If the problem is not corrected, beeps
and voice messages start again 10 hours later.
AC Power Failure
Your system may have been accidentally unplugged from AC power
or there may be an AC power outage. The backup battery will take
over. If AC power is not restored within 15 minutes, the system will
alert you (and the central monitoring station if your installer enabled
this feature).
You will hear
1. Press # + * to check the condition
of your system.
AC power failure.
References
79
Troubleshooting
AC Power Failure
Keychain Touchpad
Operations
Trouble Messages
Phone Operations
Possible Trouble Signals
Touchpad Operations
System Tests
AC Power Failure
You will hear
2. If the power goes out or your system is accidently unplugged and
power isn’t restored within 15
minutes:
• 90-TROUBLE AC POWER is
reported to the central monitoring station if your installer
has turned this feature on.
• If you have the energy saver
feature on, it will shut down
to conserve battery power and
control will be returned to
your furnace thermostat.
• If AC power failure lasts long
enough to drain the backup
battery to the “low battery”
level, the system will tell you
that you have a low battery
problem.
Six trouble beeps in a
row, every 60 seconds.
System Battery Failure
This means that the emergency backup battery has been drained and
must be recharged or replaced. If your AC power is not working, your
security system may shut down once the battery is drained. When AC
power is restored, your security system will recharge its battery.
System Battery Failure
You will hear
•
Six trouble beeps from interior sirens.
91 TROUBLE CPU LOW BATTERY is reported to the central
monitoring station.
80
The sensor indicated is not communicating with the system.
You will hear
1. If your system is set up to sound
immediate trouble beeps, or if the
sensor with the problem is a
hardwire sensor, trouble beeps
start immediately.
Six trouble beeps, then
Sensor nn failure (if sensor is wireless), or Sensor
nn trouble (if sensor is a
hardwire).
2. Press # + * to find out what the
trouble is.
3. If your system is not set up to
sound immediate beeps, and the
troubled sensors are wireless,
beeps begin after 10 hours if the
problem is not corrected.
The sensor indicated has an internal problem. The battery may be low
or the sensor cover may be off. The sensor may still be working.
Sensor Trouble
You will hear
1. If the problem is a low battery:
Sensor nn low battery.
Keychain Touchpad
Operations
Sensor Trouble
Phone Operations
Sensor Failure
Touchpad Operations
Sensor Failure
or
Sensor nn trouble.
2. If the sensor cover is open:
References
81
Troubleshooting
3. If the problem is not corrected
within seven days trouble beeps
begin.
Fire Sensor Trouble
A fire or smoke sensor has not been properly reset after activation.
Fire Sensor Trouble
You will hear
1. If sirens are still on, turn them off
by entering # + your access code
+ 1.
One long beep, then
Alarm system is off.
2. If you wish, check which hardwire smoke detectors are open by
locating those with a light on.
3. To reset hardwire smoke detectors, enter # + your access code
+ 1 again.
One long beep, then
Alarm system is off.
4. Wireless smoke detectors automatically reset themselves when
all smoke clears.
Fail-to-Communicate
Your security system cannot communicate an alarm to the central
monitoring station. Your system will try to report to the central monitoring station three times before it tells you there is a fail-to-communicate problem. It will then try five more times.
Fail-to-Communicate
You will hear
Phone failure trouble.
If the control panel discovered the fail-to-communicate while attempting to send an auxiliary or silent alarm, the system will change
to a police siren. Once the siren shuts off, trouble beeps begin.
Manual Tests
The tests your security system automatically performs provide continuing reassurance that it is working properly. There are also system
tests you can do yourself on a regular basis as an added safeguard.
It is recommended that you test the system on a weekly basis.
82
The sensor test checks all sensors, including panic buttons and motion
detectors. Part of the sensor test requires you to walk through your
home or business and open, or trip, each sensor.
To perform the sensor test:
You will hear
1. Set the system to level 1 (disarm)
by entering # + your access code
+ 1.
One beep, then Alarm
system is off.
2. Then, enter # + your access code
+ 9.
One beep, then Sensor
test is on.
Note
The 9 on the display will flash during the test. During sensor testing, tripping
a sensor will not cause an alarm.
Now, walk through your home or business, tripping sensors as indicated in the “Sensor Test Tripping Instructions” table located in Section
4.
You will hear
1. As you trip each sensor following
the tripping instructions:
(If the control panel does not
receive the signal from a sensor
you won’t hear anything. This is
how you tell if a sensor is bad.)
One beep as each sensor
is tripped, then Sensor nn
OK is announced after the
sensor is tripped if sensor
is working properly.
2. Press the * key when you think all
sensors have been tested.
The system announces
untested sensor numbers.
References
83
Troubleshooting
Do this
Keychain Touchpad
Operations
The 15-minute test is started and the alarm memory is cleared. Every
60 seconds the system will sound a short beep and announce sensor
test is on.
Phone Operations
Do this
Touchpad Operations
Testing Sensors
Do this
You will hear
3. After 15 minutes the system will
exit test to level 1. Press # + your
access code + 9 while the system
is still in sensor test if you need
more time to trip sensors. The
system will stay in sensor test for
an additional 15 minutes.
4. After all sensors have been tested,
press the * key.
Sensor test is on, then All
sensor test OK.
5. To exit sensor test enter # + your
access code + 1.
Alarm system is off.
Testing Communication with the Central Monitoring
Station
One of the most important benefits of your security system is the ability to react and call for help immediately. To do this, your system talks
to a central monitoring station through your telephone lines. Test the
communication ability regularly to make sure you have the proper
telephone link between your system and the central monitoring station.
Some central monitoring stations require you to call them before starting this test. Remember to check with them first.
Note
If your system is not connected to a central monitoring station, you won’t need
to do this test.
Performing a Phone Communication Test
Do this
You will hear
1. Set the system to level 1 (disarm)
by entering # + your access code
+ 1.
One beep, then Alarm
system is off.
2. Then, enter # + your access code
+ 8.
One beep, then Phone test
is on.
Phone test is OK, alarm
system is off.
(If the test didn’t fail.)
84
If service is required, contact:
_______________________________
_______________________________
Phone Operations
If you start the phone test from a remote phone (off-site), your security system
will go back to the level it was in before the test.
Touchpad Operations
Notes
The arming level can be changed to level 1 then to level 2 or 3 if you wish, anytime after the test has started. (If you change arming level, you will not hear
Phone test is OK, alarm system is off at the end of the test.) The phone test
will continue whether or not the display reads PHONE TEST. Most phone tests
take less than 15 minutes. However, your system will try for up to 15 minutes
to establish communication with the central monitoring station. Some central
monitoring stations may require that you call them before performing a phone
test. Check with yours before you start this test.
Keychain Touchpad
Operations
Troubleshooting
References
85
86
Section 8:
Basic Keychain Operations 89
•
Phone Operations
Keychain Touchpad
Operations
Troubleshooting
87
Keychain Overview 88
•
Keychain Touchpad Operations
Touchpad Operations
References
Keychain Overview
A keychain touchpad can be used to operate the basic functions of your
security system. The keychain allows you to conveniently keep a
touchpad handy for entering and exiting your home.
Use the procedures in this section only when using a keychain touchpad. Other touchpad operations and phone operations are more extensive than the functions performed by a keychain touchpad. Turn to the
“Touchpad Operations” and/or “Phone Operations” section of this
manual for additional operating instructions.
88
Using Panic Alarms:
Police, Silent, and Auxiliary
8557104A.DS4
All panic alarms call the central monitoring station, but each sounds
and reacts differently when activated.
•
•
The order of alarm priority is as follows: fire, police, and auxiliary. A
higher priority alarm will cause the lower priority alarm sound to
change.
References
89
Troubleshooting
Emergency panic alarms are active in all security levels if your installer has turned them on.
Keychain Touchpad
Operations
•
The police panic alarm is a slow on-off-on-off sound from interior and exterior sirens to scare off an intruder and alert neighbors
to your trouble. The central monitoring station responds by calling the police.
The silent panic alarm does not sound an alarm at your home or
business but silently tells the central monitoring station to send
police to your home or business.
The auxiliary panic alarm is a fast on-off-on-off sound from
interior sirens only to signal a medical or other type of emergency. The central monitoring station responds by calling the service or agency, such as an ambulance, you have designated.
Phone Operations
Panic alarms are used to quickly alert the central monitoring station to
an emergency in your home. Your installer can enable the police, silent, or auxiliary panic alarm on your keychain touchpad. When a panic alarm is activated, the central monitoring station knows
immediately what your emergency is. This information helps emergency personnel respond appropriately.
Touchpad Operations
Section 8:
Basic Keychain Operations
Sending a Panic Alarm
To send a panic alarm:
Do this
•
If within range of a system speaker, you will hear
Police, Silent, or Auxiliary
Panic Alarm
From a 2- or 4-button keychain,
press and hold the Unlock and
Lock buttons together until the
light blinks.
•
A loud beeping alarm,
then Help Help...sensor
nn. (If the silent alarm is
enabled, you will not hear
beeps or announcements.)
Auxiliary Panic Alarm
From a 4-button keychain, press
and hold the Star and Lights buttons together until the light blinks.
A loud rapidly beeping
alarm, then Help
Help...sensor 8, 2.
Canceling a Panic Alarm
To cancel a panic alarm:
Do this
If within range of a system speaker, you will hear
1. Within 15 seconds of activating
the alarm, press and hold the
Unlock button until the light
blinks.
One long beep, then
Alarm system is off.
If canceled, Alarm bypassed.
2. If 15 seconds have already
passed, call the central monitoring
station to cancel the alarm.
Turning Security Protection On
ON
Turning security protection on means you are arming your system.
Your installer can set up your keychain touchpad to either increase the
90
•
•
You can also arm your system with a door or window open. While the
rest of your home, and second-floor window, for example, can be “bypassed” and left open and unarmed.
Note
The exit delay is the period defined by your installer for you to exit after turning
security protection on. The programmed exit delay is _______ seconds.
If within range of a system speaker, you will hear
1. Press and hold the Lock button
until the keychain light blinks.
Security protection will be turned
on as programmed (level 2 or 3).
Two or three short beeps,
then Alarm system is on
level (2 or 3).
2. If anyone is exiting, do so during
the exit delay period. An alarm
will sound if you exit after the
delay period is over.
One beep every 4 seconds
for most of the delay, then
one beep every second for
the last 10 seconds of the
delay.
91
References
Two or three short beeps
indicating the end of the
exit delay.
Troubleshooting
Do this
Keychain Touchpad
Operations
To turn security protection on:
Phone Operations
•
Level 2-Stay turns on protection for exterior entrances like doors
and windows but doesn’t arm interior sensors like motion detectors. You might use Level 2-Stay at night when everyone is sleeping or anytime you want the freedom to move around inside your
home with outside doors and windows protected.
Level 3-Away turns on protection for all security sensors, including exterior doors and windows and interior motion detectors and
doors. Use Level 3-Away for complete security protection when
no one is in your home.
Level 3-Away, No Delay offers the same level of protection as
Level 3-Away, however the “no delay” option cancels the exit or
entery delay, immediately turning security protection on. Use this
option when no one will exit or enter after your system is armed.
Touchpad Operations
arming level each time the lock button is pressed (level 1 to level 2,
level 2 to level 3) or to arm directly to level 3 with no exit/entry delay.
Do this
If within range of a system speaker, you will hear
3. If your keychain is programmed
to do so, you can cancel the exit
delay by pressing the Star button
until the keychain light blinks.
No delay.
Note
If an alarm sounds, turn security protection back off and then investigate the
problem. See the help box for details.
To turn security protection on with a door or window open:
Do this
If within range of a system speaker, you will hear
1. Press and hold the Lock button.
Sensor nn open, protest
beeps (long-short-long).
2. Press and hold the Lock button
again.
Alarm system is on level
2 (or 3), sensor nn bypassed.
92
What if I receive the protest message Sensor nn is open?
This means the system detects an open window, door, or other sensor. You can close the window or other open sensor, and then repeat
the procedure to turn on security protection. If you prefer to leave
the window or other sensor open, follow the “Arming with a Door
or Window Open” procedure for turning security protection on with
a door or window open.
CAUTION
If open doors or windows caused the protest beeps and they are left open,
they will not be protected.
Phone Operations
Note
If you arm your system, exit, and accidentally leave the door open, then
when the exit delay time expires, the police alarm will sound and the central
monitoring station will be notified of an exit fault. Check with your central
monitoring station for its procedures following this alarm.
Touchpad Operations
Help!
Turning Security Protection Off
Turning security protection off means you are disarming your system.
When you disarm to Level 1-Off, you turn off all protection to doors,
windows, and motion detectors. However, your security system is not
completely off in level 1. Some features, like police, silent, and auxiliary panic buttons, are still on. You might use Level 1-Off when you
enter or when you want to go in and out of your home freely and do
not wish to have any intrusion sensors on. Level 1-Off is also used to
cancel an accidental alarm.
Keychain Touchpad
Operations
OFF
Troubleshooting
References
93
To turn security protection off:
Do this
If within range of a system speaker, you will hear
•
One long beep, then
Alarm system is off.
Press and hold the Unlock button
until the light blinks.
WARNING!
If you enter your home and controlled lights that are normally off are on
and/or you hear alarm sirens, an intruder may be inside or another emergency may have occurred. The same may be true if you enter a door with
an entry delay and instead of the normal entry delay beeps (two beeps
every 2 seconds) you hear faster beeping (three beeps every 2 seconds).
The alarm sirens may have “timed-out” and these faster beeps indicate
that an alarm occurred. Leave immediately, and call for emergency help
from a neighbor’s phone.
Help!
What if pulsing beeps sound after I turn protection off?
This indicates an alarm occurred while the system protection was
on. To cancel the beeps, repeat the procedure to turn protection off.
(Press and hold the Unlock button.) Use a full-key touchpad and
press COMMAND + STATUS to find out what alarm occurred or
press # + CODE + * + 5 from a touch-tone telephone.
CAUTION
If an alarm occurred while you were away, an intruder may still be in your
home. You should have emergency personnel check out the situation before you enter.
Using the Energy Saver
Feature
The energy saver feature can override your normal heating and air
conditioning temperature settings. This allows you to use more energy-efficient settings when you are away from your home or business.
For example, if your heating system at home is usually set at 68°F, you
can turn the energy saver on and set the temperature to 55°F while you
are away. You can call your system from work to check the tempera94
In addition to controlling temperature, the energy saver feature notifies
the central monitoring station if your heating or air conditioning unit
fails, before pipes freeze or pets are harmed by extreme heat or cold.
Touchpad Operations
ture and turn the energy saver off to give temperature control back to
your furnace thermostat. Your house then heats to your furnace temperature setting. In this case, 68°F. You control your air conditioning
temperatures the same way.
Turning Energy Saver On and Off
Note
The following keychain procedures can be used for either the energy saver
feature or to instant arm (no delay) depending on how your installer programmed your keychain. Ask your installer for details.
Do this
If within range of a system speaker, you will hear
•
Energy saver is on, then
one short beep.
Press and hold the Star button
until the light blinks. Energy
saver turns on (if it was off) or off
(if it was on).
or
Energy saver is off, then
one short beep.
95
References
Your security system can be used to control various lights and appliances in your home when they are plugged into special wireless lamp
or appliance modules. These modules connect your lights or appliances to your security system, allowing you to turn them on and off using
touchpads or your telephone. You can turn all devices plugged into a
lamp module on or off at the same time or turn individual lights on and
off.
Troubleshooting
Controlling Lights and
Appliances
Keychain Touchpad
Operations
To turn the energy saver feature on or off:
Phone Operations
To override your normal heating or air conditioning settings, turn on
the energy saver feature. When you are ready to return to your normal
temperature control settings, turn the feature off. You use the same
steps for turning the feature on and off.
The lights connected to your security system also play an important
role in emergency situations. For example, all lights connected to your
security system automatically turn on during alarms. Some lights turn
on when you enter or exit and remain on for 5 minutes, giving you ample light and time to see your way.
Your keychain touchpad allows you to make controlled lights flash on
and off continuously. You might use this feature if you are in bed and
hear a noise downstairs. The lights may scare off an intruder inside,
and if the noise is not an intruder or other emergency, you won’t unnecessarily wake your neighbors.
To turn all lights on or off:
Do this
If within range of a system speaker, you will hear
•
On (if lights are off), then
one short beep.
Press and hold the Lights button
until the light blinks.
Off (if lights are on), then
one short beep.
To make controlled lights flash on and off continuously:
Do this
1. Press and hold the Lights button
for about 3 seconds.
2. To stop the lights from flashing,
turn security protection on or off,
or press any key on your keychain
touchpad.
96
How do lights connected to my security system react during an
alarm?
Alarm sirens automatically stop ringing after 4 minutes, however,
lights caused by an alarm will stay on until the system is reset by
disarming.
•
•
•
Notes
The operation of the lights in an alarm condition is supplementary to the
alarm siren.
Lamps plugged into lamp modules set to unit setting 1 turn on during entry
or exit delays. Lamps plugged into lamp modules set to unit setting 2 flash
one, two, or three times when the arming level is changed to level 1, 2, or
3. Appliance modules will turn off when all lights are turned off.
Keychain Touchpad
Operations
During both fire and auxiliary alarms, lights turn on and
remain on with no flashing until 5 minutes after your system is
disarmed or armed to a new security level.
During a police alarm, lights flash on and off until the siren is
canceled or after 4 minutes. After 4 minutes, lights remain on
steadily until 5 minutes after your
system is disarmed.
During an intrusion alarm, lights flash on and off until the siren
is canceled or after 4 minutes. After 4 minutes, lights remain
on steadily until 5 minutes after your system is disarmed.
During entry and exit delay time, selected lights turn on and
remain on for 5 minutes.
Phone Operations
•
Touchpad Operations
Help!
Troubleshooting
References
97
98
Phone Operations
Keychain Touchpad
Operations
Troubleshooting
References
99
Section 9:
Troubleshooting 67
•
Troubleshooting
Touchpad Operations
Section 9:
Troubleshooting
Security System Sounds
Your security system uses a variety of different alarm sirens, status
beeps, voice messages, trouble beeps, and indicator lights to communicate with you. The next few pages describe the different sounds and
what they mean. Try to familiarize yourself with the differences. You
will hear some sounds each time you tell your security system to do
something, like arm or disarm. Some sounds you will hear only when
there is a problem with the system, like a low battery. And, there are
sounds you will only hear in an emergency. Getting to know your system sounds allows you to react quickly and appropriately to the messages you hear.
Sounds You’ll Hear When an Alarm Is Tripped
Exterior and interior sirens produce different alarm sounds that indicate the conditions described below.)
Alarm Type
Alarm Sound
Sound Pattern
Police or Intrusion
Alarm
Slow on-off-on-off
______
Fire Alarm
Loud, steady tone
______________
Auxiliary Alarm
Fast on-off-on-off
__ __ __ __ __
______
Notes
If a police alarm is sounding and then a fire alarm is tripped, the fire alarm overrides the police alarm. The police and fire alarms override an auxiliary alarm.
Sirens will “time-out” (shut off) after sounding for a certain length of time. The
default siren time-out is 4 minutes. This means that after an alarm has gone
off, the sirens will stop ringing after 4 minutes. The alarm is still in progress after the sirens time-out, until you manually disarm your system. Your installer
can set the siren time-out anywhere from 1 minute to 30 minutes.
100
The touchpad with display (alphanumeric) and all interior sirens and
piezos (speakers) produce operating beeps and trouble beeps to tell
you what your system is doing or if there is a problem. The table below
describes the operating and trouble beeps you may hear from your system.
Sound
tern
Pat-
When You
Arm or
Disarm
1 beep
Your system disarmed to level 1.
2 beeps
Your system armed immediately
to level 2 or armed to level 2 and
exit delay has expired.
3 beeps
1 beep every
4 seconds
2 beeps
every 2
seconds
Chime
Feature On
2 beeps
(short beeps)
Your system is armed and the exit
delay is in progress.
(Beeps sound once per second during last 10 seconds.)
Your system is armed and the entry delay is in progress.
(Beeps sound once per second during last 10 seconds.)
Your system is armed, an alarm
has occurred, the alarm sirens have
already “timed-out,” and the entry
delay is in progress.
(Beeps sound once per second during last 10 seconds.)
Your system is in level 1, the
chime feature is on, and an exterior
sensor like a door or window is
opened.
References
101
Troubleshooting
3 beeps
every 2
seconds
Your system armed immediately
to level 3 or armed to level 3 and
exit delay has expired.
Keychain Touchpad
Operations
When You
Enter or Exit
What These Sounds Mean
Phone Operations
Type of
Sound
Touchpad Operations
Sounds You’ll Hear When Operating Your System
Type of
Sound
Sound
tern
Pat-
Protest Beeps
2 beep
continuous
sequence
(1 long, 1
short)
What These Sounds Mean
You are trying to arm to level 2 or
3 with an exterior sensor like a
door or window open. Close the
sensor or see section “Arming with
a Door or Window Open.”
or
You are trying to disarm after an
alarm has occurred and the alarm
sirens have already “timed-out.”
System
Trouble
Beeps
6 beep
sequence
once every
60 seconds
(6 beeps may
sound for any
of these reasons)
1. Your system has an AC power
failure.
2. Your system has low sensor or
touchpad battery.
3. Your control panel can’t communicate with a hardwire
device, such as a hardwire
sensor.
4. Your system has sensor or
touchpad failure.
5. Your system has a low battery.
6. The energy saver feature stops
reporting.
7. Your system has failed to
communicate with the central
monitoring station.
8. Your system memory has
failed.
9. There is a siren wiring problem (if feature is on).
Press the STATUS button to find
out which problem is occurring.
Sounds You’ll Hear if There Is a Problem with Your System
This table describes the conditions under which trouble beeps occur
and when they begin. (These sounds are heard from interior sirens and
touchpads if available.)
102
AC Power
Failure
15 minutes after failure is detected. (If programmed to do so, a report is sent to the central
monitoring station at this time.)
Level 1.
Fail-toCommunicate
After third dial attempt.
Levels 1 and 2.
Hardwire
Sensor
Trouble
As soon as the control panel detects the condition.
Levels 1 and 2.
Panel Low
Battery
As soon as the control panel detects the condition.
Levels 1 and 2.
Phone Fail
Trouble
As soon as the control panel detects the condition.
Levels 1 and 2.
Basic Displays on Your Touchpad
The table below is a very basic listing of alphanumeric touchpad display elements.
Keychain Touchpad
Operations
Levels in Which
Beeps Sound
Phone Operations
When Beeps Begin
Touchpad Operations
Condition
Display*
No Flashing Number
Flashing Number†
1-OFF
System is off and not
armed.
A sensor is opened or
something is wrong, such
as a low battery or sensor
failure.
Troubleshooting
Display*
No Flashing Number
Flashing Number†
References
103
2-STAY
System is armed to level 2.
System is armed to level 2,
and a door or window sensor has been bypassed or
something is wrong, such
as a low battery or sensor
failure.
3-AWAY
System is armed to level 3.
System is armed to level 3,
and a door or window sensor has been bypassed or
something is wrong, such
as a low battery or sensor
failure.
*Not all touchpads have a display available.
†The most common reason a display number flashes is that security pro-
tection has been turned on with a door or window open (sensor bypass).
Silencing Trouble Beeps
Pressing the STATUS button on a touchpad, pressing # + * from any
phone, or changing the arming level while the system has a trouble
condition stops trouble beeps and voice messages. Trouble beeps begin again 10 hours later unless the trouble condition is resolved.
Troubleshooting Problems
This section contains a summary of system troubleshooting techniques.
104
Arming/
Disarming
System won’t arm.
1. If arming to level 2 or
level 3, make sure all
monitored perimeter
doors and windows are
closed.
2. Press # + * for a voice
message of the problem.
3. Someone else is controlling your system from a
different touchpad or
phone.
Bypass
Panel announces Invalid when you try
to bypass a sensor.
You are trying to bypass a 24hour sensor that cannot be bypassed or a sensor that is not
active in the current security
level. You don’t need to bypass this sensor.
Batteries
Panel announces
System battery failure or Sensor nn low
battery.
Call your security system installer.
False
Alarm
Alarm is being sent.
Enter your access code + 1 to
cancel the alarm. This command bypasses the alarm if
done within 15 seconds and
does not send a call to the central monitoring station. Fire
alarms will send a call to the
station even after canceling.
Smoke
Sensor
Beeps once every
minute.
Batteries are low. Replace the
smoke sensor batteries.
References
105
Troubleshooting
Solution
Keychain Touchpad
Operations
Problem
Phone Operations
Feature
Touchpad Operations
Troubleshooting System Problems
Feature
Problem
Solution
Trouble
Beeps
6-beep sequence
once every 60 seconds.
Press # + * for a voice message of the problem. This disables the trouble beeps for 10
hours. Most problems won’t
start beeps in level 2 or 3.
Lamp
Modules
Lights controlled by
the lamp modules do
not work.
1. Make sure the lamp has a
working bulb.
2. Check the lamp’s operation at a working outlet.
3. Make sure the lamps are
plugged into the lamp
module and the lamp
modules are plugged into
outlets not controlled by a
switch.
4. Commands are ignored if
someone is pressing keys
on another touchpad or is
using the phone to control
your system.
106
Appendix A:
Equipment Considerations 108
•
Appendix B:
Touchpad Shortcuts 115
•
Appendix C:
Planning for Emergencies 117
•
Glossary 121
•
Index 131
•
FCC Notices 137
Phone Operations
•
Touchpad Operations
References
Keychain Touchpad
Operations
Troubleshooting
References
107
Appendix A:
Equipment Considerations
Options for Operating Your Security System
2-Line LCD
Alphanumeric Touchpad
Touch-Tone
Telephone
1
Keychain
Touchpads
Alphanumeric Touchpad
with Display
1
Handheld
Wireless Touchpad
Wireless Touchpad
8557128C
108
BY
ST
BYPASS
8557130C.DS4
C O D E + 0 or COMMAND + 0
If installed, turns all lights/appliances plugged
into modules on or off.
Keychain Touchpad
Operations
CODE+ 8
Tests the communication from your
system to the monitoring service.
Chime
Sensor Test
CODE+ 9
Tests the communication from
sensors to the control panel.
0
5
Phone Test
109
9
4
Lights
8
3
C O D E + 7 or COMMAND + 7
Turns chime feature on or off. (System
must be in level 1)
7
2
5
C O D E + BY + sensor number + COMMAND
Used to bypass sensors after arming.
BYPASS
BY + light/appliance number
Turns individual lights/appliances on or off.
6
1
STATUS
Press once to read condition
message. Press twice for
a full status report.
Energy Saver
C O D E + 5 or COMMAND +
If installed, turns energy saver
feature on or off.
Bypass
Used to bypass sensors.
Command:
Used in "shortcut"
commands. Acts like an
"enter" key.
24-Hour Fire Panic:
Press and hold
until siren sounds.
24-Hour Auxiliary Panic:
Press and hold
until siren sounds.
2
No Delay
Press after successful arming
to eliminate entry delay.
Phone Operations
24-Hour Police Panic:
Press and hold
until siren sounds.
Level 1-Off
CODE+ 1
24-hour sensors on,
all others off.
Level 2-Stay
C O D E + 2 or COMMAND +
24-hour and perimeter sensors on,
interior sensors off.
3
Alphanumeric Touchpad Features
Level 3-Away
C O D E + 3 or COMMAND +
All sensors on.
Touchpad Operations
Troubleshooting
References
Touch-tone Phone Commands
Your installer can program your system's phone commands to work one of two ways:
key is programmed to begin all phone commands
1. Normal Setting - The
and the
key functions as the STATUS button on a full-key touchpad.
or
key is programmed to begin all phone
2. Programmed by Request - The
commands and the
key functions as the STATUS button on a full-key touchpad.
All numbers
can be used
for an access
code.
1
+ CODE +
1
turns security protection to Level 1-Off.
2 abc
+ CODE +
2
turns security protection to Level 2-Stay.
3 def
+ CODE +
3
turns security protection to Level 3-Away.
4 ghi
+ CODE +
2
or
5
+ CODE +
5
turns the energy saver feature on and off.
jkl
6mno
7 prs
3
+
4
cancels the exit delay period.
+ C O D E + 2 or 3 + 6 "bypasses" an open sensor when
arming system.
+ C O D E + 6 + sensor number bypasses a sensor while
system is already armed.
+ CODE +
7
turns the chime feature on and off.
8 tuv
+ C O D E + 8 starts the test to check the phone communication
between your system and the central monitoring station.
9 wxz
+ CODE +
9
starts the test to check your system's sensors.
0 oper
+ CODE +
0
turns controlled lights on and off.
+ CODE +
2
or
#
3
+
0
turns entry/exit lights on and off.
Normal setting - Begins all phone commands.
(See information at top of page.)
+
+ light/appliance number controls individual lights and devices.
Normal setting - Functions as the STATUS button on a touchpad.
(See information at top of page.)
8557132B.DS4
110
8557131C.DS4
Troubleshooting
111
Star Button
Used to cancel exit delay or
to turn the energy saver feature on,
depending on how your installer
set this up.
Lights Button
Turns controlled lights on and off.
Also used to make controlled lights
flash continuously.
Keychain Touchpad
Operations
Lights and Star Buttons
Together they activate the
auxiliary panic alarm.
Unlock Button
Turns security protection off.
Lock Button
Turns security protection on.
Phone Operations
Lock and Unlock Buttons
Together they activate the police
or silent panic alarm.
Signal Indicator Light
Keychain Touchpad Features
Touchpad Operations
References
Additional Components
Your security system is compatible with a variety of security system components.
Choose the devices you want to customize your security environment.
Refer to installation instructions or device marking for model number.
Control Panel
Water-Resistant
Pendant Panic
Sensor
Door/Window
Sensor
X-10 Lamp Module
Pendant Panic
Sensor
Smoke
Detector
Energy Saver
Module
Rate-of-Rise
Heat Sensor
DS-924
Motion
Detector
Shock
Sensor*
Intellisense
Sound Sensor
(Glass Break Detector)
Freeze
Sensor*
Hardwire
Exterior
Siren
Glass Guard
Sensor*
Hardwire Interior
Siren and Piezo
Interrogator 200 Alarm
Verification Module*
Fire Alarm
Pull Station*
8557129D.DS4
* Not UL listed
112
Phone Operations
Sample Security System Layout
Heat Sensor
Smoke Sensor
Touch-tone
Telephone
Exterior
Siren
Lamp Module
Passive
Infrared
Sensor
Sound Sensor
Smoke Sensor
Door/
Window
Sensor
Control
Panel
Shock Sensor
Glass Guard
Freeze Sensor
Wireless Siren
To Tel. Co.
Keychain Touchpad
Operations
Door/
Window
Sensor
Touchpad Operations
The following shows a typical installation layout. Some devices are
not UL listed and may not be included in your system. See Installation
Instructions for details.
Smoke Sensor
Door/Window Sensor connected
to sump pump
8557G02C.DS4
References
113
Troubleshooting
Fire Pull Station
114
Your security system lets you use some shortcuts to operate it. The following table lists the operations that have shortcuts. Some shortcut
commands limit your control, so we recommend that you use these
only after you are familiar with the features of your security system
and are proficient at using the system.
Activity to Perform
Turning
protection
on—staying in
Lights on/
off
your
access
code +
2
And cancel
your
the exit delay access
code +
2+4
Basic proce- your
dure
access
code +
3
And cancel
your
the exit delay access
code +
3+4
Turn chime
your
on or off.
access
code
+7
Turn all
your
lights on or
access
off
code +
0
COMMAND + 2*
Alarm system is on level 2.
COMMAND + 2 +
4*
Alarm system is on level 2. No
delay.
Alarm system is on level 3.
COMMAND + 3*
COMMAND + 3 +
4*
COMMAND + 7
COMMAND + 0
or
BYPASS +
BYPASS
Alarm system is on level 3. No
delay.
On or Off.
On or Off.
References
115
You Will Hear
Troubleshooting
Chime on/
off
Basic procedure
Shortcut
Entry
Keychain Touchpad
Operations
Turning
protection
on—going
away
Basic
Entry
Phone Operations
Summary of Touchpad Operations and Shortcuts
Touchpad Operations
Appendix B: Touchpad Shortcuts
Summary of Touchpad Operations and Shortcuts
(Continued)
*
Energy
saver on/
off
Turn energy
saver on or
off
your
access
code +
5
COMMAND + 5
Energy saver
is on/off,
then one
short beep.
Full status
check
Review recent activity
STATUS +
STATUS
Arming level beeps, then
messages.
Alarm
memory
Check recent
alarms
your
access
code +
STATUS +
1
your
access
code +
STATUS +
5
COMMAND +
STATUS
Arming level beeps.
Then, messages about
alarms.
or
Alarm memory is OK.
This shortcut only works when arming to a higher level.
116
This section describes what you can do to plan ahead for an emergency.
•
•
•
Emergency Planning
Floor Plan Example
Your Floor Plan
Since an emergency is always unexpected, you should develop plans
to help prepare for a variety of emergency situations. Periodically discuss and rehearse emergency plans that include the following:
•
•
•
Keychain Touchpad
Operations
•
•
•
Understand how to use your security system.
Know the normal state of doors and windows; open, closed, or
locked.
Escape fast! (Do not stop to pack.)
Use a different escape route if closed doors feel hot to the touch.
Crawl and hold your breath as much as possible to help reduce
smoke inhalation during your escape.
Meet at a designated outdoor location.
Emphasize that no one should return to the premises if there is a
fire.
Notify fire department from a neighbor’s phone.
Phone Operations
Emergency Planning
•
•
Touchpad Operations
Appendix C: Planning
for Emergencies
Emphasize that no one should enter the premises if they hear sirens.
Floor Plan Example
The figure on the next page shows an example of a multilevel floor
plan. Use this example as a guide and draw your floor plan on the
blank page provided.
References
117
Troubleshooting
CAUTION
If you arrive at the premises and hear sirens, do not enter. Call for emergency
assistance from a neighbor’s phone.
A smoke detector should
be located on each level.
Bedroom
Living
Dining
Room
Room
Living
Room
Basement
Basement
Dining
Bedroom
Kitchen
Room
Bedroom
H
Hall
Living
Room
Dining
TV
Room
Room
Bedroom
Kitchen
Bedroom
H
Living
Room
Bedroom
x
Hall
Hall
Bedroom
Bedroom
Recreation
Room
Smoke detectors should
be located between the
sleeping area and the rest
of the family living unit.
In family living units with more
than one sleeping area, locate a
smoke detector at each area.
Bedroom
Bedroom
NOTE: Ceiling-mounted smoke detectors should be located in the center of the room
or hall, or not less than 4 inches from the wall. When the detector is mounted
on the wall, the top of the detector should be 4 to 12 inches from the ceiling.
NOTE: Do not install smoke detectors where normal ambient temperatures are above
100°F or below 40°F. Also, do not locate detectors in front of AC/ Heat
registers or other locations where normal air circulation will keep smoke
from entering the detector.
NOTE: Additional information on household fire warning is available at nominal
cost from: The National Fire Protection Association, Batterymarch Park,
Quincy, MA 02269. Request Standard No. NFPA74.
Required smoke detector
H
Heat detector
x Indicates smoke detector is optional if door is not provided between
basement and recreation rooms.
8557144a
118
Use the following guidelines when drawing your floor plan:
•
•
•
•
Show all building levels.
Show exits from each room (two exits per room are recommended).
Show the location of all security system components.
Show the locations of any fire extinguishers.
Touchpad Operations
Your Floor Plan
Phone Operations
Keychain Touchpad
Operations
Troubleshooting
References
119
120
account number
A number that identifies your system to the central monitoring station.
alarm memory
The record of the most recent alarms that have occurred in your
home.
appliance module
A wireless device into which appliances, like coffeemakers or
televisions, can be plugged to become controlled by your security
system. Any appliance plugged into an appliance module can be
turned on or off from a phone or touchpad using the individual device control command. Controlled appliances can also be turned
off using the all lights off command. Controlled appliances turn
off during an alarm.
121
References
arming
Turning your system on. Arming to Level 2-Stay turns on protection to the outside areas while allowing you to walk around inside.
An alarm will sound if anyone enters. Arming to Level 3-Away
turns on all sensors, and an alarm will sound if anyone moves
around inside or enters from the outside.
Troubleshooting
arm/disarm access code
A code that allows you to turn protection on and off in the building
but not to use other system options. For example, a house guest or
repair person may use an arm/disarm access code. The system allows you to define up to 14 different arm/disarm access codes.
Keychain Touchpad
Operations
alarm report
Alarm information sent over telephone lines from your system to
the central monitoring station.
Phone Operations
access code
A four-digit number that allows you and others to control your
system. The system uses one primary access code, which can control all operations in the system, and one secondary access code,
which can control all operations except changing system settings,
triggering a phone or sensor test, and gaining system access from
a remote phone. It also can use up to 14 temporary arm/disarm access codes, each of which is limited to arming and disarming.
Touchpad Operations
Glossary
auto force arming
When you turn security protection on, the system will notify you
if a door or window is open or there is other system trouble. If you
do not correct the problem before leaving, your system will arm,
but it will also report the situation to the central monitoring station.
auxiliary panic alarm
An alarm used for medical or other urgent situations. The auxiliary
alarm may be set off by hand or when certain sensors are activated.
For example, an auxiliary alarm may go off after a certain number
of hours of inactivity if the system is set up that way. During an
auxiliary alarm, lights come on steadily and interior sirens sound
low-volume, fast on-off-on-off tones. Exterior sirens are not activated.
battery supervision
The system’s mechanism for detecting a low battery in wireless
sensors. To determine if the battery is low, press the STATUS button and listen for the voice message announcing Sensor nn low
battery. If this is not announced, the battery is OK.
battery test
A diagnostic feature that checks the condition of the control panel
backup battery.
central monitoring station
Your system communicates with this station to report alarms or
other problems. During an emergency, the central monitoring station will send police and fire personnel.
chime
A feature that gives you a warning when a door or window opens,
an off-limits area is entered, or a device is turned on. For example,
if a toddler is playing in a room with a sensor installed on the door,
you can use this feature to warn you if the child has opened the
door. This feature works only when security protection is turned
off.
closing report
A report provided to the central monitoring station listing who
armed your system and when. This feature is optional.
control panel
This is the electronic “brains” of your system. The control panel is
a minicomputer in which the various options of your system are
programmed. The control panel monitors and controls your entire
security system.
122
delay door
The door designated for entry and exit when the security system is
armed or disarmed. (See also delay, entry delay, and exit delay.)
References
123
Troubleshooting
exterior siren
A siren controlled by your system and located outside of the protected building. Exterior sirens are only used for police and fire
alarms to alert neighbors and attract attention.
Keychain Touchpad
Operations
exit delay
The period of time in which you must leave your home after turning security protection on. The exit delay time is set by your installer. Your system has three different exit delay times available,
for example, the delay on the front door may be set to last 30 seconds, the garage door delay set for 2 minutes, and the gate delay
set for 4 minutes. In this example, when you arm your system, you
have 30 seconds to exit through the front door. You then have 2
minutes to exit the garage door, and 4 minutes to exit the gate. If
the delay period counts down to 0, and a door is opened, an alarm
will occur. (See also delay.)
Phone Operations
entry delay
The period of time in which you must turn your system off after
entering your home. The entry delay time is set by your installer.
Your system has three different entry delay times available, for example, a gate delay can be set to last 4 minutes, a garage door delay set for 2 minutes, and an entry door delay set for 30 seconds.
In this example, when you open the gate, the 4-minute timer starts.
If you then open the garage door, your system starts counting
down again from the time left from the gate delay or the 2 minutes
from the garage delay, whichever time is shorter. If you then open
the entry door, your system starts counting down from the time left
from the garage delay or the 30 seconds from the entry delay,
whichever time is shorter. If the delay period counts down to 0 an
alarm will occur. (See also delay.)
Touchpad Operations
delay
A delay gives you time to arm the system and leave your home
without setting off an alarm or to get in and disarm before sounding an alarm. Your system has three different entry delay times
and three different exit delay times. Times are set by your installer.
(See also entry delay and exit delay.)
fire panic alarm
The fire panic alarm is a loud, steady tone sounding from all interior and exterior sirens to alert neighbors and anyone in your home
to a fire. The central monitoring station responds by calling the fire
department. Activate the alarm from any touchpad or phone (if set
up by your installer) in your home.
follower delay
After turning security protection on, motion detectors “follow” the
entry delay with their own delay time, allowing you to pass in
front of a motion detector without activating an alarm. Motion detectors immediately sound an alarm if no entry delay is in progress
and you pass in front of it with security protection on.
full status
Use the full status command to check all recent activity in your
home. The full status report gives all recent alarms, the current
arming level, system problems such as power or battery trouble,
and information about the energy saver feature, if installed.
hardwire
A sensor or device that is connected by wire to the system rather
than with wireless technology.
Hardwire Interior Siren (HIS)
A siren used indoors to alert you of alarms and other activity in
your home. A hardwire siren uses wires rather than wireless technology.
hardwire trouble
Your system alerts you with trouble beeps and touchpad display
messages, if available, if hardwire sensors or devices such as hardwire touchpads have trouble communicating with the control panel. If there is a problem with a hardwire device, it is most likely a
wiring problem and you need to call your security system installer.
instant alarm
Alarms, such as a fire alarm, that sound as soon as an armed sensor
is tripped.
keychain touchpad
Miniature 2- or 4-button wireless touchpads that control basic system functions such as arming and disarming. No access code is required to control your system with a keychain touchpad. The builtin light blinks when the keychain touchpad transmits a signal.
lamp module
See X-10 Lamp Module.
124
loop
Security system installers sometimes use this term interchangeably with the words zone or, more commonly, sensor.
motion detector
See PIR (passive infrared motion sensor).
no delay
An option that lets you turn security protection on without the exit
delay. For example, if turning protection on to level 2 and no one
is leaving the building, you may want to cancel the exit delay
beeps. Press 4 immediately after arming to use this option. This
also turns off the entry delay. If a front door is opened, for example, an alarm will sound immediately.
panic buttons
Buttons on the touchpad with fire, police, and auxiliary symbols.
When activated (press and hold for at least 2 full seconds), they
send an immediate alarm to the central monitoring station. See
also auxiliary, fire, and police panic alarms.
125
References
phone failure
If attempts by your system to report to your central monitoring station fail (perhaps there is a problem with the phone line) your system will notify you with a phone failure message.
Troubleshooting
opening report
A report sent to the central monitoring station reporting who
turned the system off and what procedures were used. This is an
optional feature available from your installer.
Keychain Touchpad
Operations
no activity
A feature that notifies the central station if your system doesn’t detect activity in your home within a specified time period. The system sounds a 5-minute alarm notifying you that the time limit is
approaching. If no one turns the alarm off, the your security system notifies the central station. This feature helps protect you if
you are injured or sick and is especially helpful for a person who
lives alone. (Your installer must turn this option on.)
Phone Operations
monitoring service
See central monitoring station.
Touchpad Operations
local
Refers to activity and equipment that is located at your home. For
example, the phone in your home where the control panel is installed is called the local phone. This term is also used to describe
alarms that sound at your home but are not sent to the central monitoring station.
phone communication test
A feature that tests the communication from the control panel to
the central monitoring station.
PIR
Passive infrared motion sensor. A motion sensing device that detects the presence of an intruder by comparing the intruder’s body
temperature with the background temperature of the room.
police panic alarm
The police panic alarm is a slow on-off-on-off sound from interior
and exterior sirens to scare off an intruder and alert neighbors to
your trouble. The central monitoring station responds by calling
the police. Activate the alarm from any touchpad or phone in your
home.
primary access code
The standard access code that lets you operate all features of your
system. The primary code is the only one that can change access
codes.
protest beeps
A low-volume, two-tone rhythmic beeping that alerts you that the
system cannot be armed unless further action is taken.
quick arm
Certain features can be controlled using the COMMAND button
rather than your access code. We recommend that you do not use
this method until you become proficient using you system. For a
list of these shortcuts, see appendix B.
quiet mode
When this option is on, you may operate your system without
sounding some of the usual beeps and messages. When entering
commands from a touchpad with display (alphanumeric) or phone,
few voice messages will be heard from the speakers or will only
be heard over the phone. Arming level beeps will sound from interior speakers. Quiet mode does not affect touchpads that do not
have a display (wireless).
RJ-31X Jack
The phone port connecting the control panel to phone equipment.
This jack enables the control panel to take control of your phone
line and report to the central monitoring station.
secondary access code
The four-digit access code that allows full use of the system except
changing system settings, triggering a phone or sensor test, and
gaining system access from a remote phone.
126
sensor
These are the devices such as smoke detectors, motion detectors,
glass break detectors, and door/window sensors that detect a problem in your home and report it to the control panel. Security system installers sometimes use this term interchangeably with the
words zone or loop.
sensor number
A number used to identify a particular sensor in the system.
sensor test
A setting that allows you to test the operation of each sensor in the
system.
supervisory failure
Sensors check in every hour by sending a signal to the control panel. If the panel doesn’t hear from a sensor you will be alerted to the
trouble condition.
127
References
touchpad tamper
If your installer has enabled this feature, and your system detects
more than 40 keys pressed without a recognized access code, a police siren sounds and a call is reported to the central monitoring
station. This prevents a prowler from trying to find a valid access
code by randomly pressing keys.
Troubleshooting
smoke verification
Hardwire smoke detectors have a smoke verification feature that
helps eliminate false smoke alarms. If a hardwire smoke detector
is tripped, the detector’s power turns off and then quickly back on.
If the alarm is activated again, your system calls the central monitoring station. Your installer must enable this feature.
Keychain Touchpad
Operations
siren time-out
Sirens will “time-out” (shut off) after sounding for a certain length
of time. The default siren time-out is 4 minutes. This means that
after an alarm has gone off, the sirens will stop ringing after 4 minutes. The alarm is still in progress after the sirens time-out, until
you manually disarm your system. Your installer can set the siren
time-out anywhere from 1 minute to 30 minutes.
Phone Operations
sensor bypass
A feature that allows you to turn off protection in selected areas of
your home, such as a window or door you wish to have open.
Touchpad Operations
security level
The degree of protection set at the panel. The security levels are
level 1 (off), level 2 (on with outside protection only), and level 3
(on with full protection inside and outside).
trip, tripped
To cause a sensor to go into a “nonnormal” state, resulting in a signal to the control panel. For example, if a door has a sensor attached to it, then when protection is on, opening the door trips the
sensor, causing an alarm.
trouble
A warning that there is a problem in the system. The problem may
be any of the following: a low sensor battery, a low control panel
battery, a sensor that fails to respond, or a sensor that was tampered with. The system notifies you of a trouble condition by
sounding six successive beeps, repeated every 60 seconds.
trouble beeps
Six successive beeps produced every 60 seconds by interior sirens
and the control panel speaker when a trouble condition is detected
by the control panel. Trouble beeps caused by a sensor that fails to
respond or a low sensor battery are repeated every 24 hours if not
corrected.
24-hour sensor
Sensors that monitor your home all the time. These sensors are active even when your system’s security protection is turned off
(Level 1-Off). Some examples of 24-hour sensors include heat,
freeze, smoke, and panic sensors.
wireless
Some of the devices in your system are “wireless.” They send and
receive messages to and from the control panel using radio waves.
Wireless Interior Siren (WIS)
A siren that plugs into a standard wall outlet. It receives signals
over the electrical wiring in your home.
wireless touchpad
A system component that allows you to operate your system within radio range of the control panel. This touchpad can be carried
around with you to operate your system from various rooms.
128
Touchpad Operations
X-10 Lamp Module
A wireless device into which lamps can be plugged to become
controlled by your security system. Any lamp plugged into a lamp
module can be turned on or off from a phone or touchpad. Different settings on the X-10 Lamp Module determine how the device
plugged into it will react. The operation of these modules is supplementary to the alarm siren.
zone
Security system installers sometimes use this term interchangeably with the words loop or, more commonly, sensor.
Phone Operations
Keychain Touchpad
Operations
Troubleshooting
References
129
130
Troubleshooting
References
131
Keychain Touchpad
Operations
AC Power Failure message, 48, 79
access code
defined, 33, 71
primary, 33, 71
protection against attempts to
guess
by phone, 77
by touchpad, 46
secondary, 33, 71
setting
by phone, 71
by touchpad, 33
temporary, 33, 71
accidental alarms
canceling
by phone, 63
by touchpad, 18
caused by pets, 16, 63
common causes of, 16, 17, 63
during entry and exit delays, 16, 63
preventing, 16, 63
activity in home or business
checking recent
by phone, 70
by touchpad, 30, 70
monitoring for
by phone, 76
by touchpad, 45
alarm
activating
by keychain, 90
by phone, 61
by touchpad, 14
automatic lighting during, 42
auxiliary, 14, 61
canceling
by keychain, 90
by phone, 62
by touchpad, 14
resetting smoke detectors, 15,
62
canceling accidental
by phone, 63
by touchpad, 18
Phone Operations
door open when exiting, 21, 23
fire, 14, 61
no activity in home or business, 45,
76
panic
overview, 13, 61, 63
police, 14, 61
preventing accidental, 16, 63
reviewing recent, 31, 70
sounds, 13, 100
when protection is off, 16, 63
appliances
controlling automatically, 40, 74
arming
bypassing a door or window, 24, 66
instantly, 25, 67
silently, 25, 67
when going away (level 3)
by keychain, 91
by phone, 66
by touchpad, 22
when staying in (level 2)
by keychain, 91
by phone, 65
by touchpad, 19
with a window or door open
by keychain, 92
by phone, 66
by touchpad, 24
automatic lighting, 2, 40, 74
automatic test features, 47, 79
auxiliary alarm, 14, 61
activating
by keychain, 90
by phone, 61, 62
by touchpad, 14
canceling
by keychain, 90
by phone, 62
by touchpad, 14
defined, 13, 61
A
Touchpad Operations
Index
B
E
battery failure
handling of, 49, 80
beeps
overview of what they mean, 100
possible trouble signals, 48, 79
protest during arming, 21, 23
pulsing when protection is off, 28,
68
pulsing when returning, 27, 68
blinking arming level number, 28, 69
bypassing
when arming, 24, 66
when protection is on, 25, 67
emergencies
overview of handling, 4
sending alarm
by keychain, 90
by phone, 61
by touchpad, 13, 61
overview, 13, 61
energy saver feature
changing temperatures
by phone, 73
by touchpad, 36
defined, 36, 72
turning on and off
by keychain, 95
by phone, 73
by touchpad, 36
entry/exit delay
canceling
by phone, 67
by touchpad, 26
defined, 26, 67
exit fault condition, 21
C
canceling
accidental alarms, 17, 63
resetting smoke detectors, 15, 62
Central Monitoring Station
defined, 8
testing communications, 55, 84
chime feature
by phone, 76
by touchpad, 44
F
FAIL message, 25, 67
Failure to Communicate message, 52,
82
features, 1–5
automatic lighting, 2
backup battery, 5
door and window alarm delays, 3
heating and air control, 2
monitor off-limits areas, 2
off-site control, 4
protect business information, 3
quiet exit, 3
sensor groups, 2
touchpad display brightness, 3
fire alarm, 15, 62
activating
by keychain, 90
by phone, 61, 62
by touchpad, 14
canceling
by keychain, 90
by phone, 62
by touchpad, 14
D
delay time
canceling entry/exit
by phone, 67
by touchpad, 26
disarming
by keychain, 93
by phone, 68
by touchpad, 27
door open
arming with
by keychain, 92
by phone, 66
by touchpad, 24
notification with chime
by phone, 76
by touchpad, 44
when protection is on, 25, 67
132
H
heating and air conditioning control
by keychain, 95
by phone, 72
by touchpad, 36
overview, 2
I
individual light control, 41, 75
Invalid message, 25, 67
M
L
N
level 1
defined, 27, 68
turning system off to
by phone, 68
by touchpad, 27
level 2
arming to
by keychain, 91
by phone, 65
by touchpad, 19
defined, 19, 65
level 3
arming to
by keychain, 91
by phone, 66
by touchpad, 22
defined, 65
lights
all, on or off
by keychain, 95
by phone, 74
no activity feature
by phone, 76
by touchpad, 45
noises, 100
see also beeps
Keychain Touchpad
Operations
keychain operations
emergencies, 89
overview, 88
turning energy saver on and off, 94
turning lights on and off, 95
turning security protection off, 93
turning security protection on, 90–
93
manual
basic terms, 7
how organized, 5
manual tests
communication test, 55, 84
sensor test, 52, 82
messages
FAIL, 25, 67
Invalid, 25, 67
Sensor nn is open, 21, 23
K
Phone Operations
by touchpad, 41
controlling
by keychain, 95
by phone, 74
by touchpad, 40
during an alarm, 42
flash on and off continuously
by keychain, 96
individual, on or off
by phone, 75
by touchpad, 41
overview, 2
when you arrive or go away, 40
Touchpad Operations
defined, 13, 61
Fire Sensor Trouble message, 51, 82
forced arm condition, 21
O
turning the system
by phone, 68
by touchpad, 27
off-limits areas, 2, 44, 76
opening a door or window
when protection is on
by phone, 67
by touchpad, 25
overview of the system, 1–5
overview of this manual, 5
References
133
Troubleshooting
off
P
R
panic alarms, 13, 61, 63
activating
by keychain, 90
by phone, 61, 62
by touchpad, 14
canceling
by keychain, 90
by phone, 62
by touchpad, 14
defined, 13, 61
when protection is off, 16, 63
phone operations
basics, 65–70
canceling a panic alarm, 62
checking your system status, 69
emergencies, 61–62
from a remote phone, 58
from your home or business, 58
overview, 58
receiving a call while operating
your system, 59
sending a panic alarm, 61
turning security protection off, 68
turning security protection on, 65–
66
police alarm
activating
by keychain, 90
by phone, 61, 62
by touchpad, 14
canceling
by keychain, 90
by phone, 62
by touchpad, 14
defined, 13, 61
power failure
handling of, 48, 79
primary access code, 33, 71
remote phone, 58
reports
summary of opening and closing
procedures
by phone, 78
by touchpad, 47
resetting smoke detectors, 15, 62
S
secondary access code, 33, 71
security protection
checking the current level
by phone, 69
by touchpad, 28
defined, 19, 65
exiting quietly
by phone, 75
by touchpad, 42
opening a door or window when on
by phone, 67
by touchpad, 25
silent
by phone, 67
by touchpad, 25
turning off (level 1)
by keychain, 93
by phone, 68
by touchpad, 27
when you go away (level 3)
by keychain, 91
by phone, 66
by touchpad, 22
when you stay in (level 2)
by keychain, 91
by phone, 65
by touchpad, 19
with a window or door open
by keychain, 92
by phone, 66
by touchpad, 24
with no entry/exit delay
by phone, 67
by touchpad, 26
Sensor Failure message, 50, 81
Sensor nn is open message, 21, 23
Sensor Trouble message, 51, 81
sensors
Q
quiet exit feature
by phone, 75
by touchpad, 42
134
W
Troubleshooting
T
Keychain Touchpad
Operations
window open
arming with
by keychain, 92
by phone, 66
by touchpad, 24
when protection is on, 25, 67
Phone Operations
touchpad operations
adjust display brightness, 45
basics, 19–28
checking your system status, 28
emergencies, 13–15
sending a panic alarm, 14
shortcuts, 115, 117
turning security protection off, 27
turning security protection on, 19–
24
touchpad tamper feature
by phone, 77
by touchpad, 46
trouble
checking for, 29, 69
what to do, 104
Touchpad Operations
24 hour, 21, 23
door and window delays, 3
failure message, 50, 81
groups, 2
how they work, 2
monitoring off-limits areas, 2
protecting business information, 3
resetting smoke detectors, 15, 62
testing, 52, 83
trouble message, 51, 81
silent exit
by phone, 75
by touchpad, 42
sirens
turning off, 18, 63
when away, 16, 63
smoke detectors
resetting after alarm
by phone, 62
by touchpad, 15
sounds
see also beeps
stopping alarms, 16, 63
System Battery Failure message, 49, 80
system status
current security level
by phone, 69
by touchpad, 28
recent activity
by phone, 70
by touchpad, 30
recent alarms
by phone, 70
by touchpad, 31
135
References
temporary access code, 33, 71
testing communications, 55, 84
testing sensors, 52, 83
tests
for communication with
monitoring service, 55, 84
for possible trouble signals, 47
for sensor operation, 52, 83
problem messages, 48, 79
text conventions, 7
touchpad
shortcuts, 108
FCC Notices
FCC Part 15 Information to the User
Changes or modifications not expressly approved by Interactive Technologies, Inc. can void the user’s authority to operate the equipment.
FCC Part 15 Class B
This equipment has been tested and found to comply with the limits for a Class B digital device, pursuant to
part 15 of the FCC Rules. These limits are designed to provide reasonable protection against interference in a
residential installation.
This equipment generates, uses, and can radiate radio frequency energy and, if not installed and used in accordance with the instructions, may cause harmful interference to radio communications. However, there is no
guarantee that interference will not occur in a particular installation.
If this equipment does cause harmful interference to radio or television reception, which can be determined by
turning the equipment off and on, the user is encouraged to try to correct the interference by one or more of the
following measures:
•
•
•
•
Reorient or relocate the receiving antenna.
Increase the separation between the equipment and receiver.
Connect the affected equipment and the panel receiver to separate outlets, on different branch circuits.
Consult the dealer or an experienced radio/TV technician for help.
FCC Part 68
This equipment complies with part 68 of the FCC Rules. Located on this equipment is a label that contains,
among other information, the FCC registration number and the ringer equivalence number (REN) for this
equipment. If requested, this information must be provided to the telephone company.
The REN is used to determine the maximum number of devices that may be connected to your telephone line.
In most areas, the sum of all device RENs should not exceed five (5.0).
If this equipment causes harm to the telephone network, the telephone company may temporarily disconnect
your service. If possible, you will be notified in advance. When advance notice is not practical, you will be
notified as soon as possible. You will also be advised of your right to file a complaint with the FCC.
Your telephone company may make changes in its facilities, equipment, operations, or procedures that could
affect the proper operation of your equipment. You will be given advanced notice in order to maintain uninterrupted service.
If you experience trouble with this equipment, please contact the company that installed the equipment for service and repair information. The telephone company may ask you to disconnect this equipment from the network until the problem has been corrected or you are sure that the equipment is not malfunctioning.
This equipment may not be used on coin service provided by the telephone company. Connection to party lines
is subject to state tariffs.
136