1
WMS400 CU
wireless microphone system
400
dual-slot charger
Bedienungsanleitung . . . . . . . . . . . . S. 2
Bitte vor Inbetriebnahme des Gerätes lesen!
User Instructions. . . . . . . . . . . . . . . p. 6
Please read the manual before using the equipment!
Mode d’emploi. . . . . . . . . . . . . . . . p. 10
Veuillez lire cette notice avant d’utiliser le système!
Istruzioni per l’uso. . . . . . . . . . . . . p. 14
Prima di utilizzare l’apparecchio, leggere il manuale!
Modo de empleo . . . . . . . . . . . . . . p. 18
¡Sirvase leer el manual antes de utilizar el equipo!
Instruções de uso . . . . . . . . . . . . . p. 22
Favor leia este manual antes de usar o equipamento!
1 Safety and Environment
1.1 Safety
1. Do not spill any liquids on the charger. This may cause short circuits and contaminate the charging
contacts.
2. If any liquid penetrates into the charging receptacle, disconnect the charger from power immediately
and have the charger checked by AKG service personnel.
3. Never use the charger to charge dry batteries. The charger will detect dry batteries and automatically deactivate the charging function.
4. Use the charger in dry rooms only.
5. The charger may be opened, serviced, and repaired by authorized personnel only. The charger contains no user-serviceable parts.
6. Place the charger at least 1 inch away from walls or other equipment to ensure adequate heat dissipation from the charger. If the charger overheats, the charging cycle will be stopped immediately.
7. Before connecting the charger to power, check that the AC mains voltage stated on the included
power supply is identical to the AC mains voltage available where you will use the charger.
8. Do not operate the charger with any power supply other than the included AC adapter with an output
voltage of 5 VDC. Using a power supply with an AC output and/or a different output voltage may cause
serious damage to the charger.
9. If you will not use the charger for a long period of time, disconnect the charger from power. To prevent unwanted discharging, be sure to remove the transmitter(s) from the charger every time you disconnect the charger from power.
10.Do not place the charger near heat sources such as radiators, heating ducts, or amplifiers, etc. and
do not expose it to direct sunlight, excessive dust, moisture, rain, mechanical vibrations, or shock.
11.Clean the charger with a moistened (not wet) cloth only. Be sure to disconnect the charger from power
before cleaning the charger! Never use caustic or scouring cleaners or cleaning agents containing
alcohol or solvents since these may damage the enamel and plastic parts.
12.Use the charger for the applications described in this manual only. AKG cannot accept any liability for
damages resulting from improper handling or misuse.
1.2 Environment
1. The charger will draw a low current even when the charging mode is off. To save energy, disconnect
the charger from power if you will not use the charger for a long period of time. To prevent unwanted
discharging, be sure to remove the transmitter(s) from the charger every time you disconnect the
charger from power.
2. Be sure to dispose of used batteries as required by local waste disposal rules. Never throw batteries
into a fire (risk of explosion) or garbage can.
3. When scrapping the charger, separate the case, circuit boards, and cables, and dispose of all components in accordance with local waste disposal rules.
4. The packaging of the charger is recyclabe. To dispose of the packaging, make sure to use a collection/recycling system provided for that purpose and observe local legislation relating to waste disposal and recycling.
2 Description
2.1 Introduction
Thank you for purchasing an AKG product. This Manual contains important instructions for setting up and
operating your equipment. Please take a few minutes to read the instructions below carefully before
operating the equipment. Please keep the Manual for future reference. Have fun and impress your audience!
2.2 Unpacking
1 CU 400 charger
1 AC adapter (if checked on the
packaging)
2 AA size NiMH rechargeable
batteries (2100 mAh)
Check that the packaging contains all of the items listed above. Should anything be missing, please contact your AKG dealer.
2.3 Description
The CU 400 has been designed specifically for use with the WMS 400 system.
The charger provides two charging slots specially shaped to accept the HT 400/PT 400 transmitters. The
charging slots operate completely independently so you can charge two rechargeable batteries simultaneously. You do not need to remove the battery from the transmitter for charging.
Designed specifically for use with the WMS 400 transmitters, the CU 400 charger
• monitors battery voltages and temperatures during charging;
• generates a flag signaling the end of the charging cycle upon reaching maximum capacity;
• monitors all required safety parameters and will stop the charging cycle if one or more safety parameters are out of range.
The charger checks the battery inside the transmitter and will automatically deactivate the charging function if it detects a dry battery.
Indicators
DC input
6
There is one STATUS LED in front of each charging slot.
These tricolor (red/orange/green) LEDs indicate the current operating status of the charger.
The DC 5V jack on the rear panel accepts the DC cable on the included AC adapter.
CU 400
3 Connecting to Power
1. Check that the AC mains voltage stated on the included power supply is identical to the AC
mains voltage available where you will use your system. Using the power supply with a different AC voltage may damage the unit.
Important!
Do not use any power supply other than the AC adapter supplied with the charger.
Never connect the CU 400 charger to the PSU 4000 central power supply because the output
voltage of the PSU 4000 is incompatible with the CU 400.
Important!
2. Connect the DC cable of the supplied AC adapter to the DC 5 V jack on the charger rear panel.
3. Connect the AC adapter to a convenient power outlet.
4. The charger is ready to operate. Note that both STATUS LEDs remain dark.
Refer to fig. 1.
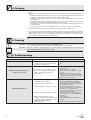
4 Charging
Rechargeable batteries (those included or those you may buy later) are delivered uncharged or
partially charged. Therefore, you will need to charge each new battery before using it.
Important!
Each charging slot features a tricolor STATUS LED that indicates the current operating status of the
respective charging slot (">…<" marks an LED flashing in the respective color):
4.1 STATUS LEDs
STATUS LED
--orange
red
green
>red<
Status
The charger is ready to operate, no transmitter is inserted in the
charging slot.
The battery inside the inserted transmitter is being checked.
The battery is being charged.
The battery is fully charged; the charging cycle is completed.
Error.
1. Check that a rechargeable battery is inside the transmitter battery compartment.
Do not try to charge a dry battery.
If there is no battery inside the battery compartment, do not place the transmitter in a charging slot
before you inserted a rechargeable battery into the transmitter.
2. Make sure to switch the transmitter OFF before placing it in a charging slot.
This is the only way to guarantee optimum charging.
3. Insert the transmitter into the charging slot so that the display on the transmitter faces the LEDs on
the charger. The charger will automatically power the transmitter via the charging contacts.
4. Never switch the transmitter ON during the charging cycle. This may cause the charger to falsely indicate a completed charging cycle before charging is actually completed.
If the transmitter has been switched ON by accident during the charging cycle,
1. Remove the transmitter from the charger.
2. Switch the transmitter OFF.
3. Insert the transmitter into the charger.
The charging cycle will start automatically as soon as you insert a transmitter with a rechargeable battery
into the charger.
STATUS LED
orange
red
green
Status
The voltage and temperature of the battery are being checked.
The battery is being charged.
Charging time is approx. 1.5 hours for a completely discharged battery and proportionately less for a partially discharged battery.
Charging two batteries simultaneously will extend the charging time
to 3 to 4 hours.
The battery is fully charged; the charging cycle is completed. The
charger has switched to trickle charging mode.
You may remove the transmitter from the charger.
Due to the charging process, the battery may heat up to +60°C. This
is normal.
1. You may safely remove the transmitter at any time before the charging cycle is completed.
Table 1: STATUS LED indications
4.2 Inserting a Transmitter
with a Battery Inside
Refer to fig. 2.
Note:
4.3 Charging Cycle
Table 2: Charging cycle
4.4 Important Notes
2. You may safely charge the battery inside the transmitter at any time, even before the battery is completely discharged.
3. At ambient temperatures above +40°C, the charger may overheat. As a result, the charging cycle may
take considerably longer or stop altogether (STATUS LED flashing red).
As soon as the ambient temperature drops below +40°C, the charging cycle will be resumed automatically (STATUS LED will be lit red).
4. If the battery heats up to more than +60°C during a charging cycle (e.g., due to high ambient temperature), the charging cycle will be stopped automatically (STATUS LED flashing red). Most batteries
will be unusable after being heated up to more than +60°C.
5. Excessive vibrations may cause the charging cycle to be stopped (STATUS LED flashing red), restarted (STATUS LED is lit orange), or appear completed (STATUS LED lit green) ahead of time. Make sure
CU 400
7
4 Charging
the charger will not be subjected to vibrations during the charging cycle and will rest firmly on a hard
surface.
6. Items 1 and 2 above notwithstanding, if you wish to extend the useful life of rechargeable batteries be
sure to
• completely discharge the battery every time, i.e., not to charge the battery before the battery warning appears on the transmitter display (see also the WMS 400 manual);
• charge the battery fully every time, i.e., not to remove it from the charger before the charging cycle
is completed;
• avoid charging batteries at temperatures below +5°C or above +40°C. At these temperatures, the
charging cycle will not start and the STATUS LED will be lit orange.
The charging cycle will be resumed automatically as soon as the battery temperature returns to the
acceptable range.
• use no batteries other than the rechargeable types recommended in section 7 Specifications.
7. Rechargeable batteries will only reach their full capacity after several charging cycles.
8. If you insert a transmitter with a dry battery into the charger, the charging cycle will be stopped immediately after the battery test and a few minutes of charging. The STATUS LED will start flashing red.
Although there is virtually no risk of damaging the transmitter or charger, it is good practice not to
insert transmitters using dry batteries into the charger.
5 Cleaning
Important!
1. Disconnect the DC cable from the rear panel DC 5 V jack.
2. Use a cloth moistened (not wet!) with water to clean the surfaces of the charger.
Important!
Never use caustic or scouring cleaners or cleaning agents containing alcohol or solvents since
these may damage the enamel or plastic parts.
6 Troubleshooting
Problem
All LEDs dark.
All LEDs dark although at least one
charging slot is loaded.
Possible Cause
Remedy
• No defect. STATUS LEDs are not activated before you insert a transmitter with a
battery into a charging slot.
• (Insert transmitter with rechargeable battery.)
1. AC adapter is not connected to power.
1. Connect power supply to convenient
power outlet.
2. Connect DC cable to charger.
3. Check contacts for resilience, or clean
contacts.
4. Disconnect power supply or DC cable,
wait for 10 seconds, and connect again.
Should the problem persist, contact your
nearest AKG Service Center.
2. DC cable is no not connected to charger.
3. One or more charging contacts fail to
make contact with the transmitter.
4. Internal error.
• Charging cycle has been stopped:
1. Transmitter uses dry battery.
2.
3.
STATUS LED flashing red.
4.
5.
6.
7.
8
1. Remove transmitter from charging slot;
replace dry with rechargeable battery.
Charging contacts contaminated.
2. Clean charging contacts on charger and
transmitter with soft cloth.
Inside temperature of battery is too high.
3. Allow battery/charger to cool down,
charging cycle will resume when temperature returns to acceptable range.
Should the problem persist, contact your
nearest AKG Service Center.
Inside temperature of charger is too high. 4. Make sure there is enough free space
around charger to provide adequate heat
dissipation.
Battery defective (voltage <0.5 V).
5. Replace battery.
Charger connected to incompatible power 6. Use original AC adapter supplied with
supply whose output voltage is too high:
charger.
both STATUS LEDs flashing red.
Charger defective.
7. Contact your nearest AKG Service Center.
CU 400
7 Specifications
Operating voltage:
Recommended batteries:
AC voltage:
Charging current:
Charging time:
Size (LxHxD):
Weight:
5 VDC, 1.5 A max.
NiMH or NiCd rechargeable with 1500 mAh minimum capacity
refer to label on AC adapter
typ. 1.4 A in single-slot mode
typ. 0.7 A if both slots are used simultaneously
typ. 1.5 hours in single-slot mode
typ. 3 hours if both slots are used simultaneously
(depending on battery type and capacity)
188 x 115 x 78 mm (7.4 x 4.5 x 3.1 in.)
approx. 420 g (14.8 oz.)
This product conforms to the standards listed in the Declaration of Conformity. To order a free copy of the Declaration of Conformity, visit
http://www.akg.com or contact [email protected]
FCC Statement
The device complies with part 15 of the FCC rules. Operation is subject to the following two
conditions:
(1) this device may not cause harmful interference, and
(2) this device must accept any interference received, including interference that may
cause undesired operation.
CU 400
9
Mikrofone
·
Kopfhörer
·
Drahtlosmikrofone
·
Drahtloskopfhörer
·
Kopfsprechgarnituren
·
Akustische
Komponenten
Microphones · Headphones · Wireless Microphones · Wireless Headphones · Headsets · Electroacoustical Components
Microphones · Casques HiFi · Microphones sans fil · Casques sans fil · Micros-casques · Composants acoustiques
Microfoni
·
Cuffie
HiFi
·
Microfoni
senza
filo
·
Cuffie
senza
filo
·
Cuffie-microfono
·
Componenti
acustici
Micrófonos · Auriculares · Micrófonos inalámbricos · Auriculares inalámbricos · Auriculares con micrófono · Componentes acústicos
Microfones · Fones de ouvido · Microfones s/fios · Fones de ouvido s/fios · Microfones de cabeça · Componentes acústicos
Technische Änderungen vorbehalten. Specifications subject to change without notice. Ces caractéristiques sont susceptibles de modifications.
Ci riserviamo il diritto di effettuare modifiche tecniche. Nos reservamos el derecho de introducir modificaciones técnicas. Especificações sujeitas à mudanças sem aviso prévio.
AKG Acoustics GmbH
Lemböckgasse 21–25, P.O.B. 158, A-1230 Vienna/AUSTRIA, Tel: (+43 1) 86 654-0*, Fax: (+43 1) 86 654-7516, www.akg.com, e-mail: [email protected]
Hotline: (+43 676) 83200 888, [email protected]
AKG Acoustics GmbH
Bodenseestraße 228, D-81243 München/GERMANY, Tel: (+49 89) 87 16-0, Fax: (+49 89) 87 16-200, www.akg.com/de, e-mail: [email protected]
Hotline: (+49 89) 87 16-22 50, [email protected]
AKG ACOUSTICS, U.S.
914 Airpark Center Drive, Nashville, TN 37217, U.S.A., Tel: (+1 615) 620-3800, Fax: (+1 615) 620-3875, www.akgusa.com, e-mail: [email protected]
For other products and distributors worldwide see our website: www.akg.com
Printed in Austria on recycled paper.
10/04/9100 U 1137