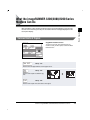
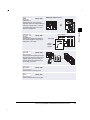
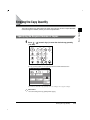
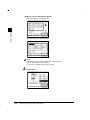
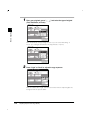
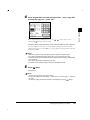
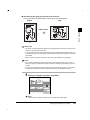
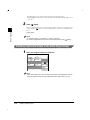
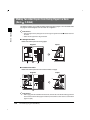
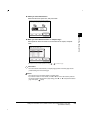
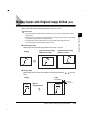
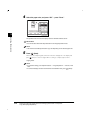
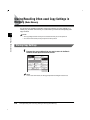
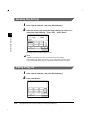
1
Series
Copying Guide
Please read this guide before operating this equipment.
After you finish reading this guide, store it in a safe place for future reference.
ENG
About the Manuals for the Machine
The manuals for this machine are divided as follows. Please read them to suit your needs.
For Basic Use ................................................
Troubleshooting .............................................
Reference Guide
For Basic Copying ...........................................
For Convenient Copying ....................................
Copying Guide
For Basic Mail Box Function Use .........................
For Convenient Mail Box Function Use ..................
Mail Box Function Guide
For Fax Use...................................................
For Convenient Fax Use ....................................
Facsimile Guide
For Remote UI Use ..........................................
Remote UI Guide
For Setting Up the Network Connection & Installing
the CD-ROM Software ......................................
Setup Guide
For Printer Use...............................................
PS/PCL Printer Guide
For Installing Printer Driver, etc. .........................
PS Driver Guide
PCL Driver Guide
For Connecting and Setting the Network.................
Network Guide
(This Document)
The manuals supplied with optional equipment are included in the list above.
Depending on the system configuration and product purchased, some manuals may be unavailable
(irrelevant).
• The product illustration on the cover may differ slightly from your product.
How This Manual Is Organized
Chap 1
Basic Copying
1
Chap 2
Useful Copy Functions
2
Chap 3
Setting/Storing Specifications of the Copy Function
3
Chap 4
Appendix
4
Copyright 2001 by Canon, Inc. All rights reserved.
No part of this publication may be reproduced or transmitted in any form or by any means, electronic or
mechanical, including photocopying and recording, or by any information storage or retrieval system
without the prior written permission of Canon, Inc.
• Considerable effort has been made to make sure that this manual is free of inaccuracies and omissions.
• However, as we are constantly improving our products, if you need an exact specification, please contact Canon.
Table of Contents
How This Manual Is Organized . . . . . . . . . . . . . . . . . . . . . . . . . . . . . . . . . . . ii
Table of Contents. . . . . . . . . . . . . . . . . . . . . . . . . . . . . . . . . . . . . . . . . . . . . . iii
How to Use This Manual . . . . . . . . . . . . . . . . . . . . . . . . . . . . . . . . . . . . . . . . vi
Symbols Used in This Manual . . . . . . . . . . . . . . . . . . . . . . . . . . . . . . . . . vi
Keys Used in This Manual . . . . . . . . . . . . . . . . . . . . . . . . . . . . . . . . . . . . vi
Displays Used in This Manual . . . . . . . . . . . . . . . . . . . . . . . . . . . . . . . . vii
Illustrations Used in This Manual . . . . . . . . . . . . . . . . . . . . . . . . . . . . . . vii
Chapter 1
Basic Copying
What the imageRUNNER 3300/2800/2200 Series Machine Can Do . . . . .1-3
Various Kinds of Copies . . . . . . . . . . . . . . . . . . . . . . . . . . . . . . . . . . . . .1-3
Flow of Copy Operations . . . . . . . . . . . . . . . . . . . . . . . . . . . . . . . . . . . . . .1-9
Entering the Copy Quantity . . . . . . . . . . . . . . . . . . . . . . . . . . . . . . . . . . .1-15
Specifying the Required Number of Copies . . . . . . . . . . . . . . . . . . . .1-15
Changing the Copy Quantity . . . . . . . . . . . . . . . . . . . . . . . . . . . . . . . .1-16
Selecting the Copy Paper Size (Paper Select) . . . . . . . . . . . . . . . . . . . .1-17
Automatic Paper Selection (Auto Paper Selection). . . . . . . . . . . . . . .1-17
Specifying Paper Size/Type (Manual Paper Selection) . . . . . . . . . . . .1-19
Adjusting Exposure and Image Quality. . . . . . . . . . . . . . . . . . . . . . . . . .1-22
Adjusting Copy Exposure . . . . . . . . . . . . . . . . . . . . . . . . . . . . . . . . . . .1-22
Selecting Image Quality . . . . . . . . . . . . . . . . . . . . . . . . . . . . . . . . . . . .1-23
Automatic Adjustment of Exposure and Image Quality . . . . . . . . . . .1-25
Changing the Copy Exposure During Printing . . . . . . . . . . . . . . . . . .1-26
Changing the Copy Ratio (Copy Ratio) . . . . . . . . . . . . . . . . . . . . . . . . . .1-27
Enlarging/Reducing Originals to a Standard Size (Preset Zoom). . . .1-27
Specifying the Copy Ratio by % (Zoom Designation). . . . . . . . . . . . .1-29
Automatically Setting the Copy Ratio Based on the Original
and Copy Paper Sizes (Auto) . . . . . . . . . . . . . . . . . . . . . . . . . . . . . . . .1-31
Slightly Reducing Images to Prevent the Original from Being
Trimmed (Entire Image). . . . . . . . . . . . . . . . . . . . . . . . . . . . . . . . . . . . .1-33
Calculating the Copy Ratio Based on the Original and Copy
Paper Sizes (Zoom Program) . . . . . . . . . . . . . . . . . . . . . . . . . . . . . . . .1-35
Enlarging/Reducing Originals with Copy Ratios Set Independently for X and Y Axes (XY Zoom) . . . . . . . . . . . . . . . . . . . . . . . . . . .1-40
Collating Copies (Finisher) . . . . . . . . . . . . . . . . . . . . . . . . . . . . . . . . . . . .1-44
Collating Copies into Sets in Page Order (Collate) . . . . . . . . . . . . . . .1-48
Collating Copies into Groups of the Same Page (Group) . . . . . . . . . .1-50
Collating Pages and Stapling (Staple) . . . . . . . . . . . . . . . . . . . . . . . . .1-53
iii
Table of Contents
Two-sided Copying (Two-sided Mode) . . . . . . . . . . . . . . . . . . . . . . . . . . 1-56
Making Two-sided Copies from One-sided Originals (1 2-Sided) . . 1-57
Making Two-sided Copies from Two-sided Originals (2 2-Sided) . . 1-59
Making One-sided Copies from Two-sided Originals (2 1-Sided) . . 1-61
Making Two-sided Copies from Facing Pages in a Book
(Book 2-Sided) . . . . . . . . . . . . . . . . . . . . . . . . . . . . . . . . . . . . . . . . . . 1-64
Reserved Copying. . . . . . . . . . . . . . . . . . . . . . . . . . . . . . . . . . . . . . . . . . . 1-67
Interrupting the Current Job to Make Priority Copies
(Interrupt Mode). . . . . . . . . . . . . . . . . . . . . . . . . . . . . . . . . . . . . . . . . . . . . 1-69
Checking a Sample Set Before Copying (Sample Set) . . . . . . . . . . . . . 1-71
Checking the Copy Mode Settings (Setting Confirmation) . . . . . . . . . . 1-74
Changing or Canceling a Selected Copy Mode
(Setting Cancel) . . . . . . . . . . . . . . . . . . . . . . . . . . . . . . . . . . . . . . . . . . . . . 1-75
Chapter 2
Useful Copy Functions
Copying Facing Pages in a Book on Two Separate Sheets of
Paper (Two-page Separation) . . . . . . . . . . . . . . . . . . . . . . . . . . . . . . . . . . . 2-3
Adding Front and Back Covers, Sheet Insertions and
Chapter Pages to Copy Sets (Cover/Sheet Insertion) . . . . . . . . . . . . . . . 2-5
Making Copies for Use as a Booklet (Booklet). . . . . . . . . . . . . . . . . . . . 2-11
Making Copies with Sheets of Paper Interleaved Between
Transparencies (Transparency Interleaving) . . . . . . . . . . . . . . . . . . . . . 2-15
Making Copies with Original Image Shifted (Shift) . . . . . . . . . . . . . . . . 2-19
Makes Copies with Original Image Shifted to the Center or a Corner2-20
Makes Copies with Original Image Shifted Using the Numeric Keys 2-21
Making Copies with Margins (Margin). . . . . . . . . . . . . . . . . . . . . . . . . . . 2-23
Erasing Shadows and Frame Lines from Copies (Frame Erase) . . . . . 2-26
Making Copies Erasing the Frame of the Originals (Original Frame Erase) . . . . . . . . . . . . . . . . . . . . . . . . . . . . . . . . . 2-28
Making Copies Erasing the Book Frame (Book Frame Erase) . . . . . . 2-30
Making Copies Erasing Binding Holes etc. (Binding Erase). . . . . . . . 2-32
Reducing Two, Four, or Eight Originals to Fit on a Single Copy
Sheet (Image Combination) . . . . . . . . . . . . . . . . . . . . . . . . . . . . . . . . . . . 2-34
Dividing an Original into Equal Sections and Enlarging Each
Section on a Separate Copy Sheet (Image Separation). . . . . . . . . . . . . 2-39
Feeding Different-size Originals Together in the Feeder
(Different Size Originals) . . . . . . . . . . . . . . . . . . . . . . . . . . . . . . . . . . . . . 2-43
Copying Separately-set Originals (Job Build) . . . . . . . . . . . . . . . . . . . . 2-45
Storing/Recalling Often-used Copy Settings in Memory
(Mode Memory) . . . . . . . . . . . . . . . . . . . . . . . . . . . . . . . . . . . . . . . . . . . . . 2-48
Storing Copy Settings . . . . . . . . . . . . . . . . . . . . . . . . . . . . . . . . . . . . . 2-48
Storing a Memory Key Name . . . . . . . . . . . . . . . . . . . . . . . . . . . . . . . . 2-51
Recalling Copy Settings. . . . . . . . . . . . . . . . . . . . . . . . . . . . . . . . . . . . 2-54
Table of Contents
iv
Erasing a Copy Job . . . . . . . . . . . . . . . . . . . . . . . . . . . . . . . . . . . . . . .2-54
Recalling a Previous Copy Setting (Recall) . . . . . . . . . . . . . . . . . . . . . .2-57
Inverting Original Images (Nega/Posi) . . . . . . . . . . . . . . . . . . . . . . . . . . .2-58
Making Copies with the Original Image Repeated (Image Repeat). . . .2-59
Making Copies with Image Reversed (Mirror Image) . . . . . . . . . . . . . . .2-62
Making Sharp Contrast Copies (Sharpness). . . . . . . . . . . . . . . . . . . . . .2-64
Chapter 3
Setting/Storing Specifications of the Copy Function
Copy Settings List . . . . . . . . . . . . . . . . . . . . . . . . . . . . . . . . . . . . . . . . . . . .3-2
Setting Standard Keys . . . . . . . . . . . . . . . . . . . . . . . . . . . . . . . . . . . . . . . .3-3
Setting Automatic Collate On/Off. . . . . . . . . . . . . . . . . . . . . . . . . . . . . . . .3-5
Setting Image Orientation Priority to On/Off. . . . . . . . . . . . . . . . . . . . . . .3-6
Setting the Job Duration Display . . . . . . . . . . . . . . . . . . . . . . . . . . . . . . . .3-7
Setting Auto Orientation to On/Off. . . . . . . . . . . . . . . . . . . . . . . . . . . . . . .3-8
Setting the Photo Mode of the Copy Function . . . . . . . . . . . . . . . . . . . . .3-9
Changing the Current Standard Settings . . . . . . . . . . . . . . . . . . . . . . . .3-10
Storing New Standard Settings for Copying . . . . . . . . . . . . . . . . . . . .3-10
Initializing the Standard Settings . . . . . . . . . . . . . . . . . . . . . . . . . . . . .3-11
Restoring Settings to Default Copy Settings . . . . . . . . . . . . . . . . . . . . .3-13
Chapter 4
Appendix
Chart of Available Combination of Functions. . . . . . . . . . . . . . . . . . . . . .4-2
Index . . . . . . . . . . . . . . . . . . . . . . . . . . . . . . . . . . . . . . . . . . . . . . . . . . . . . . .4-6
v
Table of Contents
How to Use This Manual
Symbols Used in This Manual
The following symbols are used in this manual, for explanations of procedures and
restrictions, handling cautions, and instructions that should be observed for safety.
WARNING
Indicates a warning concerning operations that may lead to death or injury
to persons if not performed correctly. In order to use the machine safely,
always pay attention to these warnings.
CAUTION
Indicates a caution concerning operations that may lead to injury to
persons or damage to property if not performed correctly. In order to use
the machine safely, always pay attention to these cautions.
IMPORTANT
Indicates operational warnings and restrictions. Be certain to read these
items to operate the machine correctly, and to avoid damage to the
machine.
NOTE
Indicates notes for operation or additional explanations. Reading these is
highly recommended.
Keys Used in This Manual
The following symbols and key names are used in this manual.
• Control panel keys………………
(Start)
• Touch panel display keys………“OK”
How to Use This Manual
vi
Displays Used in This Manual
Screenshots of the touch panel display used in this manual are those taken when the
Finisher-J1, Cassette Feeding Unit-W1, Feeder (DADF-H1), Printer Kit, and FAX Board are
attached to the imageRUNNER 3300. Note that functions that cannot be used depending on
the model or options, are not displayed on the touch panel display.
The keys which you should press are marked with
, as shown below.
When multiple keys can be pressed on the touch panel display, all keys are marked. Select
the keys which suit your needs.
Place the original, and press “Special Features.”
Press this key for operation
Illustrations Used in This Manual
Unless otherwise noted, illustrations used in this manual are those taken when the FinisherJ1 and Cassette Feeding Unit-W1 are attached to the imageRUNNER 3300.
vii
How to Use This Manual
Basic Copying
1
CHAPTER
This chapter describes the basic copy functions.
What the imageRUNNER 3300/2800/2200 Series Machine Can Do . . . . . . . . . . . . . . . . 1-3
Various Kinds of Copies . . . . . . . . . . . . . . . . . . . . . . . . . . . . . . . . . . . . . . . . . . . . . . . . . . . . . . . .1-3
Flow of Copy Operations . . . . . . . . . . . . . . . . . . . . . . . . . . . . . . . . . . . . . . . . . . . . . . . . . 1-9
Entering the Copy Quantity. . . . . . . . . . . . . . . . . . . . . . . . . . . . . . . . . . . . . . . . . . . . . . . 1-15
Specifying the Required Number of Copies . . . . . . . . . . . . . . . . . . . . . . . . . . . . . . . . . . . . . . .1-15
Changing the Copy Quantity . . . . . . . . . . . . . . . . . . . . . . . . . . . . . . . . . . . . . . . . . . . . . . . . . . .1-16
Selecting the Copy Paper Size (Paper Select) . . . . . . . . . . . . . . . . . . . . . . . . . . . . . . . . 1-17
Automatic Paper Selection (Auto Paper Selection) . . . . . . . . . . . . . . . . . . . . . . . . . . . . . . . . . .1-17
Specifying Paper Size/Type (Manual Paper Selection) . . . . . . . . . . . . . . . . . . . . . . . . . . . . . . .1-19
Adjusting Exposure and Image Quality. . . . . . . . . . . . . . . . . . . . . . . . . . . . . . . . . . . . . . 1-22
Adjusting Copy Exposure. . . . . . . . . . . . . . . . . . . . . . . . . . . . . . . . . . . . . . . . . . . . . . . . . . . . . .1-22
Selecting Image Quality . . . . . . . . . . . . . . . . . . . . . . . . . . . . . . . . . . . . . . . . . . . . . . . . . . . . . . .1-23
Automatic Adjustment of Exposure and Image Quality . . . . . . . . . . . . . . . . . . . . . . . . . . . . . . .1-25
Changing the Copy Exposure During Printing . . . . . . . . . . . . . . . . . . . . . . . . . . . . . . . . . . . . . .1-26
Changing the Copy Ratio (Copy Ratio). . . . . . . . . . . . . . . . . . . . . . . . . . . . . . . . . . . . . . 1-27
Enlarging/Reducing Originals to a Standard Size (Preset Zoom) . . . . . . . . . . . . . . . . . . . . . . .1-27
Specifying the Copy Ratio by % (Zoom Designation) . . . . . . . . . . . . . . . . . . . . . . . . . . . . . . . .1-29
Automatically Setting the Copy Ratio Based on the Original and Copy Paper Sizes (Auto) . . .1-31
Slightly Reducing Images to Prevent the Original from Being Trimmed (Entire Image). . . . . . .1-33
Calculating the Copy Ratio Based on the Original and Copy Paper Sizes (Zoom Program) . .1-35
Enlarging/Reducing Originals with Copy Ratios Set Independently for X and Y Axes
(XY Zoom). . . . . . . . . . . . . . . . . . . . . . . . . . . . . . . . . . . . . . . . . . . . . . . . . . . . . . . . . . . . . . . . . .1-40
Collating Copies (Finisher) . . . . . . . . . . . . . . . . . . . . . . . . . . . . . . . . . . . . . . . . . . . . . . . 1-44
Collating Copies into Sets in Page Order (Collate) . . . . . . . . . . . . . . . . . . . . . . . . . . . . . . . . . .1-48
Collating Copies into Groups of the Same Page (Group) . . . . . . . . . . . . . . . . . . . . . . . . . . . . .1-50
Collating Pages and Stapling (Staple) . . . . . . . . . . . . . . . . . . . . . . . . . . . . . . . . . . . . . . . . . . . .1-53
Two-sided Copying (Two-sided Mode) . . . . . . . . . . . . . . . . . . . . . . . . . . . . . . . . . . . . . . 1-56
Making Two-sided Copies from One-sided Originals (1 2-Sided) . . . . . . . . . . . . . . . . . . . . . .1-57
Making Two-sided Copies from Two-sided Originals (2 2-Sided) . . . . . . . . . . . . . . . . . . . . . .1-59
Making One-sided Copies from Two-sided Originals (2 1-Sided) . . . . . . . . . . . . . . . . . . . . .1-61
Making Two-sided Copies from Facing Pages in a Book (Book 2-Sided) . . . . . . . . . . . . . . . .1-64
Reserved Copying . . . . . . . . . . . . . . . . . . . . . . . . . . . . . . . . . . . . . . . . . . . . . . . . . . . . . 1-67
1-1
1. Basic Copying
Interrupting the Current Job to Make Priority Copies (Interrupt Mode). . . . . . . . . . . . . .1-69
Checking a Sample Set Before Copying (Sample Set). . . . . . . . . . . . . . . . . . . . . . . . . .1-71
Checking the Copy Mode Settings (Setting Confirmation) . . . . . . . . . . . . . . . . . . . . . . .1-74
1
Basic Copying
Changing or Canceling a Selected Copy Mode (Setting Cancel) . . . . . . . . . . . . . . . . . .1-75
1-2
What the imageRUNNER 3300/2800/2200 Series
Machine Can Do
Most operations of this machine are done from the touch panel display. To use the copy
function of this machine, press keys in accordance with the messages displayed on the
touch panel display.
Basic Copying
1
Various Kinds of Copies
Copy Basic Features screen
The screen on the left, which appears when the
machine is ready to make copies, is called the Basic
Features screen.
See p. 1-17.
Press to select the paper features and the paper source.
See p. 1-27.
Press to make copies at a different copy
ratio.
See p. 1-27.
Press to make copies of the same size as the original.
What the imageRUNNER 3300/2800/2200 Series Machine Can Do
1-3
See p. 1-44.
When you select “Collate”
REPORT
REPORT
Press to select or cancel Collate, Group,
or Staple modes.
REPORT
REPORT
REPORT
1
1
2
1
3
1
1
4
Basic Copying
1
See p. 1-56.
When you select “1
2-Sided”
Press to select or cancel the Two-sided
mode. You can copy one-sided/two-sided
originals and facing pages of an original,
such as books, on both the front and back
sides of the paper, and make one-sided
copies from two-sided originals.
See p. 1-22.
SCENE
SCENE
SCENE
Press “Light” or “Dark” to manually control
the copy exposure. Press “A” to select or
cancel Auto Exposure Control.
See p. 1-23.
Press to copy originals specifying the
image quality (text only, text and photo,
photo only). You can also select the type
of photo (printed image/photo) when you
set the Photo mode in Additional
Functions beforehand.
The world’s coral reefs, where
brilliantly colored fish and a
myriad of other tropical creatures
come together. Aptly nicknamed
“Tropical Forests under the sea”,
these spots of breathtaking
beauty serve as home to
countless varieties of life, and to
us of the land, this alluring,
dream-like world forms a tropical
paradise filled with romance.
The world’s coral reefs, where
brilliantly colored fish and a
myriad of other tropical creatures
come together.
See Chapter 2.
Press to select the Special Features mode.
See the Reference Guide.
Press to check the progress of a copy job, change the order of printing, or cancel printing.
1-4
What the imageRUNNER 3300/2800/2200 Series Machine Can Do
Special Features screen 1/2
The screen on the left, which appears on the touch
panel display when you press “Special Features” in the
Copy Basic Features screen, is called the Special
Features screen. This screen is divided into two
screens, and pressing “ ▼” or “▲” displays the next/
previous screen. The Special Features screen displays
additional functions available for copying. In some
cases, when a function is selected, a more detailed
screen for the selected function appears.
To close the Special Features screen and return to the
Basic Features screen, press “Done.”
Pressing
(Guide) after selecting a function displays
a help screen containing guidance information.
This is useful when you want to learn more about the
function.
See p. 2-3.
1
Basic Copying
1
1
Press to select or cancel the Two-page
Separation mode. This mode enables you
to copy facing pages of an opened book
onto separate copy sheets of paper.
See p. 2-5.
When you select “Front Cover”
REPORT
REPORT
Press to add covers, or to add sheet
insertions or chapter pages between
specified pages.
See p. 2-11.
Press to make copies of several originals
to form a booklet.
1
2
3
4
7
2
8
1
1
8
5
4
6
3
6
3
5
6
7
8
What the imageRUNNER 3300/2800/2200 Series Machine Can Do
1-5
Transparencies
See p. 2-15.
REPORT
REPORT
REPORT
Press to select or cancel the
Transparency Interleaving mode. This
mode enables you to insert a sheet
between each transparency when copying
transparencies. (You can make the same
prints on the interleaf sheets as those on
the transparencies.)
Basic Copying
1
Interleaf sheets
See p. 2-19.
Press to select or cancel the Shift mode.
This mode enables you to shift the
position of the original image on the copy
sheet.
See p. 2-23.
Press to select or cancel the Margin
mode. This mode enables you to create
margins along the sides of copies.
See p. 2-26.
When you select “Original Frame Erase”
Press to select or cancel the Frame Erase
mode. This mode enables you to eliminate
dark border areas and lines that appear
around original images, or shadows from
punched holes.
Original Frame Erase
mode selected
Original Frame Erase
mode not selected
See p. 2-34.
Press to select or cancel the Image
Combination mode. This mode enables
you to automatically reduce two, four or
eight originals to fit on a one-sided or twosided copy sheet.
When you select “2 On 1.”
1
1
2
1-6
What the imageRUNNER 3300/2800/2200 Series Machine Can Do
2
When you select “1 To 2.”
See p. 2-39.
Press to select or cancel the Image
Separation mode. This mode enables you
to divide an original into 2 or 4 sections
and enlarge each section onto a copy
sheet of a specified size.
1
2
1
1
11"x17" original
See p. 2-43.
CITY
Press to make copies feeding differentsize originals together in one group, by
setting them in the feeder.
Basic Copying
2
CITY
LTR original
CITY
Original
feeding
direction
See p. 2-45.
Press to divide the originals into several
parts and scan them, then print them all
together. This is convenient when you
cannot load all of the originals that you
want to copy at one time.
See p. 2-48.
Press to store or recall copy mode.
See p. 2-57.
Press to recall previously set copy jobs.
What the imageRUNNER 3300/2800/2200 Series Machine Can Do
1-7
Special Features screen 2/2
Basic Copying
1
See p. 2-58.
SCENE
SCENE
Press to make copies with the entire
black/white image inverted.
See p. 2-59.
Press to copy an original with the image
repeated in the vertical or horizontal
direction.
CITY
CITY
See p. 2-62.
Press to copy the image of the original
reversed as a reflection in the mirror.
See p. 2-64.
Press to select or cancel the Sharpness
mode. This mode enables you to make
copies of original images reproduced with
sharper or softer contrast.
1-8
What the imageRUNNER 3300/2800/2200 Series Machine Can Do
CITY
Flow of Copy Operations
This section describes the flow of basic copy operations.
1
Basic Copying
NOTE
• For the following items, see the Reference Guide:
- Main power and control panel power
- Routine maintenance
1 Press
COPY
COPY
(Copy).
FAX
MAIL BOX
SCAN
If the message <You must insert a control card> appears, insert a control card. (See the
Reference Guide.)
Flow of Copy Operations
1-9
If the message <Enter the Department ID and Password using the numeric keys.>
appears, enter the Department ID and Password. (See the Reference Guide.)
Basic Copying
1
2
Place your original.
NOTE
• For instructions on placing the original, see the Reference Guide.
• When Auto Collate is set to “On,” the Collate (Offset Collate) mode is automatically set when
the original is placed in the feeder. (See ‘Setting Automatic Collate On/Off,’ on p. 3-5.)
3
Set the copy mode in the Basic Features screen.
NOTE
• In the Basic Features screen, you can select the paper size, the copy exposure and image
quality settings, the copy ratio, the two-sided mode, and the desired collating function.
1-10
Flow of Copy Operations
4
Set the desired copy mode in the Special Features screen.
The Special Features screen is divided into two screens. Press “▼”or “▲” to select the
desired mode.
You can continue setting other available modes. (See ‘Useful Copy Functions,’ in Chapter
2.)
5
Enter the copy quantity.
Reset
ABC
DEF
GHI
JKL
MNO
Additional Functions PRS
TUV
WXY
Guide
Interrupt
Clear
S
OPER
NOTE
• For instructions on setting the number of copies, see ‘Entering the Copy Quantity,’ on p. 115.
Flow of Copy Operations
1-11
Basic Copying
1
6
Press
EF
(Start).
Clear
Stop
NO
1
Start
Basic Copying
XY
Power
Copying starts.
When scanning is completed, remove the original.
If the optional Card Reader-C1 is attached, remove the control card. (See the Reference
Guide.)
If you have set the Department ID Management, press
(ID). (See the Reference Guide.)
IMPORTANT
• While copying, you cannot change copy mode settings, such as the copy quantity, paper
size, and copy ratio.
NOTE
• If there is a current job, the machine scans the original, and waits to print it. Printing starts
when the current job is completed.
1-12
Flow of Copy Operations
● When the following screen is displayed:
Follow the instructions in the screen, and press
When scanning is completed, press “Done.”
(Start) once for each original.
Basic Copying
1
● When you want to copy a different original while printing:
Press “Done,” and place your originals. Then Press
Copying,’ on p. 1-67.)
(Start). (See ‘Reserved
Flow of Copy Operations
1-13
● When you want to stop a copy job:
Press
EF
(Stop).
Clear
Stop
NO
1
Start
Basic Copying
XY
Power
For instructions on canceling a copy job, see the Reference Guide.
NOTE
• After you have pressed (Stop), several copies may be output from the machine.
• You can also stop a copy job in the System Monitor screen. (See the Reference Guide.)
● When you want to interrupt a copy job:
To interrupt a copy job when you need to make priority copies, press
(Interrupt).
Guide
GHI
JKL
MN
Additional Functions PRS
TUV
W
Interrupt
OPER
Processing/Data
E
For instructions on explaining how to interrupt a copy job, see ‘Interrupting the Current Job
to Make Priority Copies (Interrupt Mode),’ on p. 1-69.
1-14
Flow of Copy Operations
Entering the Copy Quantity
Specifying the Required Number of Copies
1 Press
(1 to 999).
(numeric keys) to enter the desired copy quantity
Reset
ABC
DEF
GHI
JKL
MNO
Additional Functions PRS
TUV
WXY
Guide
Interrupt
Clear
S
OPER
The copy quantity appears on the upper right side of the Basic Features screen.
The maximum allowable copy quantity varies according to the copy job settings.
IMPORTANT
• You cannot change the copy quantity while copying.
Entering the Copy Quantity
1
Basic Copying
The machine allows up to 999 copies to be made. The maximum number of copies allowable
can be changed. For details, contact your service representative.
1-15
Changing the Copy Quantity
1 Press
(Clear) to clear the entered number.
ON / OFF
Basic Copying
1
Clear
EF
Stop
NO
Start
WXY
2
Press
(1 to 999).
(numeric keys) to enter the desired copy quantity
Reset
ABC
DEF
GHI
JKL
MNO
Additional Functions PRS
TUV
WXY
Guide
Interrupt
Clear
S
OPER
The copy quantity appears on the upper right side of the Basic Features screen.
IMPORTANT
• You cannot change the copy quantity while copying.
1-16
Entering the Copy Quantity
Selecting the Copy Paper Size (Paper Select)
NOTE
• When copying an original onto the same size paper at a 100% copy ratio, the periphery of the
original may be cut slightly on the copy. For details of the size of the non-image areas, see the
Reference Guide.
• If you select the Entire Image mode, the copied image is automatically reduced slightly based on the
paper size and the image size. As a result, the entire original image is reproduced on paper without
being trimmed. (See ‘Slightly Reducing Images to Prevent the Original from Being Trimmed (Entire
Image),’ on p. 1-33.)
• For instructions on setting paper in the stack bypass, see the Reference Guide.
Automatic Paper Selection (Auto Paper Selection)
The machine automatically selects copy paper.
IMPORTANT
• When the machine is operating in the Automatic Paper Selection mode, you cannot use the Auto
Copy Ratio, XY Auto Copy Ratio, Rotate Collating, Rotate Grouping, Saddle Stitch, Booklet, Image
Combination, Image Separation, or Image Repeat (Auto) modes.
• When the machine is operating in the Different Size Originals mode in combination with the Shift
mode or the Cover/Sheet Insertion mode, you cannot use the Automatic Paper Selection mode.
• You cannot use the Automatic Paper Selection mode when copying the following types of originals.
Copy these originals using the Manual Paper Selection mode.
- Non-standard size originals
- Highly transparent originals such as transparencies
- Originals with an extremely dark background
- Originals smaller than STMT in size
NOTE
• The default setting is “Auto.”
• When the Drawer Eligibility for APS/ADS of the paper drawers in the Common Settings is set to “Off,”
you can not make copies in the Automatic Paper Selection mode. (See the Reference Guide.)
Selecting the Copy Paper Size (Paper Select)
1-17
1
Basic Copying
You can set the machine to automatically select the paper size, or you can specify the paper
size for a copy job.
1 Place your original, and press “Paper Select.”
Basic Copying
1
2
Select “Auto,” and press “Done.”
The following screen is displayed.
3
Press
(Start).
Copying starts.
1-18
Selecting the Copy Paper Size (Paper Select)
Specifying Paper Size/Type (Manual Paper Selection)
You can make copies after selecting the paper size and type (color, recycled, etc.) of paper
loaded in the paper drawer.
1
Basic Copying
1 Place your originals, and press “Paper Select.”
NOTE
• The default setting is “Auto.”
2
Select the desired paper size.
When Finisher-J1 is attached
When Saddle Finisher-G1 and
Paper Deck-L1 are attached
To select the stack bypass when paper is fed from the stack bypass for the current job or
reserved job, press “Stack Bypass Setting.”
NOTE
• The paper sizes are displayed in the order in which they are loaded in the paper drawers.
•
displayed on the touch panel indicates that the paper is set vertically;
indicates that
the paper is set horizontally. Paper sizes with the suffix <R> (such as LTRR) indicate paper
placed in the paper drawer or the stack bypass horizontally.
• The paper sizes which are loaded in the paper drawers are shown on the display.
• The paper type (color, recycled) loaded in the paper drawers is indicated by the displayed
icons. (See the Reference Guide.)
Selecting the Copy Paper Size (Paper Select)
1-19
● When you select “Stack Bypass Setting”:
Select the paper size, and press “Next.”
Basic Copying
1
Select the paper type, and press “OK.”
NOTE
• When placing paper other than a standard size, press “Free Size.”
• When loading envelopes, press “Envelope.”
• To select an A or B series paper size, press “A/B-size.”
3
1-20
Press “Done.”
Selecting the Copy Paper Size (Paper Select)
The display returns to the Basic Features screen, and the selected paper size is displayed.
4
Press
Basic Copying
1
(Start).
Copying starts.
NOTE
• To cancel all settings and return the machine to the Standard mode, press
(Reset).
Selecting the Copy Paper Size (Paper Select)
1-21
Adjusting Exposure and Image Quality
The exposure and image quality can be adjusted when the original is scanned.
Basic Copying
1
NOTE
• You can also change the exposure while printing. (See ‘Changing the Copy Exposure During
Printing,’ on p. 1-26.)
Adjusting Copy Exposure
You can manually adjust the exposure to the most appropriate level for the original.
1 Place your originals, and press “Light” or “Dark.”
Move the indicator above “Light” and “Dark” to the left to make the exposure lighter or to
the right to make the exposure darker.
2
Press
(Start).
Copying starts.
NOTE
• To cancel all settings and return the machine to the Standard mode, press
1-22
Adjusting Exposure and Image Quality
(Reset).
Selecting Image Quality
You can adjust image quality to the level best suited to the quality of text or photo originals.
The following three modes are available for adjusting image quality:
Text mode
Photo mode
Text/Photo mode
The world s coral reefs, where
brilliantly colored fish and a
myriad of other tropical creatures
come together. Aptly nicknamed
Tropical Forests under the sea ,
these spots of breathtaking
beauty serve as home to
countless varieties of life, and to
us of the land, this alluring,
dream-like world forms a tropical
paradise filled with romance.
Basic Copying
1
The world s coral reefs, where
brilliantly colored fish and a
myriad of other tropical creatures
come together.
IMPORTANT
• Combinations of these three modes (Text mode, Text/Photo mode and Photo mode) cannot be set. If
you select one of these modes, the previously set mode is canceled.
NOTE
• When you select the Text, Text/Photo, or Photo mode, the exposure can be adjusted only by the
Manual Exposure Control. Automatic Exposure Control cannot be selected.
• When <Photo Mode> in Copy Settings is “On,” you can select “Printed Img.” or “Photo.” (See ‘Setting
the Photo Mode of the Copy Function,’ on p. 3-9.)
• If the original is a transparency, select the Text, Text/Photo, or Photo mode and adjust the exposure
to the most appropriate level.
■ Text Mode
This mode is best suited for making copies from text originals. Blueprints or penciled
originals can be copied clearly.
■ Text/Photo Mode
This mode is best suited for making copies from originals containing both text and photos.
■ Photo Mode
This mode is best suited for making copies from photos printed on photographic paper, or
photo originals containing halftones (i.e., printed photos).
IMPORTANT
• If you make copies of an original containing halftones, such as a printed photograph using the Photo
mode, then moire may occur. If this happens, you can soften the moire effect by using the
Sharpness mode. (See ‘Making Sharp Contrast Copies (Sharpness),’ on p. 2-64.)
Adjusting Exposure and Image Quality
1-23
1 Place
your originals, press “
(Text, Text/Photo, or Photo).
,” and select the type of original
Basic Copying
1
When <Photo Mode> in Copy Settings is set to on, you can select “Printed Img.” or
“Photo.” (See ‘Setting the Photo Mode of the Copy Function,’ on p. 3-9.)
2
Press “Light” or “Dark” to adjust the copy exposure.
Move the indicator above “Light” and “Dark” to the left to make the exposure lighter or to
the right to make the exposure darker.
1-24
Adjusting Exposure and Image Quality
3
Press
(Start).
Copying starts.
NOTE
• To cancel the copy exposure setting, press “A.”
• To cancel all settings and return the machine to the Standard mode, press
(Reset).
Basic Copying
1
Automatic Adjustment of Exposure and Image Quality
1 Place your originals, and press “A.”
The exposure is automatically adjusted to the level best suited to the quality of the original.
NOTE
• When scanning transparencies, adjust exposure using “Light” or “Dark” as the automatic
exposure control may not operate correctly on transparent originals.
2
Press
(Start).
Copying starts.
NOTE
• To cancel all settings and return the machine to the Standard mode, press
(Reset).
Adjusting Exposure and Image Quality
1-25
Changing the Copy Exposure During Printing
The copy exposure can be changed during printing.
1 Press “Light” or “Dark,” in the screen displayed during printing.
Basic Copying
1
Move the indicator above “Light” and “Dark” to the left to make the exposure lighter, or to
the right to make the exposure darker.
The printing exposure changes, and when printing is completed, the display returns to the
Basic Features screen.
Adjusting the exposure after printing has started produces a different result than adjusting
the exposure before scanning the original.
1-26
Adjusting Exposure and Image Quality
Changing the Copy Ratio (Copy Ratio)
NOTE
• If you want to make copies at the copy ratio of 100%, press “Direct.”
Enlarging/Reducing Originals to a Standard Size
(Preset Zoom)
You can enlarge or reduce standard size originals to a standard paper size.
IMPORTANT
• Place your originals horizontally in the following cases:
- When enlarging LTR-size originals to 11" x 17" or LGL-size paper
- When enlarging STMT-size originals to 11" x 17"-size paper
• When reducing 11" x 17" or LGL-size originals to LTR-size with Image Orientation Priority set to
“Off,” place LTRR-size paper in the paper drawer or stack bypass.
NOTE
• Placing an original horizontally means setting the original with the longer side sideways.
■ Reduce
The copy ratio set when making reduced copies is as follows:
-LGL LTR (78%)
-11" x 17" LGL, 11" x 15" LTR (73%)
-11" x 17" LTR (64%)
-11" x 17" STMT (50%)
-Minimum (25%)
■ Enlarge
The copy ratio set when making enlarged copies is as follows:
-Maximum (800%)
(400%)
-STMT 11" x 17" (200%)
-LTR 11" x 17" (129%)
-LGL 11" x 17" (121%)
NOTE
• The copy ratio of 800% is available only when the original is placed on the platen glass.
Changing the Copy Ratio (Copy Ratio)
1
Basic Copying
You can set the machine to adjust the copy ratio automatically, or to specify the copy ratio for
a job.
1-27
1 Place your original, and press “Paper Select.”
Basic Copying
1
2
Select “Auto,” and press “Done.”
The display returns to the Basic Features screen.
NOTE
• The default setting is “Auto.”
3
1-28
Press “Copy Ratio.”
Changing the Copy Ratio (Copy Ratio)
4
To reduce, select a reduction ratio. To enlarge, select an
enlargement ratio. Following your selection, press “Done.”
The display returns to the Basic Features screen, and the selected copy ratio is displayed.
5
Press
(Start).
Copying starts.
NOTE
• To return the copy ratio to 100%, press “Direct.”
• To cancel all settings and return the machine to the Standard mode, press
(Reset).
Specifying the Copy Ratio by % (Zoom Designation)
You can reduce or enlarge images by any copy ratio, in 1% increments. The available copy
ratios are from 25% to 800% when the original is placed on the platen glass, and from 25%
to 400% when the original is placed in the feeder.
Original
Copy
CITY
CITY
CITY
CITY
Changing the Copy Ratio (Copy Ratio)
1-29
Basic Copying
1
1 Place your original, and press “Copy Ratio.”
Basic Copying
1
2
Set a copy ratio by pressing “–” or “+,” and press “Done.”
You can also use
(numeric keys) to input the value. Even if you entered the ratio
with
(numeric keys), you can change the entered values with “–” or “+.”
The display returns to the Basic Features screen, and the selected copy ratio is displayed.
If you specify values outside the range which can be set, a message telling you to set a
value within the appropriate range is displayed.
NOTE
• If you make a mistake when entering values, press
1-30
Changing the Copy Ratio (Copy Ratio)
(Clear), and enter the correct value.
3
Press
(Start).
Copying starts.
NOTE
• To return the copy ratio to 100%, press “Direct.”
• To cancel all settings and return the machine to the Standard mode, press
(Reset).
Automatically Setting the Copy Ratio Based on the
Original and Copy Paper Sizes (Auto)
The machine automatically selects the appropriate copy ratio based on the size of the
original and the selected paper. The available copy ratios are from 25% to 800% when the
original is placed on the platen glass, and from 25% to 400% when the original is placed in
the feeder.
Original
Copy
IMPORTANT
• You cannot use the Auto mode with Automatic Paper Selection.
• You cannot copy highly transparent originals, such as transparencies, in the Auto mode. Use the
Preset Zoom or Zoom Designation modes.
• To use the Auto mode, your originals must conform to a standard paper size.
• The paper sizes that can be used with Auto are 11" x 17"/LGL/LTR/LTRR/STMT/STMTR. However,
when copying STMT-size original using the platen glass, you need to set the “LTRR/STMT Original
Selection” in Additional Functions. (See the Reference Guide.)
NOTE
• If an error occurs between the Auto copy ratio and the actual copy size, you can perform an
adjustment with the Zoom Fine Adjustment function. (See the Reference Guide.)
Changing the Copy Ratio (Copy Ratio)
1-31
Basic Copying
1
1 Place your original, and press “Paper Select.”
Basic Copying
1
2
Select the paper size, and press “Done.”
The display returns to the Basic Features screen.
IMPORTANT
• Select a paper size other than “Auto.” If not, the copy ratio will be automatically set to the
size of the paper loaded in the top paper drawer.
3
1-32
Press “Copy Ratio.”
Changing the Copy Ratio (Copy Ratio)
4
Press “Auto,” and press “Done.”
Basic Copying
1
The specified mode is set and the display returns to the Basic Features screen.
5
Press
(Start).
Copying starts.
NOTE
• To return the copy ratio to 100%, press “Direct.”
• To cancel the setting, press “Copy Ratio” “Auto” in this order.
• If the original is placed on the platen glass, the zoom ratio appears when the feeder is
lowered, provided that the original size can be detected.
• If the original is placed in the feeder, the zoom ratio appears when
(Start) is pressed.
• To cancel all settings and return the machine to the Standard mode, press
(Reset).
Slightly Reducing Images to Prevent the Original from
Being Trimmed (Entire Image)
When copying an original onto identically sized copy paper at a 100% ratio, the original
image may be trimmed slightly on the copy. However, if you set the Entire Image mode, the
image is slightly reduced proportional to the paper and image size. As a result, the entire
image is copied without being trimmed.
IMPORTANT
• When the machine is operating in the Entire Image mode, you cannot use the Booklet, Frame Erase,
Image Combination, Image Separation, Image Repeat, or Mirror Image modes.
Changing the Copy Ratio (Copy Ratio)
1-33
1 Place your originals, and press “Copy Ratio.”
Basic Copying
1
2
Press “Entire Image,” and press “Done.”
The specified mode is set and the display returns to the Basic Features screen.
3
Press
(Start).
Copying starts.
NOTE
• To cancel the setting, press “Copy Ratio” “Entire Image,” in this order.
• To cancel all settings and return the machine to the Standard mode, press
1-34
Changing the Copy Ratio (Copy Ratio)
(Reset).
Calculating the Copy Ratio Based on the Original and Copy
Paper Sizes (Zoom Program)
You can change the copy ratio by specifying the original size and paper size in inches. The
available copy ratios are from 25% to 800% when the original is placed on the platen glass,
and from 25% to 400% when the original is placed in the feeder. The following two Zoom
Program modes are available.
Basic Copying
NOTE
• The specified sizes are converted to the copy ratio (%) as follows:
- Copy ratio (%) = (copy size / original size) x 100
■ Making Copies with the Same XY Copy Ratio (Zoom)
Specify the same copy ratio for the vertical and horizontal directions.
Original
Copy
X=5-7/8" (150 mm)
X=4" (100 mm)
■ Making Copies with Different XY Copy Ratios (XY Zoom)
Specify different copy ratios for the vertical and horizontal directions.
Original
Copy
Y=4-3/4" (120 mm)
Y=5-1/2" (140 mm)
X=4" (100 mm)
1
X=3-1/8" (80 mm)
Changing the Copy Ratio (Copy Ratio)
1-35
Making Copies with the Same XY Copy Ratio (Zoom)
1 Place your originals, and press “Copy Ratio.”
Basic Copying
1
1-36
2
Press “Other Zoom.”
3
Press “Zoom Program.”
Changing the Copy Ratio (Copy Ratio)
4
Press “Original Size” and enter the original size press “Copy Size”
and enter the copy size press “OK.”
When entering values in millimeters, you can use
numbers and
(Clear) to clear your entries.
-
Basic Copying
1
(numeric keys) to enter
The display returns to the Basic Features screen, and the specified copy ratio is displayed.
If the copy ratio is less than 25%, a message appears telling you that the ratio will be
adjusted to 25%. If it is more than 800%, a message appears telling you that the ratio will
be adjusted to 800%.
NOTE
• When the copy ratio is larger than 400%, place the original on the platen glass.
• If you make a mistake when entering values, press “C,” and enter the correct value.
• To specify the sizes of the horizontal direction (X) and the vertical direction (Y) independently,
press “XY Zoom.”
• If you want to enter values in millimeters, press “mm.”
• For details of how to enter the values in inches, see the Reference Guide.
5
Press
(Start).
Copying starts.
NOTE
• To return the copy ratio to 100%, press “Direct.”
• To cancel the setting, press “Copy Ratio” “Other Zoom” “Zoom Program” “Cancel,” in
this order.
• To cancel all settings and return the machine to the Standard mode, press
(Reset).
Changing the Copy Ratio (Copy Ratio)
1-37
Making Copies with Different XY Copy Ratios (XY Zoom)
1 Place your originals, and press “Copy Ratio.”
Basic Copying
1
1-38
2
Press “Other Zoom.”
3
Press “Zoom Program.”
Changing the Copy Ratio (Copy Ratio)
4
Press “XY Zoom.”
5
Enter each value for both the original and copy size, after pressing
“X” (horizontal direction) and “Y” (vertical direction). Then press
“OK.”
When entering values in millimeters, you can use
numbers and
(Clear) to clear your entries.
-
(numeric keys) to enter
The display returns to the Basic Features screen, and the selected copy ratio is displayed.
If the copy ratio is less than 25%, a message appears telling you that the copy ratio will be
adjusted to 25%. If it is more than 800%, a message appears telling you that the ratio will
be adjusted to 800%.
NOTE
• When the ratio is larger than 400%, place the original on the platen glass.
• If you make a mistake when entering values, press “C,” and enter the correct value.
• To set the same values for the X and Y axes, press “Zoom.”
• If you want to enter values in millimeters, press “mm.”
• For details of how to enter the values in inches, see the Reference Guide.
Changing the Copy Ratio (Copy Ratio)
1-39
Basic Copying
1
6
Press
(Start).
Copying starts.
NOTE
• To return the copy ratio to 100%, press “Direct.”
• To cancel the setting, press “Copy Ratio” “Other Zoom”“Zoom Program” “Cancel,” in
this order.
Basic Copying
1
• To cancel all settings and return the machine to the Standard mode, press
(Reset).
Enlarging/Reducing Originals with Copy Ratios Set
Independently for X and Y Axes (XY Zoom)
If you set the XY Zoom mode, you can make enlarged or reduced copies with different XY
copy ratios. The available copy ratios are from 25% to 800% when the original is placed on
the platen glass, and from 25% to 400% when the original is placed in the feeder.
■ Manually Specifying the Copy Ratio (XY Zoom)
You can manually specify the XY copy ratios in 1% increments.
Original
Copy
Enlarging and reducing with
different XY copy ratios
Y=80%
X=120%
NOTE
• If you set the copy ratio with the XY Zoom mode, the copy image computed from the original size
and copy ratio is automatically rotated and copied to suit the size of the selected paper.
1-40
Changing the Copy Ratio (Copy Ratio)
■ Automatically Specifying the Copy Ratio (Auto XY Zoom)
The XY copy ratio is automatically set to suit the size of the selected paper.
Original
Copy
1
Basic Copying
LTRR selected
LTRR
LTR
IMPORTANT
• You cannot copy highly transparent originals, such as transparencies, in the Auto XY Zoom mode. To
make such copies, specify the copy ratio.
• If you set the Auto XY Zoom mode, select the paper size by the Manual Paper Selection mode. If you
do not select the paper size, the copy ratio is automatically set to the size of the paper set in the top
paper drawer.
• When you set the copy ratio in the Auto XY Zoom mode, Auto Orientation is not performed.
NOTE
• If you specify a magnification of smaller than 25%, a message appears telling you to set it to
25%. If you specify a magnification of larger than 800%, a message appears telling you to set it
to 800%.
• If an error occurs between the Auto XY Zoom copy ratio and the actual copy size, you can perform
an adjustment of this with the Zoom Fine Adjustment function. (See the Reference Guide.)
1 Place your originals, and press “Copy Ratio.”
NOTE
• When the ratio is larger than 400%, place the original on the platen glass.
Changing the Copy Ratio (Copy Ratio)
1-41
2
Press “Other Zoom.”
3
Press “XY Zoom.”
Basic Copying
1
4
Enter each value for X and Y after pressing “X” and “Y.” Then press
“OK.”
You can also use
(numeric keys) to input the value. Even if you entered the copy
ratio with
(numeric keys), you can change the entered values with “–” or “+.”
The display returns to the Basic Features screen, and the selected copy ratio is displayed.
If you specify values outside the range which can be set, a message appears telling you to
set the appropriate value.
1-42
Changing the Copy Ratio (Copy Ratio)
IMPORTANT
• When you select “Auto XY Zoom,” you cannot use <Auto> for a paper size. If no paper size
is specified, the copy ratio is automatically set to the size of the paper in the top paper
drawer.
NOTE
• If you make a mistake when entering values, press “C,” and enter the correct value.
• When you select “Auto XY Zoom” in the following cases, <X: Auto%> and <Y: Auto%> are
5
Press
(Start).
Copying starts.
NOTE
• To return the copy ratio to 100%, press “Direct.”
• To cancel the setting, press “Copy Ratio” “Other Zoom” “XY Zoom” “Cancel,” in this
order.
• To cancel all settings and return the machine to the Standard mode, press
(Reset).
Changing the Copy Ratio (Copy Ratio)
1
Basic Copying
displayed as the copy ratios in the Basic Features screen.
- When the original is placed in the feeder
- When the original whose size cannot be detected is placed on the platen glass
1-43
Collating Copies (Finisher)
The Finisher mode can be selected to collate the copies in various ways by pages or copy
sets.
Basic Copying
1
NOTE
• When envelopes, tracing paper, transparencies, or labels are selected, Finisher functions cannot
be set.
• When heavyweight paper is selected, the Staple or Hole Punch mode cannot be set.
Below is a list of finishing functions and paper sizes available for each optional unit.
Staple
Optional units
Offset
None
–
Rotate
LTR, LTRR,
STMT, STMTR
Hole Punch
Corner
Double
Saddle Stitch
–
–
–
–
–
–
–
–
–
–
*2
Finisher-J1
11"x17", LGL,
LTR, LTRR,
STMT
–
–
LTR, LTRR,
STMT, STMTR
11"x17":
15 sheets;
LGL: 20 sheets;
LTR, LTRR:
30 sheets
Inner 2way Tray-A1
Copy Tray-F1
–
Saddle Finisher-G1
–
*1
Puncher Unit-K1
*1
11"x17", LGL, LTR, LTRR, 11"x17", LGL:
LTR, LTRR, STMT, STMTR
25 sheets
STMT
LTR, LTRR:
50 sheets
11"x17", LGL:
25 sheets
LTR, LTRR:
50 sheets
11"x17",
LTRR:
10 sheets
11"x17", LTR:
3 holes;
LGL, LTRR:
2 holes
*1 If Tray A is selected as a designated tray in the Additional Functions Common Settings Tray Designation
screen, Offset is applied. If it is not selected, Rotate is applied.
*2 Stapling position cannot be selected.
1-44
Collating Copies (Finisher)
■ When <Collate> Is Set
Copies are automatically collated into sets arranged in page order, and output into the
trays as follows:
Originals
Three sets of
specified copies
Copy set 1
Copy set 2
Copy set 3
1
1
1
2
2
3
1
2
3
4
2
3
4
3
4
4
■ When <Group> Is Set
All copies of the same original page are automatically collated and grouped together, and
output into the trays as follows:
Originals
Three sets of
specified copies
1
2
1
4
3
2
1
3
4
3
2
1
2
Grouped
copies of
page 4
Grouped
copies of
page 3
Grouped
copies of
page 2
Grouped
copies of
page 1
4
3
4
■ When <Staple> Is Set
Copies are automatically collated into sets arranged in page order, automatically stapled,
and output into the trays, as shown below.
• When you select “Corner” (Top Left)
Originals
Copy set 1
Copy set 2
1
1
Copy set 3
Three sets of
specified copies
1
2
1
3
4
Collating Copies (Finisher)
1-45
Basic Copying
1
• When you select “Double” (Left)
Originals
Copy set 1
Copy set 2
Copy set 3
Three sets of
specified copies
1
1
1
2
1
1
3
Basic Copying
4
• When you select “Saddle Stitch”
Originals
Copy set 1
Copy set 2
Copy set 3
Three sets of
specified copies
7
2
8
1
1
8
1
8
5
4
6
3
6
3
6
3
1
8
6
3
IMPORTANT
• You cannot select the position to be stapled when the Finisher-J1 (option) is attached. (See the
Reference Guide for staple position.)
• Folds may appear differently depending on the type or quantity of paper.
NOTE
• You must place the completed original as a Booklet, as shown in the above illustration. (See
‘Making Copies for Use as a Booklet (Booklet),’ on p. 2-11.)
• “Saddle Stitch” can only be set when the 1 2-Sided or 2 2-Sided mode is selected. (See ‘Twosided Copying (Two-sided Mode),’ on p. 1-56.)
1-46
Collating Copies (Finisher)
■ When <Non-collate> Is Set
When neither Collate, Group, nor Staple is set, copies are output into the trays as shown
below.
Copies
Originals
1
1
2
Basic Copying
1
2
3
4
3
4
■ When <Hole Punch> Is Set
The machine punches 2 or 3 holes in the copies.
Copies
Originals
1
1
2
3
4
■ When <Rotate> Is Set
When originals of the same size are copied, the pages are aligned and the copy sets are
output into the output trays in alternating directions.
Copies
Originals
1
1
1
2
1
3
4
Collating Copies (Finisher)
1-47
■ When <Offset> Is Set
Copies are shifted to the front and back, alternatively.
Copies
Originals
1
1
1
2
1
Basic Copying
3
1
4
Collating Copies into Sets in Page Order (Collate)
1 Place your originals, and press “Finisher.”
NOTE
• When Auto Collate is set to “On,” the Offset Collate mode is automatically set when you
place the originals in the feeder. (See ‘Setting Automatic Collate On/Off,’ on p. 3-5.)
1-48
Collating Copies (Finisher)
2
Press “Collate,” and press “OK.”
When Saddle Finisher-G1 and
Puncher Unit-K1 are attached,
and Tray A exit slot is selected
When Saddle Finisher-G1 and
Puncher Unit-K1 are attached,
and Tray A exit slot is not
selected
Basic Copying
1
When Finisher-J1 is attached
When Finisher is not attached, or
when only Inner 2way Tray-A1 is
attached
When you want hole punches made, press “Hole Punch.”
● When you select “Rotate”:
When the Automatic Paper Selection mode is set, press “Next” select LTR,
LTRR, STMT, or STMTR-size paper press “OK.”
Press “OK,” as long as:
- Available paper size is selected manually.
Collating Copies (Finisher)
1-49
- Available paper size is loaded in both horizontal and vertical directions.
- Drawer Eligibility for APS/ADS of the paper drawers loaded with available paper size is
set to “On.”
3
Â
Press
(Start).
When the original is placed on the platen glass, follow the instructions that appear on the
screen and press
(Start) once for each original. When scanning is completed, press
“Done.”
Basic Copying
1
Copying starts.
NOTE
• To cancel the setting, press “Finisher” “Cancel,” in this order.
• To cancel all settings and return the machine to the Standard mode, press
(Reset).
Collating Copies into Groups of the Same Page (Group)
1 Place your original, and press “Finisher.”
NOTE
• When Auto Collate is set to “On,” the Offset Collate mode is automatically set when you
place the originals in the feeder. (See ‘Setting Automatic Collate On/Off,’ on p. 3-5.)
1-50
Collating Copies (Finisher)
Press “Group,” and press “OK.”
1
When Saddle Finisher-G1 and
Puncher Unit-K1 are attached,
and Tray A exit slot is selected
When Finisher-J1 is attached
When Saddle Finisher G-1 and
Puncher Unit-K1 are attached,
and Tray A exit slot is not
selected
When Finisher is not attached, or
when only Inner 2way Tray-A1 is
attached
Basic Copying
2
When you want hole punches made, press “Hole Punch.”
Collating Copies (Finisher)
1-51
● When you select “Rotate”
When the Automatic Paper Selection mode is set, press “Next” select LTR,
LTRR, STMT, or STMTR-size paper press “OK.”
Basic Copying
1
Press “OK,” as long as:
- Available paper size is selected manually.
- Available paper size is loaded in both horizontal and vertical direction.
- Drawer Eligibility for APS/ADS of the paper drawers loaded with the available paper size
is set to “On.”
3
Press
(Start).
When the original is placed on the platen glass, follow the instructions that appear on the
screen and press
(Start) once for each original. When scanning is completed, press
“Done.”
Copying starts.
NOTE
• To cancel the setting, press “Finisher” “Cancel,” in this order.
• To cancel all settings and return the machine to the Standard mode, press
1-52
Collating Copies (Finisher)
(Reset).
Collating Pages and Stapling (Staple)
1 Place your originals, and press “Finisher.”
Basic Copying
1
NOTE
• When Auto Collate is set to “On,” the Offset Collate mode is automatically set when you
place the originals in the feeder. (See ‘Setting Automatic Collate On/Off,’ on p. 3-5.)
2
Press “Staple.”
When Saddle Finisher-G1 and
Puncher Unit-K1 are attached,
and Tray A exit slot is selected
When Finisher-J1 is attached
Collating Copies (Finisher)
1-53
Basic Copying
1
When Saddle Finisher-G1 and
Puncher Unit-K1 are attached,
and Tray A exit slot is not
selected
When you want hole punches made, press “Hole Punch.”
When the Finisher-J1 is attached, the saddle stitch position cannot be selected. For details
of the saddle stitch position, see the Reference Guide.
● When you select “Staple,” with the Saddle Finisher-G1 attached
Press “Next” select the type of staple (“Corner,” “Double,” or “Saddle Stitch”) select the staple position.
If “Saddle Stitch” is selected, follow the steps below.
- Press “Next.”
1-54
Collating Copies (Finisher)
- Select the paper size, and press “OK.”
Basic Copying
1
NOTE
• You can adjust the saddle stitch position. (See the Reference Guide.)
3
Press “OK.”
The specified mode is set and the display returns to the Basic Features screen.
4
Press
(Start).
When the original is placed on the platen glass, follow the instructions that appear in the
screen and press
(Start) once for each original. When scanning is completed, press
“Done.”
Copying starts.
NOTE
• To cancel the setting, press “Finisher” “Cancel,” in this order.
• To cancel all settings and return the machine to the Standard mode, press
(Reset).
Collating Copies (Finisher)
1-55
Two-sided Copying (Two-sided Mode)
This function enables you to make two-sided copies from one- or two-sided originals or onesided copies from two-sided originals.
Basic Copying
1
IMPORTANT
• When the machine is operating in the Two-sided Mode, you cannot use the Two-page Separation,
Booklet, Transparency Interleaving, Image Combination, or Image Separation modes.
• When the machine is operating in the Book 2-Sided mode, you cannot use the Cover/Sheet
Insertion, Binding Erase, Different Size Originals, or Image Repeat modes, in addition to the modes
mentioned above.
• Non-standard paper sizes cannot be used to make two-sided copies.
• There are some types of paper which may meet the above specifications, but cannot be used to
make two-sided copies.
NOTE
• When copying with the Two-sided mode, align the top edge of the original with the back edge of
the platen glass or the feeder.
• The Two-sided mode you have set is displayed above “Two-sided Mode” in the Basic Features
screen.
• Paper used to make two-sided copies must conform to the following specifications:
- Paper size: 11" x 17", LGL, LTR, LTRR, STMTR and EXEC
- Paper weight: 17-lb bond to 20-lb index (64g/m2 to 80g/m2)
■ Making Two-sided Copies from One-sided Originals (1 2-Sided)
This feature enables you to make two-sided copies from one-sided originals.
■ Making Two-sided Copies from Two-sided Originals (2 2-Sided)
This feature automatically turns over two-sided originals placed in the feeder to make twosided copies.
■ Making One-sided Copies from Two-sided Originals (2 1-Sided)
This feature automatically turns over two-sided originals placed in the feeder to make onesided copies.
■ Making Two-sided Copies from Facing Pages in a Book (Book 2-Sided)
This feature enables you to make two-sided copies from facing pages, or front and back
sides of a page, in a bound original, such as a book or a magazine.
1-56
Two-sided Copying (Two-sided Mode)
Making Two-sided Copies from One-sided Originals
(1 2-Sided)
This feature enables you to make two-sided copies from one-sided originals.
Copy
1
Basic Copying
Originals
IMPORTANT
• Place the originals horizontally when copying originals that are LTRR or STMTR-size. If these
originals are placed vertically, the back side of the copies is printed upside down.
NOTE
• If there are an odd number of originals, then the back side of the last print is left blank. (The
machine's counter does not count the blank page as a copy.)
• When combined with Different Size Originals, two-sided copying cannot be performed. The differentsized originals will be printed as one-sided copies on their respective sizes. When wanting to make
copies on both sides of the paper with different-sized originals, select the type of paper before
printing. (See ‘Feeding Different-size Originals Together in the Feeder (Different Size Originals),’ on
p. 2-43.)
1 Place your original, and press “Two-sided Mode.”
Two-sided Copying (Two-sided Mode)
1-57
2
Press “1 2-Sided.”
Basic Copying
1
To select the type of two-sided copy: press “Option” select the type of two-sided original
press “Done.”
3
Press “OK.”
The display returns to the Basic Features screen, and <1
“Two-sided Mode.”
4
Press
2-Sided> is displayed above
(Start).
When the original is placed on the platen glass, follow the instructions that appear in the
screen and press
(Start) once for each original. When scanning is completed, press
“Done.”
Copying starts.
1-58
Two-sided Copying (Two-sided Mode)
(Reset).
Making Two-sided Copies from Two-sided Originals
(2 2-Sided)
1
This feature enables you to copy two-sided originals on the front and back sides of the paper.
Original
Copy
1 Place your original, and press “Two-sided Mode.”
NOTE
• When Auto Collate is set to on, the Collate mode or the Offset Collate mode is
automatically set when you place the originals in the feeder. (See ‘Setting Automatic
Collate On/Off,’ on p. 3-5.)
Two-sided Copying (Two-sided Mode)
1-59
Basic Copying
NOTE
• To cancel the setting, press “Two-sided Mode” “Cancel,” in this order.
• To cancel all settings and return the machine to the Standard mode, press
2
Press “2
2-Sided.”
Basic Copying
1
To select the type of two-sided copy: press “Option” select the type of two-sided original
press “Done.”
3
Press “OK.”
The display returns to the Basic Features screen, and <2 2-Sided> is displayed above
“Two-sided Mode.”
1-60
Two-sided Copying (Two-sided Mode)
4
Press
(Start).
When the original is placed on the platen glass, follow the instructions that appear in the
screen and press
(Start) once for each original. When scanning is completed, press
“Done.”
Copying starts.
1
Basic Copying
NOTE
• To cancel the setting, press “Two-sided Mode” “Cancel,” in this order.
• To cancel all settings and return the machine to the Standard mode, press
(Reset).
Making One-sided Copies from Two-sided Originals
(2 1-Sided)
This feature enables you to copy two-sided original onto one side of the paper.
Original
Copy
IMPORTANT
• Be sure to set horizontally a LTRR or STMTR landscape-oriented original. If you set it vertically and
copy, the top sides of the front and rear sides are copied in opposite directions.
NOTE
• To copy two-sided originals using the platen glass, use the Job Build mode of Special Features.
(See ‘Copying Separately-set Originals (Job Build),’ on p. 2-45.)
Two-sided Copying (Two-sided Mode)
1-61
1 Place your original, and press “Two-sided Mode.”
Basic Copying
1
NOTE
• When Auto Collate is set to “On,” the Collate mode or the Offset Collate mode is
automatically set when you place the original in the feeder. (See ‘Setting Automatic Collate
On/Off,’ on p. 3-5.)
2
Press “2
1-Sided.”
To select the type of two-sided copy: press “Option” select the type of two-sided original
press “Done.”
1-62
Two-sided Copying (Two-sided Mode)
3
Press “OK.”
The display returns to the Basic Features screen, and <2 1-Sided> is displayed above
“Two-sided Mode.”
Basic Copying
1
4
Press
(Start).
Copying starts.
NOTE
• To cancel the setting, press “Two-sided Mode” “Cancel,” in this order.
• To cancel all settings and return the machine to the Standard mode, press
(Reset).
Two-sided Copying (Two-sided Mode)
1-63
Making Two-sided Copies from Facing Pages in a Book
(Book 2-Sided)
This feature enables you to make two-sided copies from facing pages or front and back sides
of a page in a bound original, such as a book or a magazine.
1
Basic Copying
IMPORTANT
• Place the original on the platen glass. You cannot copy the original in the Book 2-Sided mode from
the feeder.
• Select LTR-size paper when using this feature.
■ Left/Right Two-sided
Makes two-sided copies from facing pages.
Copies
Originals
1
2
1
1
2
■ Front/Back Two-sided
Makes two-sided copies from front and back sides of a page.
Copies
Originals
1
2
2
1
IMPORTANT
• When copying with the Front/Back Two-sided mode, the front side of the first two-sided page and the
back side of the last two-sided page are left blank. (The machine's counter does not count the blank
pages as copies.)
1-64
Two-sided Copying (Two-sided Mode)
1 Place
your original on the platen glass, and press “Two-sided
Mode.”
Basic Copying
1
If you want to make copies in page order, begin copying from the first page.
Place the original face down, so that its top edge is aligned with the top left corner of the
platen glass.
2
Press “Book
2-Sided,” and press “Next.”
Two-sided Copying (Two-sided Mode)
1-65
3
Select the type of two-sided original, and press “OK.”
Basic Copying
1
If “Left/Right Two-sided” is selected, the left and right pages of a book or a magazine are
copied to the front and back of a single sheet.
If you select “Front/Back Two-sided,” the front and back sides of the left page, or the front
and back sides of the right page, are copied onto the front and back sides of a single
sheet.
The display returns to the Basic Features screen and <Book
“Two-sided Mode.”
4
Press
2-Sided> is displayed above
(Start).
To scan the next spread original, place the original and press
(Start) again.
Scanning starts.
5
When scanning is completed, press “Done.”
Copying starts.
NOTE
• To cancel the setting, press “Two-sided Mode” “Cancel,” in this order.
• To cancel all settings and return the machine to the Standard mode, press
1-66
Two-sided Copying (Two-sided Mode)
(Reset).
Reserved Copying
NOTE
• You can reserve up to five copy jobs for the Copy function, including the current job. Interrupt
copy jobs are not included in this count.
• You can set a different mode for each job.
1 Press
“Done” in the following screen that is displayed while
printing.
If the job displayed in the touch panel display is a function other than a copy function,
press COPY (Copy) to display the Basic Features screen.
2
Place your original, and set the desired copy mode.
Reserved Copying
1-67
1
Basic Copying
You can select copy settings and scan originals even if the machine is currently printing. Your
scanned documents are processed after the current job is completed.
3
Press
(Start), and start scanning originals.
If the following screen is displayed, press “OK.” After the current job is completed, repeat
the operation.
Basic Copying
1
1-68
Reserved Copying
Interrupting the Current Job to Make Priority
Copies (Interrupt Mode)
NOTE
• You can make interrupt copies when the machine is ready to scan.
1 Press
(Interrupt).
When you want to copy after changing the Department ID while Department ID
Management is enabled, press
(ID) and enter the Department ID and Password. (See
the Reference Guide.)
NOTE
• Even when you press
(Interrupt), the job currently being output will not be interrupted
until the interrupt copy starts printing.
2
Place your original, and set the desired copy mode.
NOTE
• To cancel the Interrupt mode, press
(Interrupt).
• To cancel all settings and return the machine to the Standard mode, press
3
Press
(Reset).
(Start).
When the Interrupt copy job starts,
1
Basic Copying
The Interrupt mode enables you to interrupt the reserved or current job long enough to make
higher priority copies. This mode is useful when making a rush copy during a long copy job.
(Interrupt) stops blinking.
Interrupting the Current Job to Make Priority Copies (Interrupt Mode)
1-69
4
Once the original is scanned, remove it from the machine.
Basic Copying
1
When the Interrupt copy job is completed, the interrupted printing operation resumes.
IMPORTANT
• If you want to continue making Interrupt copies, wait until the current Interrupt copy job is
completed (end of printing).
1-70
Interrupting the Current Job to Make Priority Copies (Interrupt Mode)
Checking a Sample Set Before Copying (Sample Set)
IMPORTANT
• “Sample Set” is displayed only when you set to make multiple copies of your original in the Collate,
Staple, Cover/Sheet Insertion, or Booklet mode. “Sample Set” is not displayed in the Group mode.
NOTE
• The machine’s counter counts the sample print as a print.
1 Place your originals, and select the desired copy settings.
2 Press “Sample Set,” and press (Start).
Scanning starts.
The sample set printing starts, and one print set is made.
Checking a Sample Set Before Copying (Sample Set)
1-71
1
Basic Copying
Before making multiple copies, you can check the copy result using the Sample Set mode.
3
Check the print, and select “Start Print,” “Cancel,” or “Change
Settings.”
Basic Copying
1
To make the remaining copies, press “Start Print.”
To cancel the copying, press “Cancel.”
1-72
Checking a Sample Set Before Copying (Sample Set)
To change the setting, press “Change Settings,” set a new mode, and press “Done.”
-
To change the number of copies, use
(numeric keys).
To change the exposure, press “Light” or “Dark.”
To make a two-sided copy, press “2-Sided Copy.”
To select the copy paper, press “Paper Select.” (See ‘Selecting the Copy Paper Size
(Paper Select),’ on p. 1-17.)
To collate the copied papers, press “Finisher.” (See ‘Collating Copies (Finisher),’ on p. 144.)
To set a margin for binding, press “Margin.” (See ‘Making Copies with Margins (Margin),’
on p. 2-23.)
When you change the copy settings, the machine starts printing from the first set.
To copy another sample set, press “Sample Set” again.
Checking a Sample Set Before Copying (Sample Set)
1-73
Basic Copying
1
Checking the Copy Mode Settings (Setting Confirmation)
When the copy mode settings are selected in screens, for example, the Special Features
screen, you can check those settings in a list.
Basic Copying
1
1 Press “Setting Confirmation” in the Basic Features screen.
The display shows the selected copy mode settings.
2
Check the settings, and press “Done.”
When ten or more copy modes have been set, use “▼” to bring up the next screen. To
return to the previous screen, press “▲.”
The display returns to the Basic Features screen.
NOTE
• If the copy mode key has a < > mark attached, another screen appears when you press
the key.
1-74
Checking the Copy Mode Settings (Setting Confirmation)
Changing or Canceling a Selected Copy Mode
(Setting Cancel)
1 Press “Setting Confirmation” in the Basic Features screen.
The Setting Confirmation screen is displayed, showing the selected copy mode settings.
2
Press the key of the copy mode to be changed or canceled.
When ten or more copy modes have been set, use “▼” to bring up the next screen. To
return to the previous screen, press “▲.”
The copy mode settings screen appears.
NOTE
• If the copy mode key has a < > mark attached, another screen appears when you press
the key.
• If you press “Done” after pressing a key for which < > is not displayed, the setting is
released.
Changing or Canceling a Selected Copy Mode (Setting Cancel)
1
Basic Copying
From the Setting Confirmation screen, you can also change or cancel selected functions.
1-75
● To change a mode (for example, Sharpness)
Perform the same steps as when setting the mode. Change the setting as you
desire, and press “OK.”
Basic Copying
1
The display returns to the Setting Confirmation screen.
● To cancel a mode
Press “Cancel.”
The display returns to the Setting Confirmation screen.
3
Press “Done.”
The display returns to the Basic Features screen.
1-76
Changing or Canceling a Selected Copy Mode (Setting Cancel)
Useful Copy Functions
2
CHAPTER
This chapter describes more advanced copy functions.
Copying Facing Pages in a Book on Two Separate Sheets of Paper
(Two-page Separation) . . . . . . . . . . . . . . . . . . . . . . . . . . . . . . . . . . . . . . . . . . . . . . . . . . . 2-3
Adding Front and Back Covers, Sheet Insertions and Chapter Pages to Copy Sets
(Cover/Sheet Insertion). . . . . . . . . . . . . . . . . . . . . . . . . . . . . . . . . . . . . . . . . . . . . . . . . . . 2-5
Making Copies for Use as a Booklet (Booklet) . . . . . . . . . . . . . . . . . . . . . . . . . . . . . . . . 2-11
Making Copies with Sheets of Paper Interleaved Between Transparencies
(Transparency Interleaving) . . . . . . . . . . . . . . . . . . . . . . . . . . . . . . . . . . . . . . . . . . . . . . 2-15
Making Copies with Original Image Shifted (Shift) . . . . . . . . . . . . . . . . . . . . . . . . . . . . . 2-19
Makes Copies with Original Image Shifted to the Center or a Corner . . . . . . . . . . . . . . . . . . . .2-20
Makes Copies with Original Image Shifted Using the Numeric Keys . . . . . . . . . . . . . . . . . . . .2-21
Making Copies with Margins (Margin) . . . . . . . . . . . . . . . . . . . . . . . . . . . . . . . . . . . . . . 2-23
Erasing Shadows and Frame Lines from Copies (Frame Erase) . . . . . . . . . . . . . . . . . . 2-26
Making Copies Erasing the Frame of the Originals (Original Frame Erase) . . . . . . . . . . . . . . .2-28
Making Copies Erasing the Book Frame (Book Frame Erase). . . . . . . . . . . . . . . . . . . . . . . . . .2-30
Making Copies Erasing Binding Holes etc. (Binding Erase) . . . . . . . . . . . . . . . . . . . . . . . . . . .2-32
Reducing Two, Four, or Eight Originals to Fit on a Single Copy Sheet
(Image Combination) . . . . . . . . . . . . . . . . . . . . . . . . . . . . . . . . . . . . . . . . . . . . . . . . . . . 2-34
Dividing an Original into Equal Sections and Enlarging Each Section on a
Separate Copy Sheet (Image Separation) . . . . . . . . . . . . . . . . . . . . . . . . . . . . . . . . . . . 2-39
Feeding Different-size Originals Together in the Feeder (Different Size Originals). . . . . 2-43
Copying Separately-set Originals (Job Build) . . . . . . . . . . . . . . . . . . . . . . . . . . . . . . . . . 2-45
Storing/Recalling Often-used Copy Settings in Memory (Mode Memory) . . . . . . . . . . . 2-48
Storing Copy Settings. . . . . . . . . . . . . . . . . . . . . . . . . . . . . . . . . . . . . . . . . . . . . . . . . . . . . . . . .2-48
Storing a Memory Key Name . . . . . . . . . . . . . . . . . . . . . . . . . . . . . . . . . . . . . . . . . . . . . . . . . . .2-51
Recalling Copy Settings . . . . . . . . . . . . . . . . . . . . . . . . . . . . . . . . . . . . . . . . . . . . . . . . . . . . . . .2-54
Erasing a Copy Job . . . . . . . . . . . . . . . . . . . . . . . . . . . . . . . . . . . . . . . . . . . . . . . . . . . . . . . . . .2-54
Recalling a Previous Copy Setting (Recall) . . . . . . . . . . . . . . . . . . . . . . . . . . . . . . . . . . 2-57
Inverting Original Images (Nega/Posi) . . . . . . . . . . . . . . . . . . . . . . . . . . . . . . . . . . . . . . 2-58
Making Copies with the Original Image Repeated (Image Repeat) . . . . . . . . . . . . . . . . 2-59
Making Copies with Image Reversed (Mirror Image) . . . . . . . . . . . . . . . . . . . . . . . . . . . 2-62
2-1
2. Useful Copy Functions
Making Sharp Contrast Copies (Sharpness) . . . . . . . . . . . . . . . . . . . . . . . . . . . . . . . . .2-64
Useful Copy Functions
2
2-2
Copying Facing Pages in a Book on Two Separate
Sheets of Paper (Two-page Separation)
This mode enables you to copy facing pages in a book or a magazine onto separate sheets
of paper.
Copy
1
2
Useful Copy Functions
Original
1
IMPORTANT
• When the machine is operating in the Two-page Separation mode, you cannot use the Two-sided,
Cover/Sheet Insertion, Booklet, Transparency Interleaving, Binding Erase, Different Size
Originals, Image Combination, Image Separation, or Image Repeat modes.
• Place the original on the platen glass. You cannot copy originals in the Two-page Separation
mode from the feeder.
NOTE
• When copying both sides in a book, select the Two-sided Separation mode. (See ‘Making Two-sided
Copies from Facing Pages in a Book (Book 2-Sided),’ on p.1-64.)
1 Place
the original on the platen glass, and press “Special Features”
press “Two-page Separation.”
If you want to make copies in page order, begin copying from the first page and work your
way forward.
Place the original face down with the original’s top edge against the top left corner of the
platen glass.
Copying Facing Pages in a Book on Two Separate Sheets of Paper (Two-page
Separation)
2-3
2
Press “Done.”
Useful Copy Functions
2
The specified mode is set and the display returns to the Basic Features screen.
3
Press
(Start).
Copying starts.
NOTE
• To cancel the setting, press “Special Features” “Two-page Separation” “Done,” in this
order.
• To cancel all settings and return the machine to the Standard mode, press
2-4
Copying Facing Pages in a Book on Two Separate Sheets of Paper (Two-page
Separation)
(Reset).
Adding Front and Back Covers, Sheet Insertions
and Chapter Pages to Copy Sets (Cover/Sheet Insertion)
This function enables you to set the machine to automatically add front and back covers,
sheet insertions, or chapter pages using a different type of paper from which is used for the
main text. In addition, the front and back covers and sheet insertions can also be copied on.
Offset Group, Rotate Collating, Rotate Grouping, Saddle Stitch, Book 2-Sided, Two-page
Separation, Booklet, Transparency Interleaving, Image Combination, Image Separation, Image
Repeat, or Mirror Image modes.
• When Finisher-J1 (option) is attached, you cannot staple more than 30 sheets (LTR and LTRR),
20 sheets (LGL), or 15 sheets (11" x 17") of output paper, including sheet insertions.
• When Saddle Finisher-G1 (option) is attached, you cannot staple more than 50 sheets (LTR and
LTRR), or 25 sheets (11" x 17" and LGL) of output paper, including sheet insertions.
NOTE
• When copying on the front and back covers/sheet insertions, and chapter pages, these sheets are
included in the count of the total number of copies.
• When copying on chapter pages, these sheets are included in the count of the total number of
copies.
■ Front Cover
Adds a front cover sheet to each set of copies. The cover sheet can also be copied on.
Original
REPORT
Copy
REPORT
Printed front cover selected in the Cover/Sheet Insertion mode
Adding Front and Back Covers, Sheet Insertions and Chapter Pages to Copy Sets
(Cover/Sheet Insertion)
2-5
2
Useful Copy Functions
IMPORTANT
• When the machine is operating in the Cover/Sheet Insertion mode, you cannot use the Group,
■ Back Cover
Adds a back cover sheet to each set of copies. The back cover can also be copied on.
Original
REPORT
Copies
REPORT
Useful Copy Functions
2
Printed back cover selected in the Cover/Sheet Insertion mode
■ Sheet Insertion
Adds sheet insertions between the pages of copy sets. This function is useful when you
want to divide your copy sets into different sections, using a blank sheet. The sheet
insertions can also be copied on.
Original
REPORT
Copies
REPORT
Printed sheet insertions selected in the Cover/Sheet Insertion mode
2-6
Adding Front and Back Covers, Sheet Insertions and Chapter Pages to Copy Sets
(Cover/Sheet Insertion)
■ Chapter Page
Adds chapter pages between the pages of copy sets. Since the chapter page is always
copied on one side, this function is useful when you want to divide the copy by chapter.
Original
REPORT
Copies
REPORT
Printed chapter page selected in the Cover/Sheet Insertion mode
1 Place
your originals, and press “Special Features”
Sheet Insertion.”
press “Cover/
NOTE
• When Auto Collate is set to “On,” the Collate mode or the Offset Collate mode is
automatically set when you place the originals in the feeder. (See ‘Setting Automatic
Collate On/Off,’ on p.3-5.)
2
Select the Cover/Sheet Insertion feature you want to use, and press
“Next.”
When you select only the Chapter Page mode, proceed to step 4 (when you select “Sheet
Insertion” or “Chapter Page”).
You cannot select the “Sheet Insertion” and “Chapter Page” modes at the same time.
NOTE
• You can cancel a mode by pressing the mode key again.
Adding Front and Back Covers, Sheet Insertions and Chapter Pages to Copy Sets
(Cover/Sheet Insertion)
2-7
Useful Copy Functions
2
3
When copying onto the front cover, back cover, or sheet insertion,
press “Printed,” and press “Next.”
Useful Copy Functions
2
When setting Two-sided Copying, press “Option,” set the side to be copied, and press
“Done.”
NOTE
• The display varies depending on the setting in step 2.
• The chapter page is always copied on only one side.
4
Make the following settings depending on the mode selected.
NOTE
• The display will vary depending on the mode selected.
2-8
Adding Front and Back Covers, Sheet Insertions and Chapter Pages to Copy Sets
(Cover/Sheet Insertion)
● When you select “Back Cover”:
Select the side to be copied onto, and press “Next.”
Useful Copy Functions
2
● When you select “Sheet Insertion” or “Chapter Page”:
Set all positions where the sheet is to be inserted into the copies, and press
“Next.”
Specify the sheet insertion positions using
-
(numeric keys).
IMPORTANT
• You cannot set the sheet insertion (or chapter page) position on the first page. Set the
position starting from the second page.
NOTE
• You can insert up to 20 insertion sheets or chapter pages.
• If you want to insert 6 or more sheets, use “▲” or “ ▼” to scroll to the insertion positions.
• To cancel a specific sheet insertion page setting, press “▲” or “ ▼” and press the desired
page. Then press
(Clear).
Adding Front and Back Covers, Sheet Insertions and Chapter Pages to Copy Sets
(Cover/Sheet Insertion)
2-9
5
Select the paper source for each cover/sheet insertion press
“OK” press “Done.”
Useful Copy Functions
2
The specified mode is set and the display returns to the Basic Features screen.
IMPORTANT
• Select the same paper size for the front and back cover, sheet insertions, and chapter
page.
• When one of the paper sizes is changed to another size, the other two will be changed. But
when only the paper drawer is changed with the same paper size, the other two sizes will not
be changed.
NOTE
• The display will vary depending on the mode selected.
6
Press
(Start).
When the original is placed on the platen glass, follow the instructions that appear on the
display and press
(Start) once for each original. When scanning is completed, press
“Done.”
Copying starts.
NOTE
• To cancel the setting, press “Special Features” “Cover/Sheet Insertion” “Cancel,” in
this order.
• To cancel all settings and return the machine to the Standard mode, press
2-10
Adding Front and Back Covers, Sheet Insertions and Chapter Pages to Copy Sets
(Cover/Sheet Insertion)
(Reset).
Making Copies for Use as a Booklet (Booklet)
You can copy one-sided or two-sided originals in such a way that the copies are made into a
booklet.
Originals
2
Useful Copy Functions
Copies
1
2
3
4
7
2
8
1
1
8
5
4
6
3
6
3
When the Saddle Finisher-G1
is attached
5
6
7
8
IMPORTANT
• When the machine is operating in the Booklet mode, you cannot use the Entire Image, Finisher,
Two-sided, Two-page Separation, Cover/Sheet Insertion, Transparency Interleaving, Margin,
Frame Erase, Different Size Originals, Image Combination, Image Separation, Image Repeat, or
Mirror Image modes.
• When you horizontally place vertical originals and scan them, the images of the even number
pages will be printed upside down.
• Saddle stitching will not be performed when there is only one sheet of paper.
• Saddle stitching cannot be set when the Saddle Finisher-G1 (option) is not attached.
• Folds may appear differently depending on the type or quantity of paper.
1 Place
your originals, and press “Special Features”
“Booklet.”
press
NOTE
• When Auto Collate is set to “On,” the Collate mode or the Offset Collate mode is
automatically set when you place the original in the feeder. (See ‘Setting Automatic Collate
On/Off,’ on p.3-5.)
Making Copies for Use as a Booklet (Booklet)
2-11
2
Select the original size, and press “Next.”
Useful Copy Functions
2
If two-sided originals will be copied, also press “2-Sided Original” to select how the twosided originals are to be saddle stitched, and press “OK.”
NOTE
• To select an A or B series paper size, press “A/B-size.”
3
Select the paper size, and press “Next.”
If the Saddle Finisher-G1 (option) is not attached, press “OK” “Done,” in this order, and
proceed to step 5.
11" x 17" and LTRR-size paper can be selected.
To add a cover page, press “Add Cover.”
2-12
Making Copies for Use as a Booklet (Booklet)
NOTE
• Set the cover paper face down in the stack bypass.
● When you select “Add Cover”:
Select “Yes” or “No” to specify whether or not to copy on the cover, and press
“Next.”
Useful Copy Functions
2
Select the type of paper, and press “Next.”
IMPORTANT
• The paper used for the cover page must be the same size as the other pages.
• The paper used for the main text or the cover must be from 17-lb to 20-lb bond (64g/m2 to
80g/m2).
• When you select “Add Cover,” you cannot set the paper used for the main text in the stack
bypass.
NOTE
• The cover page can only be copied on the front.
Making Copies for Use as a Booklet (Booklet)
2-13
4
Select whether to saddle stitch the booklet, and press “OK” press
“Done.”
Useful Copy Functions
2
The specified mode is set and the display returns to the Basic Features screen.
NOTE
• When the number of sheets exceeds 11, stapling is not performed, and the sheets are
output to the tray.
• The Booklet tray can hold up to 10 sets of copies at a time for saddle-stitching.
• When you set the Booklet mode, the Shift mode is automatically set.
5
Press
(Start).
When the original is placed on the platen glass, follow the instructions that appear on the
display and press
(Start) once for each original. When scanning is completed, press
“Done.”
Copying starts.
NOTE
• To cancel the setting, press “Special Features” “Booklet” “Cancel,” in this order.
• To cancel all settings and return the machine to the Standard mode, press
(Reset).
2-14
Making Copies for Use as a Booklet (Booklet)
Making Copies with Sheets of Paper Interleaved
Between Transparencies (Transparency Interleaving)
IMPORTANT
• When the machine is operating in the Transparency Interleaving mode, you cannot use the
Finisher, Two-sided, Two-page Separation, Cover/Sheet Insertion, Booklet, Image Combination,
Image Separation, Image Repeat, or Mirror Image modes.
• You cannot make more than one set of copies at a time in the Transparency Interleaving mode.
• Even if your machine is equipped with the Finisher, you cannot use any of the Finisher modes
with the Transparency Interleaving mode.
NOTE
• The machine’s counter does not count blank interleaf sheets as copies.
• Transparencies are output into Tray A when Inner 2way Tray-A1 is attached, and into Tray B in the
case of Saddle Finisher-G1, even if the other tray is specified as a designated tray.
■ When Not Printing on the Interleaf Sheets:
Outputs a printed transparency and a blank interleaf sheet alternately.
Copies
Originals
REPORT
REPORT
Transparencies
Blank interleaf
sheets
Making Copies with Sheets of Paper Interleaved Between Transparencies (Transparency Interleaving)
2-15
2
Useful Copy Functions
Use this mode when copying onto transparencies fed from the stack bypass. The machine
automatically interleaves a sheet of paper between each transparency. The interleaf sheets
protect the copied surface of the transparencies. The image can also be printed on the
interleaf sheets.
■ When Printing on the Interleaf Sheets:
Outputs a printed transparency and a printed interleaf sheet alternately.
Copies
Originals
REPORT
REPORT
REPORT
Transparencies
2
Useful Copy Functions
Printed interleaf
sheets
1 “Transparency
Place your original, and press “Special Features”
Interleaving.”
press
NOTE
• When Auto Collate is set to “On,” the Collate mode or the Offset Collate mode is
automatically set when you place the originals in the feeder. (See ‘Setting Automatic
Collate On/Off,’ on p.3-5.)
2
2-16
Select the size of the transparencies, and press “Next.”
Making Copies with Sheets of Paper Interleaved Between Transparencies (Transparency Interleaving)
3
Select the size of the interleaf sheet, and press “Next.”
4
Select whether or not to copy the image onto the interleaf sheet, and
press “OK” press “Done.”
The selected mode is set and the display returns to the Basic Features screen.
NOTE
• When copying interleaf sheets, these sheets are included in the count of the total number
of copies.
Making Copies with Sheets of Paper Interleaved Between Transparencies (Transparency Interleaving)
2-17
Useful Copy Functions
2
5
Place the transparencies in the stack bypass, and press
(Start).
Useful Copy Functions
2
Scanning starts.
When the original is placed on the platen glass, follow the instructions that appear on the
display and press
(Start) once for each original. When scanning is completed, press
“Done.”
Copying starts.
The copies are output with the copied side face down, with the transparency first, and
followed by the interleaf sheet.
NOTE
• In the Transparency Interleaving mode, the transparencies are fed from the stack bypass
and the interleaf sheets are fed from the paper drawer.
• To cancel the setting, press “Special Features” “Transparency Interleaving” “Cancel,”
in this order.
• To cancel all settings and return the machine to the Standard mode, press
2-18
Making Copies with Sheets of Paper Interleaved Between Transparencies (Transparency Interleaving)
(Reset).
Making Copies with Original Image Shifted (Shift)
Makes copies with the entire image shifted to the center or a corner.
Image modes.
• When the machine is operating in the Shift with No. Key Entry mode, you cannot use the Image
Combination, Image Separation, or Booklet modes.
• The Shift mode cannot be selected when you set the Different Size Originals mode in
combination with the Automatic Paper Selection mode.
■ Center/Corner Shift
Makes copies with the entire image shifted to the center or a corner.
Original
Copy with original image
shifted to the center
Copy with original image
shifted to a corner
■ No. Key Entry
Makes copies with the entire image shifted to a position specified with
keys).
Original
-
(numeric
Copy
4-3/4”(120mm)
4-3/4"(120mm)
3-1/8"(80mm)
3-1/8”(80mm)
CITY
Move to
designated area
CITY
Making Copies with Original Image Shifted (Shift)
2-19
2
Useful Copy Functions
IMPORTANT
• When the machine is operating in the Shift mode, you cannot use the Image Repeat or Mirror
Makes Copies with Original Image Shifted to the Center or
a Corner
1 Place your original, and press “Special Features” press “Shift.”
2 Press “Center Shift/Corner Shift,” and select the shift direction with
2
Useful Copy Functions
an arrow key. Then press “OK,” and “Done.”
The shift direction refers not to the direction in which the original is placed on the platen
glass or in the feeder, but to the direction that you want the original image shifted (viewing
the original that you want to scan as face up and situated in the center of the copy page).
The specified mode is set and the display returns to the Basic Features screen.
3
Press
(Start).
Copying starts.
NOTE
• To cancel the setting, press “Special Features” “Shift” “Cancel,” in this order.
• To cancel all settings and return the machine to the Standard mode, press
(Reset).
2-20
Making Copies with Original Image Shifted (Shift)
Makes Copies with Original Image Shifted Using the
Numeric Keys
1 Place your original, and press “Special Features” press “Shift.”
2 Press “No. Key Entry” to select the shift direction, enter the desired
-
(numeric keys).
If you enter a value outside the setting range, a message prompting you to enter an
appropriate value appears in the screen.
NOTE
• To change an entered value, select the direction and enter the desired value again.
• If you make a mistake when entering a value, press
(clear) and enter the correct value.
• If you want to enter values in millimeters, press “mm.”
• For details of how to enter values in inches, see the Reference Guide.
● Example: To move the image to the left:
Press the left “
.”
Enter the value on the touch panel display, and press “OK” press “OK.”
The specified mode is set and the display returns to the Basic Features screen.
Making Copies with Original Image Shifted (Shift)
2-21
2
Useful Copy Functions
value using
● Example: To move the image in a diagonal direction as in the illustration
below:
Press the upper or lower side “
side “ .”
” to enter the value. Next, press the right or left
Useful Copy Functions
2
Enter the value on the touch panel display, and press “OK” press “OK.”
The specified mode is set and the display returns to the Basic Features screen.
3
Press
(Start).
Copying starts.
NOTE
• To cancel the setting, press “Special Features” “Shift” “Cancel,” in this order.
• To cancel all settings and return the machine to the Standard mode, press
(Reset).
2-22
Making Copies with Original Image Shifted (Shift)
Making Copies with Margins (Margin)
This mode enables you to make copies with the entire original image shifted by a designated
width to the left, right, top, or bottom to create a margin on the copies. Use this mode to
make copies ready for placement in ring binders.
Left margin
selected
Right margin
selected
Top margin
selected
Bottom margin
selected
IMPORTANT
• When the machine is operating in the Margin mode, you cannot use the Booklet, Image Repeat,
or Mirror Image modes.
• When the Margin mode is set, the entire original image is shifted to the left, right, top, or bottom
by a selected width, then copied. If copying an original image that extends to the edge of the
sheet, part of that image is cut off.
Making Copies with Margins (Margin)
2-23
2
Useful Copy Functions
Original
1 Place your original, and press “Special Features”
2 Select the type of margin, and press Next.
“
press “Margin.”
”
Useful Copy Functions
2
IMPORTANT
• If you are using the Margin and Two-sided modes together and copying an original that
already has a left or right margin, follow the instructions below:
- 1 2-sided: Set the margin for the back only.
- 2 2-sided: You do not need to set the margin. Proceed to make copies in the usual way.
- 2 1-sided: Set the margin for the back only.
• If you are using the Margin and Two-sided modes together and copying an original that does
not have a margin, then follow the instructions below:
- 1 2-sided: Set the margin for both the front and back.
- 2 2-sided: Set the margin for both the front and back.
- 2 1-sided: Set the margin for both the front and back.
NOTE
• If you want to enter values in millimeters, press “mm.”
• The default setting is 3/8" (10 mm).
2-24
Making Copies with Margins (Margin)
● When you select “Left Margin” or “Right Margin”:
Use “–” or “+” to set the margin for the front and back (0" to 13/16" or 0 to 20mm).
Then press “OK,” and press “Done.”
The specified mode is set and the screen returns to the Basic Features screen.
● When you select “Top Margin” or “Bottom Margin”:
Use “–” or “+” to set the margin (1/16" to 13/16" or 1 to 20mm) press “OK” press “Done.”
When entering values in millimeters, you can use
-
(numeric keys) and
(Clear).
The specified mode is set and the screen returns to the Basic Features screen.
If you enter a value outside the setting range, a message prompting you to enter an
appropriate value appears in the screen.
3
Press
(Start).
Copying starts.
NOTE
• To cancel the setting, press “Special Features” “Margin” “Cancel,” in this order.
• To cancel all settings and return the machine to the Standard mode, press
(Reset).
Making Copies with Margins (Margin)
2-25
Useful Copy Functions
2
Erasing Shadows and Frame Lines from Copies
(Frame Erase)
This mode erases shadows and lines that appear when copying various types of originals.
IMPORTANT
• Combination of the Original Frame Erase, Book Frame Erase, or Binding Erase modes cannot be
2
Useful Copy Functions
set. If you select one of these modes, the previously set mode is canceled.
■ Original Frame Erase
Erases the dark borders and frame lines that appear around the copy when the original is
smaller than the selected paper size. Also, it creates a blank border around the edge of
the copy.
Copy (LTR)
Original (STMT)
Original Frame
Erase mode
selected
Copy (LTR)
Original Frame
Erase mode
not selected
IMPORTANT
• When the machine is operating in the Original Frame Erase mode, you cannot use the Entire
Image, Booklet, Image Combination, Image Separation, Image Repeat, or Mirror Image modes.
2-26
Erasing Shadows and Frame Lines from Copies (Frame Erase)
■ Book Frame Erase
Erases the dark border as well as center and contour lines that appear when copying
facing pages in a bound original onto a single sheet of paper.
Copy
2
Copy
Book Frame
Erase not
selected
IMPORTANT
• When the machine is operating in the Book Frame Erase mode, you cannot use the Entire
Image, Booklet, Image Combination, Image Separation, Image Repeat, or Mirror Image modes.
■ Binding Erase
Erases the shadows that appear in copies from binding holes in originals.
Copy
Original
Binding Erase
mode selected
Copy
Binding Erase mode
not selected
IMPORTANT
• When the machine is operating in the Binding Frame Erase mode, you cannot use the Entire
Image, Book 2-Sided, Two-page Separation, Booklet, Image Separation, Image Repeat, or
Mirror Image modes.
• Do not place originals with binding holes in the feeder, as this may damage the originals.
Erasing Shadows and Frame Lines from Copies (Frame Erase)
2-27
Useful Copy Functions
Original
Book Frame
Erase
selected
Making Copies Erasing the Frame of the Originals
(Original Frame Erase)
1 Place
your originals, and press “Special Features”
Erase.”
2
Press “Original Frame Erase,” and press “Next.”
3
Select the size of the original, and press “Next.”
press “Frame
Useful Copy Functions
2
IMPORTANT
• You can set the Original Frame Erase mode only on the original sizes shown on the touch
panel display.
NOTE
• To select an A or B series paper size, press “A/B-size.”
2-28
Erasing Shadows and Frame Lines from Copies (Frame Erase)
Select the desired original frame erase width using “-” or “+,” and
press “OK” press “Done.”
2
When entering values in millimeters, you can use
Even when you enter the values with
with “–” or “+.”
-
-
(numeric keys) and
(Clear).
(numeric keys), you can change the values
The value set here is specified for all sides around the original. To set independent frame
erase width values for the top, bottom, left, and right sides of the original, press “Adjust
Each Dim.”
When you select “Adjust Each Dim.,” select the side of the frame erase width using “-” or
“+,” and press “OK” press “Done.”
The specified mode is set and the display returns to the Basic Features screen.
If you enter a value outside the setting range, a message prompting you to enter the
appropriate value appears in the screen.
NOTE
• If you want to enter values in millimeters, press “mm.”
• The default setting is 1/8" (4mm).
Erasing Shadows and Frame Lines from Copies (Frame Erase)
2-29
Useful Copy Functions
4
5
Press
(Start).
Copying starts.
NOTE
• To cancel the setting, press “Special Features” “Frame Erase” “Cancel,” in this order.
• To cancel all settings and return the machine to the Standard mode, press
(Reset).
Useful Copy Functions
2
Making Copies Erasing the Book Frame (Book Frame
Erase)
1 Erase.”
Place your original, and press “Special Features”
press “Frame
2
Press “Book Frame Erase,” and press “Next.”
3
Select the book size of the original, and press “Next.”
NOTE
• To select an A or B series paper size, press “A/B-size.”
2-30
Erasing Shadows and Frame Lines from Copies (Frame Erase)
Press each key: “Top,” “Left,” “Center,” “Right,” and “Bottom” set
the desired book frame erase width using “-” or “+” press “OK” “Done.”
2
When entering values in millimeters, you can use
Even when you enter the values with
using “–” or “+.”
-
-
(numeric keys) and
(Clear).
(numeric keys), you can change the values
The values set here are specified independently for all sides around the original. To set the
same value for all sides around the original, press “Adjust All At Once.”
When you select “Adjust All At Once,” enter the value using “-” or “+,” and press “OK.”
The specified mode is set and the display returns to the Basic Features screen.
If you enter a value outside the setting range, a message prompting you to enter an
appropriate value appears in the screen.
NOTE
• If you want to enter values in millimeters, press “mm.”
• The default settings are 3/8" (10mm) for “Center” and 1/8" (4mm) for “Top,” “Left,” “Right”
and “Bottom.”
• If you select “Adjust Each Dim.,” then you want to set a value uniformly around the original,
press “Adjust All At Once.”
Erasing Shadows and Frame Lines from Copies (Frame Erase)
2-31
Useful Copy Functions
4
5
Press
(Start).
Copying starts.
NOTE
• To cancel the setting, press “Special Features” “Frame Erase” “Cancel,” in this order.
• To cancel all settings and return the machine to the Standard mode, press
(Reset).
Making Copies Erasing Binding Holes etc. (Binding Erase)
Useful Copy Functions
2
1 Place
your original on the platen glass, and press “Special
Features” press “Frame Erase.”
IMPORTANT
• Do not place originals with binding holes in the feeder, as this may damage the originals.
2-32
2
Press “Binding Erase,” and press “Next.”
3
Specify the binding erase feature, and press “Next.”
Erasing Shadows and Frame Lines from Copies (Frame Erase)
The position of the binding holes refers not to the position in which the original is placed on
the platen glass, but to the position of the binding holes viewed when the surface of the
original that you want to scan is face up, with its top edge aligned with the top left corner of
the platen glass.
4
Set the desired binding erase width using “–” or “+,” and press “OK”
press “Done.”
When entering values in millimeters, you can use
Even when you enter the values with
using “–” or “+.”
-
-
(numeric keys) and
(Clear).
(numeric keys), you can change the values
The specified mode is set and the display returns to the Basic Features screen.
If you enter a value outside the setting range, a message prompting you to enter an
appropriate value appears in the screen.
NOTE
• If you want to enter values in millimeters, press “mm.”
• The default setting is 3/4" (18mm).
5
Press
(Start).
Copying starts.
NOTE
• To cancel the setting, press “Special Features” “Frame Erase” “Cancel,” in this order.
• To cancel all settings and return the machine to the Standard mode, press
(Reset).
Erasing Shadows and Frame Lines from Copies (Frame Erase)
2-33
Useful Copy Functions
2
Reducing Two, Four, or Eight Originals to Fit on a
Single Copy Sheet (Image Combination)
This mode automatically reduces two, four, or eight originals, two-sided originals, or the
facing pages of a book to fit on one side or both sides of a selected paper size.
IMPORTANT
• When the machine is operating in the Image Combination mode, you cannot use the Entire
2
Useful Copy Functions
Image, Two-sided, Two-page Separation, Cover/Sheet Insertion, Booklet, Transparency
Interleaving, Saddle Stitch, Original Frame Erase, Book Frame Erase, Different Size Originals,
Image Separation, Image Repeat, or Mirror Image modes.
• Originals copied in the Image Combination mode must all be the same size. You cannot use the
Image Combination mode with the Different Size Originals mode.
NOTE
• The reduction ratio is automatically set so that the originals fit on the selected paper size.
■ 2 On 1
Reduces two 1-sided originals or one 2-sided original to fit on one side or both sides of
the copy sheet.
Originals
Copy
or
1
1
2
2-34
2
1
Reducing Two, Four, or Eight Originals to Fit on a Single Copy Sheet (Image Combination)
■ 4 On 1
Reduces four 1-sided or two 2-sided originals to fit on one side or both sides of the copy
sheet.
Originals
Copy
or
2
3
4
2
1
2
3
3
4
■ 8 On 1
Reduces eight 1-sided or four 2-sided originals to fit on one side or both sides of the copy
sheet.
Copy
Originals
REPORT
or
REPORT
1
1
7
5
2
3
6
7
4
REPORT
1
6
2
3
8
5
8
7
3
5
4
8
7
Reducing Two, Four, or Eight Originals to Fit on a Single Copy Sheet (Image Combination)
2-35
Useful Copy Functions
1
1
1 Place
your originals, and press “Special Features”
Combination.”
press “Image
NOTE
• When Auto Collate is set to “On,” the Collate mode or the Offset Collate mode is
automatically set when you place the originals in the feeder. (See ‘Setting Automatic
Collate On/Off,’ on p.3-5.)
2
Select the size of the original, and press “Next.”
Useful Copy Functions
2
When copying a two-sided original with the Image Combination mode, select the size of
the original, and press “2-Sided Original.”
When you pressed “2-Sided Original,” select the opening method, and press “OK.”
NOTE
• To select an A or B series paper size, press “A/B-size.”
2-36
Reducing Two, Four, or Eight Originals to Fit on a Single Copy Sheet (Image Combination)
Select the desired Image Combination feature, and press “Next.”
2
If you want to make two-sided copies, press “2-Sided Copy,” select the opening method,
and press “OK.”
Press “Option” to select the order of the image layout, and press “Done.”
2 On 1
4 On 1, 8 On 1
If you do not specify “Option,” the images are printed in the following order: left right for
2 On 1; upper left upper right lower left lower right for 4 On 1 or 8 On 1.
Reducing Two, Four, or Eight Originals to Fit on a Single Copy Sheet (Image Combination)
2-37
Useful Copy Functions
3
4
Select the paper size, and press “OK” press “Done.”
Useful Copy Functions
2
The specified mode is set and the display returns to the Basic Features screen.
IMPORTANT
• You cannot set Automatic Paper Selection in the Image Combination mode.
NOTE
• The machine automatically selects the copy ratio depending on the selected paper size.
• When you set the Image Combination mode, the Shift mode is automatically set.
5
Press
(Start).
When the original is placed on the platen glass, follow the instructions that appear on the
display and press
(Start) once for each original. When scanning is completed, press
“Done.”
Copying starts.
NOTE
• To cancel the setting, press “Special Features” “Image Combination” “Cancel,” in this
order.
• To cancel all settings and return the machine to the Standard mode, press
2-38
Reducing Two, Four, or Eight Originals to Fit on a Single Copy Sheet (Image Combination)
(Reset).
Dividing an Original into Equal Sections and Enlarging
Each Section on a Separate Copy Sheet (Image Separation)
IMPORTANT
• When the machine is operating in the Image Separation mode, you cannot use the Entire Image,
Two-sided, Two-page Separation, Cover/Sheet Insertion, Booklet, Transparency Interleaving,
Saddle Stitch, Frame Erase, Different Size Originals, Image Combination, or Image Repeat
modes.
• Originals copied in the Image Separation mode must all be the same size. You cannot use the
Different Size Originals mode in combination with the Image Separation mode.
• Place the original on the platen glass. You cannot copy the original in the Image Separation mode
from the feeder.
NOTE
• The enlargement ratio is automatically set to match the designated paper size.
■ 1 to 2
Divides a one-sided original into two equal sections and outputs the sections in an
enlarged form as two 1-sided copies or one 2-sided copy.
Original
Copies
or
1
2
1
1
2
NOTE
• You can place LTR-size originals horizontally or vertically when using this feature. When placed
vertically, each page is divided into upper and lower sections.
Dividing an Original into Equal Sections and Enlarging Each Section on a Separate
Copy Sheet (Image Separation)
2-39
2
Useful Copy Functions
This mode automatically divides an original into equal sections and copies each section in
an enlarged form on a separate sheet of paper.
The following four types of Image Separation features are available: 1 to 2 (1-sided and 2sided copies), and 1 to 4 (1-sided and 2-sided copies).
■ 1 to 4
Divides a one-sided original into four equal sections and outputs the sections in an
enlarged form as four 1-sided copies or two 2-sided copies.
Original
Copies
or
2
Useful Copy Functions
1
2
1
1
2
4
3
3
3
4
NOTE
• You can place LTR-size originals horizontally or vertically when using this feature.
1 Place
the original on the platen glass, and press “Special Features”
press “Image Separation.”
2
2-40
Select the type of zooming layout, and press “Next.”
Dividing an Original into Equal Sections and Enlarging Each Section on a Separate
Copy Sheet (Image Separation)
If “2-Sided Copy” is selected, select the opening method, and press “OK.”
3
Select the layout of the final page of the original, and press “Next.”
1 To 2
1 To 4
You can reduce the output of pages without images (blank output) by setting the layout of
the last original.
Press “Option” to select the order of the image layout, and press “Done.”
1 To 2
1 To 4
If you do not specify “Option,” the images are printed in the following order: left right for
1 To 2; upper left upper right lower left lower right for 1 To 4.
Dividing an Original into Equal Sections and Enlarging Each Section on a Separate
Copy Sheet (Image Separation)
2-41
Useful Copy Functions
2
4
Select the paper size, and press “OK” press “Done.”
Useful Copy Functions
2
The specified mode is set and the display returns to the Basic Features screen.
IMPORTANT
• You cannot select “Automatic Paper Selection” in the Image Separation mode.
NOTE
• The machine automatically selects the copy ratio depending on the selected paper size.
5
Press
(Start).
When there are multiple originals, follow the instructions that appear on the display and
press
(Start) once for each original. When scanning is completed, press “Done.”
Copying starts.
NOTE
• To cancel the setting, press “Special Features” “Image Separation” “Cancel,” in this
order.
• To cancel all settings and return the machine to the Standard mode, press
2-42
Dividing an Original into Equal Sections and Enlarging Each Section on a Separate
Copy Sheet (Image Separation)
(Reset).
Feeding Different-size Originals Together in the
Feeder (Different Size Originals)
This function enables you to copy different-size originals together in one group, by setting
them in the feeder.
2-sided, Two-page Separation, Booklet, Image Combination, Image Separation, or Image Repeat
modes.
• You cannot select the Shift mode when you set “Automatic Paper Selection” in combination with
the Different Size Originals mode.
• All originals placed together in the feeder must be the same weight (paper type).
• To set originals of different widths, align the top edge of the document with the back edge of the
feeder.
• Set different-size originals in the combinations as follows. Other combinations may damage the
originals.
- 11''x17'' and LGL, LTR and LGL, LTR and LTRR.
• When you place different-width originals, the originals may move slightly when fed to the platen
glass, and as a result, the images may be scanned and copied slanted.
• You cannot set the Staple mode when placing different-width originals.
NOTE
• When combined with Different Size Originals, two-sided copying cannot be performed. The differentsize originals will be printed as one-sided copies on their respective sizes.
1 Place
your originals in the feeder, and press “Special Features”
press “Different Size Originals.”
NOTE
• When Auto Collate is set to “On,” the Collate mode or the Offset Collate mode is
automatically set when you place the originals in the feeder. (See ‘Setting Automatic
Collate On/Off,’ on p.3-5.)
Feeding Different-size Originals Together in the Feeder (Different Size Originals)
2-43
2
Useful Copy Functions
IMPORTANT
• This function can be set when the Feeder (DADF-H1) is attached.
• When the machine is operating in the Different Size Originals mode, you cannot use the Book
2
Select the type of Different Size Originals mode, and press “OK” press “Done.”
Useful Copy Functions
2
When you are setting originals of the same width, press “Same Width.”
When you are setting originals of different widths, press “Different Width.”
The selected mode is set and the display returns to the Basic Features screen.
3
Press
(Start).
When the original is placed on the platen glass, follow the instructions that appear on the
display and press
(Start) once for each original. When scanning is completed, press
“Done”.
Copying starts.
NOTE
• To cancel the setting, press “Special Features “Different Size Originals” “Cancel,” in
this order.
• To cancel all settings and return the machine to the Standard mode, press
2-44
Feeding Different-size Originals Together in the Feeder (Different Size Originals)
(Reset).
Copying Separately-set Originals (Job Build)
This mode enables you to scan too many originals to set at once, by dividing them into
multiple batches. You can use both the feeder and the platen glass for scanning. The
originals are copied as one document after all batches have been scanned.
2
Copies
Useful Copy Functions
Originals
IMPORTANT
• You cannot change the copy settings while scanning originals in the Job Build mode. You need to
set the necessary settings beforehand according to the type of original or the desired Finisher
mode.
• However, you can change or specify the following before scanning the next originals, i.e.,
between jobs: the number of copies, image quality, exposure and 2-sided mode.
• When you place each original in the feeder, continue to remove each original from the original
output area when scanning is completed.
NOTE
• When you place different-size originals in the feeder, set the Different Size Originals mode.
• When you want to copy one-sided and two-sided originals as two-sided copies, set the 1 2-Sided
mode beforehand, if the first batch of originals is one-sided. If the first batch is two-sided, then set
the 2 2-Sided mode beforehand. To scan the next original, set or cancel the Two-sided Original
mode according to the type of original.
• It is useful to store originals in a mail box and print them with the Merge Documents mode when you
cannot prepare the originals at one time, or when you want to set different settings for each original.
(See the Mail Box Function Guide.)
1 Place your first original, and press “Special Features.”
Copying Separately-set Originals (Job Build)
2-45
2
Press “Job Build,” and press “Done.”
Useful Copy Functions
2
The specified mode is set and the display returns to the Basic Features screen.
3
Press
(Start).
Scanning starts.
NOTE
• To cancel scanning, press “Cancel” or
4
(Stop).
When scanning is completed, place the next original, and press
(Start).
Change the scan settings before pressing
(Start), if necessary.
- You can adjust the exposure and the image quality. (See ‘Adjusting Exposure and Image
Quality,’ on p.1-22.)
- You can change the setting of the original type (i.e., One-sided/Two-sided). (See ‘Entering
the Copy Quantity,’ on p.1-15.)
- You can change the number of copy sets. (See ‘Entering the Copy Quantity,’ on p.1-15.)
2-46
Copying Separately-set Originals (Job Build)
When scanning two-sided originals, press “2-sided Original.”
2
Useful Copy Functions
Select the type of two-sided original, and press “OK.”
- Do not forget to set or cancel the Two-sided Original mode according to the type of
originals.
Repeat this operation as necessary.
5
After the last original is scanned, press “Done.”
NOTE
• To cancel the setting, press “Special Features” “Job Build,” in this order.
• To cancel all settings and return the machine to the Standard mode, press
(Reset).
Copying Separately-set Originals (Job Build)
2-47
Storing/Recalling Often-used Copy Settings in
Memory (Mode Memory)
You can store any possible combination of the Copy functions, up to nine settings, in a
memory key, and then name that key. It is useful when you want to store frequently used
Copy functions.
Useful Copy Functions
2
NOTE
• The copy settings stored in memory are not erased even when you turn the power off.
• You can store all functions (modes), except for the Interrupt mode.
Storing Copy Settings
1 Program
the copy settings that you want to store in the Basic
Features and/or Special Features screen.
NOTE
• In the case shown above, the Two-page Separation and Margin modes are set.
2-48
Storing/Recalling Often-used Copy Settings in Memory (Mode Memory)
2
Press “Mode Memory.”
3
Press “Store/Erase.”
4
Press “Store.”
Storing/Recalling Often-used Copy Settings in Memory (Mode Memory)
Useful Copy Functions
2
2-49
5
Select the desired memory key from among memory keys “M1” to
“M9,” and press “Next.”
Useful Copy Functions
2
NOTE
• A mode memory key already storing copy settings shows a small, black square ( ■) in the
lower right corner.
• If you select a memory key already storing copy settings, the settings are displayed.
• If there are more stored copy settings than are currently displayed, then you can scroll the
list using “▲” or “ ▼.”
● If you select a memory key not already storing copy settings:
Select “Yes” to store copy settings.
Select “No” to cancel storing.
When storing is completed, the message <Stored in memory.> appears for about two
seconds.
The memory key storing the copy settings is reversed and the stored settings are displayed.
2-50
Storing/Recalling Often-used Copy Settings in Memory (Mode Memory)
● If you select a memory key already storing a copy setting:
Select “Yes” to overwrite the stored settings.
Select “No” to cancel storing.
When storing is completed, the message <Stored in memory.> appears for about two
seconds.
The memory key storing the copy settings is reversed and the stored settings are displayed.
6
Press “OK,” and press “Done.”
The display returns to the Basic Features screen.
Storing a Memory Key Name
1 Press “Special Features,” and press “Mode Memory.”
2 Press “Store/Erase.”
Storing/Recalling Often-used Copy Settings in Memory (Mode Memory)
2-51
Useful Copy Functions
2
3
Press “Store Name.”
Useful Copy Functions
2
4
Select the memory key (“M1” to “M9”) to which you want to store a
name, and press “Next.”
NOTE
• A mode memory key already storing copy settings shows a small, black square ( ■) in the
lower right corner.
• If you select a memory key already storing copy settings, the settings are displayed.
2-52
Storing/Recalling Often-used Copy Settings in Memory (Mode Memory)
5
Enter the new name, and press “OK.”
The maximum number of characters you can use for the memory key name is 10.
For details of how to enter characters from the touch panel display, see the Reference
Guide.
The name appears on the memory key.
NOTE
• If you press “OK” without any characters entered, the name of the memory key returns to
its default setting, e.g., “M1” or “M2.”
6
Press “OK,” and press “Done.”
The display returns to the Basic Features screen.
Storing/Recalling Often-used Copy Settings in Memory (Mode Memory)
2-53
Useful Copy Functions
2
Recalling Copy Settings
1 Press “Special Features,” and press “Mode Memory.”
2 Select the memory key storing the copy settings you want to use
confirm the stored settings press “OK” press “Done.”
Useful Copy Functions
2
The display returns to the Basic Features screen.
NOTE
• Recalling copy settings from memory cancels the current copy settings.
• After recalling copy settings from memory, you can change them, and make copies.
• If you press another memory key, the copy settings stored in that key are recalled.
Erasing a Copy Job
1 Press “Special Features,” and press “Mode Memory.”
2 Press “Store/Erase.”
2-54
Storing/Recalling Often-used Copy Settings in Memory (Mode Memory)
3
Press “Erase.”
4
Useful Copy Functions
2
Select a memory key to be erased, and press “Next.”
The message appears to confirm that you want to erase the copy job.
IMPORTANT
• Check the copy settings before you erase them.
NOTE
• A mode memory key already storing copy settings shows a small, black square ( ■) in the
lower right corner.
• If you selected a memory key already storing copy settings, the settings are displayed.
• If there are more stored copy settings than are currently displayed, then you can scroll the
list using “▲” or “ ▼.”
Storing/Recalling Often-used Copy Settings in Memory (Mode Memory)
2-55
5
Press “Yes.”
Useful Copy Functions
2
If you want to cancel erasing, press “No.”
The message <Erased.> appears for about two seconds on the touch panel display.
The stored copy setting is erased.
NOTE
• The name of the memory key is not erased. For details of how to change the name, see
‘Storing a Memory Key Name,’ on p.2-51.
6
Press “Cancel,” and press “Done.”
The display returns to the Basic Features screen.
2-56
Storing/Recalling Often-used Copy Settings in Memory (Mode Memory)
Recalling a Previous Copy Setting (Recall)
IMPORTANT
• One copy job is defined by setting the number of copies, exposure, copy ratio, etc., and pressing
2
(Start) or
(Reset) when the Auto Clear function is “On”, or by calling up a copy job stored
in memory. If one of these keys was not pressed, or if the Auto Clear function is not active, then
calling up a copy job by pressing “Recall” is not possible.
Useful Copy Functions
With this function, you can recall up to three previous copy settings and make copies using
these settings.
• The Standard mode cannot be recalled by this procedure.
• Identical copy settings are counted as one setting.
NOTE
• Once stored, the last three copy settings are held in memory even if the power is turned off.
1 Place your originals, and press “Special Features” “Recall.”
2 Select either “1 Before,” “2 Before,” or “3 Before” confirm the
settings press “OK” “Done.”
The display returns to the Basic Features screen.
NOTE
• You can also check which copy jobs are stored to memory other than the currently
displayed copy job by pressing “▲” or “ ▼.”
3
Press
(Start).
Copying starts.
Recalling a Previous Copy Setting (Recall)
2-57
Inverting Original Images (Nega/Posi)
This function enables you to make copies of the original image inverting the black and the
white areas.
Original
2
Useful Copy Functions
SCENE
Copy
SCENE
1 Place your originals, and press “Special Features”
2 Press “Nega/Posi,” and press “Done.”
press “▼.”
The specified mode is set and the display returns to the Basic Features screen.
3
Press
(Start).
Copy starts.
NOTE
• To cancel the setting, press the “Special Features” “ ▼” “Nega/Posi,” in this order.
• To cancel all settings and return the machine to the Standard mode, press
(Reset).
2-58
Inverting Original Images (Nega/Posi)
Making Copies with the Original Image Repeated
(Image Repeat)
You can repeatedly copy the image of an original in either the vertical or horizontal direction.
The following two setting methods are available for the Image Repeat mode.
Original
Copy
CITY
CITY
CITY
IMPORTANT
• When the machine is operating in the Image Repeat (auto setting) mode, you cannot use the
Entire Image, Book 2-Sided, Two-page Separation, Cover/Sheet Insertion, Shift, Booklet,
Transparency Interleaving, Margin, Frame Erase, Different Size Originals, Image Combination,
Image Separation, Mirror Image, Automatic Paper Selection, or Auto modes.
Making Copies with the Original Image Repeated (Image Repeat)
2-59
2
Useful Copy Functions
■ Automatic Setting
The original image is copied so that the maximum possible number of copies fit in the
selected paper size.
■ Manual Setting
The original image is copied a specified number of times.
Original
Copy
CITY
CITY
2
CITY
Useful Copy Functions
CITY
Example: When <3 times> is specified,
images overlap when copied.
IMPORTANT
• When the machine is operating in the Image Repeat (manual setting) mode, you cannot use the
Entire Image, Book 2-Sided, Two-page Separation, Cover/Sheet Insertion, Shift, Booklet,
Transparency Interleaving, Margin, Frame Erase, Different Size Originals, Image Combination,
Image Separation, or Mirror Image modes.
1 Place
your original, and press “Special Features”
press “Image Repeat.”
2
press “▼” Set the number of Image repeat times for each of the horizontal and
vertical directions.
● Automatic setting
Press “Auto.”
To make repeated copies with the number of repeats automatically set, select the paper
size.
The original image is copied so that the maximum possible number of copies fit in the
selected paper size.
2-60
Making Copies with the Original Image Repeated (Image Repeat)
● Manual setting
Press “–” or “+” to set the number of images.
The number of times the image can be repeated is from 1 to 20.
IMPORTANT
• Depending on how many times you have manually set the image to be repeated, some of
the designated images may overlap.
3
Press “OK,” and press “Done.”
The specified mode is set and the display returns to the Basic Features screen.
4
Press
(Start).
Copying starts.
NOTE
• To cancel the setting, press “Special Features” “ ▼” “Image Repeat” “Cancel,” in
this order.
• To cancel all settings and return the machine to the Standard mode, press
(Reset).
Making Copies with the Original Image Repeated (Image Repeat)
2-61
Useful Copy Functions
2
Making Copies with Image Reversed (Mirror Image)
This mode copies the image of the original reversed as a reflection in the mirror.
Original
Copy
Useful Copy Functions
2
IMPORTANT
• When the machine is operating in the Mirror Image mode, you cannot use the Entire Image,
Cover/Sheet Insertion, Shift, Booklet, Margin, Frame Erase, Image Combination, Transparency
Interleaving, or Image Repeat modes.
1 Place your original, and press “Special Features”
2 Press “Mirror Image,” and press “Done.”
press “▼.”
The specified mode is set and the display returns to the Basic Features screen.
2-62
Making Copies with Image Reversed (Mirror Image)
Press
(Start).
Copying starts.
NOTE
• To cancel the setting, press “Special Features” “ ▼” “Mirror Image,” in this order.
• To cancel all settings and return the machine to the Standard mode, press
(Reset).
2
Useful Copy Functions
3
Making Copies with Image Reversed (Mirror Image)
2-63
Making Sharp Contrast Copies (Sharpness)
This mode allows you to make copies of original images with the contrast reproduced more
sharply or more softly. To make copies with text or lines reproduced more sharply, use “High.”
To make copies with photographs or other halftones reproduced more softly, use “Low.”
2
Useful Copy Functions
■ Low
If you make copies of an original image containing halftones, such as a printed
photograph using the Photo mode, moire may occur. However, by using “Low,” you can
soften this moire effect so that the copy is easier on the eyes.
Copy
Original
Low set
The world's coral reefs, where
brilliantly colored fish and a
myriad of other creatures of the
tropics come together.
Low not set
The world's coral reefs, where
brilliantly colored fish and a
myriad of other creatures of the
tropics come together.
The world's coral reefs, where
brilliantly colored fish and a
myriad of other creatures of the
tropics come together.
■ High
This feature enhances the edges of original images so that faint or fine text is reproduced
more sharply. This feature is particularly suited to blueprints and faint pencil-drawn
original images.
Copy
Original
Low set
The world’s coral reefs, where
brilliantly colored fish and a myriad
of other tropical creatures come
together. Aptly nicknamed
“Tropical Forests under the sea”,
these spots of breathtaking beauty
serve as home to countless
varieties of life, and to us of the
land, this alluring, dream-like
world forms a tropical paradise
filled with romance.
2-64
Making Sharp Contrast Copies (Sharpness)
The world’s coral reefs, where
brilliantly colored fish and a myriad
of other tropical creatures come
together. Aptly nicknamed
“Tropical Forests under the sea”,
these spots of breathtaking beauty
serve as home to countless
varieties of life, and to us of the
land, this alluring, dream-like
world forms a tropical paradise
filled with romance.
Low not set
The world’s coral reefs, where
brilliantly colored fish and a myriad
of other tropical creatures come
together. Aptly nicknamed
“Tropical Forests under the sea”,
these spots of breathtaking beauty
serve as home to countless
varieties of life, and to us of the
land, this alluring, dream-like
world forms a tropical paradise
filled with romance.
1 Place
your original, and press “Special Features”
press “Sharpness.”
2
press “▼” Adjust the sharpness by pressing “Low” or “High,” and press “OK”
press “Done.”
Useful Copy Functions
2
To copy text and lines clearly, the setting should be towards “High.” To copy halftone
images such as photographs, the setting should be towards “Low.”
The specified mode is set and the display returns to the Basic Features screen.
3
Press
(Start).
Copying starts.
NOTE
• To cancel the setting, press “Special Features” “ ▼” “Sharpness” “Cancel,” in this
order.
• To cancel all settings and return the machine to the Standard mode, press
(Reset).
Making Sharp Contrast Copies (Sharpness)
2-65
Setting/Storing Specifications
of the Copy Function
3
CHAPTER
This chapter describes how to store or change the default settings to suit your needs.
Copy Settings List. . . . . . . . . . . . . . . . . . . . . . . . . . . . . . . . . . . . . . . . . . . . . . . . . . . . . . . 3-2
Setting Standard Keys . . . . . . . . . . . . . . . . . . . . . . . . . . . . . . . . . . . . . . . . . . . . . . . . . . . 3-3
Setting Automatic Collate On/Off . . . . . . . . . . . . . . . . . . . . . . . . . . . . . . . . . . . . . . . . . . . 3-5
Setting Image Orientation Priority to On/Off . . . . . . . . . . . . . . . . . . . . . . . . . . . . . . . . . . . 3-6
Setting the Job Duration Display . . . . . . . . . . . . . . . . . . . . . . . . . . . . . . . . . . . . . . . . . . . 3-7
Setting Auto Orientation to On/Off . . . . . . . . . . . . . . . . . . . . . . . . . . . . . . . . . . . . . . . . . . 3-8
Setting the Photo Mode of the Copy Function . . . . . . . . . . . . . . . . . . . . . . . . . . . . . . . . . 3-9
Changing the Current Standard Settings . . . . . . . . . . . . . . . . . . . . . . . . . . . . . . . . . . . . 3-10
Storing New Standard Settings for Copying . . . . . . . . . . . . . . . . . . . . . . . . . . . . . . . . . . . . . . .3-10
Initializing the Standard Settings . . . . . . . . . . . . . . . . . . . . . . . . . . . . . . . . . . . . . . . . . . . . . . . .3-11
Restoring Settings to Default Copy Settings. . . . . . . . . . . . . . . . . . . . . . . . . . . . . . . . . . 3-13
3-1
Copy Settings List
The following items can be stored or set in the Copy Settings screen.
Additional Function
Available settings
Applicable page
Copy Settings
Standard Key 1, 2 Settings
3
All modes (No setting*)
p. 3-3
On*/Off
p. 3-5
Image Orientation Priority*2 On/Off*
p. 3-6
Job Duration Display
On/Off*
p. 3-7
Auto Orientation
On*/Off
p. 3-8
Photo Mode
On/Off*
p. 3-9
Standard Settings
Store, Initialize
p. 3-10
Initialize Copy Settings
Initialize
p. 3-13
Setting/Storing Specifications of the Copy Function
Auto
Collate*1
Settings marked * are default settings.
*1: Displayed only when the Feeder (DADF-H1) is attached.
*2: Not displayed when the Finisher-J1 is attached.
NOTE
• For instructions on how to set the modes not described in this manual, refer to the other manuals
available separately.
• The Copy Settings screen is made up of several screens. Use “ ▼” or “▲” to scroll to the screen you
want, and make the required settings.
• When “ ▼” or “▲”should be pressed, the indication
3-2
Copy Settings List
is displayed in this manual.
Setting Standard Keys
You can store up to two Standard keys from the Copy Ratio, Finisher, and Two-sided Mode
keys on the Basic Features screen, the keys on the Special Features screen, or the memory
keys containing copy settings stored in Mode Memory. This is useful when you want to store
the frequently-used copy functions in the Basic Features screen.
1 Call up the desired screen as follows:
Setting/Storing Specifications of the Copy Function
3
(Additional Functions)
2
Display the group of functions to be stored as Standard keys by
pressing “▼” or “▲,” and select the desired group of functions.
NOTE
• To cancel the Standard Key setting already stored, press “No Setting.”
Setting Standard Keys
3-3
3
Select the desired modes to be stored with the Standard key, and
press “OK.”
3
Setting/Storing Specifications of the Copy Function
NOTE
• To cancel storing, press “Cancel.”
4
Press “Done.”
Repeat this procedure.
The display returns to the Basic Features screen.
Example: The stored Standard keys are displayed as shown below.
Standard key 1 Standard key 2
3-4
Setting Standard Keys
Setting Automatic Collate On/Off
This mode allows automatic selection of the Collate (Offset Collate) mode when the original
is placed in the feeder. This is helpful when making multiple copies, because you do not need
to remember to select the Finisher mode.
IMPORTANT
• This setting is available only when the Feeder (DADF-H1) is attached.
Without any output option attached, the Collate mode is set.
• The default setting is “On.”
1 Call up the desired screen as follows:
(Additional Functions)
2
Select “On” or “Off,” and press “OK.”
3
Press “Done.”
Repeat this procedure.
The selected mode is set and the display returns to the Basic Features screen.
Setting Automatic Collate On/Off
3-5
3
Setting/Storing Specifications of the Copy Function
NOTE
• When Auto Collate is set to “On” with the finisher (option) attached, the Offset Collate mode is set.
Setting Image Orientation Priority to On/Off
The image orientation may be printed conversely depending on the copy mode set. With this
function, you can set whether or not to copy the image in the same direction as the original
image.
IMPORTANT
• This setting is not available when the Finisher-J1 is attached.
3
Setting/Storing Specifications of the Copy Function
NOTE
• When Image Orientation Priority is set to “On,” the first copy will take longer to process than
normally.
• The default setting is “Off.”
1 Call up the desired screen as follows:
(Additional Functions)
2
Select “On” or “Off,” and press “OK.”
3
Press “Done.”
Repeat this procedure.
The selected mode is set and the display returns to the Basic Features screen.
3-6
Setting Image Orientation Priority to On/Off
Setting the Job Duration Display
When Job Duration Display is set to “On,” the time remaining until completion of the copy job
(Job Duration Time) is indicated in minutes on the touch panel display.
NOTE
• The job duration time is not displayed for the Transparency Interleaving, Cover/Sheet Insertion,
Different Size Originals, Rotate Collating, and Rotate Grouping modes or when the copy waiting time
is less than one minute.
1 Call up the desired screen as follows:
(Additional Functions)
2
Select “On” or “Off,” and press “OK.”
3
Press “Done.”
Repeat this procedure.
The selected mode is set and the display returns to the Basic Features screen.
Setting the Job Duration Display
3
Setting/Storing Specifications of the Copy Function
• The default setting is “Off.”
3-7
Setting Auto Orientation to On/Off
Using parameters such as original size and zoom ratio, this function automatically rotates the
image to the most suitable position for the specified paper size.
NOTE
• The default setting is “On.”
3
Setting/Storing Specifications of the Copy Function
1 Call up the desired screen as follows:
(Additional Functions)
2
Select “On” or “Off,” and press “OK.”
NOTE
• Only standard size originals up to LTR (for direct zoom ratio) can be rotated.
• When “Automatic Paper Selection” is selected, any paper matching the width will be displayed
as the optimum size if there is no paper with the optimum length.
3
Press “Done.”
Repeat this procedure.
The selected mode is set and the display returns to the Basic Features screen.
3-8
Setting Auto Orientation to On/Off
Setting the Photo Mode of the Copy Function
You can set whether or not to use the Photo mode in the Copy function. When the Photo
Mode is “On,” you can select “Printed Image” and “Photo” when making copies with the
image quality setting.
NOTE
• The default setting is “Off.”
3
Setting/Storing Specifications of the Copy Function
1 Call up the desired screen as follows:
(Additional Functions)
2
Select “On” or “Off,” and press “OK.”
3
Press “Done.”
Repeat this procedure.
The display returns to the Basic Features screen.
Setting the Photo Mode of the Copy Function
3-9
Changing the Current Standard Settings
Standard Settings refers to a combination of Copy modes that the machine automatically
sets after the power is turned on or when
(Reset) is pressed. The Standard Settings can
be changed to suit your needs, or be returned to the default settings.
NOTE
• The default settings are as follows:
-
Setting/Storing Specifications of the Copy Function
3
Copy quantity: 1
Paper selection: Automatic Paper Selection
Exposure/ Image quality: A
Copy Ratio: Direct (100%)
Copy function: 1 1-sided copy
Storing New Standard Settings for Copying
To store copy settings as Standard Settings, you need to specify the settings you wish to
store from the Basic Features screen and/or Special Features screen, and then follow the
procedure below.
1 Call up the desired screen as follows:
(Additional Functions)
2
3-10
Press “Store.”
Changing the Current Standard Settings
Press “Yes.”
To cancel storing the currently displayed settings as the Standard Settings, press “No.”
This screen is displayed for about two seconds as the settings currently displayed are stored
as the Standard Settings.
NOTE
• The settings displayed here are the currently set copy settings. Press “▲” or “ ▼” to display
Copy modes that do not fit in the display area.
4
Press “Done.”
Repeat this procedure.
The display returns to the Basic Features screen.
Initializing the Standard Settings
1 Call up the desired screen as follows:
(Additional Functions)
Changing the Current Standard Settings
3-11
3
Setting/Storing Specifications of the Copy Function
3
Setting/Storing Specifications of the Copy Function
3
2
Press “Initialize.”
3
Check the setting, and press “Yes.”
To cancel the initialization, press “No.”
This screen is displayed for about two seconds as the Standard Settings are initialized.
4
Press “Done.”
Repeat this procedure.
The display returns to the Basic Features screen.
3-12
Changing the Current Standard Settings
Restoring Settings to Default Copy Settings
Items that have been changed in the Copy Settings can be returned to their default settings.
1 Call up the desired screen as follows:
2
Press “Yes.”
To cancel the initialization of copy settings, press “No.” The display returns to the Copy
Setting screen.
This screen is displayed for about two seconds.
3
Press “Done.”
Repeat this procedure.
The display returns to the Basic Features screen.
Restoring Settings to Default Copy Settings
3-13
Setting/Storing Specifications of the Copy Function
3
(Additional Functions)
Appendix
4
CHAPTER
Chart of Available Combination of Functions . . . . . . . . . . . . . . . . . . . . . . . . . . . . . . . . . . 4-2
Index . . . . . . . . . . . . . . . . . . . . . . . . . . . . . . . . . . . . . . . . . . . . . . . . . . . . . . . . . . . . . . . . . 4-6
4-1
Chart of Available Combination of Functions
Priority to Image Combination,
Image Separation, and Booklet
modes (Ratio can be changed)
Functi
Priority to latest set mode
▲▲▲
▲
▲▲
▲▲
▲
▲▲▲
▲▲▲▲
▲
▲
▲
▲
✕ ✕
4-2
*1
*1
▲
▲
▲
▲
✕
✕
*1
▲▲
▲
▲
▲▲
▲▲
▲▲
▲▲
▲▲
▲
▲
▲
*1
▼ ▼ ▼
Function intend to set
Enlargement
Zoom Designation
XY Zoom
Auto Zoom mode
Zoom Program
Entire Image
Automatic Exposure Control
Printed Image
Photo
Text
Text/Photo
Automatic Paper Selection
Automatic Paper Selection, Auto Orientation
Auto Drawer Switching
Stack Bypass
Collate
Group
Rotate Collating
Rotate Grouping
Offset Collate
Offset Group
Staple
Saddle Stitch
Hole Punch
Interrupt Copy
Reserve Copy
1 2-Sided
2 2-Sided
2 1-Sided
Book 2-Sided
▼
Appendix
Combination unavailable
▼ ▼ ▼
4
✕
▲
●
▼
Combination available
on alre
ady se
Enlarg
t
ement
Zoom
Desig
n
ation
XY Zo
om
Auto Z
oom m
od
Zoom
Progra e
m
Entire
Image
Autom
ati
Printed c Exposure
Contro
Image
l
Photo
Text
Text/P
ho
Autom to
ati
Automatic c Paper Se
lec
P
Auto D aper Seleciton, tion
Auto
ra
Stack wer Switchin Orientation
By
g
Collate pass
Group
Rotate
C
Rotate ollating
G
Offset rouping
Collate
Offset
G
Staple roup
Saddle
S
Hole P titch
un
Interru ch
pt
Reserv Copy
e
1 2-S Copy
ide
2 2-S d
ide
2 1-S d
ided
Book
2-Side
d
The chart shows the settings combinations when you want to reconfigure the functions.
Chart of Available Combination of Functions
▲
*1 *1 *1
✕ ✕
✕ ✕
✕ ✕
*1
*1
*1
*1
*1
*1
*1
*1
*1
✕
✕
✕ ✕
✕ ✕
*1
*1
*1
*1 *1
▲
▲
▲▲
▲▲
▲▲
▲▲
▲▲
▲▲
*1 *1 *1 *1
▲▲▲▲
▲▲▲▲
▲▲▲
▲
▲▲
▲▲
▲
▲▲▲
▲▲▲▲
▲▲▲▲
*1
▲
▲
▲
▲
▲
▲
▲
*1 *1
▲
▲
▲
▲
▲
▲
▲
*1
*1
*1
✕
✕
*1 *1
*1
✕ ✕
▲▲▲
▲
▲▲
▲
▲▲
▲▲▲
Priority to Image Combination,
Image Separation, and Booklet
modes (Ratio can be changed)
n alrea
dy set
Enlarg
ement
Zoom
Desig
nation
XY Zo
om
Auto Z
oo
Zoom m mode
Progra
m
Entire
Im
Autom age
atic Ex
pos
Printed
Image ure Control
Photo
Text
Text/P
ho
Autom to
ati
Automatic c Paper Se
lec
P
Auto D aper Selection, tion
Au
ra
Stack wer Switch to Orientation
ing
By
Collate pass
Group
Rotate
C
Rotate ollating
G
Offset rouping
Collate
Offset
G
Staple roup
Saddle
S
Hole P titch
un
Interru ch
pt
Reserv Copy
e
1 2-S Copy
ide
2 2-S d
ide
2 1-S d
ided
Book
2-Side
d
Priority to latest set mode
Functi
o
Combination unavailable
▼ ▼ ▼
✕
▲
●
▼
Combination available
Function intend to set
● ● ●
● ● ●
● ✕
● ✕
✕
✕
✕
✕ ✕
✕ ✕
✕
✕
✕
*1
*1
*1
✕ ✕ ✕ ✕
✕ ✕ ✕ ✕
✕ ✕ ✕ ✕
✕
4
▲
● ● ●
● ● ●
● ● ●
● ✕
● ✕
● ✕
✕
✕
✕
*1
*4 *4
✕
*1
*4 *4
*1
✕
*4 *4
*1
✕
✕ *6 ✕ ✕ ✕
✕ ✕
*1 ✕ ✕
✕ ✕
*1 ✕ ✕
✕ ✕
*1 ✕ ✕
*1
✕
✕
✕ ✕
✕
✕
✕
✕
✕
✕
✕
✕
✕
✕
✕
✕
✕
✕
✕
✕
✕
✕
✕
✕
✕
✕
✕
✕
✕
✕
✕
✕
✕
✕
✕
✕
✕
✕
✕
✕
✕
*5
✕
✕
✕
✕
✕
✕
✕
✕
✕
✕
✕
✕
✕
✕
✕
✕
✕
Appendix
Two-page Separation
Image Combination
Image Separation
Original Frame Erase
Book Frame Erase
Binding Erase
Right Margin
Left Margin
Top Margin
Bottom Margin
Shift
Front Cover
Sheet Insertion (Printed/Blank)
Chapter Page
Transparency Interleaving
Booklet
Booklet/Saddle Stitch
Front Cover (Printed/Blank)
Sample Set
Different Size Originals
Job Build
Sharpness
Nega/Posi
Image Repeat (Auto Setting)
Image Repeat (Manual Setting)
Mirror Image
✕
✕
✕
✕
✕
✕
✕
*2 *3
*1
*1
Chart of Available Combination of Functions
✕
✕
4-3
Priority to latest set mode
Priority to Image Combination,
Image Separation, and Booklet
modes (Ratio can be changed)
▼ ▼ ▼
Function intend to set
Enlargement
Zoom Designation
XY Zoom
Auto Zoom mode
Zoom Program
Entire Image
Automatic Exposure Control
Printed Image
Photo
Text
Text/Photo
Automatic Paper Selection
Automatic Paper Selection, Auto Orientation
Auto Drawer Switching
Stack Bypass
Collate
Group
Rotate Collating
Rotate Grouping
Offset Collate
Offset Group
Staple Collate
Saddle Stitch
Hole Punch
Interrupt Copy
Reserve Copy
1 2-Sided
2 2-Sided
2 1-Sided
Book 2-Sided
▼
Appendix
4
Combination unavailable
on alre
ady se
Two-p
t
ag
Image e Separatio
n
Comb
ination
Image
S
Origin eparation
al
Book F Frame Erase
ra
Bindin me Erase
g Eras
e
Right
Ma
Left M rgin
argin
Top M
arg
Bottom in
Margin
Shift
Front C
o
Sheet ver
Insertio
n (Prin
Chapte
ted/Bla
r
nk)
Transp Page
arency
Bookle
Interle
aving
t
Bookle
t/S
Front C addle Stitc
h
o
Samp ver (Printed
le S
/Blank
)
Differe et
nt
Job B Size Origin
uild
als
Sharp
ne
Nega/p ss
o
Image si
R
Image epeat (Auto
Mirror Repeat (Ma Setting)
nual S
Image
etting)
✕
▲
●
Functi
Combination available
4-4
● ●
● ●
● ●
● ● ●
● ● ●
● ● ●
● ●
✕ ✕ ✕ ✕ ✕
● ● ●
✕ ✕ ✕
✕ ✕
✕ ✕
*4 *4 *4
✕ ✕
*4 *4 *4 ✕ ✕ ✕
✕
*1 *1 *1 *1 ✕☛ 1*1
✕ ✕ ✕
✕ ✕ ✕ ✕ ✕ ✕
✕ ✕ ✕ ✕ ✕ ✕
✕ ✕ ✕ ✕ ✕ ✕
✕ ✕ ✕
✕ ✕ ✕ ✕ ✕ ✕
✕ ✕ ✕
✕ ✕ ✕ ✕ ✕ *5
✕ ✕ ✕
*1 *1 *1
✕ ✕ ✕
✕
✕
✕
✕
✕
✕
✕
✕
✕
✕
✕
✕
✕
✕
Chart of Available Combination of Functions
✕
✕
✕
✕ ✕ ✕ ✕
✕
✕
✕
✕
✕
✕
✕
✕
✕
✕
✕
✕ ✕
✕
*1
✕
✕ ✕
✕
✕ ✕
✕
✕ ✕
✕
✕
✕
*7
*8
✕
✕
✕
✕
✕
✕
✕ ✕
*1 *1
✕ ✕
Priority to latest set mode
Priority to Image Combination,
Image Separation, and Booklet
modes (Ratio can be changed)
Function intend to set
Two-page Separation
Image Combination
Image Separation
Original Frame Erase
Book Frame Erase
Binding Erase
Right Margin
Left Margin
Top Margin
Bottom Margin
Shift
Front Cover
Sheet Insertion (Printed/Blank)
Chapter Page
Transparency Interleaving
Booklet
Booklet/Saddle Stitch
Front Cover (Printed/Blank)
Sample Set
Different Size Originals
Job Build
Sharpness
Nega/Posi
Image Repeat (Auto Setting)
Image Repeat (Manual Setting)
Mirror Image
*1
*2
*3
*4
*5
*6
*7
*8
*9
*10
*11
✕
✕
✕ ✕
✕
✕
✕
✕
✕
✕
✕
✕
✕
✕
*11
✕
✕
✕
✕
▲
▲
▲
✕ ✕
✕
✕ ✕ ✕
✕ ✕ ✕ ✕
▲▲
✕▲
▲
✕▲▲
✕
✕
✕
✕
✕
✕
✕
✕
✕
▲▲▲
▲
▲▲
▲▲
▲
▲▲▲
✕ ✕ ✕ ✕ ✕ ✕
✕ ✕ ✕ ✕ ✕ ✕
✕ ✕ ✕ ✕ ✕ ✕
✕
✕ ✕ ✕ ✕ ✕ ✕ ✕
✕
▲✕ ✕ ✕ ✕▲▲▲
✕
✕ ✕ ✕ ✕ ✕ ✕ ✕
✕ ✕ ✕
✕ ✕ ✕
✕ ✕ ✕
✕ ✕ ✕
✕ ✕ ✕
✕ ✕ ✕
✕ ✕ ✕
*9
☛ 10*10 *10
✕ ✕ ✕ ✕
✕ ✕ ✕ ✕ ✕
✕
✕ ✕ ✕ ✕
✕ ✕ ✕ ✕
✕ ✕ ✕
*10 ✕ ✕ ✕ ✕
✕
*10 ✕ ✕ ✕ ✕
✕
*10 ✕ ✕ ✕ ✕
✕
✕
*9
✕ ✕ ✕
✕ ✕
✕ ✕ ✕ ✕ ✕ ✕ ✕ ✕ ✕ ✕ ✕ ✕ ✕ ✕ ✕
✕ ✕ ✕ ✕ ✕ ✕ ✕ ✕ ✕ ✕ ✕ ✕ ✕ ✕ ✕ ✕ ✕ ✕
✕
✕ ✕ ✕ ✕ ✕ ✕ ✕ ✕ ✕ ✕ ✕ ✕ ✕ ✕ ✕
✕
✕
✕
✕
✕
✕
✕
✕
✕
✕
✕
✕
✕
✕
✕
✕
✕
✕
✕
✕
✕
✕
✕
✕
✕
✕
✕
✕
✕
✕
✕
✕
✕
✕
✕
✕
✕
✕
✕
✕
✕
✕
✕
✕
✕
✕
✕
✕
✕
✕
✕
✕
✕
✕
4
Appendix
Combination unavailable
on alre
rady s
Two-p
et
ag
Image e Separatio
n
Comb
ination
Image
S
Origin eparation
al
Book F Frame Erase
ra
Bindin me Erase
g Eras
e
Right
Ma
Left M rgin
arg
Top M in
arg
Bottom in
Margin
Shift
Front C
o
Sheet ver
In
Chapte sertion (Prin
ted/Bla
r
nk)
Transp Page
arency
Bookle
Interle
aving
t
Bookle
t/S
Add C addle Stitc
h
ov
Samp er (Printed/B
le S
lank)
Differe et
nt
Job B Size Origin
uild
als
Sharp
ne
Nega/P ss
o
Image si
R
Image epeat (Auto
R
Mirror epeat (Man Setting)
Image
ual Se
tting)
✕
▲
●
Functi
Combination available
✕ ✕
▲
✕
▲ ✕
You cannot combine these modes when free size is selected.
You can set the Sample Set mode in the Interrupt mode.
You can set the Sample Set mode in the Reserve Copy mode.
You cannot combine these modes when the Different Size Originals mode is set.
When the Booklet Saddle Stitch mode and the Saddle Stitch mode are set at the same time, priority is given to the Booklet
Saddle Stitch mode.
The Auto Drawer Switching mode is available to interleave sheets.
You cannot make Interrupt copy while copying with the Sample Set mode, nor while changing the settings after the Sample Set
has been made.
You cannot reserve a copy job while copying with the Sample Set mode, nor while changing the settings after the Sample Set
has been made.
You cannot combine these modes when the Automatic Paper Selection mode is selected. You can combine these modes when
the Manual Paper Selection mode is selected.
You cannot combine these modes when No. Key Entry is selected.
You cannot combine these modes when No. Key Entry is selected. When the Image Combination mode is combined with
Center/Corner Shift, the latter-set mode takes priority.
Chart of Available Combination of Functions
4-5
Index
1 to 2 ......................................................................................................................................... 2-39
1 to 4 ......................................................................................................................................... 2-40
1 2-Sided ....................................................................................................................... 1-56, 1-57
2 On 1 ....................................................................................................................................... 2-34
2 1-Sided ....................................................................................................................... 1-56, 1-61
2 2-Sided ....................................................................................................................... 1-56, 1-59
4 On 1 ....................................................................................................................................... 2-35
8 On 1 ....................................................................................................................................... 2-35
Appendix
4
A
Auto ........................................................................................................................................... 1-31
Auto Collate ................................................................................................................................. 3-5
Auto Orientation .......................................................................................................................... 3-8
B
Back Cover .................................................................................................................................. 2-6
Binding Erase .................................................................................................................. 2-27, 2-32
Book 2-Sided ............................................................................................................................ 1-64
Book Frame Erase .......................................................................................................... 2-27, 2-30
Book 2-Sided ........................................................................................................................... 1-56
Booklet ...................................................................................................................................... 2-11
C
Center Shift ...............................................................................................................................2-20
Center/Corner Shift ................................................................................................................... 2-19
Chapter Page .............................................................................................................................. 2-7
Collate ............................................................................................................................. 1-45, 1-48
Copy Basic Features Screen ...................................................................................................... 1-3
Copy Quantity ........................................................................................................................... 1-16
Copy Ratio ................................................................................................................................ 1-27
Corner Shift ...............................................................................................................................2-20
Cover/Sheet Insertion ................................................................................................................. 2-5
4-6
Index
D
Different Size Originals ............................................................................................................. 2-43
Direct ........................................................................................................................................ 1-27
E
Entire Image ............................................................................................................................. 1-33
F
G
Group ...............................................................................................................................1-45, 1-50
H
Hole Punch ............................................................................................................................... 1-47
I
Image Combination .................................................................................................................. 2-34
Image Orientation Priority ........................................................................................................... 3-6
Image Repeat ........................................................................................................................... 2-59
Image Separation ..................................................................................................................... 2-39
Interrupt Mode .......................................................................................................................... 1-69
J
Job Build ................................................................................................................................... 2-45
Job Duration Display ................................................................................................................... 3-7
Index
4-7
4
Appendix
Finisher ..................................................................................................................................... 1-44
Frame Erase ............................................................................................................................. 2-26
Front Cover ................................................................................................................................. 2-5
Front/Back Two-sided ................................................................................................................ 1-64
L
Left/Right Two-sided .................................................................................................................. 1-64
M
Manual Paper Selection ............................................................................................................ 1-19
Margin ....................................................................................................................................... 2-23
Mirror Image .............................................................................................................................. 2-62
Mode Memory ........................................................................................................................... 2-48
N
Appendix
4
Nega/Posi .................................................................................................................................. 2-58
Non-collate ................................................................................................................................ 1-47
O
Offset ........................................................................................................................................ 1-48
Original Frame Erase ...................................................................................................... 2-26, 2-28
P
Paper Select .............................................................................................................................. 1-17
Photo Mode ....................................................................................................................... 1-23, 3-9
Preset Zoom ............................................................................................................................. 1-27
R
Recall ........................................................................................................................................ 2-57
Rotate ....................................................................................................................................... 1-47
S
Sample Set ...............................................................................................................................1-71
Setting Cancel ........................................................................................................................... 1-75
Setting Confirmation ................................................................................................................. 1-74
Sharpness ................................................................................................................................. 2-64
Sheet Insertion ............................................................................................................................ 2-6
4-8
Index
Shift .......................................................................................................................................... 2-19
Special Features Screen 1/2 ...................................................................................................... 1-5
Special Features Screen 2/2 ...................................................................................................... 1-8
Standard Keys ............................................................................................................................ 3-3
Standard Settings ..................................................................................................................... 3-10
Staple ..............................................................................................................................1-45, 1-53
T
Text Mode ................................................................................................................................. 1-23
Text/Photo Mode ....................................................................................................................... 1-23
Transparency Interleaving ......................................................................................................... 2-15
Two-page Separation .................................................................................................................. 2-3
Two-sided Mode ........................................................................................................................ 1-56
X
XY Zoom ...................................................................................................... 1-35, 1-38, 1-40, 1-41
Z
Zoom ...............................................................................................................................1-35, 1-36
Zoom Designation .................................................................................................................... 1-29
Zoom Program .......................................................................................................................... 1-35
Index
4-9
Appendix
4
The contents of this guide are
printed on 100% recycled paper.
CANON INC.
30-2, Shimomaruko 3-chome, Ohta-ku, Tokyo 146-8501, Japan
CANON U.S.A., INC.
One Canon Plaza, Lake Success, NY 11042, U.S.A.
CANON CANADA INC.
6390 Dixie Road Mississauga, Ontario L5T 1P7, Canada
CANON EUROPA N.V.
Bovenkerkerweg 59-61 P.O. Box 2262, 1180 EG Amstelveen, The Netherlands
CANON FRANCE S.A.
17,quai du President Paul Doumer 92414 Courbevoie Cedex, France
CANON (U.K.) LTD.
Woodhatch, Reigate, Surrey, RH2 8BF, United Kingdom
CANON DEUTSCHLAND GmbH
Europark Fichtenhain A10, 47807 Krefeld, Germany
CANON ITALIA S.p.A.
Palazzo L Strada 6 20089 Milanofiori Rozzano (MI) Italy
CANON LATIN AMERICA, INC.
6505 Blue Lagoon Drive Suite 325 Miami Florida 33126 U.S.A.
CANON AUSTRALIA PTY. LTD
1 Thomas Holt Drive, North Ryde, Sydney, N.S.W. 2113, Australia
CANON SINGAPORE PTE. LTD.
79 Anson Road #09-01/06, Singapore 079906
CANON HONGKONG CO., LTD
9/F, The Hong Kong Club Building, 3A Chater Road, Central, Hong Kong
FA7-2568-020
042001IS4
CANON INC. 2001
PRINTED IN JAPAN