1
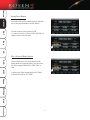
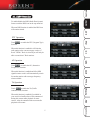
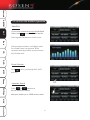
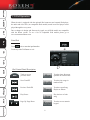
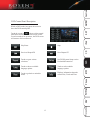
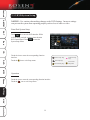
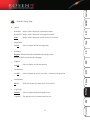
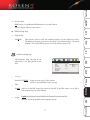
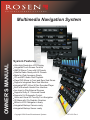
E
N
T
E
R
T A
I
N
M
E
N
T S
Y
S
T
E
M
S
Multimedia Navigation System
OWNER’S MANUAL
System Features
Ultra High Resolution LCD Display
Integrated Touch Screen Controls
AM/FM Stereo Tuner with 24 Presets
Satellite Radio Ready with 24 Presets
Made for iPod Accessory Ready
CD and MP3 Audio Disc Playback
Plays DVD Movie to Front and Rear Seat Zones
Supports Integrated Rear Seat Monitors
Integrated MP3 Virtual 6 Disc Recorder/Player
Built in Bluetooth Hands-Free Interface
Aux Input to Play External Sources
Supports Dolby 5.1 Surround Sound
Supports Full Subwoofer Control
Voice and Visual 3D Turn-By-Turn Navigation
3D Maps with City Realistic Graphics
Millions of POI Navigation Library
Integrated Backup Camera ready
Integrated Backup Sensor ready
Copyright 2009 Rosen Entertainment Systems
DP-1001 Rev J
COPYRIGHT
Copyright © 2009 by Rosen Entertainment Systems. All rights reserved.
Except as permitted under the Copyright Act of 1976, no part of this publication
may be reproduced or distributed in any form or by any means, or stored in a
database or retrieval system, without the prior written permission of Rosen
Entertainment Systems.
NOTE
In order to use the product correctly and safely, please read this manual
carefully.
Specifications and designs are subject to change without notice.
SAFETY NOTICE
NOTICE OF INTENDED USE
Some features of Rosen Entertainment Systems are not intended for viewing by the driver
when the vehicle is in motion, such as movie playback. When using navigation, minimize
the amount of time spent viewing the screen and use voice prompts as much as possible.
Avoid prolonged use of the touch screen controls. Such use might distract the driver or
interfere with the driver’s safe operation of the vehicle , and thus result in serious injury or
death. Such use might also violate state and local laws.
Rosen Entertainment Systems disclaims any liability for any bodily injury or property
damage that might result from any improper or unintended use.
COMPATIBILITY
BLUETOOTH PHONES
This system requires a Bluetooth enabled phone. Cell phones and software vary by brand
and date of manufacture. Therefore some phones may not be compatible and/or some
functions may be different or not compatible with this system during actual use.
APPLE iPOD/iPHONES
Due to operational differences in various generations of iPods/iPhones and changes in Apple
firmware not all iPods/iPhones are compatible with the Rosen system.
Using non-compatible equipment may cause unpredictable operation or cause the system to
lockup and require a resetting.
Product compatibility is subject to change without notice and is not covered under the
product warranty.
CONTENTS
1. Control Organization.................................................................................................
1
2. Basic Operation.........................................................................................................
3
2.1 RADIO Operation............................................................................................
3
2.1.1 RDS Operation.......................................................................................
5
2.2 SAT RADIO Operation....................................................................................
6
2.3 iPod Operation..................................................................................................
8
2.4 CD Operation................................................................................................... 11
2.5 DVD Operation................................................................................................ 12
2.5.1 VCD Playback........................................................................................ 14
2.5.2 SD Card Playback.................................................................................. 15
2.5.3 JPEG Playback....................................................................................... 16
5.5.4 USB Hard Drive Playback..................................................................... 17
2.6 MP3 Operation................................................................................................. 18
2.6.1 MP3 Recording....................................................................................... 18
2.7 Bluetooth Operation......................................................................................... 19
3. System Setup............................................................................................................. 24
3.1.1 System Settings...................................................................................... 24
3.1.2 Touch Screen Calibration....................................................................... 25
3.1.3 Extras...................................................................................................... 27
3.1.4 Rear Seat Source.................................................................................... 28
3.1.5 Reverse Camera/Sensor.......................................................................... 29
3.1.6 Display Adjustments............................................................................... 30
3.1.7 Audio Adjustments................................................................................. 30
3.1.8 AUX Input.............................................................................................. 31
3.1.9 DVD Setup.......................................................................................... 32
CONTENTS
4. Navigation................................................................................................................ 40
4.1 Touch Screen Calibration................................................................................. 41
4.2 Map and POI Updates...................................................................................... 41
5. Precautions/System Reset.......................................................................................... 42
Controls
AM/FM
1. CONTROL ORGANIZATION
SAT
Controls
iPod
Your system (while it may not look like the
figure), is equipped with various push buttons and
rotary knobs in some cases. You can use these to
access selected functions directly.
CD
Touch Controls
Screen Organization
The Information Bar is located at the top of the
screen. Depending on the source, it will provide
information or content sensitive controls. .
Phone
MP3
You can use these to access selected functions. .
DVD
Your system is equipped with a touch sensitive
screen. Most areas of the screen contain buttons.
Menu for advanced control settings. .
The Source Tabs located at the bottom of the
screen will give you direct access to common
Settings
This will take you to the Settings
1
Precautions
Bluetooth is enabled. .
NAV
Note: “PHONE” is highlighted BLUE when
sources. .
Controls
AM/FM
Spectrum Display
SAT
If the spectrum is turned on, it will display after
several seconds of no operation while in Radio or
Satellite Radio mode.
DVD T-
1 00:
12
iPod
After the spectrum screen appears, touch
to
switch among several different spectrum display
options (as figure shows).
Spectrum can be enabled/disabled from the settings
screen.
CD
Turning the Unit On/Off
Turning on
DVD
Vehicle ignition must be ON or in ACC mode to operate system. Press the power knob or button on
the unit to turn the system On/Off.
Turning off
MP3
To power OFF, press and hold the power knob or button.
Phone
Settings
NAV
Precautions
2
Controls
AM/FM
2. BASIC OPERATION
2.
1 RADIO Operation
Touch
SAT
Enter/
Exit
to enter radio interface.
iPod
Touch any other Tab Button to exit this screen.
DVD
CD
If the spectrum is turned on, it will display after a
few seconds if there is no operation. When
spectrum is showing, touch the screen to return to
the radio mode.
MP3
Band Selection
Phone
Touch
tab to cycle through AM, FM1,
FM2, and FM3.
Settings
Automatic Search
Touch
or
button to use
the scan/seek functions as follows:
Long press
enables you to SCAN all
available stations. To stop SCAN press the button
a second time.
3
Precautions
NAV
Short press enables you to SEEK the next station.
Controls
Setting Preset Buttons
AM/FM
Select the radio station, and then press and hold
one of the preset buttons to set the station.
SAT
18 radio stations can be stored for FM
(6 stations for each of FM1, FM2 and FM3), 6
stations can be stored for AM.
iPod
CD
Play a Selected Radio Station
DVD
Using a short press of a preset button or the
tuning knob on equipped radios, you can select
the desired station from FM1, FM2, FM3 or
AM.
MP3
A short press of the button labeled 103.7Mhz
will tune the radio to 103.7Mhz.
Phone
Settings
NAV
Precautions
4
Controls
AM/FM
2.1.1 RDS Operation
To enable/disable the RDS (Radio Data System)
feature touch the RDS icon on the top menu bar.
SAT
When an RDS function is enabled the RDS icon
will remain colored.
to enable the PTY (Program Type)
When this function is enabled it will limit the
radio tuning to the current category such as “C
Rock.” When C Rock is selected you will only be
able to scan/select C Rock stations.
To enable or disable the AF feature of RDS.
DVD
AF Operation
CD
Touch
function.
iPod
PTY Operation
MP3
Touch
to enable the AF (Alternative
Frequencies) function.
When this function is enabled and if the RDS
signal becomes weak it will automatically search
for another station with a stronger frequency
when available.
Phone
To enable or disable the AF feature of RDS.
TA Operation
Settings
Touch
to enable the TA (Traffic
Announcement) function.
When this function is enabled (if available in
your area) local traffic alerts will be announced
during the current audio playback for most
sources. After the announced the current audio
playback will resume.
5
Precautions
NAV
To enable or disable the AF feature of RDS.
Controls
AM/FM
2.2 SATELLITE RADIO Operation
Enter/
Exit
SAT
If your system contains the optional Satellite Radio
feature, touch
to enter SAT radio interface.
Touch any other Tab Button to exit this screen.
iPod
CD
If the spectrum is turned on, it will display after a
few seconds if there is no operation. When
spectrum is showing, touch the screen to return to
the SAT radio mode.
DVD
Preset Selection
MP3
Touch
and SAT3.
tab to cycle through SAT1, SAT2
Phone
Automatic Search
Settings
Touch
or
button to use
the seek functions as follows:
Short press enables you to SEEK the next station.
NAV
Precautions
6
Controls
AM/FM
Setting Preset Buttons
Select the SAT radio station, and then press
and hold one of the preset buttons to set the
station.
iPod
SAT
18 stations can be stored for SAT
(6 stations for each of SAT1, SAT2 and
SAT3).
Play a Selected SAT Radio Station
7
Precautions
NAV
Settings
Phone
MP3
DVD
CD
Using a short press of a preset button you
can select the desired station from SAT1,
SAT2, or SAT3.
Controls
2.
3 iPod Operation
AM/FM
When the unit is equipped with the optional iPod connector and external iPod player,
the audio and video files (on compatible iPod models) stored in an iPod player can be
played through the car system.
SAT
Due to changes in design and firmware by Apple, not all iPod models are compatible
with the Rosen system. To see a list of compatible iPod models please go to
www.rosenentertainment.com.
iPod
Enter/
Exit
Touch
tab to enter the ipod interface.
Touch any other Tab Button to exit.
CD
DVD
iPod Control Panel Description
MP3
Phone
Settings
NAV
Touch to access
previous menu
Touch to show album art,
optional on some models.
Next Track/FF
Touch to play songs in
random order
Previous Track/FR
Touch to repeat Song,
Playlist or Album
Play/ Pause
Play the intro of each
song
Page Up/ Page Down
Touch to access numeric
keypad
Precautions
8
Controls
AM/FM
Main Menu
to go up one level in the menu
SAT
Touch
structure.
iPod
To Play A Song
Touch
or
to play the previous/next
to Pause or resume Playback.
DVD
Touch
song.
CD
To play a song from the menu, touch the song
name.
MP3
Display Song Information
Phone
Touch the EQ button once and the play
information will be displayed in the box on the
right (as shown).
9
Precautions
NAV
Settings
Touch the EQ button when the play information is
displayed and it will launch the spectrum display
it the spectrum is enabled.
Controls
AM/FM
Numeric Keypad
Touch
interface.
to enter the numeric keypad
SAT
Touch the numbers on the keypad to select the
desired song choice, then touch Enter to confirm.
Your selection will then be played.
iPod
CD
Video Playing
DVD
Touch
to access the main menu of the iPod.
Select Video from the menu list as shown.
Control will be switched back to the iPod. Use the
iPod to select the video file to play and it will be
played on the system’s screen.
MP3
Phone
While in video play mode, touch the screen to
open the iPod control panel.
Touch
to return to the iPod main menu and
touch any other menu item to exit from video
play.
Settings
Touch any other Tab Button to exit from iPod
interface.
NAV
Note: Video function may not be supported on all iPod models. Video Playback is not allowed while
the vehicle is in motion. To play video the vehicle park brake must be engaged.
Precautions
10
Controls
AM/FM
2.4 CD Operation
Touch the
SAT
CD Disc Playing
tab to enter the main CD interface.
iPod
Touch any other Tab Button to exit this screen.
Inserting a CD will automatically start audio
playback. Discs should be inserted with the label
facing upwards.
DVD
CD
A CD can be inserted at any time and the system will
automatically switch to CD mode (except in
Navigation mode).
If the spectrum is turned on, it will display after
several seconds of no operation.
Previous Track/FR
Next Track/FF
Touch to play songs at random.
Touch to repeat Track or All.
Touch to scan through the intro
of each track.
Touch to add the current track
or entire disc to the optional
MP3 function.
11
Phone
Stop
Settings
Play/Pause
NAV
Touch to cycle through
available spectrum displays.
Precautions
Touch to cycle through
available sound field modes.
MP3
CD Control Panel Description
Controls
2 . 5 DVD Operation
AM/FM
This unit plays discs in formats such as DVD/VCD/CD/MP3/JPEG/MPEG4/
CD-
R, etc.
However, some user produced disc may not play or may cause unpredictable operation.
Disc which are not the proper region will not play in this system and the disc size is
limited to the standard 12cm diameter type only.
SAT
Enter/
Exit
Touch
to enter DVD
interface.
iPod
Touch any other Tab Button to exit the
DVD interface.
CD
If a USB/
SD card is connected, touch the
card playing mode.
tab again to access USB/
SD DVD
Note: DVD video playback is not allowed when the vehicle is in motion. Video
playback is enabled when the vehicle park brake is engaged.
MP3
Disc Load/Eject
Phone
A DVD can be inserted at any time and the system will automatically switch to DVD
mode (except in Navigation mode).
Settings
Insert the disc with the label facing upwards.When the system detects the disc,it will load automatically and play.
NAV
Insert a Mp3 disc into the DVD/CD slot and it will be read and played automatically.
Precautions
12
Controls
AM/FM
9.镜头功能操作
DVD Control Panel Description
SAT
While in DVD mode, long press the screen to
show the DVD control panel.
Next Chapter/FF
Touch to repeat various
selections.
See DVD System Setup section
for detailed instruction.
Touch to choose available
language options.
Touch to select subtitle
language options.
Touch to go back to main disc
menu.
Displays information about the
current Disc, Track and Time.
DVD
Previous Chapter/FR
MP3
Stop
13
Precautions
NAV
Settings
Phone
Play/Pause
CD
iPod
Touch the screen or
tab to exit the control
panel and return the DVD to full screen or after
several seconds of no operation , the DVD screen
will return to full screen mode.
Controls
AM/FM
2.5.1 VCD Disc Playing
If the VCD has no menu,the system will
SAT
automatically read the disc and play directly.If
Normal
the disc has a menu,touch the menu item to play.
Select song
iPod
Touch
on the DVD setting page, to return to main menu of the disc.
CD
While playing a disc, touch the upper right part of
the screen to display the play information.
DVD
If the VCD disc supports the function, you can
play a selected song from the keypad found on the
control panel.
DVD T-
01 02:
16 play
My HEART WILL GO ON
Near, far, wherever you are, I believe that the
heart does go on.
MP3
DVD T-
01 02:
16 play
Current track
number
Phone
Settings
NAV
Precautions
14
8
Play time Play status
Controls
AM/FM
2.5.2 SD Card Playing
SAT
If the unit is equipped with the optional multi-media SD card port, this operation is available.
Inserting /Removing SD Card
iPod
Insert the SD card, with media information into the SD card slot
directly until the card is locked.
To remove the SD card, exit from SD card playback mode first, and then press the
SD card slightly to cancel the locking status and the SD card will eject automatically.
CD
SD Card Playback Mode
00:
15 03:
42
001/
018
MP3
MP3
MP3
After the SD card is read, you can select from the
available files. Other operation will be the same as
the CD audio Playback mode.
MP3
MP3
001
00
2
00
3
00
4
00
5
00
6
SD/
MMC
NAV
Settings
Phone
Note: Some formats of MP3 are not supported.
MP3
DVD
ta to enter into the SD card playback
MP3
Touch the
interface.
15
Precautions
Controls
AM/FM
2.5.3 JPEG Disc Playing
Play Status:
SAT
Insert a JPEG disc into the DVD player. The disc
will play the first file automatically.
To exit, touch the screen to bring up the main
menu Tab Buttons.
iPod
Thumbnail View:
CD
While playing, touch
view.
to return to thumbnail
From thumbnail view, touch any picture to begin
playing
DVD
Random
MP3
Touch
Previous Next
Previous Next
to page up/down to browse images.
Touch the icon” random” to play the picture in the current folder at random.
Contents menu interface:
Phone
Touch one more time, and you will return
to the menu interface.
00:
15 03:
42
001/
018
..
A0
2
A0
3
A0
4
Settings
A05
A0
6
Image preview window
Resolution 1150X866 DISC
Current image resolution
NAV
Precautions
16
Controls
AM/FM
SAT
2.5.4 Play USB Hard Disc
Inserting / Removing USB
iPod
To use the USB input, insert USB directly into the unit or though the USB
adaptor cable included with the system.
CD
To remove the USB, exit from USB mode first.
Access to USB Mode
After the USB device is read, you can select from
the available files. Other operation will be the same
as the CD audio Playback mode.
MP3
MP3
MP3
MP3
MP3
MP3
DVD
00:
15 03:
42
001/
018
to enter into the USB interface.
001
00
2
00
3
00
4
00
5
00
6
USB
MP3
Touch
17
Precautions
NAV
Settings
Phone
Note: Some formats of MP3 are not supported.
Controls
2.6 MP3 Operation
AM/FM
Your system may contain an optional built in MP3
storage feature.
Touch the
interface.
tab to enter the optional MP3
SAT
Touch any other Tab Button to exit from the MP3
interface.
Touch any button where MP3 music has been
recorded to start playback.
iPod
Previous
Track
Stop
Next
Track
CD
Play/Pause
DVD
To delete the stored music from the folder
or a single track from the Favorites list,
short press the desired folder then touch the
Delete button. A message will show “OK to
Delete,” touch Delete again and the
contents of the selected folder or single
track will be deleted.
MP3
2.6.1 MP3 Recording
Phone
To add songs to your MP3 library insert a CD or
touch the CD Tab Button. When a CD is inserted it
will automatically show the CD interface. Press
.
to begin recording the CD or Song.
Settings
The MP3 screen will show and indicate that it is
copying the selected files. To save the entire CD,
press and hold the desired Disc button. Press and
hold
to save the current song to the
Favorites folder.
NAV
Precautions
Note: If the recording is stopped for any reason
(turning the system off) only a partial recording
will be saved, you must restart the process from
the beginning to add the entire content to your
MP3 library.
18
Controls
dial up, call answering, and bluetooth music play.
Note: This system requires a Bluetooth enabled phone. Cell phones and software vary by brand and
date of manufacture. Therefore some phones may not be compatible and/or some functions may be
different or not compatible with this system during actual use.
iPod
Phone compatibility issues are not covered under warranty.
Enter/
Exit
tab to enter main bluetooth
CD
Touch
interface.
AM/FM
The system can provide bluetooth hands free communication function. If your mobile phone is
bluetooth enabled, it can establish a point-to-point connection with the system, providing telephone
SAT
2.
7 Bluetooth Handsfree Touch any other Tab Button to exit this screen.
DVD
DISCONNECT
MP3
tab to cycle through available phone
Pair/Connect
tab as needed to enter the pairing
DISCONNECT
PAIRING INSTRUCTIONS:
Never Pair while Driving.
Place your handset into
DISCOVERY MODE
On your handset, open the Bluetooth set-up. Set
your handset to “Discovery” mode and select to
add a new device. See your handset owners
manual for more information.
Phone
Touch
screen.
Settings
Select ROSEN and Enter
Pass Code 1234
NAV
Touch
, after you have turned your cell
phone’s bluetooth on.
19
Precautions
Touch
screens.
Controls
“Pairing” will be displayed on the screen.
AM/FM
After the connection succeeds, your cell phone will
display (Rosen).
Connect to the device by entering the pass code
(1234).
SAT
The system will indicate “Linking” and then
“Connected.” When your phone is connected its
name will be displayed on the unit.
iPod
Connection Settings
CD
For Normal Use, this function should be enabled. Enabling this button will
automatically reconnect your phone when the system is turned on or if the
connection is lost.
For manual connection, with a paired phone, click this button to reestablish
the connection after the system has been turned off or the connection has been lost.
DVD
After three rings, the phone call will be automatically answered.
MP3
Dialing
Phone
Touch
to enter this screen. You can dial
through your phone or from the touch screen
shown at the right.
Settings
NAV
Precautions
20
Controls
If the wrong number has been entered, press
CD
1-888-555-1212
iPod
SAT
1-888-555-1212
AM/FM
To make a call from the touch screen, enter the
desired number and press
Touch
to transfer the call between car
speakers and handset.
MP3
DVD
1-888-555-1212
To end the call, press
Touch
to call the last number dialed from
the system touch screen.
21
Precautions
NAV
1-888-555-1212
Settings
Phone
1-888-555-1212
Controls
AM/FM
Answer A Call
SAT
While in any mode, if there is an incoming cal,
the Bluetooth handsfree system is automatically
activated.
1-888-555-1212
Press
to answer or
to reject the call.
If Auto Answer is selected, the incoming call will
be automatically connected after three rings.
iPod
Any time during the call press
phone
to switch between audio over the car speakers or mobile
CD
Call List
Touch
to enter the call list interface.
DVD
Select the appropriate button to show the last five
numbers Missed, Received or Made calls.
Although it will not display your cell phone’s
internal phonebook.
MP3
To make a call from the list, short touch the
name/number on the screen and it will
automatically dial the number.
Phone
Phonebook
Settings
Touch
interface.
to enter the optional phonebook
In addition to the Call List features above, you
can create and store phone numbers and names in
the systems phone book. These phonebook
entries can be accessed by any paired user
NAV
Note: The system will not display your cell
phone’s internal phonebook.
Precautions
22
Controls
SAT
.
Bluetooth Music Play
If your system contains the optional Bluetooth
Music Player you can use your phone as a music
source.
Note: Not all phones are
compatible with this A2D2
system
MP3
to enter the Bluetooth music
If the cell phone supports Bluetooth music play,
the audio from the cell phone can be heard on the car'
s speakers.
When phone is paired to the system,activate bluetooth music play on the phone.
You should be able
to hear audio through the car'
s speakers.
You can control music play through the touch screen
Phone
Touch
interface.
Place your handset into
A2D2 Bluetooth Audio
Mode.
DVD
CD
iPod
To return to the previous screen, select the
icon.
AM/FM
To Add/Edit/Delete an entry, long touch the
name/number on the screen and this will open the
full keyboard as shown. Select the name or
number button to edit the entry. After your entry is
correct press the
button.
Stop
Play next track
Play previous track
23
NAV
Play/pause
Precautions
While music is playing, the screen will automatically switch to spectrum interface.
Settings
interface.
Controls
3. SYSTEM SETTINGS MENU
AM/FM
3.1.1 Settings Menu Enter/
Exit
SAT
Touch
to enter the main menu interface.
Touch
to enter the system settings menu.
iPod
Touch
icon to exit.
CD
System Settings
DVD
Touch to enable/disable the clock
display on the menu bar.
12:00
MP3
Phone
Touch to enable/disable the reverse
function. If the optional backup
camera is connected the screen will
automatically display the camera
view when the vehicle is put in
reverse.
Settings
NAV
Touch to enable/disable the video
while in NAV mode. The
navigation screen will interrupt the
display when necessary.
Touch to enable/disable the
spectrum. Enabling this function
would display the spectrum after
several seconds of no operation.
Touch to enable/disable the button
tone associated with button presses.
Touch to change the Bluetooth
microphone sensitivity.
Precautions
24
Controls
From the main menu, touch
system settings interface.
to enter the
+0
+5
+5
+4
Touch the clock display directly to make changes
to the time.
12:
00
iPod
When the selected item (hour and minute) flashes,
touch the + and - buttons to make the changes.
After the time has been set, touch
. To
save the changes.
to display the time in 12 hour clock
CD
Touch
notation.
AM/FM
+5
SAT
Time Setup
Touch
to display the time in 24-hour clock
notation (military time).
DVD
To display the clock, the Clock Button must be selected.
MP3
3.1.2 Touch Screen Calibration
Settings
to enter the control calibration
If you need to re-calibrate the screen settings, go
through the following steps to adjust your system.
NAV
!
25
Precautions
Touch
interface.
Phone
Control Calibration
Controls
Touch Screen Calibration
AM/FM
To re-calibrate the touch screen settings follow the steps below.
SAT
To ensure accuracy please use the stylus provided with your system and be sure to touch the center
point of the cross as close as possible otherwise the precision of the touch calibration will be
affected.
Step 2: Touch the bottom right + as shown.
Step 1: Touch the bottom left + as shown.
iPod
!
!
CD
Step 3: Touch the top right + as shown.
Step 4: Touch the top left + as shown.
!
!
DVD
MP3
Step 5: Touch the center + as shown.
Phone
Settings
When you have completed this process you will automatically be exited from the touch screen
calibration interface and returned to the radio interface.
NAV
Precautions
26
Controls
Your system may be equipped with various extra features.
AM/FM
3.1.3 Extras
Touch
to open the available Extras.
Touch
to exit from the main menu.
iPod
to enter the main menu interface.
CD
Touch
SAT
Enter/Exit
DVD
If no extras are available the extras page will not
open.
27
Precautions
NAV
Settings
Phone
MP3
Touch one of the selections in the menu as shown
to access the Extras Features.
Controls
3.1.4 Rear Seat Source
AM/FM
The system offers a rear seat source function. The driver can enjoy music while the
passenger can watch a DVD through an option display for rear seat passengers.
SAT
Enter/
Exit
iPod
From any screen touch the
main menu.
Touch
icon to open the
to open the available selections.
CD
DVD
Touch one of the selections in the menu as shown
to set that source to the Rear Display.
MP3
Phone
Touch the
icon to exit.
Note: Some sources require optional equipment.
Settings
NAV
Precautions
28
When the system is connected with an optional rear camera or sensors you can view the
image from the rear camera on the unit or use the backup warning system.
Controls
AM/FM
3.1.5 Reverse Camera/Sensor Operation
When the camera is installed and the backup
SAT
setting enabled, the rear camera view will
automatically open when the vehicle is shifted
iPod
into reverse.
Notice: The rear camera is provided for additional information only.
CD
As the driver, you should always check your surroundings before backing the vehicle.
.
icon to enter the main menu. Touch the
.
button to enter the camera view.
to exit the camera interface.
MP3
Touch
DVD
To access the camera view manually touch the
Notice: The reverse sensors are provided for additional information only.
Settings
Phone
If the optional reverse sensors are connected
without a camera the image will show the
approximate distance from any object to the
vehicle.
29
Precautions
If both optional camera and sensors are connected, the distance screen will be shown in addition to the
camera image.
NAV
As the driver, you should always check your surroundings before backing the vehicle.
Controls
3.1.6 Audio Setup
AM/FM
From the main menu touch
audio settings interface.
to enter the
0
0
8
SAT
Touch any of the Treble, Mid Range, Bass or
Speaker buttons to adjust the balance of the audio
settings.
iPod
Select the + and - icons on the top menu bar to
adjust the levels for the audio and speaker
settings.
Press to enable/disable the
optional 5.1 channel
surround sound speaker
configuration enhancement.
CD
Speakers:
LR- Left Rear
LF- Left Front
SUB- Subwoofer (if equipped)
CTR- Center (only available when 5.1 Channel is enabled.)
RR- Right Rear
RF- Right Front
DVD
Press to enable/disable the
BBE sound enhancement
technology setting. The
adjustment bar is located on
the top menu bar.
Press to reset the system to
the factory audio settings.
MP3
3.1.7 Video Setup
Phone
From the main menu touch
video display settings interface.
to enter the
Settings
Select the + and - icons to adjust the Brightness,
Color or Contrast settings.
Touch
to reset the system to the factory
display settings.
NAV
Precautions
30
to enter the main menu interface.
Touch
to access the external video source.
Controls
iPod
Touch
SAT
If you have an external video source connected to your system you can access the
source through the Auxiliary Input function (AUX).
AM/FM
3.1.8 AUX Operation
The AUX source will be displayed in full screen
DVD
CD
mode
31
Precautions
NAV
Settings
Phone
MP3
Touch the screen to bring up the top menu bar.
Touch
to exit.
Controls
3.1.9 DVD System Setup
AM/FM
NOTICE: Use caution when making changes to the DVD Settings. Incorrect settings
can prevent the system from operating properly such as loss of audio or video.
Enter/Exit System Setup
SAT
iPod
Touch
tab to enter the DVD interface. While
in DVD mode, touch the screen to show the main
DVD Control Panel. Touch
to enter the
System Setup Menu.
CD
DVD
Touch the icon to enter the corresponding function
interface.
Touch the
icon to exit Setup menu.
General Setup Page
Password Setup Page
MP3
Operation
Phone
Touch the icon to enter the corresponding function interface.
Touch the
icon to exit Setup menu.
Settings
NAV
Precautions
32
Preference Setup Page
Audio Setup Page
Exit from the
Setup Menu
Controls
AM/FM
General Setup Page
Images will be displayed in panoramic format
Normal/LB Images will be displayed in message box format
Images will be displayed in wide screen (16:9) format
iPod
Wide Angle Mark
On/
Off
Select to display or hide the angle mark.
Osd Lang
English/
Chinese/
Francais/
French/
Italiano/
Svenska/
pyccknn
CD
Normal/Ps
SAT
Screen
On/
Off
Select to display the screen saver after 3-4 minutes of no operation.
Last Memory
On/
Off
DVD will resume play from where it last left off.
Logo Type
Select to display the default splash screen.
Captured
The splash screen is customized by the user.
NAV
Default
MP3
Screen Saver
Phone
Select to display or hide the subtitles.
33
Precautions
On/
Off
Settings
Captions
DVD
Select the DVD system interface language
Controls
AM/FM
Audio Setup Page
CAUTION: Selecting certain audio settings may disable the audio if your system does not have
optional equipment.
SAT
SPEAKER SETUP
DOWNMIX
iPod
CD
LT/
RT
Dolby stereo, distributes the sound from the middle and the surround channels
to the left and right speakers.
Stereo
Audio output to left and right channel signal.
V Surr
Select to create surround sound effect
OFF
The audio output 5.1 channel audio signal (only support 5.1ch DVD disc)
DVD
Speaker
MP3
Adjust depending on speaker configuration preference.
Front speaker
Center speaker
Rear speaker
Subwoofer
"LRG" refers to all band speakers "SML" refers to the medium and tweeter speakers Test Tone
Phone
On/
Off
When the test tone is turned on, the system will play a section of test audio in
accordance with the sequence of the front left, center, front right, right surround
and left surround sequence.
Settings
Dialog
00-
20
Adjust the volume of the DVD disc dialog. (It is unavailable
to this model).
NAV
Post DRC
Precautions
On/
Off/
Auto
Select to set-up the post DRC ratio of sound. It is recommended that the post
DRC be set to "Auto" mode.
34
Controls
AM/FM
SPDIF Setup Page
SPDIF Output
Meaning that the output signal is an analog signal, which is the normal setting.
SAT
Output/
Off
SPIDF/
ALL/PCM
LPCM Output
96K
It is available to convert 96 K LPCM digital audio into 48K LPCM output when
selecting LPCM as 48 K. (That entry is selected when your power amplifier does
not support 96K LPCM decoding.)
It is available to deliver the LPCM digital audio in true form output when selecting
LPCM96 K.
DVD
48K
CD
iPod
If you have a 5.1 surround sound system it may support a SPDIF input.
Dolby Digital Setup
Dynamic NAV
Settings
The greater the dynamic range compression rate, the less obvious of the
dynamic range difference
35
Precautions
FULL-
OFF
Phone
This entry is the selection of Dolby digital channel setup
R-Mono/Mix-Mono
MP3
Dual Mono
Stereo/L-Mono
Controls
AM/FM
Channel Delay
To adjust the sound configuration use the cursor to scroll up/down; to adjust the sound delay
distance use the cursor to scroll left/right.
SAT
iPod
The Sound Delay Distance is used to select
different sound transmission effects in
different spaces. The magnitude of space
decides the magnitude of delay.
- -
Audio Setup Page- -
Speaker Setup
Spdif Setup
Dolby Digital Setup
Channel Delay
Equalizer
3d Processing
Hdcd To Audio setup page
CD
Equalizer Page
Eq Type
Done/Rock/Pop/Live/Dance/Techno/Classic/Soft
DVD
Select to set up the audio output. This feature can be used to imitate various effects of music style.
Bass Boost
MP3
On/
Off
Select to adjust the enhancement of bass output.
Super Bass
Phone
On/
Off
Select to adjust the enhancement of super bass output.
Treble Boost
On/
Off
Select to adjust the enhancement of treble boost output.
Settings
3D Processing Page
PRO LOGIC II
On/
Off/
Auto
NAV
Dolby directional logic setup, the setup is only effective when “DOWNMIX”
setup in “Speaker setup” is set to “OFF.”
Precautions
36
Controls
AM/FM
Reverb Mode
Off/
Concert /Living/
Room/Hall/bathroom/Cave/Arena/Church
Select to obtain different reverb effects.
Digital Filter
This option is used to select the sampling frequency for the digital wave filter.
The higher the frequency the clearer the quality. The default setting is 1X (which
displays CD).To play HDCD, please set it to the default setting or 2X.
CD
Off/
1X/
2X
iPod
SAT
HDCD Setup Page
- -
Preference Setup Page- -
Tv Type
Ntsc
PBC
Off
Audio
Chi
Subtitle
Chi
Disc Menu
Chi
Parental
Default
To Preference setup Page
PA L
Multi
NTSC
MP3
The Preference Page can only be set
when there is no disc present in the
unit.
DVD
Preference Setup Page
Select to set the PBC menu play control to ON/OFF. If the PBC menu is set to ON it
will automatically play when reading.
Audio
English/
French/
Italian/
Swedish/
Spaish/
Chinese/
Japanese/
Korean/
Russian/
Thai
Select to choose the available audio language options.
37
Settings
PBC
On/
Off
NAV
Select to set the type of video system.
(
NTSC is recommended for this system)
.
Precautions
PAL/
MULTI/
NTSC
Phone
TV Type
Controls
AM/FM
Subtitle
English/
French/
Italian/
Swedish/
Spaish/
Chinese/
Japanese/
Korean/
Russian/
Thai
Select to choose the available subtitle language options.
SAT
Disc Menu
English/
French/
Italian/
Swedish/
Spaish/
Chinese/
Japanese/
Korean/
Russian/
Thai
Select to choose the available disc menu language options.
iPod
Parental
1 KID SAF/2 G/3 PG/
4 PG 13/5 PGR/6 R/
7 NC17/8 ADULT
Select to set the parental controls of your system.
CD
Default
Reset
Select to reset your system to the default settings.
DVD
Password Setup Page
Password Setup
MP3
On/
Off
Phone
Select On to enable your system with
password protection; requiring a password
be entered before changing any settings or
viewing a disc.
- -
- -3D处理设定页- -
- -音频设定页- -
Password Setup Page- -
Password Setup On On
Password
Off
Settings
Select Off to disable the password setting.
To Password Setup Page
NAV
CAUTION: If your password is lost, the system can not be recovered. Password errors or loss are
not covered under warranty.
Precautions
38
****
Password
AM/FM
Controls
As the figure shows, use remote number
key or touch the number pad of the touch
screen to enter correct password and
confirm.
SAT
If the password has been set, enter the original password to cancel the original password first
before canceling the password setting.
iPod
OK
Password
Old Password
New Password
Confirm PWD
****
CD
Select sub-item “Change” in password
options and press OK to access password
change page. As the figure shows, enter the
new and old passwords respectively, and
press OK to end.
DVD
OK
The original password of the system is“
1389”
to exit from the setting menu.
39
Precautions
NAV
CAUTION: If your password is lost, the system can not be recovered. Password errors or loss
are not covered under warranty.
Settings
Phone
Press
MP3
Exit from the Setup Menu
Controls
4. NAVIGATION OPERATION
AM/FM
4. NAV Operation
NOTE: While in NAV, the touch screen functions are limited to Navigation Functions only.
SAT
Enter/
Exit
iPod
Press the NAV button on the perimeter of the unit to enter the navigation interface.
Press the NAV button or any other source button on the unit to exit navigation.
To access any other functions, you must first exit the navigation interface.
CD
Navigation Audio and Video Function
DVD
While in NAV mode, you can still listen to music or play a video. Voice navigation and the map screen
will interrupt the music/video when necessary.
For details on how to change these settings, see the System Settings section.
MP3
Volume Adjustment
To adjust the volume of navigation voice, adjust the volume setting during voice commands.
Phone
Navigation System Operation
Settings
For more detail on navigation functions, refer to the navigation manual.
NAV
Precautions
40
Controls
Step 2: Select NAV after the Self Test has
completed.
Step 3: Touch the Screen quickly, before it
“Times Out.” If needed, repeat Steps 1 and 2.
Step 4: Follow the On-Screen instruction to
adjust the calibration.
The SD navigation card in your system contains Map and POI data. Because this data is frequently
updated you may want to update the data on your NAV SD Card.
To purchase Map or POI updates please go to www.naviextras.com.
CAUTION: The content on the NAV SD Card contains a License Code. This code can not be moved to
different cards. If the Card is Lost or Damaged in anyway, it will render the Navigation system
inoperable.
MP3
NAV
4.2 Map and POI Updates
Settings
Phone
+
DVD
CD
iPod
Step 1: Start the Rosen Unit and wait for the
Self Test to complete.
AM/FM
The Navigation Calibration Screen is only available for a short time, after the vehicle is switched ON.
To access the Navigation Calibration Screen, select NAV as soon as the System Self Test has finished.
SAT
4.1 NAV Touch Screen Calibration
41
Precautions
Damaged or deleted files on the NAV SD Card are NOT covered under the product Warranty
Controls
5. PRECAUTIONS/SYSTEM RESET
AM/FM
Hazards
-Never use excessive force on the Touch Panel in the System, as this may cause glass breakage and
result in sharp edges.
SAT
-Never place foreign objects into the unit Disc slot, USB, or SD card slot as this will damage the unit
and could result in electrical shock or fire.
iPod
-Plastic bags and some packing materials may present suffocation or choking hazards. Never place
these materials where babies or children may come into contact with them.
Precautions When Using This Product
CD
-Do not insert anything other than approved discs into the disc loading slot. This will cause damage to
the product.
DVD
-Protect this product from moisture.
-To clean the screen, wipe with a soft cloth. Do not use chemicals, as this may cause damage to the
product.
MP3
-Do not attempt to repair this product. Please contact an authorized dealer.
Phone
Precautions When Using Discs
-Use only fully circular 12cm discs.
Settings
-Do not use cracked, chipped, warped or otherwise damaged discs as they may cause damage to the
product.
-Avoid leaving discs in excessively hot environments, including under direct sunlight.
-Playback of discs may not be possible due to disc format, recorded application, storage conditions,
etc.
NAV
-To clean discs, with the disc with a soft cloth outward from the center.
Precautions
42
Controls
-Never modify the System unless instructed by the installation manual. Rosen Entertainment Systems
will not be held liable for property damage, injury or death which are the result of improper
installation or modification. This system should be installed by a qualified service technician.
SAT
Normal Use
AM/FM
Installation
Abnormal Operation
-If the System fails to read the Disc after extended periods of high heat or cold temperatures, allow
approximately one hour for the System to regain a normal operating temperature and try again.
-Do not use the System if it is malfunctioning, turn the System off until a qualified service technician
can examine the System.
CD
DVD
-Never apply liquids directly to the System when cleaning it. Only use non-abrasive mild cleaners
applied to a soft cloth to clean the System.
MP3
-The driver should avoid changing Disc, USB, iPod or other devices related to the system while
driving, as this may create a hazardous situation resulting in accident or death. To make changes to the
Disc, USB or iPod, stop the vehicle in a safe place before making these changes.
iPod
-The driver should avoid looking at the System while the vehicle is in motion, as this may create a
hazardous situation resulting in accident or death.
System Reset
43
Precautions
NAV
If the system does not respond normally reset the system. To reset the system use a paperclip or
something similar to press and hold the reset switch for about 5 seconds or until the system restarts.
Settings
-If the System overheats or smoke is emitted, turn the System off and discontinue use until a qualified
service technician can examine the System.
Phone
-If liquids are spilled or come into contact with the System, turn the System off and discontinue use
until a qualified service technician can examine the System.
TRADEMARKS/CERTIFICATIONS
Manufactured under license from Dolby Laboratories;
“Dolby” and the “Double-D” symbol are trademarks of Dolby
Laboratories.
iPod and Made For iPod is a trademark of Apple Inc., registered
in the U.S. and other countries. “Made for iPod” means that an
electronic accessory has been designed to connect specifically to
iPod and has been certified by the developer to meet Apple
performance standards.
Bluetooth is a registered trademark of Bluetooth SIG, Inc.
This product incorporates copyright protection technology that is
protected by method claims of certain U.S. patents and other
intellectual property rights owned by Macrovision Corporation
and other rights owners.
This device complies with DHHS Rule 21 CFR subchapters J
applicable by date of manufacture.
FCC ID: EST0908-201-F
EVLD
EVLD: AT0809616R
CE: AT0809616S