Download Ultratec Miniprint 225 Specifications
Transcript
USING YOUR
™
MINIPRINT 225
SIGNAL
POWER
PRINT
OPTIONS
!
@
#
$
%
-
&
1
2
3
4
5
6
7
Esc
Q
W
A
Ctrl
Shift
E
S
Z
SK
R
D
X
T
F
C
Y
G
V
8
U
H
B
)
0
I
J
N
(
9
O
K
+
=
P
Back
Space
Return
L
"
'
M
Shift
GA
305–003003
Acknowledgement
In 1963, Dr. Robert H. Weitbrecht, an
American physicist who was deaf, developed
an acoustic coupler that could send and
receive teletypewriter signals over the
telephone lines. His invention, the
Weitbrecht Modem, enabled people who
are deaf to use the telephone for the first
time.
While modern technology now
makes it possible to build advanced microcomputer devices like your
Dr. Robert H.
new Ultratec text telephone, the
Weitbrecht, 1920–1983,
Weitbrecht modem remains the major
inventor of the first TTY
modem.
technological breakthrough that began
telecommunications for the deaf. Ultratec
wishes to acknowledge the importance of Dr. Weitbrecht’s contribution
to the welfare of people who are deaf the world over.
Ultratec, Inc.
450 Science Drive, Madison, WI 53711
608 238-5400 (voice/TTY)
Fax: (608) 238-3008
Email: [email protected]
Fourth edition
March 1999
First printing
© 1997, 1999 Ultratec, Inc.
and Turbo Code are registered trademarks of Ultratec, Inc.
Miniprint 225 and Auto ID are trademarks of Ultratec, Inc.
CONTENTS
Important safety instructions
Introduction
Overview of the Miniprint 225
p. 3
p. 5
6
CHAPTER
1 Set-up
Charging the batteries
About Auto ID™
About the printer
p. 7
8
8
9
CHAPTER
2 Calling
Making a call
Answering a call
About Turbo Code
Using interrupt
p. 11
12
13
14
15
CHAPTER
®
3 Options
Setting the print case
Setting the print size
Setting the Baudot code baud rate
Turning off Turbo Code
Turning off Auto ID™
Turning off interrupt
p. 16
16
16
17
18
18
18
4 Care & Repair
Replacing the printer paper
About the batteries
p. 19
20
21
®
CHAPTER
CONTENTS • 1
Replacing the batteries
22
Troubleshooting
23
Repair
25
Sticky keys
p. 26
Specifications
p. 27
Other TTYs available from Ultratec p. 28
FCC information
p. 30
Index
p. 32
Conversation etiquette
Back cover
2 • CONTENTS
Important safety instructions
When using your Miniprint 225, basic safety precautions
should always be followed to reduce the risk of fire, electric
shock, and injury to persons.
1. Read and understand all instructions.
2. Follow all warnings and instructions marked on the product.
3. Unplug this product from the wall outlet before cleaning. Do not
use liquid or aerosol cleaners. Use a damp cloth for cleaning.
4. Do not use this product near water, for example, near a bath
tub, wash bowl, kitchen sink, laundry tub, in a wet
basement, or near a swimming pool.
5. Do not place this product on an unstable cart, stand, or table.
The product may fall, causing serious damage to the product.
6. Operate this product only from the type of power source
indicated on the marking label. If you are not sure of the
type of power supply to your home, consult your dealer or
local power company.
7. Do not allow anything to rest on the power cord. Do not
locate this product where the cord will be abused by persons
walking on it.
8. Do not overload wall outlets and extension cords. This overloading can result in a fire or electric shock.
9. To reduce the risk of electric shock, do not disassemble this
product, but take it to a qualified service person when service
or repair work is required. Opening or removing covers may
expose you to dangerous voltages or other risks. Incorrect
re-assembly can cause electric shock when the appliance is
subsequently used.
10. Avoid using a telephone (other than a cordless type) during
an electrical storm. There is a remote risk of electric shock
from lightning.
SAFETY INSTRUCTIONS • 3
11. Unplug this product from the wall outlet and refer servicing
to qualified service personnel under the following conditions:
a. When the power supply cord or plug is damaged or frayed.
b. If liquid has been spilled into the product.
c. If the product has been exposed to rain or water.
d. If the product does not operate normally by following the
operating instructions. Adjust only those controls that are
covered by the operating instructions because improper
adjustment of other controls may result in damage and
will often require extensive work by a qualified technician
to restore the product to normal operation.
e. If the product has been dropped and/or damaged.
f. If the product exhibits a distinct change in performance.
12. Do not use the telephone to report a gas leak in the vicinity
of the leak.
Battery safety
Caution: To reduce the risk of fire or injury to persons, read
and follow these instructions:
1. Use only the type and size battery specified in the battery
instructions for your unit.
2. Do not dispose of the batteries in a fire. Cells may explode.
Check local codes for possible special disposal instructions.
3. Do not open or mutilate the batteries. Released electrolyte is
corrosive and may cause damage to the eyes or skin. It may
be toxic if swallowed.
4. Exercise care in handling batteries in order not to short them
with conducting materials such as rings, bracelets, and keys.
The battery or conductor may overheat and cause burns.
Save these instructions
4 • SAFETY INSTRUCTIONS
INTRODUCTION
™
Welcome to the Miniprint 225 TTY from Ultratec. You can use
the Miniprint 225 with any standard telephone and handset.
Turbo Code communication protocol transmits signals to other
®
Turbo-equipped TTYs as fast as you can type. Turbo Code also
lets you interrupt the other person’s typing.
™
Auto ID alert system tells the answering party that you are
calling by TTY.
You can change the print size from 24 characters per line (normal)
to 19 characters (bold) or 14 characters (wide) per line.
The rechargeable batteries allow you to use your Miniprint 225
when you are traveling or during a power failure.
The signal light on the left side of the display tells you what is
happening on the telephone line.
The power light, below the signal light, glows steadily red when
you have power.
Please note that in this manual TTY, TDD, and text telephone
all refer to the same device.
INTRODUCTION • 5
Overview of the Miniprint 225
™
Acoustic cups
Printer
On/Off switch
Display
Signal light
SIGNAL
Power light
POWER
PRINT
Printer on/off
@
#
$
%
-
&
1
2
3
4
5
6
7
Esc
Options key
Sensitivity key
OPTIONS
!
Q
W
A
Ctrl
Shift
E
S
Z
R
D
X
T
F
C
Y
G
V
8
U
H
B
SK
)
9
0
I
J
N
(
O
K
+
=
P
Back
Space
Return
L
"
'
M
Shift
GA
top view
PRESS
HERE
AC adapter
jack
back view
Battery compartment
Special keys
Escape key Esc quits whatever you are doing and saves changes.
Control key Ctrl gives instructions to the Miniprint 225 when
you hold it down and press a function key.
Function keys give commands to the Miniprint 225 when you
hold down the Ctrl key.
6 • INTRODUCTION
CHAPTER
1
SET-UP
All you need to do to set up the Miniprint 225 is plug it in! You
must plug in the AC adapter for 24 hours to charge the
batteries. After the batteries are charged, you can leave the AC
adapter plugged in all the time unless you need to use the
batteries during a power outage or while traveling.
Be sure to pull the plastic tab out of the battery compartment on
the bottom of the Miniprint 225 before you plug in the AC adapter.
Step 2
Plug the AC
adapter into
a wall outlet.
Step 3
Plug the AC
adapter cord
into the
Miniprint 225.
Step 1
Place the
Miniprint
225 next to a
telephone.
SIGNAL
POWER
PRINT
!
1
Esc
OPTIONS
@
#
2
SK
5
E
S
Z
Shift
Y
G
V
(
8
7
T
F
C
&
6
R
D
X
-
%
4
W
A
Ctrl
$
3
Q
U
H
B
J
N
0
O
K
+
=
)
9
I
P
Back
Space
Return
L
"
'
M
Shift
GA
SET–UP • 7
Charging the batteries
The AC adapter supplies electricity to the Miniprint 225 and
charges the built-in batteries. Leaving the AC adapter plugged
in will not harm the Miniprint 225 or the batteries.
The first time you set up your Miniprint 225, leave the AC
adapter plugged in for 24 hours to charge the batteries. You can
use the Miniprint 225 at the same time. Fully-charged batteries
will provide 45 to 60 minutes of normal use. For more
information on using battery power, see About the batteries on
page 21.
About Auto ID
™
™
The Auto ID feature alerts a hearing person that you are calling
from a TTY. It alerts the person by sending several audible tones
over the telephone line every few seconds. Auto ID helps
emergency service centers such as 911 automatically detect that
you are calling by TTY.
Auto ID comes on when you turn on your Miniprint 225 and
continues until you start a conversation. If you are on-line, you
will see SENDING AUTO ID every time the Miniprint 225
sends out tones. Auto ID will also begin sending tones
whenever no one types for a few minutes during a conversation.
It will continue until someone starts typing.
You can turn off Auto ID in the Options section. See Turning off
Auto ID on page 18.
Note that when you turn off Auto ID, it stays off and will not
send tones until you turn it on again. This means that an
emergency service center such as 911 cannot use Auto ID tones
to detect your TTY call.
8 • SET–UP
SET–UP • 9
About the printer
The printer is on when you turn on your Miniprint 225 for the
first time. Press the print key ( Ctrl + 2 ) to turn the printer off.
The display says PRINTER OFF. Press the print key again to
turn the printer back on. You can turn the printer on or off at
any time, including during a call.
The printer starts a new line after 24 characters are typed. If a
word is too long to fit at the end of a line, the printer divides it
with a dash. You can also start a new line yourself by pressing
the Return key. Often a few characters will not be printed at the
end of a conversation unless you press the Return key before you
turn off the machine.
Setting the print case
The Miniprint 225 prints everything you type in lowercase
(small) letters and everything the other person types in
uppercase (CAPITAL) letters. You can also set the Miniprint
225 so that everything is printed in uppercase letters. Follow
these steps to change the print case:
1. Press the options key ( Ctrl +
3
). The display says PRINT
(UP/LOW) CASE.
2. Press the
Spacebar
3. Press the
Esc
to change the setting to UPPER.
key to save the setting and leave the options.
This option stays changed until you change it again or
completely reset the Miniprint 225.
Setting the print size
Your Miniprint 225 is set to print 24 characters on each line
(normal). You can change this setting and print 19 characters
(bold) or 14 characters (wide) per line. Follow these steps to
change the print size:
10 • SET–UP
CHAPTER
2
CALLING
This chapter explains how to make and answer calls. It also
describes Turbo Code and how to interrupt the other person
during a conversation.
CALLING • 11
Making a call
1. Put the telephone handset in the acoustic cups
on the Miniprint 225.
Make sure the telephone
cord is on the left side.
2. Turn on the Miniprint 225.
ON
OFF
3. Dial the telephone
number you are calling.
4. When you see an answer
on the display, type a
greeting.
When your conversation is
finished, turn off the
Miniprint 225 and replace
the telephone handset.
12 • CALLING
Answering a call
1. Put the telephone
handset in the acoustic
cups on the Miniprint
225. Make sure the
telephone cord is on the
left side.
2. Turn on the Miniprint
225.
ON
OFF
3. Type a greeting and
HELLO JOHN HERE GA
wait for an answer.
!
@
#
$
%
–
&
*
(
)
+
1
2
Q
3
W
4
E
5
R
6
T
7
Y
8
U
9
0
O
=
P
A
S
D
F
G
H
J
K
L
:
;
Esc
Ctrl
Z
Shift
SK
X
C
V
BTypeN
I
M
/
,
?
.
Back
Space
Return
"
'
Shift
GA
4. When you are finished
with your conversation,
turn off the Miniprint
225 and replace the
telephone handset.
CALLING • 13
Signal light and display
The signal light shows what is happening on the telephone line
in the following ways:
Signal light steadily on: dial tone.
Signal light flashing slowly: telephone ringing.
Signal light flashing quickly: telephone busy.
Signal light flickering: person picking up the telephone or
speaking.
Dialing tips
In an office, type a 9 or another number to reach an outside line.
For long distance, include a 1 and the area code.
About Turbo Code
®
Turbo Code is an alternative to Baudot Code. It sends signals
to other Turbo Code TTYs as fast as you can type. The
Miniprint 225 takes care of connecting in Turbo Code or
Baudot code, depending on which code the other TTY is using.
It only uses Turbo Code with other Turbo Code TTYs.
You know you are connected in Turbo Code when a dot appears
in the lower left-hand corner of the display.
If necessary, you can turn off Turbo Code at anytime. If you do,
the Miniprint 225 will not use it. Follow these steps to turn off
Turbo Code:
1. Press the options key ( Ctrl +
3
). You will see PRINT
(UP/LOW) CASE.
2. Press the
Return
key until you see TURBO CODE ( ON) on
the display.
3. Press the
14 • CALLING
Spacebar
to change the setting to OFF.
4. Press the
key to leave options. Turbo Code is now turned
off until you turn it on again.
Esc
Note: During a call, you may temporarily turn off Turbo Code
and switch to Baudot (45) code by pressing the
Shift key, and the B key ( Ctrl + Shift + B ).
Ctrl
key, the
Using interrupt
You can interrupt the other person when he or she is typing
by pressing the interrupt key ( Ctrl + I ). Your display says
INTERRUPT REQUESTED. The other person’s display says
INTERRUPT. The other person can choose to stop typing and
let you go ahead or ignore your interruption and continue.
If you see INTERRUPT on your display while you are typing, it
means that the other person wants to interrupt you and start
typing. You can choose to stop and let the other person go
ahead or continue typing yourself.
Interrupt only works with newer TTYs and when the other
person is typing continuously. If the other person does not stop
typing when you press Ctrl + I , the other TTY probably does
not have the interrupt feature.
You can turn off the interrupt feature so that the other person
cannot send an interrupt to you by following the steps on page
18. Turning off interrupt does not affect your outgoing
interrupts—you can still send an interrupt to the other person.
CALLING • 15
CHAPTER
3
OPTIONS
This chapter describes all of the settings you can change with
the options key. They are listed in the order they appear on the
display when you press the options key ( Ctrl + 3 ) and then the
Return key. Use the Spacebar to show the different settings for each
option. Use the
Return
key to select a setting.
Setting the print case
Follow these steps to print in all uppercase letters instead of in
upper and lower case:
1. Press the options key ( Ctrl +
). You will see PRINT
(UP/LOW) CASE on the display.
2. Press the
Spacebar
3. Press the
Esc
3
to change the setting to UPPER.
key to save the new setting and leave options
or press the Return key to save and go to the next option.
Setting the print size
Follow these steps to print either 14 or 19 characters on a line
instead of 24 characters:
1. Press the options key ( Ctrl +
3 ). You will see PRINT
(UP/LOW) CASE on the display.
16 • OPTIONS
2. Press the
Return
key until you see PRINT SIZE (NORMAL)
on the display.
3. Press the
Spacebar
4. Press the
Esc
to change the setting to BOLD or WIDE.
key to save the new setting and leave options
or press the Return key to save and go to the next option.
Setting the Baudot code baud rate
Each time you turn on the Miniprint 225, the Baudot code baud
rate is set to the auto setting. The auto setting uses whichever
code it needs to answer a call. If you need to specify the code that
the Miniprint 225 uses, you can set the unit so that it will only
use either 45.5-baud or 50-baud Baudot code. When you do, the
Miniprint 225 will not try to use other codes. Follow these steps
to change the Baudot code baud rate setting:
1. Press the options key ( Ctrl +
). You will see PRINT
(UP/LOW) CASE on the display.
2. Press the
Return
3
key until you see BAUDOT (AUTO) BAUD
on the display.
3. Press the
Spacebar
to choose one of the following:
• AUTO to automatically use either 45.5 baud Baudot code
or Turbo Code.
• 45 to use only 45.5-baud Baudot code. Most Baudot TTYs
use 45.
• 50 to use only 50-baud Baudot code. TTYs purchased in
Australia, New Zealand, and South Africa use 50-baud
Baudot code. Note that in order to use 50-baud Baudot
code, you must change the setting to 50. The Auto setting
does not use 50-baud Baudot code.
4. Press the
Esc
or press the
key to save the new setting and leave options
key to save and go to the next option.
Return
The Baudot code baud rate setting always returns to auto when
you turn off the Miniprint 225.
OPTIONS • 17
Turning off Turbo Code
®
Follow these steps to turn off Turbo Code:
1. Press the options key ( Ctrl +
3 ). You will see PRINT
(UP/LOW) CASE on the display.
2. Press the
Return
key until you see TURBO CODE ( ON) on
the display.
3. Press the
Spacebar
4. Press the
Esc
to change the setting to OFF.
key to save the new setting and leave options
or press the Return key to save and go to the next option.
Turning off Auto ID
™
Follow these steps to turn off Auto ID:
1. Press the options key ( Ctrl +
). You will see PRINT
(UP/LOW) CASE on the display.
2. Press the
Return
3
key until you see AUTO ID (ON) on the
display.
3. Press the
Spacebar
4. Press the
Esc
or press the
to change the setting to OFF.
key to save the new setting and leave options
key to save and go to the next option.
Return
Turning off interrupt
Follow these steps to turn off interrupt:
1. Press the options key ( Ctrl +
). You will see PRINT
(UP/LOW) CASE on the display.
2. Press the
Return
3
key until you see INTERRUPT (ON) on the
display.
3. Press the
Spacebar
4. Press the
Esc
18 • OPTIONS
to change the setting to OFF.
key to save the new setting and leave options.
CHAPTER
4
CARE & REPAIR
Ordinary care of your Miniprint 225 requires changing the
printer paper when it runs out and replacing the batteries
when they no longer hold a full charge. You may be able to
solve other problems by reading the troubleshooting section.
Besides the printer paper and battery compartments, the
Miniprint 225 has no other user-serviceable parts. Any repair
work should be done by a qualified service person. If you try to
repair the unit yourself, you may damage the Miniprint 225
and you will void your warranty. The repair section explains
how to get help.
CARE AND REPAIR • 19
Replacing the printer paper
The printer uses high-quality thermal paper. Use the order
card that comes with the Miniprint 225 to order paper. If you
do not have a card, contact your dealer or Ultratec (the
Ultratec address is on the inside front cover of this manual.)
Turn on the Miniprint 225 and be sure the printer is on, then
follow these steps to put in a new roll of paper:
Step 1
Step 5
Put the roll in
the holder behind the printer.
Replace the
printer cover.
Step 4
Feed the paper
through the slot
in the printer
cover.
Step 3
Press the Return
key a few times
until the paper
comes out of the
top of the printer.
Pull the paper up
gently.
20 • CARE AND REPAIR
Take off the
printer cover by
pushing in on the
back and lifting
up.
S
ES E
PR ER
H
Step 2
Hold the new
roll so it unrolls
from the bottom.
Feed the end
into the slot in
the back of the
printer.
About the batteries
The Miniprint 225 runs on batteries when you unplug the AC
adapter or the power fails. The six AA rechargeable NiCad
batteries will provide 45 to 60 minutes of normal use when fully
charged.
When the power light blinks, you have about 5 minutes of battery
power left.The batteries will last longer if you turn off the
printer when you use battery power.
Checking the batteries
The batteries lose their ability to hold a full charge if you keep
the Miniprint 225 plugged in all the time. If you want to be
sure the batteries stay fully-charged, check them once a month.
Follow these steps to check the batteries:
1. Unplug the AC adapter.
2. Turn on the Miniprint 225 for 30 minutes. (You can still use
it for calls during this time).
3. If the power light glows steadily after 30 minutes, the batteries
are fine. Plug the AC adapter back in and turn off the
Miniprint 225.
If the power light blinks within 30 minutes, exercise the batteries.
Exercising the batteries
1. Leave the Miniprint 225 on with the AC adapter unplugged
until the power light flashes.
2. Plug in the AC adapter for 24 hours. (You can use the
Miniprint 225 for calls during this time).
3. Unplug the AC adapter and leave the Miniprint 225 on for
30 minutes.
4. Repeat steps 1 to 3 until the power light glows steadily after
30 minutes without the AC adapter.
CARE AND REPAIR • 21
Replacing the batteries
Replace the batteries every two or three years, or when they
always run down in less than 30 minutes and exercising them
does not help. To change the batteries, turn over the Miniprint
225 and follow these steps:
Step 1
Take off the
battery cover by
pushing in on
the latch and
lifting up.
S.
G
RIE
TTE
RNIN
WA ad BA
iC
AA
YN
ONL SIZE
E
S
U
Step 3
Put the battery
cover back on.
Step 2
Take out the old
batteries and put
in new ones. Be
sure the + and ends match the
symbols on the
holder.
CAUTION!
The rechargeable batteries contain nickel and cadmium. Do
not burn or puncture them. If you do, they could release
toxic material that could injure you. Do not dispose of them
in household trash. For information about recycling or
proper disposal, consult your local trash collection or disposal organization.
22 • CARE AND REPAIR
Troubleshooting
Poor reception
The display shows all numbers and punctuation marks instead
of words.
Press the
Spacebar .
The text should change to words.
An incoming message does not make sense.
Press the handset down firmly into the acoustic cups on the
Miniprint 225.
The telephone connection may be weak or the other TTY is
sending the wrong signals. If you are using Baudot code, press
the sensitivity key (hold down the Ctrl key and press the S key).
The display says HIGH SENSITIVITY. Sensitivity returns to
normal when you press the sensitivity key again or turn off the
Miniprint 225.
Printer
The printer does not work.
Be sure the printer is on. You can also try resetting the printer
by turning the Miniprint 225 off and on.
The printer works, but it prints too lightly or not at all.
Make sure you have high-grade thermal printer paper and it is
correctly installed. See Replacing the printer paper on page 20.
The printer only prints the bottom half of characters.
The print head should be replaced. Contact your dealer or
Ultratec.
On battery power, the printer prints too slowly or lightly.
The batteries are low. Plug in the AC adapter for 24 hours to
recharge the batteries.
CARE AND REPAIR • 23
Power
The batteries run down too soon.
You may not be regularly using your Miniprint 225 on battery
power, or the batteries are old. See About the batteries on page 21.
The Miniprint 225 does not turn on when you press the On/Off
switch, or the power light blinks, even when the AC adapter is
plugged in.
Be sure the electrical outlet is working. Be sure you are using the
correct AC adapter—it should be a 9VDC, 650 ma AC adapter. If
you still have a problem, contact your dealer or Ultratec.
The Miniprint 225 works fine in the evening, but does not work
during the day.
You may have plugged the AC adapter into a switch-controlled
outlet. Try a different outlet that you are sure is not controlled
by a switch.
Resetting the Miniprint 225
Resetting the Miniprint 225 returns all options to their default
settings. Follow these steps to reset the Miniprint 225:
1. Press the left
Shift key, the right Shift key, and the Ctrl key all
at the same time. The display will give a version number and
say RESET Y/N.
2. Press the
Y
key to reset. The display says MINIPRINT IS
RESET!
Press the N key if you change your mind and decide not to
reset the Miniprint 225.
24 • CARE AND REPAIR
Repair
Calling for help
If your Miniprint 225 is not working, we may be able to help
you solve the problem over the telephone. Call Ultratec at the
number on the inside front cover.
Sending the Miniprint 225 for repair
If you need to send the Miniprint 225 to our repair center,
follow these steps:
1. Pack it in the original shipping carton or a similar sturdy box.
2. Include a note that describes the problem you are having.
The note will help the technicians find the problem.
3. Insure the Miniprint 225 for shipment. Ultratec or an
authorized Ultratec repair center is not responsible for
damage during shipping to the center.
4. Send the Miniprint 225 to:
Ultratec National Service Center
5901 Research Park Blvd.
Madison, WI 53719
Email: [email protected]
CARE AND REPAIR • 25
STICKY KEYS
Ordinarily, when you use the Ctrl or Shift keys, you must hold
down either key while you press another key. If you have
trouble pressing two keys at once, the sticky keys feature lets
you use the Ctrl and Shift keys by pressing one key at a time.
To turn on sticky keys, press either
display says STICKY KEYS ON.
Shift
key five times. The
Now you can type a $ by pressing and releasing the
then pressing and releasing the 4 key.
Shift
key,
When sticky keys is on, you can also lock down the Ctrl key or a
Shift key so that it affects every other key until you unlock it.
To lock the Ctrl key or a Shift key, press the key twice. To unlock
the key, press it once more.
Press either Shift key five more times to turn off sticky keys.
The display says STICKY KEYS OFF.
If you use sticky keys all the time, you do not have to turn it on
each time you turn on the Miniprint 225. After you turn on the
sticky keys feature, it stays on until you turn it off or reset the
machine.
26 • STICKY KEYS
SPECIFICATIONS
Physical Dimensions
0.25” (6mm) character height
Size—10” x 9.5” x 3” (25.4 cm x 24.1 cm
x 7.6 cm)
Weight—3.75 lbs (1.7 Kg) with batteries
Acoustic Coupler
Power
AC adapter–9VDC, 650 ma (barrel is
positive)
AC adapter is UL/CSA listed
The six AA NiCad rechargeable
batteries are user replaceable. They
power the unit for 45 to 60 minutes of
normal use.
Keyboard
50 ergonomic keys in 5 rows
Control key plus 4 function keys
Sticky Keys for single-handed typists
Character set: A-Z, 0-9, Backspace,
Return/LF, Space, +=-$’()”/:;?,.*# GA, SK.
Display
Blue/green vacuum-fluorescent
20 characters
Accepts both circular and square
telephone handsets
Communication Codes
Automatic code detection on incoming
and outgoing calls (Turbo Code or
Baudot)
Baudot Code:
45.5 and 50 baud
Sensitivity = -45 dbm, 67 dBSPL (min)
Output = -10 dbm
Turbo Code:
Enhanced communication protocol
Printer
Prints 24, 19, and 14 characters per line
Uses 2.25” (58mm) thermal paper
Approvals
FCC approved. FCC Registration No.
(Part 68): D8KUSA-18408-DT-N
SPECIFICATIONS • 27
Other TTYs available from Ultratec
™
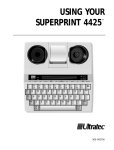
Superprint 4425
The most advanced printing TTY.
• Built-in 24-character printer
(3 print sizes)
• Turbo Code®
• Auto ID™
• Direct connect
• Auto-answer with remote message
retrieval
• 32k memory with 9500 characters
for memos and telephone numbers
• Time and date stamp
• Built-in ring flasher
• Advanced calling options
• ASCII option
Superprint 4425
™
™
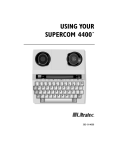
Supercom 4400
The most sophisticated non-printing TTY.
• Turbo Code®
• Auto ID™
• Direct connect
• Auto-answer with remote message
retrieval
• 32k memory with 9500 characters
for memos and telephone numbers
• Two telephone jacks
• Built-in ring flasher
• Advanced calling options
• Printer port to connect with your
external printer
• ASCII option
28 • OTHER TTYS
Supercom 4400
™
Compact
™
Pocket-sized, personal TTY to carry
in purse, briefcase or backpack.
• Turbo Code®
• Auto ID™
• Portable
• 2-line, 80-character LCD display
• 8k memory
• ASCII/32k memory option
• 7–10 hour rechargeable batteries
• Weighs only 1 lb.
Compact™
™
Minicom IV
Basic, non-printing TTY with no
memory and acoustic use only
• Turbo Code®
• Auto ID™
• Printer port to connect with your
external printer
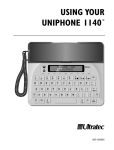
Uniphone 1140
Minicom IV
™
™
Combination telephone and TTY
with amplified handset and VCO
capabilities with 8k memory and
some advanced features.
Turbo Code®
™
Auto ID
Volume control
VCO request key
8k conversation/auto-answer
memory
• Ten Fastdial numbers
• Built-in ring flasher
• Auto-answer
•
•
•
•
•
Uniphone 1140
™
OTHER TTYS • 29
FCC Information
This equipment generates and uses radio
frequency energy and if not installed and
used properly, that is, in strict accordance
with the manufacturers instructions, may
cause interference with the radio and
television reception. The Miniprint 225 has
been tested and found to comply with the
specifications for a Class B computing device
in accordance with the specifications in
Subpart J of Part 15 of the FCC Rules. These
rules are designed
to provide reasonable protection against
radio frequency interference in residential
installations.
measures:
– Reorient the radio or television receiving
antenna.
– Move the Miniprint 225 further away from
the radio or television.
– Plug the Miniprint 225 into a different
outlet so it is on a different branch circuit
than the television or radio.
– If necessary, consult an experienced
radio/television technician or the
manufacturer for additional suggestions.
There is no guarantee that interference will
not occur during use. You can determine if
this equipment causes interference to radio
or television reception by turning the
Miniprint 225 on and off while the television
or radio is on.
The user may find the following booklet
prepared by the Federal Communications
Commission helpful: Interference Handbook.
This booklet is available from the
Superintendent of Documents, U.S.
Government Bookstore, 310 W. Wisconsin
Ave., Suite 150, Milwaukee, WI 53203.
If this equipment does cause interference
the user is encouraged to try to correct the
interference by one or more of the following
Other than replacing the batteries, the
Miniprint 225 does not have any user
serviceable parts.
30 • FCC & DOC INFORMATION
FCC & DOC INFORMATION • 31
INDEX
AC adapter, 6, 7, 21, 24
jack, 6
Acoustic cups, 6
using, 12, 13, 23
Adapter, See AC adapter
Address, Ultratec, inside front cover
Answering calls, 13
Auto ID, 5, 8
turning off, 18
Batteries, 5, 21
charging, 7, 21
checking, 21
disposing of, 4, 22
exercising, 21
how long they last, 8, 21
low power in, 21
safety, 4
replacing, 22
Baud rate
for Baudot code, 16
Baudot code
auto setting, 17
baud rates, 17
Cleaning, 3
Control key, 6
Dialing, 12, 14
Electrical power, See Power
Escape key, 6
Options key, 16
Paper
replacing, 20
type needed, 20
Phone, See Telephone
Power
connecting, 7
problems, 24
Power jack, See AC adapter jack
Power light, See Light, power
Print key, 9
Printer
last line of conversation and, 9
paper, See Paper
resetting, 23
print case, 9, 16
print size, 9, 16
problems, 23
turning on and off, 9
Reception problems, 23
Repair, 25
Resetting the Miniprint 225, 24
Return key, 16
Safety instructions, 3–4
Sensitivity key, 6, 23
Signal light, See Light, signal
SK, back cover
Spacebar, 16
Specifications, 27
Sticky Keys, 26
GA, back cover
Interrupt key, 15
Lightning danger, 4
Light, power, 6, 21
Light, signal, 6, 14
32 • INDEX
Telephone, 7, 12
dialing with a, 12
Troubleshooting, 23–24
Turbo Code, 5, 14, 18
turning off, 18
Conversation etiquette
GA
When you talk with another person by TTY, you
type while the other person reads. When you want
the other person to respond, type GA for “Go
ahead.”
GA OR SK To say goodbye, type GA OR SK. This gives the
other person a chance to say any last words before
ending the conversation.
SKSK
To end the conversation, type SKSK.
Q
Some people prefer to type Q instead of a question
mark because it saves time and is easier to type.
You can use punctuation marks such as commas and periods,
although many people choose to omit them. You may also
abbreviate words, such as:
GA
SK
CD
CUL
CUZ
HD
MTG
NBR
OIC
go ahead
stop keying
could
see you later
because
hold
meeting
number
oh, I see
OPR
PLS
Q
R
SHD
THX
TMW
U
UR
operator
please
question mark
are
should
thanks
tomorrow
you
your


