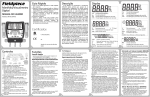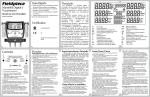
1
Operation and Maintenance Instruction Manual 2100-9001 Rev. 3 – June 2014 Product Leadership • Training • Service • Reliability Operation and Maintenance Instruction Manual WARRANTY Bacharach, Inc. warrants to Buyer that at the time of delivery this Product will be free from defects in material and manufacture and will conform substantially to Bacharach Inc.’s applicable specifications. Bacharach’s liability and Buyer’s remedy under this warranty are limited to the repair or replacement, at Bacharach’s option, of this Product or parts thereof returned to Seller at the factory of manufacture and shown to Bacharach Inc.’s reasonable satisfaction to have been defective; provided that written notice of the defect shall have been given by Buyer to Bacharach Inc. within one (1) year after the date of delivery of this Product by Bacharach, Inc. Bacharach, Inc. warrants to Buyer that it will convey good title to this Product. Bacharach’s liability and Buyer’s remedy under this warranty of title are limited to the removal of any title defects or, at the election of Bacharach, to the replacement of this Product or parts thereof that are defective in title. The warranty set forth in paragraph 1 does not apply to parts the Operating Instructions designate as having a limited shelf-life or as being expended in normal use (e.g., filters). THE FOREGOING WARRANTIES ARE EXCLUSIVE AND ARE GIVEN AND ACCEPTED IN LIEU OF (I) ANY AND ALL OTHER WARRANTIES, EXPRESS OR IMPLIED, INCLUDING WITHOUT LIMITATION THE IMPLIED WARRANTIES OF MERCHANTABILITY AND FITNESS FOR A PARTICULAR PURPOSE: AND (II) ANY OBLIGATION, LIABILITY, RIGHT, CLAIM OR REMEDY IN CONTRACT OR TORT, WHETHER OR NOT ARISING FROM BACHARACH’S NEGLIGENCE, ACTUAL OR IMPLIED. The remedies of the Buyer shall be limited to those provided herein to the exclusion of any and all other remedies including, without limitation incidental or consequential damages. No agreement varying or extending the foregoing warranties, remedies or this limitation will be binding upon Bacharach, Inc. unless in writing, signed by a duly authorized officer of Bacharach. Register Your Warranty by Visiting www.mybacharach.com NOTICE Product improvements and enhancements are continuous; therefore the specifications and information contained in this document may change without notice. Bacharach, Inc. shall not be liable for errors contained herein or for incidental or consequential damages in connection with the furnishing, performance, or use of this material. No part of this document may be photocopied, reproduced, or translated to another language without the prior written consent of Bacharach, Inc. Copyright © 2014, Bacharach, Inc., all rights reserved. BACHARACH® is a registered trademark of Bacharach, Inc. All other trademarks, trade names, service marks and logos referenced herein belong to their respective owners. ii P/N 2100-9001 Rev 3 Operation and Maintenance Instruction Manual Table of Contents 1. Introduction ...................................................................................................................................... 1 1.1. How to Use This Manual ........................................................................................................ 1 1.2. Conventions Used in This Manual ......................................................................................... 1 1.3. Analyzer-Specific Warnings ................................................................................................... 1 1.4. General Warnings and Cautions ............................................................................................ 2 1.5. Features and Capabilities....................................................................................................... 2 1.6. Kit Contents and Reorder Part Numbers ............................................................................... 3 1.7. Functional Overview ............................................................................................................... 3 2. Specifications ................................................................................................................................... 4 3. Components ..................................................................................................................................... 5 3.1. Base Unit ................................................................................................................................ 5 3.2. Low Side Vapor Sample Hose ............................................................................................... 5 3.3. High Side Liquid Sample Hose .............................................................................................. 5 3.4. Control Panel .......................................................................................................................... 6 3.5. AC Power Adapter .................................................................................................................. 6 3.6. Back Panel Connections ........................................................................................................ 7 3.7. Hard Shell Storage/Carrying Case ......................................................................................... 7 4. Operation .......................................................................................................................................... 8 4.1. First Use ................................................................................................................................. 8 4.2. Turning On the Unit ................................................................................................................ 8 4.3. Calibration .............................................................................................................................. 8 4.4. Vapor Sampling ...................................................................................................................... 9 4.5. Liquid Sampling .................................................................................................................... 10 4.6. Viewing the Test Results ...................................................................................................... 10 4.7. Contaminated Refrigerants .................................................................................................. 10 4.8. Pure Refrigerants ................................................................................................................. 11 4.9. Pure Blends with Incorrect Component Ratios .................................................................... 12 4.10. Measuring Air ....................................................................................................................... 12 4.11. Printing the Test Results and Channel Data ........................................................................ 13 4.12. Channel Data Modeling ........................................................................................................ 14 5. Maintenance and Troubleshooting............................................................................................... 15 5.1. Setting the LCD Contrast ..................................................................................................... 15 5.2. Changing the White Plastic Sample Filter ............................................................................ 15 5.3. Replacing the Sample Hose ................................................................................................. 16 5.4. Changing the Printer Paper .................................................................................................. 16 5.5. Software Updates ................................................................................................................. 17 5.6. Low Battery Warning ............................................................................................................ 17 5.7. Air Sensor Low ..................................................................................................................... 18 5.8. Error Messages .................................................................................................................... 18 6. Service Centers .............................................................................................................................. 19 P/N 2100-9001 Rev 3 iii Operation and Maintenance Instruction Manual List of Figures Figure 3-1. Figure 3-2. Figure 3-3. Figure 3-4. Figure 3-5. Figure 3-6. Figure 3-7. Base Unit Showing Key Components ...................................................................................... 5 Low Side Vapor Sample Hose ................................................................................................. 5 High Side Sample Hose Configuration .................................................................................... 6 Control Panel Showing Key Components................................................................................ 6 AC Power Adapter (Cord and Converter) ................................................................................ 6 Back Panel Connectors ........................................................................................................... 7 Hard Shell Storage/Carrying Case .......................................................................................... 7 Figure 4-1. Figure 4-2. Figure 4-3. Figure 4-4. Figure 4-5. Figure 4-6. Figure 4-7. Figure 4-8. Figure 4-9. Figure 4-10. Figure 4-11. Figure 4-12. Sample Screens Showing Typical Start-up Sequence ............................................................ 8 Sample Screens Showing Initiation and Progress of Calibration Testing ............................... 9 Sample Gas Testing Screens .................................................................................................. 9 Screens Showing Sample Test Results ................................................................................. 10 Test Results for Contaminated Blend Refrigerants ............................................................... 11 Sample R12 Test Screen Showing “Purity Unknown” Message ........................................... 11 Sample Test Results for Pure Blend Refrigerant with Correct Component Ratios ............... 12 Sample Test Results for Pure Blend Refrigerant with Incorrect Component Ratios ............. 12 Sample Test Results for Air Measurements .......................................................................... 12 Sample Printing Results and Printing Components Screens ................................................ 13 Samples of Printed Test Results ........................................................................................... 13 Samples of Test Results Showing Channel Data Printout .................................................... 14 Figure 5-1. Figure 5-2. Figure 5-3. Figure 5-4. Figure 5-5. Sample Screens Used in Setting LCD Contrast .................................................................... 15 Screens Used in Changing Printer Paper .............................................................................. 16 How to Change Printer Paper ................................................................................................ 17 Sample Screen Showing Low Battery Warning ..................................................................... 17 Sample Screen Showing Air Sensor Low Message .............................................................. 18 List of Tables Table 1-1. Table 1-2. Pur•Chek Pro Kit Part Number.............................................................................................. 3 Pur•Chek Pro Kit Replacement Part Numbers ..................................................................... 3 Table 2-1. Specifications ........................................................................................................................... 4 iv P/N 2100-9001 Rev 3 Operation and Maintenance Instruction Manual 1. Introduction 1.1. How to Use This Manual This manual provides important information on how to operate and maintain Bacharach’s Pur•Chek™ Pro HVAC Diagnostic Refrigerant Analyzer. To assure operator safety and proper use of the Pur•Chek™ Pro, please read, understand, and follow the contents of this manual. 1.2. Conventions Used in This Manual When used in this manual or as labeled on the Pur•Chek™ Pro, the following hazard symbols and/or associated words are defined as follows. WARNING: This symbol and/or the use of the word WARNING indicates a potential hazard associated with the use of this equipment. It calls attention to a procedure, practice, condition, or the like, which if not correctly performed or adhered to, could result in death or serious injury. WARNING: This symbol and/or the use of the word WARNING indicates a potential hazard from electrical shock. It calls attention to a procedure, practice, condition, or the like, which if not correctly performed or adhered to, could result in death or serious injury. CAUTION: This symbol and/or the use of the word CAUTION indicates a potential hazard associated with the use of this equipment. It calls attention to a procedure, practice, condition, or the like, which if not correctly performed or adhered to, could result in minor or moderate injury. IMPORTANT: The use of the word IMPORTANT in this manual calls attention to a procedure, practice, or condition which if not correctly performed or adhered to, could result in incorrect performance of or damage to the equipment and may void the warranty. NOTE: The use of the word NOTE in this manual is used to emphasize a procedure, practice, or condition. 1.3. Analyzer-Specific Warnings Refrigerant Blend Warning: The HVAC industry is continually introducing new refrigerants. Many of these new blends can be profiled using the Pur•Chek™ Pro. Sample Filter Warning: Replace the sample filter of the instrument AS SOON AS RED SPOTS OR DISCOLORATION BEGINS TO APPEAR ON THE OUTSIDE DIAMETER OF THE WHITE ELEMENT. Failure to properly maintain and replace the sample filter will result in severe damage or inaccurate results. Sample Input Warning: The instrument includes sampling options. One for High Side Liquid sampling and one for Low Side Vapor Sampling. Failure to use the correct hose configuration on the proper sample port may result in incorrect readings and/or damage to the instrument. DO NOT attempt to introduce liquid or samples heavily laden with oil into the low side sampling hose configuration. Damage caused to the instrument due to the use of the wrong hose configuration on the wrong port will void the warranty. Battery Charger Warning: When charging the battery with the charger, the charger will become warm. If the charger becomes hot, unplug the charger immediately! When charging multiple battery packs, allow the charger to cool between each battery. P/N 2100-9001 Rev 3 1 Operation and Maintenance Instruction Manual 1.4. General Warnings and Cautions • • • • • • • • ALWAYS wear eye and skin protection when working with refrigerants. Escaping refrigerant vapors will present a freezing danger. ALWAYS turn the compressor off before connecting the instrument to an air conditioning system. ALWAYS inspect the sample hose before each use. Replace the hose if it appears cracked, frayed, obstructed or fouled with oil. DO NOT direct refrigerant vapors venting from hoses towards the skin. DO NOT disassemble the instrument. There are no serviceable components internal to the instrument and disassembly will void the warranty. ALWAYS place the analyzer on a flat and sturdy surface. To reduce the risk of electrical shock, DO NOT disassemble the instrument; do not use the instrument in wet or damp areas. Some systems may contain hydrocarbons or flammable refrigerants. This analyzer is designed with sealed heat sources and without sparking components. ALWAYS ensure adequate ventilation and ALWAYS take proper precautions when working with refrigerants. • DO NOT breathe refrigerant and lubricant vapor or mist. Exposure may irritate eyes, nose, and throat. If accidental system discharge occurs, immediately ventilate the work area. • DO NOT utilize any other hose other than those supplied with the instrument. The use of other hose types will introduce errors into the refrigerant analysis and instrument calibration. ALWAYS verify that the refrigerant to be tested from the Low Side does not contain or will not emit heavy loads of oil or liquid. DO NOT expose unit or external components to rain or moisture. Protect the unit by keeping it in the storage case when not in use. • • • • NEVER admit any sample into the instrument at pressures in excess of 500 psig. NEVER obstruct the air intake, sample exhaust, or case vent ports of the instrument during use. 1.5. Features and Capabilities The Pur•Chek™ Pro HVAC Diagnostic Refrigerant Analyzer is the most advanced portable instrument ever manufactured for determining the purity of gaseous refrigerants for the HVAC-R market. Features of the Pur•Chek™ Pro include the following. • • Identification of more than 12 refrigerants with a single IR detector Large graphic display with on-screen instructions • Internal, rechargeable Lithium Iron Phosphate battery for cordless operation in any location • USB port for remote software updates 2 • Advanced ergonomic design Rugged rubberized hand grips Fast test time Built-in printer for instant analysis report Vapor or liquid sampling ability • Hard shell carry/storage case • • • • P/N 2100-9001 Rev 3 Operation and Maintenance Instruction Manual 1.6. Kit Contents and Reorder Part Numbers The Pur•Chek Pro kit contains the individual parts listed below. • • • • • • • • Pur•Chek™ Pro with internal rechargeable battery (available only through kit 2100-8003) Hard shell storage/carrying case 1/4” flare vapor sampling hose 1/4” flare liquid sampling assembly AC adapter/charger Printer paper (1 roll) Instruction manual Spare sample hose filter The Pur•Chek Pro kit is contained in a hard shell storage/carrying case. Note that some kit components are available for individual reorders. Table 1-1. Pur•Chek Pro Kit Part Number Part Number Description 2100-8003 Pur•Chek Pro Kit Table 1-2. Pur•Chek Pro Kit Replacement Part Numbers Part Number Contents of Pur•Chek Pro Kit (P/N: 2100-8003) N/A N/A Pur•Chek™ Pro (available only through kit 2100-8003) Hard shell storage/carrying case (available only through kit 2100-8003) 2100-9001 2100-0003 2100-0004 2100-0006 2100-0008 2100-0009 2100-0010 Instruction manual Printer paper (1 roll) AC power adapter White plastic sample filter 1/4” flare low-pressure vapor sampling hose 1/4” flare high-pressure liquid sampling hose and trap assembly Spare low pressure sample hose filter/restrictor 1.7. Functional Overview Contamination of refrigerants either in storage cylinders or air conditioning systems can lead to component corrosion, elevated head pressures, and system failures when used by unsuspecting technicians. The ability of the technician to determine refrigerant type and purity is severely hampered by the presence of air when attempting to use temperature-pressure relationships. The development of various substitute refrigerants further complicates the ability of a technician to identify refrigerant purity based on temperature-pressure relationships. The substitute refrigerant blends can also introduce a flammability hazard to the technician and the ultimate end user of the air conditioning system. The Bacharach Pur•Chek™ Pro HVAC diagnostic refrigerant analyzer provides a fast, easy, and accurate means to determine refrigerant purity in refrigerant storage cylinders or directly in air conditioning systems. The instrument utilizes non-dispersive infrared (NDIR) technology to determine the weight concentrations of multiple refrigerant types. Refrigerant purity is displayed on the LCD screen. Users must determine acceptable levels of purity based on their use or recovery standards. Sample gas is admitted into the instrument through one of the two supplied sampling hose configurations and presented to the sensing device. The instrument provides the user with direct percent-by-weight concentrations. P/N 2100-9001 Rev 3 3 Operation and Maintenance Instruction Manual The instrument’s user interface consists of an LCD graphic display, status indicator lamps, push-button communication switches. Alarm indicators provide alerts of instrument fault conditions. Direct percent-byweight concentrations of the sample refrigerant are provided on the display, which also provides user directions and prompts. A built-in printer is provided to print an on-the-spot analysis report. The Bacharach Pur•Chek™ Pro provides the refrigerant technician with: • • • 2. refrigerant type refrigerant purity refrigerant contamination information. Specifications Table 2-1. Specifications Category Description Sample Parameters Vapor or liquid, oil-free, 500 psig maximum Identified Refrigerants R12, R32, R408A, R409A, R417A , R421A*, R421B, R422A, R422B, R422C, R427A, HC (Hydrocarbons) * * Due to similar formulas, R417A and R421A may be identified as either R417A or R421A. Identified and Analyzed Refrigerants R134a, R22, R404A, R407C, R410A, HC (Hydrocarbons) Sensor Technology Non-Dispersive Infrared (NDIR) Refrigerant Sample Size 0.3 ounces (8.5 grams) per sample Power External Power Supply Input: 90-264VAC, 50-60 Hz Output: 12 VDC, 2.0 A Built-in Lithium Iron Phosphate Battery Output: 2100 mAh Environmental Conditions Humidity: 0 to 95% RH non-condensing. Protect the unit by keeping it in the storage case when not in use. Do not expose unit or external components to rain or moisture. Operational Temperature 50-120° F (10-49° C) 4 P/N 2100-9001 Rev 3 Operation and Maintenance Instruction Manual 3. Components 3.1. Base Unit The Pur•Chek™ Pro base unit (shown in Figure 3-1) houses the graphic display, infrared bench, internal battery, electrical connections, and printer module. These components require no maintenance. IMPORTANT: There are no serviceable components internal to the instrument, and disassembly will void the warranty. Figure 3-1. Base Unit Showing Key Components 3.2. Low Side Vapor Sample Hose The 6.5 foot (2 meter) low side vapor sample hose configuration is constructed of a polyurethane tube. See Figure 3-2. A brass flow restrictor acts to reduce pressure at the sample connection point and reduce the introduction of harmful oil into the machine. The maximum inlet pressure is 500 psig. The hose is provided with an instrument inlet port mating connector on one end and a 1/4” SAE female flare coupling nut on the service end. Service End Analyzer End Figure 3-2. Low Side Vapor Sample Hose (1/4″ SAE Flare Nut) 3.3. High Side Liquid Sample Hose The 6.5 foot (2 meter) high side sample hose configuration is constructed of a polyurethane tube with an oil reservoir. A brass flow restrictor acts to transform liquid refrigerant to vapor at the sample connection point while the oil trap syringe collects oil and provides a means of expulsion after the test is complete. The maximum pressure is 500 psig. The syringe is provided with a magnet for attaching it to the tank. It also is provided with an instrument inlet port mating connector on one end and a 1/4″ SAE female flare coupling nut on the service end. Refer to Figure 3-3. P/N 2100-9001 Rev 3 5 Operation and Maintenance Instruction Manual Analyzer End Service End (1/4” SAE Flare Nut) High Pressure Liquid Sample Trap Sample Hose Brass Restrictor Figure 3-3. High Side Sample Hose Configuration NOTE: The analyzer will indicate “Non-Condensable” or “Unknown Refrigerant” if the analyzer does not receive a good sample due to obstructed flow or lack of flow. If this occurs the Brass Sample Hose Restrictor may need to be replaced. 3.4. Control Panel The control panel serves as the main user interface. The control panel features three soft key buttons that change their function as the instrument changes modes. The current function for each button is displayed by the soft key label at the bottom of the graphic display. Red and green LEDs at the top of the control panel are used for visual status indications. Refer to Figure 3-4. This is the Graphic Display Figure 3-4. Control Panel Showing Key Components 3.5. AC Power Adapter The Pur•Chek™ Pro is powered via a preinstalled Lithium Iron Phosphate battery. You can also power the unit via the 90-264 VAC, Hz power transformer. This 50-60 transformer is included with each unit and converts a standard 100-240VAC 50/60Hz wall outlet to 12VDC, 2.0A, which powers the device. This AC Power Adapter will also charge the battery when connected to the analyzer. Figure 3-5. AC Power Adapter (Cord and Converter) NOTE: Use of any other power source may cause damage to the unit and void the warranty. 6 P/N 2100-9001 Rev 3 Operation and Maintenance Instruction Manual 3.6. Back Panel Connections The connections located on the back panel are illustrated below in Figure 3-6. CAUTION: The sample outlet port should never be obstructed. Keep the sample outlet port free and clear at all times. Do not operate near open flame. Figure 3-6. Back Panel Connectors 3.7. Hard Shell Storage/Carrying Case The hard shell storage/carrying case is custom fit to the Pur•Chek™ Pro. It provides rugged protection for the instrument as well as convenient storage for all components. See Figure 3-7. The enclosure is general purpose and is not watertight. Figure 3-7. Hard Shell Storage/Carrying Case P/N 2100-9001 Rev 3 7 Operation and Maintenance Instruction Manual 4. Operation 4.1. First Use The Pur•Chek™ Pro has a built-in Lithium Iron Phosphate battery. Prior to the first use, charge the battery for a minimum of 2 hours with the included AC power supply. If a power outlet is accessible you may also use the AC power supply to power the unit. The analyzer will function and charge the battery while the AC Power Supply is connected. NOTE: The Pur•Chek™ Pro can be operated with or without the battery using the supplied AC adapter. 4.2. Turning On the Unit Ensure the unit has either battery power (charged battery), or use the AC power adapter. For the latter, connect the included AC power adapter to the 12 VDC power input jack on the back of the unit (refer to Figure 3-6 on page 7). Plug in the AC power cord to a 110-240 VAC outlet. Press the left soft key (the power on/off button). The splash screen shown in Figure 4-1 A will appear for approximately three seconds followed immediately by the screen in Figure 4-1 B. If you wish to adjust factory settings press ‘SET’ and refer to Section 5: Maintenance and Troubleshooting on page 15. If you do not need to adjust the settings, connect the sample hose to the analyzer (Figure 4-1 C) in preparation for calibration, then wait approximately 30 seconds for the unit to warm up. (A) (B) (C) Figure 4-1. Sample Screens Showing Typical Start-up Sequence 4.3. Calibration NOTE: The supplied sample hose needs to be connected to accomplish proper calibration. Verify the sampling hose assembly is connected to the analyzer and making sure it is disconnected from any refrigerant source before calibration. When you first turn the unit on an Air Calibration will be required; additional air calibrations are only required periodically. A reminder to perform air calibrate will appear when needed (refer to Figure 4-2 A). Press ‘CAL’ to calibrate the machine. When calibrating, the unit will pull fresh air into the sample cell via an internal pump. This fresh air purges any excess refrigerant and ensures accurate test results. Calibration requires that the sample hose is disconnected from the refrigerant cylinder or air conditioning system and remains connected to the 8 P/N 2100-9001 Rev 3 Operation and Maintenance Instruction Manual instrument. Figure 4-2 B shows a sample progress screen that is displayed as the Air Calibration is occurring. Calibration will take approximately 130 seconds. NOTE: In the unlikely event an ‘Air Calibration Unstable’ message is displayed as shown in (Figure 4-2 C) verify you are in a ventilate area and there is no gas flowing near the air intake. Once you have verified both parameters, press ‘RETRY’ to complete another calibration. (A) (B) (C) Figure 4-2. Sample Screens Showing Initiation and Progress of Calibration Testing When the unit has completed a successful Air Calibration, the analyzer is then ready for gas testing. The unit will display the screen shown in Figure 4-3 A. Determine if you are Vapor Sampling or Liquid Sampling and make sure the proper hose assembly is connected to complete your required form of testing. Section 4.4 Vapor Sampling and section 4.5 Liquid Sampling outline proper procedure for both forms of testing. Connect the hose to the tank or system, open the valve if connecting to a tank, and then press ‘TEST’. The Pur•Chek™ Pro will display the screen shown in Figure 4-3 B. Before the test is completed the screen in Figure 4-3 C will appear to indicate the test is nearly complete (A) (B) (C) Figure 4-3. Sample Gas Testing Screens 4.4. Vapor Sampling Vapor sampling is the most common process used for identifying refrigerants using the Pur•Chek™ Pro. It is a simple process requiring the operator to take these 4 steps: 1. Connect the vapor sampling hose to the instrument and then to the low side vapor port of the system or cylinder. 2. Open the low side valve of the cylinder and press TEST (see Figure 4-3 A). 3. When the test is complete, close the low side valve of the cylinder and disconnect the hose from the cylinder. 4. Disconnect the hose from the Pur•Chek™ Pro for storage. P/N 2100-9001 Rev 3 9 Operation and Maintenance Instruction Manual 4.5. Liquid Sampling Liquid sampling is an option that is exclusive to the Pur•Chek™ Pro. It permits the user to flash liquid into vapor for introduction into the analyzer. To use the liquid sampling assembly, follow the steps below. 1. Inspect the high-pressure liquid sampling trap assembly and ensure that the plunger on the oil trap syringe is completely depressed. Assemble the high side liquid sample hose as shown in Figure 3-3 on page 6. 2. Connect the appropriate end of the hose to the instrument and the opposite end of the liquid sampling assembly to the High Side Liquid port of the system or cylinder. Affix the high pressure liquid sample trap assembly vertically to a tank with the magnet. 3. Open the high side valve of the cylinder. The liquid sample will exit the tank and flash to vapor by the hose assembly. As the liquid is flashed, the plunger on the high pressure liquid sample trap assembly will begin to rise and the flashed refrigerant sample will travel into the analyzer. 4. Wait for the plunger on the high pressure liquid sample trap assembly to expand past the outlet port. 5. Press “Test” on the analyzer (see Figure 4-3 A). 6. Upon completion of the test, close the valve on the cylinder, disconnect the hose from the inlet of the high pressure liquid sample trap assembly, and depress the plunger to expel any trapped oil. 7. Inspect the hose for signs of oil and replace the brass hose restrictor if necessary. 8. Disconnect the hose from the Pur•Chek™ Pro. NOTE: Liquid sampling will likely clog the brass sample hose restrictor much faster than vapor sampling. If the restrictor becomes clogged and the analyzer continuously displays “NonCondensable” or “Unknown Refrigerant” readings, you will need to replace the clogged restrictor with a new one. To avoid oil or liquid contamination from entering the analyzer, have a designated vapor and liquid brass sample hose restrictor for each form of testing. 4.6. Viewing the Test Results Upon completion of the test, the Pur•Chek™ Pro will display a screen similar to that shown in Figure 4-4 A. Pressing the MORE button will display the screen shown in Figure 4-4 B. Once you have completed your test, press ‘DONE’ to return back to the ‘READY’ screen Figure 4-3 A or refer to section 4.11 Printing the Test Results and Channel Data on page 13. (A) (B) Figure 4-4. Screens Showing Sample Test Results 4.7. Contaminated Refrigerants The Pur•Chek™ Pro includes the ability to detect and analyze the composition of many common R400 Series refrigerants in addition to R134a, R22 and hydrocarbons. In the event that the Pur•Chek™ Pro determines that the primary refrigerant in the system or cylinder is one of the recognized measurable 10 P/N 2100-9001 Rev 3 Operation and Maintenance Instruction Manual refrigerants, a results screen similar to Figure 4-5 A will be displayed. Pressing the MORE button will display a detail screen similar to Figure 4-5 B. If the blend or refrigerant mixture is not recognized, Figure 4-5 C will be displayed. Refer to section 4.11 Printing the Test Results and Channel Data on page 13 to print. (A) (B) (C) Figure 4-5. Test Results for Contaminated Blend Refrigerants 4.8. Pure Refrigerants The Pur•Chek™ Pro has the ability to identify the following refrigerants. • • • • R12 R32 R408A R409A • • • • R417A R421A R421B R422A • • • • R422B R422C R427A Hydrocarbons (HC) All identified refrigerants will show “Purity Unknown” as the analyzer cannot yield additional information regarding the composition. See Figure 4-6. Refer to section 4.11 Printing the Test Results and Channel Data on page 13 to print. Refer to section 4.12 Channel Data Modeling on page 14 for additional information regarding identified refrigerants. Figure 4-6. Sample R12 Test Screen Showing “Purity Unknown” Message The instrument can also, identify and analyze the component content of pure: • • R134A R22 • • HC (hydrocarbons) R404A • • R407C R410A Analysis of analyzed pure blend refrigerants will yield additional data regarding the composition of the refrigerant sample. The Pur•Chek™ Pro will display the blend refrigerant type as shown in Figure 4-7 A. Pressing the ‘MORE’ button will display the detail screen shown in Figure 4-7 B. Refer to section 4.11 Printing the Test Results and Channel Data on page 13 to print. NOTE: Hydrocarbons (HC) encompass R600, R600A and R290. The Pur•Chek™ Pro cannot differentiate between hydrocarbons. P/N 2100-9001 Rev 3 11 Operation and Maintenance Instruction Manual (A) (B) Figure 4-7. Sample Test Results for Pure Blend Refrigerant with Correct Component Ratios 4.9. Pure Blends with Incorrect Component Ratios The Pur•Chek™ Pro has the ability to detect blend ratios that have been altered by contamination. As stated above, the blends that can be identified and analyzed are as follows. • • R134A R22 • • HC (hydrocarbons) R404A • • R407C R410A If one of the multi-component refrigerant blends has incorrect component ratios, it will be displayed as shown in Figure 4-8 A. Press MORE To see the component concentrations. See Figure 4-8 B. Refer to section 4.11 Printing the Test Results and Channel Data on page 13 to print. (A) (B) Figure 4-8. Sample Test Results for Pure Blend Refrigerant with Incorrect Component Ratios 4.10. Measuring Air The Pur•Chek™ Pro offers the ability to measure the presence of air independently during every test. The built in oxygen sensor will display the percentage of air in all identified or identified and analyzed refrigerants if there is air in a system or cylinder. Figure 4-9 A shows how the LCD will display air if detected. Pressing ‘MORE’ will display the purity of the refrigerants which were detected (Figure 4-9 B). (A) (B) Figure 4-9. Sample Test Results for Air Measurements 12 P/N 2100-9001 Rev 3 Operation and Maintenance Instruction Manual NOTE: Air is measured independently from refrigerant. You can have 100% pure refrigerant with a percentage of air in a system or tank. The presence of air will display on the initial results screen and on every printed test. 4.11. Printing the Test Results and Channel Data The test results can be printed by selecting the PRINT button. Pressing PRINT will print the test results for all analyzed refrigerants. The screen in Figure 4-10 A will display during printing. If printing identified or unknown refrigerants, pressing PRINT will print the channel data from the test. Figure 4-10 B will display during channel data printing. (A) (B) Figure 4-10. Sample Printing Results and Printing Components Screens After the print is complete, carefully tear off the printout and the unit will return to the previous screen. Additional printouts may be made following the same procedure. To exit the test, press the EXIT button. Figure 4-11A, Figure 4-11B, and Figure 4-11C show sample printouts for various test results. NOTE: Care must be taken when tearing off the printed results to leave a clean edge. Tear the paper from RIGHT to LEFT to avoid paper jams. (A) (B) (C) Figure 4-11. Samples of Printed Test Results P/N 2100-9001 Rev 3 13 Operation and Maintenance Instruction Manual 4.12. Channel Data Modeling Channel Data Modeling is a unique feature to the Pur•Chek™ Pro. It allows the user to test refrigerants that the analyzer may not already identify and “fingerprint” the data using the available channels. The channel data is available for identified and unknown refrigerants. Once you complete a test on an identified refrigerant (see list in section 4.8 Pure Refrigerants on page 11) or unknown refrigerants, the test results will display similar to Figure 4-12 A for identified refrigerants or Figure 4-12 B for unknown refrigerants. Once displayed, the analyzer will allow the user to print. Press the PRINT button and the data will appear on the printout similar to Figure 4-12 C. This new feature allows the user to develop a “fingerprint” model for different refrigerants the Pur•Chek™ Pro may not already analyze. If the user tests a virgin tank of refrigerant at least 3 times and receives channel data that is consistent or within a close range to one another, this data can be used as a “fingerprint” model of that particular refrigerant. This feature will allow the user to have a guide to identify refrigerants not already established by the analyzer and increases the capabilities of the Pur•Chek™ Pro. Figure 4-12. Samples of Test Results Showing Channel Data Printout NOTE: This is not a guaranteed method for identifying refrigerants. Results will vary and some refrigerants may create inconsistent data. 14 P/N 2100-9001 Rev 3 Operation and Maintenance Instruction Manual 5. Maintenance and Troubleshooting 5.1. Setting the LCD Contrast The Pur•Chek™ Pro features an adjustable LCD contrast for use in varying light conditions. To adjust the contrast, press the SET button which appears after the unit is powered on. The screen will display several options as shown in Figure 5-1 A. Press the SET button to display the options in Figure 5-1 B. (A) (B) Figure 5-1. Sample Screens Used in Setting LCD Contrast 5.2. Changing the White Plastic Sample Filter When inspecting the sample filter, look completely around the entire outside diameter of the white filter element located inside of the clear plastic housing. Look for red spots or the beginnings of discoloration on the white outside diameter of the element. Do not look into the round ends of the white element for red spots or discoloration. The round ends of the filter may always appear red. If red spots or discolorations are discovered on the outside diameter, the sample filter requires replacement to prevent the influx of particulate and oil mists into the instrument. To replace the white plastic sample filter, follow the instructions below. 1) Obtain replacement filter P/N 2100-0006 (see Table 1-2 on page 3). 2) Remove the existing filter from the retaining clip of the instrument by pulling straight up and out. 3) CAREFULLY remove the flexible, black rubber tubing connections from both ends of the existing filter. IMPORTANT: DO NOT allow the tubes to slip back into the internal portion of the case. 4) Discard the existing filter in an environmentally friendly manner. 5) Install the tube ends onto the barbs of the replacement filter, taking note to align the flow arrow of the filter with the flow arrow of the instrument top panel. 6) CAREFULLY slide the tubing back into the internal portion of the instrument and seat the new filter into the retaining clip. 7) Inspect the sample hoses for signs of oil entrapment. 8) Replacement of the sample filter usually requires cleaning or replacement of the sample hoses. P/N 2100-9001 Rev 3 15 Operation and Maintenance Instruction Manual 5.3. Replacing the Sample Hose Inspect the inside diameter of the tube for signs of oil build up, dirt, obstructions, kinks, cuts, fraying, or any other signs of wear before use. Oil contamination cannot be cleaned out of sample hoses due to the density of the brass oil restrictor. If oil is visible in the hose assembly, replace the hose and brass restrictor with P/N 2100-0010 (refer to Table 1-2 on page 3). NOTE: The analyzer will indicate “Non-Condensable” or “Unknown Refrigerant” if it does not receive a good sample due to obstructed flow or lack of flow (approximately less than 30 psig or 2 Bar). If this occurs the sample hose may need to be replaced. To replace the hose and restrictor assembly, follow the instructions below. 1) Disconnect the sample hose from the analyzer. 2) Remove the brass restrictor (with hose attached) from the coupler and discard. Be sure to use a backing wrench to avoid damaging the coupler. 3) Check for signs of oil and debris in the coupler. 4) Using “CRC Brakleen” or similar cleaner which ONLY contains tetrachloroethylene and carbon dioxide, follow the safety instructions on the can and spray all parts of the coupler with the cleaner to remove the oil. IMPORTANT: DO NOT soak the parts for more than 60 seconds. 5) Allow coupler parts to dry. Check coupler parts for oil once again. Failure to clean the oil out of the coupler will result in premature clogging of the new filter. 6) Install the new brass restrictor (P/N 2100-0010) into the coupler and lightly tighten. Usually finger tight is sufficient. 5.4. Changing the Printer Paper Pur•Chek™ Pro Refrigerant Analyzers are equipped with on-board printers and use an inexpensive thermal paper for printing. The paper roll should be changed when a red stripe appears on the left side of the printout. To change the paper roll, press the SET button shortly after powering on the analyzer (or any time that it appears). See Figure 5-2 A. Press the SET button to advance to the screen shown in Figure 5-2 B. Follow the instructions on the screen to load the paper. (A) (B) Figure 5-2. Screens Used in Changing Printer Paper 16 P/N 2100-9001 Rev 3 Operation and Maintenance Instruction Manual Open the printer door (see Figure 5-3 A) and remove the old roll by tearing the paper as it enters the printer then pressing the FEED button shown in Figure 5-2 B until the old roll exits the printer completely. Insert the new paper roll from the underside as shown in Figure 5-3 A and B. Press the FEED button (shown in Figure 5-2 B) to automatically advance the paper through the printer. Allow at least 3 in (7cm) of paper to exit the top of the printer. Press DONE to stop the printer from advancing the paper. Slide the paper through the slot in the printer door and close the door. (A) (B) Figure 5-3. How to Change Printer Paper 5.5. Software Updates From time to time, software updates may be made available to improve operating performance or add additional features. Some updates will be provided at no charge to implement operating efficiencies while others will be optional, paid upgrades, to add new refrigerants, etc. Many of the updates can be completed by the user however some will require the instrument to be returned to the factory for new gas calibrations. The Pur•Chek™ Pro has a USB update port located on the back panel. This port should not be used for any other purpose other than to install factory updates using the Bacharach factory USB drive. NOTE: If you do not register your analyzer we will not be able to inform you of any software updates. 5.6. Low Battery Warning A battery warning will occur when the internal lithium iron phosphate battery voltage becomes low. You can either continue working or connect the 12V AC Power Supply and continue to work by pressing IGNORE. The analyzer will charge the battery while it is connected to the AC Power Supply, but if you wish to use it wirelessly press OFF, plug the analyzer into the AC Power Supply via the 12DC Outlet Input on the Back Panel and allow it to fully charge. Reaching a full charge takes at least 2 hours. Figure 5-4. Sample Screen Showing Low Battery Warning P/N 2100-9001 Rev 3 17 Operation and Maintenance Instruction Manual 5.7. Air Sensor Low In the event you receive an ‘Air Sensor Low’ message there is no need to discontinue use. This message is meant to alert you that the built-in oxygen sensor is depleting and will need to be replaced in the near future. If the analyzer you are using is new and you believe you received this message in fault, first verify gas is not flowing into the analyzer and that you are in a well ventilated area. Once you have verified both, press RECAL to recalibrate the analyzer. If you have had the analyzer for a few years, the oxygen sensor may be near depletion. Pressing TEST allows you to bypass the message and finish your testing. The oxygen sensor is a consumable part and will eventually need to be replaced. After receiving this message plan on contacting Bacharach to schedule service. Figure 5-5. Sample Screen Showing Air Sensor Low Message 5.8. Error Messages In the unlikely event that an error message is displayed on the screen, power off the unit, take it to a location outside of the shop environment where fresh air is available and turn the unit back on. If the error message reappears, contact the service department for assistance. 18 P/N 2100-9001 Rev 3 Operation and Maintenance Instruction Manual 6. Service Centers For service and replacement parts, contact a Bacharach Service Center. United States Bacharach, Inc. 621 Hunt Valley Circle New Kensington, PA 15068 USA Phone: 724-334-5000; press 2 at prompt Fax: 724-334-5723 Email: [email protected] P/N 2100-9001 Rev 3 Canada Bacharach of Canada, Inc. 20 Amber St. Unit #7 Markham, Ontario L3R SP4 Canada Phone: 905-470-8985 Fax: 905-470-8963 Email: [email protected] 19 Operation and Maintenance Instruction Manual Headquarters: 621 Hunt Valley Circle, New Kensington, PA 15068 Ph: 724-334-5000 • Fax: 724-334-5001 • Toll Free: 800-736-4666 Website: www.mybacharach.com • E-mail: [email protected] Printed in U.S.A. 20 ® Registered Trademark of Bacharach, Inc. P/N 2100-9001 Rev 3