1
Series
Programmer’s Manual
Psion Teklogix Corporation
3000 Kustom Drive
Hebron, KY 41048
800-322-3437
www.psionteklogix.com
Psion Teklogix, Rev. B
Manual Revision Notes:
Released as Part Number 5886 in October, 2004
• Original release for the MLP 3040 Series printers.
• Based on MLP Series firmware version 1.7.
Released as Part Number 6035 in March, 2005
• Added support for the MLP 3030 Series printers.
• Based on MLP Series firmware version 2.0.
Released as Part Number 6035 Rev. A in October, 2005
• Updated to reflect MLP Series firmware version 2.8.
Released as Part Number 6035 Rev. B in February, 2006
• Recommended black mark position dimension changed from 0.9” to 0.7092”.
• Updated to reflect MLP Series firmware version 2.9.
Released as Part Number 6361 Rev. A in December, 2006
• Added PrintAbout MP 2000 support.
• Updated to reflect firmware version 3.2.
Released as Part Number 6361 Rev. B in March, 2007
• Updated to reflect firmware version 3.6.
Acknowledgements
Psion Teklogix is a registered trademark of Psion Teklogix, Inc.
Bluetooth is registered trademark of Bluetooth SIG, Inc.
Printek is a registered trademark of Printek, Inc.
O’Neil is a trademark of O’Neil Product Development, Inc.
Palm OS is a trademark of PalmSource, Inc.
PrintBoy is a registered trademark of Bachmann Software
PrinterCE is a registered trademark of Fieldsoftware Products
Wi-Fi is a registered trademark of the Wi-Fi Alliance
Windows is a registered trademark of Microsoft Corporation
Zebra, ZPL-II, and Comtec are registered trademarks of Zebra Technologies, ZIH Corp.
All other trademarks are the property of their respective owners.
© 2004 – 2008 By Psion Teklogix Corporation, 3000 Kustom Drive, Heborn, KY 41048. All rights reserved.
Specifications subject to change without notice.
ii
TABLE OF CONTENTS
Manual Revision Notes: .......................................................................................................................................ii
Acknowledgements...............................................................................................................................................ii
Introduction ..........................................................................................................................................................1
Printer Models and Key Features ....................................................................................................................1
Manual Contents .............................................................................................................................................1
Selecting Emulations ............................................................................................................................................3
Psion Teklogix Emulation....................................................................................................................................5
Introduction .....................................................................................................................................................5
Control Codes and Escape Sequences Grouped by Function..........................................................................6
Communications ......................................................................................................................................6
Character Size and Line Spacing .............................................................................................................7
Character Attributes .................................................................................................................................9
Character Sets ........................................................................................................................................10
Horizontal Position ................................................................................................................................10
Vertical Position.....................................................................................................................................11
Bar Codes...............................................................................................................................................13
Graphics .................................................................................................................................................17
Storing and Printing Graphic Images and Logos ...................................................................................22
Black Mark Sensing ...............................................................................................................................24
Black Mark Requirements................................................................................................................24
Black Mark Sensing Commands ......................................................................................................24
Gap Sensing ...........................................................................................................................................25
Printer Controls ......................................................................................................................................26
Printer Status Commands .......................................................................................................................28
Magnetic Card Reader............................................................................................................................31
Control Code and Escape Sequence Summary .............................................................................................33
MLP Emulation ..................................................................................................................................................35
O’Neil Emulation................................................................................................................................................37
ZPL-II Emulation...............................................................................................................................................41
CPCL Emulation ................................................................................................................................................43
Hex Dump Mode.................................................................................................................................................47
Print & Font Samples.........................................................................................................................................49
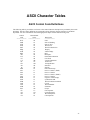
ASCII Character Tables ....................................................................................................................................53
ASCII Control Code Definitions...................................................................................................................53
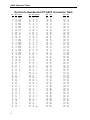
Decimal to Hexadecimal TO ASCII Conversion Table ................................................................................54
Printer Reset Conditions....................................................................................................................................55
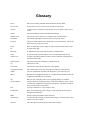
Glossary...............................................................................................................................................................56
iii
Introduction
This manual is intended to be used by software developers for the purpose of creating and/or modifying
applications to make use of the special features offered by the Psion Teklogix PTX Print Series of mobile
thermal printers.
This section of the manual describes the various models of printers and the features supported by this manual
and the information contained in other sections.
For printer set up and operating information for users, system integrators and information technology
personnel, please refer to the printer’s Operator’s Manual for the specific model of interest.
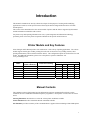
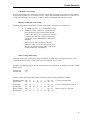
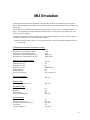
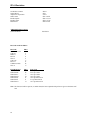
Printer Models and Key Features
Psion Teklogix mobile thermal printers offer solutions for a wide variety of printing applications. The various
models support flexible paper widths, printing from roll stock or flat stock in easy loading cassettes, label
printing enhancements, and several host interface choices. The configuration options are shown below for each
model. For additional information, please refer to the printer’s Operator’s Manual or visit
www.psionteklogix.com.
Model
MLP 3030
MLP 3030LP
MLP 3040
MLP 3040LP
MLP3040SL
PrintAbout
Max Paper Size
Label/Ticket Printing
(Width x Diameter)
RS-232
3.12” x 2.625” Roll
Front Black Mark
Std
3.12” x 2.625” Roll Front/Back Black Mark, Gap
Std
4.125” x 2.625” Roll
Front Black Mark
Std
4.125” x 2.625” Roll Front/Back Black Mark, Gap
Std
4 x 6” Cassette
n/a
Std
4.125” x 1.75” Roll
Front Black Mark
Std
Host Interfaces
IrDA Bluetooth Wi-Fi
Opt
Opt
Opt
Opt
Opt
Opt
Opt
Opt
Opt
Opt
Opt
Opt
Opt
Opt
Opt
n/a
Opt
Opt
Manual Contents
The remaining sections of this manual provide information on printer commands offered for the various
emulations as well as additional information helpful to programmers. Descriptions of each section are shown
below.
Selecting Emulations describes how to select the various printer emulations available.
Printek Emulation describes in detail the Printek commands available.
Mt3 Emulation provides a summary of the commands that are supported when emulating a Printek MtP printer.
1
Introduction
O’Neil Emulation provides a summary of the commands that are supported when emulating an O’Neil
microFlash4t printer.
ZPL-II Emulation provides a summary of the commands that are supported when emulating a Zebra ZPL-II
compatible printer.
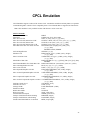
CPCL Emulation provides a summary of the commands that are supported when emulating a Comtec CPCL
compatible printer.
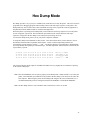
Hex Dump describes the printer’s output while in Hex Dump mode, and how it may be used to debug software
problems.
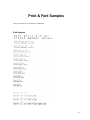
Print & Font Samples provides character set mapping information and several font print samples.
ASCII Character Tables provides a definition of ASCII control codes and an ASCII to Decimal to
Hexadecimal conversion table.
Printer Reset Conditions describes the state of the printer after a power up reset or receipt of a reset command.
Glossary provides a reference for printer related terms.
2
Selecting Emulations
The emulations offered by Printer Mobile Thermal Printers allow for a great deal of language commonality
between the various series of Psion Teklogix printers as well as compatibility with systems and software that
have been created for printers offered by other manufacturers.
The Psion Teklogix PTX Print Series printers offer Printek, O’Neil, ZPL-II and CPCL emulations to allow the
printers to work with existing three inch applications.
The printer’s default emulation, Printek, may be selected through the control panel set up as described in the
printer’s Operator’s Manual. To select an emulation temporarily, the host system may send an escape sequence
as described below.
Select Emulation
ESC ESC n
This command selects emulation mode n by which future commands will be interpreted as described in the
following table. The selected mode will be in effect until another Select Emulation command is received or
until the printer is reset via an escape sequence appropriate for the current emulation, or the printer is manually
reset by entering/exit the front panel set up mode or cycling power on the printer.
Once the emulation has been selected, please refer to the section of this manual that describes the commands
available for that emulation.
Example: The following escape sequence will set the printer to Mt3 Emulation.
Escape Sequence: ESC ESC
Hexadecimal:
1B 1B
n
0
1
2
3
4
5
6
?
@
4
04
Emulation
Test (reserved for factory use)
Printek Emulation
O’Neil Emulation
ZPL-II Emulation
Mt3 Emulation
CPCL Emulation
Hex Dump Mode
Previously Selected Emulation
Default Emulation
If more than one emulation has been selected, ESC ESC ? will return to the previously selected emulation. This
is particularly useful when the previous emulation is unknown. Please beware that the memory (stack) is only
one level deep.
ESC ESC @ will return to the default emulation, as specified by the “Emulation” value in the Interface setup
menu.
Note: Numeric values may be specified as either a binary or an ASCII value. As such, the example above
may be sent as either 1B 1B 04 or 1B 1B 34.
3
Printek Emulation
Introduction
This section describes the control codes and escape sequences comprising the default Printek emulation for
PTX Print Series printers. This emulation may be selected by setting “Emulation” to “Printek” in the
appropriate interface setup menu, or via software with the ESC ESC 1 sequence. While this emulation is
selected, control codes and escape sequences from other emulations are not available.
Control codes and escape sequences are used to control printer operation. An ASCII control code is a single
character in the range 00 hex through 1F hex, and 7F hex. The ESC (Escape) control code (1B hex) is used to
introduce character strings called escape sequences, which provide an extension of the commands available
with ASCII control codes.
If a sequence accepts one numeric parameter, it will be represented as “n”. If a sequence accepts more than one
numeric parameter, they will be represented as “n1 n2 ... nx”.
Spaces are used when documenting escape sequences to increase readability. If a space character is actually a
valid part of the sequence, it will be represented as “SPACE”. Characters that appear in italics (such as “n” and
“n1” above) are not sent to the printer as is; they are used as a place holder indicating that some value must be
supplied.
Multiple character strings without intervening spaces typically represent control codes. For example, BS is the
Backspace control code (08 hex), not the two characters “B” and “S” (42 and 53 hex), and SPACE is the space
character (20 hex). An ASCII Control Code Table is provided on page 53 for your convenience. If you have
any doubt about how to interpret a documented control code or escape sequence, refer to the hexadecimal
representation in the example. The examples may also be helpful when analyzing a Hex Dump printed by the
printer. Please refer to the “Hex Dump ” section of this manual on page 47.
5
Printek Emulation
Control Codes and Escape Sequences
Grouped by Function
Communications
This section describes various methods of controlling the flow of data to and from the printer. Unlike other
sections describing printer commands, the descriptions in this section indicate whether the command is one that
is “received” by the printer, or “transmitted” by the printer.
Note that some handshaking methods are only supported by the RS-232C Serial interface and are not supported
for the IrDA, Bluetooth, or Wi-Fi interfaces.
End of Text (Received by Printer)
ETX
If “ETX/ACK” is set to “On” in the Serial Interface Menu (refer to the Operator’s Manual), then processing of
an ETX from the printer’s input buffer causes the printer to transmit an ACK to the host computer.
Since the ETX may be a legal value within an escape sequence, it is the user's responsibility to ensure that an
ETX used for data handshake is not sent within an escape sequence. The user must also ensure that the
maximum block size or the number of blocks sent at one time does not exceed the input buffer size of the
printer.
The input buffer size is 32K (32,768 Bytes) unless Minimum Buffer has been selected in the printer’s Options
Menu. Please refer to the Operator’s Manual for more information.
Control code:
Hexadecimal:
ETX
03
Acknowledge (Transmitted by Printer)
ACK
Please refer to the “End of Text” description above.
Control Code:
Hexadecimal:
ACK
06
End of Transmission (Transmitted by Printer)
EOT
The printer sends an EOT character each time the printer’s input buffer becomes empty to indicate the printer is
idle.
Control Code:
Hexadecimal:
EOT
04
Transmitter On (Transmitted by Printer, Serial Only)
XON (DC1)
When enabled for the Serial Interface (refer to the Operator’s Manual), this character is transmitted by the
printer to indicate that the printer is on line and ready to receive data. See DC3/XOFF for more information.
Control Code:
Hexadecimal
6
XON
11
Printek Emulation
Transmitter Off (Transmitted by Printer, Serial Only)
XOFF (DC3)
When enabled for the Serial Interface (refer to the Operator’s Manual), this character is transmitted by the
printer to indicate that the printer’s input buffer is nearly full and that the host computer should stop sending
data. When the printer is able to accept data again, it will transmit DC1/XON.
Control Code:
Hexadecimal:
XOFF
13
Character Size and Line Spacing
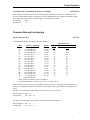
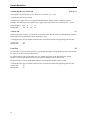
Select Character Pitch
ESC K n
Selects the character pitch according to the following table.
n (hex)
Character Pitch/Font
Matrix
MLP
3030
13
28
30
36
38
41
44
48
52
57
64
72
48
52
57
12
Columns Per Line
MLP3040 & PrintAbout MP
2000
22
41
43
52
55
59
64
69
75
83
92
104
69
75
83
17
00
5.5 cpi Sans Serif
37 x 60
01
10.2 cpi Sans Serif
20 x 26
02
10.7 cpi Sans Serif
19 x 26
03
12.7 cpi Courier
16 x 23
04
13.5 cpi Courier
15 x 23
05
14.5 cpi Courier
14 x 23
06
15.6 cpi Courier
13 x 23
07
16.9 cpi Courier
12 x 23
08
18.5 cpi Courier
11 x 23
09
20.3 cpi Courier
10 x 23
0A
22.6 cpi Courier
9 x 23
0B
25.4 cpi Courier
8 x 23
0C
16.9 cpi Sans Serif
12 x 23
0D
18.5 cpi Sans Serif
11 x 23
0E
20.3 cpi Sans Serif
10 x 23
0F
4.2 cpi Sans Serif *
48 x 60
**
Downloaded Fonts
* Only available in firmware version 3.2 and later.
** For downloaded fonts, use font ID. First font = A, second = B, etc.
This command must be sent prior to any printable characters on the line. If sent after printable characters are
received, a Carriage Return and Line Feed will be inserted and a new line started before the command takes
effect.
Example 1: The following escape sequence will select the 12.7 cpi Courier font.
Escape Sequence: ESC
Hexadecimal:
1B
K
4B
3
03
Example 2: The following escape sequence will select the first downloaded font.
Escape Sequence: ESC
Hexadecimal:
1B
K
4B
A
41
7
Printek Emulation
Set Printer to 12.7 cpi
SO
Sets the character size to 12 cpi. This is equivalent to sending ESC K 0x03.
This command must be sent prior to any printable characters on the line. If sent after printable characters are
received, a Carriage Return and Line Feed will be inserted and a new line started before the command takes
effect.
Control Code:
Hexadecimal:
SO
0E
Set Printer to 22.6 cpi
SI
Sets the character size to 22.6 cpi. This is equivalent to sending ESC K 0x0A.
This command must be sent prior to any printable characters on the line. If sent after printable characters are
received, a Carriage Return and Line Feed will be inserted and a new line started before the command takes
effect.
Control Code:
Hexadecimal:
SI
0F
Set Printer to 22. 6 cpi
DC4
Sets the character size to 22.6 cpi. This is equivalent to sending ESC K 0x0A.
This command must be sent prior to any printable characters on the line. If sent after printable characters are
received, a Carriage Return and Line Feed will be inserted and a new line started before the command takes
effect.
Control Code:
Hexadecimal:
DC4
14
Double High On
FS
Enables double high printing. This will cause the characters and the interline spacing to be doubled in height.
Double high printing will be in effect until the Double-High Off (GS) command is received.
This command must be sent prior to any printable characters on the line. If sent after printable characters are
received, a Carriage Return and Line Feed will be inserted and a new line started before the command takes
effect.
Control Code:
Hexadecimal:
FS
1C
Double High Off
GS
Disables double high printing.
This command must be sent prior to any printable characters on the line. If sent after printable characters are
received, a Carriage Return and Line Feed will be inserted and a new line started before the command takes
effect.
Control Code
Hexadecimal:
8
GS
1D
Printek Emulation
Double High/Wide On
DC2 D
Enables double high/wide printing.
This command causes all characters on the current line to printed double high and double wide.
Control Code
Hexadecimal:
DC2
12
D
44
Double High/Wide Off
DC2 d
Disables double high/wide printing.
This command cancels double high/wide printing for the current line.
Control Code
Hexadecimal:
DC2
12
d
64
Set Text Line Spacing
ESC a n
Sets the number of dot rows the paper is to be moved after printing each row of text. Each dot row is 0.125mm.
0 ≤ n ≤ 10.
Example: The following escape sequence sets the line spacing to zero (as needed when printing line drawing
characters when the PC Line Drawing character set is selected).
Escape Sequence: ESC
Hexadecimal:
1B
a
61
0
00
Character Attributes
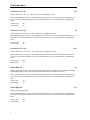
Select Emphasized Mode
ESC U n
Selects emphasized printing mode. Emphasized mode may be used to highlight text by giving it a more bold
appearance.
n
0
1
Selection
Emphasized Mode Off
Emphasized Mode On
This command must be sent prior to any printable characters on the line. If sent after printable characters are
received, a Carriage Return and Line Feed will be inserted and a new line started before the command takes
effect.
Example: The following escape sequence will set emphasized printing mode to On.
Escape Sequence: ESC
Hexadecimal:
1B
U
55
1
31
9
Printek Emulation
Character Sets
Select Extended Character Set
ESC F n
Selects the character set to be used when printing extended characters (hexadecimal 80-FF).
n
1
2
Character Set
International Character Set
PC Line Drawing Character Set
When using the PC Line Drawing Character Set, the Text Line Spacing should be set to zero. Doing so will
allow the vertical line characters to form continuous lines.
This command must be sent prior to any printable characters on the line. If sent after printable characters are
received, a Carriage Return and Line Feed will be inserted and a new line started before the command takes
effect.
Please refer to “Print & Font Samples” on page 49 for information on the specific characters contained in each
character set.
Example: The following escape sequence will select the International character set.
Escape Sequence: ESC
Hexadecimal:
1B
F
46
1
31
Horizontal Position
Carriage Return
CR
Causes the current line to be printed and the paper to advance to the next line. The current print position is set
to the beginning of the next line.
Note that either a Carriage Return (CR) or a Line Feed (LF) will cause both functions to be performed.
However, a Carriage Return and Line Feed “pair” (CRLF) will only perform a single line feed.
Control code:
Hexadecimal:
CR
0D
Backspace
BS
Removes the previous character from the print buffer. Backspacing can be done up to, but not beyond, the
beginning of the line.
Control code:
Hexadecimal:
10
BS
08
Printek Emulation
Horizontal Tab
HT
Advances to the next horizontal tab stop. If no tab stop exists between the active column and the right margin,
the print position will advance to the beginning of the next line.
Horizontal tab stops are associated with columns, not absolute physical positions. Changing the character
spacing or font will change the physical position of the tab stops. Default tab stops are set to every fourth
column, i.e. 5,9,13,17,21,25,29,33,37 ….
Control code:
Hexadecimal:
HT
09
Set Horizontal Margins
ESC H l r
Sets the left and right margins in millimeters. l and r may be set from zero up to ½ the line length.
Example: The following escape sequence will set both the left and right margins to 10mm (0.394”).
Escape Sequence: ESC
Hexadecimal:
1B
H
48
10
0A
10
0A
Vertical Position
Line Feed
LF
Causes the current line to be printed and/or advances the paper to the next line. The total distance the paper is
advanced is based on the vertical size of the current font plus the Text Line Spacing.
A Carriage Return is also performed which places the current print position at the beginning of the next line.
Note that either a Carriage Return (CR) or a Line Feed (LF) will cause both functions to be performed.
However, a Carriage Return and Line Feed “pair” (CRLF) will only perform a single line feed.
Control code:
Hexadecimal:
LF
0A
Variable Size Line Feed
ESC J n
Causes paper to be moved forward n x 0.125mm. 0 ≤ n ≤ 255.
A Carriage Return is also performed which places the current print position at the beginning of the next line.
Example: The following escape sequence performs a line feed of five millimeters ( 5 ÷ 0.125 ).
Escape Sequence: ESC J
Hexadecimal:
1B 4A
40
28
11
Printek Emulation
Variable Size Reverse Line Feed
ESC Q J n
Causes paper to be moved in the reverse direction n x 0.125mm. 0 ≤ n ≤ 255.
A Carriage Return is also performed.
Note that reverse paper motion is not supported in MLP3040 SL models and this command is ignored.
Example: The following escape sequence moves paper in the reverse direction two millimeters (2 ÷ 0.125).
Escape Sequence: ESC
Hexadecimal:
1B
Q
51
J
4A
16
10
Vertical Tab
VT
Advances the paper five lines. If a partial line exists in the buffer, that line will be printed including a Carriage
Return and Line Feed, and then the paper advanced five lines.
A Carriage Return is also performed which places the current print position at the beginning of the next line.
Control code:
Hexadecimal:
VT
0B
Form Feed
FF
If a partial line exists in the buffer, that line will be printed including a Carriage Return and Line Feed, and then
the paper will be advanced as described below.
For printers that use rolls of print media, (not “SL” models), the paper will be advanced by the “FFeed
Distance” set for the current Format (refer to the Operator’s Manual for more information).
For printers that use cassette media (MLP 3040 SL), the current sheet of paper will be ejected.
A Carriage Return is also performed which places the current print position at the beginning of the next line.
Control code:
Hexadecimal:
12
FF
0C
Printek Emulation
Bar Codes
Several types barcode symbols may be printed using the following command. The specification for each bar
code type is also described.
Print Bar Code
ESC a t n h data
Psion Teklogix printers support several bar code symbologies including Code 39, Code 128, UCC/EAN-128,
Interleaved 2 of 5, UPC/EAC/JAN, and Codabar. The following table describes the Bar Code command.
Details for each specific bar code type, including examples, are found below.
Variable
a
t
n
h
Value
z (lower case)
Z (upper case)
1
2
3
4
5
1 ≤ n ≤ 255
1 ≤ h ≤ 255
data
Description
Print bar code only.
Print bar code and human readable text.
Code 39
Code 128, UCC/EAN-128
Interleaved 2 of 5
UPC/EAN/JAN
Codabar
Number of characters in bar code.
Height of bar code in increments of 0.125mm.
n characters to be represented in the bar code.
See individual bar code types for allowable
characters and other specific requirements.
Notes: All barcodes are printed with the minimum bar width (“x-dimension”) of 0.250mm, in compliance with
the respective official specification.
All barcodes are printed centered between the left and right margins. For information on setting
margins, please refer to the Operator’s Manual.
Code 39 Specifications
Description: Each symbol starts with Leading Quiet Zone, followed with Start Symbol, Data
Symbols, ending with Stop Symbol and Trailing Quiet Zone.
Character set: 43 ASCII characters including A-Z (uppercase only), 0-9, . (period), - (dash), $, /, +,
%, and SPACE
Elements per symbol: 9 (5 bars, 4 spaces)
Character density: 6.25 CPI
Bar width: 0.25mm (narrow to wide ratio = 1:3)
Example: The following escape sequence will print a bar code containing the characters "CODE-39" 1 mm
high followed by human readable text.
Escape Sequence: ESC Z
Hexadecimal:
1b 5A
1
31
7
07
8
08
C
43
O
4F
D
44
E
45
2D
3
33
9
39
13
Printek Emulation
Code 128 Specifications
Description: Each symbol starts with Leading Quiet Zone, followed with Start Symbol, Data
Symbols, ending with Stop Symbol and Trailing Quiet Zone.
Character set: 256 ASCII via three Code Sets and an “Extend” function.
Elements per symbol: 6 (3 bars, 3 spaces)
Character density: 9.1 CPI
Bar width: 0.25mm
The first character position in the data portion of the escape sequence must contain a “Start Character”, as
defined below. This Start Character defines the Code Set to be used to interpret the following data characters.
Each Code Set has special character values defined that allow switching to a different Code Set(s) within the
bar code.
Start Character
Code Set
A
Characters Sent To Printer
20 – 5F
60 – 7F
Characters Read By Scanner
20 – 5F
00 – 32
87
88
B
20 – 7F
20 – 7F
89
C
Pairs of 30 – 39
Numeric Character Pairs
30, 30 – 39, 39 (00-99 Dec.)
All character values shown in Hexadecimal.
Special data characters are available for each Code Set that allow switching to a different Code Set and other
special functions. These characters have values of 80-86 Hexadecimal and their functions in each Code Set are
defined below.
Character Value
(Hex)
80
81
82
83
84
85
86
Code Set A
Code Set B
Code Set C
FNC3
FNC2
Shift
Switch to Code Set C
Switch to Code Set B
FNC4
FNC1
FNC3
FNC2
Shift
Switch to Code Set C
FNC4
Switch to Code Set A
FNC1
Switch to Code Set B
Switch to Code Set A
FNC1
FNC 1: Reserved for EAN use.
FNC 2: Concatenate the data in this bar code with the data in the next bar code read. Not
supported by all bar code readers.
FNC 3: Reset the bar code reader. Any other data in this bar code will be discarded.
FNC 4: Extended characters. The bar code reader will add 128 (80 Hex.) to each character.
Example 1: The following escape sequence will print a bar code containing “ABC123” that is 10mm high and
is followed with human readable text.
Escape Sequence: ESC Z
Hexadecimal:
1B 5A
14
2
32
7
07
80 Start B A
50
88
41
B
42
C
43
1
31
2
32
3
33
Printek Emulation
Example 2: The following escape sequence will print a bar code using numeric pairs of numeric characters
containing “123456” that is 10mm high without human readable text.
Escape Sequence: ESC z
Hexadecimal:
1b 7A
2
32
7
07
80 Start C 1
50
89
31
2
32
3
33
4
34
5
35
6
36
Example 3: The following escape sequence will print the same data as in Example 1, “ABC123”, using Code
Sets that allow a mixture of alphanumeric character and numeric pairs. The bar code will be 20mm high
without human readable text.
Escape Sequence: ESC z
Hexadecimal:
1B 7A
2
32
7
07
160 Start A A
A0 87
41
B
42
C
43
1 Switch C 2
31
83
32
3
33
UCC/EAN-128 Specifications
Description: The UCC/EAN-128 specification is an internationally recognized format for
application identifiers in code 128 bar codes. The bar code symbology is identical to
Code 128. Only recognized bodies of the UCC or EAN may assign application
identifiers. For more information visit www.ean-int.org and www.uc-council.org.
Character set: 256 ASCII via three Code Sets and an “Extend” function.
Elements per symbol: 6 (3 bars, 3 spaces)
Character density: 9.1 CPI
Bar width: 0.25mm
Example: The following escape sequence prints an all numeric bar code containing “1234” in an EAN-128
format that is 10mm high followed by human readable text.
Escape Sequence: ESC Z
Hexadecimal:
1B 5A
2
32
6
06
80 FNC1 1
50
86
31
2
32
3
33
4
34
UPC/EAN/JAN Specifications
Description: Each symbol starts with Leading Quiet Zone, followed with Left Guard Bars, Left
Data Symbols, Center Bar Pattern, Right Data Symbols, Check Character, ending with
Right Guard Bars and Trailing Quiet Zone. The UPC, EAN/JAN-8, EAN/JAN-13
specifications comprise an internationally recognized format for application identifiers.
Unlike the UCC/EAN-128 specification, these identifiers are intended for point-of-sale
applications. Only recognized bodies of the UCC and EAN may assign application
identifiers. For more information visit www.ean-int.org and www.uc-council.org.
Character set: numeric - fixed length as follows:
•
•
•
•
UPC-A – Requires 12 digits. The first 11 will be printed and the 12th will be
replaced by a check digit calculated by the printer.
UPC-E – Requires 7 digits. (The check digit will be added by the printer.)
EAN/JAN-8 – Requires 8 digits. The first 7 will be printed and the 8th will be
replaced by a check digit calculated by the printer.
EAN/JAN-13: – Requires 13 digits. The first 12 will be printed and the 13th will
be replaced by a check digit calculated by the printer.
15
Printek Emulation
Elements per symbol: 4 (2 bars, 2 spaces)
Character density: 14.5 CPI
Bar width: 0.25mm
Note: When specifying the bar code height that h represents the total height including a 1.25mm drop bar
pattern printed after the barcode pattern.
Example 1: The following escape sequence will print a UPC-A bar code containing “12345678901” that is
30mm high followed by human readable text. Note that a check digit “9” is also sent, but will be ignored and
recalculated by the printer.
Escape Sequence: ESC Z
Hexadecimal:
1B 5A
4
34
12 240 1
0C F0 31
2
32
3
33
4
34
5
35
6
36
7
37
8
38
9
39
0
30
1
31
9
39
Example 2: The following escape sequence will print a UPC-E bar code containing “1234567” that is 30mm
high followed by human readable text.
Escape Sequence: ESC Z
Hexadecimal:
1B 5A
4
34
7
07
240
F0
1
31
2
32
3
33
4
34
5
35
6
36
7
37
Example 3: The following escape sequence will print an EAN/JAN-8 bar code containing “1234567” that is
30mm high followed by human readable text. Note that a check digit “9” is also sent, but will be ignored and
recalculated by the printer.
Escape Sequence: ESC Z
Hexadecimal:
1B 5A
4
34
8
08
240
F0
1
31
2
32
3
33
4
34
5
35
6
36
7
37
9
39
Example 4: The following escape sequence will print an EAN/JAN-13 bar code containing “123456789012”
that is 30mm high followed by human readable text. Note that a check digit “9” is also sent, but will be ignored
and recalculated by the printer.
Escape Sequence: ESC Z
Hexadecimal:
1B 5A
4
34
13 240 1
08 F0 31
2
32
3
33
4
34
5
35
6
36
7
37
8
38
9
39
0
30
1
31
Interleaved 2 of 5 Specifications
Description: Each symbol starts with Leading Quiet Zone, followed with Start Symbol, Data
Symbols, ending with Stop Symbol and Trailing Quiet Zone.
Character set: numeric pairs.
Elements per symbol: 10 (5 bars, 5 spaces)
Character density: 11.11 CPI
Bar width: 0.25mm
Example: The following escape sequence will print a bar code containing “123456” that is 10mm high
followed by human readable text.
Escape Sequence: ESC Z
Hexadecimal:
1B 5A
16
3
33
6
06
80
50
1
31
2
32
3
33
4
34
5
35
6
36
2
32
9
39
Printek Emulation
Codabar Specifications
Description: Each symbol starts with Leading Quiet Zone, followed with Start Symbol, Data
Symbols, ending with Stop Symbol and Trailing Quiet Zone.
Character set: 0-9, $, -, :, /, ., + and the start/stop pairs of A/T, B/N, C/*, and D/E.
Elements per symbol: 7 (4 bars, 3 spaces)
Character density: 8.1 CPI
Bar width: 0.25mm
Example 1: The following escape sequence will print a bar code containing “123456”, using the A/T start/stop
characters, and 20mm high followed by human readable text.
Escape Sequence: ESC Z
Hexadecimal:
1B 5A
5
35
8
08
160
A0
A
41
1
31
2
32
3
33
4
34
5
35
6
36
T
54
Example 2: The following escape sequence will print a bar code containing “123456”, using the C/* start/stop
characters and 20mm high followed by human readable text.
Escape Sequence: ESC Z
Hexadecimal:
1B 5A
5
35
8
08
160
A0
C
43
1
31
2
32
3
33
4
34
5
35
6
36
*
2A
Graphics
The printer uses a single line thermal print head with elements spaced at 0.125mm. The maximum number of
graphic data bytes allowed for each model printer is shown for each command. After each line of graphic data,
the paper is automatically advanced 0.125mm to position the paper for the next graphic line. To advance the
paper by additional graphic increments without printing, refer to “Variable Size Line Feed” on page 11.
8-Bit Graphics
ESC # h w data
This command may be used to print any graphics pattern. The height and width of the graphic image may be
specified as shown below. Each line must contain the same number of bytes (width).
The image will be printed starting from the left margin and up to the right margin. If the width specified will
not fit within the margins, the right side of the image will be truncated.
Variable
h
w
data
Value
1 ≤ h ≤ 255
MLP3030: 0 ≤ w ≤ 72
MLP3040: 0 ≤ w ≤ 104
PrintAbout MP 2000:
0≤
w ≤ 104
A line of graphic data bytes
where the value of each byte
Description
Number of graphic lines in the data to follow.
Number of bytes per graphic line in the data to
follow. Each byte contains 8 bits.
h x w bytes per line are required.
17
Printek Emulation
is 0-255
Example 1: The following escape sequence will print a horizontal line 2mm long starting 2mm from the left
margin.
Escape Sequence: ESC
Hexadecimal:
1B
#
23
1
01
4
04
0
00
0
00
255
FF
255
FF
Example 2: The following escape sequence will print a square box 2mm x 1mm starting 2mm from the left
margin, and then move the paper forward an additional 5mm.
Escape Sequence: ESC #
Hexadecimal
1B 23
Escape Sequence:
Hexadecimal
Escape Sequence:
Hexadecimal
Escape Sequence:
Hexadecimal
Escape Sequence:
Hexadecimal
Escape Sequence:
Hexadecimal
Escape Sequence:
Hexadecimal
Escape Sequence:
Hexadecimal
Escape Sequence: ESC J
Hexadecimal:
1B 4A
8
08
4
04
0
00
0
00
0
00
0
00
0
00
0
00
0
00
0
00
0
00
0
00
0
00
0
00
0
00
0
00
0
00
0
00
255
FF
128
80
128
80
128
80
128
80
128
80
128
80
255
FF
255
FF
1
01
1
01
1
01
1
01
1
01
1
01
255
FF
40
28
8 Bit Compressed Graphics
ESC v h w c data [c data] [c data] …
This command differs from the 8 Bit Graphics command described above by reducing the number of bits
(bytes) that have to be sent to the printer. This allows for faster data transfer between the host computer and the
printer.
Variable
h
w
c
data
18
Value
1 ≤ h 255
MLP3030: 0 ≤ w ≤ 72
MLP3040: 0 ≤ w ≤ 104
PrintAbout MP 2000:
0
≤ w ≤ 104
0 ≤ c ≤ 255
Graphic data bytes where
the value of each byte is 0255
Description
Number of graphic lines in the image.
Number of bytes in each graphic line of the image.
Counter(s) describing how following bytes are to be
interpreted. A description of how counter values and
the following data are interpreted follows this table.
Graphic data bytes to be interpreted as specified by the
preceding counter, c.
Printek Emulation
Multiple “sets” of counters and data may be sent to the printer as necessary to describe the graphic pattern to be
printed. The values specified by the counter(s) are interpreted as follows.
19
Printek Emulation
The counter may be considered as either a signed 7 bit value or an unsigned 8 bit value.
For signed 7 bit values:
0 ≤ c ≤ 127
-128 ≤ c ≤ –1
For unsigned 8 bit values: 0 ≤ c ≤ 127
128 ≤ c ≤ 255
Process the next (c + 1) bytes as simple 8 bit graphic patterns.
Repeat the next byte (-c + 1) times.
Process the next (c+1) bytes as simple 8 bit graphic patterns.
Repeat the next byte (256 - c + 1) times.
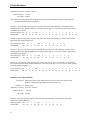
Example: The following escape sequence will print a graphic image that is two lines long and six bytes (48
bits) wide as shown below. Note that the outlines for each bit are shown only to explain this example and that
only the image represented by the black “bits” will actually be printed.
In the following escape sequence the data bytes are shown in binary. The hexadecimal values for each byte are
shown on the second line.
ESC v 2 6 255 01010101 255 10101010 3 00010001 00100010 00110011 01000100 253 10011001
1B 76 02 06 FF
55
FF
AA 03
11
22
33
44
FD
99
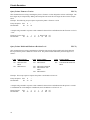
Vector Graphics
ESC > id lines size data
ESC > id p data t
Note: This feature is only available in units with firmware version 2.8 or later.
Vector graphics may be used to print images of straight lines, curved lines, or even more complex shapes such
as a person’s signature. Each shape is defined as one or more “line segments”. A curved line is simply several
shorter, straight lines connected together. To define such a line, the data sent to the printer contains the
endpoints, or nodes, of each line segment and the printer will draw the entire line by drawing line segments
between the nodes.
Note that the image will be automatically scaled, up or down, to fit between the currently defined left and right
margins.
Vector graphic data may be sent in two different formats as specified by id and as described below.
id
0
lines size data
lines = Eight bit value indicating the number of lines to be drawn. This is the number of distinct
lines, not line segments.
size = wmsb wlsb hmsb hlsb = 16 bit width and 16 bit height of the grid that the image will be
specified in. The image does not have to be this large, but nodes may not be specified
outside of the grid size. Maximum values: w = 65,535, h = 32,767.
data = xmsb xlsb ymsb ylsb = 16 bit X position and 16 bit Y position of each node. Multiple
lines are drawn in a single graphic image by setting the most significant bit of ymsb = 1
(0x80). This indicates the end of the current line and will cause no line segment to be
drawn between this node and the next.
20
Printek Emulation
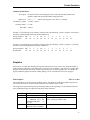
Example: id = 0
This example will print the following signature. The size of the grid that the image is specified in is 277 points
wide by 145 points high. When printed the image will be scaled to fit between the left and right margins.
Escape Sequence: ESC
Hexadecimal:
1B
>
3E
0
30
w = 277
h = 145
x = 63
y = 91
2 wmsb wlsb hmsb hlsb xmsb xlsb ymsb ylsb
02 01
15
00
91
00
3F
00
5B
…
…
…
The entire string of data representing the graphic nodes for this example is:
00 3F 00 5B
00 34 00 31
00 39 00 5D
00 31 00 69
00 3F 00 58
00 50 00 5E
00 53 00 56
00 59 00 32
00 5B 00 53
00 62 00 57
00 70 00 62
00 80 00 58
00 84 00 56
00 8F 00 61
00 B8 00 5A
00 B8 00 35
00 C0 00 59
00 D0 00 56
00 D9 00 5E
00 D7 00 54
00 E9 00 51
00 EC 00 4A
id
1
00 3B 00 5A
00 3E 00 2C
00 2C 00 77
00 39 00 63
00 3E 00 5D
00 4F 00 5C
00 56 00 54
00 57 00 30
00 5A 00 5F
00 65 00 55
00 75 00 5F
00 7F 00 5C
00 8C 00 53
00 99 00 61
00 BA 00 5C
00 C2 00 39
00 BA 00 5B
00 D3 00 55
00 DB 00 5E
00 D9 00 54
00 EF 00 50
00 EE 00 53
00 35 00 57
00 40 00 2D
00 24 00 80
00 43 00 5B
00 43 00 60
00 4B 00 59
00 5C 00 50
00 55 00 32
00 59 00 61
00 66 00 58
00 78 00 5C
00 7D 00 5F
00 8E 00 54
00 99 80 61
00 B9 00 57
00 C7 00 3F
00 B8 00 59
00 CF 00 55
00 DC 00 5A
00 DD 00 55
00 F7 00 4E
00 FD 00 5B
00 2F 00 51
00 41 00 34
00 1F 00 80
00 49 00 55
00 49 00 61
00 49 00 59
00 5E 00 4B
00 55 00 38
00 56 00 62
00 64 00 5C
00 7B 00 58
00 7B 00 61
00 8C 00 57
00 B7 00 4D
00 B6 00 4E
00 C9 00 47
00 C1 00 57
00 CB 00 56
00 DA 00 58
00 E0 00 54
00 FA 00 4C
01 06 80 5D
00 28 00 41
00 41 00 3A
00 1F 00 7E
00 4A 00 53
00 4D 00 61
00 47 00 58
00 5D 00 40
00 57 00 3C
00 5A 00 5C
00 63 00 5E
00 7D 00 56
00 7C 00 5E
00 8B 00 59
00 B8 00 51
00 B2 00 3D
00 C9 00 4C
00 C5 00 57
00 CB 00 58
00 D6 00 55
00 E2 00 53
00 F7 00 49
00 2B 00 38
00 3F 00 4A
00 24 00 74
00 45 00 54
00 4F 00 60
00 4D 00 58
00 5A 00 36
00 5A 00 47
00 60 00 58
00 69 00 62
00 7F 00 56
00 7E 00 59
00 8B 00 5D
00 B8 00 57
00 B4 00 37
00 C7 00 53
00 CD 00 56
00 D3 00 5C
00 D3 00 53
00 E5 00 51
00 F1 00 48
p data t
p = A variable number of prefix characters that may be inserted by some signature capturing
devices. These characters may not include a pair of adjacent characters that would
represent a valid hexadecimal value (00-FF) at any position in the string. These characters
will be ignored by the printer and are not required.
data = xmsb xlsb ymsb ylsb = 8 bit X position and 8 bit Y position of each node (xy). Each X
and Y value is sent as a pair of ASCII characters that represent the hexadecimal value of
the position. Maximum values: x = 127, y = 127. Multiple lines are drawn in a single
graphic image by setting the most significant bit of ymsb = 1 (0x80). This indicates the
beginning of a new line and will cause no line segment to be drawn between the previous
node this node.
t = Terminating character. The vector graphic command is terminated by any ASCII control
character (< 0x20) such as a Carriage Return (0x0d).
21
Printek Emulation
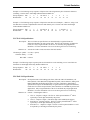
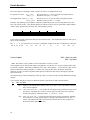
Example: id = 1
This example will print the following image, but it will be scaled to fit between the left and right margins.
Escape Sequence: ESC >
Hexadecimal:
1B 3E
x = 45 y = 19+128
x = 44
y = 17
xmsb xlsb ymsb ylsb xmsb xlsb ymsb ylsb … t
1
ESIG= (v)
2
D
9
3
2
C
1
1
… CR
31 45 53 49 47 3D 32 44
39 33
32 43
31 31 … 0D
The entire string of data representing the graphic nodes for this example is:
2
32
2
32
1
31
2
32
3
33
3
33
0
30
0
30
3
33
D
44
4
34
F
46
D
44
E
45
A
41
F
46
F
46
E
45
9
39
1
31
3
33
3
33
3
33
2
32
2
32
2
32
3
33
3
33
B
42
4
34
F
46
1
31
2
32
0
30
E
45
5
35
2
32
2
32
1
31
3
33
3
33
2
32
0
30
1
31
4
34
C
43
3
33
F
46
3
33
F
46
B
42
C
43
1
31
3
33
1
31
1
31
3
33
3
33
2
32
1
31
2
32
2
32
3
33
1
31
D
44
8
38
E
45
F
46
F
46
2
32
F
46
4
34
2
32
2
32
2
32
3
33
3
33
1
31
0
30
1
31
4
34
A
41
2
32
0
30
6
36
F
46
E
45
B
42
5
35
D
44
1
31
1
31
3
33
3
33
2
32
1
31
2
32
3
33
3
33
2
32
F
46
A
41
C
43
B
42
E
45
4
34
1
31
1
31
2
32
2
32
2
32
3
33
3
33
1
31
0
30
2
32
4
34
8
38
0
30
2
32
8
38
F
46
B
42
B
42
6
36
B
42
1
31
2
32
3
33
3
33
2
32
1
31
2
32
3
33
3
33
4
34
4
34
C
43
A
41
7
37
E
45
6
36
4
34
1
31
2
32
1
31
2
32
3
33
3
33
1
31
0
30
2
32
6
36
F
46
4
34
B
42
E
45
7
37
B
42
8
38
1
31
2
32
3
33
3
33
2
32
1
31
2
32
3
33
6
36
D
44
E
45
6
36
5
35
E
45
9
39
4
34
2
32
1
31
2
32
3
33
3
33
1
31
0
30
3
33
5
35
F
46
6
36
D
44
C
43
1
31
D
44
B
42
1
31
3
33
3
33
3
33
2
32
1
31
2
32
3
33
9
39
1
31
F
46
3
33
3
33
F
46
D
44
5
35
Storing and Printing Graphic Images and Logos
Graphic images including logos may be stored permanently in the printer’s flash memory so that they may be
printed as often as needed without having to retransmit the graphic image each time. A total of 1MB of Flash
memory is allocated to storing graphic images. The number of images that may be stored depends on the size
of the images.
An image is programmed into the printer’s memory using a series of steps, or commands, as shown below.
Step 1: Send the Load Graphic Image command to the printer.
Step 2: Send the image using up to 2,436 graphic lines as described in the Graphics section on page 17. (The
8-Bit Compress Graphics command is not supported when defining logos.)
Step 3: Send the Store Graphic Image command to the printer.
Step 4: Wait for the printer to respond with “D” (Hexadecimal 44) indicating that the printer has begun
storing the image.
Step 5: Wait for the printer to respond with an Exclamation Point character (Hexadecimal 21) indicating that
the image has been stored.
22
Printek Emulation
Load Graphic Image
ESC L G n
This command indicates that graphic commands describing an image to be stored is to follow. The value of n is
used to identify this particular graphic image and may be any printable ASCII character (0x21 ≤ n ≤ 0x7E).
This same value is then used to print the graphic.
The graphic data is sent using Graphic commands as described on page 17. The image may consist of up to
2,436 graphic lines. The loading process will terminate when 2,436 lines have been received, or upon receipt
of the Store Graphic Image command.
Example: This escape sequence specifies that the following graphic command(s) will define graphic image
“A”.
Escape Sequence: ESC
Hexadecimal:
1B
L
4C
G
47
A
41
Graphics Data
Graphic commands as described on page 17.
Note 1: This command may be used to store graphic images that can later be recalled and printed using
CPCL, ZPL-II, and O’Neil Emulation Easy Print commands. The name used in the Easy Print
command would be “LOGOn”, or “LOGOA” for the above example.
Note 2: As of printer firmware revision 2.8, a special “Print Promo” feature is available that may be enabled
through the printer’s control panel. This feature allows an image that is stored with the value of
n = 0x24 (“$”) to automatically be printed at the end of each print job.
Refer to the Options configuration section in the printer’s operator’s manual for more information.
Note 3: As of printer firmware revision 3.1, a special “Print Header” feature is available that may be enabled
through the printer’s control panel. This feature allows an image that is stored with the value of
n = 0x3F (“?”) to automatically be printed at the beginning of each print job.
Refer to the Options configuration section in the printer’s operator’s manual for more information.
Store Graphic Image
ESC L G DEL
This command terminates the Load Graphic Image mode and causes the graphic image to be stored in the
printer’s Flash memory.
After this command is received, the printer will transmit a “D” (Hexadecimal 44) and begin saving the image.
Once the image is stored, the printer will transmit a an Exclamation Point (Hexadecimal 21). The image may
now be printed using the Print Graphic Image command.
Caution: The printer power must remain on throughout this entire process.
Escape Sequence: ESC
Hexadecimal:
1B
L
4C
G
47
DEL
FF
Print Graphic Image
ESC L g n
This command will print a graphic image that was previously stored using the Load Graphic Image command.
Example: The following escape sequence will print the graphic logo stored as “A”.
Escape Sequence: ESC
Hexadecimal:
1B
L
4C
g
67
A
41
23
Printek Emulation
Black Mark Sensing
The PTX Print Series printers can print on preprinted forms on roll media by using a “black mark” to sense the
beginning of each form. The black mark is located on the form in a position where the printer’s paper out
sensor can be used to detect its presence. Additionally, the MLP “LP” models are capable of sensing a black
mark on the back side of the form and for sensing the gap between labels. The recommended position for the
black mark is described below.
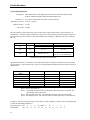
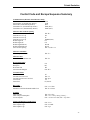
Black Mark Requirements
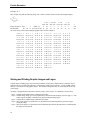
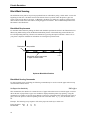
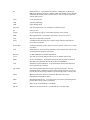
For automatic label and ticket printing, the black mark should be positioned as shown in the illustration below.
When using Mark Sensing mode, the MLP and PrintAbout printers will automatically position the label for
tear-off and printing following a Form Feed command or by pressing the Paper Feed button. Please refer to
your printer’s Operator’s Manual for information on selecting this operation mode.
Perforation or tear position
Black Mark should span width
of paper for best results.
0.15”
Optimum Black Mark Position
Black Mark Sensing Commands
For non-automatic paper positioning, the following commands may be used to cause the paper motion to stop
when the black mark is sensed.
Set Paper Out Sensitivity
ESC Q Q n
This command sets the number of 0.125mm dot rows of paper motion that can occur after the paper out sensor
detects the lack of paper before a paper out condition is displayed and the printer stops printing. Using this
command to set a number of dot rows larger than the vertical size of the black mark, which looks like a lack of
paper, allows the printer to continue operating in the area of the black mark. 0 ≤ n ≤ 255, the default value is
40.
Example: The following escape sequence will set the paper out sensitivity to 50 dot rows.
Escape Sequence
Hexadecimal
24
ESC
1B
Q
51
Q
51
50
32
Printek Emulation
Forward Seek Black Mark
ESC Q F n
This command causes the printer to move the paper forward up to n dot rows to seek the beginning of a black
mark on a form where 0 ≤ n ≤ 255 0.250mm dot rows. If the black mark is found, the printer responds with the
escape sequence ESC Q ? ? n1 n2 where n1 n2 represent the number of dot rows the paper was moved before
the black mark was detected. If the black mark is not found, the printer responds with ESC Q 0 0 n1 n2 where
n1 n2 represent the number of dot rows moved before the seek was aborted.
Example: The following escape sequence commands the printer to move the paper forward up to 200 * 0.250
mm dot rows in search of a black mark on the form. This example also shows the printer’s response that it
found the beginning of the black mark in 183 dot rows.
Command sent to printer:
Escape Sequence: ESC
Hexadecimal:
1B
Q
51
F
46
200
C8
Q
51
?
3F
?
3F
Response from printer:
Escape Sequence: ESC
Hexadecimal:
1B
;
3B
7
37
Note that the values for n1 n2, or in this example “;” “7” in the response from the printer, represent the upper
and lower nibbles, respectively, of the number of dot rows the paper was moved before detecting the beginning
of the black mark. Each of these values has been “or’ed” with 30 Hexadecimal in order to provide the
character shown. As a result, the value represented by “;” is 176, and the value represented by “7” is 7,
indicating that the paper was moved 183 dot rows, or 45.75mm.
Reverse Seek Black Mark
ESC Q B n
This command is identical to the Forward Seek Black Mark command described above except that the paper is
moved in the reverse direction in order to seek the bottom edge of the black mark. Care should be taken not to
move the paper very far in the reverse direction to avoid wrinkling the paper and creating the possibility of
paper jams.
Note that reverse paper motion is not supported in MLP3040 SL models and this command is ignored.
Black Mark Found (Response From Printer)
ESC Q ? ? n1 n2
This response is provided by the printer after detecting the presence of a black mark on the form in response to
either a Forward Seek Black Mark or Reverse Seek Black Mark command. Please refer to the example for
Forward Seek Black Mark, above.
Black Mark Not Found (Response From Printer)
ESC Q 0 0 n1 n2
This response is provided by the printer when the presence of a black mark is not detected on the form in
response to either a Forward Seek Black Mark or Reverse Seek Black Mark command. Please refer to the
example for Forward Seek Black Mark, above.
Gap Sensing
Gap sensing is only available on “LP” models and is used to sense the space between die cut labels. The
minimum space between labels is 0.125” (3.2mm).
Gap sensing is very similar to Black Mark sensing and uses the same commands. Refer to the Operator’s
Manual for instructions on how to select Gap versus Black Mark sensing.
25
Printek Emulation
Printer Controls
Bell
BEL
Causes the printer's bell to sound.
Control code:
Hexadecimal:
BEL
07
CANCEL
CAN
Deletes all data in the printer’s input buffer and resets the printer to power up default values. Refer to “Printer
Reset Conditions” on page 55 for more information.
Control Code:
Hexadecimal:
CAN
18
Print Contrast
ESC P n
Sets the contrast, or relative “darkness”, of the characters or graphic images to be printed where 0 ≤ n ≤ 9
(hexadecimal 30-39). A value of zero provides the greatest contrast and also the slowest print speed. Likewise,
a value of nine provides the lowest contrast, but the fastest print speed. The default value is “5”.
Since contrast is greatly affected by the quality of thermal paper being used, this command allows varying
grades of paper to be printed on successfully.
In association with this setting, the printer automatically adjusts the contrast while printing in order to achieve
consistent output based on the current battery condition and print head temperature.
Example: The following escape sequence with set the printer to a Print Contrast setting of “4”.
Escape Sequence: ESC
Hexadecimal:
1B
P
50
4
34
Buffer Mode
ESC P #
ESC P $
Buffer Mode may be used to force the printer to “hold” data until the entire print job is received.
If Buffer Mode has been enabled, the printer continues to hold data in its input buffer until an EOT character
(Hexadecimal 04) has been received. Once the EOT is received, the printer will print the data in the input
buffer up to the EOT character.
When Buffer Mode is not enabled (default) data are printed as received.
Example 1: The following escape sequence enables Buffer Mode.
Escape Sequence: ESC P
Hexadecimal:
1B 4D
$
24
Example 2: This escape sequence disables Buffer Mode.
Escape Sequence: ESC P
Hexadecimal:
1B 4D
26
#
23
Printek Emulation
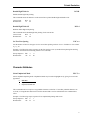
Select Format
ESC l n
Causes the current line to be printed, and then loads the format parameters for Format n. 1 ≥ n ≥ 5. If Format n
is already selected, this command is ignored. Refer to the Printer Configuration section of the Operator’s
Manual for complete details.
Example: This escape sequence selects Format 2.
Escape Sequence: ESC
Hexadecimal:
1B
l
6C
2
02
Select Emulation
ESC ESC n
Select the printer emulation mode to be used for future commands. For complete details, refer to “Selecting
Emulations” on page 3.
Store Printer Command File
ESC T type id size name data
Stores a command file in the printer.
This command file may be executed from the front panel of the printer by pressing and holding the Increment
Button until “Recall File:” is displayed. Continue to hold the Increment Button and press the Enter Button
to select which command file to execute (if more than one has been loaded) or to select “Exit” to cancel
performing the command. When selecting the command file, the printer will display “Recall File: id” on the
top line and the name on the bottom line.
The selected command will be executed when the
type =
Increment Button is released.
Type of command file:
T = Text, a string of ASCII characters.
Note: Using other values for type is not supported and may cause unpredictable
results.
id =
size =
name =
data =
A single printable ASCII character used to identify the command file.
Four byte value containing the number of command file bytes to follow. This size includes the
16 character name.
Sixteen character command name. This name will be displayed on the printer’s front panel
when selecting a command file(s) to perform. Names shorter than 16 characters must be
padded at the end with enough spaces to total 16 characters.
Number of command bytes plus sixteen as specified by size.
Example: This command will store a Text command file with the id of “1”, the name “TestCmdFile” to display
on the printer, and will cause the printer to print “Hello world” followed by a CRLF.
Escape Sequence: ESC T T 1
Hexadecimal:
1B 54 54 31
(Continued)
29
00 00 00 1D
T e s t C m d F i
l e SP
54 65 73 74 43 6D 64 46 69 6C 65 20
SP SP SP SP H e l
l o SP w o r l d CR LF
20 20 20 20 48 65 6C 6C 6F 20 77 6F 72 6C 64 0D 0A
27
Printek Emulation
Reset
ESC c
ESC * 0
Deletes all data in the printer’s input buffer and resets the printer to power up default values. Refer to “Printer
Reset Conditions” on page 55 for more information.
Escape Sequence: ESC
Hexadecimal:
1B
c
63
Escape Sequence: ESC *
Hexadecimal:
1B 2A
0
00
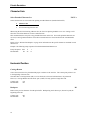
Turn Printer Off
ESC * 1
Causes the printer to turn itself off
Escape Sequence: ESC *
Hexadecimal:
1B 2A
1
01
Printer Status Commands
Print Battery Status
ESC P ^
This command will cause the printer to print the current battery voltage and charge status followed by a
Carriage Return and Line Feed.
If a partial line exists in the buffer, it will be printed prior to printing the battery information.
Escape Sequence: ESC
Hexadecimal:
1B
P
50
^
5E
Query Printer Status
STX
SYN
Each of these commands returns character strings which provide information regarding the current print buffer
status and the magnetic card reader status. Additionally, SYN will return the current battery voltage.
Each status is returned as an escape sequence and four ASCII hexadecimal digits followed by a Carriage Return
and Line Feed. The hexadecimal digits are nibbles that have been “OR’ed” with 0x30. The statuses returned
for each command are as follows:
Command
STX
SYN
28
Returned Strings
ESC B b1
ESC M m
ESC B b1
ESC M m
ESC V v1
b2
s1
b2
s1
v2
b3
s2
b3
s2
v3
b4
t
b4
t
v4
CR
CR
CR
CR
CR
LF
LF
LF
LF
LF
Comment
Print Buffer Status
MCR Status
Print Buffer Status
MCR Status
Battery Voltage Status
Printek Emulation
Print Buffer Status String
The print buffer status will be retuned as a four digits representing the number bytes in the buffer that remain to
be processed, divided by 32. For example, if b1-b4 = “0020”, this would indicate that there are at least 20 x 32,
or 640, bytes remaining to be processed. A value of “0000” would indicate that the buffer is empty.
Magnetic Card Reader Status String
The MCR status indicates the presence of a reader in the printer, and if present, its current status.
m
s1, s2
t
“0” if MCR is present. “X” if not installed in printer.
Number of seconds remaining for a good card swipe
before the timeout specified in the read command
occurs. If this value is “00” and a non-zero value for t
is returned, the reader will not time out and must be
cancelled by a Cancel Read Magnetic Card Reader
command.
The tracks to be read as specified by the read
command. If this value is zero and m and s1, s2 are
also zero, this indicates that the reader is present but
currently disabled (no read pending).
Battery Voltage Status String
This string contains the current battery voltage in millivolts. A string where v1 through v4 contains “7123”
would indicate that the battery voltage is currently 7123 millivolts, or 7.123 volts.
Example: The following control code will return the status of the print buffer, the magnetic card reader, and the
battery voltage.
Control Code:
Hexadecimal:
SYN
16
The three sample status strings that would be returned in response to this command are as follows.
Print Buffer Status: ESC
Hexadecimal:
1B
B
42
0
30
0
30
4
34
2
32
CR
0D
LF
0A
1,344 bytes in input buffer.
MCR Status:
Hexadecimal:
ESC M
1B 4D
0
30
1
31
2
32
4
34
CR
0D
LF
0A
Twelve seconds remain to read 1 & 2.
Battery Voltage:
Hexadecimal:
ESC
1B
7
37
1
31
2
32
3
33
CR
0D
LF
0A
Battery Voltage is 7.123 Volts
V
56
29
Printek Emulation
Query Printer Firmware Version
ESC P (
This command returns a string containing the printer’s firmware version designation as three ASCII digits. The
three digits may be interpreted by adding a decimal point between the first two digits as shown in the example
below.
Example: This following escape sequence requests the printer’s firmware version.
Escape Sequence: ESC
Hexadecimal:
1B
P
50
(
28
A sample string returned in response to this command is shown below and indicates that the firmware version is
“1.00”.
Firmware Version: ESC
Hexadecimal:
1B
(
28
1
31
0
30
0 SPACE CR
30
20 0D
LF
0A
Query Printer Model and Hardware Revision Level
ESC P )
This command returns a string containing three digits that represent the printer model and a single character
that represents the printer’s hardware revision level. The printer models indicated by the three digits are as
follows:
Value Printer Model
300 MLP3030
302 MLP3030 with
MCR
304 MLP3030 LP
Value Printer Model
400 MLP3040
401 MLP3040 SL
402
403
404
Value
4F0
4F2
Printer Model
PrintAbout MP 2000
PrintAbout MP 2000 with
MCR
MLP3040 with MCR
MLP3040 SL with
MCR
MLP3040 LP
Example: This escape sequence requests the printer’s model and revision level.
Escape Sequence: ESC
Hexadecimal:
1B
P
50
)
29
A sample string returned in response to this command is shown below and indicates that the printer is a model
is an MLP3040 SL with a Magnetic Card Reader, and is at hardware revision level “A”.
Printer/Version:
Hexadecimal:
30
ESC
1B
)
29
4
34
0
30
3
33
A
41
CR
0D
LF
0A
Printek Emulation
Magnetic Card Reader
Read Magnetic Card Data
ESC M n1 n2 t CR
If the optional Magnetic Card Reader (MCR) is installed in the printer, this command instructs the printer to
read data from a card such as a credit card or driver’s license. The MCR is a three track reader designed to read
magnetically encoded data conforming to ANSI/ISO 7810, 7811 standards. The card specifications are listed
below.
Track 1
Track 2
Track 3
ISO1 (IATA)
ISO2 (ABA)
ISO3 (MINTS)
210 bpi
75 bpi
210 bpi
7
5
7
79
40
107
0.030” ±0.003” (0.76mm ±0.08mm)
Recording Density
Data Bits
Characters Per Track
Card Thickness
The Read Magnetic Card Data command to allows an application to request that the MCR reads one, two, or
three tracks simultaneously within a specified number of seconds, where n1 n2 are ASCII digits that specify the
number of seconds to wait for the user to successfully swipe a card before a “timeout” error occurs, and t is an
ASCII digit specifying the tracks to be read.
Specifying a timeout value of “00” disables the timeout timer and allows the user to swipe a card until a
successful read is accomplished or until a cancel command (ESC C) is sent by the host.
t
1
2
3
4
5
6
Tracks To Be Read
Track 1
Track 2
Track 3
Tracks 1 & 2
Tracks 2 & 3
Tracks 1, 2 & 3
After the printer receives the command, the MCR indicator will begin to flash indicating to the user that (s)he
may now pass the card to be read through the MCR slot near the front of the printer. The card may be swiped
in either direction. If the read is successful, the MCR indicator will stay lit momentarily (not flashing) and
the printer will transmit the data read and/or the status of the requested read operation.
If a swipe does not result in a successful read, the Error Indicator will also begin to flash and an error
message as described below will be transmitted. The card may be swiped multiple times until a successful read
occurs or until the specified timeout expires. Once the timeout occurs, the MCR will be disabled and both
indicators will be turned off.
The data are returned as string(s) of ASCII characters in the following format.
ASCII:
Hexadecimal:
%
25
/
2F
1
31
/
2F
track 1 data
…
?
3F
CR
0D
LF
0A
ASCII:
Hexadecimal:
;
3B
/
2F
2
32
/
2F
track 2 data
…
?
3F
CR
0D
LF
0A
ASCII:
Hexadecimal:
+
2B
/
2F
3
33
/
2F
track 3 data
…
?
3F
CR
0D
LF
0A
Note: If no data is available for a track, the track data portion of the string will be empty. Other tracks
containing valid data will be returned. If an error occurs on any track, the track data portion of the
string for that track will contain a single “E” (Hexadecimal 45).
31
Printek Emulation
If for any reason the MCR is unable to read the card’s data, the printer will transmit an error message string in
the format shown below. The characters n1 n2 represent an error number and error message is a description of
the error. Possible values are described in the subsequent table.
ASCII:
ESC
Hexadecimal: 1B
n1 n2
05
06
07
08
09
E
45
,
2C
n1
…
n2
…
,
2C
error message
…
,
2C
CR
0D
LF
0A
Error Message
Time-out Expired
Invalid Character
Invalid Track Number
Unsupported Track Selected
Cancel Request
Cancel Read Magnetic Card Data Command
ESC C
This command will cancel a pending MCR read command. The printer will transmit an “error” message
indicating that it has processed the cancel request and turn off the MCR indicator.
Escape Sequence: ESC
Hexadecimal:
1B
32
C
43
Printek Emulation
Control Code and Escape Sequence Summary
Communications (RS-232C Serial Interface Only)
End of Text
ETX
Acknowledge (Transmitted by Printer)
ACK
Printer Idle (Transmitted by Printer)
EOT
Transmitter On (Transmitted by Printer)
XON (DC1)
Transmitter Off (Transmitted by Printer)
XOFF (DC3)
Character Size and Line Spacing
Select Character Pitch
Set Printer to 12.7 cpi
Set Printer to 22.6 cpi
Set Printer to 22.6 cpi
Double High On
Double High Off
Double High/Wide On
Double High/Wide Off
Set Text Line Spacing
ESC K n
SO
SI
NORM (DC4)
FS
GS
DC2 D
DC2 d
ESC a n, ESC A n
Character Attributes
Select Emphasized Mode
ESC U n
Character Sets
Select Extended Character Set
ESC F n
Horizontal Position
Carriage Return
Backspace
Horizontal Tab
Set Horizontal Margins
CR
BS
HT
ESC H l r
Vertical Position
Line Feed
Variable Size Line Feed
Variable Size Reverse Line Feed
Vertical Tab
Form Feed
LF
ESC J n
ESC Q J n
VT
FF, ESC E
Bar Codes
Print Bar Code
Print Bar Code With Human Readable Text
ESC z t n h data
ESC Z t n h data
Graphics
8-Bit Graphics
8 Bit Compressed Graphics
Vector Graphics
ESC # h w data
ESC v h w c data [c data] [c data] …
ESC > id lines size data, ESC > id p data t
Storing and Printing Graphic Logos
Load Graphic Logo
Store Graphic Logo
Print Graphic Logo
ESC L G n
ESC L G DEL
ESC L g n
33
Printek Emulation
Black Mark Sensing
Set Paper Out Sensitivity
Forward Seek Black Mark
Reverse Seek Black Mark
ESC Q Q n
ESC Q F n
ESC Q B n
Printer Controls
Sound Bell
Cancel
Print Contrast
Enable Buffer Mode
Disable Buffer Mode
Print Buffer Contents (Buffer Mode)
Select Format
Select Emulation
Store Printer Command File
Reset Printer
Turn Printer Off
BEL
CAN
ESC P n
ESC P $
ESC P #
EOT
ESC l n
ESC ESC n
ESC T type id size name data
ESC c, ESC * 0
ESC * 1
Printer Status Commands
Print Battery Status
Query Print Buffer & MCR Status
Query Print Buffer, MCR, & Battery Voltage Status
Query Printer Firmware Version
Query Printer Model and Hardware Revision Level
ESC P ^
STX
SYN
ESC P (
ESC P )
Magnetic Card Reader
Read Magnetic Card Data
Cancel Magnetic Card Data Read Command
ESC M n1 n2 t CR
ESC C
34
Mt3 Emulation
Selecting Mt3 Emulation allows applications written for the PTX Print series printers to operate properly.
When using this emulation in an MLP3040 or PrintAbout MP 2000, the printer matches the print width of the
Printek Mt3.
For information on selecting emulations using Escape Sequences, please refer to “Selecting Emulations” on
page 3. For information selecting emulations through the printer’s control panel set up, please refer to the
printer’s Operator’s Manual.
The following summary lists the commands supported when Mt3 Emulation is selected. For more detailed
information, please refer to the MLP Programmer’s Manual.
Note: Items marked with an asterisk (*) are Printek extensions. Refer to the Printek Emulation section of
this manual.
Communications (RS-232C Serial Interface Only)
End of Text
ETX
Acknowledge (Transmitted by Printer)
ACK
Printer Idle (Transmitted by Printer)
EOT
Transmitter On (Transmitted by Printer)
XON (DC1)
Transmitter Off (Transmitted by Printer)
XOFF (DC3)
Character Size and Line Spacing
Select Character Pitch
Set Printer to 12 cpi
Set Printer to 21 cpi
Set Printer to 21 cpi
Double High On
Double High Off
Set Text Line Spacing
ESC k n
SO
SI
NORM (DC4)
FS
GS
ESC a n, ESC A n
Character Attributes
Select Emphasized Mode
ESC U n
Character Sets
Select Extended Character Set
ESC F n
Horizontal Position
Carriage Return
Backspace
Horizontal Tab
Set Horizontal Margins *
CR
BS
HT
ESC H l r
Vertical Position
Line Feed
Variable Size Line Feed
Variable Size Reverse Line Feed
Vertical Tab
Form Feed (ESC E *)
LF
ESC J n
ESC Q J n
VT
FF, ESC E
35
Mt3 Emulation
Bar Codes
Print Bar Code
Print Bar Code With Human Readable Text
ESC z t n h data
ESC Z t n h data
Graphics
8 Bit Graphics
8-Bit Graphics *
8 Bit Compressed Graphics
ESC V n1 n2 data
ESC # h w data
ESC v h w c data [c data] [c data] …
Storing and Printing Graphic Logos
Enter Flash Logo Mode
Load Graphic Logo
Store Graphic Logo
Print Graphic Logo
ESC D L
ESC L G 0
ESC L G DEL
ESC L g 0
Black Mark Sensing
Set Paper Out Sensitivity
Forward Seek Black Mark
Reverse Seek Black Mark
ESC Q Q n
ESC Q F n
ESC Q B n
Printer Controls
Sound Bell *
Cancel
Print Contrast
Peak Power Mode
Enable Buffer Mode
Disable Buffer Mode
Print Buffer Contents (Buffer Mode)
Select Emulation *
Reset Printer *
Turn Off Printer *
BEL
CAN
ESC P n
ESC P n
ESC P #
ESC P $
EOT
ESC ESC n
ESC * 0
ESC * 1
Printer Status Commands
Print Battery Status
Query Print Buffer & MCR Status
Query Print Buffer, MCR, & Battery Voltage Status
Query Printer Firmware Version
Query Printer Model and Hardware Revision Level
ESC P ^
STX
SYN
ESC P (
ESC P )
Magnetic Card Reader
Read Magnetic Card Data
Cancel Magnetic Card Data Read Command
ESC M n1 n2 t CR
ESC C
36
O’Neil Emulation
O’Neil Emulation allows Printek printers to respond to commands designed to operate an O’Neil microFlash
printer. The commands that are supported are listed below.
Note: Items marked with an asterisk (*) are Printek extensions. Refer to the Printek Emulation section of
this manual.
Communications
Same as Printek Emulation
Line Printer Mode
Character Size and Line Spacing
Double Wide On
Double Wide Off
Double High/Wide On *
Double High/Wide Off *
Multiply Character Height
Select Double High and Double Wide
SO
SI
DC2 D
DC2 d
ESC H n
ESC ! n
Character Sets
Select Font (See Font Mapping, below.)
ESC w n
Horizontal Position
Backspace *
Horizontal Tab *
Carriage Return
BS
HT
CR
Vertical Position
Line Feed
Vertical Tab *
Form Feed (ESC E *)
Set Interline Spacing
Set Form Length
Advance From Q Mark
LF
VT
FF, ESC E
ESC A n
ESC C n
ESC Q n1 n2
Graphics
Select Graphics Mode
Begin Graphics
End Graphics
ESC V n1 n2
ESC B
ESC E
37
O’Neil Emulation
Printer Controls
Sound Bell *
Cancel Line Buffer
Reset
Select Easy Print Mode
BEL
CAN
ESC @
ESC E Z
Easy Print Mode
Move Paper Forward
Move Paper Backward
Select Line Printer Mode
Print Test Page
Save Graphic
{AHEAD:n}
{BACK:n}
{LP}
{TP}
{SAVE:n} This command has been added to provide a
mechanism for storing graphic images. The
image defined in the PRINT command that
immediately follows will be stored as a
graphic named “n”, where n is a string of up
to five characters in length.
Print Text Line/Bar Code/Graphic Image/Line
{PRINT,GlobalOptions:@row,column:name,FieldOptions|data|}
GlobalOptions: BACK, DEMAND, QUANTITY, QSTOP, STOP, ROT270
FieldOptions: Fonts – HMULTn (HMn), VMULTn (VMn)
Bar Codes – HIGHn (Hn), WIDEn (Wn)
Graphics – HMULTn (HMn), VMULTn (VMn)
Lines – length n (Ln), thick n (Tn)
Note: In addition to the standard fonts, specifying “MFDEF” will select the printer’s default font for the
currently selected Format. Refer to the printer’s operator’s manual for more information.
Line Printer and Easy Print Modes
Query Commands
Print Status Request
Configuration Request
Battery Condition Request
Version Request
Memory Information/Status Request
Print Head Information Request
IrDA Configuration Information Request
Font List Request
Graphic List Request
Format List Request
Demand Quantity Remaining Request
Cancel Demand Printing
Reset Printer
38
ESC{ST?}
ESC{CF?}
ESC{BT?}
ESC{VR?}
ESC{MY?}
ESC{PH?}
ESC{IR?}
ESC{FN?}
ESC{GR?}
ESC{FM?}
ESC{DQ?}
ESC{CN!}
ESC{RE!}
O’Neil Emulation
Magnetic Card Reader Commands
Configure Reader
Configure MCR
Enable MCR
Disable MCR
Zero MCR Data
Read MCR Status
Read MCR Data
ESC{CCR:n}
ESC{CMR:n}
ESC{ME!}
ESC{MD!}
ESC{MZ!}
ESC{RS?}
ESC{MR?}
Printer Controls
Select Emulation
ESC ESC n
Font Mapping
Line Printer Mode
0x20
0x21
0x22
0x23
0x24
0x25
0x26
0x28
0x29
0x2a
0x2b
0x41
0x42
0x43
0x44
0x45
0x46
0x47
0x48
0x49
0x4a
0x4b
0x5b
0x5d
0x60
0x61
0x62
0x63
0x7a
Font Used
10.2 cpi Sans Serif A Bold
20.3 cpi Sans Serif A
10.2 cpi Sans Serif A
5.5 cpi Sans Serif A
18.5 cpi Sans Serif A
22.6 cpi Courier
10.7 cpi Sans Serif A Bold
10.7 cpi Sans Serif A
10.7 cpi Sans Serif A
15.6 cpi Courier
20.3 cpi Sans Serif A
34.0 cpi Sans Serif A
34.0 cpi Sans Serif A
25.4 cpi Courier
18.5 cpi Sans Serif A
14.5 cpi Courier Bold
12.7 cpi Courier Bold
12.7 cpi Courier Bold
10.2 cpi Courier Sans Serif A
10.2 cpi Courier Sans Serif A Bold
10.2 cpi Courier Sans Serif A Bold
10.2 cpi Courier Sans Serif A
22.6 cpi Courier
12.7 cpi Courier
10.7 cpi Sans Serif A
12.7 cpi Courier
12.7 cpi Courier
12.7 cpi Courier
25.4 cpi Courier
Notes: 1. In Easy Print Mode, the font used will be equal to, or smaller than, the font requested with
preference given to the Sans Serif font.
2. Any downloaded font with and ID of an internal font will override the internal font.
39
ZPL-II Emulation
ZPL-II Emulation supports a subset of the Zebra ZPL-II command set and allows Printek printers to respond to
commands designed to control a ZPL-II compatible printer. The commands that are supported are listed below.
Select Font For Current Field
Interleaved 2 of 5 Bar Code
Code 39 Bar Code
PDF417 Bar Code
EAN-8 Bar Code
UPC-E Bar Code
Code 128 (A, B, C) Bar Code
EAN-13 Bar Code
ANSI Codabar Bar Code
UPC-A Bar Code
Bar Code Field Default
Change format command prefix (default is ^)
Change parameter delimiter (default is ,)
Change control command prefix (default is ~)
Change default font
Download Format
Download graphics (uncompressed ASCII)
Download graphics
Field Data
Field Number
Field Origin
Field prints white over black and black over white
Field Separator
Graphic Box
Draw circle
Draw diagonal line
Send a status message to host
Delete object from RAM or flash
Load image to bitmap
Move image from storage to bitmap
Save label as image
Change Backfeed Sequence to Normal
Set 230 Dots Per Inch
Reprint After Error = Yes
Label Home
Label Reverse Print
Label Top
Map Clear = Yes
Relative contrast adjustment
Media Feed
Print Mirror Image = No
Print Quality
Print Rate = Maximum
Set page/print width
^A n1,n2,n3,n4
^B2 n1,n2,n3,n4,n5
^B3 n1,n2,n3,n4,n5
^B7 n1,n2,n3,n4,n5,n6
^B8 n1,n2,n3,n4
^B9 n1,n2,n3,n4,n5
^BC n1,n2,n3,n4,n5,n6
^BE n1,n2,n3,n4
^BK n1,n2,n3,n4,n5,n6,n7
^BU n1,n2,n3,n4,n5
^BY n1,n2,n3
^CC/~CC n1
^CD/~CD n1
^CT/~CT n1
^CF n1,n2,n3
^DF n1:n2.n3
~DG n1,n2,n3,n4,<data>
~DY n1,n2,n3,n4,n5,<data>
^FD n
^FN n
^FO n1,n2
^FR
^FS or SI
^GB n1,n2,n3,n4,n5
^GC n1,n2,n3
^GD n1,n2,n3,n4,n5
~HS
^ID n1,n2
^IL n1
^IM n1
^IS n1,n2
~JSN
^JMA
^JZY
^LH n1,n2
^LR
^LT n
^MCY
^MD n1
^MF n1,n2
^PMN
^PQ n1,n2,n3,n4
^PR
^PW n1
41
ZPL-II Emulation
Set absolute contrast
Select ZPL-II
Adjust tear-off position
Start Format
Recall Graphic
Recall Format
End Format
~SD n1
^SZ2
~TA n1
^XA or STX
^XG n1,n2,n3
^XF n1,n2,n3
^XZ or ETX
Additional Printer Control
Select Emulation
ESC ESC n
Bar Code and Font Indices
Bar Code
Interleaved 2 of 5
Code 39
PDF417
EAN-8
UPC-E
Code 128
EAN-13
Codabar (ANSI)
UPC-A
Index
2
3
7
8
9
C
E
K
U
Font Requested
Zebra Font A
Zebra Font B
Zebra Font C
Zebra Font D
Zebra Font E
Zebra Font F
Zebra Font G
Index
A
B
C
D
E
F
G
Font Used
25.4 cpi Courier
22.6 cpi Courier
18.5 cpi Courier
18.5 cpi Courier
10.2 cpi Sans Serif A
5.5 cpi Sans Serif A
10.7 cpi Sans Serif A
Note: The font used will be equal to, or smaller than, the font requested with preference given to the Sans Serif
font.
42
CPCL Emulation
CPCL Emulation supports a subset of the Comtec CPCL command set and allows Printek printers to respond to
commands designed to control a CPCL compatible printer. The commands that are supported are listed below.
Note: This emulation is only available in units with firmware version 2.0 or later.
CPCL Commands
Terminate and Print File
Form Feed
Place Text on Label
Place Text on Label, Rotated 90° CCW
Place Text on Label, Rotated 180°
Place Text on Label, Rotated 270° CCW
Place Mult. Same Size Text Lines on Label
PRINT
FORM {max feed} {skip length}
TEXT, T {font} {size} {x} {y} {data}
TEXT90, VTEXT, T90, VT {font} {size} {x} {y} {data}
TEXT180, T180 {font} {size} {x} {y} {data}
TEXT270, T270 {font} {size} {x} {y} {data}
MULTILINE, ML {height}{text} {font} {size}
{x} {y} {data}
ENDMULTILINE, ENDML
Set Font Magnification
SETMAG {w} {h}
Print Bar Code
BARCODE, B {type*} {width} {ratio} {height}
{x} {y} {data}
Print Vertical Bar Code
VBARCODE, VB {type*} {width} {ratio} {height}
{x} {y} {data}
Print PDF-417 Bar Code
BARCODE PDF-417 {x} {y} [XD n] [YD n [C n] [S n] {data}
ENDPDF
Print Human Readable Text Under Bar Code BARCODE-TEXT, BT {font number} {font size} {offset}
Place a Rectangular Box on Label
BOX {x0} {y0} {x1} {y1} {width}
Place a Line on Label
LINE, L {x0} {y0} {x1} {y1} {width}
Place Expanded Graphics on Label
EXPANDED-GRAPHICS, EG {width} {height}
{x} {y} {data}
Place Vertical Expanded Graphics on Label
VEXPANDED-GRAPHICS, VEG {width} {height}
{x} {y} {data}
Place Compressed Graphics on Label
COMPRESSED-GRAPHICS, CG {width} {height}
{x} {y} {data}
Place Vertical Compressed Graphics on Label VCOMPRESSED-GRAPHICS, VCG {width} {height}
{x} {y} {data}
Set Print Contrast Level
CONTRAST {level}
Set Print Tone Level
TONE {level}
Set Page Width
PAGE-WIDTH,PW {width}
Enable Pace Mode
PACE
Disable Pace Mode
NO-PACE
Wait n/8 Seconds
WAIT {delay-time}
Set Maximum Print Speed
SPEED {speed level}
Set Paper Feed Distance Before Printing
PREFEED {length}
Set Paper Feed Distance After Printing
POSTFEED {length}
Sound Control Panel Bell for n/8 Seconds
BEEP {beep length}
43
CPCL Emulation
CPCL Commands (Continued)
Set Printer to Use Gap Sensing (LP Models Only)
Set Printer to Use Back Mark Sensing (LP Only)
Print PCX formatted Graphic
Print Different Character Styles On One Line
Print Different Character Styles Vertically
Left Justify Fields
Center Justify Fields
Right Justify Fields
Draw a Circle **
Print a Logo/Graphic **
Save Label Job as Logo **
Utility Commands
Set Line Printer Font
Set Line Feed Height
Set Horizontal Position
Set Horizontal and Vertical Position
Set Vertical Position
Move Horiz. Relative to Current Position
Move Vertically Relative to Current Position
Set Left Margin
Set Bold Mode
Set Spacing Between Characters
Align Media to Print Head
Set Start Printing Timeout to n/8 Seconds
Set Page Width
Print Bar Code
Print Vertical Bar Code
Print a Rectangular Box
Print a Line
Set Print Tone
Print PCX Formatted Graphic **
Relative Move Horizontally & Vertically **
Line Print Mode Commands
Graphic Data
Carriage Return
Line Feed
Form Feed
Backspace
I/O Handshake, Printer Responds With ACK
Use Format File
Define Format File
Begin a Label Print Session
Single Utility Command
Multiple Utility Command
44
GAP-SENSE,
BAR-SENSE,
PCX {x} {y} {data}
CONCAT {x} {y} {font} {size} {offset} {data} …
{font} {size} {offset} {data} ENDCONCAT
VCONCAT {x} {y} {font} {size} {offset} {data} …
{font} {size} {offset} {data} ENDCONCAT
LEFT [end]
CENTER [end]
RIGHT [end]
CIRCLE {x} {y} {r} {thick}
LOGO {logoname} {x} {y} {wscale} {hscale}
SAVE {logo ID} {logo name}
SETLP {font number} {font size} {unit height}
SETLF {unit height}
X {unit value}
XY {x unit value} {y unit value}
Y {unit value}
RX {unit x value to move relative to present position}
RY {unit y value to move relative to present position}
LMARGIN {dots to offset from left}
SETBOLD {value}
SETSP {unit to separate characters}
SETFF {max-feed} {skip-length}
SETLP-TIMEOUT {time in 1/8 seconds}
PAGE-WIDTH, PW {width}
BARCODE, B {type*} {width} {ratio} {height}
{x} {y} {data}
VBARCODE, VB {type*} {width} {ratio} {height}
{x} {y} {data}
BOX {x0} {y0} {x1} {y1} {width}
LINE, L {x0} {y0} {x1} {y1} {width}
TONE {level}
PCX {x} {y} {data}
RXY {x} {y} {data}
ESC-g {00} {width}
CR
LF
FF
BS
ETX
! USE-FORMAT, ! UF {format name}
! DEFINE-FORMAT, !DF{format name}
! {offset} 200 200 {height} {qty}
! U1 {single utility command}
! UTILITIES, ! U
{multiple utility command separated by CRLF}
PRINT
CPCL Emulation
Additional Printer Control
Select Emulation
ESC ESC n
* Supported barcode types:
UPCA,UPCE,EAN13,EAN8,39,39C,I2OF5,I2OF5C,128,UCCEAN128,CODABAR,CODABAR16
** Additional command extensions.
45
Hex Dump Mode
Hex Dump provides a way to print, in a readable form, all the data received by the printer. This tool is useful to
programmers for debugging programs when sending control codes and escape sequences to the printer. Hex
Dump mode may also be used to detect what commands are being sent by a particular software application to
help determine which emulation mode is needed for that application.
When the printer is operating in Hex Dump mode, control characters and escape sequences sent to the printer
are not recognized or processed. The hexadecimal representation of the control characters and escape
sequences will appear in the hex dump, but no other special processing will occur.
To select Hex Dump mode, please refer to your printer’s Operator’s Manual.
A sample hex dump for the MLP3040 is shown below. Note that each line shows sixteen characters, first in
hexadecimal format and then in printable ASCII format. Certain, common nonprinting characters are
represented by special characters such as CR, LF, and FF. The Escape character is represented by a diamond shape
(♦) to help identify the beginning of command strings. All other unprintable ASCII characters (0x00-0x1F) are
represented by a period.
54
20
75
66
68
68
73
6F
69
65
74
72
73
78
72
6D
20
20
61
61
69
64
74
74
73
75
65
0D
20
6D
20
0A
61
70
68
0C
20
20
65
00
73
74
78
00
61
6F
20
00
6D
20
64
00
70
69
75
1B
6C
6C
6D
1B
65
6C
70
01
This.is.a.sample
.hex.dump.to.ill
ustrate.hex.dump
formatCRLFFF....♦♦.
The format of the Hex Dump output for the MLP3030 models will vary slightly due to constraints of printing
on the smaller width paper.
Note: ETX/ACK handshake will not operate properly in Hex Dump mode. When an ETX is received by the
printer, its hexadecimal representation will be printed in the hex dump, but no ACK will be sent to the
host computer. When using the printer in Hex Dump mode using the RS-232C Serial Interface, it is
recommended that the printer be configured for RTS/CTS handshake or XON/XOFF handshake.
Note: The Hex Dump feature is only available in units with firmware version 2.0 or later.
47
Print & Font Samples
These print samples were produced on an MLP3040.
Print Samples
49
Print & Font Samples
Courier Font With International Extended Character Set
Courier Font PC Line Drawing Extended Character Set
50
Print & Font Samples
Sans Serif Font
51
ASCII Character Tables
ASCII Control Code Definitions
The following table is provided as a reference to the control character descriptions as provided by the ASCII
definition. Not all of these definitions are supported by Psion Teklogix printers and some are emulation
dependent. For more information consult the appropriate chapter for the emulation being used.
Control
Code
───────────
NUL
SOH
STX
ETX
EOT
ENQ
ACK
BEL
BS
HT
LF
VT
FF
CR
SO
SI
DLE
DC1
DC2
DC3
DC4
NAK
SYN
ETB
CAN
EM
SUB
ESC
FS
GS
RS
US
Hexadecimal
Value
─────────────
00
01
02
03
04
05
06
07
08
09
0A
0B
0C
0D
0E
0F
10
11
12
13
14
15
16
17
18
19
1A
1B
1C
1D
1E
1F
Description
───────────
Null
Start of Heading
Start of Text
End of Text
End of Transmission
Enquiry
Acknowledge
Bell
Backspace
Horizontal Tabulation
Line Feed
Vertical Tabulation
Form Feed
Carriage Return
Shift Out
Shift In
Data Link Escape
Device Control 1 (XON)
Device Control 2
Device Control 3 (XOFF)
Device Control 4
Negative Acknowledge
Synchronous Idle
End of Transmission Block
Cancel
End of Medium
Substitute
Escape
File Separator
Group Separator
Record Separator
Unit Separator
53
ASCII Character Tables
Decimal to Hexadecimal TO ASCII Conversion Table
Dec
0
1
2
3
4
5
6
7
8
9
10
11
12
13
14
15
16
17
18
19
20
21
22
23
24
25
26
27
28
29
30
31
32
33
34
35
36
37
38
39
40
41
42
43
44
45
46
47
48
49
50
51
52
53
54
55
56
57
58
59
60
61
62
63
54
Hex
00
01
02
03
04
05
06
07
08
09
0A
0B
0C
0D
0E
0F
10
11
12
13
14
15
16
17
18
19
1A
1B
1C
1D
1E
1F
20
21
22
23
24
25
26
27
28
29
2A
2B
2C
2D
2E
2F
30
31
32
33
34
35
36
37
38
39
3A
3B
3C
3D
3E
3F
ASCII
NUL
SOH
STX
ETX
EOT
ENQ
ACK
BEL
BS
HT
LF
VT
FF
CR
SO
SI
DLE
XON
DC2
XOFF
DC4
NAK
SYN
ETB
CAN
EM
SUB
ESC
FS
GS
RS
US
SP
!
“
#
$
%
&
'
(
)
*
+
,
.
/
0
1
2
3
4
5
6
7
8
9
:
;
<
=
>
?
Dec
64
65
66
67
68
69
70
71
72
73
74
75
76
77
78
79
80
81
82
83
84
85
86
87
88
89
90
91
92
93
94
95
96
97
98
99
100
101
102
103
104
105
106
107
108
109
110
111
112
113
114
115
116
117
118
119
120
121
122
123
124
125
126
127
Hex ASCII
40
@
41
A
42
B
43
C
44
D
45
E
46
F
47
G
48
H
49
I
4A
J
4B
K
4C
L
4D
M
4E
N
4F
O
50
P
51
Q
52
R
53
S
54
T
55
U
56
V
57
W
58
X
59
Y
5A
Z
5B
[
5C
\
5D
]
5E
^
5F
_
60
`
61
a
62
b
63
c
64
d
65
e
66
f
67
g
68
h
69
i
6A
j
6B
k
6C
l
6D
m
6E
n
6F
o
70
p
71
q
72
r
73
s
74
t
75
u
76
v
77
w
78
x
79
y
7A
z
7B
{
7C
|
7D
}
7E
~
7F DEL
Dec
128
129
130
131
132
133
134
135
136
137
138
139
140
141
142
143
144
145
146
147
148
149
150
151
152
153
154
155
156
157
158
159
160
161
162
163
164
165
166
167
168
169
170
171
172
173
174
175
176
177
178
179
180
181
182
183
184
185
186
187
188
189
190
191
Hex
80
81
82
83
84
85
86
87
88
89
8A
8B
8C
8D
8E
8F
90
91
92
93
94
95
96
97
98
99
9A
9B
9C
9D
9E
9F
A0
A1
A2
A3
A4
A5
A6
A7
A8
A9
AA
AB
AC
AD
AE
AF
B0
B1
B2
B3
B4
B5
B6
B7
B8
B9
BA
BB
BC
BD
BE
BF
Dec
192
193
194
195
196
197
198
199
200
201
202
203
204
205
206
207
208
209
210
211
212
213
214
215
216
217
218
219
220
221
222
223
224
225
226
227
228
229
230
231
232
233
234
235
236
237
238
239
240
241
242
243
244
245
246
247
248
249
250
251
252
253
254
255
Hex
C0
C1
C2
C3
C4
C5
C6
C7
C8
C9
CA
CB
CC
CD
CE
CF
D0
D1
D2
D3
D4
D5
D6
D7
D8
D9
DA
DB
DC
DD
DE
DF
E0
E1
E2
E3
E4
E5
E6
E7
E8
E9
EA
EB
EC
ED
EE
EF
F0
F1
F2
F3
F4
F5
F6
F7
F8
F9
FA
FB
FC
FD
FE
FF
Printer Reset Conditions
The following list describes what conditions are assumed whenever the printer is powered on.
This list includes all variables which may be modified by the user for all emulations even though some
emulations cannot modify all the variables shown. Refer to the appropriate section for the emulation being
used.
Variable
───────────────
Emulation
Line Printer/Easy Print
Character Pitch/Font
Extended Character Set
Double High
Double Wide
Double High/Wide
Emphasized
Line Spacing
Left Margin
Right Margin
Print Contrast
Buffer Mode
Text in an Incomplete Line
Input Buffer
Magnetic Card Reader
Reset Condition
───────────────
According to Interface Setup
Line Printer Mode
According to Format Setup
International
Off
Off
Off
Off
According to Format Setup
According to Format Setup
According to Format Setup
According to Format Setup
Disabled
Discarded
Cleared
Pending Read Canceled
55
Glossary
802.11
Wireless networking communication standards created by IEEE.
access point
An interface between a wireless network and a wired network.
Ad-Hoc
A Wi-Fi network consisting of only stations (no access point). Same as Peerto-Peer.
ASCII
American Standard Code for Information Interchange.
authentication
The process a Wi-Fi station uses to identify itself to another station.
bandwidth
The amount of data that be transferred in a given period of time.
baud rate
The rate at which characters are transmitted over a serial interface. This is also
often referred to as bits per second.
binary
Base two numbering system. Digits are represented by the characters 0 and 1.
bit
A single binary digit.
Bluetooth
A definition for short range radio frequency communications.
client
Any node on a network that requests services from another node (server).
control code
A single, non-printing character which is used to control the configuration or
operation of the printer.
character pitch
The horizontal spacing of characters. Measured in cpi.
cpi
Characters per inch.
current line
The line upon which the next character will be printed.
current print position
The column on the current line where the next character will be printed.
default
Value or configuration assumed when the printer is powered on or reset.
DHCP
Dynamic Host Configuration Protocol. A method used to centrally control the
assignment of IP addresses on a network.
dpi
Dots per inch. Generally used to refer to graphics density or resolution.
escape sequence
String of characters beginning with the escape (ESC) character which is used
to control the configuration or operation of the printer. The characters which
are part of this string are not printed.
font
A group of characters of a given shape or style.
hexadecimal
Base sixteen numbering system. Digits are represented by the characters 0
through 9 and a through f.
IEEE
Institute of Electrical and Electronic Engineers
infrastructure
A Wi-Fi network consisting of stations connecting to a wired network or other
stations via an access point.
interface
The connection between the printer and the host computer.
IP
Internet Protocol. A specification for packets, or datagrams, of data and an
addressing method to allow the exchange of data with another system. Must be
combined with another protocol such as TCP to create a complete connection
with the other system.
LAN
Local Area Network.
LCD
Liquid crystal display.
LED
Light emitting diode.
line pitch
The vertical spacing of rows of characters. Measured in lpi.
lpi
Lines per inch.
margin
An area along any edge of a form where data may not be printed.
MSB
Most significant bit. In a character, this refers to bit seven (of 0 to 7).
node
Any device connected to a network.
parity
A method used for detecting errors within a single character transmitted or
received via an interface.
Peer-to-Peer
A network consisting of only stations (no access point or central server). Same
as Ad-Hoc.
reset
Initialization of various operating parameters of the printer to the value or state
assumed when the printer is powered on.
RS-232C
An EIA standard for serial data transmission.
server
Any node on a network that provides services to another node (client).
SSID
Service Set IDentifier. An identifier attached to packets on a Wi-Fi network
that identify the particular network the packets are intended for.
TCP
Transmission Control Protocol. A specification that controls the connection
between systems on a network.
top of form
The vertical position where the first line is printed on the paper. Also the
position the paper is advanced to when a form feed (FF) character is received
from the host or the Form Feed button is pressed on the printer's control panel.
WAN
Wide Area Network. Refers to connections that allow one LAN to
communicate with another LAN(s).
WEP
Wired Equivalent Privacy. A security protocol for wireless LANs designed to
provide data security similar a wired LAN.
Wi-Fi
Refers to any of the IEEE 802.11 standards.
WLAN
Wireless Local Area Network. A LAN made up of wireless nodes.