1
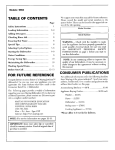
FOR FUTURE REFERENCE
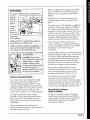
Congratulations
onyourchoiceoFaM*ag
cooktop! As you use your new cooktop we know
you will appreciate the many" features that
provide excellent performance, ease of cleaning,
convenience and dependability,
New features have dramatically changed today's
cooking appliances and the way we cook. It is
theretbre very important to understand how
your new cooktop operates before you use it. On
the following pages you will find a wealth of
information regarding all aspects of your
eooktop. By following the instructions carefi]lly,
you
will be able to fhlly enjoy and properly
maintain your Maytag eooktop and achieve
Model
Identification
For future reference, keep this manual in a
convenient location. Ree0rd the model and
serial number s of this eooktop in the spaces
provided. This information is located either on
the bottom of the eooktop or under the
elements/drip bowls depending on your model.
ModelNumber
[
serial Number
excellent results with the food you prepare.
IMPORTANT:
Should you have any questions about using your
Maytag cooktop, call or write us. Be sure to
provide the model and serial numbers of your
cooktop,
documents for warranty" service.
MAYTAG
CONSUMER EDUCATION
ONE DEPENDABILITY SQUARE
NEWTON, IOWA 50208
(515) 791-891i
(Mon.-Fri., 8 am-5 pm CST)
Retai n the proof of purchase
NOTE: In our continuing effbrt to improve the
quality- of our cooking products, it may be
necessary to make changes to the appliance
without revising this manual. As an example, a
knob on your appliance may not look like an
illustration in this book.
NOTE: For Canadian eooktops only, check with
the installer for the location of the breaker box.
Note this location lbr filtnre reference. Refer to
page 1'2for more information.
Be sure you read the IMPORTANT
SAFETY INSTRUCTIONS on pages 2--4
before you start to use this eooktop.
CONSUMER
PUBLICATIONS
For more information, order Lhefollowing booklets from Maytag at the prices indicated. Send your name,
address, booklet title, form number and payment to: Maytag Consumer Education, One Dependability"
Sqnare, Newton, IA 50208. Allow 4-6 weeks for delivery.
Cooking Made Simple 272YG ...............................................................................................
Cooktop Choices - 298YG ........................................................................................................
Appliance Buying Guides .........................................................................................................
Washer -- 211YG
50¢
50¢
,50¢ EACH
Dryer -- 212YG
Dishwasher -- 213YG
Elcctrie Range
"214YG
(.;as t/ange -- 21,SYG
Refrigerator -- 276YG
PAG E
IMPORTANT
Read
SAFETY INSTRUCTIONS
all instructions
before
using this appliance.
The following instructions are based on safety
General
considerations and must be strictly followed to
eliminate the potential risks of fire, electric _,,
shock or personal injury. _.e,
Never use appliance to heat or warm a
room. This instruction is based on safe_ ,,..
considerations, to prevent potential hagards and :_--
Installation
to prevent damage to the Unit.
Installation of unit must be in accordance with
local and national fire codes and with clearances
from combustible surface or materials as listed in
the Installation Instructions. Be sure appliance is
properly installed and is grounded by a qualified
technician to avoid shock hazard,
Loose-fitting or
hanging
garments should
never be worn
while using the
appliance.
Adjustment and service of this unit must be done
by a qualified installer to insure proper operation,
avoid possible damage of the unit or injury to an
unqualified installer.
Clothing may
ignite
catch
utensil orhandles.
Care should be given to location of appliance. Be
sure walls adjacent to appliance, cabinetry
adjacent to appliance, and other materials
adjacent to appliance can withstand prolonged
heat.
If appliance is installed near a window, take steps
to prevent curtains from blowing over surface
materials, vapors and liquids near surface units
or in the vicinity of this or any"other appliance.
The fumes can create a fire hazard or explosion.
Do not use unit as a storage area for food or
cooking utensils.
elements creating a fire hazard,
_
,/
Do not store or use gasoline or other flammable
To
eliminate
the hazard
reachingshould
over hot
surface
elements,
cabinetofstorage
not be
provided directly above a unit. If provided,
storage should be limited to infrequently used
items that can be safely stored in an area
subjected to heat. Temperatures ]nay be unsafe
for some items such as volatile liquids, cleaners
or aerosol sprays. If cabinet storage is provided,
installation of a range hood that projects at least
5 inches beyond the bottom of the cabinet will
reduce the hazards associated with such storage.
Servicing
Be certain all packing materials are
removed from the appliance before
operating, to prevent fire or smoke damage
should the packing
material
Circuit
or Fuse
Breaker
ignite.
Locate and mark circuit breaker or fuse. Never
replace, a blown fuse or reset a circuit breaker
until you know what has caused the fuse to blow
or circuit to be tripped. Always replace a blown
fuse with one of the correct amperage, do not use
a substitute.
PAGE 2
Do not repair or replace any part of this unit
unless such service is specifically recommended
in this booklet. All servicing not specifically
recommended in this booklet must be referred
to a qualified service technician.
Always disconnect unit or cut-off power to unit
by removing fuse or by tripping circuit breaker
manually to the ......
off poatm n , before any
servicing.
Do not operate after any product malfnnction
until proper repair has been made.
Child Safety
Do not leave children alone or unsupervised
near the
Make sure drip bowls, if equipped, are in place.
Absence of these bowls during cooking may
subject wiring or components underneath to
damage.
appliance
when it is
in use or is
still hot.
__-._j_.2__
-_4._
'
_
¢____.]
Deep fat fryers: Use extreme cantion when
moving the grease kettle or disposing of hot
grease.
neverbe
_ll_
_
allowed to
_
sit or stand
ir
on any part
of the appliance,
_/_7
]_
_._.__¢._._
_ __
I
I1 Ill
I
_
_
_
with one or more surface elements of different
Use proper pan size. This appliance is equipped
sizes. Select utensils having flat bottoms large
undersized
utensils
expose
a portion
theof
enough to cover
the will
surface
element.
Theofuse
heating element to direct contact and may result
in
ignition
of clothing.
relationship
of
utensil
to element
will Proper
also improve
efficiency.
Children MUST be taught that the applianee
and utensils in or on it can be hot.
Children should be taught that an appliance is
not a toy. They should not be allowed to play
with controls or other parts of"the unit.
Only certain types of glass, glass/eeramie,
ceramic, earthenware, or other glazed cooking
utensils are suitable for eooktop service without
breaking due to the sudden ehange in
temperature.
Let hot utensils coot in a safe place, out of reach
of small ehildrem
Utensil handles should be turned inward and not
extend over adjacent surface units. To reduce the
--
Surface
items of interest to children in
cabinets above a cooktop,
Children elinlbing on the
eooktop to reaeh items could
be seriously injured. An
appliance should not be used
CAUTION:
as a step stoolDo
to aaotstore
eabinets
Cooking
Safety
Never leave surface units unattended at high
heat settings and do not use high heat for
extended cooking operations. Boilovers cause
smoking and greasy spillovers may ignite. Begin
cooking on a higher heat setting then reduce to a
lower setting to continue cooking. Turn off
control at the completion of a eooking operation.
Use only dry potholders. Moist or damp
potholders on hot surfaces may result in bulns
from steam. Do not let potholder touch hot
heating elements. Do not use a towel or other
bulky cloths,
and spillage due to unintentional eontaet with
the utensil, the handle of a utensil should be
positioned so that it is turned inward, and does
not extend over adjacent surface elenmnts.
Do not soak removable heating elements.
Heating elements should never be immersed in
risk of Immersing
water.
burns, ignition
element
of flammable
in water would
matelials,
damage insulating material inside element.
It is normal for some parts of the eooktop,
especially areas surrounding the surface
elements, to become warn_ or hot during surface
eooking operations. Therefore, do not touch the
cooktop until it has had sufficient time to cool. If
necessary, use dry potholders to protect hands.
Smoothtop
(select
Cooktop
models)
Do not cook on broken eooktop. If eooktop
should break, cleaning solutions and spillovers
may penetrate the broken eooktop and create a
risk of electric shock. Contact a qualified
teehnieian immediately.
To prevent damage to the eooktop, never
operate a surface unit without a pan in place and
never allow a pan to boil dry.
PAGE 3
Heating
Element
Safety
Plastics
DO NOT TOUCH SURFACE UNITS OR
AREAS NEAR UNITS. Surface elements may
be hot even though they are dark in color. Areas
near surface elements may become hot enough
to cause burns. During and after use, do not
Many plastics are vlllnerable to heat. Keep
plastics away from parts of the appliance that
may become warm or hot.
touch, or let clothing or other flammable
materials contact surface elements or areas near
elements until they have had sufficient time to
cool. Other surfaces of the appliance may
become hot enough to cause burns among
these surfaces are the eooktop and surfaces
facing the cooktop. Mso do not allow aluminum
foil, meat probes or any other metal object, other
Many aerosol-type spray cans are EXPLOSIVE
when exposed to heat and may be highly
flanm_able. Avoid their use or storage near a hot
appliance.
than a utensil on a surface element, to contact
surface eIements,
surface unit drip bowls, except as suggested in
this booklet. Improper installation of these liners
Cleaning
may result in a risk of electric shock, or fire.
Be sure all appliance parts are cool before
Cooking
touching or cleaning them. Clean eooktop with
caution. If a wet sponge or cloth is used to wipe
spills on a hot cooking area, be careful to avoid
steam bums. Some cleaners can produce noxious
fumes if applied to a hot suriZace.
Clean only parts listed in this manual and use
procedures recommended,
This appliance has been tested for safe
performance
using conventional
eookware.
Do not use any devices or accessories that are
not specifically recommended in this manual.
Do not use eyelid covers for the surface units or
stove top grills. The use of devices or accessories
that are not expressly recommended in this
booklet can create serious safely" hazards, result
in performance problems, and reduce the life of
Vent
Hood
Clean ventilating hood frequently to prevent
grease from accumulating on it or its filter. When
"flaming" foods under the hood, or ifa boilover
results in an open flame, immediately turn off
the hood's ventilating fan. The fan can cause
flame to spread. After flame is thoroughly
extinguished, the fan may be turned on to
remove unpleasant odor or smoke.
PAGE 4
Aerosol
Sprays
Aluminum
Foil
Use
aluminum
as directed
in thisto line
booklet.
Do notfoil
useonly
almuioum
foil liners
Accessories
the components of the appliance.
I-NCASEOFFIItEi
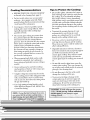
COOKWARE
Cooking performance
INFORMATION
is greatly affected by the
type of pans used. Pans MUST HAVE FLAT
BOTTOMS, especially with ceramic glass
eooktops. The fiat bottom allows good
conductivity between the pan and the element to
provide uniform cooking results, faster heating
and more efficient use of energy,
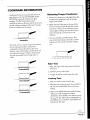
Acceptable
Pans with uneven, warped, or grooved bottoms
do not make good contact, reduce heat
conductivity and result in slower, less even
heating. A pan with a badly curved bottom will
not make good contact with the element and
may not get enough heat to bring water to
a boil.
Selecting
* Select heavy gauge pans with tight fitting lids.
Usually heavy gauge pans will not change
shape when heated.
• Match the size of the pan to the size of the
element. Ideally the pan should not extend
more than 1-inch over the cooking area on
ceramic glass cooktops and not more than 2
inches beyond the coil element on coil
cooktops.
• Use pans with flat, smooth bottoms. Two
ways to determine if pans have flat, smooth
bottoms are the ruler test aud the cooking
test.
_
Unacceptable
_
[
[ I _
-,
Proper Cookware
I _ _ _
1. Place the edge of fire ruler across the bottom
of the pan.
2. Hold tile pan up to tile light.
C
,3. No light should be visible under the ruler.
Cooking
Test:
Unacceptable
1. Place one inch of water into the pan.
L_
2-
._. _
Unacceptable
HI
and heat until bubbles form on the pan
2. bottom,
Place the pan on the element. Turn control to
3. Observe the bubble formation on the bottom
of the Fan. Look for patterns of heat
distribution. If the bubbles are uniform across
the pan, the pan will perform satisfactorily: If
the bubbles are not uniform, the bubbles will
indicate the hot spots.
...more
PAGE 5
Improper
Cookware
• Do not use oversized pans or pans that rest
across two elements. These may trap enough
heat to cause damage to the cooktop or
elements,
• Do not use specialty items on ceramic glass
that are oversized, have an uneven bottom or
do not meet proper pan specifications such as
round bottom woks, griddles, rippled bottom
canners, lobster pots, large pressure canners,
etc.
• Do not use a small pan on a large element to
reduce energy loss.
• Test cast ironware since all are not flat. Be
aware of possible "impact damage" should a
heavy east iron pan be dropped on a ceranfic
glass surface.
Cookware
Home
Canning
• AcceptahIe water-bath or pressure canners
should not be oversized. (Recommendation:
No more than 1 inch larger than the cooking
area on a ceramic glass surface and 2 inches
larger than a coil element.) They must also
have flat bottoms fur eeramic glass surIhees.
When canners do not meet these standards,
the use of the HI heat setting becomes
excessive and may result in damage to the
cooktop. In addition, water may not come to a
boil and a pressure canner may not reach 10
Ibs. of pressure on a ceramic glass surface.
• The acceptable canning procedure, fbr all
cooktops, uses the HI setting just long enough
to bring the water to a boil, then lowers the
setting to maintain the water temperature.
" For more information on canning procednres,
contact your local county extension office.
Material
The pan material determines how evenly and quickly heat is transferred from the heat source to the pan
bottom. Some widely used pan materials are:
Aluminum
I
Excellent
heat, conductor.
Some foods will eausc it to darken or pit. Anodizing
,
,
maproves stam resistance. Often used as a bottom eoating to improve the
heating of other pan materials.
NOTE:
canse Remove
metal marks
glass ceramic
cooktops,
yon slideMnminmn
them acrosspans
thewill
cooktop.
metalonmarks
immediately.
(See if
Copper
Stainless Steel
page 1i.)
Excellent heat eonduetor. Discolors easily, requires constant polishing. Often
used as a bottom coating to improve the heating of other pan materials.
Slow heat conductor. Develops hot spots and produces uneven cooking results.
Durable, attractive, easy to clean and stain resistant, will distribute heat better
if other metals (aluminum or copper) are combined or sandwiched together as
a bottom coating.
Cast Iron
Slow heat eonduetor. Cooks evenly once temperature
is reached. Heavy-. Needs
seasoning to make cleaning easier and to prevent sticking and rusting.
Glass or Ceramic
Slow heat eonduetors. Easy to clean. Not recommended for ceramic glass
surfaces beeanse they can scratch the eooktop. Some types may only be used in
the oven.
P0reelam-Eiaamel ......
.....
....
Glass-like substance fused to metal. Heating characteristics depend on base
material (usually aluminmn, stainless steel, carhon steel or cast iron). Available
in color and easy to clean.
Note:Somebrandsof metal smoothbottomcookwarethat generallyperformwellonall typesof rangesare Farberware,
Magnalite,Revere\Vare,Wearever,T-Faland smoothbottomClubAluminum°.
•Brandnamesare the trademarksof respectivemantfl:acturers.
PAGE 6
USING YOUR COIL ELEMENT COOKTOP
Surface
Control
Knobs
Cooking
(select
models)
Recommendations
Your eooktop unit is equipped with control
knobs that provide an infinite choice of heat
• For best results, always use reeonmmnded
eookware.
settings from L. to HI. The knob can be set on
any of the numbered settings or between the
numbered settings,
To operate control: Push in and turn the knob
* Covering pans, whenever possible, speeds
cooking and is more energy efficient. This is
especially important when cooking large
quantities of foods.
in
either
direction
thetodesired
A red
signal
light
will turntoon
indicatesetting.
that one
or
more of the surface elements are on.
• When preparing foods which can be easily
When the control is in any position, other than
scorched or overcooked, start cooking at a
lower setting and gradually increase setting as
needed.
OFF, it may
be turned in any direction without
pushing
down.
• A lower setting can be used when cooking
small quantities of foods or when using a pan
that conducts heat quickly:
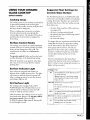
Suggested
° A higher settiug than normaI may be used to
start a cooking process when pans are made
with a material that is slow to conduct heat,
Heat Settings
for
Coil Elements
The size and type of cookware used and the
amount and type of food being cooked will
influence the setting needed for best cooking
results. Electrical line voltage may also vary,
which will affect the needed control setting. The
setting indicated should serve as a guide while
you become familiar with your eooktop.
such as cast iron. Turn down the setting when
the pan has heated up.
° Use a high heat setting to bring liquids to a
boil. When liquid just begins to boil,
REDUCE to a lower heat setting.
vses
To bring liquid to a boil, blanch, melt fat, preheat skillet, bring up pressure in pressure cooker.
NOTE.. Follow instructions in pressure cooker Use and Care Book for cmnplete cooking
directions
ALWAYSREDUCE to a lower heat setting when liquids boil or food begins to cook.
To brown or sear meat, heat fat for deep fat frying, scald for last sauteing or frying.
,.........
,
, To maintain fast boil for large amounts of liquids, for slower frying or sauteing.
To maintain a slow boil for large amounts of liquids, to continue cooking uncovered foods, for
most frying operations,
deep fat frying, or scalding.
I
)) )
I To continue cooking covered foods, maintain boil, stew, braise or steam.
To maintain boil, poach, steam or simmer.
To keep foods warm before serving, poach or simmer.
"Controlknobnumberingmayvaryslightlyaccordingto model
PAGE 7
Care and Cleaning
Element
of Coil
Cooktop
Porcelain
Enamel
(select models)
Make sure the drip bowls are in place
Absence of these bowls during cooking may
subject wiring or components underneath to
damage.
Cooktop
• All spillovers, especially acid spillovers, should
be wiped up as soon aspossible with a dry
cloth. To prevent possible cracking or
chipping of the porcelain, never wipe off a
warm or hot surface with a damp cloth,
• When the surface is cool, clean with warm
soapy water,
• Do not use abrasive or caustic cleaning agents
on the porcelain enamel finish for they will
permanently damage the finish.
Brushed
Chrome
Drip Bowls
Cooktop
Protective Liners--Do not use 'aluminum foil to
line surface unit drip bowls. Improper
installation of these liners may result in a risk of
electric shock, or fire.
Chrome Bowls (select models)
• The drip bowls should be wiped after each
use. For light soil wipe with a soapy cloth. For
medium soil use a mild abrasive cleaner or
plastic scouring pad. To prevent scratching
the finish, do not use any abrasive cleaning
agents. Heavy burned-on soil may be
impossible to remove.
* Blue/gold stains are caused by overheating.
These stains usually occur over a period of
(select models)
time and are permanent.
stains:
To minimize heat
• For light soil wipe with a soapy cloth. For
heavier soil use a mild abrasive cleanser,
rubbing with the grain to avoid streaking the
surface.
1. Avoid excessive use of the high heat
setting. Use it only to start cooking, then
lower the heat setting to fiuish cooking.
2. Use flat bottom pans that do not extend
• After cleaning, rinse and buffthe surface,
more than two inches from the surface
element. If large pans or canners are used,
Coil
alternate the elements that are used.
Elements
Surface elements are self eleaning. Do not
immerse the elements in water.
Porcelain Bowls (select models)
To remove: Raise the elenmnt WHEN COOL
and carefully pull out and away from the
receptacle,
To replace: Insert the terminals of the element
• For light to moderate soil, wipe with a soapy
cloth or use a mild abrasive cleaner such as
Soft Scrub and a scouring pad. Porcelain
bowls may"be washed in a dishwasher or
cleaned in the self-clean cycle of an oven.
into the receptacle. Gently lift up on the outer
edge of the element while guiding the terminals
into the receptacle. Gently press down on the
outer edge of the element until the elenmnt sits
level on the drip bowl.
Controls
Knobs
Rmnove the knobs for cleaning by gently pulling
up. Wash with mild detergent and water. Do not
use abrasive cleaning agents as they will scratch
the finish or remove markings. Rinse, dry and
replace. Control knobs may also be washed in a
dishwasher.
PAGE 8
• For chrome rings, follow the directions above
for chrome bowls.
• On models with separate drip bowls and trim
rings, be sure the drip bowl and chrome trim
ring are properly installed. The notch in the
trim ring should be centered over the screw
securing the receptacle to the maintop. If the
trim ring rests ou this screw, the trim ring and
drip bowl will "rock."
USING
YOUR
CERAMIC
GLASS
COOKTOP
(select models)
Cooking
Areas
The conking areas on your cooktop are identified
by permanent pattm'ns in the ceramic glass
surface. Use the smaller areas for small pans and
the larger areas }br large pans.
When a cooking area is turned on, a red glow
from the element can be seen through the
ceramic glass surface. The red glow will cycle on
and offas the element cycles to maintain the
heat setting.
Suggested
Heat Settings
Ceramic Glass Surface
for
Use the _bllowing chart as a GUIDELINE until
you become more familiar with the ceramic glass
cooktop. Remember that there are many factors
that affect the choice of the heat setting. Anmug
those fhctors are:
the type, flatness and size of the cookware
(see pages 5_6).
-- the type of cooking action desired.
the quanti_ and Lype of food being cooked.
the use of a lid.
-- the electrical voltage.
The cooking area controls are called INFINITE
controls. This type of control provides an infinite
choice of heat settings from LO to HI. The
control can be set either on or between the
settings,
To operate control: Push in and turn the knob,
We suggest that you experiment to find the heat
setting that best suits your particular cooking
needs. Information in the chart is based on
heavy gauge metal cookware. (Do not use
glassware on the ceramic glass cooktop. Glass
ceramic or earthenware pans may scratch the
ceramic glass cooktop and are not reeommended.)
in either direction, to the desired heat setting.
Tuna the control knob to the desired heat
When the control is in any position, other than
off, it may be turned in any direction without
pushing down.
setting. If in doubt as to the correct setting, it is
better to select a lower setting and increase to a
higher setting as needed.
Surface
Setting
Surface
Control
Indicator
Knobs
Light
Your cooktop is equipped with a light(s) to
indicate
when
surface
The off.
light
will
remain
on auntil
the element
element is
is on.
turned
ttI
After a cooking operation, be sure the element
and indicator light are off.
Hot
Surface
Light
After 30 minutes, the eooktop may be too eooI to
keep foods warm; however, the top may still be
too warm to touch. When the HOT
SURFACE indicator light tunas off, the top will
be cool enough to touch.
To bring liquid to a boil, blanch, heat oil
for deep fat frying.
Always reduce to a lower heat setting
when liquids just begin to boil or food
begins to cook.
MED HI To brown or sear meat, scald.
To fast saute.
The eooktop is also equipped with a HOT
SURFACE light. This red light will turn on to
indicate that the cooking area is hot and will
remain on until the area has cooled.
Uses
To maintain fast boil for large anaonnts of
liquids.
MED
To maintain slow boil for large amounts of"
liquids, for frying.
MED LO To continue cooking foods, maintain boil,
stew, braise or steam.
LO
To keep foods warm before serving.
Melting butter or chocolate.
PAGE
Cooking
Recommendations
• BEFORE FIRST USE, CLEAN COOKTOP
as directed in the cleaning chart, page 11.
to Protect
the Cooktop
• For best results, always use recommended
cookware heavy gauge metal with FLAT,
smooth bottoms that do not extend more than
1 inch beyond the cooking area.
• Do not allow plastic, aluminum foil, sugar, or
foods with high sugar content to melt onto the
hot cooktop. If you accidentally melt these
items to the cooktop, remove immediately
while still hot using a razor blade scraper held
carefully with a pot holder. Melted materials
can cause permanent damage to the cooktop.
• Covering pans, whenever possible, speeds
cooking and is more energy" efficient. This is
especially important when cooking large
quantities of foods,
Do not attempt further cleaning until the area
has cooled.
• To protect the ceramic glass top, it is not
recommended to use the top as a work
• The ceramic glass cooking area retains heat
for a period of time after the elements have
been turned off. Put this retained heat to
good use. Tuna the elements off a few minutes
before food is completely cooked and use the
surface, as a cutting board or to cook food
directly on the eooktop without a pan.
• Do not use a trivet or metal stand (such as a
wok ring) between the pan and the cooktop.
These items can mark or etch the surface and
retained heat to complete the cooking,
Because of this heat retention characteristic,
the elements will not respond to changes in
heat settings as quickly as coil elements. In
the event of a potential boilover, remove the
pan from the cooking area.
• When preparing foods which can be easily
scorched or overcooked, start cooking at a
lower setting and gradually increase setting as
needed.
• A lower setting can be used when cooking
small quantities of foods or when nsing a pan
that conducts heat quickly.
• A higher setting than normal may be used to
start a cooking process when using pans made
with a material that is slow to conduct heat,
such as cast iron. Turn down the setting when
the pan has heated up.
• Use a high setting to bring liquids to a boil.
"When liquid just begins to boil, REDUCE to
a lower heat setting.
affect cooking efficiency.
• Disposable aluminum cookware, aluminum
foil or foil containers such as popcorn poppers
are NOT recommended for use on the
ceramic glass cooktop. They will leave metal
marks and may permanently melt onto the
ceramic glass top if the cooking area is turned
on.
• Do not slide metal or glass items across the
ceramic glass cooktop. They may"damage the
top or leave marks which need to be removed
promptly. (See cleaning chart.)
• Do not allow pan to boiI dry as this could
damage the cooktop and the pan.
• To prevent scratching or damage to the
ceramic glass top, do not leave sugar, salt,
sand, soil, shortening or other tats on the
cooking area. Be sure the area is free from
these before turning on the cooking area.
i
!
. •
L_
•
Care
Cleaning
Surface
and
Glass
of Ceramic
each use; dry thoroughly.
• Carefully
WARNING:cooking
areas Betbreare
turned
offandCleaning'
betheCertainsu_aeeall
. . l[
_ :::i:
Controls
.
.
:
]
_-..:,.
i.'
agents as they will scratch
the finish or remove markings. Rinse, dry and
replace.
Control knobs may also be washed in a
dishwasher.
surface
Surface
Cleaning
1. Abrasives
• Make it a practice to wipe eooktop su_ace
with a clean damp cloth or paper towel before
Cleaning
(metal scouring
(oven cleaners,
"
in
pads, cleansing
or pads) will
chlorine
or ammonia)
finish of the ceramic
• To help keep eeoktop clean, be sure bottoms
of pans are clean and dry. Soil from the pan
bottom can be transferred
to the eooktop
surface.
Cleaning
is cool, clean as directed
powders, scouring cleaners
scratch the cooktop.
rust removers
Recommendations
area as they occur with dry
the chart below. DO NOT USE the
following
cleaning
agents:
2. Chemicals
Ceramic
the outside
w'hen
paper wiping
towels,. 615spills.
Be earefulDonotnorto Use
burna damp
hands :._-,:
cloth which may cause steam bums..',
• When
Remove the knobs for cleaning by gently pulling
up. Wash with mild detergent and water. Do not
cleaning
blot up spillovers around
of the cooking
Knobs
use abrasive
spatters,
dust specks, cleansers or water can cause
stains that appear after unit is heated.
]
iseooi.
Invisible
bleaches,
may damage
the
glass eooktop.
3. Glass cleaners which contain
harm the eooktop.
ammonia
may
4. Soiled cloths or sponges will leave an invisible
film on the cooktop which may cause stains
on the surface after area is heated.
Chart
Agents
Directions
Daily cleaning, light to moderate soil.
• Cooktop Cleaning Creme °.
• Liquid dishwashiug detergent.
• Paste of baking soda and water.
Gently apply with a clean cloth, nylon or plastic pad, or paper
towels, rinse completely and dD:
Hea D, soil or brown/gray stains from hard
water or metal marks,
• Cooktop Cleaning Creme*.
• Non-abrasive soft scrubbing cleansers,
such as Bon Ami, or Bar Keepers Friend.
Gently scour with creme or cleansers and clean cloth or paper
towel to remove as much as possible. Then reapp]y creme or
cleansers and let stand for 30 to 45 minutes. Cover with clamp
paper towels and plastic wrap to keep moist. Scour to rein(we
remaining stain. Rinse completely and dry.
Burned-on or crusty soil, or residue.
• Single edge razor blade
(such as Widget by Gillette).
Place edge of single-edge razor on ceramic surface at a 30 °
angle. Very- carefully scrape off soil. Clean remaining soil with
Cooktop Cleaning Creme.
Sugar, plastic, aluminum foil.
• Single-edge razor blade held with a hot
pad or wooden handled stainless steel
spatula.
Scrape from hot surface to a cool area immediately. Clean
residue with Cooktop Cleaning Creme when surface has
cooled,
°Cooktop Cleaning Creme may be purchased from your local authorized dealer or service agency_
PAGE
11
BEFORE YOU CALL FOR SERVICE
Check
these
The cooktop
points
does
not
if...
operate
Metal markings
ceramic
glass
models)
appear
cooktop
on the
(select
• Are any house fuses blown or circuit breakers
tripped?
• Is the cooktop properly connected to an
electric circuit in the house?
• Were metal pans slid across the cooktop,
especially aluminum.
The cooktop
hot enough
sheen appear on the ceramic
cooktop
(select models)
elements
do not get
Brown streaks and/or areas of
discoloration
with a metallic
glass
• Are the snrfaee controls properly- set?
• Were/hod
boilovers burned into the cooktop?
• Is the voltage to the house low?
• Were the bottoms of the pans clean to avoid
• Is the eool_vare bottom FLAT and not
oversized?
soil transfer to the cooktop?
• Was water with hard water minerals allowed
to evaporate on eooktop?
The elements
and/or smoke
• This is normal,
lliny scratches
on the ceramic
emit a slight odor
when first turned on
or abrasions
appear
glass cooktop
(select
models)
• Is the surface free of coarse particles of sugar,
dust, salt, etc. before you placed the pan on
the surface?
* Were correct cleaning products used to dean
cooktop? (no ehlorine bleach, ammonia, rest
removers, oven cleaners)
Chipping
of the ceramic
surface (select models)
• Was a sugar solution, plastic or aluminum foil
allowed to remain on a hot eooktop surface?
For further
• Were proper cleaning products used when
cleaning the surface?
• Was glass cool.rare used?
dealer
assistance
contact
Canadian
CANADA
1-800-688-2002
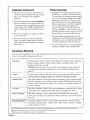
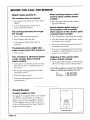
Breaker
Appliance
e
Only
Your appliance is equipped with a circuit breaker
box. The box is located either on a wall or in a
cabinet next to or near the appliance. If part or
all of the appliance does not operate, cheek to
see if one of the breakers has tripped. Reset the
breaker to the ON position.
_
[
e
O
I
4 BREAKER BOX
i
PAGE 12
your Maytag
or call Maytag Customer Serviee:
U.S.
1-800-688-9900
• Were pans with rough bottoms used on the
cooking surface?
Circuit
glass
COOKTOP
WARRANTY
Full One Year WarrantyFor one (1) year from the date of oliginal retail purchase, any part whir, h fails in normal home use will be repaired Mr
replaced free of charge.
Limited
Warranty
After the first year from the date of original retail lmrchase, through the second year, parts which fail in normal home
use will be repaired or replaced free of charge tor the part itselt, with the owner paying all other costs, including labor,
when the appliance is located in the United States or Canada.
Electric Heating Elements:
After the second year from the date of original retail purchase, through the fifth year,
all surface elements (solid disc, coil and smooth top) and glass cooking surfaces which fail in normal home use will be
repaired or replaced free of thane for the pm_ itsdf, _,Ath the owner paying all other costs, including labor, when the
appliance is located in the United States or Canada.
Sealed Gas Burners:
After the second year from the date of original retail purchase, through the tenth yem; sealed
gas burners which fail in nOiTnaI home use will be repaired or repIaced free of charge for the part itself, with the owner
paying all other costs, including labor, when the appliance is located in the United States or Canada.
Canadian l_esidents
This warran_ covers only those applianees installed in Canada that have been listed with Canadian Standards Association
unless the appliances are brought into Canada due to transfer of residence from the United States to Canada.
Limited Parts Warranty Outside
The United States Or Canada
For two ('2) years from the date of original retail prochase, any part which fails in normal home use will be repaired or
replaced free of charge for the part itself, with the owner paying all other costs, including labor, when the appliance is located
outside the United States or Canada.
This Warrant 3, gives you specific legal rights, and you may also have other rights which vary from state to state.
To Receive
Warranty
Service
To locate an authorized sera4.ce company in your area contact the Maytag dealer from whom your appliance was purchased; or call
Maytag Customer Ser,4ee. Should you not receive satis_act(n T warra_ity service, call or write:
Maytag Customer
Service
240 Edwards St. S.E.
Cleveland,
US
TN 37311
1-800-688-9900
CANADA
1-800-688-2002
When contacting Maytag Customer SejYice be sure to provide the model and serial numhers of your appliance, the name and
address of the dealer from whom you purchased the appliance and the date of purchase.
Should you still/_tve a problem, write to: Major Appliance Consumer Action Panel, 20 North Wacker Drive, Chicago,
Illinois 60606. MACAP is an industry sponsored but independent group of consumer expeits who receive and act on
complaints from appliance owners.
NOTE: When writing about an unsolved service problem, please inch.lde the following inibm_ation:
(a) Your name, address and telephone numher;
(b) Model number and serial number (found on the data plate);
(el Nanle aild address of your dealer and date the appliance was bougbt;
(d) A clear description of the problem you are having.
PAGE 13