1
This Operation Guide is for 1650, 2050, and 2550. This Operation Guide mentions that 1650 is a
16 ppm (prints per minute) model, 2050 is a 20 ppm (prints per minute) model, and 2550 is a
25 ppm (prints per minute) model.
Note
This Operation Guide contains information that corresponds to using both the inch and metric
versions of this machine.
This Operation Guide shows messages of the inch version. When using the metric version, see
the messages of the inch version for reference. With regard to the messages in the text, if a
message has only the difference of upper- and lower-case spelling, we show only the message
of the inch version. When there is even a slight difference in the message, we have listed the
information for the inch version followed, in brackets, by the corresponding information for the
metric version.
Guide to This Operation Guide
This operation guide has the following chapters. The content of each chapter is summarized
below for reference.
1 Copier Functions
This chapter explains various settings that can be made in relation to the copier functions of this
machine.
2 Printer Settings
This chapter explains various settings that can be made in relation to the printer functions of this
machine.
3 System Menu
This chapter explains the other general settings that can be made in this machine.
4 Job Accounting
This chapter explains the settings of the job accounting functions.
Appendix
This chapter includes a table of paper that can be used in this machine, a table of specifications,
a chart which explains the combinations of functions and settings that can be used with this
machine, and glossary of terms used in this document.
Guides Supplied with This Machine
The following guides are supplied with this machine. Refer to the guides as needed.
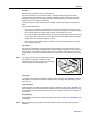
Basic Operation Guide
This Basic Operation Guide contains explanations on the procedures for loading paper and
connection of this product, the basic procedures of copying and printing, and troubleshooting.
Advanced Operation Guide (this guide)
The Advanced Operation Guide contains explanations on copier and printer functions as well as
default settings that can be adjusted on this machine.
KX Printer Driver Installation Guide
This guide describes the procedure to install the printer driver software.
KX Printer Driver Operation Guide
This guide describes how to install and set the printer driver software.
PRESCRIBE Commands Technical Reference
PRESCRIBE is the native language of the Kyocera Mita printers. This Technical Reference
contains the information about how the printing is performed using the PRESCRIBE commands
as well as the font and emulation description. Also included is a list of permanent parameters
and their explanation needed when customizing your printer.
PRESCRIBE Commands Command Reference
Gives a detailed explanation of the PRESCRIBE command syntax and parameters with the aid
of print examples.
i
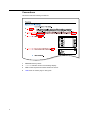
Conventions
This manual uses the following conventions:
3
4
1
2
ii
1
Bold indicates key names.
2
Courier indicates content of the message display.
3
Note contain important information aside from the text.
4
Italic refers to another page or other guide.
CONTENTS
1
Copier Functions ........................................................................................... 1-1
Paper Source Selection ...........................................................................................................1-2
Original Size Selection .............................................................................................................1-3
Image Quality Mode .................................................................................................................1-5
Copy Exposure Adjustment ......................................................................................................1-6
Number of Copies to Be Made .................................................................................................1-7
Zoom Copying ..........................................................................................................................1-8
Auto Zoom Ratio Selection Mode .......................................................................................1-8
Zoom Mode ........................................................................................................................1-9
Preset Zoom Mode .............................................................................................................1-9
Original Orientation ................................................................................................................1-10
Interrupt Mode ........................................................................................................................1-11
Duplex Copying ......................................................................................................................1-13
Split Copying ..........................................................................................................................1-15
Sort Copying ..........................................................................................................................1-17
Offset Copying ........................................................................................................................1-18
Staple Copying .......................................................................................................................1-19
Combine Copying ...................................................................................................................1-20
Combine Copying Modes .................................................................................................1-20
Borderline Types ...............................................................................................................1-24
Setting the Combine Copying ...........................................................................................1-24
Margin Mode ..........................................................................................................................1-26
Border Erase Mode ................................................................................................................1-27
Continuous Copying ...............................................................................................................1-28
Auto Rotation .........................................................................................................................1-29
EcoPrint Mode ........................................................................................................................1-30
Auto Selection Mode ..............................................................................................................1-31
Program Function ...................................................................................................................1-32
2
Printer Settings .............................................................................................. 2-1
Using This Machine as a Network Printer ................................................................................2-2
Menu Hierarchical Diagram ......................................................................................................2-3
Status Page Printing .................................................................................................................2-7
e-MPS Function .......................................................................................................................2-8
Printing Quick Copy/Proof-and-Hold ..................................................................................2-8
Deleting Quick Copy/Proof-and-Hold .................................................................................2-9
Printing Private Print/Stored Job .........................................................................................2-9
Deleting Private Print/Stored Job ......................................................................................2-10
Printing Virtual Mailbox Accumulated Data .......................................................................2-11
Printing Virtual Mailbox List ..............................................................................................2-11
Printing Code Job List ......................................................................................................2-12
e-MPS Detail Settings ......................................................................................................2-13
Interface .................................................................................................................................2-16
Parallel Interface ...............................................................................................................2-16
Network Setting ................................................................................................................2-17
Emulation ...............................................................................................................................2-22
Emulation Mode Selection ................................................................................................2-22
Font ........................................................................................................................................2-25
Font Selection ...................................................................................................................2-25
Font Size ..........................................................................................................................2-26
Courier/Letter Gothic Font Character Pitch ......................................................................2-27
Courier/Letter Gothic Font Setting ....................................................................................2-27
Code Set Selection ...........................................................................................................2-28
Font List Printing ...............................................................................................................2-28
iii
Print Configuration ................................................................................................................. 2-30
Number of Copies ............................................................................................................ 2-30
Reduction Printing ........................................................................................................... 2-31
Print Orientation ............................................................................................................... 2-31
Page Protect Mode .......................................................................................................... 2-32
Line Feed (LF) Action ...................................................................................................... 2-32
Carriage Return (CR) Action ............................................................................................ 2-33
Wide A4 ........................................................................................................................... 2-33
Print Quality ........................................................................................................................... 2-34
KIR Mode ......................................................................................................................... 2-34
EcoPrint Setting ............................................................................................................... 2-35
Resolution Setting ............................................................................................................ 2-35
Print Density .................................................................................................................... 2-36
Memory Card Operation ........................................................................................................ 2-37
Reading Font Data ........................................................................................................... 2-37
Reading Macro Data ........................................................................................................ 2-38
Reading Data ................................................................................................................... 2-38
Reading Program ............................................................................................................. 2-38
Writing Data ..................................................................................................................... 2-39
Deleting Data ................................................................................................................... 2-39
Deleting Font Data ........................................................................................................... 2-39
Deleting Program Data .................................................................................................... 2-40
Deleting Macro Data ........................................................................................................ 2-40
Deleting Language Data .................................................................................................. 2-40
Formatting Memory Card ................................................................................................. 2-40
Printing a Partition List ..................................................................................................... 2-41
Hard Disk Operation .............................................................................................................. 2-43
RAM Disk Operation .............................................................................................................. 2-44
RAM Disk Functions ........................................................................................................ 2-44
RAM Disk Operation ........................................................................................................ 2-44
RAM Disk Size ................................................................................................................. 2-45
Paper Handling ...................................................................................................................... 2-47
Multi-Bypass Tray Mode .................................................................................................. 2-47
Paper Source ................................................................................................................... 2-48
Duplex Print Mode ........................................................................................................... 2-48
Output Destination ........................................................................................................... 2-49
Override A4/Letter ........................................................................................................... 2-49
Other Settings ........................................................................................................................ 2-51
Form Feed Timeout ......................................................................................................... 2-51
Received Data Dump ....................................................................................................... 2-52
Printer Function Resetting ............................................................................................... 2-52
Resource Protect Mode ................................................................................................... 2-53
Auto Continue .................................................................................................................. 2-53
Duplex Printing Error Detection ....................................................................................... 2-54
Stapling Error Detection ................................................................................................... 2-55
Service Status Page Printing ........................................................................................... 2-56
3
System Menu .................................................................................................. 3-1
Default Setting Mode ............................................................................................................... 3-2
Copier Default Settings ...................................................................................................... 3-2
Machine Default Settings ................................................................................................. 3-12
Multi-Bypass Tray Settings .................................................................................................... 3-26
Paper Size ....................................................................................................................... 3-26
Paper Type ...................................................................................................................... 3-28
Browsing and Printing the Total Counter ............................................................................... 3-29
Report Output ........................................................................................................................ 3-31
Language Setting .................................................................................................................. 3-33
User Adjustment .................................................................................................................... 3-34
Drum Refresh .................................................................................................................. 3-34
iv
4
Job Accounting .............................................................................................. 4-1
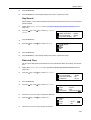
Job Accounting Mode ...............................................................................................................4-2
Managing Accounts ..................................................................................................................4-4
Registering a New Account ................................................................................................4-4
Setting Limit of Use ............................................................................................................4-5
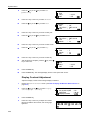
Deleting an Account ...........................................................................................................4-8
Changing Limit of Use ........................................................................................................4-9
All Account Management .......................................................................................................4-10
Individual Account Management ............................................................................................4-11
Enabling Job Accounting ........................................................................................................4-12
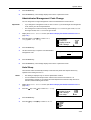
Default Settings ......................................................................................................................4-13
Copier Job Accounting .....................................................................................................4-13
Printer Job Accounting .....................................................................................................4-14
Scanner Job Accounting ...................................................................................................4-14
Fax Job Accounting ..........................................................................................................4-15
Operation against Excess over Limit ................................................................................4-16
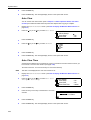
Using Job Accounting ............................................................................................................4-17
Appendix ......................................................................................................Appendix-1
Paper ...........................................................................................................................Appendix-2
Basic Specifications of Paper ................................................................................Appendix-2
Proper Paper Selection .........................................................................................Appendix-2
Special Paper ........................................................................................................Appendix-5
Specifications ..............................................................................................................Appendix-8
Main Body ..............................................................................................................Appendix-8
Copier Functions ...................................................................................................Appendix-9
Printer Functions .................................................................................................Appendix-10
Document Processor (optional) ...........................................................................Appendix-10
Paper Feeder (optional) .......................................................................................Appendix-10
Duplex Unit (optional) .......................................................................................... Appendix-11
Finisher (optional) ................................................................................................ Appendix-11
Job Separator (optional) ...................................................................................... Appendix-11
Environmental Specifications ...............................................................................Appendix-12
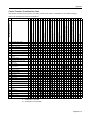
Copier Function Combination Chart ..........................................................................Appendix-13
Glossary ....................................................................................................................Appendix-16
Index ....................................................................................................................Index-1
v
vi
1
Copier Functions
This chapter explains the following topics.
•
Paper Source Selection
•
Original Size Selection
•
Image Quality Mode
•
Copy Exposure Adjustment
•
Number of Copies to Be Made
•
Zoom Copying
•
Original Orientation
•
Interrupt Mode
•
Duplex Copying
•
Split Copying
•
Sort Copying
•
Offset Copying
•
Staple Copying
•
Combine Copying
•
Margin Mode
•
Border Erase Mode
•
Continuous Copying
•
Auto Rotation
•
EcoPrint Mode
•
Auto Selection Mode
•
Program Function
1-1
Copier Functions
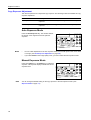
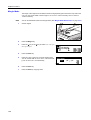
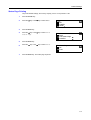
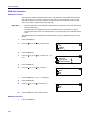
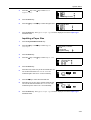
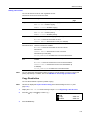
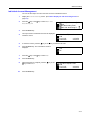
Paper Source Selection
Perform the following procedure to select a paper source (cassette or multi-bypass tray) with the
desired paper size.
1
Set the original.
If Auto is displayed on the message display, copy
paper of the same size as the original is automatically
selected.
Notes
2
Notes
3
1-2
Ready to copy.
100%
Auto
Auto
1
•
This auto paper selection function can be disabled. (For details, see Paper Selection on
page 3-4.)
•
You can set a paper size for the cassette. (For details, see Paper Size (cassettes 1 to 4) on
page 3-13.)
•
You can set a paper type for the cassette. (For details, see Paper Type (cassettes 1 to 4) on
page 3-14.)
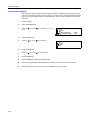
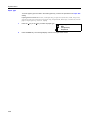
To change the paper size, press the Paper Select key
to select the desired paper source.
•
When using the multi-bypass tray, set the paper size and the paper type referring to
Multi-Bypass Tray Settings on page 3-26.
•
You can set the machine to display the Bypass Paper size screen when the multi-bypass
tray is selected. (See Multi-Bypass Tray Confirmation Display on page 3-14.)
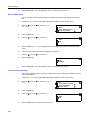
Press the Start key. Copying starts.
Copier Functions
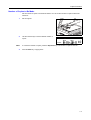
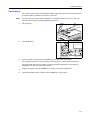
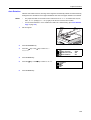
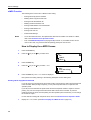
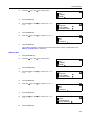
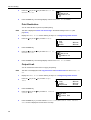
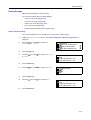
Original Size Selection
With manual original size selection, this machine can scan only the part of a specified size of the
original for copying.
Also you can use an irregular size original by inputting the original size.
Selecting an Original Size from Regular Size
1
Set the original.
2
Press the Original Size key.
3
Press the S key or the T key to select the desired
original size.
4
Press the Enter key.
5
Press the Start key. Copying starts.
Original Size:
* Auto
Input size
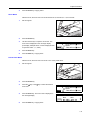
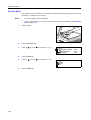
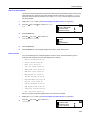
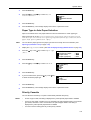
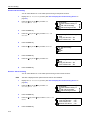
Selecting an Original Size from Other Regular Sizes
1
Set the original.
2
Press the Original Size key.
3
Press the S key or the T key to select Other
Regular Size.
Original Size:
Other Regular Size
4
Press the Enter key.
5
Press the S key or the T key to select the desired
original size.
Other Regular Size:
1-3
Copier Functions
6
Press the Enter key.
7
Press the Start key. Copying starts.
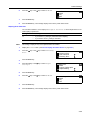
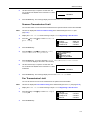
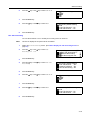
Inputting the Original Size
1-4
1
Set the original.
2
Press the Original Size key.
3
Press the S key or the T key to select Input size.
4
Press the Enter key.
5
Press the < key or the > key to set the vertical size.
You can set the vertical size to 2" to 11 5/8" in 1/8"
increments [50 to 297 mm in 1 mm increments].
6
Press the T key to move to the horizontal size.
7
Press the < key or the > key to set the horizontal size.
You can set the horizontal size to 2" to 17" in 1/8"
increments [50 to 432 mm in 1 mm increments].
8
Press the Enter key.
9
Press the Start key. Copying starts.
Original Size:
* Auto
Input size
Input size
Input size
2"
2"
2"
2"
Copier Functions
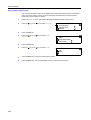
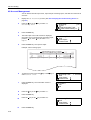
Image Quality Mode
You can select the image quality mode according to the type of originals.
Image quality mode
Description
Text + Photo
Select to copy originals that contain a mixture of both text and
photographs.
Text
Select to copy originals that contain large amounts of text, such as
documents.
Photo
Select to copy originals that contain photographs.
1
Set the original.
2
Press the image quality mode select key to select the
desired mode.
3
Press the Start key. Copying starts.
Note
•
You can adjust the copy exposure in each of the image quality modes. (See Exposure
Adjustment for Text + Photo Originals on page 3-7, Exposure Adjustment for Text
Originals on page 3-8 and Exposure Adjustment for Photo Originals on page 3-8.)
•
If you select the Photo mode, the manual copy exposure mode is set. (See Copy Exposure
Adjustment on page 1-6.)
1-5
Copier Functions
Copy Exposure Adjustment
This section explains how to adjust the copy exposure. The following modes are available for copy
exposure adjustment.
Mode
Description
Auto exposure mode
The machine detects the density of the original and sets the optimum
exposure.
Manual exposure mode
The operator presses the Lighter key or the Darker key to adjust the
exposure.
Auto Exposure Mode
Press the Auto Exposure key. The machine detects
the density of the original and sets the optimum
exposure.
Notes
•
You can make adjustments to the auto exposure mode if the overall copies come out too dark
or too light. (See Auto Exposure Adjustment on page 3-6.)
•
If you select Photo as the image quality mode, you cannot select the auto exposure mode.
Manual Exposure Mode
Press the Lighter key or the Darker key to adjust the
exposure. The exposure display indicates the current
exposure level.
Note
1-6
You can change the default setting for the copy exposure to the auto exposure mode. (See
Exposure Mode on page 3-3.)
Copier Functions
Number of Copies to Be Made
Set the number of copies to be made as follows. You can set the number of copies to 999 at the
maximum.
1
Set the original.
2
Use the numeric keys to set the desired number of
copies.
Ready to copy.
100%
Note
3
Auto
Auto
10
To cancel the number of copies, press the Stop/Clear key. The number of copies is reset to 1.
Press the Start key. Copying starts.
1-7
Copier Functions
Zoom Copying
The zoom ratio can be changed to reduce or enlarge the copies. The following modes are available
for zoom copying.
Mode
Description
Auto zoom ratio selection
mode
Original images are reduced or enlarged according to the selected
paper size.
Zoom mode
The zoom ratio can be changed from 25 % to 200 % in 1 %
increments.
Preset zoom mode
A preset zoom ratio can be used to reduce or enlarge original
images.
Inch Specification
200 % (5.5 × 8.5 Æ 11 × 17), 154 % (5.5 × 8.5 Æ 8.5 × 14),
129 % (8.5 × 11 Æ 11 × 17), 121 % (8.5 × 14 Æ 11 × 17),
78 % (8.5 × 14 Æ 8.5 × 11), 77 % (11 × 17 Æ 8.5 × 14),
64 % (11 × 17 Æ 8.5 × 11), 50 % (11 × 17 Æ 5.5 × 8.5)
Metric Specification
200 % (A5 Æ A3), 141 % (A4 Æ A3, A5ÆA4), 127 % (Folio Æ A3),
106 % (11 × 15" Æ A3), 90 % (Folio Æ A4), 75 % (11 × 15" Æ A4),
70 % (A3 Æ A4, A4 Æ A5), 50 % (A3 Æ A5)
Metric Specification (Asia Pacific)
200 % (A5 Æ A3), 141 % (A4 Æ A3, B5 Æ B4), 122 % (A4 Æ B4,
A5 Æ B5), 115 % (B4 Æ A3, B5 Æ A4), 86 % (A3 Æ B4, A4 Æ B5),
81 % (B4 Æ A4, B5 Æ A5), 70 % (A3 Æ A4, B4 Æ B5),
50 % (A3 Æ A5)
Auto Zoom Ratio Selection Mode
Original images are reduced or enlarged according to the selected paper size.
Note
You can set a default setting so that the auto zoom ratio selection mode is selected when you select
a cassette. (See Default Magnification on page 3-6.)
1
Set the original.
2
Press the AUTO%/100% key. AUTO % is displayed on
the message display.
Ready to copy.
Auto % Auto
100%
3
Press the Paper Select key to select the copy paper.
The zoom ratio is displayed on the message display.
Ready to copy.
Auto % Auto
129%
1-8
1
1
Copier Functions
4
Press the Start key. Copying starts.
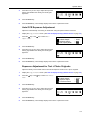
Zoom Mode
With this mode, the zoom ratio can be set between 25 % and 200 % in 1 % increments.
1
Set the original.
2
Press the Zoom key.
3
Use the numeric keys to input the zoom ratio. The
zoom ratio is displayed on the message display.
(The display example shows a screen displayed when
an operator enters 1, 1, and 8.)
4
Press the Enter key.
5
Press the Start key. Copying starts.
Zoom:
118%
121%:8.5x14
100%:
78%:8.5x14
11x17
121%:8.5x14
100%:
78%:8.5x14
11x17
8.5x11
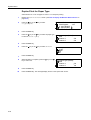
Preset Zoom Mode
With this mode, the zoom ratio can be set to one of the preset ratios.
1
Set the original.
2
Press the Zoom key.
3
Press the S key or the T key to select the desired
zoom ratio.
Zoom:
100%
4
Press the Enter key. The zoom ratio is displayed on
the message display.
Ready to copy.
121%
5
8.5x11
Auto
Auto
1
Press the Start key. Copying starts.
1-9
Copier Functions
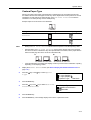
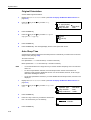
Original Orientation
You must specify the orientation of the original when using the following functions: duplex copying,
split copying (from 2-sided originals), margin mode, border erase mode, combine copying, auto
selection mode (optional), and staple copying (optional).
When the originals are set on the platen:
Original
Rear
Left top
When the originals are set in the document processor:
Original
Note
1-10
Rear
Left top
You can change the default setting of the orientation of the original. (See Original Orientation on
page 3-18.)
1
Press the Function key.
2
Press the S key or the T key to select Orig.
direction.
3
Press the Enter key.
4
Press the S key or the T key to select Rear [Back
Edge] or Left top [Left].
5
Press the Enter key.
Function:
End
Orig. direction
Continuous scan
Orig. direction:
* Rear
Left top
: Rear
: Off
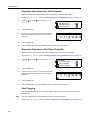
Copier Functions
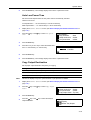
Interrupt Mode
The interrupt mode can be used to stop output of copying or another job temporarily and to output
urgent copy or print data or received fax data. After the interrupt processing is complete, the
interrupted job can be resumed.
The following modes are available for the interrupt function.
Mode
Description
Interrupt copy
•
This mode can be used to stop copying and to make a copy of
a different original at different settings. After the interrupt copy
has been produced, the interrupted copying can be resumed at
the same settings in effect prior to the interruption.
•
This mode can also be used to stop output of a job and to make
a copy of another job. After the interrupt copy has been
produced, the interrupted job is resumed.
Priority output
This mode can be used to interrupt output of a job and to output
print data or received fax data with priority. After priority output is
complete, the interrupted job is resumed.
Note
To use the fax functions, the optional fax kit must be installed.
During a Copy Job
1
Press the Interrupt key. Interrupt mode OK
[Interrupt mode] is displayed.
2
Store the originals for the current copying.
3
Set the original for interrupt copying and perform copying.
4
After the interrupt copying is complete, press the Interrupt key. The settings for the interrupted job
are restored.
5
Replace the original with the originals that have been stored. Press the Start key to resume
copying.
During Output
1
Note
2
Press the Interrupt key during output. Select Interrupt mode is displayed.
If the machine has neither print data nor received fax data, Interrupt mode OK [Interrupt
mode] is displayed. Proceed to step 4.
Press the S key or the T key to select the desired
interrupt mode.
Select Interrupt mode.
Interrupt copy
Priority:Printer
Priority:Fax
1-11
Copier Functions
Note
3
•
Priority:Printer is displayed when the machine has print data.
•
Priority:Fax is displayed when the machine has received fax data.
Press the Enter key.
If you have selected Interrupt copy, message Interrupt mode OK [Interrupt mode] is
displayed. Proceed to the next step.
If you have selected Priority:Printer or Priority:Fax, output of data starts. Proceed to
step 5.
1-12
4
Set the original for interrupt copying and perform copying.
5
After the interrupt job is complete, press the Interrupt key. The interrupted job resumes.
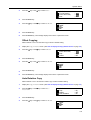
Copier Functions
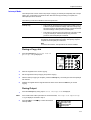
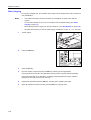
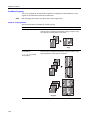
Duplex Copying
Two-sided copies can be made from a variety of originals including double-page spread or
two-sided originals.
The optional duplex unit must be installed.
The following modes are available for duplex copying.
Mode
Description
1 sided->2 sided
One-sided originals are copied onto the front and back sides of the
[1-sided->2-sided]
copy paper. If the number of originals is odd, the back side of the
(2-sided copying from 1-sided last copy page is blank.
originals)
Original
Copy
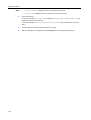
Note
In the 1-sided to 2-sided mode, select the following setting.
•
Stitch at left/right of originals Æ Finished stitch at left of copies:
The images for the back side are copied without rotation...A
•
Stitch at left/right of originals Æ Finished stitch top of copies:
The images for the back side are rotated 180 degrees and
copied. Finished copies can be bound at the top so that
double-page spread pages are copied in the same
orientation...B
ghi
def
A
ghi
B
ghi
abc
abc
abc
def
Note
def
Original
Copy
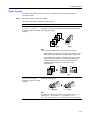
2 sided->2 sided
Front and back sides of originals are copied in the same way onto
[2-sided->2-sided]
both sides of copy paper.
(2-sided copying from 2-sided
originals)
Original
Copy
Note
The paper sizes that can be used are A3 to A5R, Folio, 11 × 17"
(Ledger), 8 1/2 × 14" (Legal), 8 1/2 × 11" (Letter), 11 × 8 1/2",
5 1/2 × 8 1/2" (Statement), 8 1/2 × 13" (Oficio II), 8K, 16K, and 16KR.
1-13
Copier Functions
Mode
Description
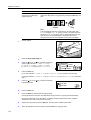
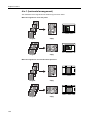
Book->2-sided (2-sided
copying from double-page
spread originals)
A double-page spread original of magazines, books, etc. can be
copied onto both sides of copy paper by pressing the Start key one
time.
Original
Copy
Note
The original sizes that can be used are A3, B4, A4R, B5R, A5R,
11 × 17" (Ledger), 8 1/2 × 11" (Letter), and 8K. The paper sizes are
limited to 11 × 8 1/2" and 16K in the inch specifications and A4, B5,
and 16K in the metric specifications. The paper size can be
changed and the zoom ratio adjusted to fit the size of the paper.
1
Set the original.
2
Press the Duplex/Split Page key.
3
Press the S key or the T key to select the desired
duplex copy mode from 1 sided->2 sided
[1-sided->2-sided], 2 sided->2 sided
[2-sided->2-sided], and Book->2-sided.
4
Press the Enter key.
Duplex/Split Page:
1 sided 2 sided
2 sided 2 sided
Book 2-sided
If you have selected 1 sided->2 sided [1-sided->2-sided], proceed to the next step.
If you have selected 2 sided->2 sided [2-sided->2-sided], or Book->2-sided, proceed to
step 7.
5
Press the S key or the T key to select the desired
finished stitch side.
6
Press the Enter key.
7
Press the Start key. Scanning of the original starts.
Saddle Stitch Direction:
Left side
Top side
If the originals have been set in the optional document processor, copying starts automatically.
If the original has been set on the platen, a message prompting replacement of the original is
displayed. In this case, proceed to the next step.
1-14
8
Replace the original and press the Start key. Scanning of the original is performed.
9
When all originals have been scanned, press the Enter key. Copying starts.
Copier Functions
Split Copying
Each page of double-page spread or two-sided originals is copied separately.
The following modes are available for split copying.
Mode
Description
2 sided->1 sided
[2-sided->1-sided] (Split
copying from double-page
spread originals)
Each page of two-sided originals is copied separately.
1
2
1
2
Original
Copy
Book->1-sided (Split
Each page of double-page spread originals of magazines, books,
copying from 2-sided originals) etc. is copied separately.
1
2
Original
2
1
Copy
Note
The original sizes that can be used are A3, B4, A4R, B5R, A5R,
11 × 17" (Ledger), 8 1/2 × 11" (Letter), and 8K. The paper sizes are
limited to 11 × 8 1/2" and 16K in the inch specifications and A4, B5,
and 16K in the metric specifications. The paper size can be
changed and the zoom ratio adjusted to fit the size of the paper.
1
Set the original.
2
Press the Duplex/Split Page key.
3
Press the S key or the T key to select the desired split
copy mode from 2 sided->1 sided
[2-sided->1-sided] and Book->1-sided.
4
Press the Enter key.
Duplex/Split Page:
Book 2-sided
2 sided 1 sided
Book 1-sided
If you have selected 2 sided->1 sided [2-sided->1-sided], proceed to the next step.
If you have selected Book->1-sided, proceed to step 7.
5
Press the S key or the T to select the original stitch
side.
6
Press the Enter key.
Original stitch side:
Left side
Top side
1-15
Copier Functions
7
Press the Start key. Scanning of the original starts.
If the originals have been set in the optional document processor, copying starts automatically.
If the original has been set on the platen, a message prompting replacement of the original is
displayed. In this case, proceed to the next step.
1-16
8
Replace the original and press the Start key. Scanning of the original is performed.
9
When all originals have been scanned, press the Enter key. Copying starts.
Copier Functions
Sort Copying
Since copying in this mode is performed after multiple originals have been scanned and memorized,
a required number of collated copy sets can be produced.
Note
If the optional document processor is installed, you can select whether or not to turn on the sort
mode at a default setting. (See Sort Copying on page 3-8.)
1
Set the original.
2
Press the Sort key.
3
Input the number of copies and press the Start key. Scanning of the original starts.
If the originals have been set in the optional document processor, copying starts automatically.
If the original has been set on the platen, a message prompting replacement of the original is
displayed. In this case, proceed to the next step.
4
Replace the original and press the Start key. Scanning of the original is performed.
5
When all originals have been scanned, press the Enter key. Copying starts.
1-17
Copier Functions
Offset Copying
For copying of multiple sets, the orientation of the copies can be changed at the end of each set for
easy classification.
Notes
•
If the optional document processor or finisher is not installed, use this function with sort
copying.
•
You can select whether or not to turn on the offset mode at a default setting. (See Offset
Copying on page 3-9.)
•
When setting the offset copying, turn the auto rotation on. (See Auto Rotation on page 1-29.)
•
The paper sizes that can be used for offset copying are limited to A4, B5, 11 × 8 1/2", and 16K.
1
Set the original.
2
Press the Offset key.
3
Press the Sort key.
4
Input the number of copies and press the Start key. Scanning of the original starts.
If the originals have been set in the optional document processor, copying starts automatically.
If the original has been set on the platen, a message prompting replacement of the original is
displayed. In this case, proceed to the next step.
1-18
5
Replace the original and press the Start key. Scanning of the original is performed.
6
When all originals have been scanned, press the Enter key. Copying starts.
Copier Functions
Staple Copying
Copies can be stapled at the upper left or upper right corner.
Note
The optional finisher must be installed.
The relation between the orientation of originals and the stapling position is shown below.
Original
Copy
Original
Copy
1
Set the original.
2
Press the Staple key.
3
Press the S key or the T key to select the desired
stapling position.
4
Press the Enter key.
5
Press the Start key. Scanning of the original starts.
Staple:
Left Top
Right Top
If the originals have been set in the optional document processor, copying starts automatically.
If the original has been set on the platen, a message prompting replacement of the original is
displayed. In this case, proceed to the next step.
6
Replace the original and press the Start key. Scanning of the original is performed.
7
When all originals have been scanned, press the Enter key. Copying starts.
1-19
Copier Functions
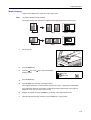
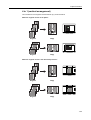
Combine Copying
Two or four originals can be reduced and copied onto a single sheet. Also borderlines of each
original can be marked with solid lines or dotted lines.
Note
Both the original size and the copy paper size must be regular sizes.
Combine Copying Modes
The following modes are available for combine copying.
Mode
Description
2 in 1 [2-UP]
Use this mode to copy two originals onto one sheet. This mode can
also be used in conjunction with duplex copying in order to copy
four originals onto both sides of one sheet.
2
1
Original
4 in 1 [4-UP] (horizontal
arrangement)
4 in 1 [4-UP] (vertical
arrangement)
2
Copy
Use this mode to copy four originals onto one sheet. This mode can
also be used in conjunction with duplex copying in order to copy
eight originals onto both sides of one sheet.
Original
1-20
1
Copy
Copier Functions
2 in 1
The orientations of the originals and the finished copy are shown below.
When the originals are set on the platen:
Original
Copy
Original
Copy
When the originals are set in the document processor:
Original
Copy
Original
Copy
1-21
Copier Functions
4 in 1 (horizontal arrangement)
The orientations of the originals and the finished copy are shown below.
When the originals are set on the platen:
Original
Copy
Original
Copy
When the originals are set in the document processor:
1-22
Original
Copy
Original
Copy
Copier Functions
4 in 1 (vertical arrangement)
The orientations of the originals and the finished copy are shown below.
When the originals are set on the platen:
Original
Copy
Original
Copy
When the originals are set in the document processor:
Original
Copy
Original
Copy
1-23
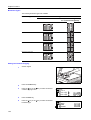
Copier Functions
Borderline Types
The following borderline types are available.
Borderline type
Copy
2 in 1
4 in 1 (horizontal arrangement)/
4 in 1 (vertical arrangement)
None
Solid
Dotted
Mark [Cropmark]
Setting the Combine Copying
1-24
1
Set the original.
2
Press the Combine key.
3
Press the S key or the T key to select the desired
combine copying mode.
4
Press the Enter key.
5
Press the S key or the T key to select the desired
borderline type.
Combine:
2 in 1
4 in 1 (Z)
4 in 1 (N)
Border line:
None
Solid
Dotted
Copier Functions
6
Press the Enter key
7
Press the Start key. Scanning of the original starts.
If the originals have been set in the optional document processor, copying starts automatically.
If the original has been set on the platen, a message prompting replacement of the original is
displayed. In this case, proceed to the next step.
8
Replace the original and press the Start key. Scanning of the original is performed.
9
When all originals have been scanned, press the Enter key. Copying starts.
1-25
Copier Functions
Margin Mode
The image of the original can be shifted to make a margin (blank) space at the left or top side on the
copy. You can set the width of each margin to 1/8" to 3/4" in 1/8" increments [1 mm to 18 mm in
1 mm increments].
Note
1-26
You can set the default value of the margin width. (See Margin Width Default Value on page 3-10.)
1
Set the original.
2
Press the Margin key.
3
Press the S key or the T key to select Left Margin
or Top Margin.
4
Press the Enter key.
5
Press the < key or the > key to set the margin width.
You can set the width to 1/8" to 3/4" in 1/8" increments
[1 mm to 18 mm in 1 mm increments].
6
Press the Enter key.
7
Press the Start key. Copying starts.
Margin:
Left Margin
Top Margin
Margin width:
1/4"
1/8"
3/4"
Copier Functions
Border Erase Mode
Shadows that may appear around the edges of copies can be erased.
The following modes are available for border erase function.
Note
Mode
Description
Sheet Erase
Use this mode to erase shadows that may appear around the edges of
copies made from sheet originals. You can set the width of the border
to be erased to 1/8" to 3/4" in 1/8" increments [1 mm to 18 mm in 1 mm
increments].
Book Erase
Use this mode to make clean copies from a thick book. You can set the
width of the border to be erased to 1/8" to 3/4" in 1/8" increments
[1 mm to 18 mm in 1 mm increments].
You can set the default value of the border erase width. (See Border Erase Width Default Value
on page 3-10.)
1
Set the original.
2
Press the Border Erase key.
3
Press the S key or the T key to select Sheet Erase
or Book Erase.
4
Press the Enter key.
5
Press the < key or the > key to set the border erase
width. You can set the width to 1/8" to 3/4" in 1/8"
increments [1 mm to 18 mm in 1 mm increments].
6
Press the Enter key.
7
Press the Start key. Copying starts.
Border Erase:
Sheet Erase
Book Erase
Border Erase width:
1/4"
1/8"
3/4"
1-27
Copier Functions
Continuous Copying
The continuous copying function allows multiple originals to be separated into some blocks, to be
scanned at more than one time, and to be copied in one batch. Since multiple originals of the same
type are scanned in multiple steps to accumulate data in memory, many originals can be copied in
one batch.
1-28
1
Set the originals.
2
Press the Function key.
3
Press the S key or the T key to select Continuous
scan.
4
Press the Enter key.
5
Press the S key or the T key to select On.
6
Press the Enter key.
7
Press the S key or the T key to select End.
8
Press the Enter key.
9
Press the Start key. Scanning of originals starts.
Function:
End
Orig. direction
Continuous scan
: Rear
: Off
Continuous scan:
* Off
On
10
Replace the originals and press the Start key. Scanning of originals of the next step starts.
11
When all originals have been scanned, press the Enter key. Copying starts.
Copier Functions
Auto Rotation
With the auto rotation function, the image of the original is automatically rotated counterclockwise by
90 degrees if the orientation of the original is different from that of the paper loaded in the cassette.
Notes
•
The paper sizes that can be used for auto rotation are A4/11 × 8 1/2" or smaller sizes. A3, B4,
Folio, 11 × 17" (Ledger), 8 1/2 × 14" (Legal) or 8K cannot be used for auto rotation.
•
You can select whether or not to enable auto rotation at a default setting. (See Auto Rotation
Copy on page 3-9.)
1
Set the original.
2
Press the Function key.
3
Press the S key or the T key to select Auto
Rotation.
4
Press the Enter key.
5
Press the S key or the T key to select On or Off.
6
Press the Enter key.
Function:
Orig. direction
Continuous scan
Auto Rotation
: Rear
: Off
: On
Auto Rotation:
Off
* On
1-29
Copier Functions
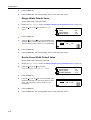
EcoPrint Mode
The ecoprint mode can reduce toner consumption. Use this mode when high quality copies are not
necessary, for example, for trial copying.
Notes
1-30
•
The copy exposure will be a little lighter.
•
You can select whether or not to turn on the ecoprint mode at a default setting. (See EcoPrint
Mode on page 3-4.)
1
Set the original.
2
Press the Function key.
3
Press the S key or the T key to select EcoPrint.
4
Press the Enter key.
5
Press the S key or the T key to select On or Off.
6
Press the Enter key.
Function:
Continuous scan
Auto Rotation
EcoPrint
EcoPrint :
* Off
On
: Off
: On
: Off
Copier Functions
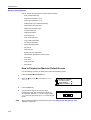
Auto Selection Mode
With the auto selection mode, you need not use the Paper Select key to specify the paper size
when using the optional document processor. The original sizes are detected one by one and each
original is automatically copied to a sheet of the same size.
Notes
•
The maximum number of sheets that can be set in the document processor in this mode is 30.
•
The original sizes that can be used for the auto selection mode:
Inch Specification — 11 × 8 1/2" and 11 × 17" (Ledger) or 8 1/2 × 14" (Legal) and 8 1/2 × 11"
(Letter)
Metric Specification — A3 and A4, folio and A4R, or B4 and B5.
The original width must be the same.
1
Set the originals in the document processor.
2
Press the Auto Selection key.
3
Press the Start key. Copying starts.
1-31
Copier Functions
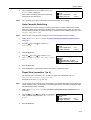
Program Function
Up to eight combinations of copy modes and functions displayed on the operation panel can be
registered as a single program.
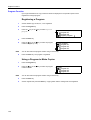
Registering a Program
1
Set the desired copy modes, etc., to be registered.
2
Press the Program key.
3
Press the S key or the T key to select Register
program.
4
Press the Enter key.
5
Press the S key or the T key to select the program
number to register (1 to 8).
Note
6
Program:
Program #7
Program #8
Register program.
Register program:
Program #1
Program #2
Program #3
You can also select the program number using a numeric key.
Press the Enter key. The program is registered.
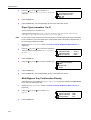
Using a Program to Make Copies
1
Press the Program key.
2
Press the S key or the T key to select the program
number to recall.
Note
1-32
Program:
Program #1
Program #2
Program #3
You can also select the program number using a numeric key.
3
Press the Enter key.
4
Set the originals and press the Start key. Copying starts with the settings that were registered.
2
Printer Settings
This chapter explains the settings required for using the printer functions. For setting operation
required for using this machine as a network printer, use the operation panel.
The principal settings that can be made are shown below.
•
Using This Machine as a Network Printer
•
Menu Hierarchical Diagram
•
Status Page Printing
•
e-MPS Function
•
Interface
•
Emulation
•
Font
•
Print Configuration
•
Print Quality
•
Memory Card Operation
•
Hard Disk Operation
•
RAM Disk Operation
•
Paper Handling
•
Other Settings
2-1
Printer Settings
Using This Machine as a Network Printer
To use this machine as a network printer, use the procedure below for the setting.
Preparation of network connection environment
(Assignment of IP address, etc.)
È
Connection of network cable
(Refer to Chapter 2 in Basic Operation Guide, Connecting the Network Cable.)
È
Setting operation from the operation panel of this machine (See this chapter.)
Principal setting items
•
Network
•
Emulation selection
•
Number of copies and print orientation
•
Print quality
•
Paper sizes for cassette and multi-bypass tray
È
Installation and setting operation of printer driver
(Refer to the KX Printer Driver Operation Guide.)
È
Printing from application
2-2
Printer Settings
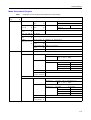
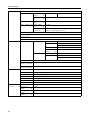
Menu Hierarchical Diagram
Note
> displayed on each setting screen indicates the current setting.
Print Status No, Print
Page
`
e-MPS
` Quick Copy
` Select User
Select JOB
Name
`
` Copies: ###
Private/
Stored
Select User
Select JOB
` Name
`
` Copies: ###
Print VMB
Data
`
Tray ###
Delete
Enter User ID
Delete
Enter User ID
List of VMB ` No, Print
List of code No, Print
JOB
`
e-MPS
Quick Copy ` Number of JOB: 0 to 50
Configuration Temp Code Job 0 to 9999 M Byte
` Size
`
Perm Code Job 0 to 9999 M Byte
Size
`
VMB Size
Interface
` Parallel
Network
` 0 to 9999 M Byte
` Auto, Normal, High speed, Nibble (high)
` NetWare
` On, Off
Change #
TCP/IP
` Auto, 802.3, Ethernet II,
802.2, 802.3 SNAP
` On, Off
Change #
` DHCP
IP Address
` On, Off
` ###.###.###.###
Subnet Mask ` ###.###.###.###
Gateway
EtherTalk
` ###.###.###.###
` On, Off
Network
On, Off
Status Page `
USB
Option
` NetWare
` On, Off
Change #
TCP/IP
` Auto, 802.3, Ethernet II,
802.2, 802.3 SNAP
` On, Off
Change #
` DHCP
IP Address
` On, Off
` ###.###.###.###
Subnet Mask ` ###.###.###.###
Gateway
EtherTalk
` On, Off
Opt.
StatusPage
`
` ###.###.###.###
On, Off
2-3
Printer Settings
Emulation
` PCL 6
KC-GL
` KC-GL Pen
Adjust
Pen (1 to 8)
KC-GL Page
Set
`
` Print KPDL
Errs
`
KPDL (AUTO) ` Print KPDL
Errs
`
KPDL
Alt.
Emulation
` 01 to 99 dot(s)
`
A2, A1, A0, B3, B2, B1, B0, SPSZ
On, Off
On, Off
PCL6, KC-GL, Line Printer, IBM Proprinter,
` Diablo 630, EPSON LQ-850
Line Printer
IBM Proprinter
Diablo 630
EPSON LQ-850
Font
` Select Font ` Internal
` I### ID
Detail
` I###
` 4 to 999.75 Point
0.44 to 99.99 CPI
Option
Courier
` Dark, Regular
Letter
Gothic
`
` #### ID
Detail
Dark, Regular
` S###, M###, H###, O###
` 4 to 999.75 Point
0.44 to 99.99 CPI
Code Set
` #####
List of
No, Print
Inter. Fonts`
List of
No, Print
Option Fonts`
Page Set
` Copies
` 1 to 999
Zoom(Reduce)` Paper size ###, Print size ###
Orientation ` Portrait, Landscape
Page Protect` Auto, On
Print
Quality
2-4
LF Action
` LF only, CR and LF, Ignore LF
CR Action
` CR only, CR and LF, Ignore CR
Wide A4
` On, Off
KIR Mode
` Ecoprint
Mode
` On, Off
On, Off
`
Resolution
` Fast1200 Mode, 600 dpi, 300 dpi
Print
Density
`
1 to 5
Printer Settings
HARD DISK
` Read Data
Read Program
Write Data
` OK
Delete Data
Delete Font
Delete Program
Delete Macro
Delete the language
RAM Disk
Mode
Format
` No, OK
List of
Partitions
`
On, Off
` Change #
No, Print
` RAM Disk
Size
1 to 1024 Mbyte
`
Read Data
Read Program
Write Data
` OK
Delete Data
Delete Font
Delete Program
Delete Macro
Delete the language
List of
Partitions
Memory Card ` Read Fonts
` OK
Read Macro
` OK
No, Print
`
Read Data
Read Program
Write Data
` OK
Delete Data
Delete Font
Delete Program
Delete Macro
Delete the language
Paper
Handling
Format
` OK
List of
Partitions
`
No, Print
Bypass Mode ` Cassette, First
` Feed Select ` Bypass, Cassette 1 (to 4)
Duplex Mode ` None, Short edge bind, Long edge bind
Stack Select` Top tray, Finisher, Job Separator
Override
A4/LT
On, Off
`
2-5
Printer Settings
Others
` Form Feed
Time Out
0 to 495 sec.
`
Print
HEX-DUMP
`
OK
Printer
Reset
`
Resource
Prot.
`
Auto
Continue
On, Off
` Change #
Finishing
Error
Proces.
On, Off
` Duplex print`
On
Off, Permanent, Perm/Temp
` 0 to 495 sec.
Staple mode ` On, Off
Service
` Print Status No, Print
Page
`
Paper Feed
2-6
` Normal, Special
Printer Settings
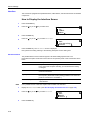
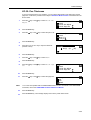
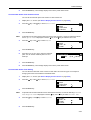
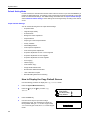
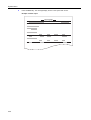
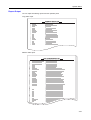
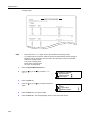
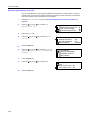
Status Page Printing
The printer default settings, the memory capacity, and so on are printed in a list.
1
Press the Printer key.
2
Press the S key or the T key to select MENU.
3
Press the Enter key.
4
Press the S key or the T key to select Print
Status Page.
5
Press the Enter key.
6
Press the S key or the T key to select Print.
7
Press the Enter key. The status page is printed.
Ready
GO
CANCEL
MENU
Menu
Back
Print Status Page
Interface
Print Status Page
No
Print
2-7
Printer Settings
e-MPS Function
The following items can be set in e-MPS function setting.
Notes
•
Printing Quick Copy/Proof-and-Hold
•
Deleting Quick Copy/Proof-and-Hold
•
Printing Private Print/Stored Job
•
Deleting Private Print/Stored Job
•
Printing Virtual Mailbox Accumulated Data
•
Printing Virtual Mailbox List
•
Printing Code Job List
•
e-MPS Detail Settings
•
To use the e-MPS functions, the optional hard disk must be installed. For details on e-MPS,
refer to the KX Printer Driver Operation Guide.
•
Even if the RAM Disk Operation (see page 2-44) is turned On, the e-MPS function can be
used. In this case, only proof-and-hold and printing private print can be used.
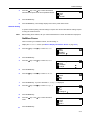
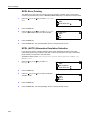
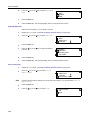
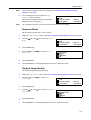
How to Display the e-MPS Screen
1
Press the Printer key.
2
Press the S key or the T key to select MENU.
3
Press the Enter key.
4
Press the S key or the T key to select e-MPS.
5
Press the Enter key. The e-MPS screen is displayed.
Ready
GO
CANCEL
MENU
Menu
Back
Print Status Page
e-MPS
Next, perform the setting referring to the following description of each setting item.
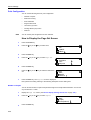
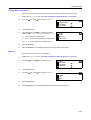
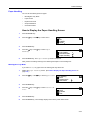
Printing Quick Copy/Proof-and-Hold
If you set quick copy with the printer driver when printing a document, the data is printed and stored
in the hard disk. When printing is required, you can print a required number of copies from the
operation panel.
If you set proof-and-hold with the printer driver and set the required number of copies to execute
printing, only one set is output and the document data is stored in the hard disk. To print the
remaining number of copies, execute printing from the operation panel. At this time, you can change
the number of copies.
For the method of setting with the printer driver, refer to the KX Printer Driver Operation Guide.
1
2-8
Display the e-MPS screen. (See How to Display the e-MPS Screen on page 2-8.)
Printer Settings
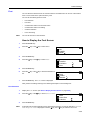
2
Press the S key or the T key to select Quick Copy.
3
Press the Enter key.
4
Press the S key or the T key to select the user name.
The user name is the name that has been set with the
printer driver.
e-MPS
Back
Quick Copy
Private/Stored
Select User Name
george
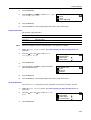
5
Press the Enter key.
6
Press the S key or the T key to select the desired job
name. The job name is the name that has been set
with the printer driver.
Select JOB
List
7
Press the Enter key.
8
Use the numeric keys to input the number of copies.
9
Select User Name
:
Copies
Delete
001
Press the Enter key. Printing starts.
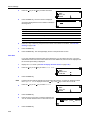
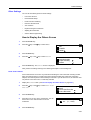
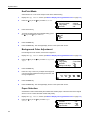
Deleting Quick Copy/Proof-and-Hold
Jobs stored with the quick copy/proof-and-hold are deleted automatically when the power of this
machine is turned off. Each job, however, can be deleted manually as shown below.
1
Select the job to delete referring to steps 1 to 7 of Printing Quick Copy/Proof-and-Hold.
2
Press the S key or the T key to select Delete.
3
Select User Name
:
Copies
Delete
001
Press the Enter key.
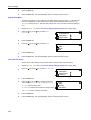
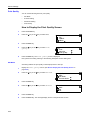
Printing Private Print/Stored Job
In private printing, you can execute printing by using the operation panel to input the four-digit
access code that has been set with the printer driver when printing from your computer. The data is
cleared after printing is complete.
In the stored job mode, access codes are not used, and print data is stored in the hard disk after
printing is complete. For the method of setting the respective functions with the printer driver, refer
to the KX Printer Driver Operation Guide.
1
Display the e-MPS screen. (See How to Display the e-MPS Screen on page 2-8.)
2-9
Printer Settings
2
Press the S key or the T key to select
Private/Stored.
3
Press the Enter key.
4
Press the S key or the T key to select the user name.
The user name is the name that has been set with the
printer driver.
e-MPS
Back
Quick Copy
Private/Stored
Select User Name
george
5
Press the Enter key.
6
Press the S key or the T key to select the desired job
name. The job name is the name that has been set
with the printer driver.
Select JOB
List
7
Press the Enter key.
8
Use the numeric keys to input the four-digit access
code. The access code has been set with the printer
driver.
9
10
11
List
Enter User ID
Press the Enter key.
Use the numeric keys to input the number of copies.
Select User Name
:
Copies
Delete
001
Press the Enter key. Printing starts.
Deleting Private Print/Stored Job
Each stored job can be deleted manually as shown below. Jobs stored with the private print function
are deleted automatically when printing is complete or the power of this machine is turned off. Jobs
stored with the stored job function, however, are not deleted.
1
Select the job to delete referring to steps 1 to 7 of Printing Private Print/Stored Job.
2
Press the S key or the T key to select Delete.
3
2-10
Press the Enter key.
Select User Name
:
Copies
Delete
001
Printer Settings
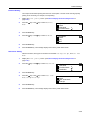
Printing Virtual Mailbox Accumulated Data
With the virtual mailbox function, a job is stored in the virtual mailbox. If you use the virtual mailbox
function to print a document with the printer driver, the job is stored and is not printed until you
execute printing from the operation panel. For the method of setting with the printer driver, refer to
the KX Printer Driver Operation Guide.
1
Display the e-MPS screen. (See How to Display the e-MPS Screen on page 2-8.)
2
Press the S key or the T key to select Print VMB
Data.
3
Press the Enter key.
4
Press the S key or the T key to select the mailbox to
print.
e-MPS
Quick Copy
Private/Stored
Print VMB Data
Print VMB Data
001: File B
5
Press the Enter key.
6
Use the numeric keys to input the five-digit access
code. The access code has been set with the KM-NET
Printer Disk Manager.
7
Press the Enter key. Printing starts. Once printing is complete, the document data in the mailbox is
deleted.
001:File B
Enter User ID
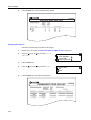
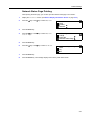
Printing Virtual Mailbox List
A list that includes the currently set virtual mailbox tray numbers (mailbox numbers), presence of
accumulated data, data sizes, etc. is printed.
1
Display the e-MPS screen. (See How to Display the e-MPS Screen on page 2-8.)
2
Press the S key or the T key to select List of VMB.
3
Press the Enter key.
4
Press the S key or the T key to select Print.
e-MPS
Private/Stored
Print VMB Data
List of VMB
List of VMB
No
Print
2-11
Printer Settings
5
Press the Enter key. The virtual mailbox list is printed.
VIRTUAL MAIL BOX LIST
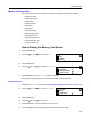
Printing Code Job List
Permanent code jobs in the hard disk can be printed.
1
Display the e-MPS screen. (See How to Display the e-MPS Screen on page 2-8.)
2
Press the S key or the T key to select List of
code JOB.
3
Press the Enter key.
4
Press the S key or the T key to select Print.
5
Press the Enter key. The code job list is printed.
e-MPS
Print VMB Data
List of VMB
List of code JOB
List of code JOB
No
Print
PERMANENT CODE JOB LIST
2-12
Printer Settings
e-MPS Detail Settings
The e-MPS settings such as the maximum number of documents that can be stored in the hard disk
and the capacity assigned to each function can be changed.
Maximum Number of Quick Copy Jobs That Can Be
Registered
1
Display the e-MPS screen. (See How to Display the e-MPS Screen on page 2-8.)
2
Press the S key or the T key to select e-MPS
Configuration.
3
Press the Enter key.
4
Press the S key or the T key to select Quick Copy.
5
Press the Enter key.
6
Press the < key or the > key to input the maximum
number of jobs that can be stored. You can set the
number to 0 to 50.
7
e-MPS
List of VMB
List of code JOB
e-MPS Configuration
e-MPS Configuration
Back
Quick Copy
Temp Code Job Size
Quick Copy
32
(0
50)
Press the Enter key.
Capacity for Storage of Temporary Code Jobs
Set the total capacity (upper limit) for storage of temporary code jobs in the hard disk. The actual
maximum size, however, is the size of available hard disk space.
1
Display the e-MPS screen. (See How to Display the e-MPS Screen on page 2-8.)
2
Press the S key or the T key to select e-MPS
Configuration.
3
Press the Enter key.
4
Press the S key or the T key to select Temp Code
Job Size [Temp. code Job size].
5
Press the Enter key.
e-MPS
List of VMB
List of code JOB
e-MPS Configuration
e-MPS Configuration
Back
Quick Copy
Temp Code Job Size
2-13
Printer Settings
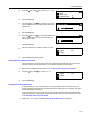
6
7
Press the < key or the > key to input the capacity for
storage of temporary code jobs. You can set the
capacity to 0 to 9999 MB.
Temporary Code Job Size
1550 Mbyte
Press the Enter key.
Total Capacity for Storage of Permanent Code Jobs
Set the total capacity (upper limit) for storage of permanent code jobs in the hard disk. The actual
maximum size, however, is the size of available hard disk space.
1
Display the e-MPS screen. (See How to Display the e-MPS Screen on page 2-8.)
2
Press the S key or the T key to select e-MPS
Configuration.
3
Press the Enter key.
4
Press the S key or the T key to select Perm Code
Job Size [Perm. code Job size].
5
Press the Enter key.
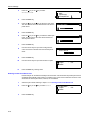
6
Press the < key or the > key to input the total capacity
for storage of permanent code jobs. You can set the
capacity to 0 to 9999 MB.
7
e-MPS
List of VMB
List of code JOB
e-MPS Configuration
e-MPS Configuration
Quick Copy
Temp Code Job Size
Perm Code Job Size
Permanent Code Job Size
1550 Mbyte
Press the Enter key.
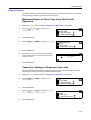
Total Capacity for Storage of Virtual Mailboxes
Set the total capacity (upper limit) for storage of virtual mailboxes in the hard disk. The actual
maximum size, however, is the size of available hard disk space.
2-14
1
Display the e-MPS screen. (See How to Display the e-MPS Screen on page 2-8.)
2
Press the S key or the T key to select e-MPS
Configuration.
3
Press the Enter key.
4
Press the S key or the T key to select VMB Size.
5
Press the Enter key.
e-MPS
List of VMB
List of code JOB
e-MPS Configuration
e-MPS Configuration
Temp Code Job Size
Perm Code Job Size
VMB Size
Printer Settings
6
7
Press the < key or the > key to input the capacity for
storage of virtual mailboxes (VMB). You can set the
capacity to 0 to 9999 MB.
VMB Size
1550 Mbyte
Press the Enter key.
2-15
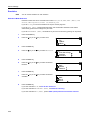
Printer Settings
Interface
This machine is equipped with a parallel interface, USB interface, and network interface as standard
components.
How to Display the Interface Screen
1
Press the Printer key.
2
Press the S key or the T key to select MENU.
3
Press the Enter key.
4
Press the S key or the T key to select Interface.
5
Press the Enter key. The Interface screen is displayed.
Ready
GO
CANCEL
MENU
Menu
Back
Print Status Page
Interface
Next, perform the setting referring to the following description of each setting item.
Parallel Interface
The parallel interface of this machine supports a bi-directional/high-speed mode. The
transmission/reception modes that can be set from the operation panel of this machine are shown
below.
Note
2-16
Mode
Description
Auto
The printer automatically changes its communication mode according
to the connected computer. Normally, you should leave this setting
unchanged.
Normal
The printer uses the standard communication method prescribed for
Centronics interfaces.
High speed
This mode enables faster data transmission between the printer and
the computer. (Select this mode if printing problems occur when the
printer is connected to a workstation.)
Nibble (high)
High speed data communication is used in compliance with the IEEE
1284 standard.
Use a parallel interface cable that complies with the IEEE 1284 standard.
1
Display the Interface screen. (See How to Display the Interface Screen on page 2-16.)
2
Press the S key or the T key to select Parallel.
3
Press the Enter key.
Interface
Back
Parallel
Network
Printer Settings
4
Press the S key or the T key to select the desired
transmission/reception mode for the parallel interface.
5
Press the Enter key.
6
Press the Reset key. The message display returns to the printer basic screen.
Parallel
Back
Auto
Normal
Network Setting
To perform network printing, network setting is required. This section describes the setting required
for using the network function.
Note
Before setting the IP address, ask your network administrator to obtain the address and prepare it.
NetWare Frame
When connecting to a NetWare network, turn this setting On.
1
Display the Interface screen. (See How to Display the Interface Screen on page 2-16.)
2
Press the S key or the T key to select Network.
3
Press the Enter key.
4
Press the S key or the T key to select NetWare.
5
Press the Enter key.
6
Press the S key or the T key to select On or Off.
7
Press the Enter key. If you have selected On, Change # is displayed.
8
Press the S key or the T key to select Change #.
9
Press the Enter key.
10
Press the S key or the T key to select the frame
mode.
11
Press the Enter key.
Interface
Back
Parallel
Network
Network Setting
Back
NetWare
TCP/IP
NetWare
Back
On
Off
NetWare
On
Off
Change #
NetWare Frame
Back
Auto
802.3
2-17
Printer Settings
12
Press the Reset key. The message display returns to the printer basic screen.
EtherTalk
When using this machine by connecting to an Apple Macintosh computer, turn EtherTalk On.
1
Display the Interface screen. (See How to Display the Interface Screen on page 2-16.)
2
Press the S key or the T key to select Network.
3
Press the Enter key.
4
Press the S key or the T key to select EtherTalk.
5
Press the Enter key.
6
Press the S key or the T key to select On.
7
Press the Enter key.
8
Press the Reset key. The message display returns to the printer basic screen.
Interface
Back
Parallel
Network
Network Setting
NetWare
TCP/IP
EtherTalk
EtherTalk
Back
On
Off
TCP/IP
When connecting to a Windows network through TCP/IP, turn TCP/IP On.
2-18
1
Display the Interface screen. (See How to Display the Interface Screen on page 2-16.)
2
Press the S key or the T key to select Network.
3
Press the Enter key.
4
Press the S key or the T key to select TCP/IP.
5
Press the Enter key.
6
Press the S key or the T key to select On.
Interface
Back
Parallel
Network
Network Setting
Back
NetWare
TCP/IP
TCP/IP
Back
On
Off
Printer Settings
7
Press the Enter key.
DHCP
This machine supports DHCP (Dynamic Host Configuration Protocol). When using DHCP, turn
DHCP On.
1
Display the TCP/IP screen referring to steps 1 to 5 of TCP/IP setting.
2
Press the S key or the T key to select Change #.
3
Press the Enter key.
4
Press the S key or the T key to select DHCP.
5
Press the Enter key.
6
Press the S key or the T key to select On.
7
Press the Enter key.
TCP/IP
On
Off
Change #
TCP/IP Setting
Back
DHCP
IP Address
DHCP
Back
On
Off
IP Address
Register the IP address of this machine.
Notes
•
The IP address that should be registered here differs depending upon your network
environment. Check with your network administrator before performing this setting.
•
If you use the following procedure to manually register the IP address, be sure to turn the
DHCP setting Off and the TCP/IP setting On.
1
Display the TCP/IP screen referring to steps 1 to 5 of TCP/IP setting.
2
Press the S key or the T key to select Change #.
3
Press the Enter key.
4
Press the S key or the T key to select IP Address.
5
Press the Enter key.
TCP/IP
On
Off
Change #
TCP/IP Setting
Back
DHCP
IP Address
2-19
Printer Settings
6
7
Use the numeric keys to input the IP address. Enter the
first block of 3 digits of the address in the highlighted
area.
IP Address
Press the > key. Enter the next block of 3 digits of the
address in the highlighted area.
IP Address
0.
10 .
8
Continue the same procedure for the other 2 blocks.
9
Press the Enter key.
0.
0.
0
0.
0.
0
0.
0
0.
0
Next, set the subnet mask.
Subnet Mask
To register the subnet mask, continue the procedure from step 9 above.
1
Press the S key or the T key to select Subnet Mask.
2
Press the Enter key.
3
Use the same procedure as steps 6 to 8 of IP Address
setting to input the address.
TCP/IP Setting
DHCP
IP Address
Subnet Mask
Subnet Mask
0.
4
0.
Press the Enter key.
Next, set the default gateway.
Default Gateway
To register the default gateway, continue the procedure from step 4 above.
1
Press the S key or the T key to select Gateway.
2
Press the Enter key.
3
Use the same procedure as steps 6 to 8 of IP Address
setting to input the address.
TCP/IP Setting
IP Address
Subnet Mask
Gateway
Gateway
0.
2-20
0.
4
Press the Enter key.
5
When you finish making all of the setting, press the Reset key. The message display returns to the
printer basic screen.
Printer Settings
Network Status Page Printing
When printing the status page, you can also print the network status page in succession.
1
Display the Interface screen. (See How to Display the Interface Screen on page 2-16.)
2
Press the S key or the T key to select Network.
3
Press the Enter key.
4
Press the S key or the T key to select Network
Status Page.
5
Press the Enter key.
6
Press the S key or the T key to select On or Off.
7
Press the Enter key.
8
Press the Reset key. The message display returns to the printer basic screen.
Interface
Back
Parallel
Network
Network Setting
TCP/IP
EtherTalk
Network Status Page
Network Status Page Setting
Back
On
Off
2-21
Printer Settings
Emulation
Note
You can set the emulation for each interface.
Emulation Mode Selection
Emulation modes that can be used with this machine: PCL6, KC-GL, KPDL, KPDL (AUTO), Line
Printer, IBM Proprinter, Diablo 630, EPSON LQ-850
If you set KC-GL, you can set the thickness of the pen and the page size.
If you set KPDL (AUTO), switching between KPDL and an alternative emulation mode will be
automatically performed according to the print data.
If you set KPDL or KPDL (AUTO), the details of any error that occurs during printing can be printed.
1
Press the Printer key.
2
Press the S key or the T key to select MENU.
3
Press the Enter key.
4
Press the S key or the T key to select Emulation.
5
Press the Enter key.
6
Press the S key or the T key to select the desired
interface.
7
Press the Enter key.
8
Press the S key or the T key to select the desired
emulation.
9
Press the Enter key.
Ready
GO
CANCEL
MENU
Menu
Print Status Page
Interface
Emulation
Interface
Back
Parallel
Network
Emulation
Back
PCL 6
KC-GL
If you have selected KC-GL, set KC-GL Pen Thickness.
If you have selected KPDL or KPDL (AUTO), set KPDL Error Printing.
If you have selected KPDL (AUTO), perform KPDL (AUTO) Alternative Emulation Selection.
2-22
Printer Settings
KC-GL Pen Thickness
If you have selected the KC-GL emulation, you can set the thicknesses of the eight pens and the
page size. Continue the procedure from step 9 of Emulation Mode Selection to set these items as
shown below.
1
Press the S key or the T key to select KC-GL Pen
Adjust.
2
Press the Enter key.
3
Press the S key or the T key to select the pen to set.
4
Press the Enter key.
5
Press the < key or the > key to input the thickness
(number of dots).
KC-GL
Back
KC-GL Pen Adjust
KC-GL Page Set
KC-GL Pen Adjust
Back
Pen (1)
Pen (2)
Pen Width
1 dot(s)
6
Press the Enter key.
7
Press the S key or the T key to select Back.
8
Press the Enter key.
9
Press the S key or the T key to select KC-GL Page
Set.
10
Press the Enter key.
11
Press the S key or the T key to select the page size.
Note
(01
99)
KC-GL
Back
KC-GL Pen Adjust
KC-GL Page Set
KC-GL Page Set
B1
B0
SPSZ
SPSZ is the size specified with the PRESCRIBE SPSZ command. For details of the PRESCRIBE
commands, refer to the PRESCRIBE Command Reference Manual.
12
Press the Enter key.
13
Press the Reset key. The message display returns to the printer basic screen.
2-23
Printer Settings
KPDL Error Printing
The details of any error that occurs during printing in the KPDL emulation mode can be printed.
Continue the procedure from step 9 of Emulation Mode Selection to set this item as shown below.
1
Press the S key or the T key to select Print KPDL
Errs.
2
Press the Enter key.
3
Press the S key or the T key to select On or Off. If
you set On, the details of any error will be printed.
4
Press the Enter key.
5
Press the Reset key. The message display returns to the printer basic screen.
KPDL
Back
Print KPDL Errs
Print KPDL Errs
Back
On
Off
KPDL (AUTO) Alternative Emulation Selection
If you set KPDL (AUTO), switching between KPDL and an alternative emulation mode will be
automatically performed according to print data. Continue the procedure from step 9 of emulation
mode selection to set this item as shown below.
Available emulation modes: PCL6, KC-GL, Line Printer, IBM Proprinter, DIABLO 630,
EPSON LQ-850
2-24
1
Press the S key or the T key to select Alt.
Emulation.
2
Press the Enter key.
3
Press the S key or the T key to select the desired
emulation mode.
4
Press the Enter key.
5
Press the Reset key. The message display returns to the printer basic screen.
KPDL (AUTO)
Back
Alt. Emulation
Print KPDL Errs
Alt. Emulation
Back
PCL 6
KC-GL
Printer Settings
Font
You can select the default font for the current interface. The default font can be one of the internal
fonts or a font stored in the optional memory card.
You can set the following items for fonts.
Note
•
Font Selection
•
Font Size
•
Courier/Letter Gothic Font Character Pitch
•
Courier/Letter Gothic Font Setting
•
Code Set Selection
•
Font List Printing
You can set the font for each interface.
How to Display the Font Screen
1
Press the Printer key.
2
Press the S key or the T key to select MENU.
3
Press the Enter key.
4
Press the S key or the T key to select Font.
5
Press the Enter key.
6
Press the S key or the T key to select the interface to
set.
7
Press the Enter key. The Font screen is displayed.
Ready
GO
CANCEL
MENU
Menu
Interface
Emulation
Font
Interface
Back
Parallel
Network
Next, perform the setting referring to the following description of each setting item.
Font Selection
1
Display the Font screen. (See How to Display the Font Screen on page 2-25.)
2
Press the S key or the T key to select Select Font.
3
Note
Font
Back
Select Font
Code Set
Press the Enter key.
If optional fonts as well as internal fonts are stored in this machine, a screen for selecting Internal
font or Option font is displayed. Press the S key or the T key to select the font to set.
2-25
Printer Settings
4
Press the S key or the T key to select the font ID.
5
Press the Enter key. The font number is displayed.
Select Font
Back
I000 ID
Detail
Font ID
Characters displayed before font numbers indicate the
following items.
I000
Display
Description
I
Internal font
S
Downloaded fonts
M
Fonts in memory card
H
Fonts in RAM disk or optional hard disk
O
Fonts in optional ROM
6
Press the < key or the > key to input the font number. For internal font numbers, see Font List
Printing on page 2-28.
7
Press the Enter key.
8
Press the Reset key. The message display returns to the printer basic screen.
Font Size
If you have selected a proportional font as the default font, you can set the font size. If you have
selected the Courier font or the Letter Gothic font as the default font, this menu is not displayed and
the character pitch setting is displayed.
1
Display the Font screen. (See How to Display the Font Screen on page 2-25.)
2
Press the S key or the T key to select Select Font.
3
Note
Font
Back
Select Font
Code Set
Press the Enter key.
If optional fonts as well as internal fonts are stored in this machine, a screen for selecting Internal
font or Option font is displayed. Press the S key or the T key to select the font to set.
4
Press the S key or the T key to select Detail.
5
Press the Enter key.
6
Press the < key or the > key to input the character size.
You can set the character size to 4.00 to 999.75 point.
Select Font
Back
I000 ID
Detail
Font Size Setting
8.50Point
7
2-26
Press the Enter key.
(4.00
999.75)
Printer Settings
8
Press the Reset key. The message display returns to the printer basic screen.
Courier/Letter Gothic Font Character Pitch
You can set the character pitch of the Courier or Letter Gothic font.
1
Display the Font screen. (See How to Display the Font Screen on page 2-25.)
2
Press the S key or the T key to select Select Font.
3
Note
Font
Back
Select Font
Code Set
Press the Enter key.
If optional fonts as well as internal fonts are stored in this machine, a screen for selecting Internal
font or Option font is displayed. Press the S key or the T key to select the font to set.
4
Press the S key or the T key to select Detail.
5
Press the Enter key.
6
Press the < key or the > key to input the character
pitch. You can set the character pitch to 0.44 to
99.99 cpi.
Select Font
Back
I000 ID
Detail
Font Pitch Setting
10.00 CPI
7
Press the Enter key.
8
Press the Reset key. The message display returns to the printer basic screen.
(0.44
99.99)
Courier/Letter Gothic Font Setting
You can select the thickness of the Courier or Letter Gothic font from two types. An example of
changing the Courier font thickness is described below.
1
Display the Font screen. (See How to Display the Font Screen on page 2-25.)
2
Press the S key or the T key to select Select Font.
3
Note
Font
Back
Select Font
Code Set
Press the Enter key.
If optional fonts as well as internal fonts are stored in this machine, a screen for selecting Internal
font or Option font is displayed. Press the S key or the T key to select Internal font.
4
Press the S key or the T key to select Courier.
5
Press the Enter key.
Select Font
I000 ID
Detail
Courier
2-27
Printer Settings
6
Press the S key or the T key to select Regular or
Dark.
7
Press the Enter key.
8
Press the Reset key. The message display returns to the printer basic screen.
Courier
Back
Regular
Dark
Code Set Selection
With the PCL6 emulation, you can select a code set.
1
Display the Font screen. (See How to Display the Font Screen on page 2-25.)
2
Press the S key or the T key to select Code Set.
Font
Back
Select Font
Code Set
3
Press the Enter key.
4
Press the S key or the T key to select the desired
code set.
5
Press the Enter key.
6
Press the Reset key. The message display returns to the printer basic screen.
Code Setting
IBM PC-8
PC-855 Serbia
ISO Cyrillic
Font List Printing
1
Display the Font screen. (See How to Display the Font Screen on page 2-25.)
2
Press the S key or the T key to select List of
Inter. Fonts.
Note
2-28
Font
Select Font
Code Set
List of Inter. Fonts
If optional fonts as well as internal fonts are stored in this machine, you can also select List of
Option Fonts.
3
Press the Enter key.
4
Press the S key or the T key to select Print.
List of Inter. Fonts
No
Print
Printer Settings
5
Press the Enter key. Printing of the font list starts.
Internal Scalable and Bitmapped Fonts List
Font Name
Scalable/Bitmap
Password
Internal Scalable and Bitmapped Fonts List
Font Name
Scalable/Bitmap
Password
PRESCRIBE
Selection
[FSET]
Font ID
PRESCRIBE
Selection
[FSET]
Font ID
2-29
Printer Settings
Print Configuration
You can set the following items for print configuration.
Note
•
Number of Copies
•
Reduction Printing
•
Print Orientation
•
Page Protect Mode
•
Line Feed (LF) Action
•
Carriage Return (CR) Action
•
Wide A4
You can set the print configuration for each interface.
How to Display the Page Set Screen
1
Press the Printer key.
2
Press the S key or the T key to select MENU.
3
Press the Enter key.
4
Press the S key or the T key to select Page Set.
5
Press the Enter key.
6
Press the S key or the T key to select the interface to
set.
7
Press the Enter key. The Page Set screen is displayed.
Ready
GO
CANCEL
MENU
Menu
Emulation
Font
Page Set
Interface
Back
Parallel
Network
Next, perform the setting referring to the following description of each setting item.
Number of Copies
You can set the number of copies to be printed through the currently selected interface. You can set
any number from 1 to 999.
2-30
1
Display the Page Set screen. (See How to Display the Page Set Screen on page 2-30.)
2
Press the S key or the T key to select Copies.
3
Press the Enter key.
Page Set
Back
Copies
Zoom(Reduce)
Printer Settings
4
Press the < key or the > key to input the number of
copies. You can set any number from 1 to 999.
Copies
1
5
Press the Enter key.
6
Press the Reset key. The message display returns to the printer basic screen.
Reduction Printing
If you specify the paper size (original size) and the output size, the machine reduces the image at a
preset magnification ratio to print onto the specified output size paper.
1
Display the Page Set screen. (See How to Display the Page Set Screen on page 2-30.)
2
Press the S key or the T key to select Zoom
(Reduce).
3
Press the Enter key.
4
Press the S key or the T key to select the desired
paper size.
5
Press the > key.
6
Press the S key or the T key to select the desired
output size. The reduction ratio is automatically set and
displayed.
Page Set
Back
Copies
Zoom(Reduce)
Zoom(Reduce)
Paper size
Cassette
Print size
Cassette
Zoom(Reduce)
Paper size
8.5x11
Print size
8.5x11 98%
7
Press the Enter key.
8
Press the Reset key. The message display returns to the printer basic screen.
100%
98%
Print Orientation
You can select the print orientation from portrait and landscape.
1
Display the Page Set screen. (See How to Display the Page Set Screen on page 2-30.)
2
Press the S key or the T key to select Orientation.
3
Press the Enter key.
4
Press the S key or the T key to select Portrait or
Landscape.
Page Set
Copies
Zoom(Reduce)
Orientation
Orientation
Back
Portrait
Landscape
2-31
Printer Settings
5
Press the Enter key.
6
Press the Reset key. The message display returns to the printer basic screen.
Page Protect Mode
To maintain the printer memory efficiently, the default setting of this mode is Auto. Normally, this
menu is not displayed. If a print overrun error occurs due to insufficient printer memory, Page
Protect is forcibly set to On. After the print overrun error occurs, be sure to reset this setting to
Auto.
1
Display the Page Set screen. (See How to Display the Page Set Screen on page 2-30.)
2
Press the S key or the T key to select Page
Protect.
3
Press the Enter key.
4
Press the S key or the T key to select Auto.
5
Press the Enter key.
6
Press the Reset key. The message display returns to the printer basic screen.
Page Set
Zoom(Reduce)
Orientation
Page Protect
Page protect
Back
Auto
On
Line Feed (LF) Action
Set the action of the machine to be executed when it receives a line feed code (0AH).
1
Display the Page Set screen. (See How to Display the Page Set Screen on page 2-30.)
2
Press the S key or the T key to select LF Action.
3
Press the Enter key.
4
Press the S key or the T key to select the desired
action from LF only, CR and LF, and Ignore LF.
LF only: Performs a line feed.
CR and LF: Performs a line feed and carriage return.
Page Set
Orientation
Page Protect
LF Action
LF Action
Back
LF only
CR and LF
Ignore LF: Does not perform a line feed.
2-32
5
Press the Enter key.
6
Press the Reset key. The message display returns to the printer basic screen.
Printer Settings
Carriage Return (CR) Action
Set the action of the machine to be executed when it receives a carriage return code (0DH).
1
Display the Page Set screen. (See How to Display the Page Set Screen on page 2-30.)
2
Press the S key or the T key to select CR Action.
3
Press the Enter key.
4
Press the S key or the T key to select the desired
action from CR only, CR and LF, and Ignore CR.
CR only: Performs a carriage return.
CR and LF: Performs a carriage return and line feed.
Page Set
Page Protect
LF Action
CR Action
CR Action
Back
CR only
CR and LF
Ignore CR: Does not perform a carriage return.
5
Press the Enter key.
6
Press the Reset key. The message display returns to the printer basic screen.
Wide A4
The print area of the A4 size can be enlarged.
1
Display the Page Set screen. (See How to Display the Page Set Screen on page 2-30.)
2
Press the S key or the T key to select Wide A4.
3
Press the Enter key.
4
Press the S key or the T key to select On or Off.
5
Press the Enter key.
6
Press the Reset key. The message display returns to the printer basic screen.
Page Set
LF Action
CR Action
Wide A4
Wide A4
Back
On
Off
2-33
Printer Settings
Print Quality
You can set the following items for print quality.
•
KIR Mode
•
EcoPrint Setting
•
Resolution Setting
•
Print Density
How to Display the Print Quality Screen
1
Press the Printer key.
2
Press the S key or the T key to select MENU.
3
Press the Enter key.
4
Press the S key or the T key to select Print
Quality.
5
Press the Enter key. The Print Quality screen is displayed.
Ready
GO
CANCEL
MENU
Menu
Font
Page Set
Print Quality
Next, perform the setting referring to the following description of each setting item.
KIR Mode
Smoothing realizes the print quality of 2400 dpi equivalent × 600 dpi.
2-34
1
Display the Print Quality screen. (See How to Display the Print Quality Screen on
page 2-34.)
2
Press the S key or the T key to select KIR Mode.
3
Press the Enter key.
4
Press the S key or the T key to select On or Off.
5
Press the Enter key.
6
Press the Reset key. The message display returns to the printer basic screen.
Print Quality
Back
KIR Mode
EcoPrint Mode
KIR Mode
Back
On
Off
Printer Settings
EcoPrint Setting
The ecoprint mode allows printing with less toner consumption. Use this mode when high quality
printing is not necessary, for example, for trial printing.
1
Display the Print Quality screen. (See How to Display the Print Quality Screen on
page 2-34.)
2
Press the S key or the T key to select EcoPrint
Mode.
3
Press the Enter key.
4
Press the S key or the T key to select On or Off.
5
Press the Enter key.
6
Press the Reset key. The message display returns to the printer basic screen.
Print Quality
Back
KIR Mode
EcoPrint Mode
EcoPrint Mode
Back
On
Off
Resolution Setting
With this machine, three types of resolution are available: 300 dpi, 600 dpi, and Fast 1200
Mode.
1
Display the Print Quality screen. (See How to Display the Print Quality Screen on
page 2-34.)
2
Press the S key or the T key to select Resolution.
3
Press the Enter key.
4
Press the S key or the T key to select Fast 1200
Mode, 600 dpi or 300 dpi.
5
Press the Enter key.
6
Press the Reset key. The message display returns to the printer basic screen.
Print Quality
KIR Mode
EcoPrint Mode
Resolution
Resolution
Back
Fast 1200 Mode
600 dpi
2-35
Printer Settings
Print Density
The print density can be adjusted among five levels from 1 (light) to 5 (dark).
1
Display the Print Quality screen. (See How to Display the Print Quality Screen on
page 2-34.)
2
Press the S key or the T key to select Print
Density.
3
Press the Enter key.
4
Press the < key or the > key to set the print density.
Print Quality
EcoPrint Mode
Resolution
Print Density
Print Density
3
2-36
5
Press the Enter key.
6
Press the Reset key. The message display returns to the printer basic screen.
Printer Settings
Memory Card Operation
If the optional memory card is installed in this machine, the following operations are available.
•
Reading Font Data
•
Reading Macro Data
•
Reading Data
•
Reading Program
•
Writing Data
•
Deleting Data
•
Deleting Font Data
•
Deleting Program Data
•
Deleting Macro Data
•
Deleting Language Data
•
Formatting Memory Card
•
Printing a Partition List
How to Display the Memory Card Screen
1
Press the Printer key.
2
Press the S key or the T key to select MENU.
3
Press the Enter key.
4
Press the S key or the T key to select Memory Card.
5
Press the Enter key. The Memory Card screen is displayed.
Ready
GO
CANCEL
MENU
Menu
Hard Disk
RAM Disk Mode
Memory Card
Next, perform the setting referring to the following description of each setting item.
Reading Font Data
1
Display the Memory Card screen. (See How to Display the Memory Card Screen on page 2-37.)
2
Press the S key or the T key to select Read Fonts.
3
Press the Enter key.
4
Press the S key or the T key to select OK.
5
Press the Enter key. Fonts are read from the memory card.
6
Press the Reset key. The message display returns to the printer basic screen.
Memory Card
Back
Read Fonts
Read Macro
2-37
Printer Settings
Reading Macro Data
1
Display the Memory Card screen. (See How to Display the Memory Card Screen on page 2-37.)
2
Press the S key or the T key to select Read Macro.
3
Press the Enter key.
4
Press the S key or the T key to select OK.
5
Press the Enter key. Macros are read from the memory card.
6
Press the Reset key. The message display returns to the printer basic screen.
1
Display the Memory Card screen. (See How to Display the Memory Card Screen on page 2-37.)
2
Press the S key or the T key to select Read Data.
3
Press the Enter key.
4
Press the S key or the T key to select the data to read.
5
Press the Enter key. The selected data is read from the memory card.
6
Press the Reset key. The message display returns to the printer basic screen.
Memory Card
Back
Read Fonts
Read Macro
Reading Data
Memory Card
Read Fonts
Read Macro
Read Data
Reading Program
2-38
1
Display the Memory Card screen. (See How to Display the Memory Card Screen on page 2-37.)
2
Press the S key or the T key to select Read
Program.
3
Press the Enter key.
4
Press the S key or the T key to select the program to read.
5
Press the Enter key. The selected program is read from the memory card.
6
Press the Reset key. The message display returns to the printer basic screen.
Memory Card
Read Macro
Read Data
Read Program
Printer Settings
Writing Data
1
Display the Memory Card screen. (See How to Display the Memory Card Screen on page 2-37.)
2
Press the S key or the T key to select Write Data.
3
Press the Enter key.
4
Press the S key or the T key to select OK.
5
Press the Enter key. GO and CANCEL are displayed.
Note
6
Memory Card
Read Data
Read Program
Write Data
If you select CANCEL and press the Enter key, data is not written.
Send data from your computer to this machine.
When the data is received, the message display of this machine changes to Processing data.
When reception is complete, the message display changes to Waiting.
7
Press the S key or the T key to select GO.
8
Press the Enter key. The data is written to the memory card.
1
Display the Memory Card screen. (See How to Display the Memory Card Screen on page 2-37.)
2
Press the S key or the T key to select Delete Data.
3
Press the Enter key.
4
Press the S key or the T key to select the data to delete.
5
Press the Enter key. The selected data is deleted from the memory card.
6
Press the Reset key. The message display returns to the printer basic screen.
Deleting Data
Memory Card
Read Program
Write Data
Delete Data
Deleting Font Data
1
Display the Memory Card screen. (See How to Display the Memory Card Screen on page 2-37.)
2
Press the S key or the T key to select Delete Font.
3
Press the Enter key.
4
Press the S key or the T key to select the font to delete.
5
Press the Enter key. The selected font is deleted from the memory card.
Memory Card
Write Data
Delete Data
Delete Font
2-39
Printer Settings
6
Press the Reset key. The message display returns to the printer basic screen.
Deleting Program Data
1
Display the Memory Card screen. (See How to Display the Memory Card Screen on page 2-37.)
2
Press the S key or the T key to select Delete
Program.
3
Press the Enter key.
4
Press the S key or the T key to select the program to delete.
5
Press the Enter key. The selected program is deleted from the memory card.
6
Press the Reset key. The message display returns to the printer basic screen.
Memory Card
Delete Data
Delete Font
Delete Program
Deleting Macro Data
1
Display the Memory Card screen. (See How to Display the Memory Card Screen on page 2-37.)
2
Press the S key or the T key to select Delete
Macro.
3
Press the Enter key.
4
Press the S key or the T key to select the macro data to delete.
5
Press the Enter key. The selected macro data is deleted from the memory card.
6
Press the Reset key. The message display returns to the printer basic screen.
Memory Card
Delete Font
Delete Program
Delete Macro
Deleting Language Data
1
Display the Memory Card screen. (See How to Display the Memory Card Screen on page 2-37.)
2
Press the S key or the T key to select Delete the
language.
3
Press the Enter key.
4
Press theS key or the T key to select the language data to delete.
5
Press the Enter key. The selected language data is deleted from the memory card.
6
Press the Reset key. The message display returns to the printer basic screen.
Memory Card
Delete Program
Delete Macro
Delete the language
Formatting Memory Card
Note
2-40
Be sure to format the memory card using this machine. Any memory card formatted with other
equipment cannot be used.
Printer Settings
1
Display the Memory Card screen. (See How to Display the Memory Card Screen on page 2-37.)
2
Press the S key or the T key to select Format.
3
Press the Enter key.
4
Press the S key or the T key to select OK.
5
Press the Enter key. Formatting of the memory card starts. When formatting is complete, format
information is output.
Memory Card
Back
Format
FORMAT INFORMATION
Printing a Partition List
1
Display the Memory Card screen. (See How to Display the Memory Card Screen on page 2-37.)
2
Press the S key or the T key to select List of
Partitions.
3
Press the Enter key.
4
Press the S key or the T key to select Print.
Memory Card
Delete Macro
Delete the language
List of Partitions
List of Partitions
No
Print
2-41
Printer Settings
5
Press the Enter key. The partition list is printed.
PARTITION LIST
2-42
Printer Settings
Hard Disk Operation
If the optional hard disk is installed in this machine, the following operations are available.
•
Reading Data
•
Reading Program
•
Writing Data
•
Deleting Data
•
Deleting Font Data
•
Deleting Program Data
•
Deleting Macro Data
•
Deleting Language Data
•
Formatting Hard Disk
•
Printing a Partition List
1
Press the Printer key.
2
Press the S key or the T key to select MENU.
3
Press the Enter key.
4
Press the S key or the T key to select HARD DISK.
5
Press the Enter key.
Ready
GO
CANCEL
MENU
Menu
Page Set
Print Quality
HARD DISK
The operation procedure of each item is the same as that of the memory card operation. See
Memory Card Operation on page 2-37.
2-43
Printer Settings
RAM Disk Operation
RAM Disk Functions
This machine is equipped with RAM disk functions. The RAM disk is a virtual disk unit that uses a
part of the memory. If you assign a certain size of the memory to the RAM disk, you can use the
RAM disk for electronic sorting (for reduction of total print time) and storage and reading of data.
Also you can use the e-MPS function (see page 2-8).
Important!
•
Note that data written to the RAM disk is deleted when this machine is reset or the main power
switch is turned off ({).
•
The RAM disk area is assigned from the user available memory. Consequently, note that
printing speed may be lower or insufficient memory occurs depending on the RAM disk setting
value.
The RAM disk functions are disabled at the default setting. To use the RAM disk functions, set as
follows.
1
Press the Printer key.
2
Press the S key or the T key to select MENU.
3
Press the Enter key.
4
Press the S key or the T key to select RAM Disk
Mode.
5
Press the Enter key.
6
Press the S key or the T key to select On.
7
Press the Enter key. Change # is displayed.
8
Press the Reset key.
9
Press the S key or the T key to select Yes.
10
Press the Enter key. This machine restarts.
RAM Disk Operation
1
2-44
Press the Printer key.
Ready
GO
CANCEL
MENU
Menu
Page Set
Print Quality
RAM Disk Mode
RAM Disk Mode
Back
On
Off
Do you want to restart?
Yes
No
Printer Settings
2
Press the S key or the T key to select MENU.
3
Press the Enter key.
4
Press the S key or the T key to select RAM Disk
Mode.
5
Press the Enter key.
6
Press the S key or the T key to select Change #.
7
Press the Enter key.
Ready
GO
CANCEL
MENU
Menu
Page Set
Print Quality
RAM Disk Mode
RAM Disk Mode
On
Off
Change #
The operation procedure of each item is the same as that of the memory card operation. See
Memory Card Operation on page 2-37.
RAM Disk Size
1
Press the Printer key.
2
Press the S key or the T key to select MENU.
3
Press the Enter key.
4
Press the S key or the T key to select RAM Disk
Mode.
5
Press the Enter key.
6
Press the S key or the T key to select Change #.
7
Press the Enter key.
8
Press the S key or the T key to select RAM Disk
Size.
9
Press the Enter key.
Ready
GO
CANCEL
MENU
Menu
Page Set
Print Quality
RAM Disk Mode
RAM Disk Mode
On
Off
Change #
RAM Disk Mode Setting
Back
RAM Disk Size
List of Partitions
2-45
Printer Settings
10
Press the < key or the > key to input the RAM disk size.
You can set the size to 1 to 1024 Mbyte.
RAM Disk size
28 Mbyte
2-46
11
Press the Enter key.
12
Press the Reset key.
13
Press the S key or the T key to select Yes.
14
Press the Enter key. This machine restarts.
Do you want to restart?
Yes
No
Printer Settings
Paper Handling
You can set the following items for paper.
•
Multi-Bypass Tray Mode
•
Paper Source
•
Duplex Print Mode
•
Output Destination
•
Override A4/Letter
How to Display the Paper Handling Screen
1
Press the Printer key.
2
Press the S key or the T key to select MENU.
3
Press the Enter key.
4
Press the S key or the T key to select Paper
Handling.
5
Press the Enter key. The Paper Handling screen is displayed.
Ready
GO
CANCEL
MENU
Menu
Print Quality
RAM Disk Mode
Paper Handling
Next, perform the setting referring to the following description of each setting item.
Multi-Bypass Tray Mode
If you select First, any paper set in the multi-bypass tray will be fed.
1
Display the Paper Handling screen. (See How to Display the Paper Handling Screen on
page 2-47.)
2
Press the S key or the T key to select Bypass Mode.
3
Press the Enter key.
4
Press the S key or the T key to select Cassette or
First.
5
Press the Enter key.
6
Press the Reset key. The message display returns to the printer basic screen.
Paper Handling
Back
Bypass Mode
Feed Select
Bypass Mode
Back
Cassette
First
2-47
Printer Settings
Paper Source
Set the paper source to be selected first.
1
Display the Paper Handling screen. (See How to Display the Paper Handling Screen on
page 2-47.)
2
Press the S key or the T key to select Feed Select.
3
Press the Enter key.
4
Press the S key or the T key to select the desired
paper source.
5
Press the Enter key.
6
Press the Reset key. The message display returns to the printer basic screen.
Paper Handling
Back
Bypass Mode
Feed Select
Feed Select
Back
Bypass
Cassette 1
Duplex Print Mode
Set the binding position on finished prints in duplex printing.
Note
2-48
Setting
Binding position
Short edge bind
Binding at a short edge
Long edge bind
Binding at a long edge
This setting is displayed only if the optional duplex unit is installed.
1
Display the Paper Handling screen. (See How to Display the Paper Handling Screen on
page 2-47.)
2
Press the S key or the T key to select Duplex Mode.
Paper Handling
Bypass Mode
Feed Select
Duplex Mode
Printer Settings
3
Press the Enter key.
4
Press the S key or the T key to select Short edge
bind or Long edge bind.
5
Press the Enter key.
6
Press the Reset key. The message display returns to the printer basic screen.
Duplex Mode
Back
None
Short edge bind
Output Destination
Set the paper output destination.
Note
Setting
Output destination
Top tray
Output tray of main body
Finisher
Optional finisher
Job Separator
Optional job separator
This item is displayed only if the optional finisher or job separator is installed.
1
Display the Paper Handling screen. (See How to Display the Paper Handling Screen on
page 2-47.)
2
Press the S key or the T key to select Stack
Select [Stack Slect].
3
Press the Enter key.
4
Press the S key or the T key to select the desired
paper output destination.
5
Press the Enter key.
6
Press the Reset key. The message display returns to the printer basic screen.
Paper Handling
Bypass Mode
Feed Select
Stack Select
Select Output Tray
Back
Top tray
Finisher
Override A4/Letter
The A4 and 8 1/2 × 11" (Letter) sizes can be regarded as a size that can be used in common.
1
Display the Paper Handling screen. (See How to Display the Paper Handling Screen on
page 2-47.)
2
Press the S key or the T key to select Override
A4/LT.
3
Press the Enter key.
Paper Handling
Feed Select
Stack Select
Override A4/LT
2-49
Printer Settings
2-50
4
Press the S key or the T key to select On or Off.
5
Press the Enter key.
6
Press the Reset key. The message display returns to the printer basic screen.
Override A4/LT
Back
On
Off
Printer Settings
Other Settings
You can set the following items for other settings.
•
Form Feed Timeout
•
Received Data Dump
•
Printer Function Resetting
•
Resource Protect Mode
•
Auto Continue
•
Duplex Printing Error Detection
•
Stapling Error Detection
•
Service Status Page Printing
How to Display the Others Screen
1
Press the Printer key.
2
Press the S key or the T key to select MENU.
3
Press the Enter key.
4
Press the S key or the T key to select Others.
5
Press the Enter key. The Others screen is displayed.
Ready
GO
CANCEL
MENU
Menu
RAM Disk Mode
Paper Handling
Others
Next, perform the setting referring to the following description of each setting item.
Form Feed Timeout
If this machine does not receive any information indicating the end of data after receiving the last
data, the machine waits for a certain time without printing the last page. When the preset time
elapses, the machine performs automatically a form feed. If you set the time to 0, the machine does
not perform a form feed until GO is manually selected.
1
Display the Others screen. (See How to Display the Others Screen on page 2-51.)
2
Press the S key or the T key to select Form Feed
Time Out.
3
Press the Enter key.
4
Press the < key or the > key to set the time. You can
set the time to 0 to 495 seconds in 5 second
increments.
5
Others
Back
Form Feed Time Out
Print HEX-DUMP
Form Feed Time Out
30 sec.
(0
495)
Press the Enter key.
2-51
Printer Settings
6
Press the Reset key. The message display returns to the printer basic screen.
Received Data Dump
You can print data received by this machine as hexadecimal codes for debugging programs and
files.
1
Display the Others screen. (See How to Display the Others Screen on page 2-51.)
2
Press the S key or the T key to select Print
HEX-DUMP.
3
Press the Enter key.
4
Press the S key or the T key to select OK.
5
Press the Enter key. Waiting is displayed and the message display returns to the printer basic
screen.
6
At this time, send data to the printer. Dump pages are printed.
7
Press the S key or the T key to select GO.
8
Press the Enter key.
9
Press the Reset key. The message display returns to the printer basic screen.
Others
Back
Form Feed Time Out
Print HEX-DUMP
Print HEX-DUMP
Back
OK
Waiting
GO
CANCEL
Printer Function Resetting
This function resets the printer’s temporary settings (such as the current page orientation and font)
to the default settings.
2-52
1
Display the Others screen. (See How to Display the Others Screen on page 2-51.)
2
Press the S key or the T key to select Printer
Reset.
3
Press the Enter key.
4
Press the S key or the T key to select OK.
5
Press the Enter key. The printer functions are reset.
Others
Form Feed Time Out
Print HEX-DUMP
Printer Reset
Printer Reset
Back
OK
Printer Settings
Resource Protect Mode
The resource protect mode protects the resource data such as downloaded fonts and macros and
memorizes the PCL resources even if the emulation mode is switched. If you select Permanent,
temporary resources are not protected. If you select Perm/Temp, however, temporary resources
are also protected.
1
Display the Others screen. (See How to Display the Others Screen on page 2-51.)
2
Press the S key or the T key to select Resource
Prot.
3
Press the Enter key.
4
Press the S key or the T key to select Off,
Permanent or Perm/Temp.
Others
Print HEX-DUMP
Printer Reset
Resource Prot.
Resource Prot.
Back
Off
Permanent
5
Press the Enter key.
6
Press the Reset key. The message display returns to the printer basic screen.
Auto Continue
If any of the following error messages appears, the error can be cleared and printing can be
continued after the preset recovery time elapses (auto continue).
•
Memory Overflow/Press GO
•
Print overrun Press GO
•
KPDL error Press GO
•
File not found Press GO
•
HARD DISK error Press GO
•
RAM disk error Press GO
•
MemoryCard err Press GO
•
Illegal Account Press GO
•
Exceeded Max.out Press GO
•
Account error Press Go
•
Duplex disabled Press GO
•
Add Staples and Press GO
•
e-MPS not stored Press GO
•
Opt. ROM error Press GO
Also you can set the time that elapses before auto continue is activated.
1
Display the Others screen. (See How to Display the Others Screen on page 2-51.)
2
Press the S key or the T key to select Auto
Continue.
Others
Printer Reset
Resource Prot.
Auto Continue
2-53
Printer Settings
3
Press the Enter key.
4
Press the S key or the T key to select On or Off.
5
Press the Enter key. If you have selected On, Change # is displayed.
6
To set the time that elapses before auto continue is
activated, press the S key or the T key to select
Change #.
7
Press the Enter key. The Auto Continue (time) screen is displayed.
8
Press the < key or the > key to input the time. You can
set the time to 0 to 495 seconds in 5 second
increments.
9
10
Auto Continue
Back
On
Off
Auto Continue
On
Off
Change #
Auto Continue (time)
30 sec.
(0
495)
Press the Enter key.
Press the Reset key. The message display returns to the printer basic screen.
Duplex Printing Error Detection
This setting is available if the optional duplex unit is installed. You can select whether or not to
display Duplex disabled Press GO when you select duplex printing and specify a paper type
that cannot be used for duplex printing such as label.
Setting
Processing
On
•
If you select GO, one-sided printing is performed.
•
If you select CANCEL, printing is canceled.
Off
2-54
One-sided printing is performed.
1
Display the Others screen. (See How to Display the Others Screen on page 2-51.)
2
Press the S key or the T key to select Finishing
Error.
3
Press the Enter key.
4
Press the S key or the T key to select Proces.
Duplex print.
5
Press the Enter key.
Others
Resource Prot.
Auto Continue
Finishing Error
Finishing Error
Back
Proces. Duplex print
Staple Setting
Printer Settings
6
Press the S key or the T key to select On or Off.
7
Press the Enter key.
8
Press the Reset key. The message display returns to the printer basic screen.
Duplex Print Process
Back
On
Off
Stapling Error Detection
You can select whether or not to display Add Staples and Press GO when staples have run out
while stapling is performed.
Setting
Processing
On
•
If you select GO, printing is performed without stapling.
•
If you select CANCEL, printing is canceled.
Off
Note
Printing is performed without stapling.
This setting is displayed only if the optional finisher is installed.
1
Display the Others screen. (See How to Display the Others Screen on page 2-51.)
2
Press the S key or the T key to select Finishing
Error.
3
Press the Enter key.
4
Press the S key or the T key to select Staple
Setting.
5
Press the Enter key.
6
Press the S key or the T key to select On or Off.
7
Press the Enter key.
8
Press the Reset key. The message display returns to the printer basic screen.
Others
Resource Prot.
Auto Continue
Finishing Error
Finishing Error
Back
Proces. Duplex print
Staple Setting
Staple Setting
Back
On
Off
2-55
Printer Settings
Service Status Page Printing
The service status page contains more detailed printer setting information than the normal status
page. This page is mainly used by the service personnel for maintenance. Use the following
procedure to print this page as needed.
2-56
1
Display the Others screen. (See How to Display the Others Screen on page 2-51.)
2
Press the S key or the T key to select Service.
3
Press the Enter key.
4
Press the S key or the T key to select Print
Status Page.
5
Press the Enter key.
6
Press the S key or the T key to select Print.
7
Press the Enter key. The service status page is printed.
8
Press the Reset key. The message display returns to the printer basic screen.
Others
Auto Continue
Finisher Error
Service
Service
Back
Print Status Page
Paper Feed
Print Status Page
No
Print
3
System Menu
This chapter explains the system settings concerning the general operation of this machine.
The principal settings that can be made are shown below.
•
Default Setting Mode
•
Multi-Bypass Tray Settings
•
Browsing and Printing the Total Counter
•
Report Output
•
Language Setting
•
User Adjustment
3-1
System Menu
Default Setting Mode
For this machine, the state that the machine enters at the end of warm-up or when the Reset key is
pressed is called initial mode. The settings of this machine that are made automatically in the initial
mode are called default settings. The default settings are divided into the Copier Default Settings
and the Machine Default Settings. These settings can be changed freely according to the method
of use.
Copier Default Settings
You can set the following items as copier default settings.
•
Exposure Mode
•
Original Image Quality
•
EcoPrint Mode
•
Background Color Adjustment
•
Paper Selection
•
Paper Type in Auto Paper Selection
•
Priority Cassette
•
Default Magnification
•
Auto Exposure Adjustment
•
Auto OCR Exposure Adjustment
•
Exposure Adjustment for Text + Photo Originals
•
Exposure Adjustment for Text Originals
•
Exposure Adjustment for Photo Originals
•
Sort Copying
•
Offset Copying
•
Auto Rotation Copy
•
Margin Width Default Value
•
Border Erase Width Default Value
•
Limit of Number of Copies
•
Black Streaking Reduction Processing
How to Display the Copy Default Screen
Use the following procedure to display the Copy Default screen.
3-2
1
Press the System Menu/Counter key.
2
Press the S key or the T key to select Copy
default.
3
Press the Enter key.
4
Use the numeric keys to input the four-digit
management code. The management code at the
factory default setting is 1600 for the 16 ppm model,
2000 for the 20 ppm model, and 2500 for the 25 ppm
model.
System Menu / Counter:
Print Report
Job Accounting
Copy default
Enter pin code using # key.
System Menu
Note
5
The four-digit management code can be changed. (See Administrator Management Code
Change on page 3-23.)
If the management code is accepted, the Copy
Default screen is displayed.
Next, perform the setting referring to the following
description of each setting item.
Note
Copy Default:
End
Exposure Mode
Orig Quality
: Manual
: Text+Photo
The * (asterisk) at an item on each setting screen indicates the current setting.
Exposure Mode
Set the Default exposure mode: auto or manual.
1
Display the Copy Default screen. (See How to Display the Copy Default Screen on page 3-2.)
2
Press the S key or the T key to select Exposure
Mode.
Copy Default:
End
Exposure Mode
Orig Quality
3
Press the Enter key.
4
Press the S key or the T key to select Auto or
Manual.
5
Press the Enter key.
6
Press the Reset key. The message display returns to the copier basic screen.
: Manual
: Text+Photo
Exposure mode:
Auto
Manual
*
Original Image Quality
Set the default original image quality mode.
1
Display the Copy Default screen. (See How to Display the Copy Default Screen on page 3-2.)
2
Press the S key or the T key to select Orig
Quality.
Copy Default:
End
Exposure Mode
Orig Quality
3
Press the Enter key.
4
Press the S key or the T key to select Text+Photo,
Text or Photo.
5
Press the Enter key.
6
Press the Reset key. The message display returns to the copier basic screen.
: Manual
: Text+Photo
Original image quality:
* Text+Photo
Text
Photo
3-3
System Menu
EcoPrint Mode
Select whether or not to set the ecoprint mode at the default setting.
1
Display the Copy Default screen. (See How to Display the Copy Default Screen on page 3-2.)
2
Press the S key or the T key to select EcoPrint.
Copy Default:
Exposure Mode
Orig Quality
EcoPrint
3
Press the Enter key.
4
To set the ecoprint mode as the default setting, press
the S key or the T key to select On.
5
Press the Enter key.
6
Press the Reset key. The message display returns to the copier basic screen.
: Manual
: Text+Photo
: Off
EcoPrint:
* Off
On
Background Color Adjustment
If the background color is dark, use this item to lighten it.
1
Display the Copy Default screen. (See How to Display the Copy Default Screen on page 3-2.)
2
Press the S key or the T key to select Background
adjst.
3
Press the Enter key.
4
Press the < key or the > key to adjust the background
color. Moving right darkens the background color, and
moving left lightens it.
Copy Default :
Orig Quality
EcoPrint
Background adjst
: Text+Photo
: Off
:3
Background adjustment:
1
2
*3
5
Press the Enter key.
6
Press the Reset key. The message display returns to the copier basic screen.
4
5
Paper Selection
Set whether to select automatically the cassette that contains paper of the same size as the original
when it is set or to select the fixed cassette with priority.
3-4
1
Display the Copy Default screen. (See How to Display the Copy Default Screen on page 3-2.)
2
Press the S key or the T key to select Paper
Select.
Copy Default :
EcoPrint
Background adjst
Paper Select
: Off
:3
: Auto
System Menu
3
Press the Enter key.
4
Press the S key or the T key to select Auto or
Default cassette.
5
Press the Enter key.
6
Press the Reset key. The message display returns to the copier basic screen.
Paper select:
* Auto
Default cassette
Paper Type in Auto Paper Selection
Paper to be selected in the auto paper selection mode can be limited to a certain paper type.
Paper types that can be set: Plain, Transparency, Preprinted, Labels, Bond, Recycled,
Vellum, Rough, Letterhead, Color [Colour], Prepunched, Envelope, Cardstock, Thick
paper, High quality, and Custom 1 (to 8)
Note
You can select a paper type from the paper types that are currently set for the cassettes. (See
Paper Type (cassettes 1 to 4) on page 3-14.)
1
Display the Copy Default screen. (See How to Display the Copy Default Screen on page 3-2.)
2
Press the S key or the T key to select Paper type
(Auto).
Copy Default :
Background adjst
Paper Select
Paper type(Auto)
3
Press the Enter key.
4
Press the S key or the T key to select Off or On.
5
Press the Enter key.
6
If you have selected On, press the S key or the T key
to select the desired paper type.
7
Press the Enter key.
8
Press the Reset key. The message display returns to the copier basic screen.
:3
: Auto
: Plain
Paper type(Auto):
Off
* On
Paper type(Auto):
Plain
Preprinted
Priority Cassette
You can select the cassette (1 to 4) that is automatically selected with priority.
Notes
•
On the 16 ppm model, this setting is displayed only if the optional paper feeder is installed.
•
For the 16 ppm model, cassettes 2 to 4 are included in the optional paper feeder. For the 20/25
ppm model, cassettes 3 and 4 are included in the optional paper feeder. This setting is
displayed only if the optional paper feeder is installed.
•
You cannot set the multi-bypass tray as the priority cassette.
3-5
System Menu
1
Display the Copy Default screen. (See How to Display the Copy Default Screen on page 3-2.)
2
Press the S key or the T key to select Default
Cassette.
Copy Default :
Paper Select
Paper type(Auto)
Default Cassette
3
Press the Enter key.
4
Press the S key or the T key to select the cassette
that will be used with priority.
5
Press the Enter key.
6
Press the Reset key. The message display returns to the copier basic screen.
: Auto
: Plain
: casset.1
Default cassette:
* Cassette 1
Cassette 2
Cassette 3
Default Magnification
Select whether or not to set the auto zoom ratio selection mode when a cassette is selected.
1
Display the Copy Default screen. (See How to Display the Copy Default Screen on page 3-2.)
2
Press the S key or the T key to select Default
Magnif.
Copy Default :
Paper type(Auto)
Default Cassette
Default Magnif.
3
Press the Enter key.
4
Press the S key or the T key to select 100% or
Auto %.
5
Press the Enter key.
6
Press the Reset key. The message display returns to the copier basic screen.
: Plain
: casset.1
: 100%
Default magnification:
* 100%
Auto %
Auto Exposure Adjustment
Adjust the overall density in the auto exposure mode.
1
Display the Copy Default screen. (See How to Display the Copy Default Screen on page 3-2.)
2
Press the S key or the T key to select Adj.Auto
expos.
3
3-6
Press the Enter key.
Copy Default :
Default Cassette
Default Magnif.
Adj.Auto expos.
: casset.1
: 100%
:4
System Menu
4
Press the < key or the > key to adjust the exposure.
Moving right darkens the density, and moving left
lightens it.
5
Press the Enter key.
6
Press the Reset key. The message display returns to the copier basic screen.
Adjust auto exposure:
Auto OCR Exposure Adjustment
Adjust the overall density of scanning for OCR when using the optional scanner functions.
1
Display the Copy Default screen. (See How to Display the Copy Default Screen on page 3-2.)
2
Press the S key or the T key to select Auto
expos.(OCR).
Copy Default :
Default Magnif.
Adj.Auto expos.
Auto expos.(OCR)
3
Press the Enter key.
4
Press the < key or the > key to adjust the exposure.
Moving right darkens the density, and moving left
lightens it.
5
Press the Enter key.
6
Press the Reset key. The message display returns to the copier basic screen.
: 100%
:4
:4
Adjust Auto OCR Density:
Exposure Adjustment for Text + Photo Originals
Adjust the density of the central value in the manual exposure mode for text + photo originals.
1
Display the Copy Default screen. (See How to Display the Copy Default Screen on page 3-2.)
2
Press the S key or the T key to select Txt+Photo
Dens.
Copy Default :
Default Magnif.
Adj.Auto expos.
Txt+Photo Dens.
3
Press the Enter key.
4
Press the < key or the > key to adjust the exposure.
Moving right darkens the density, and moving left
lightens it.
5
Press the Enter key.
6
Press the Reset key. The message display returns to the copier basic screen.
: 100%
:4
:4
Text+Photo Orig.Dens.Adj:
3-7
System Menu
Exposure Adjustment for Text Originals
Adjust the density of the central value in the manual exposure mode for text originals.
1
Display the Copy Default screen. (See How to Display the Copy Default Screen on page 3-2.)
2
Press the S key or the T key to select Txt Ori
Density.
Copy Default :
Adj.Auto expos.
Txt+Photo Dens.
Txt Ori Density
3
Press the Enter key.
4
Press the < key or the > key to adjust the exposure.
Moving right darkens the density, and moving left
lightens it.
5
Press the Enter key.
6
Press the Reset key. The message display returns to the copier basic screen.
:4
:4
:4
Text original density adjust:
Exposure Adjustment for Photo Originals
Adjust the density of the central value in the manual exposure mode for photo originals.
1
Display the Copy Default screen. (See How to Display the Copy Default Screen on page 3-2.)
2
Press the S key or the T key to select Photo Ori
Dnsity.
Copy Default :
Txt+Photo Dens.
Txt Ori Density
Photo Ori Dnsity
3
Press the Enter key.
4
Press the < key or the > key to adjust the exposure.
Moving right darkens the density, and moving left
lightens it.
5
Press the Enter key.
6
Press the Reset key. The message display returns to the copier basic screen.
:4
:4
:4
Photo original density adjust:
Sort Copying
If the optional document finisher is installed, select whether or not to set the sort copy mode as a
default setting.
Note
1
3-8
This item is displayed only if the optional document processor is installed.
Display the Copy Default screen. (See How to Display the Copy Default Screen on page 3-2.)
System Menu
2
Press the S key or the T key to select Sort.
3
Press the Enter key.
4
Press the S key or the T key to select On or Off.
Copy Default :
Txt Ori Density
Photo Ori Dnsity
Sort
Sort:
*
:4
:4
: On
Off
On
5
Press the Enter key.
6
Press the Reset key. The message display returns to the copier basic screen.
Offset Copying
Select whether or not to set the offset copy mode as a default setting.
1
Display the Copy Default screen. (See How to Display the Copy Default Screen on page 3-2.)
2
Press the S key or the T key to select Offset.
Copy Default :
Photo Ori Dnsity
Sort
Offset
3
Press the Enter key.
4
Press the S key or the T key to select On or Off.
5
Press the Enter key.
6
Press the Reset key. The message display returns to the copier basic screen.
:4
: On
: Off
Offset:
* Off
On
Auto Rotation Copy
Select whether or not to set the auto rotation copy mode as a default setting.
1
Display the Copy Default screen. (See How to Display the Copy Default Screen on page 3-2.)
2
Press the S key or the T key to select Auto
Rotation.
3
Press the Enter key.
4
Press the S key or the T key to select On or Off.
Copy Default :
Sort
Offset
Auto Rotation
: On
: Off
: On
Auto Rotation:
Off
* On
3-9
System Menu
5
Press the Enter key.
6
Press the Reset key. The message display returns to the copier basic screen.
Margin Width Default Value
Set the default value of the margin width.
1
Display the Copy Default screen. (See How to Display the Copy Default Screen on page 3-2.)
2
Press the S key or the T key to select Margin
Width.
3
Press the Enter key.
4
Press the S key or the T key to set the default value
of margin width. You can set the value to 1/8" to 3/4" in
1/8" increments [1 mm to 18 mm in 1 mm increments].
Copy Default :
Offset
Auto Rotation
Margin Width
: Off
: On
: 1/4"
Margin width:
1/4"
1/8"
5
Press the Enter key.
6
Press the Reset key. The message display returns to the copier basic screen.
3/4"
Border Erase Width Default Value
Set the default value of the border erase width.
3-10
1
Display the Copy Default screen. (See How to Display the Copy Default Screen on page 3-2.)
2
Press the S key or the T key to select
BorderEraseWidth [Border Er. width].
3
Press the Enter key.
4
Press the S key or the T key to set the default value
of border erase width. You can set the value to 1/8" to
3/4" in 1/8" increments [1 mm to 18 mm in 1 mm
increments].
Copy Default :
Auto Rotation
Margin Width
BorderEraseWidth
Border Erase width:
1/4"
1/8"
5
Press the Enter key.
6
Press the Reset key. The message display returns to the copier basic screen.
3/4"
: On
: 1/4"
: 1/4"
System Menu
Limit of Number of Copies
Set the limit of the number of copies that can be set at a time.
1
Display the Copy Default screen. (See How to Display the Copy Default Screen on page 3-2.)
2
Press the S key or the T key to select Copy Limit.
3
Press the Enter key.
4
Use the numeric keys to set the maximum number of
copies (1 to 999).
Copy Default :
Margin Width
BorderEraseWidth
Copy Limit
: 1/4"
: 1/4"
: 999Set
Copy limit:
999
sets
# keys
5
Press the Enter key.
6
Press the Reset key. The message display returns to the copier basic screen.
Black Streaking Reduction Processing
If black streaks (streaks that are not contained in the original image) appear on copies from the
optional document processor, you can make black streaking less noticeable. Since the black
streaking reduction processing reduces the reproducibility of fine characters, it is normally
recommended to use the factory default setting.
1
Display the Copy Default screen. (See How to Display the Copy Default Screen on page 3-2.)
2
Press the S key or the T key to select Corr. Black
line.
3
Press the Enter key.
4
Press the S key or the T key to select None, Weak or
Strong.
Note
Copy Default :
BorderEraseWidth
Copy Limit
Corr. Black line
: 1/4"
: 999Set
: None
Correct. fine black line:
* None
Weak
Strong
To use the black streaking reduction processing, first select Weak. If black streaking is not reduced,
select Strong.
5
Press the Enter key.
6
Press the Reset key. The message display returns to the copier basic screen.
3-11
System Menu
Machine Default Settings
You can set the following items as machine default settings.
•
Auto Cassette Switching
•
Paper Size (cassettes 1 to 4)
•
Paper Type (cassettes 1 to 4)
•
Multi-Bypass Tray Confirmation Display
•
Paper Weight for Paper Type
•
Duplex Print for Paper Type
•
Custom Paper Type
•
Original Orientation
•
Auto Sleep Time
•
Auto Low Power Time
•
Copy Output Destination
•
Fax Output Destination
•
Default Operation Mode
•
Key Sound
•
Date and Time
•
Display Contrast Adjustment
•
Administrator Management Code Change
•
Auto Sleep
•
Auto Clear
•
Auto Clear Time
•
Silent Mode
How to Display the Machine Default Screen
Use the following procedure to display the machine default setting screen.
1
Press the System Menu/Counter key.
2
Press the S key or the T key to select Machine
default.
3
Press the Enter key.
4
Use the numeric keys to input the four-digit
management code. The management code at the
factory default setting is 1600 for the 16 ppm model,
2000 for the 20 ppm model, and 2500 for the 25 ppm
model.
Note
3-12
System Menu / Counter:
Job Accounting
Copy default
Machine default
Enter pin code using # key.
The four-digit management code can be changed. (See Administrator Management Code
Change on page 3-23.)
System Menu
5
If the management code is accepted, the Machine
default screen is displayed.
Next, perform the setting referring to the following
description of each setting item.
Note
Machine default:
End
Auto Casstte SW
Paper Size(1st)
: On
: Auto I
The * (asterisk) at an item on each setting screen indicates the current setting.
Auto Cassette Switching
This machine can continue copying by switching the cassette to another cassette that contains
paper of the same size and the same orientation as the current paper when paper runs out in the
currently selected cassette. To prohibit switching to a cassette that has a different paper type, select
On/Only same paper type.
Note
On the 16 ppm model, this item is displayed only if the optional paper feeder is installed.
1
Display the Machine default screen. (See How to Display the Machine Default Screen on
page 3-12.)
2
Press the S key or the T key to select Auto
Cassette SW.
Machine default:
End
Auto Casstte SW
Paper Size(1st)
3
Press the Enter key.
4
Press the S key or the T key to select On/All
types of paper, On/Only same paper type, or
Off.
5
Press the Enter key.
6
Press the Reset key. The message display returns to the copier basic screen.
: On
: Auto I
Automatic cassette switching:
* Off
On/All types of paper
On/Only same paper type
Paper Size (cassettes 1 to 4)
Set the paper sizes of cassettes 1 to 4. To detect the paper size automatically, set Auto
Detection Metric or Auto Detection Inch.
Sizes that can be set: 8 1/2 × 13", 8K, 16K
Note
For the 16 ppm model, cassettes 2 to 4 are included in the optional paper feeder. For the 20/25 ppm
model, cassettes 3 and 4 are included in the optional paper feeder. This setting is displayed only if
the optional paper feeder is installed.
1
Display the Machine default screen. (See How to Display the Machine Default Screen on
page 3-12.)
2
Press the S key or the T key to select the cassette for
which you set the paper size from Paper Size(1st)
to (4th).
3
Machine default:
End
Auto Casstte SW
Paper Size(1st)
: On
: Auto I
Press the Enter key.
3-13
System Menu
4
Press the S key or the T key to select Auto
Detection Metric, Auto Detection Inch or a
paper size.
5
Press the Enter key.
6
Press the Reset key. The message display returns to the copier basic screen.
Paper Size(1st cassette) :
Auto Detection Metric
*Auto Detection Inch
Paper Type (cassettes 1 to 4)
Set the paper types of cassettes 1 to 4.
Paper types that can be set: Plain, Preprinted, Bond, Recycled, Rough, Letterhead,
Color [Colour], Prepunched, High quality, Custom 1(to 8)
Note
For the 16 ppm model, cassettes 2 to 4 are included in the optional paper feeder. For the 20/25 ppm
model, cassettes 3 and 4 are included in the optional paper feeder. This setting is displayed only if
the optional paper feeder is installed.
1
Display the Machine default screen. (See How to Display the Machine Default Screen on
page 3-12.)
2
Press the S key or the T key to select the cassette for
which you set the paper type from Paper Type(1st)
to (4th).
Machine default:
Paper Size( 3rd)
Paper Size( 4th)
Paper Type(1st)
3
Press the Enter key.
4
Press the S key or the T key to select the paper type.
5
Press the Enter key.
6
Press the Reset key. The message display returns to the copier basic screen.
: Auto I
: Auto I
: Plain
Paper Type(1st cassette) :
*Plain
Preprinted
Bond
Multi-Bypass Tray Confirmation Display
Select whether or not to display the Bypass Paper size screen when pressing the Paper Select
key to select the multi-bypass tray.
1
Display the Machine default screen. (See How to Display the Machine Default Screen on
page 3-12.)
2
Press the S key or the T key to select Check
Bypass.
3
3-14
Press the Enter key.
Machine default:
Paper Type(3rd)
Paper Type(4th)
Check Bypass
: Plain
: Plain
: Off
System Menu
4
Press the S key or the T key to select On or Off.
5
Press the Enter key.
6
Press the Reset key. The message display returns to the copier basic screen.
Check bypass sizing:
* Off
On
Paper Weight for Paper Type
Set the paper weight for each paper type.
Paper weight types that can be set: Super-Heavy, Heavy3, Heavy2, Heavy1, Middle3
[Normal3], Middle2 [Normal2], Middle1 [Normal1], Light
1
Display the Machine default screen. (See How to Display the Machine Default Screen on
page 3-12.)
2
Press the S key or the T key to select P.type
(Weight).
3
Press the Enter key.
4
Press the S key or the T key to select the paper type
for which you set the paper weight.
5
Press the Enter key.
6
Press the S key or the T key to select the paper
weight.
Machine default:
Paper Type(4th)
Check Bypass
P. type (Weight)
Paper type (paper weight):
End
Plain
: Middle2
: S. Heavy
Transparency
Plain:
*
7
Press the Enter key.
8
When all setting is complete, press the S key or the T
key to select End.
9
Press the Enter key.
10
: Plain
: Off
Heavy1
Middle3
Middle2
Paper type (paper weight):
End
Plain
: Middle2
: S. Heavy
Transparency
Press the Reset key. The message display returns to the copier basic screen.
3-15
System Menu
Duplex Print for Paper Type
Select whether or not to use paper of custom 1 to 8 in duplex printing.
1
Display the Machine default screen. (See How to Display the Machine Default Screen on
page 3-12.)
2
Press the S key or the T key to select
P.type(Duplex).
3
Press the Enter key.
4
Press the S key or the T key to select the paper type
to set from Custom 1 (to 8).
5
Press the Enter key.
6
Press the S key or the T key to select On or Off.
7
Press the Enter key.
8
When all setting is complete, press the S key or the T
key to select End.
9
Press the Enter key.
10
3-16
Machine default:
Check Bypass
P. type (Weight)
P. type (Duplex)
: Off
Select paper type (2sided) :
End
Custom 1
: On
: On
Custom 2
Custom1:
Off
* On
Select paper type (2sided) :
End
Custom 1
: On
: On
Custom 2
Press the Reset key. The message display returns to the copier basic screen.
System Menu
Custom Paper Type
Printing onto prepunched paper, preprinted paper or letterhead in the one-sided mode and the
two-sided mode from the same paper source may cause displacement of hole positions or reverse
orientations on both sides in two-sided printing. Set Match Print Direction to match the
orientation in one-sided printing and two-sided printing.
Example: Paper is set as shown in the illustration.
Setting
One-sided printing
Two-sided printing
Match Print
Direction
Fast Mode
Note
•
Setting of Match Print Direction will decrease the speed of one-sided printing a little.
•
With the setting of Match Print Direction, set the paper with the side for the first page
face-down as shown in illustration A. (If the optional finisher is installed, set the paper with the
side for the first page face-down as shown in illustration B.)
A
•
B
If the optional finisher is installed, the stapling mode may cause incorrect orientation of printing
depending on the stapling position.
1
Display the Machine default screen. (See How to Display the Machine Default Screen on
page 3-12.)
2
Press the S key or the T key to select Special
P.type.
3
Press the Enter key.
4
Press the S key or the T key to select Match Print
Direction or Fast Mode.
5
Press the Enter key.
6
Press the Reset key. The message display returns to the copier basic screen.
Machine default:
P. type (Weight)
P. type (Duplex)
Special P. type : Fast Mode
Specific Paper Type:
Match Print Direction
* Fast Mode
3-17
System Menu
Original Orientation
Set the default original orientation.
1
Display the Machine default screen. (See How to Display the Machine Default Screen on
page 3-12.)
2
Press the S key or the T key to select Orig.
direction.
Machine default:
P. type (Duplex)
Special P. type
Orig. direction
3
Press the Enter key.
4
Press the S key or the T key to select Rear [Back
Edge] or Left top [Left].
5
Press the Enter key.
6
Press the Reset key. The message display returns to the copier basic screen.
: Fast Mode
: Rear
Orig. direction
* Rear
Left top
Auto Sleep Time
Set the time that elapses before the auto sleep function is activated if you have turned on the auto
sleep function (see page 3-23).
Time that can be set:
Inch Specification — 1 to 240 minutes (in 1 minute increments)
Metric Specification — 1 to 120 minutes (in 1 minute increments)
Note
•
It is recommended to set a longer time if you use the machine frequently, and to set a shorter
time if not.
•
For the inch specification machine, if the auto sleep function causes inconvenience for
operation of this machine, disable this function. It is recommended, however, to set a longer
time before disabling this function.
•
On the inch specification machine, if you have disabled the auto sleep function, this item is not
displayed.
1
Display the Machine default screen. (See How to Display the Machine Default Screen on
page 3-12.)
2
Press the S key or the T key to select Sleep mode
time.
3
Press the Enter key.
4
Press the < key or the > key to select the desired time
from 1 to 240 minutes [1 to 120 minutes].
Machine default:
Special P. type
: Fast Mode
Orig. direction
: Rear
Sleep mode time : 30Min.
Sleep mode:
30Min. 1-240Min.
5
3-18
Press the Enter key.
System Menu
6
Press the Reset key. The message display returns to the copier basic screen.
Auto Low Power Time
Set the time that elapses before the low power mode is automatically activated.
Time that can be set:
Inch Specification — 1 to 240 minutes (in 1 minute increments)
Metric Specification — 1 to 120 minutes (in 1 minute increments)
1
Display the Machine default screen. (See How to Display the Machine Default Screen on
page 3-12.)
2
Press the S key or the T key to select Low power
time.
3
Press the Enter key.
4
Press the < key or the > key to select the desired time
from 1 to 240 minutes [1 to 120 minutes].
Machine default:
Orig. direction
: Rear
Sleep mode time : 30Min.
Low power time : 15Min.
Low power mode time:
15Min. 1-240Min.
5
Press the Enter key.
6
Press the Reset key. The message display returns to the copier basic screen.
Copy Output Destination
Set the paper output destination with priority for copying.
Setting item
Output destination
Top tray
Output tray of main body
Finisher Tray Output Optional finisher
Job separator
Note
Optional job separator
This item is displayed only if the optional finisher or job separator is installed.
1
Display the Machine default screen. (See How to Display the Machine Default Screen on
page 3-12.)
2
Press the S key or the T key to select Copy Otput
Destn.
3
Press the Enter key.
4
Press the S key or the T key to select the desired
output destination.
Machine default:
Sleep mode time : 30Min.
Low power time : 15Min.
Copy Otput Destn : Top tray
Copy Output Destination:
* Top tray
Finisher Tray Output
3-19
System Menu
5
Press the Enter key.
6
Press the Reset key. The message display returns to the copier basic screen.
Fax Output Destination
Set the paper output destination with priority for received fax data and various reports.
Setting item
Output destination
Top tray
Output tray of main body
Finisher Tray Output Optional finisher
Job separator
Note
Optional job separator
This item is displayed only if the optional fax kit and finisher or job separator are installed.
1
Display the Machine default screen. (See How to Display the Machine Default Screen on
page 3-12.)
2
Press the S key or the T key to select Fax Output
Destn.
3
Press the Enter key.
4
Press the S key or the T key to select the desired
output destination.
5
Press the Enter key.
6
Press the Reset key. The message display returns to the copier basic screen.
Machine default:
Low power time : 30Min.
Copy Otput Destn : Top tray
Fax Output Destn : Top tray
Fax Output Destination:
* Top tray
Finisher Tray Output
Default Operation Mode
Select the default screen to be displayed when the power is turned on from the copy screen or the
fax screen.
Note
3-20
This item is displayed only if the optional fax kit is installed.
1
Display the Machine default screen. (See How to Display the Machine Default Screen on
page 3-12.)
2
Press the S key or the T key to select Main mode.
3
Press the Enter key.
4
Press the S key or the T key to select Copy mode or
Fax mode.
Machine default:
Copy Otput Destn : Top tray
Fax Output Destn : Top tray
Main mode
: Copy
Select the main mode:
* Copy mode
Fax mode
System Menu
5
Press the Enter key.
6
Press the Reset key. The message display returns to the copier basic screen.
Key Sound
Select whether or not to enable the beep sound that will be emitted each time a key on the operation
panel is pressed.
1
Display the Machine default screen. (See How to Display the Machine Default Screen on
page 3-12.)
2
Press the S key or the T key to select Key sound
On/Off.
Machine default:
Sleep mode time
Low power time
Key sound On/Off
3
Press the Enter key.
4
Press the S key or the T key to select Off or On.
5
Press the Enter key.
6
Press the Reset key. The message display returns to the copier basic screen.
: 30Min.
: 15Min.
: On
Key sound On/Off
Off
* On
Date and Time
Set the current date and time, time difference from the Greenwich Mean Time (GMT), and summer
time.
1
Display the Machine default screen. (See How to Display the Machine Default Screen on
page 3-12.)
2
Press the S key or the T key to select Date/Time.
3
Press the Enter key.
4
Press the S key or the T key to select Time Zone.
5
Press the < key or the > key to set the time difference.
6
Press the S key or the T key to select Time.
7
Machine default:
Low power time
Key sound On/Off
Date/Time
: 15Min.
: On
: 06:33
Date/Time:
Time
: 06:33
DST
: Off
Time Zone : GMT+00:00
Date/Time:
End
Time
DST
: 06:33
: Off
Press the < key or the > key to set the current time.
3-21
System Menu
8
9
Press the S key or the T key to select DST
[Summertime].
Date/Time:
End
Time
DST
: 06:33
: Off
Press the < key or the > key to select On or Off.
10
Press the S key or the T key to select Year.
11
Press the < key or the > key to set the current year.
12
Press the S key or the T key to select Month.
13
Press the < key or the > key to set the current month.
14
Press the S key or the T key to select Day.
15
Press the < key or the > key to set the current day.
16
After all setting is complete, press the S key or the T
key to select End.
Date/Time:
DST
: Off
Time Zone : GMT+00:00
Year
: 7
Date/Time:
Time Zone : GMT+00:00
Year
: 7
Month
: 11
Date/Time:
Year
Month
Day
: 7
: 11
: 28
Date/Time:
End
Time
DST
: 06:33
: Off
17
Press the Enter key.
18
Press the Reset key. The message display returns to the copier basic screen.
Display Contrast Adjustment
Adjust the display contrast if the message display is indistinct.
3-22
1
Display the Machine default screen. (See How to Display the Machine Default Screen on
page 3-12.)
2
Press the S key or the T key to select Display
Contrast [Displ. Contrast].
3
Press the Enter key.
4
Press the < key or the > key to adjust the contrast.
Moving left darkens the contrast, and moving right
lightens it.
Machine default:
Key sound On/Off
Date/Time
Display Contrast
: On
: 08:48
:
Display contrast adjustment:
*
System Menu
5
Press the Enter key.
6
Press the Reset key. The message display returns to the copier basic screen.
Administrator Management Code Change
You can change the four-digit management code for the administrator of this machine.
Important!
•
If you change the management code, be sure to note it. If you should forget the management
code, contact your service representative.
•
The management code at the factory default setting is 1600 for the 16 ppm model, 2000 for
the 20 ppm model, and 2500 for the 25 ppm model.
1
Display the Machine default screen. (See How to Display the Machine Default Screen on
page 3-12.)
2
Press the S key or the T key to select PIN #
Change [MGMT Code entry].
3
Press the Enter key.
4
Use the numeric keys to input the new administrator
management code.
Machine default:
Date/Time
Display Contrast
PIN # Change
: 08:48
:
Management code change:
1600
# keys
5
Press the Enter key.
6
Press the Reset key. The message display returns to the copier basic screen.
Auto Sleep
The machine enters automatically the sleep mode when the preset time elapses without any
operation if this setting is turned On.
Notes
•
This setting is displayed only on the inch specification machine.
•
You can disable the auto sleep function if this function causes inconvenience. It is
recommended, however, to set a longer time that elapses before the auto sleep function is
activated, before disabling this function.
1
Display the Machine default screen. (See How to Display the Machine Default Screen on
page 3-12.)
2
Press the S key or the T key to select Auto Sleep.
3
Press the Enter key.
4
Press the S key or the T key to select On or Off.
Machine default:
Display Contrast
PIN # Change
Auto Sleep
:
: On
Auto Sleep:
Off
* On
3-23
System Menu
5
Press the Enter key.
6
Press the Reset key. The message display returns to the copier basic screen.
Auto Clear
You can set the auto clear function (refer to Chapter 1 in Basic Operation Guide, Auto Clear
Function) that will be activated when the preset time elapses after copying is complete.
1
Display the Machine default screen. (See How to Display the Machine Default Screen on
page 3-12.)
2
Press the S key or the T key to select Auto Clear.
Machine default:
PIN # Change
Auto Sleep
Auto Clear
3
Press the Enter key.
4
Press the S key or the T key to select On or Off.
5
Press the Enter key.
6
Press the Reset key. The message display returns to the copier basic screen.
: On
: On
Auto Clear:
Off
* On
Auto Clear Time
Set the time that elapses from completion of copying to activation of the auto clear function if you
have turned On the auto clear function (see page 3-24).
Time that can be set: 10 to 270 seconds (in 10 second increments)
Note
This item is not displayed if the auto clear function is off.
1
Display the Machine default screen. (See How to Display the Machine Default Screen on
page 3-12.)
2
Press the S key or the T key to select Auto Clear
Timer [Auto clear time].
3
Press the Enter key.
4
Press the < key or the > key to set the time to 10 to 270
seconds.
Machine default:
Auto Sleep
Auto Clear
Auto Clear Time
: On
: On
: 90Sec.
Auto Clear Timer:
90Sec. 10-270Sec.
3-24
5
Press the Enter key.
6
Press the Reset key. The message display returns to the copier basic screen.
System Menu
Silent Mode
This mode reduces operating noise of this machine. Use this mode if the operating noise of this
machine is annoying.
1
Display the Machine default screen. (See How to Display the Machine Default Screen on
page 3-12.)
2
Press the S key or the T key to select Silent Mode.
Machine default:
Auto Sleep
Auto Clear
Silent Mode
3
Press the Enter key.
4
Press the S key or the T key to select On or Off.
5
Press the Enter key.
6
Press the Reset key. The message display returns to the copier basic screen.
: On
: Off
: On
Silent Mode:
Off
* On
3-25
System Menu
Multi-Bypass Tray Settings
Set the following items for feeding paper from the multi-bypass tray.
Paper Size
Set the size of paper to be used from the multi-bypass tray. You can use irregular size paper by
inputting the size.
Note
If the paper size is unknown or no particular paper size setting is required, select Universal
Size.
Selecting a Size from Regular Sizes
Sizes that can be set:
Inch Specification — 11 × 17" (Ledger), 8 1/2 × 14" (Legal), 8 1/2 × 13" (Oficio II), 8 1/2 × 11" (Letter),
11 × 8 1/2", 5 1/2 × 8 1/2" (Statement), A4R, A4
Metric Specification — A3, B4, A4R, A4, B5R, B5, A5R, B6R, A6R, 8 1/2 × 11" (Letter), 11 × 8 1/2",
Folio
1
Press the System Menu/Counter key.
2
Press the S key or the T key to select Bypass
setting.
3
Press the Enter key.
4
Press the S key or the T key to select the paper size.
5
Press the Enter key. The Bypass Paper type screen is displayed. Proceed to Paper Type
described below.
System Menu / Counter:
End
Language
Bypass setting
Bypass Paper size:
Input Size
Selecting a Size from Other Regular Sizes
Sizes that can be set:
Inch Specification — A3, B4, B5R, B5, A5R, B6R, A6R, HAGAKI, Folio, Executive, ISO B5,
Envelope DL, Envelope C5, Envelope C4, Comm. #10, Comm. #9, Comm. #6-3/4, Monarch,
OufukuHagaki, YOUKEI 2, YOUKEI 4, 8K, 16KR, 16K
Metric Specification — 11 × 17" (Ledger), 8 1/2 × 14" (Legal), 8 1/2 × 13" (Oficio II), 5 1/2 × 8 1/2"
(Statement), HAGAKI, Executive, ISO B5, Envelope DL, Envelope C5, Envelope C4, Comm. #10,
Comm. #9, Comm. #6-3/4, Monarch, OufukuHagaki, YOUKEI 2, YOUKEI 4, 8K, 16KR, 16K
3-26
1
Press the System Menu/Counter key.
2
Press the S key or the T key to select Bypass
setting.
3
Press the Enter key.
System Menu / Counter:
End
Language
Bypass setting
System Menu
4
Press the S key or the T key to select Other
Regular Size.
Bypass Paper size:
Other Regular Size
5
Press the Enter key.
6
Press the S key or the T key to select the paper size.
7
Press the Enter key. The Bypass Paper type screen is displayed. Proceed to Paper Type
described below.
Other Regular Size:
Inputting a Paper Size
1
Press the System Menu/Counter key.
2
Press the S key or the T key to select Bypass
setting.
3
Press the Enter key.
4
Press the S key or the T key to select Input Size.
5
Press the Enter key.
6
Press the < key or the > key to set the vertical size. You
can set the vertical size to 3 7/8" to 11 5/8" in 1/8"
increments [98 to 297 mm in 1 mm increments].
7
Press the T key to select the horizontal size.
8
Press the < key or the > key to set the horizontal size.
You can set the horizontal size to 5 7/8" to 17" in 1/8"
increments [148 to 432 mm in 1 mm increments].
9
System Menu / Counter:
End
Language
Bypass setting
Bypass Paper size:
* Universal Size
Input Size
Input size
Input size
3 7 8"
5 7 8"
3 7 8"
5 7 8"
Press the Enter key. The Bypass Paper type screen is displayed. Proceed to Paper Type
described below.
3-27
System Menu
Paper Type
To set the paper type to be used in the multi-bypass tray, continue the procedure from Paper Size
setting.
Paper types that can be set: Plain, Transparency, Preprinted, Labels, Bond, Recycled,
Vellum, Rough, Letterhead, Color [Colour], Prepunched, Envelope, Cardstock, Thick
paper, High quality, Custom 1 (to 8)
3-28
1
Press the S key or the T key to select the paper type.
2
Press the Enter key. The message display returns to the copier basic screen.
Bypass Paper type :
* Plain
Transparency
Preprinted
System Menu
Browsing and Printing the Total Counter
You can browse the total count on the operation panel. Also you can output it as a counter report.
Browsing the Total Counter
Note
You can browse the output counter and the scanning counter.
1
Press the System Menu/Counter key.
2
Press the S key or the T key to select Counter
check.
3
Press the Enter key.
4
Press the S key or the T key to select Output
count or Scan count.
5
Press the Enter key.
6
Press the S key or the T key to check the counter.
System Menu / Counter:
Language
Bypass setting
Counter check
Counter check:
End
Output count
Scan count
Output count:
End
Copy
Printer
7
After browsing is complete, press the S key or the T key to select End.
8
Press the Enter key.
9
Press the Reset key. The message display returns to the copier basic screen.
: 1.234.567
: 0.001.234
Counter Report Output
Note
Ensure that A4/11 × 8 1/2" paper is set in the cassette when printing the counter report.
1
Press the System Menu/Counter key.
2
Press the S key or the T key to select Counter
check.
3
Press the Enter key.
4
Press the S key or the T key to select Print
counter report.
5
Press the Enter key. The counter report is output.
System Menu / Counter:
Language
Bypass setting
Counter check
Counter check :
Output count
Scan count
Print counter report
3-29
System Menu
6
Press the Reset key. The message display returns to the copier basic screen.
Example: Counter report
3-30
System Menu
Report Output
You can output the following reports from the operation panel.
Copy status report
Machine status report
3-31
System Menu
Coverage report
Note
3-32
•
Ensure that A4/11 × 8 1/2" paper is set in the cassette when printing a report.
•
A coverage report is a report on which the number of printed sheets and the average of
blackness ratio for each paper size are written. The following four items are included.
Total toner coverage report
Copy toner coverage report
Printer toner coverage report
Fax toner coverage report
1
Press the System Menu/Counter key.
2
Press the S key or the T key to select Print
Report.
3
Press the Enter key.
4
Press the S key or the T key to select the report to
output.
5
Press the Enter key. The report is output.
6
Press the Reset key. The message display returns to the copier basic screen.
System Menu / Counter:
Bypass setting
Counter check
Print Report
Print Report :
End
Copy Report
Machine Report
System Menu
Language Setting
You can select the language to be used on the message display.
Languages that can be selected:
Inch Specification — English, French (Français), Spanish (Español), and Japanese (
)
Metric Specification — English, German (Deutsch), French (Français), Spanish (Español) and
Italian (Italiano)
1
Press the System Menu/Counter key.
2
Press the S key or the T key to select Language.
3
Press the Enter key.
4
Press the S key or the T key to select the language to
use.
5
Press the Enter key. The message display returns to the copier basic screen, and the language for
the message display is changed.
System Menu / Counter:
End
Language
Bypass setting
Language:
* English
Francais
Espanol
3-33
System Menu
User Adjustment
Note
This setting is displayed only on the 25 ppm model.
Drum Refresh
If output images are deformed or unnecessary white points appear, perform drum refresh. It takes
approximately two minutes.
Note
Ensure that A3, A4, 11 × 17" (Ledger), or 11 × 8 1/2" paper is set in the multi-bypass tray.
1
Press the System Menu/Counter key.
2
Press the S key or the T key to select User
Adjustment.
3
Press the Enter key.
4
Press the S key or the T key to select Drum
refresh.
5
Press the Enter key.
6
Press the S key or the T key to select Yes.
7
Press the Enter key. Drum refresh starts.
System Menu / Counter:
Machine default
Printer default
User Adjustment
User Adjustment:
End
Drum refresh
Do you want to refresh drum?
Yes
No
Now drum refreshing.
1
8
When drum refresh is complete, press the S key or the
T key to select End.
9
Press the Enter key.
10
3-34
User Adjustment:
End
Drum refresh
Press the Reset key. The message display returns to the copier basic screen.
4
Job Accounting
This chapter explains the job accounting functions of this machine.
The principal functions that can be set are shown below.
•
Job Accounting Mode
•
Managing Accounts
•
All Account Management
•
Individual Account Management
•
Enabling Job Accounting
•
Default Settings
•
Using Job Accounting
4-1
Job Accounting
Job Accounting Mode
Use the job accounting mode to control the total number of copies and prints by setting an ID-code
for each account.
The job accounting mode of this machine has the following features.
Important!
•
Controls the copier functions, printer functions, and optional scanner/fax functions using the
same ID-codes.
•
Controls up to 100 accounts.
•
You can set the ID-codes with one to eight digits.
•
Counts the number of copies for all accounts and individual accounts.
•
You can set the limit of number of sheets to up to 999,999 in 1 sheet increments.
•
You can clear the counter for all accounts and individual accounts.
For setting the limit of use in managing accounts, you must change Copier Job Accounting and
Printer Job Accounting from Off to On in the default settings. If the optional network scanner kit
or fax kit is installed, set Scanner Job Accounting or Fax Job Accounting in the default settings
to On. (See Default Settings on page 4-13.)
The following functions are available in the job accounting mode.
Job accounting mode
Description
Managing accounts
Registration — Registers ID-codes and limit of use. Up
to 100 ID-codes can be registered.
Reference
page
4-4
Deletion — Deletes registered accounts.
Change of limit of use — Changes the limit of use for
each account.
Notes
4-2
All account management
Browsing of the total count, job accounting report output,
and counter clear for all accounts can be performed.
4-10
Individual account
management
Counting of the total count and counter clear for
individual accounts can be performed.
4-11
Enabling job accounting
Turn On or Off the job accounting function.
4-12
Default settings
Adjust the default settings for the job accounting mode.
4-13
•
For settings on the computer required for using job accounting concerning the printer functions,
refer to the KX Printer Driver Operation Guide.
•
In addition, the job accounting mode that can be set from the computer is available. For details,
refer to the KM-NET for Accounting Operation Guide.
Job Accounting
How to Display the Job Accounting Screen
Use the following procedure to display the Job Accounting screen.
1
Press the System Menu/Counter key.
2
Press the S key or the T key to select Job
Accounting.
3
Press the Enter key.
4
Use the numeric keys to input the four-digit
management code. The management code at the
factory default setting is 1600 for the 16 ppm model,
2000 for the 20 ppm model, and 2500 for the 25 ppm
model.
Note
5
System Menu / Counter:
Counter check
Print Report
Job Accounting
Enter pin code using # key.
The four-digit management code can be changed. (See Administrator Management Code
Change on page 3-23.)
If the management code is accepted, the Job
Accounting screen is displayed.
Next, perform the setting referring to the following
description of each setting item.
Job Accounting:
[ On ]
End
Job Accounting Total
Each Job Accounting TL
4-3
Job Accounting
Managing Accounts
Registering a New Account
Register a one- to eight-digit ID-code and the limit of use for each account.
1
Display the Job Accounting screen. (See How to Display the Job Accounting Screen on
page 4-3.)
2
Press the S key or the T key to select Edit Job
Accounting.
3
Press the Enter key.
4
Press the S key or the T key to select New
registration.
5
Press the Enter key.
6
Use the numeric keys to input a one- to eight-digit
ID-code. A code from 0 to 99999999 can be input.
[ On ]
Job Accounting:
Each Job Accounting TL
Edit Job Accounting
Job Accountg Def. Set.
Edit Job Accounting:
End
New registration
Delete
New registration:
Account ID
Note
7
Note
8
Note
9
10
4-4
If you try to register an ID-code that has been already input, an error occurs. Input another ID-code.
Press the Enter key.
After the ID-code is registered, message Please
wait is displayed for several seconds.
Please wait.
Set the limit of use.
For the method of setting the limit of use, see Setting Limit of Use on page 4-5.
After setting of limit of use is complete, press the S
key or the T key to select End.
Press the Enter key.
Limit in use:
End
Copy
Printer
: Able use
: Able use
Job Accounting
Setting Limit of Use
You can set the limit of use for each registered account.
The items that can be set are shown below.
Item
Description of limit
Reference
page
Copy restriction
Select whether to permit or prohibit copying.
4-5
Able to use — Permits copying.
Unable to use — Prohibits copying.
Print restriction
Select whether to permit or prohibit printing.
4-6
Able to use — Permits printing.
Unable to use — Prohibits printing.
Output limit
Set the limit of total count of copying and printing.
4-6
No limit — Does not set the limit of count.
Counter limit — Set the limit of count (0 to 999,999).
Scanner
transmission limit
Set the limit of count of scanner transmission if the optional
network scanner kit is installed.
4-7
No limit — Does not set the limit of count of scanner
transmission.
Counter limit — Set the limit of count of scanner
transmission (0 to 999,999).
Is not permitted — Prohibits use of scanner transmission.
Fax transmission
limit
Set the limit of count of fax transmission if the optional fax kit is
installed.
4-7
No limit — Does not set the limit of count of fax transmission.
Counter limit — Set the limit of count of fax transmission (0
to 999,999).
Is not permitted — Prohibits use of fax transmission.
Note
You can change the management method so that you can set the limit of count for copying and
printing respectively. For details, refer to the KM-NET for Accounting Operation Guide.
Copy Restriction
You can select whether to permit or prohibit copying.
Note
This item is displayed if Copier Job Accounting in the default settings is set to On. (See
page 4-13.)
1
Display the Limit in use screen referring to steps 1 to 7 of Registering a New Account.
2
Press the S key or the T key to select Copy.
3
Limit in use:
End
Copy
Printer
: Able use
: Able use
Press the Enter key.
4-5
Job Accounting
4
Press the S key or the T key to select Able to use
or Unable to use.
5
Press the Enter key. The message display returns to the Limit in use screen.
Copy:
* Able to use
Unable to use
Print Restriction
You can select whether to permit or prohibit printing.
Note
This item is displayed if Printer Job Accounting in the default settings is set to On. (See
page 4-14.)
1
Display the Limit in use screen referring to steps 1 to 7 of Registering a New Account.
2
Press the S key or the T key to select Printer.
Limit in use:
End
Copy
Printer
3
Press the Enter key.
4
Press the S key or the T key to select Able to use
or Unable to use.
5
Press the Enter key. The message display returns to the Limit in use screen.
: Able use
: Able use
Printer:
* Able to use
Unable to use
Output Limit
You can set the limit of total count of copying and printing.
Note
4-6
This item is not displayed if both Copy Restriction and Print Restriction are set to Unable to
use.
1
Display the Limit in use screen referring to steps 1 to 7 of Registering a New Account.
2
Press the S key or the T key to select Output
limit.
Limit in use:
Copy
Printer
Output limit
: Able use
: Able use
: No limit
3
Press the Enter key.
4
Press the S key or the T key to select No limit or
Counter limit.
5
Press the Enter key. If you have selected Counter limit, the Counter limit Default
Value screen is displayed. Proceed to the next step.
Output limit
* No limit
Counter limit
Job Accounting
6
7
Use the numeric keys to input the counter limit. You
can set the limit to 999,999 at the maximum in 1 sheet
increments.
Counter limit Default Value:
999.999
Limitation
Press the Enter key. The message display returns to the Limit in use screen.
Scanner Transmission Limit
You can set the limit of count of scanner transmission if the optional network scanner kit is installed.
Note
This item is displayed if Scanner Job Accounting in the default settings is set to On. (See
page 4-14.)
1
Display the Limit in use screen referring to steps 1 to 7 of Registering a New Account.
2
Press the S key or the T key to select Scanner TX
[Scan. Trans].
Limit in use
Printer
Output limit
Scanner TX
: Able use
: No limit
: No limit
3
Press the Enter key.
4
Press the S key or the T key to select No limit,
Counter limit or Is not permitted.
5
Press the Enter key. If you have selected Counter limit, the Counter limit Default
Value screen is displayed. Proceed to the next step.
6
Use the numeric keys to input the counter limit. You
can set the limit to 999,999 at the maximum in 1 sheet
increments.
7
Scanner Transmitting:
* No limit
Counter limit
Is not permitted
Counter limit Default Value:
999.999
Limitation
Press the Enter key. The message display returns to the Limit in use screen.
Fax Transmission Limit
You can set the limit of count of fax transmission if the optional fax kit is installed.
Note
This item is displayed if Fax Job Accounting in the default settings is set to On. (See page 4-15.)
1
Display the Limit in use screen referring to steps 1 to 7 of Registering a New Account.
2
Press the S key or the T key to select Fax TX [Fax
transm].
3
Limit in use
Output limit
Scanner TX
Fax TX
: No limit
: No limit
: No limit
Press the Enter key.
4-7
Job Accounting
4
Press the S key or the T key to select No limit,
Counter limit or Is not permitted.
5
Press the Enter key. If you have selected Counter limit, the Counter limit Default
Value screen is displayed. Proceed to the next step.
6
Use the numeric keys to input the counter limit. You
can set the limit to 999,999 at the maximum in 1 sheet
increments.
7
Fax Transmitting:
* No limit
Counter limit
Is not permitted
Counter limit Default Value:
999.999
Limitation
Press the Enter key. The message display returns to the Limit in use screen.
Deleting an Account
Delete a registered account.
1
Display the Job Accounting screen. (See How to Display the Job Accounting Screen on
page 4-3.)
2
Press the S key or the T key to select Edit Job
Accounting.
3
Press the Enter key.
4
Press the S key or the T key to select Delete.
5
Press the Enter key.
6
Press the S key or the T key to select the ID-code to
delete.
7
Press the Enter key. The confirmation screen is
displayed.
8
Press the S key or the T key to select Yes.
9
Press the Enter key.
Note
10
4-8
[ On ]
Job Accounting:
Each Job Accounting TL
Edit Job Accounting
Job Accountg Def. Set.
Edit Job Accounting:
End
New registration
Delete
Delete:
End
11111111
22222222
: 123.456
: 000.234
Delete?
Yes
No
To delete another account, repeat steps 6 to 9.
Press the S key or the T key to select End.
Delete:
End
22222222
33333333
: 000.234
: 006.101
Job Accounting
11
Press the Enter key.
Changing Limit of Use
Change the limit of use that has been set for each account.
Important!
To set the limit of use in managing accounts, you must set Copier Job Accounting and Printer
Job Accounting in the default settings from Off to On. If the optional network scanner kit or fax kit
is installed, set Scanner Job Accounting or Fax Job Accounting in the default settings to On.
(See Default Settings on page 4-13.)
1
Display the Job Accounting screen. (See How to Display the Job Accounting Screen on
page 4-3.)
2
Press the S key or the T key to select Edit Job
Accounting.
3
Press the Enter key.
4
Press the S key or the T key to select Change
limit in use.
5
Press the Enter key.
6
Press the S key or the T key to select the ID-code to
change.
7
Press the Enter key.
8
Change the limit of use.
Note
9
10
[ On ]
Job Accounting:
Each Job Accounting TL
Edit Job Accounting
Job Accountg Def. Set.
Edit Job Accounting:
New registration
Delete
Change limit in use
Change limit in use:
End
11111111
22222222
: 123.456
: 000.234
For the method of setting the limit of use, see Setting Limit of Use on page 4-5.
After all operation of change is complete, press the S
key or the T to select End.
Change limit in use:
End
11111111
22222222
: 123.456
: 000.234
Press the Enter key
4-9
Job Accounting
All Account Management
You can browse the total output count, output the job accounting report, and clear the counter for all
accounts.
1
Display the Job Accounting screen. (See How to Display the Job Accounting Screen on
page 4-3.)
2
Press the S key or the T key to select Job
Accounting Total.
3
Press the Enter key.
4
The total output count of all accounts is displayed.
Check the count. To output the job accounting report,
press the S key or the T key to select Print
Report.
5
Press the Enter key. The report is output.
Job Accounting:
[ On ]
End
Job Accounting Total
Each Job Accounting TL
Job Accounting Total:
End
Print Report
Counter clear
1. 234. 567
Job Accounting Total:
End
Print Report
Counter clear
1. 234. 567
Example: Job accounting report
4-10
6
To clear the counter, press the S key or the T key to
select Counter clear.
7
Press the Enter key. The confirmation screen is
displayed.
8
Press the S key or the T key to select Yes.
9
Press the Enter key.
10
Press the S key or the T key to select End.
11
Press the Enter key.
Clear counter?
Yes
No
Job Accounting Total:
End
Print Report
Counter clear
0. 000. 000
Job Accounting
Individual Account Management
You can see the output count and clear the counter for individual accounts.
1
Display the Job Accounting screen. (See How to Display the Job Accounting Screen on
page 4-3.)
2
Press the S key or the T key to select Each Job
Accounting TL.
3
Press the Enter key.
4
The output counts of individual accounts are displayed.
Check the counts.
5
To clear the counter, press the S key or the T key to select the ID-code.
6
Press the Enter key. The confirmation screen is
displayed.
7
Press the S key or the T key to select Yes.
8
Press the Enter key.
9
After all operation is complete, press the S key or the
T key to select End.
10
Job Accounting:
[ On ]
End
Job Accounting Total
Each Job Accounting TL
Each Job Accnt Ttl/Cntr clear:
End
11111111
: 123.456
22222222
: 000.234
Clear counter?
Yes
No
Each Job Accnt Ttl/Cntr clear:
End
11111111
: 000.000
22222222
: 000.234
Press the Enter key.
4-11
Job Accounting
Enabling Job Accounting
Turn on or off the job accounting function.
1
Display the Job Accounting screen. (See How to Display the Job Accounting Screen on
page 4-3.)
2
Press the S key or the T key to select Job
Accounting On/Off.
3
Press the Enter key.
4
Press the S key or the T key to select Off or On.
5
Press the Enter key.
6
Press the Reset key. If you have selected On, the
ID-code input screen is displayed.
[ On ]
Job Accounting:
Edit Job Accounting
Job Accountg Def. Set.
Job Accounting On/Off
Job Accounting:
Off
On
*
Enter Account ID.
:Confirm
4-12
Job Accounting
Default Settings
Adjust the default settings for job accounting.
You can set the following items in default settings.
•
Copier Job Accounting (page 4-13)
•
Printer Job Accounting (page 4-14)
•
Scanner Job Accounting (page 4-14)
•
Fax Job Accounting (page 4-15)
•
Operation against Excess over Limit (page 4-16)
Copier Job Accounting
You can select whether or not to enable job accounting for the copier functions.
1
Display the Job Accounting screen. (See How to Display the Job Accounting Screen on
page 4-3.)
2
Press the S key or the T key to select Job
Accountg Def. Set.
3
Press the Enter key.
4
Press the S key or the T key to select Copy Job
Account.
5
Press the Enter key.
6
Press the S key or the T key to select Off or On.
7
Press the Enter key.
8
Press the S key or the T key to select End.
9
Press the Enter key.
[ On ]
Job Accounting:
Each Job Accounting TL
Edit Job Accounting
Job Accountg Def. Set.
Job Accounting Default Setting
End
Copy Job Account. : On
Prnt Job Account. : On
Copy Job Accounting:
Off
On
*
Job Accounting Default Setting
End
Copy Job Account. : On
Prnt Job Account. : On
4-13
Job Accounting
Printer Job Accounting
You can select whether or not to enable job accounting for the printer functions.
1
Display the Job Accounting screen. (See How to Display the Job Accounting Screen on
page 4-3.)
2
Press the S key or the T key to select Job
Accountg Def. Set.
3
Press the Enter key.
4
Press the S key or the T key to select Prnt Job
Account.
5
Press the Enter key.
6
Press the S key or the T key to select Off or On.
7
Press the Enter key.
8
Press the S key or the T key to select End.
9
Press the Enter key.
[ On ]
Job Accounting:
Each Job Accounting TL
Edit Job Accounting
Job Accountg Def. Set.
Job Accounting Default Setting
End
Copy Job Account. : On
Prnt Job Account. : On
Printer Job Accounting:
Off
* On
Job Accounting Default Setting
End
Copy Job Account. : On
Prnt Job Account. : On
Scanner Job Accounting
You can select whether or not to enable job accounting for the scanner functions.
Note
4-14
This item is displayed if the optional network scanner kit is installed.
1
Display the Job Accounting screen. (See How to Display the Job Accounting Screen on
page 4-3.)
2
Press the S key or the T key to select Job
Accountg Def. Set.
3
Press the Enter key.
4
Press the S key or the T key to select Scanner Job
Accnt.
5
Press the Enter key.
[ On ]
Job Accounting:
Each Job Accounting TL
Edit Job Accounting
Job Accountg Def. Set.
Job Accounting Default Setting
Copy Job Account. : On
Prnt Job Account. : On
Scanner Job Accnt : On
Job Accounting
6
Press the S key or the T key to select Off or On.
7
Press the Enter key.
8
Press the S key or the T key to select End.
9
Press the Enter key.
Scanner Job Accounting:
Off
* On
Job Accounting Default Setting
End
Copy Job Account. : On
Prnt Job Account. : On
Fax Job Accounting
You can select whether or not to enable job accounting for the fax functions.
Note
This item is displayed if the optional fax kit is installed.
1
Display the Job Accounting screen. (See How to Display the Job Accounting Screen on
page 4-3.)
2
Press the S key or the T key to select Job
Accountg Def. Set.
3
Press the Enter key.
4
Press the S key or the T key to select Fax Job
Accountng.
5
Press the Enter key.
6
Press the S key or the T key to select Off or On.
7
Press the Enter key.
8
Press the S key or the T key to select End.
9
Press the Enter key.
[ On ]
Job Accounting:
Each Job Accounting TL
Edit Job Accounting
Job Accountg Def. Set.
Job Accounting Default Setting
Prnt Job Account. : On
Scanner Job Accnt : On
Fax Job Accountng : On
Fax Job Accounting:
Off
* On
Job Accounting Default Setting
End
Copy Job Account. : On
Prnt Job Account. : On
4-15
Job Accounting
Operation against Excess over Limit
You can select whether to stop output by prohibiting immediately use of the machine, to stop the
operation from the next job or to display a warning message only, when the limit of count that has
been set with the function of the limit of use is exceeded.
4-16
1
Display the Job Accounting screen. (See How to Display the Job Accounting Screen on
page 4-3.)
2
Press the S key or the T key to select Job
Accountg Def. Set.
3
Press the Enter key.
4
Press the S key or the T key to select Excess
limit Set.
5
Press the Enter key.
6
Press the S key or the T key to select Stop job
immediately, Stop after job done or Only
warning.
7
Press the Enter key.
8
Press the S key or the T key to select End.
9
Press the Enter key.
[ On ]
Job Accounting:
Each Job Accounting TL
Edit Job Accounting
Job Accountg Def. Set.
Job Accounting Default Setting
: On
Scanner Job Accnt
Fax Job Accountng
: On
Excess limit Set.
: Prohibit
Excess limit Setting:
* Stop job immediately
Stop after job done
Only warning
Job Accounting Default Setting
End
Copy Job Account. : On
Prnt Job Account. : On
Job Accounting
Using Job Accounting
Copier Operation
Under job accounting, you can perform copier operation only by inputting your ID-code using the
numeric keys.
Important!
1
Be sure to press the Job Accounting key after
completing copying. The ID-code input screen is
displayed.
Input your ID-code using the numeric keys and press
the Enter key. The copier basic screen is displayed.
Enter Account ID.
********
:Confirm
Notes
•
If you input an incorrect code, press the Stop/Clear key and input the code again.
•
If the input ID-code does not match any registered ID-code, an error sound is emitted. Input the
correct ID-code.
2
Perform normal copier operation.
3
After copying is complete, press the Job Accounting
key.
Printer Operation
Under job accounting, operation on the computer is required for printing. For details, refer to the KX
Printer Driver Operation Guide.
4-17
Job Accounting
4-18
Appendix
This appendix explains the following topics.
•
Paper
•
Specifications
•
Copier Function Combination Chart
•
Glossary
Appendix-1
Appendix
Paper
Basic Specifications of Paper
This machine is designed for printing on paper for ordinary xerographic copiers and page printers
(standard paper). This machine also supports other types of paper as long as they meet the
standards explained in this chapter.
Since use of unsuitable paper may cause paper jams or wrinkling of paper, be careful about
selection of paper.
Transparencies, labels, and envelopes must be fed from the multi-bypass tray.
Notes
•
Some types of recycled paper may not satisfy the basic specifications shown in the table below
because some basic conditions such as moisture content and pulp content do not satisfy the
specifications required for using the paper in this machine. Consequently, for using recycled
paper, purchase a small amount of paper and perform trial copying. Select a type of which the
print result is good and paper powder is not extremely much.
•
For problems caused by use of off-specification paper, Kyocera Mita shall not be liable.
Available Paper Types
Use copy paper for normal xerographic copiers and page printers (standard paper). The paper
quality has an influence on print quality. Satisfactory print result cannot be obtained from poor
quality paper.
Basic Paper Specifications
The table below summarizes the basic specifications of paper that can be used in this machine.
Details are given on the subsequent pages.
Item
Specifications
Weight
Cassette: 60 to 105 g/m² (16 to 28 lb/ream)
Multi-bypass tray: 45 to 160 g/m² (12 to 42 lb/ream)
Thickness
0.086 to 0.110 mm
Dimensional tolerance
±0.7 mm
Squareness of corners
90 ° ±0.2 °
Moisture content
4 to 6 %
Grain direction
Long (paper feed direction)
Pulp content
80 % or more
Proper Paper Selection
This section describes the guideline for selecting paper.
Paper Conditions
Do not use paper with folded edges, curls, smudges, tears, lint or surface roughness or paper that is
easily torn. Using such paper may cause poor print quality as well as paper jams due to improper
paper feed, resulting in shortening of product life. Select paper with smooth and even surface. Do
not use paper with surface coating or other surface treatment because such paper may damage the
drum or the fixing unit.
Paper Composition
Do not use paper with surface coating such as art paper, paper with surface treatment, or paper
containing plastic or carbon. The heat causes such paper to emit toxic gases or to damage the
drum.
Standard paper should have at least an 80 % pulp content. The percentage of cotton and other
fibers should not exceed 20 %.
Appendix-2
Appendix
Paper Sizes
The following table lists the sizes of paper that can be used in the cassette or multi-bypass tray.
The dimensional tolerances are ±0.7 mm for both length and width of paper. The corner angles must
be 90 ° ±0.2 °.
Multi-bypass tray
Cassette or multi-bypass tray
B6R (128 × 182 mm)
A3 (297 × 420 mm)
A6R (105 × 148 mm)
B4 (257 × 364 mm)
Postcard (100 × 148 mm)
A4 (297 × 210 mm)
Return postcard (148 × 200 mm)
A4R (210 × 297 mm)
Executive (7 1/4 × 10 1/2")
B5 (257 × 182 mm)
Envelope DL (110 × 220 mm)
B5R (182 × 257 mm)
Envelope C5 (162 × 229 mm)
A5R (148 × 210 mm)
Envelope C4 (229 × 324 mm)
Folio (210 × 330 mm)
ISO B5 (176 × 250 mm)
11 × 17" (Ledger)
Comm.#10 (4 1/8 × 9 1/2")
8 1/2 × 14" (Legal)
Comm.#9 (3 7/8 × 8 7/8")
11 × 8 1/2"
Comm.#6-3/4 (3 5/8 × 6 1/2")
8 1/2 × 11" (Letter)
Monarch (3 7/8 × 7 1/2")
5 1/2 × 8 1/2" (Statement)
YOUKEI 2 (114 × 162 mm)
8 1/2 × 13" (Oficio II)
YOUKEI 4 (105 × 235 mm)
8K (273 × 394 mm)
16K (197 × 273 mm)
Custom: 3 7/8 × 5 7/8" to 11 5/8 × 17", 98 × 148 to
297 × 432 mm
Smoothness
Although paper should have smooth and even surfaces, do not use paper with surface coating.
Paper with too smooth surfaces may cause multiple-sheet feeding, resulting in paper jams.
Basis weight
Basis weight is the weight of paper expressed in grams per square meter (g/m²). Paper that is too
heavy or too light may cause feed errors or paper jams as well as premature wear of the product.
Uneven weight of paper, namely uneven paper thickness may cause multiple-sheet feeding or print
quality problems such as blurring because of poor toner fusing.
The recommended basis weight is between 60 and 105 g/m² (16 and 28 lb/ream) for the cassette
and between 45 and 160 g/m² (12 and 42 lb/ream) for the multi-bypass tray.
Thickness
Paper used by the printer should be neither too thick nor too thin. If multiple-sheet feed or frequent
paper jams occur, the paper may be too thin. Also if the paper is too thick, paper jams may occur.
The recommended thickness of a sheet for this printer is between 0.086 and 0.110 mm.
Moisture Content
Moisture content is expressed with the percentage of moisture relative to dryness. Moisture affects
paper feeding, electrostatic properties, and toner fusing onto the paper.
The moisture content of paper varies with the relative humidity in the room. If the room is too humid
and paper absorbs more moisture, the edges may swell and the paper may become wavy. If the
room is too dry and the paper loses moisture, the edges shrink and tighten, and the print contrast
may be degraded.
Appendix-3
Appendix
Wavy or dry edges may cause misalignments in paper feeding. The recommended moisture content
of paper is between 4 and 6 %.
To maintain the correct moisture content level, pay attention to the following items.
•
Store paper in a dry, well-ventilated place.
•
Leave packages of paper wrapped as long as possible. Rewrap paper that will not be used
soon after unpacking.
•
Store paper into its paper carton or packing paper with sealing. Place the cartons on a pallet or
other furniture so that they are not in direct contact with the floor. Separate particularly from a
boarded or concrete floor in the rainy season.
•
Before using paper stored for an extended period of time, keep it in a proper condition of water
content for at least 48 hours.
•
Do not expose paper to heat, direct sunlight or damp.
Grain Direction
In manufacturing of paper, paper is cut with grain vertical to the paper length (long grain) or with
grain vertical to the paper width (short grain). Since short grain paper may cause a problem in paper
feeding, use long grain paper.
Other Specifications
Porosity: Indicates the density of paper fiber.
Stiffness: Limp paper may buckle in the machine, resulting in paper jams.
Curl: Most paper naturally tends to curl one way if left unpacked. When paper passes through the
fixing unit, it curls upward a little. To produce flat printouts, load the paper so that the upward
pressure from the machine can correct their curling.
Electrostatic discharge: During the printing process, paper is given an electrostatic charge to
attract the toner. Therefore, select the paper that discharges the static electricity immediately.
Whiteness: The contrast of printed images depends on the whiteness of the paper. Whiter paper
produces sharper and clearer images.
Quality control: Uneven paper sizes, corners that are not square, jagged paper edges, irregularly
cut sheets, torn edges and corners, etc. may cause malfunction of the machine. Be careful
particularly when cutting paper by yourself for using it as copy paper.
Packaging: Select paper that is securely packed and shipped in a carton. Packing paper coated
inside for moisture proof is the best.
Special treatment: It is recommended not to use paper with the following treatment even if the
paper satisfies the basic specifications. To use such paper, perform trial printing before purchasing a
large amount of paper.
Appendix-4
•
Glazed paper
•
Watermarked paper
•
Paper with uneven surface
•
Paper with perforations
Appendix
Special Paper
This section describes printing onto special paper other than standard paper.
You can use the following types of special paper in this machine.
•
Transparency
•
Preprinted paper
•
Label
•
Bond paper
•
Recycled paper
•
Thin paper (45 to 64 g/m²)
•
Letterhead
•
Color paper
•
Prepunched paper
•
Envelope
•
Postcard
•
Thick paper (90 to 160 g/m²)
•
High-quality paper
For these types of paper, use paper specified for copiers or page printers. When using
transparencies, labels, thin paper, envelopes, postcards, or thick paper, feed the paper from the
multi-bypass tray.
Selection of Special Paper
Special paper that satisfies the conditions shown on and after the next page can be used in this
machine. However, since special paper differs significantly in paper composition and quality, special
paper is more likely to cause problems than standard paper during printing. When using special
paper, perform trial printing using this machine and check to see if the results are satisfactory before
purchasing it. Notes in printing for principal types of special paper are described on and after the
next page. Kyocera Mita shall not be liable for any danger to a person or machine that is caused by
using special paper (e.g., special paper affected by moisture).
Transparency
Transparencies must withstand the heat of fusing during the printing process. The recommended
transparency product is shown below.
3M CG3700 (Letter, A4)
The specifications of transparencies that can be used in this machine are shown in the table below.
Item
Specifications
Heat resistance
Must withstand heat at least 190 °C.
Thickness
0.100 to 0.110 mm
Material
Polyester
Size tolerance
±0.7 mm
Squareness of corners
90° ±0.2°
To avoid problems, feed transparencies from the multi-bypass tray. Be sure to set them with the long
side toward the main body.
If transparencies cause paper jams frequently, pull the end of the transparencies carefully each time
one sheet is output.
Appendix-5
Appendix
Label
Be sure to feed labels from the multi-bypass tray.
For selecting labels, use extreme care so that the adhesive may not come in direct contact with any
part of the machine and that the labels are not easily peeled from the carrier sheet. Adhesives that
stick to the drum or rollers and peeled labels remaining in the machine may cause a failure.
When printing onto labels, you must be liable for the print quality and possible trouble.
Labels consist of three layers as shown in the
illustration. The adhesive layer contains materials that
are easily affected by the force applied in the machine.
The carrier sheet bears the top sheet until the label is
used. This composition of labels may cause more
problems.
Top sheet
Adhesive layer
Carrier sheet
The label surface must be covered completely with the
top sheet. Gaps between labels may cause peeling of
labels, resulting in a serious failure.
Some label paper has large margins on the top sheet. When using such paper, do not peel these
margins from the carrier sheet before completing output.
Allowed
Not allowed
Top sheet
Carrier sheet
Use label paper that conforms to the following specifications.
Item
Specifications
Top sheet weight
44 to 74 g/m²
Basis weight (overall paper weight) 104 to 151 g/m²
Top sheet thickness
0.086 to 0.107 mm
Overall paper thickness
0.115 to 0.145 mm
Moisture content
4 to 6 % (composite)
Postcard
Fan the stack of postcards and align the edges before
loading them in the multi-bypass tray. Set the
postcards after straightening them if they are curled.
Feeding curled postcards may cause paper jams.
For printing onto return postcards, use a type that does
not contain a fold.
Some postcards have rough edges on the back (those
are created when the paper is cut). In this case, put the
postcards on a flat place and rub the edges with, for
example, a ruler lightly once or twice to smooth them.
Appendix-6
Rough
edge
Rough
edge
Appendix
Envelope
Be sure to feed envelopes from the multi-bypass tray.
Since the composition of an envelope is complex, consistent printing quality over the entire
envelope surface may be difficult. Thin envelopes, particularly, may be wrinkled while they pass
through this machine. Before purchasing envelopes, perform trial printing to check to see if the
printing result on an envelope is satisfactory.
Leaving envelopes for a long time may cause wrinkling. Unpack the envelopes just before using
them.
Also note the following items.
•
Do not use any envelopes on which adhesive is exposed. Even if adhesive is not exposed, if
simple peeling of paper exposes adhesive, do not use such envelopes. If a small piece of paper
that covers the adhesive is peeled in this machine, a serious failure may occur.
•
Do not use envelopes with special treatment. Do not use envelopes with a grommet for winding
a string, those with an open window or those with a window to which film treatment is applied.
•
If paper jams occur, set fewer envelopes at a time.
•
When printing onto multiple envelopes, avoid stack of more than 10 envelopes on the output
tray to prevent paper jams.
Thick Paper
Fan the stack of thick paper and align the edges before loading it in the multi-bypass tray. Some
thick paper has rough edges on the back (those are created when the paper is cut). In this case, put
the thick paper on a flat place and rub the edges with, for example, a ruler lightly once or twice to
smooth them in a similar way to Postcard. Printing onto paper with rough edges may cause paper
jams.
Note
If the paper cannot be fed even after the rough edges
are removed, curl the paper upward by several
millimeters at the front end as shown in the illustration
and set the paper in the multi-bypass tray.
Color paper
Color paper must satisfy the specifications listed in the table on page 2 of the Appendix. In addition,
the pigments in the paper must be able to withstand the heat of fusing during the printing process
(up to 200 °C).
Preprinted paper
Preprinted paper must satisfy the specifications listed in the table on page 2 of the Appendix. The
ink on the paper for coloring must be able to withstand the heat of fusing during the printing process
and must not be adversely affected by silicone oil. Do not use paper with any kind of coating, such
as calendars.
Recycled paper
Recycled paper must satisfy the specifications listed in the table on page 2 of the Appendix except
for whiteness.
Note
Before purchasing recycled paper, perform trial printing to check to see if the printing quality is
satisfactory.
Appendix-7
Appendix
Specifications
Note
Specifications are subject to change without notice to reflect improvements in performance.
Main Body
Copying system
Indirect electrostatic system
Original types
accommodated
Sheets, books, and 3-dimensional objects (maximum original size:
A3/11 × 17")
Copy sizes
Cassette
A3, B4, A4, A4R, B5, B5R, A5R, Folio, 11 × 17" (Ledger), 8 1/2 × 14"
(Legal), 11 × 8 1/2", 8 1/2 × 11" (Letter), 5 1/2 × 8 1/2" (Statement),
8 1/2 × 13" (Oficio II), 8K, 16K
Multi-bypass tray
A3 to A6R, postcard, Folio, 11 × 17" (Ledger) to 5 1/2 × 8 1/2"
(Statement), 8K, 16K
Width that cannot be
copied
0.5 to 5.5 mm
Paper
Refer to the Paper on page 2 of the Appendix.
Paper feed source capacity
Cassette
300 sheets (80 g/m²), 100 sheets (90 to 105 g/m²)
Multi-bypass tray
50 sheets (80 g/m²)
(25 sheets for A3, B4, Folio, 11 × 17" (Ledger), 8 1/2 × 14" (Legal),
8 1/2 × 13" (Oficio II), and 8K sizes)
Output tray capacity
250 sheets (80 g/m²)
Warm-up time
Less than 20 seconds
Time for recovery from low power mode: 10 seconds
Time for recovery from sleep mode: 20 seconds
(At room temperature: around 73.4 °F (23 °C), humidity: around 50 %)
Memory
For copier
64 MB
For printer
64 MB
Additional memory
For copier: 16 MB, 32 MB, 64 MB, and 128 MB
For printer: 32 MB, 64 MB, 128 MB, and 256 MB
Operating environment
Appendix-8
Temperature
10 to 32.5 °C
Relative humidity
15 to 80 %
Altitude
2,000 m maximum
Illumination
1,500 lux maximum
Power source
120 V AC, 60 Hz, 9.0 A
220 to 240 V AC, 50/60 Hz, 5.0 A
Dimensions
(W) × (D) × (H)
22 5/8 × 23 3/4 × 19 3/4"
574 × 603 × 545 mm
Weight
Approx. 89.54 lbs/40.7 kg
Noise emission
70 dB(A)
Required space
(W) × (D)
32 9/16 × 23 3/4"
827 × 603 mm
Appendix
Copier Functions
Copying speed
Platen (1:1)
Document processor
(1:1)
First copy time
16 ppm model
A3/11 × 17" (Ledger): 8 sheets/minute
B4/8 1/2 × 14" (Legal): 8 sheets/minute
A4/11 × 8 1/2": 16 sheets/minute
A4R/8 1/2 × 11" (Letter): 13 sheets/minute
B5: 16 sheets/minute
B5R: 13 sheets/minute
A5R: 10 sheets/minute
A6R: 10 sheets/minute
20 ppm model
A3/11 × 17" (Ledger): 10 sheets/minute
B4/8 1/2 × 14" (Legal): 11 sheets/minute
A4/11 × 8 1/2": 20 sheets/minute
A4R/8 1/2 × 11" (Letter): 13 sheets/minute
B5: 20 sheets/minute
B5R: 13 sheets/minute
A5R: 10 sheets/minute
A6R: 10 sheets/minute
25 ppm model
A3/11 × 17" (Ledger): 13 sheets/minute
B4/8 1/2 × 14" (Legal): 13 sheets/minute
A4/11 × 8 1/2": 25 sheets/minute
A4R/8 1/2 × 11" (Letter): 15 sheets/minute
B5: 25 sheets/minute
B5R: 15 sheets/minute
A5R: 12 sheets/minute
A6R: 11 sheets/minute
16 ppm model
A4/11 × 8 1/2": 16 sheets/minute
20 ppm model
A4/11 × 8 1/2": 20 sheets/minute
25 ppm model
A4/11 × 8 1/2": 25 sheets/minute
16/20 ppm model
5.9 seconds or less (1:1, A4/11 × 8 1/2")
25 ppm model
5.0 seconds or less (1:1, A4/11 × 8 1/2")
Resolution
Scanning: 600 × 600 dpi
Printing: 600 × 600 dpi
Continuous copying
1 to 999 sheets
Copying magnification
Any ratio from 25 to 200 % (1 % increments) and fixed magnifications.
Appendix-9
Appendix
Printer Functions
Printing speed
Same as Copying speed
First print time
16/20 ppm model
Approx. 5.5 seconds (1:1, A4/11 × 8 1/2")
25 ppm model
Approx. 4.9 seconds (1:1, A4/11 × 8 1/2")
Resolution
300 dpi, 600 dpi, Fast 1200 mode
Applicable OS
Microsoft Windows 95/98/Me
Microsoft Windows NT4.x/2000/XP
Apple Macintosh OS 9.x/OS X 10.x
UNIX/Linux
Interface
Parallel interface: 1 (based on IEEE1284)
Network interface: 1
USB 2.0: 1 (USB Hi-Speed)
Network interface card (optional): 1
Document Processor (optional)
Original feed system
Automatic feeding
Acceptable originals
Sheets of paper
Original sizes
Max.: A3/11 × 17"
Min.: A5R/5 1/2 × 8 1/2"
Original paper weight
One-sided originals: 45 g/m² to 160 g/m²
Two-sided originals: 50 g/m² to 120 g/m²
Acceptable number of
originals
50 sheets (50 g/m² to 80 g/m²)
Dimensions
(W) × (D) × (H)
21 3/4 × 19 1/8 × 4 11/16"
552 × 483 × 120 mm
Weight
Approx. 13.2 lbs/6 kg
Paper Feeder (optional)
Appendix-10
Paper feed system
Automatic feeding from cassettes (300-sheet [80 g/m²] capacity)
Paper sizes
A3, B4, A4, A4R, B5, B5R, A5R, Folio, 11 × 17" (Ledger), 8 1/2 × 14"
(Legal), 11 × 8 1/2", 8 1/2 × 11" (Letter), 5 1/2 × 8 1/2" (Statement),
8 1/2 × 13" (Oficio II), 8K, 16K
Acceptable paper
Weight: 64 to 105 g/m²
Types: Standard paper, recycled paper, and color paper
Dimensions
(W) × (D) × (H)
22 7/16 × 21 3/16 × 5 5/16"
570 × 538 × 135 mm
Weight
Approx. 15.4 lbs/7 kg
Appendix
Duplex Unit (optional)
System
Internal type
Paper sizes
A3, B4, A4, A4R, B5, B5R, A5R, Folio, 11 × 17" (Ledger), 8 1/2 × 14"
(Legal), 11 × 8 1/2", 8 1/2 × 11" (Letter), 5 1/2 × 8 1/2" (Statement),
8 1/2 × 13" (Oficio II), 8K, 16KR, 16K
Acceptable paper
Weight: 64 to 90 g/m²
Types: Standard paper, recycled paper, and color paper
Dimensions
(W) × (D) × (H)
14 1/2 × 2 1/16 × 7 1/16"
368 × 53 × 180 mm
Weight
Approx. 1.4 lbs/0.65 kg
Number of trays
1
Paper sizes
A3, B4, A4, A4R, B5, Folio, 11 × 17" (Ledger), 8 1/2 × 14" (Legal),
11 × 8 1/2", 8 1/2 × 11" (Letter), 8 1/2 × 13" (Oficio II)
Acceptable paper
Weight: 60 to 105 g/m²
Types: Standard paper, recycled paper, color paper, thin paper, thick
paper, and letterhead
Dimensions
(W) × (D) × (H)
12 13/16 × 17 11/16 × 6 1/2"
325 × 450 × 165 mm
Weight
Approx. 17.6 lbs/8 kg
Finisher (optional)
Job Separator (optional)
Number of trays
1
Tray capacity
100 sheets (80 g/m²)
Paper sizes
A3, B4, A4, A4R, B5, B5R, A5R, Folio, 11 × 17" (Ledger), 8 1/2 × 14"
(Legal), 11 × 8 1/2", 8 1/2 × 11" (Letter), 5 1/2 × 8 1/2" (Statement),
8 1/2 × 13" (Oficio II)
Acceptable paper
Weight: 45 to 160 g/m²
Types: Standard paper, recycled paper, color paper, thin paper, thick
paper, letterhead, and tracing paper
Dimensions
(W) × (D) × (H)
21 7/16 × 17 11/16 × 2 3/4"
545 × 450 × 70 mm
Weight
Approx. 3.3 lbs/1.5 kg
Appendix-11
Appendix
Environmental Specifications
Recovery time from the low power mode
10 seconds
Transition time to the low power mode (at time of purchase)
15 minute
Transition time to the sleep mode (at time of purchase)
30 minutes (16/20 ppm model)
45 minutes (25 ppm model)
Note
Appendix-12
Duplex (2-sided) copying
Option
Paper feed
Recycled paper made from
100 % recycled pulp may be
used with this product.
Please consult with your dealer or service representative for information on the recommended types
of paper, etc.
Appendix
Copier Function Combination Chart
This machine contains various functions, and many of them can be used in combination for more efficient copying.
Border erase mode (book erase)
Border erase mode (sheet erase)
Split copying (double-page spread to 1-sided)
Split copying (2-sided to 1-sided)
Duplex copying (double-page spread to 2-sided)
Duplex copying (2-sided to 2-sided)
Original size selection (size input)
Duplex copying (1-sided to 2-sided)
Original size selection (size selection)
9 10 11 12 13 14 15 16 17 18 19 20 21 22 23 24 25 26 27 28 29 30 31
Multi-bypass tray setting (universal size, size input)
8
Manual zoom mode (zoom mode, preset zoom)
7
Auto zoom ratio selection mode
6
Original size selection (automatic detection)
5
Y
Y
Y
Y
Y
Y
Y
Y
Y
Y
Y
Y
Y
Y
Y
Y
Y
Y
Y
Y
Y
Y
Y
Y
Y
Y
Y
Y
Y
Y
Y
Y
Y
Y
Y
Y
Y
Y
Y
Y
Y
Y
Y
Y
Y
Interrupt mode
Y
Y
Combine copying
Y
Y
Margin mode
Y
Y
Staple copying
Y
Y
Offset copying
Y
Sort copying
Y
1 21 Y
Auto selection mode
N
-
Auto rotation copying
1
Continuous copying
N
Original orientation
Image quality (text + photo)
Image quality (photo)
Paper selection
1
2
Same size copying
Manual exposure mode
4
Auto exposure mode
3
Image quality (text)
2
Image quality (photo)
1
Image quality (text + photo)
Function selected first
Function selected second
EcoPrint
Refer to the chart below for function combinations.
3
Image quality (text)
1
N
-
Y
Y
Y
Y
Y
Y
Y
Y
Y
Y
Y
Y
Y
Y
Y
Y
Y
Y
Y
Y
Y
Y
Y
Y
Y
Y
Y
4
Auto exposure mode
Y
2
Y
-
1
Y
Y
Y
Y
Y
Y
Y
Y
Y
Y
Y
Y
Y
Y
Y
Y
Y
Y
Y
Y
Y
Y
Y
Y
Y
Y
5
Manual exposure mode
Y
Y
Y 43
-
Y
Y
Y
Y
Y
Y
Y
Y
Y
Y
Y
Y
Y
Y
Y
Y
Y
Y
Y
Y
Y
Y
Y
Y
Y
Y
6
EcoPrint
Y
Y
Y
Y
Y
-
Y
Y
Y
Y
Y
Y
Y
Y
Y
Y
Y
Y
Y
Y
Y
Y
Y
Y
Y
Y
Y
Y
Y
Y
Y
7
Original size selection (size selection)
Y
Y
Y
Y
Y
Y
-
N
N
Y
Y
Y
Y
Y
Y
Y
Y 22 Y
Y
Y
Y
Y 41 Y 41 Y
Y
Y
Y
Y
8
Original size selection (size input)
Y
Y
Y
Y
Y
Y
N
-
N
Y
Y
Y
Y
Y
Y
Y
Y 22 Y
Y
Y
Y
Y
9
Original size selection (automatic
detection)
6
Y
6
Y 34 34 36 Y
Y
Y
Y
Y
Y
Y
N
N
-
Y
Y
Y
Y
Y
Y
Y
Y
Y
Y
Y
Y
Y
Y
Y
Y
Y
Y
Y
Y
Y
Y
10 Same size copying
Y
Y
Y
Y
Y
Y
Y
Y
Y
-
N
N
Y
Y
Y
Y
Y
3
Y
Y
Y
Y
Y
Y
Y
Y
Y
Y
Y
7
Y
11 Auto zoom ratio selection mode
Y
Y
Y
Y
Y
Y
Y
Y
Y
N
-
N
Y
9
Y
Y
Y
3
Y
Y
Y
Y
Y
Y
Y
Y
Y
Y
Y
Y
Y
Manual zoom mode (zoom mode,
12
preset zoom)
Y
Y
Y
Y
Y
Y
Y
Y
Y
N
N
-
Y
Y
Y
Y
Y
3
Y
Y
Y
Y
Y
Y
Y
Y
Y
Y
Y
7
Y
13 Paper selection
Y
Y
Y
Y
Y
Y
Y
Y
Y
Y
Y
Y
-
Y
Y
Y
Y
3
Y
Y
Y
Y
Y
Y
Y
Y
Y
Y
Y
Y
Y
Multi-bypass tray setting (universal
14
size, size input)
Y
Y
Y
Y
Y
Y
Y
Y
Y
Y 39 Y
Y
-
Y
Y
Y
3
Y 48 46 46 46 10 47 10 49 Y 10 10 Y
15 Original orientation
Y
Y
Y
Y
Y
Y
Y
Y
Y
Y
Y
Y
Y
Y
-
Y
Y
Y
Y
Y
Y
Y
Y
4
Y
4
Y
Y
5
Y
Y
16 Continuous copying
Y
Y
Y
Y
Y
Y
Y
Y
Y
Y
Y
Y
Y
Y
Y
-
Y
Y
Y
Y
Y
Y
Y
Y
Y
Y
Y
Y
Y
Y
Y
17 Auto rotation copying
Y
Y
Y
Y
Y
Y
Y
Y
Y
Y
Y
Y
Y
Y
Y
Y
-
Y
Y
Y
Y
Y
Y
Y
Y
Y
Y
Y
Y
Y
Y
18 Auto selection mode
Y
Y
Y
Y
Y
Y 22 22 Y 27 27 27 23 23 Y
Y
Y
-
Y
Y 24 25 Y 26 Y 26 Y 28 28 29 Y
19 Sort copying
Y
Y
Y
Y
Y
Y
Y
Y
Y
Y
Y
Y
Y
Y
Y
Y
Y
-
Y
Y
Y
Y
Y
Y
Y
Y
Y
Y
Y
Y
20 Offset copying
Y
Y
Y
Y
Y
Y
Y
Y
Y
Y
Y
Y
Y 48 Y
Y
Y
Y
Y
-
8
Y
Y
Y
Y
Y
Y
Y
Y
Y
Y
Y
21 Staple copying
Y
Y
Y
Y
Y
Y
Y
Y
Y
Y
Y
Y
Y 46 Y
Y 44 24 45 38
-
Y
Y
Y
Y
Y
Y
Y
Y
Y
Y
22 Duplex copying (1-sided to 2-sided)
Y
Y
Y
Y
Y
Y
Y
Y
Y
Y
Y
Y
Y 46 Y
Y
Y 25 Y
Y
Y
-
N
N
N
N
Y
Y
Y
Y
Y
23 Duplex copying (2-sided to 2-sided)
Y
Y
Y
Y
Y
Y
Y
Y
Y
Y
Y
Y
Y 46 Y
Y
Y
Y
Y
Y
N
-
N
N
N
Y
Y
Y
Y
Y
Duplex copying (double-page spread
24
to 2-sided)
Y
Y
Y
Y
Y
Y 42 31 Y
Y
Y
Y
Y 39 32 Y
Y 26 Y
Y
Y
N
N
-
N
N
Y
Y
Y 30 Y
25 Split copying (2-sided to 1-sided)
Y
Y
Y
Y
Y
Y
Y
Y
Y
Y
Y 47 Y
Y
Y
Y
Y
N
N
N
-
N
Y
Y
Y
Split copying (double-page spread to
26
1-sided)
Y
Y
Y
Y
Y
Y 42 31 Y
Y
Y
Y
Y 39 32 Y
Y 26 Y
Y
Y
N
N
N
N
-
Y
Y
Y 30 Y
27 Margin mode
Y
Y
Y
Y
Y
Y
Y
Y
Y
Y
Y
Y 49 Y
Y
Y
Y
Y
Y
Y
Y
Y
Y
Y
-
Y
Y 33 Y
28 Border erase mode (sheet erase)
Y
Y
Y
Y
Y
Y
Y 34 Y
Y
Y
Y
Y
Y
Y 28 Y
Y
Y
Y
Y
Y
Y
Y
Y
-
N
Y
29 Border erase mode (book erase)
Y
Y
Y
Y
Y
Y
Y 34 Y
Y
Y
Y
Y 39 35 Y
Y 28 Y
Y
Y
Y
Y
Y
Y
Y
Y
N
-
Y
Y
30 Combine copying
Y
Y
Y
Y
Y
Y
Y 36 Y 37 Y 37 Y 39 Y
Y
Y 29 Y
Y
Y
Y
Y 30 Y 30 33 Y
Y
-
Y
31 Interrupt mode
Y
Y
Y
Y
Y
Y
Y
Y
Y
Y
Y
Y
Y
Y
Y
-
Y
Y
Y
Y
Y
Y
Y
Y
Y
Y
Y
Y
Y
Y
Y
Y
Y
Y
Y
Y
Y
Y
Y
Y
Y
Y
Y
Y: Combination is possible.
N: Combination is not possible.
Appendix-13
Appendix
Secondary setting has priority.
1
2
The machine clears prior setting and gives priority to the later setting.
The machine enters the manual exposure mode because auto exposure is not available in the
image quality mode for photo.
3 The machine sets the 100 % magnification and the auto paper selection mode because the
auto selection mode is available only in the auto paper selection mode.
4 The machine sets the original orientation to rear because the orientation for double-page
spread originals is fixed to rear.
5 The machine sets the original orientation to rear because the orientation in the border erase
mode (book erase) is fixed to rear.
6 The machine sets the automatic detection of original size because original size selection (size
input) is not available for double-page spread originals.
7 The machine sets the auto zoom ratio selection mode because combine copying is available
only in the auto zoom ratio selection mode.
8 The machine clears offset copying because it cannot be used with staple copying.
9 The machine cancels the auto zoom ratio selection mode and sets the manual zoom mode.
10 The machine changes the paper feed station because the combination is not available.
Combination is not accepted. (Secondary setting is not accepted.)
21
22
23
24
25
26
27
28
29
30
31
32
33
34
35
36
37
38
39
The auto exposure mode is not available in the image quality mode (photo).
Only automatic detection for original size selection is available in the auto selection mode.
Only the auto paper selection mode is available in the auto selection mode.
Staple copying is not available in the auto selection mode.
Duplex copying (one-sided to two-sided) is not available in the auto selection mode.
Double-page spread originals cannot be used in the auto selection mode.
The magnification ratio is fixed to 100 % in the auto selection mode.
The border erase mode is not available in the auto selection mode.
Combine copying is not available in the auto selection mode.
Combine copying is not available for double-page spread originals.
Original size selection (size input) is not available for double-page spread originals.
Original orientation is fixed to landscape for double-page spread originals.
Combination of margin mode and combine copying is not available.
The border erase mode is not available with original size selection (size input).
Original orientation is fixed to landscape for the border erase mode (book erase).
Combine copying is not available with original size selection (size input).
The auto zoom ratio selection mode is selected for combine copying.
Offset copying is not available for staple copying.
Combination with multi-bypass tray setting (universal size, size input) is not available.
Conditions are limited for combination.
41 For original sizes other than A3, A4R, A5R, B4, B5R, 11 × 17" (Ledger), 8 1/2 × 11" (Letter), and
8K, this machine changes the original size selection to automatic detection and sets the
double-page spread original mode.
42 Setting is available for original sizes of A3, A4R, A5R, B4, B5R, 11 × 17" (Ledger), 8 1/2 × 11"
(Letter), and 8K. Setting is not available for other sizes.
43 Setting is not available in the image quality mode for photo. For other modes, the manual
exposure mode is canceled and the auto exposure mode is set.
44 If the auto rotation copying setting is turned off, stapling copying is also turned off (staple
copying cancellation message is displayed). If the auto rotation copying is turned on, stapling
copying setting is not changed.
45 For staple copying, sort copying is always set. Sort copying cannot be canceled.
46 Copying is not available with multi-bypass tray setting (universal size, size input). (An error
message is displayed.)
47 If the original orientation is set to rear and the binding side is set to top or the original orientation
is set to left and the binding side is set to left for copying from the document processor, copying
is not available with multi-bypass tray setting (universal size). (An error message is displayed.)
Appendix-14
Appendix
48 Offset copy is invalid if paper of the same size is not held in any other paper feed stations.
(Copying is performed without offset.) Offset copy with the finisher is not available. (An error
message is displayed.)
49 Copying is not available with multi-bypass tray setting (universal size). (An error message is
displayed.)
Appendix-15
Appendix
Glossary
Additional memory
An additional memory (optional) is used for increasing the memory capacity of this machine. In this
machine, a memory can be added for the copier functions and the printer functions respectively.
(For copier: 16 MB, 32 MB, 64 MB, and 128 MB/for printer: 32 MB, 64 MB, 128 MB, and 256 MB)
For DIMM that can be used in this machine, contact your dealer.
AppleTalk
This is a networking function that is built-in to Apple Computer Inc’s Mac OS. It is also the general
term given to the protocol that runs on AppleTalk networks. AppleTalk offers file sharing and printer
sharing and it also enables you to start application software installed on another computer on the
same AppleTalk network.
APS (Auto Paper Selection)
This mode will automatically select copy paper of the same size as the original.
Default Gateway
This is the address of a device, such as a computer or router, that serves as the entrance/exit
(gateway) for accessing computers outside of your network. When no specific gateway is
designated for a destination IP address, data is sent to the host that is designated as the Default
Gateway.
DHCP (Dynamic Host Configuration Protocol)
This is a protocol that automatically resolves the IP address, subnet mask, and gateway address on
a TCP/IP network. Use of DHCP minimizes the load of network administration, especially on
network environments with a large number of client computers because it is not specifically
necessary to assign a separate IP address to each client, including printers.
dpi (dots per inch)
This indicates the number of dots printed per inch (25.4 mm) as a unit for expressing resolution.
EcoPrint
This is a printing mode that reduces toner consumption. Pages printed in the EcoPrint mode are
lighter than pages printed in the normal mode.
Emulation
This is a function that interprets the page description language of other printers and executes the
commands. The printer emulates operation of the following printers: PCL6, KPDL, KC-GL, Line
Printer, IBM Proprinter, DIABLO 630, and EPSON LQ-850.
Form feed timeout
While data is being sent to a printer, some pauses may occur. At this time, the printer waits for the
next data without making a page break. Form feed timeout is a function to wait only a preset amount
of time before it executes an automatic page break. After the waiting period begins, once the
designated amount of time is exceeded, the printer will automatically process the currently received
data and print it out. If the machine has received no print data for the last page, the printer ends
processing of that job without outputting paper.
IEEE1284
This is a standard used for connecting a printer to a computer, and was established by the IEEE
(Institute of Electrical and Electronic Engineers) in 1994.
IP Access control
This is a function to prohibit access to this machine from a host with an IP address that is not
approved.
Appendix-16
Appendix
IP Address
The Internet Protocol address is a unique number that is assigned to each computer in a network.
The format of an IP Address is four numbers separated by dots, e.g. 192.168.110.171. Each
number should be a decimal between 0 and 255.
IPP (Internet Print Protocol)
This enables output to the printer from a printer driver over the Internet or an intranet and via an IPP
port. Using IPP, output to a remote printer is possible over the Internet.
KIR
This is Kyocera Mita’s original smoothing function. It uses software to enhance the printer’s
resolution and produce high-quality printing. The default setting is On.
KPDL
This is Kyocera Mita’s page description language compatible with Adobe PostScript Level 3.
Logical Printer
This is a software interface that exists between the Windows OS and the printers connected to it. A
printer refers to the actual device that prints out, while a logical printer refers to the software
interface that resides on the print server. By using this interface, the method of processing print jobs
as well as the method of sending that job to its destination (local port, network port, file or remote
printer sharing) is determined. When printing a document, the document data is first spooled
(stored) in the logical printer from which it is then sent to the actual printer.
Low power mode
This mode is provided for power saving. This mode is activated when operation on the main body
and transmission or reception of data do not occur for a preset time. In this mode, the machine
consumes less power than in the standby mode. The default setting of the preset time is 15 minute.
You can use the operation panel to change this time.
Multi-bypass tray
This is a paper feed tray located at the left side of the main body. When printing onto envelopes,
postcards, transparencies or labels, set them in the multi-bypass tray instead of the cassette.
NetBEUI (NetBIOS Extended User Interface)
This is a network protocol developed by International Business Machines Corporation in 1985 and
an enhanced version of the NetBIOS protocol. It gives higher performance on small-scale networks
than other protocols such as TCP/IP. However, because it does not provide the routing function that
selects the most appropriate route from among multiple routes, it is not proper for large-scale
network configurations. Since NetBEUI is the standard protocol of IBM’s OS/2 and Microsoft
Corporation's Windows series, these companies offer file sharing and printing services that utilize
NetBEUI.
Outline font
With outline fonts, character outlines are represented with numerical expressions and fonts can be
enlarged or reduced in different ways by changing the numeric values of those expressions. Printing
remains clear even if you enlarge fonts, since the characters are defined with outlines represented
with numerical expressions. You can specify the font size in steps of 0.25 points up to 999.75 points.
Parallel interface
With this interface, data transfer between this machine and a computer takes place in 8-bit chunks.
This machine can perform IEEE1284 compatible bi-directional communications.
Appendix-17
Appendix
PostScript
This is a page description language developed by Adobe Systems, Inc. It provides flexible font
functions and high-performance graphics, allowing higher quality printing. The initial version of
PostScript which was introduced in 1985 is currently referred to as Level 1. Level 2, which was
compatible with color printing and 2-byte languages such as Japanese, was introduced in 1990
while Level 3, which added compatibility to Internet, step-by-step implementation level, and PDF,
was brought out in 1996.
PPM (prints per minute)
This indicates the number of A4 size printouts that can be made in one minute.
Printer driver
The printer driver is software used for printing data created using application software. The printer
driver is contained in the supplied CD-ROM. Install the printer driver on the computer connected to
this machine.
Sleep mode
This mode is provided for power saving. This mode is activated when operation on the main body
and transmission or reception of data do not occur for a preset time. In this mode, consumed power
is reduced to the minimum. The default setting of the preset time is 30 minutes (16/20 ppm model)
or 45 minutes (25 ppm model). You can use the operation panel to change this time.
SMTP (Simple Mail Transfer Protocol)
This is a protocol for transmission of e-mail over the Internet or an intranet. It is used for transferring
mail between mail servers as well as for sending mail from each client to their server.
SNMP (Simple Network Management Protocol)
This is a protocol for monitoring and controlling communication equipment connected to a network
such as routers, computers, and terminals through the network that uses TCP/IP (Transmission
Control Protocol/Internet Protocol).
Status page
This lists machine conditions such as the machine’s memory, the total number of copies and prints,
and paper source settings. You can print the status page from the operation panel of this machine.
Subnet Mask
This is a 32-bit numerical value that defines which bits of the IP address specify the network
address for identifying the network.
TCP/IP (Transmission Control Protocol/Internet Protocol)
TCP/IP is a network protocol designed to define the way computers and other devices communicate
each other over a network.
USB (Universal Serial Bus)
This machine is equipped with USB interface that supports Hi-Speed USB 2.0. The maximum
transfer rate is 480 Mbps for high-speed data transmission.
Appendix-18
Index
Index
Numerics
2 in 1 .......................................................................................................................................... 1-21
4 in 1 (horizontal arrangement) ............................................................................................. 1-22
4 in 1 (vertical arrangement) ................................................................................................. 1-23
A
Additional memory .....................................................................................................Appendix-16
Administrator management code change ........................................................................... 3-23
All account management ....................................................................................................... 4-10
AppleTalk .....................................................................................................................Appendix-16
Auto cassette switching .......................................................................................................... 3-13
Auto clear ................................................................................................................................. 3-24
Auto clear time ......................................................................................................................... 3-24
Auto continue ........................................................................................................................... 2-53
Auto exposure adjustment ....................................................................................................... 3-6
Auto exposure mode ................................................................................................................ 1-6
Auto low power time ............................................................................................................... 3-19
Auto OCR exposure adjustment ............................................................................................. 3-7
Auto paper selection ..................................................................................................Appendix-16
Auto rotation ..................................................................................................................... 1-29, 3-9
Auto selection mode ............................................................................................................... 1-31
Auto sleep ................................................................................................................................ 3-23
Auto sleep time ........................................................................................................................ 3-18
Auto zoom ratio selection mode ............................................................................................. 1-8
B
Background color adjustment .................................................................................................. 3-4
Basic specifications of paper ...................................................................................... Appendix-2
Black streaking reduction processing .................................................................................. 3-11
Book erase ...............................................................................................................................1-27
Border erase mode ................................................................................................................. 1-27
Border erase width default value .......................................................................................... 3-10
Borderline ................................................................................................................................. 1-24
C
Carriage return (CR) action ................................................................................................... 2-33
Code job list ............................................................................................................................. 2-12
Code set ................................................................................................................................... 2-28
Color paper ................................................................................................................... Appendix-7
Combine copying .................................................................................................................... 1-20
Continuous copying ................................................................................................................ 1-28
Copier default settings .............................................................................................................. 3-2
Copier function combination chart ...........................................................................Appendix-13
Copier functions ........................................................................................................... Appendix-9
Copier job accounting ............................................................................................................. 4-13
Copy exposure adjustment ...................................................................................................... 1-6
Copy output destination ......................................................................................................... 3-19
Copy restriction .......................................................................................................................... 4-5
Index-1
Index
Copy status report ...................................................................................................................3-31
Counter report ..........................................................................................................................3-29
Courier/Letter Gothic font .......................................................................................................2-27
Coverage report .......................................................................................................................3-32
Custom paper type ..................................................................................................................3-17
D
Date and time ...........................................................................................................................3-21
Default gateway .......................................................................................................................2-20
Default magnification ................................................................................................................3-6
Default operation mode ..........................................................................................................3-20
Default setting mode .................................................................................................................3-2
Default settings ........................................................................................................................4-13
Deleting an account ..................................................................................................................4-8
DHCP ................................................................................................................. 2-19, Appendix-16
Display contrast adjustment ..................................................................................................3-22
Document processor ..................................................................................................Appendix-10
dpi .................................................................................................................................Appendix-16
Drum refresh ............................................................................................................................3-34
Duplex copying ........................................................................................................................1-13
Duplex print for paper type ....................................................................................................3-16
Duplex print mode ...................................................................................................................2-48
Duplex printing error detection ..............................................................................................2-54
Duplex unit ...................................................................................................................Appendix-11
E
Ecoprint ............................................................................................. 1-30, 2-35, 3-4, Appendix-16
e-MPS detail settings ..............................................................................................................2-13
e-MPS function ..........................................................................................................................2-8
Emulation ........................................................................................................... 2-22, Appendix-16
Enabling job accounting .........................................................................................................4-12
Envelope ........................................................................................................................Appendix-7
Environmental specifications ....................................................................................Appendix-12
EtherTalk ..................................................................................................................................2-18
Exposure adjustment for photo originals ...............................................................................3-8
Exposure adjustment for text + photo originals ....................................................................3-7
Exposure adjustment for text originals ...................................................................................3-8
Exposure mode ..........................................................................................................................3-3
F
Fax job accounting ..................................................................................................................4-15
Fax output destination ............................................................................................................3-20
Fax transmission limit ...............................................................................................................4-7
Finisher ........................................................................................................................Appendix-11
Font ............................................................................................................................................2-25
Font list ......................................................................................................................................2-28
Font size ...................................................................................................................................2-26
Form feed timeout ............................................................................................ 2-51, Appendix-16
H
Hard disk ...................................................................................................................................2-43
Index-2
Index
I
IEEE1284 ....................................................................................................................Appendix-16
Image quality mode .................................................................................................................. 1-5
Individual account management ........................................................................................... 4-11
Interface .................................................................................................................................... 2-16
Interrupt mode ......................................................................................................................... 1-11
IP access control ........................................................................................................Appendix-16
IP address ......................................................................................................... 2-19, Appendix-17
IPP ................................................................................................................................Appendix-17
J
Job accounting .......................................................................................................................... 4-2
Job accounting report ............................................................................................................. 4-10
Job separator ..............................................................................................................Appendix-11
K
Key sound ................................................................................................................................ 3-21
KIR mode ........................................................................................................... 2-34, Appendix-17
KPDL ............................................................................................................................Appendix-17
KPDL (AUTO) alternative emulation .................................................................................... 2-24
KPDL error ...............................................................................................................................2-24
L
Label ...............................................................................................................................Appendix-6
Language setting ..................................................................................................................... 3-33
Limit of number of copies ....................................................................................................... 3-11
Limit of use ......................................................................................................................... 4-5, 4-9
Line feed (LF) action ............................................................................................................... 2-32
Logical Printer .............................................................................................................Appendix-17
Low power mode ........................................................................................................Appendix-17
M
Machine default settings ........................................................................................................ 3-12
Machine status report ............................................................................................................. 3-31
Managing accounts ................................................................................................................... 4-4
Manual exposure mode ............................................................................................................ 1-6
Margin mode ............................................................................................................................ 1-26
Margin width default value ..................................................................................................... 3-10
Memory card ............................................................................................................................ 2-37
Menu hierarchical diagram ...................................................................................................... 2-3
Multi-bypass tray ........................................................................................................Appendix-17
Multi-bypass tray confirmation display ................................................................................. 3-14
Multi-bypass tray mode .......................................................................................................... 2-47
Multi-bypass tray settings ...................................................................................................... 3-26
N
NetBEUI .......................................................................................................................Appendix-17
NetWare .................................................................................................................................... 2-17
Network status page ............................................................................................................... 2-21
Number of copies ............................................................................................................ 1-7, 2-30
Index-3
Index
O
Offset copying .................................................................................................................. 1-18, 3-9
Operation against excess over limit .....................................................................................4-16
Original image quality ...............................................................................................................3-3
Original orientation ..................................................................................................................1-10
Original size selection ...............................................................................................................1-3
Other regular size ............................................................................................................ 1-3, 3-26
Others ........................................................................................................................................2-51
Outline font ..................................................................................................................Appendix-17
Output destination ...................................................................................................................2-49
Output limit .................................................................................................................................4-6
Override A4/Letter ...................................................................................................................2-49
P
Page protect mode ..................................................................................................................2-32
Paper .................................................................................................................... 2-47, Appendix-2
Paper feeder ...............................................................................................................Appendix-10
Paper selection ..........................................................................................................................3-4
Paper size (cassettes) ............................................................................................................3-13
Paper size (multi-bypass tray) ...............................................................................................3-26
Paper source .................................................................................................................... 1-2, 2-48
Paper type (cassettes) ............................................................................................................3-14
Paper type (multi-bypass tray) ..............................................................................................3-28
Paper type in auto paper selection .........................................................................................3-5
Paper weight for paper type ..................................................................................................3-15
Parallel interface ............................................................................................... 2-16, Appendix-17
Pen thickness ...........................................................................................................................2-23
Permanent code jobs ..............................................................................................................2-14
Photo ...........................................................................................................................................1-5
Postcard .........................................................................................................................Appendix-6
PostScript ....................................................................................................................Appendix-18
PPM ..............................................................................................................................Appendix-18
Preprinted paper ...........................................................................................................Appendix-7
Preset zoom mode ....................................................................................................................1-9
Print restriction ...........................................................................................................................4-6
Printer driver ................................................................................................................Appendix-18
Printer functions ..........................................................................................................Appendix-10
Printer job accounting .............................................................................................................4-14
Priority cassette .........................................................................................................................3-5
Private print/stored job .................................................................................................... 2-9, 2-10
Program function .....................................................................................................................1-32
Proof-and-Hold .................................................................................................................. 2-8, 2-9
Proper paper selection ................................................................................................Appendix-2
Q
Quick copy ................................................................................................................. 2-8, 2-9, 2-13
R
RAM disk ..................................................................................................................................2-44
RAM disk size ..........................................................................................................................2-45
Received data dump ...............................................................................................................2-52
Recycled paper .............................................................................................................Appendix-7
Index-4
Index
Reduction printing ................................................................................................................... 2-31
Registering a new account ...................................................................................................... 4-4
Registering a program ............................................................................................................ 1-32
Report ....................................................................................................................................... 3-31
Reset ......................................................................................................................................... 2-52
Resolution ..................................................................................... 2-35, Appendix-9, Appendix-10
Resource protect mode .......................................................................................................... 2-53
S
Scanner job accounting .......................................................................................................... 4-14
Scanner transmission limit ....................................................................................................... 4-7
Service status page ................................................................................................................ 2-56
Sheet erase .............................................................................................................................. 1-27
Silent Mode .............................................................................................................................. 3-25
Sleep mode ................................................................................................................. Appendix-18
SMTP ...........................................................................................................................Appendix-18
SNMP ...........................................................................................................................Appendix-18
Sort copying ............................................................................................................................. 1-17
Special paper ................................................................................................................ Appendix-5
Specifications ................................................................................................................ Appendix-8
Split copying ............................................................................................................................. 1-15
Staple copying ......................................................................................................................... 1-19
Stapling error detection .......................................................................................................... 2-55
Status page ......................................................................................................... 2-7, Appendix-18
Subnet mask ..................................................................................................... 2-20, Appendix-18
Summer time ............................................................................................................................ 3-22
T
TCP/IP ............................................................................................................... 2-18, Appendix-18
Temporary code jobs .............................................................................................................. 2-13
Text .............................................................................................................................................. 1-5
Text + Photo ...............................................................................................................................1-5
Thick paper ................................................................................................................... Appendix-7
Time difference ........................................................................................................................ 3-21
Total counter ............................................................................................................................ 3-29
Transparency ................................................................................................................ Appendix-5
U
USB ..............................................................................................................................Appendix-18
Using job accounting .............................................................................................................. 4-17
V
Virtual mailbox ......................................................................................................................... 2-11
W
Wide A4 .................................................................................................................................... 2-33
Z
Zoom copying ............................................................................................................................ 1-8
Zoom mode ................................................................................................................................ 1-9
Index-5
Index
Index-6
For best print results and machine performance, we recommend that you use only KYOCERA MITA
original supplies for your KYOCERA MITA products.
©2004
is a trademark of Kyocera Corporation