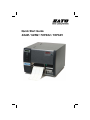
1
Quick Start Guide
SX4M / SX5M / TXPSX4 / TXPSX5
SX4M / SX5M / TXPSX4 / TXPSX5
Table of contents
Read this Quick Start manual before beginning.
For the best printing results, we recommend the use of SATO genuine labels and
ribbons.
Contact your SATO authorized reseller for further details.
More information can be found on the internet at www.satoamerica.com/hort
i
SX4M / SX5M / TXPSX4 / TXPSX5
Table of contents
Table of contents
1
General ......................................................................................................... 1
1.1 Important Information.................................................................... 1
1.2 Limitation of liability....................................................................... 1
1.3 Explanation of symbols ................................................................. 1
2
Safety ............................................................................................................ 2
2.1 Intended use ................................................................................. 2
2.2 Operating Tips............................................................................... 3
3
Transport and storage................................................................................... 5
3.1 Transport information .................................................................... 5
3.2 Storage.......................................................................................... 5
4
Unpacking the printer .................................................................................... 6
5
Installation ..................................................................................................... 7
6
Overview ...................................................................................................... 8
6.1 Parts and functions ....................................................................... 8
7
Setup and initial operation........................................................................... 11
7.1 Connecting the device................................................................. 11
7.2 Loading the ribbon ...................................................................... 12
7.3 Inserting media............................................................................ 13
7.4 Adjusting label guide ................................................................... 13
7.5 Locating the sensor..................................................................... 14
7.6 Setting the sensor ....................................................................... 15
8
Print head use and care instructions ........................................................... 16
9
Disposal .................................................................................................... 17
10
Troubleshooting........................................................................................... 18
ii
SX4M / SX5M / TXPSX4 / TXPSX5
General
1
General
1.1
Important Information
This quick start guide provides important information on how to setup your new SATO
product.
Be sure to read this quick start guide thoroughly before using this printer. It is an integral
part of the product and should be kept in the immediate vicinity of the device and available to the operating staff.
1.2
Limitation of liability
The manufacturer will not be held liable for damage resulting from:
•
Disregarding these instructions
•
Unintended use of the printer
•
Unauthorized technical modifications
•
Use of unapproved spare parts
•
Use of unapproved consumables
1.3
Explanation of symbols
WARNING!
Indicates neglectful or erroneous use may cause irreparable damage to
the product, serious injury to the operator or worse.
CAUTION!
Indicates a specific point where caution should be used. The graphic
within the triangle will indicate the specific issue, i.e.; the sign on the left
indicates a caution for potential electrical shock.
CAUTION!
Indicates a potentially hazardous situation which, if not avoided, may
result in damage to your product or host equipment.
1
SX4M / SX5M / TXPSX4 / TXPSX5
Safety
2
Safety
This paragraph provides you with an overview of the important safety aspects associated
with the operation of your printer.
Disregarding the operating instructions and safety regulations specified in this manual
may result in considerable damage to your printer and endanger the operator.
2.1 Intended use
The printer should only be used for printing on materials recommended by the
manufacturer.
WARNING!
Danger when device is used inappropriately!
Any use for purposes exceeding and/or deviating from the intended use of
the device must be avoided.
Therefore, use the device only for its intended purpose and strictly adhere
to all information provided in this manual.
No liability shall be assumed for any claims arising from damages resulting from the inappropriate use of this printer or its accessory’s.
Damages resulting from inappropriate use shall be the sole responsibility of the operator.
CAUTION!
Do not disassemble the printer or alter it’s components in any way.
Never attempt to service any internal component of your printer without
permission of Technical Support. Attempting such will void your warranty
and may cause serious personal injury.
2
SX4M / SX5M / TXPSX4 / TXPSX5
Safety
2.2 Operating Tips
Your new SX4M / SX5M /TXPSX4 / TXPSX5 Thermal Printer is a very durable and dependable piece of equipment, but we suggest you follow a few guidelines when installing
or using your printer.
•
Do not operate in unstable locations such as an unsteady, slanted or extreme vibrating table. It may cause the equipment to shift from its desired
location.
•
Do not operate or store the printer in applications where high humidity with
extreme condensation are prevalent. Be sure to follow the printer’s environment operation requirements as defined in the later in this Quick Start
Guide. Failure to follow these operating instructions may damage your
printer and void your warranty.
•
When moving the printer from a location, be sure to avoid potential shock
or damage to your printer and its cabling by first powering off the printer,
then unplug the printer from its power receptacle and disconnect the communication cable (if non-wireless).
•
Do not insert or drop anything metallic or flammable into the openings of
the printer, i.e.; cable outlet and vents.
•
In the event that a foreign object should accidentally fall inside the printer,
immediately turn off the power, unplug the printer from the power receptacle and contact your SATO dealer or service center before continuing to
use your printer. Using your printer under such conditions may cause fire
or electrical shock.
•
Do not move or ship the printer with the media loaded inside. This will
avoid damaging the components of your printer.
•
The printer is heavy. If possible, seek assistance when attempting to
move the printer from one location to another.
•
We highly recommend allocating the printer to its own dedicated power
outlet and source line. This avoids having the printer consuming power
from the same source as another electric appliance which may consume
power at various levels and creating a fluctuating power supply. Power
surges may negatively impact your printer’s performance and longevity.
•
Avoid operating in direct sunlight as this product contains optical sensors.
Prolonged direct sunlight may damage these sensors and cause erroneous operation. Ensure the printer cover is closed when operating.
3
SX4M / SX5M / TXPSX4 / TXPSX5
Safety
DANGER!
To avoid possible electrical shock, do not operate the power switch
or handle the power cable with a wet hand.
Keep the power cable away from open flame or excessive heat.
When disconnecting the power cable from its receptacle be sure to
pull at the plugs receptacle end to avoid damaging the cable or exposing the operator to possible electrical shock.
4
SX4M / SX5M / TXPSX4 / TXPSX5
Transport and storage
3
Transport and storage
3.1 Transport information
•
•
Unplug the power cable from the printer before transporting it along with
the printer.
Ensure you have removed all ribbons and media from the inside of your
printer. If you must transport these with your printer, do so separately to
avoid damaging the printer.
3.2 Storage
•
When storing the printer for an extended period of time, protect it against
influences such as extreme temperatures changes, direct sun exposure,
and high levels of moisture.
5
SX4M / SX5M / TXPSX4 / TXPSX5
Unpacking the printer
4
Unpacking the printer
1
Open the carton
2
Unpack the accessories
3
Unpack the inserts and the printer from the carton
4
Remove the inserts
5
Remove the rubber band (A) and the Velcro strap (B) from inside the printer
CAUTION!
Do not discard these parts; they are needed for your printer’s protection during shipping. Failure to use these parts in the event your
printer needs to be sent to SATO for maintenance and/or repair will
result in print head and armature damage. SATO will not be liable for
any damage related to improper packaging.
Fig. 1 Do not discard parts
6
SX4M / SX5M / TXPSX4 / TXPSX5
Installation
5
Installation
Place the printer in a level place
If installed in a rough or slanting place, quality printing will not be available. It may cause
malfunction and shorten the life of the printer.
Use a stable platform
Use a stable platform. Do not carry the printer with the media inside. Do not rock the
printer.
Avoid high heat and humidity
Do not install in a place of high temperature or humidity. High temperature or humidity
may cause malfunction.
Avoid dust
Dust may deteriorate the quality of printing. It may cause malfunction and shorten the life
of the printer.
Avoid direct sunlight
Since this product is provided with optical sensors, direct sunlight may cause erroneous
operation. Ensure that the cover is closed when printing.
Use a dedicated AC outlet
We highly recommend the printer having its own dedicated power outlet and source line.
This will avoid having the printer in-line consuming power from the same source as another electric appliance which may consume power at various levels and thereby create
power surges which may negatively impact your printer’s performance and longevity.
7
SX4M / SX5M / TXPSX4 / TXPSX5
Overview
6
Overview
6.1 Parts and functions
1
2
3
4
Fig. 2 Printer main body, front
Fig. 3 Thermal print head
8
1
Operation panel (display, buttons, LED)
2
Thermal Print head
3
Front roller
4
Front cover
SX4M / SX5M / TXPSX4 / TXPSX5
Overview
Fig. 4 Printer, internal
1
1
Head Lever
2
Platen
3
Ribbon Shaft
4
Label Holder
2
3
1
4
1
PCMCIA Card Slot (Option)
USB Connector (Option)
LAN Connector (Option)
2
Parallel Interface Connector
(Centronics)
3
Serial Interface Connector
(RS-232C)
4
Expansion I/O Interface Connector
(SX4: Option)
2
3
4
5
6
Fig. 5 Printer main body, back
5
Power Switch
6
AC Power Inlet
9
SX4M / SX5M / TXPSX4 / TXPSX5
Overview
1
2
5
3
6
4
7
1
LCD Message Display
When the power is turned on and it is ready to
print, ONLINE is displayed.
2
POWER LED (Green)
Lights when the power is turned on.
3
ON-LINE LED (Green)
•
Flashes when communicating with a host
PC.
•
Lights while printing.
4
ERROR LED (Red)
Lights when the printer does not operate correctly.
5
FEED key
Feeds paper.
6
RESTART key
Resets the printer when paused or when an
error occurs.
7
PAUSE key
Pauses printing.
Message display shows PAUSE and a remaining count.
Fig. 6 Operation panel
10
SX4M / SX5M / TXPSX4 / TXPSX5
Setup and initial operation
7
Setup and initial operation
7.1 Connecting the device
7.1.1
Connecting the interface cable
1
1
Connect the interface cable to the interface
connector (1, 2, 3, 4) on the printer and your
PC.
1
Connect the power cable to the power supply connector (6) on the printer and to your
power outlet.
2
Press the POWER button on “I”. The
POWER LED lights up.
2
Press the POWER button on “O”. The
POWER LED turns off.
1
Before removing the power cable, make
sure to turn off the printer by pressing the
POWER (5) button.
2
Pull the power cable from the power outlet
3
Pull the power cable from the printer.
2
3
4
5
6
Fig. 7 Printer main body, back
7.1.2
7.1.2
7.1.4
Turning on the device
Turning off the device
Removing the power cable
11
SX4M / SX5M / TXPSX4 / TXPSX5
Setup and initial operation
7.2 Loading the ribbon
1
Open the front cover.
2
The new roll of ribbon should be mounted on the spool to the rear of the print head
assembly.
3
The ribbon should be oriented so the shiny side faces up as it lays on top of the label
stock. The dull side should face down, this is the transfer side.
Fig. 8 Loading the ribbon
12
SX4M / SX5M / TXPSX4 / TXPSX5
Setup and initial operation
7.3 Inserting media
1
Open the front cover.
2
Slide the media stock in from the side of the
printer. Do not push the media from behind.
3
Media stock should be pushed all the way
onto the label shaft up against the round
metal plate.
4
Follow the label path as shown.
1
Open the front cover.
2
SX4M and SX5M
Loosen the thumb screw.
Fig. 9 Label path
7.4 Adjusting label guide
TXPSX4 and TXPSX5
Slide the outside and inside guides to the
edge of the media on both sides.
3
SX4M and SX5M
Adjust the label guide so the guide is
against the edge of the media on both
sides.
Fig. 10 Label guides
13
SX4M / SX5M / TXPSX4 / TXPSX5
Setup and initial operation
7.5 Locating the sensor
1
Open the front cover.
2
You might have to slide the ribbon out of the way to view the sensor.
3
Looking down, the sensor is located between the two ribbon spindles at the base of
the machine.
Fig. 11 Sensor location
14
SX4M / SX5M / TXPSX4 / TXPSX5
Setup and initial operation
7.6 Setting the sensor
Fig. 12 Sensor placement
15
SX4M / SX5M / TXPSX4 / TXPSX5
Print head use and care instructions
8
Print head use and care instructions
Thermal print heads are sensitive and can be easily damaged if mishandled.
Care should be taken during the installation to avoid dropping the print head or otherwise
impacting the printing element.
CAUTION!
The edge of the print head is the area where printing takes place. Use
care to avoid damage when cleaning the print head as to only touch
the element with the cleaner.
The print head is sensitive to contamination. Do not use media stock that has been contaminated by dirt, sand or has been dropped on the floor. Keep the labels in their original
plastic bag when not in use.
The print head should be cleaned at least every 1000 labels or every roll of label stock
used. Wipe the edge of the print head with a clean, soft lint-free cloth and isopropyl alcohol.
Due to the sensitive nature of the print head and the potential for user inflicted damage,
the print head warranty is only for the 24 hours within receipt thereof. If the print head
does not perform to expectation upon installation / testing, you must immediately inform a
representative from the company you purchased the print head from, as well as Technical
Support at 800-858-7425.
16
SX4M / SX5M / TXPSX4 / TXPSX5
Disposal
9
Disposal
Dispose of the device as specified by the appropriate national regulations.
CAUTION!
Risk of environmental damage in case of inappropriate disposal!
Electric devices and their accessories are subject to special waste
treatment and may only be disposed of by approved specialized waste
disposal companies.
WEEE/RoHS Statement
SATO is committed to being a responsible corporate citizen in the world. We understand
the importance of marketing, designing, manufacturing and distributing products that present a low burden to the environment.
Company-wide projects have been undertaken to implement both the Waste Electric and
Electronic Equipment (WEEE) and Restriction of Hazardous Substances (RoHS) initiatives.
17
SX4M / SX5M / TXPSX4 / TXPSX5
Troubleshooting
10
Troubleshooting
Paper Jam / No Paper, Sensor Related Problems
Check the label sensor to make sure it is lined up properly with the media stock you are
using. See page 15 for setting the feed gap sensor.
Perform the Feed Gap Sensor Calibration. If you are using pot tags or wrap around tags,
calibrate without any material underneath the sensor. If you are using pressure sensitive
(adhesive labels), place a sheet of empty backing paper underneath the sensor before
performing the calibration.
Check the label sensor to make sure it is lined up properly with the media you are using.
See page 15 for setting the Feed Gap Sensor.
The label stock may be shifting. If the label stock does not feed through the machine
straight, it will walk out from underneath the label sensor causing a “paper jam” or “no
paper” message. Make sure the media is loaded straight and that the label guide is in the
proper position so the media feeds through the machine correctly.
If you continue to have problems please contact Technical Support at (800) 858-7425.
Communication errors
Check cable connections to the printer and the computer.
If you continue to have problems please contact Technical Support at (800) 858-7425.
Poor Print Quality
The temperature setting may need to be changed in the software or the machine.
Print head may be out of alignment and may need to be adjusted.
If you continue to have problems please contact Technical Support at (800) 858-7425.
18
SATO America, Inc.
Horticultural Division
930 Jimmy Ann Drive
Daytona Beach, FL 32117
Sales:
(800) 874-4465
Tech Support:
(800) 858-7425