1
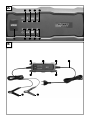
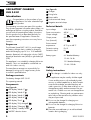
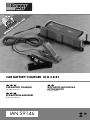
CAR BATTERY CHARGER ULG 3.8 B1
CAR BATTERY CHARGER
Operating instructions
KFZ-BATTERIELADEGERÄT
Bedienungsanleitung
IAN 59146
ΦΟΡΤΙΣΤΗΣ ΜΠΑΤΑΡΙAΣ
ΑΥΤΟΚΙΝΗΤΟΥ
Οδηүίες χρήσης
Before reading, unfold the page containing the illustrations and familiarise yourself with all functions of
the device.
Πριν ξεκινήσετε την ανάγνωση, ανοίξτε τις δυο σελίδες με τις εικόνες και εξοικειωθείτε με όλες τις
λειτουργίες της συσκευής.
Klappen Sie vor dem Lesen die Seite mit den Abbildungen aus und machen Sie sich anschließend mit allen
Funktionen des Gerätes vertraut.
GB / IE / CY
GR / CY
DE / AT / CH
Operating instructions
Οδηүίες χρήσης
Bedienungsanleitung
Page
1
Σελίδα 9
Seite
17
A
B
Contents
Introduction . . . . . . . . . . . . . . . . . . . . . . . . . . . . . . . . . . . . . . . . . . . . . . . . . . . . . . . . . . . . 2
Proper use . . . . . . . . . . . . . . . . . . . . . . . . . . . . . . . . . . . . . . . . . . . . . . . . . . . . . . . . . . . . . . . . . . . . . . . . . 2
Package contents . . . . . . . . . . . . . . . . . . . . . . . . . . . . . . . . . . . . . . . . . . . . . . . . . . . . . . . . . . . . . . . . . . . . 2
Components . . . . . . . . . . . . . . . . . . . . . . . . . . . . . . . . . . . . . . . . . . . . . . . . . . . . . . . . . . . . . . . . . . . . . . . . 2
Technical details . . . . . . . . . . . . . . . . . . . . . . . . . . . . . . . . . . . . . . . . . . . . . . . . . . . . . . . . . . . . . . . . . . . . . 2
Safety . . . . . . . . . . . . . . . . . . . . . . . . . . . . . . . . . . . . . . . . . . . . . . . . . . . . . . . . . . . . . . . . 2
Safety instructions . . . . . . . . . . . . . . . . . . . . . . . . . . . . . . . . . . . . . . . . . . . . . . . . . . . . . . . . . . . . . . . . . . . . 2
Operation . . . . . . . . . . . . . . . . . . . . . . . . . . . . . . . . . . . . . . . . . . . . . . . . . . . . . . . . . . . . . 3
Before first use . . . . . . . . . . . . . . . . . . . . . . . . . . . . . . . . . . . . . . . . . . . . . . . . . . . . . . . . . . . . . . . . . . . . . . 3
Connection . . . . . . . . . . . . . . . . . . . . . . . . . . . . . . . . . . . . . . . . . . . . . . . . . . . . . . . . . . . . . . . . . . . . . . . . . 3
Disconnecting . . . . . . . . . . . . . . . . . . . . . . . . . . . . . . . . . . . . . . . . . . . . . . . . . . . . . . . . . . . . . . . . . . . . . . . 4
Select charging mode . . . . . . . . . . . . . . . . . . . . . . . . . . . . . . . . . . . . . . . . . . . . . . . . . . . . . . . . . . . . . . . . 4
Reset/deleting settings . . . . . . . . . . . . . . . . . . . . . . . . . . . . . . . . . . . . . . . . . . . . . . . . . . . . . . . . . . . . . . . . 4
Switching between modes 1, 2, 3 and 4 . . . . . . . . . . . . . . . . . . . . . . . . . . . . . . . . . . . . . . . . . . . . . . . . . . 4
Mode 1 "6 V" (7.3 V/0.8 A) . . . . . . . . . . . . . . . . . . . . . . . . . . . . . . . . . . . . . . . . . . . . . . . . . . . . . . . . . . . 4
Mode 2 "12 V" (14.4 V/0.8 A). . . . . . . . . . . . . . . . . . . . . . . . . . . . . . . . . . . . . . . . . . . . . . . . . . . . . . . . . 4
Mode 3 "12 V" (14.4 V/3.8 A). . . . . . . . . . . . . . . . . . . . . . . . . . . . . . . . . . . . . . . . . . . . . . . . . . . . . . . . . 5
Mode 4 "12 V" (14.7 V/3.8 A). . . . . . . . . . . . . . . . . . . . . . . . . . . . . . . . . . . . . . . . . . . . . . . . . . . . . . . . . 5
Automatic battery recognition . . . . . . . . . . . . . . . . . . . . . . . . . . . . . . . . . . . . . . . . . . . . . . . . . . . . . . . . . . 5
Pulse charging mode . . . . . . . . . . . . . . . . . . . . . . . . . . . . . . . . . . . . . . . . . . . . . . . . . . . . . . . . . . . . . . . . . 5
Trickle charging . . . . . . . . . . . . . . . . . . . . . . . . . . . . . . . . . . . . . . . . . . . . . . . . . . . . . . . . . . . . . . . . . . . . . 5
Protective function of the appliance . . . . . . . . . . . . . . . . . . . . . . . . . . . . . . . . . . . . . . . . . . . . . . . . . . . . . . 5
Maintenance and Cleaning . . . . . . . . . . . . . . . . . . . . . . . . . . . . . . . . . . . . . . . . . . . . . . . 6
Warranty . . . . . . . . . . . . . . . . . . . . . . . . . . . . . . . . . . . . . . . . . . . . . . . . . . . . . . . . . . . . . . 6
Service . . . . . . . . . . . . . . . . . . . . . . . . . . . . . . . . . . . . . . . . . . . . . . . . . . . . . . . . . . . . . . . . 6
Importer . . . . . . . . . . . . . . . . . . . . . . . . . . . . . . . . . . . . . . . . . . . . . . . . . . . . . . . . . . . . . . 6
Disposal . . . . . . . . . . . . . . . . . . . . . . . . . . . . . . . . . . . . . . . . . . . . . . . . . . . . . . . . . . . . . . . 7
Translation of the original Conformity Declaration . . . . . . . . . . . . . . . . . . . . . . . . . . . . 7
ULG 3.8 B1
1
GB
IE
CY
GB
IE
CY
CAR BATTERY CHARGER
ULG 3.8 B1
See Figure B:
Charger
Fixing holes
Introduction
Power cable
Congratulations on the purchase of your
new appliance. You have selected a highquality product.
The operating instructions are part of this product.
They contain important information about safety, use
and disposal. Before using the product, familiarise
yourself with all operating and safety instructions.
Use this product only as described and only for
the specified areas of application. Please also
pass these operating instructions on to any future
owner(s).
Positive terminal clamp
Proper use
The Ultimate Speed ULG 3.8 B1 is a multi-stage
car battery charger that is suitable for charging
and trickle charging up of 6 V or 12 V lead-acid
batteries (batteries) with electrolyte solution (WET),
electrolyte absorbent mats (AGM) or gel electrolyte
(GEL).
This appliance is not suitable for charging lithium-ion
batteries. The is not intended for commercial use
and is for indoor use only.
The manufacturer accepts no responsibility for
damage(s) arising out of usage contrary to the
instructions specified below.
Negative terminal clamp
Technical details
Input voltage:
220–240 V ∼, 50/60 Hz
Power consumption:
60 W
Output voltage:
6 V
Output power:
0.8 A/3.8 A
Fuse (internal):
2 A
Environmental
temperature:
0°C up to 40°C
Protection rating:
IP 65
Protection class:
II /
Battery types:
/12 V
T2A
6 V lead-acid battery
1.2 Ah–14 Ah
12 V lead-acid battery
1.2 Ah–120 Ah
Safety
Safety instructions
This charger is suitable for indoor use only.
Package contents
Car battery charger ULG 3.8 B1
This operating manual
Components
See Figure A:
LED display "Mode 1"
LED display "Mode 2"
LED display "Mode 3"
LED display "Mode 4"
LED display "Error"
LED display "Fully charged"
LED display "Charging"
LED display "Standby mode"
"MODE" selection button
2
■ This appliance may be used by children aged
8 over and by persons with reduced physical,
sensory or mental capabilities or lack of experience and knowledge, provided that they are
under supervision or have been told how to use
the appliance safely and are aware of the potential risks. Children must not use the appliance
as a plaything. Cleaning and user maintenance
tasks may not be carried out by children unless
they are supervised.
■ Do not use the charger for charging nonrechargeable batteries.
■ Do not use the charger for charging lithium-ion
batteries.
■ Place the removed battery in a well-ventilated
location during charging.
ULG 3.8 B1
■ The automatic mode of operation and usage
restrictions are explained below in these operating instructions.
RISK OF ELECTRIC SHOCK!
■ Do not operate the appliance with a damaged cable, supply cord or mains plug. A damaged power
cord causes danger to life by electric shock.
■ If the supply cord is damaged, it must be replaced
by the manufacturer, its service agent or similarly
qualified persons in order to avoid a hazard.
■ Before connecting to the mains, make sure that
the mains current is a standard 230 V~50 Hz,
equipped with an earthed neutral conductor, a
16 A fuse and a residual-current circuit breaker
(RCCB)!
■ Disconnect the charger from the mains before
making connections to the battery.
■ Always connect positive terminal first and then
the negative to earth/bodywork away from any
fuel lines. Only then connect the charger to the
mains power supply.
■ Disconnect the charger from the mains power
supply after charging. Only then remove the
terminal clamp from the vehicle bodywork/
earth. Then remove the terminal clamp from the
vehicle bodywork/earth.
RISK OF EXPLOSION AND FIRE!
Protect yourself from a highly explosive oxyhydrogen
gas reaction!
■ Make sure that there are no sources of open fire
(flames, embers or sparks) in the vicinity when
charging or discharging batteries!
with plenty of clear running water and seek
immediate medical assistance!
■ Avoid an electric short-circuit when connecting
the charger to the battery. Connect the negative
terminal connecting cable to the negative terminal
of the battery or to the vehicle bodywork/earth
only. Connect the positive terminal connecting cable only to the positive terminal of the
battery!
■ Do not set up the charger near a fire or subject
it to heat or to long-term temperatures exceeding
50°C!
■ When attaching the charger, be sure not to
damage any lines for fuel, electricity, braking
system, hydraulics or water with screws!
■ Do not cover the charger with objects of any kind!
■ Protect the electrical contacts of the battery
against short-circuiting!
■ Use the charger exclusively for charging or
trickle charging undamaged 6 V/12 V lead
batteries! Frozen batteries may not be charged.
Operation
Before first use
♦ Before connecting the battery charger, read the
operating instructions of the battery thoroughly.
♦ In addition, observe the vehicle manufacturer's
instructions for a permanently connected battery. Secure the vehicle; turn off the ignition.
♦ Clean the battery terminals. Ensure that no dirt
comes into contact with your eyes in the process.
■ Make sure that the positive terminal connecting
cable has no contact with a fuel line (e.g. petrol
line)!
♦ Provide for sufficient ventilation.
■ Make sure that no explosive and flammable
substances, e.g. petrol or solvents, can be
ignited when using the charger!
♦ Before starting the charging or trickle charging
procedure on a permanently installed battery in
a vehicle, first disconnect the negative terminal
connecting cable (black) of the vehicle from the
negative terminal of the battery. The negative
terminal of the battery is usually connected to
the vehicle's bodywork/earth.
■ Ensure that there is adequate ventilation during
charging.
RISK OF CHEMICAL BURNS!
■ Wear safety goggles! Wear protective gloves!
If your eyes or skin come into contact with
battery acid, rinse the affected part of the body
ULG 3.8 B1
Connection
♦ Then disconnect the positive terminal connecting cable (red) of the vehicle from the positive
terminal of the battery.
3
GB
IE
CY
GB
IE
CY
♦ Clamp the positive terminal clamp (red) of the
charger to the positive terminal on the battery.
♦ Clamp the negative terminal clamp (black)
of the charger to the negative terminal on the
battery.
♦ Connect the mains cable of the battery
charger to the power socket.
♦ If the terminal clamps are connected incorrectly,
the LED display "ERROR"
will light up.
Disconnecting
♦ Disconnect the appliance from the power supply.
♦ Remove the negative terminal clamp (black)
of the charger from the negative terminal on the
battery.
♦ Remove the positive terminal clamp (red) of
the charger from the positive terminal on the
battery.
Select charging mode
You can choose between different charging modes
for charging various batteries at different ambient
temperatures.
Unlike standard battery chargers, this appliance has
a special function for reusing an empty chargeable
battery or accu. You can recharge a completely discharged battery/accu. A protection function against
incorrect connection and short circuiting ensures
safe charging. Due to the installed electronics, the
charger does not begin operation directly after
connecting the battery, but only starts after a
charging mode has been selected.
This prevents sparking, which often occurs when
connecting. In addition, the battery charger is controlled by an internal MCU (micro-computer unit).
Reset/deleting settings
♦ After connection to the power supply, the appliance automatically returns to its initial state and
remains in Standby mode
Switching between modes 1, 2, 3
and 4
Press the MODE selection button
amount of times.
a corresponding
The appliance switches through the modes in the
4
following order: Standby ( ), Mode 1 ( ), Mode
2 ( ), Mode 3 ( ), Mode 4 ( ) and then starts
the next cycle.
NOTE
► If you press the selection button MODE ,
the charging mode automatically switches to
the next mode and begins operation in that
mode. If a 12 V battery is connected, Mode
1 ( ) is not selectable. If a 6 V battery is connected, Mode 2 ( ) 3 ( ) and 4 ( ) are
not selectable. If a battery is not disconnected
from the charging station after a full charge,
the appliance remains in trickle-charge mode,
even if the user switches over to another
mode. This protects the fully charged battery
from being damaged.
Mode 1 "6 V" (7.3 V/0.8 A)
This mode is suitable for charging 6 V lead-acid
batteries with a capacity below 14 Ah.
♦ Press the selection button MODE , to activate
Mode 1 ( ). After doing so, the corresponding
LED display
lights up. If you do not activate another process afterwards, the electronic
system will automatically activate together with
the LED display
and starts the charging
process.
If the procedure runs without any problems,
the LED display
remains on during the
entire charging process, until the battery is fully
charged to 7.3 V/± 0.25 V. When the battery
is fully charged, the LED display
lights
up and the LED display
goes out.
The appliance now switches automatically into
trickle charging mode.
Mode 2 "12 V" (14.4 V/0.8 A)
This mode is suitable for charging 12 V lead-acid
batteries with a capacity below 14 Ah.
♦ Press the MODE selection button , to activate
Mode 2 ( ). After doing so, the corresponding
LED display
lights up. If you do not activate another process afterwards, the electronic
system will automatically activate together with
the LED display
and starts the charging
process.
If the procedure runs without any problems,
ULG 3.8 B1
the LED display
remains on during the
entire charging process, until the battery is fully
charged. When the battery is fully charged,
the LED display
lights up and the LED
goes out.
display
The appliance now switches automatically into
trickle charging mode.
Mode 3 "12 V" (14.4 V/3.8 A)
This mode is mainly used for charging 12 V leadacid batteries with a large capacity of more than
14 Ah under normal conditions.
♦ Press the MODE selection button , to activate
Mode 3 ( ). If you do not activate another
process afterwards, the electronic system will
activate together with the LED display
and starts the charging process.
If the procedure runs without any problems,
the LED display
remains on during the
entire charging process, until the battery is fully
charged.
When the battery is fully charged, the LED display
lights up and the LED display
goes out.
The appliance now switches automatically into
trickle charging mode.
Mode 4 "12 V" (14.7 V/3.8 A)
This mode is used for charging 12 V lead-acid
batteries with a capacity of more than 14 Ah in
cold conditions or for several AGM batteries with
a capacity of more than 14 Ah.
♦ Press the button MODE selection , to activate
Mode 4 ( ). If you do not activate another
process afterwards, the electronic system will
activate together with the LED display
and starts the charging process. In this mode,
the charging current is identical to that of
"Mode 3" ( ).
If the procedure runs without any problems,
the LED display
remains on during the
entire charging process, until the battery is fully
charged. When the battery is fully charged,
lights up and the LED
the LED display
display
goes out.
The appliance now switches automatically into
trickle charging mode.
ULG 3.8 B1
Automatic battery recognition
GB
IE
CY
As soon as the charger is connected the mains
power supply, the LED display
on the appliance lights up.
The charger recognises the battery on the basis
of the following criteria:
if the voltage of the battery is less than 3.8 V or
greater than 15 V, the battery is not suitable for
,
charging or defective. The LED Displays
,
and
flash. The charger remains in
"Standby mode" and cannot be switched to another
charging mode by means of the MODE selection
button .
Pulse charging mode
The mode is suitable for the charging/regeneration
of empty, used and overcharged 12 V lead-acid
batteries.
When the charger is connected to a battery and
the charging process starts it automatically recognises the battery voltage. It will switch to pulse
charging mode if the voltage is in the range of
7.5 V ± 0.5 V to 10.5 V ± 0.5 V.
This pulse charging process is continued until the
battery voltage has increased to 10.5 V ± 0.5 V.
As soon as this state is reached, the charger switches
over to the previously selected normal charging
mode.
Now the battery can be charged quickly and safely.
Most empty, used or overcharged batteries can be
regenerated and reused using this procedure.
NOTE
► During the pulse charging process, the LED
display
flashes.
Trickle charging
The charge is equipped with an automatic trickle
charging function. Depending on the voltage of the
battery, the charger reacts by supplying different
charging current. The battery can remain connected
to the charger for a long period of time.
Protective function of the appliance
If a non-standard situation should occur, such as
short circuiting, a critical voltage drop during the
charging process, an open circuit or reversed
5
GB
IE
CY
connection of the output terminals, the charger
deactivates the electronic system and immediately
switches back to its initial state to avoid damage.
If you do not activate any settings, the system
will remain in Standby mode. If the terminals are
incorrectly connected (reverse polarity), to the LED
display "Error"
also lights up.
must be reported immediately after unpacking, or
no later than two days after the date of purchase.
Repairs made after expiry of the warranty period
are chargeable.
Service
Service Great Britain
Tel.: 0871 5000 720 (£ 0.10/Min.)
E-Mail: [email protected]
IAN 59146
If the appliance becomes too hot during charging,
the power output is automatically reduced. This
also protects the appliance from damage.
Maintenance and Cleaning
Service Ireland
Tel.: 1890 930 034
(0,08 EUR/Min., (peak))
(0,06 EUR/Min., (off peak))
E-Mail: [email protected]
IAN 59146
WARNING! Always remove the
power plug from the wall socket
before carrying out any work on the battery
charger.
The appliance is maintenance-free.
♦ Under no circumstances should solvents or other
aggressive cleaning agents be used.
♦ Clean the plastic surfaces of the appliance with
a soft, dry cloth.
Warranty
The warranty provided for this appliance is
3 years from the date of purchase. This appliance has been manufactured with care and inspected meticulously prior to delivery. Please
retain your receipt as proof of purchase. In
the event of a warranty claim, please contact
your Customer Service by telephone. This is the
only way to guarantee free return of your
goods.
The warranty only covers claims for material and
manufacturing defects, not for transport damage,
wearing parts or for damage to fragile components
such as switches or batteries. This appliance is
intended solely for private use and not for commercial purposes. The warranty is deemed void if this
product has been subjected to improper or inappropriate handling, abuse or modifications which
were not carried out by one of our authorised service centres. Your statutory rights are not restricted
in any way by this warranty. The warranty period is
not prolonged by repairs made under the warranty.
This also applies to replaced and repaired parts.
Damage and defects present at the time of purchase
6
CY
Service Cyprus
Tel.: 8009 4409
E-Mail: [email protected]
IAN 59146
Hotline availability:
Monday to Friday 08:00 - 20:00 (CET)
Importer
KOMPERNASS HANDELS GMBH
BURGSTRASSE 21
44867 BOCHUM
GERMANY
www.kompernass.com
ULG 3.8 B1
Disposal
The packaging is made from environmentally friendly material and can be
disposed of at your local recycling plant.
Do not dispose of power tools in
your normal domestic waste!
European Directive 2012/19/EU requires that
worn-out power tools are collected separately and
fed into an environmentally compatible recycling
process.
Your local community or municipal authorities
can provide information on how to dispose of the
worn-out appliance.
Translation of the original
Conformity Declaration
We, KOMPERNASS HANDELS GMBH, Custodian
of Documents: Mr. Semi Uguzlu, BURGSTR. 21,
44867 BOCHUM, GERMANY, hereby declare
that this product complies with the following
standards, normative documents and the EC
directives:
EU Low Voltage Regulations
(2006 / 95 / EC)
EMC (Electromagnetic Compatibility)
(2004 / 108 / EC)
RoHS Directive
(2011 / 65 / EU)
Related harmonised standards:
EN 60335-2-29/A2:2010
EN 60335-1:2012
EN 62233:2008
EN 55014-1:2006+A1:2009+A2:2011
EN 55014-2:1997+A1:2001+A2:2008
EN 61000-3-2:2006+A1:2009+A2:2009
EN 61000-3-3:2008
Type designation of machine:
Car battery charger ULG 3.8 B1
Year of manufacture: 02 - 2014
Serial number: IAN 59146
Bochum, 05/03/2014
Semi Uguzlu
- Quality Manager Subject to technical changes in the course of
further developments.
ULG 3.8 B1
7
GB
IE
CY
8
ULG 3.8 B1
Περιεχόμενα
Εισαγωγή . . . . . . . . . . . . . . . . . . . . . . . . . . . . . . . . . . . . . . . . . . . . . . . . . . . . . . . . . . . . . 10
Προβλεπόμενη χρήση . . . . . . . . . . . . . . . . . . . . . . . . . . . . . . . . . . . . . . . . . . . . . . . . . . . . . . . . . . . . . . .10
Παραδοτέος εξοπλισμός . . . . . . . . . . . . . . . . . . . . . . . . . . . . . . . . . . . . . . . . . . . . . . . . . . . . . . . . . . . . .10
Περιγραφή εξαρτημάτων . . . . . . . . . . . . . . . . . . . . . . . . . . . . . . . . . . . . . . . . . . . . . . . . . . . . . . . . . . . . .10
Τεχνικά χαρακτηριστικά . . . . . . . . . . . . . . . . . . . . . . . . . . . . . . . . . . . . . . . . . . . . . . . . . . . . . . . . . . . . . .10
Ασφάλεια . . . . . . . . . . . . . . . . . . . . . . . . . . . . . . . . . . . . . . . . . . . . . . . . . . . . . . . . . . . . . 11
Υποδείξεις ασφαλείας . . . . . . . . . . . . . . . . . . . . . . . . . . . . . . . . . . . . . . . . . . . . . . . . . . . . . . . . . . . . . . .11
Χειρισμός . . . . . . . . . . . . . . . . . . . . . . . . . . . . . . . . . . . . . . . . . . . . . . . . . . . . . . . . . . . . . 12
Πριν από τη θέση σε λειτουργία. . . . . . . . . . . . . . . . . . . . . . . . . . . . . . . . . . . . . . . . . . . . . . . . . . . . . . . .12
Σύνδεση . . . . . . . . . . . . . . . . . . . . . . . . . . . . . . . . . . . . . . . . . . . . . . . . . . . . . . . . . . . . . . . . . . . . . . . . . .12
Αποσύνδεση . . . . . . . . . . . . . . . . . . . . . . . . . . . . . . . . . . . . . . . . . . . . . . . . . . . . . . . . . . . . . . . . . . . . . .12
Επιλογή λειτουργίας φόρτισης . . . . . . . . . . . . . . . . . . . . . . . . . . . . . . . . . . . . . . . . . . . . . . . . . . . . . . . .12
Επαναφορά / Διαγραφή ρυθμίσεων . . . . . . . . . . . . . . . . . . . . . . . . . . . . . . . . . . . . . . . . . . . . . . . . . . . .12
Εναλλαγή μεταξύ λειτουργιών 1, 2, 3 και 4 . . . . . . . . . . . . . . . . . . . . . . . . . . . . . . . . . . . . . . . . . . . . . . .13
Λειτουργία 1 „6 V“ (7,3 V / 0,8 A) . . . . . . . . . . . . . . . . . . . . . . . . . . . . . . . . . . . . . . . . . . . . . . . . . . . . .13
Λειτουργία 2 „12 V“ (14,4 V / 0,8 A) . . . . . . . . . . . . . . . . . . . . . . . . . . . . . . . . . . . . . . . . . . . . . . . . . . .13
Λειτουργία 3 „12 V“ (14,4 V / 3,8 A) . . . . . . . . . . . . . . . . . . . . . . . . . . . . . . . . . . . . . . . . . . . . . . . . . . .13
Λειτουργία 4 „12 V“ (14,7 V / 3,8 A) . . . . . . . . . . . . . . . . . . . . . . . . . . . . . . . . . . . . . . . . . . . . . . . . . . .14
Αυτόματη αναγνώριση μπαταριών . . . . . . . . . . . . . . . . . . . . . . . . . . . . . . . . . . . . . . . . . . . . . . . . . . . . . .14
Λειτουργία παλμικής φόρτισης . . . . . . . . . . . . . . . . . . . . . . . . . . . . . . . . . . . . . . . . . . . . . . . . . . . . . . . .14
Φόρτιση διατήρησης . . . . . . . . . . . . . . . . . . . . . . . . . . . . . . . . . . . . . . . . . . . . . . . . . . . . . . . . . . . . . . . .14
Λειτουργία προστασίας συσκευής. . . . . . . . . . . . . . . . . . . . . . . . . . . . . . . . . . . . . . . . . . . . . . . . . . . . . .14
Συντήρηση και καθαρισμός. . . . . . . . . . . . . . . . . . . . . . . . . . . . . . . . . . . . . . . . . . . . . . 15
Εγγύηση. . . . . . . . . . . . . . . . . . . . . . . . . . . . . . . . . . . . . . . . . . . . . . . . . . . . . . . . . . . . . . 15
Σέρβις. . . . . . . . . . . . . . . . . . . . . . . . . . . . . . . . . . . . . . . . . . . . . . . . . . . . . . . . . . . . . . . . 15
Εισαγωγέας . . . . . . . . . . . . . . . . . . . . . . . . . . . . . . . . . . . . . . . . . . . . . . . . . . . . . . . . . . . 15
Απόρριψη . . . . . . . . . . . . . . . . . . . . . . . . . . . . . . . . . . . . . . . . . . . . . . . . . . . . . . . . . . . . 15
Μετάφραση της Πρωτότυπης Δήλωση συμμόρφωσης . . . . . . . . . . . . . . . . . . . . . . . . . 16
ULG 3.8 B1
9
GR
CY
ΦΟΡΤΙΣΤΗΣ ΜΠΑΤΑΡΙAΣ
ΑΥΤΟΚΙΝΗΤΟΥ ULG 3.8 B1
GR
CY
Εισαγωγή
Συγχαρητήρια για την αγορά της νέας
σας συσκευής. Αποφασίσατε έτσι για
την απόκτηση ενός προϊόντος υψηλής
ποιότητας. Οι οδηγίες χρήσης είναι τμήμα αυτού
του προϊόντος. Περιέχουν σημαντικές υποδείξεις
για την ασφάλεια, τη χρήση και την απόρριψη.
Πριν από τη χρήση του προϊόντος, εξοικειωθείτε
με όλες τις υποδείξεις χειρισμού και ασφάλειας.
Χρησιμοποιείτε το προϊόν μόνο όπως περιγράφεται
και για τους αναφερόμενους τομείς χρήσης.
Παραδώστε όλα τα έγγραφα σε περίπτωση
παράδοσης του προϊόντος σε τρίτους.
Ένδειξη LED „Σφάλμα“
Ένδειξη LED „Πλήρης φόρτιση“
Ένδειξη LED „Διαδικασία φόρτισης ενεργή“
Ένδειξη LED „Λειτουργία ετοιμότητας“
Πλήκτρο επιλογής „MODE“
Βλ. Εικόνα B:
Φορτιστής
Οπές στερέωσης
Καλώδιο σύνδεσης δικτύου
Ακροδέκτης σύνδεσης θετικού πόλου
Ακροδέκτης σύνδεσης αρνητικού πόλου
Τεχνικά χαρακτηριστικά
Τάση εισόδου:
220 - 240 V ∼ 50/60 Hz
Προβλεπόμενη χρήση
Απορρόφηση ισχύος: 60 W
Το Ultimate Speed ULG 3.8 B1 είναι ένας φορτιστής
μπαταριών αυτοκινήτου πολλαπλών βαθμίδων,
κατάλληλος για τη φόρτιση και τη φόρτιση διατήρησης συσσωρευτών (μπαταριών) μολύβδου 6 V ή
12 V με διάλυμα ηλεκτρολύτη (WET), με ηλεκτρολύτη εμποτισμένο σε στρώμα από πλεκτές ίνες
γυαλιού (AGM) ή με ηλεκτρολύτη σε μορφή τζελ
(GEL).
Τάση εξόδου:
6V
Ρεύμα εξόδου:
0,8 A / 3,8 A
Η συσκευή δεν είναι κατάλληλη για τη φόρτιση
συσσωρευτών ιόντων-λιθίου! Η συσκευή δεν είναι
κατάλληλη για επαγγελματική χρήση, ενώ πρέπει
να χρησιμοποιείται μόνο σε εσωτερικούς χώρους.
Για βλάβες από χρήση μη σύμφωνη με τους
κανονισμούς ο κατασκευαστής δεν αναλαμβάνει
καμία ευθύνη.
Παραδοτέος εξοπλισμός
Ασφάλεια (εσωτερικά): 2 A
/ 12 V
T2A
Θερμοκρασία
περιβάλλοντος:
0°C έως 40°C
Είδος προστασίας:
IP 65
Κατηγορία προστασίας: II /
Τύποι μπαταριών:
Μπαταρία
μολύβδου-οξέος 6 V
1,2 Ah - 14 Ah
Μπαταρία
μολύβδου-οξέος 12 V
1,2 Ah - 120 Ah
Φορτιστής μπαταριας αυτοκινήτου ULG 3.8 B1
Οι παρούσες οδηγίες χρήσης
Περιγραφή εξαρτημάτων
Βλ. Εικόνα A:
Ένδειξη LED „Λειτουργία 1“
Ένδειξη LED „Λειτουργία 2“
Ένδειξη LED „Λειτουργία 3“
Ένδειξη LED „Λειτουργία 4“
10
ULG 3.8 B1
Ασφάλεια
Υποδείξεις ασφαλείας
Ο φορτιστής είναι κατάλληλος για λειτουργία μόνο σε εσωτερικούς χώρους.
■ Αυτή η συσκευή επιτρέπεται να χρησιμοποιείται
από παιδιά άνω των 8 ετών, καθώς και από
άτομα με περιορισμένες φυσικές, αισθητηριακές
ή νοητικές ικανότητες ή ελλείψεις από άποψη
εμπειρίας και γνώσεων, εφόσον επιτηρούνται
ή έχουν ενημερωθεί αναφορικά με την ασφαλή
χρήση της συσκευής και κατανοούν τους προκύπτοντες κινδύνους. Τα παιδιά δεν επιτρέπεται
να παίζουν με τη συσκευή. Ο καθαρισμός και η
συντήρηση χρήστη δεν επιτρέπεται να διεξάγονται από παιδιά, χωρίς επιτήρηση.
■ Μη χρησιμοποιείτε το φορτιστή για τη φόρτιση
μη επαναφορτιζόμενων μπαταριών.
■ Μη χρησιμοποιείτε το φορτιστή για τη φόρτιση
συσσωρευτών ιόντων-λιθίου.
■ Τοποθετείτε την μπαταρία που έχετε αφαιρέσει
κατά τη διαδικασία φόρτισης σε μια καλά
αεριζόμενη επιφάνεια.
■ Ο αυτόματος τρόπος δράσης, καθώς και
περιορισμοί ως προς τη χρήση, επεξηγούνται
παρακάτω στις παρούσες οδηγίες χρήσης.
ΚΙΝΔΥΝΟΣ ΗΛΕΚΤΡΟΠΛΗΞΙΑΣ!
■ Μη λειτουργείτε τη συσκευή με φθαρμένο καλώδιο, καλώδιο σύνδεσης δικτύου ή βύσμα. Τα
φθαρμένα καλώδια σύνδεσης δικτύου αποτελούν κίνδυνο για τη ζωή λόγω ηλεκτροπληξίας.
■ Εάν το καλώδιο σύνδεσης αυτής της συσκευής
παρουσιάζει βλάβη, πρέπει να αντικατασταθεί
από τον κατασκευαστή ή το τμήμα εξυπηρέτησης πελατών ή ένα αντιστοίχως εξειδικευμένο
άτομο, ώστε να αποφεύγονται κίνδυνοι.
■ Πριν από τη σύνδεση ρεύματος δικτύου,
βεβαιωθείτε ότι το ρεύμα δικτύου είναι
εξοπλισμένο σύμφωνα με τις προδιαγραφές με
γειωμένο ουδέτερο αγωγό 230 V ∼ 50 Hz, σε
ασφάλεια 16 A και σε διακόπτη FI (διακόπτης
προστασίας εσφαλμένου ρεύματος).
■ Συνδέστε πρώτα τον ακροδέκτη σύνδεσης, ο
οποίος δεν είναι συνδεδεμένος στο αμάξωμα.
Συνδέστε τον άλλο ακροδέκτη σύνδεσης μακριά από τη μπαταρία και το καλώδιο βενζίνης
του αμαξώματος. Μετά συνδέστε το φορτιστή
στο δίκτυο παροχής.
■ Μετά τη φόρτιση αποσυνδέστε το φορτιστή
από το δίκτυο παροχής. Στη συνέχεια απομακρύνετε τον ακροδέκτη σύνδεσης από το
αμάξωμα. Κατόπιν απομακρύνετε τον ακροδέκτη σύνδεσης από τη μπαταρία.
ΚΙΝΔΥΝΟΣ ΕΚΡΗΞΗΣ ΚΑΙ ΠΥΡΚΑΓΙΑΣ!
Προστατευτείτε από αντίδραση έκρηξης οξύ-υδρικού
αερίου!
■ Βεβαιωθείτε ότι κατά τη διαδικασία φόρτισης
και διατήρησης δεν υπάρχει ακάλυπτη φωτιά
(φλόγες, έκρηξη ή σπινθήρες)!
■ Βεβαιωθείτε ότι το καλώδιο σύνδεσης θετικού
πόλου δεν έχει καμία επαφή με κάποιο καλώδιο
καυσίμων (π.χ. καλώδιο βενζίνης)!
■ Βεβαιωθείτε ότι εκρηκτικές ή εύφλεκτες ουσίες,
π.χ. βενζίνη ή διαλυτικά μέσα, δεν θα μπορούν
να αναφλεγούν κατά τη χρήση του φορτιστή!
■ Φροντίζετε για επαρκή αερισμό κατά τη διάρκεια
της φόρτισης.
ΚΙΝΔΥΝΟΣ ΕΓΚΑΥΜΑΤΟΣ
■ Φοράτε γυαλιά προστασίας!
Φοράτε προστατευτικά γάντια! Εάν τα μάτια ή
η επιδερμίδα έρθουν σε επαφή με το οξύ της
μπαταρίας, ξεπλύνετε το αντίστοιχο σημείο του
σώματος με άφθονο τρεχούμενο καθαρό νερό
και ζητήστε αμέσως ιατρική βοήθεια!
■ Αποφεύγετε ηλεκτρικό βραχυκύκλωμα κατά τη
σύνδεση του φορτιστή στην μπαταρία. Συνδέετε
το καλώδιο σύνδεσης αρνητικού πόλου αποκλειστικά στον αρνητικό πόλο της μπαταρίας ή
στο αμάξωμα. Συνδέετε το καλώδιο σύνδεσης
θετικού πόλου αποκλειστικά στο θετικό πόλο
της μπαταρίας!
■ Μην εκθέτετε το φορτιστή κοντά σε φωτιά, ζέστη
και συνεχή υψηλή θερμοκρασία άνω των 50° C!
■ Αποσυνδέστε το φορτιστή από το δίκτυο, προτού κλείσετε ή ανοίξετε συνδέσεις στη μπαταρία.
ULG 3.8 B1
11
GR
CY
■ Κατά την τοποθέτηση του φορτιστή μην καταστρέφετε καλώδια καυσίμου, ηλεκτρισμού,
συστημάτων πέδησης, υδραυλικού συστήματος
ή νερού με βίδες!
GR
CY
■ Μην καλύπτετε το φορτιστή με αντικείμενα!
■ Προστατεύετε τις επιφάνειες των ηλεκτρικών
επαφών της μπαταρίας από βραχυκύκλωμα!
■ Χρησιμοποιείτε το φορτιστή αποκλειστικά για τη
διαδικασία φόρτισης και διατήρησης μη φθαρμένων μπαταριών μολύβδου 6 V- / 12 V. Δεν
επιτρέπεται η φόρτιση παγωμένων μπαταριών.
♦ Στερεώστε τον ακροδέκτη σύνδεσης αρνητικού
πόλου (μαύρος) στον αρνητικό πόλο της
μπαταρίας.
♦ Συνδέστε το καλώδιο σύνδεσης δικτύου
φορτιστή στην πρίζα.
του
♦ Σε περίπτωση εσφαλμένης σύνδεσης (αναστροφή
πόλων) των ακροδεκτών σύνδεσης ανάβει η
ένδειξη LED „Σφάλμα“
.
Αποσύνδεση
♦ Αποσυνδέστε τη συσκευή από το ρεύμα δικτύου.
Πριν από τη θέση σε λειτουργία
♦ Αφαιρέστε τον ακροδέκτη σύνδεσης αρνητικού
πόλου (μαύρος) από τον αρνητικό πόλο της
μπαταρίας.
♦ Πριν από τη σύνδεση του φορτιστή πρέπει
να δίνεται προσοχή στις οδηγίες χρήσης της
μπαταρίας.
♦ Αφαιρέστε τον ακροδέκτη σύνδεσης θετικού
πόλου (κόκκινος) από το θετικό πόλο της
μπαταρίας.
♦ Επίσης, πρέπει να τηρούνται οι προδιαγραφές
του κατασκευαστή του οχήματος σχετικά με
μπαταρίες μόνιμα συνδεδεμένες στο όχημα.
Ασφαλίζετε το όχημα, απενεργοποιείτε την
ανάφλεξη.
Επιλογή λειτουργίας φόρτισης
♦ Καθαρίζετε τους πόλους της μπαταρίας.
Προσοχή, ώστε τα μάτια σας να μην έρχονται
σε επαφή με τη βρωμιά.
Σε σύγκριση με τους συνήθεις φορτιστές μπαταριών,
αυτή η συσκευή διαθέτει μια ειδική λειτουργία για
την εκ νέου χρήση μιας άδειας μπαταρίας / ενός
συσσωρευτή. Μπορείτε να φορτίσετε πάλι μία
πλήρως αποφορτισμένη μπαταρία / έναν συσσωρευτή. Προστασία από εσφαλμένη σύνδεση και
βραχυκύκλωμα διασφαλίζει την ασφαλή διαδικασία
φόρτισης. Μέσω του ενσωματωμένου ηλεκτρονικού
μηχανισμού, ο φορτιστής μπαταριών δεν τίθεται σε
λειτουργία αμέσως μετά τη σύνδεση της μπαταρίας,
αλλά μόνο αφότου έχει επιλεγεί μια λειτουργία
φόρτισης. Με αυτόν τον τρόπο αποφεύγονται
σπινθήρες, οι οποίοι συχνά εμφανίζονται κατά τη
διαδικασία σύνδεσης. Επιπλέον, ο φορτιστής
μπαταριών ελέγχεται μέσω ενός εσωτερικού MCU
(μονάδα μικροϋπολογιστή).
Χειρισμός
♦ Φροντίζετε για επαρκή αερισμό.
Σύνδεση
♦ Πριν τη διαδικασία φόρτισης και διατήρησης
και σε μια μόνιμα συνδεδεμένη στο όχημα
μπαταρία αποσυνδέστε πρώτα το καλώδιο
σύνδεσης αρνητικού πόλου (μαύρο) του
οχήματος από τον αρνητικό πόλο της μπαταρίας. Ο αρνητικός πόλος της μπαταρίας είναι
κατά κανόνα συνδεδεμένος στο αμάξωμα του
οχήματος.
♦ Στη συνέχεια αποσυνδέστε το καλώδιο σύνδεσης θετικού πόλου (κόκκινο) του οχήματος
από το θετικό πόλο της μπαταρίας.
♦ Στερεώστε τον ακροδέκτη σύνδεσης θετικού
πόλου (κόκκινος) του φορτιστή στο θετικό
πόλο της μπαταρίας.
12
Για τη φόρτιση διαφορετικών μπαταριών σε διαφορετική θερμοκρασία περιβάλλοντος μπορείτε
να επιλέξετε ανάμεσα σε διάφορες λειτουργίες
φόρτισης.
Επαναφορά / Διαγραφή ρυθμίσεων
♦ Μετά τη σύνδεση στην παροχή ρεύματος, η
συσκευή τίθεται αυτόματα στην αρχική θέση και
παραμένει σε λειτουργία ετοιμότητας.
ULG 3.8 B1
Εναλλαγή μεταξύ λειτουργιών
1, 2, 3 και 4
Πιέστε διαδοχικά το πλήκτρο επιλογής MODE
Λειτουργία 2 „12 V“ (14,4 V / 0,8 A)
.
Η συσκευή αλλάζει τους τρόπους λειτουργίας ως
εξής: Standby ( ), Λειτουργία 1 ( ), Λειτουργία
2 ( ), Λειτουργία 3 ( ), Λειτουργία 4 ( ) και
εκκινεί στη συνέχεια τον επόμενο κύκλο.
ΥΠΟΔΕΙΞΗ
► Όταν πιέζετε το πλήκτρο επιλογής MODE ,
η λειτουργία φόρτισης γυρίζει στην επόμενη λειτουργία και την διεξάγει. Εάν συνδεθεί μπαταρία
12 V, η Λειτουργία 1 ( ) δεν είναι επιλέξιμη.
Εάν συνδεθεί μπαταρία 6 V, οι Λειτουργίες
2 ( ), 3 ( ) και 4 ( ) δεν είναι επιλέξιμες.
Όταν ωστόσο μια μπαταρία μετά από πλήρη
φόρτιση δεν απομακρύνεται από τη συσκευή
φόρτισης, παραμένει στη λειτουργία διατήρησης, ακόμα και όταν ο χειριστής γυρίζει
σε άλλη λειτουργία. Αυτό είναι χρήσιμο για
να προστατέψετε την πλήρως φορτισμένη
μπαταρία από βλάβες.
Λειτουργία 1 „6 V“ (7,3 V / 0,8 A)
Αυτή η λειτουργία ενδείκνυται για τη φόρτιση
μπαταριών μολύβδου-οξέος 6 V με χωρητικότητα
μικρότερη από 14 Ah.
♦ Πιέστε το πλήκτρο επιλογής MODE για να
επιλέξετε τη λειτουργία 1 ( ). Μετά από διεξαγωγή αυτής της διαδικασίας ανάβει η αντίστοιχη
ένδειξη LED
. Εάν στη συνέχεια δεν διεξάγετε καμία περαιτέρω διαδικασία, ενεργοποιείται
αυτόματα ο ηλεκτρονικός μηχανισμός μαζί με
την ένδειξη LED
και ξεκινάει η διαδικασία
φόρτισης.
Εάν η διαδικασία διεξαχθεί χωρίς προβλήματα,
η ένδειξη LED
παραμένει αναμμένη καθ'
όλη τη διαδικασία φόρτισης, έως ότου η μπαταρία φορτιστεί στα 7,3 V/± 0,25 V. Όταν η μπαταρία έχει φορτιστεί πλήρως, ανάβει η ένδειξη
LED
και η ένδειξη LED
σβήνει.
Η συσκευή γυρίζει τώρα αυτόματα στη λειτουργία διατήρησης.
ULG 3.8 B1
Αυτή η λειτουργία ενδείκνυται για τη φόρτιση
μπαταριών μολύβδου-οξέος 12 V με χωρητικότητα
μικρότερη από 14 Ah.
♦ Πιέστε το πλήκτρο επιλογής MODE για να
επιλέξετε τη λειτουργία 2 ( ). Μετά από διεξαγωγή αυτής της διαδικασίας ανάβει η αντίστοιχη
ένδειξη LED
. Εάν στη συνέχεια δεν διεξάγετε καμία περαιτέρω διαδικασία, ενεργοποιείται
αυτόματα ο ηλεκτρονικός μηχανισμός μαζί με
την ένδειξη LED
και ξεκινάει η διαδικασία
φόρτισης.
Εάν η διαδικασία διεξαχθεί χωρίς προβλήματα,
η ένδειξη LED
παραμένει αναμμένη καθ'
όλη τη διαδικασία φόρτισης, έως ότου η μπαταρία φορτίσει. Όταν η μπαταρία έχει φορτιστεί
πλήρως, ανάβει η ένδειξη LED
και η
ένδειξη LED
σβήνει.
Η συσκευή γυρίζει τώρα αυτόματα στη λειτουργία
διατήρησης.
Λειτουργία 3 „12 V“ (14,4 V / 3,8 A)
Αυτή η λειτουργία χρησιμοποιείται κυρίως για
τη φόρτιση μπαταριών μολύβδου-οξέος 12 V με
μεγάλη χωρητικότητα, μεγαλύτερη από 14 Ah, υπό
φυσιολογικές συνθήκες.
♦ Πιέστε το πλήκτρο επιλογής MODE για να
επιλέξετε τη λειτουργία 3 ( ). Εάν στη συνέχεια δεν διεξάγετε καμία περαιτέρω διαδικασία,
ενεργοποιείται ο ηλεκτρονικός μηχανισμός
μαζί με την ένδειξη LED
και ξεκινάει η
διαδικασία φόρτισης.
Εάν η διαδικασία διεξαχθεί χωρίς προβλήματα,
η ένδειξη LED
παραμένει αναμμένη καθ'
όλη τη διαδικασία φόρτισης, έως ότου η μπαταρία φορτίσει. Όταν η μπαταρία έχει φορτιστεί
πλήρως, ανάβει η ένδειξη LED
και η
ένδειξη LED
σβήνει.
Η συσκευή γυρίζει τώρα αυτόματα στη λειτουργία διατήρησης.
13
GR
CY
Λειτουργία 4 „12 V“ (14,7 V / 3,8 A)
GR
CY
Αυτή η λειτουργία χρησιμοποιείται για τη φόρτιση
μπαταριών μολύβδου-οξέος 12 V με χωρητικότητα
μεγαλύτερη από 14 Ah υπό κρύες συνθήκες ή για
τη φόρτιση μερικών μπαταριών AGM μεγαλύτερων
από 14Ah.
♦ Πιέστε το πλήκτρο επιλογής MODE για να
επιλέξετε τη λειτουργία 4 ( ). Εάν στη συνέχεια
δεν διεξάγετε καμία περαιτέρω διαδικασία, ενεργοποιείται ο ηλεκτρονικός μηχανισμός μαζί
με την ένδειξη LED
και ξεκινάει η διαδικασία φόρτισης. Σε αυτή τη λειτουργία το ρεύμα
φόρτισης είναι το ίδιο όπως στη "Λειτουργία
3 ( )".
Εάν η διαδικασία διεξαχθεί χωρίς προβλήματα,
παραμένει αναμμένη καθ'
η ένδειξη LED
όλη τη διαδικασία φόρτισης, έως ότου η μπαταρία φορτίσει. Όταν η μπαταρία έχει φορτιστεί
πλήρως, ανάβει η ένδειξη LED
και η
ένδειξη LED
σβήνει.
Η συσκευή γυρίζει τώρα αυτόματα στη λειτουργία διατήρησης.
Αυτόματη αναγνώριση μπαταριών
Μόλις ο φορτιστής συνδεθεί στο δίκτυο παροχής,
ανάβει η ένδειξη LED
στη συσκευή.
Ο φορτιστής αναγνωρίζει τη μπαταρία βάσει των
εξής κριτηρίων:
Εάν η τάση της μπαταρίας είναι μικρότερη από
3,8 V ή μεγαλύτερη από 15 V, η μπαταρία δεν
είναι κατάλληλη για φόρτιση ή είναι ελαττωματική.
Σε αυτήν την περίπτωση αναβοσβήνουν οι ενδείξεις
LED
,
,
και
. Ο φορτιστής
παραμένει σε „Λειτουργία ετοιμότητας“ και δεν
γυρίζει σε άλλο τρόπο λειτουργίας με το πλήκτρο
επιλογής MODE .
Λειτουργία παλμικής φόρτισης
Αυτός ο τρόπος λειτουργίας είναι κατάλληλος για
τη φόρτιση/ανανέωση άδειων, χρησιμοποιημένων
και υπερφορτισμένων μπαταριών μολύβδου-οξέος
12 V.
Όταν ο φορτιστής μπαταριών συνδεθεί σε μια
μπαταρία και εκκινείται η διαδικασία φόρτισης, η
συσκευή αναγνωρίζει αυτόματα την τάση της μπαταρίας. Γυρίζει στη λειτουργία παλμικής φόρτισης
όταν η τάση βρίσκεται μεταξύ 7,5 V ± 0,5 V έως
10,5 V ± 0,5 V.
Αυτή η διαδικασία παλμικής φόρτισης συνεχίζεται,
έως ότου η τάση μπαταρίας ανέβει στα 10,5 V ±
0,5 V.
Μόλις αυτή η κατάσταση επιτευχθεί, ο φορτιστής
μπαταριών γυρίζει στην κανονική λειτουργία φόρτισης, την οποία είχατε επιλέξει προηγουμένως.
Τώρα η μπαταρία μπορεί να φορτιστεί γρήγορα
και με ασφάλεια. Με αυτή τη διαδικασία μπορούν
να ανανεωθούν οι περισσότερες άδειες, χρησιμοποιημένες ή υπερφορτισμένες μπαταρίες και να
επαναχρησιμοποιηθούν.
ΥΠΟΔΕΙΞΗ
► Κατά τη διαδικασία της παλμικής φόρτισης
.
ανάβει η ένδειξη LED
Φόρτιση διατήρησης
Ο φορτιστής διαθέτει μια αυτόματη φόρτιση
διατήρησης. Αναλόγως της πτώσης τάσης της
μπαταρίας, ο φορτιστής αντιδρά με διαφορετικό
ρεύμα φόρτισης. Η μπαταρία μπορεί να παραμείνει
συνδεδεμένη στο φορτιστή για μεγάλο διάστημα.
Λειτουργία προστασίας συσκευής
Μόλις εμφανιστεί μια αποκλίνουσα κατάσταση,
όπως βραχυκύκλωμα, κρίσιμη πτώση τάσης
κατά τη διαδικασία φόρτισης, ανοιχτό κύκλωμα
ρεύματος ή αντίστροφη σύνδεση των ακροδεκτών
εξόδου, ο φορτιστής μπαταριών απενεργοποιεί τον
ηλεκτρονικό μηχανισμό και επαναφέρει άμεσα το
σύστημα στην αρχική θέση, ώστε να αποφευχθούν
βλάβες.
Εάν δεν προβείτε σε άλλη ρύθμιση, το σύστημα παραμένει στη λειτουργία ετοιμότητας. Σε περίπτωση
αντίστροφης σύνδεσης των ακροδεκτών εξόδου
(αναστροφή πόλων) ανάβει επιπλέον η ένδειξη
.
LED „Σφάλμα“
Εάν η συσκευή ζεσταθεί πάρα πολύ κατά τη
διαδικασία φόρτισης, μειώνεται αυτόματα η ισχύς
εξόδου. Έτσι η συσκευή προστατεύεται από πιθανές βλάβες.
14
ULG 3.8 B1
Συντήρηση και καθαρισμός
Σέρβις
ΠΡΟΕΙΔΟΠΟΙΗΣΗ! Αποσυνδέετε το
βύσμα πάντα από την πρίζα, προτού
διεξάγετε εργασίες στο φορτιστή
μπαταριών.
Η συσκευή δε χρειάζεται συντήρηση.
♦ Σε καμία περίπτωση μην χρησιμοποιείτε διαλυτικά
μέσα ή άλλα επιθετικά απορρυπαντικά.
♦ Καθαρίζετε τις πλαστικές επιφάνειες της συσκευής
με ένα απαλό πανί.
Εγγύηση
Η παρούσα συσκευή διαθέτει 3 χρόνια εγγύηση
από την ημερομηνία αγοράς. Η συσκευή κατασκευάστηκε και ελέγχθηκε προσεκτικά πριν από
την αποστολή. Παρακαλούμε φυλάξτε την απόδειξη ταμείου ως απόδειξη για την αγορά.
Σε περίπτωση απαίτησης εγγύησης επικοινωνήστε
τηλεφωνικώς με το τμήμα σέρβις. Μόνο έτσι
μπορεί να εξασφαλιστεί δωρεάν αποστολή του
εμπορεύματός σας.
Η απόδοση εγγύησης ισχύει μόνο για σφάλματα
υλικού ή κατασκευής, όχι όμως για ζημιές από τη
μεταφορά, για εξαρτήματα φθοράς ή για βλάβες σε
εύθραυστα εξαρτήματα, π.χ. διακόπτες ή συσσωρευτές. Το προϊόν προορίζεται μόνο για ιδιωτική
και όχι για επαγγελματική χρήση. Σε περίπτωση
κακής μεταχείρισης και ακατάλληλης χρήσης,
χρήσης βίας και παρεμβάσεων, οι οποίες δεν
διεξήχθησαν από το εξουσιοδοτημένο μας τμήμα
σέρβις, η εγγύηση παύει να ισχύει. Τα νομικά σας
δικαιώματα δεν περιορίζονται μέσω αυτής της
εγγύησης. Ο χρόνος εγγύησης δεν επιμηκύνεται
μέσω της εγγύησης. Αυτό ισχύει και για εξαρτήματα, τα οποία έχουν αντικατασταθεί και επισκευαστεί. Ενδεχόμενες ήδη υπάρχουσες ζημιές και
ελλείψεις κατά την αγορά πρέπει να γνωστοποιηθούν αμέσως μετά το άνοιγμα της συσκευασίας, το
αργότερο ωστόσο δύο ημέρες μετά την ημερομηνία
αγοράς. Μετά τη λήξη του χρόνου εγγύησης,
τυχόν εμφανιζόμενες επισκευές χρεώνονται.
ULG 3.8 B1
Σέρβις Ελλάδα
Tel.: 801 5000 019 (0,03 EUR/Min.)
E-Mail: [email protected]
IAN 59146
CY
GR
CY
Σέρβις Κύπρος
Tel.: 8009 4409
E-Mail: [email protected]
IAN 59146
Τηλεφωνικό κέντρο (Hotline):
Δευτέρα έως Παρασκευή, 8:00 – 20:00 (CET)
Εισαγωγέας
KOMPERNASS HANDELS GMBH
BURGSTRASSE 21
44867 BOCHUM
GERMANY
www.kompernass.com
Απόρριψη
Η συσκευασία αποτελείται από φιλικά
προς το περιβάλλον υλικά, τα οποία
μπορείτε να απορρίψετε μέσω των
τοπικών σημείων ανακύκλωσης.
Μην απορρίπτετε τα ηλεκτρικά
εργαλεία στα οικιακά απορρίμματα!
Σύμφωνα με την Ευρωπαϊκή Οδηγία 2012/19/ΕU
τα χρησιμοποιημένα ηλεκτρικά εργαλεία πρέπει να
συλλέγονται χωριστά και να οδηγούνται σε μια φιλική
για το περιβάλλον επαναχρησιμοποίηση.
Για τις δυνατότητες απόρριψης των αχρηστευμένων
συσκευών ενημερώνεστε από τη διαχείριση της
κοινότητας ή της πόλης σας.
15
Μετάφραση της Πρωτότυπης
Δήλωση συμμόρφωσης
GR
CY
Εμείς, η KOMPERNASS HANDELS GMBH,
Υπεύθυνος τεκμηριώσεων: Κύριος Semi Uguzlu,
BURGSTR. 21, 44867 BOCHUM, ΓΕΡΜΑΝΙΑ,
δηλώνουμε δια της παρούσης ότι το παρόν
προϊόν συμφωνεί με τα ακόλουθα πρότυπα, τα
κανονιστικά έγγραφα και τις οδηγίες της ΕΚ:
Οδηγία περί χαμηλής τάσης ΕΚ
(2006 / 95 / EC)
Ηλεκτρομαγνητική συμβατότητα
(2004 / 108 / EC)
Οδηγία RoHS (Σχετικά με τον περιορισμό
χρήσης συγκεκριμένων επικίνδυνων ουσιών
στον ηλεκτρικό και ηλεκτρονικό εξοπλισμό)
(2011 / 65 / EU)
Εφαρμοσμένα εναρμονισμένα πρότυπα
EN 60335-2-29/A2:2010
EN 60335-1:2012
EN 62233:2008
EN 55014-1:2006+A1:2009+A2:2011
EN 55014-2:1997+A1:2001+A2:2008
EN 61000-3-2:2006+A1:2009+A2:2009
EN 61000-3-3:2008
Ονομασία τύπου του μηχανήματος:
Φορτιστής μπαταριας αυτοκινήτου ULG 3.8 B1
Έτος κατασκευής: 02 - 2014
Αύξων αριθμός: IAN 59146
Bochum, 5/3/2014
Semi Uguzlu
- Διευθυντής ποιότητας Με την επιφύλαξη τεχνικών αλλαγών υπό την έννοια
της συνεχούς ανάπτυξης.
16
ULG 3.8 B1
Inhaltsverzeichnis
Einleitung . . . . . . . . . . . . . . . . . . . . . . . . . . . . . . . . . . . . . . . . . . . . . . . . . . . . . . . . . . . . . 18
Bestimmungsgemäßer Gebrauch . . . . . . . . . . . . . . . . . . . . . . . . . . . . . . . . . . . . . . . . . . . . . . . . . . . . . . .18
Lieferumfang . . . . . . . . . . . . . . . . . . . . . . . . . . . . . . . . . . . . . . . . . . . . . . . . . . . . . . . . . . . . . . . . . . . . . . .18
Teilebeschreibung . . . . . . . . . . . . . . . . . . . . . . . . . . . . . . . . . . . . . . . . . . . . . . . . . . . . . . . . . . . . . . . . . . .18
Technische Daten . . . . . . . . . . . . . . . . . . . . . . . . . . . . . . . . . . . . . . . . . . . . . . . . . . . . . . . . . . . . . . . . . . .18
Sicherheit . . . . . . . . . . . . . . . . . . . . . . . . . . . . . . . . . . . . . . . . . . . . . . . . . . . . . . . . . . . . . 18
Sicherheitshinweise. . . . . . . . . . . . . . . . . . . . . . . . . . . . . . . . . . . . . . . . . . . . . . . . . . . . . . . . . . . . . . . . . .18
Bedienung . . . . . . . . . . . . . . . . . . . . . . . . . . . . . . . . . . . . . . . . . . . . . . . . . . . . . . . . . . . . 19
Vor der Inbetriebnahme . . . . . . . . . . . . . . . . . . . . . . . . . . . . . . . . . . . . . . . . . . . . . . . . . . . . . . . . . . . . . .19
Anschließen . . . . . . . . . . . . . . . . . . . . . . . . . . . . . . . . . . . . . . . . . . . . . . . . . . . . . . . . . . . . . . . . . . . . . . .20
Trennen . . . . . . . . . . . . . . . . . . . . . . . . . . . . . . . . . . . . . . . . . . . . . . . . . . . . . . . . . . . . . . . . . . . . . . . . . . .20
Lademodus auswählen . . . . . . . . . . . . . . . . . . . . . . . . . . . . . . . . . . . . . . . . . . . . . . . . . . . . . . . . . . . . . . .20
Reset / Einstellungen löschen . . . . . . . . . . . . . . . . . . . . . . . . . . . . . . . . . . . . . . . . . . . . . . . . . . . . . . . . . .20
Umschalten zwischen Modus 1, 2, 3 und 4 . . . . . . . . . . . . . . . . . . . . . . . . . . . . . . . . . . . . . . . . . . . . . .20
Modus 1 „6 V“ (7,3 V / 0,8 A) . . . . . . . . . . . . . . . . . . . . . . . . . . . . . . . . . . . . . . . . . . . . . . . . . . . . . . . .20
Modus 2 „12 V“ (14,4 V / 0,8 A) . . . . . . . . . . . . . . . . . . . . . . . . . . . . . . . . . . . . . . . . . . . . . . . . . . . . . .21
Modus 3 „12 V“ (14,4 V / 3,8 A) . . . . . . . . . . . . . . . . . . . . . . . . . . . . . . . . . . . . . . . . . . . . . . . . . . . . . .21
Modus 4 „12 V“ (14,7 V / 3,8 A) . . . . . . . . . . . . . . . . . . . . . . . . . . . . . . . . . . . . . . . . . . . . . . . . . . . . . .21
Automatische Batterieerkennung . . . . . . . . . . . . . . . . . . . . . . . . . . . . . . . . . . . . . . . . . . . . . . . . . . . . . . .21
Impulslademodus . . . . . . . . . . . . . . . . . . . . . . . . . . . . . . . . . . . . . . . . . . . . . . . . . . . . . . . . . . . . . . . . . . .21
Erhaltungsladung . . . . . . . . . . . . . . . . . . . . . . . . . . . . . . . . . . . . . . . . . . . . . . . . . . . . . . . . . . . . . . . . . . .22
Geräteschutzfunktion . . . . . . . . . . . . . . . . . . . . . . . . . . . . . . . . . . . . . . . . . . . . . . . . . . . . . . . . . . . . . . . .22
Wartung und Reinigung . . . . . . . . . . . . . . . . . . . . . . . . . . . . . . . . . . . . . . . . . . . . . . . . . 22
Garantie . . . . . . . . . . . . . . . . . . . . . . . . . . . . . . . . . . . . . . . . . . . . . . . . . . . . . . . . . . . . . 22
Service . . . . . . . . . . . . . . . . . . . . . . . . . . . . . . . . . . . . . . . . . . . . . . . . . . . . . . . . . . . . . . . 23
Importeur . . . . . . . . . . . . . . . . . . . . . . . . . . . . . . . . . . . . . . . . . . . . . . . . . . . . . . . . . . . . 23
Entsorgung . . . . . . . . . . . . . . . . . . . . . . . . . . . . . . . . . . . . . . . . . . . . . . . . . . . . . . . . . . . 23
Original-Konformitätserklärung . . . . . . . . . . . . . . . . . . . . . . . . . . . . . . . . . . . . . . . . . . 23
ULG 3.8 B1
17
DE
AT
CH
KFZ-BATTERIELADEGERÄT
ULG 3.8 B1
Einleitung
DE
AT
CH
Wir beglückwünschen Sie zum Kauf Ihres
neuen Gerätes. Sie haben sich damit für
ein hochwertiges Produkt entschieden.
Die Bedienungsanleitung ist Teil dieses Produkts.
Sie enthält wichtige Hinweise für Sicherheit, Gebrauch
und Entsorgung. Machen Sie sich vor der Benutzung
des Produkts mit allen Bedien- und Sicherheitshinweisen vertraut. Benutzen Sie das Produkt nur wie
beschrieben und für die angegebenen Einsatzbereiche. Händigen Sie alle Unterlagen bei Weitergabe
des Produkts an Dritte mit aus.
LED-Anzeige „Standby-Modus“
Auswahltaste „MODE“
Siehe Abbildung B:
Ladegerät
Befestigungsbohrungen
Netzanschlussleitung
Plus-Pol-Anschlussklemme
Minus-Pol-Anschlussklemme
Technische Daten
Eingangsspannung:
220 - 240 V ∼ 50/60 Hz
Leistungsaufnahme:
60 W
Ausgangsspannung:
6V
Bestimmungsgemäßer Gebrauch
Ausgangsstrom:
0,8 A / 3,8 A
Das Ultimate Speed ULG 3.8 B1 ist ein mehrstufiges
Kfz-Batterieladegerät, dass zur Aufladung und
Erhaltungsladung von 6 V- oder 12 V-Blei-Akkus
(Batterien) mit Elektrolyt-Lösung (WET), mit Elektrolyt
absorbierenden Matten (AGM) oder mit gelförmigem
Elektrolyt (GEL) geeignet ist.
Sicherung (innen):
2A
Das Gerät ist nicht zur Aufladung von Lithium-IonenAkkus geeignet! Das Gerät ist nicht für den gewerblichen Einsatz und nur zur Verwendung in Innenräumen bestimmt.
Für aus bestimmungswidriger Verwendung entstandene Schäden übernimmt der Hersteller keine
Haftung.
Lieferumfang
Kfz-Batterieladegerät ULG 3.8 B1
Diese Bedienungsanleitung
Teilebeschreibung
Siehe Abbildung A:
LED-Anzeige „Modus 1“
LED-Anzeige „Modus 2“
LED-Anzeige „Modus 3“
LED-Anzeige „Modus 4“
LED-Anzeige „Fehler“
LED-Anzeige „Vollständig aufgeladen“
LED-Anzeige „Ladevorgang aktiv“
18
/ 12 V
T2A
Umgebungstemperatur: 0°C bis 40°C
Schutzart:
IP 65
Schutzklasse:
II /
Batterietypen:
6 V-Blei-Säure-Batterie
1,2 Ah - 14 Ah
12 V Blei-Säure-Batterie
1,2 Ah - 120 Ah
Sicherheit
Sicherheitshinweise
Das Ladegerät ist nur für den Betrieb im
Innenbereich geeignet.
■ Dieses Gerät kann von Kindern ab 8 Jahren
und darüber sowie von Personen mit verringerten physischen, sensorischen oder mentalen
Fähigkeiten oder Mangel an Erfahrung und
Wissen benutzt werden, wenn sie beaufsichtigt
oder bezüglich des sicheren Gebrauchs des
Gerätes unterwiesen wurden und die daraus
resultierenden Gefahren verstehen. Kinder
dürfen nicht mit dem Gerät spielen. Reinigung
und Benutzer-Wartung dürfen nicht von Kindern
ohne Beaufsichtigung durchgeführt werden.
■ Verwenden Sie das Ladegerät nicht zum Laden
von nicht wiederaufladbaren Batterien.
ULG 3.8 B1
■ Verwenden Sie das Ladegerät nicht zum Laden
von Lithium-Ionen-Akkus.
■ Stellen Sie die ausgebaute Batterie während
des Ladevorgangs auf eine gut belüftete Fläche.
■ Die automatische Wirkungsweise sowie Einschränkungen in der Anwendung werden nachstehend
in dieser Bedienungsanleitung erklärt.
STROMSCHLAGGEFAHR!
■ Betreiben Sie das Gerät nicht mit beschädigtem
Kabel, Netzanschlussleitung oder Netzstecker.
Beschädigte Netzanschlussleitungen bedeuten
Lebensgefahr durch elektrischen Schlag.
■ Wenn die Netzanschlussleitung dieses Gerätes
beschädigt wird, muss sie durch den Hersteller
oder seinen Kundendienst oder eine ähnlich
qualifizierte Person ersetzt werden, um Gefährdungen zu vermeiden.
■ Stellen Sie vor dem Netzstromanschluss sicher,
dass der Netzstrom vorschriftsmäßig mit 230 V ∼
50 Hz, geerdetem Nullleiter, einer 16 A Sicherung
und einem FI-Schalter (Fehlerstromschutzschalter)
ausgestattet ist.
■ Trennen Sie das Ladegerät vom Netz, bevor Sie
Verbindungen zur Batterie schließen oder öffnen.
■ Schließen Sie die Anschlussklemme, die nicht
an die Karosserie angeschlossen ist, zuerst an.
Schließen Sie die andere Anschlussklemme entfernt von der Batterie und der Benzinleitung an
die Karosserie an. Schließen Sie das Ladegerät
erst danach an das Versorgungsnetz an.
■ Trennen Sie das Ladegerät nach dem Laden vom
Versorgungsnetz. Entfernen Sie erst danach die
Anschlussklemme von der Karosserie. Entfernen
Sie im Anschluss daran die Anschlussklemme
von der Batterie.
Stoffe, z.B. Benzin oder Lösungsmittel, beim
Gebrauch des Ladegerätes nicht entzündet
werden können!
■ Sorgen Sie für eine ausreichende Belüftung
während des Ladens.
VERÄTZUNGSGEFAHR
■ Tragen Sie eine Schutzbrille!
Tragen Sie Schutzhandschuhe! Wenn Augen
oder Haut mit Batteriesäure in Kontakt geraten
sind, spülen Sie die betroffene Körperregion mit
viel fließendem, klarem Wasser ab und suchen
Sie umgehend einen Arzt auf!
■ Vermeiden Sie einen elektrischen Kurzschluss
beim Anschluss des Ladegerätes an die Batterie.
Schließen Sie das Minus-Pol-Anschlusskabel
ausschließlich an den Minuspol der Batterie
bzw. an die Karosserie an. Schließen Sie das
Plus-Pol-Anschlusskabel ausschließlich an den
Pluspol der Batterie an!
■ Setzen Sie das Ladegerät nicht in der Nähe von
Feuer, Hitze und lang andauernder Temperatureinwirkung über 50°C aus!
■ Beschädigen Sie bei der Montage des Ladegerätes keine Leitungen für Treibstoff, Elektrizität,
Bremsanlagen, Hydraulik oder Wasser mit
Schrauben!
■ Decken Sie das Ladegerät nicht mit Gegenständen ab!
■ Schützen Sie die Elektrokontaktflächen der
Batterie vor Kurzschluss!
■ Verwenden Sie das Ladegerät ausschließlich
zum Auflade- und Erhaltungsladevorgang von
unbeschädigten 6 V- / 12 V-Blei-Batterien. Eingefrorene Batterien dürfen nicht geladen werden.
EXPLOSIONS- UND BRANDGEFAHR!
Schützen Sie sich vor einer hochexplosiven Knallgasreaktion!
Bedienung
■ Stellen Sie sicher, dass beim Auflade- und Erhaltungsladevorgang kein offenes Licht (Flammen,
Glut oder Funken) vorhanden ist!
♦ Vor dem Anschluss des Ladegerätes ist die
Bedienungsanleitung der Batterie zu beachten.
■ Stellen Sie sicher, dass das Plus-Pol-Anschlusskabel keinen Kontakt zu einer Treibstoffleitung
(z.B. Benzinleitung) hat!
■ Stellen Sie sicher, dass explosive oder brennbare
ULG 3.8 B1
Vor der Inbetriebnahme
♦ Weiterhin sind die Vorschriften des Fahrzeugherstellers bei einer ständig im Fahrzeug angeschlossenen Batterie zu beachten. Sichern Sie
das Kfz, schalten Sie die Zündung aus.
19
DE
AT
CH
♦ Reinigen Sie die Batteriepole. Achten Sie darauf,
dass Ihre Augen dabei nicht mit dem Schmutz in
Kontakt kommen.
♦ Sorgen Sie für eine ausreichende Belüftung.
DE
AT
CH
sondern erst, nachdem ein Lademodus ausgewählt
wurde. Auf diese Weise werden Funken, die oftmals
während des Anschlussvorgangs auftreten, vermieden.
Des Weiteren wird das Batterieladegerät durch eine
interne MCU (Mikro-Computer-Einheit) gesteuert.
Anschließen
Reset / Einstellungen löschen
♦ Trennen Sie vor dem Auflade- und Erhaltungsladevorgang, bei einer ständig im Fahrzeug
angeschlossenen Batterie, zuerst das MinusPol-Anschlusskabel (schwarz) des Fahrzeugs
vom Minus-Pol der Batterie. Der Minus-Pol der
Batterie ist in der Regel mit der Karosserie des
Fahrzeugs verbunden.
♦ Nach Anschluss an die Stromversorgung bringt
sich das Gerät automatisch in die Grundstellung
und bleibt im Standby-Modus.
♦ Trennen Sie anschließend das Plus-Pol-Anschlusskabel (rot) des Fahrzeugs vom Plus-Pol der Batterie.
♦ Klemmen Sie die Plus-Pol-Anschlussklemme (rot)
des Ladegeräts an den Plus-Pol der Batterie.
♦ Klemmen Sie die Minus-Pol-Anschlussklemme
(schwarz) an den Minus-Pol der Batterie.
♦ Schließen Sie die Netzanschlussleitung
Ladegeräts an die Steckdose an.
des
♦ Bei falschem Anschluss (Verpolung) der Anschlussklemmen leuchtet die LED-Anzeige „Fehler“
.
Trennen
♦ Trennen Sie das Gerät vom Netzstrom.
♦ Nehmen Sie die Minus-Pol-Anschlussklemme
(schwarz) vom Minus-Pol der Batterie.
♦ Nehmen Sie die Plus-Pol-Anschlussklemme (rot)
vom Plus-Pol der Batterie.
Lademodus auswählen
Sie können zum Laden verschiedener Batterien
bei unterschiedlicher Umgebungstemperatur aus
verschiedenen Lademodi auswählen.
Im Vergleich zu herkömmlichen Batterieladegeräten,
verfügt dieses Gerät über eine spezielle Funktion
zum erneuten Verwenden einer leeren Batterie /
eines Akkus. Sie können eine vollständig entladene
Batterie / einen Akku wieder aufladen. Ein Schutz
gegen Fehlanschluss und Kurzschluss gewährleistet
den sicheren Ladevorgang. Durch die eingebaute
Elektronik setzt sich das Batterieladegerät nicht
unmittelbar nach Anschluss der Batterie in Betrieb,
20
Umschalten zwischen Modus
1, 2, 3 und 4
Drücken Sie die Auswahltaste MODE
chend nacheinander.
entspre-
Das Gerät schaltet die Lademodi in folgender
Reihenfolge: Standby ( ), Modus 1 ( ), Modus
2 ( ), Modus 3 ( ), Modus 4 ( ) und startet
dann den nächsten Zyklus.
HINWEIS
► Wenn Sie die Auswahltaste MODE drücken, schaltet der Lademodus zum nächsten
Modus und führt diesen aus. Wird eine 12 VBatterie angeschlossen, ist Modus 1
( ) nicht wählbar. Wird eine 6 V-Batterie
angeschlossen, ist Modus 2 ( ), 3 ( ) und 4
( ) nicht wählbar. Wenn jedoch eine Batterie
nach voller Ladung nicht vom Ladegerät abgeklemmt wird, verbleibt sie im Erhaltungslademodus, sogar wenn der Benutzer in einen
anderen Modus schaltet. Dies ist nützlich, um
die voll geladene Batterie vor Schäden zu
schützen.
Modus 1 „6 V“ (7,3 V / 0,8 A)
Dieser Modus eignet sich zum Laden von 6 V-BleiSäure-Batterien mit einer Kapazität geringer als
14 Ah.
♦ Drücken Sie die Auswahltaste MODE , um
Modus 1 ( ) auszuwählen. Nach Durchführung dieses Vorgangs leuchtet die entsprechende
LED-Anzeige
auf. Wenn Sie anschließend
keinen weiteren Vorgang vornehmen, stellt sich
die Elektronik automatisch zusammen mit der
LED-Anzeige
an und startet den Ladevorgang.
Verläuft der Vorgang ohne Probleme, bleibt die
LED-Anzeige
während des gesamten Lade-
ULG 3.8 B1
verlaufs sichtbar, bis die Batterie auf 7,3 V/±
0,25 V geladen ist. Wenn die Batterie vollständig
aufgeladen ist, leuchtet die LED-Anzeige
und die LED-Anzeige
erlischt.
Das Gerät wechselt nun automatisch in den
Erhaltungslademodus.
Modus 2 „12 V“ (14,4 V / 0,8 A)
Dieser Modus eignet sich zum Laden von 12 VBlei-Säure-Batterien mit einer Kapazität geringer
als 14 Ah.
♦ Drücken Sie die Auswahltaste MODE , um
Modus 2 ( ) auszuwählen. Nach Durchführung
dieses Vorgangs leuchtet die entsprechende
LED-Anzeige
auf. Wenn Sie anschließend
keinen weiteren Vorgang vornehmen, stellt
sich die Elektronik automatisch zusammen mit
der LED-Anzeige
an und startet den
Ladevorgang.
Verläuft der Vorgang ohne Probleme, bleibt die
LED-Anzeige
während des gesamten
Ladeverlaufs an, bis die Batterie geladen ist.
Wenn die Batterie vollständig aufgeladen ist,
leuchtet die LED-Anzeige
und die LEDAnzeige
erlischt.
Das Gerät wechselt nun automatisch in den
Erhaltungslademodus.
Modus 3 „12 V“ (14,4 V / 3,8 A)
Dieser Modus wird hauptsächlich zum Laden von
12 V-Blei-Säure-Batterien mit großer Kapazität
von mehr als 14 Ah unter normalen Bedingungen
angewendet.
♦ Drücken Sie die Auswahltaste MODE ,
um Modus 3 ( ) auszuwählen. Wenn Sie
anschließend keinen weiteren Vorgang vornehmen, stellt sich die Elektronik zusammen mit
der LED-Anzeige
an und startet den
Ladevorgang.
Verläuft der Vorgang ohne Probleme, bleibt die
während des gesamten
LED-Anzeige
Ladeverlaufs an, bis die Batterie geladen ist.
Wenn die Batterie vollständig aufgeladen ist,
und die LEDleuchtet die LED-Anzeige
Anzeige
erlischt.
Das Gerät wechselt nun automatisch in den
Erhaltungslademodus.
ULG 3.8 B1
Modus 4 „12 V“ (14,7 V / 3,8 A)
Dieser Modus wird zum Laden von 12 V-Blei-SäureBatterien mit einer größeren Kapazität von mehr
als 14 Ah unter kalten Bedingungen oder zum
Laden einiger AGM-Batterien von mehr als 14 Ah
angewendet.
♦ Drücken Sie die Auswahltaste MODE , um
Modus 4 ( ) auszuwählen. Wenn Sie anschließend keinen weiteren Vorgang vornehmen, stellt
sich die Elektronik zusammen mit der LEDAnzeige
an und startet den Ladevorgang.
In diesem Modus ist der Ladestrom der gleiche,
wie in „Modus 3 ( )“.
Verläuft der Vorgang ohne Probleme, bleibt die
LED-Anzeige
während des gesamten
Ladeverlaufs an, bis die Batterie geladen ist.
Wenn die Batterie vollständig aufgeladen ist,
leuchtet die LED-Anzeige
und die LEDAnzeige
erlischt.
Das Gerät wechselt nun automatisch in den
Erhaltungslademodus.
Automatische Batterieerkennung
Sobald das Ladegerät an das Versorgungsnetz
angeschlossen ist, leuchtet die LED-Anzeige
am Gerät.
Das Ladegerät erkennt die Batterie an Hand
folgender Kriterien:
Ist die Spannung der Batterie kleiner als 3,8 V oder
größer als 15 V, ist die Batterie nicht zum laden
geeignet oder defekt. In diesen Fällen blinken die
LED-Anzeigen
,
,
und
. Das
Ladegerät bleibt im „Standby-Modus“ und lässt
sich nicht durch die Auswahltaste MODE in
einen anderen Lademodus umschalten.
Impulslademodus
Dieser Modus eignet sich zum Laden/Regenerieren
von leeren, verbrauchten und überladenen 12 VBlei-Säure-Batterien.
Wenn das Batterieladegerät an eine Batterie angeschlossen wird und den Ladevorgang startet, erkennt
es die Batteriespannung automatisch. Es wechselt
in den Impulslademodus, wenn die Spannung im
Bereich von 7,5 V ± 0,5 V bis 10,5 V ± 0,5 V liegt.
Dieser Impulsladelauf wird fortgesetzt, bis die
Batteriespannung auf 10,5 V ± 0,5 V ansteigt.
21
DE
AT
CH
Sobald dieser Zustand erreicht ist, wechselt das
Batterieladegerät in den normalen Lademodus,
den Sie zuvor ausgewählt haben.
DE
AT
CH
Nun kann die Batterie schnell und sicher aufgeladen werden. Mit diesem Verfahren lassen sich die
meisten leeren, verbrauchten, oder überladenen
Batterien regenerieren und können wieder verwendet werden.
Wartung und Reinigung
WARNUNG! Ziehen Sie den Netzstecker immer aus der Steckdose,
bevor Sie Arbeiten am Batterieladegerät durchführen.
Das Gerät ist wartungsfrei.
HINWEIS
♦ Verwenden Sie keinesfalls Lösungsmittel oder
andere aggressive Reinigungsmittel.
► Während des Impulsladevorgangs blinkt die
LED-Anzeige
.
♦ Reinigen Sie die Kunststoffoberflächen des
Gerätes mit einem trockenen Tuch.
Erhaltungsladung
Garantie
Das Ladegerät verfügt über eine automatische
Erhaltungsladung. Abhängig vom Spannungsfall
der Batterie reagiert das Ladegerät mit unterschiedlichem Ladestrom. Die Batterie kann über längere
Zeit an das Ladegerät angeschlossen bleiben.
Sie erhalten auf dieses Gerät 3 Jahre Garantie
ab Kaufdatum. Das Gerät wurde sorgfältig
produziert und vor Anlieferung gewissenhaft
geprüft. Bitte bewahren Sie den Kassenbon
als Nachweis für den Kauf auf. Bitte setzen
Sie sich im Garantiefall mit Ihrer Servicestelle
telefonisch in Verbindung. Nur so kann eine
kostenlose Einsendung Ihrer Ware gewährleistet werden.
Die Garantieleistung gilt nur für Material- oder
Fabrikationsfehler, nicht aber für Transportschäden, Verschleißteile oder für Beschädigungen an
zerbrechlichen Teilen, z. B. Schalter oder Akkus.
Das Produkt ist lediglich für den privaten und nicht
für den gewerblichen Gebrauch bestimmt. Bei
missbräuchlicher und unsachgemäßer Behandlung,
Gewaltanwendung und bei Eingriffen, die nicht
von unserer autorisierten Service-Niederlassung
vorgenommen wurden, erlischt die Garantie. Ihre
gesetzlichen Rechte werden durch diese Garantie
nicht eingeschränkt. Die Garantiezeit wird durch
die Gewährleistung nicht verlängert. Dies gilt auch
für ersetzte und reparierte Teile. Eventuell schon
beim Kauf vorhandene Schäden und Mängel müssen sofort nach dem Auspacken gemeldet werden,
spätestens aber zwei Tage nach Kaufdatum. Nach
Ablauf der Garantiezeit anfallende Reparaturen
sind kostenpflichtig.
Geräteschutzfunktion
Sobald eine abweichende Situation wie Kurzschluss,
kritischer Spannungsabfall während des Ladevorgangs, offener Stromkreis oder umgekehrter Anschluss
der Ausgangsklemmen auftritt, schaltet das Batterieladegerät die Elektronik aus und stellt das System
unmittelbar in die Grundstellung zurück, um Schäden
zu vermeiden.
Sofern Sie keine andere Einstellung vornehmen,
bleibt das System im Standby-Modus. Bei umgekehrtem Anschluss der Ausgangsklemmen (Verpolung)
leuchtet zusätzlich die LED-Anzeige „Fehler“
.
Sollte das Gerät während des Ladevorgangs zu
heiß werden, wird automatisch die Ausgangsleistung
verringert. Dies schützt ebenfalls das Gerät vor
Beschädigung.
22
ULG 3.8 B1
Service
Service Deutschland
Tel.: 0800 5435 111 (Kostenfrei aus dem
dt. Festnetz/Mobilfunknetz)
E-Mail: [email protected]
IAN 59146
Service Österreich
Tel.: 0820 201 222 (0,15 EUR/Min.)
E-Mail: [email protected]
IAN 59146
Service Schweiz
Tel.: 0842 665566 (0,08 CHF/Min.,
Mobilfunk max. 0,40 CHF/Min.)
E-Mail: [email protected]
IAN 59146
Erreichbarkeit Hotline: Montag bis Freitag von
8:00 Uhr – 20:00 Uhr (MEZ)
Importeur
OriginalKonformitätserklärung
Wir, KOMPERNASS HANDELS GMBH, Dokumentenverantwortlicher: Herr Semi Uguzlu, BURGSTR. 21,
44867 BOCHUM, DEUTSCHLAND, erklären hiermit,
dass dieses Produkt mit den folgenden Normen,
normativen Dokumenten und EG-Richtlinien
übereinstimmt:
EG-Niederspannungsrichtlinie
(2006 / 95 / EC)
Elektromagnetische Verträglichkeit
(2004 / 108 / EC)
RoHS Richtlinie
(2011 / 65 / EU)
angewandte harmonisierte Normen
EN 60335-2-29/A2:2010
EN 60335-1:2012
EN 62233:2008
KOMPERNASS HANDELS GMBH
EN 55014-1:2006+A1:2009+A2:2011
BURGSTRASSE 21
EN 55014-2:1997+A1:2001+A2:2008
44867 BOCHUM
EN 61000-3-2:2006+A1:2009+A2:2009
GERMANY
EN 61000-3-3:2008
www.kompernass.com
Typbezeichnung der Maschine:
Entsorgung
Die Verpackung besteht aus umweltfreundlichen Materialien, die Sie über die örtlichen
Recyclingstellen entsorgen können.
Werfen Sie Elektrowerkzeuge nicht
in den Hausmüll!
Gemäß Europäischer Richtlinie 2012/19/EU
müssen verbrauchte Elektrowerkzeuge getrennt
gesammelt und einer umweltgerechten Wiederverwertung zugeführt werden.
Möglichkeiten zur Entsorgung des ausgedienten
Gerätes erfahren Sie bei Ihrer Gemeinde- oder
Stadtverwaltung.
ULG 3.8 B1
KFZ-Batterieladegerät ULG 3.8 B1
Herstellungsjahr: 02 - 2014
Seriennummer: IAN 59146
Bochum, 05.03.2014
Semi Uguzlu
- Qualitätsmanager Technische Änderungen im Sinne der Weiterentwicklung sind vorbehalten.
23
DE
AT
CH
24
ULG 3.8 B1
KOMPERNASS HANDELS GMBH
BURGSTRASSE 21
44867 BOCHUM
DEUTSCHLAND / GERMANY
www.kompernass.com
Last Information Update · Έκδοση των πληροφοριών
Stand der Informationen: 05 / 2014 · Ident.-No.: ULG3.8B1-052014-3
IAN 59146