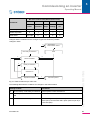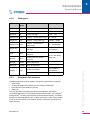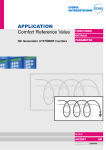
1
POSIDRIVE® FDS 5000
Operating Manual
Settings
Interfaces
Communication
V 5.6
03/2011
en
Table of contents
Titel des Dokuments
Table of contents
6
1.1 Purpose of the manual . . . . . . . . . . . . . . . . . . . . . . . . . . . . . .
6
1.2 Readers . . . . . . . . . . . . . . . . . . . . . . . . . . . . . . . . . . . . . . . . .
7
1.3 Other manuals . . . . . . . . . . . . . . . . . . . . . . . . . . . . . . . . . . . .
7
1.4 Further support . . . . . . . . . . . . . . . . . . . . . . . . . . . . . . . . . . . .
8
2 Notes on Safety. . . . . . . . . . . . . . . . . . . . . . . . . .
9
2.1 Component part of the product . . . . . . . . . . . . . . . . . . . . . . . .
9
2.2 Operation in accordance with its intended use . . . . . . . . . . . .
9
2.3 Risk assessment . . . . . . . . . . . . . . . . . . . . . . . . . . . . . . . . . . .
9
2.4 Ambient conditions . . . . . . . . . . . . . . . . . . . . . . . . . . . . . . . . .
10
2.5 Qualified personnel . . . . . . . . . . . . . . . . . . . . . . . . . . . . . . . . .
11
2.6 Transportation and storage . . . . . . . . . . . . . . . . . . . . . . . . . . .
11
2.7 Installation and connection . . . . . . . . . . . . . . . . . . . . . . . . . . .
12
2.8 Commissioning, operation and service . . . . . . . . . . . . . . . . . .
12
2.9 Disposal . . . . . . . . . . . . . . . . . . . . . . . . . . . . . . . . . . . . . . . . .
13
2.10 Residual dangers . . . . . . . . . . . . . . . . . . . . . . . . . . . . . . . . . .
13
2.11 Presentation of notes on safety. . . . . . . . . . . . . . . . . . . . . . . .
14
3 Commissioning an inverter . . . . . . . . . . . . . . . .
15
3.1 Standard device state machine . . . . . . . . . . . . . . . . . . . . . . . .
15
3.2 Device state machine acc. to DSP 402. . . . . . . . . . . . . . . . . .
20
4 Parameterize . . . . . . . . . . . . . . . . . . . . . . . . . . . .
4.1 Parameters . . . . . . . . . . . . . . . . . . . . . . . . . . . . . . . . . . . . . . .
23
24
4.1.1
Structure . . . . . . . . . . . . . . . . . . . . . . . . . . . . . . . . . .
24
4.1.2
Data types . . . . . . . . . . . . . . . . . . . . . . . . . . . . . . . .
26
4.1.3
Parameter list structure . . . . . . . . . . . . . . . . . . . . . .
26
4.2 POSITool . . . . . . . . . . . . . . . . . . . . . . . . . . . . . . . . . . . . . . . . .
27
4.3 Operator panel . . . . . . . . . . . . . . . . . . . . . . . . . . . . . . . . . . . .
27
ID 442281.00
WE KEEP THINGS MOVING
1 Introduction . . . . . . . . . . . . . . . . . . . . . . . . . . . . .
2
Table of contents
Titel des Dokuments
29
5.1 Selection in the configuration assistant. . . . . . . . . . . . . . . . . .
29
5.2 Direct entry in the parameters. . . . . . . . . . . . . . . . . . . . . . . . .
30
5.3 Further motor datas. . . . . . . . . . . . . . . . . . . . . . . . . . . . . . . . .
32
5.3.1
Current controller . . . . . . . . . . . . . . . . . . . . . . . . . . .
32
5.3.2
Thermal model . . . . . . . . . . . . . . . . . . . . . . . . . . . . .
32
5.3.3
Absolute Limit values . . . . . . . . . . . . . . . . . . . . . . . .
32
5.4 Parameterize motor temperature sensor evaluation . . . . . . . .
33
6 Parameterizing encoder data . . . . . . . . . . . . . . .
34
6.1 Deactivating the motor encoders . . . . . . . . . . . . . . . . . . . . . .
34
6.2 Interface X4. . . . . . . . . . . . . . . . . . . . . . . . . . . . . . . . . . . . . . .
34
6.3 Interface X101 (BE encoder) . . . . . . . . . . . . . . . . . . . . . . . . .
35
7 Parameterizing brake data . . . . . . . . . . . . . . . . .
7.1 Parameterizing brake activation . . . . . . . . . . . . . . . . . . . . . . .
36
36
8 Parameterizing axis management . . . . . . . . . . .
39
9 Parameterizing brake resistor . . . . . . . . . . . . . .
40
10 Parameterizing in-/outputs. . . . . . . . . . . . . . . . .
41
11 Communication between inverter and PC . . . .
43
11.1 Settings . . . . . . . . . . . . . . . . . . . . . . . . . . . . . . . . . . . . . . . . . .
43
11.2 Online operation . . . . . . . . . . . . . . . . . . . . . . . . . . . . . . . . . . .
44
12 Service . . . . . . . . . . . . . . . . . . . . . . . . . . . . . . . . .
48
12.1 Replacing inverters . . . . . . . . . . . . . . . . . . . . . . . . . . . . . . . . .
48
12.2 Replacing an application . . . . . . . . . . . . . . . . . . . . . . . . . . . . .
49
12.3 Copying Paramodule . . . . . . . . . . . . . . . . . . . . . . . . . . . . . . .
51
12.4 Replacing the firmware . . . . . . . . . . . . . . . . . . . . . . . . . . . . . .
52
12.5 Actions . . . . . . . . . . . . . . . . . . . . . . . . . . . . . . . . . . . . . . . . . .
55
12.5.1
Actions without enable . . . . . . . . . . . . . . . . . . . . . . .
55
12.5.2
Actions with enable . . . . . . . . . . . . . . . . . . . . . . . . .
57
ID 442281.00
WE KEEP THINGS MOVING
5 Parameterizing motor data. . . . . . . . . . . . . . . . .
3
Table of contents
Titel des Dokuments
60
13.1 LED . . . . . . . . . . . . . . . . . . . . . . . . . . . . . . . . . . . . . . . . . . . . .
60
13.2 Display . . . . . . . . . . . . . . . . . . . . . . . . . . . . . . . . . . . . . . . . . .
61
13.2.1
General . . . . . . . . . . . . . . . . . . . . . . . . . . . . . . . . . .
61
13.2.2
Event Indications . . . . . . . . . . . . . . . . . . . . . . . . . . .
61
13.3 Events . . . . . . . . . . . . . . . . . . . . . . . . . . . . . . . . . . . . . . . . . . .
64
13.3.1
31:Short/ground. . . . . . . . . . . . . . . . . . . . . . . . . . . .
64
13.3.2
32:Short/gr.int . . . . . . . . . . . . . . . . . . . . . . . . . . . . . .
64
13.3.3
33:Overcurrent . . . . . . . . . . . . . . . . . . . . . . . . . . . . .
65
13.3.4
34:Hardw.fault . . . . . . . . . . . . . . . . . . . . . . . . . . . . .
66
13.3.5
35:Watchdog . . . . . . . . . . . . . . . . . . . . . . . . . . . . . .
67
13.3.6
36:High voltage . . . . . . . . . . . . . . . . . . . . . . . . . . . .
68
13.3.7
37:Encoder . . . . . . . . . . . . . . . . . . . . . . . . . . . . . . . .
69
13.3.8
38:TempDev.sens. . . . . . . . . . . . . . . . . . . . . . . . . . .
74
13.3.9
39:TempDev i2t . . . . . . . . . . . . . . . . . . . . . . . . . . . .
75
13.3.10 40:Invalid data . . . . . . . . . . . . . . . . . . . . . . . . . . . . .
76
13.3.11 41:Temp.MotorTMS . . . . . . . . . . . . . . . . . . . . . . . . .
78
13.3.12 42:TempBrakeRes . . . . . . . . . . . . . . . . . . . . . . . . . .
79
13.3.13 44:External fault . . . . . . . . . . . . . . . . . . . . . . . . . . . .
79
13.3.14 45:oTempMot. i2t . . . . . . . . . . . . . . . . . . . . . . . . . . .
80
13.3.15 46:Low voltage . . . . . . . . . . . . . . . . . . . . . . . . . . . . .
81
13.3.16 47:TorqueLimit . . . . . . . . . . . . . . . . . . . . . . . . . . . . .
82
13.3.17 52:Communication . . . . . . . . . . . . . . . . . . . . . . . . . .
83
13.3.18 55:OptionBoard . . . . . . . . . . . . . . . . . . . . . . . . . . . .
87
13.3.19 56:Overspeed. . . . . . . . . . . . . . . . . . . . . . . . . . . . . .
89
13.3.20 57:Runtime usage . . . . . . . . . . . . . . . . . . . . . . . . . .
90
13.3.21 58:Grounded . . . . . . . . . . . . . . . . . . . . . . . . . . . . . .
91
13.3.22 59:TempDev. i2t . . . . . . . . . . . . . . . . . . . . . . . . . . . .
91
13.3.23 60-67:Application events 0-7 . . . . . . . . . . . . . . . . . .
92
13.3.24 68: External fault . . . . . . . . . . . . . . . . . . . . . . . . . . .
92
ID 442281.00
WE KEEP THINGS MOVING
13 Diagnosis. . . . . . . . . . . . . . . . . . . . . . . . . . . . . . .
4
Table of contents
Titel des Dokuments
13.3.25 69:Motor connect. . . . . . . . . . . . . . . . . . . . . . . . . . .
93
13.3.26 70:Param.consist . . . . . . . . . . . . . . . . . . . . . . . . . . .
94
13.3.27 71:Firmware . . . . . . . . . . . . . . . . . . . . . . . . . . . . . . .
96
13.3.28 72:Brake test . . . . . . . . . . . . . . . . . . . . . . . . . . . . . .
97
13.3.29 73:Ax2braketest . . . . . . . . . . . . . . . . . . . . . . . . . . . .
98
13.3.30 74:Ax3braketest . . . . . . . . . . . . . . . . . . . . . . . . . . . .
99
13.3.31 75:Ax4braketest . . . . . . . . . . . . . . . . . . . . . . . . . . . . 100
13.3.32 #004:illeg.Instr . . . . . . . . . . . . . . . . . . . . . . . . . . . . . 101
13.3.33 #006:illSlotInst . . . . . . . . . . . . . . . . . . . . . . . . . . . . . 101
13.3.34 #009:CPU AddrErr . . . . . . . . . . . . . . . . . . . . . . . . . . 102
13.3.35 #00c:StackOverfl . . . . . . . . . . . . . . . . . . . . . . . . . . . 102
13.3.36 *ParaModul ERROR:update firmware!. . . . . . . . . . . 103
13.3.37 *ParaModul ERROR: file not found . . . . . . . . . . . . . 103
13.3.38 *ParaModul ERROR: Checksum error . . . . . . . . . . . 104
13.3.39 *ParaModul ERROR: ksb write error . . . . . . . . . . . . 104
13.3.40 *ConfigStartERROR parameters lost . . . . . . . . . . . . 105
13.3.42 *ConfigStartERROR unknown block . . . . . . . . . . . . 106
13.3.43 *ConfigStartERROR unknown string . . . . . . . . . . . . 106
13.3.44 *ConfigStartERROR unknown scale . . . . . . . . . . . . 107
13.3.45 *ConfigStartERROR unknown limit . . . . . . . . . . . . . 107
13.3.46 *ConfigStartERROR unknown post-wr . . . . . . . . . . . 108
13.3.47 *ConfigStartERROR unknown pre-rd . . . . . . . . . . . . 108
13.3.48 *ConfigStartERROR unknown hiding . . . . . . . . . . . . 109
13.3.49 no configuration paramodul error . . . . . . . . . . . . . . . 109
13.3.50 no configuration start error . . . . . . . . . . . . . . . . . . . . 109
13.3.51 configuration stopped . . . . . . . . . . . . . . . . . . . . . . . . 109
ID 442281.00
WE KEEP THINGS MOVING
13.3.41 *ConfigStartERROR remanents lost. . . . . . . . . . . . . 105
5
1
Introduction
Operating Manual
1
Introduction
Axis management is integrated on the inverters. This offers the following operating modes:
• Single-axis operation:
•
An axis configured with POSITool is used on a connected motor.
Multiple-axis operation:
Two, three and four axes configured with POSITool are used on a connected
motor. The axes can be used sequentially like parameter records on the motor.
This option requires the following system structure.
The system of the 5th generation of STÖBER inverters is divided into two areas –
the global area and the axis area. The global area contains the programming and
parameterization related to the inverter. This includes device control, the setting
of I/O components such as brake resistors and so on. In addition, it is responsible
for managing the axis area.
The axis area is divided into up to four axes. Each axis contains the programming
and parameterization for one motor and is addressed by the global area. The axis
area contains the motor setting and the application of the motor. The uses are defined by STÖBER ANTRIEBSTECHNIK in so-called applications or, optionally,
can be programmed as desired by the user.
#
ESC
Axis areas
Axis 1
I/O
Axis 2
X3
Axis 3
Axis 4
Fig. 1-1: Setup of global and axis area
1.1
Purpose of the manual
This manual provides you with information on the basic operation of the inverter.
Here functions in the inverter independent of the standard applications defined by
STÖBER ANTRIEBSTECHNIK are explained.
ID 442281.00
WE KEEP THINGS MOVING
Global area
6
1
Introduction
Operating Manual
1.2
Readers
Users who are familiar with the control of drive systems and have a knowledge of
commissioning inverter systems are the target group of this manual.
1.3
Other manuals
The documentation of the FDS 5000 includes the following manuals:
Manual
Contents
ID
Latest version
Commissioning Instructions
Reinstallation, replacement, function
test
442292
V 5.6
Projecting manual
Installation and connection
442268
V 5.6
Operating manual
Set up the inverter
442280
V 5.6
Manual
Contents
ID
Latest version
POSITool operating manual
Information on the
basic functions of
POSITool
442232
V 5.6
Programming manual
Information on pro441683
gramming with POSITool
V 5.6
Note that the programming functionality of POSITool can only be used after training by STÖBER ANTRIEBSTECHNIK. You can find information on training at
www. stoeber.de
The devices of the 5th generation of STÖBER inverters can be optionally connected with different fieldbus systems. The connection is described in the following manuals:
Manuals
ID
Latest version
PROFIBUS DP operating manual
441685
V 5.6
CANopen operating manual
441684
V 5.6
EtherCAT operating manual
441895
V 5.6
PROFINET operating manual
442339
V 5.6
USS operating manual
441706
V 5.6
ID 442281.00
WE KEEP THINGS MOVING
You can find information on the POSITool software in the following manuals:
7
1
Introduction
Operating Manual
The accessories of the inverter are documented in the following manuals:
Manual
Product description
ID
Latest version
ASP 5001 operating
manual
Safe technical integration of the inverter
in a machine
442180
V 5.6
Sequential switchover between up to
POSISwitch® Ax 5000 four axes
operating manual
441669
V 5.6
Control box operating
manual
Operating device for parameterization
and configuration of the inverter.
441445
V 5.6
Operating manual
Absolute Encoder
Support AES
For buffering the power supply when us- 442342
ing the inductive Multiturn EnDat ® 2.2
absolute encoder EBI1135 when the
power supply is switched off at the inverter.
V 5.6
1.4
Further support
If you have questions about the documentation or training programs, please contact:
• E-Mail: [email protected]
ID 442281.00
WE KEEP THINGS MOVING
If you have questions about the technology which have not been answered in this
document, please contact:
• Telephone: +49 (0) 7231 582-1187
• E-Mail: [email protected]
8
2
Notes on Safety
Operating Manual
2
Notes on Safety
The devices may cause risks. For these reasons, comply with the following:
• The safety notes listed in the following sections and points
• The technical rules and regulations.
In addition, always read the appropriate documentation. STÖBER ANTRIEBSTECHNIK GmbH + Co. KG accepts no liability for damages caused by non-adherence to the instructions or applicable regulations. Subject to technical changes
to improve the devices without prior notice. This documentation is purely a product description. It does not represent promised properties in the sense of warranty
law.
2.1
Component part of the product
The technical documentation is a component part of a product.
•
Since the technical documentation contains important information, always
keep it handy in the vicinity of the device until the machine is disposed of.
If the product is sold, disposed of, or rented out, always include the technical
documentation with the product.
2.2
Operation in accordance with its intended use
In the sense of DIN EN 50178 (previously VDE 0160), the inverters represent the
electrical equipment of power electronics for the control of power flow in high-voltage current systems. They are designed exclusively to power asynchronous motors. Operation for purposes other than the intended use include the connection
of other electrical loads!
2.3
Risk assessment
Before the manufacturer is allowed to put a machine on the market, he must have
a danger analysis prepared as per machine guideline 06/42/EG. This analysis establishes the dangers connected with the use of the machine. The danger analysis is a multi-stage, iterative process. Since this documentation cannot begin to
provide sufficient insight into the machine guidelines, please carefully study the
latest standards and legal situation yourself. After the drive controller has been
installed in machines, it cannot be commissioned until it has been determined that
the machine complies with the regulations of EG guideline 06/42/EG.
ID 442281.00
WE KEEP THINGS MOVING
•
9
2
Notes on Safety
Operating Manual
2.4
Ambient conditions
Inverters are products of the restricted sales class as described in IEC 61800-3.
This product may cause high-frequency interference in residential zones and the
user may be asked to take suitable measures.
The inverters are not designed for use in public low-voltage networks which power
residential areas. High-frequency interference must be expected when the inverters are used in such a network. The inverters are only intended for use in TN networks. The inverters are only designed for use on supply current networks which
can delivery at the most a maximum of symmetrical rated short circuit current at
480 Volts as per the following table:
Size
Max. symmetrical rated short circuit current
BG 0 and BG 1
5000 A
BG 2
5000 A
BG 3
10000 A
The following applications are prohibited:
• Use in potentially explosive areas
• Use in environments with harmful substances as per EN 60721 (e.g., oils, acids, gases, fumes, powders, irradiation)
• Use with mechanical vibration and impact stresses which exceed the information in the technical data of the projecting manuals.
Implementation of the following applications is only permitted when STÖBER
ANTRIEBSTECHNIK GmbH + Co. KG has been contacted first for permission:
• Use in non-stationary applications
ID 442281.00
WE KEEP THINGS MOVING
Install the inverter in a switching cabinet in which the permissible ambient temperature is not exceeded (see mounting instructions)..
10
2
Notes on Safety
Operating Manual
2.5
Qualified personnel
Since the devices may harbor residual risks, all configuration, transportation, installation and commissioning tasks including operation and disposal may only be
performed by trained personnel who are aware of the possible risks.
Personnel must have the qualifications required for the job. The following table
lists examples of occupational qualifications for the jobs:
Activity
Possible occupational qualifications
Transportation and storage
Worker skilled in storage logistics or comparable
training
Configuration
- Graduate engineer (electro-technology or electrical power technology)
- Technician (m/f) (electro-technology)
Installation and connection
Electronics technician (m/f)
Commissioning
(of a standard application)
- Technician (m/f) (electro-technology)
- Master electro technician (m/f)
Programming
Graduate engineer (electro-technology or electrical power technology)
Operation
- Technician (m/f) (electro-technology)
- Master electro technician (m/f)
Disposal
Electronics technician (m/f)
In addition, the valid regulations, the legal requirements, the reference books, this
technical documentation and, in particular, the safety information contained therein must be carefully
• read
• understood and
• complied with
2.6
Transportation and storage
Immediately upon receipt, examine the delivery for any transportation damages.
Immediately inform the transportation company of any damages. If damages are
found, do not commission the product. If the device is not to be installed immediately, store it in a dry, dust-free room. Please see the documentation for how to
commission an inverter after it has been in storage for a year or longer.
ID 442281.00
WE KEEP THINGS MOVING
Tab. 2-1: examples of occupational qualifications
11
2
Notes on Safety
Operating Manual
2.7
Installation and connection
Installation and connection work are only permitted after the device has been isolated from the power!
The accessory installation instructions allow the following actions during the installation of accessories:
• The housing in the upper slot can be opened.
Opening the housing in another place or for other purposes is not permitted.
Use only copper lines. For the line cross sections to be used, refer to DIN VDE
0298-4 or DIN EN 60204-1 Appendix D and Appendix G.
Protect the device from falling parts (pieces of wire, leads, metal parts, and so on)
during installation or other tasks in the switching cabinet. Parts with conductive
properties inside the inverter can cause short circuits or device failure.
The motor must have an integrated temperature monitor with basic isolation in
acc. with EN 61800-5-1 or external motor overload protection must be used.
The permissible protection class is protective ground. Operation is not permitted
unless the protective conductor is connected in accordance with the regulations.
Comply with the applicable instructions for installation and commissioning of motor and brakes.
Commissioning, operation and service
Remove additional coverings before commissioning so that the device cannot
overheat. During installation, provide the free spaces specified in the projecting
manuals to prevent the inverter from overheating.
The housing of the drive controller must be closed before you turn on the supply
voltage. When the supply voltage is on, dangerous voltages can be present on
the connection terminals and the cables and motor terminals connected to them.
Remember that the device is not necessarily de-energized after all indicators
have gone off.
When network voltage is applied, the following are prohibited:
• Opening the housing
• Connecting or disconnecting the connection terminals
• Installing accessories
Before carrying out any work on the machine, observe all the following five safety
regulations in the above-mentioned sequence:
1. Enable. Ensure that you also activate the auxiliary circuits.
2. Secure against switching on.
3. Ensure that the parts are de-energized.
4. Earth and short-circuit.
5. Cover or isolate any live neighboring parts.
ID 442281.00
WE KEEP THINGS MOVING
2.8
12
2
Notes on Safety
Operating Manual
Information
Please note that the discharge time for the intermediate circuit capacitors is 5 min. You can only ensure that the parts are de-energized after
this time.
You can then start your work on the drive controller. Repairs may only be performed by STÖBER ANTRIEBSTECHNIK GmbH + Co. KG.
Send defective devices together with a fault description to:
STÖBER ANTRIEBSTECHNIK GmbH + Co. KG
Department VS-EL
Kieselbronner Str.12
75177 Pforzheim
GERMANY
2.9
Disposal
2.10
Residual dangers
The connected motor can be damaged with certain settings of inverters:
• Longer operation against an applied motor halting brake
• Longer operation of self-cooled motors at slow speeds
Drives can reach dangerous excess speeds (e.g., setting of high output frequencies for motors and motor settings which are unsuitable for this). Secure the drive
accordingly.
ID 442281.00
WE KEEP THINGS MOVING
Please comply with the latest national and regional regulations! Dispose of the individual parts separately depending on their nature and currently valid regulations
such as, for example:
• Electronic scrap (PCBs)
• Plastic
• Sheet metal
• Copper
• Aluminum
13
2
Notes on Safety
Operating Manual
2.11
Presentation of notes on safety
NOTICE
Notice
means that property damage may occur
X if the stated precautionary measures are not taken.
CAUTION!
Caution
with warning triangle means that minor injury may occur
X if the stated precautionary measures are not taken.
WARNING!
Warning
means that there may be a serious danger of death
X if the stated precautionary measures are not taken.
DANGER!
means that serious danger of death exists
X if the stated precautionary measures are not taken.
Information
indicates important information about the product or a highlighted portion of the documentation which requires special attention.
ID 442281.00
WE KEEP THINGS MOVING
Danger
14
3
Commissioning an inverter
Operating Manual
3
Commissioning an inverter
For the solution of a technical drive task, the programming of the inverter system
must conform to the sequence of certain device states. They define the state of
the power portion and implement functions such as the restart of the drive. The
device state can be changed with control commands and internal events.
The 5th generation of STÖBER inverters offers you a choice between a standard
state machine and a state machine as per DSP 402.You can select the state machines in the Configuration Assistant of the POSITool software.
Information
Please note the special features involved in commissioning an inverter
with the safe torque off safety function (ASP 5001 accessory), and read
the operating instructions ASP 5001, ID 442181.
Standard device state machine
Information
The 24-V power for the accessories must be switched on before or at
the same time as the voltage supply of the control unit.
To be able to place an inverter in operation with the standard device state of the
machine, the following requirements apply:
• You have connected all power supplies.
• You have connected the motor and, if necessary, the encoder, brake and motor temperature sensor in accordance with your machine documentation.
• You use the standard device state of the machine with the default settings in
your project.
• You have completed all parameter settings, transferred them to the inverter
and saved them.
Proceed as follows:
Placing inverter in operation
1
If available, switch on the 24V supply of the accessory (e.g. LEA 5000).
2
If you are using an inverter with a 24V supply for the control part, switch on
the 24V supply (X11).
Ö The device starts. If relay 1 is closed (X1.1, X1.2), the inverter changes
to the 1:switchONinh device state.
3
Switch on the power supply of the power stage (X10).
Ö The DC link capacitors are charged (E14 = 1:active).
4
If you use safety technology, switch on the controller of the ASP 5001.
Ö The acknowledgement on the ASP 5001 displays that the safety function
is not active (E67 = 0:inactive). Afterwards the inverter is in the 2:Ready
for switch on device state.
ID 442281.00
WE KEEP THINGS MOVING
3.1
15
3
Commissioning an inverter
Operating Manual
5
Switch on the enable.
Ö The inverter is in the 4:Enabled device state.
Ö You have placed the inverter in operation.
Device state
of the inverter
1.
24 V power
accessory
Startup
24 V power
control unit (X11)
relay 1
(X1.1, X1.2)
3.
Power
power unit (X10)
DC link charging
relay (E14)
4.
Activation ASP 5001
(X12.3, X12.4)
2:Ready to 4:Enabled
switch on
1
0
>0
2.
1:Switchon
disable
t
1
0
t
1
0
t
1
0
t
1
0
t
1
0
t
5.
Enable
(X1.4, X1.3)
0
t
1
0
t
Response message 1
enable (A900)
0
ID 442281.00
t
WE KEEP THINGS MOVING
Response message
ASP 5001 (E67)
1
16
3
Commissioning an inverter
Operating Manual
Display
XDS 5000
V5.X
Designation
Behavior
Not ready to
switch on
•
•
•
•
•
The electronics are powered.
Self-test is running.
Initialization is running.
Drive functiona) is disabled.
Ready-for-operation relay is open.
Switchon disable
•
•
•
•
•
Software/hardware initialization is finished.
The application was reparameterizedn.
The drive function1 is disabled.
The ready-for operation relay is closed.
The ASP 5001 option (safe torque off) is active.
Ready to switch
on
•
•
•
The application can be reparameterized.
The drive function1 is disabled.
The ready-for-operation relay is closed.
Switched on
•
•
•
The application can be reparameterized.
The drive function1 is disabled.
The ready-for-operation relay is closed.
Operation
enabled
•
•
•
The application can be partially parameterized.
The drive function1 is enabled.
The ready-for-operation relay is closed.
Fault
•
•
•
The application can be partially parameterized.
The drive function1 is disabled.
The ready-for-operation relay is closed.
Fault reaction
active
•
•
•
•
The application can be reparameterized.
An error-dependent action is being executed (disable drive function or quick stop).
The drive function1 can be enabled.
The ready-for-operation relay is open.
•
•
•
•
The application can be reparameterized.
The quick stop function is being executed.
The drive function1 is enabled.
The ready-for-operation relay is closed.
Or
±0Rpm
0.0A
0: Self test
±0Rpm
0.0A
1: ONdisable
±0Rpm
0.0A
2: ReadyforON
±0Rpm
0.0A
3: Switched on
±0Rpm
0.0A
4: Enabled
Fault
No.X: type of fault
Fault
No.X: type of fault
Quick stop active
±0Rpm
0.0A
7: Quick stop
WE KEEP THINGS MOVING
The following eight states exist in the standard device state machine in accordance with the DRIVECOM profile for drive technology.
a) A disabled drive function means the same as a power part which is switched off and a reset application (e.g., reset ramp
generator). This means that the drive is not following the reference value.
ID 442281.00
17
3
Commissioning an inverter
Operating Manual
The following Figure 3 1 shows which state changes are possible. The table below shows which conditions apply.
14
Störungsreaktion
aktiv
Fault
reaction active
15
0
Störung
Fault
Einschaltbereit
NotNicht
ready
for switchon
1
16
12
13
Einschaltsperre
Switchon
disable
2
11
10
6
9
Einschaltbereit
Ready
for switchon
3
5
Eingeschaltet
Switched
on
4
7
Betrieb freigegeben
Operation
enabled
Schnellhalt
Quick
stop aktiv
active
8
Zustandswechsel
Bedingungen
0
Device startup Æ Not ready for switchon
Control power section switched on.
1
Not ready for switchon Æ Switchon disable
Self-test without errors and initialization concluded.
2
Switchon disable Æ Ready for switchon
•
•
•
•
Enable on low level (E19 Bit 0 = 0 or A300 = 0) or autostart active (A34) during first startup
DC link charged (E03)
The ASP 5001 option (safe torque off) is not active
(E67).
Axis activated (E84)
3
Ready for switchon Æ Switched on
Enable on high level (E19 Bit 0 = 1 and A300 = 1).
4
Switched on Æ Operation enabled
Enable on high level (E19 Bit 0 = 1 and A300 = 1).
5
Switched on Æ Ready for switchon
Enable on low level (E19 Bit 0 = 0 or A300 = 0).
6
Ready for switchon Æ Switchon disable
•
•
•
ID 442281.00
DC link not charged (E03) or
The ASP 5001 option (safe torque off) is active (E67).
Axis deactivated (E84)
WE KEEP THINGS MOVING
Fig. 3-1: Standard-Gerätezustandsmaschine
18
3
Commissioning an inverter
Operating Manual
Zustandswechsel
Bedingungen
7
Operation enabled Æ Quick stop active
•
•
8
Quick stop active Æ Operation enabled
Enable for high level (E19 Bit 0 = 1 and A300 = 1) and quick
stop signal on low level (A302) and quick stop end reached
(A45) in accordance with parameterization.
9
Quick stop active Æ Ready for switchon
Enable for low level (E19 Bit 0 = 0 or A300 = 0) and quick
stop end reached in accordance with parameterization
(A45).
10
Quick stop active Æ Switchon disable
The ASP 5001 option (safe torque off) is active (E67).
11
Operation enabled Æ Rea
Enable for low level (E19 Bit 0 = 0 or A300 = 0) and quick
stopwith enable off inactive (A44).
12
Operation enabled Æ Einschaltsperre
The ASP 5001 option (safe torque off) is active (E67).
13
Switched on Æ Switchon disable
•
•
14
All states Æ Störungsreaktion Aktiv
Fault detected (E81).
15
Fault reaction active Æ Fault
Fault reaction concluded (E81).
16
Fault Æ Switchon disable
No fault is queued (E81) and rising edge of the acknowledgment signal (A301).
Quick stop signal on high level (A302) or
Enable on low level (E19 Bit 0 = 0 or A300 = 0) and
quick stop with enable off signal active (A44)
WE KEEP THINGS MOVING
DC link not charged or
The ASP 5001 option (safe torque off) is active (E67).
ID 442281.00
19
3
Commissioning an inverter
Operating Manual
3.2
Device state machine acc. to DSP 402
The device state machine as per DSP 402 has the same states as the standard
device state machine. The following table shows the designation of the states as
per DSP 402.
Displaya)
Designation acc. to DSP 402
XDS 5000
V5.X
Or
Not Ready to Switch On
±0Rpm
0.0A
0: Self test
±0Rpm
0.0A
1: ONdisable
Switch On Disabled
±0Rpm
0.0A
2: ReadyforON
Ready to Switch On
±0Rpm
0.0A
3: Switched on
Switched On
±0Rpm
0.0A
4: Enabled
Operation Enable
Fault
Fault
No.X: type of fault
±0Rpm
0.0A
7: Quick stop
Quick Stop Active
a) Depending on the applications, indication of the device states may differ from what
is shown.
The device state machine must receive certain commands for a change in state.
The commands are bit combinations in the DSP 402 control word (parameter
A576 Controlword). The table shows the states of the bits in parameter A576 and
their combination for the commands (the bits marked with X are irrelevant).
Bit of the control word (A576 control word)
Bit 7
Bit 3
Bit 2
Bit 1
Bit 0
Fault
Reset
Enable
Operation
Quick
Stop
Enable
Voltage
Switch
On
Shutdown
0
X
1
1
0
Switch On
0
0
1
1
1
Disable Voltage
0
X
X
0
X
QuickStop
0
X
0
1
X
Command
ID 442281.00
WE KEEP THINGS MOVING
Fault Reaction Active
(2nd line flashing)
20
3
Commissioning an inverter
Operating Manual
Bit of the control word (A576 control word)
Bit 7
Bit 3
Bit 2
Bit 1
Bit 0
Fault
Reset
Enable
Operation
Quick
Stop
Enable
Voltage
Switch
On
Disable Operation
0
0
1
1
1
Enable Operation
0
1
1
1
1
pos. edge
X
X
X
X
Command
Fault Reset
The difference between the standard device state machine is the possible state
changes and the conditions for the changes. Figure 3 2 shows the possible
changes in state.
13
Störungsreaktion
aktiv
Fault
reaction active
14
0
Störung
Fault
Einschaltbereit
NotNicht
ready
for switchon
1
15
9
Einschaltsperre
Switchon
disable
2
8
12
7
Einschaltbereit
Ready
for switchon
3
6
Eingeschaltet
Switched
on
4
5
Betrieb freigegeben
Operation
enabled
11
Schnellhalt
aktiv
Quick
stop active
Fig. 3-2: State machine as per DSP 402
The following table lists the conditions for changes in the state machine.
Change in State
Conditions
0
Device startup Æ Not ready for switchon
Control power section switched on.
1
Not ready for switchon Æ Switchon disable
Self-test without errors and initialization concluded.
2
Switchon disable Æ Ready for switchon
Enable on high level (E19 Bit 0 = 1) and command Shutdown (A577) and the ASP 5001 option (safe torque off) is
not active (E67)
ID 442281.00
WE KEEP THINGS MOVING
10
21
3
Commissioning an inverter
Operating Manual
Change in State
Conditions
3
Ready for switchon Æ Switched on
Enable on high level (E19 Bit 0 = 1) and command Switch
On (A577)
4
Switched on Æ Operation enabled
Enable on high level (E19 Bit 0 = 1) and command Enable
Operation (A577)
5
Operation enabled Æ Switched on
Enable on high level (E19 Bit 0 = 1) and command Disable
Operation (A577)
6
Switched on Æ Ready for switchon
Enable on high level (E19 Bit 0 = 1) and command Shutdown (A577)
7
Ready for switchon Æ Switchon disable
•
•
•
•
8
Operation enabled Æ Ready for switchon Command Shutdown
9
Operation enabled Æ Switchon disable
•
•
•
Enable on low level (E19 Bit 0 = 0) or
Command Disable Voltage (A577) or
The ASP 5001 option (safe torque off) is active (E67).
10
Switched on Æ Switchon disable
•
•
•
•
Enable on low level (E19 Bit 0 = 0) or
Command Quickstop (A577) or
Command Disable Voltage (A577) or
The ASP 5001 option (safe torque off) is active (E67).
11
Operation enabled Æ Quick stop
Command Quickstop (A577)
12
Quick stop Æ Switchon disable
•
•
13
All states Æ Fault reaction active
Fault detected
14
Fault reaction active Æ Fault
Fault reaction concluded
15
Fault Æ Switchon disable
Command Fault Reset (positive edge) (A577).
ID 442281.00
Quick stop finished or
Command Disable Voltage (A577)
WE KEEP THINGS MOVING
Enable on low level (E19 Bit 0 = 0) or
Command Quickstop (A577) or
Command Disable Voltage (A577) or
The ASP 5001 option (safe torque off) is active (E67).
22
4
Parameterize
Operating Manual
4
Parameterize
P S
T o
Program
Parameterize
Diagnostic
Fig. 4-1: User interface
ID 442281.00
X3
Display
Oper. indication
Device states
Events
Oper.
panel
Parameterize
LED
Device states
1
,
1
WE KEEP THINGS MOVING
The user interfaces of the 5th generation of STÖBER inverters consist of several
elements with different functionalities (see figure).
To program a device system of the 5th generation of STÖBER inverters, the user
needs the POSITool software. With the POSITool software, either an application
defined by STÖBER ANTRIEBSTECHNIK or the option of a freely programmed
application can be used. POSITool provides a parameter list with which the application can be adjusted. The software also has comprehensive diagnostic functions.
Parameters can also be changed via the operator panel on the front of the inverter. It consists of a keyboard for calling the menu functions and the display for indication. When appropriately programmed, the keyboard can be used to
implement functions such as manual operation or tipping. Response messages
on the device status are shown by the LEDs on the front.The display provides detailed information.
23
4
Parameterize
Operating Manual
4.1
Parameters
Parameters perform various tasks in the inverter system:
• Adjust the application to external conditions (e.g., the motor type)
• Indicate the values (e.g. current speed or the torque).
• Trigger actions (e.g., "save values" or "phase test"
Parameters are allocated to the global area or the axis area.
4.1.1
Structure
The parameter structure is set up as shown in the adjacent example::
The axis code identifies an axis parameter when it is shown mixed with global parameters.
The group divides the parameters into functional characteristics.
The line distinguishes the individual parameters in a group.
The element subdivides a parameter (subfunctions).
1.E250.2
Axis
(only for axis parameters)
Group
Line
Element
Fig. 4-2: Parameterstruktur
Parameter group
Subject area / dependency
A.. Inverter
Inverter, bus, cycle time
B.. Motor
Motor
C.. Machine
Speed, torque
D.. Reference value
Speed ref. values, reference value generator
E.. Display value
Indication for device and application
F.. Control interface
Analog inputs / outputs,
binary inputs / outputs, brake
G.. Technology
Depends on the application
(e.g., synchronous running)
H.. Encoder
Encoder
I.. Positioning
Only with positioning applications
J.. Process blocks
Only with positioning application
motion block positioning
ID 442281.00
WE KEEP THINGS MOVING
The individual subject areas of the parameter groups are listed in the table below:
24
4
Parameterize
Operating Manual
Parameter group
Subject area / dependency
L.. PLCopen reference
values
Only with positioning application PLCopen
N.. Posi.switches
Only with positioning applications
P.. Customer-specific
parameters
Only with "free, graphic programming" option
Q.. Customer-specific
parameters, dependent on instance
Only with "free, graphic programming" option
R.. Production dataa)
Production data of inverter
T.. Scope
Scope parameters
U.. Protection functions Parameterizing the results
Z.. Fault counter
Fault counter of events; In POSITool only visible during online operation.
WE KEEP THINGS MOVING
a) Only visible in POSITool during online operation.
ID 442281.00
25
4
Parameterize
Operating Manual
Data types
Name
Abbrev.
Name
Description
Value Range
Boolean
B
1 bit (internal: LSB in 1 byte)
0 ... 1
Unsigned 8
U8
1 byte, without sign
0 ... 255
Integer 8
I8
1 byte, with sign
-128 ... 127
Unsigned 16 U16
2 bytes - 1 word, without sign
0 ... 65535
Integer 16
2 bytes - 1 word, with sign
-32768 ... 32767
4 bytes - 1 douple word,
without sign
0 ... 4294967295
4 bytes - 1 douple word,
with sign
-2147483648 ...
2147483647
I16
Unsigned 32 U32
I32
Integer 32
Float
R32
Floating decimal, simple
accuracy
Double
R64
Floating decimal, double
accuracy
String 8
STR8
Text, 8 characters
String 16
STR16
Text, 16 characters
Posi 64
4.1.3
P64
in acc. with ANSI /
IEEE 754
32 bits, increments
-2147483648 ...
2147483647
32 bits, rest
0 ... 2147483647
Parameter list structure
To address parameters via the fieldbus, the following information is important:
• Value range
• Scaling via fieldbus if this differs form the scaling via POSITool.
• Rounding errors via fieldbus, if present.
• Data type
They are specified in the parameter table in the application description.
The fieldbus addresses are specified as hexadecimal numbers. For CANopen®
and EtherCAT®, the index and subindex can be transferred directly. For PROFIBUS DP-V1 and PROFINET®, index = PNU and subindex = index. Further details
are in the documentation for the fieldbus interface connection (see section1.3
Other manuals).
ID 442281.00
WE KEEP THINGS MOVING
4.1.2
26
4
Parameterize
Operating Manual
4.2
POSITool
The POSITool software represents the many-sided interface between user and inverter. If offers a wide variety of ways to configure an inverter.
POSITool offers a user interface for the representation of the programming. In the
option "free, graphic programming," blocks are linked here to implement a control
sequence.
In addition to this STÖBER ANTRIEBSTECHNIK provides pre-defined applications for programming. This includes applications such as fast reference value
and command positioning which can be selected via an assistant.
For parameterization, POSITool offers the user parameter lists. The lists are used
to adjust the control sequence to external conditions such as motor type, shaft encoder or bus systems. In addition, limit values such as maximum speed are specified or indicator values such as the current speed are presented.
Using a serial interface (RS 232), program and parameters are transferred to the
inverter. The inverter then begins with processing. The user can monitor the parameters via the serial connection. A scope function is available for expanded diagnostics to record the time progression of various values.
For more details on the use of POSITool, see the applicable chapter in the Bedienhandbuch POSITool and programming manual respectively (ID 442233 and ID
441693).
Operator panel
The operator panel is used for monitoring and changing parameter values. The
operator panel consists of a two-line display with 16 characters each and a keyboard. The keyboard has six keys for menu prompting and two keys for local operation.
ESC
#
Jumps back to operator level.
Resets parameter value.
Enter key: Opens the menu level, menu groups and the parameters. Accepts a changed parameter value.
Selects a parameter in the menu group. During entry, increases/decreases the parameter value (positive/negative).
Selects the menu group. During entry, changes the decade
(ones, tens, hundreds, etc.).
Activates/deactivates local mode (if programmed). In local
mode, deactivation also deletes the enable.
I/O
Tab. 4-3: Operator panel
ID 442281.00
Enable for local mode I/O
(if programmed).
WE KEEP THINGS MOVING
4.3
27
4
Parameterize
Operating Manual
The parameter menu of the inverter is divided into menu groups. The menu
groups are arranged in alphabetical order, beginning with the group A.. Inverter,
B.. Motor, C.. Machine, and so on. Each menu group contains a list of parameters
which are identified by the letter of the group and a consecutive number such as
A00, A01, A02, etc. To change a parameter, proceed as shown below. Use the
Enter key # to go from the operation indicators to the menu level.
Betriebsanzeige
A..
Inverter
3000 rpm 1.3A
4: Enabled
B..
Motor
C..
Machine
Parameter
groups
....
B20 Control mode
0: V/f control
Parameter
selection
B26 Motor encoder
3: X140
Parameter
entry
Value
flashing
B26 Motor encoder
3: X140
Fig. 4-4: Menu structure
The menu groups are selected with the arrow keys
and activated with # .
Use the
keys to select the desired parameter within the menu group. You
can switch back and forth between the elements in an array parameter with the
keys. A parameter is then activated for change with # . The value flashes
to indicate that it can be changed with
. The
keys can be used to
select which decade (ones, tens, hundreds, and so on) is to be adjusted. The value is then accepted with the # key or reset with the ESC key. Use the ESC key to
access a higher menu level. To save safe from power failure, all changes must be
stored with the A00 save values = 1:active!
ID 442281.00
WE KEEP THINGS MOVING
Accept change
Reject change
28
5
Parameterizing motor data
Operating Manual
5
Parameterizing motor data
Specifications and control mode must be given so that the motors can be controlled correctly. There are several ways to enter the motor data:
• Selection of a STÖBER standard motor in the configuration assistant.
• Direct entry in the parameter lists for motors from other manufacturers or special motors.
Information
Refer to the inverter's configuration manual for information on connection.
Information
The number of parameters displayed on the inverter and in the POSITool depends on the access level set in the parameters. The access
level in the drive controller can be set in the parameter A10 and in the
POSITool in Extra/Change access level.
5.1
Selection in the configuration assistant
Selecting the motor in the configuration assistant
1
Open the configuration assistant in POSITool.
2
Proceed up to step 5 motor selection.
3
Select your required motor from the list of motors (e.g. asynchronous motor
112 M Y 4 kW).
4
Close the assistant.
5
In POSITool select the parameter list and in parameter B20 enter the necessary control mode (e.g. 1:Sensorless vector control).
6
Go online and transfer the settings to the inverter.
7
Save the settings with A00 Save values.
Ö The motor data and the control mode are correctly entered.
ID 442281.00
WE KEEP THINGS MOVING
Information
In control type 0:V/f-control, no current or torque limitation occurs. Also
connection to a rotating motor is not possible (capture).
Proceed as shown below to select a STÖBER standard motor in the configuration
assistant:
29
5
Parameterizing motor data
Operating Manual
Fig. 5-1: Motor selection in Step 5 of the configuration assistant
5.2
Direct entry in the parameters
Information
In control type 0:V/f-control, no current or torque limitation occurs. Also
connection to a rotating motor is not possible (capture).
Direct entry of the motor data
1
Open the configuration assistant in POSITool.
2
Go to step 5 motor selection:
3
Select a motor similar to your motor from the list of motors.
4
Close the assistant.
5
In POSITool select the parameter list.
6
In B20 control mode, select the necessary control mode.
7
In B06 motor-data, enter 1:User defined
ID 442281.00
WE KEEP THINGS MOVING
The specifications of motors which do not have an electronic nameplate and cannot be selected in the configuration assistant must be entered in the parameter
list (e.g. motors of other manufacturers and special motors). Depending on the
motor type and the type of control, different parameters must sometimes be used.
30
5
Parameterizing motor data
Operating Manual
8
Then edit the following parameters:
- B02 Back EMF (only for servo motors)
- B05 Commutation-offset (only for servo motors)
- B10 Motor-poles
- B11 Nominal motor power
- B12 Nominal motor current
- B13 Nominal motor speed
- B14 Nominal motor voltage (only for asynchronous motors)
- B15 Nominal motor frequency (only for asynchronous motors)
- B16 cos(phi) (only for asynchronous motors)
- B17 T0 (only for servo motors)
- B52 Stator inductance
- B53 Stator winding resistance
- B54 Leakage factor (only for asynchronous motors)
- B55 Magnetic saturation coefficient (only for asynchronous motors)
- B62 Motor inertia
- B73 stat. friction torque and
- B74 dyn. friction torque for an optimized i2t model
9
You can also enter the type designation in parameter B00 Motor type (max.
of 16 characters).
10 Go online and transfer the settings to the inverter
11 Save the settings with A00 Save values
The following actions will make it easier for you to enter parameters
• You can calibrate the parameter B05 Commutation-offset with the aid of the
action B40 Phase test.
• The parameters B52 to B55 can be determined using action B41 Autotune
motor.
• The current controller can be adapted using the action B42 Optimize current
controller.
The actions are described in chapter 12.5 Actions.
ID 442281.00
WE KEEP THINGS MOVING
Ö The motor data and the type of control are entered in the parameters.
31
5
Parameterizing motor data
Operating Manual
5.3
Further motor datas
Information
Since parameters in the parameter lists and assistant are indicated or
hidden based on how B20 is set, all parameters are not always visible
for each setting.
5.3.1
Current controller
Parameters B64 to B68 pertain to the setting of the current controller. If an initial
test with the default settings of the parameters does not provide the desired results, we recommend using the current controller optimization. It is performed with
the action B42 Optimize current controller. Afterwards, save the measured values
with A00 Save values.
5.3.2
Thermal model
The parameters B70, B71 and B72 describe a motor model for the protection of
the motor. The default values are usually sufficient.
5.3.3
Absolute Limit values
WE KEEP THINGS MOVING
The parameters B82 I-max and B83 n-max motor are limit values which may never be exceeded.
ID 442281.00
32
5
Parameterizing motor data
Operating Manual
5.4
Parameterize motor temperature sensor evaluation
Information
Please note that the temperature sensor evaluation in the inverter is always active. If operation without temperature sensor is permissible, the
connections on X2 will have to be bridged. A fault is triggered if the connection is not bridged when the inverter is switched on.
Information
Note that the evaluation of a KTY84-130 on the FDS 5000 is possible
with a hardware version of 200 or higher. Before using a KTY, note that
motor protection is not ensured to the same extent as when monitoring
with PTC drilling.
ID 442281.00
B38 = 0:PTC,
B38 = 1:KTY 84-1xx
WE KEEP THINGS MOVING
You can connect a maximum of two PTC triplets or one KTY. If the nominal triggering temperature has been reached, the PTCs increase their ohmic resistance
by a considerable factor. The KTY 84 has a linear characteristic curve, which allows analogue measurement of the motor temperature. The measurement is restricted to one motor coil, which is why the motor protection is restricted in
comparison with a PTC triplet.
In the B38 Motor temperature sensor parameter, set whether you will evaluate
PTC drilling or a KTY 84-1xx.
In B39 Maximum motor temperature, set the maximum permitted temperature of
the motor. If this is reached, the 41:TempMotorTMP malfunction is triggered.
The motor temperature measured by the KTY is displayed in E12 Motor temperature.
33
6
Parameterizing encoder data
Operating Manual
6
Parameterizing encoder data
The following paragraphs explain the settings for commissioning encoder systems with POSITool. We assume that an encoder system and the appropriate interface have already been chosen for your drive. The settings for the simulation
of encoder signals is not described in this chapter.
Various encoder interfaces are provided on the MDS 5000 or SDS 5000. The interfaces must be selected in the parameter B26 Motor encoder. Interface X4
which is the interface integrated in the basic system is entered as the default setting. The motor encoder can also be deactivated or set to another interface.
Information
Refer to the inverter's configuration manual for information on connection.
6.1
Deactivating the motor encoders
Select B26=0:inactive when an asynchronous motor without speed feedback is to
be used (B20=0:V/f-control or 1:Sensorless vector control). This setting is not permitted when servo motors or vector control are used.
6.2
Interface X4
Parameterize interface X4
1
From the parameter list, select the parameter B26.
2
In B26, set 2:X4-encoder.
3
Open group H.. in the parameter list...
4
In H00, set the encoder system which you want to run on X4.
5
Set H01 and H02 in accordance with the connected encoder.
6
Transfer the settings to the inverter and save them.
7
Switch the inverter off and back on again.
Ö You have parameterized the X4 interface.
ID 442281.00
WE KEEP THINGS MOVING
You can evaluate the following encoders on X4:
• HTL encoder
• TTL encoder
34
6
Parameterizing encoder data
Operating Manual
6.3
Interface X101 (BE encoder)
You can connect the following encoders to X101:
• HTL encoder
• Stepper motor signals
NOTICE
When a BE encoder is used, the binary inputs BE3, BE4 and BE5 should not
be used for any other function in the application.
BE encoder
1
From the parameter list, select the parameter B26.
2
In B26, set 1:BE encoder.
3
In H40, select whether you are connecting stepper motor signals or an incremental encoder (HTL)..
4
Make further parameter assignments in H41 and H42.
5
Transfer the settings to the inverter and save them.
6
Switch the inverter off and back on again.
WE KEEP THINGS MOVING
Ö You have parameterized the BE encoder
ID 442281.00
35
7
Parameterizing brake data
Operating Manual
7
Parameterizing brake data
Motors with holding brakes can be connected to the devices oft the 5th generation
of STÖBER inverters. There are two ways to activate the brake. A brake control
is integrated in the following applications:
• Fast reference value with brake activation
• Comfort reference value
• Technology controller
• Command positioning (endless and limited position range)
• Synchronous command positioning (endless and limited position range)
• Motion block positioning (endless and limited position range)
• Electronic cam (endless and limited position range)
You can activate the brake control in parameter F08. Further settings are made in
F01, F02, F06, F07 and F09.
In addition, a signal source can be parameterized in F100. The signal for releasing the brake can be given direct via the source. F100 is a global parameter and
is available to all applications.
Information
Refer to the inverter's configuration manual for information on connection.
7.1
Parameterizing brake activation
To parameterize, proceed as shown below:
Parameterizing brake activation
1
Activate brake activation in parameter F08.
2
In F02, enter the speed at which the brake is to be applied (control modes
B20 = 0:V/f-control and 1:sensorless vector control).
3
In F01, enter the speed at which the brake is to be released (control modes
B20 = 0:V/f-control and 1:sensorless vector control).
4
In B27, enter the time during which the motor is to remain magnetized after
the braking process is triggered (control modes B20 = 1:sensorless vector
control and 2:vector control).
5
In B25, enter the percentage of the halt flux which is to be maintained after
the time entered in B27 (control modes B20 = 1:sensorless vector control
and 2:vector control).
6
In F07, enter the time that the brake takes to be applied (control modes B20
= 2:vector control and 64:servo-control).
ID 442281.00
WE KEEP THINGS MOVING
The parameters for the brake control can be set in the assistant General options/
Holding brake) or directly in the parameter lists.
36
7
Parameterizing brake data
Operating Manual
7
In F06, enter the time that the brake takes to be released (control modes B20
= 2:vector control and 64:servo-control).
8
Transfer the parameters to the inverter and save them there.
9
Turn the inverter off and on again.
Ö You have parameterized brake activation.
The current motor torque is stored in the setting F08 = 1:active while the brake is
activated. This torque is built up again after the brake is released. If F08 is set to
2:Do not save torque, only the motor flux is built up while the brake is being released.
When F08 is set to 0:inactive, the brake is activated with system enable A900.In
this case, brake release and application times are ignored.
Use motors with brakes from STÖBER ANTRIEBSTECHNIK GmbH & Co. KG.
Look up the correct values for F07 and F06 in the catalogs. If you use a servo motor with EnDat® encoder, F07 and F06 will be automatically read from the electronic nameplate each time the device is started.
If you have connected two brakes to an SDS 5000, enter the greater value in F06
and F07. Also set in B07= 1:arbitrary setting, so that the electronic name plate
does not automatically overwrite these parameters.
WE KEEP THINGS MOVING
To accommodate for the physical factors of motor and brakes, parameterize the
parameter F08 > 0. Please note that the assistant page Holding brake is displayed
dynamically as a function of the control mode selected.
ID 442281.00
37
7
Parameterizing brake data
Operating Manual
Depending on how you parameterize it on assistant page holding brake, brake activation is triggered by the system enable A900, a stop (setting of the signal
source in D102 Stop source or a quick stop command (setting of the signal source
in A62 Quick stop source).
Fig. 7-1: Parameterization of brake activation with a control mode without feedback (B20 = 0:V/f-control or 1:Sensorless vector control)
Status signals (only in application comfort reference value)
Function
Brake
released
The signal is 1:active when the brake is released. The signal be- D201 Bit 2
comes 0:inactive when the brake begins to be applied.
D431
Brake
released
The signal is 1:active when the brake is applied. The signal be- D201 Bit 3
comes 0:inactive when the brake begins to be released.
D432
ID 442281.00
Fieldbus
Image
Single
Parameter
WE KEEP THINGS MOVING
Signal
38
8
Parameterizing axis management
Operating Manual
8
Parameterizing axis management
This section describes axis management. Management of the axes takes place
in the global area. Management means the unique control of a maximum of one
axis. All axes can be deactivated. The display of the inverter shows which axis is
active or whether there is an active axis.
Information
The axis can only be switched when the enable has been switched off
and E48 device state is not 5:fault. The option startup disable ASP 5001
may not be active when an axis is switched!
The axes can be combined with motors in different ways. For instance, when only
one motor is connected directly to the inverter, several axes can be allocated with
applications and switched. In this case, the axes function like parameter sets (see
Figure 8 1).
Axis management
Axis 1
(= ”parameter set 1”)
#
ESC
I/O
X3
Axis 2
(= “parameter set 2”)
Axis 3
(= “parameter set 3”)
Motor 1
Axis 4
(= “parameter set 4”)
no axis active!
WE KEEP THINGS MOVING
Fig. 8-1: Using the axes as parameter records
ID 442281.00
39
9
Parameterizing brake resistor
Operating Manual
9
Parameterizing brake resistor
To remove excess braking energy from the DC link, a brake resistor can be connected to the 5th generation of STÖBER inverters. You will find information on the
types available from STÖBER ANTRIEBSTECHNIK and connection in the configuration manual for the inverter.
WE KEEP THINGS MOVING
Parameters
• A21 Braking resistor R [Ω]
• A22 Braking resistor P [W]
• A23 Braking resistor thermal [s]
are available for the settings. Enter the value 0 in A22 and the activation of the
braking resistor (brake chopper) is deactivated. Note that the brake chopper continues working when most malfunctions occur. The malfunctions that cause the
brake chopper to be switched off are documented accordingly in section 13.3.
ID 442281.00
40
10
Parameterizing in-/outputs
Operating Manual
10
Parameterizing in-/outputs
This chapter discusses the linking of control and status signals with the application.
The system of the control signals will now be explained with the example of quick
stop.
The signal can be provided on various binary inputs or via fieldbus. The user
makes the selection with a selector (A62 here). In addition, an indicator parameter
exists which shows the signal status (A302 here). The application descriptions list
selection, fieldbus and indicator parameters for each signal.
The output signals are allocated by the specific selection of status signals. The
routine is explained with the example of ref.value reached.
Fig. 10-2: Selection of the signal sources for output signals
ID 442281.00
WE KEEP THINGS MOVING
Fig. 10-1: Selection of the signal sources for input signals
41
10
Parameterizing in-/outputs
Operating Manual
All available parameters can
be entered in the source parameters.
WE KEEP THINGS MOVING
To be able to poll application status signals, the signals must be allocated to an
output (BA, AA, parameter). There is a source parameter for each output in which
the signals available for the particular application can be selected / inscribed.
Source parameters F61 and F62 are used for the binary outputs BA1 and BA2
shown in the diagram. At the same time, the signal is written in a parameter (D200
bit 1 here). This parameter can be read from a fieldbus system.
The indicator parameter (D181 in the diagram) shows the signal state after handling by the application. It is used to check the signal path. The application descriptions specifies for each signal the possible outputs and the related selection
parameters as well as the fieldbus and indicator parameter.
ID 442281.00
42
11
Communication between inverter and PC
Operating Manual
11
Communication between inverter and PC
Communication between PC and inverter is established with a serial connection.
A cable (cat. no. 41488) is connected to a serial interface on the PC and to terminal X3 of the inverter as shown in the adjacent figure.
PC
2
Inverter
2
3
3
4
FDS cable G3
ID. No. 41488
5
4
5
Housing
Fig. 11-1: Serial connection to communication between inverter and PC
Settings
The serial transmission is parameterized in the inverter entry under Communication/Settings. The dialog which appears indicates the communication status.
Communication is parameterized below this. The settings include the interface
used on the PC, the transmission speed and the bus address. 0 is preset as the
bus address. It does not have to be changed unless you want to establish a serial
daisy chain connection with several inverters.
The checkboxes under the communication status are used to select whether the
settings saved in the project are to be used for communication or the global settings of POSITool. It can be useful to use the project settings when an inverter network is configured on a PC on which each inverter has a permanently assigned
interface. The disadvantage of the project settings becomes obvious, however,
when the project is transferred to other users.Sometimes online operation cannot
be established with the project settings because another COM interface is being
ID 442281.00
WE KEEP THINGS MOVING
11.1
43
11
Communication between inverter and PC
Operating Manual
used. In this case, you can use the global settings of POSITool. The global parameterization takes place in the menu Extras/Options in the dialog screen General (see Fig. 11-2).
Fig. 11-2: Project settings
Online operation
There are three ways for a user to establish a connection between inverter and
PC:
• The
button in the tool bar
• The area labeled Establish connection to inverter in the inverter entry under
Communication
• the F5 key
Both devices must have the same configuration and parameter values for a serial
connection between PC and inverter. If the user gives the command to go online
via one of the two ways, POSITool checks the configuration of PC and inverter.
During this check a differentiation can be made between two results:
• The configurations are different
• The configurations are identical
ID 442281.00
WE KEEP THINGS MOVING
11.2
44
11
Communication between inverter and PC
Operating Manual
First case: Different configurations
When POSITool determines that inverter and PC have different configurations,
the dialog screen shown in Fig 11-3 appears. You have the following choices,
• Transfer the configuration in POSITool to the inverter ( ) or
• Load the configuration of the inverter to POSITool ( , reverse documentation)
If you want to check the differences between the applications, press the Details
button ( ).
When the configuration is adjusted, the parameters of the selected project are
also used.
Partial reverse documentation
It is standard that, when a file is saved, all information is stored to enable a reverse documentation with configuration data to be read out. If this is not the case
(know-how protection) a partial reverse documentation can be read. The following
functions are available in this online mode.
• Parameter lists
• Fault memory indication
• Scope
• Simubox
• Free parameter list
ID 442281.00
WE KEEP THINGS MOVING
Fig. 11-3: Establishing connection with different configurations
45
11
Communication between inverter and PC
Operating Manual
When online mode is concluded with a partial reverse documentation, the data record is marked as reverse documentation and parameter values can no longer be
changed. The data record cannot be converted in a configuration or transferred
again to the inverter.
Utilizing memory space
When the configuration is loaded, the memory requirements of the data record
are compared with existing memory space on the inverter. If it is certain that the
data record can be stored, POSITool does not give you a message. If the expected memory utilization is 95 % or more, a message is indicated.
A memory utilization in this range occurs, for example, when you have defined too
many motion blocks and profiles in the motion block positioning application. Try
to optimize the configuration. Contact [email protected] if you have questions.
Fig. 11-4: Establishing a connection for identical configurations
ID 442281.00
WE KEEP THINGS MOVING
Second case: Identical configurations
When POSITool determines that the configurations are identical, the dialog
screen shown in Fig 11-4 appears. When this happens, you have the following
choices:
• Load the parameters from POSITool to the inverter ( ) or
• Load the parameters from the inverter to POSITool ( )
46
11
Communication between inverter and PC
Operating Manual
If you want to check the differences between the parameters in POSITool and the
inverter, press the Details button ( ). POSITool then indicates the differences in
a dialog screen in which the values of the parameters in POSITool and the inverter
are listed.
Ergebnis
NOTICE
After being loaded to the inverter the application is not saved safe from
power failures!
X To do this, execute A00 Save values.
Fig. 11-5: Online connection established
With active connection ...
When a connection is active, the values which were changed on the inverter are
automatically transferred to the PC and vice versa. Similarly, actions can start the
Scope and Simubox function. The indicator parameters are only visible in online
mode.
ID 442281.00
WE KEEP THINGS MOVING
During the connection is established, a status screen appears in the working area.
The progress of the current status procedure is indicated in this screen.
When the connection is activated, the following screen appears.
47
12
Service
Operating Manual
12
Service
This chapter lists various service jobs and explains their performance.
12.1
Replacing inverters
This chapter provides you with an introduction to the simple replacement of two
inverters without additional aids. Only the Paramodule from the replaced inverter
must be used on the new inverter. In the Paramodule, the action A00 save values
stores the programming and the parameterization of the inverter safe from a power failure.
Information
If inverters of different types are replaced or the devices to be configured on the inverter are changed, the entire configuration must be
changed with POSITool and checked!
Replacing the inverter
1
Start the action A00 save values. Wait until the action has been concluded
with the result 0:error free.
2
Turn the power supply of the inverter off. Wait until the indication on the display disappears.
3
Unplug Paramodule from the inverter to be replaced!
Inverter to be replaced
ID 442281.00
WE KEEP THINGS MOVING
The following conditions apply to the replacement:
• The new inverter takes over the job of the replaced inverter. There are no
changes in the drive task.
• Inverters of the same device type are exchanged.
• The new inverter has the same hardware and software status as the inverter
to be replaced or a higher one.
• None of the devices or components (motor, shaft encoder, option board, and
so on) to be configured on the inverter change.
Proceed as shown below:
48
12
Service
Operating Manual
4
Plug Paramodule into the inverter to be installed!
Inverter to be installed
5
Remove the inverter to be replaced and install the new inverter. Adhere to
the mounting instructions!
6
Schließen Sie die Versorgungsspannung an.
Ö During startup the inverter loads the configuration from Paramodule and
continues using the application of the previously installed inverter.
7
Validate the Safe Torque Off safety function.
See also operating instructions ASP 5001, ID 442181.
Ö The inverter has been replaced.
Replacing an application
This chapter provides you with a guide to the simple change of an application
without extra aids. Only the Paramodule must be replaced. In the Paramodule,
the action A00 save values stores the programming and the parameterization of
the inverter safe from a power failure.
The following conditions apply to the replacement:
• The hardware configuration (option boards, motor settings, etc.) stored on the
Paramodule corresponds to the drive which will use the data of the Paramodule in the future.
• The programming and parameterization stored on the Paramodule was tested beforehand.
• After the Paramodule has been exchanged and the drive has been tested, set
up the drive again (referencing, parameter optimization, etc.).
Proceed as shown below:
Replacing the application
1
Start the action A00 save values. Wait until the action has been concluded
with the result 0:error free.
2
Turn the power supply of the inverter off. Wait until the indication on the display disappears.
ID 442281.00
WE KEEP THINGS MOVING
12.2
49
12
Service
Operating Manual
3
Remove the Paramodule from the inverter.
4
Install the new Paramodule (Paramodule with changed application) on the inverter!
5
Connect the power supply.
WE KEEP THINGS MOVING
Ö During startup, the inverter loads the configuration and the new application
from the Paramodule and accepts these.
ID 442281.00
50
12
Service
Operating Manual
12.3
Copying Paramodule
The following section describes how to copy a Paramodule so that an application
can be utilized in additional inverters.
Proceed as shown below:
1
Start the action A00 save values. Wait until the action has been concluded
with the result 0:error free.
2
Remove the Paramodule from the inverter.
3
Install the new Paramodule on the inverter!
4
Start the action A00 save values. Wait until the action has been concluded
with the result 0:error free.
Ö You have copied Paramodule.
ID 442281.00
WE KEEP THINGS MOVING
Copying Paramodule
51
12
Service
Operating Manual
12.4
Replacing the firmware
The following section describes how to replace the firmware of an inverter.
WARNING!
Danger of injury or property damage due to unsecured loads. During the
firmware download, the control and the power unit of the inverter are
switched off. This means that unsecured loads on the drive may slip
through.
X Secure the drive load before beginning the firmware download.
NOTICE
Unexpected inverter behavior! If a firmware download is carried out, the
previously saved firmware will be deleted initially. If the firmware download
is a tear stopped too early, the inverter will not start as normal. The display
will remain empty, the LEDs will only illuminate briefly.
X Avoid any early stoppage of the firmware download.
Prerequisites:
• At least the control unit of the inverter is powered (24 V on terminal X11). The
power may only be switched off during the download when the software displays an appropriate instruction.
• You have connected the inverter to the PC via serial interface X3.
• POSITool is not communicating with the inverter via serial interface X3.
You will need:
• The program Download.exe which is stored in the Download folder in the directory of POSITool.
• The mot files which are stored in the same directory.
Proceed as shown below:
ID 442281.00
WE KEEP THINGS MOVING
X If an interruption took place, carry out the firmware download again and ensure that it completes. After this, the inverter can be operated normally.
52
12
Service
Operating Manual
Replacing the firmware
1
Start the program Download.exe.
Ö The following dialog screen appears:
2
Select the language in which the download is to be presented by pressing
one of the flag buttons.
3
Press the button Next.
4
Read the safety guidelines.
5
If you accept the safety guidelines, check the box Accept safety guidelines.
ID 442281.00
WE KEEP THINGS MOVING
Ö The following dialog screen appears:
53
12
Service
Operating Manual
6
Press the OK button.
Ö The following dialog screen appears:
7
Select the mot file which is to be loaded to the inverter.
8
Press the Open button
9
In the lower part of the screen set the options with which the download is to
be executed.
10 Confirm the check box Next >>.
Ö The following dialog screen appears:
11 Press the button Download per Software start....
Ö The firmware download is started.
ID 442281.00
WE KEEP THINGS MOVING
Ö The following dialog screen appears:
54
12
Service
Operating Manual
12 Wait until a dialog message reports that the firmware was saved to the inverter.
Ö You have performed the firmware download.
If the download failed, check the following points:
1. After you pressed the button Download per Software start..., the following instruction appears after a certain amount of time:
Switch off and on again the control section of the connected inverter ....
Switch the power supply on X11 off and on again to continue with the download. Then proceed with step 12.
The mot. files are stored on your PC during the installation of POSITool. The
name of the mot. file for the FDS 5000 begins with f.
Actions
Actions are functions which are executed by the inverter automatically after their
start.
Actions are controlled and analyzed using special parameters. The parameters
contain three elements.
You can start the action via the element 0 (e.g. A00.0) The element 1 (e.g. A00.1)
shows you the action's progress. Element 2 (e.g. A00.2) shows the result. You
can start an action via every interface (operator panel on the inverter, fieldbus or
POSITool in online mode).
For some actions, power must be applied to the motor and the motor must be free
to turn. For this reason the inverter must be enabled if you want to run these actions. Other actions can be performed without energizing the motor. Since these
two action groups are executed differently, they will be described separately below.
12.5.1
Actions without enable
Actions which do not need an enable before they can be executed are:
• A00 Save values
• A37 Reset memorized values
Proceed as shown below:
Executing actions without enable
1
Set element 0 of 0 to the value 1 (e.g., A00.0 = 1).
Ö Element 1 indicates the progress of the action (e.g., A00.1 = 33 %).
2
Wait until element 0 indicates the value 0 again (e.g., A00.0 = 0)
Ö Element 2 indicates the results of the action (e.g., A00.2 = 0:error free).
ID 442281.00
WE KEEP THINGS MOVING
12.5
55
12
Service
Operating Manual
A00 Save values
When you activate A00.0, the inverter's current configuration and the parameter
values are stored in Paramodule, safe from loss due to a power failure. After power-off, the inverter starts with the configuration stored in Paramodule.
When it is determined during the saving procedure that the configuration data in
Paramodule and the inverter are identical, only the parameters are stored. This
speeds up the procedure.
You can read the following results from the third element (A00.2):
0: error free
10: write error
11: invalid data
12: write error
14: Warning
Information
Do not turn off the power of the control section (devices of the /L version: 24 V, devices of the /H version: supply voltage) while the action is
still being executed. Turning off the power while actions are being executed will cause data to be lost. The display indicates the fault *ConfigStartERROR parameters lost" or *Paramodul ERROR - Read error. In
such cases, the application must be transferred to the inverter again
(POSITool or Paramodul).
A37 Reset memorized values
The action A37 resets memorized values E33 to E38. The action can be started
in A37.0.
The action offers the following result (A37.2): 0:error free.
ID 442281.00
WE KEEP THINGS MOVING
With the results 10 to 12 an error was determined while saving to Paramodule. If
the results occur repeatedly, the Paramodule should be replaced.
Result 14 means that saving was error-free. At the same time it is determined that
the maximum number of write cycles has been reached. The Paramodule should
be replaced as soon as possible (MDS 5000/SDS 5000: ID 49315; FDS 5000: ID
49314).
56
12
Service
Operating Manual
12.5.2
Actions with enable
Actions which require that the motors be energized before these actions can be
executed:
• B41 Autotune motor
• B42 Optimize current controller
• B43 Winding test
• D96 Reference value generator
Execute
Executing actions with enable
1
Change to the device state Ready for switch on.
2
Set the first element of the action to the value 1 (e.g., B40.0 = 1).
3
Enable the motor.
Ö Element 1 indicates the progress of the action (e.g., B40.1 = 33 %).
4
Wait until element 1 indicates the value 100 % (e.g., B40.1 = 100 %).
5
Turn off the enable.
Ö Element 2 indicates the result of the action (e.g., B40.2 = 0:error free).
B41 Autotuning
NOTICE
During this action, the motor shaft will move.
X Make sure that the motor can turn freely during the action!
Using the action B41 the stator resistance (B53) and stator inductance (B52) are
measured on servo motors. On asynchronous motors Leakage factor (B54) and
Magnetic saturation coefficient (B55) are also determined.
During activation, the enable must be inactive. If you have started the action in
B41.0, you must activate the enable. After the action was concluded, you must
deactivate the enable again. You can then read the measured values (B52 to
B55).
During the action, the cycle time is set internally to 32 msec.
ID 442281.00
WE KEEP THINGS MOVING
Please note that since parameter values be determined directly during these actions, you should perform the action A00 save values afterwards so that the values are stored safe from loss due to power failure.
57
12
Service
Operating Manual
You can read the following results from the third element (B41.2):
0: error free: The action was executed without errors and concluded.
1: abortedn: The action was aborted by turning off the enable.
B42 Optimize current controller
NOTICE
During the action, the motor turns at approx. 2000 Rpm.
X For this reason ensure the motor and the mechanism coupled to it are allowed
to be operated at this speed and can rotate freely!
X During the action, you hear clicking noises at regular intervals. The action
takes approx. 20 minutes.
NOTICE
Danger due to delayed shut-down.
X If you have enable the action via local operation, the action can only be interrupted with a very long delay by deactivating the enable!
During activation, the enable must be inactive. If you have started the action in
B42.0, you must activate the enable. After the action was concluded, you must
deactivate the enable again. You can then read the measured values in B64 to
B68.
If a quick stop request occurs during the action, the drive is halted immediately.
For the duration of the action, the cycle time is set internally to 32 msec.
You can read the following results from the third element (B42.2):
0: error free: The action was executed without errors and concluded.
1: aborted: The action was aborted by turning off the enable.
B43 Winding test
NOTICE
During this action, the motor shaft will move.
X Make sure that the motor can turn freely during the action!
When you start the action, the symmetry of the ohmic resistors of the motor windings are checked.
ID 442281.00
WE KEEP THINGS MOVING
When you start the action, the parameters of the current controller are specified
again (B64 to B68).
58
12
Service
Operating Manual
During activation, the enable must be inactive. If you have started the action in
B43.0, you must activate the enable. After the action was concluded, you must
deactivate the enable again.
During the action, the cycle time is set internally to 32 msec.
You can read the following results from the third element (B43.2):
0: error free: The action was executed without errors and concluded.
1: aborted: The action was aborted by turning off the enable.
2: R_SYM_U: The resistance of phase U differs significantly from that of the other
phases.
3: R_SYM_V: Same as 2
4: R_SYM_W: Same as 2
5: POLAR_SYM_U: An asymmetry was determined when the polarity changed.
6: POLAR_SYM_V: Same as 5
7: POLAR_SYM_W: Same as 5
Results 5 to 7 are usually an indication of an inverter error.
D96 Reference value generator
NOTICE
During this action, the motor shaft will move.
When you start the action, a square-shaped reference value is specified for the
motor. You can parameterize the reference value in D93 to D95.
During activation, the enable must be inactive. If you have started the action in
D96.0, you must activate the enable.
The action can only be concluded by turning off the enable and quick stop! With
a quick stop signal, the drive is halted immediately.
During the action, the cycle time is set internally to 32 msec.
You can read the following result from the third element (D96.2):
1: aborted: The action was aborted by turning off the enable.
ID 442281.00
WE KEEP THINGS MOVING
X Make sure that the motor can turn freely during the action!
59
13
Diagnosis
Operating Manual
13
Diagnosis
13.1
LED
The LEDs on the front of the inverter give you a quick overview of the state of the
inverter. A green and a red LED which light up in different combinations and frequencies provide information on the device's status based on the following table.
ERROR RUN
(green)
(red)
Fig. 13-1: LED on the front
State of the inverter
ERROR (red)
RUN (green)
OFF
OFF
ERROR (red)
OFF / ON
No power
RUN (green)
Device initialization (startup phase)
or data action (A00 is active).
Flashing at 8 Hz Paramodul is not installed correctly.
ERROR (red)
OFF
RUN (green)
Flashing at 1 Hz
ERROR (red)
OFF
RUN (green)
ON
ERROR (red)
Flashing at 1 Hz Warning
RUN (green)
ON or flashing
ERROR (red)
ON
RUN (green)
OFF
ERROR (red)
Flashing at 8 Hz No configuration active
RUN (green)
OFF
ID 442281.00
Ready for operation
(not enabled)
Operation (enabled)
Fault
WE KEEP THINGS MOVING
LEDs
60
13
Diagnosis
Operating Manual
13.2
Display
The display gives the user a detailed response message on the state of the inverter. In addition to the indication of the parameters and events, the device states are
shown.
The display permits an initial diagnosis without additional aids.
13.2.1
General
After the self-test of the inverter, the operation indication appears on the display.
Depending on the configuration and the current device state, the first and second
line of the display may differ from what is shown in the example. Im Picture shows
the configuration fast ref. value in the device state enabled. See chap. 3 for device
states.
If no axis is active, this is indicated with an asterisk (*). The active axis is then
shown when it differs from axis no. 1. Only for active brake chopper or active
local mode does the appropriate symbol appear on the display.
Speed
3000 rpm
4: Enabled
Current
1.3A
Brake chopper
active
Axis no. 2 active
Fig. 13-2: Display indication
13.2.2
Event Indications
Events
Event indications on the display give the user information on the state of the device. The event list (chapter 4.4.3) gives you a list of the event indications. The
following event groups exist.
Events
active
configuration
Fig. 13-3: Events
ID 442281.00
Sequence error
recognized
by CPU
inactive
configuration
WE KEEP THINGS MOVING
Device state
61
13
Diagnosis
Operating Manual
Error during active configuration
Events during active configuration are used to monitor the device during operation. The reaction to one of these events can be set in four levels - inactive, message, warning or fault.
1. When an event is parameterized as a message, it is shown flashing at the bottom of the display. An application is not affected by a message (i.e., the top
part of the display does not change). A message is not acknowledged. It is
queued until the cause disappears.
2. A warning is shown in the top part of the display with the appropriate logo. The
bottom line indicates the flashing event. The upper right corner shows the remaining time after which the warning becomes a fault. If the cause disappears
within this parameterized time, the warning is reset. An application is not affected by a warning.
3. When an event with the level "fault" occurs, the device immediately changes
to the device state "fault reaction." The event appears flashing in the bottom
line of the display. A fault must be acknowledged.
Sequence faults recognized by the CPU
The 5th generation of STÖBER inverters includes a digital computer with microprocessor, memory and I/O modules. When an error occurs which affects this area, the device reacts with an indication on the display. At the same time, the
inverter assumes a defined state (power section is turned off). The device must
be turned off and on again before it can return to its normal functionality.
At the same time, device control (menu function) and communication with the inverter are not possible. Events of this type are marked on the display with the
character "#".
Inactive configuration…
There are two cases when a configuration is inactive:
1. A fault occurs during device start.
2. The configuration was stopped by POSITool.
Events which will lead to an inactive configuration are marked on the display with
an asterisk (*).
ID 442281.00
WE KEEP THINGS MOVING
The device provides notes on the cause of some of the events. These events are
marked with a number and appear alternately to the event indicators on the display. Causes which are not documented with a number in the event description
are only an indication of possible faults. They do not appear on the display.
For additional diagnosis, the occurrence of an event of this group is documented
by incrementing a counter. The fault counters are stored in the parameter group
Z.. An acknowledgment can be programmed on the operator panel or via binary
input for some of these events. These events do not affect communication and
device control. The events can be identified by their consecutive numbering.
62
13
Diagnosis
Operating Manual
...during device startup
During device startup, configuration and parameters, flags and signal values are
loaded from Paramodul. Afterwards the configuration is started. During both steps
detailed error messages can be generated. When a fault occurs during loading
from Paramodul, "*ParaModuleERROR" appears in the top line. When a fault occurs while the configuration is being started, "*ConfigStrtERROR" appears. These
faults are corrected by turning the device off and on or transferring a configuration.
WE KEEP THINGS MOVING
...after stop by POSITool
If the configuration was stopped by POSITool, the logo of the company STÖBER
ANTRIEBSTECHNIK appears on the display.
ID 442281.00
63
ID 442281.00
13.3
Events
13.3.1
31:Short/ground.
Resolution
Level
Response
Fault counter
The hardware short-circuit switch-off is active. The output current is too high.
Malfunction
The motor continues to coast. The brake chopper Z31
cuts out. Any existing brakes are engaged if they
were not released via F100 independent of the device controller.
Possible cause
Test
Measure
Acknowledgement
Interwinding fault
Check the motor.
Replace the motor.
Fault in motor cable
Check the cable
Replace the cable
Switch the device on/off
or programmed acknowledgement
Connection fault
Check the connection, e.g. whether Correct the connection.
V or W is connected to PE at X20 U.
13.3.2
32:Short/gr.int
Resolution
Level
An internal test is performed when the con- Malfunctroller part power supply is switched on. An tion
existing short-circuit causes a malfunction.
Response
Fault counter
The inverter cannot be enabled.
Z32
Measure
Acknowledgement
There is an internal device fault.
—
Please contact our service department, see section 1.4 Further support
Switch the device on/off
or programmed acknowledgement
64
13
WE KEEP THINGS MOVING
Diagnosis
Test
Operating Manual
Possible cause
ID 442281.00
13.3.3
33:Overcurrent
Resolution
Level
The total motor current exceeds the permit- Malfuncted maximum value.
tion
Response
Fault counter
The motor continues to coast. Any existing brakes Z33
are engaged if they were not released via F100 independent of the device controller.
Possible cause
Test
Measure
Acknowledgement
Acceleration times too
short
Extend the ramps.
Apply this setting for operation.
Incorrectly set torque
limits in the C03 and
C05 parameters.
Set smaller values in C03 and C05.
Apply this setting for operation.
Switch the device on/off
or programmed acknowledgement
Diagnosis
Operating Manual
65
13
WE KEEP THINGS MOVING
ID 442281.00
13.3.4
34:Hardw.fault
Resolution
Level
Response
Fault counter
There is a hardware fault.
Malfunction
The inverter can no longer be enabled.
Z34
Cause
Description
Measure
Acknowledgement
1:FPGA
Fault when loading the FPGA
2:NOV-ST
Faulty power stage memory (EEPROM)
Please contact our service department, see section 1.4 Further support
can not be acknowledged
3:NOV-ST
Faulty control part memory (EEPROM)
4:Brake1
The controller of the brake 1 is faulty
or the 24 V supply is missing at the
brake module.
Check the wiring and correct it if necessary.
5:Brake2
The controller of the brake 2 is faulty
or the 24 V supply is missing at the
brake module.
Check the wiring and correct it if necessary.
11:CurrentMeas
The current offset measurement for Please contact our service departthe device start-up indicates a devia- ment, see section 1.4 Further suption that is too large.
port
Diagnosis
Operating Manual
66
13
WE KEEP THINGS MOVING
ID 442281.00
13.3.5
35:Watchdog
Resolution
Level
Response
Fault counter
The watchdog of the microprocessor is activated.
Malfunction
The motor continues to coast. The brake chopper
is switched off while the inverter restarts. Any existing brakes are engaged if they were not released via F100 independent of the device
controller.
Z35
Possible cause
Test
Measure
Acknowledgement
The microprocessor is
used to capacity or
faulty.
•
•
Switch the device on/off
or programmed acknowledgement
•
Check the E191 parameter, it
should indicate a value less than
80%.
Check the wiring for EMC-compliant design.
•
Set a higher cycle time in the
A150 parameter.
Wire according to EMC regulations.
Diagnosis
Operating Manual
67
13
WE KEEP THINGS MOVING
ID 442281.00
13.3.6
36:High voltage
Resolution
Level
The voltage in the intermediate circuit exMalfuncceeds the permitted maximum (DC link volt- tion
age display in E03).
Possible cause
Response
The motor continues to coast. The brake chopper is
Z36
switched off as long as the malfunction is present. Any
existing brakes are engaged if they were not released via
F100 independent of the device controller.
Test
Supply voltage too high Check whether the supply voltage exceeds
the permitted input voltage.
No braking resistor con- Check the wiring.
nected
Brake chopper is deactivated
Check whether A22 = 0 is set.
Braking resistor too
small or too large
•
•
Fault counter
Measure
Acknowledgement
Take measures to adjust the supply voltage. Switch the device on/off
or programmed acknowledgement
Connect a braking resistor.
Enter the values of the braking resistor in
the A21, A22 and A23 parameters.
Check whether A21 does not reach the Connect a suitable braking resistor.
permitted value.
Check whether the resistance is suitable to dissipate the power losses arising.
Brake chopper is faulty
Observe the DC link voltage in the Scope. If
this increases to the overvoltage limit without hindrance, the brake chopper is faulty.
68
Please contact our service department, see
section 1.4 Further support
13
WE KEEP THINGS MOVING
Extend the braking ramps.
Connect a suitable braking resistor.
Check the application of the DC link
connection.
Diagnosis
Observe the DC link voltage during a brak- •
ing procedure, e.g. using a Scope record- •
ing.
•
Operating Manual
Braking ramps to steep
ID 442281.00
13.3.7
37:Encoder
Resolution
Level
Response
Fault counter
Error due to
encoder
Malfunction
The motor always coasts except when U30 Emergency stop is activated.
Caution: The reference is deleted for positioning applications due to the event
37:Encoder. Referencing must be repeated after acknowledgement.
If the encoder is not connected when switching on the control part power supply,
the encoder supply is permanently switched off. Acknowledgement is then only
possible by switching the inverter off and on.
Z37
Cause
Description
Measure
Acknowledgement
1:Para<>Encoder
Parameterization is not suitable
for the connected encoder.
Check the setting of the H00 parameter.
programmed acknowledgement
2:ParaChgOffOn
Parameter change; encoder parameterization can not be
changed during operation
Save and then switch the device off/on so that the
change is effective.
programmed acknowledgement
4:X4 chan.A/Clk
Wire break track A/Clock
•
•
programmed acknowledgement
5:X4-chan. B/Dat
Wire break track B/Data
6:X4-chan. 0
Wire break track 0
programmed acknowledgement
7:X4-EnDatAlarm
Alarm bit of EnDat® encoder
present.
Switch device off/
on
programmed acknowledgement
Diagnosis
Operating Manual
69
13
WE KEEP THINGS MOVING
Check the encoder cable and replace if necessary.
Please contact our service department, see section
1.4 Further support
ID 442281.00
Cause
Description
Measure
Acknowledgement
8:X4-EnDatCRC
Errors accumulate during data
transfer.
•
Check the connection and shielding of the encoder
cable.
Reduce the electromagnetic interference.
Please contact our service department, see section
1.4 Further support
programmed acknowledgement
Check the encoder cable
Check whether the specification of the resolver
matches the specifications of STÖBER ANTRIEBSTECHNIK.
Please contact our service department, see section
1.4 Further support
Switch device off/
on
•
•
10:Resol.carrier
The resolver could not be calibrat- •
ed or optimized.
•
11:X140-undervolt.
Incorrect transfer factor
•
12:X140-overvolt.
14:resol.failure
Wire break
15:X140 double tr.
Different positions are frequently
determined at X120 during dual
transfer.
16:X120-Busy
Encoder has not responded for
too long; for SSI-slave: No telegram for 5 ms for enabled drive.
•
•
Check the encoder cable
Please contact our service department, see section
1.4 Further support
Switch device off/
on
programmed acknowledgement
Switch device off/
on
Switch device off/
on
•
Diagnosis
70
13
WE KEEP THINGS MOVING
programmed acknowledgement
Operating Manual
•
•
Replace the option board that the encoder is connected to.
Replace the inverter.
Please contact our service department, see section
1.4 Further support
ID 442281.00
Cause
Description
Measure
17:X140-wire break
A wire break was detected at
X120.
•
•
•
•
•
18:X120-Timeout
No cycle signal was detected
from the SSI master.
•
•
•
•
•
19:X4 double tr.
Encoder has not responded for
too long.
•
•
•
•
71
programmed acknowledgement
Check the connection and shielding of the encoder
cable.
Reduce the electromagnetic interference.
programmed acknowledgement
Check the encoder cable
Check whether a suitable encoder is connected.
Please contact our service department, see section
1.4 Further support
programmed acknowledgement
13
WE KEEP THINGS MOVING
Check the connected cable.
Check the power supply of the SSI master.
Make sure that the settings of all devices in the SSI
Motionbus are matched to each other.
Check whether a device is correctly parameterized
as the SSL master in the SSI Motionbus.
Check whether the devices in the SSI Motionbus
boot up together.
Diagnosis
•
Check the connected cable (encoder or SSI connec- programmed action).
knowledgement
Check the power supply of the SSI encoder or the
source that simulates the SSI signals.
Make sure that the settings of the SSI master are
matched to the SSI encoder or the source that simulates the SSI signals.
Check whether a device is correctly parameterized
as the source of the SSL signals in the SSI Motionbus.
Check whether the devices in the SSI Motionbus
boot up together.
Operating Manual
20:X4-Busy
Different positions are frequently
determined at X4 during dual
transfer.
Acknowledgement
ID 442281.00
Cause
Description
Measure
Acknowledgement
21:X4-Wire break
A wire break from one or more
tracks was detected.
•
•
Check the encoder cable
Please contact our service department, see section
1.4 Further support
programmed acknowledgement
22:AX5000
Acknowledgement for axis switchover did not occur.
Check the wiring between the inverter and POSISwitch
AX 5000.
programmed acknowledgement
23:AX5000required
A POSISwitch AX 5000 was projected but not connected.
•
•
Match the projection of your hardware.
Check the connection of the POSISwitch AX 5000.
programmed acknowledgement
24:X120-speed
B297, G297 or I297 exceeded for
the encoder at X120
•
programmed acknowledgement
25:X4-speed
B297, G297 or I297 exceeded for
the encoder at X4
Check the connection and shielding of the encoder
cable.
Reduce the electromagnetic interference.
Check the parameterization of B297, G297 or I297.
Please contact our service department, see section
1.4 Further support
26:X4-noEnc.found
No encoder was found at X4 or a
wire break was detected at the
EnDat®/SSI encoder.
•
•
•
•
Correct the connection of the encoder.
Check the encoder cable
Correct the power supply of the encoder.
Check the setting of the H00 parameter.
programmed acknowledgement
27:X4-AX5000 gef
A functional AX 5000 option was
found at X4 although the incremental encoder or EnDat® encoder was parameterized or no
EnDat® encoder is connected to
option AX 5000.
•
•
Check the setting of the H00 parameter.
Check the connection of the encoder at the POSISwitch AX 5000.
programmed acknowledgement
28:X4-EnDatfound
An EnDat® encoder was detected at X4 although a different encoder was parameterized.
Check the setting of the H00 parameter.
•
•
•
Diagnosis
programmed acknowledgement
Operating Manual
72
13
WE KEEP THINGS MOVING
programmed acknowledgement
ID 442281.00
Cause
Description
Measure
29:AX5000/IncEnc
A faulty POSISwitch AX 5000 op- •
tion at X4 or a wire break in the A- •
track for an incremental encoder
was detected.
30:Opt2 incomp
Option 2 is not the latest version.
31:X140EnDatAlar
The EnDat® encoder at X140 re- •
ports an alarm.
•
Switch the inverter off and back on again.
programmed acThe encoder is faulty. Please contact our service de- knowledgement
partment, see section 1.4 Further support
32:X140EnDatCRC
Errors accumulate during data
transfer. The encoder is is not
available.
Make sure that the correct encoder type is connected.
Check the connection and shielding of the encoder
cable.
Reduce the electromagnetic interference.
Please contact our service department, see section
1.4 Further support
programmed acknowledgement
Check the parameterization of G297.
Check the producer.
Please contact our service department, see section
1.4 Further support
programmed acknowledgement
Replace the AX 5000 option.
programmed acCheck the encoder cable of the incremental encoder. knowledgement
Install the latest version of the option board.
•
•
•
•
•
•
•
34:battery low
When switching on the inverter, it •
was determined that the voltage
of the battery has fallen below the
warning limit of the encoder. Referencing of the axis remains intact. However, the remaining
service life of the backup battery
is limited.
73
13
WE KEEP THINGS MOVING
Replace the AES battery before the next time the in- programmed acverter is switched off. Note also the Absolute Encod- knowledgement
er Support AES operating instructions (see section
1.3 Other manuals).
Diagnosis
G297 exceeded on the IGB
programmed acknowledgement
Operating Manual
33:IGB-speed
Acknowledgement
ID 442281.00
Cause
Description
Measure
35:battery empty
When switching on the inverter, it
was determined that the voltage
of the battery has fallen below the
minimal voltage of the encoder.
Referencing of the axis has been
deleted. The backup battery is no
longer able to retain the position
in the encoder over the time during which the inverter in switched
off.
•
•
13.3.8
Acknowledgement
Referencing the axis.
programmed acReplace the AES battery before the next time the in- knowledgement
verter is switched off. Note also the Absolute Encoder Support AES operating instructions (see section
1.3 Other manuals).
38:TempDev.sens
Resolution
Level
The temperature measured by the device
Malfuncsensor exceeds the permitted maximum
tion
value or has fallen below the permitted minimum value. The permitted temperatures
are saved in the power stage of the inverter.
Response
Fault counter
The parameterized malfunction reaction in the
A29 parameter.
Z38
Measure
The ambient/control
cabinet temperatures
are too high or too low.
Correct the ambient temperature of
the inverter.
Take suitable measures to match the Switch the device on/off
ambient temperature to the operating or programmed acconditions of the inverter.
knowledgement
Fan faulty
Switch on the control part power sup- Please contact our service departply and check whether the fan(s)
ment, see section 1.4 Further supstart up.
port
74
13
WE KEEP THINGS MOVING
Acknowledgement
Diagnosis
Test
Operating Manual
Possible cause
ID 442281.00
13.3.9
39:TempDev i2t
Resolution
Level
The i2t model for the invert- Inactive, message, warner exceeds 100 % thermal ing or malfunction can be
overload.
parameterized in U02
Response
Fault counter
When triggering an event, a current limit initially
takes place in the servo and vector control control
types. At the same time, a fast stop is triggered as
a malfunction when parameterizing in U02. Reducing the current can cause the fast stop to no
longer perform correctly.
Z39
Possible cause
Test
Measure
Acknowledgement
Inverter overloaded
Check the load situation of your
drive.
•
•
Correct the design of the drive.
Check the maintenance condition of the drive (block, lubrication, etc.)
Switch the device on/off
or programmed acknowledgement
Cycle frequency too
high (B24)
Check the load situation of your drive
under consideration of the derating.
•
•
Reduce B24.
Use a drive with a suitable power
rating.
Diagnosis
Operating Manual
75
13
WE KEEP THINGS MOVING
ID 442281.00
13.3.10
40:Invalid data
Resolution
Level
Response
Fault counter
A data error was detected when initializing
the non-volatile memory.
Malfunction
The inverter cannot be enabled.
Z40
1:Error
3:dataSecurity
Low level write/read error or timeout. The inverter must be sent in for repair. Please contact our service deunknown data block
partment, see section 1.4 Further
Block has no data security.
support
4:CheckSum
Block has a check sum error.
5:R/O
Block is r/o.
6:readErr
Start-up phase: Block read error
7:blockMiss
Block not found
17:Error
Low level write/read error or timeout.
18:blockMiss
unknown data block
19:dataSecurity
Block has no data security.
20:CheckSum
Block has a check sum error.
21:R/O
Block is r/o.
22:readErr
Start-up phase: Block read error
23:blockMiss
Block not found.
2:blockMiss
76
Acknowledgement
can not be acknowledged
13
WE KEEP THINGS MOVING
Measure
Diagnosis
Description
Operating Manual
Cause
ID 442281.00
Cause
Description
Measure
32:el. mot-type
no name plate data available
•
•
33:el.typeLim
Name plate parameter can not be en- •
tered (limit value or existence).
•
48:optionBoard2
Error in memory of option 2 for REA
5000 and XEA 5000 or XEA 5001.
Acknowledgement
For STÖBER standard motor:
Switch the device on/off
Please contact our service deor programmed acpartment, see section 1.4 Further knowledgement
support
For motor from other manufacturers: Set B06 to 1:arbitrary setting
and manually enter the motor data.
Check the configuration of the inverter and motor.
Please contact our service department, see section 1.4 Further
support
The option must be sent in for repair. can not be acknowledged
Diagnosis
Operating Manual
77
13
WE KEEP THINGS MOVING
ID 442281.00
13.3.11
41:Temp.MotorTMS
Resolution
Level
Response
Fault counter
Motor temperature sensor
reports overtemperature
(connection clamp X2).
Warning and malfunction
can be parameterized in
U15.
The parameterized malfunction reaction in the
A29 parameter.
Z41
Possible cause
Test
Measure
Acknowledgement
The motor temperature
sensor is not connected.
Check whether the motor temperature sensor is connected to X2 and
whether the wiring is OK.
Connect the cable properly.
Switch the device on/off
or programmed acknowledgement
The motor is overloaded
Check whether the operating condi- •
tions have caused the motor to overheat (load state, ambient
•
temperature of the motor, etc.).
Check and, if necessary, correct
the drive design.
Check whether a blockage
caused overheating.
Diagnosis
Operating Manual
78
13
WE KEEP THINGS MOVING
ID 442281.00
13.3.12
42:TempBrakeRes
Resolution
Level
Response
Fault counter
The i2t model for the braking resistor exceeds 100% load.
Malfunction
The parameterized malfunction reaction in the
A29 parameter. Note that this event often results
in the triggering of Event 36: Overvoltage. In this
case, the motor coasts.
Z42
Possible cause
Test
Measure
Acknowledgement
The braking resistor
may not be designed
according to the application.
Check whether the load state of the
braking resistor has caused overheating.
Check the drive configuration. Consider a DC link connection or the use
of a braking resistor with a larger
power rating.
Programmed acknowledgement; acknowledgement by switching of/on is
not recommended as in this case the
i2t model is reset to 80 %. As a result,
there is a risk that the braking resistor
will be damaged.
13.3.13
44:External fault
Resolution
Level
Response
Fault counter
Application-specific or by free programming option
Malfunction
The parameterized malfunction reaction in the A29 parameter.
Z44
Application-specific or
—
due to free programming option; can be
separately programmed
for each axis
79
Acknowledgement
—
Switch the device on/off or
programmed acknowledgement
13
WE KEEP THINGS MOVING
Measure
Diagnosis
Test
Operating Manual
Possible cause
ID 442281.00
13.3.14
45:oTempMot. i2t
Resolution
Level
Response
The i2t model for the motor
reaches 100% load.
Parameterized as inactive, The parameterized malfunction reaction in the
message or warning in U10 A29 parameter.
and U11.
Possible cause
Test
Measure
The motor is overloaded
Check whether the operating condi- •
tions have caused the motor to overheat (load state, ambient
temperature of the motor, etc.).
•
•
Fault counter
Z45
Acknowledgement
Take measures to meet the reSwitch the device off/on or
quirements for the operating con- programmed acknowledgeditions.
ment.
Rectify any existing blockages.
If necessary, correct the drive design.
Diagnosis
Operating Manual
80
13
WE KEEP THINGS MOVING
ID 442281.00
13.3.15
46:Low voltage
Resolution
Level
Response
A problem with the supply
voltage or DC link voltage
was detected.
•
The parameterized malfunction reaction in the
Z46
A29 parameter for cause 1 and 2. For cause 3, the
motor always coasts except when U30 Emergency stop is activated.
•
•
Cause 1: Parameterized in U00 and U01
Cause 2: Warning with
10 s warning time
Cause 3: Malfunction
Fault counter
Cause
Description
Measure
Acknowledgement
1:low Voltage
The value in E03 DC link voltage has
fallen below the value parameterized
in A35 Undervoltage limit.
Check whether the supply voltage
corresponds to the specification.
2:network phase
The line monitoring has detected that Check the line fuse and wiring.
a phase is missing when the power
stage is switched on.
Can be acknowledged for malfunction level by switching the
device off/on or programmed
acknowledgement.
3:drop in network
If the line monitoring detects that the Check whether the supply voltage
line is missing, the load relay is imcorresponds to the specification or
mediately switched off. Normal oper- whether there is a power failure.
ation is maintained. If the line return
of the power stage is still switched
on, a malfunction is triggered after
0.5 s.
Diagnosis
Operating Manual
81
13
WE KEEP THINGS MOVING
ID 442281.00
13.3.16
47:TorqueLimit
Resolution
Level
Response
Fault counter
The maximum torque permitted for static Can be paThe parameterized malfunction reaction in the
operation is exceeded in the control
rameterized in A29 parameter.
types of servo control, vector control or U20 and U21
sensorless vector control (E62 act. pos.
T-max, E66 act. neg. T-max). Note that
in many cases, operation at the torque
limit is desirable.
Z47
Possible cause
Test
Measure
Acknowledgement
Incorrect parameterization
Check whether the torque moments
in E62 and E66 correspond with your
projection.
Correct the setting of the parameters
in C03, C05, C06, C130 and C230.
Drive overloaded
Check the load situation of your
drive.
Rectify any existing blockages.
Can be acknowledged for malfunction level by switching the
device off/on or programmed
acknowledgement.
Diagnosis
Operating Manual
82
13
WE KEEP THINGS MOVING
ID 442281.00
13.3.17
52:Communication
Resolution
Level
Communication malfunction
Malfunction
Response
Fault counter
Z52
1:CAN LifeGuard
The device detects the Life-Guarding Check the CANOpen master.
event (master no longer sends any
Remote Transmit Request).
Switch off/on the Esc key of
the device at the front of the inverter or rising flank of the enable signal or programmed
acknowledgement
2:CAN Sync Error
Sync message was not received
within the timeout period that is calculated from the A201 Cycle Period
Timeout as follows:
• A201≤20 ms:
Timeout period = A201 * 4,
• 20 ms < A201≤ 200 ms:
Timeout period = A201 * 3,
• else: Timeout period = A201 * 2
Make sure that the A201 parameter is correctly set.
Make sure that the master sends
the sync message reliably.
Switch off/on the Esc key of
the device at the front of the inverter or rising flank of the enable signal or programmed
acknowledgement
Make sure that the CAN baud
rate was correctly set.
Check the wiring
Check the bit timing of a different
CAN subscriber.
Switch off/on the Esc key of
the device at the front of the inverter or rising flank of the enable signal or programmed
acknowledgement
3:CAN Bus Off
Measure
•
•
The CAN controller in the inverter
•
has switched off due to critical and
repeated CAN bit timing errors. The •
CAN controller is restarted after a
•
waiting time of 2 s and acknowledgement of the malfunction.
83
13
WE KEEP THINGS MOVING
Acknowledgement
Diagnosis
Description
Operating Manual
Cause
ID 442281.00
Cause
Description
4:PZD-Timeout
•
•
Measure
Failure of the cyclic data connec- •
tion (PROFIBUS master no longer sends) or connection is faulty •
or
PROFINET IO controller no longer sends or the connection is
faulty)
Check the PLC (RUN switch, set
cycle time).
Check the wiring
Acknowledgement
Switch off/on the Esc key of
the device at the front of the inverter or rising flank of the enable signal or programmed
acknowledgement
5:USS
Failure of cyclic data connection
(USS).
Check the USS master.
Switch off/on the Esc key of
the device at the front of the inverter or rising flank of the enable signal or programmed
acknowledgement
6:EtherCAT PDO-Ti
The inverter did not receive process
data in the time period that was parameterized in A258.
•
Switch the device off/on or
programmed acknowledgement. Note that an action must
also occur in the controller or
the EtherCAT master for complete acknowledgement.
•
84
13
WE KEEP THINGS MOVING
Diagnosis
•
Operating Manual
•
•
Make sure that the A252.x,
A253.x, A256, A257.x, A258,
A259.x, A260, A261.x, A262.x,
A263.x, A264.x, A265.x, A266
and A267.x parameters are correctly set.
Make sure that the timeout value
parameterized in A258 matches
the A150 cycle time (of the inverter) and the cycle time of the
controller or EtherCAT masters
that were selected.
Check the wiring
Check the EtherCat state of the
inverter and the controller or EtherCAT master.
Check whether CoE emergency
messages are present in the controller or the EtherCAT master.
ID 442281.00
Cause
Description
Measure
Acknowledgement
7:EtherCAT-DcSYN
If the inverter is synchronised to EtherCAT by means of the Distributed
Clock, the "SYNC 0" synchronisation
signal is checked by a watchdog. If
this SYNC 0 signal remains for a certain time (that can not be parameterized), this cause is triggered. This
cause can only be triggered for EtherCAT with synchronization by the
Distributed Clock.
•
•
Switch the device off/on or
programmed acknowledgement. Note that an action must
also occur in the controller or
the EtherCAT master for complete acknowledgement.
•
•
Check the controller.
Make sure that the wiring is in accordance with electromagnetic
interference regulations.
Replace the ECS 5000.
Please contact our service department, see section 1.4 Further
support
8:IGB µC failure
The microcontroller for the IGB com- •
munication has failed.
•
Check the wiring for EM-compli- Switch the device on/off or
ant design.
programmed acknowledgeThe inverter must be sent in for ment
repair. Please contact our service
department, see section 1.4 Further support
9:IGB Lost Frame
IGB-Motionbus: The subscriber has
detected the loss of min. 2 consecutive data frames (double error). This
cause can only occur when the IGB
state = 3:Motionbus and the motor is
powered.
Make sure that all inverters in the Switch the device on/off or
IGB network are switched on.
programmed acknowledgeMake sure that all connection ca- ment
bles are plugged in.
10:IGB P. LostFr
Switch the device on/off or
programmed acknowledgement
Diagnosis
85
13
WE KEEP THINGS MOVING
•
Operating Manual
IGB-Motionbus: A different subscriber has detected a double error and
reported this via A163. As a result,
this inverter is also faulty with this
cause. This cause can only occur
when the IGB state = 3:Motionbus
and the motor is powered.
•
ID 442281.00
Cause
Description
Measure
11:IGB Sync Erro
The synchronisation within the inverter is faulty as the configuration
was stopped by POSITool. This
cause can only occur when the IGB
state = 3:Motionbus and the motor is
powered.
•
12:IGB ConfigTim
An IGB Motionbus consumer module
or producer module in the graphical
programming was called up at the
wrong time. The module was called
up too early or closed too late. This
cause can only occur when the IGB
state = 3:Motionbus and the motor is
powered.
Adjust the run-time sequence of the
modules, transfer the changed configuration to the inverter and save it
there. Restart the inverter.
Switch the device off/on or
programmed acknowledgement.
13:IGBPartnerSyn
There is a synchronisation malfunction for another subscriber in the IGB
network (see cause 11). This subscriber reported its malfunction via
A163. As a result, this inverter is also
faulty with cause 13. This cause can
only occur when the IGB state =
3:Motionbus and the motor is powered.
Check the inverter that displays
event 52 with cause 11.
Switch the device on/off or
programmed acknowledgement
Start the configuration in the in- Switch the device on/off or
verter.
programmed acknowledgeIf the result occurs with this
ment
cause for a running configuration, the inverter must be sent in
for repair. Please contact our service department, see section 1.4
Further support
Diagnosis
Operating Manual
86
13
WE KEEP THINGS MOVING
•
Acknowledgement
ID 442281.00
13.3.18
55:OptionBoard
Resolution
Level
Error when operating with option board. Malfunction
Response
Fault counter
The parameterized malfunction reaction in the
A29 parameter.
Z55
Measure
1:CAN5000Failure
CAN 5000 was detected, installed
and failed.
•
•
2:DP5000Failure
DP 5000 was detected, installed and
failed.
Uninstall and reinstall the option. Switch the device on/off or
Replace the option.
programmed acknowledgement
3:REA5000Failure
REA 5000 was detected, installed
and failed.
4:SEA5000failure
SEA 5000 was detected, installed
and failed.
5:XEA5000Failure
XEA 5000 or XEA 5001 was detected, installed and failed.
6:InkSim-Init
Incremental encoder simulation on
XEA could not be initialized. The motor may have rotated during initialization.
7:wrongOption
incorrect or missing option board
(seeE54/E58 with E68/E69)
•
•
Install the projected option.
Adjust the projection.
8:LEA5000failure
LEA 5000 was detected, installed
and failed.
•
•
Uninstall and reinstall the option. Switch the device on/off or
Replace the option.
programmed acknowledgement
87
Switch device off/on
13
WE KEEP THINGS MOVING
Acknowledgement
Diagnosis
Description
Operating Manual
Cause
ID 442281.00
Cause
Description
Measure
9:ECS5000failure
ECS 5000 was detected, installed
and failed.
•
•
10:24Vfailure
Failure of 24V supply for XEA 5001
or LEA 5000.
Check and, if necessary, correct the
24V supply of the option.
11:SEA5001failure
SEA 5001 was detected, installed
and failed.
•
•
Uninstall and reinstall the option. Switch the device on/off or
Replace the option.
programmed acknowledgement
12:REA5001failure
REA 5001 was detected, installed
and failed.
•
•
Uninstall and reinstall the option. Switch the device on/off or
Replace the option.
programmed acknowledgement
13:PN5000 Failure1
PN 5000 was detected, installed and •
failed. Basic hardware tests have detected an error.
•
14:PN5000 failure2
PN 5000 was detected, installed and
failed. Basic software tests have detected an error.
15:PN5000 failure3
PN 5000 was detected, installed and
failed. The watchdog function of the
PN-5000 monitoring system has detected an error.
•
for SDS 5000: Option board with old
hardware version (XEA 5001: from
HW 10, REA 5000: from HW 19)
•
•
Switch device off/on
Check whether the PN 5000 ac- Switch device off/on
cessory was correctly installed.
Check whether suitable EMC
measures were taken.
Switch device off/on
Check whether only PROFINETcertified components were connected to the inverter.
Check whether the cabeling and Switch device off/on
connections correspond to the
PROFINET standard.
Contact the service department,
see section 1.4 Further support.
Install the projected option.
Adjust the projection.
Switch device off/on
Diagnosis
88
13
WE KEEP THINGS MOVING
•
Uninstall and reinstall the option. Switch the device on/off or
Replace the option.
programmed acknowledgement
Operating Manual
17:opt.2 too old
•
Acknowledgement
ID 442281.00
13.3.19
56:Overspeed
Resolution
Level
Response
Fault counter
The measured speed is larger than C01
x 1.1 + 100 rpm.
Malfunction
The motor always coasts (from V5.0D) except
Z56
when U30 Emergency stop is activated. Any existing brakes are engaged if they were not released
via F100 independent of the device controller.
Measure
Incorrect parameterization of the encoder
Check the parameterization of the
encoder, e.g. the line number of the
incremental encoders.
If necessary, correct the parameters. Switch the device on/off or
programmed acknowledgement
Lag error too large
Use a Scope recording to check
whether the value in E07 is larger
than C01 at the time of the error.
Correct the parameters (ramps,
torque limits, etc.).
Motor overshoots
Use a Scope recording to check the
value in E91 is larger than E07 at the
time of the error.
Optimize the parameterization of the
speed controller (C31 ,C32).
Incorrect commutation
offset for the encoder of
a servo motor
Perform the B40 phase test action.
The B40 phase testaction must be in
accordance with specifications.
Encoder faulty
Check whether a speed that clearly
differs to zero is displayed in E91
during a motor standstill.
The motor must be sent in for repair.
Please contact our service department, see section 1.4 Further support
89
13
WE KEEP THINGS MOVING
Acknowledgement
Diagnosis
Test
Operating Manual
Possible cause
ID 442281.00
13.3.20
57:Runtime usage
Resolution
Level
Response
Fault counter
The cycle time of a real time cycle was
exceeded.
Malfunction
The parameterized malfunction reaction in the
A29 parameter.
Z57
Cause
Description
Measure
2:RT2
Cycle time of real time task 2 exceed- The inverter must be sent in for reed (1 ms).
pair. Please contact our service department, see section 1.4 Further
support
3:RT3
Cycle time of real time task 3 exceed- Set a higher cycle time in A150.
ed (technology task).
4:RT4
Cycle time of real time task 4 exceeded (32 ms).
5:RT5
Cycle time of real time task 5 exceeded (256 ms).
Acknowledgement
Switch the device on/off or
programmed acknowledgement
Diagnosis
Operating Manual
90
13
WE KEEP THINGS MOVING
ID 442281.00
13.3.21
58:Grounded
Resolution
Level
Unbalanced motor currents were detect- Malfunction
ed. This involves a hardware from the
power stage for MDS 5000 size 3 or
SDS 5000 size 3.
Response
Fault counter
The motor continues to coast. Any existing brakes are
engaged if they were not released via F100 independent
of the device controller. The brake chopper is switched
off as long as the malfunction is present.
Z58
Possible cause
Test
Measure
Acknowledgement
Ground fault in motor
Check the motor.
Replace the motor.
Fault in motor cable
Check the cable.
Replace the cable
Switch the device on/off or
programmed acknowledgement
Connection fault
Check the connection, e.g. whether Correct the connection.
V or W is connected to PE at X20 U.
13.3.22
59:TempDev. i2t
Resolution
Level
Response
Fault counter
The i2t model calculated for the inverter
exceeds 105% of thermal load.
Malfunction
The parameterized malfunction reaction in the
A29 parameter.
Z59
Measure
Inverter overloaded
Check the load situation of your
drive.
•
•
Cycle frequency too
high
Check the load situation of your drive
under consideration of the derating.
91
Reduce any existing loads (lubri- Switch the device on/off or
cations, blockages, etc.).
programmed acknowledgeUse a drive with a suitable power ment
rating.
Reduce B24.
Use a drive with a suitable power
rating.
13
WE KEEP THINGS MOVING
•
•
Acknowledgement
Diagnosis
Test
Operating Manual
Possible cause
ID 442281.00
13.3.23
60-67:Application events 0-7
Resolution
Level
Response
Fault counter
Application-specific or due to free programming option; can be separately programmed for each axis
• Message/warning: Evaluation occurs in 256 ms cycle.
• Malfunction: Evaluation occurs in
parameterized cycle time (A150)
Can be paThe parameterized malfunction reaction in the
rameterized in A29 parameter.
the U100,
U110, U120,
etc. up to
U170 system
parameters.
Z60 to Z67
Possible cause
Test
Measure
Acknowledgement
Application-specific or due to
free programming option; can
be separately programmed for
each axis
—
—
Switch the device on/off or
programmed acknowledgement
13.3.24
68: External fault
Resolution
Level
Fault counter
The parameterized malfunction reaction in the
A29 parameter.
Z68
Test
Measure
Acknowledgement
Application-specific or
by free programming
option
—
—
Switch the device on/off or
programmed acknowledgement
92
13
WE KEEP THINGS MOVING
Diagnosis
Possible cause
Operating Manual
Application-specific or by free program- Malfunction
ming option; should be used for application events that may only be
parameterized on the malfunction level.
Response
ID 442281.00
13.3.25
69:Motor connect.
Resolution
Level
Response
Fault counter
Motor connection error
Can be parameterized as
inactive or malfunction in
U12
The parameterized malfunction reaction in the
A29 parameter.
Z69
Cause
Description
Measure
1:motorNotDiscon
The protection did not open during
Replace the protection.
the axis change. This cause can only
be determined when at least two
phases stick and the intermediate circuit is loaded (see E03).
2:no motor
Possibly no motor connected or the
line to the motor is interrupted.
Acknowledgement
Switch the device on/off or
programmed acknowledgement
Check the connection of the motor.
Diagnosis
Operating Manual
93
13
WE KEEP THINGS MOVING
ID 442281.00
13.3.26
70:Param.consist
Resolution
Level
Response
Fault counter
Conflicting parameterization.
Malfunction
A malfunction is only triggered when enabled for
faulty parameterization.
Z70
Measure
Acknowledgement
1:Encoder type
The B20 control type is set to servo
but no corresponding encoder is selected (B26, H.. parameter).
Correct the parameterization.
Switch the device on/off or
programmed acknowledgement
2:X120-direction
X120 is used as the source in a pa- Correct the parameterization.
rameter but is parameterized in H120
as a drain (or vice-versa).
3:B12<->B20
B20 control type is not set to the ser- Correct the parameterization.
vo but the rated motor current (B12)
exceeds the 4 kHz rated current
(R24) of the device by more than
1.5x.
Switch the device on/off or
programmed acknowledgement
4:B10<->H31
The set motor pole number (B10)
and the resolver pole number (H31)
do not match.
Correct the parameterization.
Switch the device on/off or
programmed acknowledgement
5:neg. slip
When using the control types U/f,
SLVC or Vector Control (B20): Control type set to "ASM": The values for
the rated motor speed (B13), rated
motor frequency (B15) and motor
pole number (B10) result in a negative slippage.
Correct the parameterization.
Switch the device on/off or
programmed acknowledgement
94
13
WE KEEP THINGS MOVING
Diagnosis
Description
Operating Manual
Cause
ID 442281.00
Cause
Description
Measure
Acknowledgement
6:Torque limit
When using the values entered in
C03 or C05, the maximum current of
the inverter is exceeded. Enter lower
torque limits.
Correct the parameterization.
Switch the device on/off or
programmed acknowledgement
7:B26:SSI-Slave
SSI slave must not be used as a mo- Correct the parameterization.
tor encoder (synchronisation problems).
Switch the device on/off or
programmed acknowledgement
8:C01>B83
C01 must not be larger than B83.
Correct the parameterization.
Switch the device on/off or
programmed acknowledgement
9:E102/E103 faulty
An attempt was made to apply a
master position via the IGB but the
required E102 and E103 parameters
are not available.
Correct the parameterization.
Switch the device on/off or
programmed acknowledgement
10: G104<->G27
A master position is sent via the IGB
Motionbus (i.e. G104 is not set to
0:inactive ) but the 0:inactive and
6:IGB settings valid for this case
could not be detected in G27.
Correct the parameterization.
Switch the device on/off or
programmed acknowledgement
Diagnosis
Operating Manual
95
13
WE KEEP THINGS MOVING
ID 442281.00
13.3.27
71:Firmware
Resolution
Level
Response
Fault counter
A firmware error was detected.
Malfunction
Causes 1 and 2 only occur when the device starts
so that the inverter can not be enabled. Cause 3
can also occur during operation.
Z71
Cause
Description
Measure
Acknowledgement
1:FW defective
Only for SDS 5000: An active firmware error was detected or faulty
firmware was detected in the firmware download memory.
Reload the firmware using the POSI- Switch device off/on
Tool software. Also note the Service
section.
2:Activate FW!
Only for SDS 5000: The firmware
was loaded into the inverter but not
yet activated.
Activate the firmware and perform a
device restart. Also note the Service
section.
3:CRC error
A firmware error was detected.
Switch off the 24V supply and switch
it on again. If the error occurs repeatedly, contact our service department,
see section 1.4 Further support
Diagnosis
Operating Manual
96
13
WE KEEP THINGS MOVING
ID 442281.00
13.3.28
72:Brake test
Resolution
Level
Response
For active brake management in the SDS 5000, the
time set in B311 has
elapsed without the B300
Brake test action having
been performed.
Message until the time set This malfunction only occurs with the enable
in B311Timeout for brake
switched off.
testB300 has elapsed twice
and afterwards a malfunction occurs.
Cause
Description
Measure
1:B311Timeout
The time entered in B311 Timeout for
brake test B300 has elapsed twice
without the B300 Brake test action
having been performed.
Perform the B300 Brake test action.
2:brakeDefective
When performing the brake test ac- •
tion, the holding torque entered in
B304 or B305 could not be applied or •
the encoder test run included in the
brake test was completed with errors.
Z72
Acknowledgement
For the Malfunction level, the
event can be acknowledged
for a duration of 5 minutes to
be able to perform the B300
Brake test action. If this time
Perform the brake grinding funcelapses without the B300
tion and then the brake test.
Brake test action being sucThe motor must be sent in for recessfully performed, the inpair. Please contact our service
verter changes to the
department, see section 1.4 FurMalfunction state again. If the
ther support
B300 Brake test action is successfully performed, the event
is automatically acknowledged.
Diagnosis
Operating Manual
97
13
WE KEEP THINGS MOVING
Fault counter
ID 442281.00
13.3.29
73:Ax2braketest
Resolution
Level
Response
For active brake management in the SDS 5000, the
time set in B311 has
elapsed without the B300
Brake test action with active axis 2 having been performed.
Message until the time set This malfunction only occurs with the enable
in B311Timeout for brake
switched off.
testB300 has elapsed twice
and afterwards a malfunction occurs.
Cause
Description
Measure
1:B311Timeout
The time entered in B311 Timeout for
brake test B300 has elapsed twice
without the B300 Brake test action
with active axis 2 having been performed.
Perform the B300 Brake test action.
2:brakeDefective
When performing the brake test ac- •
tion with active axis 2, the holding
torque entered in B304 or B305 could •
not be applied or the encoder test run
included in the brake test was completed with errors.
Z73
Acknowledgement
Diagnosis
For the Malfunction level, the
event can be acknowledged
for a duration of 5 minutes to
be able to perform the B300
Brake test action. If this time
elapses without the B300
Perform the brake grinding funcBrake test with active axis 2
tion and then the brake test.
being successfully performed,
The motor must be sent in for rethe inverter changes to the
pair. Please contact our service
Malfunction state again. If the
department, see section 1.4 FurB300 Brake test action is sucther support
cessfully performed, the event
is automatically acknowledged.
Operating Manual
98
13
WE KEEP THINGS MOVING
Fault counter
ID 442281.00
13.3.30
74:Ax3braketest
Resolution
Level
Response
For active brake management in the SDS 5000, the
time set in B311 has
elapsed without the B300
Brake test action with active axis 3 having been performed.
Message until the time set This malfunction only occurs with the enable
in B311Timeout for brake
switched off.
testB300 has elapsed twice
and afterwards a malfunction occurs.
Cause
Description
Measure
1:B311Timeout
The time entered in B311 Timeout for
brake test B300 has elapsed twice
without the B300 Brake test action
with active axis 3 having been performed.
Perform the B300 Brake test action.
2:brakeDefective
When performing the brake test ac- •
tion with active axis 3, the holding
torque entered in B304 or B305 could •
not be applied or the encoder test run
included in the brake test was completed with errors.
Z74
Acknowledgement
Diagnosis
For the Malfunction level, the
event can be acknowledged
for a duration of 5 minutes to
be able to perform the B300
Brake test action. If this time
elapses without the B300
Perform the brake grinding funcBrake test with active axis 3
tion and then the brake test.
being successfully performed,
The motor must be sent in for rethe inverter changes to the
pair. Please contact our service
Malfunction state again. If the
department, see section 1.4 FurB300 Brake test action is sucther support
cessfully performed, the event
is automatically acknowledged.
Operating Manual
99
13
WE KEEP THINGS MOVING
Fault counter
ID 442281.00
13.3.31
75:Ax4braketest
Resolution
Level
Response
For active brake management in the SDS 5000, the
time set in B311 has
elapsed without the B300
Brake test action with active axis 4 having been performed.
Message until the time set This malfunction only occurs with the enable
in B311Timeout for brake
switched off.
testB300 has elapsed twice
and afterwards a malfunction occurs.
Cause
Description
Measure
1:B311Timeout
The time entered in B311 Timeout for
brake test B300 has elapsed twice
without the B300 Brake test action
with active axis 4 having been performed.
Perform the B300 Brake test action.
2:brakeDefective
When performing the brake test ac- •
tion with active axis 4, the holding
torque entered in B304 or B305 could •
not be applied or the encoder test run
included in the brake test was completed with errors.
Z75
Acknowledgement
Diagnosis
For the Malfunction level, the
event can be acknowledged
for a duration of 5 minutes to
be able to perform the B300
Brake test action. If this time
elapses without the B300
Perform the brake grinding funcBrake test with active axis 4
tion and then the brake test.
being successfully performed,
The motor must be sent in for rethe inverter changes to the
pair. Please contact our service
Malfunction state again. If the
department, see section 1.4 FurB300 Brake test action is sucther support
cessfully performed, the event
is automatically acknowledged.
Operating Manual
100
13
WE KEEP THINGS MOVING
Fault counter
ID 442281.00
13.3.32
#004:illeg.Instr
Resolution
Level
Response
An unknown operation code was detected.
Malfunction
The motor coasts, the microprocessor is stopped and all device
functions are inoperable.
Possible cause
Test
Measure
Acknowledgement
Error in code memory
(bit dumped, permanent).
Reestablish the operating conditions
at the time of the error and check
whether the error occurs again.
•
Switch inverter off/on
EMC error:
Check the wiring for EMC-compliant
design.
Wire according to EMC regulations.
13.3.33
•
Reload the application in the inverter and save it.
Perform a firmware upgrade.
#006:illSlotInst
Resolution
Level
Response
An invalid operation code was detected after a jump command.
Malfunction
The motor coasts, the microprocessor is stopped and all device
functions are inoperable.
Measure
Acknowledgement
Error in code memory
(bit dumped, permanent).
Reestablish the operating conditions
at the time of the error and check
whether the error occurs again.
•
Switch inverter off/on
EMC error:
Check the wiring for EMC-compliant
design.
Wire according to EMC regulations.
101
13
WE KEEP THINGS MOVING
•
Reload the application in the inverter and save it.
Perform a firmware upgrade.
Diagnosis
Test
Operating Manual
Possible cause
ID 442281.00
13.3.34
#009:CPU AddrErr
Resolution
Level
Response
The address for data access is invalid.
Malfunction
The motor coasts, the microprocessor is stopped and all device
functions are inoperable.
Possible cause
Test
Measure
Acknowledgement
Error in code memory
(bit dumped, permanent).
Reestablish the operating conditions
at the time of the error and check
whether the error occurs again.
•
Switch inverter off/on
EMC error:
Check the wiring for EMC-compliant
design.
Wire according to EMC regulations.
13.3.35
•
Reload the application in the inverter and save it.
Perform a firmware upgrade.
#00c:StackOverfl
Resolution
Level
Response
A stack that is too small was detected.
Malfunction
The motor coasts, the microprocessor is stopped and all device
functions are inoperable.
Measure
Acknowledgement
Error in code memory
(bit dumped, permanent).
Reestablish the operating conditions
at the time of the error and check
whether the error occurs again.
•
Switch inverter off/on
EMC error:
Check the wiring for EMC-compliant
design.
Wire according to EMC regulations.
102
13
WE KEEP THINGS MOVING
•
Reload the application in the inverter and save it.
Perform a firmware upgrade.
Diagnosis
Test
Operating Manual
Possible cause
ID 442281.00
13.3.36
*ParaModul ERROR:update firmware!
Resolution
Level
Response
The versions of configuration and firmware
do not match.
—
The configuration does not start.
Possible cause
Test
Measure
Old firmware version
—
Apply a suitable configuration or firm- —
ware.
13.3.37
Acknowledgement
*ParaModul ERROR: file not found
Resolution
Level
Response
The Paramodule file can not be read.
—
The configuration does not start.
Possible cause
Test
Measure
Acknowledgement
May have been
switched off during the
A00 action.
—
•
—
Faulty or unformatted
Paramodule
—
•
Replace the Paramodule.
—
Diagnosis
Operating Manual
103
13
WE KEEP THINGS MOVING
Apply a suitable configuration via
POSITool and then save it (A00)
Attach a suitable Paramodule.
ID 442281.00
13.3.38
*ParaModul ERROR: Checksum error
Resolution
Level
Response
A checksum error was detected when load- —
ing from the Paramodule.
The configuration does not start.
Possible cause
Test
Measure
Acknowledgement
Memory bit dumped.
—
Apply a suitable configuration via
POSITool and then save it (A00)
—
13.3.39
*ParaModul ERROR: ksb write error
Resolution
Level
Response
An error was detected when writing the con- —
figuration in the configuration memory.
The configuration does not start.
Possible cause
Test
Measure
Acknowledgement
Faulty flash memory.
—
Replace the Paramodule.
—
•
Apply a suitable configuration via
POSITool and then save it (A00)
Replace the Paramodule.
Diagnosis
104
13
WE KEEP THINGS MOVING
•
Operating Manual
The configuration is too
large for the configuration memory.
ID 442281.00
13.3.40
*ConfigStartERROR parameters lost
Resolution
Level
Response
No parameter values are saved in the Paramodule.
—
The configuration does not start.
Possible cause
Test
Measure
Acknowledgement
The control part was
switched off while A00
was active.
—
•
—
13.3.41
•
Apply a suitable configuration via
POSITool and then save it (A00)
Replace the Paramodule.
*ConfigStartERROR remanents lost
Resolution
Level
Response
No flag values are saved.
—
The configuration does not start.
Possible cause
Test
Measure
Acknowledgement
The A00 Save values
action was not performed.
—
•
—
•
Apply a suitable configuration via
POSITool and then save it (A00)
Replace the Paramodule.
Diagnosis
Operating Manual
105
13
WE KEEP THINGS MOVING
ID 442281.00
13.3.42
*ConfigStartERROR unknown block
Resolution
Level
Response
The versions of configuration and firmware
do not match.
—
The configuration does not start.
Possible cause
Test
Measure
The configuration saved in the —
Paramodule originates from a
newer inverter firmware that
recognises more system modules.
13.3.43
Acknowledgement
Apply a suitable configuration or firm- —
ware via POSITool.
*ConfigStartERROR unknown string
Resolution
Level
Response
The versions of configuration and firmware
do not match.
—
The configuration does not start.
Measure
The configuration saved in the
Paramodule originates from a
newer inverter firmware that
recognises more texts (e.g.
name of the system standard
module parameters).
—
Apply a suitable configuration or firm- —
ware via POSITool.
106
13
WE KEEP THINGS MOVING
Acknowledgement
Diagnosis
Test
Operating Manual
Possible cause
ID 442281.00
13.3.44
*ConfigStartERROR unknown scale
Resolution
Level
Response
The versions of configuration and firmware
do not match.
—
The configuration does not start.
Possible cause
Test
Measure
The configuration saved in the —
Paramodule originates from a
newer inverter firmware that
recognises more scaling functions.
13.3.45
Acknowledgement
Apply a suitable configuration or firm- —
ware via POSITool.
*ConfigStartERROR unknown limit
Resolution
Level
Response
The versions of configuration and firmware
do not match.
—
The configuration does not start.
Measure
The configuration saved in the
Paramodule originates from a
newer inverter firmware that
recognises more limit value
functions.
—
Apply a suitable configuration or firm- —
ware via POSITool.
107
13
WE KEEP THINGS MOVING
Acknowledgement
Diagnosis
Test
Operating Manual
Possible cause
ID 442281.00
13.3.46
*ConfigStartERROR unknown post-wr
Resolution
Level
Response
The versions of configuration and firmware
do not match.
—
The configuration does not start.
Possible cause
Test
Measure
The configuration saved in the
Paramodule originates from a
newer inverter firmware that
recognises more PostWrite
functions.
—
Apply a suitable configuration or firm- —
ware via POSITool.
13.3.47
Acknowledgement
*ConfigStartERROR unknown pre-rd
Resolution
Level
Response
The versions of configuration and firmware
do not match.
—
The configuration does not start.
Possible cause
Test
Apply a suitable configuration or firm- —
ware via POSITool.
Diagnosis
108
13
WE KEEP THINGS MOVING
Acknowledgement
Operating Manual
The configuration saved in the —
Paramodule originates from a
newer inverter firmware that
recognises more Pre-read
functions (mapping of firmware parameters to configuration parameters).
Measure
ID 442281.00
13.3.48
*ConfigStartERROR unknown hiding
Resolution
Level
Response
The versions of configuration and firmware
do not match.
—
The configuration does not start.
Possible cause
Test
The configuration saved in the Para- —
module originates from a newer inverter firmware that knows more hide
functions (hide parameters that
should be visible depending on other
parameters).
13.3.49
Measure
Acknowledgement
Apply a suitable configuration or firm- —
ware via POSITool.
no configuration paramodul error
When displaying no configuration paramodule error, the device start-up is ended and an error was detected by the Paramodule during start-up.
Note also the events in section 13.3.36 *ParaModul ERROR:update firmware! to 13.3.39 *ParaModul ERROR: ksb write error
Alternating to the event display, STÖBER ANTRIEBSTECHNIK appears.
13.3.50
no configuration start error
configuration stopped
When displaying configuration stopped, the current configuration was stopped. Apply a configuration or switch the inverter off and on again so
that the previous configuration can be loaded from the Paramodule.
109
13
WE KEEP THINGS MOVING
Diagnosis
13.3.51
Operating Manual
When displaying no configuration start error, the device start-up is ended and an error was detected when starting the configuration. Note also
the events in section 13.3.40 *ConfigStartERROR parameters lost to 13.3.48 *ConfigStartERROR unknown hiding
Alternating to the event display, STÖBER ANTRIEBSTECHNIK appears.
WE KEEP THINGS MOVING
Notes
ID 442281.00
110
Global Presence
Address registers
Always up to date on the internet: www.stoeber.de → contact
• Technical Offices (TB) for advice and marketing in Germany
• Global presence for advice and marketing in about 25 countries
• Service Network Germany
• Service Network International
• STÖBER Subsidiaries:
STÖBER ANTRIEBSTECHNIK GmbH
Fabriksplatz 1
4662 Steyrermühl
Fon +43 7613 7600-0
Fax +43 7613 7600-2525
eMail: [email protected]
www.stoeber.at
Switzerland
STÖBER SCHWEIZ AG
Rugghölzli 2
5453 Remetschwil
Fon +41 56 496 96 50
Fax +41 56 496 96 55
eMail: [email protected]
www.stoeber.ch
China
STOBER CHINA
German Centre Beijing
Unit 2010, Landmark Tower 2,
8 North Dongsanhuan Road
Chaoyang District
100004 Beijing
Fon +86 10 65907391
Fax +86 10 65907393
eMail: [email protected]
www.stoeber.cn
USA
STOBER DRIVES INC.
1781 Downing Drive
Maysville, KY 41056
Fon +1 606 7595090
Fax +1 606 7595045
eMail: [email protected]
www.stober.com
Great Britain
STOBER DRIVES LTD.
Ability House
121 Brooker Road, Waltham Abbey
Essex EN9 1JH
Fon +44 1992 709710
Fax +44 1992 714111
eMail: [email protected]
www.stober.co.uk
Japan
STOBER Japan
P.O. Box 113-002, 6 chome
15-8, Hon-komagome
Bunkyo-ku
Tokyo
Fon +81 3 5395-6788
Fax +81 3 5395-6799
eMail: [email protected]
www.stober.co.jp
France
STÖBER S.a.r.l.
131, Chemin du Bac à Traille
Les Portes du Rhône
69300 Caluire et Cuire
Fon +33 4 78989180
Fax +33 4 78985901
eMail: [email protected]
www.stober.fr
Italy
STÖBER TRASMISSIONI S. r. l.
Via Risorgimento, 8
20017 Mazzo di Rho (Milano)
Fon +39 02 93909-570
Fax +39 02 93909-325
eMail: [email protected]
www.stoeber.it
www.stoeber.de
Austria
m
STÖBER ANTRIEBSTECHNIK GmbH + Co. KG
Kieselbronner Str. 12
75177 PFORZHEIM
GERMANY
Tel. +49 (0)7231 582-0
Fax. +49 (7231) 582-1000
E-Mail: [email protected]
24/h service hotline +49(0) 180 5 786 323
www.stober.com
Technische Änderungen vorbehalten
Errors and changes excepted
ID 442281.00
03/2011