1
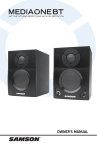
OWNER'S MANUAL Copyright 2013 v1.6 Samson Technologies Corp. 45 Gilpin Avenue Hauppauge, New York 11788-8816 Phone: 1-800-3-SAMSON (1-800-372-6766) Fax: 631-784-2201 www.samsontech.com The Bluetooth® word mark and logos are registered trademarks owned by Bluetooth SIG, Inc. and any use of such marks by Samson Technologies is under license. Other trademarks and trade names are those of their respective owners.” Important Safety Information AVIS RISQUE DE CHOC ÉLECTRONIQUE NE PAS OUVRIR WARNING: TO REDUCE THE RISK OF ELECTRIC SHOCK, DO NOT REMOVE COVER (OR BACK) AS THERE ARE NO USER-SERVICEABLE PARTS INSIDE. REFER SERVICING TO QUALIFIED SERVICE PERSONNEL. This lightning flash with arrowhead symbol within an equilateral triangle is intended to alert the user to the presence of non-insulated “dangerous voltage” within the product’s enclosure that may be of sufficient magnitude to constitute a risk of electric shock. The exclamation point within an equilateral triangle is intended to alert the user to the presence of important operating and maintenance instructions in the literature accompanying the appliance. If you want to dispose this product, do not mix it with general household waste. There is a separate collection system for used electronic products in accordance with legislation that requires proper treatment, recovery and recycling. Private household in the 25 member states of the EU, in Switzerland and Norway may return their used electronic products free of charge to designated collection facilities or to a retailer (if you purchase a similar new one). For Countries not mentioned above, please contact your local authorities for a correct method of disposal. By doing so you will ensure that your disposed product undergoes the necessary treatment, recovery and recycling and thus prevent potential negative effects on the environment and human health. Important Safety Information 1. Read these instructions. 2. Keep these instructions. 3. Heed all warnings. 4. Follow all instructions. 5. Do not use this apparatus near water. 6. Clean only with dry cloth. 7. Do not block any ventilation openings. Install in accordance with the manufacturer’s instructions. 8. Do not install near any heat sources such as radiators, heat registers, stoves, or other apparatus (including amplifiers) that produce heat. 9. Do not defeat the safety purpose of the polarized or grounding type plug. A polarized plug has two blades with one wider than the other. A grounding type plug has two blades and a third grounding prong. The wide blade or the third prong are provided for your safety. If the provided plug does not fit into your outlet, consult an electrician for replacement of the obsolete outlet. 10. Protect the power cord from being walked on or pinched particularly at the plugs, convenience receptacles, and at the point where they exit from the apparatus. 11. Only use attachments/accessories specified by the manufacturer. 12. Use only with the cart, stand, tripod, bracket, or table specified by the manufacturer, or sold with the apparatus. When a cart is used, use caution when moving the cart/apparatus combination to avoid injury from tip-over. 13. Unplug the apparatus during lightning storms or when unused for long periods of time. 14. Refer all servicing to qualified personnel. Servicing is required when the apparatus has been damaged in any way, such as power supply cord or plug is damaged, liquid has been spilled or objects have fallen into the apparatus has been exposed to rain or moisture, does not operate normally, or has been dropped. 15. The apparatus shall not be exposed to dripping or splashing and that objects filled with liquids, such as vases, shall not be placed on apparatus. 16. Caution-to prevent electric shock, match wide blade plug wide slot fully insert. 17. Please keep a good ventilation environment around the entire unit. 18. WARNING: The mains plug/appliance coupler is used as disconnect device, the disconnect device shall remain readily operable. 19. This equipment is a Class II or double insulated electrical appliance. It has been designed in such a way that it does not require a safety connection to electrical earth. 20. Correct Disposal of this product. This marking indicates that this product should not be disposed with other household wastes throughout the EU. To prevent possible harm to the environment or human health from uncontrolled waste disposal, recycle it responsibly to promote the sustainable reuse of material resources. To return your used device, please use the return and collection systems or contact the retailer where the product was purchased. They can take this product for environmental safe recycling. 21. No naked flame sources, such as lighted candles, should be placed on the apparatus. Important Safety Information FCC Notice 1. T his device complies with Part 15 of the FCC Rules. Operation is subject to the following two conditions: (1) This device may not cause harmful interference. (2) T his device must accept any interference received, including interference that may cause undesired operation. 2. C hanges or modifications not expressly approved by the party responsible for compliance could void the user’s authority to operate the equipment. FCC Statement This equipment has been tested and found to comply with the limits for a Class B digital device, pursuant to Part 15 of the FCC Rules. These limits are designed to provide reasonable protection against harmful interference in a residential installation. This equipment generates uses and can radiate radio frequency energy and, if not installed and used in accordance with the instructions, may cause harmful interference to radio communications. However, there is no guarantee that interference will not occur in a particular installation. If this equipment does cause harmful interference to radio or television reception, which can be determined by turning the equipment off and on, the user is encouraged to try to correct the interference by one or more of the following measures: • Reorient or relocate the receiving antenna. • Increase the separation between the equipment and receiver. • Connect the equipment into an outlet on a circuit different from that to which the receiver is connected. • Consult the dealer or an experienced radio/TV technician for help. RF Warning Statement The device has been evaluated to meet general RF exposure requirement. The device can be used in portable exposure condition without restriction. This device complies with RSS-310 of Industry Canada. Operation is subject to the condition that this device does not cause harmful interference. Table of Contents Introduction . . . . . . . . . . . . . . . . . . . . . . . . . . . 7 MediaOne BT Features . . . . . . . . . . . . . . . . . . . . . . 8 MediaOne BT Layout . . . . . . . . . . . . . . . . . . . . . . .9 Positioning the Speakers . . . . . . . . . . . . . . . . . . . . 11 ® Pairing with a Bluetooth Device . . . . . . . . . . . . . . . . 12 Making Connections . . . . . . . . . . . . . . . . . . . . . . 13 Aux Input . . . . . . . . . . . . . . . . . . . . . . . . . . . 14 Specifications . . . . . . . . . . . . . . . . . . . . . . . . . 15 Introduction Thank you for purchasing the MediaOne BT Studio Reference Monitor with streaming Bluetooth® audio from Samson Technologies. Whether you are in need of a monitor system for your digital recording studio, a video production suite, or if you just want better speakers for gaming and listening to music on your computer, the MediaOne is the perfect solution. The monitor system produces a powerful, full-range sound thanks to the internal amplifier, extended range copolymer woofers, and 1" silk dome tweeters. Plus, the MediaOne system delivers deep bass and extended highs in an amazingly compact size. The MediaOne system includes one active monitor for the right-side and a passive monitor for the left-side. For easy integration into your audio system, the speakers feature the ability to connect two audio sources through either the rear panel RCA inputs or the front panel 3.5mm Aux input. For listening privacy, the speakers will mute when a pair of headphones are connected. Bluetooth connectivity allows you to stream music from your smartphone, tablet, or computer providing the freedom to listen to your music without docking or connecting any wires. In these pages, you’ll find a detailed description of the features of the MediaOne BT monitors, as well as a guided tour through its control panel, step-by-step instructions for its setup and use, and full specifications. You’ll also find a warranty card enclosed—don’t forget to fill it out and mail it in so that you can receive online technical support and so we can send you updated information about these and other Samson products in the future. Also, be sure to check out our website (www.samsontech.com) for complete information about our full product line. We recommend you keep the following records for reference, as well as a copy of your sales receipt. Serial number: ____________________________________________ Date of purchase: __________________________________________ Dealer name: _____________________________________________ With proper care and maintenance, your MediaOne BT monitors will operate troublefree for many years. Should your speakers ever require servicing, a Return Authorization (RA) number must be obtained before shipping your unit to Samson. Without this number, the unit will not be accepted. Please call Samson at 1-800-3SAMSON (1-800-372-6766) for an RA number prior to shipping your unit. Please retain the original packing materials and, if possible, return the unit in its original carton. If your Expedition Express was purchased outside of the United States, contact your local distributor for warranty details and service information. 7 MediaOne BT Features • • wo-way, active studio monitors with ported, tuned enclosures providing T extremely accurate monitoring for desktop recording, playback and multi-media applications. Bluetooth® connectivity for streaming music from your smartphone, computer, or other mobile device • Copolymer woofers with butyl surrounds deliver tight and controlled bass response • 1" silk dome high frequency driver set in a custom-designed wave guide. Produces smooth and natural high frequency response and a wide listening area • Front panel volume control allows you to easily adjust level • Front panel 3.5mm Aux input for connecting a second audio source from an MP3 player, laptop, or any stereo portable audio device • Front panel stereo 3.5mm headphone jack automatically turns off the speakers when headphones are connected • Rear panel RCA inputs accept standard -10 dBV line level input for connecting audio from your computer, mixer, and other stereo line level devices • Magnetically shielded for multimedia applications providing clean operation near computer monitors • Solid MDF (Medium Density Fiberboard) construction, provides maximum sound pressure level 8 MediaOne BT Layout Active Speaker (right speaker) THIS DEVICE COMPLIES WITH PART 15 OF THE FCC RULES. OPERATION IS SUBJECT TO THE FOLLOWING TWO CONDITIONS: (1) THIS DEVICE MUST NOT CAUSE HARMFUL INTERFERENCE, AND (2) THIS DEVICE MUST ACCEPT ANY INTERFERENCE RECEIVED, INCLUDING INTERFERENCE THAT MAY CAUSE UNDESIRED OPERATION. SUITABLE FOR HOME OR OFFICE USE. 1. Tweeter - 1" silk dome tweeter set in a custom waveguide 2. Low Frequency Driver - Heavy duty woofer with a polypropylene cone and butyl surround for extend low frequency response 3. Power/Pairing Indicator (active) - Bi-color LED lights green indicating the unit is powered on, and blue when paired with a Bluetooth® device. Alternatively flashes green and blue when in pairing mode 4. VOLUME (active) - Controls the overall amount of output level 5. Headphone Jack - 3.5mm stereo output jack for connecting headphones. The monitors automatically mute when headphones are connected 6. Aux Input - 3.5mm stereo input jack for connecting a second line level audio source. 7. AUDIO INPUT - Unbalanced, Stereo RCA-type input connectors, for connecting audio output from consumer level (-10dBV) devices such as a computer, MP3 player, or smartphone. The red connector is the for right input and the white is for the left input. 9 MediaOne BT Layout 8. PAIR Switch - Press this switch to activate discoverable mode to connect and pair with a Bluetooth® device 9. TO LEFT SPEAKER - Push Terminals for connecting the passive left-side exten- sion speaker using the included two-conductor speaker cable. Be sure to match the polarity of the right and left speaker by matching the color of the terminals: connect the red speaker terminal of the right side speaker to the red speaker terminal for the left side speaker, and the black speaker terminal of the right side speaker to the black speaker terminal of the left side speaker. 10. POWER Switch - Main power switch 11. AC INLET - Connect the supplied power cable here 12. Voltage Selection Switch - This switch is used to select the amplifiers operating voltage NOTE: Before using your speaker, be sure the Voltage Selection Switch is set to the correct voltage for your country. Passive Speaker (left speaker) 13. Speaker Connections - Push Terminals for connecting the passive left-side extension speaker using the included two-conductor speaker cable. Be sure to match the polarity of the right and left speakers by matching the color of the terminals: connect the red speaker terminal of the right side speaker to the red speaker terminal for the left side speaker, and the black speaker terminal of the right side speaker to the black speaker terminal of the left side speaker. 14. Bass Port - Tuned low frequency bass port for extending the low end of the speaker cabinets. Do not block the ports as this will restrict the overall performance of the speakers. 10 Positioning the Speakers A major objective when setting up your studio monitors is to obtain the best possible stereo image. The MediaOne BT monitors are designed to be used in a vertical position, with the tweeter and woofer symmetrically in line. Do not place these speakers horizontally as this will cause an offset in sound between the woofer and the tweeter, limiting your ability to find optimal listening positions. Near field (close to the listener) monitoring has become the choice of many engineers because of the cost and complexities associated with mounting monitors onto a wall. Positioning your studio monitors correctly is very important. Correct placement not only creates the proper stereo image, but also minimizes the effects of your room’s reflections. This is especially important in today’s project studios, which are often multi-use spaces. By taking some time and listening carefully when setting up your monitors, you can create an optimal listening environment. The most important consideration when evaluating room acoustics is the presence of reflective surfaces near the monitoring area. These can include flat tabletops, glass mirrors or framed pictures, large open walls and even the surface of your mixing console. Most reflecting sound will eventually reach the listening position, but since it is slightly delayed from the direct source, the result is random cancellation of some frequencies, or comb filtering. If possible, remove any and all reflective surfaces. You may also want to hang some acoustic foam on walls near the monitors. When positioning the monitors, you’ll want to set up what is commonly referred to as the “mix triangle” (shown below). In this ideal configuration, the space between the left and right monitor is equal to the distance from the listener to each monitor, forming an equilateral triangle. 11 Pairing with a Bluetooth ® Device Bluetooth® is a wireless communication technology that allows for connectivity between a wide range of devices. The MediaOne BT uses Bluetooth to stream high quality audio from your Bluetooth enabled device without the need for connecting any cables. In order for your device to work with the MediaOne BT it must first be paired. 1. Turn the front panel volume control counterclockwise to the 0 position. 2. With the MediaOne BT and your Bluetooth device powered on; press the PAIR button on the rear panel of the MediaOne BT speaker to make the speaker discoverable. The front panel indicator will slowly flash blue. 3. In the settings of your Bluetooth device, set it to “discover” available devices. 4. From the Bluetooth device list, select the "Samson BT" device. 5. If your device asks for a passkey, enter digits 0000 (four zeros) and press OK. Some devices may also ask you to accept the connection. 6. As the MediaOne BT is connecting to your device, the front panel indicator will turn green for a few seconds then quickly flash blue. 7. The MediaOne BT speaker indicates that pairing is complete when the indicator turns steady blue. You can now stream audio from your device to the MediaOne BT speakers. 8. With the volume control on your Bluetooth device turned up, play some music and slowly raise the MediaOne BT volume control until you have reached the desired level. 12 Making Connections The MediaOne BTmain input connections can be made via the rear panel RCA inputs. Follow the simple steps and diagram below for a quick connection using a standard recording console’s control room outputs. 1. Connect the left and right speakers using the included two-conductor speaker cable. To guarantee for the best performance and avoid phase cancellation problems, connect the red speaker terminal of the right side speaker to the red speaker terminal for the left side speaker, and the black speaker terminal of the right side speaker to the black speaker terminal of the left side speaker. 2. Connect the audio output from your audio source such as a computer, MP3 player or portable audio device to the RCA inputs of the MediaOne BT right side speaker. 3. Turn the MediaOne BT volume control completely counter-clockwise to the minimum setting. 4. Connect the MediaOne BT to an AC power outlet using the included power cable. 5. Turn the power switch on the MediaOne BT to the ON position. 6. Play music from you audio source and slowly raise the volume of the MediaOne BT to a comfortable listening level. Audio Output to RCA Inputs Speaker Wire THIS DEVICE COMPLIES WITH PART 15 OF THE FCC RULES. OPERATION IS SUBJECT TO THE FOLLOWING TWO CONDITIONS: (1) THIS DEVICE MUST NOT CAUSE HARMFUL INTERFERENCE, AND (2) THIS DEVICE MUST ACCEPT ANY INTERFERENCE RECEIVED, INCLUDING INTERFERENCE THAT MAY CAUSE UNDESIRED OPERATION. SUITABLE FOR HOME OR OFFICE USE. Note: Before plugging in and turning on, remember the “last on, first off” rule of powered speakers. When powering up your system, be sure that all the wires are connected, turn your mixer and any other outboard gear on, and then last turn on your MediaOne BT. When powering down, turn your MediaOne BT off first and then your mixer and outboard gear. 13 Aux Input Follow these steps to add another audio device, such as a spartphone or MP3 player, to the Aux Input of the MediaOne BT monitor. 1. Plug an audio cable from the audio device into the 1/8" AUX input connector on the front of the MediaOne BT speaker. 2. Turn the MediaOne BT volume control completely counter-clockwise to the minimum setting. 3. Adjust the volume on the connected audio device to almost the maximum setting. Play music from you audio source and slowly raise the volume of the MediaOne BT to a comfortable listening level. 14 Specifications Low Frequency Speakers BT3 . . . . . . . . . . . . . . 3 " (76.2mm) woofer, polypropylene cone BT4 . . . . . . . . . . . . . . 4" (101.6) woofer with polypropylene cone BT5 . . . . . . . . . . . . . . 5" (127mm) woofer polypropylene cone High Frequency Speaker . . . . . . 1" silkdome tweeter Frequency response BT3 . . . . . . . . . . . . . . 95Hz, 27KHz BT4 . . . . . . . . . . . . . . 54Hz, 27KHz BT5 . . . . . . . . . . . . . . 47Hz, 27KHz Amplifier Power Rating BT3 . . . . . . . . . . . . . . 2 x 15 watts (RMS) / 2 x 30 watts (Peak) BT4 . . . . . . . . . . . . . . 2 x 20 watts (RMS) / 2 x 40 watts (Peak) BT5 . . . . . . . . . . . . . . 2 x 20 watts (RMS) / 2 x 40 watts (Peak) Inputs Connectors . . . . . . . . . R CA (rear panel), 3.5mm (front panel), -10dBV unbalanced, line level Headphone . . . . . . . . . . . . 1/8" Stereo Output Controls . . . . . . . . . . . . . . Volume Control, Bluetooth Pairing Button Wireless Audio . . . . . . . . . . Bluetooth (A2DP) Indicators . . . . . . . . . . . . . . Bi-color - Green (Power), Blue (Bluetooth) Enclosure . . . . . . . . . . . . MDF with textured vinyl covering Fuse BT3 100V-127V . . . . . . . . . 220V-240V . . . . . . . . . BT4 100V-127V . . . . . . . . . 220V-240V . . . . . . . . . BT5 100V-127V . . . . . . . . . 220V-240V . . . . . . . . . T1AL 250V Slow Blow T800mAL 250V Slow Blow T1.6AL 250V Slow Blow T800mAL 250V Slow Blow T1.6AL 250V Slow Blow T800mAL 250V Slow Blow Dimensions (LxWxH) BT3 . . . . . . . . . . . . . . 5 .5" x 6.6" x 7.8" (140mm x 167mm x 199mm) BT4 . . . . . . . . . . . . . . 6.6" x 7.9" x 9" (169mm x 200mm x 231mm) BT5 . . . . . . . . . . . . . . 8" x 9" x 11" (205mm x 229mm x 282mm) Weight BT3 . . . . . . . . . . . . . . 9.24 lb / 4.2 kg (pair) BT4 . . . . . . . . . . . . . . 19.36 lb / 8.8 kg (pair) BT5 . . . . . . . . . . . . . . 22 lb / 10 kg (pair) Specifications are subject to change without notice. 15 Samson Technologies Corp. 45 Gilpin Avenue Hauppauge, New York 11788-8816 Phone: 1-800-3-SAMSON (1-800-372-6766) Fax: 631-784-2201 www.samsontech.com