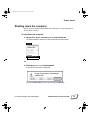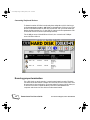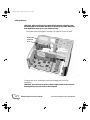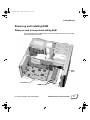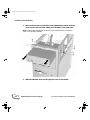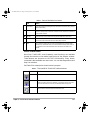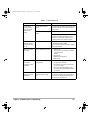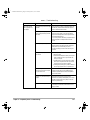
1
0Front Page i Friday, June 6, 1997 9:21 AM PowerCenter™ Pro User’s Guide Part number 6600-0034-01 Rev. number 970605 0Front Page ii Friday, June 6, 1997 9:21 AM Power Computing Corporation 1997 Power Computing Corporation. All rights reserved. Under copyright laws, this manual may not be copied, in whole or in part, without the written consent of Power Computing. Your rights to the software are governed by the accompanying software license agreement. Power Computing Corporation 2400 South Interstate 35 Round Rock, Texas 78681-7903 U.S.A. (512) 388-6868 The Power Computing logo is a registered trademark, and PowerCenter is a trademark of Power Computing Corporation. Mac and the Mac OS logo are trademarks of Apple Computer, Inc. All other trademarks mentioned are the property of their respective holders. Every effort has been made in this book to distinguish proprietary trademarks from descriptive terms by following the capitalization style used by the manufacturer. Every effort has been made to ensure that the information in this manual is accurate. Power Computing is not responsible for printing or clerical errors. Warranty information about your PowerCenter™ Pro may be found beginning on page xix. Other legal notices are found in Regulatory Information on page 115. ii PowerCenter Pro User’s Guide For Technical Support, Call 1-800-708-6227 0Front Page iii Friday, June 6, 1997 9:21 AM Support Information For basic customer and technical support information, as well as product information and other news, visit our Web Site at: http://www.powercc.com Customers who purchased systems directly from Power Computing should use the numbers listed below to contact Power Computing for assistance (all times are United States Central Time). Customers who did not purchase systems directly from Power Computing must contact the dealer they purchased their system from for assistance. Sales To place or check M – F 8 AM to 10 PM 1-800-999-7279 on an order you Sat 9 AM to 6 PM haven’t received yet Sun 10 AM to 6 PM Customer Support If you have a question about an order you have received M – F 8 AM to 6 PM Sat 10 AM to 4 PM Sun 10 AM to 6 PM Technical Support For help with a technical question M – F 8 AM to 8 PM Sat 10 AM to 4 PM Sun 10 AM to 4 PM For Technical Support, Call 1-800-708-6227 1-800-671-6227 1-800-708-6227 PowerCenter Pro User’s Guide iii 0Front Page iv Friday, June 6, 1997 9:21 AM 1A word from... Page v Friday, June 6, 1997 9:22 AM A word from the Power Computing team 0 Dear New Power Computing Owner, Thank you for choosing an award winning Mac OS system from Power Computing. As the first and only vendor of personalized Mac OS computers we appreciate your support. Our goal is to provide you with the best product available. Power Computing was chosen by Apple as the first licensed manufacturer of Mac OS systems. We created our company with the focus on providing customers with more choice, better service, and more affordable systems. Our top priority is you. We offer toll-free lifetime technical support and an inexpensive optional on-site warranty plan, which provides service at your location. We would love to hear from you. Call us with any questions, or just to let us know how you like the system. Our customer service number is 1-800-671-6227; our e-mail address is, [email protected]. We hope this is the beginning of a long relationship between us. We look forward to your continued support. Enjoy your new Power Computer. Sincerely, Steve Kahng Chairman and CEO For Technical Support, Call 1-800-708-6227 PowerCenter Pro User’s Guide v 1A word from... Page vi Friday, June 6, 1997 9:22 AM PowerCenter TOC Page vii Friday, June 6, 1997 9:24 AM Table of Contents A word from the Power Computing team ........................................ v PowerCenter™ Pro Overview ........................................................ xiii Minitower system front view .............................................................. xiv Minitower system rear view ................................................................. xv Low-Profile system front view ............................................................ xvi Low-Profile system rear view ............................................................. xvii Return, Support, Warranty, Satisfaction Guarantee, and License Information ................................................................ xix RETURN POLICIES ........................................................................... xix Support information ........................................................................ xxi LIMITED WARRANTY ....................................................................xxiii CUSTOMER SATISFACTION GUARANTEE .................................... xxv Apple Computer, Inc. System Software License Agreement ........ xxvii Chapter 1 Getting Started Finding a place for the computer and monitor ..................................... 1 Plugging in the computer ...................................................................... 2 Connecting the monitor ........................................................................ 3 Connecting the mouse and keyboard ................................................... 8 Turning the computer on .................................................................... 10 Problems starting up ......................................................................... 11 Shutting down the computer .............................................................. 13 Chapter 2 Connecting Peripheral Devices Using SCSI devices ............................................................................... 16 Setting the SCSI ID ........................................................................... 17 Ensuring proper termination ............................................................ 18 PowerCenter Pro User’s Guide vii PowerCenter TOC Page viii Friday, June 6, 1997 9:24 AM Connecting the device ..................................................................... 19 Installing software device drivers ..................................................... 21 Connecting a printer ........................................................................... 21 Connecting input devices .................................................................... 21 Connecting a modem or telecom adapter ........................................... 21 Connecting to a network ..................................................................... 22 Connecting to a LocalTalk network ................................................. 22 Connecting to an Ethernet network ................................................ 22 Connecting to a Token Ring network .............................................. 22 Using audio equipment ....................................................................... 23 Understanding the sound ports ....................................................... 23 Connecting an audio device ............................................................. 23 Connecting external speakers .......................................................... 24 Connecting a microphone ............................................................... 25 Playing audio CDs on a CD-ROM drive ........................................... 26 Chapter 3 Getting Started With Mac OS Running the Basics tutorial .................................................................. 29 Using online help ................................................................................ 30 Shutting down the computer .............................................................. 32 Sleep .................................................................................................. 33 Additional information about Mac OS ................................................ 33 Chapter 4 Troubleshooting Common problems and solutions ....................................................... 35 Restarting the computer ................................................................... 36 The monitor is dark after you turn on the computer ...................... 37 Flashing question mark on start-up ................................................. 37 A floppy disk icon with an X in it appears ....................................... 39 An icon with a sad face appears when you start up ......................... 39 A hard disk icon does not appear on the Mac OS desktop .............. 40 You cannot read a floppy disk .......................................................... 40 The mouse pointer does not move when you move the mouse ..... 41 No characters appear on the screen when you type ........................ 41 You see a dialog box with a bomb ................................................... 42 You cannot launch a program or it quits unexpectedly .................. 42 viii PowerCenter Pro User’s Guide PowerCenter TOC Page ix Friday, June 6, 1997 9:24 AM Isolating system software issues ........................................................... 43 Procedures involved in troubleshooting ............................................. 45 Starting up from the Power CD ........................................................ 46 Using Disk First Aid .......................................................................... 47 Using Hard Disk Toolkit•PE to test and repair SCSI disks ............... 48 Using the System Software installer ................................................. 51 Rebuilding the desktop file ............................................................... 55 Resetting (Zapping) the PRAM ......................................................... 56 Technical Support Contact Information ............................................. 56 Chapter 5 Installing PCI Expansion Cards What you need to know about adding expansion cards ..................... 59 Required tools ................................................................................... 60 Removing the cover ............................................................................. 60 How to remove the cover ................................................................. 61 Installing expansion cards ................................................................... 66 How to install a PCI card .................................................................. 66 Chapter 6 Adding Memory Adding memory ................................................................................... 71 Required tools ................................................................................... 71 Removing the cover ............................................................................. 71 How to remove the cover ................................................................. 72 Removing and Installing RAM ............................................................. 77 What you need to know about adding RAM ................................... 77 Prepare the computer ....................................................................... 79 Removing a DIMM ........................................................................... 80 Inserting a DIMM ............................................................................. 81 If the new RAM doesn’t work ........................................................... 82 Chapter 7 Installing Internal Drives What you need to know about installing internal drives ................... 85 Installation steps ............................................................................... 85 Preparing the drive ............................................................................... 86 Set the SCSI ID .................................................................................. 87 Preparing a Minitower system .......................................................... 90 Inserting a drive into a Minitower system ....................................... 94 PowerCenter Pro User’s Guide ix PowerCenter TOC Page x Friday, June 6, 1997 9:24 AM Install software drivers ....................................................................... 102 If the drive doesn’t work .................................................................... 103 Appendix A Safety and Health Information Safety instructions ............................................................................. 105 Health-related information about computer use .............................. 105 Appendix B Technical Information Specifications ..................................................................................... 107 RAM configurations ........................................................................... 110 Video memory configurations ........................................................... 110 Monitor resolution/color tables ..................................................... 111 Power requirements ........................................................................... 111 Appendix C Regulatory Information FCC Declaration of Conformity ........................................................ 115 Radio and television interference ................................................... 115 DOC statement .................................................................................. 116 CD-ROM drive ................................................................................... 117 Lithium battery warning .................................................................... 117 For use in European countries ........................................................... 118 Hard Disk ToolKit•Personal Edition™ Reference Guide Introduction 123 Additional Documentation ................................................................ 123 Maintaining Data Integrity ................................................................ 125 Installing and Removing Hard Disk ToolKit•PE An Overview of Hard Disk ToolKit•PE 127 131 The Selector Window: Hard Disk ToolKit•PE’s Main Screen ............ 132 The Partition List Window ................................................................ 135 Using Hard Disk ToolKit•PE 139 Starting Hard Disk ToolKit•Personal Edition ...................................... 139 Auto Initializing a Disk Device .......................................................... 141 x PowerCenter Pro User’s Guide PowerCenter TOC Page xi Friday, June 6, 1997 9:24 AM Formatting a Disk Device ................................................................... 144 Viewing and Modifying a Device’s Partitioning Scheme .................. 151 Updating a Device’s Driver ................................................................ 152 Testing a Device ................................................................................. 152 Compatibility Notes & Troubleshooting 155 Compatibility Notes ........................................................................... 155 Troubleshooting ................................................................................. 156 CD-ROM ToolKit™ Reference Guide Quick Start ..................................................................................... 167 Installing CD-ROM Toolkit ................................................................ 167 How To Use CD-ROM ToolKit ....................................................... 169 Overview ............................................................................................ 169 Opening CD-ROM ToolKit ................................................................ 170 Setting Up a CD-ROM Drive .............................................................. 170 How To Use CDT Remote ............................................................. 179 Overview ............................................................................................ 179 Playing Audio Discs with CDT Remote ............................................. 182 Troubleshooting ............................................................................ 185 Overview ............................................................................................ 185 Troubleshooting Installation ............................................................. 185 Drive Setup: Suggested Settings ................................................. 187 Overview ............................................................................................ 187 Some Notes About Settings ................................................................ 188 Bitstream Typeface Library ...............................................195 Index ....................................................................................199 Registration Cards ..............................................................207 PowerCenter Pro User’s Guide xi PowerCenter TOC Page xii Friday, June 6, 1997 9:24 AM 2Intro Page xiii Friday, June 6, 1997 9:26 AM PowerCenter™ Pro Overview 0 PowerCenter Pro systems come in two different chassis types, a Minitower system and a Low-Profile system. Note: Wherever there is no significant difference other than orientation between the two chassis types, only one chassis type will be shown. Where there is a significant difference between the two chassis types, both will be shown. PowerCenter Pro systems has a high-speed PowerPC 604e processor. PowerCenter Pro systems come with at least 16 MB of RAM, built-in video with 2 or 4 MB of video RAM, at least a 2 GB hard drive, a 16x CD-ROM player, a 1 MB level 2 cache, built-in Ethernet, and two SCSI buses. Detailed specifications for the PowerCenter Pro systems are found in Appendix B, Technical Information, on page 107. For Technical Support, Call 1-800-708-6227 PowerCenter Pro User’s Guide xiii 2Intro Page xiv Friday, June 6, 1997 9:26 AM Minitower system front view Here are the key features of the Minitower system from the front. monitor (not included) computer CD-ROM drive floppy disk drive front panel power button programmer’s interrupt button reset button keyboard power key mouse keyboard xiv PowerCenter Pro User’s Guide For Technical Support, Call 1-800-708-6227 2Intro Page xv Friday, June 6, 1997 9:26 AM Minitower system rear view Here are the key features of the system from the rear. 115/230 volt switch power input plug built-in Macintoshstandard video port built-in VGA video port g external SCSI port W modem port [ printer port AAUI Ethernet port G PCI expansion slots G 10Base-T Ethernet port V - ADB port X sound in port sound out port For Technical Support, Call 1-800-708-6227 PowerCenter Pro User’s Guide xv 2Intro Page xvi Friday, June 6, 1997 9:26 AM Low-Profile system front view Here are the key features of the Low-Profile system front panel. monitor (not included) floppy disk drive front panel power button programmer’s interrupt button reset button computer CD-ROM player keyboard power key mouse keyboard xvi PowerCenter Pro User’s Guide For Technical Support, Call 1-800-708-6227 2Intro Page xvii Friday, June 6, 1997 9:26 AM Low-Profile system rear view Here are the key components of the Low-Profile system rear panel. built-in Macintoshstandard video port PCI expansion slots - sound out port 115/230 volt switch X sound in port built-in VGA video port g external SCSI port power cord socket W ADB port G 10Base-T Ethernet port modem port [ For Technical Support, Call 1-800-708-6227 V printer port G AAUI Ethernet port PowerCenter Pro User’s Guide xvii 2Intro Page xviii Friday, June 6, 1997 9:26 AM 3MacOS License Page xix Friday, June 6, 1997 9:31 AM Return, Support, Warranty, Satisfaction Guarantee, and License Information 0 RETURN POLICIES If you received equipment (“Hardware”) from Power Computing Corporation (“Power”) in a damaged shipping container or if your Hardware was otherwise damaged in shipment to you, please contact the shipper immediately. All Hardware and packaging were fully inspected prior to shipment from Power, and you must file a claim with the shipper for any damages that may occur in shipment. Retain all shipping materials. Contact Power's Customer Service Department if you need assistance with any such claims. Customers who did not purchase systems directly from Power Computing must contact the dealer they purchased their system from for assistance. Returns for refund To return Hardware manufactured by Power Computing Corporation and purchased under Power's thirty-day money back guarantee, see the terms of the Customer Satisfaction Guarantee. You must contact Customer Service for a Return Merchandise Authorization (“RMA”) before returning the merchandise. If you have already registered your Product for warranty purposes (see Warranty registration on page xxiii for details), processing will be simplified. After your return request is received, Power's Customer Service will issue you an RMA number, along with shipping instructions for return of the Hardware. This number is valid for ten (10) days from the date of issuance. The Hardware For Technical Support, Call 1-800-708-6227 PowerCenter Pro User’s Guide xix 3MacOS License Page xx Friday, June 6, 1997 9:31 AM must be received by Power on or before the tenth day after issuance of the RMA number. Returns will not be accepted without a valid RMA number written on the box. Note: A sample shipping label is included in the back of the manual. Returns for repair In order to return Hardware for warranty or non-warranty service, you must request an RMA by contacting Power's Technical Support or Customer Service Department. CAUTION: You must back up all data stored on the Hardware before returning your Hardware to Power for repair, as Power may format your drive with a new disk image. Power is not responsible for any loss of data. If Power finds defective components, materials or workmanship in your Hardware, Power will use reasonable efforts to repair or replace the Hardware. If the Hardware is under warranty, there shall be no charge to you for such repairs or replacement, and the Hardware will be returned to you using the same class of service for shipping. Otherwise, Power's standard charges for parts, labor, shipping and handling will apply. Shipment of hardware to Power For both types of returns, all Hardware should be returned in the original packaging material, accompanied by all original components as configured by Power Computing, and the Hardware must have the RMA number clearly written at least three (3) times on the outside of each box. You bear all costs and risks of loss in connection with shipping the Hardware back to Power Computing. We recommend that the package(s) be insured for the full purchase amount. These policies are subject to change at the discretion of Power Computing, except that any changes in these policies will not apply to Hardware sold to customers prior to the effective date of any policy change. If you have any questions regarding these policies, please contact Power Computing Customer Service. xx PowerCenter Pro User’s Guide For Technical Support, Call 1-800-708-6227 3MacOS License Page xxi Friday, June 6, 1997 9:31 AM Dealers, Distributors, Leasing Companies, VARs, and other resellers of Power Hardware are not eligible for the Satisfaction Guarantee return and refund policies. Sales to those entities will be final unless otherwise agreed to in writing by Power. Customers who did not purchase systems directly from Power Computing must contact the dealer they purchased their system from for assistance. Support information For basic customer and technical support information, as well as product information and other news, visit our Web Site at: http://www.powercc.com Direct or dealer support? Customers who purchased systems directly from Power Computing should contact Power Computing for assistance. Customers who did not purchase systems directly from Power Computing must contact the dealer they purchased their system from for assistance. Contacting Customer Service To contact Power Customer Service call (800) 671-6227, fax (512) 388-6798, or e-mail [email protected] and describe in detail any problems or issues you need resolved with respect to Power Computing. Be sure to include your order or quote number, serial number, and phone number with all correspondence. Customer Service telephone hours are as follows (all times are United States Central Time). Customer Service If you have a question or a problem with an order you have received For Technical Support, Call 1-800-708-6227 M – F 8 AM to 6 PM 1-800-671-6227 Sat 10 AM to 4 PM Sun 10 AM to 6 PM PowerCenter Pro User’s Guide xxi 3MacOS License Page xxii Friday, June 6, 1997 9:31 AM Contacting Technical Support To contact Power Technical Support call (800) 708-6227, fax (512) 388-6738, or e-mail [email protected] and describe in detail the problem that you are having with your Hardware. For details on contacting Technical Support, see Technical Support Contact Information on page 56. Be sure to include your model number, serial number, date of purchase and phone number with all correspondence. We advise you to confirm receipt of all fax or e-mail requests. Technical Support telephone hours are as follows (all times are United States Central Time). Technical Support xxii For help with a technical problem PowerCenter Pro User’s Guide M – F 8 AM to 9 PM Sat 10 AM to 4 PM Sun 10 AM to 4 PM 1-800-708-6227 For Technical Support, Call 1-800-708-6227 3MacOS License Page xxiii Friday, June 6, 1997 9:31 AM LIMITED WARRANTY One-year limited hardware warranty Warranty registration You should register your Product with Power by completing the Power Owner Registration Card, enclosed in the accessory box along with the keyboard and mouse, and mail the completed card to Power. If you prefer, you can register your purchase on Power’s web site at www.powercc.com. You should register within 3 months from the date of purchase. Once you register your purchase, you will receive an on-site registration validation sticker and card for you to use to validate your limited warranty. Power Computing Corporation (“Power”) warrants the computer hardware delivered to you by Power (“Hardware”) against defects in components, materials and workmanship for a period of one year from the date of original purchase of the Hardware by the end user (proof of purchase required). If Power finds defective components, materials or workmanship in your Hardware, Power shall, at its option, either repair or replace the Hardware at no charge to you. Reconditioned parts may be used in repairing your machine. If Power is unable to repair or replace your Hardware within a reasonable time, your exclusive remedy shall be a refund of the purchase price of your Hardware upon its return to Power. Exclusions The above warranty shall not apply to defects to Power Hardware resulting from improper or inadequate maintenance by you; software or interfacing supplied by you; unauthorized modification, neglect, abuse or misuse of the Hardware, including without limitation operation of the Hardware in an environment other than an ordinary office or home; or acts of God. Power makes no warranties with respect to the software and other accessories provided with the Hardware beyond those provided by the respective vendors of such items. Power shall not be liable for shipping damages. For Technical Support, Call 1-800-708-6227 PowerCenter Pro User’s Guide xxiii 3MacOS License Page xxiv Friday, June 6, 1997 9:31 AM Obtaining warranty service To obtain warranty service, you must return your Hardware, freight pre-paid, to a service facility authorized by Power in accordance with Power's thencurrent Return Policy. All Power Harware must be returned in original packaging material. Warranty limitations and disclaimer of damages POWER MAKES NO OTHER WARRANTIES, EITHER EXPRESS OR IMPLIED, OR STATUTORY, INCLUDING WITHOUT LIMITATION ANY IMPLIED WARRANTIES OF MERCHANTABILITY OR FITNESS FOR A PARTICULAR PURPOSE. THE REMEDIES PROVIDED FOR ABOVE ARE EXCLUSIVE AND IN LIEU OF ALL OTHERS, WHETHER ORAL OR WRITTEN, EXPRESS OR IMPLIED. POWER SHALL NOT BE LIABLE TO YOU OR ANY THIRD PARTY, PURSUANT TO THIS WARRANTY OR IN ANY OTHER WAY WITH RESPECT TO THE USE OF THE HARDWARE, FOR ANY AMOUNTS REPRESENTING LOSS OF PROFITS, LOSS OF DATA, DOWNTIME, LOSS OF GOOD WILL OR BUSINESS DAMAGE OR REPLACEMENT OF EQUIPMENT AND/OR PROPERTY, OR ANY COSTS OF RECOVERING, REPROGRAMMING OR REPRODUCING ANY PROGRAM OR DATA STORED ON OR USED WITH THE HARDWARE, OR ANY INDIRECT, INCIDENTAL, CONSEQUENTIAL, OR PUNITIVE DAMAGES OF YOU OR ANY THIRD PARTY, WHETHER RESULTING FROM BREACH OF WARRANTY OR ANY OTHER LEGAL THEORY. This warranty gives you specific legal rights, and you may also have other rights that may vary from state to state. Some states do not allow the exclusion or limitation of incidental or consequential damages or exclusions of implied warranties, so the above limitations or exclusions may not apply to you. xxiv PowerCenter Pro User’s Guide For Technical Support, Call 1-800-708-6227 3MacOS License Page xxv Friday, June 6, 1997 9:31 AM CUSTOMER SATISFACTION GUARANTEE Note: The Customer Satisfaction Guarantee applies only to Hardware purchased directly from Power Computing. Hardware purchased from a reseller, dealer, or retailer is handled by that reseller, dealer, or retailer. If you did not purchase your Hardware directly from Power Computing, contact whoever you purchased your Hardware from for their terms and follow their procedures. If you purchased your Hardware directly from Power Computing, within thirty (30) days of receipt of merchandise, you may contact Power Computing to arrange for the return of any computer system purchased from Power Computing (“Hardware”) for a full refund of the cost of the system if you are not entirely satisfied, as long as the following conditions are met: 1. Contact Power Computing Customer Service within 30 days of receipt of merchandise to obtain a Return Merchandise Authorization (RMA) number, at (800) 671-6227. The merchandise must then be received by Power Computing on or before the tenth day after the RMA number is issued. 2. Repack and seal the Hardware and all documentation, software, accessories, registration cards and other materials originally supplied with the Hardware in the original packing material. 3. Make sure that the RMA number is visibly legible on the box in at least three places. 4. Ship the Hardware to Power Computing at the address shown on the sample Merchandise Return Form shown at the back of this manual. Make sure the shipper does not cover the form. The Hardware must be received by Power Computing on or before the tenth day after the RMA number is issued. 5. You should pre-pay shipment, and assume all risks of loss or damage in connection with shipping the system back to Power Computing. We recommend that package(s) be insured for the full purchase amount. 6. Refunds or credits for Hardware returned under this guarantee will be made pursuant to Power Computing's Refund Policy in effect as of the date of sale of the Hardware. Refunds or credits will be issued only after the Hardware is verified by Power to be in “like-new” condition. Reductions in credit will result if Hardware is in “less-than-new” condition, or if any documentation, For Technical Support, Call 1-800-708-6227 PowerCenter Pro User’s Guide xxv 3MacOS License Page xxvi Friday, June 6, 1997 9:31 AM software, accessories and other materials originally supplied with the Hardware are not returned completely intact. Once approval is given for a refund or credit, processing will vary according to payment method. If the Hardware was paid for with a valid credit card, a credit will be applied to the same credit card account. If payment was made with a check, a refund check will be mailed to the customer. Other payment methods will involve appropriate refunds or credits according to Power's accounting department policies. 7. Hardware received with any shipping charges due or after the tenth day after issuance of the RMA number will be refused by Power Computing and returned to the sender. We will also return any Hardware that is not in “likenew” condition and accompanied by all documentation, software, accessories, registration cards and other materials originally supplied with the Hardware, as determined by Power. If any of these circumstances occur, eligibility for the thirty-day money back guarantee may no longer apply. xxvi PowerCenter Pro User’s Guide For Technical Support, Call 1-800-708-6227 3MacOS License Page xxvii Friday, June 6, 1997 9:31 AM Apple Computer, Inc. System Software License Agreement PLEASE READ THIS LICENSE CAREFULLY BEFORE USING THE SOFTWARE. BY USING THE SOFTWARE, YOU ARE AGREEING TO BE BOUND BY THE TERMS OF THIS LICENSE. IF YOU DO NOT AGREE TO THE TERMS OF THIS LICENSE, PROMPTLY RETURN THE UNUSED SOFTWARE TO THE PLACE WHERE YOU OBTAINED IT AND YOUR MONEY WILL BE REFUNDED. 1. License. The application, demonstration, system and other software accompanying this License, whether on disk, in read only memory, or on any other media (the “Apple Software”), the related documentation and fonts are licensed to you by Apple. You own the disk on which the Apple Software and fonts are recorded but Apple and/or Apple's Licensor(s) retain title to the Apple Software, related documentation and fonts. This License allows you to use the Apple Software and fonts on a single Apple computer and make one copy of the Apple Software and fonts in machine-readable form for backup purposes only. You must reproduce on such copy the Apple copyright notice and any other proprietary legends that were on the original copy of the Apple Software and fonts. You may use the Apple Software in a networked environment so long as each computer in such environment is the subject of a license for the Apple Software; however, you many not electronically transmit the Apple Software from one computer to another over a network. You may also transfer all your license rights in the Apple Software and fonts, the backup copy of the Apple Software and fonts, the related documentation and a copy of this License to another party, provided the other party reads and agrees to accept the terms and conditions of this License. 2. Restrictions. The Apple Software contains copyrighted material, trade secrets and other proprietary material and in order to protect them you may not decompile, reverse engineer, disassemble or otherwise reduce the Apple Software to a human-perceivable form. You may not modify, network, rent, lease, loan, distribute or create derivative works based upon the Apple Software in whole or in part, except for the limited networking described above in Section 1. THIS APPLE SOFTWARE MAY NOT BE IMPORTED TO, USED IN, OR RE-EXPORTED FROM FRANCE OR ANY OF ITS COLONIES OR TERRITORIES. 3. Termination. This License is effective until terminated. You may terminate this License at any time by destroying the Apple Software, related documentation and fonts and all copies thereof. This License will terminate immediately without notice from Apple if you fail to comply with any provision of this License. Upon termination you must de- For Technical Support, Call 1-800-708-6227 PowerCenter Pro User’s Guide xxvii 3MacOS License Page xxviii Friday, June 6, 1997 9:31 AM stroy the Apple Software, related documentation and fonts and all copies thereof. 4. Export Law Assurances. You agree and certify that neither the Apple Software nor any other technical data received from Apple, nor the direct product thereof, will be exported outside the United States except as authorized and as permitted by the laws and regulations of the United States. If the Apple Software has been rightfully obtained by you outside of the United States, you agree that you will not re-export the Apple Software nor any other technical data received from Apple, nor the direct product thereof, except as permitted by the laws and regulations of the United States and the laws and regulations of the jurisdiction in which you obtained the Apple Software. 5. Government End Users. If you are acquiring the Apple Software and fonts on behalf of any unit or agency of the United States Government, the following provisions apply. The Government agrees: (i) if the Apple Software and fonts are supplied to the Department of Defense (DOD), the Apple Software and fonts are classified as “Commercial Computer Software” and the Government is acquiring only “restricted rights” in the Apple Software, its documentation and fonts as that term is defined in Clause 252.227-7013(c)(1) of the DFARS; and (ii) if the Apple Software and fonts are supplied to any unit or agency of the United States Government other than DOD, the Government's rights in the Apple Software, its documentation and fonts will be as defined in Clause 52.227-19(c)(2) of the FAR or, in the case of NASA, in Clause 18-52.227-86(d) of the NASA Supplement to the FAR. 6. Limited Warranty on Media. Apple warrants the diskettes and/or compact disc on which the Apple Software and fonts are recorded to be free from defects in materials and workmanship under normal use for a period of ninety (90) days from the date of purchase as evidenced by a copy of the receipt. Apple's entire liability and your exclusive remedy will be replacement of the diskettes and/or compact disc not meeting Apple's limited warranty and which is returned to Apple or an Apple authorized representative with a copy of the receipt. Apple will have no responsibility to replace a disk/disc damaged by accident, abuse or misapplication. ANY IMPLIED WARRANTIES ON THE DISKETTES AND/ OR COMPACT DISC, INCLUDING THE IMPLIED WARRANTIES OF MERCHANTABILITY AND FITNESS FOR A PARTICULAR PURPOSE, ARE LIMITED IN DURATION TO NINETY (90) DAYS FROM THE DATE OF DELIVERY. THIS WARRANTY GIVES YOU SPECIFIC LEGAL RIGHTS, AND YOU MAY ALSO HAVE OTHER RIGHTS WHICH VARY BY JURISDICTION. xxviii PowerCenter Pro User’s Guide For Technical Support, Call 1-800-708-6227 3MacOS License Page xxix Friday, June 6, 1997 9:31 AM 7. Disclaimer of Warranty on Apple Software. You expressly acknowledge and agree that use of the Apple Software and fonts is at your sole risk. The Apple Software, related documentation and fonts are provided “AS IS” and without warranty of any kind and Apple and Apple's Licensor(s) (for the purposes of provisions 7 and 8, Apple and Apple's Licensor(s) shall be collectively referred to as “Apple”) EXPRESSLY DISCLAIM ALL WARRANTIES, EXPRESS OR IMPLIED, INCLUDING, BUT NOT LIMITED TO, THE IMPLIED WARRANTIES OF MERCHANTABILITY AND FITNESS FOR A PARTICULAR PURPOSE. APPLE DOES NOT WARRANT THAT THE FUNCTIONS CONTAINED IN THE APPLE SOFTWARE WILL MEET YOUR REQUIREMENTS, OR THAT THE OPERATION OF THE APPLE SOFTWARE WILL BE UNINTERRUPTED OR ERROR-FREE, OR THAT DEFECTS IN THE APPLE SOFTWARE AND THE FONTS WILL BE CORRECTED. FURTHERMORE, APPLE DOES NOT WARRANT OR MAKE ANY REPRESENTATIONS REGARDING THE USE OR THE RESULTS OF THE USE OF THE APPLE SOFTWARE AND FONTS OR RELATED DOCUMENTATION IN TERMS OF THEIR CORRECTNESS, ACCURACY, RELIABILITY, OR OTHERWISE. WITHOUT PREJUDICE TO THE GENERALITY OF THE FOREGOING, APPLE DOES NOT WARRANT OR MAKE ANY REPRESENTATION OR GUARANTEE REGARDING THE AUTHENTICITY OR SECURITY OF ANY DIGITAL SIGNATURE GENERATED USING THE APPLE SOFTWARE, OR ANY WARRANTY OR REPRESENTATION THAT THE PERSON OR ENTITY THAT IS USING SUCH A DIGITAL SIGNATURE HAS THE AUTHORITY TO DO SO. NO ORAL OR WRITTEN INFORMATION OR ADVICE GIVEN BY APPLE OR AN APPLE AUTHORIZED REPRESENTATIVE SHALL CREATE A WARRANTY OR IN ANY WAY INCREASE THE SCOPE OF THIS WARRANTY. SHOULD THE APPLE SOFTWARE PROVE DEFECTIVE, YOU (AND NOT APPLE OR AN APPLE AUTHORIZED REPRESENTATIVE) ASSUME THE ENTIRE COST OF ALL NECESSARY SERVICING, REPAIR OR CORRECTION. SOME JURISDICTIONS DO NOT ALLOW THE EXCLUSION OF IMPLIED WARRANTIES, SO THE ABOVE EXCLUSION MAY NOT APPLY TO YOU. 8. Limitation of Liability. UNDER NO CIRCUMSTANCES INCLUDING NEGLIGENCE, SHALL APPLE BE LIABLE FOR ANY INCIDENTAL, SPECIAL OR CONSEQUENTIAL DAMAGES THAT RESULT FROM THE USE, INCLUDING BUT NOT LIMITED TO THE IMPROPER, WRONGFUL, OR FRAUDULENT USE OF THE DIGITAL SIGNATURES GENERATED USING THE APPLE SOFTWARE, OR INABILITY TO USE THE APPLE SOFTWARE OR RELATED DOCUMENTATION, EVEN IF APPLE OR AN APPLE AUTHORIZED REPRESENTATIVE HAS BEEN ADVISED OF THE POSSIBILITY OF SUCH DAMAGES. SOME JURISDICTIONS DO NOT ALLOW THE LIMITATION OR EXCLUSION OF LIABILITY FOR INCIDENTAL OR CONSEQUENTIAL DAMAGES SO THE ABOVE LIMITATION OR EXCLUSION MAY NOT APPLY TO YOU. For Technical Support, Call 1-800-708-6227 PowerCenter Pro User’s Guide xxix 3MacOS License Page xxx Friday, June 6, 1997 9:31 AM In no event shall Apple's total liability to you for all damages, losses, and causes of action (whether in contract, tort (including negligence) or otherwise) exceed the amount paid by you for the Apple Software and fonts. 9. Controlling Law and Severability. This License shall be governed by and construed in accordance with the laws of the United States and the State of California, as applied to agreements entered into and to be performed entirely within California between California residents. If for any reason a court of competent jurisdiction finds any provision of this License, or portion thereof, to be unenforceable, that provision of the License shall be enforced to the maximum extent permissible so as to effect the intent of the parties, and the remainder of this License shall continue in full force and effect. 10. Complete Agreement. This License constitutes the entire agreement between the parties with respect to the use of the Apple Software, related documentation and fonts, and supersedes all prior or contemporaneous understandings or agreements, written or oral, regarding such subject matter. No amendment to or modification of this License will be binding unless in writing and signed by a duly authorized representative of Apple. Note: The Apple Software Registration Card is in the back of the manual. xxx PowerCenter Pro User’s Guide For Technical Support, Call 1-800-708-6227 1 Get Start Page 1 Friday, June 6, 1997 9:36 AM 1 Getting Started 1 Chapter Your computer has been designed for easy plug-and-play setup in four simple steps - if you are in need of technical assistance, after completing the setup process described in this chapter, please feel free to call Power Computing Technical Support at 1-800-708-6227. ■ Find a place for the computer and monitor ■ Plug in the computer ■ Plug in and connect the monitor ■ Connect the mouse and keyboard Finding a place for the computer and monitor Think carefully about where to place your computer and monitor. Here are some suggestions to help you find a good place: ■ Make sure there is a grounded, three-hole electrical outlet within a few feet. ■ Use a sturdy, level table or desk as a work surface. Make sure that you can position your monitor, keyboard, and mouse so that you can work comfortably. See Appendix A, Safety and Health Information, on page 105 for detailed instructions. ■ You can place monitors up to 50 lbs. (23 kg) on top of the computer. If you have a heavier monitor, place the monitor directly on your work surface. ■ Leave a few inches of space around the computer and monitor for air to circulate. For Technical Support, Call 1-800-708-6227 PowerCenter Pro User’s Guide 1 1 Get Start Page 2 Friday, June 6, 1997 9:36 AM Getting Started Plugging in the computer Set up and plug in the computer before connecting the monitor, keyboard, and other devices. Plugging in the computer ensures that it is grounded and protected from electrical damage. The key components for plugging in the computer are shown below. 115/230 volt switch power input socket WARNING! For your safety, the computer is equipped with a three-prong plug designed to be used with a grounded electrical outlet. If you do not have access to an appropriate outlet, have an electrician install one. Do not use your computer with a threeprong adapter in an ungrounded outlet. To plug in the computer: CAUTION: Do not press the power switch on the front panel of the computer or the keyboard power switch until you have completed all of the setup instructions. 1. Place the computer in the location you have chosen. 2 PowerCenter Pro User’s Guide For Technical Support, Call 1-800-708-6227 1 Get Start Page 3 Friday, June 6, 1997 9:36 AM Getting Started 2. Set the 115/230 volt switch to the correct setting for your country. Set the switch to 115 volts for the U.S., Canada, and Japan. Use the 230volt setting in most European countries. 3. Connect the socket end of the power cord to the power input socket on the back of the computer. 4. Connect the plug end of the power cord into a grounded, three-hole electrical outlet. If you have any expansion cards, follow the instructions in Chapter 5, Installing PCI Expansion Cards, on page 59 to install them now. Connecting the monitor Your computer can be used with a wide variety of monitors. The basic system comes with built-in video circuitry and 2 MB of Video RAM. A 4 MB VRAM video card is also available as an upgrade option from Power Computing. Video memory configurations on page 110 lists the various monitor sizes, resolutions, and number of colors supported for both the 2 MB and 4 MB video cards. For Technical Support, Call 1-800-708-6227 PowerCenter Pro User’s Guide 3 1 Get Start Page 4 Friday, June 6, 1997 9:36 AM Getting Started The key components for connecting the monitor are shown below. built-in Macintoshstandard video port built-in VGA video port ■ The built-in Macintosh-standard monitor port allows you to connect a monitor with Macintosh-style connectors. ■ The built-in VGA monitor port allows you to connect a standard VGA or SVGA monitor and use PC-style connectors. CAUTION: Do not connect monitors to both built-in video ports simultaneously. The internal video card will support only one output type at a time. Use the Monitors and Sound control panel or the Control Strip in Mac OS to control how the monitor is configured. See the Mac OS Guide (available through the Guide menu, marked with ) or the Mac OS documentation that came with your system for additional information about using the M o n i t o r s and Sound control panel and the Control Strip. 4 PowerCenter Pro User’s Guide For Technical Support, Call 1-800-708-6227 1 Get Start Page 5 Friday, June 6, 1997 9:36 AM Getting Started Connecting the monitor involves two steps: plugging in the monitor and connecting the monitor cable. To plug in the monitor: 1. Place the monitor on the location you have chosen. 2. If necessary, connect the power cord to the monitor. Some monitors have permanently attached power cords. 3. Plug the monitor power cable into a grounded, three-hole electrical outlet. For Technical Support, Call 1-800-708-6227 PowerCenter Pro User’s Guide 5 1 Get Start Page 6 Friday, June 6, 1997 9:36 AM Getting Started To connect the video cable: 1. If necessary, attach the video cable to the monitor. Some monitors have video cables permanently attached. 2. Connect the video cable to the monitor port on the back of the computer. There are two types of built-in video port connectors on the back of your computer: Macintosh-standard and VGA. built-in Macintoshstandard video port built-in VGA video port Connect your monitor to the appropriate port for your monitor. The onboard video automatically senses which port you are using. CAUTION: Do not connect monitors to both built-in video ports simultaneously. The internal video card will support only one output type at a time. 6 PowerCenter Pro User’s Guide For Technical Support, Call 1-800-708-6227 1 Get Start Page 7 Friday, June 6, 1997 9:36 AM Getting Started • If you are using a monitor with a Macintosh-standard video connector, connect the monitor cable to the built-in Macintosh-standard port (the larger of the two connectors). • If you are using a VGA monitor with a PC-style connector, connect the monitor cable to the built-in VGA port (the smaller of the two connectors). • Be sure to tighten the monitor cable connector screws that secure the monitor cable connector to the computer’s video monitor connector. For Technical Support, Call 1-800-708-6227 PowerCenter Pro User’s Guide 7 1 Get Start Page 8 Friday, June 6, 1997 9:36 AM Getting Started Connecting the mouse and keyboard Once you have connected the monitor, you can connect the mouse and keyboard. To connect the mouse and keyboard: 1. Plug the mouse cable into one of the ADB ports on the keyboard. There is an ADB port at each end of the keyboard; use whichever one you prefer. keyboard ADB ports 8 PowerCenter Pro User’s Guide For Technical Support, Call 1-800-708-6227 1 Get Start Page 9 Friday, June 6, 1997 9:36 AM Getting Started 2. Plug the keyboard cable into the ADB port (marked with V) on the back of the computer. ADB port For Technical Support, Call 1-800-708-6227 PowerCenter Pro User’s Guide 9 1 Get Start Page 10 Friday, June 6, 1997 9:36 AM Getting Started Turning the computer on When the computer, monitor, keyboard, and mouse are connected, you can turn the computer on. To turn the computer on: 1. Turn on the monitor. See the documentation that came with the monitor for the location of the power switch. 2. Turn the computer on by pressing the keyboard power key (marked with a triangle) on the upper right corner of the keyboard. keyboard power key 10 PowerCenter Pro User’s Guide For Technical Support, Call 1-800-708-6227 1 Get Start Page 11 Friday, June 6, 1997 9:36 AM Getting Started When the computer finishes its start-up procedure, you should see the Mac OS desktop. If you see a blinking question mark, you need to install the system software on your hard disk (though a problem with the hard drive or a misconfigured SCSI chain can also cause a blinking question mark). See Troubleshooting on page 35 for details. If you see a blank screen or anything not already described, see Problems starting up on page 11. When you need to shut your computer down, follow the instructions in Shutting down the computer on page 13. Problems starting up If you see a blank screen when you start up, check the following items to identify the source of the problem: ■ Are the computer and monitor plugged in? If they are plugged into a power strip, is it plugged in and turned on? ■ Are the computer and monitor turned on? The power button on the front of the computer should be lighted. Most monitors also have power lights which should also be on. ■ Is the video cable securely connected to the monitor and computer? (If you need to reattach the cable, first turn off the computer and monitor.) ■ Are the keyboard and mouse properly connected to the computer? (If you need to reconnect them, first turn off the computer to avoid damage.) ■ Is the brightness control on the monitor turned too far down? Check the documentation that came with your monitor for instructions. ■ If the image on the monitor has a green or purple cast, or the display appears dark, then you may be using a monitor that requires support for Sync on Green. Older Mac OS computers used a process known as Sync on Green to produce proper video output. Most computers today do not support these types of monitors and instead support a standard called Composite Sync. You should consult with the manufacturer of your monitor to determine which type of monitor you have. Adapters are available from most monitor vendors that allow the use of older Sync on Green monitors on your new Power Computing computer. For Technical Support, Call 1-800-708-6227 PowerCenter Pro User’s Guide 11 1 Get Start Page 12 Friday, June 6, 1997 9:36 AM Getting Started Press the reset button on the front of the computer firmly and release it. reset button If these steps do not resolve the problem, see Chapter 4, Troubleshooting, on page 35 for additional help. 12 PowerCenter Pro User’s Guide For Technical Support, Call 1-800-708-6227 1 Get Start Page 13 Friday, June 6, 1997 9:36 AM Getting Started Shutting down the computer When you are finished working with your computer, it is very important to shut it down correctly. To shut down the computer 1. Choose Shut Down from the Special menu in Mac OS. You are prompted to save any unsaved files before shutting down. Sleep OR 2. Press the p o w e r k e y on the keyboard. A Shut Down dialog box is displayed. Choose the Shut Down option by pressing the return key. For Technical Support, Call 1-800-708-6227 PowerCenter Pro User’s Guide 13 1 Get Start Page 14 Friday, June 6, 1997 9:36 AM Getting Started 3. In the unlikely event that the system does not respond to mouse movement or the keyboard, see Chapter 4, Troubleshooting, on page 35. 14 PowerCenter Pro User’s Guide For Technical Support, Call 1-800-708-6227 2 Conn Periph Page 15 Friday, June 6, 1997 9:41 AM 2 Connecting Peripheral Devices 2 Chapter Your computer has a number of ports for connecting peripheral devices such as printers, storage devices, audio equipment, network cabling, and modems. See the figure below for the location of the ports. (In terms of port locations there is no significant difference between the Minitower and Low-Profile systems. built-in Macintoshstandard video port 115/230 volt switch power cord socket W built-in VGA video port g external SCSI port For Technical Support, Call 1-800-708-6227 modem port V ADB port [ printer X sound port in port - sound G AAUI out port Ethernet port G 10Base-T Ethernet port PowerCenter Pro User’s Guide 15 2 Conn Periph Page 16 Friday, June 6, 1997 9:41 AM Connecting Peripheral Devices Using SCSI devices Your computer has two separate SCSI buses - a high-speed 20 MB per second UltraSCSI bus for internal high-speed devices like hard drives and RAID arrays, and a 5 MB per second bus primarily for internal devices such as the CD-ROM drive, removable cartridge devices such as Zip and Jaz drives, and external SCSI devices. You can connect up to seven devices on the 5 MB per second SCSI bus. The internal SCSI cable, attached to the internal UltraSCSI bus, supports a maximum of two internal hard drives in the Minitower enclosure and one internal hard drive on the Low Profile enclosure. External SCSI devices, such as scanners, hard drives, CD-ROM drives, and removable-catridge drives, can be connected to your computer using the 25pin standard SCSI connector on the rear of the computer. An external 50-pin SCSI port may be available on the back of your UltraSCSI PCI card. This connector supports wide SCSI devices. At this time, the use of the external UltraSCSI connector is not supported with the PowerCenter Pro computer. Using the external high-speed SCSI connector may lead to conflicts and performance issues with the internal drives. Connecting a SCSI device involves four steps: 16 ■ Setting the device’s SCSI ID ■ Ensuring proper termination ■ Connecting the device ■ Installing a software device driver (if one is required) PowerCenter Pro User’s Guide For Technical Support, Call 1-800-708-6227 2 Conn Periph Page 17 Friday, June 6, 1997 9:41 AM Connecting Peripheral Devices Setting the SCSI ID Each device in a SCSI chain requires a unique number called a SCSI ID, which the computer uses to identify the device. The computer itself is assigned SCSI ID 7 and the internal hard disk is assigned SCSI ID 0. Every other device you install must have a unique number from 1 to 6. Drives provided by Power normally come with SCSI ID pre-set as follows; bus 1 is the high-speed 20 MB per second UltraSCSI bus and bus 0 is the 5 MB per second bus. Bus SCSI ID Device 1 0 primary internal hard drive (terminated) 1 1 optional additional internal hard drive 0 3 CD-ROM drive (terminated) 0 5 optional removable-cartridge drive both 7 motherboard (self-terminated) The way you assign SCSI IDs varies from device to device. On most external devices, the ID is displayed on the back of the device. You usually change it by pressing small buttons above or below the number display. For some external and most internal devices changing the ID requires setting switches or moving jumpers. Changing the ID requires turning your computer and any connected external devices off. Refer to the documentation that came with the device for exact instructions on how to set your device’s SCSI ID. The important thing to remember is that each device must have an ID that is unique within its bus. If there is an ID conflict, your computer and the SCSI devices connected to it will malfunction. For Technical Support, Call 1-800-708-6227 PowerCenter Pro User’s Guide 17 2 Conn Periph Page 18 Friday, June 6, 1997 9:41 AM Connecting Peripheral Devices To determine what SCSI IDs have already been assigned to which devices, go to the Ha r d Di s k Too lkit ™ P E folder in the U t i l i t i e s folder on your hard disk and run H D T P r i m e r ™ P E . HDT Primer will scan your SCSI buses and display the Bus number (0 or 1), the SCSI ID, name, and other parameters of all of the SCSI devices on the bus (see example below). The 20 MB per second UltraSCSI bus is Bus 1; the conventional 5 MB per second SCSI bus is Bus 0. Ensuring proper termination For a SCSI chain to work properly, it must be terminated correctly. The basic rule about SCSI termination is simple: the device at the end of the chain must be terminated. Active termination is recommended for external SCSI chains, as it reduces noise and increases reliability. Devices located between the computer and the end of the chain must be unterminated. 18 PowerCenter Pro User’s Guide For Technical Support, Call 1-800-708-6227 2 Conn Periph Page 19 Friday, June 6, 1997 9:41 AM Connecting Peripheral Devices Turn your computer and any connected external devices off before making any changes in termination. See the documentation that came with each device for information about how it is terminated. ■ On the internal SCSI buses, any devices you install should be unterminated because the computer's internal CD-ROM drive and hard drive are attached to the end of the SCSI chains and are terminated. All of the available internal connectors are in the middle of the chain. ■ On the external bus, you need to consider where the device is placed in the chain and whether it has an internal terminator. (Most SCSI devices use removable external terminators, but some older devices have built-in terminators that are difficult to remove.) ■ If you have an internally terminated device, place it at the end of the chain and remove or disable external terminators from other devices in the chain. ■ If you have an internally terminated device, place it at the end of the chain and remove or disable external terminators from other devices in the chain. ■ If none of the devices are internally terminated, place an external terminator on the last device in the chain and on no other device. Connecting the device Connecting an external SCSI device The SCSI port, marked with g, provides high-speed communication between the computer and devices such as hard disks, CD-ROM drives, scanners, printers, tape backup drives, and so on. To connect a single SCSI device (or the first device in a chain), you need a SCSI cable with a 25-pin connector on one end and a 50-pin connector on the other. For each additional cable, you need a cable with 50-pin connectors on both ends. The cables you use should be double-shielded and have For Technical Support, Call 1-800-708-6227 PowerCenter Pro User’s Guide 19 2 Conn Periph Page 20 Friday, June 6, 1997 9:41 AM Connecting Peripheral Devices approximately 110-ohm impedance. Most SCSI problems are the result of lowgrade cables. Of the SCSI cables our engineers have tested, Apple and APS cables are recommended for consistent reliability. Note: External SCSI devices which are connected to the computer have independent power systems and must be turned on and off at the device; internal SCSI devices are powered by the computer and turn on and off when the computer does. Devices on the SCSI bus which are turned off can cause system errors. To connect an external SCSI device: 1. Shut down the computer and the SCSI device. 2. Make sure that the device has a unique SCSI ID from 0 to 6. For details, see Setting the SCSI ID on page 17. 3. Connect the device to the computer’s SCSI port or to the last device in the chain, using the appropriate cable. 4. Make sure that the last device in the chain is terminated. Some devices require an external terminator, while others are internally terminated. Active termination is recommended for external SCSI chains, as it reduces noise and increases reliability. When you are ready to start up, turn on your SCSI devices before you turn on the computer. If you do not, your computer will not recognize the devices. Connecting an internal SCSI device You install internal SCSI devices in one of the computer’s internal storage bays. See Chapter 7, Installing Internal Drives, on page 85 for instructions on installing internal SCSI devices. 20 PowerCenter Pro User’s Guide For Technical Support, Call 1-800-708-6227 2 Conn Periph Page 21 Friday, June 6, 1997 9:41 AM Connecting Peripheral Devices Installing software device drivers Some SCSI devices require special software called device drivers to operate with your computer. If a device driver is required, it is normally supplied with the device; if you are unsure whether one is required, contact the manufacturer of the device. Follow the installation instructions supplied by the manufacturer. If a device driver is not supplied, you can assume that the device does not need one. Connecting a printer Your computer has a port (marked with [). This port can be used for direct printer connections or for LocalTalk network printer connections. You can also connect a printer to the modem port (marked with W) or one of the Ethernet ports (marked with G). Use the Chooser program to tell the Mac OS which port you are using. See the Mac OS Guide or the Mac OS manual which came with your system for information about the Chooser. To connect the printer, follow the instructions that came with it. Connecting input devices Use the computer’s ADB port (marked with V) to connect input devices such as a mouse, trackball, graphics tablet, or bar-code reader. Depending on their power consumption, you can connect up to three input devices in a chain from the ADB port. The total power used by all the ADB devices must not exceed 500 milliamperes (mA). Check the documentation that came with your ADB devices for information about their power consumption. Connecting a modem or telecom adapter Your computer is equipped with an enhanced telecommunications port (marked with W), which can be used with a standard modem or the Apple GeoPort Telecom Adapter. The GeoPort Telecom Adapter offers advanced communications features not available with standard modems. It is available from authorized Apple dealers. For Technical Support, Call 1-800-708-6227 PowerCenter Pro User’s Guide 21 2 Conn Periph Page 22 Friday, June 6, 1997 9:41 AM Connecting Peripheral Devices To connect a modem or GeoPort Adapter, follow the instructions that came with it. Connecting to a network Your computer has built-in support for two different networking systems — LocalTalk and Ethernet. Other networking systems are possible, but they require expansion cards. Use the AppleTalk or T C P / I P control panel in Mac OS to choose a networking system. See the Mac OS Guide for information about using your computer on a network. Connecting to a LocalTalk network Use the computer’s printer port (marked with [) or modem port (marked with W) to connect to a LocalTalk network. LocalTalk connectors and cables are available from several vendors. Follow the instructions that came with the connector and cabling. Connecting to an Ethernet network The computer has two built-in ports (marked with G) for connecting to highspeed Ethernet networks. Using the appropriate AAUI adapter, you can connect to standard Ethernet wiring such as 10Base-T, thick coax, and thin coax. Adapters are available from several vendors. Follow the manufacturer’s instructions for connecting the adapter. If you are connecting to a 10Base-T network, you can plug the network RJ45 connector into the 10Base-T port. If both the AAUI and the 10Base-T connectors are connected, only the 10Base-T connection will be active. Connecting to a Token Ring network You can connect to a Token Ring network by installing an expansion card and appropriate networking software. Token Ring cards and software are available from several vendors. 22 PowerCenter Pro User’s Guide For Technical Support, Call 1-800-708-6227 2 Conn Periph Page 23 Friday, June 6, 1997 9:41 AM Connecting Peripheral Devices Using audio equipment Using the sound in and sound out ports of your computer, you can record and play high-quality stereo audio. You can connect audio devices such as microphones, stereo equipment, and speakers. (You can also use an external or internal CD-ROM drive to play audio CDs. See Playing audio CDs on a CD-ROM drive on page 26 later in this section.) Understanding the sound ports Your computer has two sound ports—a sound output port (marked with -) and a sound input port (marked with X). Use these ports to connect audio devices. The sound ports accept a connector called a stereo mini-plug, the same kind of connector used to connect headphones to a personal stereo. If an audio device has a different kind of connector, you can buy an adapter at an electronics store. Connecting an audio device To play or record sounds, connect an audio device to your computer. ■ If you want to use your computer to work with the sound produced by a device like a microphone, CD, or tape player, attach it to the sound input port. ■ If you want to use a device such as a tape recorder or external speakers to work with sound produced by the computer, attach it to the sound output port. A device that can both record and play (such as a tape deck) can be connected to both the sound input and sound output ports. Select the E x t e r n a l Microphone selection in the Sound Input box in the Monitors and Sound control panel when connecting a record-and-play device. The following section gives general instructions for connecting an audio device. If you plan to connect a microphone or external speakers, read Connecting a microphone on page 25 or Connecting external speakers on page 24 later in this section. For Technical Support, Call 1-800-708-6227 PowerCenter Pro User’s Guide 23 2 Conn Periph Page 24 Friday, June 6, 1997 9:41 AM Connecting Peripheral Devices To connect an audio device: 1. Make sure that the device has a stereo mini-plug connector. Attach an adapter if necessary. 2. Shut down your computer and turn off the audio device. 3. Connect the audio cable to the device and to the appropriate sound port of the computer. 4. Turn on the computer and the device. After starting up the computer, use the Mac OS Monitors and Sound control panel to select the device as the Sound In or Sound Out source. See the Mac OS Guide for information about using the Monitors and Sound control panel. Connecting external speakers You can connect external, amplified speakers to your computer to take advantage of its high-quality, stereo sound output. You need a cable with stereo mini-plugs on each end to connect the speakers. In some cases, you connect the cable to one of the speakers and then use speaker wire to connect the second speaker. In other cases, you use a Y-shaped, two-plug adapter on the end of the cable and attach one plug to each speaker. Refer to the instructions that came with the speakers for more information. To connect external speakers: 1. Turn off the computer and the speakers. 2. Connect one end of the cable to the sound output port of the computer. 3. Connect the other end of the cable to the speakers. If necessary, use a Y-shaped adapter. 24 PowerCenter Pro User’s Guide For Technical Support, Call 1-800-708-6227 2 Conn Periph Page 25 Friday, June 6, 1997 9:41 AM Connecting Peripheral Devices 4. If necessary, connect the speakers with speaker wire. 5. Turn on the computer and speakers. The sound output of the computer is heard through the speakers. You can control the speaker volume in the Mac OS Monitors and Sound control panel or the Control Strip. In some cases, the speakers themselves may also have a volume control. See the Mac OS Guide for information about controlling the volume. Connecting a microphone You can connect a microphone to your computer via the sound input port. The microphone can be used for recording sounds or for issuing spoken commands to your computer. The computer requires the Apple PlainTalk Microphone, pictured below. PlainTalk software is required for voice commands. PlainTalk microphones and software are available from authorized Apple dealers. Other line-level microphones can be used for sound recording. For Technical Support, Call 1-800-708-6227 PowerCenter Pro User’s Guide 25 2 Conn Periph Page 26 Friday, June 6, 1997 9:41 AM Connecting Peripheral Devices Playing audio CDs on a CD-ROM drive You can use a CD-ROM drive to play audio CDs on your computer. The sound will be heard through the computer’s built-in speaker (or through headphones or external speakers if you connect them appropriately). Use audio CD software (such as AppleCD Audio Player, part of Mac OS) to play the CD. The volume control on the AppleCD Audio Player controls the output level of the CD-ROM player, and should normally be set at maximum volume. CD Audio Player volume control The CD-ROM output then may be routed from the CD-ROM player to any of several outputs. The volume you hear from the audio CD is controlled by one of several controls, depending on which output you are using, as shown in the following table. 26 Output Device Volume Control Internal speaker Monitors and Sound control panel Computer Speaker Volume control CD-ROM Player front-panel CD-ROM drive front-panel volume Headphones connector ( f ) control ( Computer rear panel Sound Out port ( - ) Monitors and Sound control panel Sound Out Level control PowerCenter Pro User’s Guide ) For Technical Support, Call 1-800-708-6227 2 Conn Periph Page 27 Friday, June 6, 1997 9:41 AM Connecting Peripheral Devices To check or adjust the internal speaker or sound out settings, open the Monitors and Sound control panel and select the Sound button at the top of the dialog box, then view or adjust the appropriate control. If you want to turn off the sound to the internal speaker, select the M u t e check box in the Computer Speaker Volume control. For Technical Support, Call 1-800-708-6227 PowerCenter Pro User’s Guide 27 2 Conn Periph Page 28 Friday, June 6, 1997 9:41 AM 3 Mac OS Page 29 Friday, June 6, 1997 9:45 AM 3 Getting Started With Mac OS 3 Chapter Your computer uses the Mac OS operating system, which offers a unique combination of power and ease of use. This chapter offers very basic instructions about how to use the built-in learning features of Mac OS. It also explains how to shut down your computer properly. For detailed information about the Mac OS, refer to the Mac OS manual that came with your system. Running the Basics tutorial Mac OS includes a tutorial program called Mac™ OS Tutorial that shows you how to use the fundamental features of the software. If you are brand new to Mac OS, we suggest you complete the tutorial before you begin working with your computer. In Mac OS, you use the mouse for tasks such as choosing menu commands or starting programs. When you move the mouse, the mouse pointer ( , the small arrow on the screen, sometimes referred to as the cursor) moves in the same direction. By placing the tip of the mouse pointer over an icon and clicking twice quickly (double-clicking), you can open a folder or launch a program. 8 For Technical Support, Call 1-800-708-6227 PowerCenter Pro User’s Guide 29 3 Mac OS Page 30 Friday, June 6, 1997 9:45 AM Getting Started With Mac OS To run the Basics program: 1. In the Mac OS desktop, if your hard disk window is not already open, double-click the icon that represents your hard disk (located in the upper-right corner of the screen). Be careful to place the mouse pointer over the icon, not on the words below. The hard disk icon “opens,” displaying a “window” containing the files and folders stored on the hard disk. 2. Double-click the folder called M a c ™ O S T u t o r i a l . The folder opens, displaying the Mac™ OS Tutorial Part 1 icon. 3. Double-click the M a c ™ O S T u t o r i a l P a r t 1 icon. The program starts up, displaying an introductory screen. 4. Follow the on-screen instructions to complete the tutorial. Using online help Mac OS (and many applications that run under it) include an online help system with information about using the software. The help system for Mac OS is called Mac OS Guide and is available through the Guide menu (marked with ). To use the Mac OS Guide: 1. Choose Finder from the Application menu (in the upper-right corner of the desktop) to make it the active application. 30 PowerCenter Pro User’s Guide For Technical Support, Call 1-800-708-6227 3 Mac OS Page 31 Friday, June 6, 1997 9:45 AM Getting Started With Mac OS 2. Choose Mac OS Guide from the Guide menu (marked with press x-shift-?. ) or The Mac OS Guide window appears. 3. Follow the on-screen instructions to get the information you need. For Technical Support, Call 1-800-708-6227 PowerCenter Pro User’s Guide 31 3 Mac OS Page 32 Friday, June 6, 1997 9:45 AM Getting Started With Mac OS Shutting down the computer When you are finished working with your computer, it is very important to shut it down correctly. To shut down the computer: 1. Choose Shut Down from the Special menu in Mac OS. You are prompted to save any unsaved files before shutting down. Sleep OR 2. Press the p o w e r k e y on the keyboard. A Shut Down dialog box is displayed. 32 PowerCenter Pro User’s Guide For Technical Support, Call 1-800-708-6227 3 Mac OS Page 33 Friday, June 6, 1997 9:45 AM Getting Started With Mac OS 3. Choose the Shut Down option by pressing the return key. CAUTION: Do not use the power button on the front panel to turn off the computer. If you do, unsaved or open documents may be lost and you may damage System files. Note: In the unlikely event that the system does not respond to mouse movement or the keyboard, see Restarting the computer on page 36. Sleep If you choose the Sleep option in the Special menu or shutdown dialog, the system enters energy-saving “sleep” mode. The monitor will dim if it is an energy-saving monitor, and the mouse will stop responding to movement. For information on how to use energy-saving functions, see E n e r g y S a v e r in the Mac OS Guide. To wake the system up, press the keyboard power key. Additional information about Mac OS For detailed information about the Mac OS, refer to the Mac OS manual that came with your system. For Technical Support, Call 1-800-708-6227 PowerCenter Pro User’s Guide 33 3 Mac OS Page 34 Friday, June 6, 1997 9:45 AM 4 Trouble Page 35 Friday, June 6, 1997 9:48 AM 4 Troubleshooting 4 Chapter This chapter contains information on how to resolve some of the most common issues users see and strategies you can use to fix them. If you are unable to resolve an issue using these suggestions, visit our Web Site at: http://www.powercc.com for additional troubleshooting tips or contact Power Computing’s Technical Support Department. Power Computing Technical Support can be reached tollfree in the United States at 1-800-708-6227. Before contacting Technical Support, please be certain to follow the pre-contact instructions detailed in Technical Support Contact Information on page 56. Customers who did not purchase systems directly from Power Computing should contact the dealer they purchased their system from for assistance. Common problems and solutions As you use your computer you may occasionally encounter a problem. A high proportion of the problems you may encounter are described and dealt with in this section. For those problems, rather than go through a general troubleshooting procedure, we just list the problem along with a logicallyordered list of their most common solutions. If your problem is on this list, try the suggested solutions before you do anything else besides restarting your computer, which resolves a gratifying number of problems. Details on how to perform the procedures involved are found in Procedures involved in troubleshooting, starting on page 45. If your problem does not appear in the Common problems and solutions list, go to Isolating system software issues, starting on page 43. If following the procedures described there does not resolve your problem, go to Technical Support Contact Information, starting on page 56. For Technical Support, Call 1-800-708-6227 PowerCenter User’s Guide 35 4 Trouble Page 36 Friday, June 6, 1997 9:48 AM Troubleshooting Restarting the computer You can eliminate some common problems by restarting the computer, which clears the computer’s memory. ■ If the mouse is still working, choose R e s t a r t from the Special menu. If an error dialog box is displayed, it may have a Restart button. ■ If the mouse is not working, try holding down the x and control keys while pressing the keyboard power key. This key combination restarts the computer, but should only be used when you cannot use the Restart menu command. power button reset button keyboard power key control key x key 36 PowerCenter User’s Guide For Technical Support, Call 1-800-708-6227 4 Trouble Page 37 Friday, June 6, 1997 9:48 AM Troubleshooting ■ If you cannot restart the computer from Mac OS, use the Reset button on the front panel. ■ If the Reset button does not work, use the power button on the front panel to turn off the computer. Wait at least ten seconds before turning it back on. (You need to wait to give the hard disk time to spin down.) The monitor is dark after you turn on the computer Follow the suggestions under Problems starting up on page 11. Flashing question mark on start-up In order for your computer to start-up successfully, the computer must have a valid System Folder to start from. A flashing question mark indicates that the computer is unable to locate a valid system folder on the hard disk or any other bootable device (i.e., a floppy disk, the CD-ROM, etc.). This is typically caused by lack of a bootable device, a device interfering in the boot-up process, or a corrupted System Folder. 1. VERIFY that all external SCSI devices such as hard drives and scanners are turned on and properly configured as detailed in Using Hard Disk Toolkit•PE to test and repair SCSI disks, starting on page 48. One of the main causes of a flashing question mark is a misconfigured SCSI chain. 2. REMOVE all external peripherals except the monitor, keyboard, and mouse from the computer. Examples of peripheral devices include removable-media drives, network connections, scanners, and modems. One of these peripherals could be interfering in the start-up process. Try booting the computer again with the external devices disconnected. If it boots with no issues, try reconnecting the external devices one-by-one until you find the interfering device. Verify the device is configured correctly. If it is, contact the device’s manufacturer for assistance and configuration information. For Technical Support, Call 1-800-708-6227 PowerCenter User’s Guide 37 4 Trouble Page 38 Friday, June 6, 1997 9:48 AM Troubleshooting 3. INSERT the Power Computing System Software CD. This CD contains a System Folder and tools that can be used to resolve your issue. The computer should present the “Happy Macintosh” and begin starting-up. If the computer does not begin booting from the Power CD, contact Power Technical Support for assistance. Tip: When the computer is finished booting up, you MAY see an error message that says, This disk is unreadable by this Macintosh. Do you want to initialize the disk? Press Cancel. The expected volume disk will not appear on the desktop, but nothing will eject from the computer either. That’s okay. Just continue following these instructions. 4. TEST the hard disk with Disk First Aid. For instructions on how to use Disk First Aid, see Using Disk First Aid, starting on page 47. 5. If Disk First Aid is unable to repair the hard disk, RE-INITIALIZE it using Hard Disk Toolkit as detailed in Using Hard Disk Toolkit•PE to test and repair SCSI disks, starting on page 48. Re-initializing the hard disk will erase all its contents. After re-initializing, re-install the system software as detailed in Using the System Software installer, starting on page 51. CAUTION: Re-initializing the hard disk will remove all data from it. Make certain you have backed-up your files prior to initializing the drive. 6. If Disk First Aid is able to repair the hard disk, but the computer still boots to a flashing question mark, CLEAN INSTALL the system software as detailed in Clean install, starting on page 54. The System Folder is likely to be missing an important file or a file in the folder may contain invalid data. Performing a clean install will disable the existing System Folder and install a new System Folder which should enable you to start up your computer from your hard drive. 38 PowerCenter User’s Guide For Technical Support, Call 1-800-708-6227 4 Trouble Page 39 Friday, June 6, 1997 9:48 AM Troubleshooting 7. If the hard drive does not appear in the selection list in Disk First Aid, PROBE the SCSI bus using Hard Disk Toolkit•PE. Verify that the hard disk is seen on the SCSI bus by the computer; most primary internal hard disks ship at ID 0. If the hard disk does not appear in the HDT Primer window, contact Power Technical Support. Tip: The PowerCenter Pro has two SCSI buses. Hard Disk Toolkit•PE lists the bus and SCSI ID for all of the devices on both buses. The UltraSCSI bus is Bus 1; the standard SCSI Bus is bus 0. 8. If after a clean installation or re-initialization the computer still only boots to a flashing question mark, contact Power Technical Support for assistance. A floppy disk icon with an X in it appears You inserted a non-start-up floppy disk during the start-up process. If you wait a few seconds, the computer will start up normally from the hard disk. Remember to insert floppy disks only after the start-up process is complete — when the Mac OS desktop is visible. If the system does not start up, power down and restart holding the mouse button down until the floppy disk ejects. Then the system should start from the hard disk containing a valid system folder. An icon with a sad face appears when you start up This can indicate a problem with the system software or with the computer hardware. ■ Try starting up from the Power Computing Mac OS CD-ROM. If you can start up with a different disk, it means that there is a problem with your system software. ■ If the sad face icon continues to appear, contact Power Computing. There is most likely a problem with the computer hardware. For Technical Support, Call 1-800-708-6227 PowerCenter User’s Guide 39 4 Trouble Page 40 Friday, June 6, 1997 9:48 AM Troubleshooting ■ If you can start up from your Power Computing Mac OS CD-ROM, follow the steps under the previous section, Flashing question mark on start-up on page 37. A hard disk icon does not appear on the Mac OS desktop ■ If the start-up hard disk is internal, restart your machine. ■ If the hard disk was recently installed, verify that all connections are firmly in place and that the drive (if it is a SCSI drive) has a unique SCSI ID. ■ If the hard disk is external, verify that it is connected and terminated properly, and that it has a unique SCSI ID. Make sure that there are no SCSI ID conflicts. See Using SCSI devices on page 16 for information. ■ If the disk is your start-up disk, start up your computer from Power Computing Mac OS CD-ROM. You can remove the internal drive from the startup sequence (and force your system to boot from the CD-ROM if you have it in place) by holding down the shift, option, x, and delete keys (the x key is also called the command or key on some keyboards) when you start up. Use the Hard Disk Toolkit PE utility on your CD-ROM drive to mount the hard drive; see Mounting the hard disk, starting on page 49 for details. Use the Disk First Aid program to check and repair your disk. (See the Disk First Aid entry in the Mac OS Guide for instructions.) If repairing the disk does not solve the problem, reinstall the system software as described in Using the System Software installer on page 51. You cannot read a floppy disk This can indicate a damaged disk or one that is not initialized. 40 ■ If a floppy disk has never been used, it may not be initialized. See the Mac OS Guide for instructions on how to initialize disks. ■ If the disk is damaged, try using the Disk First Aid program to repair it. See the Mac OS Guide for instructions about using Disk First Aid. PowerCenter User’s Guide For Technical Support, Call 1-800-708-6227 4 Trouble Page 41 Friday, June 6, 1997 9:48 AM Troubleshooting The mouse pointer does not move when you move the mouse This can indicate a system software problem, a problem with your mouse, or a problem with a program that you are running. ■ Turn off the computer by pressing the power button on the front panel and verify that the mouse and the keyboard are connected properly. See Connecting the mouse and keyboard on page 8 for information. ■ Try using a different mouse or input device. If it works, there is a problem with the original mouse. ■ Try starting up from the Power Computing Mac OS CD-ROM. If the mouse works, there is a problem with the system software on your normal start-up disk. Reinstall the system software as described in Using the System Software installer on page 51. ■ If the problem continues, you may be using an incompatible program. Verify that the applications, system extensions, and control panels on your computer are compatible with your system software. No characters appear on the screen when you type ■ Use the mouse pointer to click in the window in which you want to type. This ensures that the program is active and that you have an insertion point for your text. ■ Shut down the computer and verify that the keyboard is connected properly. See Connecting the mouse and keyboard on page 8 for information. ■ Try using the Key Caps utility, under the Apple menu, to test the functionality of the keyboard. Open the utility and type on the keyboard. As you press a key on the keyboard, the corresponding key symbol in Key Caps should darken. ■ Try using a different keyboard; turn off the computer before switching keyboards. For Technical Support, Call 1-800-708-6227 PowerCenter User’s Guide 41 4 Trouble Page 42 Friday, June 6, 1997 9:48 AM Troubleshooting ■ Try starting up from the Power Computing Mac OS CD-ROM. If the keyboard works, there is a problem with the system software on your normal start-up disk. Reinstall the system software as described in Using the System Software installer on page 51. You see a dialog box with a bomb This indicates a software problem. ■ If there is a number in the dialog box, write it down for future reference. Make note of what you were doing when the error occurred. ■ Restart the computer. See Restarting the computer on page 36 earlier in this chapter. ■ Verify that the applications, system extensions, and control panels on your computer are compatible with your system software. You may need to update some of your software. ■ Restart your computer without extensions. (To restart without extensions, hold down the Shift key as you restart.) If your software works properly, you probably have an incompatible system extension or control panel. See the Mac OS Guide for information about using the Extensions Manager control panel to isolate the problem. You cannot launch a program or it quits unexpectedly This may indicate that there is not enough RAM for the program to run. A dialog box may appear, indicating insufficient memory as the source of the problem. 42 ■ Quit programs to free up memory, then launch the application you want to use. ■ Restart the computer to clear memory. See Restarting the computer on page 36, at the beginning of this chapter. ■ Use the Get Info window to allocate more memory to the program. See the Mac OS Guide for information about Get Info. PowerCenter User’s Guide For Technical Support, Call 1-800-708-6227 4 Trouble Page 43 Friday, June 6, 1997 9:48 AM Troubleshooting ■ Rebuild the desktop by restarting and holding down the x and option keys. Answer Yes when the computer asks you if you want to rebuild the desktop. ■ Turn on virtual memory to use some of the computer’s hard disk space as memory. See the Mac OS Guide for information about turning on virtual memory. ■ Install additional RAM. See Adding memory on page 71 for information. Isolating system software issues If the problem you are trying to troubleshoot is not in the list of problems discussed in the preceding section, or if the procedures suggested there do not resolve your problem, you may need to use a general troubleshooting approach outlined in this section. Most of the issues you will encounter will be caused by incompatible or corrupted software. In order to isolate the issue, it is necessary to use a process of elimination to find the single element that is the source of your issue. The method presented here is a general one designed to demonstrate the way to approach troubleshooting your computer. Though variations may need to be made in this approach for specific situations, this process provides a general guideline you may follow to isolate most issues. If this process does not result in a solution to your problem, go to Technical Support Contact Information, starting on page 56. 1. REMOVE all peripherals from the back of the computer except the mouse, monitor, and keyboard. Examples of peripheral devices include removable drives, network connections, scanners, and modems. It always easiest to test for conflicts caused by external devices first. If, after removing your peripherals, your issue goes away, add back your peripherals one-at-a-time, restarting each time to verify whether or not the newly added peripheral is the source of your issue. For Technical Support, Call 1-800-708-6227 PowerCenter User’s Guide 43 4 Trouble Page 44 Friday, June 6, 1997 9:48 AM Troubleshooting 2. Use the Extensions Manager to test the computer with Mac OS 7.6.x Base extensions only. The Extensions Manager is located in the Control Panels folder and can be accessed via the Apple menu. You can also access the Extensions Manager during startup by holding down the spacebar as the computer boots. You can use the Extensions Manager to test the computer with only the Apple system software, excluding all non-Apple extensions and control panels which may be causing conflicts. You can do this by selecting “Mac OS 7.6.x Base” from the Sets pull-down menu. Once you select “Mac OS 7.6.x Base” you will notice that the check marks next to several items in the Extensions Manager’s extensions list disappear. A check mark next to an item indicates that the item is active. The items without checks marks are non-Apple system software and were disabled when you selected “Mac OS 7.6.x Base”. 3. If after setting the computer to “Mac OS 7.6.x Base” the issue does not occur, it is most likely related to a conflicting or corrupted extension. Turn the disabled extensions on one-by-one, restarting the computer each time, and verifying that the extension you just added back is not the source of your issue. If your issue returns after adding back an extension, disable that extension. Remove the suspect extension and try re-installing it to see if the copy on you hard drive is corrupted. If replacing the suspect extension with a fresh copy fails, contact the manufacturer of the extension to report your issue. They may have a newer version which resolves your issue. 4. TEST the issue when booted from the Power CD. If the issue does not occur when booted from the CD your issue may be a corrupted System Folder. If it continues to occur, the application you are trying to use may be corrupted. 5. If the issue appears to be related to one application and does not occur in other applications, RE-INSTALL the failing application. The application may be corrupted. Replacing the suspect application with a fresh copy may resolve you issue. 44 PowerCenter User’s Guide For Technical Support, Call 1-800-708-6227 4 Trouble Page 45 Friday, June 6, 1997 9:48 AM Troubleshooting 6. If the issue seems related to a specific type of system software like printing software, CUSTOM RE-INSTALL that software as detailed in Custom install, starting on page 53. 7. If the issue seems to occur system-wide, regardless of the application you are using, or a re-installation of a suspect application did not fix the issue, CLEAN INSTALL the system software as detailed in Clean install, starting on page 54. The issue may be corruption of your core system software. Replacing this software with a fresh copy may resolve your issue. 8. If a clean installation of the system software is unsuccessful, REINITIALIZE the hard disk as detailed in Re-initializing the hard disk, starting on page 50. The issue may be related to a low level software issue on the hard disk. Reinitializing the hard disk will remove all data from the hard drive eliminating possible corruption. CAUTION: Re-initializing the hard disk will remove all data from it. Make certain you have backed-up your files prior to initializing the drive. 9. If you are still unable to resolve your issue, CONTACT Power Computing Technical Support as detailed in Technical Support Contact Information, starting on page 56. Procedures involved in troubleshooting Rather than describe in detail how to perform each procedure in the troubleshooting process, we have consolidated the instructions for common procedures in this section. For example, if, in the process of troubleshooting a problem, you get to the point that you need to start up your system from the Power CD, just turn to those instructions and follow them. For Technical Support, Call 1-800-708-6227 PowerCenter User’s Guide 45 4 Trouble Page 46 Friday, June 6, 1997 9:48 AM Troubleshooting Starting up from the Power CD In order to test the hard disk or reinstall system software, it is necessary to startup from the Power Computing System Software CD. There are two primary methods for booting from the Power CD: Method 1 - The Startup Disk control panel If the computer boots off the hard disk normally and mounts the Power CD on the desktop when it is inserted in the CD-ROM, you can boot from the Power CD using the Startup Disk control panel located in the Control Panels folder underneath the Apple menu. When you open the Startup Disk control panel, you should see icons of all the volumes you have mounted on the desktop including the hard disk and the Power CD. The hard disk will most likely be highlighted. 1. SELECT the P o w e r C D icon by clicking on it one time. 2. CLOSE the S t a r t u p D i s k control panel. 3. SELECT R e s t a r t from the Special menu. Tip: If the CD-ROM ejects upon restart, push it immediately back in. Otherwise, the CD will not be present when the computer needs it for startup Method 2 - The Startup Key sequence If the computer is unable to boot, or the CD-ROM is unable to mount when you’re booted up from the hard drive, you will be unable to access the Startup Disk control panel. In these instances, you should use the startup key command sequence to boot-up from the Power CD. If you are testing issues related to your CD-ROM device, you may need to reactivate the CD-ROM Toolkit extension to access the device. To boot up from the Power CD: 1. Insert the Power Computing System Software CD into the CD-ROM player with the artwork side of the CD facing up. 46 PowerCenter User’s Guide For Technical Support, Call 1-800-708-6227 4 Trouble Page 47 Friday, June 6, 1997 9:48 AM Troubleshooting 2. HOLD down the x, Option , S h i f t , and D e l e t e keys on the keyboard all at the same time. The x key is also called the command or key on some keyboards. Tip: There are x, Option, and Shift keys on both the left and right sides of the keyboard, these keys are identical in function. For the purposes of starting up from the Power CD, it is always easier to hold down the x, Option, and Shift keys on the right-hand side of the keyboard. The Delete key is also on the right-hand side, but has no counterpart on the left. By holding all keys down on the right-hand side, only one hand is needed to hold all keys, freeing your other hand to use the mouse. 3. While continuing to hold these four keys, SELECT R e s t a r t from the Special menu. 4. Continue holding the keys down. You will see a flashing question mark, then a Happy Macintosh face. RELEASE the four keys. The computer should now boot from the Power CD. Tip: When you use the Startup key sequence to boot from the Power CD, you will notice that hard disk does not automatically show up on the desktop when the computer is finished booting. This is because the startup key sequence suppresses the hard disk at startup allowing the computer to start from the Power CD. (In order to test or repair the hard disk, you must first mount it by following the instructions for mounting the hard disk as detailed in Mounting the hard disk, starting on page 49.) Using Disk First Aid Disk First Aid can be used as a first step to fixing minor issues on most Macintosh storage volumes such as hard disks (SCSI and IDE) and removable cartridges. Disk First Aid can be found in the Apple Utilities folder by opening the Power CD, then opening the Utilities folder, and finally opening the Apple Utilities folder. Double-click on D i s k F i r s t A i d to launch it. When Disk First Aid is open you will see “Select volume(s) to verify” at the top of the Disk First Aid window. Underneath it you will see the icons of the Power CD, your hard disk, and any other volumes mounted on the system. For Technical Support, Call 1-800-708-6227 PowerCenter User’s Guide 47 4 Trouble Page 48 Friday, June 6, 1997 9:48 AM Troubleshooting ■ Select the volume you want to verify by clicking one time on its icon. Typically you will want to verify your hard disk, but you can verify any Macintosh (HFS) volume. Disk First Aid will then test the selected volume for directory issues. If any issues are found, they will be displayed in the “Review instructions and results” field in the Disk First Aid window. If no issues are found, Disk First Aid will report that, “The volume (your disk name) appears to be OK.” If Disk First Aid does find issues with this disk, you will see one of two responses: A. “The volume (your volume) needs to be repaired.” – Disk First Aid has detected minor issues on your hard disk which it can repair for you. To repair the hard disk: 1. SELECT the device you wish to repair, then 2. PRESS the R e p a i r button in the lower-left-hand corner of the Disk First Aid window. B. “Issues were found but Disk First Aid could not repair them.” – The issues found were too severe to be fixed by Disk First Aid. If you own another disk repair program, you may try using it to repair the drive. If the second disk repair program is unsuccessful, or you do not have another disk repair program, re-initialize the drive using Hard Disk Toolkit•PE as detailed in Re-initializing the hard disk, starting on page 50. Using Hard Disk Toolkit•PE to test and repair SCSI disks Hard Disk Toolkit•PE is the formatting software Power Computing includes for formatting, initializing, and testing SCSI storage devices. Although most devices can be formatted by Hard Disk Toolkit•PE, it does not support all devices. To verify that Hard Disk Toolkit•PE supports your SCSI device, consult the “Supported Devices” file accompanying HDT Primer in the Hard Disk Toolkit PE folder. The Hard Disk Toolkit PE folder is located in the Utilities folder on the Power CD. 48 PowerCenter User’s Guide For Technical Support, Call 1-800-708-6227 4 Trouble Page 49 Friday, June 6, 1997 9:48 AM Troubleshooting This section includes explanation of only the most frequently used functions of Hard Disk Toolkit•PE. For more detailed information on how to use Hard Disk Toolkit•PE, consult the Hard Disk Toolkit documentation. When HDT Primer is launched, you will be presented with a list of SCSI devices connected to your computer. Your hard disk will most likely be the device located at ID 0. The volume name will normally be that of your hard drive. However, if the hard drive has not been mounted yet, the volume name “N/A” will appear in its place. Mounting the hard disk If your hard disk icon does not appear on the desktop, you can use Hard Disk Toolkit•PE to make it appear by mounting it. To mount a hard disk: 1. SELECT the device you wish to mount, then 2. PRESS the Mount button located at the top of the Hard Disk Toolkit•PE main window. Testing the hard disk If a hard disk seems to be performing unreliably, you may use Hard Disk Toolkit•PE to test the physical integrity of the hard disk. This test goes a step further than Disk First Aid as it tests the actual medium rather than only testing the software structures on the medium. To test a disk: 1. SELECT the device you wish to test, then 2. PRESS the T e s t button located at the top of the Hard Disk Toolkit•PE main window. ■ If the drive passes, the drive is physically fine, but may contain software imperfections which could be the source of your issue. RE-INITIALIZING the hard disk should erase all software on the drive, removing the corruption. ■ If the drive fails, the actual hardware of the drive is most likely damaged, Contact Power Computing Technical Support for further assistance. For Technical Support, Call 1-800-708-6227 PowerCenter User’s Guide 49 4 Trouble Page 50 Friday, June 6, 1997 9:48 AM Troubleshooting Re-initializing the hard disk If the low level data on your hard disk becomes corrupted and cannot be repaired by Disk First Aid or another drive maintenance program, it may be necessary to remove all software from the hard drive to eliminate the data corruption. You can do this by re-initializing the hard disks. To re-initialize the hard disk: CAUTION: Re-initializing the hard disk will remove all data from it. Make certain you have backed-up your files prior to initializing the drive. 1. SELECT the device you wish to mount, then 2. CHOOSE the A u t o i n i t i a l i z e command from the Devices menu. You will be presented with a warning message which states, “The disk at ID x already has data on it. Initializing it will wipe out all existing data with no possibility of recovery. 3. PRESS the Continue button. A dialog box will appear which asks you to “Choose a partitioning method”. 4. Unless you wish to partition the drive into multiple volumes, select M a x i mum M a c in t o sh and press the OK button. To partition the drive into multiple volumes see the Hard Disk Toolkit documentation. 50 PowerCenter User’s Guide For Technical Support, Call 1-800-708-6227 4 Trouble Page 51 Friday, June 6, 1997 9:48 AM Troubleshooting Using the System Software installer The System Software installer can be used to refresh an old System Folder with a new copy of the system software. The installer allows for both “easy” and custom installs. Either of these install types can be used to update the existing System Folder or to create a whole new System Folder altogether. Please make certain you are booted up from the Power CD as detailed in Starting up from the Power CD, starting on page 46 before performing any system software installations. Launching the installer 1. OPEN the P o w e r C D . 2. OPEN the S y s t e m S o f t w a r e I n s t a l l e r s folder. 3. Double-click on the P o wer Co m p u t in g M ac™ OS In st all folder icon. For Technical Support, Call 1-800-708-6227 PowerCenter User’s Guide 51 4 Trouble Page 52 Friday, June 6, 1997 9:48 AM Troubleshooting 4. When the installer is open you will be presented with a welcome screen followed immediately by the following screen listing the following four steps. 5. Follow the four Mac OS Install steps. Click on the icon associated with each step to perform that operation. The steps will lead you through reading the readme file, updating your hard disk driver, choosing a disk for installation, and installing the system software. When you click on the “Install the Software” icon, the install window will be displayed. That window contains a list of the software components available for installation, with an X in the box by each component which is to be installed. You can accept the options selected by the installation or change the options to be installed, and you choose to perform a clean install. Those options are described in the next three sections. 52 PowerCenter User’s Guide For Technical Support, Call 1-800-708-6227 4 Trouble Page 53 Friday, June 6, 1997 9:48 AM Troubleshooting Easy install In most cases, you will want to do an easy install when re-installing system software. This allows the computer to determine which components are appropriate for your computer and install them for you. The easy install is the default of the system software installer. To perform an easy install from the Software Installation screen: 1. Review the list of software components to make sure they are the ones you want installed. 2. Click on the “Start” button in the lower right corner to install the software. 3. Follow the on-screen instructions for completing the system software installation. Custom install The system software installer also allows you to install specific categories or pieces of system software without having to re-install all the system software. For example, using the custom install option, you can re-install a general class of software such as Cyberdog or QuickDraw GX. A custom install is most often used to replace a specific component of corrupted or missing software, or to add specific functionality to your system. To perform a custom install from the Software Installation screen: 1. Select or deselect any of the components shown in the list labeled “Optional Software.” 2. When you have selected the software components you want, click on the “Start” button in the lower right corner to install the software. 3. Follow the on-screen instructions for completing the system software installation. For Technical Support, Call 1-800-708-6227 PowerCenter User’s Guide 53 4 Trouble Page 54 Friday, June 6, 1997 9:48 AM Troubleshooting Clean install A clean install of the system software disables the existing System Folder, renaming it “Previous System Folder”, and creates a fresh System Folder on the hard drive. A clean installation of the system software does not delete or erase any of the software on your hard drive. Performing a clean install should resolve Mac OS system software problems. To perform a clean install from the Software Installation screen: 1. Select or deselect any of the components shown in the list labeled “Optional Software.” If you are doing a clean install, you must select “Mac OS 7.6” and “FWB CD-ROM Toolkit.” 2. Click on the “Options” button on the lower left side of the Software Installation screen. 3. The options screen will present a dialog box with an option, “Create new System Folder.” The options screen may also present a dialog box with an option “Check Destination Disk” if you want to check and repair the installation disk before installing the software. 4. Click on the “Create new System Folder.” box in the upper left corner of the dialog box. If you have reason to suspect that there may be disk problems, click on the “Check Destination Disk” box if it is available. 5. Click on the “OK” button in the lower right corner of the dialog box. 54 PowerCenter User’s Guide For Technical Support, Call 1-800-708-6227 4 Trouble Page 55 Friday, June 6, 1997 9:48 AM Troubleshooting 6. Follow the on-screen instructions for completing the system software installation. After the clean installation, you will have a new System Folder containing only the licensed Apple system software, and a Previous System Folder which contains all your old system software. Because the new System Folder contains only Apple system software, non-Apple peripherals which require their own drivers will not function until the driver is reinstalled. 7. VERIFY that the issue has been solved. Do not add back non-Apple system software until you are certain that all your issues were fixed by a clean install. 8. RE-INSTALL any non-Apple system software into the new system folder one item at time. After adding an item to the system folder, restart and verify that the issue does not return. If the issue does return, remove the software you just added and contact that software’s manufacturer. 9. Once all non-Apple system software has been reinstalled into the new System Folder, REMOVE the Previous System Folder from the hard drive by dragging it to the trash. Rebuilding the desktop file The desktop file is an invisible file on your hard disk which serves as both a table-of-contents and an index for all the data on your hard drive. If are experiencing issues with proper linking to aliases or with generic or incorrect icons appearing for your files, rebuilding the desktop may help resolve these issues. To rebuild the desktop: 1. HOLD down the x and Option keys. 2. SELECT restart from the Special menu while continuing to hold x and Option. 3. CONTINUE holding For Technical Support, Call 1-800-708-6227 x and Option as the computer restarts. PowerCenter User’s Guide 55 4 Trouble Page 56 Friday, June 6, 1997 9:48 AM Troubleshooting 4. When the computer is finished starting-up you will see a dialog box which says, “Are you sure you want to rebuild the desktop?” PRESS “OK”. Resetting (Zapping) the PRAM Your computer maintains settings for the various peripherals connected to it, among other things, in the PRAM (parameter read-only memory). If the information in PRAM is not properly updated, your peripherals may not function properly. Mysterious peripheral issues can often be solved by resetting the PRAM and allowing it to re-build from scratch. The process to do this is known as zapping the PRAM. To zap the PRAM: 1. Shut down your computer. You must perform a complete shutdown; selecting R e s t a r t from the from the Special menu or pressing the Restart button is not sufficient. 2. Press the Power key on your keyboard, and immediately press and HOLD down the x, Option, ‘P’, and ‘R’ keys on the keyboard simultaneously. 3. Continue holding these keys. You will hear a startup chime. After the chime, RELEASE the keys. The PRAM should be reset. Some of your computer’s settings will be set to the factory default. For example, AppleTalk will be set to connect via the printer port instead of the Ethernet port. You may need to reset such preferences. Technical Support Contact Information Our goal at Power Computing is to provide you with the most accurate technical support possible. Please collect the following information before calling. It will enable us to diagnose and resolve your issue as quickly and efficiently as possible. 56 PowerCenter User’s Guide For Technical Support, Call 1-800-708-6227 4 Trouble Page 57 Friday, June 6, 1997 9:48 AM Troubleshooting ■ Back Up and Save. It is always a good idea to back up and save your information prior to calling Power’s technical support team. ■ Be in front of the computer when you call. In some cases in depth troubleshooting may be required to identify the issue you are experiencing. The technician may request that you perform a series of troubleshooting steps in an effort to more accurately identify and resolve the issue. Having access to your computer while on the phone with the technician will help facilitate this process. ■ Know the versions of both the software and the MAC OS you are using. There can be significant differences between various versions of software, some of which will conflict with other specific versions of software. The more information of this type we have the easier it will be for us to resolve issues that may occur from their use. You can usually obtain the version number of the software you are using by clicking once on the programs application icon and selecting “Get Info” from the File menu. ■ Have your computer serial number available. The serial number is located on a white sticker either on the back or bottom of the computer. This will help our technicians identify the configuration of your system as well as your warranty information and will help them identify and resolve issues with your computer more easily. ■ Have your Power CD and disks for any other software which may be involved easily available. In some cases it may be necessary to reinstall system software, or if you are having a issue with a particular application, control panel or extension, it may be necessary to reinstall that piece of software. Having your CDs or disks available will help facilitate the troubleshooting process. ■ Have your invoice, this User’s Guide and the Mac OS manual available. Throughout the troubleshooting process, the technician will point out relevant information in the manual that will enable you to resolve the issue should it occur again. For Technical Support, Call 1-800-708-6227 PowerCenter User’s Guide 57 4 Trouble Page 58 Friday, June 6, 1997 9:48 AM Troubleshooting ■ Isolate your computer. Your technician may ask you to disconnect external devices, such as scanners and printers in an effort to isolate the issue to its true source. Isolating your computer prior to contacting Power Technical Support will help facilitate the resolution of the issue you are experiencing in a timely manner. Thank you for calling Our technicians are trained to assist you as quickly and efficiently as possible. Be assured when you call Power Technical Support that we will make every effort to assist you in resolving your issue and in answering any questions you may have. 58 PowerCenter User’s Guide For Technical Support, Call 1-800-708-6227 5 Install card Page 59 Friday, June 6, 1997 9:51 AM 5 Installing PCI Expansion Cards 5 Chapter This chapter explains how to enhance the capabilities of your computer by adding PCI expansion cards. Note: There are two chassis types, Minitower and Low-Profile. Where the differences in the chassis types are significant both types will be illustrated; where there is no significant difference, one chassis type will be illustrated. What you need to know about adding expansion cards You can install PCI cards on the PCI riser card which is plugged into the mother board on your computer. For example you can increase processing power, improve graphics and video performance, or add networking and communications capabilities. The PCI riser card allows you to install up to three standard PCI cards. PCI riser card For Technical Support, Call 1-800-708-6227 PowerCenter Pro User’s Guide 59 5 Install card Page 60 Friday, June 6, 1997 9:51 AM Installing PCI Expansion Cards Before you install any expansion cards, be sure to follow these guidelines to protect your computer: ■ Do not remove factory-installed cards from inside the computer. Removing a card incorrectly can damage it and the computer. Contact technical support if you believe a factory-installed card requires repair or replacement. ■ The combined power consumption of the expansion cards you install must not exceed the limits of your computer. Refer to the documentation that came with your cards for their power consumption rating and to Power requirements on page 111 in this manual for the power consumption limit for your computer. ■ Some cards may need to be installed by an authorized service provider. Refer to the documentation that came with the card. Required tools ■ A small regular (slot-head) screwdriver or a small coin ■ A small Phillips-head screwdriver Removing the cover Installing expansion cards requires that you remove the computer’s cover. The cover is designed for easy removal. CAUTION: If you are not proficient with electronic equipment, Power Computing Corporation recommends that you have a certified technician install expansion cards. If you attempt to install cards yourself, any damage you may cause to your equipment will not be covered by the limited warranty on your computer. Please call technical support at 1-800-708-6227 for additional information about this or any other warranty question. CAUTION: If an anti-static grounding strap was supplied with the expansion card or other device that you are installing, put it on and ground it as directed by the device’s instructions before touching any components inside the computer. 60 PowerCenter Pro User’s Guide For Technical Support, Call 1-800-708-6227 5 Install card Page 61 Friday, June 6, 1997 9:51 AM Installing PCI Expansion Cards CAUTION: Never turn the computer on or operate the computer with the cover removed. How to remove the cover 1. Shut down the computer and turn off the monitor, but leave the computer plugged in to the electrical outlet. Leaving the computer plugged in ensures that it is grounded. 2. If the monitor is on top of the computer, disconnect it if necessary, and set it aside. Otherwise it’s going to be awkward to remove the computer cover. 3. Disconnect everything but the power cord from the back of the computer. 4. Rotate the computer so that its back panel faces you. 5. Remove the screws and cover as follows: If you have a Minitower chassis 1. Remove the four large thumb screws from the rear of the computer cover. For Technical Support, Call 1-800-708-6227 PowerCenter Pro User’s Guide 61 5 Install card Page 62 Friday, June 6, 1997 9:51 AM Installing PCI Expansion Cards 2. If the thumb screws are in too tight to remove by hand, use a small coin or a flat-bladed screwdriver to loosen the screws. thumb screws cover chassis thumb screws Put the thumb screws somewhere safe where you’ll be able to find them when you’re ready to replace the cover. 3. Gently, but firmly, pull apart the bottom corners of the cover, pull the cover toward you slightly, lift it off and set it aside. 62 PowerCenter Pro User’s Guide For Technical Support, Call 1-800-708-6227 5 Install card Page 63 Friday, June 6, 1997 9:51 AM Installing PCI Expansion Cards 4. Gently place it on its left (as viewed from the rear) side and rotate it so that the base faces you. 5. If you have a Minitower chassis, remove the four Phillips-head screws from the corners of the base and put them where you will be able to find them later. These Phillips-head screws are for the base only; don’t use the Phillips screws for the cover, or the thumb screws for the base. ba se Phillipshead screws 6. Remove the Minitower base and set it aside. For Technical Support, Call 1-800-708-6227 PowerCenter Pro User’s Guide 63 5 Install card Page 64 Friday, June 6, 1997 9:51 AM Installing PCI Expansion Cards If you have a Low-Profile chassis 1. Remove the three large thumb screws from the rear of the computer cover and put them where you will be able to find them when you’re ready to replace the cover. thumb screws One thumb screw is at the top of the cover to the left of center; the other two are on the sides. If necessary, use a small coin or a flat-bladed screwdriver to loosen the screws. 2. Gently, but firmly, pull apart the bottom corners of the cover, pull the cover toward you slightly, lift it off and set it aside. 64 PowerCenter Pro User’s Guide For Technical Support, Call 1-800-708-6227 5 Install card Page 65 Friday, June 6, 1997 9:51 AM Installing PCI Expansion Cards CAUTION: Before touching any components inside the computer, touch the metal plate over the hard disk drive to discharge any static electricity that might have built up on your clothes or body. The system must be plugged in (see step 1 on page 61) for this to work. metal plate hard disk drive To replace the cover, reverse the cover-removal steps and re-connect everything. CAUTION: Be careful not to get any cables caught in the cover or the fan housing when you put it back on the computer. For Technical Support, Call 1-800-708-6227 PowerCenter Pro User’s Guide 65 5 Install card Page 66 Friday, June 6, 1997 9:51 AM Installing PCI Expansion Cards Installing expansion cards Follow the procedure below to install expansion cards. How to install a PCI card 1. Remove the computer’s cover. See Removing the cover, starting on page 60 for instructions. WARNING! Make sure the computer is powered down before removing the cover. CAUTION: Touch the metal plate over the hard disk drive to discharge any static electricity that might have built up on your clothes or body. The system must be plugged in (see step 1 on page 61) for this to work. CAUTION: Use an anti-static grounding strap and handle cards by the nonmetallic edges only. 2. Select an unoccupied slot on the riser card. 66 PowerCenter Pro User’s Guide For Technical Support, Call 1-800-708-6227 5 Install card Page 67 Friday, June 6, 1997 9:51 AM Installing PCI Expansion Cards 3. Remove the metal slot cover from the back of the chassis for the slot you want to use. Remove the slot cover screw at the top of the slot cover and put it somewhere you will find it later; then pull the slot cover toward you so that the tongue at the bottom of the cover slides out of the groove in the chassis. groove tongue slot cover screw slot cover 4. Remove the card from its static-proof bag. Hold the card by its non-metallic edges and its metal bracket to avoid touching components or contacts on the board. For Technical Support, Call 1-800-708-6227 PowerCenter Pro User’s Guide 67 5 Install card Page 68 Friday, June 6, 1997 9:51 AM Installing PCI Expansion Cards 5. Align the card over the slot. Make sure that slot • the connector on the bottom of the card lines up with the socket on the riser card • the slot cover on the card lines up with the slot on the back panel • the slot cover tongue fits into the groove at the base of the slot. groove socket connector tongue slot cover slot cover screw 68 PowerCenter Pro User’s Guide For Technical Support, Call 1-800-708-6227 5 Install card Page 69 Friday, June 6, 1997 9:51 AM Installing PCI Expansion Cards 6. Push the card into the slot until it is firmly seated. Do not force the card. If you feel a lot of resistance, pull the card out, realign it, and insert it again. • The tongue and screw hole on the slot cover should line up with the slot and the screw hole on the chassis. • Replace and tighten the screw you removed from the slot cover. 7. If your system is a Minitower, replace the base. 8. Replace the computer cover, tighten the thumb screw(s), and reconnect everything. CAUTION: Be careful not to get any cables caught in the cover or the fan housing when you put it back on the computer. WARNING! To prevent electrical shock, always replace the cover before turning on the computer. For Technical Support, Call 1-800-708-6227 PowerCenter Pro User’s Guide 69 5 Install card Page 70 Friday, June 6, 1997 9:51 AM 6 Add mem Page 71 Friday, June 6, 1997 9:53 AM Chapter 6 Adding Memory 6 This chapter explains how to enhance the capabilities of your computer by adding additional memory. Note: There are two chassis types, Minitower, and Low-Profile. Where the differences in the chassis types are significant both chassis types will be illustrated; where there is no significant difference, a single type will be shown. Adding memory Your computer’s random-access memory (RAM) can be increased. Memory is increased by installing or replacing memory modules. The computer uses DIMMs, or dual in-line memory modules for RAM. Make sure that the memory modules you purchase are compatible with your computer. See Appendix B, Technical Information, on page 107 for technical specifications. Required tools ■ A small regular (slot-head) screwdriver or a small coin ■ A small Phillips-head screwdriver Removing the cover Installing RAM requires that you remove the computer’s cover. The cover is designed for easy removal. CAUTION: If you are not proficient with electronic equipment, Power Computing Corporation recommends that you have a certified technician install RAM. If you attempt to install RAM yourself, any damage you may cause to your equipment will not be covered by the limited warranty on your computer. Please call technical support at 1-800-708-6227 for additional information about this or any other warranty question. For Technical Support, Call 1-800-708-6227 PowerCenter Pro User’s Guide 71 6 Add mem Page 72 Friday, June 6, 1997 9:53 AM Adding Memory CAUTION: If an anti-static grounding strap was supplied with the RAM you are installing, put it on and ground it as directed by the instructions before touching any components inside the computer. CAUTION: Never turn the computer on or operate the computer with the cover removed. How to remove the cover 1. Shut down the computer and turn off the monitor, but leave the computer plugged in to the electrical outlet. Leaving the computer plugged in ensures that it is grounded. 2. If the monitor is on top of the computer, disconnect it if necessary, and set it aside. 3. Disconnect everything but the power cord from the back of the computer. 4. Rotate the computer so that its back panel faces you. 5. Remove the screws and the cover as follows: If you have a Minitower chassis 1. Remove the four large thumb screws from the rear of the computer cover. 72 PowerCenter Pro User’s Guide For Technical Support, Call 1-800-708-6227 6 Add mem Page 73 Friday, June 6, 1997 9:53 AM Adding Memory 2. If the thumb screws are in too tight to remove by hand, use a small coin or a flat-bladed screwdriver to loosen the screws. thumb screws cover chassis thumb screws Put the thumb screws somewhere safe where you’ll be able to find them when you’re ready to replace the cover. 3. Gently, but firmly, pull apart the bottom corners of the cover, pull the cover toward you slightly, lift it off and set it aside. For Technical Support, Call 1-800-708-6227 PowerCenter Pro User’s Guide 73 6 Add mem Page 74 Friday, June 6, 1997 9:53 AM Adding Memory 4. Gently place it on its left (as viewed from the rear) side and rotate it so that the base faces you. 5. If you have a Minitower chassis, remove the four Phillips-head screws from the corners of the base and put them where you will be able to find them later. These Phillips-head screws are for the base only; don’t use the Phillips screws for the cover, or the thumb screws for the base. ba se Phillipshead screws 6. Remove the Minitower base and set it aside. 74 PowerCenter Pro User’s Guide For Technical Support, Call 1-800-708-6227 6 Add mem Page 75 Friday, June 6, 1997 9:53 AM Adding Memory If you have a Low-Profile chassis 1. Remove the three large thumb screws from the rear of the computer cover and put them where you will be able to find them when you’re ready to replace the cover. thumb screws One thumb screw is at the top of the cover to the left of center; the other two are on the sides. If necessary, use a small coin or a flat-bladed screwdriver to loosen the screws. 2. Gently, but firmly, pull apart the bottom corners of the cover, pull the cover toward you slightly, lift it off and set it aside. For Technical Support, Call 1-800-708-6227 PowerCenter Pro User’s Guide 75 6 Add mem Page 76 Friday, June 6, 1997 9:53 AM Adding Memory CAUTION: Before touching any components inside the computer, touch the metal plate over the hard disk drive to discharge any static electricity that might have built up on your clothes or body. The system must be plugged in (see step 1 on page 72) for this to work. metal plate hard disk drive To replace the cover, reverse the cover-removal steps and re-connect everything. CAUTION: Be careful not to get any cables caught in the cover or the fan housing when you put it back on the computer. 76 PowerCenter Pro User’s Guide For Technical Support, Call 1-800-708-6227 6 Add mem Page 77 Friday, June 6, 1997 9:53 AM Adding Memory Removing and Installing RAM What you need to know about adding RAM The computer has four DIMM slots on the motherboard, near the front panel, (see the illustration below). front panel motherboard DIMM slots For Technical Support, Call 1-800-708-6227 PowerCenter Pro User’s Guide 77 6 Add mem Page 78 Friday, June 6, 1997 9:53 AM Adding Memory DIMMs can be inserted in any order. All DIMMs must be 168-pin, fast-paged mode, 60-nanosecond RAM access time or faster. Make sure that the memory modules you purchase are the right ones for your computer. You can install 8 MB, 16 MB, 32 MB, or 64 MB DIMMs up to a total capacity of 256 MB. To increase your system’s RAM, install additional DIMM modules in vacant DIMM slots; if there are no vacant slots, remove one or more lower-capacity DIMMs (see Removing a DIMM on page 80) and replace them with modules of higher capacity (see Inserting a DIMM on page 81). CAUTION: If you are not proficient with electronic equipment, Power Computing Corporation recommends that you have a certified technician install RAM. If you attempt to install RAM yourself, any damage you may cause to your equipment will not be covered by the limited warranty on your computer. Please call technical support at 1-800-708-6227 for additional information about this or any other warranty question. CAUTION: If an anti-static bracelet is available, put it on and ground it to your computer before touching any components inside the computer. CAUTION: Handle DIMMs by the ends and avoid touching their contacts or other metal components. CAUTION: Always store DIMMs in static-resistant bags. Take your time; don’t hurry. 78 PowerCenter Pro User’s Guide For Technical Support, Call 1-800-708-6227 6 Add mem Page 79 Friday, June 6, 1997 9:53 AM Adding Memory Prepare the computer If you haven’t done so, remove the cover from the computer. See Required tools, starting on page 71 for instructions. WARNING! Make sure the computer is powered down before removing the cover. CAUTION: Touch the metal plate over the hard disk drive to discharge any static electricity that might have built up on your clothes or body. The system must be plugged in (see step 1 on page 72) for this to work. CAUTION: Use an anti-static grounding strap and handle memory modules by the non-metallic edges only. For Technical Support, Call 1-800-708-6227 PowerCenter Pro User’s Guide 79 6 Add mem Page 80 Friday, June 6, 1997 9:53 AM Adding Memory Removing a DIMM 1. If you need to remove a DIMM module to make room for a highercapacity one, reach in and push down on the tiny lever at the end of the DIMM slot. B. rock DIMM out lever A. push lever down 2. The DIMM should pop loose from the slot at the lever end. 3. If the DIMM module does not come free, press the DIMM lever down again. 4. Grasp the DIMM module with one hand at each end and rock the module up and out of the slot by pulling first on one end and then the other. 5. When you are finished with DIMM removal and insertion, replace the cover and reconnect external cables to your computer. CAUTION: Be careful not to get any cables caught in the cover or the fan housing when you put it back on the computer. 80 PowerCenter Pro User’s Guide For Technical Support, Call 1-800-708-6227 6 Add mem Page 81 Friday, June 6, 1997 9:53 AM Adding Memory Inserting a DIMM CAUTION: Touch the metal plate over the hard disk drive to discharge any static electricity that might have built up on your clothes or body. The system must be plugged in (see step 1 on page 72) for this to work. CAUTION: Use a grounding strap and handle memory modules by the non-metallic edges only. notches chip side contacts keys 1. To insert a DIMM module, hold the module with one hand at each end with the contacts down and the chip side of the DIMM toward the front of the computer. Notice that there are two notches in the contact edge of the DIMM module. 2. Lower the DIMM squarely to the slot so that the notches line up with the raised key areas of the DIMM socket. For Technical Support, Call 1-800-708-6227 PowerCenter Pro User’s Guide 81 6 Add mem Page 82 Friday, June 6, 1997 9:53 AM Adding Memory 3. Slide the contacts into the slot, starting with the end farthest from the DIMM lever. Rock the module into the socket by pressing first on the far end of the module and then the near end until the contacts are firmly seated in the slot. Don’t force the DIMM module into the slot; if the motherboard starts bending significantly, pull the DIMM out, reposition it, and try again. Note: Some DIMM modules have sharp, square edges which are difficult to get into the DIMM slot. If you have repeated difficulty getting the DIMM into the slot, return it to your vendor for replacement. 4. If the DIMM module is seated, the DIMM lever should rise by itself so it lines up with the other levers. When you are finished, if your system is a Minitower, replace the base. On all systems, replace the cover on the computer, replace and tighten the thumb screw(s), and re-connect the external cables. CAUTION: Be careful not to get any cables caught in the cover or the fan housing when you put it back on the computer. If the new RAM doesn’t work After you have put the system back together, if either the system doesn’t work or the new RAM doesn’t show up when you click on A b o u t T h i s Macintosh… under the Apple Menu, remove the cover and check each module to make sure that it is firmly seated, and make sure you did not accidentally disconnect any cables or loosen any cards. If you are installing more than one memory module and they don’t all show up, try installing the modules one at a time and checking to see if they show up in About This Macintosh… . If a particular module consistently fails to show up, it may be defective or simply incompatible with your computer. 82 PowerCenter Pro User’s Guide For Technical Support, Call 1-800-708-6227 6 Add mem Page 83 Friday, June 6, 1997 9:53 AM Adding Memory Double-check the information that came with your memory module against the memory specifications listed in RAM configurations on page 110 to make sure you are installing compatible RAM. If the RAM is defective, return it to your vendor for replacement. For Technical Support, Call 1-800-708-6227 PowerCenter Pro User’s Guide 83 6 Add mem Page 84 Friday, June 6, 1997 9:53 AM 7 Install drives Page 85 Friday, June 6, 1997 10:09 AM 7 ™ Chapter Installing Internal Drives 7 What you need to know about installing internal drives This chapter explains how to enhance the capabilities of your computer by adding internal devices such as an additional hard disk or a removable-cartridge drive. All of the drive bays in the Low-Profile system are taken up by the standard hard drive, floppy drive, and CD-ROM drive which come with the system. The best option for expanding drive capability on the Low-Profile system is to add an external drive device. CAUTION: The combined power consumption of the drives you install internally must not exceed the limits of your computer. Refer to the documentation that came with your drive for its power consumption rating and to Power requirements on page 111 in this manual for the power consumption limit for your computer. Installation steps Installing an internal drive involves three steps. 1. Preparing the drive (page 86). 2. Preparing the computer and inserting the drive (page 90). 3. Installing any required software drivers (page 102). Required tools ■ A small regular (slot-head) screwdriver or a small coin ■ A small Phillips-head screwdriver For Technical Support, Call 1-800-708-6227 PowerCenter Pro User’s Guide 85 7 Install drives Page 86 Friday, June 6, 1997 10:09 AM Installing Internal Drives ■ 3.5-inch to 5.25-inch drive adapter, if you are installing a 3.5-inch drive. ■ Software drivers, if required. CAUTION: If you are not proficient with electronic equipment, Power Computing Corporation recommends that you have a certified technician install expansion cards, RAM, and internal drives. If you attempt to install expansion cards, RAM, or drives yourself, any damage you may cause to your equipment will not be covered by the limited warranty on your computer. Please call technical support at 1-800-708-6227 for additional information about this or any other warranty question. CAUTION: If an anti-static grounding strap was supplied with the expansion card or other device that you are installing, put it on and ground it as directed by the device’s instructions before touching any components inside the computer. CAUTION: Never turn the computer on or operate the computer with the cover removed. CAUTION: Never bump the hard drive against any hard surface. A sharp blow can cause major damage immediately and/or reduce the life of your drive. Preparing the drive Your computer uses SCSI (Small Computer Systems Interface) buses to connect internal and external drives. It has both a conventional 5 MB per second SCSI bus and a 20 MB per second UltraSCSI bus. For a more detailed discussion of how the SCSI bus on your computer is set up, see Using SCSI devices, starting on page 16. Pay particular attention to the discussion of SCSI termination, discussed in Ensuring proper termination on page 18. SCSI drives must be set up before they are installed. Drive set up involves setting the SCSI ID, checking termination, and, if you’re installing a 3.5-inch drive in a 5.25-inch drive bay, installing a drive bay adapter. 86 PowerCenter Pro User’s Guide For Technical Support, Call 1-800-708-6227 7 Install drives Page 87 Friday, June 6, 1997 10:09 AM Installing Internal Drives Set the SCSI ID Before installing a drive into a Minitower system (or adding an external SCSI drive to a Minitower or a Low-Profile system), set the drive’s SCSI ID, as explained below. 1. Set SCSI ID. Following the instructions which came with your device, set its SCSI ID and make sure it is not terminated. Each device in a SCSI chain requires a unique number called a SCSI ID, which the computer uses to identify the device. The computer itself is assigned SCSI ID 7 and the primary internal hard disk is assigned SCSI ID 0. Every other device you install must have a unique number from 1 to 6. Drives provided by Power normally come with SCSI ID pre-set as follows where bus 1 is the high-speed 20 MB per second UltraSCSI bus and bus 0 is the 5 MB per second bus. Bus SCSI ID Device 1 0 primary internal hard drive 1 1 optional additional internal hard drive 0 3 CD-ROM drive (terminated) 0 5 optional removable-cartridge drive both 7 motherboard (self-terminated) To determine what SCSI IDs have already been assigned to which devices, go to the Ha r d Di s k T o o lkit ™ P E folder in the U t i l i t i e s folder on your hard disk and run H D T P r i m e r ™ P E . HDT Primer will scan your SCSI buses and display the Bus number (0 or 1), the SCSI ID, name, and other parameters of all of the SCSI devices on the bus (see example below). For Technical Support, Call 1-800-708-6227 PowerCenter Pro User’s Guide 87 7 Install drives Page 88 Friday, June 6, 1997 10:09 AM Installing Internal Drives The 20 MB per second UltraSCSI bus is Bus 1; the conventional 5 MB per second SCSI bus is Bus 0. 88 PowerCenter Pro User’s Guide For Technical Support, Call 1-800-708-6227 7 Install drives Page 89 Friday, June 6, 1997 10:09 AM Installing Internal Drives 2. If you are installing a 3.5-inch drive in a 5.25-inch drive bay, install a 3.5-inch drive in a 3.5 to 5.25-inch adapter. 3.5 to 5.25-inch adapters are available at most computer parts stores. 3.5-inch to 5.25inch drive adapter For Technical Support, Call 1-800-708-6227 PowerCenter Pro User’s Guide 89 7 Install drives Page 90 Friday, June 6, 1997 10:09 AM Installing Internal Drives Preparing a Minitower system The Minitower system normally has available for expansion two frontaccessible internal 5.25-inch and one non-accessible 3.25 inch drive bay (which you can install a hard drive, but not a removable-media drive into). The other bays are normally occupied by the floppy disk drive, the hard drive and the CDROM drive which come with the system. The location of the available 5.25inch bays on the Minitower system is shown below. available 5.25inch drive bays 90 PowerCenter Pro User’s Guide For Technical Support, Call 1-800-708-6227 7 Install drives Page 91 Friday, June 6, 1997 10:09 AM Installing Internal Drives The available Minitower 3.5-inch drive bay is above the floppy disk drive. available 3.5inch drive bay floppy disk drive For Technical Support, Call 1-800-708-6227 PowerCenter Pro User’s Guide 91 7 Install drives Page 92 Friday, June 6, 1997 10:09 AM Installing Internal Drives Removing the minitower system cover WARNING! Make sure the computer has been shut down before removing the cover. Installing internal drives require that you remove the computer’s cover. The cover is designed for easy removal. 1. Shut down the computer and turn off the monitor, but leave the computer plugged in to the electrical outlet. Leaving the computer plugged in ensures that it is grounded. 2. Disconnect everything but the power cord from the back of the computer. 3. Rotate the computer so that its back panel faces you. 92 PowerCenter Pro User’s Guide For Technical Support, Call 1-800-708-6227 7 Install drives Page 93 Friday, June 6, 1997 10:09 AM Installing Internal Drives 4. Remove the four large thumb screws from the rear of the computer cover. If the thumb screws are in too tight to remove by hand, use a small coin or a flat-bladed screwdriver to loosen the screws. thumb screws cover chassis thumb screws Put the thumb screws somewhere safe where you’ll be able to find them when you’re ready to replace the cover. 5. Gently, but firmly, pull apart the bottom corners of the cover, pull the cover toward you slightly, lift it off and set it aside. For Technical Support, Call 1-800-708-6227 PowerCenter Pro User’s Guide 93 7 Install drives Page 94 Friday, June 6, 1997 10:09 AM Installing Internal Drives 6. Lay the computer down on its left (as seen from the rear) side with the top closest to you. Inserting a drive into a Minitower system Before you install the drive, you must first prepare the drive (see Preparing the drive, starting on page 86) and prepare the computer (see Preparing a Minitower system, starting on page 90). The CD-ROM drive In order to install a drive in either of the available 5.25-inch drives in the Minitower system, it is usually much easier if you first remove the CD-ROM drive. However, you may be able to install a small drive that doesn’t use removable media, such as a hard drive, without removing the CD-ROM drive by sliding it in from the back, angling it down to clear the power supply If the drive must be front-accessible or has a faceplate which should be visible, you must remove the CD-ROM drive and install the new drive from the front. If you don’t remove the CD-ROM drive, skip to Front access on page 97. 94 PowerCenter Pro User’s Guide For Technical Support, Call 1-800-708-6227 7 Install drives Page 95 Friday, June 6, 1997 10:09 AM Installing Internal Drives 1. To remove the CD-ROM drive, first disconnect the sound, SCSI, and power connectors from the rear of the drive. sound connector For Technical Support, Call 1-800-708-6227 SCSI connector power connector PowerCenter Pro User’s Guide 95 7 Install drives Page 96 Friday, June 6, 1997 10:09 AM Installing Internal Drives 2. Remove the screws on both sides of the CD-ROM drive which hold the drive in place and put them where you’ll be able to find them later. Note: These screws are different from the four thumbscrews which hold the cover on; keep them separate. 3. Slide the CD-ROM drive out through the front of the chassis. 96 PowerCenter Pro User’s Guide For Technical Support, Call 1-800-708-6227 7 Install drives Page 97 Friday, June 6, 1997 10:09 AM Installing Internal Drives Front access If you are installing a drive which needs to be accessible from the front, such as a removable-cartridge drive, you must remove the metal plate from the front of the bay you are planning to use and the plastic insert from the front panel. If you don’t need front access, skip to step 6 on page 100. For Technical Support, Call 1-800-708-6227 PowerCenter Pro User’s Guide 97 7 Install drives Page 98 Friday, June 6, 1997 10:09 AM Installing Internal Drives 4. If there is a metal plate across the front of the drive bay, remove the screw holding it on the left side as you face the front of the computer, swing that side of the metal plate back, and pull the metal plate out. If the drive you are installing doesn’t use removable media, do not remove the metal plate or the plastic filler panel. metal plate 98 PowerCenter Pro User’s Guide For Technical Support, Call 1-800-708-6227 7 Install drives Page 99 Friday, June 6, 1997 10:09 AM Installing Internal Drives 5. If the plastic filler panel across the front of the bay is still in place and you are installing a drive which uses removable media, such as a CD-ROM drive or a removable-cartridge drive, reach into the empty drive bay and press firmly on the middle of the plastic insert to pop it out the front of the computer. The plastic insert is very flexible and should pop out quite easily. plastic filler panel For Technical Support, Call 1-800-708-6227 PowerCenter Pro User’s Guide 99 7 Install drives Page 100 Friday, June 6, 1997 10:09 AM Installing Internal Drives 6. Slide the drive into the drive bay (inserting a drive into a 5.25-inch drive bay from the front is illustrated below), being careful not to crimp or fold any cables. The drive slides into the bay, and the four threaded holes in the sides of the drive (two on each side) should line up with the screw slots in the side of the bay. Install the drive so that it faces up; if it isn’t clear which way the drive should face (e.g., hard drives), assume that the connectors should be in the back and that the SCSI connector key should face up. 100 PowerCenter Pro User’s Guide For Technical Support, Call 1-800-708-6227 7 Install drives Page 101 Friday, June 6, 1997 10:09 AM Installing Internal Drives 7. Connect one of the unused connectors on the SCSI cable to the wide connector on the drive (see the illustration below). Find the internal SCSI cable inside the computer (it is the wide flat ribbon cable connected to the hard drive. The internal SCSI cable should have one or two unused connectors on it. You may have to detach and re-attach the SCSI connectors on one or more other drives to get connectors where you need them. Remember, this is SCSI, so the ends (but no other devices) must be terminated. See Ensuring proper termination on page 18 for details. Note: There is a key in the middle of the top of the SCSI connector and a notch in the cable connector which matches the key, to ensure that the cable is not plugged in upside down. If the cable resists being plugged in, check to make sure the key and slot are mating correctly. hard drive SCSI connector power connector beveled corners power connector 8. Find an unused 4-pin power cable in the set of cables coming from the power supply (the power supply is in the right rear of the computer, on the bottom) and connect that cable to the rear of the drive, being careful to match the beveled corners of the plug to those of the socket (see the illustration above). For Technical Support, Call 1-800-708-6227 PowerCenter Pro User’s Guide 101 7 Install drives Page 102 Friday, June 6, 1997 10:09 AM Installing Internal Drives 9. If you are installing a Zip™ drive, use the small 4 wire 4-pin power connector and plug it into the keyed 4-pin connector near the left end of the rear of the Zip drive. On some systems the small power connector is prewired into the power cables; on others you plug an adapter into the large power cable socket to get the small connector. Zip drive 4-pin Zip drive power connector SCSI connector Make sure the connectors are snug. 10. Re-insert the speaker in the bezel and replace the bezel. 11. Replace the cover, reconnect system components, turn main power back on, and restart the computer. CAUTION: Be careful not to get any cables caught in the cover or the fan housing when you put it back on the computer. Install software drivers Some SCSI devices require special software called device drivers to operate with your computer. If a device driver is required, it is normally supplied with the device; if you are unsure whether one is required, contact the 102 PowerCenter Pro User’s Guide For Technical Support, Call 1-800-708-6227 7 Install drives Page 103 Friday, June 6, 1997 10:09 AM Installing Internal Drives manufacturer of the device. Follow the driver installation instructions supplied by the manufacturer. If a device driver is not supplied, you can generally assume that the device does not need one. The drives preinstalled in your system have pre-installed drivers. If the drive doesn’t work 1. Make sure that any required drivers are properly installed. See the drive’s documentation for more information. 2. Turn the system off, unplug the system components, and remove the cover. 3. Make sure that the drive’s SCSI connector is plugged in and seated firmly. If the connection seems loose or crooked, check to make sure that no pins are bent and that the connection is keyed properly. Bent pins may be carefully straightened with a very small screwdriver. 4. Make sure that the drive’s power cable is plugged in and seated firmly. 5. If it is a CD-ROM drive, make sure the audio cable is properly connected and seated firmly at both ends 6. Make sure that each device in the internal SCSI chain has its own unique SCSI ID: the primary hard drive (in the lower bay) should be set to ID 0, a secondary hard drive is normally set to 1, and the CDROM is normally set to 3 (see Set the SCSI ID on page 87). 7. Make sure there are no internally-terminated devices in the middle of the SCSI chain. The only internally-terminated device on the internal SCSI chain should be the pre-installed CD-ROM drive. 8. Replace the cover on the computer, replace and tighten the thumb screw(s), re-connect the external cables, and restart the computer. For Technical Support, Call 1-800-708-6227 PowerCenter Pro User’s Guide 103 7 Install drives Page 104 Friday, June 6, 1997 10:09 AM Installing Internal Drives CAUTION: Be careful not to get any cables caught in the cover or the fan housing when you put it back on the computer. If these steps do not correct the problem, contact the drive manufacturer or Power Computing Technical Support at 1-800-708-6227 for assistance. 104 PowerCenter Pro User’s Guide For Technical Support, Call 1-800-708-6227 A Health/Safe Page 105 Friday, June 6, 1997 10:12 AM A Appendix Safety and Health Information A Use this appendix to learn about safety and health issues related to computer use. Safety instructions Follow these guidelines to protect yourself from electrical shock: ■ Plug the computer into a grounded, three-hole outlet. Do not use a threehole adapter in a two-hole outlet. ■ Do not use your computer if the power cord is frayed or damaged. ■ Keep the computer away from moisture and liquid. Do not use it if you spill liquids on it. ■ Turn off the computer before removing its cover. ■ Never operate the computer without its cover. ■ Follow the safety instructions in this manual. A warning alerts you of a potential health or safety hazard. A caution notice alerts you of potential harm to your computer or its components. Health-related information about computer use The way you set up and use your computer can affect not only your productivity but also your comfort and well-being. No set of guidelines can cover every situation, but if you follow a few common-sense suggestions, you can prevent the eye fatigue and musculoskeletal discomfort sometimes experienced by computer users. For Technical Support, Call 1-800-708-6227 PowerCenter Pro User’s Guide 105 A Health/Safe Page 106 Friday, June 6, 1997 10:12 AM Safety and Health Information Preventing eye strain Whenever you focus your eyes on a nearby object for a long time — whether you are reading, sewing, or working on a computer — your eyes can get tired. Follow these suggestions to prevent eye strain: ■ Take frequent breaks. Periodically look away from the screen and focus your eyes on something farther than 20 feet away. ■ To prevent glare on the screen, avoid working with a window or light source behind you. Turn off lights or close drapes if necessary. ■ Place your monitor, chair, and work table so that the top of the monitor is slightly below the top of your head and the screen is 18-28 inches away from you. This may require placing something under the monitor. Preventing discomfort and fatigue Like any activity that involves sitting for long periods of time, using a computer can make you tired and stiff. In addition, using a keyboard and mouse improperly can sometimes be associated with RSIs (repetitive stress injuries), particularly in the wrists. Follow these suggestions to prevent discomfort: 106 ■ Take frequent breaks. Stand up, stretch, and walk around. These breaks are not wasted time. They help you work more effectively in the long run. ■ Adjust your chair so that your lower back and thighs are supported and your feet are flat on the ground (or on a footrest). ■ Adjust your chair and work table so that you can type and use the mouse with your elbows at a 90° angle, your forearms level, and your hands in a straight line with your forearms. A work table equipped with an adjustable keyboard tray may make this easier. ■ Do not place your wrists on the hard edge of your table. Use a wrist pad. ■ Sit up straight in your chair. Slouching puts unnecessary strain on your back. ■ Do not strike the keys any harder than necessary. PowerCenter Pro User’s Guide For Technical Support, Call 1-800-708-6227 B Specs Page 107 Friday, June 6, 1997 10:17 AM B Appendix Technical Information B This appendix contains technical information and specifications for the Minitower and Low-Profile PowerCenter Pro 604e/180 and 604e/210 systems. Specifications Processor (upgradeable via daughtercard) ■ Minitower/Low-Profile Model 604e/180 PowerPC 604e at 180 MHz ■ Minitower/Low-Profile Model 604e/210 PowerPC 604e at 210 MHz Memory ■ Minimum 16 MB RAM, expandable to a maximum of 512 MB ■ 4 MB read-only memory (ROM) ■ 8 K of non-volatile parameter memory ■ 1 MB of synchronous burst static RAM used as Level 2 cache for the PowerPC Processor, 3.3 volt. 5 volt supported when jumper is enabled on the main logic board. Disk drives ■ 1.4 MB high-density MFM/GCR floppy disk drive supporting Mac OS, DOS and ProDOS disks ■ Internal SCSI hard disk drive, 2 GB to 4 GB ■ Internal 16X CD-ROM Drive, 2400 KB sustained transfer rate; CD XA/PhotoCD, multi-session compatible. For Technical Support, Call 1-800-708-6227 PowerCenter Pro User’s Guide 107 B Specs Page 108 Friday, June 6, 1997 10:17 AM Technical Information Video ■ Built-in high performance EDO RAM video with hardware 2D/3D acceleration ■ Horizontal refresh rate up to 75 Hz ■ On-the-fly resolution switching ■ 2 MB EDO RAM standard video ■ 4 MB EDO RAM video riser card available from Power Computing as an option ■ 3 PCI slots available for enhanced-performance cards Audio system ■ Stereo sound generator capable of driving stereo mini-plug headphones or audio equipment ■ CD-quality 16-bit stereo, 44.1 kHz sample rate, input and output ■ Sample rates of 44.1 kHz, 22.05, and 11.025 kHz ■ Input line level: 2 volts peak-to-peak nominal into 6.5 kΩ ■ Input through output signal-to-noise ratio: >86 decibels (dB) with no audible discrete tones ■ Bandwidth: 10 Hz – 19 kHz (+/– 2 dB) at 44.1 kHz sample rate ■ Total harmonic distortion plus noise: Less than 0.06%, measured 30 Hz – 60 kHz with a 2 V p-p sine wave input Interfaces 108 ■ Dual SCSI bus support with an internal UltraSCSI bus (20 MB/sec) and Conventional SCSI bus (5 MB/sec) ■ Internal UltraSCSI bus supporting up to two internal devices in Minitower enclosure and one internal device in Low-Profile enclosure ■ Conventional SCSI bus available for both internal and external devices with a maximum of seven devices supported ■ One Apple Desktop Bus (ADB) port for up to three input devices daisychained through a low-speed, synchronous serial bus ■ Three PCI bus expansion card slots, one occupied by the 20 MB/sec UltraSCSI card PowerCenter Pro User’s Guide For Technical Support, Call 1-800-708-6227 B Specs Page 109 Friday, June 6, 1997 10:17 AM Technical Information ■ Two RS-232/RS-422 serial GeoPort-compatible ports, 230.4 Kbits per second maximum (up to 2.048 Mbits per second clocked externally) ■ Built-in Ethernet AAUI and 10Base-T connectors ■ Sound output port for stereo CD audio and computer-generated sound ■ Powered sound input port for stereo sound input ■ Standard Macintosh 15-pin video connector and 15-pin SVGA connector AC line input ■ Line voltage: 100 – 240 volts AC, RMS single phase (not auto-ranging) ■ Frequency: 50 – 60 Hz ■ Power: 400 watts maximum DC power ■ 200 watts maximum for Minitower systems ■ 145 watts maximum for Low-Profile systems Current type Minitower System Total Low-Profile System Total +5 V 18 A 12 A –5 V 0.5 A 0.35 A +12 V 4.5 A 3.8 A -12 V 0.5 A 0.35 A +3.3 V 15 A 10 A Clock and calendar ■ CMOS circuitry with long-life 3.6-volt lithium battery (1/2 AA cell) Keyboard and mouse ■ Supports all ADB-compatible keyboards and mice For Technical Support, Call 1-800-708-6227 PowerCenter Pro User’s Guide 109 B Specs Page 110 Friday, June 6, 1997 10:17 AM Technical Information Operating environment ■ Operating temperature: 10°C to 40°C (50°F to 104°F) ■ Storage temperature: –40°C to 50°C (–40°F to 122°F) ■ Relative humidity: 5% to 95% (noncondensing) ■ Altitude: 0 to 3048 m (0 to 10,000 ft) Dimensions Minitower System ■ Size: 7.7" W X 16.9" H X 17.3" D (196 mm X 429 mm X 439 mm) ■ Weight: 27 lb (12.3 kg) Low-Profile System ■ Size: 16.75" W X 4.375" H X 15.9" D (425 mm X 111 mm X 404 mm) ■ Weight: 21 lb (9.5 kg) RAM configurations The PowerCenter Pro has four slots for memory modules (or DIMMs). The computer will work with a number of different memory configurations, from a minimum of 8 MB to a maximum of 512 MB. Follow these guidelines when configuring your system’s RAM: ■ DIMM slots can accept 8, 16, 32, 64, and 128 MB DIMMs. ■ All DIMMs must be 168-pin, fast-paged mode, 60-nanosecond RAM access time or faster. Slower DIMMs will not work reliably. SIMMs from older Macintosh computers are not compatible. Video memory configurations Video memory for the two built-in video ports is provided in video memory installed on the video riser card. The system comes with 2 MB of EDO RAM, but a 4 MB video riser card is available as an option. 110 PowerCenter Pro User’s Guide For Technical Support, Call 1-800-708-6227 B Specs Page 111 Friday, June 6, 1997 10:17 AM Technical Information Increasing the computer’s video memory increases the number of colors that can be displayed on a monitor. See the tables in the next section for information about how many colors can be displayed on a monitor of a particular size with different amounts of video memory. Monitor resolution/color tables The following table displays the numbers of colors available to monitors of various sizes connected to the computer’s monitor ports. Table B-1. Built-in monitor port color levels Colors or Grays Monitor Resolution 2 MB RAM 4 MB RAM 12" Color 512 X 384 Millions Millions 13 or 14" VGA 640 X 480 Millions Millions 15" Mono Portrait 640 X 870 256 256 16 or 17" Color 800 X 600 Millions Millions 832 X 624 Millions Millions 19 or 20" Color 1024 X 768 Thousands Millions 21" Color 1152 X 870 Thousands Thousands 1280 X 960 256 Thousands 1280 X 1024 256 Thousands Power requirements Apple Desktop Bus ■ Maximum power draw for all devices: 500 mA ■ Mouse power: up to 10 mA ■ Keyboard power: 25–80 mA (depending on keyboard model) For Technical Support, Call 1-800-708-6227 PowerCenter Pro User’s Guide 111 B Specs Page 112 Friday, June 6, 1997 10:17 AM Technical Information Audio and telecommunications input devices Device Voltage Current Power Microphone +5 V 20 mA 100 mW GeoPort Telecom Adapter +5 V 500 mA 2.5 W Expansion cards and devices When you add PCI cards or internal storage devices, make sure the combined power consumption of all devices meets the following guidelines. For Minitower systems: Device Voltage Current Power +3.3 V and +5 V combined 4.5 A 3A 15 W combined +12 V 0.5 A 6.0 W -12 V 0.1 A 1.2 W +3.3 V 9.0 A 30 W +5 V 10 A 50 W PCI cards total +12 V 2.5 A 30 W (3 slot maximum) -12 V 0.5 A 6W +5 V 4.5 A 22.5 W +12 V 1.7 A 20 W PCI card (per slot) Internal storage device 112 PowerCenter Pro User’s Guide For Technical Support, Call 1-800-708-6227 B Specs Page 113 Friday, June 6, 1997 10:17 AM Technical Information For Low-Profile systems: Device Voltage Current Power +3.3 V and +5 V combined 4.5 A 3A 15 W combined +12 V 0.5 A 6.0 W -12 V 0.1 A 1.2 W +3.3 V 5.0 A 16 W +5 V 5.0 A 25 W PCI cards total +12 V 1.7 A 20 W (3 slot maximum) -12 V 0.35 A 4.2 W +5 V 4.0 A 20 W +12 V 1.7 A 20 W PCI card (per slot) Internal storage device For Technical Support, Call 1-800-708-6227 PowerCenter Pro User’s Guide 113 B Specs Page 114 Friday, June 6, 1997 10:17 AM C Reg Info Page 115 Friday, June 6, 1997 10:18 AM C Regulatory Information C Appendix This appendix contains information required by regulatory agencies. FCC Declaration of Conformity This device complies with the CFR Title 47, Part 15, of the FCC Rules and complies with Class B Limits for Digital Devices. Operation is subject to the following two conditions: (1) This device may not cause harmful interference, and (2) this device must accept any interference received, including interference that may cause undesired operation. Radio and television interference The equipment described in this manual generates, uses, and can radiate radiofrequency energy. If it is not installed and used properly — that is, in accordance with the manufacturer’s instructions — it may cause interference with radio and television reception. This equipment has been tested and found to comply with the limits for a Class B digital device in accordance with the specifications in Part 15 of FCC rules. These specifications are designed to provide reasonable protection against such interference in a residential installation. However, there is no guarantee that interference will not occur in a particular installation. You can determine whether your computer system is causing interference by turning it off. If the interference stops, it was probably caused by the computer or one of the peripheral devices. If your computer system does cause interference to radio or television reception, try to correct the interference by using one or more of the following measures: For Technical Support, Call 1-800-708-6227 PowerCenter Pro User’s Guide 115 C Reg Info Page 116 Friday, June 6, 1997 10:18 AM Regulatory Information ■ Turn the television or radio antenna until the interference stops. ■ Move the computer to one side or the other of the television or radio. ■ Move the computer farther away from the television or radio. ■ Plug the computer into an outlet that is on a different circuit from the television or radio. (That is, make certain the computer and the television or radio are on circuits controlled by different circuit breakers or fuses.) If necessary, consult an authorized service provider or consult an experienced radio/television technician for additional suggestions. You may find the following booklet helpful: Interference Handbook (stock number 004-000-00493-1). This booklet, prepared by the Federal Communications Commission, is available from the U.S. Government Printing Office, Washington, DC 20402. Important: Changes or modifications to your computer not expressly approved by the party responsible for compliance could void the user’s authority to operate the equipment. This product was tested for FCC compliance under conditions that included the use of shielded cables and connectors between system components. It is important that you use shielded cables and connectors between system components to reduce the possibility of causing interference to radios, television sets, and other electronic devices. DOC statement DOC Class B Compliance This digital apparatus does not exceed Class B limits for radio noise emissions from digital apparatus as set out in the interferencecausing equipment standard entitled “Digital Apparatus,” ICES-003 of the Department of Communications. Observation des normes—Classe B Cet appareil numérique respecte les limites de bruits radioélectriques applicables aux appareils numériques de Class B prescrites dans la norme sur le matériel brouilleur: “Appareils Numériques”, NMB-003 édictée par le ministre des Communications. 116 PowerCenter Pro User’s Guide For Technical Support, Call 1-800-708-6227 C Reg Info Page 117 Friday, June 6, 1997 10:18 AM Regulatory Information CD-ROM drive WARNING! Making adjustments or performing procedures other than those specified in your equipment’s manual may result in hazardous exposure. WARNING! Do not attempt to disassemble the cabinet containing the laser. The laser beam used in this product is harmful to the eyes. The use of optical instruments, such as magnifying lenses, with this product increases the potential hazard to your eyes. For your safety, have this equipment serviced only by an authorized service provider. If you have an internal CD-ROM drive in your computer, your computer is a Class 1 laser product. The Class 1 label, located on the computer, indicates that the drive meets minimum safety requirements. A service warning label is on the CD-ROM drive inside the computer. CLASS 1 LASER PRODUCT LASER KLASSE 1 LUOKAN 1 LASERLAITE APPAREIL A LASER DE CLASSE 1 EN60825 Lithium battery warning The computer contains a lithium battery to power the clock and calendar circuitry. CAUTION: Danger of explosion if battery is replaced incorrectly. Replace only with the same or equivalent type recommended by the manufacturer. Discard used batteries according to the manufacturer’s instructions. ATTENTION! Il y a danger d’explosion s’il y a remplacement incorrect de la batterie. Remplacer uniquement avec une batterie du méme type ou d’un type recommandé par le constructer. Mettre au rébut les batteries usagées conformément aux instructions du fabricant. For Technical Support, Call 1-800-708-6227 PowerCenter Pro User’s Guide 117 C Reg Info Page 118 Friday, June 6, 1997 10:18 AM Regulatory Information For use in European countries Use an HAR approved power cord with proper plug configuration. Bitte nur mit zugelassener HAR-Stromkabel benutzen. 118 PowerCenter Pro User’s Guide For Technical Support, Call 1-800-708-6227 HDT PE 2.0 Front Matter OEM Page cxix Friday, June 6, 1997 10:21 AM Print the software serial number here: RB290343999 Hard Disk ToolKit•Personal Edition™ Reference Guide 970420 HDT PE 2.0 Front Matter OEM Page cxx Friday, June 6, 1997 10:21 AM Copyright Notice This manual, the software described in it, the product design, and design concepts are copyrighted by FWB Software, LLC (FWB) with all rights reserved. Your rights with regard to the software and manual are subject to the restrictions and limitations imposed by the copyright laws of the United States of America. Under the copyright laws, neither the programs nor the manual may be copied, reproduced, translated, transmitted or reduced to any printed or electronic medium or to any machine-readable form, in whole or in part, without the written consent of FWB. © 1996, 1997 FWB Software, LLC; © 1997 Power Computing Corporation. All rights reserved. April, 1997 HDT PE 2.0 Front Matter OEM Page cxxi Friday, June 6, 1997 10:21 AM End-User Software License Agreement DO NOT USE THIS SOFTWARE UNTIL YOU HAVE CAREFULLY READ THIS AGREEMENT AND AGREE TO THE TERMS OF THIS LICENSE. BY USING THE ENCLOSED SOFTWARE, YOU ARE AGREEING TO THE TERMS OF THIS LICENSE. The software license agreement for this program is included in this manual so you can read it before installing the program. INSTALLING THE PROGRAM OR USE OF THE MATERIALS ENCLOSED WILL CONSTITUTE YOUR ACCEPTANCE OF THE TERMS AND CONDITIONS OF THIS SOFTWARE LICENSE AGREEMENT. If you do not agree to the terms of this software license agreement, do not install the software and promptly return the package to the place of purchase for a full refund of all money that you paid for the product. In return for purchasing a license to use the computer programs, known as Hard Disk ToolKit•Personal Edition (Software) contained in this package, and for purchasing documentation included in this package, you agree to the following terms and conditions: 1. License. The Software enclosed is licensed, not sold, to you by FWB Software, LLC (FWB) for use under the terms of this software license. This non-exclusive license allows you to: i. Use the Software only on a SINGLE computer at any one time. You may only use the software on one CPU and only on drives physically connected to that single CPU. ii. Only use the software to optimize or otherwise control disk drives that are connected to a SINGLE computer that is used by you. iii. Make one copy of Software in machine readable form, provided that such copy is used only for backup purposes and the FWB copyright notice is reproduced on the backup copy. iv. Transfer Software and all rights under this license to another party together with a copy of this license and all documentation accompanying the Software, provided the other party agrees to accept the terms and conditions of this license. As a licensee, you own the magnetic media on which the Software is originally recorded. The Software is copyrighted by FWB and proprietary to FWB, and FWB retains title and ownership of the Software, and all copies of the Software. This license is not a sale of Software or any copy. You agree to hold Software in confidence and to take all reasonable steps to prevent disclosure. 2. Restrictions. You may NOT distribute copies of this Software to others or electronically transfer Software from one computer to another over a network, or via modem. The Software contains trade secrets that are wholly owned by FWB Software, LLC. You may NOT decompile, reverse engineer, translate, disassemble, or otherwise reduce Software to a human understandable format. YOU MAY NOT MODIFY, ADAPT, TRANSLATE, RENT, LEASE, RESELL FOR PROFIT, DISTRIBUTE, NETWORK, OR CREATE DERIVATIVE WORKS BASED UPON THIS SOFTWARE OR ANY PART THEREOF. 3. Termination. This license is effective until terminated. This license will terminate immediately without any notice from FWB if you fail to comply with any of its provisions. Upon termination you must destroy the Software and all copies thereof. You may terminate this license at any time by destroying the Software and all copies thereof. 4. Export Law Assurances. You agree and certify that neither the Software nor the documentation will be transferred or re-exported, directly or indirectly, into any country where such transfer or export is prohibited by the United States Export Administration Act and regulations thereunder or will be used for any purpose prohibited by the Act. You also agree that neither the Software nor any technical data received from FWB, nor the direct product thereof will be exported outside the United States except as authorized in advance by FWB, in writing, and as permitted by the laws of the United States. 5. Warranty Disclaimer, Limitation of Damages and Remedies. FWB Software, Inc. (FWB) makes no warranty or representation, either expressed or implied, regarding the merchantability, quality, functionality, performance, or fitness of either the diskette, manual, or the information provided on it. This software and manual are licensed “AS IS.” It is solely the responsibility of the consumer to determine the software’s suitability for a particular purpose or use. FWB and anyone else who has been involved in the creation, production, delivery, or support of the software, will in no event be liable for direct, indirect, special, consequential, or incidental damages resulting from any defect, error, or omission in the diskette, manual, or software or from any other events including, but not limited to, any interruption of service, loss of business, loss of profits or good will, legal action or any other consequential damages. The user assumes all responsibility arising from the use of this software. FWB’s liability for damages to you or others will in no event exceed the total amount paid by you for this software. In particular, FWB shall have no liability for any data or programs stored by or used with FWB’s software, including the costs of recovering such data or programs. FWB will be neither responsible nor liable for any illegal use of its software. FWB reserves the right to make corrections or improvements to the information provided and to the related software and hardware at any time, without notice. FWB will replace or repair defective distribution media or documentation at no charge, provided you return the item to be replaced with proof of purchase to FWB during the 90-day period after purchase. ALL IMPLIED WARRANTIES ON THE MEDIA AND DOCUMENTATION, INCLUDING IMPLIED WARRANTIES OF MERCHANTABILITY AND FITNESS FOR A PARTICULAR PURPOSE, ARE LIMITED IN DURATION TO HDT PE 2.0 Front Matter OEM Page cxxii Friday, June 6, 1997 10:21 AM NINETY (90) DAYS FROM THE DATE OF THE ORIGINAL RETAIL PURCHASE OF THIS PRODUCT. The warranty and remedies set forth above are exclusive and in lieu of all others, oral or written, expressed or implied. No FWB dealer, representative, agent, or employee is authorized to make any modification, extension, or addition to this warranty. Some states do not allow limitations on how long an implied warranty lasts, or the exclusion or limitation of implied warranties or liability for incidental or consequential damages, so the above limitation or exclusion may not apply to you. This warranty gives you specific legal rights, and you may also have other rights that vary from state to state. 6. Government End-Users. If you are a United States Government end-user, this license of the Software conveys only “RESTRICTED RIGHTS,” and its use, disclosure, and duplication are subject to DFARS 52.2277013. This Software was developed at private expense, and no part of it was developed with government funds. The Software is a trade secret of FWB for all purposes of the Freedom of Information act, and is “commercial computer software” subject to limited utilization as provided in the contract between the vendor and the governmental entity, and in all respects is proprietary data belonging solely to FWB. Government personnel using the Software, other than under a DOD contract or GSA Schedule, are hereby on notice that the use of this Software is subject to restrictions that are the same as, or similar to, those specified above. 7. General. This license will be construed under the laws of the state of California, except for that body of law dealing with conflicts of laws, if obtained in the United States, or the laws of jurisdiction where obtained if obtained outside the United States. If any provision of this license is held by a court of competent jurisdiction to be contrary to law, that provision will be enforced to the maximum extent permissible, and the remaining provisions of this license will remain in full force and effect. Complete Agreement. This license constitutes the entire agreement between the parties with respect to the use of the Software and related documentation, and supersedes all prior or contemporaneous understandings or agreements, written or oral, regarding such subject matter. Trademarks Hard Disk ToolKit•Personal Edition, Hard Disk ToolKit, RAID ToolKit, CD-ROM ToolKit, FWB Software, and the FWB logo are trademarks of FWB Software, LLC. Apple, AppleShare, Finder, and Macintosh are registered trademarks of Apple Computer, Inc. All other brand and product names are trademarks or registered trademarks of their respective holders. Credits This manual is based on the Hard Disk ToolKit•Personal Edition manual, written, edited, revised, and updated by Chuck Martin, based on the original Hard Disk ToolKit manual written by Bruce Dundas. Contributing Writers: Julianne Edmunds, Chuck Martin, Fred Swan, Richard Woo, Mike Micheletti. Editorial Advisors: Norman Fong, Stuart Saraquse, Joan Carter, Charles McBrian, Allan Levite, Jon Abilay, Traci Ivory, Robert Brown. Graphics: Deane Morris, Bruce Dundas, Chuck Martin. 1A. HDT 2.0 - Intro OEM Page 123 Friday, June 6, 1997 10:25 AM 1 Introduction Additional Documentation This manual is an abbreviated version of the Hard Disk ToolKit•Personal Edition User Guide. A full version of that manual is found on your hard drive and on the P o w e r C D . To view the manual, open the H D T ¥ P E 2 . 0 m a n u a l .pdf file; double-click on that file. The file and the rest of the Hard Disk ToolKit™ software can be located by opening the following folders: Utilities Hard Disk ToolKit™ HDT•PE 2.0 manual.pdf If you see an error message stating Adobe Acrobat is not installed, you will need to reinstall Acrobat Reader 3.0. Open the Install Acrobat Reader 3.0 application and follow the onscreen instructions. The installer application can be found by opening the following folders: CD Extras Adobe Acrobat 3.0 Install Acrobat Reader 3.0 The manual can not be viewed if the Power CD is your current startup disk. Registration Complete the registration card enclosed in the packaging and return it to FWB to qualify for updates. NOTE Technical Support Agreement: The enclosed software is an OEM version of Hard Disk ToolKit•Personal Edition. This software package may be purchased only as part of a storage sub-system. Technical support for this software is available only from the company that bundles the package with your storage device. Please contact that company for technical support. Chapter 1: Introduction 123 1A. HDT 2.0 - Intro OEM Page 124 Friday, June 6, 1997 10:25 AM FWB Software currently offers a support package that allows recipients of bundled software to receive FWB’s top-rated technical support and FWB’s latest version for a small registration fee. Please contact FWB for more information. Before you begin Before using Hard Disk ToolKit•Personal Edition, you should be familiar with the Mac OS. An understanding of the basics of connecting and terminating SCSI and IDE peripheral devices is also helpful. If you need more information on the Mac OS, or the basics of connecting external SCSI devices, see the manuals that were supplied with your computer. Hard Disk ToolKit•Personal Edition software provides complete control over your SCSI and IDE storage environment, but it cannot overcome problems from incorrect hardware installation. For data integrity and peak system performance, it is vital that your hardware is installed correctly. Installing the latest Macintosh System Software For information on installing the Mac OS software onto a hard disk, refer to the user guide that was supplied with your computer. Upgrading to Hard Disk ToolKit•PE versions 2.0 (and later) Read this section if you have drives formatted with earlier versions of Hard Disk ToolKit•PE or a non-FWB software product. Information for owners of disk devices that are currently in use Users of earlier versions of Hard Disk ToolKit•PE who do not want to reformat their existing storage devices, but who do want the enhanced functionality from the latest FWB driver, should use the Update Driver command. (See Updating a Device’s Driver in the online manual.) The Update Driver command can also install an FWB driver onto a disk storage device that was formatted with a non-HDT•PE product without having to reformat the device. Be sure to back up all of your valuable data before using the Update Driver command. ! 124 Back up all your valuable data before using the Update Driver command! Normally, the Update Driver command will work as expected, and your existing data will be totally safe. However, a device driver controls all access to the disk, and updating an older driver can put your existing data at a small risk. Hard Disk ToolKit•Personal Edition Reference Guide 1A. HDT 2.0 - Intro OEM Page 125 Friday, June 6, 1997 10:25 AM Hard Disk ToolKit•Personal Edition’s software modules The Hard Disk ToolKit•Personal Edition software package includes two separate applications: • Hard Disk ToolKit•PE • FWB Mounter The features of each of these applications are described within this manual. The HDT•PE software package also includes two System Extensions and two specialized data files. Frequently Asked Questions (FAQ) For answers to Frequently Asked Questions and compatibility issues, and for information about the latest version and supported devices, visit our World Wide Web site at http://www.fwb.com. Maintaining Data Integrity We have engineered the best solutions available to ensure the safety of your data. However, only you can take full responsibility for the integrity of your computing environment. Whether you are a computing professional or a home user, you should always: • Regularly back up the data stored on your disks • Prevent computer viruses from entering your system. Backing up your data Backing up your data is an essential task, the importance of which cannot be emphasized too highly. Backing up is the duplication of data files and applications from one data storage medium onto another. Perform backups to a secondary medium to protect against the loss of valuable data in the event that harm should somehow occur to the primary medium. Many people don’t back up because they don’t want to be bothered. Having good software with an unattended backup scheduling feature eliminates the bother. Backup is essential! Chapter 1: Introduction 125 1A. HDT 2.0 - Intro OEM Page 126 Friday, June 6, 1997 10:25 AM 1B. HDT 2.0 Installer OEM Page 127 Friday, June 6, 1997 2:46 PM 2 Installing and Removing H a r d D i s k To o l K i t • P E Your OEM version of Hard Disk ToolKit•Personal Edition is on the CDROM that came with your system and is ready to run. Figure 7.1: The Hard Disk ToolKit•PE folder. The Hard Disk ToolKit•PE, as well as the Power CD SystemSoftware Installer also contain an installer file if you want to install Hard Disk ToolKit•PE onto one of your hard disks, either separately or as a part of a systemsoftware installation. If you choose to do this, see Installing Hard Disk ToolKit•PE on page 128. Chapter 2: Installing and Removing Hard Disk ToolKit•PE 127 1B. HDT 2.0 Installer OEM Page 128 Friday, June 6, 1997 2:46 PM The Hard Disk ToolKit•PE folder on the CD-ROM contains the files in the following table: Module Name Location Purpose Hard Disk ToolKit•PE Hard Disk ToolKit•PE folder This is the main application of the HDT•PE software package. It formats, initializes, and partitions SCSI & IDE disk devices. FWB Mounter Hard Disk ToolKit•PE folder This application scans SCSI & IDE buses and mounts /unmounts devices and/or volumes without the need to launch Hard Disk ToolKit•Personal Edition. Device Data file Hard Disk ToolKit•PE folder This resource is used by HDT to optimize the settings for nearly every hard drive manufactured for the Macintosh. Read Me First file Hard Disk ToolKit•PE folder Contains important information that became available after the manual was printed. Supported Devices file Hard Disk ToolKit•PE folder This file contains a list of devices supported by HDT•PE. QuickHelp application Hard Disk ToolKit•PE folder This application is the “help engine” of the HDT•PE application. It is launched automatically when HDT•PE’s online help is used. Hard Disk ToolKit•PE Help file Hard Disk ToolKit•PE folder This file contains all of HDT•PE’s online help information. It is opened automatically when HDT•PE’s online help is used. Hard Disk ToolKit•PE Installer Hard Disk ToolKit•PE folder This installs Hard Disk ToolKit•PE to your hard drive. You can view or print the Read Me First and Supported Devices files by opening the files with SimpleText (included with the Mac OS) or other word processing application. Installing Hard Disk ToolKit•PE Determine where you will install Hard Disk ToolKit•Personal Edition. If you do not select a location for Hard Disk ToolKit•PE, it is installed by default onto your startup disk. ! 128 A Read Me file is installed onto your hard disk by the Hard Disk ToolKit•PE Installer. Be sure to read it for important information regarding compatibility issues that became available after this manual was printed. Hard Disk ToolKit•Personal Edition Reference Guide 1B. HDT 2.0 Installer OEM Page 129 Friday, June 6, 1997 2:46 PM You cannot use certain functions of the Hard Disk ToolKit•PE application on the system startup disk, or the disk from which it has been launched. For example, to use HDT•PE to format or auto initialize a device, it must have been launched from a different device. For instance, you can start up your computer fromthe bootable Power CD which also contains HDT•PE. For instructions on how to start you computer from the Power CD, follow the instructions in Starting Up from the CD-ROM elsewhere in your Power Computing User’s Guide. If you wish to reformat or auto initialize your current system startup disk, then first back up all its valuable data to another medium, and restore it after the disk has been reformatted for use. ! Hard Disk ToolKit•Personal Edition’s Format and Auto Initialize commands will overwrite all previously existing data on the drive. Be sure that you have backed up any valuable data on the drive before performing a Format or Auto Initialize operation. Before installing Hard Disk ToolKit•Personal Edition Ensure that the installation of Hard Disk ToolKit•Personal Edition software onto your hard disk is successful. Follow these preparatory steps prior to the actual installation of HDT•PE software: 1. Disable any virus protection software. 2. Turn off file sharing: from the Apple menu, choose Control Panels, then select Sharing Setup; click on the Stop File Sharing button. 3. Remove older modules of Hard Disk ToolKit or Hard Disk ToolKit•PE from your hard disk. 4. Remove any other manufacturers’ software that automatically mounts or loads drivers for removable drives — be sure to check inside the Extensions and Control Panels folders inside the System Folder. Removing other software that automatically mounts or loads drivers for removable drives prevents potential conflicts with Removable (a part of the FWB Tools Extension) for control of a removable cartridge. Some examples of other manufacturers’ software of this type are: Anubis Extension, Driver Loader, APT Extension, Mount Cache, MicroNet Cartridge Extension, Silver Control, and SD Removable CDEV. 5. Restart your computer with all Extensions off. (Turn Extensions off by restarting your computer while holding down the Shift key. Your virus protection and File Sharing will turn off when you disable Extensions.) Chapter 2: Installing and Removing Hard Disk ToolKit•PE 129 1B. HDT 2.0 Installer OEM Page 130 Friday, June 6, 1997 2:46 PM To install Hard Disk ToolKit•PE only: Note: To install Hard Disk ToolKit•PE along with the system software, follow the instructions in Installing System Software in your Power Computing User’s Guide). 1. Insert the Power CD into your CD-ROM drive. 2. Open the Utilities folder on your Power CD. 3. Open the Hard Disk ToolKit™ PE Folder. 4. Double-click on the Hard Disk ToolKit™ PE folder to open it. 5. Drag the Hard Disk ToolKit™ PE folder to the Utilities folder of your Hard Disk. 130 Hard Disk ToolKit•Personal Edition Reference Guide 2A. HDT2 Primer Intro Page 131 Friday, June 6, 1997 2:50 PM 3 A n O v e r v i e w o f H a r d D i s k To o l K i t • P E ! Hard Disk ToolKit•Personal Edition is a powerful application that formats and partitions SCSI and IDE storage devices. Formatting and partitioning are data-destructive procedures — any previously existing data on the storage device will be irrevocably erased. Back up all valuable data before using HDT•PE. Read this chapter and Chapter 4, Using Hard Disk ToolKit•PE, in the online manual before attempting any operations such as formatting or partitioning. Figure 7.2: The HDT•PE application icon. Hard Disk ToolKit•Personal Edition is a fully functional disk management utility software for SCSI and IDE storage systems for the Power Macintosh/Macintosh. Use Hard Disk ToolKit•PE as a standard formatting utility for all single-disk drives and removable media drives. Hard Disk ToolKit•PE: • Displays all peripheral devices across all SCSI and IDE buses in one convenient window NOTE IDE is also known as ATA. The terms IDE and ATA are interchangeable. • Supports Fast & Wide SCSI-2 and SCSI-3 technology (connect up to 15 devices on an installed Fast & Wide SCSI-2 bus) • Creates, deletes, and modifies partitions on SCSI and IDE disk devices • Mounts and unmounts partitions • Updates and/or installs device drivers • Tests disk devices for defects • Provides password protection to volumes Chapter 3: An Overview of Hard Disk ToolKit•PE 131 2A. HDT2 Primer Intro Page 132 Friday, June 6, 1997 2:50 PM The Selector Window: Hard Disk ToolKit•PE’s Main Screen The main screen of Hard Disk ToolKit•PE is referred to as the Selector window. Devices must be selected within it before any of HDT•PE’s primary functions can be used. All devices attached to all SCSI and IDE buses are listed in the Selector window. If one or more SCSI accelerator boards are installed and have SCSI devices connected to them, then these devices will also be displayed in the Selector window. (HDT•PE supports other manufacturers’ SCSI accelerator boards, as long as they are SCSI Manager 4.3 compliant.) Making a selection Select a single device or volume by clicking on it once anywhere in the row in which it appears. The currently selected device is highlighted in the Selector window. A different drive/volume can then be selected by using the keyboard’s up and down arrow keys. Selector window features See Figure 3.2 and the accompanying tables for details on the Selector window. 4 5 1 2 3 Figure 7.3: HDT•PE’s Selector window. The numbered items are explained in Table 1. 132 Hard Disk ToolKit•Personal Edition Reference Guide 2A. HDT2 Primer Intro Page 133 Friday, June 6, 1997 2:50 PM Table 1. Parts of the Selector window. Name Function 1 Column headings Column headings describe the data that appear directly underneath them. Change the sort order by clicking on a different column heading. 2 Device list All SCSI and IDE devices installed on all native and/or installed SCSI /IDE buses are listed and include information on capacity, volume(s), manufacturer, model number, and more. Double-click on a selected device to view its Partition List window. 3 Online help Provides online help for Hard Disk ToolKit•PE. See Using Hard Disk ToolKit•PE in the online manual. 4 Title bar The name of the computer that Hard Disk ToolKit•PE runs on is presented in the title bar of the main window. The name of the computer is determined in the Mac OS’s Sharing Setup control panel. 5 Toolbar Click on a button in the toolbar to perform a function on the highlighted item(s) in the Selector window. Alternatively, drag a selected device and drop it on a button. All buttons have tooltips. Place the mouse over any of the buttons to see a text box that describes its function. All buttons are also available as menu commands. Selector window toolbar Hard Disk ToolKit•PE’s most frequently used functions are available through the buttons on the toolbar near the top of the Selector window. These buttons are shortcuts to HDT•PE’s functionality. Every button command is also available as a menu item. You can also drag a device and drop it on a button. See Table 2 for a description of each button’s purpose. Table 2. The Hard Disk ToolKit•PE toolbar buttons. Button Name Function Mount Mount to the desktop any volumes on the device that has been selected in the Selector window. Unmount Unmount from the desktop any mounted volumes on the drive that has been selected in the Selector window. Unmounting can also be done on the Desktop—simply drag the volume’s icon to the Trash. Any of these methods will unmount the volume from the Desktop without harming any data. Rescan Rescan all buses for any devices that may have been powered on after Hard Disk ToolKit•Personal Edition was launched. The Selector window will be refreshed after Rescan. Chapter 3: An Overview of Hard Disk ToolKit•PE 133 2A. HDT2 Primer Intro Page 134 Friday, June 6, 1997 2:50 PM Table 2. The Hard Disk ToolKit•PE toolbar buttons. Button Name Function Get Info Opens a dialog box that contains detailed information about the device that has been selected. Security Add password protection to volume(s) on the selected device. Test Test selected device for defects. Auto Initialize Begin an automated formatting and partitioning process on the device(s) selected in the Selector window. Selector window column headings The sort order of devices can be changed by clicking on a different column heading. • Address The SCSI or IDE ID of devices and the SCSI or IDE bus they are connected to are displayed under this heading. The information is presented in the format: SCSI x: ID y— x represents the bus number and y represents the value on the device’s SCSI or IDE ID selector switch. If the device supports LUNs (Logical Unit Numbers), the LUN is also displayed. NOTE The Power Macintosh/Macintosh’s built-in SCSI bus is always bus 0. If a Power Macintosh/ Macintosh has dual built-in SCSI buses, then the first bus is 0 and the second bus is 1. • Type Hard Disk ToolKit•PE displays all types of SCSI and IDE storage devices, including hard disks, removable media drives (e.g., SyQuests), CD-ROM players, tape drives, and non-storage devices, such as scanners. • Capacity (Unallocated) The formatted capacity of a disk device and its unallocated free space are displayed here, presented in the format: 525MB; (220MB). Unallo134 Hard Disk ToolKit•Personal Edition Reference Guide 2A. HDT2 Primer Intro Page 135 Friday, June 6, 1997 2:50 PM cated free space is displayed in parentheses, to let you know that you can create more volumes on the device. (On a removable media device, this field is empty if a cartridge is not inserted. NOTE A newly formatted drive that has not yet been initialized will have a capacity figure slightly higher than the free space figure because the driver takes up space on the disk that cannot be used to create volumes. • Identity The manufacturer, model number, and version of the device are displayed here. • Volume(s) The name(s) of the volume(s) that have been created on the storage device are displayed here. Because of space limitations, all the volumes that might exist on a device may not be visible here. To see all volumes on a device, choose the Get Info or View Partitions command. The Partition List Window Use the Partition List window to: • • • • view the individual partitions of a specific disk device configure a device’s driver resize the volumes on a device delete volumes from the device Highlight a device in the Selector window by clicking on it once. Then choose the View Partitions command under the Devices menu to view its Partition List window (short cut: double-click on a device in the Selector Chapter 3: An Overview of Hard Disk ToolKit•PE 135 2A. HDT2 Primer Intro Page 136 Friday, June 6, 1997 2:50 PM window). The address of the device is listed in the Partition List window’s title bar. Figure 7.4: The Partition List window. Notice that the bus and ID information for the device is displayed in the title bar. Every storage device must have a Partition Map, driver partitions, and at least one Mac OS partition created for general storage before any volume(s) can be mounted to the Desktop. Partitions are sorted according to their physical location on the disk. Every block on the disk must exist in some type of partition, whether it is Apple_HFS, Apple_Free, Apple_partition_map, or some other type. HDT•PE automatically creates all partition types for you. NOTE For more information, see Partitioning in the online manual. For more information on driver partitions, see All About Drivers in the online manual. You may see the Apple_Free partition type—this is unallocated free space. The free space partition on the disk cannot be mounted to the Desktop. Mountable partitions (also known as volumes) are created from free space. To transform unallocated free space into a mountable volume, see Creating New Volumes in the online manual. NOTE 136 On a drive with greater than 1GB capacity, the driver partition must reside within the first 1GB of disk space, or Macintoshes older than the Quadra 840AV cannot start up off the disk. HDT•PE will create a driver partition only within the first 1GB of disk space. Hard Disk ToolKit•Personal Edition Reference Guide 2A. HDT2 Primer Intro Page 137 Friday, June 6, 1997 2:50 PM Four fields appear at the top of the Partition List window. • Capacity The total capacity of the storage mechanism as specified by its manufacturer. • Unallocated The amount of unallocated, free space on the storage device. • # of Partitions The total number of partitions on the storage device. Volumes, drivers, and partition maps occupy their own partitions. • Total Blocks The media of a storage device is logically divided into a finite number of addressable blocks at the time it is low-level formatted.The total number of addressable blocks in the listed partitions appears here. The Partition List window’s column headings • Title Partitions used as storage volumes can have a user-specified title (this is also the name that appears on the Desktop). Other partitions show the title of the driver or driver component. • Name The name signifies the nature of the partition. All simple HFS partitions have the name Mac OS. • Type There are several types of partitions used by the Macintosh. A simple volume that mounts to the Desktop is of the Apple_HFS type. Partition maps are of the Apple_Partition_Map type. Drivers are of the Apple_Driver43 type. • Start Block Partitions can be located by their first block or Start Block. • Size The size of the partition in kilobytes is displayed in this column. Three command buttons appear at the bottom of the Partition List window: • Configure Driver The “rules” that govern the operation of the FWB device driver can be changed to meet your computing needs. For more information on this feature, see Configuring a device’s driver in the online manual. Chapter 3: An Overview of Hard Disk ToolKit•PE 137 2A. HDT2 Primer Intro Page 138 Friday, June 6, 1997 2:50 PM • Resize Volume The size of existing volumes of the Simple HFS type can be increased or decreased—without data loss. For more information on this feature, see Resizing volumes in the online manual. • Delete A volume’s partition can be deleted by selecting it in the Partition List window and then clicking Delete. For more information on this feature, see Deleting partitions in the online manual. ! 138 The Delete command will erase any data contained within the selected partition—be sure to back up your valuable data before you delete. Hard Disk ToolKit•Personal Edition Reference Guide 2B. HDT 2.0 Primer Usage Page 139 Friday, June 6, 1997 3:06 PM 4 U s i n g H a r d D i s k To o l K i t • P E This chapter assumes that external SCSI devices have been installed according to their manufacturers’ instructions. If you are a new user to this version of Hard Disk ToolKit•PE, then we recommend that you read Chapter 3, An Overview of Hard Disk ToolKit•PE,” before proceeding with this chapter. For more detail on using Hard Disk ToolKit•PE, see the online manual. ! HDT•PE is a powerful application that formats and partitions SCSI and IDE storage devices. Back up all valuable data before using HDT•PE. Starting Hard Disk ToolKit•Personal Edition To start Hard Disk ToolKit•PE, double-click the Hard Disk ToolKit•PE icon. The HDT•PE Selector window appears (Figure 7.5). Figure 7.5: The HDT•PE Selector window. Chapter 4: Using Hard Disk ToolKit•PE 139 2B. HDT 2.0 Primer Usage Page 140 Friday, June 6, 1997 3:06 PM NOTE Hard Disk ToolKit•Personal Edition cannot format or partition the startup drive or a drive from which it has been launched. In addition, for HDT•PE to start, the Device Data file and the Device Data ATA file must be in the same folder as the HDT•PE application. Hard Disk ToolKit•PE functions Table 4-1 will guide you to detailed instructions on each of HDT•PE’s functions. To perform this function… …see this section Format a disk device Formatting a Disk Device on page 144 Prepare a disk device for general use Auto Initializing a Disk Device on page 141 Partition a disk device Creating New Volumes in the online manual Install a driver onto a disk device Updating a Device’s Driver on page 152 Update an existing driver on a a disk device Updating a Device’s Driver on page 152 Update an older FWB driver Updating a Device’s Driver on page 152 Update the driver of a device that was not originally formatted with Hard Disk ToolKit•PE Updating a Device’s Driver on page 152 Create new volumes on a previously formatted disk device Creating New Volumes in the online manual Delete an existing volume Deleting Volumes from a Device in the online manual Delete a partition Deleting partitions in the online manual Resize an existing volume Resizing volumes in the online manual Change the attributes of an existing volume Changing a Volume’s Attributes in the online manual Diagnose and fix bad media Testing a Device on page 152 Install password protection onto a volume Security and Protection Features in the on-line manual Customize a device’s driver Configuring a device’s driver in the online manual View the specifications of a system, device, and/or volume Informational Capabilities in the online manual Table 4-1. HDT•PE function locator. 140 Hard Disk ToolKit•Personal Edition Reference Guide 2B. HDT 2.0 Primer Usage Page 141 Friday, June 6, 1997 3:06 PM Should I use Format or Auto Initialize? Auto Initialize is the easiest and most automated way to prepare your SCSI and IDE disk devices. Auto Initialize will: • • • • erase any existing data on the selected device install the driver write a partition map create a new volume of the maximum possible size Use Format to access Hard Disk ToolKit•PE’s custom, low-level formatting options. Format will clear all existing data from the selected device. You can subsequently install the driver, write a partition map, and create volumes according to your needs. NOTE Auto Initializing a Disk Device Auto Initialize prepares a disk device for use. Most disk devices have already been initialized at the factory, but if your disk device has not been auto initialized with HDT•PE, you may not get the best performance from it. Typically, you would auto initialize a disk to completely clean it of existing data. The Device Data files, which reside in the same folder as the Hard Disk ToolKit•PE application, contains detailed information on the optimal parameters for hundreds of different disk devices. The HDT•PE application automatically references the Device Data files as it auto initializes your disk device to ensure that it reaches its peak performance. Auto Initialize follows a set of optimal default values so that novice users can format and create volumes on their SCSI and IDE disk devices as safely and easily as possible. Auto Initialize will: • clear any existing data on the selected device, then verify disk integrity • install the driver • write a partition map • create a new volume of the maximum size possible and mount it to the Desktop Chapter 4: Using Hard Disk ToolKit•PE 141 2B. HDT 2.0 Primer Usage Page 142 Friday, June 6, 1997 3:06 PM ! Hard Disk ToolKit•PE’s Auto Initialize command overwrites all previously existing data on the drive. Be sure that you have backed up all valuable data on the drive before performing an Auto Initialize operation. To auto initialize a drive: ! Back up all valuable data before proceeding! Auto Initialize will write over the contents of the entire disk. It is impossible to recover data that existed on a disk prior to an Auto Initialize. 1. In the Selector window, select the drive to auto initialize. 2. Click the Auto Initialize button on the toolbar. OR Drag the device and drop it on the Auto Initialize button. OR From the Devices menu, choose Auto Initialize. The Auto Initialize dialog box appears (Figure 7.6). Figure 7.6: The Auto Initialize dialog box. 3. Make your desired changes to the settings: • Format Type: Select the type of format: Quick or Low Level. Quick is the default selection and is the appropriate choice for most purposes. See Formatting: Quick vs. Low Level on page 144 for more information. 142 Hard Disk ToolKit•Personal Edition Reference Guide 2B. HDT 2.0 Primer Usage Page 143 Friday, June 6, 1997 3:06 PM • Verify After Formatting: If this checkbox is enabled, Hard Disk ToolKit•PE will verify that all blocks on the disk are free of errors. This option causes the format to take more time. If a bad block is encountered, the Auto Initialize is stopped and a warning message will appear. Use HDT•PE’s Test feature to spare out the bad blocks. For more information, see Testing a Device on page 152. NOTE When formatting a rewritable magneto-optical disk, do not use the Verify After Formatting option. If you do, you may see erroneous media error messages, because on some magnetooptical drives data needs to be written to the disk before these blocks become verifiable. 4. Click OK. Two warning boxes appear that say Auto Initialize will destroy all the data on the disk (Figure 7.7). Figure 7.7: Warning dialog boxes. 5. Click OK in both warning boxes. A status box appears while the auto initialize is in process. The length of time required to complete an auto initialize depends on the size and speed of the drive, as well as the auto initialize options you selected. Chapter 4: Using Hard Disk ToolKit•PE 143 2B. HDT 2.0 Primer Usage Page 144 Friday, June 6, 1997 3:06 PM A message box appears that says the Auto Initialize completed successfully. 6. Click OK to return to the Selector window. The device’s entire capacity has been partitioned into volumes of the maximum possible size. NOTE Different versions of the Mac OS support different maximum volume sizes. For more information, refer to Maximum volume sizes in the online manual. If you are unable to Format or Auto Initialize a device, it may be because the Hard Disk ToolKit•PE application does not have enough RAM to work with. To free up more RAM, quit HDT•PE and all other applications, then relaunch HDT•PE only, or restart your computer with all extensions turned off (hold down the Shift key during startup). Formatting a Disk Device ! Hard Disk ToolKit•Personal Edition’s Format command will overwrite all previously existing data on the drive. Back up any valuable data on the drive before performing a Format operation. Formatting prepares a disk device for use. Most disk devices have already been formatted at the factory. If your disk device has not been formatted with HDT•PE, you are probably not getting the best possible performance. The Device Data file, which resides in the same folder as the Hard Disk ToolKit•PE application, contains detailed information on the optimal parameters for hundreds of different disk devices. The HDT•PE application automatically references the Device Data file during the format process to ensure that your disk device is configured for peak performance. NOTE If HDT•PE does not directly support the selected drive, it will use a generic mode to adjust all parameters of the drive to safe settings. See the Supported Devices file in the Hard Disk ToolKit•PE folder to see if your particular device is supported. Formatting: Quick vs. Low Level A Quick Format is a fast, convenient way to optimize your hard disk without performing a time-consuming Low Level Format. Hard Disk ToolKit•PE’s Quick Format limits the format process to the first 2,000 144 Hard Disk ToolKit•Personal Edition Reference Guide 2B. HDT 2.0 Primer Usage Page 145 Friday, June 6, 1997 3:06 PM blocks of the disk device, where the partition map and device drivers are normally located. The partition map contains information about the location of each file on your disk. STOP Hard Disk ToolKit•PE’s Low Level Format maps out the entire disk device’s magnetic media into error-free sectors, zones, and tracks. A Low Level Format will also attempt to fix any bad blocks it encounters. If bad blocks are beyond repair, they can be spared out. Hard Disk ToolKit•PE then gives the user the choice to go on to partition the device into volumes, or to leave the device in a formatted, but unusable, state. STOP NOTE Sparing out means that good blocks on a special reserve track are used instead of the bad blocks. Hard Disk ToolKit•PE’s Test command can also scan for bad blocks and reallocate them. You do not need to perform a low-level format often. It is a time-consuming process that you should use only when you first purchase a drive or in situations where the integrity of the disk is suspect. In most circumstances, it is easier, faster, and just as effective to perform a Quick Format or an Auto Initialize. Chapter 4: Using Hard Disk ToolKit•PE 145 2B. HDT 2.0 Primer Usage Page 146 Friday, June 6, 1997 3:06 PM To format a device: ! Back up all valuable data before proceeding! Formatting will write over the contents of the entire disk. 1. In the Selector window, select the device to be formatted. 2. From the Devices menu, choose Format. The Format Device dialog box appears (Figure 7.8). Figure 7.8: The Format Device dialog box. ! Hard Disk ToolKit•PE’s Format command will overwrite all previously existing data on the device. Be sure that you have backed up any valuable data on the drive before performing a Format. 3. Make your desired changes to the settings: • Format Type: Select the type of format to perform on the selected device: Quick or Low Level. The Quick format is the default selection and is the appropriate choice for most formatting purposes. For more information, see Formatting: Quick vs. Low Level on page 144. • Verify After Formatting: Enable this checkbox to verify that all blocks on the disk are 146 Hard Disk ToolKit•Personal Edition Reference Guide 2B. HDT 2.0 Primer Usage Page 147 Friday, June 6, 1997 3:06 PM free of defects immediately after the format process completes. If a bad block is encountered, the verify is stopped and a warning message appears. This option will make the format take more time, but can be useful when reformatting older or suspect drives. NOTE When formatting a rewritable optical disk, do not use the Verify After Formatting option. If you do, you may see erroneous media error messages because data needs to be written to the disk before these blocks become verifiable. • Options: The Options button is only available if you select the Low Level format type. For more information, see SCSI formatting options on page 150. 4. Click OK. Two warning boxes appear that say formatting will destroy all the data on the disk (Figure 7.9). Figure 7.9: The warning message boxes. 5. Click OK in both boxes. A status box appears while the format is in process. The length of time required to complete a Format is affected by the size and speed of the drive as well as any formatting options you have selected. Chapter 4: Using Hard Disk ToolKit•PE 147 2B. HDT 2.0 Primer Usage Page 148 Friday, June 6, 1997 3:06 PM A message box appears that says the format completed successfully. 6. Click OK. The Create New Volume dialog box appears (Figure 7.10). Figure 7.10: The Create New Volume dialog box. By default, the settings create an Apple HFS volume of the maximum possible size. You can change these settings to create a volume that meets your specific needs. See Creating New Volumes in the online manual. NOTE If you click Cancel in the Create New Volume dialog box, nothing is written to disk and the device’s entire capacity will remain unallocated. Volumes can be created at any time on a device that has this free space. For more information, see Creating New Volumes in the online manual. 7. Make your changes to the settings, then click OK. HDT•PE will create the volume according to the settings that you specified. 148 Hard Disk ToolKit•Personal Edition Reference Guide 2B. HDT 2.0 Primer Usage Page 149 Friday, June 6, 1997 3:06 PM If the volume you specified does not use all the space on the drive, then a warning box appears that says you can create additional volumes at a later time (Figure 7.11). Figure 7.11: The unused free space warning box. NOTE Different versions of the Mac OS support different maximum volume sizes. For more information, see Maximum volume sizes in the online manual. A message box appears that says the new volume was created successfully. 8. Click OK. The new volume you created automatically mounts to the Desktop and the Selector window is refreshed to reflect the presence of a new volume. Chapter 4: Using Hard Disk ToolKit•PE 149 2B. HDT 2.0 Primer Usage Page 150 Friday, June 6, 1997 3:06 PM Figure 7.12 shows an example of a device that had part of its capacity partitioned into a mountable volume. Unallocated free space Figure 7.12: The amount of unallocated free space on a device appears in parentheses under the Capacity heading. NOTE If you are unable to Format or Auto Initialize a device, it may be because the HDT•PE application does not have enough free RAM to work with. To free up more RAM, quit HDT•PE and all other applications, then restart HDT•PE only, or restart your computer with all extensions turned off (hold down the Shift key during startup). SCSI formatting options You can customize certain features of a disk device. These custom features can only be done during a low-level format. Hard Disk ToolKit•PE automatically optimizes all settings for the disk device during the format process. Only knowledgeable power-users should change its formatting parameters from the default settings. For further information, see SCSI formatting options in the online manual. 150 Hard Disk ToolKit•Personal Edition Reference Guide 2B. HDT 2.0 Primer Usage Page 151 Friday, June 6, 1997 3:06 PM Viewing and Modifying a Device’s Partitioning Scheme You can view the partitioning scheme of a disk that has been formatted or auto initialized, or that has had an FWB driver installed onto it by HDT•PE. This information is presented in the Partition List dialog box. You may want to view the partitioning scheme: • • • • to inspect the current partitioning status to configure the device driver to resize an existing volume to delete an existing partition Before you use the View Partitions command Before you make changes to a disk’s partition, you must have an HDT•PE driver on the disk. You can use the Update Driver command to install the HDT•PE driver. When you format or auto initialize a disk, the HDT•PE driver is automatically installed. Do not attempt to use HDT•PE to modify a partition on a disk that doesn’t contain the HDT•PE driver. For more information on viewing and modifying partitioning schemes, see Viewing and Modifying a Device’s Partitioning Scheme in the online manual. ! HDT•PE’s Format and Auto Initialize commands will overwrite all previously existing data on the drive. Be sure that you have backed up any valuable data on the drive before performing a Format or Auto Initialize operation. ! The Update Driver command writes a new driver to disk and therefore poses a potential hazard to your existing data. Back up all valuable data before using the Update Driver command. Chapter 4: Using Hard Disk ToolKit•PE 151 2B. HDT 2.0 Primer Usage Page 152 Friday, June 6, 1997 3:06 PM Updating a Device’s Driver The hard drive in your Power Computing computer was initialized with the latest FWB hard disk driver. You do not need to update your hard disk driver on preinstalled drives. If you are using a SCSI hard drive which has an older FWB Hard Disk ToolKit PE™ hard disk driver or if you have other hard drives you want to update with the FWB driver, then you should update the driver. See Updating a Device’s Driver in the online manual for details. Testing a Device Testing a device means checking it for bad blocks. Any bad blocks found during a test will be replaced by spare blocks on the device so that data cannot be written to unreliable areas (the bad blocks) on the device. NOTE You cannot test a device that contains the startup volume. To test a device: 1. In the Selector window, select a device. 2. Click the Test button in the toolbar. OR Drag the desired device and drop it on the Test button. OR From the Devices menu, choose Test. 152 Hard Disk ToolKit•Personal Edition Reference Guide 2B. HDT 2.0 Primer Usage Page 153 Friday, June 6, 1997 3:06 PM 3. The Save Device Test Log File dialog box appears. Figure 7.13: Save Log File dialog box. 4. Click Save to proceed with the test. A status box appears. A message box appears when the test is complete that indicates if any bad blocks were found and reallocated during the test. 5. Click OK. Chapter 4: Using Hard Disk ToolKit•PE 153 2B. HDT 2.0 Primer Usage Page 154 Friday, June 6, 1997 3:06 PM You can use any standard text editor (such as SimpleText or Microsoft Word™) to view the log file (Figure 7.14): Figure 7.14: The Test feature log file. 154 Hard Disk ToolKit•Personal Edition Reference Guide 7. HDT2 Troubleshooting Page 155 Friday, June 6, 1997 3:12 PM 5 Compatibility Notes & Troubleshooting Compatibility Notes Table 5. Compatibility Notes Item Description Limited block size for some devices When formatting a drive and changing the block size in the “Format Options” dialog, DO NOT use block sizes other than 512 for Apple-labeled hard drives (with Apple logo sticker). Also, some SyQuest drives, mainly 5 1/4” 88 MB mechanisms, cannot be used with block sizes other than 512. Using a block size other than 512 with these mechanisms may cause drive or cartridge problems. Apple-labeled Seagate ST11200N and ST3600N mechanisms If you have one of these devices with early revisions of Apple firmware, our driver doesn’t perform optimally with them. If you encounter problems with these drivers, back up your data, and reinitialize your Applelabeled Seagate drive with Apple’s HD SC setup. SuperATM 3.5 SuperATM 3.5 does not perform asynchronous I/O correctly, so it does not work on the FWB JackHammer, Quadra AVs, Power Macintoshes, and Macintoshes with the PowerPC upgrade card. Call Adobe for an update to 3.6 or newer. At Ease for Workgroups 2.0 Do not use the “Lock hard disk at startup” feature with drives on a SCSI Manager 4.3 bus. The program is not SCSI Manager 4.3 savvy. At Ease for Workgroups and the HDT Driver The HDT driver is compatible with At Ease for Workgroup's “Lock Startup Volume” security feature. However, you need to disable At Ease’s “Lock Startup Volume” security feature BEFORE updating or installing HDT drivers. QuickTime 1.5 QuickTime 1.5 causes drivers that support true background asynchronous I/O to fail under some rare conditions. Upgrading to QuickTime 2.0 or newer fixes the problem completely. QuickTime 1.0 does not do asynchronous I/O and is fully compatible. FWB recommends installing Apple's QuickTime 2.1 or later. AppleShare servers If you are unsure which versions of AppleShare and/or the Mac OS you are using, keep volume sizes on AppleShare servers at or below 2 GB to avoid a limitation of Apple File Protocol. Volumes larger than 2 GB will show incorrect file and folder information on remote machines unless stations have been upgraded to System 7.5.1 or later. Testing in FWB labs has shown that networks using AppleShare version 4 or later and System 7.5.1 or later support volume sizes on AppleShare servers up to 4 GB. Stuffit Deluxe & Stuffit Expander 3.0.X and Compact Pro These applications erroneously report a data integrity error after decompressing files from encrypted volumes on systems running SCSI Manager 4.3. As a workaround, decompress the file from an unencrypted volume or just disregard the messages. Chapter 5: Compatibility Notes & Troubleshooting 155 7. HDT2 Troubleshooting Page 156 Friday, June 6, 1997 3:12 PM Table 5. Compatibility Notes Item Description Stacker 1.x and 2.x The FWB driver in this release is now compatible with Stacker 1.x and 2.x on systems using SCSI Manager 4.3.1 (or later), but only on the main SCSI bus (i.e., the internal bus on dual bus systems, e.g., Quadra 950, Power Macintosh 8100, or the standard bus on other Macintoshes). Troubleshooting Table 1. Troubleshooting 156 Problem/Question Potential Cause Solution A device or volume won’t mount to the Desktop. The device or volume might not have been set up to automatically mount to the Desktop. Try using the FWB Mounter, available from the Apple menu, to mount the device. If you’ve just formatted the device or created the volume, use HDT to change the volume’s attributes so that it mounts automatically to the Desktop. If the device is a removable, it might not have a driver in memory. If the device is an IDE device, make sure the FWB IDE extension is installed in the Extensions folder. If the device is a SCSI device, make sure the FWB Tools extension is installed in the Extensions folder. On drive of greater than 1 GB capacity, the driver partition must reside in the first 1 GB of disk space, or Macintoshes earlier than the 840AV cannot mount it. Back up the data on the drive, then re-initialize the drive. Try installing the driver again. I can’t format a device. If you selected Quick Format, your device might need a lower level format. Use HDT to perform a Low Level Format. A small file occupies too much disk space. Macintosh’s HFS determines the smallest allocation unit for files (that is, minimum file size) by the size of a volume; the larger a volume is, the larger the minimum size of a file will be. For example, if the minimum file size is 500 KB, any file smaller than 500 KB will still take 500 KB of space in a volume. When you create a new volume, the “Smallest File Size” field shows the minimum file size for the given volume size. To decrease the minimum file size, reduce the expandable size of the volume. For more information, see Creating New Volumes in the online manual. For information on allocation block size, see Partitioning in the online manual. Hard Disk ToolKit•Personal Edition Reference Guide 7. HDT2 Troubleshooting Page 157 Friday, June 6, 1997 3:12 PM Table 1. Troubleshooting Problem/Question Potential Cause Solution I’m having trouble accessing partitions on a device, and my system hangs during file transfers. Your device might be having SCSI problems. For advice on solving SCSI problems, see the table entry “Hard Disk ToolKit•PE does not recognize a device on the SCSI bus after bus rescan.” The driver or system software might be corrupted. Rebuild your Desktop. If possible, back up your data. Reinstall system software and update SCSI drivers with HDT•PE. Attempt to run with no extensions in your System Folder. To disable all extensions, hold down the Shift key when you startup the computer. Password-protected partitions are very secure; you can’t access the partition without the password. To reuse the partition, use HDT•PE to reformat it. Formatting will erase all existing data. I’ve forgotten the password to a passwordprotected partition. What can I do? Misplaced paperwork or amnesia. Many files on my system are corrupted. A virus may have infected your system. I got a message saying that my device is unreadable and needs to be initialized. A system crash probably destroyed directory information. Take these steps to repair the damage: 1. Run Apple’s Disk First Aid program 2. Use a third party recovery tool to recover information from this crash, if possible. 3. Use Hard Disk ToolKit•PE to reinitialize, then restore from a previous set of backups. Reinitializing will erase all existing data. I would like to remove the FWB driver and re-install the Apple driver. Apple’s drive formatting setup cannot format a drive running a non-Apple driver. Reformat the device using Hard Disk ToolKit•PE’s Format command. When prompted to Create a New Volume, do not continue. Quit out of HDT. Apple drive formatting software should now be able to format the drive. Chapter 5: Compatibility Notes & Troubleshooting 1. Remove the virus. Check the devices on your system with a virus detection and eradication program. Optionally: 2. Back up the data. 3. Reinitialize the drive using HDT•PE. 4. Restore the data. 157 7. HDT2 Troubleshooting Page 158 Friday, June 6, 1997 3:12 PM Table 1. Troubleshooting Problem/Question Potential Cause Solution Hard Disk ToolKit•PE does not recognize a device on the SCSI bus after bus rescan. Is the device getting power? Check the power indicators on the device. For example, for an internal hard disk, you should see the LED turn on (if it is externally visible) and hear the drive spinning up. If you have an external hard disk, you should also hear the fan inside the device spinning. You might be having problems with cabling on the SCSI bus. • Are the cables connected properly? • Are the cables still working properly? • Are there any burn marks on the connectors? • Do all of the cables have the same impedance? Some devices won’t boot up unless all devices on the SCSI bus are turned on. • Were the devices on the SCSI bus powered on before the computer? • Are all devices on the SCSI bus powered on? You might have problems with the SCSI bus configuration. • Are the SCSI IDs set properly? • Was the SCSI bus terminated correctly? • Is the device the last device in a long SCSI chain? 158 • Make sure the cables and connectors are seated properly and that there are no bent or broken pins on the connectors. These pins are especially delicate on 68-pin Fast & Wide SCSI-2 connectors. • Bad cables aren’t always visible. To check for bad cables, try swapping cables with ones that you know work properly. • Burn marks indicate arcing, which can happen if the connectors are not seated properly. • Be sure to use SCSI cables with the same impedance. Make sure all of the devices on the SCSI bus are turned on, then restart your computer with the Restart command in the Finder’s Special menu. To prevent this in the future, power on all SCSI devices first, wait a few seconds, then power on your computer. • Make sure each device on the SCSI bus has a unique ID. • Make sure that only the first (internal) and last (external) devices on the SCSI bus have a terminator attached to them. • Try attaching just the device in question to the SCSI bus. If the system then recognizes the device on the SCSI bus, your SCSI chain might have been too long (6 meters, or 20 ft., maximum), there might be a bad cable, or there might be some other communications problem. Sometimes SCSI chips on computers fail and cause failures. Test the device on another computer. If you’re running System 7.5 or later, SCSI Manager 4.3 can cause SCSI problems for some users. If you continue to run System 7.5, disable the SCSI Manager 4.3 extension. You can use SCSI Manager v. 4.3.1 on the Quadra 840AV or newer. Upgrading to System 7.5.3 can also help with this problem. Hard Disk ToolKit•Personal Edition Reference Guide 7. HDT2 Troubleshooting Page 159 Friday, June 6, 1997 3:12 PM Table 1. Troubleshooting Problem/Question Potential Cause Solution I’m having problems updating or installing a driver. You might not have enough “contiguous free space,” or unpartitioned space, to install the driver. Take the following steps. Try installing the driver after each step. NOTE: Back up your data before you begin. 1. Make sure all volumes and devices are unmounted. Close open folders and turn off file sharing. 2. If you’re updating the startup drive, startup from another device temporarily. 3. Defragment your hard drive (try using a disk optimizer). 4. If you’re running the Norton Utilities’ “File Saver” application, turn it off. 5. Use HDT•PE to reduce the size of the volume. 6. As a last resort, use “Auto Initialize” to reinitialize the drive to contain a new driver and volume, then restore the data. A hard disk isn’t reading or writing data to the disk. Finder disk error messages appear, such as “Can’t write to disk” or “Can’t read from disk.” If the device is a removable, it might be set to write-protect mode. Make sure the write-protect tab is in the write-enabled position. The volume might be set to be a read-only attribute. Check the attributes for the hard disk, and disable the “Readonly” attribute if it is enabled. See Changing a Volume’s Attributes in the online manual. Your device might be having SCSI problems. For advice on solving SCSI problems, see the table entry “Hard Disk ToolKit•PE does not recognize a device on the SCSI bus after bus rescan.” If you have an older drive, it may have developed bad blocks. To fix bad blocks, take these steps: 1. Use a disk diagnostic or repair utility. A system software analysis program, such as Norton Disk Doctor, can be a helpful tool for finding and fixing hard disk problems. These types of programs are most useful for analyzing system directory problems. 2. Back up your data, then use HDT•PE’s Test routine to scan and remap bad blocks. 3. You can also reformat the drive to eliminate bad blocks. You may need to disable the “Disable Certification” checkbox to remap bad blocks during a format. Refer to SCSI formatting options on page 150. Your drive might be having problems with the “Command Queuing” or “Parity Checking” driver configurations. In the Configure Driver dialog, disable “Command Queuing OK” or “Disable Parity.” My hard disk drive is having unexplained disk reading and writing problems. Chapter 5: Compatibility Notes & Troubleshooting 159 7. HDT2 Troubleshooting Page 160 Friday, June 6, 1997 3:12 PM Table 1. Troubleshooting Problem/Question Potential Cause Solution I’m having trouble testing a device. HDT•PE needs more memory. Increase the HDT•PE application’s memory size by using Get Info from the Finder File Menu. Your device might have SCSI problems, such as improper termination, loose cabling, and the like. For advice on solving SCSI problems, see the table entry “Hard Disk ToolKit•PE does not recognize a device on the SCSI bus after bus rescan.” This icon means there is a problem either with the Macintosh system software or with system hardware. If the suggestions in this table don’t help, refer to the manual for your Macintosh system. If the numbers 0000000F 00000003 or 0000000F 0000000C appear with the Sad Mac icon, this means there is a software error; the error could be a corrupt driver. The drivers on the hard disk might have been corrupted by incorrect termination on the SCSI bus. Take these steps to fix the driver: 1. Check your cabling and termination to ensure that the problem is not SCSI-related. For advice on solving SCSI problems, see the table entry “Hard Disk ToolKit•PE does not recognize a device on the SCSI bus after bus rescan.” 2. Use HDT•PE to update the drivers on the hard disk. HDT will not recognize any LUN addresses besides LUN 0. Versions of Apple’s SCSI Manager software before 4.3 can't recognize LUNs. Upgrade your Mac to SCSI Manager 4.3.1 or later, if the computer will support it. Contact Apple Computer for upgrade information regarding its software. Computer hangs or crashes when copying large files or large numbers of files on internal SCSI bus. Bug on internal SCSI bus on 7500/8500/ 9500 and drives set to ID5. Change SCSI ID so no drive is at ID 5 on the internal bus. System hangs when a device is on the internal bus of an 7500/8500/ 9500, but there are no problems when connected to the external bus. Slow device or drive doesn't do synchronous transfers right. Turn off Allow Disconnect. For more information, refer to Configuring a device’s driver in the online manual. The “Sad Macintosh” error icon appears when booting up. 160 Hard Disk ToolKit•Personal Edition Reference Guide 7. HDT2 Troubleshooting Page 161 Friday, June 6, 1997 3:12 PM Table 1. Troubleshooting Problem/Question Potential Cause Solution The computer does not boot up (question mark icon displays). Your hard disk may have been incorrectly terminated. Check your cabling. For advice on solving SCSI problems, see the table entry “Hard Disk ToolKit•PE does not recognize a device on the SCSI bus after bus rescan.” Software may have damaged your computer’s battery backed up parameter RAM (PRAM). To reset PRAM on Macintosh IIx and newer computers, hold down the Command, Option, P, and R keys while booting. Apple’s recommended practice is to let the system boot three times while holding these keys. If you’re using an add-on video board, you might have to hold down the Spacebar on a subsequent restart to reset the monitor. The Desktop file may be corrupt. To rebuild the invisible Desktop file, hold down the Command (Apple) and Option keys while the computer is starting up; a dialog will inform you that rebuilding is in process. This does not damage your data, but does remove any file comments. You may need to replace your device driver software. Take these steps: 1. Back up your data. 2. Insert a Macintosh startup disk or CD into your computer’s floppy or CD-ROM drive, turn on your hard disk, then turn on your computer. 3. To update the drivers, run HDT•PE and use the “Update Driver” option. The System/Finder files may have been corrupted or lost and may need to be replaced. 4. If a dialog comes up asking you if you wish to initialize it, use a recovery program to recover or repair the drive. The hard disk’s System Folder or the SCSI or IDE drivers may have been corrupted by a system crash or virus. Replace the Mac OS on the hard disk first by starting up initially off a floppy disk or CD and reinstalling using the Installer. If the problem persists, use HDT•PE to update the drivers on the hard disk. The directory on your hard disk may be damaged. Apple’s Disk First Aid program can repair some bad directories. If the directory is unsalvageable, you can recover the data on the drive with a recovery utility or restore the data from previous backups. System or driver is corrupted. Hold down Command-Option-Shift-Delete to prevent the Mac from booting off of a hard disk, so that it can boot off of a floppy or CD-ROM. Chapter 5: Compatibility Notes & Troubleshooting 161 7. HDT2 Troubleshooting Page 162 Friday, June 6, 1997 3:12 PM CDT2 OEM Mot Front Matter Page 163 Friday, June 6, 1997 3:14 PM Write the product serial number here: MA291475999 CD-ROM ToolKit™ Reference Guide 970420 CDT2 OEM Mot Front Matter Page 164 Friday, June 6, 1997 3:14 PM Copyright Notice The software described in this manual, the product design, and design concepts are copyrighted by FWB Software, LLC (FWB) with all rights reserved. Your rights with regard to the software and manual are subject to the restrictions and limitations imposed by the copyright laws of the United States of America. Under the copyright laws, neither the programs nor the manual may be copied, reproduced, translated, transmitted, or reduced to any printed or electronic medium or to any machine-readable form, in whole or in part, without the written consent of FWB. © 1996, 1997 by FWB Software, LLC; © 1997 Power Computing Corporation. All rights reserved. April, 1997 CDT2 OEM Mot Front Matter Page 165 Friday, June 6, 1997 3:14 PM End-User Software License Agreement DO NOT USE THIS SOFTWARE UNTIL YOU HAVE CAREFULLY READ THIS AGREEMENT AND AGREE TO THE TERMS OF THIS LICENSE. BY USING THE ENCLOSED SOFTWARE, YOU ARE AGREEING TO THE TERMS OF THIS LICENSE. The software license agreement for this program is included in this manual so you can read it before installing the program. INSTALLING THE PROGRAM OR USE OF THE MATERIALS ENCLOSED WILL CONSTITUTE YOUR ACCEPTANCE OF THE TERMS AND CONDITIONS OF THIS SOFTWARE LICENSE AGREEMENT. If you do not agree to the terms of this software license agreement, do not install the software and promptly return the package to the place of purchase for a full refund of all money that you paid for the product. In return for purchasing a license to use the computer programs, known as CD-ROM ToolKit (Software) contained in this package, and for purchasing documentation included in this package, you agree to the following terms and conditions: 6. License. The Software enclosed is licensed, not sold, to you by FWB Software, LLC (FWB) for use under the terms of this software license. This non-exclusive license allows you to: i. Use the Software only on a SINGLE computer at any one time. You may only use the software on one CPU and only on drives physically connected to that single CPU. ii. Only use the software to access CD-ROM data or otherwise control SCSI CD-ROM drives that are connected to a SINGLE computer that is used by you. iii. Make one copy of Software in machine readable form, provided that such copy is used only for backup purposes and the FWB copyright notice is reproduced on the backup copy. iv. Transfer Software and all rights under this license to another party together with a copy of this license and all documentation accompanying the Software, provided the other party agrees to accept the terms and conditions of this license. As a licensee, you own the magnetic media on which the Software is originally recorded. The Software is copyrighted by FWB and proprietary to FWB, and FWB retains title and ownership of the Software, and all copies of the Software. This license is not a sale of Software or any copy. You agree to hold Software in confidence and to take all reasonable steps to prevent disclosure. 7. Restrictions. You may NOT distribute copies of this Software to others or electronically transfer Software from one computer to another over a network, or via modem. The Software contains trade secrets that are wholly owned by FWB Software, LLC. You may NOT decompile, reverse engineer, translate, disassemble, or otherwise reduce Software to a human understandable format. You may not use the Software to access CDROM data or otherwise control SCSI CD-ROM drives that are not used by you. YOU MAY NOT MODIFY, ADAPT, TRANSLATE, RENT, LEASE, RESELL FOR PROFIT, DISTRIBUTE, NETWORK, OR CREATE DERIVATIVE WORKS BASED UPON THIS SOFTWARE OR ANY PART THEREOF. 8. Termination. This license is effective until terminated. This license will terminate immediately without any notice from FWB if you fail to comply with any of its provisions. Upon termination you must destroy the Software and all copies thereof. You may terminate this license at any time by destroying the Software and all copies thereof. 9. Export Law Assurances. You agree and certify that neither the Software nor the documentation will be transferred or re-exported, directly or indirectly, into any country where such transfer or export is prohibited by the United States Export Administration Act and regulations thereunder or will be used for any purpose prohibited by the Act. You also agree that neither the Software nor any technical data received from FWB, nor the direct product thereof will be exported outside the United States except as authorized in advance by FWB, in writing, and as permitted by the laws of the United States. 10.Warranty Disclaimer, Limitation of Damages and Remedies. FWB Software, LLC (FWB) makes no warranty or representation, either expressed or implied, regarding the merchantability, quality, functionality, performance, or fitness of either the diskette, manual, or the information provided on it. This software and manual are licensed “AS IS.” It is solely the responsibility of the consumer to determine the software’s suitability for a particular purpose or use. FWB and anyone else who has been involved in the creation, production, delivery, or support of the software, will in no event be liable for direct, indirect, special, consequential, or incidental damages resulting from any CDT2 OEM Mot Front Matter Page 166 Friday, June 6, 1997 3:14 PM defect, error, or omission in the diskette, manual, or software or from any other events including, but not limited to, any interruption of service, loss of business, loss of profits or good will, legal action or any other consequential damages. The user assumes all responsibility arising from the use of this software. FWB’s liability for damages to you or others will in no event exceed the total amount paid by you for this software. In particular, FWB shall have no liability for any data or programs stored by or used with FWB’s software, including the costs of recovering such data or programs. FWB will be neither responsible nor liable for any illegal use of its software. FWB reserves the right to make corrections or improvements to the information provided and to the related software at any time, without notice. FWB will replace or repair defective distribution media or documentation at no charge, provided you return the item to be replaced with proof of purchase to FWB during the 90-day period after purchase. ALL IMPLIED WARRANTIES ON THE MEDIA AND DOCUMENTATION, INCLUDING IMPLIED WARRANTIES OF MERCHANTABILITY AND FITNESS FOR A PARTICULAR PURPOSE, ARE LIMITED IN DURATION TO NINETY (90) DAYS FROM THE DATE OF THE ORIGINAL RETAIL PURCHASE OF THIS PRODUCT. The warranty and remedies set forth above are exclusive and in lieu of all others, oral or written, expressed or implied. No FWB dealer, representative, agent, or employee is authorized to make any modification, extension, or addition to this warranty. Some states do not allow limitations on how long an implied warranty lasts, or the exclusion or limitation of implied warranties or liability for incidental or consequential damages, so the above limitation or exclusion may not apply to you. This warranty gives you specific legal rights, and you may also have other rights that vary from state to state. 11.Government End-Users. If you are a United States Government end-user, this license of the Software conveys only “RESTRICTED RIGHTS,” and its use, disclosure, and duplication are subject to DFARS 52.2277013. This Software was developed at private expense, and no part of it was developed with government funds. The Software is a trade secret of FWB for all purposes of the Freedom of Information act, and is “commercial computer software” subject to limited utilization as provided in the contract between the vendor and the governmental entity, and in all respects is proprietary data belonging solely to FWB. Government personnel using the Software, other than under a DOD contract or GSA Schedule, are hereby on notice that the use of this Software is subject to restrictions that are the same as, or similar to, those specified above. 12.General. This license will be construed under the laws of the state of California, except for that body of law dealing with conflicts of laws, if obtained in the United States, or the laws of jurisdiction where obtained if obtained outside the United States. If any provision of this license is held by a court of competent jurisdiction to be contrary to law, that provision will be enforced to the maximum extent permissible, and the remaining provisions of this license will remain in full force and effect. 13.Complete Agreement. This license constitutes the entire agreement between the parties with respect to the use of the Software and related documentation, and supersedes all prior or contemporaneous understandings or agreements, written or oral, regarding such subject matter. Trademarks CD-ROM ToolKit, CDT, CDT Remote, and the FWB Software logo are trademarks FWB Software, LLC. FWB is a registered trademark of FWB Software, LLC. Apple, AppleShare, Finder, MultiFinder, and Macintosh are registered trademarks of Apple Computer, Inc. All other brand and product names are trademarks or registered trademarks of their respective holders. Credits This manual is based on the CD-ROM Toolkit User Guide, written by Joan Carter, with valuable assistance from Barry Twycross. The original CD-ROM ToolKit application was written by James Merkle. This version was substantially revised by Barry Twycross and Mike Duigou. 1 Quick Start This chapter provides a minimal outline for how to install CD-ROM ToolKit. Since CD-ROM Toolkit comes installed on your startup drive, you should not have to install it unless it has become damaged or been deleted In the online manual found on the P o w e r C D in the Bundled Software folder under CD-ROM Toolkit, you will find a complete guide to installation in the, CD-ROM Toolkit User Guide, in Chapter 3, Installing CD-ROM ToolKit. If the system software has been damaged or the startup disk has been replaced, you should go to the S y s t e m S o f t w a r e I n s t a l l e r s folder on the P o w e r CD and follow the instructions there to re-install the system software Installing CD-ROM Toolkit What follows is a quick start version of the installation instructions. For more detail on installing CD-ROM toolkit, consult the online CD-ROM Toolkit User’s Guide, Chapter 3, Installing CD-ROM Toolkit. To install CD-ROM Toolkit software: 1. Restart your computer with extensions and virus protection off (by holding down the Shift key). 2. Turn off all virus protection software. 3. Insert the Power CD in the CD-ROM drive and close it. 4. Double-click on the P o w e r C D icon. 5. Double-click on the S y s t e m S o f t w a r e I n s t a l l e r s folder. 6. Double-click on the C D - R O M S o f t w a r e folder. 7. Double-click on the C D S o f t w a r e T o o l k i t I n s t a l l e r icon. 8. Click Continue on the opening Installer screen. Chapter 1: Quick Start 167 9. You have seven options: a. Select Easy Install to install everything on the application disk. b. Select Custom Install to install only the files you specify. c. Select Remove to remove earlier versions of CD-ROM ToolKit. d. Click Switch Disk to install on a disk other than your default drive. e. Click Select Folder if you want to specify a destination folder for the CD-ROM ToolKit™ folder other than your hard drive. f. Click Quit to stop installation. g. Click Install to install CDT according to your selection. NOTE FWB recommends that you click Easy Install for standard installation. It will install all of the components necessary to run CD-ROM ToolKit and CDT Remote. 10. When installation is complete, restart your computer. You are ready to roll! 168 CD-ROM ToolKit Reference Guide 2 H o w To U s e C D - R O M To o l K i t Overview CD-ROM Drive Setup screen 2 1 3 4 Table 5: Name Function 1 Display Non-CD’s Checked means all devices attached to your system will show on the Device List (item 4). Unchecked means only CD-ROM drives will show. 2 Scan Button Click to locate all devices attached to your system and display them on the devices list. Use this to add a CD-ROM drive you powered up after you started up your system. 3 Setup Button Click to set cache and other defaults for a selected CD-ROM drive. Chapter 2: How To Use CD-ROM ToolKit 169 Table 5: 4 Name Function Device List Shows the following: • Icons of the devices attached to your system. • CDT Enabler Switches: On indicates you want the CDT driver to support the selected CD-ROM drive at startup. Fast enables use of CDT’s caching features. • Device address and type, product name, and firmware version. Opening CD-ROM ToolKit The Installer places the CD-ROM ToolKit™ folder on your hard drive or in a folder you specify. It puts an alias of CDT in Control Panels. To open CDT: 1. Select Control Panels from the Apple menu. 2. Double-click CD-ROM ToolKit™ in the Control Panels window. If you wish to rearrange the sorting order of the devices on the Devices List, select View from the menu bar and choose the sorting order you desire. Setting Up a CD-ROM Drive To set up a CD-ROM drive: 1. In the Drive Setup screen, select the drive you want set up. 2. Click Setup. This takes you to the Setup Features screen (Figure 1). 170 CD-ROM ToolKit Reference Guide NOTE Double-clicking on a CD-ROM drive in the Devices List will also take you to Setup. 1 2 3 4 Figure 1. CD-ROM ToolKit Drive Setup features screen: Cache ] Setup feature 1 Many options within the Setup features are controlled by checkboxes. These act as toggle switches to enable or disable feature options. You control the toggling by clicking on the box. • A checked box means the option is enabled. • An unchecked box means the option is disabled. 2 The banner at the top of the Setup Features screen lists the name of the drive you are setting up. 3 MouseHelp is available in Setup Features. Use your mouse to point to an option you want to know more about. Information pops into the box at the lower section of the screen. Activate MouseHelp by selecting it from the Help menu in the Menu bar. Chapter 2: How To Use CD-ROM ToolKit 171 Setup feature 4 All Setup features have Default, Cancel and OK button options. • Click Default to return feature options in the current screen to their original CDT settings. • Click Cancel to leave Setup Features, leaving all options unchanged. • Click OK to save your changes to the feature options. NOTE Drive Setup features are discussed in detail in the online CD-ROM Toolkit User Guide. Cache Figure 2. Cache options Select Cache to set up caching for a selected CD-ROM drive. Cache settings control the amount of RAM and disk space you want to devote to caching data from your CDs to accelerate their performance. The values you set here apply to the options you select in both the Prescan and Read Ahead setup features. 172 CD-ROM ToolKit Reference Guide A cache is a temporary storage area for information used frequently by your system. Cache stores data that has been gathered from your CD-ROM into RAM or to your hard disk. Acceleration results from the fact that your system is able to find and supply data from RAM and your hard disk much faster than it can from a CD-ROM. A few facts about static and dynamic cache Before you set cache profiles for your drives with Drive Setup, there are a few things you should know about Static and Dynamic cache. A static cache grabs the first information accessed off of a CD-ROM and stores it in RAM (with static RAM cache) or on your hard drive (with static disk cache). With static cache, the first data accessed is placed in cache and does not change until a new CD is inserted. Frequently, the first information accessed is the CD’s directory or table of contents. Directories and tables of contents are pointers that direct search inquiries to requested data. If you use a lot of reference CDs, like dictionaries, or CDs with a lot of files, like shareware discs or clip art collections, using static cache will improve your computer’s performance in locating the information you request. Performance improves because your computer can go to RAM or to your hard drive for the pointers that lead to the data you seek. Your computer can search RAM or your hard drive much faster than it can search a CD-ROM. A dynamic cache grabs information as it is being read and stores it in RAM. When dynamic cache is full, the first information grabbed is pushed out of the cache (overwritten) by the next information grabbed. Dynamic cache gives you fast access to the most recently used information. This speeds up your computer’s performance when you frequently ask for the same data from a CD-ROM. NOTE More detail about cache options is found in Chapter 4 of the online CD-ROM Toolkit User Guide. Chapter 2: How To Use CD-ROM ToolKit 173 Prescan Figure 3. Prescan options NOTE A system can retrieve information from a hard disk much faster than it can from a CD. This is one of the primary acceleration techniques used by CDT. Select the Prescan icon to cache specific types of information from a CD to a hard drive. Choose the types of information that will be cached. Prescan File and Folder Information Enable Prescan File and Folder Information to cache basic file information to the hard disk. It significantly accelerates responses to requests for file information from a CD. It also consumes the largest portion of the hard disk cache. General recommendations: • This represents the best opportunity to improve overall performance of CD-ROM drives and should be left on. 174 CD-ROM ToolKit Reference Guide NOTE More detail about prescan options is found in Chapter 4 of the online CD-ROM Toolkit User Guide. Mounting Figure 4. Mounting options Select the Mounting icon to allow the Macintosh to recognize CDs that are in formats other than Apple’s standard Hierarchical File System (HFS) format. Any ISO 9660 volumes on “dual-format” Apple HFS CD-ROMs Enable ISO 9660… to allow your Macintosh to mount ISO 9660 volumes on multivolume CD-ROMs. For instance, if you have a clip art CD-ROM that has popular Macintosh graphic file formats on the Macintosh HFS volume and popular PC graphic file formats on the ISO 9660 volume, you can select this checkbox and mount both volumes. Chapter 2: How To Use CD-ROM ToolKit 175 General recommendations: • Use this option only when you want to mount and use PC-formatted data that is on a disc employing both Macintosh and PC formats. Note that application programs on PC-based volumes are not written to run on the Macintosh. You will need PC emulator software or a DOS card in order to run PC-based programs. Read Ahead Figure 5. Read Ahead options Select the Read Ahead icon to enable CD-ROM ToolKit to anticipate the data you want next, grab it, and store it into RAM. Read Ahead reads information physically adjacent to the previous request. It functions in both forward and reverse directions. This speeds system response to requests for information by eliminating the time it takes to locate data. 176 CD-ROM ToolKit Reference Guide Disabled Click the Disabled button to turn Read Ahead off. Disable Read Ahead for titles that require a constant data flow, such as those that use QuickTime™. General recommendations: • Select Disabled for multimedia CDs with lots of QuickTime. This includes games, interactive educational CDs, multimedia encyclopedias, and Enhanced CDs, like CD Extra and ActiveAudio. Small Click the Small button to set a Read Ahead capacity of 2 KB. CD-ROM ToolKit anticipates the next information request, grabs 2 KB of that data and stores it into RAM. It will come up immediately when you request it. General recommendations: • Use Small for CDs that require frequent small data requests. These typically include dictionaries and database CDs. Large Click the Large button to set a Read Ahead capacity of 32 KB. Large works the same way as Small, except that it grabs and stores a larger load of data. General recommendations: • Use Large for CDs that require large data requests. These typically include Photo CDs and CDs with EPS images. Chapter 2: How To Use CD-ROM ToolKit 177 3 H o w To U s e C D T R e m o t e Overview Some initial facts CDT Remote is designed to look like a standard remote control for a home stereo. To use it you need the following: Table 6: Requirement Sound output Enabled CD-ROM device driver Enabled Sound in the Control Panels This pertains only to internal CD-ROM drives with internal speakers connected internally. NOTE Detail • headphones plugged into your CD-ROM drive • external speakers plugged into your CD-ROM drive OR • for internal CD-ROM drives: internal speakers connected internally CD-ROM ToolKit comes with a high performance device driver, see Chapter 4 for more information. 1. Open the Sound Control Panel. 2. Click on the Alert Sounds popup menu and select Sound In. 3. Make sure Built In is selected. 4. Click on the Options … button. 5. Choose Internal CD as your input source. 6. Enable the Playthrough checkbox. 7. In Sound Out, select an output device and specify 16 bit, Stereo, and 44.100kHz The Apple CD Audio Player may conflict with CDT Remote and prevent it from operating correctly. The Installer tries to disable it. If you still have problems with it, you may want to copy it to a diskette for safe keeping and remove it from your system. Apple CD Audio Player is usually stored in the Apple Menu Items folder in your System Folder. If you don’t find it there, use Find File to locate it. Chapter 3: How To Use CDT Remote 179 The CD-ROM ToolKit Installer places CDT Remote in a folder you specify at installation. It puts an alias in the Apple Menu Items folder. The Remote Player 1 2 3 4 5 Table 7: Name Function 1 Elapsed Time Window Shows the current track number and either the elapsed or remaining time on the track 2 Play Starts playing the CD at the track displayed in the Elapsed Time Window. Pause Pauses the CD. To resume play, click Pause or Play. Stop Stops play and resets to the start of the current track. Track << Skips to the start of the current track. Subsequent clicks go to the previous track. >> Skips to the beginning of the next track. Scan Scan operates only when you are playing an audio CD. 3 << Scans backward through the tracks or playlist until you release the Scan button. >> Scans forward through the tracks or playlist until you release the Scan button. 180 CD-ROM ToolKit Reference Guide Table 7: 4 Name Function Eject Stops play and ejects the disc. You also can eject by dragging the disc to Trash. Time Toggles between elapsed time and remaining time in the Elapsed Time Window. Shuffle Randomly rearranges the order of play. Audio Controls the delivery of audio. Choices include: • stereo or mono • left or right speaker only • left or right channel only (from both speakers) 5 Volume Controls the volume. Compact Disc Digital Audio When this text appears on a raised button, as it does in this example, you can save audio samples to your hard disk from the current audio CD. When the button does not appear raised, you cannot save audio samples to your hard disk. SCSI ID or ATAPI Information The SCSI identification number or the ATAPI bus number of your CD-ROM drive. Reduce the size of the remote by selecting Show Fewer Controls from the Player menu in the menu bar. This becomes Show More Controls after you have selected the smallest view. Chapter 3: How To Use CDT Remote 181 You have four views to choose from: 1 2 3 4 Figure 6. The four views of CDT Remote 1. CDT Remote standard view. 2. CDT Remote at the first level of Show Fewer Controls. 3. CDT Remote at the second level of Show Fewer Controls. 4. CDT Remote at the first level of Show More Controls, which appears on the Player menu after you have exhausted Show Fewer Controls. Use this remote view for CD+G CDs, also known as CD Karaoke. NOTE Chapter 7 of the online CD-ROM Toolkit User Guide, Technical Information, contains information on CD+G vendors and titles. Playing Audio Discs with CDT Remote Three types of CDs contain music: • traditional audio CDs • multimedia audio CDs • Enhanced CDs, such as CD Extra™ and ActiveAudio-type CDs 182 CD-ROM ToolKit Reference Guide Traditional audio CDs contain only audio tracks. Multimedia and Enhanced audio CDs are not encoded in the same way as traditional audio CDs. They contain digital data as well as audio tracks. On multimedia CDs, track 1 is reserved for data. The audio tracks always start after track 1. If a player is not equipped to handle multimedia CDs, it may try to play the data and could cause speaker damage. Enhanced CDs, such as CD Extra and ActiveAudio-type CDs, are two approaches to overcoming the track 1 limitation: • CD Extra CDs have data stored at the end of the audio tracks, so the CD player recognizes the disc as an audio CD. • ActiveAudio-type CDs have data stored in the space before track 1—referred to as Track 0—so a CD player recognizes them as audio CDs. NOTE For more information on Enhanced CDs, see Chapter 7 of the online CD-ROM Toolkit User Guide, Technical Information. CDT Remote recognizes multimedia formatting and automatically skips over the track 1 digital data when you click Play on the remote. To play audio CDs: 1. For internal CD-ROM drives with internally connected speakers, verify that Sound in the Control Panels folder is enabled. 2. Select CDT Remote™ from the Apple menu. 3. Load your audio CD into the CD-ROM drive. 4. Click Play on the remote. CDT Remote skips track 1 of multimedia CDs. See Chapter 7, Technical Information, for more information on CD formats. Use Play Only Chosen Track to play a single track on a CD. It plays the selected track and stops. It is available in the Player menu in the Menu bar. 1. Select Play Only Chosen Track from the Player menu in the Menu bar. 2. On your CDT Remote control: a. Click Play to replay the same track. b. Click Track to choose a different track. Chapter 3: How To Use CDT Remote 183 If you are not getting any sound, verify the following: Table 8: Check Is your volume high enough? • Is it high enough on the remote control? • Is it high enough in the Sound Control Panel under Sound Out? (internal CD-ROM drives with internally connected speakers only) • On an external CD-ROM drive, is the external volume control, if any, turned high enough? Is sound output connected to your system? • Headphones plugged into your CD-ROM drive • Speakers plugged into your CD-ROM drive OR • Internal speakers internally connected Is a CD-ROM device driver enabled? Is Sound enabled in the Control Panels? This applies to internal CD-ROM drives with internally connected speakers only. 184 Detail CD-ROM ToolKit comes with a high performance device driver. See Chapter 4 for more information. 1. Click on the Option … button in Sound In. 2. Choose the CD icon as your source of output. 3. Enable the Playthrough checkbox. 4. In Sound Out, select an output device and specify 16 bit, Stereo and 44.100kHz. Is the CD you are trying to play an audio CD? CDT Remote will play only audio CDs, such as traditional audio, multimedia, and Enhanced CDs. Do you have Apple CD Audio CD Player in your Apple Menu Items folder? This may conflict with CDT Remote. You might try backing it up and removing it from your system. Do you have more than one CD-ROM drive? Choose Select Device from CDT Remote’s Player menu and select the appropriate CD-ROM drive. CD-ROM ToolKit Reference Guide 4 Troubleshooting Overview This section addresses possible sources of problems. If you are having difficulty using or installing CD-ROM ToolKit, read through the relevant section in the manual first, then consult this section. Troubleshooting Installation At the restart following installation, if the CDT Extension icon briefly appears with an “X” on top of it (Figure 7), a startup error has occurred: CD-ROM ToolKit did not load properly. Figure 7. Problem startup icon If you have this problem 1. Disable other System Extensions. Pay particular attention to Extensions with CD or CD-ROM in their names. Remove them from your System Folder or use an Extension management program to make them inactive. 2. Restart your Macintosh. 3. Check the Extension icons at startup. If CDT loads without the “X,” you have isolated the conflicting Extension. Chapter 4: Troubleshooting 185 4. You may find that renaming the conflicting Extension so that it follows CDT alphabetically will solve the problem. Sometimes changing the order that Extensions load is all that’s needed. Extensions normally load in alphabetical order. In some cases, Extensions are named with a space preceding the name to make them load first. CD-ROM ToolKit will display a question mark on top of its icon (Figure 8) at startup under the following circumstances: • It has not been configured to support any CD-ROM drives, or • Your CD-ROM drive is not recognized by CD-ROM ToolKit (check the Supported Devices list in the CDT application folder) Figure 8. Missing device startup icon Typical reasons for this include: • • • • • • • 186 You have a newer drive that is not yet supported by CD-ROM ToolKit. You have an older, discontinued drive. Your drive was not powered on at startup. There is a conflict with another Extension. You did not remove old CDT software at installation. You do not have enough memory to load CDT. You have a problem on the SCSI bus, and the computer does not recognize the drive (this may be due to a bad SCSI ID, a bad cable, or improper termination). CD-ROM ToolKit Reference Guide 5 Drive Setup: Suggested Settings Overview CDT’s default settings do quite well for most CDs, but it may be possible to fine-tune settings for smoother operation and greater speed. This section contains charts with suggested settings for nine types of CDs: NOTE Type of CD Description Games Highly interactive CDs with lots of multimedia, sound, animations, and movies. Interactive children’s stories and educational CDs Moderately interactive CDs with text, sound, and some animation. Encyclopedias Moderately interactive CDs with text, sound, animations, and movies. Text-only linked databases CDs with many text files and some interactivity: you can search and jump from one location to another, such as CDs containing abstracts of articles. Shareware CDs with lots of non-interactive files (and consequently lots of file icons), such as text and downloadable applications. Photo CDs CDs with lots of files, each containing one photograph. Desktop recorded (homemade) CDs CDs that have been recorded in a nonprofessional, noncommercial setting, such as business archives or system backups. CD Extra™ CDs (previously known as CD Plus) CDs that combine digital audio and digital data in two sessions. Audio data occupies session 1; digital data occupies session 2. ActiveAudio-type CDs CDs that combine digital audio and digital data. Digital data occupies the space preceding track 1. Audio data occupies tracks 1 and up. Upgrade to the full version of CDT and customize settings for each of your compact discs. Chapter 5: Drive Setup: Suggested Settings 187 Some Notes About Settings Cache For most applications, bumping up Dynamic RAM in the Cache feature in Drive Setup will show an improvement in your CD-ROM drives speed and responsiveness. Remember, though, when CDT is active this RAM will be dedicated to caching CDs, and will otherwise be unavailable to your system. Remember Static Images Set Remember Static Images, in the Cache feature, for how you use your CDs rather than for the types of CDs you use. If you tend to do the same things each time you use a disc, it’s best to have it enabled and set to at least one. If you do different things with a disc each time you use it, you may find it helpful to disable this option. Multimedia discs If you have a noticeable problem with multimedia CDs, try steps 1 and 2 before moving onto 3 and 4. Steps 3 and 4 will slow general operation of your CD-ROM drive, but will help QuickTime™: 1. Select Disabled for Read Ahead. 2. Uncheck the Continue Prescanning Until Full checkbox in Prescan. 3. Uncheck the Static Disk Cache checkbox in Cache. 4. Turn off all caching by unchecking the Fast checkbox for the device in the main CDT application window. Miscellaneous notes on CDs • For CDs with many files, such as some shareware CDs, bumping up the Static Cache may be helpful—particularly Static RAM cache. Static cache stores the directories that point to file locations. When there are many files, your system will be able to get to them faster. • For CDs with large files, setting Read Ahead to Large may increase performance speed. 188 CD-ROM ToolKit Reference Guide The charts The charts on the following pages contain suggestions for settings within each general category. As you become more familiar with CDT’s special features, you can adjust the settings to fit even more closely any unique requirements of the types of CDs you use most frequently. NOTE For more information on settings, see Drive Setup: Suggested Setting in the online CD-ROM Toolkit User Guide. Games Highly interactive CDs with lots of multimedia links, sound, animations, and movies. If you have problems, see the information on multimedia CDs on page 188. Cache Dynamic RAM Cache 128k + Static RAM Cache Unchecked Static Disk Cache 3000k Prescan Prescan File and Folder Information Checked Prescan Desktop Information Checked Prescan System 7 Icon Files Unchecked Prescan System 7 Alias Files Unchecked Continue Prescanning Until Full Unchecked Mounting Any ISO 9660 volumes on “dual format” Apple HFS CD-ROMs Unchecked Apple ProDOS Unchecked Search every track for possible data to mount Unchecked Read Ahead Disabled Choose Me Small n/a Large n/a Chapter 5: Drive Setup: Suggested Settings 189 Special Hide custom icons for faster Finder browsing Unchecked Allow messages about badly mastered CDs Unchecked Use slower “Polled Non-Blind SCSI I/O” (rarely needed) Unchecked Do not eject tray at shutdown: your choice. This does not affect speed. 190 CD-ROM ToolKit Reference Guide Interactive Children’s Stories and Educational CDs Moderately interactive CDs with text, sound, and some animation. Cache Dynamic RAM Cache 128k + Static RAM Cache Unchecked Static Disk Cache 3000k Prescan Prescan File and Folder Information Checked Prescan Desktop Information Checked Prescan System 7 Icon Files Unchecked Prescan System 7 Alias Files Unchecked Continue Prescanning Until Full Unchecked Mounting Any ISO 9660 volumes on “dual format” Apple HFS CD-ROMs Unchecked Apple ProDOS Unchecked Search every track for possible data to mount Unchecked Read Ahead Disabled Choose Me Small n/a Large n/a Special Hide custom icons for faster Finder browsing Unchecked Allow messages about badly mastered CDs Unchecked Use slower “Polled Non-Blind SCSI I/O” (rarely needed) Unchecked Do not eject tray at shutdown: your choice. This does not affect speed. Chapter 5: Drive Setup: Suggested Settings 191 Encyclopedias Moderately interactive CDs with text, sound, animations, and movies. Cache Dynamic RAM Cache 128k + Static RAM Cache Unchecked Static Disk Cache 3000k Prescan Prescan File and Folder Information Checked Prescan Desktop Information Checked Prescan System 7 Icon Files Unchecked Prescan System 7 Alias Files Unchecked Continue Prescanning Until Full Unchecked Mounting Any ISO 9660 volumes on “dual format” Apple HFS CD-ROMs Unchecked Apple ProDOS Unchecked Search every track for possible data to mount Unchecked Read Ahead Disabled Choose Me Small n/a Large n/a Special Hide custom icons for faster Finder browsing Unchecked Allow messages about badly mastered CDs Unchecked Use slower “Polled Non-Blind SCSI I/O” (rarely needed) Unchecked Do not eject tray at shutdown: your choice. This does not affect speed. 192 CD-ROM ToolKit Reference Guide ] Photo CDs CDs with lots of files, each containing one photograph. Use CDT’s default settings. Cache Dynamic RAM Cache 128k Static RAM Cache Unchecked Static Disk Cache 3000k Prescan Prescan File and Folder Information Checked Prescan Desktop Information Checked Prescan System 7 Icon Files Unchecked Prescan System 7 Alias Files Unchecked Continue Prescanning Until Full Checked Mounting Any ISO 9660 volumes on “dual format” Apple HFS CD-ROMs Unchecked Apple ProDOS Unchecked Search every track for possible data to mount Unchecked Read Ahead Disabled n/a Small n/a Large Choose Me Special Hide custom icons for faster Finder browsing Unchecked Allow messages about badly mastered CDs Unchecked Use slower “Polled Non-Blind SCSI I/O” (rarely needed) Unchecked Do not eject tray at shutdown: your choice. This does not affect speed. Chapter 5: Drive Setup: Suggested Settings 193 Bitstream Fonts Page 195 Friday, June 6, 1997 3:23 PM Bitstream Typeface Library T y p e fa c e Library The Bitstream® Collection CD contains 250 professional-quality typefaces in both TrueType® and PostScript® Type 1 format for Macintosh® and IBM PCs (Microsoft® Windows,™ UNIX, and OS/2). Selected from Bitstream’s world-class library of almost 1,100 typefaces, the 250 type designs on this fully unlocked CD-ROM were selected by Bitstream’s type professionals to provide users with a comprehensive library of fonts for any typographic need. Bitstream’s typefaces were designed and digitized by a world-renowned staff each with more than 15 years experience in the type industry. All Bitstream typefaces are fully hinted for crisp output and sharp screen display. They also feature extensive kerning data to guarantee precise character spacing and letterfit. This typeface sample poster shows all of the 250 typefaces on the Bitstream Collection CD. Each typeface appears with its Bitstream font ID number, its name, style and trademark (if applicable). Trademark Font I.D. 1040 Amazone 0510 Amelia regular 0211 American Text TM8 regular TM4 reg- Typeface style Typeface Bitstream strives to set the highest standards for quality in typeface design and technical performance—we think you’ll be happy with the results. The owners of the trademarks and registered trademarks of typeface names designated by number on this poster correlate to the names shown below. The trademarks designated as ”registered“ are registered in the United States. These and other trademarks appearing on this poster may be registered in other countries as well. 1 2 Bitstream Inc. Linotype AG and/or its subsidiaries 3 4 5 H. Berthold AG Kingsley-ATF Type Corporation FotoStar International 6 7 8 Ludlow Industries (UK) Ltd. Johannes Wagner Tetterode Nederland (Lettergieterij Amsterdam) 9 Stephenson Blake & Company Ltd. 10 Visual Graphics Corporation ©1995 Bitstream Inc. All rights reserved. Bitstream is a registered trademark and Creative Collection is a trademark of Bitstream Inc. TrueType is a trademark of Apple Computer Inc. PostScript is a registered trademark of Adobe Systems Inc. Microsoft is a registered trademark and Windows is a trademark of Microsoft Corporation. 195 Bitstream Fonts Page 196 Friday, June 6, 1997 3:23 PM 196 Bitstream Fonts Page 197 Friday, June 6, 1997 3:23 PM 197 Bitstream Fonts Page 198 Friday, June 6, 1997 3:23 PM 198 PowerCenter IX Page 199 Friday, June 6, 1997 3:25 PM Index Numerics 115/230 volt switch, illustrated xv, xvii, 15 3.5" to 5.25" adapter 89 A AC line input specifications 109 Acceleration, see cache ActiveAudio 182 adapter, 3.5" to 5.25" 89 ADB port Low-Profile system illustrated xvii ADB port, illustrated xvii, 15 ADB ports illustrated xv input devices connection 21 mouse and keyboard connections 8 symbol for xv address 134 Anubis Extension 129 Apple CD Audio Player 179 Apple desktop bus, power requirements 111 Apple HFS 175 Apple software license agreement xxvii Apple_Free 136 Apple_HFS 136 Apple_partition_map 136 AppleCD Audio Player 26 AppleShare 155 APT Extension 129 At Ease 155 audio equipment 23 audio device connection 23 For Technical Support, Call 1-800-708-6227 external speaker connection 24 microphone connection 25 power requirements 112 sound ports 23 audio system specifications 108 auto initialize Format Type 142 Verify After Formatting 143 auto initializing 141 to 144 B backups 125 bar-code reader connecting 21 Basics tutorial, running 29 bomb dialog box 42 brightness control, monitor 11 C cables, for connecting SCSI devices 19 Cache 172 notes about settings 188 overview 173 capacity 137 unallocated 134 caution notices (see also: warning alerts) defined 105 on increasing memory 69, 110 CD Extra 182 CD+G 182 CD-ROM drive PowerCenter Pro User’s Guide 199 PowerCenter IX Page 200 Friday, June 6, 1997 3:25 PM (see also: hard disk drive) 26 illustrated xiv playing audio CDs on 26 removing 95 CDs (audio), playing 26 CDT Remote about 179 ActiveAudio 182 Apple CD Audio Player 179 CD Extra 182 Enhanced CD 182 how to play audio 183 multimedia audio CDs 182 remote control 180, 182 sound Control Panel 179, 183 sound output 179 troubleshooting 184 Chooser program 21 clock and calendar specifications 109 color tables, for monitor ports 111 commands View Partitions 135, 151 Compact Pro 155 compatibility notes 155 compatiblity problems, software 42 Configure Driver 137 connecting peripheral devices 15 Control Panels 170 cover removal instructions 60, 71 warning alert 61, 72, 86 Create New Volume format 148 cursor (see: mouse pointer) customer satisfaction guarantee xxv Customer Support contacting xxi Customer Support, contacting iii D data integrity maintenance 125 DC power 200 PowerCenter Pro User’s Guide specifications 109 Delete 138 desktop problems missing hard disk icon 40 Desktop system xiii Device Data file 141, 144 Device driver 179 device drivers, installing 21, 102 Devices list 170 view menu 170 Devices menu View Partitions 135 dimensional specifications 110 DIMM module (dual in-line memory module) inserting 81 removing 80 DIMM slots 77 DIMMs 71 DIMMS (Dual In-line Memory Modules) configuring 110 installing 77, 110 DIMMS (Dual Inline Memory Modules) installing 71 disk devices in use 124 disk drives specifications 107 Disk First Aid 40 Display non-CDs 169 DOC statement (DOC Class B) 116 double-clicking, explained 29 drive bays, location 90 Drive setup cache 172 cancel 172 default 172 devices list 170 display non-CDs 169 drive setup screen 169 fast 170 miscellaneous notes 188 mounting 175 MouseHelp 171 OK 172 For Technical Support, Call 1-800-708-6227 PowerCenter IX Page 201 Friday, June 6, 1997 3:25 PM on 170 prescan 174 read ahead 176 scan 169 setup 169 setup features screen 170 driver partitions 136 Driver Loader 129 Dual format CDs 175 dual in-line memory modules 71 E electrical outlets for plugging in computer 1 warning alert 2 electrical shock safety guidelines 105 e-mail address, Power Computing team v energy-saving mode (sleep mode) 33 Enhanced CD 182 environment (operating) specifications 110 error dialog box 36 error messages (see: troubleshooting) Ethernet illustrated xv Ethernet network connecting to 22 Ethernet port, illustrated xvii, 15 expanding computer installing expansion cards 66 expanding your computer cover removal 59, 71, 85 cover replacement 65, 76 expansion cards guidelines for installing 60 installation warning alert 66 installing 66 power consumption 60 warning alert 60, 69, 72, 86 when to install 3 Extensions disabling 129 Extensions Manager 42 external speakers, connecting 24 For Technical Support, Call 1-800-708-6227 F FAQ 125 FCC statement 115 Finder (Application menu) 30 floppy disk X icon 39 floppy disk drive illustrated xiv floppy disk drive, specifications 107 floppy disks problems with 40 folder, opening 30 format Create New Volume 148 low-level 144 options 147 quick 144 Format Type 142 format type 146 formatting 150 frequently asked questions 125 front panel power button illustrated xiv FWB recommends Drive setup settings 187 easy install 168 G GeoPort Telecom Adapter connecting 21 power requirements 112 Get Info window 42 glare, preventing 106 graphics tablet connecting 21 greenish monitor image 11 Guide menu 30 H hard disk drive (see also: CD-ROM drive) internal 17, 87 specifications 107 hard disk icon PowerCenter Pro User’s Guide 201 PowerCenter IX Page 202 Friday, June 6, 1997 3:25 PM opening 30 problems 40 Hard Disk ToolKit•PE upgrading 124 using 139 Hard Disk ToolKit•PE modules FWB Mounter 125 Hard Disk ToolKit•PE 125 HDT (Hard Disk Toolkit) Primer 18, 87 health related information 105 preventing eye strain 106 health-related information 105 Help MouseHelp 171 help online 30 Hierarchical File System 175 high-performance Macintosh-standard monitor port described 4 high-performance monitor port color table 111 power requirements 112, 113 ISO 9660 175 I Mac OS CD-ROM 40 Mac OS operating system 29 on-line help 30 tutorial 29 Mac OS Tutorial folder 30 Mac OS Tutorial Part 1 icon 30 Macintosh Guide 30 Macintosh Guide (Guide menu) 4, 30 Macintosh-standard video port illustrated xv, xvii memory configuring 107 increasing 71 MicroNet Cartridge Extension 129 microphones connecting 25 power requirements 112 modem port connecting printer to 21 illustrated xv, xvii, 15 Low-Profile system illustrated xvii icons floppy disk X icon 39 hard disk icon 30 Mac OS Tutorial Part 1 30 sad face icon 39 identity 135 input devices, connecting 21 Installation quick start 167 installation before you install 129 Installer 179 alias files 170, 180 installing expansion cards 59 internal drives 85 memory (RAM and VRAM) 71 interfaces specifications 108 internal storage devices 202 PowerCenter Pro User’s Guide K keyboard connecting to computer 8 power requirements 111 problems 41 specifications 109 keyboard power key illustrated xiv L LocalTalk network connecting to 22 printer connections 21 low level format 144 Low-Profile system front view xvi rear view xvii LUN 134 M For Technical Support, Call 1-800-708-6227 PowerCenter IX Page 203 Friday, June 6, 1997 3:25 PM symbol for xv modems connecting 21 monitor color tables 111 different sizes of, tables for 111 placement of 1 setting up 3 turning on 10 monitor ports described 4 Monitors and Sound control panel 24, 27 Monitors control panel, configuring monitors 4 Mount Cache 129 Mounting 175 Apple HFS 175 dual format CDs 175 ISO 9660 175 mouse connecting 8, 21 problems 41 specifications 109 using 29 mouse pointer, described 29 MouseHelp 171 Multimedia 188 N name 137 networks connecting to 22 O on-line help 30 operating environment, specifications 110 optical disk 143, 147 P Partition List dialog box 135 partition map 136 partitions number of 137 PCI cards For Technical Support, Call 1-800-708-6227 installing 66 PCI expansion slots Low-Profile system, location illustrated xvii Minitower system, location illustrated xv peripheral devices audio equipment 23 CD-ROM drives 26 connecting to 15 external speakers 24 input devices 21 microphones 25 modems 21 network connections 22 printers 21 SCSI devices 16 PlainTalk microphone 25 ports (see: ADB ports; monitor ports; sound ports) power button 36 restarting computer 37, 41 power cable 101 Power Computing team e-mail address v word from v power consumption of expansion cards 60 specifications 111 power cord socket, illustrated xv socket, Low-Profile system illustrated xvii power cord socket, illustrated xvii, 15 power cord, plugging in 2 power key 10, 36 turning on computer 10 Prescan 174 file and folder information 174 printer port illustrated xv Low-profile system illustrated xvii symbol for xv printer port, illustrated xvii, 15 printers, connecting 21 problems and solutions (see troubleshooting) PowerCenter Pro User’s Guide 203 PowerCenter IX Page 204 Friday, June 6, 1997 3:25 PM problems and solutions (see: troubleshooting) processor specifications 107 programs, launching 30 purplish monitor image 11 Q Quadra 840AV 136, 156 quick format 144 QuickTime 155 R radio and television interference regulatory information 115 RAM 173, 176 RAM (random-access memory) adding 77 configurations 110 insufficient memory problems 42 specifications 107 Read ahead 176 disabled 177 large 177 RAM 176 small 177 Read Me file 128 refunds xix registration 123 regulatory information 115 CD-ROM drive 117 DOC statement 116 FCC statement 115 lithium battery warning 117 radio/television interference 115 Remember static images 188 removing computer cover 60, 71 repetitive stress injuries (RSIs), preventing 106 reset button 12, 37 illustrated xiv Resize Volume 138 Restart command (Special menu) 36 restarting the computer, troubleshooting 36 return policies xix returns for refund xix 204 PowerCenter Pro User’s Guide returns for repair xx S sad face icon 39 safety and health guidelines 105 safety instructions 105 Sales, contacting iii satisfaction guarantee xxv saving files 13, 32 Scan 169 SCSI bus scanning 18, 87 SCSI cable external 19 internal 101 SCSI chain 18 SCSI device drivers 102 SCSI devices 16 connecting external 19 connecting internal 20 installing device drivers 21, 103 problems 40 SCSI ID assignment 17, 18, 87 termination 20 SCSI formatting options 150 SCSI ID number assigning 18 determining 18, 87 pre-set IDs 18 SCSI port described 19 illustrated xv, xvii, 15 Low-Profile system illustrated xvii symbol for xv SD Removable CDEV 129 Selector window 132 buttons 133 setting up your computer 1 Sharing Setup 129 shipping hardware to Power Computing xx Shut Down (Special menu) 13, 32 shutting down your computer 13, 32 Silver Control 129 size 137 For Technical Support, Call 1-800-708-6227 PowerCenter IX Page 205 Friday, June 6, 1997 3:25 PM sleep mode 33 software compatiblity problems 42 memory problems 42 software device drivers, installing 21 Sound control panel 24, 27 sound in port illustrated xv symbol for xv sound in port, illustrated xvii, 15 sound out port illustrated xv, xvii, 15 Low-Profile system illustrated xvii symbol for xv sound ports connecting audio devices to 23 speakers (external) connecting to 24 specifications 107, 107 Stacker 156 start block 137 starting up problems 11, 40 turning the computer on 10 starting your computer 10 Static disk cache 173 static electricity, discharging 65, 76 Static RAM cache 173 stereo mini-plug connectors 23, 24 Stop File Sharing 129 Stuffit Deluxe 155 Stuffit Expander 155 Suggested settings children’s stories 191 educational CDs 191 encyclopedias 192 games 189 photo CDs 193 SuperATM 155 support numbers iii, xxi Sync on Green 11 system chassis types xiii Low-Profile, front view xvi For Technical Support, Call 1-800-708-6227 Low-Profile, rear view xvii overview xiii rear view xv System software installing 124 system software problems 39 T TCP/IP control panel 22 technical information power requirements 111 RAM configurations 110 specifications 107 system specifications 107 VRAM configurations 110 Technical Support contacting iii, xxii telecom adapter 21 telecommunications devices, power requirements 112 telecommunications port (see: modem port) testing a device 152 to 154 title 137 Token Ring network connecting to 22 total blocks 137 trackball connecting 21 Troubleshooting 185 troubleshooting 35, 156 to 160 drive not working 103 restarting the computer 36 Troubleshooting installation 185 to 186 tutorial (Basics) overview 29 type 134, 137 U unallocated 137 capacity 135 updating a driver 152 upgrading 124 upgrading your computer 59, 71, 85 PowerCenter Pro User’s Guide 205 PowerCenter IX Page 206 Friday, June 6, 1997 3:25 PM expansion cards 66 installing and removing RAM 77 overview of adding RAM 77 V Verify After Formatting 143, 146, 147 VGA monitor port described 4 VGA video port illustrated xv, xvii video cable, connecting 6 video specifications 108 View Partitions 135, 151 virtual memory 43 Virus protection, disabling 129 voltage switch 2, 3 volume 135 VRAM (video memory) configuring 110 W warning alert on adjusting CD-ROM drives 117 warning alerts defined 105 on computer cover removal 60, 69, 72, 78, 86 on installing expansion cards 69 on lithium batteries 117 on using electrical outlets 2 see also: caution notices warranty xxiii warranty limitations and disclaimer of damages xxiv warranty service xxiv Web address, Power Computing team iii, xxi X X icon 39 206 PowerCenter Pro User’s Guide For Technical Support, Call 1-800-708-6227 FWB Reg/Apple Reg Page 207 Friday, June 6, 1997 3:26 PM Registration Cards FWB Reg/Apple Reg Page 208 Friday, June 6, 1997 3:26 PM 7.6 7.6 FWB Reg/Apple Reg Page 209 Friday, June 6, 1997 3:26 PM Apple Software Registration Card Please Print Clearly in Capital Letters. Primary User First name Mid. int. Last Name Title (if applicable) Department Location where software will be used: Company/Institution (if applicable) Street # or P.O. box # Street Name Apt./Suite # City Zip/Postal code Evening telephone State/Province Country Daytime telephone Fax telephone The purchasedis is System software was acquired through Power Computing Corporation. The software software purchased System 7.5,7.6, andand the the software was acquired through Power Computing Corporation. ✃ FWB Reg/Apple Reg Page 210 Friday, June 6, 1997 3:26 PM Place Stamp Here. Apple Computer Inc. PO BOX 876 Brea CA 92622-9905 U.S.A FWB Reg/Apple Reg Page 211 Friday, June 6, 1997 3:26 PM From: _______________ ____________________ ____________________ Reason for Return: ___ General disatisfaction ___ Technical difficulties ___ Pricing ___ Upgrading system ___ Downgrading system ___ Competitive replacement ___ Evaluation return ___ Other : __________________ RMA#____________ To: Power Computing Corporation Attn: RMA Returns Department 5100 North IH-35 Round Rock, TX 78681 FWB Reg/Apple Reg Page 212 Friday, June 6, 1997 3:26 PM