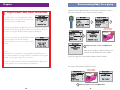
1
Baby Think It Over® Program
RealCare® Baby II
Operating
Handbook
The following are registered trademarks of Realityworks:
Baby Think It Over and the Baby Think It Over logo are registered trademarks in Australia, Canada, Japan, United Kingdom, and
the United States only.
Baby Talk It Over is registered in the United States only.
Some Decisions Last A Lifetime is registered in the United States only.
RealCare Baby is registered in Australia, European Community, Mexico, New Zealand, and the United States only.
NICoteen is registered in Australia, Japan, Mexico, Singapore, and the United States only.
NICoteen logo is registered in Australia, European Community, Japan, Mexico, New Zealand, Singapore, and the United States only.
©2004 Realityworks, Inc.
*D932*
D932
Please read these instructions before operating Baby.
Keep this handbook in a safe place for future reference.
2709 Mondovi Road Eau Claire, WI 54701 800.830.1416
Fax 715.830.2050
www.realityworks.com
! IMPORTANT SAFETY PRECAUTIONS
!
Baby rather than holding Baby at all
times. Holding techniques are listed on
the Student Care Card that accompanies
Baby.
Baby weighs 6.5 to 7 pounds and
could cause discomfort for individuals
with back pain.
Do not operate any type of equipment or attempt tasks requiring the use
of both hands while holding Baby.
Driving
Baby may cry while the student is
driving. Please be aware that crying may
start unexpectedly, and the student
should be prepared.
Do not feed, burp, rock, change diapers, or otherwise care for Baby while
driving.
The student must bring his or her
vehicle to a complete stop in a safe location
before caring for Baby, or to retrieve a
piece of Baby’s equipment that falls.
Failure to install Baby in a car seat in
a motor vehicle could result in Baby or
supplies becoming projectiles in the
event of a sudden stop or accident.
Simulation rules
The student must never take the
wristband and ID off. Not only will he or
she be deducted points, but the ID may
be lost, or the student may stumble
around in the dark looking for it if Baby
cries during the night.
The student should make a note in
his or her diary where they had to delay
caring for Baby because their safety or
the safety of others may have been compromised.
Baby’s clothing is NOT flame retardant and should NOT be worn by real
infants. Instructors should make sure all
clothing is returned with Baby.
Location
Never leave Baby unattended in a public place given the potential for Baby to be
mistaken for a real infant.
Do not place Baby in or near water.
Do not place Baby on or near a
stove, especially while cooking.
Baby should sleep somewhere close
to the student’s sleeping quarters, but not
in bed with the student. Baby may fall
out of the bed or the student could roll
over on it causing damage to Baby and
discomfort to the student.
To prevent discoloration and fading,
do not store Baby in direct sunlight or in
an area of excessive heat.
Batteries
Batteries may explode, leak, cause
property damage, or cause personal
injury if disposed of in fire, inserted
backwards, inserted forcefully, stored in
direct sunlight or an area of excessive
heat, mixed with used batteries, or mixed
with a different battery type (some types
are alkaline, carbon-zinc, or rechargeable).
Rechargeable batteries are to be
removed from Baby before being
charged and are only to be charged under
adult supervision.
Only batteries of the same or equivalent type as recommended are to be used.
The battery supply terminals (ends)
are not to be short-circuited (touched
together).
Do not STORE batteries in an
inactive Baby. They can leak. Battery
leakage can damage or destroy Baby’s
electronics and is NOT covered by warranty.
Interaction with others
Loud crying near people with potentially serious physical conditions, such as
those susceptible to heart attack or
stroke, should be avoided.
Do not allow small children to play
with Baby. Baby’s hands and feet are
small enough to be a choking hazard.
Baby is not suitable for children under
three.
Baby’s crying or other sounds may
cause pets to become agitated or aggressive. Keep Baby out of the reach of pets
or other animals.
Physical precautions
To avoid straining your arms, use an
infant car seat or carrier to transport
2
Returning Baby for repair (cont.)
5. Include a sheet of letterhead with a brief explanation of why
the item(s) are being sent for repair. Please reference each
RealCare® Baby serial number (found on the electronics box in
Baby’s back), as well as your name, organization name, and
customer ID number. If the data from the simulation you
experienced a problem with is available, please include the
printout with Baby.
6. Include a method of payment. A signed purchase order,
check, or credit card with the name of the cardholder, card
number, and expiration date will be accepted.
7. Ship Baby via mail (insured for replacement value of the
product) and address the package to :
Attn: RMA#________________
Realityworks, Inc.
2709 Mondovi Road
Eau Claire, WI 54701
8. Once your Baby is received, it will be repaired and shipped
back to you. If you have questions regarding the status of
your repair, please call the Customer Service Department at
800.830.1416.
Removing the PCB board for replacement:
(Only do this when instructed to do so by Customer Service)
1. Remove Baby’s batteries.
2. Remove two small screws (shown) with a
Phillips screwdriver.
3. Grasp circuit board by the contact point and
pull straight out.
4. Replace the two small screws and the battery cover.
5. Place circuit board in bubble wrap bag and a sturdy cardboard box, and return to Realityworks at the address above.
screw
Grasp here
screw
43
Returning Baby for repair
If you suspect your RealCare® Baby needs to be returned to
Realityworks for repair, please follow these steps:
1. Complete the troubleshooting testing on pages 29 of this
Operating Handbook (also at www.realityworksinc.com).
Table of Contents
Product overview ..........................................................................4
Control unit overview ..................................................................5
Parts identification ........................................................................6
Terms ..............................................................8
Getting started (Read these points first) ..............10
2. Contact the Customer Service Department at 800.830.1416
or e-mail them through our Web site. A Customer Service
Representative will analyze your troubleshooting results and
provide further instructions. Please have the following items
available when you call:
• Baby
• Four C batteries installed in Baby and four NEW C batteries
• Bottle or breastfeeding device
• Green patch diaper
• Yellow patch diaper
• Paper clip
• Instructor key ring
• Control unit with four NEW AA batteries
• Screwdriver
• Printer (if you have purchased one from Realityworks)
• IDs
3. If your Baby needs repair, Customer Service will give you a
Return Materials Authorization number for use when returning
Baby.
4. Remove batteries from Baby. Package RealCare® Baby II,
undressed, in the plastic bag provided with your purchase and
place it in the original box. Do NOT use newspaper for packaging
Baby; the ink transfers onto Baby’s vinyl. Unless specifically requested
by Customer Service, do NOT send accessories, batteries, or IDs.
Battery installation........................................12
Setting the control unit clock ........................14
Configuring Baby and IDs (setup) ....................15
Prepare (start and run Babies) ............................18
• Start and Stop Times
• Care Level
• Quiet Times
• Start Data Transfer
Finish (stop simulation and retrieve data) ................21
• Get Data
• End Simulation
• View Report / Print Report (on infrared printer from Realityworks)
Day Care on demand ....................................24
Demonstrating Baby for a group ..................25
Readiness Check (simulation settings) ................28
Troubleshooting Baby....................................29
Emergency Start/Stop feature ......................31
Self Test (control unit) ....................................32
Infrared printer choice ..................................33
Product compatibility ....................................34
Care, maintenance, and storage....................35
Frequently asked questions ..........................37
Returning Baby for repair ............................42
42
3
Frequently asked questions
Product overview
RealCare® Baby II is an electronic infant simulator that cries to be fed,
burped, rocked, and have its diapers changed by a student parent. RealCare®
Baby II weighs 6.5 to 7 pounds, has a flexible neck, and a head that must be
supported at all times.
The hand-held control unit is used to select:
• a start time and end time for the student’s parenting experience
• an easy, medium, or hard level of care*
• pre-set quiet times when Baby won’t cry for care
When you are ready, you can transfer all these choices to
Baby with one simple step via touchless communication
(no need to touch to Baby’s back).
!
Best control unit and ID communication areas:
What do I do if I lost the battery cover key?
Call Customer Service at 800.830.1416 for a replacement.
The bottle cover is missing. Can I get a replacement?
Yes. Call Customer Service at 800.830.1416.
Is there any latex in Baby or the bottle?
No. Baby and all accessories do not contain any latex.
Are the diapers washable?
Yes. Washing the diapers does not affect the sensors. See the tags on the diapers
for washing and drying instructions.
When I print the data, why does the printout have this
symbol on it?
The batteries in the printer are low. Replace the batteries and try printing again.
(This only applies to the HP82240B printer model.)
Can I use the grading system I use for my older Babies?
Yes. However, RealCare® Baby II has additional reporting features to help with
the grading process. Suggestions for grading can also be found in the Program
Manual.
My report summary shows five mishandling events, but only
two are shown on the detail screen. What happened?
Baby counts all mishandling and missed care events but only stores detail information for a combined total of 49 mishandling events and missed care events
together. The student had five mishandle events, but only two of them were
recorded before the first 47 missed care events occurred.
After you transfer your choices, Baby is programmed and begins following
selected infant schedules at the chosen start time.
Caring for Baby
The student parent wears a unique ID on a wristband so Baby recognizes its
“parent” and can only be cared for by that student.
When Baby cries, the student wearing the correct ID must pick Baby up,
listen for the chime sound, and then figure out what care Baby needs
(feeding, burping, diaper change, rocking, comforting after rough handling or
lack of head support). See the Student Care Card for more information.
*There are 15 schedules Baby may follow. They are grouped into three
categories: EASY, MEDIUM, and HARD.
4
41
Frequently asked questions
Control unit overview
Do I have to reset the clock for daylight savings time?
Yes. To reset the clock, select control unit from the Main Menu, and then choose
Set Clock. Press the up and down arrows to change the time.
As the instructor, you use the control unit to choose:
• start and stop time
• level of care difficulty
• quiet times
Do I have to reset the clock for leap years?
No. The control unit is designed to take leap years into account.
What is the USB connector for?
The simulation data can be downloaded from Baby to a desktop computer for
additional grading and printing options. This feature will be available in the
future. Call Customer Service for details.
The student immersed Baby in water.
Take off Baby’s arms and legs. Remove the battery cover and remove the batteries and the circuit board. Allow to dry for at least one week. Reassemble Baby
and insert batteries. If Baby beeps, try programming it. If not, call Customer
Service at 800.830.1416.
Why is Baby buzzing or making strange noises next to electronic devices?
Some electronic devices, like cell phones, create a lot of interference. This is
most easily observed in Baby’s sounds. This interference will not harm Baby.
Both the control unit and Baby are tested to ensure that such interference does
not damage the electronics or cause any lasting effect. Both the control unit and
Baby are tested to international and FCC standards to ensure that their radiated
emissions are within safe and acceptable limits and do not pose a danger to people or other electronic devices.
How do I clean Baby?
Try any of the following cleaners to remove dirt stains:
• Goop® Hand Cleaner with Pumice
• GoJo® Orange Pumice Hand Cleaner
• Baking soda
• Tech cleaner
• Soft Scrub® Cleanser without bleach
• Oxi Clean
• Mild dish soap
• All-purpose cleaner
• Acne cream
• Rubbing alcohol
Realityworks has found NO effective product to remove ink stains from Baby’s
vinyl. Depending on the type of cleaning that needs to be done, you may use a
green kitchen scrubby or the equivalent to rub the cleaner on the stain. You can
then remove the cleaner with a damp cloth. IMPORTANT: Do NOT use any
cleaners on Baby’s painted areas, including head, lips and cheeks. Use only a mild
soap and water solution and soft cloth on these areas.
You can also:
• give Baby a name
• enter its gender and ethnicity
• set up one or two IDs for Baby to recognize.
Contact
Touch this contact to Baby’s contact point if
you are programming an original RealCare® Baby.
USB connection
Connect the control unit to a
personal computer to download data.*
LCD screen
Displays all options.
(Screens stay as you leave them)
Power button
Turns the control unit on and off.
Left arrow
• Returns you to the previous screen or Main Menu
• Accepts any changes made
• Scrolls left through data selections
Help
button
Displays
a help
screen
about the
option
you are
using.
Up arrow
Scrolls up through menu
and data selections.
Down arrow
Scrolls down through menu
and data selections.
Right arrow
• Accepts any changes made
• Advances to next screen if further options exist
• Scrolls right through data selections
Note: push and hold buttons to auto scroll through data selections.
*software available soon
40
5
Frequently asked questions
Parts identification
target areas shown on page 4, and hold it steady for five seconds. Do not wave the
control unit around Baby. If the “SEARCHING” screen remains, check the battery
levels of both the control unit and Baby.
Instructor key ring
Emergency start/stop opening
Contact point
Battery cover lock
Diaper sensor area
How much simulation data can the control unit store?
Data for up to 30 Babies. After data for 30 Babies has been stored in the control
unit, the oldest simulations will automatically be deleted with each new simulation that is downloaded.
Can I start Baby without a control unit?
Yes. See page 31 about using the Emergency Start feature.
I lost the control unit. Can I use a different control unit to get
data or end the simulation?
Yes. Any RealCare® Baby II control unit will communicate with Baby. You may
also use the original RealCare® Baby control unit to program RealCare® Baby II
but you will not be able to use the new programming features with the old control unit.
Is the control unit broken when the screen looks like this?
No. You or someone else accidentally selected Japanese for the control unit’s display language. Press the left arrow button until the screen does not change. Scroll
down to the last option on the screen and press the right arrow. On the next
screen, scroll down to the last option on the screen and press the right arrow. On
the next screen, scroll up to the first option (English) and press the right arrow.
Your control unit should be back to normal.
Feeding sensor area
Speaker
The control unit does not turn on.
The batteries in the control unit could be low. Change the batteries and try the
control unit again. No data is lost.
What’s the difference between Easy, Medium, and Hard care
levels?
Each of the 15 infant schedules is ranked by length of care time and length of
time in between care events. “Easy” schedules are the five schedules with the
least amount of care time and most amount of time between events, “Hard”
schedules are the five schedules with the most amount of care time and least
amount of time between events, and Medium schedules are the five schedules in
between.
6
39
Frequently asked questions
Parts identification
How many Babies can I program at once?
There is no maximum number of Babies you can program at one time. However,
the maximum amount of Babies the control unit will store data for after the simulation is completed is 30.
How can I stop a simulation early?
Pulling the batteries out DOES NOT STOP BABY – it only pauses it. Baby can
be stopped early by two methods. The first is to use the End Simulation option
on page 21. The second method is by using the Emergency Stop feature. Use a
straightened paper clip to gently press and hold the Emergency Stop button until
Baby chimes six times. (You may need to hold it for as long as 15 seconds). Baby
is now inactive until Baby is either restarted with the Emergency Start procedure
or is reprogrammed.
Breastfeeding device
Control unit
battery cover
What’s the difference between Quiet Times and Day Care?
Quiet times are pre-programmed before the simulation and are in one-hour intervals
up to 12 hours. There are three quiet times available per simulation. Baby can be put
into Day Care with the control unit at any time during the simulation. See page 24
for instructions. Baby stays in Day Care until you take Baby out of Day Care.
Instructor and
Student videos
(step-by-step
programming
actions and
student care
instructions)
How long will Baby cry before it records a neglect?
Two minutes.
How do I individually demonstrate care events?
Select Baby Utilities from the Main Menu, and then choose Demonstration.
Scroll down to the specific care activity you would like to demonstrate (instructions on page 25).
(Located in back of binder)
How much time elapses between each care event in Practice All
mode?
There are approximately 30 seconds between each care event in the Practice All
mode on the Demonstration menu.
What are the highest event numbers?
The largest number for numerical displays such as missed care or mishandling is
254.
IDs
Tamperproof wristband
Diapers
The control unit shows a Total Crying Time of 999 minutes.
The largest number possible for crying time is 999 minutes. Crying time includes
all crying for rough handling, wrong position and neglect, as well as scheduled crying for care.
Bottle
The control unit stays on the “SEARCHING” screen and nothing
seems to be happening.
Baby may not be in the control unit’s range for communication. The best Control
Unit communication areas on Baby are on the upper chest and lower belly region in
both the front and back of Baby. Hold the control unit two inches from one of the
38
7
Terms
(words used in control unit menus and options)
About
Shows the version number and manufacture date of your control unit.
Baby Utilities
Menu where the Demonstration, Readiness Check, Troubleshooting, Configure, and
History options are located.
Care Level
The frequency and length of care Baby requests during the parenting simulation.
Choose from EASY, MEDIUM, and HARD levels in the control unit.
Configure
Menu where the name, ethnicity/gender, and IDs for a particular Baby can be changed.
Control unit
The handheld device used for all programming, data retrieval, and troubleshooting
interactions with Baby.
Day Care
Option you can activate on demand when the student can’t care for Baby. Baby does
not request any care when the day care option is activated.
Demonstration
Helps you demonstrate each of Baby’s actions individually, i.e. feeding, burping,
rocking, etc.
End Simulation
Stops the parenting simulation and downloads the data.
Finish
Menu where you can get data from Baby’s computer, end the parenting simulation,
view a report of simulation data, or print a report of the data using an infrared printer
from Realityworks.
Get Data
Downloads simulation data from Baby’s computer.
History
Displays history for a Baby.
ID
Small circular device worn on a wristband by the student caring for Baby.
Language
Select from five display languages: English, Spanish, Japanese, French, and German.
Locate Baby
Control unit screen text that means the control unit is trying to communicate with
Baby (point control unit at area shown on page 4 and hold it for 4-5 seconds).
Mishandle
Number in the simulation data report that shows how many times the student did not
support Baby’s head, roughly handled Baby, placed Baby in a wrong position, or shook
Baby (Shaken Baby Syndrome).
8
Frequently asked questions
Why did Baby cry after I installed the batteries?
The last parenting simulation was not ended. Go to the Main Menu and choose
Finish. On the Finish menu, choose End Simulation and bring the control unit
within range of Baby to end the simulation.
How will I know when it’s time to replace batteries?
Baby: The control unit screen displays a battery voltage message when you try to
prepare for a new simulation. To check Baby’s battery level at other times, follow
the directions for the Readiness Check option on page 28. Change the batteries
anytime the voltage reading is 4.2 volts or less.
Control unit: A battery symbol appears in the top right-hand corner of the
control unit screen when batteries start to weaken: You may also check the
battery level by using the Self Test option on page 32.
Will Baby work with rechargeable batteries?
Yes. However, rechargeable batteries do not last as long as alkaline batteries. Use
3,000 mAh capacity batteries or larger. Fully recharge the batteries and install in
Baby no more than 24 hours before the simulation is to begin. If the simulation
is longer than four days, monitor the battery voltage using the Readiness Check
option. Replace batteries when they get below 4.5V.
Are the IDs waterproof?
Yes, all IDs are waterproof and may be submerged in water. Dry the ID off completely before using it. The IDs do not contain batteries.
How can I tell if the IDs are working properly?
Select Baby Utilities from the control unit Main Menu, and then select Configure.
Configure the ID to Baby (instructions on page 15). If the IDs are successfully
configured to Baby, they work properly.
When do you configure Baby?
You can configure Baby at anytime before the start of a simulation. Once a student ID is configured to a specific Baby, that ID only works with that Baby
unless it is reconfigured. It is important to keep Baby and the ID together once
they have been configured for each other.
How long in advance can I program the simulation?
You can program Baby up to seven days in advance.
I programmed another simulation, but it has not started yet. Is
there any way to retrieve the previous simulation’s data?
NO. The Demonstration option, the Practice option, and Programming Baby for
a new simulation erases the data stored in Baby’s computer. Make sure you use
Get Data or End Simulation to download the data from Baby before practicing,
demonstrating, or programming.
37
Terms
Care, maintenance, and storage (cont.)
Do not let the battery terminals (ends) touch. Wrap a rubber
Missed Care
Percentage and total in the simulation data report that shows how often the student
did not provide care to Baby within two minutes.
band around bundles of batteries for organizing or storing them. Store
upright in a cool, dry place.
Original RealCare® Baby
Previous model of Baby. Uses touch IDs and a smaller, square control unit.
Do not store Baby where excessive heat or cold could
affect the vinyl or electronics.
Practice All
A shortened sequence of all Baby’s care events, used for student practice in the
classroom before taking Baby home (under the Demonstration option).
Baby’s clothes are NOT flame retardant and should not
be worn by real infants.
If you store Baby in its shipping box, place the plastic
bag around its head to prevent paint damage. The cardboard will rub paint off the back of the head. Do not wrap Baby
in newsprint. The ink will leave permanent stains on Baby’s body.
Prepare
The control unit menu where you choose a start and stop time for the simulation, an
EASY, MEDIUM, or HARD level of care, pre-set any quiet times where Baby
requires no care, and transfer those choices to Baby.
Print Report
Prints simulation data to an infrared printer from Realityworks.
Printer
An infrared printer available for purchase from Realityworks.
Proper Care
A percentage and tally in the simulation data report that shows how often the student
provided care quickly (within two minutes). The higher the percentage, the more times
the student gave good care.
Quiet Times
Pre-set periods of time throughout the simulation when Baby does not request care
from the student.
Readiness Check
Double-checks your simulation choices for a Baby and displays a report on the screen.
Searching
Text that means the control unit is trying to communicate with Baby (point control
unit at area shown on page 4 and hold it for 4-5 seconds).
Self Test
Tests all control unit functions.
Set Clock
Task where you set the clock, ensuring the start and stop times and Baby’s schedules
follow the actual time of day.
Troubleshooting
A quick way the control unit can find any technical problems with a Baby.
View Report
Allows you to view simulation data on screen.
36
9
Getting started
Care, maintenance, and storage
Important points - READ THESE FIRST!
1 Set the clock in the control unit the first time you use it.
2 Assign at least one ID to each new Baby. Keep that ID
(and a second one, if desired) with that Baby for all future parenting simulations. If those IDs are lost or misplaced, you can reconfigure that Baby to use other IDs.
3 To communicate best with Baby, point the control unit
at one of the areas illustrated on page 4 and HOLD IT
there for at least 4-5 seconds. If there is no chime, re-posi-
tion the control unit and HOLD IT again for 4-5 seconds. Do not
wave the control unit around Baby.
4 Removing the batteries from either the control unit or
Baby does NOT erase the data. The control unit stores
data for 30 simulations. Data is listed from the oldest (bottom of
list) to the newest (top of list). The oldest data is overwritten after
more than 30 simulations have been downloaded.
5 The Demonstration option, the Practice option, and
programming Baby for a new simulation erases
report data in Baby’s computer. Make sure you use Get
Data or End Simulation to download the data from Baby before
practicing, demonstrating, or programming.
6 Diapers and bottles other than the ones supplied by
Never immerse Baby in water. Never allow water to
come in contact with the electronics in Baby’s back. Baby
wipes work best for simulating a bath.
Baby’s skin stains easily. It soaks up inks and dyes. Keep Baby
away from:
• Newsprint and other printed material.
• New, unwashed clothing—especially jeans, sweatshirts,
and fleece.
• Pens and markers.
There is no cleaner that removes all dirt or stains.
These cleaners may work:
• Acne cleansing pads.
• Rubbing alcohol.
• Nail polish remover.
• All-purpose cleaner.
Do not use any cleaners or abrasives on Baby’s head.
These items will remove the paint. Wipe the head with a baby wipe or
wet cloth to remove any surface dirt.
Baby’s joints have been specially treated and should not
dry out. If the joints do become stiff, joint lubricant may be pur-
chased from Realityworks. It lubricates the joints and prevents the
tearing that results from dry vinyl. One tube of the joint lubricant can
be used for up to forty Babies.
Never store the batteries in Baby. If you are not using the
infant simulators for 14 or more days, remove the batteries for storage.
Battery leakage can damage or destroy Baby’s electronics. Battery
leakage is not covered by warranty.
Realityworks do NOT work with Baby. Original
RealCare® Baby bottles will work with RealCare® Baby II, and vice
versa. Original RealCare® Baby diapers do not work with
RealCare® Baby II, and vice versa. See diagram on page 34.
10
35
Product compatibility
Both types of bottles work
with both models of Baby.
Original
RealCare® Baby
Gather these supplies:
RealCare® Baby II
Original RealCare® Baby
diapers work only with
original RealCare® Baby.
RealCare® Baby II
diapers work only with
RealCare® Baby II.
• Baby
• Four C batteries
• IDs
• Tamperproof wristband
• Bottle or breastfeeding device
• Green patch diaper
• Yellow patch diaper (on Baby)
• Control unit
• Four AA batteries
• Instructor key ring
• Screwdriver (not included)
(not included)
The original RealCare®
Baby control unit with
original IDs work with
both models of Baby.
The combination of the
RealCare® Baby II control
unit with original
RealCare® Baby IDs
works only with original
RealCare® Baby.
The combination of the
RealCare® Baby II control
unit with RealCare® Baby
II IDs works only with
RealCare® Baby II.
The contact on some early models of the original RealCare® Baby control
unit is shorter than in later models. If used with RealCare® Baby II, hold that
type of control unit to Baby’s back as shown here
for best results.
Early models
Later models
34
Hold perpendicular to
Baby’s back.
11
Battery installation
Self Test (continued)
Self Test
Printer
Clock
Communication
Screen
Memory
Printer
Baby
1 Insert a battery cover key into the battery cover
lock and turn counterclockwise. Remove the
cover.
Point contact at
printer window
OR
Continue
Martel printer
Printer
2 Insert the four C batteries as indicated by the
plus/minus label in the battery compartment.
Baby chimes when batteries are installed correctly.
Replace the cover and lock it by inserting the
battery cover key into the lock and turning
clockwise.
Control unit
Sending
test data
to printer
Hewlett
Packard
printer
+
–
–
+
+
–
–
+
Infrared printer choice
Select which Realityworks infrared printer you plan to use.
Main Menu
1 Loosen the small screw at the bottom of
Control Unit
Prepare
Finish
Day Care
Baby Utilities
Control Unit
the battery cover. Remove the
battery cover.
Set Clock
Self Test
Printer MARTEL
About
Printer
MARTEL
HP82240B
2 Insert the four AA batteries as
indicated by the plus/minus label in the
battery compartment. The control unit beeps
and displays the main menu when the batteries
are installed correctly. Replace the
–
+
battery cover and screw and
tighten securely.
+
–
+
12
–
+
Hewlett
Packard printer
Martel printer
–
33
Self Test
Low battery information
The control unit checks its internal systems with this option.
Control Unit
Main Menu
Prepare
Finish
Day Care
Baby Utilities
Control Unit
Self Test
Battery Level
Clock
Communication
Screen
Memory
Self Test
Battery Level
Clock
Communication
Screen
Memory
Self Test
Battery Level
Clock
Communication
Screen
Memory
Battery level
Replace
Good
Clock
PASS
Touch to Baby
contact point
SEARCHING |||||||
Screen
flashes all
black,
then all
white.
Low batteries!
Replace Baby’s
batteries.
The black bar shows
the level of battery life
in the control unit.
The message means that the batteries are not strong enough to begin a
simulation. Please put fresh batteries in Baby.
If the control unit batteries are low, you will see this symbol in the top
right-hand corner of the screen:
Main Menu
Shows either a pass or
fail grade for the
operation of the
internal clock.
Communication
Battery Level
Clock
Communication
Screen
Memory
Self Test
Not Ready!
Set Clock
Self Test
Printer MARTEL
About
Self Test
Battery Level
Clock
Communication
Screen
Memory
If Baby’s batteries are low, the control unit screen will display a message when you try to transfer data to or get data from Baby.
Communication
T
O
U
C
H
PASS
Screen
Black-w
white
test complete
Prepare
Finish
Day Care
Baby Utilities
Control Unit
Please put fresh batteries in the control unit.
Neither the control unit nor Baby lose data when the batteries are changed.
Alkaline battery voltage
Battery life
(shown on Baby Found screen
during Prepare option)
4.5 – 6.0 volts
4.2 – 4.4 volts
4.2 or less volts
OK
1-2 days left
Change batteries now
Memory
EP Test PASS
Ram Test PASS
EP Check Sum XXXX
MCU Version
Date / Time
32
Rechargeable battery voltage Battery life
4.5 – 6.0 volts
4.5 or less volts
OK
Change batteries now
13
Setting the control unit clock
Emergency Start/Stop feature
(Must be done only once at first use)
Baby does not follow schedules correctly until
you set this clock.
Main Menu
Control Unit
Prepare
Finish
Day Care
Baby Utilities
Control Unit
Set Clock
Self Test
Printer MARTEL
About
This feature can be used to stop Baby if the control unit is not available,
or if the student needs to stop Baby in an emergency (it is not
recommended that you tell students this unless they contact you in an emergency).
It can also be used to start Baby if an emergency stop was done and the
control unit is not available.
EMERGENCY STOP
Use a straightened paper clip to gently press and
hold the Emergency Start/Stop button UNTIL
BABY CHIMES 6 TIMES. (You may need to
hold it for as long as 15 seconds.) Baby is inactive.
Set Clock
Friday
6:31 AM
Change day of week by setting
the correct date at the bottom.
EMERGENCY START
01/22/04
The current simulation data stored in Baby will be lost.
Push
until you return to the Main Menu.
Note: Screens and data stay the way you leave them.
Use the battery cover key to open Baby’s battery cover. Remove one
battery. Replace the battery. Baby will chime.
WITHIN 30 SECONDS, use a straightened paper clip to quickly and
gently press and hold the Emergency Start/Stop button until Baby
chimes three times.
Baby will coo and the simulation will begin. There will be no quiet
times and Baby follows schedules 1-15 in numerical order. Baby will
recognize the IDs that you have previously configured.
Replace the battery cover and lock it.
14
31
Troubleshooting Baby
Configuring Baby and IDs
Perform the following tests in any order. You can test every
function, or only the functions you are concerned about.
Function tested
Action needed
from you
Baby’s response if
function works
1
Battery
None (automatic)
None
2
Memory
None (automatic)
Coo
3
Motion
Move Baby
Cough
4
Position
Hold Baby on tummy,
then head-down
Two chimes
5
Feeding
Bring bottle to Baby’s
mouth
Chime
6
Neck Forward
Tilt Baby’s head forward Whimper
7
Neck Backward
Tilt Baby’s head backward Two whimpers
8
Rough Handling
9
Yellow Diaper
10 Green Diaper
11 Wireless ID
Contact ID (optional -- Touch ID to contact
12
original RealCare® Baby) point in Baby’s back
13
Emergency Stop
(E STOP)
14 All tests PASS
Baby Found!
AMY
HISPANIC FEMALE
Troubleshooting
started
TS Results
A. Find out Baby’s current configuration.
Drop Baby from a height
Three whimpers
of 6 inches onto back
Place yellow patch diaper
Chime
on Baby
Place green patch diaper
Chime
on Baby
Hold ID close to Baby’s
belly button
Configure
Locate Baby
Point at Baby:
listen for chime
(Hold for
4-5 seconds)
SEARCHING |||||||
None (automatic)
Coo
Name
BABY____
Ethnicity/Gender
ID 1
______
ID 2
______
B. Program IDs.
Baby uses IDs to recognize its student parent. Baby does not allow care without an ID.
Baby Found!
Point at Baby:
listen for chime
(Hold for
4-5 seconds)
SEARCHING |||||||
Name
BABY____
HISPANIC FEMALE
ID 1
______
ID 2
______
Start Data Transfer
Locate Baby
“PASS” is shown if item passed the test;
blank if item failed or was not tested.
See chart above for testing details.
ID 1
ID 1
Bring new ID
in range
SEARCHING |||||||
Point at Baby:
listen for chime
(Hold for
4-5 seconds)
Ignore the “Check Sum” lines.
30
Baby Found!
Chime
Results
Battery
5.4V
BP Check Sum (sum #)
BE Check Sum (sum #)
BW Check Sum (sum #)
Motion
PASS
Baby Utilities
Demonstration
Readiness Check
Troubleshooting
Configure
History
Baby Found! screen shows Baby’s current configuration.
Chime
TS Results
Main Menu
Prepare
Finish
Day Care
Baby Utilities
Control Unit
Chime
Push Emergency Stop
button
Troubleshooting
Results
Locate Baby
• Program student IDs so they can be used with this Baby for every
simulation with no further programming.
• Optional steps: Give Baby a name for easy tracking of simulation data, and
program Baby’s ethnicity and gender.
SEARCHING |||||||
Change
To
YES
NO
Baby Found!
Name
BABY____
HISPANIC FEMALE
ID 1
(new ID#)
ID 2
______
Baby Found! screen shows new ID number.
This is the ID the student parent should use.
15
(old ID#)
(new ID#)
Troubleshooting steps
Configuring Baby and IDs
Run a diagnostics check on all of Baby’s functions with this option.
C. Give Baby a new name (optional).
Baby’s name appears on control unit menus and reports.
Baby Found!
Gather these items:
Name
Name
Name
BABY____
Ethnicity/Gender
ID 1
______
ID 2
______
BABY____
Change
To
BABY_____
AMY
*
YES
NO
*This screen does not
appear if you made
no changes.
Start Data Transfer
Locate Baby
Point at Baby:
listen for chime
(Hold for
4-5 seconds)
Baby Found!
Name
AMY
Ethnicity/Gender
ID 1
______
ID 2
______
SEARCHING |||||||
D. Program ethnicity and gender (optional).
Ethnicity/gender appears on printed reports to help match printouts to Babies.
Ethnicity/Gender
Name
AMY
Ethnicity/Gender
ID 1
______
ID 2
______
ASIAN
F EMALE
Locate Baby
Point at Baby:
listen for chime
(Hold for
4-5 seconds)
SEARCHING |||||||
First, install the 4 C batteries in Baby. Baby chimes when
batteries are installed correctly. Follow the instructions below:
Ethnicity/Gender
Change
To
ASIAN F
HISPANIC F
YES
NO
Start Data Transfer
OR
(optional)
Baby Found! screen shows Baby’s new name.
Baby Found!
(Take Baby’s other diaper
off also if you want to test
both diapers)
Demonstration
Readiness Check
Troubleshooting
Configure
History
Prepare
Finish
Day Care
Baby Utilities
Control Unit
Baby Found!
Name
AMY
HISPANIC FEMALE
ID 1
______
ID 2
______
Baby Utilities
Main Menu
Troubleshooting
Baby
troubleshooting
Locate Baby
Point at Baby:
listen for chime
(Hold for
4-5 seconds)
SEARCHING |||||||
Baby Found!
AMY
HISPANIC FEMALE
Troubleshooting
started
TS Results
Baby Found! screen shows new ethnicity/gender.
Back to previous screens and Main Menu
16
Six seconds after the Baby Found! screen appears, Baby coos.
Leave the screen as is and move to the next page.
29
Readiness Check
Configuring Baby and IDs
Quickly check the simulation settings that are currently programmed
into Baby.
Baby Utilities
Main Menu
Demonstration
Readiness Check
Troubleshooting
Configure
History
Prepare
Finish
Day Care
Baby Utilities
Control Unit
Readiness Check
Point at Baby:
listen for chime
(Hold for
4-5 seconds)
Locate Baby
SEARCHING |||||||
Ready!
!
Original RealCare® Baby SPECIAL INSTRUCTIONS:
If you try to use the configure option with an original RealCare®
Baby, you will see this message:
Sorry!
Original RealCare
No configure option
on this model
The Configure option is not available on original RealCare® Baby.
AMY
Simulation: READY
FRI 4PM - MON 8AM
Battery 5.4V
IDs: (ID1 #) / (ID2 #)
Back to previous screens and Main Menu
!
Original RealCare® Baby SPECIAL INSTRUCTIONS:
If you try to use the Readiness Check option with an original
RealCare® Baby, you will see this message:
Sorry!
Original RealCare
Utilities not
available.
See help.
Readiness Check is not available in original RealCare® Baby.
28
17
Demonstrating Baby for a group
Prepare
This menu lets you:
• select the time Baby starts and stops the parenting simulation
• select the difficulty level of the schedules Baby follows
• pre-set quiet times throughout the simulation (Baby requests no care)
• transfer these choices to Baby in preparation for a simulation.
A. Choose start and stop time.
Main Menu
Prepare
Prepare
Finish
Day Care
Baby Utilities
Control Unit
Start and Stop Time
FRI 1PM to MON 8AM
Care Level EASY
Quiet Times 2HRS
Start Data Transfer
!
Original RealCare® Baby SPECIAL INSTRUCTIONS:
If you choose a single-feature demonstration (feeding, rocking, etc.) with an original
RealCare® Baby, you will see this message:
Stop
FRI 1PM
MON 8AM
If you choose the Practice All option, you will
see this message:
Baby Found!
Original RealCare
Back to previous screen
Prepare menu now shows selected
start and stop time.
Baby starts in Practice mode. See your original RealCare® Baby
Operating Handbook.
B. Choose care level.
Prepare
Select desired
care level
Care
EASY (E)
MEDIUM (M)
HARD (H)
CUSTOM (E,E,M,H,H)
OR
Back to previous
menu
The custom option allows you to choose easy, medium, hard, or specific
schedules for each day. To select the custom option:
Care
EASY (E)
MEDIUM (M)
HARD (H)
CUSTOM (E,E,M,H,H)
Presentation mode
started.
Practice mode
started.
Time Now THU 11:15AM
Start and Stop Time
FRI 1PM to MON 8AM
Care Level EASY
Quiet Times 2HRS
Start Data Transfer
Original RealCare
Baby starts in Presentation mode. See your original RealCare® Baby
Operating Handbook.
Start and Stop Time
Start
Baby Found!
Custom
E
E
M
Day
1
18
H
H
Parenting
simulations longer
than five days will
run a continuous
loop of the five
schedules shown.
27
Prepare
Demonstrating Baby for a group
Activity
Length
Action required
Feedback
Stop Demo
N/A
None
Demo or practice
session ends
Practice All
Continuous session
of each activity
All the actions listed Listed below
below
Feeding
60 seconds
ID Baby and put
bottle to Baby’s
mouth
Coo
Burping
60 seconds
ID Baby and pat
Baby’s back gently
Burp
Diaper change
One change
Rocking
60 seconds
ID Baby and change Coo
Baby’s diaper
ID Baby and rock
Coo
Baby gently
Happy
One coo (happy)
None
Coo
Awake
60 seconds
None
Awake noises
Sleep
60 seconds
To test position,
place Baby on
tummy or head
Breathing sounds;
cries in wrong
position
Cough
One cough
None
Cough
Fussy
60 seconds
ID Baby; nothing
will stop the crying
Crying stops
Head support
60 seconds
Let head fall back;
rock Baby to stop
crying
Crying stops
Hit or drop Baby;
rocking Baby to
stop crying
Crying stops
Rough handling
60 seconds
C. Pre-set quiet times (optional).
Prepare
Quiet Times
Start and Stop Time
FRI 1PM to MON 8AM
Care Level EASY
Quiet Times 2HRS
Start Data Transfer
Quiet Time 1
1: FRI 7PM 1HR
2: SUN 9AM 1HR
3: Zero Hours
Clear All
Start
Duration
FRI 7PM
1 HRS
Choosing 0 (zero) for the hourly duration will clear a quiet time.
Quiet times programmed outside of the start and stop time are ignored.
Back to previous screens
D. Transfer your choices to Baby.
Prepare
Start Data Transfer
Start and Stop Time
FRI 1PM to MON 8AM
Care Level EASY
Quiet Times 2HRS
Start Data Transfer
Baby Found!
AMY
Starts in 1.2 days
FRI 1PM TO MON 8AM
Care E, Battery 5.4V
2HRS Quiet Time
FRI 1PM TO MON 8AM
EASY
2 HRS QUIET TIME
Point at Baby:
listen for chime
(Hold for
4-5 seconds)
SEARCHING |||||||
Baby has confirmed that it is ready for a simulation.
Want to double-check? Use the readiness check function on
page 28.
Care E = Easy level of care (M=Medium, H=Hard).
Battery 5.4V = see the chart on page 13.
(Second line may also read “Starts in __ hrs” or
“Simulation Started” depending on your start time.)
Back to previous screens and Main Menu
Note: If you have not programmed any IDs
with Baby, you will hear a chime and see this
screen when you try to transfer your choices
to Baby. See pages 15-16 to configure your
Baby.
26
19
New Baby!
Baby needs at least
one parent ID.
Continue
Prepare
!
Demonstrating Baby for a group
Original RealCare Baby SPECIAL INSTRUCTIONS:
®
Demonstrate all of Baby’s features. You can select one feature at a time, or
use Practice All mode to run a session of all care activities.
Baby Found!
To transfer data to an original RealCare Baby,
touch the contact on the end of the control unit
to the contact point in Baby’s back.
®
Original RealCare
FRI 3PM to MON 8AM
EASY
Touch IDs now!
Touch the original RealCare® Baby IDs to the contact point to begin
the simulation. Baby must beep three times or the simulation does not
start. See your original RealCare® Baby Operating Handbook.
If you try to program an original RealCare® Baby
more than 24 hours in advance with the
RealCare® Baby II control unit, you will see this
message:
Sorry!
Original RealCare
Cannot program
more than
24 hours ahead.
Notes:
Quiet times are not available on original RealCare® Baby. When you
try to transfer simulation settings to Baby, a confirmation message will
remind you that quiet times have not been set.
Baby Utilities
Main Menu
Demonstration
Readiness Check
Troubleshooting
Configure
History
Prepare
Finish
Day Care
Baby Utilities
Control Unit
Demonstration
Start Demonstration
Stop Demo
Practice All
Feeding
Burping
Diaper Change
Feeding
Demonstration
Locate Baby
Point at Baby:
listen for chime
(Hold for
4-5 seconds)
SEARCHING |||||||
Baby Found!
AMY
HISPANIC FEMALE
Feeding
Back to previous screens and Main Menu
Baby cries for feeding (or whichever feature you
selected). Use the ID and then care for Baby.
See the next page for a chart detailing all demonstration activities.
The day care option must be used with original RealCare® Baby if you
want the student to have a break during the simulation.
To stop the demonstration or practice session:
Demonstration
Stop Demo
Practice All
Feeding
Burping
Diaper Change
Point at Baby:
listen for chime
(Hold for
4-5 seconds)
Baby Found!
AMY
HISPANIC FEMALE
Demo stopped
Back to previous screens and Main Menu
20
25
Day Care on demand
Finish
(RealCare® Baby II only)
Use this option to put Baby into day care mode at any time. Baby does
not require care or respond to rough handling.
Main Menu
Day Care
Prepare
Finish
Day Care
Baby Utilities
Control Unit
OFF
ON
This menu lets you:
• get the simulation data from Baby
• end the simulation before the pre-programmed end time
• view simulation data on the control unit screen
• print simulation data on the optional printer.
A. Get data
(Download simulation data from Baby; does not affect simulation)
Finish
Main Menu
Day Care ON
Point at Baby:
listen for chime
(Hold for
4-5 seconds)
Locate Baby
Prepare
Finish
Day Care
Baby Utilities
Control Unit
Baby Found!
AMY
Hispanic Female
Get Data
End Simulation
View Report
Print Report
Day Care ON
SEARCHING |||||||
Get Data
Point at Baby:
listen for chime
Back to previous screens
SEARCHING |||||||
Data retrieved
Data now ready for viewing and printing.
Original RealCare® Baby SPECIAL INSTRUCTIONS:
If you try to use this day care option on an original RealCare
Baby, you will see this message:
®
Sorry!
Original RealCare
Need day care ID
to start or stop
day care.
The day care on demand option does not work with original RealCare®
Baby. See your original RealCare® Baby Operating Handbook.
24
AMY 09/25
HISPANIC FEMALE
Locate Baby
Day care is on until you select the day care “OFF” option
to start Baby again.
!
Baby Found!
(Hold for
4-5 seconds)
Back to previous screens
B. End the simulation
(Download simulation data from Baby and END the simulation)
Finish
Get Data
End Simulation
View Report
Print Report
Ending Simulation
Point at Baby:
listen for chime
(Hold for
4-5 seconds)
Locate Baby
SEARCHING |||||||
Baby Found!
AMY 09/25
Hispanic Female
Back to previous screens
End simulation
Data retrieved
21
Finish
Finish
C. View a report
The control unit identifies reports by Baby name and the month/day the simulation was
programmed.
Proper Care: percent of time the student cared for Baby properly.
Finish
View Report
Get Data
End Simulation
View Report
Print Report
AMY
BEN
JON
SARA
TAYLOR
AMY 09/25
09/25NEW
09/15
09/15
09/15
09/15
Proper Care 90%
Missed Care
8
Mishandle
6
Total: 2d 9h 4m
__________________*
Mishandle: number of times Baby was handled incorrectly.
Mishandle
AMY 09/25
Proper Care 90%
Missed Care
8
Mishandle
6
Total: 2d 9h 0m
____________________
Mishandle
WP Wrong Position
RH Rough Handle
HS Head Support
SB Shaken Baby
More
1
1
4
0
HS
HS
RH
HS
WP
Fri
Fri
Sat
Sat
Sun
3:20PM
8:44PM
6:56AM
2:10PM
1:28AM
D. Print a report on the infrared printers from Realityworks
Proper Care
Proper Care
Parent ID:
Babysitter ID:
Day Care:
Rock
Diaper
Burp
Feed
Total
33
2
0
More
Back to previous
screens
3/5
8/10
10/12
14/16
35/43
*A message appears on the bottom line of the report if Baby stopped before
it was scheduled to:
E STOP = Emergency stop button was used
N STOP = Neglect stop: Baby was neglected for 12 hours and shut down
A STOP = Abuse stop: Baby was abused 24 times and shut down
B STOP = Battery stop: Baby’s batteries died and Baby shut down
Finish
Print Report
Get Data
End Simulation
View Report
Print Report
AMY
BEN
JON
SARA
TAYLOR
Make sure the printer has batteries
and paper installed. Turn on the
printer. Point the contact at the
infrared window.
09/25NEW
09/15
09/15
09/15
09/15
Martel printer
Print Report
AMY 09/25
Point contact at
printer window.
Continue
Hewlett
Packard
printer
Printing Data
Missed Care: number of times the parent missed caring for Baby for
more than two minutes.
AMY 09/25
Proper Care 90%
Missed Care
8
Mishandle
6
Total: 2d 9h 4m
Missed Care
Rock
Diaper
Burp
Feed
More
Sending AMY 09/25
to printer
SENDING |||||||
Missed Care
1
1
2
4
Feed
Burp
Diaper
Diaper
Feed
Fri 11:33PM
Fri 11:45PM
Sat 07:02AM
Sat 12:25PM
Sat 05:16PM
Be careful not to move the control unit
until the printer has completely finished printing.
Back to previous screens and Main Menu
Back to previous screens
22
23
Sample printout
Finish
Finish
C. View a report
The control unit identifies reports by Baby name and the month/day the simulation was
programmed.
Proper Care: percent of time the student cared for Baby properly.
Finish
View Report
Get Data
End Simulation
View Report
Print Report
AMY
BEN
JON
SARA
TAYLOR
AMY 09/25
09/25NEW
09/15
09/15
09/15
09/15
Proper Care 90%
Missed Care
8
Mishandle
6
Total: 2d 9h 4m
__________________*
Mishandle: number of times Baby was handled incorrectly.
Mishandle
AMY 09/25
Proper Care 90%
Missed Care
8
Mishandle
6
Total: 2d 9h 0m
____________________
Mishandle
WP Wrong Position
RH Rough Handle
HS Head Support
SB Shaken Baby
More
1
1
4
0
HS
HS
RH
HS
WP
Fri
Fri
Sat
Sat
Sun
3:20PM
8:44PM
6:56AM
2:10PM
1:28AM
D. Print a report on the infrared printers from Realityworks
Proper Care
Proper Care
Parent ID:
Babysitter ID:
Day Care:
Rock
Diaper
Burp
Feed
Total
33
2
0
More
Back to previous
screens
3/5
8/10
10/12
14/16
35/43
*A message appears on the bottom line of the report if Baby stopped before
it was scheduled to:
E STOP = Emergency stop button was used
N STOP = Neglect stop: Baby was neglected for 12 hours and shut down
A STOP = Abuse stop: Baby was abused 24 times and shut down
B STOP = Battery stop: Baby’s batteries died and Baby shut down
Finish
Print Report
Get Data
End Simulation
View Report
Print Report
AMY
BEN
JON
SARA
TAYLOR
Make sure the printer has batteries
and paper installed. Turn on the
printer. Point the contact at the
infrared window.
09/25NEW
09/15
09/15
09/15
09/15
Martel printer
Print Report
AMY 09/25
Point contact at
printer window.
Continue
Hewlett
Packard
printer
Printing Data
Missed Care: number of times the parent missed caring for Baby for
more than two minutes.
AMY 09/25
Proper Care 90%
Missed Care
8
Mishandle
6
Total: 2d 9h 4m
Missed Care
Rock
Diaper
Burp
Feed
More
Sending AMY 09/25
to printer
SENDING |||||||
Missed Care
1
1
2
4
Feed
Burp
Diaper
Diaper
Feed
Fri 11:33PM
Fri 11:45PM
Sat 07:02AM
Sat 12:25PM
Sat 05:16PM
Be careful not to move the control unit
until the printer has completely finished printing.
Back to previous screens and Main Menu
Back to previous screens
22
23
Sample printout
Day Care on demand
Finish
(RealCare® Baby II only)
Use this option to put Baby into day care mode at any time. Baby does
not require care or respond to rough handling.
Main Menu
Day Care
Prepare
Finish
Day Care
Baby Utilities
Control Unit
OFF
ON
This menu lets you:
• get the simulation data from Baby
• end the simulation before the pre-programmed end time
• view simulation data on the control unit screen
• print simulation data on the optional printer.
A. Get data
(Download simulation data from Baby; does not affect simulation)
Finish
Main Menu
Day Care ON
Point at Baby:
listen for chime
(Hold for
4-5 seconds)
Locate Baby
Prepare
Finish
Day Care
Baby Utilities
Control Unit
Baby Found!
AMY
Hispanic Female
Get Data
End Simulation
View Report
Print Report
Day Care ON
SEARCHING |||||||
Get Data
Point at Baby:
listen for chime
Back to previous screens
SEARCHING |||||||
Data retrieved
Data now ready for viewing and printing.
Original RealCare® Baby SPECIAL INSTRUCTIONS:
If you try to use this day care option on an original RealCare
Baby, you will see this message:
®
Sorry!
Original RealCare
Need day care ID
to start or stop
day care.
The day care on demand option does not work with original RealCare®
Baby. See your original RealCare® Baby Operating Handbook.
24
AMY 09/25
HISPANIC FEMALE
Locate Baby
Day care is on until you select the day care “OFF” option
to start Baby again.
!
Baby Found!
(Hold for
4-5 seconds)
Back to previous screens
B. End the simulation
(Download simulation data from Baby and END the simulation)
Finish
Get Data
End Simulation
View Report
Print Report
Ending Simulation
Point at Baby:
listen for chime
(Hold for
4-5 seconds)
Locate Baby
SEARCHING |||||||
Baby Found!
AMY 09/25
Hispanic Female
Back to previous screens
End simulation
Data retrieved
21
Prepare
!
Demonstrating Baby for a group
Original RealCare Baby SPECIAL INSTRUCTIONS:
®
Demonstrate all of Baby’s features. You can select one feature at a time, or
use Practice All mode to run a session of all care activities.
Baby Found!
To transfer data to an original RealCare Baby,
touch the contact on the end of the control unit
to the contact point in Baby’s back.
®
Original RealCare
FRI 3PM to MON 8AM
EASY
Touch IDs now!
Touch the original RealCare® Baby IDs to the contact point to begin
the simulation. Baby must beep three times or the simulation does not
start. See your original RealCare® Baby Operating Handbook.
If you try to program an original RealCare® Baby
more than 24 hours in advance with the
RealCare® Baby II control unit, you will see this
message:
Sorry!
Original RealCare
Cannot program
more than
24 hours ahead.
Notes:
Quiet times are not available on original RealCare® Baby. When you
try to transfer simulation settings to Baby, a confirmation message will
remind you that quiet times have not been set.
Baby Utilities
Main Menu
Demonstration
Readiness Check
Troubleshooting
Configure
History
Prepare
Finish
Day Care
Baby Utilities
Control Unit
Demonstration
Start Demonstration
Stop Demo
Practice All
Feeding
Burping
Diaper Change
Feeding
Demonstration
Locate Baby
Point at Baby:
listen for chime
(Hold for
4-5 seconds)
SEARCHING |||||||
Baby Found!
AMY
HISPANIC FEMALE
Feeding
Back to previous screens and Main Menu
Baby cries for feeding (or whichever feature you
selected). Use the ID and then care for Baby.
See the next page for a chart detailing all demonstration activities.
The day care option must be used with original RealCare® Baby if you
want the student to have a break during the simulation.
To stop the demonstration or practice session:
Demonstration
Stop Demo
Practice All
Feeding
Burping
Diaper Change
Point at Baby:
listen for chime
(Hold for
4-5 seconds)
Baby Found!
AMY
HISPANIC FEMALE
Demo stopped
Back to previous screens and Main Menu
20
25
Prepare
Demonstrating Baby for a group
Activity
Length
Action required
Feedback
Stop Demo
N/A
None
Demo or practice
session ends
Practice All
Continuous session
of each activity
All the actions listed Listed below
below
Feeding
60 seconds
ID Baby and put
bottle to Baby’s
mouth
Coo
Burping
60 seconds
ID Baby and pat
Baby’s back gently
Burp
Diaper change
One change
Rocking
60 seconds
ID Baby and change Coo
Baby’s diaper
ID Baby and rock
Coo
Baby gently
Happy
One coo (happy)
None
Coo
Awake
60 seconds
None
Awake noises
Sleep
60 seconds
To test position,
place Baby on
tummy or head
Breathing sounds;
cries in wrong
position
Cough
One cough
None
Cough
Fussy
60 seconds
ID Baby; nothing
will stop the crying
Crying stops
Head support
60 seconds
Let head fall back;
rock Baby to stop
crying
Crying stops
Hit or drop Baby;
rocking Baby to
stop crying
Crying stops
Rough handling
60 seconds
C. Pre-set quiet times (optional).
Prepare
Quiet Times
Start and Stop Time
FRI 1PM to MON 8AM
Care Level EASY
Quiet Times 2HRS
Start Data Transfer
Quiet Time 1
1: FRI 7PM 1HR
2: SUN 9AM 1HR
3: Zero Hours
Clear All
Start
Duration
FRI 7PM
1 HRS
Choosing 0 (zero) for the hourly duration will clear a quiet time.
Quiet times programmed outside of the start and stop time are ignored.
Back to previous screens
D. Transfer your choices to Baby.
Prepare
Start Data Transfer
Start and Stop Time
FRI 1PM to MON 8AM
Care Level EASY
Quiet Times 2HRS
Start Data Transfer
Baby Found!
AMY
Starts in 1.2 days
FRI 1PM TO MON 8AM
Care E, Battery 5.4V
2HRS Quiet Time
FRI 1PM TO MON 8AM
EASY
2 HRS QUIET TIME
Point at Baby:
listen for chime
(Hold for
4-5 seconds)
SEARCHING |||||||
Baby has confirmed that it is ready for a simulation.
Want to double-check? Use the readiness check function on
page 28.
Care E = Easy level of care (M=Medium, H=Hard).
Battery 5.4V = see the chart on page 13.
(Second line may also read “Starts in __ hrs” or
“Simulation Started” depending on your start time.)
Back to previous screens and Main Menu
Note: If you have not programmed any IDs
with Baby, you will hear a chime and see this
screen when you try to transfer your choices
to Baby. See pages 15-16 to configure your
Baby.
26
19
New Baby!
Baby needs at least
one parent ID.
Continue
Demonstrating Baby for a group
Prepare
This menu lets you:
• select the time Baby starts and stops the parenting simulation
• select the difficulty level of the schedules Baby follows
• pre-set quiet times throughout the simulation (Baby requests no care)
• transfer these choices to Baby in preparation for a simulation.
A. Choose start and stop time.
Main Menu
Prepare
Prepare
Finish
Day Care
Baby Utilities
Control Unit
Start and Stop Time
FRI 1PM to MON 8AM
Care Level EASY
Quiet Times 2HRS
Start Data Transfer
!
Original RealCare® Baby SPECIAL INSTRUCTIONS:
If you choose a single-feature demonstration (feeding, rocking, etc.) with an original
RealCare® Baby, you will see this message:
Stop
FRI 1PM
MON 8AM
If you choose the Practice All option, you will
see this message:
Baby Found!
Original RealCare
Back to previous screen
Prepare menu now shows selected
start and stop time.
Baby starts in Practice mode. See your original RealCare® Baby
Operating Handbook.
B. Choose care level.
Prepare
Select desired
care level
Care
EASY (E)
MEDIUM (M)
HARD (H)
CUSTOM (E,E,M,H,H)
OR
Back to previous
menu
The custom option allows you to choose easy, medium, hard, or specific
schedules for each day. To select the custom option:
Care
EASY (E)
MEDIUM (M)
HARD (H)
CUSTOM (E,E,M,H,H)
Presentation mode
started.
Practice mode
started.
Time Now THU 11:15AM
Start and Stop Time
FRI 1PM to MON 8AM
Care Level EASY
Quiet Times 2HRS
Start Data Transfer
Original RealCare
Baby starts in Presentation mode. See your original RealCare® Baby
Operating Handbook.
Start and Stop Time
Start
Baby Found!
Custom
E
E
M
Day
1
18
H
H
Parenting
simulations longer
than five days will
run a continuous
loop of the five
schedules shown.
27
Readiness Check
Configuring Baby and IDs
Quickly check the simulation settings that are currently programmed
into Baby.
Baby Utilities
Main Menu
Demonstration
Readiness Check
Troubleshooting
Configure
History
Prepare
Finish
Day Care
Baby Utilities
Control Unit
Readiness Check
Point at Baby:
listen for chime
(Hold for
4-5 seconds)
Locate Baby
SEARCHING |||||||
Ready!
!
Original RealCare® Baby SPECIAL INSTRUCTIONS:
If you try to use the configure option with an original RealCare®
Baby, you will see this message:
Sorry!
Original RealCare
No configure option
on this model
The Configure option is not available on original RealCare® Baby.
AMY
Simulation: READY
FRI 4PM - MON 8AM
Battery 5.4V
IDs: (ID1 #) / (ID2 #)
Back to previous screens and Main Menu
!
Original RealCare® Baby SPECIAL INSTRUCTIONS:
If you try to use the Readiness Check option with an original
RealCare® Baby, you will see this message:
Sorry!
Original RealCare
Utilities not
available.
See help.
Readiness Check is not available in original RealCare® Baby.
28
17
Troubleshooting steps
Configuring Baby and IDs
Run a diagnostics check on all of Baby’s functions with this option.
C. Give Baby a new name (optional).
Baby’s name appears on control unit menus and reports.
Baby Found!
Gather these items:
Name
Name
Name
BABY____
Ethnicity/Gender
ID 1
______
ID 2
______
BABY____
Change
To
BABY_____
AMY
*
YES
NO
*This screen does not
appear if you made
no changes.
Start Data Transfer
Locate Baby
Point at Baby:
listen for chime
(Hold for
4-5 seconds)
Baby Found!
Name
AMY
Ethnicity/Gender
ID 1
______
ID 2
______
SEARCHING |||||||
D. Program ethnicity and gender (optional).
Ethnicity/gender appears on printed reports to help match printouts to Babies.
Ethnicity/Gender
Name
AMY
Ethnicity/Gender
ID 1
______
ID 2
______
ASIAN
F EMALE
Locate Baby
Point at Baby:
listen for chime
(Hold for
4-5 seconds)
SEARCHING |||||||
First, install the 4 C batteries in Baby. Baby chimes when
batteries are installed correctly. Follow the instructions below:
Ethnicity/Gender
Change
To
ASIAN F
HISPANIC F
YES
NO
Start Data Transfer
OR
(optional)
Baby Found! screen shows Baby’s new name.
Baby Found!
(Take Baby’s other diaper
off also if you want to test
both diapers)
Demonstration
Readiness Check
Troubleshooting
Configure
History
Prepare
Finish
Day Care
Baby Utilities
Control Unit
Baby Found!
Name
AMY
HISPANIC FEMALE
ID 1
______
ID 2
______
Baby Utilities
Main Menu
Troubleshooting
Baby
troubleshooting
Locate Baby
Point at Baby:
listen for chime
(Hold for
4-5 seconds)
SEARCHING |||||||
Baby Found!
AMY
HISPANIC FEMALE
Troubleshooting
started
TS Results
Baby Found! screen shows new ethnicity/gender.
Back to previous screens and Main Menu
16
Six seconds after the Baby Found! screen appears, Baby coos.
Leave the screen as is and move to the next page.
29
Troubleshooting Baby
Configuring Baby and IDs
Perform the following tests in any order. You can test every
function, or only the functions you are concerned about.
Function tested
Action needed
from you
Baby’s response if
function works
1
Battery
None (automatic)
None
2
Memory
None (automatic)
Coo
3
Motion
Move Baby
Cough
4
Position
Hold Baby on tummy,
then head-down
Two chimes
5
Feeding
Bring bottle to Baby’s
mouth
Chime
6
Neck Forward
Tilt Baby’s head forward Whimper
7
Neck Backward
Tilt Baby’s head backward Two whimpers
8
Rough Handling
9
Yellow Diaper
10 Green Diaper
11 Wireless ID
Contact ID (optional -- Touch ID to contact
12
original RealCare® Baby) point in Baby’s back
13
Emergency Stop
(E STOP)
14 All tests PASS
Baby Found!
AMY
HISPANIC FEMALE
Troubleshooting
started
TS Results
A. Find out Baby’s current configuration.
Drop Baby from a height
Three whimpers
of 6 inches onto back
Place yellow patch diaper
Chime
on Baby
Place green patch diaper
Chime
on Baby
Hold ID close to Baby’s
belly button
Configure
Locate Baby
Point at Baby:
listen for chime
(Hold for
4-5 seconds)
SEARCHING |||||||
None (automatic)
Coo
Name
BABY____
Ethnicity/Gender
ID 1
______
ID 2
______
B. Program IDs.
Baby uses IDs to recognize its student parent. Baby does not allow care without an ID.
Baby Found!
Point at Baby:
listen for chime
(Hold for
4-5 seconds)
SEARCHING |||||||
Name
BABY____
HISPANIC FEMALE
ID 1
______
ID 2
______
Start Data Transfer
Locate Baby
“PASS” is shown if item passed the test;
blank if item failed or was not tested.
See chart above for testing details.
ID 1
ID 1
Bring new ID
in range
SEARCHING |||||||
Point at Baby:
listen for chime
(Hold for
4-5 seconds)
Ignore the “Check Sum” lines.
30
Baby Found!
Chime
Results
Battery
5.4V
BP Check Sum (sum #)
BE Check Sum (sum #)
BW Check Sum (sum #)
Motion
PASS
Baby Utilities
Demonstration
Readiness Check
Troubleshooting
Configure
History
Baby Found! screen shows Baby’s current configuration.
Chime
TS Results
Main Menu
Prepare
Finish
Day Care
Baby Utilities
Control Unit
Chime
Push Emergency Stop
button
Troubleshooting
Results
Locate Baby
• Program student IDs so they can be used with this Baby for every
simulation with no further programming.
• Optional steps: Give Baby a name for easy tracking of simulation data, and
program Baby’s ethnicity and gender.
SEARCHING |||||||
Change
To
YES
NO
Baby Found!
Name
BABY____
HISPANIC FEMALE
ID 1
(new ID#)
ID 2
______
Baby Found! screen shows new ID number.
This is the ID the student parent should use.
15
(old ID#)
(new ID#)
Setting the control unit clock
Emergency Start/Stop feature
(Must be done only once at first use)
Baby does not follow schedules correctly until
you set this clock.
Main Menu
Control Unit
Prepare
Finish
Day Care
Baby Utilities
Control Unit
Set Clock
Self Test
Printer MARTEL
About
This feature can be used to stop Baby if the control unit is not available,
or if the student needs to stop Baby in an emergency (it is not
recommended that you tell students this unless they contact you in an emergency).
It can also be used to start Baby if an emergency stop was done and the
control unit is not available.
EMERGENCY STOP
Use a straightened paper clip to gently press and
hold the Emergency Start/Stop button UNTIL
BABY CHIMES 6 TIMES. (You may need to
hold it for as long as 15 seconds.) Baby is inactive.
Set Clock
Friday
6:31 AM
Change day of week by setting
the correct date at the bottom.
EMERGENCY START
01/22/04
The current simulation data stored in Baby will be lost.
Push
until you return to the Main Menu.
Note: Screens and data stay the way you leave them.
Use the battery cover key to open Baby’s battery cover. Remove one
battery. Replace the battery. Baby will chime.
WITHIN 30 SECONDS, use a straightened paper clip to quickly and
gently press and hold the Emergency Start/Stop button until Baby
chimes three times.
Baby will coo and the simulation will begin. There will be no quiet
times and Baby follows schedules 1-15 in numerical order. Baby will
recognize the IDs that you have previously configured.
Replace the battery cover and lock it.
14
31
Self Test
Low battery information
The control unit checks its internal systems with this option.
Control Unit
Main Menu
Prepare
Finish
Day Care
Baby Utilities
Control Unit
Self Test
Battery Level
Clock
Communication
Screen
Memory
Self Test
Battery Level
Clock
Communication
Screen
Memory
Self Test
Battery Level
Clock
Communication
Screen
Memory
Battery level
Replace
Good
Clock
PASS
Touch to Baby
contact point
SEARCHING |||||||
Screen
flashes all
black,
then all
white.
Low batteries!
Replace Baby’s
batteries.
The black bar shows
the level of battery life
in the control unit.
The message means that the batteries are not strong enough to begin a
simulation. Please put fresh batteries in Baby.
If the control unit batteries are low, you will see this symbol in the top
right-hand corner of the screen:
Main Menu
Shows either a pass or
fail grade for the
operation of the
internal clock.
Communication
Battery Level
Clock
Communication
Screen
Memory
Self Test
Not Ready!
Set Clock
Self Test
Printer MARTEL
About
Self Test
Battery Level
Clock
Communication
Screen
Memory
If Baby’s batteries are low, the control unit screen will display a message when you try to transfer data to or get data from Baby.
Communication
T
O
U
C
H
PASS
Screen
Black-w
white
test complete
Prepare
Finish
Day Care
Baby Utilities
Control Unit
Please put fresh batteries in the control unit.
Neither the control unit nor Baby lose data when the batteries are changed.
Alkaline battery voltage
Battery life
(shown on Baby Found screen
during Prepare option)
4.5 – 6.0 volts
4.2 – 4.4 volts
4.2 or less volts
OK
1-2 days left
Change batteries now
Memory
EP Test PASS
Ram Test PASS
EP Check Sum XXXX
MCU Version
Date / Time
32
Rechargeable battery voltage Battery life
4.5 – 6.0 volts
4.5 or less volts
OK
Change batteries now
13
Battery installation
Self Test (continued)
Self Test
Printer
Clock
Communication
Screen
Memory
Printer
Baby
1 Insert a battery cover key into the battery cover
lock and turn counterclockwise. Remove the
cover.
Point contact at
printer window
OR
Continue
Martel printer
Printer
2 Insert the four C batteries as indicated by the
plus/minus label in the battery compartment.
Baby chimes when batteries are installed correctly.
Replace the cover and lock it by inserting the
battery cover key into the lock and turning
clockwise.
Control unit
Sending
test data
to printer
Hewlett
Packard
printer
+
–
–
+
+
–
–
+
Infrared printer choice
Select which Realityworks infrared printer you plan to use.
Main Menu
1 Loosen the small screw at the bottom of
Control Unit
Prepare
Finish
Day Care
Baby Utilities
Control Unit
the battery cover. Remove the
battery cover.
Set Clock
Self Test
Printer MARTEL
About
Printer
MARTEL
HP82240B
2 Insert the four AA batteries as
indicated by the plus/minus label in the
battery compartment. The control unit beeps
and displays the main menu when the batteries
are installed correctly. Replace the
–
+
battery cover and screw and
tighten securely.
+
–
+
12
–
+
Hewlett
Packard printer
Martel printer
–
33
Product compatibility
Both types of bottles work
with both models of Baby.
Original
RealCare® Baby
Gather these supplies:
RealCare® Baby II
Original RealCare® Baby
diapers work only with
original RealCare® Baby.
RealCare® Baby II
diapers work only with
RealCare® Baby II.
• Baby
• Four C batteries
• IDs
• Tamperproof wristband
• Bottle or breastfeeding device
• Green patch diaper
• Yellow patch diaper (on Baby)
• Control unit
• Four AA batteries
• Instructor key ring
• Screwdriver (not included)
(not included)
The original RealCare®
Baby control unit with
original IDs work with
both models of Baby.
The combination of the
RealCare® Baby II control
unit with original
RealCare® Baby IDs
works only with original
RealCare® Baby.
The combination of the
RealCare® Baby II control
unit with RealCare® Baby
II IDs works only with
RealCare® Baby II.
The contact on some early models of the original RealCare® Baby control
unit is shorter than in later models. If used with RealCare® Baby II, hold that
type of control unit to Baby’s back as shown here
for best results.
Early models
Later models
34
Hold perpendicular to
Baby’s back.
11
Getting started
Care, maintenance, and storage
Important points - READ THESE FIRST!
1 Set the clock in the control unit the first time you use it.
2 Assign at least one ID to each new Baby. Keep that ID
(and a second one, if desired) with that Baby for all future parenting simulations. If those IDs are lost or misplaced, you can reconfigure that Baby to use other IDs.
3 To communicate best with Baby, point the control unit
at one of the areas illustrated on page 4 and HOLD IT
there for at least 4-5 seconds. If there is no chime, re-posi-
tion the control unit and HOLD IT again for 4-5 seconds. Do not
wave the control unit around Baby.
4 Removing the batteries from either the control unit or
Baby does NOT erase the data. The control unit stores
data for 30 simulations. Data is listed from the oldest (bottom of
list) to the newest (top of list). The oldest data is overwritten after
more than 30 simulations have been downloaded.
5 The Demonstration option, the Practice option, and
programming Baby for a new simulation erases
report data in Baby’s computer. Make sure you use Get
Data or End Simulation to download the data from Baby before
practicing, demonstrating, or programming.
6 Diapers and bottles other than the ones supplied by
Never immerse Baby in water. Never allow water to
come in contact with the electronics in Baby’s back. Baby
wipes work best for simulating a bath.
Baby’s skin stains easily. It soaks up inks and dyes. Keep Baby
away from:
• Newsprint and other printed material.
• New, unwashed clothing—especially jeans, sweatshirts,
and fleece.
• Pens and markers.
There is no cleaner that removes all dirt or stains.
These cleaners may work:
• Acne cleansing pads.
• Rubbing alcohol.
• Nail polish remover.
• All-purpose cleaner.
Do not use any cleaners or abrasives on Baby’s head.
These items will remove the paint. Wipe the head with a baby wipe or
wet cloth to remove any surface dirt.
Baby’s joints have been specially treated and should not
dry out. If the joints do become stiff, joint lubricant may be pur-
chased from Realityworks. It lubricates the joints and prevents the
tearing that results from dry vinyl. One tube of the joint lubricant can
be used for up to forty Babies.
Never store the batteries in Baby. If you are not using the
infant simulators for 14 or more days, remove the batteries for storage.
Battery leakage can damage or destroy Baby’s electronics. Battery
leakage is not covered by warranty.
Realityworks do NOT work with Baby. Original
RealCare® Baby bottles will work with RealCare® Baby II, and vice
versa. Original RealCare® Baby diapers do not work with
RealCare® Baby II, and vice versa. See diagram on page 34.
10
35
Terms
Care, maintenance, and storage (cont.)
Do not let the battery terminals (ends) touch. Wrap a rubber
Missed Care
Percentage and total in the simulation data report that shows how often the student
did not provide care to Baby within two minutes.
band around bundles of batteries for organizing or storing them. Store
upright in a cool, dry place.
Original RealCare® Baby
Previous model of Baby. Uses touch IDs and a smaller, square control unit.
Do not store Baby where excessive heat or cold could
affect the vinyl or electronics.
Practice All
A shortened sequence of all Baby’s care events, used for student practice in the
classroom before taking Baby home (under the Demonstration option).
Baby’s clothes are NOT flame retardant and should not
be worn by real infants.
If you store Baby in its shipping box, place the plastic
bag around its head to prevent paint damage. The cardboard will rub paint off the back of the head. Do not wrap Baby
in newsprint. The ink will leave permanent stains on Baby’s body.
Prepare
The control unit menu where you choose a start and stop time for the simulation, an
EASY, MEDIUM, or HARD level of care, pre-set any quiet times where Baby
requires no care, and transfer those choices to Baby.
Print Report
Prints simulation data to an infrared printer from Realityworks.
Printer
An infrared printer available for purchase from Realityworks.
Proper Care
A percentage and tally in the simulation data report that shows how often the student
provided care quickly (within two minutes). The higher the percentage, the more times
the student gave good care.
Quiet Times
Pre-set periods of time throughout the simulation when Baby does not request care
from the student.
Readiness Check
Double-checks your simulation choices for a Baby and displays a report on the screen.
Searching
Text that means the control unit is trying to communicate with Baby (point control
unit at area shown on page 4 and hold it for 4-5 seconds).
Self Test
Tests all control unit functions.
Set Clock
Task where you set the clock, ensuring the start and stop times and Baby’s schedules
follow the actual time of day.
Troubleshooting
A quick way the control unit can find any technical problems with a Baby.
View Report
Allows you to view simulation data on screen.
36
9
Terms
(words used in control unit menus and options)
About
Shows the version number and manufacture date of your control unit.
Baby Utilities
Menu where the Demonstration, Readiness Check, Troubleshooting, Configure, and
History options are located.
Care Level
The frequency and length of care Baby requests during the parenting simulation.
Choose from EASY, MEDIUM, and HARD levels in the control unit.
Configure
Menu where the name, ethnicity/gender, and IDs for a particular Baby can be changed.
Control unit
The handheld device used for all programming, data retrieval, and troubleshooting
interactions with Baby.
Day Care
Option you can activate on demand when the student can’t care for Baby. Baby does
not request any care when the day care option is activated.
Demonstration
Helps you demonstrate each of Baby’s actions individually, i.e. feeding, burping,
rocking, etc.
End Simulation
Stops the parenting simulation and downloads the data.
Finish
Menu where you can get data from Baby’s computer, end the parenting simulation,
view a report of simulation data, or print a report of the data using an infrared printer
from Realityworks.
Get Data
Downloads simulation data from Baby’s computer.
History
Displays history for a Baby.
ID
Small circular device worn on a wristband by the student caring for Baby.
Language
Select from five display languages: English, Spanish, Japanese, French, and German.
Locate Baby
Control unit screen text that means the control unit is trying to communicate with
Baby (point control unit at area shown on page 4 and hold it for 4-5 seconds).
Mishandle
Number in the simulation data report that shows how many times the student did not
support Baby’s head, roughly handled Baby, placed Baby in a wrong position, or shook
Baby (Shaken Baby Syndrome).
8
Frequently asked questions
Why did Baby cry after I installed the batteries?
The last parenting simulation was not ended. Go to the Main Menu and choose
Finish. On the Finish menu, choose End Simulation and bring the control unit
within range of Baby to end the simulation.
How will I know when it’s time to replace batteries?
Baby: The control unit screen displays a battery voltage message when you try to
prepare for a new simulation. To check Baby’s battery level at other times, follow
the directions for the Readiness Check option on page 28. Change the batteries
anytime the voltage reading is 4.2 volts or less.
Control unit: A battery symbol appears in the top right-hand corner of the
control unit screen when batteries start to weaken: You may also check the
battery level by using the Self Test option on page 32.
Will Baby work with rechargeable batteries?
Yes. However, rechargeable batteries do not last as long as alkaline batteries. Use
3,000 mAh capacity batteries or larger. Fully recharge the batteries and install in
Baby no more than 24 hours before the simulation is to begin. If the simulation
is longer than four days, monitor the battery voltage using the Readiness Check
option. Replace batteries when they get below 4.5V.
Are the IDs waterproof?
Yes, all IDs are waterproof and may be submerged in water. Dry the ID off completely before using it. The IDs do not contain batteries.
How can I tell if the IDs are working properly?
Select Baby Utilities from the control unit Main Menu, and then select Configure.
Configure the ID to Baby (instructions on page 15). If the IDs are successfully
configured to Baby, they work properly.
When do you configure Baby?
You can configure Baby at anytime before the start of a simulation. Once a student ID is configured to a specific Baby, that ID only works with that Baby
unless it is reconfigured. It is important to keep Baby and the ID together once
they have been configured for each other.
How long in advance can I program the simulation?
You can program Baby up to seven days in advance.
I programmed another simulation, but it has not started yet. Is
there any way to retrieve the previous simulation’s data?
NO. The Demonstration option, the Practice option, and Programming Baby for
a new simulation erases the data stored in Baby’s computer. Make sure you use
Get Data or End Simulation to download the data from Baby before practicing,
demonstrating, or programming.
37
Frequently asked questions
Parts identification
How many Babies can I program at once?
There is no maximum number of Babies you can program at one time. However,
the maximum amount of Babies the control unit will store data for after the simulation is completed is 30.
How can I stop a simulation early?
Pulling the batteries out DOES NOT STOP BABY – it only pauses it. Baby can
be stopped early by two methods. The first is to use the End Simulation option
on page 21. The second method is by using the Emergency Stop feature. Use a
straightened paper clip to gently press and hold the Emergency Stop button until
Baby chimes six times. (You may need to hold it for as long as 15 seconds). Baby
is now inactive until Baby is either restarted with the Emergency Start procedure
or is reprogrammed.
Breastfeeding device
Control unit
battery cover
What’s the difference between Quiet Times and Day Care?
Quiet times are pre-programmed before the simulation and are in one-hour intervals
up to 12 hours. There are three quiet times available per simulation. Baby can be put
into Day Care with the control unit at any time during the simulation. See page 24
for instructions. Baby stays in Day Care until you take Baby out of Day Care.
Instructor and
Student videos
(step-by-step
programming
actions and
student care
instructions)
How long will Baby cry before it records a neglect?
Two minutes.
How do I individually demonstrate care events?
Select Baby Utilities from the Main Menu, and then choose Demonstration.
Scroll down to the specific care activity you would like to demonstrate (instructions on page 25).
(Located in back of binder)
How much time elapses between each care event in Practice All
mode?
There are approximately 30 seconds between each care event in the Practice All
mode on the Demonstration menu.
What are the highest event numbers?
The largest number for numerical displays such as missed care or mishandling is
254.
IDs
Tamperproof wristband
Diapers
The control unit shows a Total Crying Time of 999 minutes.
The largest number possible for crying time is 999 minutes. Crying time includes
all crying for rough handling, wrong position and neglect, as well as scheduled crying for care.
Bottle
The control unit stays on the “SEARCHING” screen and nothing
seems to be happening.
Baby may not be in the control unit’s range for communication. The best Control
Unit communication areas on Baby are on the upper chest and lower belly region in
both the front and back of Baby. Hold the control unit two inches from one of the
38
7
Frequently asked questions
Parts identification
target areas shown on page 4, and hold it steady for five seconds. Do not wave the
control unit around Baby. If the “SEARCHING” screen remains, check the battery
levels of both the control unit and Baby.
Instructor key ring
Emergency start/stop opening
Contact point
Battery cover lock
Diaper sensor area
How much simulation data can the control unit store?
Data for up to 30 Babies. After data for 30 Babies has been stored in the control
unit, the oldest simulations will automatically be deleted with each new simulation that is downloaded.
Can I start Baby without a control unit?
Yes. See page 31 about using the Emergency Start feature.
I lost the control unit. Can I use a different control unit to get
data or end the simulation?
Yes. Any RealCare® Baby II control unit will communicate with Baby. You may
also use the original RealCare® Baby control unit to program RealCare® Baby II
but you will not be able to use the new programming features with the old control unit.
Is the control unit broken when the screen looks like this?
No. You or someone else accidentally selected Japanese for the control unit’s display language. Press the left arrow button until the screen does not change. Scroll
down to the last option on the screen and press the right arrow. On the next
screen, scroll down to the last option on the screen and press the right arrow. On
the next screen, scroll up to the first option (English) and press the right arrow.
Your control unit should be back to normal.
Feeding sensor area
Speaker
The control unit does not turn on.
The batteries in the control unit could be low. Change the batteries and try the
control unit again. No data is lost.
What’s the difference between Easy, Medium, and Hard care
levels?
Each of the 15 infant schedules is ranked by length of care time and length of
time in between care events. “Easy” schedules are the five schedules with the
least amount of care time and most amount of time between events, “Hard”
schedules are the five schedules with the most amount of care time and least
amount of time between events, and Medium schedules are the five schedules in
between.
6
39
Frequently asked questions
Control unit overview
Do I have to reset the clock for daylight savings time?
Yes. To reset the clock, select control unit from the Main Menu, and then choose
Set Clock. Press the up and down arrows to change the time.
As the instructor, you use the control unit to choose:
• start and stop time
• level of care difficulty
• quiet times
Do I have to reset the clock for leap years?
No. The control unit is designed to take leap years into account.
What is the USB connector for?
The simulation data can be downloaded from Baby to a desktop computer for
additional grading and printing options. This feature will be available in the
future. Call Customer Service for details.
The student immersed Baby in water.
Take off Baby’s arms and legs. Remove the battery cover and remove the batteries and the circuit board. Allow to dry for at least one week. Reassemble Baby
and insert batteries. If Baby beeps, try programming it. If not, call Customer
Service at 800.830.1416.
Why is Baby buzzing or making strange noises next to electronic devices?
Some electronic devices, like cell phones, create a lot of interference. This is
most easily observed in Baby’s sounds. This interference will not harm Baby.
Both the control unit and Baby are tested to ensure that such interference does
not damage the electronics or cause any lasting effect. Both the control unit and
Baby are tested to international and FCC standards to ensure that their radiated
emissions are within safe and acceptable limits and do not pose a danger to people or other electronic devices.
How do I clean Baby?
Try any of the following cleaners to remove dirt stains:
• Goop® Hand Cleaner with Pumice
• GoJo® Orange Pumice Hand Cleaner
• Baking soda
• Tech cleaner
• Soft Scrub® Cleanser without bleach
• Oxi Clean
• Mild dish soap
• All-purpose cleaner
• Acne cream
• Rubbing alcohol
Realityworks has found NO effective product to remove ink stains from Baby’s
vinyl. Depending on the type of cleaning that needs to be done, you may use a
green kitchen scrubby or the equivalent to rub the cleaner on the stain. You can
then remove the cleaner with a damp cloth. IMPORTANT: Do NOT use any
cleaners on Baby’s painted areas, including head, lips and cheeks. Use only a mild
soap and water solution and soft cloth on these areas.
You can also:
• give Baby a name
• enter its gender and ethnicity
• set up one or two IDs for Baby to recognize.
Contact
Touch this contact to Baby’s contact point if
you are programming an original RealCare® Baby.
USB connection
Connect the control unit to a
personal computer to download data.*
LCD screen
Displays all options.
(Screens stay as you leave them)
Power button
Turns the control unit on and off.
Left arrow
• Returns you to the previous screen or Main Menu
• Accepts any changes made
• Scrolls left through data selections
Help
button
Displays
a help
screen
about the
option
you are
using.
Up arrow
Scrolls up through menu
and data selections.
Down arrow
Scrolls down through menu
and data selections.
Right arrow
• Accepts any changes made
• Advances to next screen if further options exist
• Scrolls right through data selections
Note: push and hold buttons to auto scroll through data selections.
*software available soon
40
5
Frequently asked questions
Product overview
RealCare® Baby II is an electronic infant simulator that cries to be fed,
burped, rocked, and have its diapers changed by a student parent. RealCare®
Baby II weighs 6.5 to 7 pounds, has a flexible neck, and a head that must be
supported at all times.
The hand-held control unit is used to select:
• a start time and end time for the student’s parenting experience
• an easy, medium, or hard level of care*
• pre-set quiet times when Baby won’t cry for care
When you are ready, you can transfer all these choices to
Baby with one simple step via touchless communication
(no need to touch to Baby’s back).
!
Best control unit and ID communication areas:
What do I do if I lost the battery cover key?
Call Customer Service at 800.830.1416 for a replacement.
The bottle cover is missing. Can I get a replacement?
Yes. Call Customer Service at 800.830.1416.
Is there any latex in Baby or the bottle?
No. Baby and all accessories do not contain any latex.
Are the diapers washable?
Yes. Washing the diapers does not affect the sensors. See the tags on the diapers
for washing and drying instructions.
When I print the data, why does the printout have this
symbol on it?
The batteries in the printer are low. Replace the batteries and try printing again.
(This only applies to the HP82240B printer model.)
Can I use the grading system I use for my older Babies?
Yes. However, RealCare® Baby II has additional reporting features to help with
the grading process. Suggestions for grading can also be found in the Program
Manual.
My report summary shows five mishandling events, but only
two are shown on the detail screen. What happened?
Baby counts all mishandling and missed care events but only stores detail information for a combined total of 49 mishandling events and missed care events
together. The student had five mishandle events, but only two of them were
recorded before the first 47 missed care events occurred.
After you transfer your choices, Baby is programmed and begins following
selected infant schedules at the chosen start time.
Caring for Baby
The student parent wears a unique ID on a wristband so Baby recognizes its
“parent” and can only be cared for by that student.
When Baby cries, the student wearing the correct ID must pick Baby up,
listen for the chime sound, and then figure out what care Baby needs
(feeding, burping, diaper change, rocking, comforting after rough handling or
lack of head support). See the Student Care Card for more information.
*There are 15 schedules Baby may follow. They are grouped into three
categories: EASY, MEDIUM, and HARD.
4
41
Returning Baby for repair
If you suspect your RealCare® Baby needs to be returned to
Realityworks for repair, please follow these steps:
1. Complete the troubleshooting testing on pages 29 of this
Operating Handbook (also at www.realityworksinc.com).
Table of Contents
Product overview ..........................................................................4
Control unit overview ..................................................................5
Parts identification ........................................................................6
Terms ..............................................................8
Getting started (Read these points first) ..............10
2. Contact the Customer Service Department at 800.830.1416
or e-mail them through our Web site. A Customer Service
Representative will analyze your troubleshooting results and
provide further instructions. Please have the following items
available when you call:
• Baby
• Four C batteries installed in Baby and four NEW C batteries
• Bottle or breastfeeding device
• Green patch diaper
• Yellow patch diaper
• Paper clip
• Instructor key ring
• Control unit with four NEW AA batteries
• Screwdriver
• Printer (if you have purchased one from Realityworks)
• IDs
3. If your Baby needs repair, Customer Service will give you a
Return Materials Authorization number for use when returning
Baby.
4. Remove batteries from Baby. Package RealCare® Baby II,
undressed, in the plastic bag provided with your purchase and
place it in the original box. Do NOT use newspaper for packaging
Baby; the ink transfers onto Baby’s vinyl. Unless specifically requested
by Customer Service, do NOT send accessories, batteries, or IDs.
Battery installation........................................12
Setting the control unit clock ........................14
Configuring Baby and IDs (setup) ....................15
Prepare (start and run Babies) ............................18
• Start and Stop Times
• Care Level
• Quiet Times
• Start Data Transfer
Finish (stop simulation and retrieve data) ................21
• Get Data
• End Simulation
• View Report / Print Report (on infrared printer from Realityworks)
Day Care on demand ....................................24
Demonstrating Baby for a group ..................25
Readiness Check (simulation settings) ................28
Troubleshooting Baby....................................29
Emergency Start/Stop feature ......................31
Self Test (control unit) ....................................32
Infrared printer choice ..................................33
Product compatibility ....................................34
Care, maintenance, and storage....................35
Frequently asked questions ..........................37
Returning Baby for repair ............................42
42
3
! IMPORTANT SAFETY PRECAUTIONS
!
Baby rather than holding Baby at all
times. Holding techniques are listed on
the Student Care Card that accompanies
Baby.
Baby weighs 6.5 to 7 pounds and
could cause discomfort for individuals
with back pain.
Do not operate any type of equipment or attempt tasks requiring the use
of both hands while holding Baby.
Driving
Baby may cry while the student is
driving. Please be aware that crying may
start unexpectedly, and the student
should be prepared.
Do not feed, burp, rock, change diapers, or otherwise care for Baby while
driving.
The student must bring his or her
vehicle to a complete stop in a safe location
before caring for Baby, or to retrieve a
piece of Baby’s equipment that falls.
Failure to install Baby in a car seat in
a motor vehicle could result in Baby or
supplies becoming projectiles in the
event of a sudden stop or accident.
Simulation rules
The student must never take the
wristband and ID off. Not only will he or
she be deducted points, but the ID may
be lost, or the student may stumble
around in the dark looking for it if Baby
cries during the night.
The student should make a note in
his or her diary where they had to delay
caring for Baby because their safety or
the safety of others may have been compromised.
Baby’s clothing is NOT flame retardant and should NOT be worn by real
infants. Instructors should make sure all
clothing is returned with Baby.
Location
Never leave Baby unattended in a public place given the potential for Baby to be
mistaken for a real infant.
Do not place Baby in or near water.
Do not place Baby on or near a
stove, especially while cooking.
Baby should sleep somewhere close
to the student’s sleeping quarters, but not
in bed with the student. Baby may fall
out of the bed or the student could roll
over on it causing damage to Baby and
discomfort to the student.
To prevent discoloration and fading,
do not store Baby in direct sunlight or in
an area of excessive heat.
Batteries
Batteries may explode, leak, cause
property damage, or cause personal
injury if disposed of in fire, inserted
backwards, inserted forcefully, stored in
direct sunlight or an area of excessive
heat, mixed with used batteries, or mixed
with a different battery type (some types
are alkaline, carbon-zinc, or rechargeable).
Rechargeable batteries are to be
removed from Baby before being
charged and are only to be charged under
adult supervision.
Only batteries of the same or equivalent type as recommended are to be used.
The battery supply terminals (ends)
are not to be short-circuited (touched
together).
Do not STORE batteries in an
inactive Baby. They can leak. Battery
leakage can damage or destroy Baby’s
electronics and is NOT covered by warranty.
Interaction with others
Loud crying near people with potentially serious physical conditions, such as
those susceptible to heart attack or
stroke, should be avoided.
Do not allow small children to play
with Baby. Baby’s hands and feet are
small enough to be a choking hazard.
Baby is not suitable for children under
three.
Baby’s crying or other sounds may
cause pets to become agitated or aggressive. Keep Baby out of the reach of pets
or other animals.
Physical precautions
To avoid straining your arms, use an
infant car seat or carrier to transport
2
Returning Baby for repair (cont.)
5. Include a sheet of letterhead with a brief explanation of why
the item(s) are being sent for repair. Please reference each
RealCare® Baby serial number (found on the electronics box in
Baby’s back), as well as your name, organization name, and
customer ID number. If the data from the simulation you
experienced a problem with is available, please include the
printout with Baby.
6. Include a method of payment. A signed purchase order,
check, or credit card with the name of the cardholder, card
number, and expiration date will be accepted.
7. Ship Baby via mail (insured for replacement value of the
product) and address the package to :
Attn: RMA#________________
Realityworks, Inc.
2709 Mondovi Road
Eau Claire, WI 54701
8. Once your Baby is received, it will be repaired and shipped
back to you. If you have questions regarding the status of
your repair, please call the Customer Service Department at
800.830.1416.
Removing the PCB board for replacement:
(Only do this when instructed to do so by Customer Service)
1. Remove Baby’s batteries.
2. Remove two small screws (shown) with a
Phillips screwdriver.
3. Grasp circuit board by the contact point and
pull straight out.
4. Replace the two small screws and the battery cover.
5. Place circuit board in bubble wrap bag and a sturdy cardboard box, and return to Realityworks at the address above.
screw
Grasp here
screw
43
Baby Think It Over® Program
RealCare® Baby II
Operating
Handbook
The following are registered trademarks of Realityworks:
Baby Think It Over and the Baby Think It Over logo are registered trademarks in Australia, Canada, Japan, United Kingdom, and
the United States only.
Baby Talk It Over is registered in the United States only.
Some Decisions Last A Lifetime is registered in the United States only.
RealCare Baby is registered in Australia, European Community, Mexico, New Zealand, and the United States only.
NICoteen is registered in Australia, Japan, Mexico, Singapore, and the United States only.
NICoteen logo is registered in Australia, European Community, Japan, Mexico, New Zealand, Singapore, and the United States only.
©2004 Realityworks, Inc.
*D932*
D932
Please read these instructions before operating Baby.
Keep this handbook in a safe place for future reference.
2709 Mondovi Road Eau Claire, WI 54701 800.830.1416
Fax 715.830.2050
www.realityworksinc.com