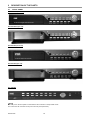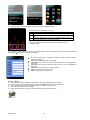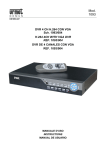
1
Mod. 1093 DS1093-038 DVR 4 CH /8 CH/ 16 CH H.264 CON VGA Sch. 1093/004A/008/016 H.264 4CH/ 8 CH/ 16CH WITH VGA DVR Ref. 1093/004A/008/016 DVR 4 CANAUX AVEC VGA Réf. 1093/004A H.264 4KANAL/ 8 KANAL/ 16 KANAL MIT VGA DVR TYP 1093/004A/008/016 DVR DE 4 / 8 / 16 CANALES H.264 CON VGA REF. 1093/004A/008/016 MANUALE DUSO INSTRUCTIONS MANUEL UTILISATEUR BEDIENUNGSANLEITUNG MANUAL DE USUARIO ENGLISH TABLE OF CONTENTS 1 General information ............................................................................................................................... 63 1.1 Product description................................................................................................................. 63 1.1.1 General features ............................................................................................................... .............................. 63 1.2 Opening the box ..................................................................................................................... 63 1.2.1 Contents of the box............................................................................................................ ............................. 63 1.3 Warnings ................................................................................................................................ 64 1.3.1 1.3.2 1.3.3 1.3.4 1.3.5 1.3.6 1.3.7 2 3 4 Power ............................................................................................................................... .............................. 64 Safety precautions............................................................................................................................... .......... 64 Installation precautions ............................................................................................................................... .. 64 Cleaning the device ............................................................................................................................... ........ 64 Hard disk ............................................................................................................................... ......................... 64 Image recording............................................................................................................................... .............. 64 Privacy and copyright............................................................................................................................... ..... 64 Description of the parts ......................................................................................................................... 65 2.1 Front panel ............................................................................................................................. 65 2.2 Rear Panel.............................................................................................................................. 68 2.3 IR remote control .................................................................................................................... 71 2.3.1 Batteries ............................................................................................................................... ....................... 73 2.4 Mouse Operation .................................................................................................................... 73 DVR Boot up ........................................................................................................................................... 74 3.1 Power on and off .................................................................................................................... 74 3.2 Main Interface......................................................................................................................... 74 DVR configuration .................................................................................................................................. 75 4.1 Main menu preview ................................................................................................................ 75 4.2 Main menu.............................................................................................................................. 76 4.2.1 4.2.2 4.2.3 4.2.4 4.2.5 4.2.6 4.2.7 4.2.8 Camera setup ............................................................................................................................... ................. 76 Record setup............................................................................................................................... ................... 77 Network set ............................................................................................................................... ..................... 79 Recording search ............................................................................................................................... ........... 81 Log Search ............................................................................................................................... ...................... 82 Device Management ............................................................................................................................... ...... 83 HDD Management............................................................................................................................... .......... 83 Alarm Set............................................................................................................................... ......................... 84 4.2.9 4.2.10 4.2.11 4.2.12 Email setup .................................................................................................................... ................................. 85 PTZ Setup ............................................................................................................................... ...................... 86 Mobile ............................................................................................................................... ............................. 86 Mobile Viewers Access Instruction ............................................................................................................ 86 4.2.13 4.2.14 4.2.15 4.2.16 4.2.17 4.2.18 4.2.19 4.2.20 4.2.21 Motion Detection ............................................................................................................................... ........... 94 Set Serial............................................................................................................................... ........................ 94 System ............................................................................................................................... ........................... 94 Time Set ............................................................................................................................... ......................... 94 Password ............................................................................................................................... ....................... 95 Video/Audio Setup ............................................................................................................................... ........ 95 Language ............................................................................................................................... ....................... 96 System Information ............................................................................................................................... ....... 96 Maintain ............................................................................................................................... .......................... 97 4.2.12.1 4.2.12.2 4.2.12.3 4.2.12.4 4.2.12.5 4.3 4.4 4.5 4.6 4.7 4.8 4.9 DS1093-038 Windows Mobile .......................................................................................................................................... 86 Symbian System Mobiles ............................................................................................................................ 87 Iphone ......................................................................................................................................................... 88 Blackberry mobile........................................................................................................................................ 89 Androids Mobile........................................................................................................................................... 92 Menu Lock .............................................................................................................................. 98 Split mode............................................................................................................................... 98 PTZ Control ............................................................................................................................ 99 DIGITAL ZOOM...................................................................................................................... 99 PIP Mode.............................................................................................................................. 100 Video Search ........................................................................................................................ 100 Mute...................................................................................................................................... 100 61 4.10 4.11 4.12 4.13 4.14 4.15 4.16 4.17 4.18 4.19 Manual Record ..................................................................................................................... 100 Stop Record.......................................................................................................................... 100 Start auto-sequence ............................................................................................................. 100 Start Cruise........................................................................................................................... 100 MONITOR selection ............................................................................................................. 101 Playback Player.................................................................................................................... 102 Watermark Software Player ................................................................................................. 104 Plug-ins download and installation for Web Login ............................................................... 105 urmet netviewer Log-in ......................................................................................................... 105 Web and urmet netviewer client software Interface ............................................................. 106 4.19.1 Menu Bar............................................................................................................................... ...................... 106 4.19.2 4.19.3 Local setting ............................................................................................................................... ................. 118 Log-out ............................................................................................................................... ......................... 118 4.19.1.1 Live screen ................................................................................................................................................ 106 4.19.1.2 Playback.................................................................................................................................................... 108 4.19.1.3 Remote setting .......................................................................................................................................... 108 Channel Parameters ............................................................................................................................................... 109 Record setting ......................................................................................................................................................... 110 Alarm Parameters ................................................................................................................................................... 111 Network Parameters................................................................................................................................................ 112 Device Parameters.................................................................................................................................................. 114 System management .............................................................................................................................................. 116 Appendix: Active X installation.................................................................................................................... 119 5 Specifications (Pal Format) ................................................................................................................. 121 DS1093-038 62 1 GENERAL INFORMATION This document describes how to install and use the URMET Domus digital video recorder ref. 1093/004A 1093/008 1093/016. Read this manual which contains information for correct, safe use carefully. Keep this manual at hand so that you can refer to it when needed. 1.1 PRODUCT DESCRIPTION The URMET Domus S.p.A. product is a digital video recorder capable of recording from several cameras to internal hard disk. 1.1.1 GENERAL FEATURES Triplex mode (recording, play and network transmission at the same time) H. 264 video compression, with D1, HD1 e CIF resolutions Real time recording Multiple or single recording Recording files with scheduled size. Main Stream e Sub Stream network transmission ADPCM audio compression Remote control (via browser and via client) Remote control through mobile Alarm management Multiple alarm recording Alarm notification through email Auto-maintenance mode PTZ controls via RS-485 Backup on USB 2.0 port (flash drive o hard disk) Use of USB Mouse Remote Control Multi-Language OSD th th PDA software Mobile for the following Platforms: Symbian 3 and 5 Edition, Windows Mobile, Iphone, Android, Blackberry Watermark Multi-Language Web / Client software. Syncronous Playback 4ch. for Sch.1093/004A, 8ch. for Sch.1093/008, 16 ch. for Sch.1093/016 1.2 OPENING THE BOX Check that the packing and the contents are not visibly damaged. Contact the retailer immediately if parts are either missing or damaged. Do not attempt to use the device in this case. Send the product back in its original packing if it is damaged. 1.2.1 CONTENTS OF THE BOX DVR Power unit INPUT 100 240 Vac 50/60Hz 1A OUTPUT 12Vdc 3A (Only for Ref.1093/004A / Sch.1093/008) 12Vdc 5A(Only for Ref.1093/0016) Instruction manual CD-ROM containing software Mouse IR remote control Audio cable (Only for Ref.1093/008 and 1093/016) Shuko plug Italian plug Cross LAN cable cat. 5 IMPORTANT NOTE Accessories may be changed without prior notice. DS1093-038 63 1.3 WARNINGS 1.3.1 POWER Only use the power unit provided to power the device. Check mains rating before plugging the power unit in. Do not pull the cable to unplug the device. Switch the device off before unplugging power unit. This operation must not be performed when the DVR is recording, playing or from the configuration menu. Stop recordings and playback in progress before disconnecting power from the device to prevent damaging the hard disk beyond repair. 1.3.2 SAFETY PRECAUTIONS Keep the device away from rain and humidity to prevent risk of fire and electrocution. Do not introduce material (solid or liquid) inside. If this should accidentally occur, disconnect the device from the mains and have it inspected by qualified personnel. Never open the device. In all cases, contact a qualified personnel or authorised service centre for repairs. Keep the device away from children, to prevent accidental damage. Do not touch the device with wet hands to prevent electrical shock or mechanical damage. Do not use the device if it should fall or the external casing is damaged. Risk of electrocution if the device is used in such conditions. Contact the retailer or authorised installer. 1.3.3 INSTALLATION PRECAUTIONS To prevent overheating the device, arrange it in a position allowing the flow of air through the slots in the casing. Ensure at least 5 cm of free space when installing inside a rack. For the same reason, do not install sources of heat, such as radiators or hot air ducts. Keep away from direct sunlight. Do not install in areas subject to excessive dust, mechanical vibrations or shocks. Do not arrange this device on an unstable surface, such as a tottering or slanted table. The device could fall causing injury or mechanical failures. Do not install the device in a place where it could be exposed to humidity or water. Do not direct a jet of water onto the device: risk of fire, electrocution or mechanical failure. Stop using the device if water or other material should penetrate inside: risk of fire and electrocution. Contact the retailer or authorised installer. Do not place heavy or heat generating objects on top of the device: this could damage the casing and/or increase internal temperature causing faults. Do not cover the device with a cloth while it is running to prevent deforming the external casing and overheating the internal parts: risk of fire, electrocution and mechanical failure. Keep magnets and magnetised objects away from the device to prevent faults. Do not use the device in presence of smoke, vapour, humidity, dust or intense vibrations. Wait for a while before operating a device immediately after transporting it from a cold place to a warm place and vice versa. Wait on average for three hours: this will allow the device to adapt to the new ambient (temperature, humidity, etc.). 1.3.4 CLEANING THE DEVICE Rub delicately with a dry cloth to remove dust and dirt. Dip the cloth in neutral detergent if dirt cannot be eliminated with a dry cloth alone. Do not use volatile liquids (such a petrol, alcohol, solvents, etc.) or chemically treated clothes to clean the device to prevent deformation, deterioration or scratches to the paint finish. 1.3.5 HARD DISK The hard disk installed in this device is sensitive to shocks, differences in temperature and vibrations. Disrespect of these precautions can compromise correct operation of the device and loss of data stored on the hard disk. If repairs are required, it is advisable to backup all important data before taking the device to the service centre. URMET Domus S.p.A. is not liable for loss of stored data. 1.3.6 IMAGE RECORDING This device was designed to record images, not as a burglar alarm. URMET Domus S.p.A. cannot be held liable for loss or damage following theft sustained by the user. Make a test recording before using the device to make sure that is working correctly. Please note that URMET Domus S.p.A. is not liable for loss of stored data consequent to loss or damage caused by incorrect observation installation, use, improper use or malfunctioning of the device. This device contains precision electronic components. Protect the device from shocks to ensure correct recording of images. 1.3.7 PRIVACY AND COPYRIGHT The 1093/004A 1093/008 1093/016 digital video recorder is a device for CCTV systems. Recording of images is subject to the laws in force in your country. Recording of images protected by copyright is forbidden. Product users shall be responsible for checking and respecting all local rules and regulations concerning monitoring and recording video signals. The manufacturing SHALL NOT BE LIABLE for use of this product not in compliance with the laws in force. DS1093-038 64 2 2.1 DESCRIPTION OF THE PARTS FRONT PANEL Ref.1093/004A (Closed lid) H.264 4CH Digital Video Recorder Ref.1093/004A (open lid) Ref.1093/008 (closed lid) Ref.1093/008 (open lid) Sch.1093/016 NOTE The USB port on the front panel is not intended for the connection of the provided mouse. The mouse must be connected on the port in the rear panel (see below) DS1093-038 65 SCH.1093/004A 1093/008 PARTICULAR DETAIL DESCRIPTION Power Led: indicates that the device is powered HDD Led: indicates that the hard disk is in use (read/write) IR Sensor: I.R. signals receiver for remote command CH1 Button: button for full screen display of camera 1 images. (only for Ref. 1093/004A) CH2 Button: button for full screen display of camera 2 images. (only for Ref. 1093/004A) CH3 Button: button for full screen display of camera 3 images. (only for Ref.1093/004A) CH4 Button: button for full screen display of camera 4 images. (only for Ref. 1093/004A). QUAD Button: button used to display all the cameras (only for Ref.1093/004A) SEARCH Button: Used to open the Playback interface and perform the tracks search (only for Ref.1093/008) MUTE Button: Used to enable/disable the AUDIO function (only for Ref.1093/008) CH- Button: Used to select the channel before the current one. (only for Ref.1093/008) CH+ Button: Used to select the channel following the current one (only for Ref..1093/008) ALL Button: Shows all the cameras (only for Ref.1093/008) REW Button: fast backward button; used to move left in the menus / rewind during playback / Switch video output control menu (i.e. VGA or MAIN BNC) with pressure and hold Button about 5 seconds. PAUSE Button: still image button; to restart the playback use the button play. Allows the frame by frame playback. PLAY Button: playback button; used to start play. Used to access the playback menu. FWD Button: fast forward button. It allows the fast playback of images at various speed. Press many times to change the speed. STOP Button: stop button; stops play and record functions. REC Button: record button; starts the operation. USB port: connection port for a USB device (Flash Drive, Hard Drive). DS1093-038 66 SCH.1093/016 PARTICULAR DETAIL DESCRIPTION Button: in the configuration menu, it moves the cursor upward. EDIT Button: used to select. It allows the access to the pop-up menu and to the sub menus. It is the confirm button of the configuration menu. Button: in the configuration menu it moves the cursor downward. menu. MENU/ESC Button: used to access/exit the configuration menu or to go back to the previous . Used to access the pop-up menu. USB port: connection port for a USB device (Flash Drive, Hard Drive). CH 1 / CH 0 numeric button . Used to access video channels. Audio Button: enables/disables the audio (only for Ref.1093/016) Multiscreen button: allows the simultaneous vision of all the video channels Button for recording and backup start. Button for frame by frame recording and playback. Start Button: starts the manual mode images recording. Stop Button: stops recording Green led indicator: indicates that the devices is powered Red led indicator: indicates that the device hard disk is in use Button for selecting UP Button for selecting RIGHT and for fast forward of images. Button for selecting LEFT and for fast backwards of images. Button for selecting DOWN. Multifunction button: used to access/exit the OSD menu; enable/disable the PTZ function; it performs the function previously selected. (only for Ref. 1093/016) DS1093-038 67 2.2 REAR PANEL Ref.1093/004A Ref.1093/008 Ref.1093/016 PARTICULAR DETAIL DESCRIPTION Power on / power off switch. Power supply plug: use the provided adapter to supply the device. BNC connectors for Video output: connect here the monitor. BNC connector for CH1 / CH2 / CH3 / CH16 channel Video input : connect here cameras. 75 (4 Inputs are available on Ref. 1093/004A 8 inputs on Ref. 1093/008 16 inputs on Ref. 1093/016) VGA Audio output: used to connect Audio devices (only for Ref. 1093/016) 12 ways terminal strip for RS485/Sensors/Alarm: this is the connector to which input sensors, alarm output and RS458 line are connected. (only for Ref. 1093/004A) (See details in the following page) DS1093-038 68 16 ways terminal strip for RS485/Sensors/Alarm: this is the connector to which input sensors, alarm output and RS458 line are connected. (only for Ref. 1093/008) (See details in the following page) 24 ways terminal strip for RS485/Sensors/Alarm: this is the connector to which input sensors, alarm output and RS458 line are connected. (only for Ref. 1093/016) (See details in the following page) Fan output (located to side panel): avoid to obstruct the air flow, otherwise the device could be damaged Connector for ground connection / ground wire. VGA Video output: output connector for VGA monitor VGA Audio output: used to connect audio devices ( only for Ref. 1093/008) Ethernet port: intranet or internet connection (RJ45). Use a crossed cable (not provided) both for router/switch connection and for pc connection. Obviously, for a router/switch connection also a straight cable can be used. USB port: USB mouse connection Audio inputs: connector for 1-4 audio channels (RCA) (RCA) (only for Ref. 1093/004A) Audio output: audio output connector (RCA) (only for Ref..1093/004A) Video output: (higher one) main audio output; (lower one) spot output (BNC) (only for Ref. 1093/016) Audio input: Connector for channels CH1 CH4 (BNC) (only for Ref.) Audio output: the audio output connector includes main audio output and spot audio output (only for Ref. 1093/016) DS1093-038 69 RS485/Sensor/Alarm port Sch.1093/004A Pin 1: RS-485A Pin 2: RS-485B Pin 3-4: Sensor 1 input Pin 5-6: Sensor 2 input Pin 7-8: Sensor 3 input Pin 9-10: Sensor 4 input Pin 11-12: Alarm Output RS485/Sensor/Alarm port Sch.1093/008 Pin -: RS-485A Pin +: RS-485B Pin 1-2: Sensor 1 input Pin 3-4: Sensor 2 input Pin 5-6: Sensor 3 input Pin 7-8: Sensor 4 input Pin 9-10: Alarm Output RS485/Sensor/Alarm port Sch.1093/016 RS 485 +/- input Keybord D+/D- input ALARM OUT NO/COM output G GROUND Pin 16-12: ALARM IN input G GROUND Pin 1-11: ALARM IN input DS1093-038 70 2.3 IR REMOTE CONTROL Although the remote control handset supplied with the appliance is designed to be as robust and practical to use as possible, please handle with the due care and attention. Do not: expose to rain, spill any liquids on the keypad or drop in water subject to violent knocks or drop on hard surfaces expose to sunlight introduce obstacles between the remote control and the appliance while using the remote control. The remote control constitutes an interface between the User and the Appliance. Therefore, it is particularly important to be familiar with the controls on the remote handset. IR REMOTE CONTROL FOR REF.1093/004A 1093/008 BUTTON DESCRIPTION 1-8 Channel Select 1-8 ; Numeric key 9 0 Numeric Key ALL Preview all Channel Menu Enter/Exit Main Menu Up Key Down Key / SEL Left / Right Key Select Key/ Edit Key Rewind key Play Key, Enter to recording search menu Forward Key Manual Recording Pause / Frame Play Stop manual recording; Stop Playback Audio Undefined Mute Undefined DS1093-038 71 IR REMOTE CONTROL FOR REF.1093/016 BUTTON DESCRIPTION REC Start manual recording SEARCH Search menu access 2X2 Quad displaying 3X3 9 channels displaying 4X4 16 channels displaying AUTO DISPLAY MODE 0-9 Sequence displaying Multiple visualizations selection Channels selection; numeric buttons Up button Down button / Left/right button ENTER Menu/Esc Enter Main menu access/exit PIP Picture In Picture MUTE Mute REW Go back button PLAY Playback button, access to recorded track search menu FWD Forward button PAUSE Pause / frame by frame playback STOP Stop manual recording; Stop playback SLOW Slow forward Z+ Zoom in Z- Zoom out F+ Focus F- Focus I+ PTZ luminosity increasing I- PTZ luminosity decreasing PTZ PTZ control LOCK Lock DS1093-038 72 2.3.1 BATTERIES The remote control is powered by two size AAA batteries (included). To install, slide the battery compartment cover open and insert in the compartment respecting the polarity shown. Close the cover after inserting the batteries. Point the remote towards the DVR receiver to use it. Dispose of used batteries correctly in specifically provided special collection bins. the IMPORTANT NOTE Always change both batteries at the same time. Remove the batteries if the remote control is not used for long periods. 2.4 MOUSE OPERATION In menu lock mode, Enter into pop-up menu and clicking any sub menu to pop up Log-in window; on menu unlock mode, enter into pop-up menu, and then clicking left key to enter into any sub menu directly. Click left key of Mouse Click right key of Mouse Double-click Left key of Mouse Moving Mouse Sliding Mouse DS1093-038 After entering main menu, clicking left key could enter into any sub menu; On[Detailed file] menu mode, clicking left key could playback one recording file. Change the status of check box and motion detection area. Clicking combo box to access pull-down menu By clicking left key you can adjust Color control bar and volume control bar. By clicking left key you can select values in edit boxes or pull-down menu, special symbol, numeric and character input, use instead of [Enter] or [Backspace] In the [Detailed file] menu mode, clicking left key will playback one recording file. In live display mode, clicking right key will display pop-up menu In Main menu or sub menu mode, clicking right key will exit current menu. In live display or playback mode, double-clicking left key will maximize the screen. Select menu item On motion mode, sliding mouse will select motion area; On [Color set] menu mode, sliding mouse will adjust color control bar and volume control bar. 73 3 3.1 Press DVR BOOT UP POWER ON AND OFF on the back of the unit. The PWR LED on the front panel will light up. The following will appear on the monitor. The system will boot-up and start initializing. 3.2 MAIN INTERFACE After finishing system initialization the system will enter into main interface. Picture is the main interface displayed by system, which is showing no video input status. Once there are video inputs, the interface will display live images from the cameras. In main interface mode, if you use the mouse to double-click the live image of any channel, the image will be maximized to full screen, by double-clicking again, the display will be come back to quad mode displaying all cameras; clicking the right button of the mouse, will enter into Pop-up Menu; by clicking the left button of the mouse, you select menu items; when clicking any area outside the menu, you will exit the Pop-up menu. DS1093-038 74 4 DVR CONFIGURATION POP UP MENU After finishing system initialization, click right key of mouse on main interface mode to enter into Pop-up Menu. Now you could proceed parameter setting and operate for Main Menu, Menu Lock, Video Search, PTZ, Start record, Stop Record and also operate for Start Cruise after successful PTZ parameter setting etc. 4.1 MAIN MENU PREVIEW Color set Camera Dwell time display Recording Network Search Playback Rec. Search File List HDD Management Alarm Setting Device Management E-mail setting PTZ Setting Mobile Motion Time Setting User password Video Setting System Language Select System Information System Maintenance DS1093-038 75 Area setting 4.2 MAIN MENU After clicking right button of mouse, pop-up menu will be displayed on the screen. You can click [main menu] button on pop-up menu to enter into Main menu interface. You can also use the Menu button on the front panel to bring up the window, when using the front panel buttons use the FWD and REW button to move in the menu, and the SEL button to select the icon. You use the ESC button to return to previous window. In Main Menu mode, you can control device management settings, such as Camera, Recording, Network, Recording search, HDD, Alarm, PTZ Control, Mobile Phone & motion detection etc, you can also set system function settings, such as Time setting, User password, Audio/Video setting, Language select, and access system information, system maintenance etc. 4.2.1 CAMERA SETUP Go to [Main menu Camera] to set up the CH name and position for each channe. You can set up whether each channel can be previewed or not under Live display and/or record mode, enable live time or not under live screen and set up record time or not on the record history. Please note that the name of each channel supports up to eight characters or four Chinese characters. Copy function: allow you copy all data of one channel to any other channel. You can adjust image brightness, saturation, contrast and hue parameters of each channel after entering into [Color] menu. Explanation: 1 2 3 The modifications will be available after clicking [APPLY] button on the bottom of the sub-menu windows and being prompted to save and then clicking [ok] button. If you want to cancel the modification, click [Exit] button to exit the menu. When clicking [DEFAULT] button, all system default values will be reset to default value. System default value indicates the ex-factory default setting. DS1093-038 76 4.2.2 RECORD SETUP Click [Main Menu] [Record] to enter into [Record Setup] menu. [Record] option allows you set up recording status (Enable/Disable) of each channel. [Audio] option allows you turn audio on/off. [Quality] include three options Best, Good and Normal. [Pack time] indicates maximum continuous record time (15, 30, 45 and 60 min). [Frame rate] include two options Fixed and Manual. When set to Manual and click [Frame rate setup] option, you may allocate the frame rate for each channel. [Mode] allow you select record modes, including Always and Scheduled. To record 24 hours a day set the [Mode] to Always. To record on motion or a set schedule, select the [Schedule] option When setting [Mode] to Schedule, the schedule screen will appear as shown in Picture 5-6. [Record CH] options include All, CH-1, CH-2, CH-3, CH-4, CH-5 CH-16 in turn. Please click the channel you need. To setup weekly schedules, tick-select the box of the record status you want (Alarm, General, or No Record) and then click on each box in the schedule time line that you want this method to apply to. You can use the [From To] pulldown menus and Copy button to copy settings from one day to another day or all days. After you complete the schedule setting please activate it by clicking the [Apply] button. Please note that 01~07H is defaulted to No record, 08~18H to Normal and 19~00H to Alarm. Explanation: On the [record Set] and [Search] mode, original color stands for no record, Red stands for alarm record, Green stands for normal record. DS1093-038 77 MAXIMUM RECORDING TIME WITH 500GB HARD DISK The following list contains recording maximum times with 500GB HD for 4 / 8 / 16 recording channels. 1093/004 DVR 4ch. Resolution/Frame Rate HDD Duration (days) Best Quality Better Quality Good Quality [email protected] 14 19,5 24,5 HD1@25FPS 12 16,5 24,5 CIF@25FPS 16,5 23 29 1093/008 DVR 8ch. Resolution/Frame Rate HDD Duration (days) Best Quality Better Quality Good Quality [email protected] 11 15 17 [email protected] 11 15 21 CIF@25FPS 9 12 16 1093/016 DVR 16ch. Resolution/Frame Rate HDD Duration (days) Best Quality Better Quality Good Quality [email protected] 5,5 7,5 8,5 [email protected] 5,5 7,5 10,5 CIF@25FPS 4,5 6 8 Explanation: Bandwidth and HDD Duration can be highly variable depending on the scene recorded. DS1093-038 78 4.2.3 NETWORK SET Enter into [Main Menu Network Setup] to setup the network configuration: After selecting network mode - such as DHCP, PPPOE or static allocation- and setting up web ports,you can visit DVR remotely through a network or internet. DNS: DNS server is generally provided by local ISP. Herein please enter the IP address of your DNS. Note: When there are multiple DVRs at the same LAN, you need to change the MAC address. When selecting DHCP the router will allocate DVR IP address automatically after you exit the menu. The IP address of the DVR might change whenever the unit is turn on. When selecting Static from the Type, user can directly set IP address, Subnet Mask, Gateway, Web Port and DNS s. When selecting PPPoE form the Type, user can input user name and password provided by ISP and set Media and Web port. You can visit your DVR via public network without port forwarding when network type is set to PPPoE and web port is right. At the bottom of the NETWORK SETUP window there is an option to setup a DDNS service of the DVR shown as Picture 510.You can access the DVR through a static or dynamic IP address; however a dynamic address can change from time to time. How often depends on your service provider. When it changes you need to go to a website such as www.myipaddress.com from a computer attached to the same router as the DVR to find out what the new IP address is. There are two solutions to this problem. One would be to get a static IP address from your service provider so that you do not have to be concerned with the address changing. Another solution would to use a dynamic domain name service to get a domain name that can be linked to your dynamic address. You can register on DVR2009.3322.org website and get a domain name, user name, and password. You can then enter your dynamic domain name into an Internet Explorer browser instead of an IP address and be directed to whatever the current dynamic IP address is, so that you can always access the DVR by entering the same address. You can get more information on how to use these services from www.dyndns.com website. DS1093-038 79 Server: select a Dynamic domain name server provided by ISP; Host Name: Input host name registered from Dynamic Domain Naming System, for example: DVR2009.3322.org; User Name: Input a user name registered before applying for a domain name; Password: Input a password you set when registering a user name. Routers Port Forwarding Port forwarding is required when you want to access the DVR connected to the router from outside of the routers network. 1. Input routers IP address from IE-based browser to open the Router configuration interface; 2. Click [Transmittal rule] option to take you to perform the port forwarding setting for your router; 3. Set the corresponding parameters illustrated. When server port and web port can be routed to the DVR IP address, user can visit the DVR remotely. 4. User can enter below website or domain name as per current PC network environment to visit the remote DVR. http://public IP: Web port(such as 0080) http://intranet IP: Web port(such as 0080)(only available at the same LAN) http://superdvr.3322.org: Web port(such as 0080) Friendly Reminder: The routers port forwarding interface may be different, however, when entering into virtual server, user will need forward port 0080 and port 9000 of router to IP address of DVR allocated or automatically captured, and select [All] or [Both] in corresponding protocol column and save the above setting. Above steps may differ from the router device depending on the manufacturer. UPnP server: Now that you have set up the DVR on your local network, you will no doubt want to access your camera from a remote location over the Internet. The DVR makes this easy to do as it supports technology called Universal Plug and Play (UPnP). To make use of this feature your router will also need to support UPnP. Most routers nowadays do support this however check your router manufacturers website just to make sure. Log into your DVRs setup menu Advanced Network Ensure UPNP is enabled and leave the default ports as http port: 8050 Server port: 9000 3G Mobile port: 9100 Your router will usually have UPNP enabled by default, but just to make sure, log into your router to check it is (refer to manufacturer guidelines on how to do this) Once both your DVR and router are UPNP enabled, you are now able to view your DVR from any computer with high speed Internet access. To do this you need to type your external IP address in your Internet Browser address bar. DS1093-038 80 4.2.4 RECORDING SEARCH Click [Main menu search] to enter into [Video Search] menu Channel: allows you select the channel you want to search Time Search: In the Video Search screen, user can search for a specific date and time for a recording and view it in Playback mode. This is useful for hunting a specific recording of an incident if you know the date and time it occurred. Date Search: In the Video Search screen, user can search for all the recordings in a specific date. To execute a video search, highlight and select the date numeric field,and then click a detailed time quantum of the specific date, system will start the playback from the first recoding of the time quantum. Playback Mode: You can use the Playback Control bar to operate the Fast Forward (X2, X4 and X8), Slow play (1/2, ¼ and 1/8 speed), Play, Pause/Frame, Rewind(X2, X4 and X8). When ending playback, DVR will return back to previous menu. File List: click [File list] button to enter into the [File List] screen, the video recordings for the time quantum will appear in the screen. And you also can filter the recordings you want to view by the Channel or recording mode based on date/time search. First:Indicates the first page of recording history you have searched. When you view other pages, clicking [First] button brings you back to Page one. PRE (Previous page): When viewing event list, clicking [Previous page] button will take you back to previous page from current page (except the first page). NEXT (Next page): When viewing event list, clicking [Next page] button will take you to the next page from current page (except the last page). LAST (Last page): Indicates the last page of recording history you have searched. When you view other pages, clicking [Last page] button will take you to the Last page. ALL (Select All): Allows you to select all the events on the current page. INVERSE (Select Invert): Allows you to select other events on the current page except those you have currently selected. File backup If you want to backup one history record from the file list, you just select the record and backup device, and then click [Ok] button. DS1093-038 81 If you select embedded DVD recorder, backup will be started after clicking [OK] button. When backup processing ends, system will prompt you Backup success! . Picture 5-15 Picture 5-16 When the backup is completed you will be notified. Please click [OK] button to save your backup. Backup file will be in H264 format, you can convert it to AVI format using the Multimedia Player program that comes with the DVR or through the net-viewer program, so you can use any player which supports AVI format. Note: Please make sure you have connected the backup device well. 4.2.5 LOG SEARCH User can search relative log information using [Log Search] function. DS1093-038 82 4.2.6 DEVICE MANAGEMENT Options in device management include HDD, Alarm, PTZ, Mobile, Motion and Serial set. Click [Main Menu Device Management] option to enter into the window. 4.2.7 HDD MANAGEMENT In the [Device Management] screen, highlight and click [HDD] icon to enter into the window. When DVR is connected to a HDD, the system will automatically detect if HDD is normal or not; If the cable connected to HDD is loosen or HDD is abnormal, HDD status will be shown as No Disk, or, If HDD need to be formatted, status will be shown as no format, otherwise, the HDD status will be shown as Normal . NO HDD number defaulted by system Status Available Hard drive. You could use HDD only when formatting the HDD and inspect its status normal. TOTAL SPACE: Indicates total space available on Hard Drive. FREE SPACE: Indicates unused space available on the Hard Drive. USEABLE REC TIME: Based on current image detail/quality and frame rate, system will show you how many record time you have left on the Hard Drive. HDD FORMAT: You use this option to format the hard drive, you can not record files to the hard drive until it has been formatted. Click [Format HDD] button to start formatting. When selecting [Format HDD] option the system will prompt you Format HDD will loss all the data, do you confirm? ; click OK, system will prompt you Is formatting and successful format; and then system will restart automatically. OVERWRITE: If you select AUTO the system will automatically overwrite the oldest recordings once the hard drive is full; if you select OFF, recording will stop once the hard drive is full. It is also possible to define the time (i.e. in days) that the recording file can be displayed in SEARCH RECORDING. Select the value (i.e. days) between the suggested options. USB FORMAT: Use this option to format USB devices. Note: It is an important first step when configuring your DVR to make sure that the hard drive (HDD) options are correctly set. So, it is strongly recommended that you do format the HDD before start the first record. DS1093-038 83 ALARM SET 4.2.8 Click [Main Menu Device Alarm] to enter into the below window. Channel select: the option allows you select one channel you want. I/O Status: allows you select the three options NO (Normal Open), NC (Normal Close) and OFF. Set to Normal Open, I/O status Alarm will be activated while sensor is ON; set to Normal Close, I/O status alarm will be activated while sensor is OFF; set to OFF, I/O status alarm will not be triggered. Copy To: it is possible to copy Alarm Setting for some or all channels. ALARM CONFIG Click [Alarm Config] on the bottom of the [Alarm set] window to enter into the interface.Now you are allowed to set detailed alarm parameters. In Alarm config is possible to select/deselect for each event type (Motion Detection, Alarm input, Video signal loss, HD full, HD loss) the signal type by choosing among the following: BUZZER OUTPUT EMAIL (only for Motion Detection, I/O Alarm) FULL SCREEN (only for Motion Detection, I/O Alarm) In Alarm config is possible to select the Event Time: Buzzer time: you can set how long the buzzer will sound when motion is detected (0s, 10s, 20, 40s, 60s); Alarm Output: you can set how long the external sensor alarm will last when motion is detected (off, 10s, 20s, 40s, and 60s); Alarm time: you can set how long alarm record will last when alarm ends (0s, 30s, 1minute, 2minute, 5minute); Pre-record time: you can set how long record will last before alarm occurs (Off, 10s). Alarm Type Motion Detection I/O Alarm HDD Loss / HDD Space Video Loss Function When an object moves into motion detection area, alarm will be triggered. You can adjust sensitivity level to suit the needs of your actual application environment. System can convert alarm signal triggered by external sensor into signal identified by system. When Hard Drive is not detected (HDD damage, power supply malfunction), or HDD auto-overwrite is off, and free space is not enough, an alarm will be triggered. Sends alarm when DVR cant receive video signal (such as camera damage, cable broken or damaged or power supply malfunction). Record Alarm setting Please refer the below matrix: stand for only alarm but no record; AMR stand for alarm record; NLR stand for normal record; and NOR stand for no record. Once alarm is triggered, alarm icon will occur, and when many alarms are triggered, alarm remarks will occur on the screen. Record Mode Record alarm setting Alarm icon Record after power on Scheduled recording AMR NLR Manual Record NOR MD alarm AMR AMR NLR NLR Alarm I/O triggered alarm AMR AMR NLR NLR mode HDD loss, HDD Full Video Loss Video Loss In the record mode, [ ] icon or [ ] icon will appear on the screen. But when [ ] icon and [ ] icon appear on the screen that means a motion alarm is triggered. When [ ] icon appears on the screen, that means HDD alarm has occurred. DS1093-038 84 4.2.9 EMAIL SETUP On the [EMAIL] screen, when Enabling [Email] option, you can set its parameters. Click [Email Set] to enter into the interface. SSL: is a security link transport protocol. You can encrypt your communication info (including your email) using SSL to prevent hackers from monitoring your email or communication info and even your password. Generally Gmail.com server set SSL to [On], and other mail server to [Off]. If your setting is still not right, please contact the web site where you have applied for your email box to get SMTP port and SSL of mail box. SMTP Port: indicates sender port of SMTP server. Generally the SMTP port value is 25, but there are exceptions, for example, SMTP port of G-mail server should be 465. SMTP server: indicates server address you use. Sender email: indicates senders email address. The email address should be consistent with the server you use. That is to say, when you use email address [email protected], the according server should be smtp.gmail.com. Receiver address: indicates receivers email address. The email address is used to receive image transmitted from motion detection alarm of DVR. Please clear the images you have received as soon as possible to avoid overloading your email account. Interval: it is possible to set the time that DVR spends in order to send E-mail. DS1093-038 85 Explanation: When configuring the messages sent via e-mail (Main menu Devices Alarms), to ensure the correct operation it is suggested to configure a user account (that is sender address and password) with the same address as the SMTP Server. For example, if an address like [email protected] is used, the SMTP must be smtp.dominio.it. 4.2.10 PTZ SETUP Enter into [Main menu Device PTZ Setup] to select the channel you want to control and set PTZ protocol (Pelco-D or Pelco-P), Baud Rate (1200, 2400, 4800, 9600), Stop bit (1, 2), Parity Check (None, Odd, Even Mark Space), Address Code and Cruise status respectively. Please note the above mentioned channel settings must match with the settings of the PTZ camera. 4.2.11 MOBILE The DVR is currently compatible with mobile phones running Andriod, Windows Mobile and Symbian operating systems on 3G networks. Details access methods please refer to separate Mobile phone Access Instruction. Click [Main menu Device Mobile] to enter into [Mobile] menu. NOTE: In order to login as admin, set to Mobile phone the default password 123456 or the same customized password set in Mobile DVR Screen. 4.2.12 MOBILE VIEWERS ACCESS INSTRUCTION The DVR is currently compatible with mobile phones running Windows Mobile, Symbian, Iphone, Blackberry and Androids operating systems. Below are these Mobile Viewers installation procedures. 4.2.12.1 Windows Mobile 1) First you need to copy a program named as Aseesetup.CAB that is included on the CD provided by the DVR to the mobile phone. 2) 3) 4) 5) Click the program Aseesetup and choose an installation location after the initialization. Click [Install] button to start the installation processing. After finishing the installation, click the icon named Asee to run the program. Now you are allowed to enter into the program screen. DS1093-038 86 [CH]click [Pull-down] menu to select the channel you need to monitor. [Connect]click the button to enter into the live image of the channel you selected [Setup]click the button to allow you set parameter of the mobile viewer. Function buttons in the bottom from Left to right in turn are:[PTZ Direction (left, right, up, down)]: Area Selection (ZOOM+, ]: Iris (I+,I -) )]: [Snapshot]. Note: Please firstly make sure you have right PTZ parameter setting on DVR, then you could control PTZ camera through your mobile phone. The captured images will be saved to the defaulted path (Explorer Program Files Moveeye Photo file). If you use this program first time or need to change parameter settings, please click [Setup] button to enter into the window. Users Name: herein indicate the user name which have been set on DVR-[Mobile Set] menu. Password: herein indicate the password which has been set on DVR[Mobile set] menu. Server: indicate public IP address connected to DVR or dynamic domain name used by DVR Port: indicate the server port which has been set to your DVR. Notes: Enter DVR name (User defined) Click ok to confirm the above setting , and system will return back the previous menu. Auto-connect: When tick-selecting [Auto-Connect] option, the mobile phone will be auto-connected to the DVR. History: Clicking the button will allow you auto-record all the log histories. Click any area of screen to toggle display modes between normal view and full screen. 4.2.12.2 1) Symbian System Mobiles First you need to copy a program named as Asee_AL_3rd 0723.sisx or SeeAL5th0723.sisx that is included on the CD provided by the DVR to the mobile phone (shown as Picture 7). Generally the program is defaulted to save into mobile storage card. rd rd th Note: See_AL_3 _0723.sisx apply to S60 The 3 edition operate system Mobile, and See_AL_5 _0723.sisx to S60 The 5th edition operate system Mobile 2) 3) 4) 5) 6) Click the program Asee_AL_3rd _0723.sisx to start the installation. Choose Phone memory or SD card as an installation location. Click [Continue] button to make sure the application program you installed may visit network or dial phone when popping-up the dialog box. After successful installation system will prompt you Installation finished. If the program is installed into SD card, please enter into [Application] menu to find [Asee] icon. DS1093-038 87 7) Click [Asee] icon to run the program, and then you will enter into the interface. (Function buttons in the bottom in turn are:) 1 CH 1; CH 2; CH3; CH 4 2 PTZ Direction :left, right, up, down PTZ Lens control: Focus+/-, Zoom+/- and Iris+/- from left to right in 3 turn. Play Bar: Play/Pause, Full screen, Snapshot, Setup, Next CHs 4 Group and Quit button from left to right in turn Note: The snapshot images will be saved to the defaulted path-File manager\Images. 8) For first time using or Need some change on the Parameters, click the Setup button you will enter into the window; or, Click [Option] [Play] button to enter into live display. IP: herein indicate public IP address connected to DVR or dynamic domain name used by DVR. Port: Enter the Mobile Port No. Of the DVR User Name: herein input the user name which has been set on DVR-[Mobile Set] menu. Password: herein input the password which has been set on DVR-[Mobile Set] menu. Channel: select one channel you want to monitor Alias: Enter DVR name (User defined) Option: include play and history list 4.2.12.3 1) 2) 3) 4) 5) Iphone Visit Apple website http://www.apple.com/itunes/ to download & install the iTunes program. Run the iTunes program, and then click the Menu- [Store Search] to enter into its sub-menu. On the [Search] mode, enter the characters Asee to search the program Asee. Download and install the Asee program. After finishing installation, [Asee] icon will be displayed to mobile phone interface. DS1093-038 88 7) 8) 9) 10) Channel select PTZ Direction ( left, right, up, down) Area Selection: ZOOM+, ZOOMFocus: (focus +, focus-) Aperture: I+,I -). 12) Function buttons from left to right in turn are: Play/Pause, Snapshot, Setup, Next CHs Group and Help. NOTE We have introduced Monitor point setting in the previous Sybian and Windows system setting. The setting method for Iphone is same as the Sybian and Windows system. Please refer to the previous section. Enter DVR name (User defined) Enter IP address of the DVR Enter the Mobile Port No. Of the DVR Enter user name of DVR Enter password of DVR Click the button to preview History record 4.2.12.4 8 9 10 11 12 13 14 Blackberry mobile Install Blackberry Mobile software: Download and install the Blackberry Desktop Manager on your PC; Connect your Mobile to your PC via USB cable; Open the Desktop Manager; Choose [Application Loader ] from the Main Menu; Click [Start] Button on the Add/Remove application menus; Click [browse] button and tick-select [Asee.alx] file; Click [Finish] button to end the installation process . DS1093-038 89 3 4 Set and run Blackberry mobile viewer: The Blackberry viewer will be installed to the [Downloads] directory. Enter into the [Downloads] directory, and then click the [Asee] icon. The blackberry mobile viewer has two versions, including RTSP and MP4: RTSP: allows you proceed relative operation through screen icon, and the version is applicable to WIFI connection. MP4: allows you proceed relative operations through mobile keyboard, and the version is applicable to WIFI and 3G connection but not support touch-screen mobile. 1 ---Connect/Disconnect 2 ---Full screen 3 ---snapshot 4 ---setup 5 ---help 6 ---Next CHs Group 7 ---PTZ Control 5 Enter the Monitor DVR info in the below Setup Menu: Name: allows you set devices title Address: allows you enter device IP address Port: allows you enter device port User ID: allows you enter user name you set. Password: allows you enter password. Network Type: allows you select network type, including WIFI or 3G. IP: allows you enter device IP address and Port number User name: allows you enter user name you set. Password: allows you enter password. Default camera : allows you select defaulted camera. Network Type: allows you select network type, including WIFI or 3G. DS1093-038 90 3.3 Click [Save] or [Enter] respectively to apply the parameter and return back the previous menu. 3.4 Click [History] or [List] button to open the history record shown as. 3.5 Highlight any [History] record and right-click the mouse to open/edit/delete the record. 6 Click [Next Page] icon to search [Channel] option, and then choose the channel you want to display. 7 Click [Full screen] icon to enter into full screen display mode, again click the [Trackball] button of mobile to quit the full screen mode. Click [Next page] button to find the [PTZ Control] icon and enter into the mode. Now you could freely control your PTZ camera via mobile phon 8 6.1 Select [I+]/[I-], [Z+]/[Z-] or [F+]/[F-] 6.2 Click the middle key of mouse 6.3 Loose the middle key to stop the PTZ operation. 9 For the MP4 version, click [Help] button to view the softwares Help instruction. Please perform the relative operation according to the below keyboard shortcuts. DS1093-038 91 10 Click [Close] button to exit the program Note: upgrade the blackberry operate system to 5.0 or upper version. 4.2.12.5 Androids Mobile Please make sure the software environment support on your Android Mobile, such as Apkinstaller. 13. Make sure your mobile have been connected to network and could download the software. a) b) c) Enter into [Program] option and highlight [E-market] icon. Enter into the [E-market] interface. Click [Search] icon on the upper right corner and input Apkinstaller, to search the Apkinstaller program. d) e) Highlight and install the program you searched. Follow up the installation steps. DS1093-038 92 f) g) h) i) j) Enter into [Program] file and click [Apkinstaller] icon. Find the Asee.apk file you want to install. Click the software to install to your phone shown as. Enter into [Program] option to click [Asee] icon. Enter into [Asee] main interface. k) Setting Menu 1 3 5 6 CHs Select 2 PTZ Direction Zoom+/4 Focus+ Iris +/Function buttons from left to right in turn are: Play/Pause, Snapshot, Setup, Next CHs Group and Help. Address: Enter the IP address of the DVR Port: Enter the Mobile Port No. Of the DVR Device Name: Enter DVR name (User defined) User ID: Enter the Users Name Password: Enter the Users Password History: Click the [History] button to preview History record Enter the testing device infos l) m) Help Instructions. History Record and auto-record info DS1093-038 93 4.2.13 MOTION DETECTION Click [Main Device Motion] to enter into the [Motion Detection] menu. The [Motion detection] Menu has three sections, including Channel Status, Sensitivity and Motion area. Channel STATUS: This option allow you enable motion detection on any channel. SENSITIVITY: This option allows you to set sensitivity level of motion detection from 1 to 4 with 4 being the most sensitive. MD AREA: This option allows you select the area you want to be sensitive to motion. The channel is separated into a 13X10 area. When any object moves into the motion detection area, and the area where the object is located is displayed in red recording will be triggered. In the semi-transparent area the motion detection is off. 4.2.14 SET SERIAL (only for 1093/016 DVR Model) When Multiple DVRs are controlled by keyboard, user needs to set communication protocol. Baud rate: set baud rate of serial protocol Data Bit: Set data bit. Stop Bit: Set stop bit Check: allow you set [Check] to none. 4.2.15 SYSTEM The [System] Menu includes the below sub-menus: Time Set, User Password, Audio/Video Setting, Language select, System Info and System Maintain. After entering into the [System] menu, you can freely configure the system parameters to meet your needs. 4.2.16 TIME SET On the [System] menu screen, click [Time] icon to enter into [Time set] menu. Now you are allowed to modify system date, time, date/time format and time zone, setup DST (day saving time) status and mode. DS1093-038 94 4.2.17 PASSWORD Set the system password if you want to use one. The new passwords will be available after clicking [APPLY] button. If User Level is selected, it is possible to set the User Permission pressing the relative button.. Note: DVR supports max. 7 users (i.e. admin + 6 users) The default password for administrator/user is customizable. When you set Password Enabled to ON firstly, you can setup a user password and administrator password respectively. The password is consist of digital number 0~9 and supports up to 6 characters. 4.2.18 VIDEO/AUDIO SETUP Click [Main Menu System Video/Audio Setup] to enter into Video/Audio setup screen. \ System: allow you set Camera system (PAL, NTSC). Monitor: available only for Sch. 1093/016 It is possible to switch between 2 Options: Main Video Output or SPOT Video Output. RotateTime: Allow to set the Poll time. Select a value in the following range 0÷300 sec. View Setup: available only for Sch. 1093/016 the option allows you setup display position of any channel in a multi-screen grid. When this function is enabled, Rolling function is not available. VGA Resolution: Your options are 1024×768;1280×1024; 1440×900. Video output: includes the following options: VGA: it is possible to upload the Menu Control settings when DVR is powered on for VGA Video Output. VOUT: it is possible to upload the Menu Control settings when DVR is powered on for Main BNC Video Output. AUTO: it is possible to upload the Menu Control settings automatically when DVR is powered on for VGA or Main BNC Video Output, based on Monitor Type. Volume control: allow you set volumes default value. Margin: it is possibile to set the Margin on Monitor. Privacy Zone: it is possible to set the Privacy Masks. Note: After changing saved it, press [APPLY] button, exit menu, reboot the Device and the modifications will have effect. DS1093-038 95 Privacy Zone Privacy Zones (up to 4 per channel) can be enabled/disabled by selecting ON/OFF for each channel. It is possible to select, for each camera, 4 privacy zones that can be moved, enlarged or reduced according to requirements (SETUP). 4.2.19 LANGUAGE Enter into [System Language] menu to select the language you want to use on the DVR and click [APPLY] button. The selection will be available after system Auto restarts. 4.2.20 SYSTEM INFORMATION Enter into [Click [Main Menu System Info] to preview system info, including Device Name/Device ID/Device Type/Device SN, Software (firmware) version and MAC address etc. DS1093-038 96 4.2.21 MAINTAIN Enter into [Main menu System Maintain] menu to reset the DVR parameters to factory default settings, update system software (firmware), and set system automaintenance. Auto Maintain: When opening auto-maintain function, you can setup system to restart regularly. System Update: Copy the file named with dvrupgrade to U flash drive; and connects U flash drive to USB port of DVR, and then click [System upgrade] menu. Default: Click the [Default] button to reset the DVR parameters to factory default settings. Reboot: Click the [Reboot] button to restart the device manually. Safe power off: the button allows you cut the power after making sure the DVR shutdown. Note: 1 2 3 Please not cut power and unplug U flash disk during the upgrade. Please manual recover ex-factory default value after restart. Please return back to live screen and have no any operation after setting auto maintain time, otherwise, the auto-maintenance function will be not effective. DS1093-038 97 4.3 MENU LOCK Considering a system safety feature you can click [Menu Lock] menu to lock menu when leaving the DVR. If you want to login to the DVR, you would input device code and password. Common user only has the authority to search recordings, but Administrator has full authority over Main Menu operations. Any user can start and close manual record on the non-record mode. 4.4 SPLIT MODE The model displays 16 live images in the sequence of single, 4-split, 9-split and 16-split modes. If you clicking the right key in 4-split mode: Channel (CH1~4) Channel (CH5~8) Channel (CH9~12) CH13~16 16-split mode If you clicking the right key in 4-split mode: Channel (CH1~4) Channel (CH5~8) Channel (CH9~12) CH13~16 If you clicking the right key in 9-split mode: Channel (CH1~9) Channel (CH10~16) If in the 16-split mode, the display show as below: Channel (CH1~16) DS1093-038 98 4.5 PTZ CONTROL We introduced setting PTZ parameters previously in chapter 5.2.6.3. Here we will discuss how to operate PTZ controls. Pop up the Pop-up Menu to highlight and enter into [PTZ control] menu. Now user can control the camera with Pan, Tilt and Zoom capabilities. Click [Zoom-/+] button to zoom in / out the image; Click [Focus -/+] button to focus the image; Click [Iris -/+] button adjust iris to open or close. Cruise set Open auto cruise function on PTZ setting menu if you want to setup cruise function (system default: off), and set up cruise channel, cur point and total quantity and stop time etc. Channel select: select the channel with the PTZ camera Total: set up pre-set bit quantity Cur Point: indicates starting point cruised. System default point is 01. Stop time: sets the stop time at each point GOTO: allow you go to a specific preset point. Set: allow you set a set of specific preset points of a PTZ camera. 1. Select a camera you desire to set a preset point; 2. Adjust the camera in a desired direction 3. Click [Set] to set the point as preset point 4. Click [Save] to save the preset point 5. Follow the above step to add one more preset point. Clean: allow you delete one selected preset. Note: Up to 254 presets bit for the model can be stored. However, actual preset quantity differs depending on PTZ performance. 4.6 DIGITAL ZOOM This option allows to select a channel in full screen mode and zoom in on the image in LIVE mode. By right clicking on the channel displayed in full screen mode, it is possible to select the option DIGITAL ZOOM. Now it is possible to select the area to be enlarged with the mouse, by keeping the left button pressed and dragging the area. On the bottom right the user can see in a window the whole channel images with the area to be enlarged, selected in a red box. To disable this function, right click. DS1093-038 99 4.7 PIP MODE PIP display is one kind of live display mode, including 1x1 display modes and 1x2 display modes. 1x1 display mode 4.8 VIDEO SEARCH 4.9 MUTE 1x2 display mode Click Pop-up Menu to quickly enter into [Video Search] Menu. We have introduced how to search and playback video record in previous section. Details please refer to section 5.2.4 Video Search. You can control volume open or close by clicking the [Mute] option. 4.10 MANUAL RECORD Double-Click Pop-up Menu to enter into the [Record] option. Now you can start manual record function, or you also can click [Rec.] button on the Front panel or Remote controller to activate manual record. Please stop record manually once you activate manual record. 4.11 STOP RECORD To stop record quickly, please enter into pop up Menu to click [Stop] option. 4.12 START AUTO-SEQUENCE When entering into [Start sequence] menu, auto-sequence will be conducted at the set interval. 4.13 START CRUISE If multiple presets are specified, the PTZ camera will automatically move to all of presets at a time whilst user activates [Start Cruise] options. DS1093-038 100 4.14 MONITOR SELECTION This Function allows to control the OSD Menu switching between BNC video Output and VGA Video Output. It is possibile to switch the Osd Menu on video Output, using Mouse(i.e. selecting the relative Video Output from Pop-up Menu), using Remote Control (i.e. Selecting 0 Key) or DVR front Panel (i.e. see the instructions below). Sch.1093/004A and 1093/008: In order to switch Menu Control on Video Output, press and hold REW Button on Front Panel and release it after audible warning is heard. Sch.1093/016: In order to switch Menu Control on Video Output, it is needed to select the following sequence button on Front Panel: MENU/ESC UP Button Enter Button NOTE: Pay attention to press the buttons one time, if te sequence is failed reboot the DVR and waiting for the completed DVR Power cycle, after that repeat the Procedure above. DS1093-038 101 4.15 PLAYBACK PLAYER 1 2 Copy backup file to your PC; Open Playback Media Player, and then click [+] button to open the file. 3 Select the playback file you desired from the file Note: Please select the file with *.264 format or *.nvr. The record file backed-up by U flash disk or removable disk is with *.264 format, and DVD Recorder with *.nvr format. 4 Open backup file Double-click the record event at the right side to start record file playback. DS1093-038 102 The button functions from left to right in turn are as follows: [Play] button: start playing record file [Pause] button: pause the record file playback [Stop] button: stop the record file playback [Rewind] button: rewind playing the record file at X2, X4, X8 and X16 speeds. [Forward] button: forward playing the record file at X2, X4, X8 and X16 speeds. [Frame by frame]: Play the record file frame by frame. [Snapshot]: click the button to capture the record image and save the image to a specified position. [Add]: click the button to add one record file. [Del]: click the button to delete one record file. [Del all]: click the button to delete all the record file in the event list.ù+ DS1093-038 103 4.16 WATERMARK SOFTWARE PLAYER This Software allows the Video Playback with enabled Watermark function. Install the Software and launch it. Here follow the instructions in order to play a stored video into PC or USB DVR Backup: Click OPEN Button and select video file. Click the PLAY Button. Click WATERMARK Button in order to enable/disable Watermark function displayed as for picture above. It is possible to use the others Player functions (i.e. Pause Stop F.F/Fast Forward Slow/Slow Playback Next Frame/Frame By Frame 1X/Playback speed). DS1093-038 104 4.17 PLUG-INS DOWNLOAD AND INSTALLATION FOR WEB LOGIN 1. 2. 3. Open your web browser and input the IP address and web port of DVR; If your computer is connected to internet, you will be prompted to download and install ActiveX Control; You may have Windows Security Alert that attempts to block this with the windows Firewall. In that case, click [Unblock] button to continue your installation processing. 4. The installation is complete; you will enter into the interface and activate some ActiveX control. Reminder: If the plug-in program is not downloaded successfully, please check if your browsers safety level or firewall setting is too advanced. Also refer to section 5.2.3 Network Setup to make sure network configuration is correct, ports are forwarded correctly, and ActiveX is enabled Note: Cause DVR sytem update, If you want to delete old IE webcam at the computer which already login before, input the command characters: regsvr32/u HiDvrOcx.ocx on Start Menu Run 4.18 URMET NETVIEWER LOG-IN After finishing plug-ins installation or Client Software Installation, the Login Urmet Netviewer Screen is displayed. Please enter password and click [Log-in] button, and now you can view DVR remotely through the Web Client. Please note default password is empty. System allows Administrator to set new password as per instructions in previous section [Password set] menu. It is possible to select the Network Type (i.e. Main Stream or Sub Stream). Login as Admnistrator can setup every parameter ; Login as user only can setup live, playback, logout, but can not setup other parameters. 4-CH allow respectively five users on-line simultaneously, and 8-CH / 16CH DVR allow three users DS1093-038 105 4.19 WEB AND URMET NETVIEWER CLIENT SOFTWARE INTERFACE After successful logging-in web client, you will enter into the Live interface and simultaneously Audio / Video will be automatically connected well. 4.19.1 MENU BAR Menu bar include [Live], [Playback], [Remote setting], [Local Setting] and [Logout] option and [Language select] option on the upper-right corner. 4.19.1.1 Live screen After PC Web Client logging in, system will be defaulted to enter into Live mode and connect audio. User can set record manually via shortcut key, open or close image preview through Play control bar, and select display modes, including single CH mode, 4split mode, 9-split mode and 16-split mode. Left key Click the icon of one channel to display the channels image Click the icon to start manual record. save path is setup on local setting Live display Key function: LIVE DISPLAY KEY FUNCTION 1. 2. 3. 4. 5. On/Off Live display: clicking the button will open or close Live display. Snapshot: clicking the button will capture the live image from one selected channel and save the image with *.bmp format to PC. Record: clicking the button will remotely record the Live images and automatically save the recording to a specified position. Channel display mode: the icons stand for the Single channel display, Quad display, 9-split mode, 16-split mode and full screen mode respectively. If want to play Audio, click the channel that you want. Volume control: clicking the icon to adjust sound volume. DS1093-038 106 PTZ Control 1) 2) 3) 4) 5) 6) 7) 8) 9) PTZ direction control: the buttons allows you control PTZ moving direction. Zoom, Focus and Iris control: the buttons allows you control PTZ moving direction, zoom, focus and iris. Preset bit control Pan & Tilt Pos: indicates starting point you desire to cruise firstly. Set: allow you set a series of specific preset points of a PTZ camera. (Detailed settings please refer to section 5.5 PTZ control). Go to: On the Live mode, enter preset point No you want to display and click [Go to] button, system will quickly go to the specific preset point. Load: allow you load the last preset point you set. Save: allow you save the preset point you set. Cruise: allow you enable/disenable the [Cruise] function. Clean: allow you delete the current preset point. DS1093-038 107 4.19.1.2 Playback Click [Playback] option to playback record files from remote DVR by selecting relevant date, channel and type. Double-click any file listed or highlight any file and click [Play] button to play the selected recording file. Also can select channel and file type. Click [download] to download and save selected recording file to specified saving path. It is only possible to download the file after that the playback is stopped. Picture 6-4 You can set [Save Path] option on the [Local Setting] menu. The [Play control] bar is located at the bottom of the interface, include [Play], [Pause], [Stop], [Slow Play], [Fast Play], [Next Frame] and [Volume adjust] option. The backup file will be defaulted to save as AVI format. 4.19.1.3 Remote setting Click the [Remote setting] option and then enter into the interface. Now you are allowed to perform the parameter settings of Display, Record,Alarm, Network ,Device and System DS1093-038 108 Channel Parameters Default enter channel setting menu, you can setting remotely and save on the DVR: Click [Copy Setting to] option on the right-bottom corner of the interface to copy all the remote setting to any channel showna bove. DS1093-038 109 Record setting Enter into [Record Setup] option to set record control parameters, including record enabling, audio enabling, Pack time, Record mode and Frame,Quanlity, Resolution etc. If Frame rate is adjustable, you can setup Picture Quality and Frame rate for each chanel. DS1093-038 110 Select [Schedule] mode in record setting then can setup record mode on the form which are the same method on DVR menu Alarm Parameters Click [Alarm Parameters] option to enter into the Alarm Config interface, which include I/O Status,Video cover, Video loss, HDD loss ,HDD space, Prerecord and Alarm time. Also can setup Email alarm and Full screen enlarge when in Alarm. DS1093-038 111 Network Parameters Click [Network] option to enter into [Network setting] menu, including [Basic character], [PPPoE], [DDNS], and [Email set] DS1093-038 112 DS1093-038 113 Device Parameters Click [Device] option to enter into the interface. Now you can check Hard disk info, PTZ Parameters, Mobile info and Motion. Click[PTZ Parameters ] to setup PTZ control the setting are same with DVR menu. DS1093-038 114 Mobile phone setup: the same with DVR menu setup. ClickMotion Detectionto setup each channel parameters: including Sensitivity and Motion Area. The sam with DVR menu setup. DS1093-038 115 System management Extend [System] option to enter into sub menus System setting, User Authority , DST(Daylight saving time) and DVR information. DS1093-038 116 Click [User] to setup Authority, Log-in name and password for different user. DST setting. DS1093-038 117 DVR system information. 4.19.2 LOCAL SETTING The option allows you set [Record Save Path], [snapshot Save Path] and [File Save Path]. Note:Record save path --- Save file of remote manual record from netwok File save path --- Save download recording file from DVR 4.19.3 LOG-OUT Click [Logout] option to return back Log-in Interface DS1093-038 118 APPENDIX: ACTIVE X INSTALLATION If the installation of an ActiveX component is required, follow the procedure below. Before performing the connection to the PC, activate IE protection configuration, following the procedure below: Double click the icon to open Internet Explorer browser. The following display will appear (or, however, the default page). Double click the icon . The screen Internet Properties will appear. Select the area Trusted sites. Click the item Sites . DS1093-038 119 The following screen will appear: Add the device IP address in the field. Add this website to the zone. Click the button Add. The following confirm screen will appear. NOTE Do not select the item: Require server (https:) verification for all sites in this zone. Click repeatedly OK to finish. Install Active X. DS1093-038 120 5 SPECIFICATIONS (PAL FORMAT) Feature Characteristics 1093/008 1093/004A Compression formats Video Inputs/outputs Audio I/O 1093/016 Video: H.264 / Audio: 8kHz*16bit ADPCM 4-CH BNC Input/ 2-CH BNC Output 1 CH VGA Output 4-CH RCA Input / 1-CH RCA Output 8-CH BNC Input/ 2-CH BNC Output 1 CH VGA Output 8-CH RCA Input / 1-CH RCA Output 16-CH BNC Input/ 2-CH BNC Output 1 CH VGA Output 16-CH BNC Input / 2-CH BNC Output Display resolution D1: 704×576 Frame rate Single channel: 25fps Recording resolution CIF(352*288), HD1(704*288), D1 (704*576) Recording frame rate Recording modes 50 fps@D1, 100 fps@HD1, 100 fps@CIF Always / Timed / Manual /Motion Detection / External Alarms 50 fps@D1, 100 fps@HD1, 200 fps@CIF Always / Timed / Manual /Motion Detection / External Alarms 100 fps@D1, 200 fps@HD1, 400 fps@CIF Always / Timed / Manual /Motion Detection / External Alarms Recorded files dimension 15/30/45/60min Sub Stream Configurable network or Software Client. NETWORK:SUB STREAM Hard Disk Interface Max 1 Sata HDD Max 2 Sata HDD Hard Disk 500 GB (default)* Memory for video backup USB pen drive / removable HD / USB CD/DVD writer / Network (AVI files) Playback modes Syncronous Playback PLAY /SLOW /FWD/Frame by Frame 4 ch. 8 ch. Watermark Yes Web / Client Software Multi - Language Yes I/O alarm Alarm types Maximum number of PC that can be connected simultaneously 4-CH alarm inputs, 1-CH alarm output 8-CH alarm inputs, 1-CH alarm output 16 ch. 16-CH alarm inputs, 1CH alarm output Motion/ External alarms / Input alarms / Video loss / HD space / HD failure 5 3 3 PDA Software Mobile Symbian 3th/5th Edition, Windows Mobile, Iphone, Android, Blackberry PTZ Control By RS485 using PELCO-D and PELCO-P protocol USB 2.0 port Support mouse Ethernet RJ-45 10M/100MB self-adaptable Interface Network protocols TCP/IP, DHCP, UDP, DDNS, PPPOE Power consumption 15W Power supply 12V / 3A Operating temperature range 12V / 3A 12V / 5A 5°C – 40°C Dimensions (width x height x depth) 340x50x220 mm 340x50x220 mm 380x50x315 mm Weight ~3 kg ~3 kg ~4 kg IMPORTANT NOTE Product specifications may be subject to change without prior notice MAX Hard Disk capacity is 1 TB. DS1093-038 121