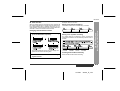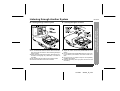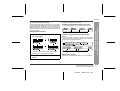
1
PORTABLE MINIDISC RECORDER
LECTEUR-ENREGISTREUR MINIDISC PORTABLE
MODEL
MODÈLE
MD-MT99C
OPERATION MANUAL
MODE D’EMPLOI
for SECL
TINSK0119AWZZ
ENGLISH
······ Please refer to pages E-1 to E-48.
FRANÇAIS
······ Se reporter aux pages F-1 à F-48.
ENGLISH
Introduction
Contents
-Introduction/Contents-
Important Introduction
Thank you for purchasing this SHARP product. For the best performance, read this manual carefully. It will guide you
in operating your SHARP product.
„ Important Introduction
„ Advanced Features
Special Notes . . . . . . . . . . . . . . . . . . . . . . . . . . . . . . . . 2
Accessories . . . . . . . . . . . . . . . . . . . . . . . . . . . . . . . . . 2
Names of Controls and Indicators . . . . . . . . . . . . . 3-4
Precautions. . . . . . . . . . . . . . . . . . . . . . . . . . . . . . . . . . 5
Changing Default Settings . . . . . . . . . . . . . . . . . . . . 32
Titling a MiniDisc. . . . . . . . . . . . . . . . . . . . . . . . . . 33-36
Editing a Recorded MiniDisc . . . . . . . . . . . . . . . . 37-39
Listening through Another System . . . . . . . . . . . . . 40
„ Preparation
„ References
Inserting a MiniDisc . . . . . . . . . . . . . . . . . . . . . . . . . . . 6
Connections . . . . . . . . . . . . . . . . . . . . . . . . . . . . . . . 7-8
Other Features and Caution . . . . . . . . . . . . . . . . . . . 41
MiniDisc System Limitations . . . . . . . . . . . . . . . . . . 42
Error Messages . . . . . . . . . . . . . . . . . . . . . . . . . . . 43-44
Troubleshooting . . . . . . . . . . . . . . . . . . . . . . . . . . 45-46
Maintenance . . . . . . . . . . . . . . . . . . . . . . . . . . . . . . . 46
Specifications . . . . . . . . . . . . . . . . . . . . . . . . . . . . 47-48
„ Basic Operation
Recording . . . . . . . . . . . . . . . . . . . . . . . . . . . . . . . . 9-12
Playback . . . . . . . . . . . . . . . . . . . . . . . . . . . . . . . . 13-14
„ Useful Features
Advanced Playback . . . . . . . . . . . . . . . . . . . . . . . 15-16
Advanced Recording . . . . . . . . . . . . . . . . . . . . . . 17-22
Recording from a Microphone . . . . . . . . . . . . . . 23-26
Checking Displays . . . . . . . . . . . . . . . . . . . . . . . . 27-28
Battery Power . . . . . . . . . . . . . . . . . . . . . . . . . . . . 29-30
Hold Function . . . . . . . . . . . . . . . . . . . . . . . . . . . . . . . 31
E-1
ENGLISH
01/4/26
99secl_E_1.fm
Special Notes
z The letters in brackets contained in the model number
indicate the colour of the product only. Operation and
specifications are unaffected.
z Audio-visual material may consist of copyrighted works
which must not be recorded without the authority of the
owner of the copyright. Please refer to the relevant laws in
your country.
Accessories
Remote Control x 1
Headphones x 1
AC Adaptor x 1
Battery Carrying Case x 1
Rechargeable NickelMetal Hydride Battery
(AD-N70BT) x 1
Connection Cable
(for analogue recording)
x1
Connection Cable
(for digital recording) x 1
Carrying Bag x 1
-Special Notes/Accessories-
z US and foreign patents licensed from Dolby Laboratories.
z The AC adaptor supplied with the MD-MT99C must not be
used with other equipment.
z When recording important selections, make a preliminary
test to ensure that the desired material is properly
recorded.
z SHARP is not liable for damage or loss of your recording
arising from malfunction of this unit.
Important Introduction
MD-MT99C
Notes:
z Parts and equipment mentioned in this operation manual other than those detailed above are not included.
z The AC adaptor may be different from the one in the drawing.
ENGLISH
01/4/26
99secl_E_1.fm
E-2
Names of Controls and Indicators
E-3
Reference page
1. 5V DC Input Socket . . . . . . . . . . . . . . . . . . . . . . . 7
2. Optical/Line Input Socket . . . . . . . . . . . . . . . . 7, 8
3. Microphone Input Socket . . . . . . . . . . . . . . . . . . 23
4. Bass/Delete Button . . . . . . . . . . . . . . . . . . . 14, 34
5. Edit/Auto Mark/Time Mark Button . . . . . 21, 26, 33
6. Display/Character Select Button . . . . . . . . . 27, 33
7. Mode/Charge Button . . . . . . . . . . 10, 16, 17, 29, 32
8. Record/Track Mark Button . . . . . . . . . . . . . . . 9, 21
9. Volume/Cursor/Fast Forward/
Fast Reverse/Recording Level/
Name Select Button . . . . . . . . . . . 9, 14, 15, 33, 34
10. Play/Pause Button . . . . . . . . . . . . . . . . . . . . . 10, 14
11. Stop/Power Off/Hold Button . . . . . . . . . . 10, 14, 31
12. Enter/Fast Play/Synchro Button. . . . . . . 16, 19, 33
13. Remote Control/Headphones/
Line Output Socket . . . . . . . . . . . . . . . . . . . . 13, 40
14. Open Lever. . . . . . . . . . . . . . . . . . . . . . . . . . . . . . . 6
15. Battery Cover. . . . . . . . . . . . . . . . . . . . . . . . . . . . 29
-Names of Controls and Indicators-
Important Introduction
„ Main unit
ENGLISH
01/4/26
99secl_E_1.fm
MD-MT99C
„ Remote control unit
Reference page
1. Headphones Socket . . . . . . . . . . . . . . . . . . . . . . . 13
2. Bass/Delete/Track Mark Button. . . . . . . . 14, 21, 34
3. Volume Down/Cursor Button. . . . . . . . . . . . . 14, 34
4. Volume Up/Cursor Button . . . . . . . . . . . . . . . 14, 34
5. Hold Switch. . . . . . . . . . . . . . . . . . . . . . . . . . . . . . 31
6. Play/Pause Button . . . . . . . . . . . . . . . . . . . . . 10, 14
7. Fast Reverse/Recording Level Down/Name Select
Button . . . . . . . . . . . . . . . . . . . . . . . . . . . . . 9, 15, 33
8. Fast Forward/Recording Level Up/Name Select
Button . . . . . . . . . . . . . . . . . . . . . . . . . . . . . 9, 15, 33
9. Stop/Power Off Button . . . . . . . . . . . . . . . . . . 10, 14
ENGLISH
01/4/26
99secl_E_1.fm
Important Introduction
Reference page
1. Level Meter . . . . . . . . . . . . . . . . . . . . . . . . . . . . . . . 9
2. Record Indicator. . . . . . . . . . . . . . . . . . . . . . . . . . . 9
3. Long-play/Recording Mode Indicator. . . . . . 10, 17
4. Monaural Mode Indicator. . . . . . . . . . . . . . . . . . . 17
5. Repeat Indicator . . . . . . . . . . . . . . . . . . . . . . . . . . 16
6. TOC Indicator . . . . . . . . . . . . . . . . . . . . . . . . . . . . 10
7. Synchro Recording Indicator . . . . . . . . . . . . . . . 19
8. Disc Mode Indicator
9. Disc Name Indicator. . . . . . . . . . . . . . . . . . . . . . . 27
10. Track Name Indicator . . . . . . . . . . . . . . . . . . . . . . 27
11. Remaining Recording Time Indicator. . . . . . . . . 27
12. Total Track Number Indicator . . . . . . . . . . . . . . . 27
13. Fast Play Indicator . . . . . . . . . . . . . . . . . . . . . . . . 16
14. Battery Indicator. . . . . . . . . . . . . . . . . . . . . . . . . . 28
15. Random Indicator. . . . . . . . . . . . . . . . . . . . . . . . . 16
16. Track Number Indicator . . . . . . . . . . . . . . . . . . . . 27
17. Character/Time Information Indicator
-Names of Controls and Indicators-
„ Display panel
E-4
-Precautions-
Important Introduction
Precautions
E-5
„ Important
„ Storing the unit
z Do not wear your headphones when you are crossing
streets or near traffic.
z Do not use your headphones whilst
driving a motor vehicle. It may create a
traffic hazard and may be illegal. Remember to obey all of the safety rules
in your area.
Avoid using or leaving the unit in the following places.
z Do not play the unit at a high volume. Hearing experts
advise against extended listening at high volume levels.
z If you experience ringing in your ears, reduce the volume
or discontinue use.
z This portable MD should only be used within the range of
0°C - 40°C (32°F - 104°F).
To avoid accidental electric shock or other possible
problems, observe the precautions listed below.
z Do not disassemble or modify the unit.
z Do not drop or subject the unit to shock.
z Do not use the unit near open flames.
z Do not spill liquid on the unit.
z Do not use an external power supply, other than the 5V
DC supplied with this unit, as it may damage it.
z SHARP is not responsible for damage due to improper
use. Refer all servicing to a SHARP authorised service
centre.
z Places exposed to direct sunlight for
many hours (especially in cars with the
doors and windows closed) or near
heaters. (The cabinet may deform,
change colour or the unit may malfunction.)
z Places exposed to excessive dust.
z Places exposed to water.
z Places where temperatures are excessively high or low.
z Places (bathrooms) where the humidity
is extremely high.
z Places with strong magnetic fields such
as TVs or loudspeakers.
z Places exposed to vibration.
z Places where sand can easily enter the
inside of the unit (beaches etc.).
z If the unit is used near radio tuners or TVs, noise and/or
picture interference may result. If you experience these
problems, move the unit away from such devices.
z It is not recommendable to put the MiniDisc into a rear
pocket, as this may damage the product when sitting.
ENGLISH
01/4/26
99secl_E_1.fm
Inserting a MiniDisc
MD-MT99C
Lift it up.
Insert a MiniDisc as shown.
Close the compartment door.
Notes:
z Do not place the MiniDisc under the holder.
Preparation
2
3
4
Slide the OPEN lever to release the compartment door.
-Inserting a MiniDisc-
1
z If any resistance is felt, do not force the MiniDisc into
the unit, as it may cause damage to the unit. If resistance is felt, remove the MiniDisc and reload it.
z The lid cannot be opened if "TOC" is displayed; refer
to the instruction on page 11.
ENGLISH
01/4/26
99secl_E_2.fm
E-6
Connections
-Connections-
Preparation
You can record your favourite CDs or tapes to MD.
E-7
ENGLISH
01/4/26
99secl_E_2.fm
ENGLISH
01/4/26
99secl_E_2.fm
-Connections-
Preparation
MD-MT99C
E-8
Recording
3
Press the
ing level.
or
button to adjust the record-
Analogue recording
Level meter indicator
-Recording-
Basic Operation
Adjust the recording level so that the maximum
sound volume from the source makes the reading
swing somewhere between -4 dB and 0 dB.
Digital recording
You can adjust the level in 1dB increments within
the range of +12 - -12dB.
1
2
E-9
Once you adjust the digital recording level, the setting remains even after the recording stops. (For
cancellation instructions, see page 32.)
Press the REC button.
Begin playback on the stereo system connected
to this portable MD.
ENGLISH
01/4/26
99secl_E_3.fm
MD-MT99C
To interrupt recording
Here you can search for the track to record.
5
6
7
Press the MODE/CHRG button repeatedly to select the recording mode (page 17).
Press the PLAY/PAUSE button to start the MiniDisc unit recording.
Begin playback on the stereo system, the output will be recorded.
Press the PLAY/PAUSE button.
z To resume recording, press the PLAY/PAUSE button
again.
z The track number will be increased by one each time
the recording is interrupted.
To stop recording
Press the /:OFF button.
z When recording stops, "TOC" appears. Whilst "TOC"
appears, the MiniDisc recorded contents have not yet
been updated.
z To prevent the new recording from being lost, it is not
possible to remove the MiniDisc whilst "TOC" is displayed.
TOC display
Notes:
z Changing the volume level whilst recording does not
affect the recording.
z You cannot adjust the bass level whilst recording.
ENGLISH
01/4/26
99secl_E_3.fm
-Recording-
Press the PAUSE button on the stereo system
to enter the playback pause mode.
Basic Operation
4
E-10
Recording (continued)
To update the recorded contents of the MiniDisc
Press the /:OFF button whilst in the stop mode.
The power turns off after recorded contents have been
updated on the MiniDisc.
-Recording-
Basic Operation
About the TOC
E-11
After any recording or editing function, "TOC" (Table Of
Contents) is displayed. To finalise the recording or editing
function, press the /:OFF button. During this process
"TOC" will flash and "TOC EDIT!" will be displayed. During any recording or editing function, the MiniDisc unit lid
is locked, and the MiniDisc cannot be removed until the
process is finalised.
Warning:
If the power is removed (Battery/AC adaptor) whilst
"TOC" is displayed, the MiniDisc unit lid will remain
locked until the battery/main power is restored and the
unit is turned on. Your new recordings or edited changes
will be lost and your MiniDisc may become unusable.
Caution:
Whilst "TOC" or "TOC EDIT!" is displayed, follow the
instructions below.
- Do not jerk or bump the unit.
- Do not unplug the AC adaptor.
- Do not remove the rechargeable battery or an alkaline battery.
- Do not subject the unit to shock.
Otherwise, tracks may not be recorded properly.
ENGLISH
01/4/26
99secl_E_3.fm
MD-MT99C
This portable MD incorporates a sampling rate converter
meaning it can record from digital radios or DAT tape
recorders.
„ Note for digital recording
You cannot copy a MiniDisc that you recorded from digital
inputs to another MiniDisc or DAT. It is prevented by the
SCMS (Serial Copy Management System). Recording
from analogue inputs is not affected.
Digital signals
Digitally recorded
MiniDisc
Cannot record
To add a recording to such a MiniDisc, slide the accidental erase prevention tab back to its original position.
„ Helpful tip when attaching a label
When attaching a label to an MiniDisc cartridge, be sure
to note the following. If the label is not attached properly,
the MiniDisc may jam inside the unit and it may not be
possible to remove it.
z If the label peels off or partially lifts
away, replace it with a new one.
z Do not put a new label on top of an existing one.
z Attach the label only in the specified
location.
ENGLISH
01/4/26
99secl_E_3.fm
-Recording-
Slide the accidental erase prevention tab, located on the
side of the MiniDisc, in the direction indicated by the
arrow.
The MiniDisc will then be protected against accidental
erasure.
„ About sampling rate converter
Basic Operation
„ To prevent recorded MiniDiscs from being
erased accidentally
E-12
-Playback-
Basic Operation
Playback
E-13
ENGLISH
01/4/26
99secl_E_3.fm
MD-MT99C
3
4
„ Volume control
Press the VOL+ button to increase the volume and the
VOL- button to decrease the volume.
Volume (0-30)
Plug the remote control into the REMOTE socket on the unit.
Insert a MiniDisc (page 6).
Press the PLAY/PAUSE button.
Playback starts automatically with a playback only
MiniDisc or a MiniDisc which is protected against
accidental erasure (Auto-play function).
To interrupt playback
Press the PLAY/PAUSE button.
To resume playback, press the PLAY/PAUSE button
again.
To stop playback
Press the /:OFF button.
If the unit is not operated for at least 2 minutes whilst in
the stop mode, the power will shut off automatically.
To turn off the power
Press the /:OFF button whilst in the stop mode.
„ Bass control
Each time the BASS button is pressed, the tone will be
switched as follows.
BASS 1
Emphasised slightly
BASS 2
Emphasised more
BASS 3
Emphasised fully
BASS OFF
Cancelled
Notes:
z If power failure occurs whilst playing a disc using the
AC adaptor, disconnect it from the wall socket. Otherwise, playback may start automatically when electricity
resumes.
z If you connect the AC adaptor without installing the
rechargeable battery, playback may start automatically. Be sure to turn off the power.
z Reduce the volume before starting to play. MiniDiscs,
compared to ordinary cassette tapes, have very little
noise. If the volume is adjusted according to your
usual expectations of noise, high volume may damage
your hearing.
z The sound escaping from your headphones may
annoy people around you. In particularly crowded
places (such as on trains or buses), reduce the volume.
ENGLISH
01/4/26
99secl_E_3.fm
-Playback-
2
Insert the headphones plug firmly into the headphones socket on the remote control.
Basic Operation
1
E-14
Advanced Playback
„ To locate the beginning of a track
To move to the beginning of the next track:
Press the
button during playback.
To restart the track being played:
-Advanced Playback-
Useful Features
Press the
button during playback.
To locate the next track:
Press the
„ To locate the desired portion
To locate the previous track:
Press the
For audible fast forward:
Press and hold down the
button during playback.
For audible fast reverse:
Press and hold down the
button during playback.
z Normal playback will resume when the
button is released.
button whilst the unit is stopped.
or
button whilst the unit is stopped.
z To skip a number of tracks at one time, press the
or
button repeatedly until the desired track number is shown.
z When you press the PLAY/PAUSE button, playback
starts from the beginning of the track.
z When the end of the last track is reached during fast
forward, the unit will enter the pause mode. When
the beginning of the first track is reached during fast
reverse, the unit will enter the playback mode.
E-15
ENGLISH
01/4/26
99secl_E_4.fm
MD-MT99C
„ Random play or repeat play
During playback, press the MODE/CHRG button repeatedly to select the playback mode.
RANDOM
RANDOM
Random play
Repeat play of tracks in random order
Press the ENTER/SYNC button whilst a MiniDisc
recorded in the monaural mode is being played.
z If a track recorded in the stereo mode is reached during fast playback, the fast playback mode will be cancelled.
z Depending on the contents recorded on a MiniDisc, it
may be difficult to hear them.
To interrupt fast playback
Press the PLAY/PAUSE button during playback.
When the PLAY/PAUSE button is pressed again, the unit
will resume fast playback.
Repeat play of a single track
No display
Normal playback
Notes:
z If the playback mode is selected whilst stopped, press
the PLAY/PAUSE button to start playback.
z When "TOC" is displayed, random play or repeat play
is impossible.
z In random play the unit will select and play tracks automatically. (You cannot select the order of the tracks.)
After all of the tracks have been played once each in
random order, the unit will stop automatically.
z During random, random repeat, or single track repeat
play, you can forward or reverse the MiniDisc only
within the track being played.
z During random play, the unit cannot find the beginning
of any track which has been played.
z Repeat play lasts until you stop the unit.
-Advanced Playback-
„ To play at double speed
1
Useful Features
Repeat play of all of the tracks
To return to normal playback
Press the ENTER/SYNC button.
ENGLISH
01/4/26
99secl_E_4.fm
E-16
Advanced Recording
„ Long-play recording
2 times and 4 times long recording
Double or quadruple time of stereo recording is possible.
1
Each time the button is pressed, the display will
change as follows.
-Advanced Recording-
Useful Features
Monaural recording
In monaural, you can record twice as long as the stereo
recording.
A track recorded in monaural can be played back in double speed, see page 16.
When a recording is paused, press the MODE/
CHRG button repeatedly to select the recording
mode.
2
Start recording.
The recording mode remains unchanged until a new
mode is selected.
E-17
ENGLISH
01/4/26
99secl_E_4.fm
MD-MT99C
Notes:
z Tracks can be recorded in stereo recording mode, 2
times long recording mode, and 4 times long recording
mode on one MiniDisc.
z In monaural recording, the sound on the right and left
channels is mixed even if the input source is in stereo.
Although you can hear the stereo sound from the
headphones, the recorded sound is monaural.
z Tracks recorded in 2 times long recording and 4 times
long recording modes cannot be played with the unit
that does not support these modes. On such a unit,
"LP" is displayed at the beginning of the track and no
sound is heard. (The operation and the display may
vary depending on the unit.)
z Tracks recorded in monaural cannot be played if
equipment does not support the monaural playback.
„ About the recording mode
„ About ATRAC
„ Caution for 4 times long recording (LP4)
The ATRAC (Adaptive TRansform Acoustic Coding) system compresses the sound data into 1/5 by cutting out
the inaudible sound. Since the sound is selected based
on psychoacoustics masking, the sound quality is not
impaired. This unit is equipped with the ATRAC3 compressing system that can reduce the sound data to 1/10
or 1/20 of its original size. By employing this system, 2
times and 4 times long recordings are enabled in stereo
mode.
Special compressing method allows the 4 times long
recording to realise long-time stereo recording. Therefore, some noise is recorded occasionally. If sound quality should be emphasised, stereo recording or 2 times
long recording is recommended.
Recording mode
Recording
time
No display
Stereo
MAX. 80 min.
LP2
2 times long (stereo)
MAX. 160 min.
LP4
4 times long (stereo)
MAX. 320 min.
MONO
Monaural
MAX. 160 min.
ENGLISH
01/4/26
99secl_E_4.fm
Useful Features
Indication
-Advanced Recording-
You can select the recording mode from stereo recording,
2 times long recording, 4 times long recording, and monaural recording. Recordable time varies depending on
the recording mode. If the tracks are recorded on an 80minute MiniDisc, its recording time changes as follows:
E-18
Advanced Recording (continued)
„ Playback sound-actuated recording
Recording automatically starts or pauses by detecting
sound from the stereo system (Synchronised recording).
4
Press the PAUSE button on the stereo system
to enter the playback pause mode.
Select the starting point for your recording and
press the PAUSE button.
Useful Features
-Advanced Recording-
5
6
Press the ENTER/SYNC button.
z "SYNC" will be displayed.
z To cancel the operation, press the /:OFF button.
7
1
2
3
E-19
Press the MODE/CHRG button repeatedly to select the recording mode (page 17).
Press the REC button.
Begin playback on the stereo system connected
to this portable MD.
Begin playback on the stereo system. Recording will begin automatically.
To interrupt recording
z When the stereo system is stopped, the unit will enter
the synchro recording pause mode. When playback is
resumed, the recording will be resumed.
z If a silence lasts for 3 seconds or more, the recording
will be paused (pause function does not work for
approximately 10 seconds after a recording starts).
When the unit receives sound again, recording automatically starts.
z A new track number is created when the recording
resumes.
Press the
or
button to adjust the recording level. (See page 9.)
ENGLISH
01/4/26
99secl_E_4.fm
MD-MT99C
1
2
During playback, press the PLAY/PAUSE button
at the point where you want to begin recording.
Press the REC button.
To cancel the operation, press the /:OFF button.
3
Press the ENTER/SYNC button.
All of the tracks and track names will be erased, following the point where the playback is paused.
4
5
Press the MODE/CHRG button repeatedly to select the recording mode (page 17).
Press the PLAY/PAUSE button.
Useful Features
You can erase a portion of a track and make a new
recording.
All of the tracks that follow the newly recorded track will
be erased.
-Advanced Recording-
„ To start recording from the middle of a track
Recording will start.
Note:
To keep a track after the point you want to make a new
recording, move the track and then make recording after
that point. (See "Editing a Recorded MiniDisc", page 39.)
ENGLISH
01/4/26
99secl_E_4.fm
E-20
Useful Features
-Advanced Recording-
Advanced Recording (continued)
E-21
„ To create your own track numbers
„ Recording tracks as a single track
You can create your own track numbers at any point.
You can record several pieces of music as a single track
by disabling the auto marker function.
Whilst recording, press the REC button at the point
where you want to create track numbers.
The track number will be increased by one.
z One track number will be added every time the REC
button is pressed.
z The BASS button on the remote control can also be
used to add track numbers.
Numbering restriction
If you try to number more than 10 tracks in certain
amount of time, "SORRY" will be displayed and the operation will be disabled.
In that case, wait until the next operation can be
resumed.
In stereo recording
Within 40 seconds
In 2 times long recording
Within 80 seconds
In 4 times long recording
Within 160 seconds
In monaural recording
Within 80 seconds
When a recording is paused or whilst recording...
Press the EDIT button.
Note:
When making digital recordings using a CD player or an
MiniDisc player, track numbers will be created automatically regardless of the setting of the auto marker function.
ENGLISH
01/4/26
99secl_E_4.fm
MD-MT99C
z When recording, if a programmed playback is performed by the source or playback is performed by
selecting tracks manually, the MiniDisc track numbers
may not be the same as on the source.
z Track numbers may not be created properly, depending on the connected stereo system.
Useful Features
1. Track numbers are created automatically during recording via the analogue connection when a silence
of 1 second or more is detected (Auto marker function). A series of tracks can be recorded as one by
disabling the auto marker function, see page 21.
2. When recording from a CD or a MiniDisc using the
digital connection, track numbers will be created at
the same points as on the CD or MiniDisc (Synchro
marker function).
-Advanced Recording-
„ About track numbers
z Track numbers may not be created in proper places,
depending on the source to be recorded from, such as
signals with noise.
z The track numbers on the playback side may not
match the track numbers recorded on the MiniDisc.
ENGLISH
01/4/26
99secl_E_4.fm
E-22
Recording from a Microphone
Useful Features
-Recording from a Microphone-
„ To record from a microphone
E-23
ENGLISH
01/4/26
99secl_E_4.fm
MD-MT99C
Insert a recordable MiniDisc (page 6).
Press the PLAY/PAUSE button whilst recording.
z To resume recording, press the PLAY/PAUSE button
again. The track number will be increased by one each
time you interrupt recording.
To stop recording
Press the REC button.
Press the
ing level.
or
button to adjust the record-
Press the /:OFF button.
To write recorded contents on the MiniDisc
Press the /:OFF button whilst in the stop mode.
Level meter indicator
Adjust the recording level so that the maximum
sound volume from the source makes the reading
swing between -4 dB and 0 dB.
5
6
Press the MODE/CHRG button repeatedly to select the recording mode (page 17).
Useful Features
2
3
4
To interrupt recording
Connect a stereo microphone to the MIC IN
socket.
-Recording from a Microphone-
1
Press the PLAY/PAUSE button.
Recording will start.
ENGLISH
01/4/26
99secl_E_4.fm
E-24
Recording from a Microphone (continued)
Useful Features
-Recording from a Microphone-
„ Sound-actuated recording (Mic Synchronised recording)
1
2
Press the
level.
or
button to adjust the recording
Level meter indicator
3
4
5
E-25
Press the REC button.
Press the MODE/CHRG button repeatedly to select
the recording mode (page 17).
Press the ENTER/SYNC button to select the recording sensitivity.
MIC SYNC H :
Recording starts when the unit detects -24 dB or more (the unit can
start recording from quiet sounds).
MIC SYNC L :
Recording starts when the unit detects -12 dB or more.
When a sound, such as person speaking, is picked
up by the microphone, recording will begin automatically.
About pause function
The unit automatically pauses when the microphone
does not pick up any sound for 3 seconds or more.
(Pause function does not work for approximately 10 seconds after a recording starts.) When the microphone
picks up sound again, recording starts automatically.
Notes:
z Whilst making a mic recording, do not connect anything to the OPTICAL/LINE IN socket on the portable
MD.
z To use a microphone, be sure it is a plug-in-power
type microphone.
- When a plug-in-power type microphone is plugged in,
the portable MD will provide power for the microphone's operation.
- If a different type of microphone is plugged in, it may
not operate properly or it may cause the unit to malfunction.
z Insert the plug firmly. If you don't, the recording will not
be made properly.
z Use a microphone with a 3.5 mm (1/8") diameter stereo mini plug.
z If the unit starts recording too often from low unwanted
noises, set the microphone input to "MIC SYNC L".
z Recording sensitivity can be changed whilst recording.
ENGLISH
01/4/26
99secl_E_4.fm
MD-MT99C
„ Track intervals
Example: Set to "5 minutes".
When recording from the microphone, track numbers will
be created automatically at regular intervals (default setting: approximately every 5 minutes). During a mic synchro recording, the unit pauses when a silence lasts for 3
seconds or more, and creates a track number.
During a mic manual recording
1
When a recording is paused or whilst recording,
press the EDIT button repeatedly.
During a mic synchro recording
If a silence lasts for 3 seconds or more, a timed auto
mark will be created 5 minutes after the previous mark is
created.
The interval between marks may vary slightly compared with the actual recording time.
2
Track numbers will be created automatically at
regular intervals.
Useful Features
Changing intervals between tracks
-Recording from a Microphone-
Timed auto marks will be created every 5 minutes.
Creating track numbers manually
Press the REC button whilst recording.
ENGLISH
01/4/26
99secl_E_4.fm
E-26
-Checking Displays-
Useful Features
Checking Displays
E-27
„ To check the elapsed time and remaining
time of the track
„ To check the remaining recording time and
the total playing time
During playback, press the DISP button.
Whilst in the stop mode, press the DISP button.
Each time the button is pressed, the display will change
as follows.
Each time the button is pressed, the display will change
as follows.
A
B
C
Track number
Track name
A
B
D
Elapsed playback time
Remaining playback time
C
Notes:
z If the disc name or the track name was not originally
recorded on the MiniDisc, "NO NAME" will be displayed.
z Remaining recording time will not be displayed with a
playback only MiniDisc.
z Elapsed playback time and remaining playback time
may be different from the actual time.
D
Total number of tracks
Disc name
Remaining recording time
Total playing time
Remaining recording time varies depending on the set
recording mode.
ENGLISH
01/4/26
99secl_E_4.fm
MD-MT99C
Whilst in the stop mode, press the
or
button to display the track number and track name.
The remaining amount of battery level is shown by the
battery indicator (
) during operation.
Track number
Track name
2
Press the DISP button to display the playing
time for that track.
Playing time
Each time the
or
button is pressed, the playing time of the previous or next track will be displayed.
z When the battery is completely discharged, the battery indicator will flash. Recharge the battery or
replace the alkaline battery with a new one.
z When the battery has run completely out, "BATT
EMPTY" will appear. Then, the power will be disconnected automatically.
Notes:
z If you use the battery which you stopped charging
halfway, "
" may appear. It does not mean that the
battery is completely charged.
z The battery indicator will not correctly display the
remaining capacity for approximately 10 seconds after
the power has been turned on.
z When the AC adaptor or a separately available car
adaptor is used, the battery indicator will not be
shown.
z The number of bars shown in the battery indicator may
increase or decrease, depending on the operation
being performed. This is normal.
ENGLISH
01/4/26
99secl_E_4.fm
-Checking Displays-
1
„ Checking the remaining amount of battery
level
Useful Features
„ To display the playing time of an individual
track
E-28
Battery Power
„ Charging the rechargeable battery
When the rechargeable battery is used for the first time
or when you want to use it after a long period of disuse,
be sure to charge it fully.
Insert the rechargeable battery.
A rechargeable battery other than the one supplied
or the optional one (AD-N70BT) cannot be charged.
2
-Battery Power-
Useful Features
1
E-29
3
Plug the AC adaptor into the wall socket, and
then insert the plug on the other end into the DC
IN 5V socket.
Press the MODE/CHRG button.
"
" will flash, and battery will begin charging.
z After the rechargeable battery is charged or used, it
will get slightly warm. This is normal.
z When the portable MD is turned on or operating, the
battery will not be charged.
ENGLISH
01/4/26
99secl_E_4.fm
MD-MT99C
Notes:
z Charge the battery within the range of 5°C - 35°C
(41°F - 95°F).
z Charging is completed if "
" does not blink when
you plug in the AC adaptor and press the MODE/
CHRG button.
z The unit can be left in the charging state after it is
completed.
Caution:
z Use the specified battery AD-N70BT only. Do not
charge a battery (nickel-cadmium, alkaline, etc.) other
than that specified.
z Do not remove the outer cover of the rechargeable battery. It may cause heat generation, fire, or explosion.
z Do not dip the battery in water, do not dispose of it in a fire, and do not take it apart.
1
2
Disconnect the AC adaptor.
Insert the rechargeable battery
or alkaline battery from the (+)
marked side.
Use a commercially available LR6,
"AA" size alkaline battery.
Notes:
z Setting the volume level to "0" whilst recording with the
rechargeable or an alkaline battery reduces the battery drain.
z When you do not use the unit for hours, remove the
battery. (The battery drains gradually even when the
power is turned off.)
z Carry the battery in the supplied case.
z This unit can be used with the AC adaptor when the
rechargeable or an alkaline battery is in the unit.
-Battery Power-
To charge the battery fully, continue charging for about 2
more hours. In this case, you do not need to press the
MODE/CHRG button. Even if the MODE/CHRG button is
pressed, "
" will not appear.
„ Using with the rechargeable or alkaline battery
Useful Features
„ About charging time
After about 3.5 hours have passed, " " will
go out. The battery charging is about 90 %
complete.
Caution:
Do not use a nickel-cadmium battery.
z If the rechargeable battery terminal is dirty, charging
may not start. In such a case, wipe off the dirt with a
dry cloth.
z Do not disassemble the battery.
ENGLISH
01/4/26
99secl_E_4.fm
E-30
Hold Function
-Hold Function-
Useful Features
The present operation condition can be kept even if other buttons are accidentally pressed in a place such as a
crowded train.
E-31
If the battery is inserted or the AC adaptor is connected,
you can set this function even when the power is turned
off.
To cancel the hold mode
Move the HOLD switch away from the safety position (the
opposite direction of the arrow).
To cancel the hold mode
Press and hold down the HOLD button for 2 seconds or
more whilst the unit is in the hold mode.
"HOLD OFF" will be shown.
If the hold function is active whilst the power is turned
off, the power cannot be turned on by mistake and the
battery will not be drained.
ENGLISH
01/4/26
99secl_E_4.fm
Changing Default Settings
With a MiniDisc inserted, press the MODE/CHRG
button for 2 seconds or more. "SET UP" will appear.
When you release the button, "BEEP ON" or "BEEP
OFF" will appear.
2
3
4
Press the
or
button to display the menu.
Press the MODE/CHRG button to switch items.
Press the /:OFF button.
You can eliminate the confirmation sound that beeps when
you press a button.
„ Auto play
You can make the unit not play automatically when you insert
a playback-only MiniDisc or an accidental erasure protected
MiniDisc.
„ Auto power save
When the unit is used in a place exposed to much vibration,
sound skipping can be decreased by cancelling the auto
power save function. (Battery will drain faster.)
What is auto power save function?
During playback, maximum 40 seconds (in stereo) of
musical information is stored. Auto power save function
automatically adjusts the storage time between 5 and 40
seconds to reduce the power consumption. If this function is cancelled, the storage time cannot be adjusted. (It
cannot be adjusted even if it is operated on the battery
charger.) The storage time varies depending on the playback mode.
„ Digital recording level
"D.L MODE 1"
The digital recording level you set will be kept even after cancelling recording.
Advanced Features
1
„ Beep sound
-Changing Default Settings-
Whilst in the stop mode ...
MD-MT99C
"D.L MODE 2"
Every time you cancel recording, the level will return to [D.L
0dB].
ENGLISH
01/4/26
99secl_E_5.fm
E-32
Titling a MiniDisc
„ Creating disc and track names
Load a MiniDisc to be named. A playback only or recording prevented MiniDisc cannot be edited.
<Disc name>
Whilst in the stop
mode, press the EDIT
button to select "DISC
NAME".
-Titling a MiniDisc-
Advanced Features
1
3
Press the DISP button repeatedly to select the
type of characters.
<Track name>
Whilst in the pause
mode, press the EDIT
button to select
"TRACK NAME".
The first 3 characters in the group of the selected
characters will be displayed for about 1 second.
2
Press the ENTER/SYNC button.
4
z The unit will enter the character input mode.
5
Press the
the letter.
or
button repeatedly to select
Press the ENTER/SYNC button to enter it.
z To cancel the operation, press the /:OFF button.
Position where the next letter will be entered
E-33
ENGLISH
01/4/26
99secl_E_5.fm
MD-MT99C
When the name has been completely entered,
press the EDIT button.
"TOC" will be displayed. To write the updated
contents to the MiniDisc, press the /:OFF button.
You cannot remove the MiniDisc whilst "TOC" is
displayed. "TOC" will not disappear until the recorded contents have been updated.
Note:
One disc name and up to 255 track names can be created per disc (a maximum of 100 characters for the disc
and each track name and a total of 1,700 characters can
be entered. However, if any tracks are recorded in the 2
times or 4 times long recording mode, the number of
characters to be entered is decreased, since the information of the recording mode is stored by the track).
„ To erase a charactor
Press the VOL+ or VOL- button to move the cursor to the
character you want to erase, and then press the BASS
button.
„ To enter a space
Press the VOL+ button to move the cursor to the right.
Space
„ Characters (symbols)
A B C D E F G H
S T U V W X Y Z .
a
b
c
e
f
s
t
u
v w x
d
y
1
*
2 3 4 5
+ ,
.
6
)
/
I
J
,
/
g h i
z . ,
/
7
:
j
8 9 0
; < =
K L M N O P Q R
k
l
m n
o
p q
! " # $ % &
> ? @ _ `
'
r
(
ENGLISH
01/4/26
-Titling a MiniDisc-
8
To enter more letters, repeat steps 3 - 5.
Advanced Features
6
7
99secl_E_5.fm
E-34
Titling a MiniDisc (continued)
„ To add characters
1
Put the unit in the character input mode.
2
-Titling a MiniDisc-
Advanced Features
(Perform steps 1 - 2 on page 33.)
Press the VOL+ or VOL- button to move the cursor to the character before which you want to
add a new character.
„ Stamping titles from another MiniDisc
Before stamping
When there are 2 MiniDiscs on which the same tracks
are recorded, you can transfer the character information
(disc and track names) of the Master MiniDisc to another
MiniDisc (for stamping).
1. What is a master MiniDisc?
A recordable MiniDisc that contains tracks and character information. (You cannot transfer the information
from a playback-only MiniDisc.)
3
Select the character to add.
2. What is a MiniDisc for stamping?
(Perform steps 3 - 4 on page 33.)
4
5
6
Press the ENTER/SYNC button.
Press the EDIT button.
A MiniDisc that contains the same tracks in the same
order as the master MiniDisc. (Make sure that the total
number of tracks of the master MiniDisc and the one for
stamping are the same.)
"TOC" will be displayed. To write the updated
contents to the MiniDisc, press the /:OFF button.
You cannot remove the MiniDisc whilst "TOC" is
displayed. "TOC" will not disappear until the recorded contents have been updated.
E-35
ENGLISH
01/4/26
99secl_E_5.fm
MD-MT99C
Master MiniDisc operation
1
Insert a Master MiniDisc.
Operation of the MiniDisc for stamping
6
Load a MiniDisc for stamping.
7
Press the ENTER/SYNC button.
3
Whilst in the stop mode, press the EDIT button to
select "NAME STAMP".
Press the ENTER/SYNC button.
The unit will finish recording the character information
and enter the stop mode.
To cancel the operation, press the /:OFF button.
4
5
Press the ENTER/SYNC button again.
When the unit displays "CHANGE MD", remove the
master MiniDisc.
Note:
If the total number of tracks on the master MiniDisc does
not match that on the MiniDisc for stamping, the unit will
display "Can'tSTAMP" and turn off the power.
-Titling a MiniDisc-
2
Advanced Features
Do not mistake the Master MiniDisc for the target one.
If this happens, adjust the total number of tracks on the
newly recorded MiniDisc using the edit operation.
Remove it without turning off the power. Or, the operation will be cancelled.
ENGLISH
01/4/26
99secl_E_5.fm
E-36
Editing a Recorded MiniDisc
„ To erase tracks one at a time
1
Advanced Features
-Editing a Recorded MiniDisc-
2
E-37
Start playing the track to be erased, and press
the PLAY/PAUSE button.
„ To erase all of the tracks at once
1
Press the EDIT button repeatedly to select
"ERASE".
2
3
Whilst in the stop mode, press the EDIT button
repeatedly to select "ALL ERASE".
Press the ENTER/SYNC button.
Press the ENTER/SYNC button.
To cancel the operation, press the /:OFF button.
3
Press the ENTER/SYNC button again.
To cancel the operation, press the /:OFF button.
4
Press the ENTER/SYNC button again.
The track will be erased.
5
To erase other tracks, repeat steps 1 - 4.
All of the tracks will be erased.
Caution:
Once a track has been erased, it cannot be recovered. Check the track number before erasing it.
ENGLISH
01/4/26
99secl_E_5.fm
MD-MT99C
2
3
Start playing the track to be divided into two.
Press the PLAY/PAUSE button at the point
where you want to divide the track.
1
2
Press the EDIT button repeatedly to select "DIVIDE".
3
Start playing the last of the two tracks to be
combined, and press the PLAY/PAUSE button.
Press the EDIT button repeatedly to select
"COMBINE".
Press the ENTER/SYNC button.
Press the ENTER/SYNC button.
To cancel the operation, press the /:OFF button.
To cancel the operation, press the /:OFF button.
4
Press the ENTER/SYNC button again.
The track will be divided into two tracks, and the unit
will pause at the beginning of the second of the two
new tracks.
4
Press the ENTER/SYNC button again.
The two tracks will be combined, and the unit will be
paused at the beginning of the combined track.
ENGLISH
01/4/26
99secl_E_5.fm
Advanced Features
1
„ To combine tracks
-Editing a Recorded MiniDisc-
„ To divide a track
E-38
Editing a Recorded MiniDisc (continued)
„ To move a track
1
Advanced Features
-Editing a Recorded MiniDisc-
2
3
Play the track to be moved, and press the PLAY/
PAUSE button.
Press the EDIT button repeatedly to select
"MOVE".
Press the ENTER/SYNC button.
To cancel the operation, press the /:OFF button.
4
5
Press the
tion.
or
button to select the direc-
When a track has a name before dividing:
The two new tracks will have the same name. However, in
the "TOC FULL" condition, the second track may not be
named.
Total number of tracks that can be divided:
Each disc can hold up to 255 tracks. However, even if the
number of assigned tracks has not reached 255, it might
not be possible to make any further divisions of tracks.
To combine two non-adjacent tracks:
First, put the two tracks next to each other in the order
you want using the MOVE function. Then combine them
using the COMBINE function.
When one or both tracks to be combined have a
name:
The first track name will be used. However, when the first
track does not have a name, the second track name will
be used.
In the following cases, tracks may not be combined.
z Tracks recorded by different inputs cannot be combined.
Example:
-Digital recorded track and analogue recorded track.
-Different recording modes (stereo recording, 2 times
long recording, 4 times long recording, monaural recording).
z Tracks whose recording time is less than 12 seconds.
Press the ENTER/SYNC button again.
The track will be moved, and the unit will be paused
at the beginning of the track.
E-39
ENGLISH
01/4/26
99secl_E_5.fm
Listening through Another System
„ Listening through a car stereo
Notes:
z It is recommended that the volume level of the MiniDisc unit be set to maximum when listening through a
stereo system.
z When recording with stereo system, eliminate the confirmation sound (page 32). Otherwise, it will also be
recorded.
z The recording will be made in the analogue mode.
z Character information will not be recorded.
Notes:
z Adjust the volume of both this portable MD and a car
stereo.
z Do not operate this portable MD whilst you drive a car.
It may distract your attention and cause a traffic accident.
z Do not use any car adaptor except for the separately
available AD-CA20X.
z Remove the battery when you power the unit from the
car battery.
ENGLISH
01/4/26
99secl_E_5.fm
Advanced Features
„ Listening through a stereo system
-Listening through Another System-
MD-MT99C
E-40
References
-Other Features and Caution-
Other Features and Caution
E-41
„ Resuming auto play
„ Rechargeable battery
When you stop playback and replay the MiniDisc
without removing it, playback starts from the point
you stopped it.
z A rechargeable nickel-metal hydride battery is the only
kind that can be used. Even if the battery is not used,
you should charge it at least once every three months
because of the special quality of this battery.
z The rechargeable battery can be charged approximately 300 times.
z When the operating time is reduced to about half the
normal amount of time, even after a full charge is performed, replace the battery with a new one (ADN70BT).
z When the battery is charged for the first time or is
charged after not being used for a long period, the
operating time may be shorter than normal. The battery life will recover with normal use i.e. charging and
discharging.
z To avoid shortening the service life of the battery only
recharge the battery after it has been completely discharged.
z If the rechargeable battery is used in a cold environment, the operating time will be reduced.
z Do not carry the battery in your pocket or a bag
together with metal objects (keys, coins, jewelry, etc.).
The battery may short out and generate significant
amounts of heat.
z Do not short-circuit the terminals as they will become
very hot and will damage the battery.
z Do not drop or subject the battery to shock.
z Do not insert objects (metal etc.) into the battery compartment of this product or into the rechargeable battery.
Once you remove the MiniDisc, playback starts from
the first track.
The unit provides the following functions when you
use it with the separately available car adaptor (ADCA20X) (when the rechargeable or alkaline battery is
removed):
1. When you turn off the engine, the power of this portable MD also turns off. (It may not work with some types
of cars.)
2. When you restart the engine, playback starts from the
beginning of the stopped track.
ENGLISH
01/4/26
99secl_E_6.fm
MiniDisc System Limitations
MD-MT99C
The unit may have the following symptoms whilst recording or editing. The unit is not out of order.
"DISC FULL" or "TOC FULL" appears
even though the MiniDisc still has recording time left.
More than 255 tracks (maximum) cannot be recorded regardless of
the recording time. If the MiniDisc is recorded or edited repeatedly or
if it has scratches (recording skips scratched parts), you may not be
able to record the maximum tracks above.
The remaining recording time does not
increase even though you erased
tracks.
The unit does not count non-recorded portions that last 12 or fewer
seconds to display the remaining recording time. The time may not
increase even if you erase short tracks.
The total of the recorded time and the
remaining time does not match the maximum recordable time.
One cluster (approximately 2 seconds) is the minimum unit for recording. For example, a 3-second track uses 2 clusters (approximately 4 seconds). Therefore, the actual recordable time may be
shorter than the displayed time.
Combine function does not work.
A MiniDisc on which recording and editing are repeated may not allow the combine function.
Sound skips in fast reverse/forward.
One track is divided and recorded in separate places on a repeatedly
recorded or edited MiniDisc. Sound may skip.
A track number is created in the middle
of a track.
A track number may be created if there are scratches or dust on the
MiniDisc.
ENGLISH
01/4/26
99secl_E_6.fm
References
LIMITATIONS
-MiniDisc System Limitations-
SYMPTOM
E-42
Error Messages
ERROR MESSAGES
BATT EMPTY
z The battery has run down.
BLANK MD
z Nothing is recorded.
References
Can't COPY
-Error Messages-
MEANING
ERROR MESSAGES
Can'tSTAMP
(Check the number of tracks.)
Can'tWRITE
z You tried to record from a copy prohibited MiniDisc.
z Cannot save the TOC information correctly to a MiniDisc.
DEFECT
z The disc is scratched.
(If the recorded sound is not right, retry
recording or replace the disc with a recordable one.)
(Record using the analogue cable.)
z A track cannot be edited.
(Change the stop position of the track and
then edit it.)
DISC FULL
z The disc is out of recording space.
Er-MD (**)
z The microprocessor has reported a
system fault and the unit is out of order.
Can't READ (*) z The disc data cannot be read because
the disc or unit is damaged.
(Reload the Minidisc or replace it with another one.)
Can't REC
z Stamp function does not work.
(Replace the disc with a recorded disc.)
z You tried to record signals other than
music (such as data).
Can't EDIT
MEANING
z Recording cannot be performed correctly due to vibration or shock.
(To have it repaired, go to the distributor
where you purchased the unit.)
HOLD
z The unit is in the hold mode.
LOCKED
z You removed a MiniDisc whilst recording or editing.
(Turn off the power and remove the MiniDisc.)
NO DISC
z A disc has not been loaded.
Number or symbol appears in (*) position.
E-43
ENGLISH
01/4/26
99secl_E_6.fm
MD-MT99C
z Poor connection of the digital cable.
z No output signal comes out from the
connected unit to playback.
(Use the AC power for the connected
unit.)
z The input signal has improper sampling frequency.
NOT PLAY
z You tried to play back a track that cannot be played with this equipment.
PLAY MD
z You recorded on a playback-only disc.
POWER ?
z Improper power is being supplied.
PROTECTED
z The write protection tab of a MiniDisc
is set to the protected position.
z You tried to record on a playback-only
disc.
SORRY
z Since a track number is currently being located or updated, the unit cannot
accept your command.
(Wait for a whilst and try the operation
again.)
ERROR MESSAGES
TEMP OVER
MEANING
z The temperature is too high.
(Turn off the power, and wait for a whilst.)
TOC FORM
(**)
z There is an error in the recording signal.
(Erase all of the tracks, and then record
again.)
TOC FULL
z There is no space left for recording
character information (track names,
disc names, etc.).
Tr. Protect
z The track has been protected from being erased.
(Edit the track with the device on which it
was recorded.)
? DISC
z A disc which contains data other than
music was played.
References
NO SIGNAL
MEANING
-Error Messages-
ERROR MESSAGES
(A disc which contains nonmusic data
cannot be played.)
z There is an error in the signal recorded
on the disc.
Number or symbol appears in (*) position.
ENGLISH
01/4/26
99secl_E_6.fm
E-44
Troubleshooting
Many potential "problems" can be resolved by the owner without calling a service technician. If something seems to be wrong
with this product, check the following before calling your authorised SHARP dealer or service centre.
The unit does not turn on.
Some sounds are skipped.
z Is the AC adaptor disconnected?
z Is the battery exhausted?
z Is the battery exhausted?
z Is the unit being subjected to excessive vibration?
References
-Troubleshooting-
z Is the unit in the hold mode?
z Has condensation formed inside the unit?
z Is the unit being influenced by mechanical shock or by
static electricity?
The MiniDisc cannot be ejected.
z Has the track number or character information been
written on the disc yet?
z Is the unit in the recording or editing mode?
No sound is heard from the headphones.
z Is the volume set too low?
z Is the remote control or the headphones plugged in?
z Are you trying to play a MiniDisc with data on it instead
of a MiniDisc containing music?
When the operation buttons are pressed, the unit does
not respond.
z Is the unit in the hold mode?
z Is the battery exhausted?
Recording and editing are impossible.
z Is the MiniDisc protected against accidental erasure?
z Is the unit connected properly to the other equipment?
z Is the AC adaptor unplugged or did a power failure occur whilst recording or editing?
z Is the unit in the hold mode?
z Is an optical signal being output from the stereo system? Read the operation manual for the stereo system.
z Is the remote control unit plug or the headphones plug
inserted firmly?
E-45
ENGLISH
01/4/26
99secl_E_6.fm
Maintenance
„ Cleaning
When this product is subjected to strong external interference (mechanical shock, excessive static electricity,
abnormal supply voltage due to lightning, etc.) or if it is
operated incorrectly, it may malfunction.
When the unit becomes dirty
Clean it with a soft cloth. When the unit is excessively
dirty, use a soft cloth dampened in water (external surfaces only).
If such a problem occurs, do the following:
1. Unplug the AC adaptor from the wall socket.
2. Remove the battery.
3. Leave the unit completely unpowered for approximately 30 seconds.
4. Plug the AC adaptor back into the wall socket and reoperate the unit.
„ Moisture condensation
When the unit has condensation inside, the disc signals
cannot be read, and the unit may not function properly.
In the following cases, condensation may form inside the
unit.
z Shortly after turning on a heater.
z When the unit is placed in a room where there is
excessive steam or moisture.
z When the unit is moved from a cool place to a warm
place.
Clean the plugs and the connecting sockets.
If the plugs or sockets are dirty, noise may be heard.
Cleaning will prevent noise.
Caution:
z Do not use chemicals for cleaning (petrol, paint thinner, etc.). It may damage the cabinet finish.
z Do not apply oil to the inside of the unit. It may cause
malfunctions.
References
„ If trouble occurs
-Troubleshooting/Maintenance-
MD-MT99C
To remove condensation:
Remove the MiniDisc and leave the unit for approximately 1 hour. The condensation should evaporate and
the unit will work properly.
ENGLISH
01/4/26
99secl_E_6.fm
E-46
Specifications
References
-Specifications-
As a part of our policy of continuous improvement, SHARP reserves the right to make design and specification changes for product improvement without prior notice. The performance specification figures indicated are nominal values
of production units. There may be some deviations from these values in individual units.
E-47
Power source:
DC 1.2 V:
DC 5 V:
DC 1.5 V:
DC 4.5 V:
Power consumption:
Output power:
7 W (AC adaptor)
RMS: 20 mW (10 mW + 10 mW)
(0.2 % T.H.D.)
Approx. 3.5 hours (90 %)
Approx. 5.5 hours (fully charged)(When using the AC adaptor included with the unit)
Width: 81.1 mm (3-7/32")
Height: 19.9 mm (13/16")
Depth: 92.4 mm (3-21/32")
172 g (0.38 lbs.) with rechargeable battery
Line/optical digital, microphone (powered by the main unit)
Headphones (impedance: 16 ohms)/remote control
Portable MiniDisc recorder
Non-contact, 3-beam semiconductor laser pickup
Stereo 2 channels/monaural 1 channel
20 - 20,000 Hz (±3 dB)
Approx. 400 - 900 rpm
ACIRC (Advanced Cross Interleave Reed-Solomon Code)
ATRAC/ATRAC3 (Adaptive TRansform Acoustic Coding), 24-bit computed type
Magnetic modulation overwrite method
44.1 kHz (32 kHz and 48 kHz signals are converted to 44.1 kHz, and then recorded.)
Unmeasurable (less than ±0.001 % W. peak)
Charging time:
Dimensions:
Weight:
Input socket:
Output socket:
Type:
Signal readout:
Audio channels:
Frequency response:
Rotation speed:
Error correction:
Coding:
Recording method:
Sampling frequency:
Wow and flutter:
Rechargeable Nickel-Metal Hydride battery (AD-N70BT) x 1
AC adaptor (AC 120 V, 60 Hz)
Commercially available, "AA" size (LR6), alkaline battery x 1
Optional car adaptor, AD-CA20X (for cars with a 12-24 V DC negative earth
electrical system)
ENGLISH
01/4/26
99secl_E_6.fm
MD-MT99C
Battery life:
4 times long
Continuous
play: Approx.
13 hours
Continuous
recording:
Approx. 10.5
hours
Continuous
play: Approx.
15.5 hours
Continuous
recording:
Approx. 13.5
hours
Continuous
play: Approx.
17.5 hours
When using a commercially
available, high capacity, "AA"
size (LR6), alkaline battery
Continuous
recording:
Approx. 3
hours
Continuous
play: Approx.
15 hours
Continuous
recording:
Approx. 4.5
hours
Continuous
play: Approx.
17.5 hours
Continuous
recording:
Approx. 7
hours
Continuous
play: Approx.
20 hours
Input sensitivity:
Recording level
Reference input
level
Input impedance
MIC H
0.25 mV
10 k ohms
MIC L
2.5 mV
10 k ohms
LINE
100 mV
20 k ohms
Output level:
Specified
output
Maximum
output level
Load impedance
Headphones -
10 mW +
10 mW
16 ohms
LINE
-
10 k ohms
250 mV
(-12 dB)
z The continuous recording time is for analogue inputs
when the volume level is set to "VOL 0".
z The continuous play time shows the value when the volume level is set to "VOL 15".
z The above values are the standard values when the unit is
charged and used at an ambient temperature of 25°C
(77°F).
z The operating time when using an alkaline battery may be
different, depending on the type and manufacturer of the
battery, and on the operating temperature.
ENGLISH
01/4/26
99secl_E_6.fm
References
2 times long
Continuous
recording:
Approx. 7.5
hours
-Specifications-
Stereo
When using the rechargeable
battery (fully charged) included
with the unit
E-48
FRANÇAIS
Nous vous remercions d'avoir porté votre choix sur ce produit SHARP. Avant l'utilisation, veuillez lire ce mode d'emploi très attentivement.
-Introduction/Table des matières-
Instructions importantes
Introduction
F-1
Table des matières
„ Instructions importantes
„ Fonctions avancées
Remarques spéciales . . . . . . . . . . . . . . . . . . . . . . . . . 2
Accessoires . . . . . . . . . . . . . . . . . . . . . . . . . . . . . . . . . 2
Commandes et voyants . . . . . . . . . . . . . . . . . . . . . . 3-4
Précautions. . . . . . . . . . . . . . . . . . . . . . . . . . . . . . . . . . 5
Modifications des réglages par défaut . . . . . . . . . . 32
Titrage d'un minidisc . . . . . . . . . . . . . . . . . . . . . . 33-36
Montage d'un minidisc enregistré . . . . . . . . . . . . 37-39
Écoute à travers un autre système . . . . . . . . . . . . . 40
„ Avant l'utilisation
„ Références
Mise en place d'un MD. . . . . . . . . . . . . . . . . . . . . . . . . 6
Raccordement . . . . . . . . . . . . . . . . . . . . . . . . . . . . . 7-8
Autres fonctions et précautions . . . . . . . . . . . . . . . 41
Limites du minidisc. . . . . . . . . . . . . . . . . . . . . . . . . . 42
Messages affichés . . . . . . . . . . . . . . . . . . . . . . . . 43-44
Dépannage. . . . . . . . . . . . . . . . . . . . . . . . . . . . . . . 45-46
Entretien. . . . . . . . . . . . . . . . . . . . . . . . . . . . . . . . . . . 46
Fiche technique . . . . . . . . . . . . . . . . . . . . . . . . . . . 47-48
„ Fonctionnement de base
Enregistrement. . . . . . . . . . . . . . . . . . . . . . . . . . . . 9-12
Lecture . . . . . . . . . . . . . . . . . . . . . . . . . . . . . . . . . 13-14
„ Fonctions pratiques
Lecture avancée . . . . . . . . . . . . . . . . . . . . . . . . . . 15-16
Enregistrement avancé . . . . . . . . . . . . . . . . . . . . 17-22
Enregistrement à partir d'un microphone . . . . . 23-26
Vérification de l'affichage . . . . . . . . . . . . . . . . . . 27-28
Fonctionnement sur les piles . . . . . . . . . . . . . . . 29-30
Fonction de maintien . . . . . . . . . . . . . . . . . . . . . . . . . 31
FRANÇAIS
01/4/26
99secl_CF_1.fm
Remarques spéciales
Accessoires
Télécommande x 1
Casque x 1
Adaptateur CA x 1
Boîtier de batterie x 1
Batterie au nickel-métalhydride (AD-N70BT) x 1
Câble de raccordement
(pour enregistrement
analogique) x 1
Câble de raccordement
(pour enregistrement
numérique) x 1
Étui x 1
Instructions importantes
z Les lettres mises en parenthèses du numéro de modèle
indiquent la couleur du produit concerné. Le fonctionnement et les caractéristiques ne varient pas selon la couleur du modèle.
z Le matériel audio-visuel peut comporter des oeuvres faisant l'objet de droits d'auteur qui ne peuvent pas être
enregistrées sans l'autorisation du possesseur du droit
d'auteur, veillez vous référer aux réglementations nationales en vigueur.
-Remarques spéciales/Accessoires-
z Licences de brevets É.-U. et étrangers obtenues de Dolby
Laboratories.
z L'adaptateur CA livré avec le MD-MT99C ne devra pas
être utilisé avec un autre appareil.
z Avant tout enregistrement important, faire un essai pour
s'assurer que l'enregistrement se fait correctement.
z SHARP n'est pas tenu responsable de tout dommage (ou
perte d'enregistrement) qui pourrait résulter d'un mauvais
fonctionnement de l'appareil.
MD-MT99C
Notes:
z L'appareil est livré seulement avec les éléments ci-dessus.
z L'adaptateur CA peut être différent de celui indiqué dans l'illustration.
FRANÇAIS
01/4/26
99secl_CF_1.fm
F-2
Commandes et voyants
F-3
Page de référence
1. Jack d'entrée 5V CC . . . . . . . . . . . . . . . . . . . . . . . 7
2. Jack d'entrée de ligne/optique . . . . . . . . . . . . . 7, 8
3. Jack d'entrée de microphone . . . . . . . . . . . . . . . 23
4. Touche des graves/annulation . . . . . . . . . . . 14, 34
5. Touche de montage/numérotage automatique/
marque de temps. . . . . . . . . . . . . . . . . . . 21, 26, 33
6. Sélecteur d'affichage/caractères . . . . . . . . . 27, 33
7. Touche de mode/recharge . . . . . 10, 16, 17, 29, 32
8. Touche d'enregistrement/
marque de morceaux . . . . . . . . . . . . . . . . . . . 9, 21
9. Touche de volume/curseur/avance rapide/
inversion/niveau d'enregistrement/
sélection de titre . . . . . . . . . . . . . . 9, 14, 15, 33, 34
10. Touche de lecture/pause. . . . . . . . . . . . . . . . 10, 14
11. Touche d'arrêt/hors tension/
maintien . . . . . . . . . . . . . . . . . . . . . . . . . . 10, 14, 31
12. Touche d'entrée/lecture rapide/
synchro. . . . . . . . . . . . . . . . . . . . . . . . . . . 16, 19, 33
13. Jack de télécommande/casque/
sortie de ligne . . . . . . . . . . . . . . . . . . . . . . . . 13, 40
14. Levier d'ouverture . . . . . . . . . . . . . . . . . . . . . . . . . 6
15. Couvercle de batterie . . . . . . . . . . . . . . . . . . . . . 29
-Commandes et voyants-
Instructions importantes
„ Appareil principal
FRANÇAIS
01/4/26
99secl_CF_1.fm
MD-MT99C
„ Télécommande
Page de référence
1. Jack de casque. . . . . . . . . . . . . . . . . . . . . . . . . . . 13
2. Touche de graves/annulation/
numérotage. . . . . . . . . . . . . . . . . . . . . . . . 14, 21, 34
3. Touche de volume bas/curseur. . . . . . . . . . . 14, 34
4. Touche de volume haut/curseur . . . . . . . . . . 14, 34
5. Touche de maintien . . . . . . . . . . . . . . . . . . . . . . . 31
6. Touche de lecture/pause . . . . . . . . . . . . . . . . 10, 14
7. Touche d'inversion/niveau d'enregistrement bas/
sélection de titre. . . . . . . . . . . . . . . . . . . . . 9, 15, 33
8. Touche d'avance rapide/niveau d'enregistrement
haut/sélection de titre . . . . . . . . . . . . . . . . 9, 15, 33
9. Touche d'arrêt/hors tension . . . . . . . . . . . . . 10, 14
FRANÇAIS
01/4/26
99secl_CF_1.fm
-Commandes et voyants-
Page de référence
1. Compteur de niveau. . . . . . . . . . . . . . . . . . . . . . . . 9
2. Voyant d'enregistrement . . . . . . . . . . . . . . . . . . . . 9
3. Voyant de lecture longue/
mode d'enregistrement . . . . . . . . . . . . . . . . . 10, 17
4. Voyant de mode monaural . . . . . . . . . . . . . . . . . . 17
5. Voyant de répétition . . . . . . . . . . . . . . . . . . . . . . . 16
6. Voyant TOC . . . . . . . . . . . . . . . . . . . . . . . . . . . . . . 10
7. Voyant d'enregistrement synchronisé . . . . . . . . 19
8. Voyant de mode de disque
9. Voyant de titre de disque . . . . . . . . . . . . . . . . . . . 27
10. Voyant de titre de morceau . . . . . . . . . . . . . . . . . 27
11. Voyant de temps d'enregistrement restant . . . . 27
12. Voyant de nombre de morceaux total. . . . . . . . . 27
13. Voyant de lecture rapide . . . . . . . . . . . . . . . . . . . 16
14. Voyant de pile . . . . . . . . . . . . . . . . . . . . . . . . . . . . 28
15. Voyant de lecture au hasard . . . . . . . . . . . . . . . . 16
16. Voyant de numéro de morceau . . . . . . . . . . . . . . 27
17. Voyant d'information en caractères/temps
Instructions importantes
„ Afficheur
F-4
-Précautions-
Instructions importantes
Précautions
F-5
„ Important
„ Conservation de l'appareil
z Ne pas utiliser l'appareil en traversant la rue ou en passant près de la voiture.
z Ne pas utiliser l'appareil en conduisant
une voiture automobile. Ce sera dangereux et illicite. Respecter le code de
la route.
Mettre l'appareil à l'abri des ennemis suivants pour éviter des problèmes.
z Éviter l'écoute à niveau sonore élevé. Les spécialistes
déconseillent une écoute prolongée et continue.
z En cas de bourdonnement dans les oreilles, réduire le
volume sonore ou interrompre l'audition.
z L'appareil MD devra être utilisé dans une plage de température comprise entre 0°C - 40°C.
Pour éviter une secousse électrique ou d'autres problèmes, prendre les précautions suivantes.
z Ne pas démonter ni modifier l'appareil.
z Ne pas laisser tomber ni cogner l'appareil.
z Ne pas utiliser l'appareil à proximité d'une flamme vive.
z Ne pas renverser de liquide dessus.
z Une alimentation extérieure devra être de 5 V CC. Dans le
cas contraire, l'appareil risque de se détériorer.
z SHARP n'est pas responsable des dommages causés par
une mauvaise utilisation. Pour toute réparation, confier
l'appareil au centre de service autorisé par SHARP.
z Au soleil (surtout sur la plage arrière de
la voiture) ou à proximité d'un radiateur.
(Il se produira une déformation du coffret, un changement de la couleur ou un
mauvais fonctionnement.)
z Poussière
z Eau
z Chaleur ou froid extrêmes
z Humidité trop élevée (salle de bain, par
exemple)
z Champs magnétiques (à proximité d'un
téléviseur ou d'une enceinte)
z Vibrations
z Sable (sur la plage, par exemple)
z Si l'on utilise cet appareil à proximité d'un poste de radio
ou d'un téléviseur, une émission radiodiffusée ou télédiffusée risque d'être parasitée. Si le cas se présente, on en
écartera l'appareil.
z Il est déconseillé de mettre le MD dans une pocherevolver. On le brisera en s'asseyant.
FRANÇAIS
01/4/26
99secl_CF_1.fm
Mise en place d'un MD
MD-MT99C
Ouvrir le compartiment.
Mettre un MD en place (voir illustration).
Refermer le compartiment.
Notes:
z Ne pas placer le minidisc sous le support.
-Mise en place d'un MD-
2
3
4
Agir sur le levier OPEN pour déverrouiller le
compartiment.
Avant l'utilisation
1
z Ne pas forcer pour introduire un minidisc dans l'appareil. Si on constate une gêne, retirer le MD et réessayer.
z Le compartiment ne s'ouvre pas si l'appareil affiche
"TOC". Se reporter aux instructions à la page 11.
FRANÇAIS
01/4/26
99secl_CF_2.fm
F-6
Raccordement
-Raccordement-
Avant l'utilisation
On peut enregistrer des CD ou cassettes favoris sur un MD.
F-7
FRANÇAIS
01/4/26
99secl_CF_2.fm
FRANÇAIS
01/4/26
99secl_CF_2.fm
-Raccordement-
Avant l'utilisation
MD-MT99C
F-8
Enregistrement
3
Appuyer sur la touche
ou
niveau d'enregistrement.
pour régler le
Le niveau sonore maximal devra alors être situé entre - 4 dB et 0 dB.
Voyant de compteur de niveau
-Enregistrement-
Fonctionnement de base
Enregistrement analogique
Enregistrement numérique
On peut ajuster le niveau par paliers de 1 dB dans
une plage comprise entre +12 - -12 dB.
Une fois réglé, le niveau d'enregistrement numérique reste en mémoire même après l'arrêt de l'enregistrement. (Pour l'annulation, voir page 32.)
1
2
F-9
Appuyer sur la touche REC.
Déclencher la lecture sur un système hi-fi raccordé à ce lecteur-enregistreur MD portable.
FRANÇAIS
01/4/26
99secl_CF_3.fm
MD-MT99C
Maintenant on peut rechercher un morceau à enregistrer.
5
Agir à plusieurs reprises sur la touche MODE/
CHRG pour sélectionner un mode d'enregistrement (page 17).
Appuyer sur la touche PLAY/PAUSE.
z Pour reprendre la lecture, réappuyer sun la touche
PLAY/PAUSE.
z Le numéro de morceau augmente chaque fois que
l'enregistrement est interrompu.
Pour arrêter l'enregistrement
Appuyer sur la touche /:OFF.
z À l'arrêt d'enregistrement, "TOC" apparaît. Dans cet
état, l'enregistrement n'est pas mis à jour sur MD.
z Pour protéger un nouvel enregistrement contre la
perte, le MD ne se retire pas pendant l'affichage de
"TOC".
Affichage TOC
6
7
Appuyer sur la touche PLAY/PAUSE pour déclencher l'enregistrement.
Déclencher la lecture sur la chaîne hi-fi.
Notes:
z La modification du niveau sonore au cours d'enregistrement ne donne aucun effet sur l'enregistrement.
z Il est impossible de régler le niveau des graves pendant l'enregistrement.
FRANÇAIS
01/4/26
99secl_CF_3.fm
-Enregistrement-
Pour interrompre l'enregistrement
Appuyer sur la touche PAUSE sur la chaîne hi-fi
pour mettre cette dernière en pause.
Fonctionnement de base
4
F-10
Enregistrement (suite)
Pour écrire l'enregistrement sur MD
Du TOC
-Enregistrement-
Fonctionnement de base
Appuyer, en arrêt, sur la touche /:OFF.
L'appareil s'éteint après la mise à jour de l'enregistrement sur MD.
F-11
Après l'enregistrement ou le montage, l'appareil affiche
"TOC". Pour terminer l'opération, appuyer sur la touche
/:OFF. L'appareil fait clignoter alors "TOC" et affiche
"TOC EDIT!". Pendant l'enregistrement ou le montage, le
compartiment MD reste verrouillé et le MD ne se retire
qu'après la finalisation.
Avertissement:
Si on retire la source d'alimentation (pile/adaptateur CA)
malgré l'affichage de "TOC", l'appareil refuse de s'ouvrir
jusqu'au rétablissement de courant. L'enregistrement ou
le montage qu'on vient d'effectuer sera perdu et le MD
sera inutilisable.
Attention:
Suivre les instructions ci-dessous pendant l'affichage de
"TOC" ou de "TOC EDIT!".
- Mettre l'appareil à l'abri de chocs ou de vibrations.
- Ne pas débrancher l'adaptateur CA.
- Ne pas retirer la batterie rechargeable ou la pile alcaline.
- Mettre l'appareil à l'abri de chocs.
Autrement, l'enregistrement n'est pas assuré.
FRANÇAIS
01/4/26
99secl_CF_3.fm
MD-MT99C
Cet appareil est doté d'un convertisseur de taux d'échantillonnage grâce auquel l'enregistrement à partir d'un
tuner numérique ou d'une cassette DAT est possible.
„ Note pour l'enregistrement numérique
Il est impossible de copier un minidisc qu'on a enregistré
numériquement à partir d'un MD ou DAT. Il est interdit
selon le système SCMS (Serial Copy Management System). Ce n'est pas le cas pour l'enregistrement analogique.
Pour effectuer un nouvel enregistrement, déplacer le
cavalier de protection vers la position d'origine.
„ Collage d'une étiquette
Signaux numériques
Minidisc numériquement enregistré
Enregistrement impossible
Coller une étiquette sur le MD en prenant les précautions
suivantes. Si l'étiquette est mal collée, le minidisc peut
être coincé dans l'appareil et refuser d'en sortir.
z Remplacer l'étiquette si celle-ci est
décollée ou cornée.
z Ne pas coller une étiquette sur une
autre.
z Afficher l'étiquette sur une place prévue sur le disque.
FRANÇAIS
01/4/26
99secl_CF_3.fm
-Enregistrement-
Déplacer le cavalier de protection, situé sur le côté, dans
le sens indiqué par la flèche.
Le minidisc est alors protégé contre l'effacement.
„ Convertisseur de taux d'échantillonnage
Fonctionnement de base
„ Pour protéger les MD contre un effacement
accidentel
F-12
-Lecture-
Fonctionnement de base
Lecture
F-13
FRANÇAIS
01/4/26
99secl_CF_3.fm
MD-MT99C
„ Commande de volume
Appuyer sur la touche VOL+ pour augmenter le niveau
sonore et sur la touche VOL- pour le baisser.
Brancher la télécommande sur le jack REMOTE
de l'appareil.
Mettre un minidisc en place (page 6).
Appuyer sur la touche PLAY/PAUSE.
La lecture se déclenche automatiquement s'il s'agit
d'un MD non-enregistrable ou d'un MD protégé
contre un effacement accidentel (lecture automatique).
Pour interrompre la lecture
Appuyer sur la touche PLAY/PAUSE.
Pour relancer la lecture, réappuyer sur la touche PLAY/
PAUSE.
Pour arrêter la lecture
Appuyer sur la touche /:OFF.
Si on laisse l'enregistreur en arrêt plus de 2 minutes, il
s'éteint automatiquement.
Pour éteindre l'enregistreur
Appuyer, en arrêt, sur la touche /:OFF.
Volume (0-30)
„ Commande de graves
Chaque fois que la touche BASS est pressée, la tonalité
se modifie comme suit.
BASS 1
légèrement amplifiée.
BASS 2
Plus amplifiée.
BASS 3
Complètement amplifiée.
BASS OFF
Annulé.
Notes:
z S'il se produit une panne de courant pendant le fonctionnement sur l'adaptateur CA, débrancher ce dernier. Dans le cas contraire, la lecture se déclenche
automatiquement dès le rétablissement de courant.
z Si on branche l'adaptateur CA sans mettre la batterie
rechargeable en place, la lecture peut démarrer. Penser à éteindre l'appareil.
z Réduire le volume avant d'entamer la lecture. Les MD,
à la différence des cassettes ordinaires, donnent très
peu de bruit. Si on règle le niveau sonore comme s'il
s'agissait d'une cassette, on risque de s'abîmer l'ouïe.
z Le son s'échappant du casque peut déranger les
autres. Baisser le volume surtout dans un train bondé.
FRANÇAIS
01/4/26
99secl_CF_3.fm
-Lecture-
3
4
Bien brancher le casque sur la télécommande.
Fonctionnement de base
1
2
F-14
Lecture avancée
„ Pour localiser un morceau
Pour passer au morceau suivant:
Appuyer, en cours de lecture, sur la touche
.
Appuyer, en cours de lecture, sur la touche
.
Pour localiser un morceau suivant:
-Lecture avancée-
Fonctions pratiques
Pour repasser le morceau en cours:
Appuyer, en cours d'arrêt, sur la touche
„ Pour localiser un passage souhaité
En cours de lecture, presser la touche
.
Pour l'inversion audible:
En cours de lecture, presser la touche
Pour localiser un morceau précédent:
Appuyer, en cours d'arrêt, sur la touche
Pour l'avance rapide audible:
.
z La lecture normale se déclenche dès qu'on relâche
la touche
ou
.
.
.
z Pour sauter plusieurs morceaux, agir à plusieurs reprises sur la touche
ou
pour afficher le numéro du morceau souhaité.
z Une pression sur la touche PLAY/PAUSE déclenche
la lecture à partir du début de ce morceau.
z Lorsque l'avance rapide atteint la fin du disque, l'appareil entre en pause. Lorsque l'inversion atteint le
début du disque, l'appareil entre en mode de lecture.
F-15
FRANÇAIS
01/4/26
99secl_CF_4.fm
MD-MT99C
„ Lecture au hasard et répétition
Pendant la lecture, appuyer à plusieurs reprises sur la
touche MODE/CHRG pour sélectionner le mode de lecture.
Lecture au hasard
Répétition de morceaux dans un ordre
aléatoire
Répétition de tous les morceaux
„ Pour reproduire à double vitesse
Appuyer sur la touche ENTER/SYNC pendant la lecture
d'un minidisc enregistré monophoniquement.
z Si, pendant la lecture accélérée, l'appareil atteint un
morceau enregistré en stéréo, elle sera annulée.
z Selon la nature de l'enregistrement, il est parfois difficile de reproduire d'une façon intelligible.
Pour interrompre la lecture accélérée
Appuyer, en cours de lecture, sur la touche PLAY/
PAUSE.
Une nouvelle pression sur la touche PLAY/PAUSE permet de relancer la lecture.
Pour repasser à une lecture ordinaire
1
Répétition d'un seul morceau
Lecture ordinaire
Lecture normale
Notes:
z Si on choisit le mode de lecture en laissant l'appareil
en arrêt, appuyer sur la touche PLAY/PAUSE pour
déclencher la lecture.
z Pendant l'affichage de "TOC", la lecture au hasard ou
la répétition n'est pas autorisée.
z La lecture au hasard consiste à sélectionner et à
reproduire des morceaux automatiquement. (On ne
peut pas spécifier l'ordre de lecture.) Elle s'arrête
après la reproduction de tous les morceaux. Un morceau ne sera jamais lu deux fois.
z On peut avancer ou reculer sur le morceau en cours
pendant la lecture au hasard (ou répétée) ou la répétition.
z Pendant la lecture au hasard, l'enregistreur ne peut
pas localiser des morceaux déjà reproduits.
z La répétition durera indéfiniment à moins qu'on ne
l'arrête.
-Lecture avancée-
RANDOM
Fonctions pratiques
RANDOM
Appuyer sur la touche ENTER/SYNC.
FRANÇAIS
01/4/26
99secl_CF_4.fm
F-16
Enregistrement avancé
„ Enregistrement de longue durée
-Enregistrement avancé-
Fonctions pratiques
Enregistrement 2 ou 4 fois plus long
Il est possible de doubler ou quadrupler la durée d'enregistrement en stéréo.
1
Enregistrement monaural
En monaural, la durée d'enregistrement sera doublée.
Un morceau enregistré en monaural peut être reproduit à
une vitesse doublée. Se reporter à la page 16.
Pour sélectionner un mode d'enregistrement,
mettre l'enregistrement en pause et agir sur la
touche MODE/CHRG.
Chaque fois que la touche est pressée, l'affichage
se modifie comme suit.
2
Déclencher l'enregistrement.
Le mode d'enregistrement reste inchangé à moins qu'on
ne le modifie.
F-17
FRANÇAIS
01/4/26
99secl_CF_4.fm
MD-MT99C
Le système ATRAC (Adaptive TRansform Acoustic
Coding) compresse des données sonores à 1/5 en supprimant les sons inaudibles. Grâce au masquage de la
psychologie acoustique, la qualité sonore reste assurée.
Le système ATRAC3 équipant cet appareil permet de
réduire des données à 1/10 ou 1/20 et assure l'enregistrement 2 ou 4 fois plus long en stéréo.
On peut sélectionner l'un des modes d'enregistrement:
stéréo, 2 fois plus long, 4 fois plus long, monaural. La
durée d'enregistrement varie selon le mode choisi. S'il
s'agit d'un minidisc de 80 minutes, on peut avoir 4 possibilités suivantes.
Indication
Mode d'enregistrement
Durée d'enregistrement
Lecture ordinaire
Stéréo
MAXI 80 mn
LP2
2 fois plus long (stéréo)
MAXI 160 mn
LP4
4 fois plus long (stéréo)
MAXI 320 mn
MONO
Monaural
MAXI 160 mn
„ Note pour l'enregistrement 4 fois plus long
(LP4)
Une méthode de compression spéciale permet de quadrupler la durée d'enregistrement en stéréo, mais l'enregistrement peut être parfois parasitée. Si on insiste sur la
qualité sonore, opter pour l'enregistrement 2 fois plus
long.
FRANÇAIS
01/4/26
99secl_CF_4.fm
-Enregistrement avancé-
„ À propos d'ATRAC
„ Du mode d'enregistrement
Fonctions pratiques
Notes:
z On peut spécifier sur le minidisc le mode d'enregistrement stéréo, 2 fois plus long ou 4 fois plus long.
z En enregistrement monaural, le son en provenance
des deux canaux est mélangé même si la source
d'entrée est en stéréo. Le son qu'on entend à travers
le casque reste stéréophonique, mais l'enregistrement
se fait monophoniquement.
z Les morceaux enregistrés en mode 2 ou 4 fois plus
long peuvent être reproduits seulement sur un appareil supportant ces modes. Si ce n'est pas le cas, on
voit apparaître "LP" au début d'un morceau et on
n'entend rien. (Le fonctionnement et l'affichage varient
selon l'appareil.)
z Les morceaux monophoniquement enregistrés ne
peuvent pas être reproduits s'il s'agit d'un équipement
ne permettant pas une lecture monaurale.
F-18
Enregistrement avancé (suite)
„ Enregistrement déclenché par le son reproduit
4
Sélectionner un point de démarrage pour l'enregistrement et puis réappuyer sur la touche PAUSE.
5
-Enregistrement avancé-
Fonctions pratiques
L'enregistrement se déclenche dès la détection de
signaux sonores en provenance d'une chaîne hi-fi (enregistrement synchronisé).
6
Agir à plusieurs reprises sur la touche MODE/
CHRG pour sélectionner un mode d'enregistrement (page 17).
Appuyer sur la touche ENTER/SYNC.
z L'appareil affiche "SYNC".
z Pour annuler l'opération, appuyer sur la touche
/:OFF.
7
1
2
3
F-19
Appuyer sur la touche PAUSE sur la chaîne hi-fi
pour mettre cette dernière en pause.
Appuyer sur la touche REC.
Déclencher la lecture sur un système hi-fi raccordé à ce lecteur-enregistreur MD portable.
Appuyer sur la touche
ou
pour régler le
niveau d'enregistrement (voir page 9).
Déclencher la lecture sur la chaîne hi-fi. L'enregistrement se déclenche automatiquement.
Pour interrompre l'enregistrement
z Lorsque la chaîne hi-fi est mise en arrêt, l'appareil
passe en attente pour l'enregistrement synchronisé.
Dès la reprise de la lecture, l'enregistrement redémarre.
z Si un passage silencieux dure 3 secondes ou plus,
l'enregistrement sera mis en pause (la fonction de
pause ne marche pas dans les 10 secondes qui suivent le départ de l'enregistrement). Lorsque l'appareil
capte de nouveau du son, l'enregistrement redémarre.
z Un numéro est donné lorsque l'enregistrement reprend.
FRANÇAIS
01/4/26
99secl_CF_4.fm
MD-MT99C
On peut effectuer un nouvel enregistrement sur un morceau en effaçant ce dernier.
Cette opération efface tous les morceaux qui suivent un
morceau nouvellement enregistré.
2
En cours de lecture, appuyer sur la touche
PLAY/PAUSE lorsqu'on atteindra un point par
lequel on commencera l'enregistrement.
Appuyer sur la touche REC.
Pour annuler l'opération, appuyer sur la touche /
:OFF.
3
Appuyer sur la touche ENTER/SYNC.
L'enregistreur efface tous les morceaux (et tous les
titres) qui suivent le point de pause.
4
5
Agir à plusieurs reprises sur la touche MODE/
CHRG pour sélectionner un mode d'enregistrement (page 17).
-Enregistrement avancé-
1
Fonctions pratiques
„ Pour déclencher l'enregistrement à partir
du milieu d'un morceau
Appuyer sur la touche PLAY/PAUSE.
L'enregistrement reprend.
Note:
Pour conserver un morceau qui vient après le point d'un
nouvel enregistrement, on le déplacera et puis fera
l'enregistrement. (Se reporter à "Montage d'un minidisc
enregistré", page 39.)
FRANÇAIS
01/4/26
99secl_CF_4.fm
F-20
Enregistrement avancé (suite)
„ Pour numéroter comme on le souhaitera
-Enregistrement avancé-
Fonctions pratiques
On peut numéroter des points de son choix.
F-21
„ Enregistrement des morceaux comme un
seul
Pendant l'enregistrement, appuyer sur la touche REC
dès qu'on arrivera à un point souhaité.
Le numéro de morceau augmente d'une unité.
z Un numéro est donné chaque fois que la touche REC
est pressée.
z La touche BASS de la télécommande permet d'ajouter
des numéros de morceaux.
On peut enregistrer des morceaux de musique comme
un seul en désactivant le numérotage automatique.
Limite de numérotage
Si on tente de numéroter plus de 10 morceaux dans un
laps de temps donné, l'appareil refuse l'opération en affichant "SORRY".
Il faut alors attendre une opération suivante qui va
démarrer.
Note:
S'il s'agit d'un enregistrement numérique au moyen d'un
lecteur CD ou MD, le numérotage s'effectue automatiquement qu'il soit activé ou pas.
En enregistrement stéréo
Avant 40 secondes
En enregistrement 2 fois
plus long
Avant 80 secondes
En enregistrement 4 fois
plus long
Avant 160 secondes
En enregistrement monaural
Avant 80 secondes
En cours d'enregistrement ou de pause...
Appuyer sur la touche EDIT.
FRANÇAIS
01/4/26
99secl_CF_4.fm
MD-MT99C
z Les numéros des morceaux sur MD peuvent ne pas
correspondre à ceux de la source si on a effectué la
lecture en programmant des morceaux sur la source
ou en en programmant à la main.
z Le numérotage ne peut pas être réalisé correctement
selon le type de la chaîne hi-fi.
2. Lorsque l'on enregistre à partir d'un CD (ou MD) en
raccordant un élément numériquement, les morceaux sont numérotés de la même manière que ceux
enregistrés sur le CD (ou MD) de source (numérotage synchronisé).
-Enregistrement avancé-
1. Les morceaux sont numérotés automatiquement en
cours d'enregistrement (raccordement analogique)
lorsqu'un passage silencieux dure plus de 1 seconde
(numérotage automatique). On peut aussi enregistrer
des morceaux consécutifs comme un seul en désactivant le numérotage automatique (voir page 21).
Fonctions pratiques
„ Numéros de morceaux
z Le numérotage peut ne pas être bien effectué selon la
nature de la source (bruyante, etc.).
z Les numéros de morceaux sur la source ne correspondent pas à ceux enregistrés sur le minidisc.
FRANÇAIS
01/4/26
99secl_CF_4.fm
F-22
Enregistrement à partir d'un microphone
Fonctions pratiques
-Enregistrement à partir d'un microphone-
„ Pour enregistrer par un microphone
F-23
FRANÇAIS
01/4/26
99secl_CF_4.fm
MD-MT99C
Mettre un minidisc en place (page 6).
Appuyer, en cours d'enregistrement, sur la touche PLAY/
PAUSE.
z Pour reprendre l'enregistrement, réappuyer sur la touche PLAY/PAUSE. Le numéro de morceau augmente
chaque fois que l'on interrompt l'enregistrement.
Pour arrêter l'enregistrement
Appuyer sur la touche REC.
Appuyer sur la touche /:OFF.
Appuyer sur la touche
ou
niveau d'enregistrement.
pour régler le
Pour écrire l'enregistrement sur MD
Appuyer, en arrêt, sur la touche /:OFF.
Voyant de compteur de niveau
Le niveau sonore maximal devra alors être situé entre -4 dB et 0 dB.
5
6
Agir à plusieurs reprises sur la touche MODE/
CHRG pour sélectionner un mode d'enregistrement (page 17).
Appuyer sur la touche PLAY/PAUSE.
Fonctions pratiques
2
3
4
Pour interrompre l'enregistrement
Brancher un microphone stéréo sur le jack MIC
IN.
-Enregistrement à partir d'un microphone-
1
L'enregistrement reprend.
FRANÇAIS
01/4/26
99secl_CF_4.fm
F-24
Enregistrement à partir d'un microphone (suite)
Fonctions pratiques
-Enregistrement à partir d'un microphone-
„ Enregistrement synchronisé de son (enregistrement synchronisé avec micro)
1
2
Appuyer sur la touche
veau d'enregistrement.
ou
pour régler le ni-
Voyant de compteur de niveau
L'appareil se met en pause si un silence dure 3 secondes
ou plus. (La fonction de pause ne marche pas dans les
10 secondes qui suivent le départ de l'enregistrement.)
Lorsque le microphone capte de nouveau du son, l'enregistrement redémarre.
Notes:
z Pendant l'enregistrement par micro, on ne branchera
rien sur le jack OPTICAL/LINE IN.
z Utiliser un microphone d'auto-alimentation.
- Si on branche ce type de microphone sur l'enregistreur MD, ce dernier alimente le microphone pour assurer le fonctionnement.
3
4
5
F-25
Appuyer sur la touche REC.
Fonction de pause
Agir à plusieurs reprises sur la touche MODE/
CHRG pour sélectionner un mode d'enregistrement (page 17).
Appuyer sur la touche ENTER/SYNC pour sélectionner une sensibilité pour l'enregistrement.
MIC SYNC H :
L'enregistrement démarre dès la
détection d'un son à -24 dB ou plus
(l'appareil déclenche l'enregistrement même s'il s'agit d'un silence).
MIC SYNC L :
L'enregistrement démarre dès la
détection d'un son à -12 dB ou
plus.
- Si on utilise un autre type de microphone, ce dernier
ne marchera pas ou l'appareil risque de mal fonctionner.
z Bien brancher les fiches. Dans le cas contraire, l'enregistrement n'est pas bien assuré.
z Utiliser un microphone doté d'une mini-fiche stéréo
ayant 3,5 mm de diamètre.
z Si l'enregistrement démarre souvent de manière inattendue, mettre l'entrée de microphone sur "MIC SYNC
L".
z La sensibilité de l'enregistrement peut être commutée
en cours d'enregistrement.
Lorsque le microphone capte un son comme la
voix d'une personne, l'enregistrement se déclenche automatiquement.
FRANÇAIS
01/4/26
99secl_CF_4.fm
MD-MT99C
„ Intervalles entre morceaux
Exemple: numérotage à "5 minutes"
Pendant l'enregistrement par microphone, les morceaux
sont numérotés automatiquement à un intervalle régulier
(réglage par défaut: toutes les 5 minutes environ). Pendant l'enregistrement synchronisé par micro, l'appareil se
mettra en arrêt si un silence dure 3 secondes ou plus, et
créera un numéro.
Pendant l'enregistrement manuel par micro
1
Agir, en cours d'enregistrement ou de pause,
sur la touche EDIT.
Pendant l'enregistrement synchronisé par
micro
Si un silence dure 3 secondes ou plus, le numérotage
(marque de temps) se fait à un intervalle de 5 minutes, à
compter d'une marque précédente.
L'intervalle entre morceaux peut différer légèrement de temps d'enregistrement affiché.
2
L'enregistrement est numéroté à un intervalle
régulier.
Numérotage manuel
Fonctions pratiques
Changement d'intervalle
-Enregistrement à partir d'un microphone-
Le numérotage s'effectue à un intervalle de 5 minutes.
Appuyer, en cours d'enregistrement, sur la touche REC.
FRANÇAIS
01/4/26
99secl_CF_4.fm
F-26
-Vérification de l'affichage-
Fonctions pratiques
Vérification de l'affichage
F-27
„ Pour vérifier le temps écoulé et le temps
restant sur le morceau
„ Pour vérifier le temps d'enregistrement restant et le temps de lecture total
Pendant la lecture, appuyer sur la touche DISP.
En mode d'arrêt, appuyer sur la touche DISP.
Chaque fois que la touche est pressée, l'affichage se
modifie comme suit.
Chaque fois que la touche est pressée, l'affichage se
modifie comme suit.
A
B
C
Numéro de morceau
Titre de morceau
A
B
D
Temps de lecture écoulé
Temps de lecture restant
C
Notes:
z Si le titre de disque ou de morceau n'est pas enregistré initialement sur le MD, "NO NAME" apparaît.
z Le temps d'enregistrement restant s'affiche seulement
s'il s'agit d'un MD enregistrable.
z Le temps écoulé ou le temps restant pour la lecture
peut différer du temps affiché.
Nombre de morceaux
total
Titre de disque
D
Temps d'enregistrement
restant
Temps de lecture total
Le temps d'enregistrement restant diffère selon le mode
choisi.
FRANÇAIS
01/4/26
99secl_CF_4.fm
MD-MT99C
En mode d'arrêt, appuyer sur la touche
ou
pour afficher le numéro et le titre du morceau.
Numéro de morceau
Titre de morceau
2
L'état d'usure de la batterie est indiqué par le voyant de
pile (
).
Appuyer sur la touche DISP pour afficher le
temps de lecture sur le morceau en cours.
Temps de lecture
Chaque fois que la touche
ou
est pressée,
l'appareil affiche le temps de lecture sur un morceau précédent ou suivant.
z Si la pile se décharge complètement, le voyant se met
à clignoter. On rechargera la batterie rechargeable ou
remplacera la pile alcaline.
z Si la pile s'épuise complètement, l'appareil affiche
"BATT EMPTY". Après, l'appareil s'éteint automatiquement.
Notes:
z Si on utilise la batterie qu'on a arrêtée de recharger à
mi-chemin, "
" peut apparaître malgré une recharge
incomplète.
z Le voyant de pile n'affiche pas correctement l'état
d'usure pendant les 10 secondes qui suivent la mise
sous tension.
z Lorsque l'appareil fonctionne sur l'adaptateur CA ou
l'adaptateur automobile (en option), le voyant de pile
ne s'affiche pas.
z Le nombre de segments dans le voyant de pile varie
selon l'opération en cours. Il ne s'agit pas d'une
panne, c'est normal.
FRANÇAIS
01/4/26
99secl_CF_4.fm
-Vérification de l'affichage-
1
„ Pour vérifier l'état d'usure de la batterie
Fonctions pratiques
„ Pour afficher le temps de lecture sur le morceau
F-28
Fonctionnement sur les piles
„ Mise en place de la batterie rechargeable
Penser à charger complètement la batterie s'il s'agit de la
première utilisation ou après une longue période de nonemploi.
Fonctions pratiques
-Fonctionnement sur les piles-
1
F-29
Introduire la batterie rechargeable.
Il est possible de recharger seulement la batterie livrée avec l'appareil ou en option (AD-N70BT).
2
3
Brancher l'adaptateur CA sur une prise murale
et puis sur le jack DC IN 5V.
Appuyer sur la touche MODE/CHRG.
"
" se met à clignoter et la recharge démarre.
z La batterie chauffe légèrement pendant l'utilisation ou
la recharge. Il ne s'agit pas d'une panne, c'est normal.
z La batterie ne se recharge pas pendant que l'appareil
marche ou reste allumé.
FRANÇAIS
01/4/26
99secl_CF_4.fm
MD-MT99C
Notes:
z Effectuer la recharge dans une plage de température
entre 5°C - 35°C.
z La recharge est terminée si le branchement de l'adaptateur CA et la pression sur la touche MODE/CHRG
ne permettent pas de faire clignoter "
".
z L'appareil peut être laissé en état de recharge même
après qu'elle est terminée.
Attention:
z Utiliser seulement la batterie spécifiée AD-N70BT. Ne
jamais recharger d'autres piles (nickel-cadmium, alcaline, etc.).
z Ne pas dérober la batterie rechargeable. Il
peut entraîner un dégagement de la chaleur,
un incendie ou une explosion.
z Éviter de jeter la batterie dans l'eau ou au
feu. Ne jamais la démonter.
z Si la borne de recharge est encrassée, la recharge
n'est pas assurée. On l'essuiera avec un coton-tige.
z Ne jamais démonter la batterie rechargeable.
1
2
Débrancher l'adaptateur CA.
Introduire la batterie rechargeable ou une pile alcaline en place,
côté marqué (+) le premier.
Utiliser une pile alcaline au format
de LR6 ou AA en vente dans le
commerce.
Notes:
z Si on réduit le niveau sonore à "0" pendant l'enregistrement avec la batterie rechargeable ou une pile alcaline, on peut épargner l'énergie.
z En période de non-emploi (même pour quelques heures), retirer la batterie. (La batterie se consomme
même si l'appareil est éteint.)
z Mettre la batterie dans le boîtier fourni pour la transporter.
z Cet appareil peut fonctionner avec l'adaptateur CA
lorsque l'appareil contient la pile rechargeable ou une
pile alcaline.
Fonctions pratiques
Pour recharger la batterie complètement, poursuivre
encore 2 heures. Alors, on n'a pas besoin d'appuyer sur
la touche MODE/CHRG. Même si la touche MODE/
CHRG est pressée, l'appareil n'affiche pas "
".
„ Avec la batterie rechargeable ou une pile
alcaline
-Fonctionnement sur les piles-
„ Temps de charge
Environ 3,5 heures après, " " s'éteint. La
recharge de la batterie est alors réalisée à 90
%.
Attention:
Éviter d'utiliser une batterie nickel-cadmium.
FRANÇAIS
01/4/26
99secl_CF_4.fm
F-30
Fonction de maintien
-Fonction de maintien-
Fonctions pratiques
L'appareil gardera son fonctionnement en cours même si une touche est pressée accidentellement (dans un train
bondé par exemple).
Si on a mis une pile en place ou si l'adaptateur CA est
raccordé, on peut activer cette fonction que l'appareil soit
éteint ou allumé.
Pour annuler le mode de maintien
En mode de maintien, maintenir la touche HOLD enfoncée pour 2 secondes ou plus.
L'appareil affiche "HOLD OFF".
F-31
Pour annuler le mode de maintien
Déplacer le commutateur HOLD dans le sens opposé de
la flèche.
Si on active la fonction de maintien en laissant l'enregistreur éteint, ce dernier ne sera pas rallumé par erreur et l'énergie de la pile ne sera pas consommée.
FRANÇAIS
01/4/26
99secl_CF_4.fm
Modification des réglages par défaut
„ Bips
Lorsque l'on relâche la touche, "BEEP ON" ou "BEEP
OFF" apparaît.
2
3
4
Appuyer sur la touche
menu.
ou
pour afficher le
Appuyer sur la touche MODE/CHRG pour passer à
un paramètre souhaité.
Appuyer sur la touche /:OFF.
On peut supprimer le bip de confirmation qui est émis à la
pression d'une touche.
„ Lecture automatique
On peut désactiver cette fonction qui déclenche automatiquement la lecture dès l'insertion d'un MD non-enregistrable
ou protégé contre l'effacement.
„ Économie d'énergie automatique
Si on utilise l'appareil dans un endroit qui subit des vibrations, annuler cette fonction pour réduire le saut de son. (La
batterie s'épuise rapidement.)
Qu'est-ce que la fonction d'économie d'énergie?
Pendant la lecture, l'appareil stocke 40 secondes d'information musicale en stéréo. La fonction d'économie
d'énergie règle automatiquement ce temps entre 5 et 40
secondes pour épargner de l'énergie. Si on annule cette
fonction, le temps de stockage n'est plus réglable. (Il
n'est pas réglable même en cas de fonctionnement avec
le chargeur.) Le temps de stockage varie suivant le mode
de lecture.
„ Niveau d'enregistrement numérique
"D.L MODE 1"
Le niveau d'enregistrement numérique, une fois réglé, restera en mémoire même après l'annulation de l'enregistrement.
Fonctions avancées
Mettre un MD en place et appuyer plus de 2 secondes sur la touche MODE/CHRG. "SET UP" apparaît.
-Modification des réglages par défaut-
En mode d'arrêt ...
1
MD-MT99C
"D.L MODE 2"
Chaque fois qu'on annule l'enregistrement, le niveau repasse
à [D.L 0dB].
FRANÇAIS
01/4/26
99secl_CF_5.fm
F-32
Titrage d'un minidisc
„ Titrage de disques et de morceaux
Mettre un MD à titrer. Le montage n'est pas possible
avec un MD non-enregistrable ou protégé contre l'enregistrement.
-Titrage d'un minidisc-
Fonctions avancées
1
<Titre de disque>
<Titre de morceau>
En mode d'arrêt, appuyer sur la touche
EDIT pour sélectionner
"DISC NAME".
En mode de pause, appuyer sur la touche
EDIT pour sélectionner
"TRACK NAME".
3
L'appareil affiche pour 1 seconde les 3 premiers caractères du type choisi.
4
2
Appuyer sur la touche ENTER/SYNC.
z L'appareil passe en mode d'entrée de caractères.
Sélectionner un type de caractère en agissant
sur la touche DISP.
5
Agir à plusieurs reprises sur la touche
pour sélectionner un caractère.
ou
Appuyer sur la touche ENTER/SYNC.
z Pour annuler l'opération, appuyer sur la touche
/:OFF.
Endroit où un caractère vient s'insérer
F-33
FRANÇAIS
01/4/26
99secl_CF_5.fm
MD-MT99C
8
La saisie de caractères terminée, on pressera
sur la touche EDIT.
L'appareil affiche "TOC" pour écrire de nouvelles données sur le MD. On pressera alors sur la
touche /:OFF.
„ Pour effacer un caractère
Appuyer sur la touche VOL+ ou VOL- pour déplacer le
curseur sur un caractère à effacer, et puis appuyer sur la
touche BASS.
„ Pour insérer un espace
Appuyer sur la touche VOL+ pour déplacer le curseur
vers la droite.
Pendant l'affichage de "TOC", on ne peut pas retirer
le MD. "TOC" ne disparaîtra qu'après la mise à jour.
Note:
On peut titrer un disque et ses 255 morceaux (maxi) en
utilisant au total 1.700 caractères (100 caractères pour
chaque titre). Toutefois, si des morceaux sont enregistrés
en mode d'enregistrement 2 ou 4 fois plus long, le nombre de caractères utilisables diminue à cause d'informations stockées pour le mode d'enregistrement.
Espace
„ Caractères (symboles)
-Titrage d'un minidisc-
7
Pour saisir d'autres caractères, renouveler les
étapes 3 - 5.
Fonctions avancées
6
0
FRANÇAIS
01/4/26
99secl_CF_5.fm
F-34
Titrage d'un minidisc (suite)
„ Pour ajouter des caractères
1
Mettre l'appareil en mode d'entrée de caractère.
2
-Titrage d'un minidisc-
Fonctions avancées
(Suivre les étapes 1 et 2 à la page 33.)
Appuyer sur la touche VOL+ ou VOL- pour déplacer le curseur sur un caractère devant lequel
un nouveau caractère vient s'insérer.
„ Copie de titres
Avant la copie de titres
Il est possible de copier des informations en caractères
(titres de disque et de morceaux) si des mêmes morceaux sont enregistrés sur les deux MD de source et de
cible.
1. Qu'est-ce qu'un MD de source ?
Un minidisc enregistrable qui contient des morceaux et
leurs informations en caractères. (Il est impossible de
copier des titres à partir d'un MD non-enregistrable.)
3
Sélectionner un caractère à ajouter.
2. Qu'est-ce qu'un MD de cible ?
(Suivre les étapes 3 et 4 à la page 33.)
4
5
6
Appuyer sur la touche ENTER/SYNC.
Appuyer sur la touche EDIT.
Il s'agit ici d'un minidisc qui contient les mêmes morceaux (dans le même ordre) que ceux enregistrés sur
le MD de source. (Il faut vérifier le nombre de morceaux
enregistrés, qui devra être même entre les deux MD.)
L'appareil affiche "TOC" pour écrire de nouvelles données sur le MD. On pressera alors sur la
touche /:OFF.
Pendant l'affichage de "TOC", on ne peut pas retirer
le MD. "TOC" ne disparaîtra qu'après la mise à jour.
F-35
FRANÇAIS
01/4/26
99secl_CF_5.fm
MD-MT99C
Opération pour côté source
1
Mettre un MD de source en place.
Opération pour côté cible
6
Mettre un MD de cible en place.
7
Appuyer sur la touche ENTER/SYNC.
3
En mode d'arrêt, appuyer sur la touche EDIT pour
sélectionner "NAME STAMP".
Appuyer sur la touche ENTER/SYNC.
L'appareil termine la copie des caractères et repasse
en mode d'arrêt.
Pour annuler l'opération, appuyer sur la touche /:OFF.
4
5
Réappuyer sur la touche ENTER/SYNC.
Lorsque l'appareil affiche "CHANGE MD", on retirera le MD de source.
Note:
Si le nombre de morceaux enregistrés est différent entre
les deux MD, l'appareil affichera "Can'tSTAMP" et s'éteindra.
-Titrage d'un minidisc-
2
Fonctions avancées
Ne pas le confondre avec celui de cible.
Si le cas se présente, ajuster le nombre de morceaux sur
le MD de cible en faisant le montage.
On le retirera sans éteindre l'enregistreur. Si on l'éteint,
la copie sera annulée.
FRANÇAIS
01/4/26
99secl_CF_5.fm
F-36
Montage d'un minidisc enregistré
„ Pour effacer des morceaux à la fois
Fonctions avancées
-Montage d'un minidisc enregistré-
1
F-37
2
Reproduire le morceau à effacer et appuyer sur
la touche PLAY/PAUSE.
„ Pour effacer tous les morceaux à la fois
1
Agir à plusieurs reprises sur la touche EDIT
pour sélectionner "ERASE".
2
3
En mode d'arrêt, agir à plusieurs reprises sur la
touche EDIT pour sélectionner "ALL ERASE".
Appuyer sur la touche ENTER/SYNC.
Appuyer sur la touche ENTER/SYNC.
Pour annuler l'opération, appuyer sur la touche /
:OFF.
Pour annuler l'opération, appuyer sur la touche /
:OFF.
4
Réappuyer sur la touche ENTER/SYNC.
Réappuyer sur la touche ENTER/SYNC.
Le morceau s'efface.
5
3
Pour effacer un autre morceau, renouveler les
étapes 1 - 4.
Tous les caractères s'effacent.
Attention:
Une fois le morceau effacé, il ne sera pas restauré. Il
faut bien réfléchir avant l'effacement.
FRANÇAIS
01/4/26
99secl_CF_5.fm
MD-MT99C
2
3
Reproduire le morceau à diviser en deux. Appuyer sur la touche PLAY/PAUSE lorsque l'on
atteindra un point par lequel on divise le morceau.
2
Appuyer sur la touche EDIT pour sélectionner
"DIVIDE".
3
Reproduire le deuxième des deux morceaux à
fusionner et appuyer sur la touche PLAY/PAUSE.
Appuyer sur la touche EDIT pour sélectionner
"COMBINE".
Appuyer sur la touche ENTER/SYNC.
Appuyer sur la touche ENTER/SYNC.
Pour annuler l'opération, appuyer sur la touche /
:OFF.
4
1
Réappuyer sur la touche ENTER/SYNC.
Le morceau est alors divisé en deux et l'appareil se
cale sur le début d'un deuxième morceau ainsi
créé.
Pour annuler l'opération, appuyer sur la touche /
:OFF.
4
Réappuyer sur la touche ENTER/SYNC.
Les deux morceaux sont ainsi réunis et l'appareil se
cale sur le début de ce nouveau morceau.
FRANÇAIS
01/4/26
99secl_CF_5.fm
Fonctions avancées
1
„ Pour fusionner des morceaux
-Montage d'un minidisc enregistré-
„ Pour diviser un morceau
F-38
Montage d'un minidisc enregistré (suite)
„ Pour déplacer un morceau
Fonctions avancées
-Montage d'un minidisc enregistré-
1
2
3
Reproduire le morceau à déplacer et appuyer
sur la touche PLAY/PAUSE.
Appuyer sur la touche EDIT pour sélectionner
"MOVE".
Appuyer sur la touche ENTER/SYNC.
Pour annuler l'opération, appuyer sur la touche /
:OFF.
4
5
Appuyer sur la touche
ner un sens.
ou
pour sélection-
Titre du morceau divisé:
Les deux morceaux portent un même titre. Toutefois, le
deuxième ne portera pas de titre si l'appareil affiche
"TOC FULL".
Nombre de morceaux divisibles:
Chaque disque peut contenir 255 morceaux au total.
Toutefois, le disque peut ne pas arriver à en contenir
autant et n'accepte plus la division de morceaux.
Pour fusionner deux morceaux qui ne sont pas consécutifs:
On placera d'abord deux morceaux l'un à la suite de
l'autre au moyen de la fonction MOVE. Et puis on les
fusionnera avec la fonction COMBINE.
Titre d'un morceau fusionné:
Le titre du premier morceau sera adopté. Si le premier
n'est pas titré, celui du deuxième sera utilisé.
Deux morceaux ne seront pas fusionnés dans les
cas suivants.
z Il est impossible de fusionner deux morceaux enregistrés différemment.
Exemple:
-L'un enregistré numériquement et l'autre analogiquement.
-Modes d'enregistrement différents (stéréo, 2 fois plus
long, 4 fois plus long, monaural)
z Morceaux qui durent moins de 12 secondes.
Réappuyer sur la touche ENTER/SYNC.
Le morceau est ainsi déplacé et l'appareil se cale
sur le début de ce morceau.
F-39
FRANÇAIS
01/4/26
99secl_CF_5.fm
Écoute à travers un autre système
„ Avec un autoradio
Notes:
z Il est conseillé de porter le niveau sonore du MD au
maximum pour l'écouter au moyen d'une chaîne hi-fi.
z S'il s'agit d'un enregistrement sur une chaîne hi-fi,
annuler le bip de confirmation (page 32). Sinon, le bip
sera aussi enregistré.
z L'enregistrement se fait analogiquement.
z Les caractères ne sont pas enregistrés.
Notes:
z Régler le volume sur l'enregistreur MD et un autoradio.
z Ne pas utiliser l'enregistreur MD en conduisant une
voiture pour éviter un accident de la route.
z Utiliser seulement l'adaptateur AD-CA20X en option.
z Retirer la batterie rechargeable de l'appareil si on fait
fonctionner l'appareil sur la batterie de voiture.
FRANÇAIS
01/4/26
99secl_CF_5.fm
Fonctions avancées
„ Avec une chaîne audio
-Écoute à travers un autre système-
MD-MT99C
F-40
Références
-Autres fonctions et précautions-
Autres fonctions et précautions
F-41
„ Reprise de la lecture automatique
„ Batterie rechargeable
Lorsque l'on arrête et recommence la lecture sans
retirer le MD, elle part à partir d'un point où on a
interrompu.
z La seule batterie au nickel-métal-hydride est utilisable.
Il faut recharger la batterie rechargeable tous les trois
mois même en période de non-utilisation prolongée
afin d'assurer la qualité de la batterie.
z La batterie est rechargeable à 300 fois environ.
z Au fur et à mesure de l'utilisation, la durée de la batterie sera réduite. Si elle diminue à moitié malgré une
recharge complète, on remplacera la batterie par une
neuve (AD-N70BT).
z La durée de la batterie peut être plus courte que prévu
si on l'a rechargée pour la première fois ou après une
période de non-utilisation prolongée. Ce problème
sera résolu après plusieurs cycles de charge/
décharge.
z Pour assurer la longévité de la batterie, on la rechargera après l'avoir déchargée complètement.
z La durée de la batterie peut être réduite dans un environnement froid.
z Ne pas mettre la batterie dans une poche ou une
valise avec un objet métallique (clé, pièces de monnaie, bijou, etc.). La batterie risque de trop chauffer à
cause d'un court-circuit.
z Ne pas court-circuiter les bornes. Elles risquent d'abîmer la batterie en chauffant.
z Mettre la batterie à l'abri de chocs.
z Ne pas mettre un objet métallique dans le boîtier ou la
batterie rechargeable.
Si on a retiré le MD, la lecture commence par le premier morceau.
L'appareil assure les fonctions suivantes si on le fait
fonctionner sur l'adaptateur automobile (AD-CA20X).
(La batterie rechargeable et la pile sont retirées de
l'appareil.)
1. Lorsque l'on arrête le moteur de la voiture, l'enregistreur MD s'éteint aussi. (Certaines voitures n'assurent
pas cette fonction.)
2. Lorsque l'on relance le moteur, la lecture reprend à
partir d'un morceau interrompu.
FRANÇAIS
01/4/26
99secl_CF_6.fm
Limites du minidisc
MD-MT99C
DESCRIPTION
L'appareil peut afficher "DISC FULL" ou
"TOC FULL" même si le temps d'enregistrement reste encore.
Il est impossible d'enregistrer plus de 255 morceaux (maxi), quelle
que soit la durée d'enregistrement. S'il s'agit d'un MD sur lequel on
a souvent effectué l'enregistrement ou le montage ou d'un MD rayé
(l'enregistrement ne se fait pas sur une partie endommagée), le
nombre de morceaux enregistrables est réduit.
Le temps restant peut demeurer inchangé même si on efface des morceaux.
L'appareil affiche le temps d'enregistrement restant sans tenir compte de morceaux de courte durée (12 secondes ou moins). Le temps
affiché restera donc inchangé même si on efface de tels morceaux.
Le total du temps d'enregistrement effectué et du temps restant sur le disque
peut ne pas correspondre au temps
d'enregistrement maximal.
Le cluster (2 secondes d'enregistrement) est une unité minimale
pour l'enregistrement. L'enregistrement de 3 secondes par exemple
utilise donc 2 clusters (une seconde de perte). De cette façon, le
temps réellement enregistrable sera réduit auprès du temps affiché.
La fusion de morceaux ne marche pas.
La fonction de fusion ne sera pas réalisée avec un minidisc sur lequel on a souvent effectué l'enregistrement et le montage.
Perte de son pendant l'inversion on
l'avance rapide.
S'il s'agit d'un MD sur lequel on a effectué souvent l'enregistrement
ou le montage, il peut se produire une perte de son.
Numérotage au milieu d'un morceau.
Le numérotage peut être mal fait s'il y a des rayures ou de la poussière sur le MD.
FRANÇAIS
01/4/26
99secl_CF_6.fm
Références
PROBLÈME
-Limites du minidisc-
L'appareil peut se comporter comme suit pendant l'enregistrement ou le montage. Il ne s'agit pas d'une panne.
F-42
Messages affichés
MESSAGES
D'ERREUR
BATT EMPTY
z La batterie est épuisée.
BLANK MD
z Rien n'a été enregistré.
Références
Can't COPY
-Messages affichés-
SIGNIFICATION
MESSAGES
D'ERREUR
Can'tSTAMP
(Vérifier le nombre des morceaux.)
Can'tWRITE
z Il s'agit d'un MD protégé par le droit
d'auteur.
z Les informations TOC ne sont pas correctement enregistrées.
DEFECT
z Le disque est rayé.
(Utiliser un câble analogique.)
z Impossible de monter un morceau.
(Modifier la position d'arrêt sur le morceau et refaire le montage.)
(Si le son enregistré n'est pas bon, recommencer l'enregistrement ou remplacer le disque.)
DISC FULL
z Le disque n'a plus de place pour l'enregistrement.
Er-MD (**)
z Le microprocesseur a rapporté une erreur du système et l'appareil est en
panne.
Can't READ (*) z Les données du disque ne peuvent
pas être lues, car le disque ou l'appareil est endommagé.
(Remettre le minidisc en place ou le remplacer.)
Can't REC
z La copie de titres est impossible.
(Remplacer le disque.)
z On a tenté d'enregistrer des signaux
non-audio (données informatiques par
exemple).
Can't EDIT
SIGNIFICATION
z L'enregistrement ne peut pas être effectué correctement à cause des vibrations ou des chocs subis.
(S'adresser au revendeur pour la réparation.)
HOLD
z L'appareil se trouve en mode de maintien.
LOCKED
z On a retiré le MD en cours d'enregistrement ou de montage.
(Éteindre l'appareil et retirer le minidisc.)
NO DISC
z Aucun disque n'est mis en place.
Numéro ou symboles à la place de (*).
F-43
FRANÇAIS
01/4/26
99secl_CF_6.fm
MD-MT99C
z Mauvais raccordement du câble numérique.
z Aucun signal en provenance d'un élément raccordé.
(Faire fonctionner l'élément raccordé sur
secteur.)
z La fréquence d'échantillonnage des signaux d'entrée n'est pas adéquate.
NOT PLAY
z On a tenté de reproduire un morceau
qui ne peut pas être lu sur cet appareil.
PLAY MD
z On a tenté l'enregistrement sur un disque non-enregistrable.
POWER ?
z Alimentation non adaptée.
PROTECTED
z Le MD est protégé contre l'écriture.
z On a tenté d'enregistrer sur un disque
non-enregistrable.
SORRY
z En cours d'écriture du numéro, l'appareil refuse une commande.
(Patienter un instant et tenter de nouveau.)
MESSAGES
D'ERREUR
TEMP OVER
SIGNIFICATION
z La température est trop élevée.
(Éteindre l'appareil et patienter un instant.)
TOC FORM
(**)
z Il s'est glissé une erreur dans les données.
(On effacera tout et recommencera l'enregistrement.)
TOC FULL
z Il ne reste plus de place disponible
pour l'information en caractères (titres
de morceau, de disque, etc.).
Tr. Protect
z Le morceau est protégé contre l'effacement.
(Modifier le morceau avec le matériel qui
l'a enregistré.)
? DISC
z Il ne s'agit pas d'un disque musical.
Références
NO SIGNAL
SIGNIFICATION
-Messages affichés-
MESSAGES
D'ERREUR
(L'appareil peut reproduire seulement
des disques audio.)
z Il s'est glissé une erreur dans les données.
Numéro ou symboles à la place de (*).
FRANÇAIS
01/4/26
99secl_CF_6.fm
F-44
Dépannage
L'utilisateur peut résoudre pas mal de problèmes sans faire appel à un dépanneur. Si le cas se présente, vérifier les points
ci-dessous avant de prendre contact avec un revendeur ou un centre de réparation agréés par SHARP.
L'appareil ne s'allume pas.
Perte de son.
z L'adaptateur CA reste-t-il débranché?
z La batterie est-elle épuisée?
z La batterie est-elle épuisée?
z L'appareil a-t-il subi des vibrations?
z Une condensation est-elle formée dans l'appareil?
-Dépannage-
Références
z L'appareil est-il en mode de maintien?
z L'appareil a-t-il subi un choc ou une décharge électrique?
z L'appareil n'a pas encore écrit le numéro de morceau
ou les données en caractères ?
z L'enregistrement ou le montage est en cours?
Aucun son n'est émis des enceintes.
z Le niveau de volume est-il trop bas?
L'enregistrement et le montage sont impossibles.
z La télécommande ou le casque est-il branché?
z Le minidisc est-il protégé contre un effacement accidentel ?
z S'agit-il d'un minidisc musical?
z L'appareil est-il correctement raccordé?
Les touches ne répondent pas à la pression.
z L'adaptateur est-il débranché ou y a-t-il eu une panne
de courant pendant l'enregistrement ou le montage?
z L'appareil est-il en mode de maintien?
z L'appareil est-il en mode de maintien?
z La batterie est-elle épuisée?
z Un signal optique est-il envoyé à partir de la chaîne hifi ? Lire le manuel d'utilisation qui accompagne la
chaîne hi-fi.
z La télécommande ou le casque est-il branché?
F-45
Le minidisc refuse de s'éjecter.
FRANÇAIS
01/4/26
99secl_CF_6.fm
Entretien
„ Nettoyage
Si l'appareil a subi une force extérieure (chocs, électricité
statique, surtension due à un foudre, etc.) ou une mauvaise manipulation, il peut mal fonctionner.
Si l'appareil est encrassé
Essuyer l'appareil avec un chiffon sec. Si la saleté résiste, nettoyer l'appareil avec un chiffon légèrement humecté d'eau (surface seulement).
Procéder alors comme suit:
1. Débrancher l'adaptateur CA.
2. Retirer la batterie.
3. Laisser l'appareil hors tension pour 30 secondes environ.
4. Rebrancher l'adaptateur CA sur secteur et rallumer
l'appareil.
„ Condensation
Si une condensation se forme à l'intérieur de l'appareil,
ce dernier peut mal fonctionner.
Dans les cas suivants, la condensation peut se former à
l'intérieur de l'appareil.
z Juste après la mise en marche d'un radiateur.
z Lorsque l'on a mis l'appareil dans une pièce très
humide.
z Lorsque l'on a déplacé l'appareil d'une pièce froide à
une pièce chaude.
Nettoyer les fiches et les jacks du câble de raccordement.
Cela supprimera des bruits.
Attention:
z Ne pas appliquer à l'appareil de produit chimique
(essence, diluant, etc.). La qualité et la couleur de
l'enveloppe peuvent s'altérer.
z Ne pas lubrifier l'intérieur de l'appareil, qui pourrait mal
fonctionner.
Références
„ En cas de dérangement
-Dépannage/Entretien-
MD-MT99C
Désembuage:
Si le cas se présente, retirer le disque. La condensation
s'évaporera 1 heure plus tard et l'appareil fonctionnera
alors correctement.
FRANÇAIS
01/4/26
99secl_CF_6.fm
F-46
Fiche technique
SHARP se réserve le droit d'apporter des modifications à la présentation et aux caractéristiques des appareils à fin
d'amélioration. Les valeurs indiquées dans ce document sont les valeurs nominales des appareils de série mais de
légères différences peuvent être constatées d'un appareil à l'autre.
Batterie au nickel-métal-hydride rechargeable (AD-N70BT) x 1
Adaptateur CA (120 V CA, 60 Hz)
Pile alcaline au format "AA" (LR6) vendue dans le commerce x 1
Adaptateur automobile en option, AD-CA20X (pour voiture ayant 12-24 V CC
négatif à la masse)
7 W (adaptateur CA)
Consommation:
RMS: 20 mW (10 mW + 10 mW)
Puissance de sortie:
(0,2 % de D.H.T.)
Environ 3,5 heures (90 %)
Temps de recharge:
Environ 5,5 heures (complètement rechargé) (avec l'adaptateur CA livré avec l'appareil)
Largeur: 81,1 mm
Hauteur: 19,9 mm
Profondeur: 92,4 mm
Dimensions:
172 g avec pile rechargeable
Poids:
Ligne/optique numérique, microphone (s'alimentant depuis l'appareil)
Jack d'entrée:
Casque (impédance: 16 ohms)/télécommande
Jack de sortie:
Lecteur-enregistreur minidisc portable
Type:
Sans contact, lecture optique (par laser à semi-conducteur à 3 faisceaux)
Procédé de lecture:
Stéréo 2 canaux/monaural 1 canal
Canaux audio:
20 - 20.000 Hz (±3 dB)
Réponse en fréquence:
Environ 400 - 900 tr/mn
Vitesse de rotation:
ACIRC (Advanced Cross Interleave Reed-Solomon Code)
Système de correction:
ATRAC/ATRAC3 (Adaptive TRansform Acoustic Coding), calculé à 24 bits
Codage:
Écrasement par réécriture (overwrite) à modulation magnétique
Enregistrement:
Fréquence d'échantillonna- 44,1 kHz (Les signaux à 32 ou 48 kHz sont enregistrés après la conversion en 44,1 kHz.)
ge:
Non mesurable (moins de ±0,001 % crête, pondéré)
Pleurage et scintillement:
Références
-Fiche technique-
Alimentation:
F-47
1,2 V CC:
5 V CC:
1,5 V CC:
4,5 V CC:
FRANÇAIS
01/4/26
99secl_CF_6.fm
MD-MT99C
Durée de batterie:
4 fois plus long
Lecture ininterrompue:
13 heures environ
Enregistrement ininterrompu: 10,5
heures environ
Lecture ininterrompue:
15,5 heures
environ
Enregistrement ininterrompu: 13,5
heures environ
Lecture ininterrompue:
17,5 heures
environ
Avec une pile alcaline de haute
capacité au format de "AA"
(LR6), en vente dans le commerce
Enregistrement ininterrompu: 3
heures environ
Lecture ininterrompue:
15 heures environ
Enregistrement ininterrompu: 4,5
heures environ
Lecture ininterrompue:
17,5 heures
environ
Enregistrement ininterrompu: 7
heures environ
Lecture ininterrompue:
20 heures environ
Sensibilité d'entrée:
Niveau d'enregistrement
Niveau d'entrée de
référence
Impédance d'entrée
MIC H
0,25 mV
10 kilohms
MIC L
2,5 mV
10 kilohms
LINE
100 mV
20 kilohms
z La durée d'enregistrement ininterrompue est ici celle
obtenue pour l'entrée analogique en laissant le volume
sur "VOL 0".
z La durée de lecture ininterrompue est obtenue lorsque le
niveau de volume est réglé sur "VOL 15".
z Les valeurs ci-dessus s'obtiennent lorsque l'appareil est
rechargé et utilisé à la température ambiante de 25°C.
z La durée de vie des piles alcalines peuvent différer selon
le type, le fabricant et la température d'utilisation.
Références
2 fois plus long
Enregistrement ininterrompu: 7,5
heures environ
-Fiche technique-
Stéréo
Avec la batterie rechargeable
fournie (complètement rechargée)
Niveau de sortie:
Sortie spécifiée
Niveau de
sortie maximal
Impédance
de charge
Casque
-
10 mW +
10 mW
16 ohms
LINE
250 mV
(-12 dB)
-
10 kilohms
FRANÇAIS
01/4/26
99secl_CF_6.fm
F-48
VALID IN CANADA ONLY
LIMITED WARRANTY
LIMITED WARRANTY / GARANTIE LIMITÉE
Consumer Electronics Products
Congratulations on your purchase!
Sharp Electronics of Canada Ltd. (hereinafter called “Sharp”) gives the following express warranty to the first consumer purchaser for this Sharp brand product, when
shipped in its original container and sold or distributed in Canada by Sharp or by an Authorized Sharp Dealer:
Sharp warrants that this product is free, under normal use and maintenance, from any defects in material and workmanship. If any such defects should be found in
this product within the applicable warranty period, Sharp shall, at its option, repair or replace the product as specified herein.
This warranty shall not apply to:
(a) Any defects caused or repairs required as a result of abusive operation, negligence, accident, improper installation or inappropriate use as outlined in the owner’s
manual.
(b) Any Sharp product tampered with, modified, adjusted or repaired by any party other than Sharp, Sharp’s Authorized Service Centres or Sharp’s Authorized
Servicing Dealers.
(c) Damage caused or repairs required as a result of the use with items not specified or approved by Sharp, including but not limited to head cleaning tapes and
chemical cleaning agents.
(d) Any replacement of accessories, glassware, consumable or peripheral items required through normal use of the product including but not limited to earphones,
remote controls, AC adapters, batteries, temperature probe, stylus, trays, filters, belts, ribbons, cables and paper.
(e) Any cosmetic damage to the surface or exterior that has been defaced or caused by normal wear and tear.
(f) Any damage caused by external or environmental conditions, including but not limited to transmission line/power line voltage or liquid spillage.
(g) Any product received without appropriate model, serial number and CSA/cUL markings.
(h) Any products used for rental or commercial purposes.
(i) Any installation, setup and/or programming charges.
Should this Sharp product fail to operate during the warranty period, warranty service may be obtained upon delivery of the Sharp product together with proof of
purchase and a copy of this LIMITED WARRANTY statement to an Authorized Sharp Service Centre or an Authorized Sharp Servicing Dealer. In home warranty
service may be provided at Sharp’s discretion on any Sharp television with the screen size of 27” or larger and on any Sharp Over The Range Microwave Oven.
This warranty constitutes the entire express warranty granted by Sharp and no other dealer, service centre or their agent or employee is authorized to extend, enlarge
or transfer this warranty on behalf of Sharp. To the extent the law permits, Sharp disclaims any and all liability for direct or indirect damages or losses or for any
incidental, special or consequential damages or loss of profits resulting from a defect in material or workmanship relating to the product, including damages for the
loss of time or use of this Sharp product or the loss of information. The purchaser will be responsible for any removal, reinstallation, transportation and insurance
costs incurred. Correction of defects, in the manner and period of time described herein, constitute complete fulfillment of all obligations and responsibilities of Sharp
to the purchaser with respect to the product and shall constitute full satisfaction of all claims, whether based on contract, negligence, strict liability or otherwise.
Colour Television
LCD TV
Camcorder
Audio Products
Vacuum Cleaner
1
1
1
1
1
year (picture tube 1 additional year)
year
year
year
year
WARRANTY PERIODS
LCD Projector
Video Cassette Recorder
TV/VCR Combo
Microwave Oven
DVD Player
1
1
1
2
1
year (bulb 90 days)
year
year (picture tube 1 additional year)
years (magnetron 3 additional years for part only)
year
To obtain the name and address of the nearest Authorized Sharp Service Centre or Dealer, please contact:
SHARP ELECTRONICS OF CANADA LTD.
SHARP ELECTRONICS OF CANADA LTD
335 Britannia Road East
Mississauga, Ontario
L4Z 1W9
(905) 568-7140 or 1-(877) SHARP-CC
Web site: www.sharp.ca
(2001.01)
2
WARRANTY ENGLISH
POUR CANADA SEULEMENT
GARANTIE LIMITÉE
Bravo! Vous Venez de faire un excellent achat!
Sharp Électronique du Canada Ltée (ci-après nommée “Sharp”) donne la garantie expresse suivante à l’acheteur initial du produit ci-dessous mentionné de Sharp,
si celui-ci est emballé dans son contenant original et s’il est vendu et distribué au Canada par Sharp ou par un Détaillant autorisé Sharp:
Sharp garantit que ledit produit est, s’il est utilisé et entretenu normalement,exempt de défaut de fabrication. Si un défaut de fabrication est décelé durant la période
de garantie stipulée, Sharp s’engage à réparer ou remplacer, selon son choix, le produit spécifié ci-dessous.
La garantie offerte par Sharp ne s’applique pas:
(a) Aux appareils qui ont été l’objet d’un emploi abusif, de négligence, d’un accident, d’une installation inadéquate ou d’une utilisation non appropriée, tel qu’il est
mentionné dans le manuel du propriétaire;
(b) Aux produits Sharp altérés, modifiés, réglés ou réparés ailleurs qu’aux bureaux de Sharp, à un centre agréé de service Sharp ou à un Détaillant autorisé au
service Sharp;
(c) Au dommage causé ou réparation requise à la suite de l’utilisation avec des articles non désignés ou approuvés par Sharp, y compris, mais non limité aux rubans
pour nettoyage de tête et les nettoyants chimiques;
(d) Au remplacement des accessoires, des pièces en verre, des articles consommables ou périphériques, devenu nécessaire à la suite d’une utilisation normale du
produit, y compris, mais sans en être limité, aux écouteurs, les télécommandes, les adaptateurs c.a., les piles, la sonde de température, les pointes de lecture,
les plateaux, les filtres, les courroies, rubans, papier ou autre;
(e) Aux défauts cosmétiques à la surface ou à l’extérieur de l’appareil, et qui sont causés par une usure normale;
(f) Aux dommages causés par des conditions extérieures et relatives à l’environnement, y compris mais non limité à du liquide répandu, une tension de la ligne
électrique ou de transmission trop élevée ou autre;
(g) Aux produits dont le numéro de série et de modèle ou le marquage CSA/cUL, ou les deux, ont été enlevés ou effacés;
(h) Aux produits de consommation ou utilisés à des fins de location.
(i) Aux coûts d’installation, configuration et/ou programmation.
Si un défaut de fabrication est décelé dans ce produit Sharp au cours de la période de la garantie. La réparation sous garantie est offerte à la condition que le produit
Sharp soit livré accompagné de la preuve d’achat et une copie de cette GARANTIE LIMITÉE à un centre agréé de service Sharp ou à un Détaillant autorisé au
service Sharp. La garantie de service à domicile peut être offerte, à la discrétion de Sharp, sur tous les téléviseurs Sharp dont l’écran est de 27 pouces ou plus et sur
les fours micro-onde Sharp au-dessus de la cuisinière.
La garantie ci-dessus constitue la seule garantie expresse accordée par Sharp. Aucun autre détaillant, aucun centre de service, leurs représentants ou employés,
ne sont autorisés à prolonger la durée de la garantie, à fournir des garanties autres ou à transférer cette garantie au nom de Sharp. Dans la mesure où la loi en
vigueur le permet, Sharp décline toute responsabilité pour les pertes ou les dommages directs ou indirects, pour les pertes ou les dommages imprévus et pour les
pertes de profits indirectes résultant d’un défaut de fabrication du produit, y compris les dommages reliés à la perte de temps ou d’utilisation de ce produit Sharp.
L’acheteur doit assumer les coûts de démontage, de réinstallation, de transport et d’assurance de l’appareil. La réparation des défectuosités, selon la manière et
durant la période de temps ci-haut décrites, constitue l’exécution complète de toutes les obligations et les responsabilités de Sharp vis-à-vis de l’acheteur en ce qui
a trait au produit et constituera un acquittement complet pour toute réclamation, qu’elle soit basée sur le contrat, la négligence, la responsabilité stricte ou autre.
Téléviseur couleur
Télévisour LCD
Caméscope
Produits audio
Aspirateurs
1 an (tube cathodique 1 an additionel)
1 an
1 an
1 an
1 an
PÉRIODES DE GARANTIE
Projecteur LCD
Magnétoscope
Téléviseur/magnétoscope
Four micro-ondes
Lecteur DVD
1 an (ampoule 90 jours)
1 an
1 an (tube cathodique 1 an additionel)
2 ans (magnétron 3 ans de garantie supplémentaire-pièces seulement)
1 an
Pour obtenir le nom et l’adresse du Centre de service ou du Détaillant autorisé au service Sharp le plus près, veuillez écrire ou téléphoner à:
SHARP ÉLECTRONIQUE DU CANADA LTÉE
335 Britannia Road East
Mississauga, Ontario
L4Z 1W9
(905) 568-7140 ou 1-(877) SHARP-CC
Site Web: www.sharp.ca
SHARP ÉLECTRONIQUE DU CANADA LTÉE.
(2001.01)
WARRANTY FRENCH
LIMITED WARRANTY / GARANTIE LIMITÉE
Produits Électronique grand public
SHARP ELECTRONICS OF CANADA LTD.
335 Britannia Road East, Mississauga,Ontario L4Z 1W9
SHARP CORPORATION
9906
PRINTED IN MALAYSIA
IMPRIMÉ EN MALAISIE
TINSK0119AWZZ
4
A0105.TO
MD-MT99C
PORTABLE MINIDISC RECORDER