1
I
d
'3
3
CHEVROLET
ASTRO VAN
OWNER'S MANUAL
" Ill
IJ I
How To Use This Manual
INTRODUCTION
11993 Chevrolet Astm Owner3 Manual
Welcome
Thismanualhasbeenprepared
to acquaintyouwiththeoperation
and
maintenance of your 1993 Astro, and to provide important safety information.
There is also a Chevrolet Truck Warranty and Owner Assistance Information
booklet. In somevehicles,therecanbeinformationmanualsfromother
manufacturerslikebodybuilders,vanoutfittersorspecialequipment
companies.Weurgeyou
to read all thesepublicationscarefully.Thiswillhelp
you enjoy the safe and trouble-free operation of yourvehicle.
When it comes to service, keep in mind that your Chevrolet dealer knows
yourvehiplebestand
is interested in your complete satisfaction.
Your dealer
invites you to return for
all ofyourserviceneedsbothduring
and after the
warranty period.
it to your
Remember, if youhaveaconcernandneedhelphandling
satisfaction, see the procedure in theChevroletTruckWarranty and Owner
AssistanceInformationbooklet.
Thanks for choosing a Chevrolet product.
We value you as a member
ofthe
Chevrolet family. We want to assure you ofourcontinuinginterest
in your
pleasure and satisfaction with your vehicle.
Chevrolet Motor Division
GeneralMotorsCorporation
30007 Van Dyke Ave.
Warren,Michigan
@Copyr@ht7992 General Motors Corporation, Chevrolet Motor Division.
All Rights Resewed
Second Edition
Printed in USA.
i
How To Use This Manual
ImportantNotestoOwnersandDrivers
. . .
About thisManual: Pleasekeepthismanualinyourvehicle,
so it
If yousellthe
willbethere if youeverneed it whenyou’reontheroad.
it so thenewownerordrivercanuseit.
vehicle,pleaseleavethismanualin
Thismanualincludesthelatestinformationatthetimeit
was printed. We
reserve the right to make changes in the product after that time without
furthernotice.ForvehiclesfirstsoldinCanada,substitutethename“General
Motors of Canada Limited” for Chevrolet Motor Division whenever it appears
in thismanual.
. . .
ForCanadianOwners
Who PreferaFrenchLanguageManual:
Aux proprietairescanadiens: Vouspouvezvousprocurerunexernplairede
au DGNMarketing
ceguideenfrancaischezvotreconcessionaireou
1C7.
ServicesLtd., 1500 BonhillRd.,Mississauga,OntarioL5T
-
GM
GENERAL MOTORS, GM, the GM Emblem, Chevrolet, the Chevrolet Emblem
and Astro are registered trademarks of General Motors Corporation.
ii
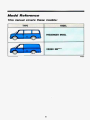
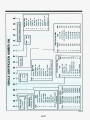
Model Reference
This manual covers these models:
, r
PO357
iii
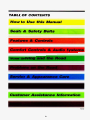
TABLE OF CONT€N7
I
How to
I
7
I
I
TO212
iv
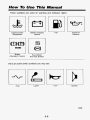
How To Use This Manual
Manypeoplereadtheirowner’smanualfrombeginningtoendwhentheyfirst
receivetheirnewvehicle.Thiswillhelpyoulearnaboutthefeaturesand
controlsforyourvehicle.Inthismanual,you’llfindthatpicturesandwords
worktogethertoexplainthingsquickly.
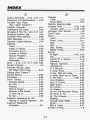
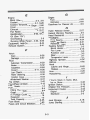
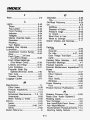
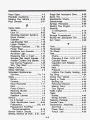
INDEX: A goodplace to look forwhatyouneedistheIndex
in backofthe
manual.It’sanalphabeticallistofallthat’s
in themanual,andthepage
number where you’ll find it.
SECTIONS 1-6: Eachsectionofthismanualbeginswithabrieflistofits
if asectioncontainsthe
contents, so youcanoftenfindataglance
informationyouwant.
SECTION 7: Thissection of thismanualcoversthemaintenancerequiredfor
your vehicle.
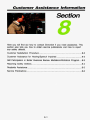
SECTION 8, CUSTOMERASSISTANCE: Thissectionincludesimportant
informationaboutReportingSafetyDefects
and givesyoudetailsaboutthe
“RoadsideAssistance”program. You willalsofindcustomersatisfactionphone
numbers(includingcustomersatisfactionnumbersforthehearing
and speech
impaired),aswellasthemediationlarbitrationprocedure.We’vealsoincluded
orderinginformationforservicepublications
in thissection.
0-1
How To Use This Manual
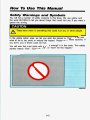
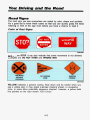
Safety Warnings and Symbols
Youwill find a number ofsafetycautionsinthis
book. Weuseyellow and
if youwere to
theword CAUTION to tell youaboutthingsthatcouldhurtyou
ignorethewarning.
1 CAUTION
Thesemeanthere
is somethingthatcouldhurtyou
I
or otherpeople.
I
- -
Intheyellowcautionarea,
we tell youwhatthehazardis.Thenwetellyou
what to do to helpavoidorreducethehazard.Pleasereadthesecautions.
youdon’t,youorotherscouldbehurt.
If
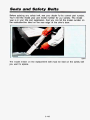
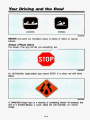
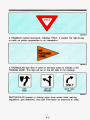
You willalsofindaredcirclewithaslashthroughit
in this book. Thissafety
do this”,or“Don’tletthishappen.”
symbolmeans“Don’t’’,“Don’t
AM002002
0-2
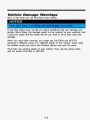
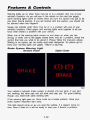
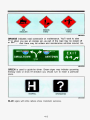
Vehicle Damage Warnings
Also,in this bookyouwillfindthesebluenotices:
In thebluenoticearea, we tell youaboutsomethingthatcandamageyour
vehicle.Manytimes, this damagewouldnotbecoveredbyyourwarranty,and
itcouldbecostly.Butthenoticewill
tell youwhat to do to helpavoidthe
damage.
Whenyoureadothermanuals,youmightseeCAUTIONandNOTICE
warningsindifferentcolorsor
in differentwords. In thismanual,we’veused
thefamiliarwordsandcolorsthatGeneralMotorshasusedforyears.
You’ll also see warning labels on your vehicle. They use the same colors,
andthewordsCAUTIONorNOTICE.
0-3
How To Use This Manual
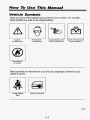
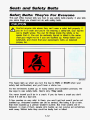
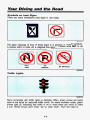
Vehicle Symbo/s
These are someof the symbols you will find on your vehicle. For example,
these symbols are used on an original battery:
A
Caution
Possible Injury
Protect Eyes
by Shielding
Caustic Battery Acid
Could Cause Burns
Spark or Flame Could
Explode Battery
A void Sparks
or Flames
These symbols are Important foryou and your passengers whenever your
vehicle is driven:
Fasten Safety
Belts
Door Lock/Unlock
PO335
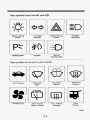
These symbols have to do with your lights:
A
0
Master Lighting
Switch
Turn Signal
Direction
Hazard Warning
Flasher
Parking Lights
Fog Lights
Daytime
Running Lights
Headlight
High Beam
~
These symbols are on some of your controls:
Hood Release
Windshield
Wper
Windshield
Washer
Ventilating Fan
Rear Window
Wiper L? Washer
Rear Window
Defogger
Windshield
Defroster
Hatch
Release
PO358
0-5
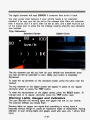
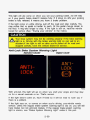
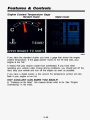
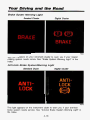
These symbols areusedon
warning and indicator lights:
1
Engine Coolant
Temperature
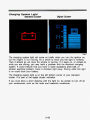
mrtery Charging
System
Fuel
Engine Oil
Pressure
I
ANTILOCK
BRAKE
Brake
(Standard Cluster)
Four- Wheel
Anti-lock Brakes
Here are someother symbols you may see:
Horn Fuse
Lighter
Speaker
PO359
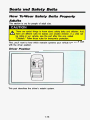
Hereyou’llfindinformationabouttheseats
in yourvehicleandhowtouse
your safety belts properly . You can also learn about some things you should
not do with safety belts .
Seats and Seat Controls ...................................................................................... 1-2
Front Seats ........................................................................................................ 1-2
Rear Seats ......................................................................................................... 1-5
Head Restraints ............................................................................................... 1-11
Safety Belts: They’re For Everyone ................................................................... 1-12
Why Safety Belts Work ................................................................................... 1-13
Questions People Ask ..................................................................................... 1-16
1-17
Safety Belt Reminder Light .............................................................................
How To Wear Safety Belts Properly .................................................................
1-18
Adults ................................................................................................................... 1-18
Driver Position..................................................................................................
1-18
1-19
Lap-Shoulder Belt.........................................................................................
Safety Belt Use During Pregnancy ................................................................ 1-25
Right Front Passenger Position ......................................................................1-26
Rear Seat Outside Passenger Positions ....................................................... 1-27
Center Passenger Positions ............................................................................
1-30
Children ................................................................................................................ 1-31
Smaller Children and Babies .......................................................................... 1-32
1-33
Child Restraints................................................................................................
1-40
Larger Children ................................................................................................
1-42
Safety Belt Extender ...........................................................................................
1-43
Checking Your Restraint Systems ......................................................................
Replacing Safety Belts After a Crash ............................................................... 1-43
1-1
Seats and Safety Belts
Seats and Seat Controls
Thissectiontellsyouabouttheseats-howtoadjustthem,takethemout
andputthembackin.Italsotellsyouaboutbucketandbenchseats,power
seats,andheadrestraints.
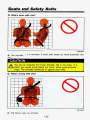
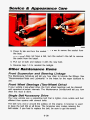
Front Seats
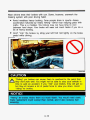
Manual Seats
bnu I I W I
You canlosecontrol of thevehicleifyoutry
to adjust a manual
2 driver’s seat while the vehicle is moving. The sudden movement
couldstartleandconfuse you, ormakeyou push a pedalwhenyou
don’twantto.Adjustthedriver’sseatonlywhenthevehicleisnot
moving.
A
d
I
I
I
PO414
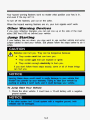
Thebucketseatscanbeadjustedforwardorrearwardbytheleveratthe
front of the seat.
Slide the lever at the front of theseattothelefttounlockit.Slidetheseat
to whereyouwant it. Thenreleasetheleverandtry
to movetheseatwith
yourbody,tomakesuretheseatislockedintoplace.
1-2
..
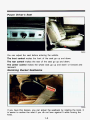
PO410
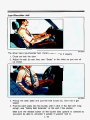
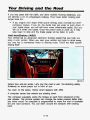
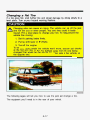
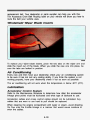
You canadjusttheseatbeforeenteringthevehicle.
Thefrontcontrol makesthefront of theseatgoupanddown.
Therearcontrol makestherear of theseat go upanddown.
Thecentercontrol makesthewholeseat go upanddownorforwardand
rearward.
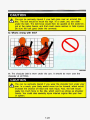
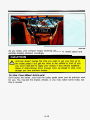
Reclining Bucket Seatbacks
I
PO409
Ifyouhave this feature,youcanadjusttheseatbackbyrotatingtheknob.
iseasier to reclinetheseat if you do notleanagainst it while turning the
knob.
1-3
It
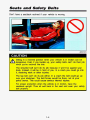
Don’thaveaseatbackreclined
if yourvehicleismoving.
AM101010
1
CAUTION
*
is inmotioncanbe
Sitting in areclinedpositionwhenyourvehicle
4 dangerous.Evenifyoubuckleup,yoursafetybeltscan’t
do their job
whenyou’rereclinedlikethis.
The shoulder belt can’t do its job because it won’t be against your
In acrashyoucouldgo
body.Instead, it willbeinfrontofyou.
it,receivingneckorotherinjuries.
Thelapbeltcan’t do its jobeither. In acrashthebeltcouldgoup
overyourabdomen.Thebeltforceswouldbethere,notatyour
pelvicbones.Thiscouldcauseseriousinternalinjuries.
I
For proper protection when the vehicle
is in motion,havethe
in theseatandwearyoursafety
seatbackupright.Thensitwellback
properly.
belt
into
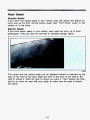
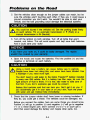
Rear Seats
Bucket Seats
If you haverearbucketseatsinyourvehicle,they
will reclineandadjustthe
See "FrontSeats"earlier in this
sameway as thefrontmanualbucketseats.
sectionor in the Index.
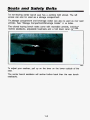
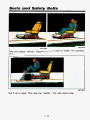
Bench Seats
If youhavebenchseats in yourvehicle,eachseat can carry up to three
passengers.Theycanalsoberemoved
to increasestoragespace.
-.
:..,:.;..*i
K3203
Thecenter and rearbenchseatscanbeadjustedforwardorrearwardbythe
of the seat to the
lever at the front of the seat. Slide the lever at the front
right to unlockit.Slide the seat to whereyouwant it. Thenreleasethelever
and try to movetheseatwithyourbody,
to make sure the seat is locked
intoplace.
. 1-5
Seatls and Safe#y Belts
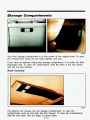
Thenon-touringcenterbenchseathasapivotingrightarmrest.Theleft
armrestcanalsobe used as a storagecompartment,
The storagecompartmentandbeveragecoolercanalsobeused
as rear seat
armrests. See "StorageCornpartmenVBeverageCooler" in theIndex.
Theoptionaltouringbenchseatscomewithmoveablearmrests,individual
recliningseatbacks,adjustableheadrestsanda
fold downcenterconsole.
.:
PO461
To adjustyourseatback,pullupontheleverontheloweroutside
seat.
Thecenterbenchseatbackswillreclinefurtherbackthantherearbench
seatbacks.
1-6
of the
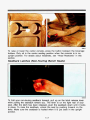
K3106
To foldyournon-touringseatbackforward,
pull uponthelatchreleaselever
whilepullingtheseatbacktowardyou.Thelever
is on therightrear ofyour
seat.Afterthelatchhasbeenreleased,pushtheseatbackdownuntilitlocks
in place. To raisetheseatback,unlocktheseatbypushingforwardonthe
lever.Makesuretheseatback
is lockedwhen it is putbackintheupright
position.
1-7
Seats and Safety Belts
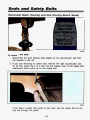
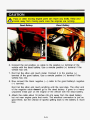
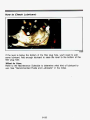
Removable Seats (Touring and Non-Touring Bench Seats)
PO415
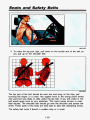
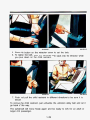
To remove the seat:
1. Disconnectthequickreleaselatchplatesforthelap-shoulderbeltfrom
thebucklesintheroof.
2. If youareremovingthecenterseat,removetherightlap-shoulderbelt.
To do this,pressthetip of akeyintothereleaseholeof
the safety belt
attachmentwhilepullinguponthesafetybelt.
I
1
NO034
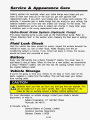
If youhaveasafetybeltguide
wayoutthroughtheguide.
on yourseat,pullthesafetybeltallthe
1-8
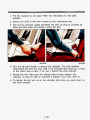
3. Pull uponthe seatback latch on the rightrear of the front seat. Push
the seatback down until it locks in place (non-touringbenchseats only).
4. Lift up ontheseatreleaselatch.Thelatchesarenearthefloor
rearlegs of theseat. To relievepressureonthelatch,pullback
seat.
on the
on the
1
K3109
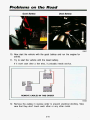
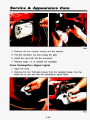
5. Liftup on therear of theseat to removetheseatassemblyfromthe
lift theseatout of thevehicle.
rearlatchpins.Then,pullbackand
1-9
Seats and Safety Belts
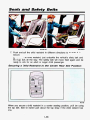
To install the seat:
a
1. Lowertheseatintoposition.Makesurethefrontretainersarehooked
ontotheanchorpins. Do the samefortherearretainers.Makesurethe
seatislockedinbypullingupanddownontheseat.
2. Raisetheseatbackbypushingforwardonthelatchattherightrear
theseat.Pullupontheseatback
until it islockedsecurely
position.
of
in theup
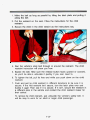
3. Attachthequickreleaselatchplate
to thebuckles in theroof. If youare
installing the center seat, connect the right lap-shoulder belt
to the
attachmentontheseatcushion.Ifyouhaveasafetybeltguideonyour
seat,pullthebeltthroughtheguidebeforereattachingthelap-shoulder
be facingoutward.
belt to theside of theseat.Thereleaseholeshould
If youinstalledthesafetybeltwiththereleaseholefacinginward
up so youcanseethebuckle.
(toward the seat), slide the plastic cover
Disconnecttheseatbelt.Slidethecoverbackdownandreinstallthe
belt correctly.
A
To avoidpersonalinjury, do notride in therightposition of the
centerseatunlessthesafetybelt
is securelyanchored.Besurethe
buckle on the free end of the belt is fastened securely
to the latch
plate mountedatthebase of theseat.
1-1 0
I
NOTICE
Be sure to put the correct seats back
belts will work properly.
in the proper positions so the safety
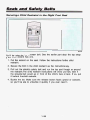
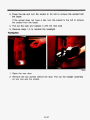
Head Restrahts
ANI 0201 2
If yourvehiclehastheoptionaltouringpackage,youhaveadjustablehead
restraints.
Slidetheheadrestraintupordown
to the top of your ears.
so that the top of the restraint is closest
This position reducesthechances of a neck injury in a crash.
1-11
Seats and Safety Belts
Safety Belts: They’= For Everyone
Thispartofthemanualtellsyouhowtousesafetybeltsproperly.
you somethings you shouldnot dowithsafetybelts.
I
I
It alsotells
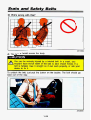
Don’t let anyone ride where they can’t wear a safety belt properly.
A
-b you are in a crash and you’re not wearing a safety belt, your injuries
If
canbe much worse.Youcan hitthingsinsidethevehicleorbe
ejectedfromit. You canbeseriouslyinjuredorkilled.
In thesame
if youarebuckledup.Alwaysfastenyour
crash,youmightnotbe
safety belt, and check that your passengers’ belts are fastened
properly too.
I
I
I
AM110001
This figure lights upwhenyouturnthekey
to RUN or START whenyour
safety belt isn’t buckled, and you’ll hear a chime too.
It’s thereminder to buckleup. In manystatesandCanadianprovinces,the
law says to wear safety belts. Here’s why: They work.
Youneverknow if you’llbe in acrash. If youdohaveacrash,youdon’t
know if it will be a bad one.
A fewcrashesareverymild.Inthem,youwon’tgethurteven
if you’renot
so serious,likebeinghitbya
train,
buckledup.Andsomecrashescanbe
thatevenbuckledupapersonwouldn’tsurvive.Butmostcrashesare
in
can surviveandsometimes
between. In many of them,peoplewhobuckleup
walkaway.Withoutbeltstheycouldbebadly
hurt or killed.
1-12
After 25 years of safety belts in vehicles, the facts are clear. In most crashes
bucklingup does matter . . . a lot!
AM110014
Why Safety Belts Work
’-’?
I
.
AM115001
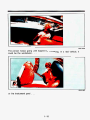
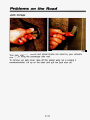
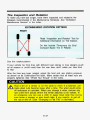
When youride in or onanything,yougoasfastas
it goes. For example, if
thebikeisgoing
10 mph (16 km/h), so isthe child. When thebikehitsthe
block, it stops.Butthechildkeepsgoing!
1-1 3
Seats and Safety Belts
E
I
R
AM115004
AM115003
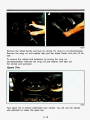
Take thesimplest“vehicle.”Supposeit’sjust
on it.
a seat on wheels.Putsomeone
I
I
Get it uptospeed.Thenstopthe“vehicle.”Theriderdoesn’tstop.
1-1 4
L
I
AM115006
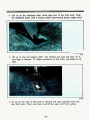
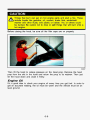
Thepersonkeepsgoinguntilstoppedbysomething.Inarealvehicle,it
...
couldbethewindshield
1
I
or theinstrumentpanel
...
1-1 5
Seats and Safety Belts
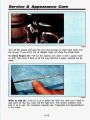
AM115008
or the safety belts!
Withsafetybelts,youslowdownasthevehicle
does.You getmoretime
stop. Youstopovermoredistance,andyourstrongestbonestaketheforces.
That’swhysafetybeltsmakesuchgoodsense.
to
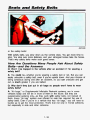
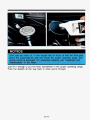
Here Are Questions Many People Ask About Safety
Belts-and the Answers
Q: Won’t
I betrapped in thevehicleafteranaccident
safetybelt?
if I’m wearinga
A: You could be-whetheryou’rewearinga
safety belt or not.Butyoucan
if you’reupsidedown.Andyourchanceof
easilyunbuckleasafetybelt,even
so you can unbuckleandget
being consciousduringandafteranaccident,
out, is much greater if youarebelted.
Q: Whydon’ttheyjustput
safetybelts?
in airbags so peoplewon’thave to wear
A: “Airbags,” or SupplementalInflatableRestraintsystems,are
in some
vehiclestodayandwillbeinmore
of them in thefuture.Butthey are
with safetybelts,notinstead of
supplementalsystems only-sotheywork
them.Every“airbag”systemeverofferedforsalehasrequiredtheuse
of
safetybelts.Even if you’re in avehiclethathas“airbags,’’youstillhaveto
buckleup to getthemostprotection.That’struenotonly
in frontalcollisions,
but especially in side and other collisions.
1-16
Q: If I’m a gooddriver,and
wear safety belts?
I neverdrivefarfrom
home, whyshould I
A: Youmay beanexcellentdriver,but
if you’re in an accident-even one
thatisn’tyourfault-youandyourpassengerscanbehurt.Beingagood
driver doesn’t protect you from things beyond your control, such as bad
drivers.
Mostaccidentsoccurwithin 25 miles (40 km)ofhome.Andthegreatest
number of serious injuries and deaths occur at speeds
of less than 40 mph
(65 kmlh).
Safety belts are for everyone.
Safety Belt Reminder Light
K3264
Whenthekey is turnedto RUN or START, alightwill comeonforabout
eight seconds to remind people to fasten
their’ safety belts. Unless the driver’s
safetybeltisbuckled, a chimewill also sound.
1-1 7
Seats and Safety Belts
How To Wear Safety Belts Prroperiy
Adults
This section is onlyforpeople
of adult size.
I CAUTION
I
There are special things to know about safety belts and children. And
If a child will
there are different rules for babies and smaller children.
beriding in yourvehicle,seethepartafterthisone,called
“Children.” Follow those rules for everyone’s protection.
st, you’ll want to knowwhichrestraintsystemsyourvehiclehas.We’llstart
with the driver position.
Driver Position
U
This part describes the driver’s restraint system.
1-1 8
Lap-Shoulder Belt
I
AN1 20049
Thedriver has alap-shoulderbelt.Here’showtowearitproperly.
1. Closeandlockthedoor.
2. Adjusttheseat(tosee
upstraight.
.
..
how,see“Seats”
intheIndex)
so youcansit
.
AN120033
3. Pick up thelatchplateand pull thebeltacross you. Don’tlet it get
twisted.
4. Push the latch plate into the buckleuntilitclicks. If thebeltisn’tlong
of thissection.
enough,see“SafetyBeltExtender”attheend
Makesure the releasebutton on thebucklefacesupward or outward so
youwould be abletounbuckle it quickly if youever had to.
1-1 9
Seats and Safety Belts
L
AM120167
5. To makethelapparttight,pulldownonthebuckleendofthebeltas
youpullupontheshoulderbelt.
d
Thelappart of thebeltshouldbewornlowandsnug
on thehips,just
touching the thighs. In acrash,thisappliesforce
to the strong pelvic bones.
If youslidunderit,the
Andyou'dbelesslikely
to slideunderthelapbelt.
beltwouldapplyforceatyourabdomen.Thiscouldcauseseriousoreven
fatal injuries. The shoulder belt should go over the shoulder and across the
to takebeltrestrainingforces.
chest. These parts of the body are best able
The safety belt locks
if there's a sudden stop or a crash.
1-20
Shoulder Belt Height Adjuster
You can move the shoulder belt adjuster to the height that is right for you.
i
AN120160
To moveitdown,pushintheadjusteratthearrowsand
adjuster.Afteryoumovetheadjustertowhereyouwant
anddowntomake
sure itislockedintoplace.
AN120161
1
pull downonthe
it, try to move it up
You canmovetheadjusterupfromalowerpositionjustbypushinguponit.
1
AN1201 62
Adjusttheheight so that the shoulder portion of the belt is centered on your
off
shoulder.Thebeltshould be awayfromyourfaceandneckbutnotfalling
your shoulder.
1-21
Seats and Safety Belts
Q: What’s wrong withthis?
I
-7
I
I
8
P
AM120015
A: Theshoulderbelt
way.
is too loose. It won’tgivenearlyasmuchprotectionthis
You can beseriouslyhurt if yourshoulder belt is too loose. In a
crash, youwouldmoveforwardtoomuch,whichcouldincrease
injury. The shoulderbeltshould fit aqainst your body.
AM120058
A: Thebelt is overanarmrest.
1-22
CAUTION
I
A
You canbeseriouslyinjured
ifyour beltgoesoveranarmrestlike
this.The belt wouldbemuchtoohigh.
In acrash,youcanslide
underthebelt. The belt forcewouldthenbeappliedattheabdomen,
or fatalinjuries.
notatthepelvicbones,andthatcouldcauseserious
Besurethe belt goesunderthearmrests.
Q: What’swrongwiththis?
IT
m
I
A: Theshoulder belt is worn under the arm. It shouldbeworn
shoulder at all times.
A
-
-
over the
You can be seriously injured if youweartheshoulderbeltunderyour
move too far forward,whichwould
arm. In acrash,yourbodywould
Also, the belt would
increase the chanceofheadandneckinjury.
apply too much force to the ribs, which aren’t as strong as shoulder
bones.Youcouldalsoseverelyinjureinternalorganslikeyourliver
or spleen.
1-23
Seats and Safety Belts
Q: What's wrong withthis?
I
i
i
AM125002
I CAUTION
-
* You can beseriouslyinjured by a twisted belt. In a crash, you
I
wouldn't have the full width of the belt to take impact forces. If a
belt is twisted, make it straight so it can workproperly,or ask your
dealer fix it.
Ib unlatch the belt, just pushthebutton
back out of the way.
m
on the buckle.Thebeltshould
--iu
1-24
go
I
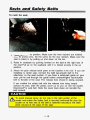
Beforeyouclosethe door,besurethebeltisout
of the way. If youslam
the dooronit,youcandamage
both thebeltandyourvehicle.
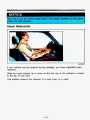
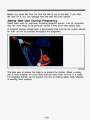
Safety Belt Use During Pregnancy
Safetybelts work foreveryone,includingpregnantwomen.Likealloccupants,
they are more likely to be seriously injured if they don't wearsafetybelts.
A pregnantwoman should wearalap-shoulderbeltandthelapportionshould
bewornaslowaspossiblethroughout
the pregnancy.
AM135001
The best way to protect the fetus is to protect the mother.Whena safety
belt is wornproperly, it's morelikelythatthefetuswon'tbehurt
in acrash.
Forpregnantwomen,asforanyone,thekey
to makingsafetybeltseffective
is wearingthemproperly.
1-25
Seats and Safety Belts
Right Front Passenger Position
K3114
The right front passenger’s safety belt works the same
safetybelt.See“DriverPosition,”earlierinthissection.
way as the driver’s
Rear Seat Passengers
It’sveryimportantforrearseatpassengerstobuckleup!Accidentstatistics
showthatunbeltedpeopleintherearseatarehurtmoreoften
in crashes
thanthose who arewearingsafetybelts.
Rear passengers who aren’t safety belted can be thrown out
of the vehicle in
a crash.Andtheycanstrikeothersinthevehiclewhoarewearingsafety
belts.
1-26
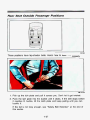
Rear Seat Outside Passenger Positions
K3138
Thesepositionshavelap-shoulderbelts.Here's
how to wearoneproperly.
I
I
AM1471 06
1. Pickupthelatchplateand
pull itacrossyou.Don'tlet
it gettwisted.
2. Pushthelatchplateintothebuckleuntil
it clicks. If thebelt stops before
it reachesthebuckle, tilt thelatch plate andkeeppullinguntilyoucan
buckleit.
If thebeltisnotlongenough,see"SafetyBeltExtender''
this section.
1-27
at theend of
Seats and Safety Belts
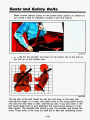
Makesurethereleasebutton
youwouldbeabletounbuckle
so
on thebucklefacesupwardoroutward
it quickly if youeverhadto.
AN147135
3. To makethelapparttight,pulldownonthebuckleend
you pull upontheshoulderpart.
of thebelt as
I
AM14700'
Thelappartofthebeltshouldbewornlowandsnugonthehips,just
touchingthethighs. In a crash,thisappliesforcetothestrongpelvicbones.
If youslidunderit,the
Andyou'dbelesslikelytoslideunderthelapbelt.
belt would apply force at your abdomen. This could cause serious or even
fatal injuries. The shoulder belt should go over the shoulder and across the
chest.Theseparts of thebodyarebestabletotakebeltrestrainingforces.
1-28
Thesafetybelt
locks if there’sasuddenstop
or acrash.
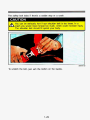
CAUTION
You canbeseriouslyhurtifyourshoulderbeltistoo
loose. Ina
b crashyouwouldmoveforwardtoomuch,whichcouldincreaseinjury.
The shoulder belt should fit againstyourbody.
To unlatch thebelt, just push the button on the buckle.
1-29
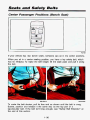
Center Passenger Positions (Bench Seat)
If yourvehicle has rear benchseats,someone can sit in the center positions.
When you sit in a centerseatingposition, you have a lapsafetybelt,which
hasno retractor. To makethebeltlonger,tilt
tho belt.
the latchplateand
pull it along
I
AM145018
AM145026
To makethebeltshorter,pullitsfreeend
as shownuntilthebelt
is snug.
Buckle,positionandrelease it thesamewayasthelappartofa
lap-shoulderbelt. If thebeltisn’tlongenough,see“SafetyBeltExtender”at
the end of this section.
1-30
Makesurethereleasebuttononthebucklefacesupwardoroutward
would be able tounbuckle it quickly if you everhad to.
so you
Children
tveryone in a vehicleneedsprotection!Thatincludesinfantsand
all children
smaller than adultsize. In fact,the law in everystateandCanadianprovince
says children up to some agemustberestrainedwhilein
a vehicle.
1-31
Seats and Safety Belts
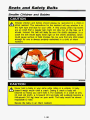
Smaller Children and Babies
I
Smallerchildrenandbabiesshouldalwaysberestrained
in a child ot
infantrestraint.Theinstructionsfortherestraintwillsaywhether
it is
the right type and size for your child. A veryyoungchild'shipbones
on the hips, as it
are so smallthat a regularbeltmightnotstaylow
In a
should.Instead,thebeltwilllikelybeoverthechild'sabdomen.
crash the belt would apply force right onthechild'sabdomen,which
could causeseriousorfatalinjuries.
So, be surethatanychild small
enoughforoneisalwaysproperlyrestrained
in achildorinfant
restraint.
I-
I
A
Neverholdababy
in yourarmswhileridinginavehicle.
A baby
doesn'tweighmuch-untilacrash.Duringacrashababywill
become so heavyyoucan'tholdit.Forexample,inacrashatonly
25mph (40 km/h),a12-pound (5.5 kg)baby will suddenlybecomea
240-pound (110 kg)forceonyourarms.Thebabywouldbe-.almost
.z
impossibletohold.
. _ _. . .
7,-.
. _. . ... .
Securethebaby in aninfantrestraint.
. . .
.
~
*.I
A&
<
~
,
.
L
1-32
I
I
1
AP150032
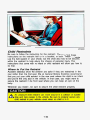
Child Restraints
Be sure to follow the instructions for the restraint.
Youmay find these
instructionsontherestraintitself
or in a booklet, or both.Theserestraints
usethe belt systeminyourvehicle,butthe
child alsohastobesecured
withintherestraint to helpreducethechance of personalinjury.The
instructions that come with the infant or child restraint will show you
how to
do that.
Where to Put the Restraint
Accident statistics show that children are safer
if they are restrained in the
rearratherthanthefrontseat.
We atGeneralMotorsthereforerecommend
thatyouputyourchildrestraintintherearseatunlessthechildisaninfant
andyou’retheonlyadult
in thevehicle. In thatcase,youmightwantto
securetherestraint in thefrontseatwhereyoucankeepaneyeonthe
baby.
Whereveryouinstallit,besuretosecurethechildrestraintproperly.
CAUTION
A
Anunsecuredchildrestraintcanmovearoundin
a collisionorsudden
stopandinjurepeople inthevehicle.Besuretoproperlysecureany
child
restraint
your
in
vehicle-even when
child
no
it.inis
1-33
I
Seats and Safety Bel&
Top Strap
AN155001
If your child restraint has a top strap,
it shouldbeanchored.
If youneedtohaveananchorinstalled,youcanaskyourGeneralMotors
dealer to put it in foryou. If youwantto installananchoryourself,your
dealer can tell youhow to do it.
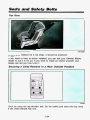
Securing a Child Restraint in a Rear Outside Position
K3138
You’llbeusingthelap-shoulderbelt.Seetheearlierpartaboutthetopstrap
if the child restrainthasone.
134
1. Put the restrainton the seat. Follow theinstructions for the child
restraint.
2. Securethechild
in thechildrestraint
as theinstructions say.
3. Pulloutthevehicle'ssafety
belt. Makethebeltaslongaspossibleby
tilting the latch plate and pulling it alongthebelt.
AN160085
4. Runthe lap partthroughoraroundtherestraint.Thechildrestraint
if theshoulderbelt would go in front
instructionswill showyouhow.See
of thechild'sface or neck.If so, put it behindthechildrestraint.
5. Buckle the belt.Makesurethereleasebuttonfacesupwardand
outward, so you'll be able to unbuckle it quickly if youeverneedto.
6. To tighten thebelt,pull
the child restraint.
upontheshoulderbeltwhileyoupushdownon
1-35
Seats and Safety Belts
L
AN160148
7. Pushandpullthechildrestraintindifferentdirectionstobesure
secure.
AN160087
it is
To removethechildrestraint,justunbucklethevehicle’ssafetybeltand
let it gobackallthe way.Thesafetybelt
willmovefreelyagainand
readytowork for an adult or larger child passenger.
be
Securing a Child Restraint in the Center Rear Seat Position
I
K3133
Whenyousecure achildrestraint in acenterseatingposition,you’llbeusing
if the child restraint has
the lap belt.Seetheearlierpartaboutthetopstrap
one.
1-36
1. Makethe belt as longaspossibleby
alongthebelt.
2. Puttherestrainton
tilting the latch plate and pulling it
the seat.Followtheinstructionsforthechild
restraint.
3. Securethechild
in the child restraintastheinstructions
say.
AM1 WJUI3
AM1 6301 9R1
4. Runthevehicle’s
safetybeltthrough oraroundtherestraint.Thechild
restraintinstructionswill showyouhow.
5. Bucklethebelt.Makesurethereleasebuttonfacesupwardoroutward,
so you’llbeable to unbuckle it quickly if youeverneed to.
6. To tightenthebelt,pullitsfreeendwhileyoupushdown
restraint.
on thechild
7. Pushand pull thechildrestraintindifferentdirections
to besure it is
secure. If thechildrestraintisn’tsecure,turnthelatchplateoverand
buckle it again.Thensee if itissecure.Ifitisn’t,securetherestraintin
adifferentplaceinthevehicleandcontactthechildrestraintmakerfor
their advice.
To removethechildrestraint,justunbucklethevehicle’ssafetybelt.
will beready to workforanadultorlargerchildpassenger.
1-37
It
Seats and Safety Belts
Securing a Child Restraint in the Right Front Seat
1
J
K3114
You’ll beusingthelap-shoulderbelt.Seetheearlierpartaboutthetopstrap
if thechildrestraint hasone.
1. Puttherestraintontheseat.Followtheinstructionsforthechild
restraint.
2. Securethechildinthechildrestraintastheinstructionssay.
3. Pull outthevehicle’ssafetybeltandrunthelappartthroughoraround
therestraint.Thechildrestraintinstructionswillshowyou
how.Seeif
If so, put
theshoulderbeltwouldgoinfront
of thechild’sfaceorneck.
it behindthechildrestraint.
4. Bucklethebelt.Makesurethereleasebuttonfacesupward
so you’llbeabletounbuckle
it quickly ifyoueverneedto.
1-38
or outward,
I
AN1 651 45
AN165022
5. Pressthebuttonon
the retractorcovertoset
6. To tighten the belt, feed theshoulderbeltback
the lock.
into theretractorwhile
you push down on the child restraint.
B
1
AN165133
7. Pushandpullthe
34
AN1 651
child restraint in differentdirections to besure it is
secure.
To removethe child restraint,justunbucklethevehicle'ssafetybeltand
gobackall the way.
Thesafetybeltwillmovefreelyagainandbeready
larger child passenger.
1-39
to workforanadultor
let it
Seafs and Safefy Belts
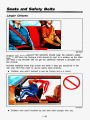
Larger Children
-
AM1 70007
Children whohaveoutgrownchildrestraints
should wear thevehicle’ssafety
belts. If you havethechoice, a childshouldsitnextto
a window so the child
canwear a lap-shoulderbeltand get theadditionalrestraint a shoulder belt
can provide.
if they are restrained in the
Accidentstatisticsshowthatchildrenaresafer
to usethesafetybeltsproperly.
rearseat.Buttheyneed
Children who aren’tbuckled up canbethrownout
in acrash.
I
AM170061
Children whoaren’t buckled up canstrikeotherpeoplewhoare.
1-40
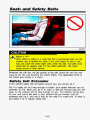
erson
AM170037
CAUTION
Never do this.
Heretwochildrenarewearing
the samebelt.Thebeltcan’tproperly
spreadtheimpactforces.
In acrash, the two childrencanbe
crushedtogetherandseriouslyinjured. A beltmustbeusedbyonly
one
Q: What if a child is wearing a lap-shoulderbelt,butthechild
is so
small thattheshoulderbelt is veryclosetothechild’sface
or neck?
A: Movethe child towardthecenter of thevehicle,butbesurethatthe
so that in acrashthechild’s
shoulderbelt still isonthechild’sshoulder,
upperbodywouldhavetherestraintthatbeltsprovide.
If thechild is so smallthattheshoulderbeltstill
is very close to thechild’s
face orneck,youmightwant
to placethechild in aseatthathasalapbelt,
if yourvehiclehasone.
1-41
I
Seats and Safety Belts
3
W
/.
AM170019
I
I
' CAUTION
Never do this.
I
Hereachildissitting
in aseatthathasalap-shoulderbelt,butthe
shoulderpart is behindthechild. If thechild wears thebelt in this
way, in acrashthechildmightslideunderthebelt.
The belt'sforce
wouldthenbeappliedrightonthechild'sabdomen.Thatcould
causeserious or fatalinjuries.
Whereverthechildsits,the
lap portion of thebeltshouldbewornlowand
snugonthehips,justtouchingthechild'sthighs.Thisappliesbeltforce
thechild'spelvicbones in acrash.
I
I
to
Safety Belt Extender
If thevehicle'ssafetybeltwillfastenaroundyou,youshoulduseit.
to fasten,yourdealerwillorderyouan
But if asafetybeltisn'tlongenough
in to orderit,taketheheaviestcoatyouwill
extender. It's free.Whenyougo
just
wear, so theextenderwillbelongenoughforyou.Theextenderwillbe
foryou,andjustfortheseatinyourvehiclethatyouchoose.Don't
let
someoneelseuse it, anduse it onlyfortheseat it ismade to fit. To wear it,
just attach it to the regular safety belt.
1-42
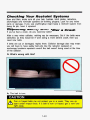
Checking Your Resfraint Systems
Now and then,makesure all yourbelts,buckles,latchplates,retractors,
Look foranyloose
anchoragesandremindersystemsareworkingproperly.
partsordamage. If you see anythingthatmightkeep a restraintsystemfrom
doing its job,have it repaired.
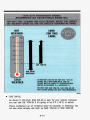
Replacing Safety Belts After a Crash
If you’vehadacrash,
do youneednewbelts?
if thebeltswere
Afteraveryminorcollision,nothingmaybenecessary.But
if wornduringamoreseverecrash,thenyou
stretched,astheywouldbe
neednewbelts.
If beltsarecut or damaged,replacethem.Collisiondamagealsomaymean
youwillhave to havesafetybeltpartsliketheretractorreplacedor
if thebeltwasn’tbeingusedatthetime
anchoragelocationsrepaired-even
of the collision.
Q: What’s wrong withthis?
AP125004
A: Thebelt is torn.
CAUTION
Torn or frayedbelts may notprotectyouinacrash.Theycanrip
is torn orfrayed,getanewone
apartunderimpactforces.Ifabelt
right
away.
1-43
I
Seats and Safety Belts
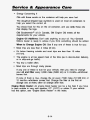
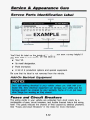
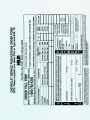
Before replacing any safety belt, see
your dealer for thecorrectpartnumber.
your vehicle. The model
You'llneedthemodelyearandmodelnumberfor
on
year is onyourtitleandregistration.Andyoucanfindthemodelnumber
the certificationhire label on the rear edge
of the driver's door.
I
K2447
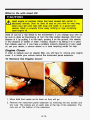
The modelnumber on thereplacementbeltmustbelisted
youwant to replace.
1-44
on thesafetybelt
Features & Controls
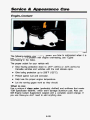
ic
c
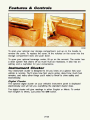
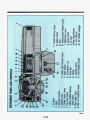
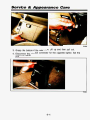
Hereyoucanlearnaboutthemanystandardandoptionalfeaturesonyour
vehicle,andinformationonstarting,shiftingandbraking.Alsoexplainedare
theinstrumentpanelandthewarningsystemsthat
tell you if everything is
to do if youhaveaproblem.
workingproperly-andwhat
For explanation of vehicle symbols, refer to “Vehicle Symbols in
Section 0.
Keys .......................................................................................................................
2-3
Your Doors and How They Work
........................................................................2-5
2-10
Door Locks ..........................................................................................................
Theft .....................................................................................................................
2-1 2
2-13
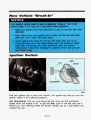
New Vehicle “Break-In” ......................................................................................
Ignition Switch .....................................................................................................
2-13
Starting Your Engine ...........................................................................................
2-14
2-15
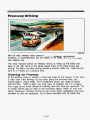
Fuel Regulator .................................................................................................
Driving Through Deep Standing Water ..........................................................2-16
2-16
Engine Block Heater .......................................................................................
Automatic Transmission ...................................................................................... 2-17
Locking Rear Axle ...............................................................................................
2-20
Parking Brake...................................................................................................... 2-20
2-1
Features & Controls
Shifting Into P (Park) ..........................................................................................
2-21
Shifting Out of P (Park) ..................................................................................... 2-23
......................................................................... 2-23
Engine Exhaust ................................................................................................... 2-24
.................................................. 2-25
Running Your Engine While You’re Parked
Windows ............................................................................................................... 2-26
2-28
Horn......................................................................................................................
2-28
Tilt Wheel .............................................................................................................
Turn Signal/MuItifunction Lever ..........................................................................2-29
Turn Signal and Lane Change Indicator ....................................................... 2-30
Headlight High-Low Beam .............................................................................. 2-31
Windshield Wipers ........................................................................................... 2-32
2-33
Windshield Washer ..........................................................................................
Rear Window WiperNVasher ........................................................................... 2-34
2-35
Cruise Control ..................................................................................................
Lights.................................................................................................................... 2-40
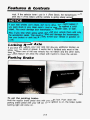
Parking Over Things That Burn
Mirrors ..................................................................................................................
2-45
Sun Visors ........................................................................................................... 2-48
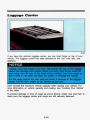
Luggage Carrier................................................................................................... 2-49
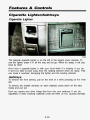
Cigarette Lighter/Ashtrays ...................................................................................
2-50
Storage Compartments .......................................................................................
2-51
Instrument Cluster ...............................................................................................
2-52
..........................................................
Indicator Lights.................................................................................................
Trailer Wiring Harness ........................................................................................
Assist Handles .....................................................................................................
2-57
Warning Lights, Gages and Indicators
2-2
2-64
2-67
2-68
Keys
r
K3202
1
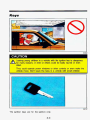
CAUTION
Leavingyoungchildreninavehiclewiththeignitionkeyisdangerous
L formanyreasons. A childorotherscouldbebadlyinjuredoreven
.
.
-.
killed. . 1.f,.,.
.?& I
.
.
7' %
Theycouldoperatepowerwindowsorothercontrolsorevenmakethe
small children.
vehiclemove.Don'tleavethekeysinavehiclewith
K5127
Theignitionkeys are fortheignitiononly.
2-3
Features & Controls
L
K5316
Thedoorkeysareforthedoorsandallotherlocks.
K1298
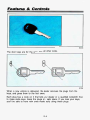
Whenanewvehicle
keys,andgivesthem
is delivered,thedealerremovestheplugsfromthe
to thefirstowner.
it thattellsyourdealeroraqualifiedlocksmithhow
Eachplughasacodeon
to makeextrakeys.Keeptheplugsinasafeplace.
If youloseyourkeys,
you’llbeabletohavenewonesmadeeasilyusingtheseplugs.
lour vehicle has a number of newfeaturesthatcanhelppreventthefi.
-
3utyoucanhavea
lot of troublegettinginto
your vehicle if youever lo(
four keysinside.You may evenhave to damage yourvehicle to
50 besureyouhaveextrakeys.
-
aet in.
Your Doors and How They Work
Side Doors
PO413
To openthefrontsidedoorfromtheoutside,graspthehandleandpullthe
door open.
To openthefrontsidedoorfromtheinside,
pushthedooropen.
pull thelevertoward
2-5
you and
Features & Controls
Sliding Side
Door
PO411
To open the sliding side door, pullthehandletowardthe
door to therearuntil it latchesintheopenposition.
back andslidethe
'0444
To close the sliding side door, pull thehandletowardthefront
rear latch, and slide the door forward.
2-6
to releasethe
PO412
To open thereardoorsfromtheoutside,opentherightreardoorfirst.Grasp
thehandle and pull the dooropen.
To opentheleftreardoor,
the door.
pull on the latchreleasehandleintheinside
To closethereardoors,closetheleft
doors are completely closed.
Thereardoorshave
beyond 90".
of
door first.Check to make sureboth
a checkassembly to keep the doors fromopening
2-7
To fully open the doors,push in ontheclipandlift
the checkassembly up
off themountingbracket. Do this on each door. Replacetheassembliesthe
same way.
See thecautionunder“Swing-OutWindows”
in thissection.
i
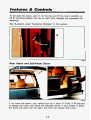
Rear Hatch and Split-Panel Doors
i ‘r: r ,<“. *:,
c.
e”,-”I
-..I
:..
,
7
1
PO476
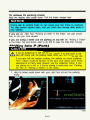
If you havethisoption,yourvehicle
must beineither P (Park)or N (Neutral)
to releasethehatchandunlockthesplit-paneldoors.
If your battery is dead,
not open,even from theoutsidewithakey.
thehatchanddoorswill
2-8
PO477
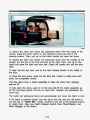
To release thehatchandunlockthesplit-paneldoorsfromtheinside
of the
vehicle, press the hatch switch on the instrument panel just left of the
and open.the doors.
steeringcolumn.Then,pulluponthehatchhandle
To releasethehatch and unlock the split-panel doors from the outside of the
to theright.Then,pullup
on the
vehicle,putthekeyinthelockandturn
door
hatch and open the right rear door first. Grasp the handle and pull the
open.
To opentheleftrear
the door.
door, pull on thelatchreleasehandlein
the inside of
To close the rear doors, close the left door first.Check to make sure both
doors are completely closed.
The rear doors have a check assembly
beyond 90".
to keep the doors from opening
To fully open the doors, push in on the clip and lift thecheckassemblyup
off themountingbracket.Dothis
on each door. Replace the assemblies the
sameway.
The hatch and split-panel
doors will automatically lock when the hatch is shut.
If the hatch is partially closed, the rear doors wil lock and you will need to
use the key or "Hatch Rel." switch, located to the left of the steering column,
to unlockthem.(SeealsoHatchReleaseSwitch,RearWiperNVasher,and
Rear Defogger in the Index.)
2-9
Features dik Controls
Door Locks
.
Unlockeddoorscanbedangerous.
-
.... .
*
. .
.
Passengers-especiallychildren-caneasily
open thedoorsand
out. When a door is locked,theinsidehandlewon'topen
it,
Outsiderscaneasilyenterthrough
down or stop your vehicle.
an unlockeddoorwhen
.. .. - -fall
I
-.
8.
i
'
you slow
Thismay not be so obvious: You increasethechance of being
thrown out of thevehicle in a crash if thedoorsaren'tlocked. Wear
safetybeltsproperly,lockyourdoors,and
you willbefarbetter off
wheneveryoudriveyourvehicle.
'hereareseveralways
to lockandunlockyourvehicle:
PO441
Fromtheoutside:Useyourdoor
key.
Fromtheinside: To lockfront doors andslidingside door,slide thelock
levers down.
Reardoorscannotbemanuallylockedfromtheinside.
2-1 0
PO438
To unlockthefrontdoorsandtheslidingsidedoorfromtheinside:Slidethe
locklevers up.
To unlock the rearhatchandsplit-paneldoorsfromtheinside:Pushthetop
of the switch.
Power Door Locks
I
I
P043E
If your vehiclehaspower door locks,pushthepowerdoorlockswitch
orunlockallthedoorsatonce.
2-1 1
to lock
Features & Contds
Every vehicle with power door locks has a pulse lock system. A pulse lock
system works like this:
If the sliding door is open and you push the power door lock switch, the
sliding door will not lock immediately. After you close the door, the system
comesonand, in aboutfiveseconds,lockstheslidingdoor.
All modelshaveoverridingdoorlocks.Whenadoorislocked,thedoor
handle will not workthelatch.Thiswillhelpstopadoorfrombeing
accidentallyopened.However,powerdoorlocksdonotaffecttheoperationof
thehatch.
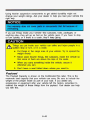
Leaving Your Vehicle
If you are leavingthevehicle,takeyourkeys,openyourdoorandsetthe
locksfrominside.Thengetoutandclosethedoor.
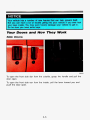
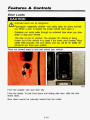
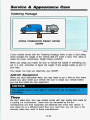
Theft
Vehicletheft is bigbusiness,especiallyinsomecities.Althoughyourvehicle
hasanumberoftheftdeterrentfeatures,weknowthatnothingweputon
canmake it impossibletosteal.However,therearewaysyoucanhelp.
it
Key in theignition: If youwalkawayfromyourvehiclewiththekeysinside,
or professionalthieves-sodon’t
do it. When
it’s an easy target for joy riders
youparkyourvehicleandopenthedriver’sdoor,you’llhearachime
remindingyoutoremoveyourkeyfromtheignitionandtakeitwithyou.
so willyourignition
Alwaysdothis.Your
steeringwheelwillbelocked,and
andtransmission.Andremember to lockthedoors.
ParkingatNight: Parkinalightedspot,closeallwindowsandlockyour
vehicle.Remembertokeepyourvaluablesoutofsight.Puttheminastorage
area, or takethemwithyou.
Parking Lots: If youpark in a lot wheresomeonewillbewatchingyour
if youhaveto
vehicle, it’s besttolock it upandtakeyourkeys.Butwhat
if youhavetoleavesomethingvaluableinyour
leaveyourignitionkey?What
vehicle?
Putyourvaluablesinastorageareaoutofsight.
Lock all doorsexceptthedriver’s.
Thentakethedoorkeywithyou.
2-1 2
I NOTICE
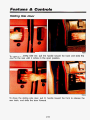
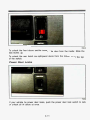
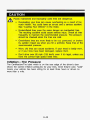
Ignition Switch
Useyourignitionkey to start your vehicle. The ignition key
ignitionswitch to fivedifferentpositions.
lets you turn the
Acc(Accessory): Letsyouusethingsliketheradioandthewindshield
wiperswhentheengine
is off. To getinto Acc, push in thekeyand turn it
it was beforeyou
towardyou. Your steeringwheelwillremainlocked,justas
insertedthe key.
2-1 3
LOCK: Thispositionlocksyourignition,steeringwheelandtransmission.
a theftdeterrentfeature. You will only be abletoremoveyourkeywhen
ignition is turned to LOCK.
It‘s
the
Off: Thispositionletsyouturn
off theengine,but still turn the steering
LOCK. Use Off ifyoumust
wheel. It doesn’tlockthesteeringwheellike
haveyourvehicle in motion while the engine is off (forexample, if your
vehicleisbeingpushed).
Ron: This is thepositionfordriving.
Start: This starts your engine.
If yourkeyseemsstuck
in LOCK and you can’t turn it, be sure it is ai
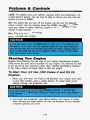
Starting Your Engine
Engines start differently. The 8th digit
ofyourVehicle Identification Number
(VIN)showsthecodeletterornumberforyourengine.
You will find the VIN
atthetop left ofyourinstrumentpanel.(See“VehicleIdentificationNumber”
in theindex.) Follow the proper steps to start the engine.
To Start Your 4.3 Liter (WN Codes Z and W) V6
€nglnes:
1. Moveyourshiftleverto
P (Park)or N (Neutral). Yourenginewon’t start
in anyotherposition-that’sasafetyfeature.
alreadymoving,use N (Neutral)only.
To restartwhenyou’re
2. Don’tpushtheacceleratorpedalbeforestartingyourengine.
In some
do this,butbecause of yourvehicle’s
othervehiclesyoumightneedto
computersystems,youdon’t.
2-1 4
3. Turnyourignitionkey
to Start. Whentheenginestarts,letgo
key. The idle speedwillgodownasyourenginegetswarm.
of the
NOTICE
Holdingyourkey in Start for longer than 15 secondsatatimewill
yourbattery to be drained ---? s
~ And-thee:*-?ssive
~
~ heat~
damage your starter motor
car-
---
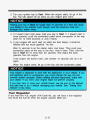
4. If it doesn’tstartright away, hold yourkey in atart. If it doesn’tstartin
threeseconds,pushtheacceleratorpedalaboutone-quarter
of the way
downfor 12 moreseconds,or untilitstarts.
5. If yourenginestillwon’tstart(orstartsbutthenstops),it
floodedwithtoomuchgasoline.
Try this:
could be
Wait 15 seconds to letthestartermotorcooldown.Thenpushyour
acceleratorpedalallthe way to thefloor.Holditthere.Then,holdthe
ten seconds.Thisclearstheextra
keyin Start fornomorethan
gasolinefromtheengine.
If theenginestilldoesn’tstart,waitanother
again.
When theenginestarts,letgo
15 secondsanddo
it all
of the keyandtheacceleratorpedal.
NOTICE
~
Your engine is designed to work withtheelectronics in yourvehicle. If yo
addelectricalparts or accessories,youcouldchange the way the fuel
injectionsvstemoperates.Beforeaddingelectricalequipment,checkwith
If you -.m’t, you. -ngi might
not 1-.form I perlv.
vour d t
IT youeverhave
to haveyourvehicletoweseetl
that tells how to doitwithoutdamagingyour
Vehi ’ ‘ 7 the Inc’ .
pan of tnrsMan[
‘We. e “TowingYou
”
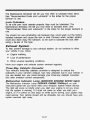
Fuel Regulator
If youhavethe
4.3L engine (VIN Code W), youwillhaveafuelregulator
thatshutsthefuel off when theenginereaches 5600 rpm.
2-1 5
I
Features & Controls
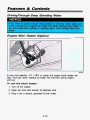
Driving Through Deep Standing Water
’‘
~ o udrive too quickly through deep puddles
or standing water,water
n e inthroughyourengine’sairintakeandbadlydamageyourengine.
youcan”.voiddeeppuddles
or standingwater,drivethroughthemvery
slowly.
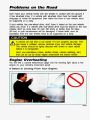
Engine Block Heater (Option)
In verycoldweather, -0°F (-18°C) or colder,theengineblockheatercan
help.You’llgeteasierstarting
andbetterfueleconomyduringengine
warm-up.
To use the block heater:
1.Turn off theengine.
2. Openthehoodandunwraptheelectrical
cord.
3. Plug it intoanormal,grounded110-voltoutlet.
2-1 6
ci
I!
CAUTION
Pluggingthecord into anungroundedoutletcouldcauseanelectrical
shock. Also, thewrongkind of extensioncordcouldoverheatand
cause a fire. You couldbeseriouslyinjured.Plugthecord
into a
properly grounded three-prong 1IO-volt outlet. If the cord won't
reach,use a heavy-dutythree-prongextension cord ratedfor atleast
15 amm.
I
Afteryou've used theblockheater,besure
to store the cord as it was
ep it i 9v from vinaenaineParts.
If voudon't, it could be
before,to
damaaed.
I
How longshouldyoukeeptheblockheaterpluggedin?Theanswer
,)ends
of oil youhave,andsomeotherthings.Instead
of
ontheweather,thekind
tryingtolisteverythinghere,
weask thatyoucontact a GM dealerinthe
areawhereyou'llbeparkingyourvehicle.Thedealercangiveyouthebest
advice for that particular area.
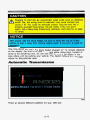
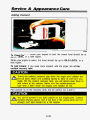
Automatic Ilansmission
PO472
There are several different positions for your shift lever.
2-1 7
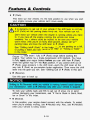
P (Park).
It’s thebestposition
Thislocksyourrearwheels.
yourenginebecauseyourvehiclecan’tmoveeasily.
to usewhen youstart
WTION
It is dangerous to get out of your vehicle if the shift lever is not -fully
in P (Park)withtheparkingbrakefirmlyset.
Your vehiclecanroll.
.
Don’t leave your vehiclewhentheengine is runningunlessyouhave
to. If youhavelefttheenginerunning,thevehiclecanmove
suddenly.You or others could beinjured. to besureyourvehicle
won’tmove,whenyou’re
onfairlylevelground,alwayssetyour
parking brake and move the shift lever to P (Park).
See“Shifting Into P (Park)” in theIndex. If youareparkingona
hill:
or pulling a trailer, also see “Parking on Hills”
or “Towinga Trailer”
in theIndex.
Ensuretheshiftleverisfully
in P (Park)rangebeforestartingthe
engine.Your vehiclehasabrake-transmissionshiftinterlock.
You have
to fully apply yourregularbrakes before youcanshiftfrom P (Park)
of
when theignition keyis in the Run position. If youcannotshiftout
P (Park),easepressureontheshiftlever-pushtheshiftlever
all the
way into P (Park)asyoumaintainbrakeapplication.Thenmovetheshift
leverintothegearyou
wish.See “ShiftingOut of P (Park) in thispart.
R (Reverse).
Use this geartobackup.
I
Shifting to R (Reverse)whileyourvehicle is moving forward could dama-is stoppec
your transmission. Shift to R (Reverse) only after your vehicle
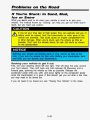
To rockyour vehicle back and forth to getout ofsnow, ice or sand
“If You’reStuck in Sand,Mud,
withoutdamagingyourtransmission,see
Ice orSnow” in theIndex.
N (Neutral).
To restart
In thisposition,yourenginedoesn’tconnectwiththewheels.
N (Neutral)only. Also, use N (Neutral)
whenyou’realreadymoving,use
whenyourvehicle is being towed.
2-1 8
CAUTION
Shiftingout of P (Park)or N (Neutral)whileyourengineis
b “racing”(running at high speed) is dangerous. Unless your foot
firmlyonthebrakepedal,yourvehiclecouldmoveveryrapidly.
You couldlosecontrolandhitpeople
orobjects.Don’tshiftout
P (Park)or N (Neutral)whileyourengineisracing.
is
of
NOTICE
sed by shiftingout of P (Park) (
g isn’t
covered
. . . . . . . .by
. . your warranty.
.,
...
..
. . .: .. . ..
. . . .,
,
I
.
,
I
. ::::,.:.
’
,,
..I.
’., ; ,
:,
,
,
,
,
,
,
,
., ,
s,L
;
,
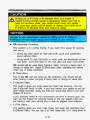
OD (AutomaticOverdrive).
This position is fornormaldriving.
and you’re:
If you need morepower for passing,
- Going less thanabout 35 mph (56 km/h), pushyouraccelerator
about halfway down,
- Going about 35 mph(56km/h)ormore,pushtheacceleratorall
waydown. You’ll shiftdowntothenextgearandhavemorepower.
the
OD should not beusedwhentowing
a trailer,carrying a heavyload,or
D (third gear)whenoperatingthevehicle
drivingonsteephills.Select
under any of these conditions.
e
D (ThirdGear).
You shoulduse D
This is like OD, butyounevergointoOverdrive.
whentowing a trailer,carrying a heavyload,ordrivingonsteephills.
e
2 (SecondGear).
Thispositiongivesyoumorepowerbutlowerfuel
economy.Youcan
go
use 2 (SecondGear)onhills. It canhelpcontrolyourspeedasyou
downsteepmountainroads,butthenyouwould
also want touseyour
brakes off and on.
If youmanuallyselect 2, thetransmission will drive in secondgear.You
mayuse this feature for reducing torque to the rear wheels when you
are trying to start your vehicle from a stop on slippery road surfaces.
e
1 (First Gear).
Thispositiongivesyouevenmorepower(butlowerfueleconomy)than
2 (SecondGear). You canuse it onverysteephills,or
in deepsnowor
2-1 9
Features & Controls
mud. If theselectorleverisputin
1 (FirstGear),thetransmissionwon't
shiftinto 1 (FirstGear)untilthevehicleisgoingslowlyenough.
1
NOTICE
I
If yourrearwheelscan'trotate,don'ttry
to drive. This might happen
youwerestuck in very deep sand or mud or wereupagainst a soli(
obiect. You could damage your transmission or transfarcase, or hoth
Atso, IT u stopwhengoiruphill,m'tholdyour
vel - e tl 'ewithonly
the accelerator pedal. This couldoverheat and damage the transmission.
Use yo1 "--kes or shift into :Park)
hold yourvehicle in position o
~
Loc&hg Rear Axle
If youhavethisfeature, your rear axlecangive you additionaltraction on
snow,mud,ice,sand
or gravel. It works like a standardaxle most of the
time, but whenone of therearwheels has notractionandtheotherdoes,
thelockingfeaturewillallowthewheelwithtractiontomovethevehicle.
Parking Brake
2-20
To release the parking brake:
Hold theregular brake pedal down. Pullthebrakereleaselever.
I NOTICE
hiving .Ah thc, ,arking brakL
‘oumay ha in ronlnro thorn
‘our vehicle.
,
,Pwe real
your
-1
,rakes to nverheal.
ar
- -
If youareona
hill: See“Parkingon
how to turn yourfrontwheels.
Hills” in theIndex.Thatpartshows
If youaretowingatrailerandareparkingonany
hill: See“Towing aTrailer”
intheIndex.Thatpartshowswhattodofirsttokeepthetrailerfrommoving.
Shifting Into P (Park)
A
b
Itcanbe dangerous’to getout of yourvehicle if theshiftlever is not
fullyin P (Park) with theparkingbrakefirmlyset.Yourvehiclecanroll.
If youhaveleft the-engine running,thevehiclecanmove
suddenly.
You or others could be injured. To besureyourvehicle won’t-:.rnove,
follow. If you
whenyou’reon faiily level ground,usethestepsthat
are parking on $:h!i, or if you’re pulling’ a trailer, also see “P;a.rking
On Hills” or “Towing a Trailer” in the Index.
1. Hold thebrakepedaldownwithyourrightfootandsettheparking
brake.
F“
2-21
Features & Controls
2. Movetheshiftleverintothe
Pullthelevertoward
P (Park)positionlike this:
you.
Movetheleverupasfarasitwillgo.
3. Movetheignitionkey
to LOCK.
4. Removethekeyandtake
it withyou.Ifyoucanwalkawayfromyour
vehiclewiththeignition key in yourhand,yourvehicleis
in P (Park).
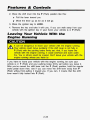
Leaving Your Vehicle With the
Engine Running
It can be dangerous to leave your vehicle with the engine running.
Your vehicle could move suddenly if the shift lever is not fully in
P (Park)withtheparkingbrakefirmlyset.And,
if you leave the
vehicle.withtheenginerunning, it could overheatandeven catch’
fire,Youor others could beinjured.Don’tleaveyourvehicle
with the
engine
running
unless
you
have
to.
‘)
I
If youhave to leaveyourvehiclewiththeenginerunning,besureyour
vehicleis in P (Park)andyourparkingbrakefirmlysetbeforeyouleaveit.
P (Park)position,holdtheregular
Afteryou’vemovedtheshiftleverintothe
shiftleverawayfrom
P
brake pedal downthen,see if youcanmovethe
{Park)withoutfirstpullingittowardyou.
If youcan, it meansthattheshift
lever wasn’t fullylockedinto P (Park).
2-22
Shifting Out of P (park]
Your vehicle has a brake-transmissionshiftinterlock. You have to fully apply
yourregularbrakebeforeyoucanshiftfrom
P (Park)whentheignition
is in
in theIndex.
the RUN position.See“AutomaticTransmission”
If youcannotshiftout of P (Park),easepressureontheshiftlever-pushthe
shiftleverallthe way into P (Park)as you maintainbrakeapplication.Then
movetheshiftlever into thegearyouwish.
If youever hold the brakepedaldownbut
this:
still can’tshiftout
of P (Park), try
1. Turn the key to “Off’.
2. Applyandhold
the brakeuntiltheend
ofStep 4.
3. Shift to N (Neutral).
4. Start the vehicle and
then shift to thedrivegearyouwant.
5. Havethevehiclefixedassoonasyoucan.
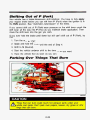
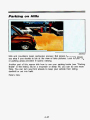
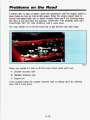
Parking Over Things That Burn
-1
AN220012
CAUTION
I
Things that can burn could touch hot. exhaust parts underyour
dry grassor other‘
vehicleandignite.Don’tparkoverpapers,leaves,
things that-can
burn.
:-
2-23
I
Features & Controls
Engine Exhaust
CAUTION
Engineexhaustcan
whichyoucan'tsee
death.
kill. It containsthegascarbonmonoxide
(CO),
or smell. It cancauseunconsciousnessand
Youmighthaveexhaustcoming
in if:
Yourexhaustsystemsoundsstrange
or different.
Yourvehiclegetsrustyunderneath.
in a collision.
Yourvehiclewasdamaged
Yourvehiclewasdamagedwhendrivingoverhighpointsonthe
roadoroverroaddebris.
Repairsweren'tdonecorrectly.
Yourvehicle or exhaustsystemhadbeenmodifiedimproperly.
If you ever suspect exhaust is coming into your vehicle:
Drive it onlywith all thewindowsdown to blow out any CO;
2-24
I
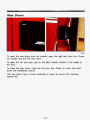
Running Your Engine While You’re Parked
It’s better not to parkwiththeenginerunning.But
are some things to know.
if youeverhave to, here
I CAUTION
A
Idling the engine with the air system control
off couldallow
dangerousexhaust into yourvehicle.(SeetheearlierCautionunder
“EngineExhaust.”)
Also,idling in aclosed-inplacecanletdeadlycarbonmonoxide
(CO)
into your vehicle even if the fan switch is at the highest setting. One
place this canhappenisagarage.Exhaust-with
C k a n come in
easily. NEVER park in agaragewiththeenginerunning.
Anotherclosed-inplacecanbeablizzard.(See“Blizzard”inthe
Index.)
I
CAUTION
rA
Itcanbedangerous to getout of yourvehicle if theshiftleverisnot
h fully in P (Park)withtheparkingbrakefirmlyset.
Your vehicle can
roll.Don’tleaveyourvehiclewiththeenginerunningunlessyou
haveto. If you’velefttheenginerunning,thevehiclecanmove
suddenly. You orothers could beinjured. To besureyourvehicle
won’tmove,evenwhenyou’reonfairlylevelground,alwayssetyour
P (Park).
parkingbrakeandmovetheshiftleverto
Follow the proper steps to be sure your vehicle won’t move. See
If you areparkingon a hill, or
“Shifting Into P (Park)”)intheIndex.
if you’repullingatrailer,alsosee“ParkingonHills”
nr “Towing a
Trailer” in theIndex.
2-25
Features & Controls
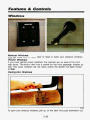
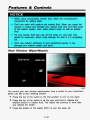
Windows
PO437
Manual Windows
Turn thehandcrank on eachdoor to raise or lower your sidedoorwindows.
Power Windows
If you haveoptional power windows, the controls are on each of the front
side doors. The driver’sdoor has aswitchforthe front passengerwindow as
well. Your powerwindows will notmoveunlesstheignitionhasbeenturned
to Run.
Swing-Out Windows
PO44
To openyourswing-outwindows,pullup
on thelatch and pushthewindowout.
2-26
To close the window, pull thelatchtoward
you andpushitdown.
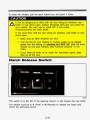
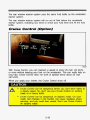
Hatch Release Switch
K33'13
Thisswitch is to theleft of the steeringcolumn. It willreleasetherearhatch.
Thevehiclemustbe
in P (Park)or N (Neutral) to releasethehatchand
unlockthesplit-paneldoors.
2-27
FeatuEs & Contmls
Horn
NO047
Pressthe pad in the center of thesteeringwheel
to sound the horn.
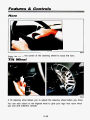
Tilt Wheel
NO046
A tiltsteeringwheelallowsyoutoadjustthesteeringwheelbeforeyoudrive.
You can also raiseittothehighestleveltogiveyourlegsmoreroomwhen
youexitandenterthevehicle.
2-28
To tiltthewheel, hold thesteeringwheel and pull thelever. Move the
steeringwheel to acomfortablelevel, then releasethelever to lockthewheel
in place.
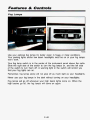
The 7brn Signal/Multifunction Lever
PO436
Theleverontheleftside
of thesteeringcolumnincludesyour:
Turn SignalandLaneChangeIndicator
HeadlightHigh-LowBeam
& PassingSignal
WindshieldWipers
WindshieldWasher
CruiseControl(Optional)
2-29
Features & Controls
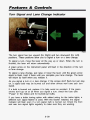
Turn Signal and Lane Change hdicator
Theturnsignalhastwoupward(forRight)andtwodownward(forLeft)
positions.Thesepositionsallowyoutosignalaturnoralanechange.
To signalaturn, move theleverallthe
wayupordown.When
finished,theleverwillreturnautomatically.
A greenarrowontheinstrumentpanelwillflash
or lanechange.
theturnis
in thedirection of theturn
To signal a lane change, justraise orlower theleveruntilthegreenarrow
starts to flash. Hold itthereuntilyoucompleteyourlanechange.Thelever
willreturnbyitself whenyoureleaseit.
As you signal a turn or a lane change,
if thearrowsdon'tflashbutjuststay
on,a signal bulb may beburnedoutandotherdriverswon'tseeyourturn
signal.
If a bulb is burnedout,replace it to helpavoid anaccident.Ifthegreen
arrowsdon'tgoonatallwhenyousignalaturn,checkthefuse(see
"Fuses" in theIndex)andforburned-outbulbs.
If you have a trailer towing option with added wiring for the trailer lights, a
different turn signal flasher is used. With this flasher installed, the signal
indicator will flash even if a turn signal bulb is burnedout.Checkthefront
andrear turn signallightsregularlytomakesuretheyareworking.
2-30
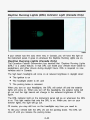
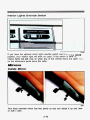
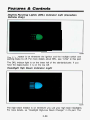
Operation of Lights
Althoughyourvehicle'slightingsystem(headlights,parkinglights,foglamps,
sidemarker lights and tail lights)meet all applicableFederallighting
requirements,certainstatesandprovincesmayapplytheirownlighting
regulationsthat may requirespecialattentionbeforeyouoperatetheselights.
For example, some jurisdictions may require that you operate your lower
beam lights with fog lamps at all times,or that headlights be turned on
wheneveryoumustuseyourwindshieldwipers.
In addition,mostjurisdictions
prohibit driving solely with parking lights, especially at
dawn ordusk. It is
recommended that you check with your own state or provincial highway
authority for applicable lighting regulations.
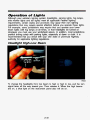
Headlight High-Low Beam
I
PO433
To changetheheadlightsfrom
low beam to highorhigh to low, pulltheturn
it. Whenthehighbeams
signallever all thewaytowardyou.Thenrelease
areon,abluelightontheinstrumentpanelalsowillbeon.
2-31
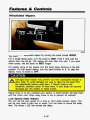
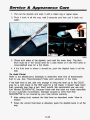
Windshield Wipers
PO478
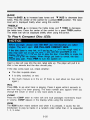
You control the windshield wipers by turning the band marked
WIPER.
Forasinglewipingcycle,turntheband
to MIST. Hold it there until the
If youwant
wipersstart,thenletgo.Thewiperswillstopafteronecycle.
morecycles, hold thebandon MIST longer.
For steady wiping at low speed, turn the band away from you
position. For highspeedwiping,turnthebandfurther,to
wipers,movetheband
to OFF.
to the LO
HI. To stop the
‘ CAUTION
I
~~~
A
Damagedwiperbladesmaypreventyoufromseeingwellenough
to
drive safely. To avoid damage, be sure to clear ice and snow from
If they’refrozen to the
thewiperbladesbeforeusingthem.
If yourbladesdobecome
windshield,carefullyloosenorthawthem.
serts.
blade orblades
newdamaged,
get
Heaw snow or ice can overload your wipers.
A circuit breaker will stop them
or ice to preventanoverload.
unt.. .he motorcools.Clearawaysnow
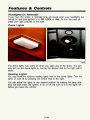
Speed Delay Wipers
You can set the wiper speed for a long or short delay between wipes. This
canbeveryuseful in light rain or snow.Turnthe band to choosethedelay
time.Thecloser to LO, theshorterthedelay.
LOW
2-32
I
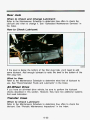
Windshield Washer
.I
E
K3279
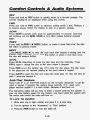
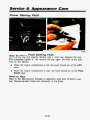
At thetop of the multifunction lever there's a paddle with the word
PUSH on
it.To spraywasher fluid on thewindshield,pushandreleasethepaddle.The
or return to your preset
wipers will clear the window and then either stop
speed. For continuedwashoperation,pressandholdthepaddledown.
/
b
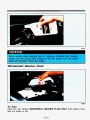
Drivingwithoutwasher fluid canbedangerous. A bad mud
splashcanblockyourvision.
You couldhitanothervehicle
or go
off theroad.Checkyourwasherfluidleveloften.
In freezingweather,don'tuseyourwasheruntilthewindshieldis
warmed.Otherwisethewasher
fluid canformiceonthe
windshield,blockingyourvision.
2-33
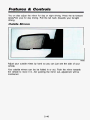
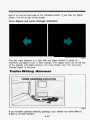
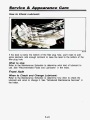
Features & Controls
K3387
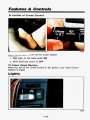
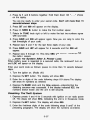
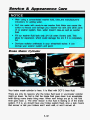
You controlyourrearwindowwipedwasherfrom
panel, just left of your steering column.
Pressthetop
a switchonyourinstrument
of theswitchtothefirstpositiontoturnonthewiper.
Pressthetop of theswitchin all theway andholdtoreleasethe
desired amount ofwasherfluid.Thewiperswillcontinuetoworkafter
youreleasetheswitch.
Pressthebottomoftheswitch
(OFF) to turn thewiper off,
2-34
Therearwindowwashersystemusesthesamefluidbottleasthewindshield
washer system.
Therearwindowwashersystemwillrunoutoffluidbeforethewindshield
washersystem,indicatingyouneedtocheckyourfluidleveland
bottle.
fill the fluid
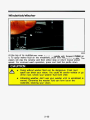
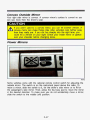
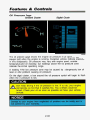
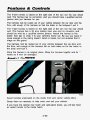
Cruise Control (Option)
P04:
WithCruiseControl,youcanmaintainaspeed
of about 25 mph (40 km/h)
ormorewithoutkeepingyourfootontheaccelerator.Thiscanreallyhelpon
25 mph
longtrips.CruiseControldoesnotworkatspeedsbelowabout
(40 km/h).
Whenyouapplyyourbrakes,theCruiseControlshutsoff.
235
Featums & Controls
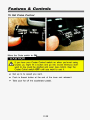
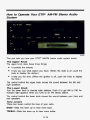
To Set Cruise Control
MovetheCruiseswitchto
ON.
If youleaveyourCruiseControlswitchonwhenyou'renotusing
go intoCruisewhenyoudon't
Cruise,youmighthitabuttonand
wantto. You couldbestartledandevenlosecontrol.Keepthe
CruiseControlswitch OFF untilyou wanttouseit.
Getup to thespeedyouwant.
Push in thesetbuttonattheend
Takeyourfoot
of theleverandreleaseit.
off theacceleratorpedal.
2-36
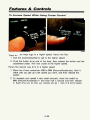
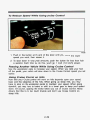
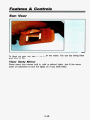
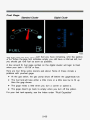
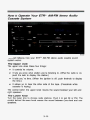
To Resume a Set Speed
'"
PO431
SupposeyousetyourCruiseControlatadesiredspeedandthenyouapply
thebrake.This, of course,shuts off theCruiseControl.Butyoudon'tneed
to reset it. Onceyou'regoingabout
25 mph (40 km/h)ormore,youcan
move theCruiseswitchfrom ON to WA (ResumelAccelerate)forabouthalfa
second.
You'llgorightbackuptoyourchosenspeedandstaythere.
X
Ifyouholdtheswitchat
WA (Resume/Accelerate)longerthanhalfa
, second,thevehiclewillkeepgoingfasteruntilyoureleasetheswitch
orapplythebrake.
You couldbestartledandevenlosecontrol
unlessyouwant to go faster,don't hold theswitchat WA
(ResumelAccelerate).
2-37
'
90
I
Features & Controls
To lncrease Speed While Using Cruise Control
Therearetwoways
to go to a higherspeed.Here’sthefirst:
1. Usetheacceleratorpedal
to gettothehigherspeed.
2. Pushthebuttonattheend
of thelever,thenreleasethebuttonandthe
acceleratorpedal. You’llnow cruiseatthehigherspeed.
Here’s the second way
to go to ahigherspeed:
1. MovetheCruiseswitchfrom
ON to WA (ResumelAccelerate). Hold it
the
there until yougetup to thespeedyouwant,andthenrelease
switch.
2. To increaseyourspeed in verysmallamounts,movetheswitch
to
RIA (Resume/Accelerate)forlessthanhalf
a secondandthenrelease
do this, your vehiclewill go 1 mph (1.6 km/h)faster.
it.Eachtimeyou
2-38
To Reduce Speed While Using Cruise Control
J
PO398
1. Push in the button attheend
speedyouwant,thenreleaseit.
of thelever until youreachthelower
2. To slowdowninverysmallamounts,pushthebuttonforlessthanhalf
asecond. Each timeyou do this,you’ll go 1 mph (1.6 kmlh) slower.
Passing Another Vehicle While Using Cruise Control
Use the accelerator pedal to increase your speed. When you take your
foot
off thepedal,yourvehicle
will slowdown to theCruiseControlspeedyou
set
earlier.
Using Cruise Control on Hills
HowwellyourCruiseControlwillworkonhillsdependsuponyourspeed,
of thehills.Whengoingupsteephills,youmay
load,andthesteepness
to maintainyourspeed.Whengoing
havetostepontheacceleratorpedal
downhill, you mayhave to brakeorshift to alowergear to keepyourspeed
out of CruiseControl.Many
down.Of course,applyingthebraketakesyou
driversfind this tobe too muchtroubleanddon’tuseCruiseControlon
steephills.
2-39
Featums & Controls
To Get Out of Cruise Confrol
,
,)
.
I
:A
. ... .
./.
PO429
There are twoways to turn off theCruiseControl:
1. Step lightlyonthebrake
pedal OR
2. Move theCruiseswitch to OFF.
To Erase Speed Memory
When you turn off the Cruise Control or the ignition, yourCruiseControl
memory is erased.
Lights
.
,
.
... . .. ,... .
.
.
.
.. ..- .. ..
. ..
PO397
2-40
Your lightswitchesare on theleftside
vent.
Pressthetoplightswitch
of theinstrument panel above the
to the left to turn on:
ParkingLights
Taillights
LicensePlateLights
InstrumentPanelLights
Pressthebottomlightswitch
with:
to theleft to turn on theheadlights,together
ParkingLights
Taillights
LicensePlateLights
InstrumentPanelLights
Press both switches to theright to turn off yourlights.
Turnthe dial above the light switches to the left to dim your instrument panel
lights.
Turnthedial to theright to brightenyourinstrumentpanellights. If youturn
on.
the dial alltheway to therightuntil it clicks,yourinteriorlightswillcome
You canswitchyourheadlightsfrom
high to low beam by pulling onthe
multifunctionleveron the left of thesteeringcolumn.
A circuitbreakerprotectsyourheadlights.
If youhaveanelectricaloverload,
your headlights will flicker on and off. Have your headlight wiring checked
rightaway if thishappens.
2-41
Features & Contmls
PO396
Use your optional fog lamps for better vision
in foggy or misty conditions.
Your parkinglights and/orlowbeam headlightsmustbeonoryourfoglamps
won't work.
Your fog lampswitch is in thecenter of theinstrumentpanelabove the radio.
Slide the rightside of theswitch to turnthefoglampson,andtheleftside
of the switch to turn them off. A warninglight in theswitchwillremindyou
on.
thatyourfoglightsare
off asmuchlight
Remember, foglampsalonewillnotgive
Never use your fog lamps
as yourheadlights.
in the dark without turning on your headlights.
off wheneveryourhighbeamlightscomeon.Whenthe
Foglampswillgo
highbeamsgo off, thefoglampswillcomeonagain.
2-42
Daytime Running Lights ( D M ) lndicator Light (Canada Only)
K3269
If yourvehiclewasfirstsold,whennew,inCanada,youwillhavethislighton
theinstrumentpanel. It goesonwhenevertheDaytimeRunningLightsareon.
Daytime Running Lights (Canada Only)
TheCanadianFederalGovernmenthasdecidedthat“DaytimeRunningLights
(DRL)” is ausefulfeature, in that DRLcanmakeyourvehiclemorevisible
pedestriansandotherdriversduringdaylighthours.
DRLisrequiredonnew
vehicles sold in Canada.
Thehighbeamheadlightswillcomeonatreducedbrightnessindaylightwhen:
Theignitionison
Theheadlightswitch
Theparkingbrake
is off, and
is released.
Whenyou turn onyourheadlights,theDRLwillswitch
off andtheexterior
lightswillcomeon.Whenyou
turn offtheheadlights,theexteriorlightswill
go outandthe high beamswillchange to thereducedbrightness of DRL
again.
TheDRLindicatorlightontheinstrumentpanelwillgoonwhenevertheDRL
is on. This light meansthatonlytheDRLison.Whenyouturnonyour
exteriorlights, this light will goout.
Ofcourse,youmay
still turn ontheheadlightsanytimeyouneedto.
To idle yourvehiclewiththeDRL
off, settheparkingbrake.TheDRLwill
stay off until youreleasetheparkingbrake.
2-43
to
Featums & Contmls
Headlights-On Reminder
If youhavethisoption,aremindertone
will soundwhenyourheadlightsare
in Off, LOCKor Acc. To turnthetone off,
turnedonandyourignitionis
pressbothlightswitchestotheright.
Dome Lights
I
.
...
.
PO395
Thedomelightsmaycomeonwhen
you openanyofthedoors.
You can
to therightuntil it
alsoturnonthedomelightsbyturningthedimmerdial
clicks.
Reading Lights
Youmayhavetheoptionalreadinglightsnexttothedomelights.Turnthe
lights on and off bypressingtheswitchnexttothelight.
You canadjustthelights to anydesiredpositionbyrotatingthelampand
off. Besuretoturnthelights
theywillworkwhentheignitionisonor
before you leavethevehicle.
244
off
Interior Lights Override Switch
PO393
If youhavetheoptionalinteriorlightoverrideswitchanditis
in the DOOR
position,yourinteriorlights will workasusual. If theswitchis OFF, the
of thevehicledoorsareopen.Itis
interiorlightswill not comeonwhenany
on theinstrumentpanelabovetheradio.
Mirrors
Inside Mirror
PO394
tourinsidereanriewmirror
)r side to side.
has two pivots so youcanadjust
2-45
it up anddown
Featurres & CTontmIs
You can also adjustthemirrorforday
or nightdriving.Pressthetabforward
for night
(awayfromyou) for daydriving.Pullthetabback(towardsyou)
driving.
Outside Mirrors
Ir
. -
'
I
PO392
Adjustyouroutsidemirrorsbyhand
vehicle.
so you canjustseetheside
of your
Your outsidemirrorscanalsobefolded
in or out.Pushthemirrortowards
thevehicle to move it in.Afterpushingthemirrorout,adjustmentwillbe
maintained.
2-46
Convex Outside Mirror
Your rightsidemirrorisconvex.
A convexmirror'ssurface
canseemorefromthedriver'sseat.
is curved so you
I
Ifyouaren'tused
to aconvexmirror,youcanhitanothervehicle.
convexmirrorcanmakethings(likeothervehicles)lookfartheraway
thantheyreallyare.Ifyoucuttoosharplyintotherightlane,you
could hit avehicleonyourright.Checkyourinsidemirrororglance
nes.
hanging
before
shoulder
your over
A
I
Power Mirrors
PO445
Somevehiclescomewiththeoptionalremotecontrolswitchforadjustingthe
outsidemirror.Theswitchis
on theinstrumentpanelabove the radio. To
to L for the driver's side mirror or to R for
moveamirror,slidetheswitch
thepassenger'ssidemirror.Then,pressthefour-waypad
to move themirror
in the desireddirection. To makesureyou do notaccidentally moveamirror,
slidetheswitch to themiddle (off) position.
2-47
Features & Contmls
Sun Visor
PO391
To blockoutglare,youcanswingdownthevisors.
from side to side.
You canalsoswingthem
Visor Vanity Mirror
Somevisorshavemirrorsbuiltin,with
or withoutlights.Just
cover on each visor to turn the lights on if youhavethem.
248
lift themirror
PO480
If youhavetheoptionalluggagecarrier,youcanloadthingsontopofyour
vehicle.Theluggagecarrierhasslatsattachedtotheroof,siderails,and
tiedowns.
200 pounds (91 kg) on theluggage
Loadingcargothatweighsmorethan
carrier maydamageyourvehicle.Whenyoucarrylargethings,neverlet
or thesidesofyourvehicle.Loadyourcargo
so
themhangovertherear
that it rests on the slats and does not scratch
or damagethevehi
Put the cargo against the side rails and fasten
it securely to the 1
carrier.Putthemainweightasfarforwardasyoucan.
Don’texceedthemaximumvehiclecapacitywhenloadingyourvehicle.For
moreinformationonvehiclecapacityandloading,see“Loading
YourVehicle’’
in theIndex.
To prevent damage or loss of cargo as you’re driving, check now and then
makesuretheluggagecarrierandcargoarestillsecurelyfastened.
249
to
Features & Contmls
Cigarette Lighter/Ashtrays
Cigarette Lighter
PO428
Theoptionalcigarettelighter is ontheleft of theenginecoverconsole. To
usethelighter,pressit
in allthe wayand let go.Whenit’sready,
it willpop
backbyitself.
If youdo,
Don’t hold acigarettelighter in withyourhandwhileitisheating.
it won’tbeable to backawayfromtheheatingelementwhenit’sready.That
canmake it overheat,damagingthelighterandtheheatingelement.
Ashtrays
To removethefrontashtray,
tab.
To removethesmallerashtrays
insideandpullout.
pull onthefront of it whilepressingontheinner
on eachsidewall,pressdownon
the tabs
If you do,
Don’tputpapersandotherthingsthatburnintoyourashtrays.
cigarettes orothersmokingmaterialscouldsetthemonfire,causingdamage.
2-50
Storage Compartments
PO426
Your front storage compartment is atthecenter of theenginecover.
thecompartment,pressthetwotabstogetherandpull.
To open
If youhaveanoptionalslidingtraystoragecompartment,
it is underthefront
passengerseat. To openthecompartment,slidethelatchinthe
top handle
andpullthetrayforward.
Roof Console
1
PO481
Theoptionalroofconsolehas
two storagecompartments. To openthe
To closethecompartments,
compartments,pushupandslidethedoorfonvard.
Use thestrapstosecureitems.
slidethedoorback.
2-5 1
Features & Contmls
K3256
To open yo.ur optionalrearstoragecompartment,
pull up on thehandle to
on thecoverintothe
removethecover. To replacethecover,fitthenotches
storagecompartmentslotsandpushdown.
To openyouroptionalbeveragecooler,liftuponthearmrest.Thecoolerhas
off asmuchfluidasnecessary.
It alsohasan
adrainsystemthatdrains
ashtray and a cupholder for your convenience.
Instrument Cluster
Yourinstrument cluster is designed to let youknowataglancehowyour
vehicleisrunning. You’llknowhowfastyou’regoing,abouthowmuch
fuel
remains,andmanyotherthingsyou’llneedtoknow
to drivesafelyand
economically.
5igital Cluster
The optional digital cluster onyourvehicle’sinstrumentpanel
is displayed
electronically and will tell youeverythingthestandardclusterdoes.
The digital cluster will give readings
in eitherEnglishorMetric.
fromEnglish to Metric,justpressthe EIM button.
2-52
To switch
PO361
2-53
Features & Contmls
f
I
PO663
2-54
1
c3
.&i
a
r.i
A
PO666
2-55
Featurns & Controls
Speedometer and Odometer
Digital Cluster
Standard Cluster
Your speedometerletsyouseeyourspeed
in bothmilesperhour(mph)and
kilometersperhour(km/h). Your odometer shows how far your vehiclehas
US.) or kilometers(used in
beendriven, in eithermiles(usedinthe
Canada).
Tamper Resistant Odometer
Cluster
Digifal
Cluster
Standard
t
PO639
Your odometer is tamper resistant. The odometer will show silver lines
betweenthenumbers if someonetriesto turn itback.
2-56
Thedigitalodometerwillread
ERROR ifsomeonetriestoturnitback.
Youmay wonderwhathappens if yourvehicleneedsanewodometer
old odometer,
installed. If thenewonecanbesettothemileagetotalofthe
thenitmustbe.Butifitcan’t,thenit’ssetatzero,andalabelmustbeput
on thedriver’sdoortoshowtheoldmileagereadingwhenthenewodometer
wasinstalled.
Trip Odometer
Cluster
Digital
Cluster
Standard
km/h
t
PO640
The trip odometer can tell you howfaryourvehiclehasbeendrivensince
you last set the trip odometer to zero.Makesurebutton
is completely
depressed.
To resetthetripodometeronthestandardcluster,pressthebuttonnearthe
readout.
will appear in place ofyourregular
The trip odometer on the digital cluster
TRIP button.
odometer when you press the
RESET button. To
To reset the trip odometer on the digital cluster, press the
TRIP buttonagain.
changebacktotheregularodometer,pressthe
Warning Lights, Gauges and Indicators
This part describes the warning lights
and gages that are on your vehicle.
The pictures will helpyoulocatethem.
Warninglights and gagescansignalthatsomething
is wrongbefore it
becomesseriousenough to causeanexpensiverepairorreplacement.Paying
attention toyourwarninglightsandgagescouldalsosaveyouorothersfrom
injury.
2-57
Features & Contmls
Warninglightsgo onwhen there maybeorisaproblemwithoneofyour
vehicle’sfunctions. As youwillsee in thedetails on thenext fewpages,
somewarninglightscomeonbrieflywhenyouturntheignitionkeyjusttolet
If youarefamiliarwiththissection,youshouldnot
youknowthey’reworking.
bealarmedwhenthishappens.
Gagescanindicatewhentheremaybe
or is aproblemwithoneofyour
vehicle’sfunctions.Oftengagesandwarninglightsworktogethertoletyou
knowwhenthere’s a problemwithyourvehicle.
Whenone of thewarninglightscomes on andstayson whenyou are
a problem,checkthe
driving, orwhenone of thegagesshowstheremaybe
section that tells you what to do aboutit.Pleasefollowthemanual’sadvice.
So pleaseget to
Waitingto do repairscanbecostly-andevendangerous.
a bighelp.
knowyourwarninglightsandgages.They’re
Brake System Warning Light
Standard Cluster
Digital Cluster
KE
Your vehicle’shydraulicbrakesystem is dividedinto two parts. If onepart
good braking,
isn’tworking,theotherpartcanstillworkandstopyou.For
though,youneed both partsworkingwell.
If thewarninglightgoeson,therecouldbe
brakesysteminspectedrightaway.
a brakeproblem.Haveyour
it doesn’tcomeon
This light shouldcomeon as youstartthevehicle.If
then,have it fixed so it willbe ready to warnyou if there’s a problem.
2-58
This light willalso come onwhenyousetyourparkingbrake,and
will stay
on if yourparkingbrakedoesn’treleasefully.
If it staysonafteryourparking
brake is fullyreleased, it meansyouhavea.brakeproblem.
You
If thelightcomesonwhiledriving,
pull off theroadandstopcarefully.
to
may notice that the pedal is harder to push.Orthepedalmaygocloser
thefloor. It may takelonger to stop. If thelight is still on,havethevehicle
towedforservice.(See“Towingyourvehicle”
in theIndex).
I
Yourbrakesystemmaynotbeworkingproperly
if thebrakewarning
lightison.Drivingwiththebrakewarninglight
oncanlead to an
off theroadand
accident. If thelightisstillonafteryou’vepulled
stoppedcarefully,havethevehicletowedforservice.
Anti-Lock Brake System Warning Light
Cluster
Digital
Cluster
Standard
r
Withanti-lock,thislightwill
goonwhenyoustartyourengineandmaystay
or so. That’snormal.
onforaseveralseconds
If thelightdoesn’tcomeon,have
there is aproblem.
if fixed so itwillbeready
to warnyou if
If thelightstayson,orcomesonwhenyou’redriving,yourvehicleneeds
service.Unlesstheregularbrakesystemwarninglightisalsoon,youwill
havebrakes,butnotanti-lockbrakes.
If theregularbrakesystemwarning
lightisalsoon,see“BrakeSystemWarningLight”earlier
in thispart.
2-59
still
Features & Controls
Engine Coolant Temperature Gage
Cluster
Digital
CIuster
Standard
TEMP
PPLY BRAKE TO SHIFT
PO643
If youhavethestandardcluster,youhaveagagethatshowstheengine
coolanttemperature. If thegagepointermoves to the H (red)side,your
engineistoohot!
If youhavebeen
Itmeansthatyourenginecoolanthasoverheated.
operating your vehicle under normal driving conditions, you should pull
off theengineassoonaspossible.
road,stopyourvehicleandturn
box aroundthetemperaturesymbolwillalso
If youhaveadigitalcluster,a
flash if yourengine is toohot.
HOT COOLANT CAN BURN YOU BADLY!
In “Problems on the Road,” thismanualshowswhat to do.See“Engine
Overheating” in theIndex.
2-60
off the
Malfunction Indicator Lamp (SERVICE ENGINE SOON Light)
Cluster
Digital
Cluster
Standard
*
.
.,
El
PO644
A computermonitorsoperation ofyourfuel, ignitionandemissioncontrols
system.Thislightshouldcomeonwhentheignitionison,buttheengineis
If itdoesnotcomeonat
notrunning,asachecktoshowyouitisworking.
If it stayson,oritcomes
on whileyouare
all,haveitfixedrightaway.
driving,thecomputerisindicatingthatyouhaveaproblem.
You shouldtake
yourvehicleinforservicesoon.
NOTICE
f you keep driving your vehicle with this light on, after a while, the
g--.
!mission controls won't work well, your fuel economy won't be as
lnd your engine may notrunassmoothly. T i s could lead to costly
epairs not covered by your warranty.
light is on the right hand side ofyourstandardcluster.
digitalcluster, it is on the left handside.
I nis
2-61
If youhavethe
Featuves & Controls
Oil Pressure Gage
Cluster
Digital
Cluster
Standard
Theoilpressuregageshowstheengineoilpressureinpsi(poundsper
squareinch)whentheengineisrunning.Canadianvehiclesindicatepressure
inkPa(kilopascals).Oilpressuremayvarywithenginespeed,outside
temperatureandoilviscosity,butreadingsabovethelowpressurezone
indicatethenormaloperatingrange.
A readinginthelowpressurezonemaybecausedbyadangerouslylowoil
levelorotherproblemcausingoilpressure.
Onthedigitalcluster,aboxaroundtheoilpressuresymbolwillbegintoflash
whenthe oil pressureislow.
CAUTION
Don'tkeepdriving if theoilpressureis
low. If youdo,yourengine
canbecome so hotthatitcatchesfire.
Youor otherscouldbe
burned.Checkyouroilassoonaspossibleandhaveyourvehicle
serviced.
NOTICDamage to yo/
not covered b)
2-62
Fuel Gage
Digifal Cluster
Sfandard Cluster
FU
PO651
Thefuelgagetellsyouhowmuchfuelyouhaveremaining,whentheignition
ison.Whenthegagefirstindicatesemptyyoustillhavealittlefuelleft,but
youshouldgetmorefuelassoonaspossible.
A boxaroundthefuelgagesymbolonthedigitalcluster
1/8 fullorless.
whenyourtankis
Herearefourthingssomeownersaskabout.None
problemwithyourfuelgage:
At thegasstation,thegaspumpshuts
will begin to flash
of theseindicatea
off beforethegagereadsfull.
Thefueltankwilltakeeitheralittlemoreoralittlelessfuelto
thanthegageshows.
fill up
Thegagemovesalittlewhenyouturnacornerorspeedup.
Thegagedoesn’tgoback
to emptywhenyouturn
off theignition.
Foryourfueltankcapacity,seetheIndexunder“FluidCapacities.”
2-63
Featurns & Controls
Voltmeter
Cluster
Digital
Cluster
Standard
r
I
i
f
r
I
'i
I
LT S
M
I
I
I
I
I
PO652
Whenyourengineisnotrunning,buttheignitionison(inthe
Run position),
of chargein DC volts.Whentheignition
thegageshowsyourbattery'sstate
isrunning,thegageshowstheconditionofthechargingsystem.Readings
betweenthelowandhighwarningzonesindicatethenormaloperatingrange.
Readings in eitherwarningzoneindicateapossibleproblemintheelectrical
system.
a boxaroundthevoltmetersymbolwillbegin
Onthedigitalcluster,
whenthechargingsystemneedsservice.
You canonlydrivefora
If youmustdrive,turn
to flash
short timewiththereadingsineitherwarningzone.
off allunnecessaryaccessories.
indicator Lights
Indicatorlightsgoonwhenyouuseyourturnsignals,changefrom
low beam
or whenyouuseyourhazardflashers.Thenext
headlightstohighbeams,
fewpages will also tell you about the indicator lights on your vehicle and
helpyoulocatethem.
2-64
Charging System Light
Standard
Cluster
Digital
Cluster
3
Thechargingsystemlightwillcomeonbrieflywhenyouturntheignition
on,
buttheengineisnotrunning.
As a checktoshowyouthelightisworking.
If itstayson, or comeson
Thenitshouldgooutoncetheengineisrunning.
whileyouaredriving, you mayhave a problemwiththeelectricalcharging
a looseaccessorydrivebelt,or
system. It couldindicatethatyouhave
it
checked
right away. Drivingwhilethislight
anotherelectricalproblem.Have
is oncoulddrainyourbattery.
The charging system light is on the left bottom corner
cluster.Itispart of thedigitalclustervoltmeter.
of your standard
If youmustdrive a shortdistancewiththelighton,becertain
youraccessories,suchastheradioandheater/airconditioner.
2-65
to turn off all
Features & Cantmls
Daytime Running Lights (DRL) Indicator Light (Canadian
Vehicles Only)
The DRL indicator is on whenevertheignitionandtheheadlightswitchand
see "Lights" in this part.
parkingbrakeare off. FormoredetailsaboutDRL,
The DRL indicatorlight ison thelowerleft of thestandardcluster.
havethedigitalcluster, it isonthetop left.
Headlight High Beam Indicator Light
If you
w
.
-.
K3270
The high beamindicator is onwheneveryouuseyourhighbeam
headlights.
Formoredetails,see"HeadlightHigh-LowBeamChanger"
in thispart.The
2-66
light is onthelefthand
cluster, it is onthetop
side of thestandardcluster. If youhave the digital
of thecluster.
Turn Signal and Lane Change Indicator
K3271
Theturnsignalindicatorisalightwithtwogreenarrows.Itcomeson
wheneveryousignala turn or lanechange.Turnsignalarrowsareatthetop
of thestandardanddigitalclusters.Formoredetails,see“TurnandLane
ChangeSignal” in thispart.
mailer Wiring Harness
PO47
If youhavethe optional traileringpackage,yourvehiclemayhaveeithera
5-wire or a 7-wireharness.
2-67
Features & Contmls
The5-wireharness is stored ontherightsideofthevanneartherearwheel
well.Theharnesshasnoconnector,andyoushouldhaveaqualifiedservice
personwireyourharnessforyou.
Theharnessmustberoutedout
floor,withenoughoftheharness
of yourvehiclebetweenthereardoorandthe
so thatthetrailerorthebodywon'tpull
it.
The7-wireharnessisstoredontherightside
of the vanneartherearwheel
30 amp batteryfeedwireandnoconnector,and
well.Thisharnesshasa
to the
shouldbewiredbyaqualifiedserviceperson.Attachtheharness
you leave it
trailer,thentape or strap it to your vehicle'sframerail.Besure
looseenough so thewiringdoesn'tbend or break,butnot so loosethat it
dragsontheground.
of yourvehiclebetweenthereardoorand
Theharnessmustberoutedout
so thatthetrailer
thefloor,withenough of theharnessleftonbothsides
thebodywon'tpullit.
Storetheharness in itsoriginalplace. Wrap theharnesstogetherand
neatly so it won'tbedamaged.
or
tie it
Assist Handles
PO664
Assisthandlesarelocatedontheinsidefrontandcentervehiclepillars
Graspthem as necessary to help enter and exit your vehicle.
If youhavetheoptionalrearhatchandsplit-paneldoors,you
anassisthandleontheinsidehatch.
2-68
will also have
Comfort Controls & Audio Systems
In thissectionyou’llfindout
howtooperatethecomfortcontrolandaudio
systemsofferedwithyourvehicle.Besuretoreadabouttheparticularsystem
supplied with your vehicle.
For explanation of vehicle symbols in thissection,referto“Vehicle
Symbols” in Section 0.
Comfort Controls ...................................................................................................
3-3
Flow-Through Ventilation System .....................................................................
3-3
Heating System.................................................................................................. 3-5
Heating/Air Conditioning System ......................................................................
3-6
Rear Heater .......................................................................................................3-7
3-8
Rear Air Conditioning ........................................................................................
Rear Window Defogger .....................................................................................
3-8
Engine Block Heater ............................................................................................. 3-9
Audio Systems.......................................................................................................
3-9
FM Stereo ........................................................................................................
3-10
AM.....................................................................................................................
3-10
AM Stereo ........................................................................................................
3-10
How to Operate Your ETR@ AM Radio........................................................
3-11
How toOperate YourETR@AM-FM
Stereo Audio System ...................................................................................
3-13
3-1
Comfort Contmls & Audio Systems
How to Operate Your ETR@ AM-FM
Stereo Audio Cassette System ...................................................................
3-15
How toOperate Your ETR@ AM-FM
Stereo Audio Cassette System with Equalizer ..........................................3-18
Care of Your Cassette Tape Player ..............................................................
3-22
How to Operate Your ETR@ AM-FM
Stereo Audio Compact Disc (CD) System ................................................
3-23
Care of Your Compact Discs .........................................................................
3-28
Fixed Mast Antenna ........................................................................................
3-29
3-2
Comfort Controls
Flow-Through Ventilation System
K3302
Your vehicle'sflow-throughventilationsystemsuppliesoutsideairtotheinside
ofyourvehiclewhen
it ismoving.Withthesidewindowsclosed,airwillflow
of thewindshield,throughthevehicle
into the front air inlet grilles at the base
andouttherearairexhaustvalves.Outsideairwillalsoenterthevehicle
when the heaterortheairconditioningfanisrunning.
Venfilation Tips
Keepthehoodandfrontairinletfreeofice,snow,oranyother
obstruction(suchasleaves).Theheateranddefrosterwillworkfar
better,reducingthechance of foggingtheinside of yourwindows.
Whenyouenteravehicleincoldweather,turntheblowerfantoHIGH
off. Thishelpscleartheintakeducts
forafewmomentsbeforedriving
ofsnowandmoisture,andreducesthechanceoffoggingtheinsideof
your windows.
Keeptheairpathunderthefrontseatsclearofobjects.Thishelpsair
to circulate throughout your vehicle.
3-3
Comfort Controls & Audio Systems
Air Vents
You will find airvents in thecenterandonthesides
ofyour instrument
panel. Youcanmove the vents to direct the flow of air, or closethevents
altogether.Whenyoucloseavent,
it willincreasetheflow of aircomingout
of anyventsthatareopen.
PB021
3-4
Heating System
PO450
If your vehicle does not have air conditioning,
systemwill look like.
this is what your heating
Fan Lever
Thetopleverhasfivepositions.
To increase the air flow, move the lever
toward HIGH. To decrease the airflow,move it toward OFF.
Temperature Lever
The left lever lets you select the temperature
of the air flowing into your
vehicle.Movetheleverupforwarmerair.Movetheleverdownforcoolerair.
Function Lever
The right lever can be moved
to four different functions.
Defrost: The setting with the defrost symbol operates the defroster. Most
of
the air comes out near the windshield, with some going
to the floor vents.
Use this when you get fog or
ice on the windshield.
HTR (Heater): Mostof the air comes out near the floor. The rest comes out
from the defroster vents under the windshield and at the
front sidewindows.
This is best for cold weather.
VENT: The air comes out at the vents on your instrument panel and at your
front side windows.
BLEND: With this setting,theheatedoutsideaircomesoutbetweenthe
heater vents and defroster vents with some air coming through the side
vents. Adjust the temperature lever for warmer or cooler air.
3-5
HeatingAir Conditioning System
PO451
If your vehicle has air conditioning, your heating/air conditioning system will
look like this.
Beforeusingyourvehicle'sairconditioning,openthewindows
vehicle of hot air.Closethewindowswhenusingthesystem.
Fan Lever
The top leverhasfivepositions.
toward HIGH.
to clear the
To increasetheairflow,movethelever
Temperature Lever
Theleftleverletsyouselectthetemperature
of the air flowing into your
vehicle. Move theleverupforwarmerair.Movetheleverdownforcoolerair.
Function Lever
Therightlevercanbemoved
functions.
to sevendifferentheatingandairconditioning
Defrost: Thesettingwiththedefrostsymboloperatesthedefroster.Most
of
the aircomesoutnearthewindshield,withsomegoing
to the floor vents
and side windowdefrostvents.Usethiswhenyougetfogor
ice on the
windshield.
BLEND: Withthissetting,theheatedoutsideaircomesoutbetweenthe
heaterventsanddefrostervents,withsomeaircomingthroughtheside
vents.Adjust thetemperatureleverforwarmerorcoolerair.
3-6
HTR(Heater): Mostof the aircomesoutnearthefloor.Therestcomesout
from the defroster vents under the windshield and at the front side windows.
This is best for cold weather.
VENT Theaircomesoutatthevents
on yourinstrumentpanelandatyour
frontsidewindows.Theairconditionerwillnotrun.Adjustthetemperature
lever for warmer or cooler air.
BI-LEV NC: With this, outside air comes
in throughtheheaterfloorventand
theinstrument panel vents. If youmoveyourtemperaturecontrollever
betweencoldandhot,coolerairwillcomeout
of theupperventswhile
warmeraircomesout of the floor vent.Thissetting is usefulincoolweather
withbrightsunlight.
NORM NC: Thissettingcools the outsideair.Ifyoufirstused
MAX NC, use
NORM NC assoon as thevehiclehascooleddown,
so outsideair will be
going through your vehicle.
MAX NC: This cools the air the fastest. Move the other lever all the
way to
You canuse MAX
Cold. MAX A/C lets in onlya little airfromtheoutside.
NC atfirstwhenit’sreally
hot outsideandyouneedtocool
off quickly.
Whentheairconditioningordefrost
or decrease in engine .speed.
is on,youmaynoticeaslightincrease
Rear Heater
You mayhavetheoptionalrear
heater.Thethree-speedfanswitch
is above
HI forwarmer air in the rear area. Move the
theradio.Slidethelevertoward
switch to OFF to turn thesystem off.
~
PO654
3-7
Comfort Contmls & Audio Systems
Rear Air Conditioning
Youmayhave rearairconditioning.Therearairconditioningswitchislocated
abovetheradioatthetop
of theinstrumentpanel.Slidethelevertoward
forcoolerair in thereararea.Slidetheleverto
OFF to turnthesystem
If yourvehiclehasrearairconditioning,settingiton
NC performancebyallowingtrappedrefrigerant
HI
off.
LOW mayenhance front
in rearlines to circulate.
Thesystem will onlysend cooledair if thefrontsystemison.Itcanstillbe
used to recirculate air,even if thefront system is off.
Beforeusingtherearairconditioning,openthewindowstoclearthevehicle
of hot air.Closethewindowswhenusingthesystem.
Rear Window Defogger
HATCH REL
REAR DEFOG
If yourvehiclehasthisoptiontherearwindowwillhavelinesrunningacross
theglass.Theselinesheatyourwindow.
For bestresults,clearthewindow
ofasmuchsnowand
beforeusingthe rearwindowdefogger.
ice aspossible
Rear Defog on
To turn on the rearwindowdefogger,findtheswitchmarked
yourinstrumentpaneltotheleft
of thesteeringcolumn.Pressthetop
of the
switchuntilthelight in theswitchcomeson,thenreleaseit.Therearwindow
defoggerwillonlyworkwhentheignitionis
in the RUN position.
You can turn thedefogger off atanytimebypressingthebottom
of the
off afterseveralminutes so thattheglass
switch.Thedefoggerwillshutitself
3-8
doesnotgettoo
again.
hot. If the window still isn’tclear, turn thedefoggeron
I
Scraping the inside of your rear window could cut and damage thA*A
don’t put
defogger.Yourwarrantywouldnotcoverthisdamage.
decalsthere,youmighthave
to scrapethem
Engine Block Heater
Ifyouusetheoptionalengineblockheaterbeforestartingyourengine,your
heating system will produce warmer air faster to heat the passenger
compartment in cold weather.See“EngineBlockHeater”
in theIndex.
Audio Systems
Your Dekoa audiosystemhasbeendesigned
to operateeasilyandgive
yearsof listeningpleasure.Butyouwill
get themostenjoymentoutofit,
youacquaintyourselfwith
it first. Findout whatyourDelco@systemcando
andhow to operateallitscontrols,tobesureyou’regettingthemostout
theadvancedengineeringthatwentintoit.
if
of
CAUTION
’
Hearingdamagefrom loud noise is almostundetectableuntil it istoo
of sound.Soundthat
late. Your hearingcanadapttohighervolumes
seemsnormalcanbeloudandharmful
to yourhearing. Take
precautions by adjustingthevolumecontrolonyourradio
to a safe
sound level beforehearingadapts to it.
To help avoid hearing loss or damage:
Adjust the volumecontrol to thelowestsetting.
Increasevolumeslowlyuntilyouhearcomfortablyandclearly.
3-9
Comfort Confmls & Audio Systems
NOTICE
Beforeyouaddanysoundequipment
CBradio,mobiletelephoneortwo-wa)
youwant. If youcan,it’sveryimportanttodo
equipmentmayinterferewiththeoperationof
Delco@radio orothersystems,andevendamagt
vehicle’s systems may interfere with the. ‘operQtion
hasbeenaddedimprop(
And,
of sound t
I.
I
1
before adding sound equipment, LI teck L V I L Iyour
~
dealerancj
checkFederalrulescoveringmobileradioandtelephoneunit-
2,
tu
u
FM Stereo
FM stereowillgiveyouthebestsound.ButFMsignalswillreachonlyabout
10 to 40 miles (16 to 65 km).TallbuildingsorhillscaninterferewithFM
signals,causingthesoundtocomeand
go.
AM
TherangeformostAMstationsisgreaterthanforFM,especiallyatnight.
Thelongerrange,however,cancausestationstointerferewitheachother.
AMcan pickupnoisefromthingslikestormsandpowerlines.
Tryreducing
the treble to reducethisnoise if youeverget it.
AM Stereo
ThismeanstheDelco@systemcanreceiveC-QUAM@stereobroadcasts.
C-QUAM@ toproducestereo,
ManyAMstationsaroundthecountryuse
(C-QUAM@ is areisteredtrademark
ofMotorola,Inc.)
thoughsomedonot.
If your Delco@ system can get C-QUAM’, your “STEREO” light will come on
whenyou’rereceivingit.
8
3-1 0
How to Operate Your ETW AM Radio
... ,,, ,
:.
,
.
.
.! ..y ' .:., , : : ' s .
,.
..
.-,
,
I
. . . ..
.:..:,.
. . . . ':.
... :,. e..,
:.i.
.:$: :.
;(
;:;
K4308
ThisparttellsyouhowyourETR@
AM radioworks.
The Upper Knob
Theupperknobdoesthesethreethings:
It controlsthevolume.
It letsyouseewhatstationyouhave.(When
knob to displaythestation.)
It tellsyouthetime.(Whentheignition
the time.)
the radioison,pushthe
is off, pushtheknob
to display
Thecontrolbehindtheupperknobmovesthesoundbetweentheleftand
right speakers.
The Lower Knob
Turnthelowerknob to chooseradiostations.
Tone Levers
Twoleverscontrolthetone
BASS-Slidethisleverup
TREBLE-Slidethisleverup
of yourradio.
to hearmorebass.
to hearmoretreble.
Adjusttheselevers to giveapleasingsound.
move TREBLE downtoreducethenoise.
3-1 1
If astationis
weakandnoisy,
P WR (Power)
The PWR buttonturnsyoursystemonand
off.
Pushbuttons
Thefourpushbuttonsletyoureturntofavoritestations.
pushbuttons,just:
To setthe
1. Tuneinthestation.
2. Push SET.
3. Within 5 seconds,pushone
thatbutton,thepresetstation
of thefourpushbuttons.Wheneveryoupush
will return.
Repeat these steps for each pushbutton.
You canpresetthreemorestationsbypushingapair
otheratthesametime.Just:
of buttonsnexttoeach
1. Tune inthestation.
2. Push SET.
3. Within 5 seconds,pushtwobuttonsnexttoeachotheratthesame
time.Wheneveryoupushthatpairofbuttons,thepresetstationwill
return.
Repeatthesesteps for eachstationyouselect.
CIock
To set the clock, just:
1. Push SET (radiostation will bedisplayed).
2. Within 5 seconds,pushandhold
correct hour appears.
3. Pushandhold
MlNS untilthecorrectminuteappears.
To displaytheclockwiththeignition
be displayed for a
HRS (time will bedisplayed)untilthe
off, pushtheupperknob.Thetimewill
fewseconds.
3-1 2
How to Operate Your E T P AM-FM Stereo Audio
System
Thisparttellsyouhowyour
ETR@ AM-FM stereoaudiosystemworks.
The Upper Knob
Theupperknobdoesthesethreethings:
It controlsthevolume.
It letsyouseewhatstationyouhave.(Whentheradioison,pushthe
knob to display the station.)
It tellsyouthetime.(Whentheignitionis
the time.)
off, pushtheknob
to display
Thecontrolbehindtheupperknobmovesthesoundbetweentheleftand
right speakers.
The Lower Knob
Turn thelower knob to chooseradiostations.Pushit
to get AM or FM. An
FM
stereo
station.
indicatorlightappearswhenyoutune
to an
Thecontrolbehindthelowerknobmovesthesoundbetweenyourfrontand
rear speakers.
Tone Levers
These two levers control the tone
BASS-Slidethisleverup
TREBLE-Slidethisleverup
of your radio.
to hearmorebass.
to hearmoretreble.
3-1 3
Comfort Contmls & Audio Systems
Adjusttheselevers to giveapleasingsound. If astationis weakandnoisy,
move TREBLE down to reducethenoise.
PWR (Power)
The PWR buttonturnsyoursystem on and off.
Pushbuttons
Thefourpushbuttonsletyoureturntofavoritestations.
You cansetthepushbuttonsforup
4 FM). Just:
to eightfavoritestations
(4 AM and
1. Tuneinthestation.
2. Push SET. (SET will bedisplayed.)
3. Within 5 seconds,pushoneofthefourpushbuttons.Wheneveryoupush
thatbutton,thepresetstationwillreturn.
Repeat these steps for each pushbutton.
You canpreset 3 morestationsoneachband
next to each other at the same time. Just:
by pushingapairofbuttons
1. Tune in thestation.
2. Push SET. (SET will be displayed.)
3. Within 5 seconds,pushtwobuttonsnext
to eachotheratthesame
time.Wheneveryoupushthatpairofbuttons,thepresetstationwill
return.
of buttons.
Repeat these steps for each pair
Scan Button
Whenyoupushthis,theradio
will go to thenextstationandstaytherea
fewseconds.Then it will go to thenextstationandpause,andkeepdoing
that.Press SCAN again to stopscanning.
Seek Button
Thischoosesstationsalso,but
it doesn’tkeepmovingas
SCAN does.When
youpush SEEK, theradiogoes to thenextstationandstaysthere.
Clock
To settheclock,just:
1. Push SET. (SET will bedisplayed.)
2. Within 5 seconds,pushandhold
SCAN until the correcthourappears.
3. Pressand hold SEEK untilthecorrectminuteappears.
To displaytheclockwiththeignition
off, push the upperknob.Thetimewill
be displayed for a few seconds.
3-1 4
How to Operate Your ETW AM-FM Stereo Audio
Cassette System
K4310
Thispart tells youhowyour
systemworks:
ETR@ AM-FMstereoaudiocassettesound
The Upper Knob
The upper knob does these four things:
It controlsthevolume.
Itletsyouknowwhatstationyou'relisteningto.(Whentheradioison,
push the knob to displaythestation.)
It tells you thetime.(Whentheignitionis
the time.)
Itallowsyoutoheartheotherside
cassette is playing.)
off, pushtheknob
to display
of thetape.(Pressknobwhile
Thecontrolbehindtheupperknobmovesthesoundbetweenyourleftand
right speakers.
The Lower Knob
Turnthelowerknob to chooseradiostations.Pushittoget
AM orFM. The
controlbehindthelowerknobmovesthesoundbetweenyourfrontandrear
speakers.
3-1 5
Comfort Contmls & Audio Systems
Tone Levers
Thesetwoleverscontrolthetone
BASS-Slidethisleverup
TREBLE-Slide
ofyourradio.
to hearmorebass.
thisleverup
to hearmoretreble.
Adjusttheselevers to giveapleasingsound.
moveTREBLEdown to reducethenoise.
P WR (Power)
The PWR button turnsyoursystemonand
If astationis
weakandnoisy,
off.
DNR@Button
ThisistheDynamicNoiseReductionbutton.
It helpsremovebackground hiss
noisefromtheradioortapeplayer.
Youmaywant to leave it pushed in all
the time.
DNR@ is aregisteredtrademark
of NationalSemiconductorCorporation.
Pushbuttons
Thefourpushbuttonsletyoureturntofavoritestations.
You cansetthepushbuttonsforuptoeightfavoritestations
4 FM). Just:
(4 AM and
1. Tune in thestation.
2. Push SET. (SET will bedisplayed.)
3. Within 5 seconds,pushoneofthefourpushbuttons.Wheneveryoupush
will return.
thatbutton,thepresetstation
Repeatthesestepsforeachpushbutton.
You canpreset 3 more stationson eachbandbypushingapairofbuttons
next to eachotheratthesametime.Just:
1. Tune in thestation.
2. PushSET.(SETwillbedisplayed.)
3. Within 5 seconds,push two buttonsnext to eachotheratthesame
time.Wheneveryoupushthatpairofbuttons,thepresetstationwill
return.
Repeat these steps for each pair
of buttons.
Scan Button
Whenyoupushthis,theradiowillgo
to thenextstationandstaytherea
fewseconds.Then it willgo to thenextstationandpause,andkeepdoing
to stopscanning.
that.PressSCANagain
3-1 6
Seek Button
Thischoosesstations'also,but
it doesn't keep moving as SCAN does.When
youpush SEEK, theradiogoes to thenextstation .and staysthere.
Clock
To set theclock,just:
1.Push SET. (SETwillbedisplayed.)
2. Within 5 seconds,pushand
3.Pressand
hold SCAN untilthecorrecthourappears.
hold SEEK untilthecorrectminuteappears.
To displaytheclockwiththeignition
be displayed for a few seconds.
off, pushtheupperknob.Thetimewill
Cassette Tape Player
Your tapeplayer is builttoworkbestwithtapesthatare
30 to 45 minutes
long on each side. Tapeslonger than that are so thintheymaynotworkwell
inthisplayer.
To play a cassette tape:
Havetheradioon.
Insertthetapesquarelythroughthetapedoor.
Thelongersidewiththetapevisiblegoes
in first.Ifyouhearnothingorhear
justgarbledsound, it may not be in squarely.Push STOP-EJECT toremove
thetapeandstartover.
Oncethetapeisplaying,usetheupperandlowerknobsforvolumeand
balance,justasyoudoforradio.Thearrowsshowwhichside
of thetapeis
playing.
To go forward to anotherpartof thetape,pushthebuttonwithan
arrowpointingtowardthelightedarrow.
To go backward, pushthebuttonwithanarrowpointingawayfromthe
STOPEJECT buttonlightly.
lighted arrow. To stopthetape,pushthe
To gofromoneside
onyourradio.
of thetape to theother,push
To removeorstopthetape,push
in the upperknob
STOP-EJECT.
Press STOP-EJECT lightly to stop the cassette. Push
removethecassetteandstarttheradio.
3-1 7
STOP-EJECT again to
Comfort Controls & Audio Sysfems
How to Operate Your E T F AM-FM Stereo Audio
Cassette System with Equalizer
K4372
This part tells youhowyourETR@AM-FMstereoaudiocassettesystemwith
equalizer works.
The Upper Knob
Theupperknobdoesthesefourthings:
It controlsthevolume.
It letsyouknowwhatstationyou’relisteningto.(Whentheradio
pushtheknobtodisplaythestation.)
is on,
It tellsyouthetime.(Whentheignition
the time.)
is off, pushtheknob
It allowsyou to heartheotherside
cassette is playing.)
of thetape.(Pressknobwhile
Thecontrolbehindtheupperknobmovesthesoundbetween
right speakers.
to display
your leftand
The Lower Knob
Turnthelowerknobtochooseradiostations.Push
it to get AM or FM.An
FM stereostation.Thecontrol
indicatorlightappearswhenyoutunetoan
behindthelowerknobmovesthesoundbetweenyourfrontandrear
speakers.
3-1 8
Tone Levers (Equalizer)
The 5 levers near the upper knob control the tone
ofyourradio.
Use the leverstosetthebass,midrange,andtrebleuntilyougetthesound
youprefer.The 60 and 250 leversadjustthebass; 1K is midrange;and 3.5K
and 10K adjust the treble.
PWR (Power)
The PWR buttonturnsyoursystemonand
Loud Button
Pressthisformorebasssound;pressagain
off.
to remove it.
AM-ST Button
Pushthisbutton if youwant AM stereo. (“STEREO’ will be displayed when
you are receiving an AM stereostation.)
Cr02 Button
The Cr02 button lets you set the system for the type
of cassette being used.
If you are using chromeormetaltapes,pushthe
Cr02 buttonin. If youare
usingstandardirontapes,makesure
the buttonisout.
DN@
Your audiosystemhasautomaticDynamicNoiseReduction.
background hiss noise from the radio or tape player.
It helpsremove
DNR@ is a registered trademark of the National Semiconductor Corporation.
Pushbuitons
The four pushbuttons let you return
You can set the pushbuttons for
4 FM). Just:
to favorite stations.
up to eight favorite stations (4 AM and
1. Tune inthestation.
2. Push SET. (SET willbedisplayed.)
3. Within 5 seconds,pushoneofthefourpushbuttons.Wheneveryoupush
will return.
thatbutton,thepresetstation
Repeatthesestepsforeachpushbutton.
3-1 9
Comfort Controls & Audio Systems
Youcan preset 3 more stationsoneachbandbypushingapair
next to eachotheratthesametime.Just:
of buttons
1. Tune in thestation.
2. Push SET. (SETwillbedisplayed.)
3. Within 5 seconds,pushtwobuttonsnext
to eachotheratthesame
of buttons,thepresetstationwill
time.Wheneveryoupushthatpair
return.
Repeatthesesteps
for eachpairof
buttons.
Scan Button
Whenyoupushthis,theradiowillgotothenextstationandstaytherea
fewseconds.Thenitwillgo
to thenextstationandpause,andkeepdoing
that.Press SCAN againtostopscanning.
Seek Button
Thischoosesstationsalso,but
it doesn’tkeepmovingas SCAN does.When
youpush SEEK, theradiogoes to thenextstation ahdstaysthere.
Clock
To set the clock, just:
1. Push SET. (SETwillbedisplayed.)
2. Within 5 seconds,pushand
3. Pressandhold
hold SCAN until 1:t-lecorrecthourappears.
SEEK untilthecorrectminuteappears.
To displaytheclockwiththeignition
be displayed for a fewseconds.
off, pushtheupperknob.Thetimewill
3-20
Cassette Tape Player
Yourtapeplayer is built to work best with tapes that are
30 to 45 minutes
so thintheymightnotwork
longoneachside.Tapeslongerthanthatare
wellinthisplayer.
To play a cassettetape:
Havetheradioon.
Insertthetapesquarelythroughthetape
door.
or hear
Thelongersidewiththetapevisiblegoes
in first. If youhearnothing
justgarbledsound, it maynotbe in squarely.
Push EJECT toremovethetapeandstartover.
Oncethetape is playing,usetheupperandlowerknobsforvolume
and balance, just as you do for the radio. The arrows show which side
of the tape is playing.
To go forward to anotherpartofthetape,push
FWD.
Togo backward,push REV. To stopthetapepushtheotherbutton
lightly.
To gofromoneside of thetape to theother,pushintheupperknob
EJECT.
onyourradio. To removeorstopthetape,push
The SEARCH button lets you play
next selection.
a selectionagain,orskipahead
to the
To playtheselectionagain:
Push SEARCH button to theright.(The
ON light will come on.)
Push REV to goback to thebeginning of theselectionthat
is playing.
To playthenextselection:
Push SEARCH button to theright.(The
ON light will comeon.)
Push FWD. Thetapewillgo
to thenextselection.
Press EJECT to removethecassetteandstarttheradio.
3-21
Comforf Controls & Audio Systems
Care of Your Cassette Tape Player
A tapeplayerthatisnotcleanedregularlycancausereducedsoundquality,
ruinedcassettes,oradamagedmechanism.Cassettetapesshouldbestored
in theircasesawayfromcontaminants,directsunlight,andextremeheat.
If
they aren’t, they may not operate properly
or causefailure ofthetapeplayer.
or after 15 hours of
Your tapeplayershouldbecleanedregularlyeachmonth
use. If younoticeareduction in soundquality, try aknown good cassette to
see if thetape or theplayerisatfault.
If thisothercassettehasno
improvementinsoundquality,cleanthetapeplayer.
Cleanyourtapeplayerwithawiping-action,nonabrasivecleaningcassette,
andfollowthedirectionsprovidedwithit.
Cassettes are subject to wear and the sound quality may degrade over time.
Alwaysmakesurethatthecassettetapeis
in goodconditionbeforeyou
haveyourtapeplayerserviced.
I
K1313
3-22
How to Operate Your E T P AM-FM Stereo Audio
Compact Disc (CD) System
1
Thisparttellsyouhowyour
ETR@ AM-FM stereosystemworks:
P WR (Power)
The PWR buttonswitchestheradioonand
off whentheignitionison.
Upper Knob
The upper knob does these
two things:
Itcontrols the volume.VolumewillincreasewhentheVOLknob
is
turnedclockwiseanddecreasewhenturnedcounterclockwise.Volumewill
bedisplayedbrieflyunlessthe
LeftlRight speakercontrol,Rear/Front
speaker control, BASS or TREB are adjusted.
It controlsthemutefeature. By pressingthe MUTE knob, all soundfrom
or by turning
the radio or CD playerstops.Bypressingtheknobagain,
theVOLknobclockwise,soundwillbeginagain.
LeWRight Speaker Control
The control behind the upper knob allows you
to balancethesoundbetween
therightandleftspeakers.Balancewillbedisplayedbrieflywhenusingthis
control.
Lower Knob
Thelowerknobdoesthesetwothings:
It enablesyoutotuneindifferentradiostationsbyturningtheknob
clockwise or counterclockwise.
3-23
It enablesyou to alternatebetween AM and FM stationsbypressingthe
BAND knob.Yourselectionwill
be brieflydisplayed.
RighVFront Speaker Control
Thecontrolbehindthelowerknobfadesthesoundbetweenyourfrontand
rearspeakers.Fadelevelswill
be brieflydisplayed.
SEEK
Pressingthe SEEK b buttonwillcausethereceiver
stationandstop.
Pressingthe 4 SEEK buttonwillcausethereceiver
stationandstop.
to seekthenexthigher
to seekthenextlower
SCAN
Whenyoupress SCAN, theradiowillgo
to thenextstationandpause,and
SCAN again. SC willbedisplayedwhen
willkeepscanninguntilyoupress
usingthiscontrol.
Pushbuttons
Thefivepushbuttonsletyoureturn
to favoritestations.Theyarealsoused
whenyouplay a disc.(See “ToPlay A CompactDisc”.)
(5 AM and 5 FM):
To setthepushbuttonsforuptotenfavoritestations
Tuneinthedesiredstation.
Pushthe SET button. (SET is displayedbriefly.)
Within 5 seconds,pushone of thefivepushbuttons to storethestation.
Wheneveryoupressthatbutton,thepresetstationwillreturn.
Clock
To settheclock,just:
Pressthe SET pushbutton.Theradiomay
be on or off.
Within 5 seconds,pressandholdeither
SEEK b increasetheminutes
or 4 SEEK to decreasetheminutesuntilthecorrectminuteappearson
thedisplay.
Pressandhold
SCAN untilthecorrecthourappears
pn thedisplay.
RCL
Pressthe RCL button to alternatebetweentimeandradiostationonthe
display. RCL may be pressedwhentheignition is offtoseethetime.
3-24
BASS
Pressthe BASS A to increasebasstonesand
V BASS to decreasebass
tones.Pressthecenter of the control for a preset BASS position. The bass
levelwillbedisplayedbrieflywhenusingthiscontrol.
TREBLE
Press the TREB A to increase the treble tones and
V TREB to decrease
the treble tones. Press the center of the control for a preset TREB position.
Thetreblelevelwillbedisplayedbrieflywhenusingthiscontrol.
To Play A Compact Disc (CD):
NOTICE
Beforeyoubegin,pleasenote:
DONOT usemini-discsthat are called
USE FULL-SIZECOMPACTDISCS
singles.Theywon’teject.
If the disc player is veryhot, or if you’re driving on a very rough
roakp:d
disc may come out or
just not play. If youseetheword HOT on the $i$
display, the discplayer is too hot to playthedisc.Press RCL to ma&iL,,G
to normal, the disc
word HOT go off thedisplay.Whenthingsgetback
PWR to turn thesystemon.
shouldplayagain.Press
Insertadiscpart way into the slot,labelsideup.Theplayerwillpull
Waitafewsecondsand
thediscshouldplay.
it in.
If thedisccomesbackout,checkwhether:
Thedisc is upsidedown.
It is dirty,scratched,orwet.
Toomuch moistureis in theair. (If thereis,waitaboutonehourandtry
again.)
RCL
Press RCL toseewhattrackisplaying.Press
it againwithin 5 secondsto
seehow long it hasbeenplaying.Thetracknumberalsoappearswhenyou
changethevolume orwhenanew
trackstartstoplay.
COMP
Pressthe COMP buttontomakesoftandloudpassagesmorenearlyequal
involume. COMP appearsinthedisplaywhileusingthiscommand.
RDM
The RDM buttonmeansrandomandwhen
it is pressed, it causesthe CD
mechanism to playthetracks in arandomorderratherthan
in thesequential
1, 2, 3 order.
3-25
Comfort Contmls & Audio Systems
REV
Pressandholdthe
REV buttontoquicklyreturntoafavoritepassage.The
counterreadingwillbedisplayedwhenusingthiscontrol.
FWD
Pressand hold the FWD buttontoadvancequicklywithin
toresumeplaying.Watchthedisplaytostopataspecificpassage.
a track.Releaseit
SCAN
Press SCAN tosampleeachtrackforapproximately
10 seconds.Scanning
RDM,SCAN or anyothermotionbuttonispressed
willcontinueuntilthe
again.
PREV
If youholdthe PREV (4 SEEK) button, or pressitmorethanonce,thedisc
willreturn to previoustracks.
NEXT
Press NEXT(SEEK b) tohearthenexttracknowinsteadofwaitinguntilthe
presenttrackisfinished. If youholdthisbutton or pressitmorethanonce,
thedisc will advancefurther.
ST-Pf
Press ST-PL (Stop-Play)tomakethediscstop
ST-PL againtorestartthediscatthepointwhere
and theradioplay.Press
it stopped.
Press PWR or turntheignitionkey off tostopthediscplayer.Thediscstays
intheplayerandwillresumeplayingatthepointwhereitstopped.
Press EJECT toejectthediscandmaketheradioplay.Thediscwillstartat
tract 1 whenyoureinsertit.
Anti-Theft Feature
Delco LOC Il@isanAnti-Theftfeature for thecompactdiscplayer.
It canbe
If itisused,your
usedorignored.Ifignored,thesystemplaysnormally.
on.
playerwon’tbeusableifitiseverstolen,becauseitwon’tturn
Theinstructionsbelowtellyouhowtoenterasecretcodeintothesystem.
yourcarlosesbatterypowerforanyreason,youmustunlockthesystemwith
thesecretcodebeforetheradiowillturnon.
To Lock The System:
1. Writedownany
6 digitnumberandkeep
2. Turntheignition
to the“Accessory” or “Run”position.
3. Pressthe PWR buttontoturntheradio
3-26
it in asafeplace.
off.
If
4. Pressthe 1 and 4 buttonstogether. Hold themdownuntil
on the display.
You arenowready to enter your secret code.
secondsbetweensteps.
“-
- -” shows
Don’twait more than 15
5. Press SET and 000 willappearonthedisplay.
6. Pressthe SEEK b buttontomakethefirstnumberappear.
7. Rotatethe TUNE knobrightorleft
to makethelasttwonumbersagree
with your code.
8. Press BAND and 000 willappearagain.
last three digits ofyourcode.
Now youareready
to enterthe
9. Repeat steps 6 and 7 for the last three digits ofyourcode.
10. Press BAND and rEP willappearfor
appear.
5 secondsandthen
000 will
11. Repeatsteps 6 through IO. Thistime SEC willappear-indicatingthat
theradioissecure.
To Unlock The System After A Power Loss
When batterypower is reapplied to asecuredradio,theradiowon’tturnon
and LOC willappearonthedisplay.
Enteryoursecretcode
steps.
as follows:pause no morethan 15 secondsbetween
off.)
2. Depressthe SET button.Thedisplaywillshow
000.
3. Enterthesixdigits of thecodefollowingsteps 6-9 above.Thedisplay
willshowthenumbersasentered.
4. Depress the BAND knobandthe time appears-indicatingthatthe
disablingsequence wassuccessful. If thedisplayindicates SEC, the
numbers did notmatchandtheunit
is stillsecured.
1. Turntheignitionon.(Radio
Disabling The Theft System
1. Depresspresets 1 and 4 for 5 secondswithignitiononandradiopower
off. Thedisplay will show SEC, indicatingtheunitisinthesecuremode.
2. Depressthe SET button.Thedisplaywill
show 000.
3. Enter the first three digits
of the code following steps 6 and 7 of the
preceding paragraphs. The display will show
the numbers as entered.
3-27
Comfort Contmls & Audio Systems
~
~
~~~
~~
4. Depressthe BAND knob.Theradiowilldisplay
5. Enterthesecondthreedigits
numbers as entered.
000.
of thecode.Thedisplaywillshowthe
6. Depress the BAND knob. If the display shows
I the disabling
sequencewassuccessful.Thenumbersmatchedtheuser-selectedcode
or the factoryback-upcodeand the unit is in the UNSECURED mode. If
the display shows SEC, the disabling sequence was unsuccessful and
the numbers did not match either of the codes and the unit will remain
in the SECURED mode.
“1
1 1’’
Care of Your Compact Discs
KO557
Handle discs carefully. Store them in their original cases or other protective
casesandaway from direct sunlight and dust. If the surface of a disc is
soft cloth in amild,neutraldetergentsolutionand
soiled,dampenaclean,
clean it, wiping from the center to the edge.
Besurenever to touchthesignalsurfacewhenhandlingdiscs.Pickupdiscs
hole and the outer edge.
by grasping the outer edges or theedgeofthe
3-28
Fixed Mast Antenna
The fixed mast antenna can withstand most car washes without being
damaged. If themastshouldeverbecomeslightlybent,youcanstraightenit
outbyhand. If themastisbadlybent,asitmightbebyvandals,youshould
replace it.
Check every once in a while to be sure the mast is still tightened
fender.
3-29
to the
Your Driving and the Road
Section
A
A
.
1
Here you’ll find information about driving on different kinds
ofroadsand in
tips on
varying weather conditions . We’ve also included many other useful
driving.
Road Signs ............................................................................................................ 4-2
Defensive Driving .................................................................................................. 4-8
Drunken Driving .....................................................................................................
4-9
Control of a Vehicle ............................................................................................
4-12
Braking..............................................................................................................
4-12
Steering ............................................................................................................ 4-18
Steering Tips ....................................................................................................
4-18
Passing .............................................................................................................
4-21
Loss of Control ................................................................................................
4-22
Driving at Night ...................................................................................................
4-23
Driving in the Rain ..............................................................................................
4-26
Driving in Fog, Mist and Haze ..........................................................................
4-28
City Driving ..........................................................................................................
4-30
Freeway Driving................................................................................................... 4-31
Driving On A Long Trip ...................................................................................... 4-33
Hill and Mountain Roads ....................................................................................
4-35
Parking On Hills ..................................................................................................
4-37
Winter Driving ......................................................................................................
4-40
Towing a Trailer ...................................................................................................
4-43
4-1
Your Driving and fhe Road
-. . *p
...
Road Signs
:.&+.
-:
:*. -
p.,
L.._
5- , i
.. .
f
@
@
&
_.
c.=-
., .
--r
,.
.A;
-..
.. ;I;;
-I’
+
-,
,’
’
Theroadsignsyouseeeverywhere
a d Yoded bycolor,shapeandsymbols.
so thatyoucanquicklygraspthebasic
It’sa good idea to know these codes
meaningorintentof
the sign even before you have a chance to read it.
Color of Road Signs
RED means STOP. Itmayalsoindicatethatsomemovementisnotallowed.
Examplesare DONOTENTER and WRONGWAY.
YELLOW indicatesageneralwarning.
Slow down and be carefulwhenyou
It maysignalarailroadcrossingahead,ano-passing
seeayellowsign.
a yellowsolid
zone, or someotherpotentiallydangeroussituation.Likewise,
linepaintedontheroadmeans“Don’tCross.”
4-2
AM402003
ORANGE indicatesroadconstruction ormaintenance.You’llwant
to slow
downwhenyouseeanorangesign,
as part of theroad maybe closed off
or torn up.Andtheremaybeworkersandmaintenancevehiclesaround,
too.
SMALLTOMIN
A
ANYTu vu 14
A
‘AILE
-
AM402004
GREEN is usedtoguidethedriver.Greensignsmayindicateupcoming
freewayexitsorshowthedirectionyoushould
turn toreachaparticular
place.
BLUE signswithwhitelettersshowmotorists’services.
4-3
Your Driving and the Road
SWIMMING
AM402006
BROWN signspoint out recreationareas or points of historic or cultural
interest.
Shape of Road Signs
Theshape of thesign will tell yousomething, too.
An OCTI
letters.
- -
AL (eight-sided)signmeans
STOP. It is alwaysredwithwhite
A
A DIAMOND-shapedsignisawarningofsomethingahead-forexample,the
hill, soft shoulder, or anarrow
end of adividedhighway,acurve,steep
bridge.
4-4
7
AM402009
A TRIANGLEpointeddownward,indicates YIELD. It assignstheright-of-way
totraffic on certainapproachestoanintersection.
AM402010
A TRIANGULARsignalso
PASSINGZONE.Thissign
is used on two-laneroads to indicateaNO
willbeontheleftside
of theroadway.
AM402011
RECTANGULAR(square or oblong)signsshowspeedlimits,parking
to cities.
regulations,givedirections,andsuchinformationasdistances
4-5
Your Driving and the Road
Symbols on Road Signs
in usetoday.
Therearemanyinternationalroadsigns
AM402012
Thebasicmessageofmanyofthesesigns
isinpicturesorgraphicsymbols.
A picturewithin a circle withadiagonallineacross
it showswhat NOT to do.
I
AM40201
Traffic Lights
We’re all familiarwithtrafficlightsorstoplights.Often,greenarrowsarebeing
used in thelightsforimprovedtrafficcontrol.Onsomemultilaneroads,green
arrowslightup,indicatingthattraffic
in oneormorelanescanmoveormake
You’ll stillneed to
aturn.Greenarrowsdon’tmean“gonomatterwhat”.
4-6
proceedwithcaution,yieldingtheright
toothervehicles.
of way to pedestriansandsometimes
Sometrafficlightsalsouseredarrows
turningonred.
to signifythatyoumuststopbefore
Manycityroads and expressways,andevenbridges,usereversible-lane
A red X lightabovealanemeansnodriving
trafficcontrolduringrushhours.
A greenarrowmeansyoumaydrive
in thatlane.
inthatlaneatthattime.
Look for the signs posted to warn drivers what hours and days these
systemsare in effect.
REVERSlbLE
LANEON
MULTI-LANE
ROADWAY
V
P
AM402015
Pavement Markings
I
I
AM402011
Pavementmarkingsaddtotrafficsignsandsignals.Theygiveinformationto
A solidyellowlineonyour
driverswithouttakingattentionfromtheroadway.
side of theroadorlanemeans“don’tcross.”
Your Own Signals
Driverssignaltoothers,too.It’snotonlymorepolite,it’ssafertoletother
driversknowwhatyouaredoing.And
in someplacesthelawrequiresdriver
signals.
4-7
Your Driving and the Road
Turnand lane changesignals: Alwayssignalwhenyouplantoturnor
changelanes.
If necessary,youcanusehandsignalsoutthewindow:Leftarmstraightout
foraleftturn,downforsloworabout-to-stop,andupforarightturn.
Slowing down: If timeallows,tapthebrakepedalonceortwiceinadvance
of slowingorstopping.Thiswarnsthedriverbehindyou.
Disabled: Your four-wayflasherssignalthatyourvehicleisdisabledorisa
hazard.See“HazardWarningFlashers”intheIndex.
Traffic Officer
Thetrafficpoliceofficerisalsoasource
of importantinformation.Theofficer’s
signalsgovern,nomatterwhatthetrafficlightsorothersignssay.
Thenextpartdiscussessome
of theroadconditionsyoumayencounter.
Defensive Driving
Thebestadviceanyonecangiveaboutdrivingis:Drivedefensively.
Pleasestartwithaveryimportantsafetydeviceinyourvehicle:Buckleup.
(See“SafetyBeltsintheIndex.”)
Defensivedrivingreallymeans“bereadyforanything.’’Oncitystreets,rural
roads,orfreeways, it means“alwaysexpecttheunexpected.”
Assumethatpedestriansorotherdriversaregoingtobecarelessandmake
do. Bereadyfortheirmistakes.
mistakes.Anticipatewhattheymight
Expectchildren to dashoutfrombehindparkedcars,oftenfollowedbyother
to opendoorsintotraffic.Watchfor
children.Expectoccupantsinparkedcars
to openadoor.
movementinparkedcars-someonemaybeabout
Expectotherdrivers to runstopsignswhenyouareonathroughstreet.Be
readytobrakeifnecessaryasyougothroughintersections.
Youmay not
if you do, youwillbeready.
havetousethebrake,but
If you’re driving through a shopping center parking lot where there are
well-markedlanes,directionalarrows,anddesignatedparkingareas,expect
somedriverstoignoreallthesemarkingsanddashstraighttowardonepart
of the lot.
Pedestrianscanbecareless.Watchforthem.Ingeneral,youmustgiveway
ofway.
topedestrianseven if youknowyouhavetheright
Rear-endcollisionsareaboutthemostpreventable
of accidents. Yet theyare
It’s thebestdefensivedriving
common.Allowenoughfollowingdistance.
4-0
maneuver,in both city and ruraldriving. You neverknowwhenthevehiclein
front ofyouisgoing
to brake or turnsuddenly.
Here’safinal bit of informationaboutdefensivedriving.Themostdangerous
US. isveryearlyonSundaymorning.
In fact, GM
timefordrivinginthe
Researchstudiesshowthatthemostandtheleastdangeroustimesfor
driving,everyweek,fallonthesameday.ThatdayisSunday.Themost
3 a.m. to 4 a.m. Thesafesttime is Sunday
dangeroustimeisSundayfrom
a Sundayat 3 a.m.
from 10 a.m. to 11 a.m.Drivingthesamedistanceon
isn’tjust a little moredangerousthanit is at 10 a.m. It‘s about 134 times
more dangerous!
Thatleads to thenextpart.
Drunken Driving
Deathandinjuryassociatedwithdrinkinganddrivingisanationaltragedy.It’s
thenumberonecontributortothehighwaydeathtoll,claimingthousandsof
victimseveryyear.Alcoholtakesawaythreethingsthatanyoneneedsto
drive a vehicle:
Judgment
MuscularCoordination
0
Vision
Policerecordsshowthathalfofallmotorvehicle-relateddeathsinvolve
alcohol-adriver,
apassengerorsomeoneelse,suchasapedestrian,had
beendrinking.Inmostcases,thesedeathsaretheresult
of someonewho
25,000 motorvehicle-relateddeathsoccur
wasdrinkinganddriving.Over
eachyearbecauseofalcohol,andthousandsofpeopleareinjured.
if apersonplanstodrive?Ideally,no
Justhowmuchalcoholistoomuch
if onedoes,thenwhat’s “too
oneshoulddrinkalcoholandthendrive.But
much”? It can be alotlessthanmanymightthink.Although
it dependson
is somegeneralinformationontheproblem.
eachpersonandsituation,here
TheBloodAlcoholContent(BAC)
four things:
0
of someonewhoisdrinkingdependsupon
Howmuchalcoholisinthedrink.
Thedrinker’sbodyweight.
Theamount of foodthatisconsumedbeforeandduringdrinking.
Thelength of timeithastakenthedrinkertoconsumethealcohol.
4-9
1
-7
'. ,
/-
'I
AM407001
Dl
1 THAT WILL
RI ULT IN A BAC
OF A
' .85% IN
THE
I
HOURS
6
AM407002
According to theAmericanMedicalAssociation,a180-pound(82kg)person
who drinksthree12-ounce (355 ml) bottles of beerinanhour will end up
withaBAC of about 0.06 percent.ThepersonwouldreachthesameBAC
if
by drinking three 4-ounce (120 ml) glasses of wineorthreemixeddrinks
each had 1-1/2ounces(45 ml) of aliquorlikewhiskey,ginorvodka.
It's theamount of alcoholthatcounts.Forexample,
if thesamepersondrank
threedoublemartinis (3 ouncesor 90 mlofliquoreach)withinanhour,the
4-1 0
person’sBACwould be close to 0.12 percent. A person who consumes food
just before orduringdrinkingwill have a slightly lowerBAClevel.
of 0.10 percent. In
Thelaw in most US. statessets the legallimitataBAC
Canadathe limit is 0.08 percent,and in someothercountriesit’slowerthan
be over 0.10 percent after three to six drinks (in one
that.TheBAGwill
is in the
hour). Of course, as we’ve seen, it dependsonhowmuchalcohol
drinks,andhowquicklythepersondrinksthem.
Butit’sveryimportant to keep in mind that the ability to drive is affected well
ofmany
belowaBAC of 0.10 percent.Researchshowsthatthedrivingskills
peopleareimpairedat a BACapproaching 0.05 percent,andthat the effects
0.05 percent.
are worseatnight.AlldriversareimpairedatBAClevelsabove
Statisticsshowthatthechance
of being in an accident increases sharply for
drivers whohave a BAC of 0.05 percentorabove. A driverwithaBAClevel
of 0.06 percent(threebeers in onehourfora180-poundor82kgperson)
At aBAClevel of
hasdoubledhisorherchanceofhavinganaccident.
0.10 percent, the chanceofthatdriverhavinganaccident
is six times
0.15 percent, the chancesaretwenty-fivetimesgreater!
greater;atalevelof
And, thebodytakesaboutanhour
to riditself of thealcohol in onedrink.
No amountof coffee ornumberof coldshowerswillspeedthatup.
“I’ll becareful”isn’ttheright
answer.What if there’san emergency,aneed
totakesuddenaction,
as whena child darts into thestreet? A personwitha
higher BAC might not be able toreactquicklyenough to avoid the collision.
There’ssomethingelseaboutdrinkinganddrivingthatmanypeopledon’t
know. Medicalresearchshowsthatalcoholinaperson’ssystemcanmake
crashinjuriesworse.That’sespeciallytrueforbrain,spinalcordandheart
drinking-driver or
injuries. That meansthat if anyonewhohasbeen
passenger-is in acrash,thechance of being killed orpermanentlydisabled
is higherthan if thatpersonhadnotbeendrinking.Andwe’vealreadyseen
that the chance of a crash itself is higher for drinking drivers.
CAUTION
[
Drinkingandthendriving is verydangerous.Yourreflexes,
perceptions,andjudgmentwillbeaffectedbyevenasmallamount
if you
of alcohol. You could havea serious-or evenfatal-accident
driveafterdrinking.Pleasedon’tdrinkanddrive
or ridewithadriver
who hasbeendrinking.Ridehomeinacab;
or if you’rewitha
group,designateadriverwhowillnotdrink.
4-1 1
Your Driving and the Road
Control of a Vehicle
You havethreesystemsthatmakeyourvehicle
go whereyouwant it to go.
They are thebrakes,thesteeringand
the accelerator.Allthreesystemshave
to do their work at the places where the tires meet the road.
f
’ ;
5
’.
I
;::-;.
?>
+.
-
I
:
--.
in: .’.
AN409007
Sometimes,aswhenyou’redrivingonsnoworice,it’seasytoaskmoreof
thosecontrolsystemsthanthetiresandroadcanprovide.Thatmeansyou
can lose control ofyourvehicle.
Braking
Brakingactioninvolves perceptiontime and reactiontime.
First,youhave to decide to pushonthebrakepedal.That’s
perception
time. Thenyouhave to bringup your footand do it.That’s reactiontime.
Average reactiontime is about 3/4 ofasecond.Butthat’sonlyanaverage.
It might be lesswithonedriverandaslongastwoorthreesecondsor
morewithanother.Age,physicalcondition,alertness,coordination,and
So do alcohol,drugsandfrustration.Buteven
in
eyesightallplayapart.
60 mph (100 km/h) travels 66 feet
3/4 of a second, a vehicle moving at
(20 m).That could bealot of distance in anemergency, so keepingenough
spacebetweenyourvehicleandothers
is important.
And,ofcourse, actualstoppingdistancesvarygreatlywiththesurfaceofthe
of theroad(wet, dry,
road(whetherit’spavementorgravel);thecondition
icy);tiretread;andthecondition
ofyourbrakes.
4-1 2
Most driverstreattheir brakes withcare.Some,however,overworkthe
brakingsystemwithpoordrivinghabits.
Avoidneedlessheavybraking.Somepeopledrive
in spurts-heavy
accelerationfollowedbyheavy braking-ratherthankeepingpacewith
traffic.This is a mistake.Yourbrakesmaynothave
time to cool
between hard stops. Your brakeswillwearoutmuchfaster
if youdoa
lot of heavy braking.
Don’t ”ride”the brakes by letting your leftfootrest
pedal while driving.
lightly on the brake
II
!
I
AM410001
1
CAUTION
A
“Riding” your brakes can cause them
to overheat to the point that
theywon’tworkwell.You
mightnotbeable to stopyourvehicle in
so
timeto avoid anaccident. If you“ride”yourbrakes,theywillget
hottheywillrequirealot
of pedalforce to slowyoudown.Avoid
“riding”thebrakes.
I
NOTICE
“Riding .he brakeswears them out muchfaster. You wouldneedcostll
brakereplacementmuch sooner than normal. and it also reduces fuel
4-1 3
If youkeeppace with thetrafficandallowrealisticfollowingdistances,you
willeliminate a lot of unnecessarybraking.Thatmeansbetterbrakingand
longerbrake life.
4
If yourengineeverstopswhileyou’redriving,brakenormally
but don’t
pump yourbrakes. If youdo, the pedal may getharder to pushdown. If
yourengine stops, you willstillhave somepowerbrake assist. But you
up, itmay
will use it whenyoubrake, Once thepowerassistisused
takelonger to stop andthebrake pedal willbeharder to push.
Anti-lOCk Brakes (ABS)
Your vehiclehas an advancedelectronicbrakingsystemthatcanhelpyou
away,
keep it undercontrol.Whenyoustartyourvehicleandbegintodrive
youmayhear amomentarymotor or clicking noise. This is the ABS system
testingitself.
AM41501 0
Here’showanti-lockworks.Let’ssaytheroad
Suddenly an animal jumps out
in frontofyou.
Youslam onthebrakes.Here’swhathappenswith
is wet.You’redrivingsafely.
ABS.
A computer senses that wheels are slowing down.
at the
The computer separately works the brakes at each front wheel and
rearwheels.Theanti-locksystemcanchangethebrakepressurefasterthan
to make the most of available
any driver could. The computer is programmed
tire androadconditions. You cansteeraroundtheobstaclewhilebraking
hard.
4-1 4
...
AM41 5020
As youbrake, your computerkeepsreceivingupdatesonwheelspeedand
controls braking pressureaccordingly.
CAUTION
Anti-lock doesn’t change the time you need to get your foot up to
the brakepedal. If you gettoo close to thevehicle in front of you,
you won’t have time to applyyourbrakes if thatvehiclesuddenly
slows or stops. Alwaysleaveenough room up ahead to stop, even
though you haveanti-lockbrakes.
To Use Four-wheel Anti-Lock:
Don’tpump the brakes.Just hold thebrakepedaldownandletanti-lockwork
for you.Youmay feelthebrakesvibrate, or youmaynoticesomenoise,but
thisisnormal.
4-1 5
Brake System Warning Light
Cluster
Digital
Cluster
Standard
PO641
This light appears on your instrument cluster to warn you if yourregular
braking system needs service. See “Brake System Warning Light” in the
Index.
Anti-lock Brake System Warning Light
Standard CIusfer
Digital Cluster
Thislightappearsontheinstrumentclustertowarn
brakesystemneedsservice.See“Anti-lockBrakeSystem
theIndex.
4-1 6
you if your anti-lock
Warning Light”in
Disc Brake Wear Indicators
Your vehiclehasfrontdiscbrakesandreardrumbrakes.Discbrakepads
have built-in wear indicatorsthatmakeahigh-pitchedwarningsoundwhen
thebrakepadsarewornandnewpadsareneeded.Thesoundmaycome
and goorbe heard allthetimeyourvehicle
is moving(exceptwhenyouare
pushingonthebrakepedalfirmly).
I
CAUTION
A
Thebrakewearwarningsoundmeansthatsoonerorlateryour
4 brakeswon’tworkwell.That
could lead to an accident. When you
hearthebrakewearwarningsound,haveyourvehicleserviced.
I
NCTICE
Somedrivingconditions or climates maycauseabrakesquealwhen
brakes are firstapplied or lightlyapplied.Thisdoesnotmeansomething
wrongwithyourbrakes.
the
is
Rear Drum Brakes
Your reardrumbrakesdon’thavethewearindicators,but
if youeverheara
rearbrakerubbingnoise,havetherearbrakeliningsinspected.Also,
the rear
brakedrumsshouldberemovedandinspectedeachtime
the tiresare
removedforrotationorchanging.When
youhave thefrontbrakesreplaced,
have the rearbrakesinspected,too.
Brake linings shouldalwaysbereplaced
ascompleteaxlesets.
Brake Pedal Travel
Seeyourdealer if thebrake pedal does notreturntonormalheight,or
if
there is arapidincrease in pedal travel. This could beasign of brake
trouble.
Brake Adjustment
Everytimeyoumakeabrake
stop, your discbrakesadjustfor wear. If your
brakepedalgoesdownfartherthannormal,yourreardrumbrakesmayneed
adjustment.Adjustthemby backing upandfirmlyapplyingthebrakesafew
times.
4-1 7
Your Driving and the Road
Braking In Emergencies
Useyouranti-lockbrakingsystemwhenyouneedto.Withanti-lock,youcan
steerandbrakeatthesametime.
In manyemergencies,steeringcanhelp
youmorethaneventheverybestbraking.
Steering
Power Steering
If youlosepowersteeringassistbecausetheenginestopsorthesystem
fails to function,youcansteerbutitwilltakemuchmoreeffort.
Steering Tips
Driving on Curves
It’s importanttotakecurvesat
a reasonablespeed.
A lot of the“driver lost control”accidentsmentionedonthenewshappenon
curves.Here’swhy:
is subject to thesamelaws of
Experienceddriver orbeginner,eachofus
physics whendrivingoncurves.Thetractionofthetiresagainsttheroad
to changeitspathwhenyouturn
surfacemakesitpossibleforthevehicle
thefrontwheels. If there’snotraction,inertiawillkeepthevehiclegoingin
thesamedirection. If you’veevertried to steer a vehicleonwetice,you’ll
understandthis.
a curvedependsontheconditionofyourtires
The traction you can get in
andtheroadsurface,theangleatwhichthecurveisbanked,andyour
speed.Whileyou’re in a curve,speedistheonefactoryoucancontrol.
Supposeyou’resteeringthrough a sharpcurve.Thenyousuddenly
accelerate.Thosetwocontrolsystems-steeringand
acceleration-can
overwhelmthoseplaceswherethetiresmeettheroadandmakeyoulose
control.
Whatshouldyou do if thiseverhappens?Letupontheacceleratorpedal,
to go,andslowdown.
steer the vehicle the way you want it
Speed limit signs near curves warn that you should adjust your speed.
course,thepostedspeedsarebasedongoodweatherandroadconditions.
to goslower.
Under less favorable conditions you’ll want
Of
If you need to reduceyourspeedasyouapproach
a curve, do itbeforeyou
Try to adjust your
enter the curve, while your front wheels are straight ahead.
a reasonable,steady
speed so youcan“drive”throughthecurve.Maintain
speed.Waittoaccelerateuntilyouareoutofthecurve,andthenaccelerate
gently into the straightaway.
4-1 8
Whenyoudrive into acurveatnight,it’sharder
to seetheroadahead
youbecause it bendsawayfromthestraightbeams
of yourlights.This
onegoodreason to drive slower.
of
is
Steering in Emergencies
Therearetimeswhensteeringcanbemoreeffectivethanbraking.For
example,youcomeovera
hill and find atruckstopped in yourlane,ora
carsuddenlypulls out fromnowhere,orachilddartsoutfrombetween
parkedcarsandstopsright
in front ofyou.You canavoidtheseproblemsby
braking-ifyou canstop in time.Butsometimesyoucan’t;thereisn’troom.
That’sthetimeforevasiveaction-steeringaroundtheproblem.
Your vehiclecanperformverywell
brakes.
in emergencieslikethese.Firstapplyyour
It is better to remove as muchspeed as youcanfromapossiblecollision.
Thensteeraround the problem, to the left or rightdependingonthespace
available.
If you
Anemergency like thisrequirescloseattentionandaquickdecision.
are holdingthesteeringwheel at the recommended 9 and 3 o’clockpositions,
youcan turn it a full 180 degreesveryquicklywithoutremovingeitherhand.
Butyouhave to actfast,steerquickly,and
just asquicklystraightenthe
wheelonceyouhaveavoidedtheobject.
Youmust thenbeprepared to steer
back to youroriginallaneandthenbrake
to acontrolledstop.
4-1 9
Your Driving and the Road
Dependingonyourspeed,thiscanberatherviolentforanunprepareddriver.
This is oneof thereasonsdrivingexpertsrecommendthatyouuseyour
safetybeltsandkeep both handsonthesteeringwheel.
Thefactthatsuchemergencysituationsarealwayspossible
to practicedefensivedrivingat all times.
is agoodreason
Off-Road Recovery
Youmay findsometimethatyourrightwheelshavedroppedofftheedgeof
a road onto the shoulder while you’re driving.
If thelevel of theshoulderisonlyslightlybelowthepavement,recovery
is
fairly easy.Easeoff theacceleratorandthen, if there is nothing in the way,
of the pavement. You can turn
steer so that your vehicle straddles the edge
thesteeringwheel up to a quarter turn until the right front tire contacts the
to gostraightdownthe
pavementedge.Thenturnyoursteeringwheel
roadway.
I
AM428001
If the shoulderappears to be about four inches (100 mm)ormorebelowthe
If there is notenough room to
pavement,thisdifferencecancauseproblems.
pullentirelyontotheshoulderandstop,thenfollowthesameprocedures.But
if the right tire scrubs against the side of the pavement, do
NOT steer more
sharply.With too muchsteeringangle,thevehiclemayjumpbackontothe
road with so muchsteeringinputthat it crossesover into theoncomingtraffic
beforeyoucanbring it backundercontrol.
Instead,ease off again on theacceleratorandsteeringinput,straddlethe
pavementoncemore,then
try again.
4-20
Passing
The driver of a vehicle about to pass another on a two-lane highway waits
forjusttherightmoment,accelerates,movesaround
the vehicleahead,then
A simplemaneuver?
goesback into therightlaneagain.
Notnecessarily!Passinganothervehicle onatwo-lanehighwayisa
potentiallydangerous move, sincethepassingvehicleoccupiesthesamelane
A miscalculation, anerrorin
asoncomingtrafficforseveralseconds.
to frustration or anger can suddenly put the
judgment,orabriefsurrender
passing driver face to face with the worst of all traffic accidents-thehead-on
collision.
So herearesometipsforpassing:
“Driveahead.”Lookdowntheroad,
to thesides,and to crossroadsfor
situationsthatmightaffectyourpassingpatterns.Ifyouhaveanydoubt
whatsoeveraboutmakingasuccessfulpass,waitforabettertime.
If youcanseea
Watch fortrafficsigns,pavementmarkings,andlines.
sign upaheadthatmightindicatea
turn oranintersection,delayyour
to pass
pass.A broken centerlineusuallyindicatesit’sallright
(providingtheroadaheadisclear).Nevercrossasolid
line onyourside
of the lane oradoublesolidline,even
if theroadseemsempty of
approaching traffic.
If you suspect that the driver
of the vehicle you want to pass isn’t aware
ofyour presence, tap the horn a couple
of times before passing.
Do not get too close to the vehicle you want to pass while you’re
awaitinganopportunity.Foronething,followingtoocloselyreducesyour
areaofvision,especially if you’re following a larger vehicle. Also, you
if thevehicleaheadsuddenlyslowsorstops.
won’thaveadequatespace
Keepbackareasonabledistance.
When it lookslikeachancetopass
is comingup,start to accelerate
butstay in the rightlaneand don’tget tooclose. Timeyourmove so
youwillbeincreasingspeedasthetimecomestomoveintotheother
lane. If the wayisclear to pass,youwillhavea“runningstart”that
morethanmakesupforthedistanceyouwouldlose
by dropping back.
And if somethinghappens to causeyou to cancelyourpass,youneed
only slow downanddropbackagainandwaitforanotheropportunity.
If other cars are lined up to passaslowvehicle,waityourturn.But
out to pass
takecarethatsomeoneisn’ttrying
to passyouasyoupull
the slow vehicle. Remember to glance over your shoulder and check the
blind spot.
4-2 1
Your Driving and the Road
Checkyourmirrors,glanceoveryourshoulder,andstartyourleftlane
changesignalbeforemovingout
of therightlane to pass.Whenyou
are far enough ahead of the passed vehicle to see its front in your
insidemirror,activateyourrightlanechangesignalandmovebackinto
therightlane.(Rememberthatyourrightoutsidemirrorisconvex.The
vehicleyoujustpassed mayseem to befurtherawayfromyouthanit
really is.)
Try not to passmorethanonevehicleatatimeontwo-laneroads.
Reconsiderbeforepassingthenextvehicle.
too rapidly.Eventhoughthe
Don’tovertakeaslowlymovingvehicle
to turn.
brakelightsarenotflashing,it
maybe slowingdownorstarting
0
If you’re being passed, make it easy for the following driver
ofyou.Perhapsyoucanease
a little to theright.
to get ahead
Loss of Control
Let’sreviewwhatdrivingexpertssayaboutwhathappenswhenthethree
controlsystems(brakes,steeringandacceleration)don’thaveenoughfriction
to do whatthedriverhasasked.
where the tires meet the road
In anyemergency,don’tgiveup.Keeptrying
escape route or area of lessdanger.
to steer,andconstantlyseekan
Skidding
In askid,adrivercanlosecontrol
of thevehicle.Defensivedriversavoid
most skidsbytakingreasonablecaresuited
to existingconditions,andbynot
“overdriving”thoseconditions.Butskidsarealwayspossible.
The three types of skids correspond to your vehicle’s three control systems.
In thebrakingskid,yourwheelsaren’trolling.
In thesteeringorcornering
to slipandlose
skid, too muchspeedorsteeringinacurvecausestires
too muchthrottlecausesthe
corneringforce.Andintheaccelerationskid,
driving wheels to spin.
A corneringskidandanaccelerationskidarebesthandled
byeasingyour
foot off the accelerator pedal. If your vehicle starts to slide (as when you turn
off the
acorneronawet,snow-orice-coveredroad),easeyourfoot
accelerator pedal as soon as you feel the vehicle start to slide. Quickly steer
to go. If you start steering quickly enough, your
thewayyouwantthevehicle
vehiclewillstraightenout. As it does,straightenthefrontwheels.
Of course,traction is reducedwhenwater,snow,ice,gravel,orothermaterial
to slowdown andadjustyourdriving
isontheroad.Forsafety,you’llwant
4-22
to
theseconditions. It is important to slowdownonslipperysurfacesbecause
stoppingdistancewill be longer and vehiclecontrolmorelimited.
While driving on asurfacewithreducedtraction,tryyourbest
to avoid
suddensteering,acceleration,orbraking(includingenginebrakingbyshifting
to alowergear).Anysuddenchangescouldcausethetirestoslide.You
maynotrealizethesurface
is slipperyuntilyourvehicle is skidding.Learnto
recognizewarningclues-suchasenoughwater,iceorpackedsnow
on the
road to makea“mirroredsutface”-andslowdownwhenyouhaveany
doubt.
Remember:Anyanti-lockbrakingsystem
skid.Steer the way youwanttogo.
(ABS) helpsavoidonlythebraking
Driving at Night
AN450006
Nightdriving is moredangerousthandaydriving.Onereason
is thatsome
driversarelikely to beimpaired-by alcoholordrugs,withnightvision
problems, or by fatigue.
Herearesometips
on nightdriving.
Drivedefensively.Remember,this
is the mostdangeroustime.
Don’tdrinkanddrive(See“DrunkenDriving”
thisproblem.)
in theIndexformoreon
Adjustyourinsiderearviewmirrortoreducetheglarefromheadlights
behind you.
4-23
Your Driving and the Road
Sinceyoucan’tseeaswell,youmayneedtoslowdownandkeep
morespacebetweenyouandothervehicles.It’shardtotellhowfast
thevehicleaheadisgoingjustbylookingatitstaillights.
Slowdown,especially onhigherspeedroads.
uponly so muchroadahead.
Yourheadlightscanlight
In remoteareas,watchforanimals.
If you’retired,
pull offtheroad
in a safeplaceandrest.
Night Vision
No onecanseeaswellatnightasinthedaytime.Butaswegetolder
thesedifferencesincrease. A 50-year-olddrivermayrequireatleasttwiceas
much light to see the same thing at night as a 20-year-old.
For example, if
Whatyou do in thedaytimecanalsoaffectyournightvision.
youspendthedayinbrightsunshineyouarewisetowearsunglasses.
Your
eyeswillhavelesstroubleadjustingtonight.
But if you’redriving,don’twearsunglassesatnight.Theymaycutdownon
glarefromheadlights,buttheyalsomakealotofthingsinvisiblethatshould
or eventrains
remainvisible-suchasparkedcars,obstacles,pedestrians,
blocking railway crossings. Youmaywanttoputonyoursunglassesafteryou
or refreshmentarea.Eyesshielded
havepulledintoabrightly-lightedservice
fromthatglaremayadjustmorequicklytodarknessbackontheroad.But
besure to removeyoursunglassesbeforeyouleavetheservicearea.
You can be temporarilyblindedbyapproachinglights.
It cantakeasecond or
two, or evenseveralseconds,foryoureyes
to readjust to the dark. When
youarefacedwithsevereglare(asfromadriverwhodoesn’tlowerthehigh
beams, or avehiclewithmisaimedheadlights),slowdownalittle.Avoid
If thereisaline ofopposing
staringdirectlyintotheapproachinglights.
of headlightstomakecertain
traffic,makeoccasionalglancesovertheline
thatoneofthevehiclesisn’tstartingtomoveintoyourlane.Onceyouare
pastthebrightlights,giveyoureyestime
to readjustbeforeresumingspeed.
High Beams
If thevehicleapproachingyouhasitshighbeamson,signalbyflickingyours
tohighandthenbacktolowbeam.Thisistheusualsignaltolowerthe
headlight beams. If theotherdriverstilldoesn’tlowerthebeams,resistthe
two half-blinded
temptationtoputyourhighbeamson.Thisonlymakes
drivers.
4-24
On a freeway,use your high beams only in remote areas where you won’t
impair approachingdrivers, In some places, like cities, using highbeams is
illegal.
low beams.
Whenyoufollowanothervehicleon
a freewayorhighway,use
True,mostvehiclesnowhaveday-nightmirrorsthatenablethedriverto
reduceglare.Butoutsidemirrorsarenotofthistypeandhighbeamsfrom
behind can bother the driver ahead.
A Few More Night Driving Suggestions
Keepyourwindshieldandalltheglassonyourvehicleclean-insideandout.
of
Glareatnightismademuchworseby
dirt ontheglass.Eventheinside
theglasscan build up a filmcausedbydust.Tobaccosmokealsomakes
insideglasssurfacesveryfilmyandcanbe
a visionhazard if it’sleftthere.
Dirtyglassmakeslightsdazzleandflashmorethancleanglasswould,
to
makingthepupils of youreyescontractrepeatedly.Youmightevenwant
keep a cloth andsomeglasscleaner
in yourvehicle if you need to clean
your glass frequently.
Remember that your headlights light up far less of
in a turn or curve.
Keepyoureyesmoving;that
a roadway when you are
way, it’seasiertopickoutdimlylightedobjects.
Just as your headlights should be checked regularly for proper aim,
youreyesbeexaminedregularly.Somedriverssufferfromnight
blindness-theinability to see in dimlight-andaren’tevenawareofit.
4-25
so should
Your Driving and #he Road
Driving in the Rain
1
I
I
Rainandwetroadscanmeandrivingtrouble.Onawetroadyoucan’tstop,
accelerate or turn as wellbecauseyourtire-to-roadtractionisn’tasgoodas
on dry roads.And, if yourtiresdon’thavemuchtreadleft,you’llgeteven
lesstraction.
if rainstarts to fallwhileyou
It’salwayswisetogoslowerandbecautious
are driving.Thesutfacemaygetwetsuddenlywhenyourreflexesaretuned
fordrivingondrypavement.
it is to see.Even if yourwindshieldwiper
Theheaviertherain,theharder
it harder to seeroadsigns
bladesare in goodshape,aheavyraincanmake
andtrafficsignals,pavementmarkings,theedge
of theroad,andeven
peoplewalking.Roadspraycanoftenbeworseforvisionthanrain,
especially if it comesfromadirtyroad.
So it iswise to keepyourwipingequipment
in goodshapeandkeepyour
windshield washertankfilled.Replaceyourwindshieldwiperinsertswhenthey
orwhen strips of
showsigns of streaking or missingareasonthewindshield,
rubberstart to separatefromtheinserts.
4-26
I
AM455019
Drivingtoofastthroughlargewaterpuddlesorevengoingthroughsome
car
too. Thewatermayaffectyourbrakes.
Try to
washescancauseproblems
avoidpuddles.But if youcan’t, try to slow downbeforeyou hit them.
’
I
I
Wetbrakescancauseaccidents.Theywon’tworkwell
in aquick
stopand maycause pulling to oneside.You couldlosecontrol of
thevehicle.
After driving through a large puddle
ofwaterora
yourbrakepedallightlyuntilyourbrakesworknormally.
I
carwash,apply
Hydropraning
Hydroplaningisdangerous. So muchwatercanbuildupunderyourtiresthat
theycanactuallyrideonthe
water. Thiscanhappen if theroad is wet
enoughandyou’regoingfastenough.Whenyourvehicle
is hydroplaning, it
has little ornocontactwiththeroad.
You mightnotbeaware of hydroplaning. You coulddrivealongforsometime
without realizing your tires aren’t in constant contact with the road. You could
find outthehard way:when youhave to slow, turn,moveout to pass-or if
youget hit byagustofwind.You
could suddenly find yourselfout of control.
Hydroplaningdoesn’thappenoften.But
it can if yourtireshaven’tmuchtread
or if thepressure in oneormore is low. It canhappen if alot ofwateris
standingontheroad.Ifyoucanseereflectionsfromtrees,telephonepoles,
4-27
Your Driving and the Road
orothervehicles,andraindrops“dimple”thewater’ssurface,therecouldbe
hydroplaning.
Hydroplaningusuallyhappensathigherspeeds.Therejustisn’tahardand
is to slow downwhenitis
fastruleabouthydroplaning.Thebestadvice
raining,andbecareful.
Some Other Rainy Weather Tips
Turnonyourheadlights-notjustyourparkinglights-tohelpmakeyou
more visible to others.
Lookforhard-to-seevehiclescomingfrombehind.
yourheadlightseven in daytimeifit’sraininghard.
Youmaywant
touse
Besidesslowingdown,allowsomeextrafollowingdistance.Andbe
especiallycarefulwhenyoupassanothervehicle.Allowyourselfmore
clearroomahead,andbeprepared
to haveyourviewrestrictedbyroad
spray. If the roadsprayis so heavyyouareactuallyblinded,dropback.
Don’tpassuntilconditionsimprove.Goingmoreslowlyisbetterthan
havinganaccident.
Useyourdefogger
if it helps.
Havegoodtireswithpropertreaddepth.(See“Tires”intheIndex.)
Driving in Fog, Mist and Haze
I
~
AN459007
Fogcanoccurwithhighhumidityorheavyfrost.
It canbe so mildthatyou
it mightbe so thick
canseethrough it forseveralhundredfeet(meters).Or
4-28
thatyou can see only a few feet (meters) ahead. It may come suddenly to
an otherwiseclearroad.And it can be a majorhazard.
Whenyoudriveintoafogpatch,yourvisibilitywillbe
ieduced quickly.The
or beingstruck by theone
biggestdangersarestrikingthevehicleahead
If thevehicleahead
behind.Try to “read” the fog density down the road.
to see,the
starts to becomelessclear or, atnight,ifthetaillightsareharder
to
fog is probably thickening. Slow down to give traffic behind you a chance
slowdown.Everybodythenhasabetterchance
to avoid hitting the vehicle
ahead.
A patch of densefogmayextendonlyforafewfeet(meters)
or formiles
(kilometers);youcan’treally tell whileyou’rein it. Youcan onlytreatthe
situationwithextremecare.
or ground fog-can
Onecommonfogcondition-sometimescalledmist
or intheearly
happeninweatherthatseemsperfect,especiallyatnight
morning in valleyandlow,marshyareas.Youcan
besuddenlyenveloped in
thick,wethazethatmayevencoatyourwindshield.
You canoftenspotthese
fog patches or mistlayerswithyourheadlights.Butsometimestheycanbe
waitingforyouasyoucomeovera
hill or dipintoashallowvalley.Start
to helpclearaccumulatedroaddirt.
Slow
yourwindshieldwipersandwasher,
downcarefully.
Tips on Driving in Fog
If yougetcaughtinfog,turnyourheadlightsonlowbeam,evenindaytime.
You’llsee-andbeseen-better.Useyourfog
lights if yourvehiclehasthem.
Don’tuseyourhighbeams.Thelightwillbounce
makeupfogandreflectbackatyou.
off thewaterdropletsthat
Useyourdefogger. In highhumidity,evenalightbuildup
of moistureonthe
inside of theglasswillcutdownonyouralreadylimitedvisibility.Runyour
windshieldwipersandwasheroccasionally.Moisturecanbuilduponthe
outsideglass,andwhatseemstobefogmayactuallybemoistureonthe
outside of your windshield.
Treatdense fog asanemergency. Try tofindaplace to pull off the road.Of
to put
courseyouwant to respectanother’sproperty,butyoumightneed
somethingbetween you andmovingvehicles-space,trees,telephonepoles,
aprivatedriveway,anythingthatremovesyoufromothertraffic.
If visibility is near zero and you must stop but are unsure whether you are
awayfrom theroad, turn your lights on, start your hazard warning flashers,
or whenyouhearapproachingtraffic.
andsoundyourhornatintervals
4-29
Your Driving and the Road
Passothervehicles in fogonly if youcanseefarenoughaheadtopass
is
safely.Eventhen,beprepared
to delayyourpass if yoususpectthefog
worseupahead. If other vehicles try to passyou,make it easy for them.
City Driving
AM460005
Oneof the biggest problems with city streets
is the amountof traffic on them.
You’llwant to watchoutforwhattheotherdriversaredoing,andpay
attention to traffic signals.
Herearewaystoincreaseyoursafety
e
in city driving:
Knowthebestway to gettowhereyouaregoing.
Try not to drive
aroundtryingtopickoutafamiliarstreetorlandmark.Getacitymap
and plan your trip into anunknownpartofthecityjust
as youwouldfor
a cross-county trip.
Try to usethefreewaysthatrimandcrisscrossmostlargecities.
savetimeandenergy.(Seethenextsection,“FreewayDriving.”)
You’ll
e
Treatagreenlightasawarningsignal.
A trafficlightistherebecause
it. When alightturns green, and just
thecorner is busyenoughtoneed
before youstart to move,check both ways for vehicles that have not
clearedtheintersection ormay berunningtheredlight.
e
Obeyallpostedspeedlimits.Butrememberthatthey
are foridealroad,
weatherandvisibilityconditions. Youmay need to drivebelowthe
posted limit in badweather or when visibility is especiallypoor.
e
Pull to theright(withcare)andstopclearofintersectionswhenyousee
or hear emergency vehicles.
430
Freeway Driving
I
P
AN461001
Mileformile,freeways(alsocalledthruways,parkways,expressways,
turnpikes,orsuperhighways)arethesafestof
all roads.Buttheyhavetheir
ownspecialrules.
Themostimportantadviceonfreewaydrivingis:Keepupwithtrafficand
keep to theright.Driveatthesamespeedmostoftheotherdriversare
flow. Treattheleft
driving.Too-fastortoo-slowdrivingbreaksasmoothtraffic
laneonafreewayasapassinglane.
Entering the Freeway
At theentrancethereisusuallyarampthatleadstothefreeway.
If youhave
aclearview ofthefreewayasyoudrivealong
theentranceramp,you
shouldbegin to checktraffic.Try to determinewhereyouexpecttoblend
no problem.But if it is heavy,
withtheflow. If traffic is light,youmayhave
findagapasyoumovealongtheenteringlaneandtimeyourapproach.Try
tomergeintothegapatclosetotheprevailingspeed.Switchonyourturn
signal,checkyourrearviewmirrorsasyoumovealong,andglanceoveryour
Try toblendsmoothlywiththetrafficflow.
shoulderasoftenasnecessary.
4-31
Your Driving and the Road
Driving on the Freeway
Onceyouareonthefreeway,adjustyourspeedtothepostedlimitor
prevailingrate if it’s slower.Stayintherightlaneunlessyouwanttopass.
youareonatwo-lanefreeway,treattherightlaneastheslowlaneandthe
leftlaneasthepassinglane.
to the
If
If youareonathree-lanefreeway,treattherightlaneastheslower-speed
throughlane,themiddlelaneasthehigher-speedthroughlane,andtheleft
laneasthepassinglane.
Beforechanginglanes,checkyourrearviewmirrors.Thenuseyourturn
signal. Just before you leave the lane, glance quickly over your shoulder to
makesurethereisn’tanothervehicleinyour“blind”spot.
If youaremovingfromanoutsidetoacenterlaneonafreewayhaving
morethantwolanes,makesureanothervehicleisn’tabouttomoveintothe
two lanesoverandwatchfortelltalesigns:
samespot.Lookatthevehicles
turnsignalsflashing,anincreaseinspeed,ormovingtowardtheedgeofthe
lane.Bepreparedtodelayyourmove.
Onceyouaremovingonthefreeway,makecertainyouallowareasonable
followingdistance.Expecttomoveslightlysloweratnight.
Leaving the Freeway
Whenyouwanttoleavethefreeway,movetotheproperlanewell
advance.Dashingacrosslanesatthelastminuteisdangerous.
yourexitdonot,underanycircumstances,stopandbackup.Driveon
nextexit.
in
If youmiss
to the
it shouldbelongenoughfor
At eachexitpointisadecelerationlane.Ideally
you to enter it atfreewayspeed(aftersignaling,ofcourse)andthendoyour
brakingbeforemovingontotheexitramp.Unfortunately,notalldeceleration
lanesarelongenough-somearetooshortforallthebraking.Decidewhen
if thereistraffic
tostartbraking. If youmustbrakeonthethroughlane,and
closebehindyou,youcanallowalittleextratimeandflashyourbrakelights
to slow
(in addition to your turn signal) as extra warning that you are about
down and exit.
Theexitrampcanbecurved,sometimesquitesharply.Theexitspeedis
usuallyposted.Reduceyourspeedaccordingtoyourspeedometer,notto
yoursenseofmotion.Afterdrivingforanydistanceathigherspeeds,you
maytend to thinkyouaregoingslowerthanyouactuallyare.Forexample,
40 mph (65 km/h)mightseemlikeonly
20 mph (30 kmk). Obviously,this
couldlead to serioustrouble on a rampdesignedfor 20 mph (30 kmlh)!
4-32
Driving On a Long n i p
Althoughmostlongtripstodayaremadeonfreeways,there
madeonregularhighways.
are still many
Long-distancedrivingonfreewaysandregularhighways
is thesameinsome
ways.The trip has to beplannedandthevehicleprepared,youdriveat
higher-than-cityspeeds,andtherearelongerturns
behind thewheel.You’ll
in goodshape.Hereare
enjoyyourtripmore if youandyourvehicleare
some tips for a successful long trip.
Before Leaving on a Long Trip
Make sure you’reready. Try to bewellrested. If youmuststartwhenyou’re
not fresh-suchas afteraday’swork-don’t
plan to make too manymiles
that first part of the journey. Wear comfortable clothing and shoes you can
easilydrivein.
Is yourvehiclereadyforalongtrip?
If youkeepitservicedandmaintained,
it’sready to go. If it needsservice,have it donebeforestartingout. Of
course,you’ll find experiencedandableserviceexperts
in GM dealerships all
across North America.They’llbereadyandwilling
to help if youneedit.
Here are somethingsyoucancheckbeforeatrip:
WindshieldWasherFluid:
inside and outside?
Is thereservoir full? Are allwindowsclean
WiperBlades: Arethey in goodshape?
Fuel,EngineOil,OtherFluids:
Lights: Are theyallworking?
Haveyoucheckedalllevels?
Are thelensesclean?
Tires: Theyarevitallyimportant
to asafe,trouble-freetrip. Is thetread
goodenoughforlong-distancedriving?Are
the tiresall inflated to the
recommendedpressure?
WeatherForecasts: What’stheweatheroutlookalongyourroute?
Should you delay your trip a short time to avoid a major storm system?
Maps: Do youhaveup-to-datemaps?
On the Road
Unless you are the only driver, it is good to share the driving task with
others.Limitturns behind thewheel to about 100 miles (160 km) ortwo
hours-at a sitting. Then, either change drivers or stop for some refreshment
do stopandmove
likecoffee, tea orsoftdrinksandsomelimberingup.But
around.Eatlightlyalongthe
way.Heaviermeals tend to makesomepeople
sleepy.
4-33
Your Driving and the Road
Ontwo-lanehighwaysorundividedmultilanehighwaysthat
do nothave
controlledaccess,you’llwant to watchforsomesituationsnotusuallyfound
onfreeways.Examplesare:stopsignsandsignals,shoppingcenterswith
directaccess to the highway,no passingzonesandschoolzones,vehicles
turningleftandright off theroad,pedestrians,cyclists,parkedvehicles,and
evenanimals.
Highway Hypnosis
Is there actuallysuchaconditionas“highwayhypnosis?’’Or
is it justplain
falling asleepatthewheel?Call
it highwayhypnosis,lackofawareness,or
whatever.
of roadwiththesamescenery,
There is somethingaboutaneasystretch
of theengine,andthe
alongwiththehum of thetiresontheroad,thedrone
it
rush of the windagainstthevehiclethatcanmakeyousleepy.Don’tlet
in less than a
happentoyou! If it does,yourvehiclecanleavetheroad
second, andyoucouldcrashandbeinjured.
Whatcanyoudoabouthighwayhypnosis?First,beawarethat
happen.
it can
Thenherearesometips:
Makesureyourvehicle
is wellventilated,withacomfortablycoolinterior.
Keepyoureyesmoving.Scan
theroadaheadandtothesides.Check
yourrearviewmirrorsfrequentlyandyourinstrumentsfromtime
to time.
Thiscanhelpyouavoidafixedstare.
Weargoodsunglasses
in brightlight.Glarecancausedrowsiness.But
don’twearsunglassesatnight.Theywilldrasticallyreduceyouroverall
visionattheverytimeyouneed
all theseeingpoweryouhave.
Ifyougetsleepy,
pull off theroadintoarest,service,
or parkingarea
andtakeanap,getsomeexercise,orboth.Forsafety,treatdrowsiness
on thehighwayasanemergency.
As in anydrivingsituation,keeppacewithtrafficandallowadequate
followingdistances.
4-34
Hill and Mountain Roads
AM470001
Drivingonsteep hills ormountains is differentfromdriving in flatorrolling
terrain. If youdriveregularly in steepcountry, or if you'replanning to visit
there, here aresometipsthatcanmakeyourtripssaferandmoreenjoyable.
Keepyourvehicle in goodshape.Checkall
fluid levelsandalsothe
brakes,tires,coolingsystemandtransmission.Thesepartscanwork
hard onmountainroads.
Knowhow to godownhills.Themostimportant
thing to know is this:
Let your engine do someof the slowing down.Don'tmakeyourbrakes
do it all.Shift to alowergearwhenyougodownasteeporlonghill.
That way, youwill slow downwithoutexcessiveuse ofyourbrakes.
*
L
If you don't shiftdown,yourbrakescouldget
so hot that they
b wouldn't workwell.Youwould
thenhavepoorbraking
or evennone
goingdownahill. You couldcrash.Shiftdown
to letyourengine
assistyourbrakesonasteepdownhillslope.
4-35
Your Driving and the Road
1
CAUTION
A
Coastingdownhillin N (Neutral)orwiththeignition
off isdangerous.
Yourbrakes will have to do all the work of slowing down.Theycould
You could crash.Always
get so hot that they wouldn’t work well.
havevour ignition onandvourvehicle
in aearwhenyougodownhill.
--
I
Knowhow to go uphill. Youmaywant to shift down to alowergear.
Thelowergearshelp cool yourengineandtransmission,andyoucan
climbthe hill better.
Stay in yourownlanewhendrivingontwo-laneroads
in hills or
mountains.Don’tswingwideorcutacrossthecenteroftheroad.Drive
at speedsthatletyoustay
in yourownlane.Thatway,youwon’tbe
surprised by a vehicle coming toward you
in thesamelane.
It takeslonger to passanothervehiclewhenyou’regoinguphill.You’ll
If avehicle is passingyou and
want to leaveextraroomtopass.
doesn’thaveenough room, slowdown to make it easierfortheother
vehicle to getby.
As yougooverthetop
of ahill,bealert.Therecouldbesomething
yourlane,likeastalledcaroranaccident.
in
Youmay seehighwaysignsonmountainsthatwarn
of specialproblems.
Examplesarelonggrades,passingorno-passingzones,afallingrocks
area,orwindingroads.Bealert
to theseandtakeappropriateaction.
Winter driving can present special problems. See “Winter Driving”
Index.
4-36
,,in the
1
AM470027
Hillsandmountainsmeanspectacular scenery.Butpleasebecarefulwhere
Look forpull-offs
youstop if youdecide to lookattheviewortakepictures.
or parking areas provided for scenic viewing.
how to useyourparkingbrake(see“Parking
Anotherpartofthismanualtells
hill, youcan do onemore
Brake” in theIndex.) But onamountainorsteep
thing. You canturnyourfrontwheelstokeepyourvehiclefromrolling
downhilloroutintotraffic.
Here’show:
4-37
Your Drivina and the Road
Parking Downhill
I
AM470033
Turnyourwheelstotheright.
You don'thave to jam yourtiresagainstthecurb,
contact is all youneed.
if there is a curb. A gentle
Parking Uphill
1
If there is acurb, turn your wheels to the left
of your vehicle.
4-38
if the curb is at the right side
~~~~
If you’re going uphill on a one-waystreetandyou’reparkingonthe
your wheels should point to the right.
left side,
AM470055
If thereisnocurbwhenyou’reparkinguphill,turnthewheels
to theright.
If thereisnocurbwhenyou’reparkinguphillontheleftside
to theleft.
street,yourwheelsshouldbeturned
of a one-way
Torque Lock (Automatic Transmission)
If youareparkingon a hill andyoudon’tshiftyourtransmissioninto
P
(Park)properly,theweightofthevehiclemayput
too muchforceonthe
parkingpawl in thetransmission. Youmay finditdifficult to pull theshiftlever
outof P (Park).This is calledtorquelock. To preventtorquelock,alwaysbe
To find
suretoshiftinto P (Park) properly before you leave the driver’s seat.
out how,see “ShiftingInto P (Park) in theIndex.”
Whenyou areready to drive,movetheshiftleveroutof
youreleasetheparkingbrake.
P (Park) BEFORE
If “torquelock”doesoccur,youmayneed
to haveanothervehiclepush
so
yours a little uphill to take some of thepressurefromthetransmission,
youcan pull the shift leverout of P (Park).
4-39
Your Driving and the Road
Winter Driving
AM480005
Here are some tips for winter driving:
Haveyourvehicle
mix iscorrect.
in goodshapeforwinter.Besureyourenginecoolant
Snowtirescanhelpinloosesnow,buttheymaygiveyoulesstraction
If youdonotexpect
to bedrivingindeep
onicethanregulartires.
not want to switch to
snow, butmayhave to traveloverice,youmay
snow tires at all.
Youmaywant
to putwinteremergencysuppliesinyourvehicle.
Includeanicescraper,asmallbrush
or broom, asupplyofwindshield
washerfluid,arag,somewinterouterclothing,asmallshovel,aflashlight,a
of reflectivewarningtriangles.And,ifyouwillbe
redcloth,andacouple
of sand, apiece of old
drivingundersevereconditions,includeasmallbag
carpet or acouple of burlap bags to help provide traction. Be sure you
properly secure these ,itemsin your vehicle.
Driving on Snow or Ice
Most of thetime,thoseplaceswhereyourtiresmeettheroadprobablyhave
goodtraction.
However, if thereissnow or icebetweenyourtiresandtheroad,youcan
haveaveryslipperysituation.You’llhave
a lot lesstractionor“grip”andwill
need to beverycareful.
4-40
...
AN480019
What’stheworsttimeforthis?“Wetice.”Verycoldsnoworicecanbeslick
andhardtodriveon.Butweticecanbeevenmoretroublebecauseitmay
offertheleasttraction ofall.You canget“wetice”whenit’saboutfreezing
(32°F; 0°C) andfreezingrainbegins to fall. Trytoavoiddrivingonwetice
untilsaltandsandcrewscangetthere.
or loose snow-drive
Whateverthecondition-smoothice,packed,blowing
If you
withcaution.Accelerategently.Trynottobreakthefragiletraction.
acceleratetoofast,thedrivewheelswillspinandpolishthesurfaceunder
thetiresevenmore.
Your anti-lockbrakesimproveyourabilitytomakeahardstoponaslippery
road.Eventhoughyouhavetheanti-lockbrakingsystem,you’llwanttobegin
stoppingsoonerthanyouwouldondrypavement.See“Anti-lock”inthe
Index.
Allowgreaterfollowingdistanceonanyslipperyroad.
Watchforslipperyspots.Theroadmightbefineuntilyouhitaspot
that’scoveredwithice.Onanotherwiseclearroad,icepatchesmay
appear in shadedareaswherethesuncan’treach:aroundclumps
trees,behindbuildings,orunderbridges.Sometimesthesurface
curveoranoverpassmayremainicywhenthesurroundingroadsare
clear. If youseeapatchoficeaheadofyou,brakebeforeyouareon
it. Try not to brakewhileyou’reactuallyontheice,andavoidsudden
steeringmaneuvers.
4-41
of
of a
acceleratorslightly.Thisuseslessfuelfortheheatthatyougetand
thebatterycharged. You will needawell-chargedbatterytorestartthe
vehicle,andpossiblyforsignalinglateronwithyourheadlights.Lettheheater
run for awhile.
it keeps
off andclosethewindowalmost
all thewayto
Then,shuttheengine
preservetheheat.Starttheengineagainandrepeatthisonlywhenyoufeel
do itas little aspossible.Preserve
reallyuncomfortablefromthecold.But
thefuelaslongasyoucan.
To helpkeepwarm,you
caIngetoutofthe
vehicle and do some fairly vigorous exercises every half
houror so until help
comes.
If You’re Stuck in Deep Snow
This manual explains how
damagingit.See“Rocking
to getthevehicleoutofdeep
YourVehicle”intheIndex.
snow without
Towing a mailer
If you don’t use the correct equipment and drive properly you can
losecontrol whenyou pull atrailer. For example, if thetraileris too
heavythebrakesmaynotwork
well-or evenatall. You andyour
if youhave
passengers could be seriously injured. Pull a trailer only
followed all thesteps in this section.
I
NOTICE
Pulling a trailer improperly can damage your vehicle and result
pairs
not
covered
our \a/arran+y. To pullcorrect‘
ra fnllow
the
advice in this section.
in costly
Every vehicle is reaay ior some trailer towing. If it was built with trailering
options,asmanyare,it’sreadyforheaviertrailers.Buttraileringisdifferent
thanjustdrivingyourvehiclebyitself.Traileringmeanschanges
in handling,
safe traileringtakescorrect
durability,andfueleconomy.Successful,
equipment,andithas to beusedproperly.
That’sthereasonfor
this section. In it aremany time-tested,important
trailering tips andsafetyrules.Many of these are important for your safety
before you
and that ofyourpassengers. So pleasereadthissectioncarefully
pull a trailer.
4-43
Your Driving and the Road
If You DoDecide To Pull A Trailer
If youdo,herearesomeimportantpoints.
Therearemanydifferentlawshaving
to dowithtrailering.Makesure
your rig willbelegal,notonlywhereyoulivebutalsowhereyou’llbe
or provincial
driving.Agoodsourceforthisinformationcanbestate
police.
Considerusingaswaycontrol
if your trailerwillweigh 2,000 pounds
(900 kg)orless.Youshouldalwaysuseasway
control if your trailer will
weighmorethan 2,000 pounds(900kg). You canaskahitchdealer
about sway controls.
Don’ttowatraileratallduringthefirst
vehicle is driven. Yourengine,axle,or
500 miles(800km)yournew
other parts could ‘be damaged.
Then,duringthefirst
500 miles(800km)thatyoutowatrailer,don’t
This
driveover 50 mph(80km/h)anddon’tmakestartsatfullthrottle.
helps your engine and other parts
ofyourvehiclewear in at the heavier
loads.
Threeimportantconsiderationshave
to dowithweight:
Weight of the Trailer
Howheavycanatrailersafelybe?
It dependsonhowyouplan
to useyour
rig.Forexample,speed,altitude,roadgrades,outsidetemperature,andhow
muchyourvehicle is used to pullatrailerare all important.And, it canalso
dependonanyspecialequipmentthatyouhaveonyourvehicle.
You can
or you can write us at
ask your dealer for our trailering information or advice,
theaddresslistedinyourWarrantyandOwnerAssistanceInformationbooklet.
In Canada,writeto:
GeneralMotors ofCanadaLimited,
CustomerAssistanceCenter
1908ColonelSamDrive,
Oshawa,Ontario L1H 8P7
4-44
Weight of the Trailer Tongue
The tongue load (A) of any trailer is an important weight
to measure because it
affects the total or gross weight of your vehicle. The gross vehicle weight (GVW)
includes the curb weight of the vehicle, any cargo you may carry
in it,andthe
peoplewhowillberiding
in thevehicle.And if youwilltow a trailer,youmust
to the GVWbecauseyourvehiclewillbecarryingthat
addthetongueload
weighttoo.See“LoadingYourVehicleintheIndexfor
moreinformationabout
yourvehicle’smaximumloadcapacity.
1
B
A
---
--1
I
AN490002
If you’re using a “dead-weight” hitch, the trailer tongue (A) should weigh
10% of
thetotalloadedtrailerweight
(B). If youhave a “weight-distributing”hitch,the
12% of the total loaded trailer weight
(B).
trailertongue(A)shouldweigh
After
you’ve
loaded
your
trailer,
weigh
the
trailer
and
then
the
tongue,
If theyaren’t,youmaybeable
separately, to see if theweightsareproper.
getthemrightsimplybymovingsomeitemsaroundinthetrailer.
to
Total Weight on Your Vehicle’sTires
Be sure your vehicle’stiresareinflated
to thelimitforcoldtires.You’llfind
these numbers on the Certification label at the rear edge of the driver’s door (or
see the “Tire Loading” in the Index.) Then be sure you don’t go over the GVW
limit for your vehicle.
4-45
Your Driving and the Road
Hitches
It’simportant to havethecorrecthitchequipment.Crosswinds,largetrucks
going by, androughroadsareafewreasonswhyyou’llneedtherighthitch.
Herearesomerules to follow:
a
If you’ll be pullingatrailerthat, whenloaded,willweighmorethan
2,000
pounds (900 kg),besure to use a properlymountedweight-distributing
hitchandswaycontrol of thepropersize.Thisequipmentisvery
importantforpropervehicleloadingandgoodhandlingwhenyou’re
driving.
a
Will youhave to makeanyholes in thebody ofyour vehicle whenyou
installatrailerhitch? If you do, thenbesure to sealtheholeslater
If youdon’tsealthem,deadlycarbon
whenyouremovethehitch.
monoxide(CO)fromyourexhaustcanget
intoyourvehicle(see“Carbon
Monoxide” in theIndex).Dirtand watercantoo.
a
If
Don’tletthesteelinahitchcontactthealuminumonyourbumper.
youdo, thetwowillcorrode. Youcan usesomethinglikepaintorplastic
tapetoseparatethesteelandaluminum.Thesamesteel
to aluminum
problemcanhappenwithfastenerstoo.
Safety Chains
You shouldalwaysattachchainsbetweenyourvehicleandyourtrailer.Cross
the safety chains under the tongue
of the trailer so that the tongue will not
drop to theroad if itbecomesseparatedfromthehitch.Instructionsabout
safety chains maybeprovidedby
thehitchmanufacturer or bythetrailer
manufacturer.Followthemanufacturer’srecommendationforattachingsafety
so youcan turn withyourrig.And,
chains.Alwaysleavejustenoughslack
neverallowsafetychains to dragontheground.
Trailer Brakes
If your trailer weighs
its ownbrakes-and
morethan 1,000 pounds (450 kg)loaded,then
theymustbeadequate.
Be sure to readand follow the instructions for the trailer brakes
adjustandmaintainthemproperly.
it needs
to install,
Don’t tap into yourvehicle’sbrakesystem if thetrailer’sbrakesystemwilluse
more than 0.02 cubic inch ( 0 . 3 ~ ~of) fluidfromyourvehicle’smastercylinder.
If it does,bothbrakingsystemswon’tworkwell.Youcouldevenloseyour
brakes.
4-46
Willthetrailerbrakepartstake
3,000 psi (20 650 kPa) of pressure? If
not,thetrailerbrakesystemmustnotbeusedwithyourvehicle.
if everythingchecksoutthisfar,thenmakethebrake
fluid tap at the
port on the master cylinder that sends fluid to the rear brakes. But don’t
If you do, it will bend and finally break
off.
usecoppertubingforthis.
Usesteelbraketubing.
Driving with a Trailer
Towing a trailer requires a certain amount
of experience.Beforesettingout
fortheopenroad,you’llwant
to get to knowyourrig.Acquaintyourselfwith
thefeel of handlingandbrakingwiththeaddedweight
of thetrailer.And
alwayskeep in mindthatthevehicleyouaredrivingisnowagooddeal
longerandnotnearly so responsiveasyourvehicleisbyitself.
Beforeyoustart,checkthetrailerhitchandplatform,safetychains,electrical
If thetrailerhaselectricbrakes,
connector,lights,tiresandmirroradjustment.
startyourvehicleandtrailermovingandthenapplythetrailerbrakecontroller
byhand to besurethebrakesareworking.Thisletsyoucheckyour
electricalconnectionatthesametime.
If you have a rear-most window open and
you pull a trailer with your
vehicle,carbonmonoxide(CO)couldcomeintoyourvehicle.
You
can’tseeorsmellCO.
It cancauseunconsciousnessordeath(see
“EngineExhaust”in the Index). To maximizeyoursafetywhentowing
a trailer:
Haveyourexhaustsysteminspectedforleaksandmake
necessary repairs before starting on your trip.
Keeptherear-mostwindowsclosed.
If exhaustdoescomeintoyourvehiclethroughawindow
in the
rear,oranotheropening,drivewithyourfront,mainheatingor
coolingsystem on and withthefanonanyspeed.Thiswill
Do notuse MAX NC
bringfresh,outsideairintoyourvehicle.
because it only recirculates the air inside your vehicle. See
“ComfortControls” in theIndex.
Duringyourtrip,checkoccasionally
to besurethattheloadissecure,
that the lights and any trailer brakes are still working.
4-47
and
Your Driving and the Road
Following Distance
Stayatleasttwiceasfarbehindthevehicleaheadasyouwouldwhen
driving your vehicle without a trailer. This can help you avoid situations that
requireheavybrakingandsuddenturns.
Passing
You’llneedmorepassingdistanceupaheadwhenyou’retowingatrailer.
to gomuch farther
And,becauseyou’reagooddeallonger,you’llneed
to yourlane.
beyondthepassedvehiclebeforeyoucanreturn
Backing Up
Holdthebottom of thesteeringwheelwithonehand.Then,
to movethe
To movethetrailertothe
trailer to the left, just move your hand to the left.
right,moveyourhandtotheright.Alwaysbackupslowlyand,ifpossible,
havesomeoneguideyou.
Making Turns
Whenyou’returningwithatrailer,makewiderturnsthannormal.
Do this so
yourtrailerwheelswon’tstrikesoftshoulders,curbs,roadsigns,trees,
or
otherobjects.Avoidjerky
or suddenmaneuvers.Signalwell
in advance.
Turn Signals When Towing a Trailer
Whenyoutowatrailer,yourvehiclehas
to haveadifferentturnsignal
flasher and extra wiring. The green arrows on your instrument panel will flash
wheneveryousignalaturnorlanechange.Properlyhookedup,thetrailer
lights will also flash, telling other drivers you’re about
to turn,changelanes,
or stop.
Whentowingatrailer,thegreenarrowsonyourinstrumentpanelwillflashfor
turnseven if thebulbsonthetrailerareburnedout.Thus,youmaythink
driversbehindyouareseeingyoursignalwhentheyarenot.It’simportantto
checkoccasionally to besurethetrailerbulbsarestillworking.
Driving on Grades
Reducespeedandshift to alowergear before youstartdownalong
or
steepdowngrade. If youdon’tshiftdown,youmighthave
to useyourbrakes
so much that they would get hot and no longer work well.
45 mph
Onalonguphillgrade,shiftdownandreduceyourspeedtoaround
(70 km/h) to reducethepossibilityofengineandtransmissionoverheating.
You shoulduse D (or asyouneed to, alowergear)whentowingatrailer.
Operating your vehicle in D whentowingatrailerwillminimizeheatbuildup
and extend the life of yourtransmission.
4-48
Parking on Hills
You reallyshouldnotparkyourvehicle,withatrailerattached,onahill.
If
somethinggoeswrong,yourrigcouldstart
to move.Peoplecanbeinjured,
and both your vehicle and the trailer can be damaged.
But if youeverhave
to parkyourrigonahill,here’show
1. Applyyourregularbrakes,butdon’tshiftinto
to doit:
P (Park)yet.
2. Havesomeoneplacechocksunderthetrailerwheels.
3. Whenthewheelchocksare
chocksabsorb the load.
in place,releasetheregularbrakesuntilthe
4. Reapplytheregularbrakes.Thenapplyyourparkingbrake,andshift
P (Park).
5. Releasetheregularbrakes.
When You Are Ready to Leave After Parking on a Hill
1. Applyyourregularbrakesandholdthepedaldownwhileyou:
Startyourengine.
Shift into a gear; and
Releasetheparkingbrake.
2. Letuponthebrakepedal.
3. Drive slowly until the trailer is clear
ofthechocks.
4. Stop and havesomeonepickupandstorethechocks.
Maintenance When Trailer Towing
Your vehicle will needservicemoreoftenwhenyou’repullingatrailer.See
on this. Things that are especially
the Maintenance Schedule for more
important in trailer operation are automatic transmission fluid (don’t overfill),
engineoil,axlelubricant,belt,coolingsystem,andbrakeadjustment.Eachof
theseiscovered in thismanual,andtheIndexwillhelpyoufindthem
to reviewthesesectionsbefore
quickly. Ifyou’retrailering,it’sagoodidea
you start your trip.
Check periodically to see that all hitch nuts and bolts are tight.
mailer Light Wiring
See“TrailerWiringHarness”intheIndex.
4-49
to
m
I
Section
Here you’ll find what to do about some problems that can occur on the road
.
Hazard Warning Flashers ...................................................................................
5-2
Other Warning Devices .......................................................................................
5-3
Jump Starting ......................................................................................................
5-3
Towing Your Vehicle ............................................................................................
5-7
Engine Overheating.............................................................................................
5-8
Engine Fan Noise ...............................................................................................
5.16
a Tire Goes Flat ..............................................................................................
5-16
.......................................................................................
5-17
Changing a Flat Tire
...............................................................................
5-30
Mud, Ice or Snow ................................................... 5-32
Storing the Jack and Tire
You’re Stuck: In Sand,
5-1
Hazard Warning Flashers
r
I
-'--
1
AN505006
Your hazardwarningflashers let you warnothers.They also let police know
youhavea problem. Your frontandrear turn signallights will flashonand
Off
m
But they won't flash
if you're braking.
I
...
Pressthebuttonin
and off.
to makeyourfrontandrear
5-2
turn signallightsflashon
Your hazardwarningflashersworknomatterwhatpositionyourkeyisin,
andeven if thekeyisn’t in.
To turn off theflashers, pull outonthecollar.
Whenthehazardwarningflashersareon,yourturnsignalswon’twork.
Other Warning Devices
If youcarryreflectivetriangles,youcansetoneupatthesideoftheroad
about 300 feet (100 m) behind your vehicle.
Jump Starting
If yourbatteryhasrundown,you
maywant to useanothervehicleandsome
do it
jumper cables to start your vehicle. But please follow the steps below to
safely.
Batteriescanhurtyou.Theycan
be dangerousbecause:
Theycontain acid thatcanburnyou.
Theycontain gas thatcanexplodeorignite.
Theycontainenough
electricity toburn you.
If youdon’tfollowthesestepsexactly,someorall
canhurtyou.
of these things
Ignoring these steps could result in costlydamage to your vehicle that
to start your vehicle Iwouldn’t be covered by your warranty. Trying
pushing or pulling itwon’t work, and it could damage your vehicle.
I
To Jump Start Your Vehicle
a 12-volt batterywith a negative
1. Checktheothervehicle.Itmusthave
groundsystem.
I
5-3
2. Get the vehicles close enough
so thejumpercablescanreach,butbe
If theyare, it couldcausea
surethevehiclesaren’ttouchingeachother.
to start your
ground .connection you don’t want.Youwouldn’tbeable
vehicle,andthebadgroundingcoulddamagetheelectricalsystems.
1 CAUTION
I
You couldbeinjured if thevehiclesroll.Settheparkingbrakefirmly
A\ b on
eachvehicle.Putanautomatictransmissionin
P (Park)ora
I
manual
transmission
in N (Neutral).
3. Turn off theignitiononbothvehicles. Turn off all lightsthataren’t
needed,andradios.Thiswillavoidsparksandhelpsavebothbatteries.
And it couldsaveyourradio!
1’
I
NOTICE
f you leave yourradioon, it couldbe t
Nouldn’tbe covered bvvourwarrallLv
Iv dar li
1.
The
4. Openthehoodsandlocatethebatteries.Findthepositive
negative (-) terminalsoneachbattery.
1
(t)andthe
CAUTION
A
I
Pairs
Usingamatchnearabatterycancausebatterygas
to explode.
Peoplehavebeenhurtdoingthis,andsomehavebeenblinded.Use
a flashlight if you need more light.
You don’t need to add water to the Delco Freedom@ battery installed
in everynew GM vehicle.But if a battery has filler caps, be sure the
rightamountof fluid is there. If it is low, add water to takecareof
thatfirst.Ifyoudon’t,explosivegascouldbepresent.
it onyou. If
Batteryfluidcontainsacidthatcanburnyou.Don’tget
you accidentally get it in youreyesoronyourskin,flushthe
place
with
water
and
get
medical
help
immediately.
5. Checkthatthejumpercablesdon’thavelooseormissinginsulation.
theydo,youcouldgetashock.Thevehiclescouldbedamaged,
If
too.
Before you connect the cables, here are some things you should know.
Positive (t) will go to positive (+) andnegative (-) will go to negative
(-) orametalenginepart.Don’tconnect
(t)to (-) oryou’llgeta
too.
shortthatwoulddamagethebatteryandmaybeotherparts,
5-4
A
Fansorothermovingengine
parts caninjure you badly.Keepyour
hands
away
from
moving
parts once
the
engines
are
running.
6. Connect the red positive (+) cable to thepositive (t)terminal of the
(t) terminal if the
vehiclewiththedeadbattery.Usearemotepositive
vehiclehasone.
7. Don’tlettheotherendtouchmetal.Connect
it to thepositive (t)
terminal of thegoodbattery.Usearemotepositive
(t) terminal if the
vehiclehasone.
8. Now connecttheblacknegative
(-) terminal.
(-)
cable to thegoodbattery’snegative
Don’t let theotherendtouchanythinguntilthenextstep.Theotherend
of thenegativecable doesn’t gotothedeadbattery.Itgoes
to aheavy
unpaintedmetalparton the engine of thevehiclewiththedeadbattery.
9. Attachthecableabout
18 inches (45 cm)awayfrom thedeadbattery,
butnotnearenginepartsthatmove.Theelectricalconnection
is justas
of sparksgettingback to thebatteryismuch
goodthere,butthechance
less.
5-5
I
Dead Battery
Good Battery
K350
10. Now startthevehiclewiththegoodbatteryandruntheenginefor
awhile.
11. Try tostartthevehiclewiththedeadbattery.
If it won't startafterafewtries,
it probablyneedsservice.
GOOD BAlTERY
I
DEAD BAlTERY
K1508
12. Removethecables
in reverseorder to preventelectricalshorting.
care that they don't touch each other or any other metal.
5-6
Take
Towing Your Vehicle
Try to have a GM dealer or a professional towing service tow your vehicle.
Theycanprovidetherightequipmentandknowhow
to towitwithout
damage.
If yourvehiclehasbeenchangedormodifiedsince
addingaftermarketitemslikefoglamps,aeroskirting,
wheels,thesethingscouldbedamagedduringtowing.
it was factory-newby
or specialtiresand
Beforeyou do anything,turnonthehazardwarningflashers.
Whenyoucall,
tell thetowingservice:
That, if yourvehiclehasall-wheeldriveorrear-wheeldrivewithfog
lamps, it cannotbetowedfromthefrontwithsling-typeequipment.
Thatyourvehiclehasrear-wheeldrive,
option.
Themake,model,andyear
or that it hastheall-wheel-drive
of yourvehicle.
Whetheryoucanstillmovetheshiftlever.
If there wasan
*
I
I
accident, whatwasdamaged.
To helpavoidinjury
to youorothers:
Neverletpassengersridein
a vehicle that is beingtowed.
Nevertowfasterthansafeorpostedspeeds.
Nevertowwithdamagedpartsnotfullysecured.
Nevergetunderyourvehicleafter
it hasbeenliftedbythetow
truck.
Alwaysuseseparatesafetychains
on eachsidewhen towing a
vehicle.
off. Thesteering
Whenyourvehicleisbeingtowed,havetheignitionkey
wheelshouldbeclamped
in astraight-aheadposition, withaclampingdevice
designed for towing service. Do not usethevehicle’ssteeringcolumnlockfor
N (Neutral)andtheparkingbrake
this. Thetransmissionshouldbein
released.
If yourvehiclehastheall-wheeldriveoption,itcanonly
be towedwith
allfourwheels off theground. A dollymust be usedundertheun-raised
wheelswhentowingorthevehiclemust
be transported on a flatbed
carrier.
5-7
Don’t have your vehicle towed with the wheels
in contactwiththeground if
it hasall-wheeldrive. If a vehiclewithall-wheeldrivemustbetowedwith
or rearwheelsmust
sling-type or wheel lift equipment, then either the front
besupportedonadolly.
If yourvehiclehasrear-wheeldrive,don’thaveittowedontherearwheels
the rear
unlessyoumust. If avehiclewithrear-wheeldrivemustbetowedon
35 mph (56 kmlh) orfartherthan 50 miles
wheels,don’tgomorethan
(80 km)oryourtransmissionwillbedamaged.
If theselimitsmustbe
exceeded,thentherearwheelshavetobesupportedonadolly.
1 CAUTION
L
b
A vehiclecan fall fromacarcarrier if it isn’tproperlysecured.This
cancauseacollision,seriouspersonalinjuryandvehicledamage.
The vehicle should be tightly secured with chains or steel cables
before it is transported.
Don’tusesubstitutes(ropes,leatherstraps,canvaswebbing,etc.)
that can be cut by sharpedgesunderneaththetowedvehicle.
Engine Overheating
You will find a coolant temperaturegageandthewarninglight
engineonyourvehicle’sinstrumentpanel.
about a hot
If Steam Is Coming From Your Engine:
PO452
5-8
CALITION
I
Steamfromanoverheatedenginecan
burn youbadly,even if you
if youseeorhear
just openthehood.Stayawayfromtheengine
steamcomingfrom it. Justturn it off andgeteveryoneawayfrom
the vehicle until it coolsdown.Wait until there is nosign ofsteam or
coolantbeforeopeningthehood.
If youkeepdriving whenyourengine is overheated,theliquids in it
can catch fire. You orothers could bebadlyburned.Stopyour
engine if it overheats,andgetout of thevehicle until theengine is
cool
m
NOTICE
~~
~
your enginecatches fire becauseyoukeepdrivingwithnocoolant,yolrl
covered
lehicle canbebadlydamaged. Thrr costlyrepairswouldnotbe
y your warranty.
I
If No Steam /s Coming From Your Engine:
If you get the overheatwarningbutseeorhearnosteam,theproblemmay
notbe too serious.Sometimes the enginecangeta little toohotwhenyou:
Climbalonghillon
a hot day.
Stopafter high speeddriving.
Idlefor long periods in traffic.
Tow atrailer.
Ifyougettheoverheatwarningwithnosignofsteam,trythis
or so:
1. Ifyouhaveanairconditioner,turn
2. Turnyourheater
for aminute
it off.
to fullhotatthefanspeedandopenthewindowas
necessary.
3. Ifyou’re in atrafficjam,shiftto
N (Neutral).
If you no longerhavetheoverheatwarning,youcandrive.Just
to besafe,
If thewarningdoesn’tcomeback
on, you
driveslowerforabouttenminutes.
candrive normally.
If thewarningcontinues,pullover,stop,andparkyourvehiclerightaway.
5-9
If there’s still nosign of steam,pushtheacceleratoruntiltheenginespeed
is
back to
abouttwice as fast as normal idle speed.Bringtheenginespeed
or threeminutes.Now see if thewarningstops.
normalidlespeedaftertwo
Butthen, if you still havethewarning,TURN OFF THEENGINEAND GET
EVERYONE OUT OF THEVEHICLEuntil it cools down.
Youmay decidenotto
lift thehoodbuttogetservicehelprightaway.
PO424
Whenyoudecideit’ssafetoliftthehood,here’swhatyou’llsee:
A. Coolantrecoverytank
B.Radiatorpressurecap
C. Enginefan
If the coolant inside the coolant recovery tank
elseuntil it coolsdown.
5-1 0
is boiling, don’t do anything
c
I
PO453
Thecoolantlevelshouldbeatorabove
FULL. If it isn't,youmayhave
leak in theradiatorhoses,heaterhoses,radiator,waterpumporsomewhere
else in the coolingsystem.
a
I CAUTION m m
How to Add Coolant to the Coolant Recovery Tank
If youhaven'tfoundaproblemyet,butthecoolantlevelisn'tatorabove
FULL, adda 50/50 mixture of cleanwater (preferabledistilled)andaproper
antifreezeatthecoolantrecoverytank.(See"EngineCoolant"
in theIndex
formoreinformationaboutthepropercoolantmix.)
5-1 1
1 CAUTION
A
~
Addingonlyplainwater
to yourcoolingsystemcanbedangerous.
Plain water,orsomeotherliquidlikealcohol,can
boil beforethe
is set
proper coolant mix will. Yourvehicle’scoolantwarningsystem
for thepropercoolantmix.Withplainwaterorthewrongmix,your
enginecouldgettoohotbutyouwouldn’tgettheoverheatwarning.
Yourengine could catch fire and you
or others could be burned. Use
cold weather,watercanfreeze
‘e andotherparts.
andcrack the engine,radiator,heater
Use therecommendedcoolant.
I CAUTION
can beburned if youspillcoolantonhotengineparts.Coolant
A b You
contains ethylene glycol and it will burn if the enginepartsarehot
enough.Don’tspillcoolantonahotengine.
V w n thecoolantinthecoolantrecoverytankisat
your vehicle.
5-1 2
or above FULL, start
If theoverheatwarningcontinues, there's onemorethingyoucan
try. You
canaddtheproper coolant mix directlytotheradiator, but be sure the
cooling system is cool beforeyoudo it.
I CAUTION
I
A
I
Steam and scaldingliquidsfrom a hotcoolingsystemcanblowout
if you turn the
andburnyoubadly.Theyareunderpressure,and
radiatorpressure cap-even a little-theycancomeoutathigh
speed.Never turn the pressure cap whenthecoolingsystem,
including the radiator pressure cap, is hot.
Wait for thecooling
system and radiatorpressurecap to cool if you ever have to turn
thepressurecap.
I
A
PO425
5-1 3
Problems on #he Road
How to Add Coolant to the Radiator
PO422
1. You canremovetheradiatorpressurecapwhenthecoolingsystem,
and upperradiatorhose, is nolonger
includingtheradiatorpressurecap
hot. Turnthepressurecapslowlytotheleft
until it first stops. (Don't
press downwhileturningthepressure
cap.)
If YOU hear a hiss,wait for that to stop. A hiss means thereisStill
pressure left.
2. Thenkeepturningthepressurecap,but
now pushdownasyouturn
SOt-t~e
it.
Remc-thepressurecap.
PO423
3. Filltheradiatorwiththeproper
mix, up to thebase of thefillerneck,
5-1 4
4. Then fill thecoolantrecoverytankto
FULL.
t
PO658
5. Putthecapbackonthecoolantrecoverytank,butleavetheradiator
pressurecap off.
6. Starttheengineandlet
it rununtilyoucanfeeltheupperradiatorhose
gettinghot. Watch outfortheenginefan.
7. By thistime, the coolantlevelinsidetheradiatorfillerneck
maybe
lower.Ifthelevel
is lower, add moreof thepropermixthroughthefiller
neckuntilthelevelreachesthebase
of thefillerneck.
I
PO407
8. Thenreplacethepressurecap.Besurethearrowsonthepressurecap
line up likethis.
5-1 5
Pmblems on the Road
Engine Fan Noise
This vehicle has a clutched engine cooling fan. When the clutch
is engaged,
the fan spins faster to provide more air to cool the engine. In mosteveryday
driving conditions, the clutch is not engaged. This improves fuel economy
and
reducesfannoise.Underheavyvehicleloading,trailertowingandlorhigh
So
outsidetemperatures,thefanspeedincreaseswhentheclutchengages.
youmayhearanincrease
in fannoise.This is normalandshouldnotbe
mistaken as the transmission slipping or making extra shifts. It is merely the
cooling system functioning properly. The fan will slow down when additional
cooling is notrequired and theclutchdisengages.
Youmayalsohearthisfannoisewhenyoustart
as the fan clutch disengages.
the engine. It will go away
If a Tim Goes Flat
It’s unusualforatire to “blowout”whileyou’redriving,especially
if you
likely to
maintain your tires properly. If airgoesoutofatire,it’smuchmore
leakoutslowly.But if youshouldeverhavea“blowout,”hereareafewtips
to do:
about what to expect and what
If a front tire fails, the flat tire
will createadragthatpullsthevehicletoward
off theacceleratorpedalandgripthesteeringwheel
thatside.Takeyourfoot
to astopwellout
firmly.Steer to maintainlaneposition,thengentlybrake
the traffic lane.
A rearblowout,particularlyonacurve,actsmuchlikeaskidandmay
requirethesamecorrectionyou’duse
in askid.Inanyrearblowout,remove
yourfootfromtheacceleratorpedal.Getthevehicleundercontrolbysteering
to go. It maybeverybumpyandnoisy,but
thewayyouwantthevehicle
to astop,well off theroad if possible.
youcanstillsteer.Gentlybrake
If yourtiregoesflat,thenextpartshowshow
to changeaflattiresafely.
5-1 6
to useyourjackingequipment
of
Changing a Flat Tire
If a tire goes flat, avoid further tire and wheel damage by
levelplace.Turnonyourhazardwarningflashers.
driving slowly to a
I CAUTION
4
Changing a tire can cause an injury. The vehicle can slip
off thejack
and roll overyou or otherpeople. You andtheycouldbebadly
injured.Find a levelplace to changeyourtire. To helppreventthe
vehiclefrommoving:
1. Settheparkingbrakefirmly.
2. Put the shiftlever in P (Park).
3. Turn off the engine.
To be even more certain the vehicle won’t move, you
can put chocks
at the front and rear
of the tire farthest away from the one being
changed.Thatwouldbethetireon
the other side of thevehicle,at
theoppositeend.
I
I
AM545006
Thefollowingpageswilltellyouhow
Theequipmentyou’llneed
to usethejackandchange
is in therear of yourvehicle.
5-1 7
a tire.
Pmblerns on the Road
Jack Storage
F
Your jack,extension,ratchetandwheelblocksarestoredbyyourvehicle’s
reardoors,alongthepassengersidewall.
To removeyourjackcover,take
off theplasticwingnutbyturning
counterclockwise. Lift upon thelatchandpullthejackcover
off.
5-1 8
it
0
I
i
'
.
., . .
.
K3524
Remove thewheelblocksandjackbyturningthewingnutcounterclockwise.
pull thewheelblocksandjack
Removethewingnutandwasherthen
bolt.
off the
To removetheratchetandextensionbyturningthewingnut
counterclockwise.Removethewingnutandretainerandtakeout
theratchetandextension.
Spare Tire
K3526
Your sparetireisstoredunderneathyourvehicle.
andextensiontolowerthesparetire.
5-1 9
Youwilluse
theratchet
Prob/ems on the Road
K3533
Theratchethasan
UP sideand a DOWN side.
PO418
Attachtheratchet,withthe
DOWN sidefacingyou,totheextension.The
extensionhas a socketendand a flat(screwdrivershaped)end.Puttheflat
end of theextensiononananglethroughtheholeinthereardoorframe,
abovethebumper. Be suretheflatendconnectsintothehoistshaft.
Turntheratchetcounterclockwisetolowerthesparetiretotheground.Keep
turning the ratchet until the spare
tire canbepulledoutfromunderthe
vehicle.
5-20
r
K3529
When thetirehasbeenlowered,tilttheretainerattheend
pull it throughthewheelopening.
Changing the Tire
Startwiththejack,ratchet,extensionandwheelblocks.
5-2 1
of thecableand
K3531
on theend.
The jack has a bolt
Attachthesocketend
of the extension to the jack bolt like this.
I
Attachtheratchet
to the extension with the
UP side facing you.
Rotate the ratchetclockwise.That will raisethe lift headalittle.Before
raising the vehicle, do the following things.
5-22
...._I
p
. . .w
. ., , .
..
:
,
..
.. .
,.
.
.
.
..
.
..
.
.
.
... . .... .. . . .. .
.
...
... .
.. .
.
.
.,
.
.
.... . . .... ..
. .. .
.. . .
PO456
You havetwowheelblocksstoredwithyour
jack. Placeblocksatthefront
the one beingchanged.Thatwould
andrear of the tire farthest away from
be the tire on the other side of thevehicle,attheoppositeend.
Putyoursparetireneartheflattire.
Removethewheeltrim.
I
,,
-.'
--.-
If thereisawheelcover,remove
it byusingtheflatend
of theextension.
Pry alongtheedge of thewheelcoveruntil
it comes off. Becareful;therim
try to remove it withyourbarehands.
edgesmaybesharp.Don't
5-23
7
e
PO459
If the wheelhasacentercap,
you do nothavetoremovethecentercapto
loosenthewheelnuts.Placetheratchetandsocketonthewheelnutwith
thecentercapon.
. ., .. ..
PO462
With DOWN facing you, usetheratchetandsocket
nuts.Don'tremovethemyet.
5-24
to loosenallthewheel
K3536
Position jack under the vehicle.
CAUTION
I
Gettingunderavehiclewhen
it is jackedup is dangerous. If the
vehicleslips off thejack,you could bebadlyinjured or kilted.Never
getunder a vehiclewhen it issupportedonlyby a jack.
I
Raising your vehicle with the jack improperly positioned will damage the
vehicle or may allow the vehicle
to fall off the jack. Besure to fit the iz
lift head into the Droner locationbefore raisinn your vehicle.
5-25
Problems on the Road
..
I
.." -
-_
I
4..
I
PO463
Raisethevehicle by rotatingtheratchetclockwise.Makesurethe
UP
markingfaces you. Raisethevehiclefarenough
off theground so there is
enoughroomforthesparetiretofit.
PO457
Remove all the wheel nuts and take
off the flat tire.
5-26
K3543
A
I
~
Rustordirtonthewheel,oronthepartstowhich
it is fastened,
canmakethewheelnutsbecomelooseafteratime.Thewheel
couldfall off andcauseanaccident.Whenyouchangeawheel,
to
removeanyrustordirtfromtheplaceswherethewheelattaches
thevehicle. In anemergency,youcanuseaclothorapapertowel
to do this;butbesuretouseascraperorwirebrushlater,
if you
needto,togetalltherustordirt
off.
Removeanyrust or dirtfromthewheelbolts,mountingsurfaces.orspare
wheel.Placethespareonthewheelmountingsurface.
IL.
r
CAb I'ION
A
Neveruseoilorgreaseonstudsornuts.
Ifyoudo,thenutsmight
comeloose.Yourwheel
couldfall off, causingaseriousaccident.
5-27
..r
>: ,
PO464
Replacethewheelnutswiththeroundedend
Tighteneachnutbyhanduntilthewheelis
of thenutstowardthewheel.
held againstthehub.
c
PO390
Lowerthevehiclebyrotatingtheratchetcounterclockwise.Lowerthejack
completely.
5-28
PO465
Tightenthewheelnutsfirmly
in acriss-crosssequenceasshown.Rotatethe
ratchetclockwisewiththe UP markingfacingyou.
*
I
Incorrectwheelnuts orimproperlytightenedwheelnutscancause
’,thewheeltobecomelooseandevencome
off. This could lead to
an accident. Besure to usethecorrectwheelnuts.
If youhave to
replace them, besure to get the rightkind.
Stopsomewhereassoon
tightened
torque
wrench
with
a
as youcanandhavethewheelnuts
to proper
the
torque.
I
Forproperwheelnuttorque,see“WheelNutTorque”intheIndex.
Don’t try to putawheelcoveronyourcompactsparetire.Itwon’tfit.Store
flat tirerepaired orreplaced.
thewheelcover in thetrunkuntilyouhavethe
I coverswon’tfitonyour
cc
I
Removethewheelblocks.
5-29
try to put a
cover or the
1
Spi
Storing the Tire and Jack
Storing the Tire
Put the tire on the ground at the rear of the vehicle, with the valve stem
pointed down.
Pull the retaining bar through the center
of the wheel,makingsure it is
UP sidefacing you, to the
properlyattached.Attachtheratchet,withthe
extension.
Put theflatendoftheextensiononananglethroughthehole
doorframe,abovethebumper.Turntheratchetclockwiseuntilthe
against the underside of the vehicle.
in the rear
tire is
You willhear two “clicks” when thetire is up allthe way. Try to movethe
tire withyourhands to makesureit is securelyinplace.
Storing the Jacking Equipment
K35r
Returnthejack,ratchet,extensionandwheelblocks
to theproperlocationin
therearstoragearea.Replace
all bolts,retainersand wing nuts in theproper
location.Securethejackingequipment
in itsproperlocationandreplacethe
jackstoragecover.
5-30
I
I
Storing a jack, a tire, or other equipment in the passenger
b compartmentofthevehiclecouldcauseinjury.
In asuddenstopor
collision,looseequipmentcouldstrikesomeone.Storeallthese
in
proper
theplace.
Compact Spare Tire
Althoughthecompactsparewasfullyinflatedwhenyourvehiclewasnew,
canloseairafteratime.Checktheinflationpressureregularly.Itshouldbe
60 psi (420 kPa).Thecompactspareismadetogoup
to 3,000 miles
(5000 km), so youcanfinishyourtripandhaveyourfull-sizetirerepairedor
to replaceyoursparewitha
replacedwhereyouwant.Ofcourse,it’sbest
will lastlongerandbeingood
full-sizetire assoonasyoucan.Yourspare
it again.
shapeincaseyouneed
it
Don’tuseyourcompactspareonsomeothervehicle.
Anddon’tmixyourcompactspareorwheelwithotherwheelsortires.They
won’tfit.Keepyourspareanditswheeltogether.
Tire chains won’t fit your compact spare. Using them will damage your
ti- chair 3n yourcompacl
vehicleanddestro)“rechc”?too.Don’tuse
spare.
-
A
Storing a jack, a tire, or other equipment
in the passenger
In a suddenstopor
compartment of thevehiclecouldcauseinjury.
collision,looseequipmentcouldstrikesomeone.Storeallthese
in
the
5-3 1
I
Problems on the Road
If You’m Stuck: In Sand, Mud,
Ice or Snow
Whatyou don’t want to dowhenyour vehicle is stuck is to spin your
wheels.Themethodknownas“rocking”canhelpyougetoutwhenyou’re
stuck,butyoumustusecaution.
I
CAUTION
A
If youletyourtiresspinathighspeed,theycanexplodeandyouor
otherscouldbeinjured.And,thetransmissionorotherparts
of the
vehiclecanoverheat.Thatcouldcauseanenginecompartment
fire
little as
orotherdamage.Whenyou’restuck,spinthewheelsas
possible.Don’tspin the wheelsabove 35 mph (55 km/h)asshown
onthespeedometer.
NOTICE
Spinning your wheels can destroy parts
of yourvehicleaswell as the
VOUI
;missionbal
tires. If youspinthewheelstoofastwhileshifting
and forth, you can destroy your transmissioi
Rocking your vehicle to get it out:
First,turnyoursteeringwheelleftandright.Thatwillcleartheareaaround
R (Reverse)anda
yourfront wheels.Thenshiftbackandforthbetween
forward gear, spinningthe wheels as littleaspossible.Releasethe
acceleratorpedalwhileyoushift,andpresslightlyontheaccelerator
pedal
whenthetransmissionis
in gear. If thatdoesn’tgetyououtafterafewtries,
youmayneed to betowedout.
If you do need to betowedout,see“TowingYourVehicle”intheIndex.
5-32
.
Service & Appearance Care
.
-&-.A-
.....
I
"9
-.....
5,
L
Here you will find information about the care of your vehicle
. This Section
it showshowtocheck
beginswithserviceandfuelinformation.andthen
important fluid and lubricant levels . There is also technical information about
your vehicle. and a section devoted to its appearance care .
Service ...................................................................................................................
6-3
Fuel ........................................................................................................................
6-4
Checking Things Under the Hood .......................................................................
6-8
Hood Release ....................................................................................................
6-8
Engine Oil .......................................................................................................... 6-9
Engine Cover ................................................................................................... 6-15
Air Cleaner .......................................................................................................
6-19
.........................................................................
Rear Axle .........................................................................................................
All-Wheel Drive ................................................................................................
Transfer Case ..................................................................................................
6-20
Automatic Transmission Fluid
6-23
6-23
6-23
Front Axle......................................................................................................... 6-24
Engine Coolant ................................................................................................
6-26
Power Steering Fluid .......................................................................................
6-30
Windshield Washer Fluid .................................................................................
6-31
Brake Master Cylinder ..................................................................................... 6-32
6-1
Service & Appearance Care
Replacing Brake System Parts .......................................................................... 6-33
Fluid Leak Check ................................................................................................
6-34
Battery .................................................................................................................. 6-34
Vehicle Storage ...................................................................................................
6-34
Bulb Replacement ...............................................................................................
6-35
Other Maintenance Items ...................................................................................
6-38
Loading Your Vehicle .......................................................................................... 6-42
Tires...................................................................................................................... 6-44
Appearance Care ................................................................................................
6-52
Vehicle Identification Number .............................................................................
6-60
Service Parts Identification Label
......................................................................
6-62
Capacities and Specification Charts ..................................................................
6-64
Fuses and Circuit Breakers ................................................................................
6-68
6-2
Service
Your General Motors dealer knows your vehicle best and wants you
to be
happy with it. Wehopeyou’llgo to your dealer for all your service needs.
You’llgetgenuine GM partsandGM-trainedandsupportedservicepeople.
We hopeyou’llwant
thesemarks:
to keepyourGMvehicle
of
all GM. GM partshaveone
K1604
Doing Your Own Service Work
Ifyouwant to do some of yourownservicework,you’llwant
to get the
properGeneralMotorsServiceManual.Ittellsyoumuchmoreabouthow
To order the proper service
service your vehicle than this manual can.
manual,see ‘Service Publications’’ in theIndex.
to
You shouldkeeparecordwithallpartsreceiptsandlistthemileageandthe
date.ofanyserviceworkyouperform.See“MaintenanceRecord”
in the
Index.
You canbeinjured if youtrytodoserviceworkonavehiclewithout
knowingenoughabout it.
Besureyouhavesufficientknowledge,experience,andthe
properreplacementpartsandtoolsbeforeyouattemptany
vehiclemaintenancetask.
I
Besure to usethepropernuts,boltsandotherfasteners.
If you
“English”and“metric”fastenerscanbeeasilyconfused.
usethewrongfasteners,partscanlaterbreakor
fall off. You
could be hurt.
6-3
Service & Appearance Care
I- NOTICE
Fuel
The8thdigitofyourVehicleIdentificationNumber(VIN)showsthecode
letter for your engine. You will find the VIN at the top left
ofyourinstrument
panel.(See“VehicleIdentificationNumber”intheIndex.)
Useregularunleadedgasolineratedat87octaneorhigher.Withthe4.3L
(Code W) engine,usepremiumunleadedgasolineratedat91octaneor
higher for high power performance, when towing a trailer or with a high
payloadrequirement.Butwhenoperatingwithalightloadasanormal
condition,youmayusemiddlegradeorregularunleadedgasolines.
ThegasolineyouuseshouldmeetspecificationsASTMD4814in
the U.S.
andCGSB3.5-92inCanada.Thesefuelsshouldhavetheproperadditives,
so youshouldnothavetoaddanything
to thefuel.
In the U.S. andCanada,it’seasytobesureyougettherightkindof
UNLEADED rightonthepump.Andonly
gasoline(unleaded).You’llsee
unleaded nozzles will fit into your vehicle’s filler neck.
is atleast91forpremium,89formiddlegrade
Besurethepostedoctane
and 87 forregular. If theoctane is lessthan87,youmaygetaheavy
knockingnoisewhenyoudrive.
Ifit’s bad enough, it candamageyour
engine.
6-4
.
If you’reusingfuelratedat
91 octaneorhigherandyoustillhearheavy
knocking,yourengineneedsservice.Butdon’tworry
ifyouheara
little
pingingnoise when you’reacceleratingordriving up a hill. That’snormal,and
youdon’thave to buy a higher octane fuel
to get rid of pinging.It’sthe
heavy,constantknockthatmeansyouhaveaproblem.
Whataboutgasolinewithblendingmaterialsthatcontainoxygen,suchas
MTBE or alcohol?
MTBE is“methyltertiary-butylether.”Fuelthatisnomorethan
fine for your vehicle.
15% MTBEis
Ethanol isethyl orgrainalcohol.Properly-blendedfuelthatisnomorethan
10% ethanol is fine foryourvehicle.
Methanol is methylorwoodalcohol.
5% methanol is badforyourvehicle.Don’tuse
Fuelthatismorethan
Itcancorrodemetalparts
in yourfuelsystemandalsodamageplastic
and rubber parts. That damage wouldn’t be covered under your warran
And evenat 5% or less,theremustbe“cosolvents”
md cc----6io
preventersinthis fuel to help avoid these problems
It.
Gasolines for CIeaner Air
Youruseof gasolinewithdetergentadditiveswillhelppreventdepositsfrom
forming in yourengineandfuelsystem.Thathelpskeepyourengine
in tune
andyouremissioncontrolsystemworkingproperly.It’sgoodforyourvehicle,
and you’ll be doing your part for cleaner
air.
Manygasolinesarenowblendedwithmaterialscalledoxygenates.General
Motorsrecommendsthatyouusegasolineswiththeseblendingmaterials,
so, youcanhelpcleantheair,
suchasMTBEandethanol.Bydoing
especiallyinthoseparts of thecountrythathavehighcarbonmonoxide
levels.
In addition,somegasolinesuppliersarenowproducingreformulated
gasolines.Thesegasolinesarespeciallydesigned
to reducevehicle
emissions.GeneralMotorsrecommendsthatyouusereformulatedgasoline.
in thoseparts of the
By doing so, youcanhelpcleantheair,especially
countrythathavehighozonelevels.
if their gasolines contain
You should ask your service station operators
detergentsandoxygenates,and if theyhavebeenreformulated to reduce
vehicleemissions.
6-5
Fuels in Foreign Countries
If you plan ondriving in anothercountryoutsidethe U.S.orCanada,
Do not’useleadedgasoline.Ifyouuse
unleadedfuelmaybehardtofind.
evenonetankfull,youremissioncontrolswon’tworkwelloratall.With
continuoususe,sparkplugscangetfouled,theexhaustsystemcancorrode,
andyourengineoilcandeterioratequickly.
Your vehicle’soxygensensorwill
bedamaged. All of thatmeanscostlyrepairsthatwouldn’tbecoveredby
yourwarranty.
To check on fuelavailability,askanautoclub,orcontactamajoroil
companythatdoesbusiness in thecountrywhereyou’llbedriving.
for advice.Just tell us where
You canalsowriteusatthefollowingaddress
(VIN).
you’regoingandgiveyourVehicleIdentificationNumber
GeneralMotors ofCanada, Limited
InternationalExportSales
P.O. Box 828
Oshawa,Ontario L1H 7N1, Canada
Filling Your Tank
PO389
6-6
CAUTION
A
Gasolinevapor is highlyflammable. It burnsviolently,andthatcan
if you’reneargasolineor
causeverybadinjuries.Don’tsmoke
refuelingyourvehicle.Keepsparks,flames,andsmokingmaterials
awayfromgasoline.
Thecap is behindahingeddoorontheleftside
Your optional fuel filler door release button
driver’s side stepwell.
of your ~ i c l e .
is in theuppercorner
of the
Whilerefueling,hangthecapinsidethefueldoor.
To take off thecap, turn it slowly to theleft(counterclockwise).
I CAUTION
A
If yougetgasolineonyouandthensomethingignitesit,youcould
if youopenthe fuel
bebadlyburned.Gasolinecansprayoutonyou
if yourtank is nearly
fillercaptooquickly.Thisspraycanhappen
full,and is morelikely in hot weather.Open thefuelfillercapslowly
to stop.Thenunscrewthecap
all the
andwaitforany“hiss”noise
way.
Whenyouput the capbackon,turn
noise.
it to the right until you hear a clicking
6-7
Service & Appearance Care
Checking Things Under the Hood
PO469
Hood Release
To openthehood,firstpullthehandleinsidethevehicle.
Then go tothe front of thevehicleandreleasethesecondaryhoodrelease.
K3605
Liftthehood,releasethehoodpropfromitsretainerandputthehoodprop
intothe slot inthehood.
6-8
A
I
Thingsthatburncangetonhotengine
parts andstartafire.These
includeliquidslikegasoline,oil,coolant,brakefluid,windshield
washerandotherfluids,andplasticorrubber.
You or others could
beburned.Becarefulnot
to dropor spill thingsthatwillburnontoa
hot engine.
Before closing the hood, be sure all the filler caps
I
are onproperly.
I
~
K3607
Then lift thehoodtorelievepressureon
the hoodprop.Removethehood
propfromtheslot
in thehoodandreturntheproptoitsretainer.Thenjust
it firmly.
letthehooddownandclose
Engine Oil
It’s a good idea to checkyourengineoileverytimeyougetfuel.Inorder
getanaccuratereading,theoilmustbewarmandthevehiclemustbeon
levelground.
6-9
to
Service dk Appearance Care
K3608
Turn off theengineandgivetheoilafewminutes
to drainbackdowninto
theoilpan. If youdon’t,theoildipstickmightnotshowtheactuallevel.
To CheckEngineOil: Pull outthedipstickandcleanitwithapapertowel
orcloth,thenpushitbackinallthe
way.Removeitagain,keeping
thetip
lower.
K3609
When to Add Oil: If the oil isatorbelowthe
ADD line,thenyou’llneedto
addsomeoil.Butyoumustusetherightkind.Thissectionexplainswhat
kind of oiltouse.Forcrankcasecapacitysee‘CapacitiesandSpecifications’’
intheIndex.
6-1 0
PO384
NOTICE
Just fill it enough to putthelevelsomewhere in theproperoperatingrange.
Pushthedipstickallthewayback
in whenyou’rethrough.
\
6-1 1
Service & Appearance Cam
KO704
What Kind of Oil to Use:
Look for three things:
SG
SG mustbeonthe oil container,eitherbyitselforcombinedwithother
qualitydesignations,suchas SG/CC, SG/CD, SF, SG, CC, etc.These
letters showAmericanPetroleumInstitute(API)levels
ofquality.
NOTICE
I
you use oils that don’thavethe SG dl
3maae not covered bv vour warrantv.
6-1 2
PO344
SAE5W-30
for yourvehicle.However,
Asshown in thischart,SAE5W-30isbest
if it’sgoingtobe 0°F (-18°C) or above.
youcanuseSAEIOW-30
Thesenumbersonan
notuseotherviscosity
oil containershowitsviscosity, or thickness. Do
oils such as SAE1OW-40 or SAE2OW-50.
6-1 3
Service & Appearance Care
e
EnergyConserving II
Oils withthesewordsonthecontainerwillhelpyousavefuel.
Thedoughnut-shapedlogo(symbol)isusedonmostoilcontainers
help you select the correct oil.
to
only those oils
You should look for this on the oil container, and use
that display the logo.
GMGoodwrench@oil(inCanada,GMEngineOil)meetsallthe
requirements for your vehicle.
EngineOilAdditives: Don’taddanything to youroil.YourGeneral
if youthinksomethingshouldbeadded.
Motorsdealerisreadytoadvise
WhentoChangeEngineOil:
See if anyoneoftheseis
e
Mosttripsarelessthan
e
It’s belowfreezingoutsideandmosttripsarelessthan10miles
(16km).
e
Theengine is at low speedmost of thetime(as
or in stop-and-go traffic).
e
You tow a trailer often.
e
Most trips are through dusty places.
true for you:
4 miles (6 km).
in door-to-door delivery,
If anyoneofthese
is true for yourvehicle,thenyouneedtochange
your oil andfilter every 3,000 miles (5000 km) or 3 months-whichever
comes first.
If none of them is true,changethe oil every 7,500 miles (12 500 km)or
12months-whichevercomes
first. Change the filter at the first
oil
changeandateveryotheroilchangeafterthat.
Engine Block Heater: Anengineblockheatercanbeabighelp
if youhave
to park outside in verycoldweather, 0°F (-18°C) or colder. If yourvehicle
hasthisoption,see“EngineBlockHeater”
in the Index.
6-14
What to Do with Used Uii:
I
I
Used engine oil contains things that have caused skin cancer
in
laboratory animals. Don’t let used
oil stayonyourskinforverylong.
or a goodhand
Clean your skin and nails with soap and water,
cleaner.Wash or properlythrowawayclothing
or ragscontaining
used engine oil.
m
-
m
Usedoilcanbearealthreattotheenvironment.
If youchangeyourownoil,
be sure to drain all free-flowing oil fromthefilterbeforedisposal.Don’tever
dispose of it by putting it in thetrash,pouringitontheground,intosewers,
orintostreams or bodies of water.Instead,recycle it by taking it to a place
of yourused
thatcollectsusedoil. If youhaveaproblemproperlydisposing
oil, askyourdealer,aservicestationoralocalrecyclingcenter
for help,
Engine Cover
In order to replace your air cleaner filter, you will have to remove your engine
cover. It is insideyourvehiclebehindtheinstrumentpanelextension.
To Remove the Engine Cover:
1. Movebothfrontseats
as farbackastheywillgo.
2. Removetheinstrumentpanelextensionbyremovingthetwoscrewsand
twonuts.Thescrewsareoneachsideatthetop
of theextension.The
nutsare onthe bottom of theextension.
6-1 5
Service & Appearance Care
PO383
3. Graspthe bottom of theextension.Lift up andthenpullout.
4. Disconnecttheelectricalconnectorforthecigarettelighter.Setthe
extensionaside.
6-1 6
5. Graspthetop
of theheater duct and pull down gently to remove.
. -e
-
PO381
6. Removethebolt from theenginecoverbracket.Loosenthenutand
movethebracketout of the way.
1
PO65i9
6-1 7
Senrice & Appearance Cam
-
7. Liftuponeach
of thetwolatchesatthebottom
ofthecover.
8. Removethetwoscrewsattheenginecoverusingalonghandled
screwdriver.Thescrewsarenotsupposetocomeoutofthecover,only
fromthefrontofdash.Whenremovingthecover,becarefulnot
damagetheinstrumentpanelorthetrim.
9. Graspthebottom of thecoverandslide
and outofthevehicle.
to
it backwards.Then, lift it up
To Install the Engine Cover:
1. Lifttheenginecoverintothevehicleandslide
it allthewayforward.
Makesuretherubbersealisoverthelatches.
2. Installthetwoscrewsattheenginecover.
Do nottightenthescrewsall
theway.
3. Pressdownoneach
of thetwolatchesatthebottomofthecover.
Makesuretheyaresecure.
4. Tightenthetwoscrewsattheenginecover.
5. Turnthebracketintopositionandinstallthebolt.Tightenthenutatthe
otherend ofthebracket.
6. Puttheheaterductovertheenginecoverstuds.Pushupontheduct
gentlyuntil it snapsintoplace.
7. Reconnecttheelectricalconnectorforthecigarettelighter.
6-1 8
8. Graspthebottom of theinstrumentpanelextensionandinstallthetop
intothegroovefirst.Then,pushthebottom
of theextensionintoplace.
9. Install thetwonutsandtwoscrews
on theextension.
Air Cleaner
To Remove the Air CIeaner Filter:
Ifyouhavethe
4.3L engine (VIN Code Z) withtheroundaircleaner,you
mustfirstremovetheenginecoverbeforechangingthefilter.(See“Engine
Cover”earlierinthissection.)Afterremovingtheengine
cover,unscrewthe
wingnut to takethecoverofftheaircleaner.Afterchangingthefilter,put
thecoverbackonandbesurethewingnutisproperlytightened.Besure
air cleaner lid is correctly positioned to seal outdustandcontaminantsthat
areharmfultoyourengine.
Ifyouhavethe 4.3L engine (VIN Code W) withthesquareaircleaner,you
can change the air cleaner filter without removing the engine cover. Just lift
thehood,unsnap both clipsandremovethetop.Afterchangingthefilter,
snap both clips tosecurethe air cleaner.Besureaircleaner
lid is correctly
positioned to seal out dust and contaminants that
are harmfultoyourengine.
Refer to the MaintenanceSchedule to determinewhen to replace the air
cleanerfilter.See“ScheduledMaintenanceServices”
in theIndex.
6-1 9
Service & Appearance Care
h
Operating the engine with the air cleaner
off cancauseyou or other!
to beburned.Theaircleanernotonlycleanstheair,
it stopsflame
if theenginebackfires. If it isn’tthere,andtheenginebackfires,you
could beburned.Don’tdrivewith
it off,andbecarefulworkingon
the engine with the air cleaner off.
If the air cleaner is off, a backfir
$use a damagingengir
dirt can easily get into your engine,
hicl vill damage it. Na)
air cleaner in place whenyou’re drivin
Automatic Transmission Nuid
When to Check and Change:
A good time to checkyourautomatictransmissionfluidlevel
engineoil is changed.RefertotheMaintenanceSchedule
to changeyourfluid.See“ScheduledMaintenanceServices”
is when the
to determinewhen
in theIndex.
How to Check:
Becausethisoperationcanbealittledifficult,youmaychoose
doneata GM dealershipServiceDepartment.
If you do ityourself, besure to followalltheinstructionshere,
getafalsereading on thedipstick.
to havethis
or you could
Too much or too little fluid can damage yourtransmission. Too muchcan
meanthatsomeof the fluid could comeoutand fall on hotenginepartstarting a fire. Besure to getanaccuratereading if youcheckyour
transmissionfluid.
Waitatleast 30 minutesbeforecheckingthetransmissionfluidlevel
havebeendriving:
Whenoutsidetemperaturesareabove
90°F (32°C).
At highspeedforquiteawhile.
In heavytraffic-especially
in hotweather.
Whilepullingatrailer.
6-20
if you
I
I
To gettherightreading,
the fluidshould be atnormal operating temperature,
whichis 180°F to 200°F (82°C to 93°C).
To checktransmissionfluidhot: Getthevehiclewarmedupbydriving
50°F (10°C).If
about 15 miles (24 km)whenoutsidetemperaturesareabove
it's colderthan 50°F (lO'C), drivethevehicle in D (ThirdGear)untilthe
enginetemperaturegagemovesandthenremainssteadyfortenminutes.
Then follow the hot check procedures.
To check transmission fluid cold: A coldcheck is madeafterthevehicle
off andisusedonlyas
hasbeensittingfor 8 hours or morewiththeengine
5 minutes if outsidetemperatures
areference.Lettheenginerunatidlefor
are 50°F (10°C) or more. If it's colder than 50°F (lO"C), youmayhaveto
is addedduringa
idletheenginelonger. A hotcheckmustfollowwhenfluid
coldcheck.
To check the fluid hot
or cold:
Parkyourvehicleonalevelplace.
Placetheshiftleverin
P (Park)withtheparkingbrakeapplied.
Withyourfootonthebrakepedal,movetheshiftleverthrougheach
gearrange,pausingforaboutthreeseconds
in eachrange.Then,
positiontheshiftlever in P (Park).
Lettheenginerunatidleforthreeminutes
or more.
Then, without shutting off the engine, follow these steps:
K3619
6-21
Service & Appearance Care
1. Pull out the dipstickandwipe
it with a cleanragorpapertowel.
2. Push it back in all the way,wait
again.
3 seconds and then pull it backout
3. Checkbothsides of thedipstick,andreadthelowerlevel.Thefluid
levelmustbe in theCOLDareaforacoldcheckor
in the HOT area or
cross-hatched area for a hotcheck.
4. If thefluidlevelis
way.
where itshouldbe,pushthedipstickback
in all the
To Add Fluid:
Refer to theMaintenanceSchedule to determinewhatkindoftransmission
in theIndex.
fluid to use.See“RecommendedFluidsandLubricants”
If thefluidlevelis low,addonlyenoughtobringthelevel
up to theCOLD
HOT area for a hot check.
It doesn’t take much
area for a cold check or the
fluid,generallylessthanapint.Don’toverfill.
We recommendyouuseonly
fluidlabeledDEXRON@IIE,becausefluidswiththatlabelaremadeespecially
foryourautomatictransmission.Damagecausedbyotherfluidthan
DEXRON*IIE is not covered by your new vehicle warranty.
Afteraddingfluid,recheckthefluidlevel
Check”.
Whenthecorrectfiuidlevel
way.
as describedunder“How
is obtained,pushthedipstickback
6-22
to
in all the
Rear Axle
When to Check and Change Lubricant:
Refer to theMaintenanceSchedule to determinehowoftentocheck
the
lubricantandwhen to changeit.See“ScheduledMaintenanceServices”
in
theIndex.
How to Check Lubricant:
1
,....
1
If thelevelisbelowthebottom
of thefillerplughole,you’llneed
to add
somelubricant. Add enoughlubricant to raisethelevel to thebottom of the
filler plug hole.
What to Use:
Refer to theMaintenanceSchedule to determinewhatkindoflubricant
use.See”RecommendedFluidsandLubricants”
in theIndex.
All=Wheel Drive
If youhaveanall-wheeldrivevehicle,besure
to performthelubricant
checksdescribed in thissection.However,theyhavetwoadditionalsystems
thatneedlubrication.
Transfer Case
When to Check Lubricant:
Refer to theMaintenanceSchedule to determinehowoften to checkthe
lubricant.See“PeriodicMaintenanceInspections”
in the Index.
6-23
to
How to Check Lubricant:
J
K3170
If the level is belowthebottom of thefillerplughole,you’llneed
to add
somelubricant.Addenoughlubricant
to raisethelevel to thebottom of the
fillerplughole.
What to Use:
Refer to theMaintenanceSchedule to determinewhat kind of lubricant to
use.See”RecommendedFluidsandLubricants”intheIndex.
Front Axle
When to Check and Change Lubricant:
Refer to the MaintenanceScheduletodeterminehowoftentocheckthe
lubricantand when to changeit.See“ScheduledMaintenanceServices”
theIndex.
6-24
in
How to Check Lubricant:
r
KO998
If thelevel is belowthebottom of thefillerplughole,you’llneed
to add
somelubricant. Add enoughlubricant to raisethelevel to thebottom of the
filler plug hole.
What to Use:
Refer to theMaintenanceSchedule to determinewhat kind of lubricant to
use.See“RecommendedFluidsandLubricants”
in theIndex.
6-25
Engine Coolant
A
~
1
L
PO453
Thefollowingexplainsyourcoolingsystemandhowtoaddcoolantwhenitis
low. If youhaveaproblemwithengineoverheating,see"Engine
Overheating"intheIndex.
The proper coolant for your vehicle will:
Givefreezingprotectiondown to -20°F(-29°C)or -40°F (-40°C)for
Canadian vehicles and vehicles with the cold climate option.
Giveboilingprotection
up to 258°F (125°C).
Protect'againstrustandcorrosion.
Helpkeeptheproperenginetemperature.
Letthewarninggagesworkastheyshould,
What to Use:
Useamixture of cleanwater (preferablydistilled)andantifreezethatmeets
Also use
"GMSpecification6038-M,"whichwon'tdamagealuminumparts.
If
GMEngineCoolantSupplement(sealer)withacompletecoolantchange.
youusethese,youdon'tneed
to addanythingelse.
6-26
If youhave to addcoolantmorethan
four times a year,haveyourdealer
check your cooling system.
I
If youusethepropercoolant,youdon’thave
to add extra inhibitors or
be harm1
additiveswhichclaim to improvethesystem.Thesecan
6-27
Service & Appearance Care
Adding Coolant
PO408
TO CheckCoolant: Whenyourengine
COLDLEVEL, or a little higher.
is cold,thecoolantlevel
Whenyourengineiswarm,thelevelshouldbeup
littlehigher.
To Add Coolant: If youneedmorecoolant,add
coolant recovery tank.
should beat
to COLD LEVEL, or a
the proper mix atthe
CAUTION
Turningtheradiatorpressurecapwhentheengineandradiatorare
hotcanallowsteamandscaldingliquids
to blow outandburnyou
to
badly.Withthecoolantrecoverytank,youwillalmostneverhave
addcoolantattheradiator.Neverturntheradiatorpressure
cap-even
little-when
a
the
engine
and
radiator
are
hot.
Addcoolantmixattherecoverytank,butbecarefulnot
to spill it.
CAUTION
i You
canbeburned if youspillcoolantonhotengineparts.Coolant
-containsethyleneglycol,and it willburn if theenginepartsarehot
enough.Don'tspillcoolantonahotengine.
6-28
I
Radiator Pressure Cap
PO407
"wr radiator pressure cap is a 15 psi (105 kPa) pressure-type cap and
loss and possible engine
w s t be tightly installed to prevent coolant
lir
damagefromoverheating.Besure
the arrowsonthepressurecap
with overflow tube on the radiator filler neck.
Whenyoureplaceyourradiatorpressurecap,
AC@cap is IGdommendGu.
u l ~
Thermostat
Enginecoolanttemperatureiscontrolledbyathermostatintheenginecoolant
system.Thethermostatstops the flow of coolant through the radiator until the
coolantreachesapresettemperature.
Whenyoureplaceyourthermostat,
anAC@ thermostatisrecommended.
6-29
I
I
Power Steering Fluid
.
I
.,
...
. .
L
I
PO665
How To Check Power Steering Fluid:
Unscrewthecapandwipethedipstickwithacleanrag.Replacethecap
andcompletelytighten it. Thenremovethecapagainandlookatthe
levelonthedipstick.
Whentheenginecompartmentishot,thelevelshouldbeatthe
mark.
Whentheenginecompartment
COLD mark.
HOT
is cool,thelevelshouldbeatthe
What to Add:
Refer to the Maintenance Schedule to determine what kind
See”RecommendedFluidsandLubricants”intheIndex.
6-30
fluid
FULL
of fluid to use.
PO667
NOTICE
Whenaddingpowersteeringfluid
or makingcompletefluidchange,
to use the proper fl I can cause
usetheproperfluid.Failure
1' leaks and damage hoses and seals.
Windshield Washer Fluid
1
1
1
/
PO406
To Add:
Openthecaplabeled WINDSHIELDWASHERFLUID
until thebottle is full.
6-31
ONLY. Add washer fluid
Service & Appearance Care
I
0
Whenusingaconcentratedwasherfluid,followthemanufacturer's
instructions for adding water.
Don'tmixwaterwithready-to-usewasherfluid.Watercancausethe
and other parts
solution to freeze and damage your washer fluid tank
of thewashersystem.Also,waterdoesn'tcleanaswellas"L..:.i:washer
.,.
fluid.
. .. ...;'r .... . .~
..., .-....
,..,
~,~.
I
Fill your washer fluid tank only 314 full"when it's'vety cold. This
if itis completely
allowsforexpansion,whichcoulddamagethetank
full.
I
,,
P ..
..
I .
Don't use radiator antifreeze
andsystem
washeryour
damage
y : ~i;
"
: ,y*: ,
1' .
:a,'
.
*>,:
2
,
. . . j...j., .I'
<:':,.YY<..'.%
:,,;,.: >:
:,:. I ,
.,.
._
I_
,
'-I
"
_I
,
,
.', ..
<
c 7 ~Ij
in yourwindshieldwasher.
It can
I
Brake Master Cylhder
Your brakemastercylinderishere.
It is filled with DOT-3 brake fluid.
There are only two reasonswhythebrakefluidlevelinyourmastercylinder
mightgodown.Thefirst
is that the brake fluid goes down to an acceptable
levelduringnormalbrakelining
wear.Whennewliningsareputin,the
fluid
level goes back up. Theotherreason is that fluid is leaking out of the brake
system. If it is,youshouldhaveyourbrakesystemfixed,sincealeakmeans
that sooner or later your brakes won't work well, or won't work at all.
6-32
So, it isn’tagoodidea to “top off’ yourbrakefluid.Addingbrake
fluid won’t
correctaleak. If youaddfluidwhenyourliningsareworn,thenyou’llhave
too muchfluidwhenyougetnewbrakelinings.
You shouldadd(orremove)
brakefluid, as necessary,onlywhenwork
is doneonthebrakehydraulic
system.
If youhave too muchbrakefluid, it canspill on the engine.Thefluid I
willburn if theengine is hotenough.Youor
others could be burned,
andyourvehicle could bedamaged.Addbrake
fluid onlywhenwork
I
on done is
RefertotheMaintenanceSchedule
to determinewhentocheckyourbrake
fluid. See “PeriodicMaintenanceInspections” in theIndex.
To Check Brake Fluid:
You cancheckthebrakefluidwithouttaking
off the cap.Justlookatthe
MIN. If
windowson the brake fluid reservoir.Thefluidlevelsshouldbeabove
theyaren’t,haveyourbrakesystemchecked
to see if there is aleak.
Afterwork is doneonthebrakehydraulicsystem
above MIN andbelowthetop of eachwindow.
, makesure thelevels are
What To Add:
Whenyoudoneedbrakefluid,useonlyDOT-3brakefluid-suchasDelco
Supreme ll@ (GM Part No. 1052535),Usenewbrakefluidfromasealed
container only.
brake fLlu
lamagn
lehicle
Replacing Brake System Parts
Thebrakingsystem on amodernvehicleiscomplex.
Its manypartshave to
be of top quality and workwelltogether if the vehicle is tohavereallygood
GM brakeparts in
braking.Vehicleswedesignandtesthavetop-quality
it is new.Whenyoureplaceparts
of your
them,asyourvehicledoeswhen
6-33
Service & Appearance Care
braking system-forexample,whenyourbrake
linings weardownandyou
have to havenewonesputin-besureyougetnewgenuineGM
replacementparts. If youdon’t,yourbrakesmaynolongerworkproperly.For
example, if someoneputs in brakeliningsthatarewrongforyourvehicle,the
balancebetweenyourfrontandrearbrakescanchange,fortheworse.The
brakingperformanceyou’vecometoexpectcanchangeinmanyotherways
if someoneputs in thewrongreplacementbrakeparts.
Hydro-Boost Brake System (Hydraulic Pump)
ThepowersteeringpumpisalsousedastheHydro-Boostpump.Refer
to
“PowerSteeringFluid”inthissection
when. checkingthefluidleveloradding
fluid.
Fluid Leak Check
Afterthevehiclehasbeenparkedforawhile,inspectthesurfacebeneaththe
vehicleforwater,oil,fuelorotherfluids.Waterdrippingfromtheair
conditioningsystem is normal.Ifyounoticefuelleaksorfumes,thecauses
should befoundandcorrectedatonce.
Battery
EverynewGM vehicle has [email protected]
to
addwater to one of these, Whenit’stimeforanewbattery,werecommend
aDelcoFreedom@battery. Getone thathasthecatalognumbershownon
theoriginalbattery’slabel.
Vehicle Storage
If you’re not going to drive your vehicle for 25 daysormore,takeoffthe
black,negative (-) cablefromthebattery.Thiswillhelpkeepyourbattery
fromrunningdown.
I CAUTION
Formoreinformarlononvehiclestorage,contactyourdealer’sservice
department,orwriteto:
AdistraCorporation171HamiltonStreet
Plymouth, MI 48170
In Canada,write to:
GeneralMotors of Canada,Limited
CustomerServicesDepartment
Oshawa, Ontario L1 J5Z6
6-34
Bulb Replacement
Beforereplacinganybulbs,makesure
running.
all lightsare off and the vehicle is not
Halogen Bulbs
I CAUTION
I
Halogenbulbshavepressurizedgasinsideandcanburst
b or scratch the bulb. Youor otherscouldbeinjured.
halogen
bulbs.
I disposing
ofhandling
and
when
if youdrop
Take specialcare
I
Headlights
I
\
PO404
1. Openthe hood.
2. [email protected]
parkinghrn-signal sockets.
bezelout so youcanseethe
3. Pressthetaband turn thesocket to the left to removethesocketfrom
a tab,turnthesockettothe
left.
thebezel. If thesocketdoesnothave
Set the bezel aside.
6-35
Service & Appearance Care
I
PO403
4. Remove thefourretainerscrewsandtheretainer.
5, Pulltheconnectoroutandunplugthelight.
6. Installthe new bulb intothe connector.
7. Reversesteps 1-5 to reinstalltheheadlight.
Front ParkingFurn Signal Lights
1. Openthe hood.
2. Remove thefour Torxheadscrewsfromthe
headlightbezel. Pull the
bezelout so you canseetheparkinglturnsignallights.
!$
3
:K
.
>-: ..
PO401
6-36
3. Press the tab and turn the socket to the left to remove the
thebezel.
If thesocketdoesnothaveatab,
thesocketfromthebezel.
socket from
turn thesocket to the left to remove
4. Pull out thebulbandreplaceitwiththenewbulb.
5. Reversesteps 1-3 to reinstalltheheadlight.
Taillights
n
PO402
1. Openthereardoor.
2. Removethetwoscrewsbehindthedoor.
so you can seethesocket.
6-37
Pull out thetaillightassembly
Service & Appearance Care
PO400
3. Pressthetabandturnthesocket
thebezel.
If thesocketdoesnothave
thesocketfromthebezel.
to the left to
a tab,turnthesocket
removethesocketfrom
to the left to remove
4. Pulloutthebulbandreplaceitwiththenewbulb.
5. Reversesteps 1-3 toreinstallthetaillight.
Other Maintenance Items
Front Suspension and Steering Linkage
TheMaintenanceSchedulewilltellyouhowoften
“RecommendedFluidsandLubricants”intheIndex
use.
to lubricatethefittings.See
for theproperlubricantto
Front Wheel Bearings (Two-Wheel Drive)
If yourvehicleistwo-wheeldrive,thefrontwheelbearingsmustbecleaned
and repackedatcertainintervals.TheMaintenanceSchedulewilltellyouhow
oftenthismustbedone.
Single Belt Accessory Drive
Yournewvehicleuses
aserpentinebeltthat
efficientthansystemswithseveralbelts.
is lighter,moredurableandfuel
A tensionerisused
Thebeltrunsover or aroundthepulleysontheengine.
tokeepthebelttightat
all times.Thetensioneralsomakesreplacingthe
to getthecorrect
belteasier. If youneedtoreplacethebelt,besure
6-38
replacementbelt. Your dealershiporpartssuppliercanhelpyouwiththis.
The Accessory Drive Belt Routing label on your vehicle will show you how to
route the belt your vehicle uses.
Windshield Wiper Blade lnsetts
I
K3630
To replace your wiper blade inserts, pinch the
two tabsonthewiperarmand
slidetheinsertout of theblade.Whenyouslidethenewoneintoplace,be
surethetabsarelocked
in position.
Air Conditioning
Every now and then have your dealership check your air conditioning system
If youthinkthesystemisnot
to besureithasnotlostanycoolingability.
workingproperly,haveyourdealershipcheckitoutassoonaspossible.
Theairconditioningwillnotworkwhenthetemperatureisbelow
40°F (4°C).
Lubrication
Accelerator Control System
Refer to theMaintenanceSchedule to determinehowoftentheaccelerator
linkagepivotpointsmustbelubricated
and whattype of lubricanttouse.
Acceleratorcablesandcruisecontrolcablesshouldnotbelubricated.Any
cablesthatareworn or arehardtopullshouldbereplaced.
When cleaning the engine compartment with water or steam, avoid directing
the flow onto the throttle linkage
in amannerthatwouldcausemoistureto
enter the cables.
6-39
Senrice & Appearance Care
Hood Latches and Hood Hinge
TheMaintenanceSchedulewilltellyouhowoften
to lubricatethehoodlatch
and hoodhingeassembly.See“RecommendedFluidsandLubricants”inthe
Index for the proper lubricant to use.
Propeller Shaft Slip Splines/Universal Joints
TheMaintenanceSchedule will tellyou how oftentheslipsplinesmustbe
lubricated.See“RecommendedFluidsandLubricants”intheIndexforthe
proper lubricant to use.
Constant Velocity Joints (All- Wheel Drive Only)
TheMaintenanceSchedulewilltellyouhowoften
to lubricatethethe
constantvelocityjoints.See“RecommendedFluidsandLubricants”
in the
to use.
Index for the proper lubricant
Sliding Door Tracks
Your vehicle’sslidingdoorhasthreetrackswhichneedlubrication.
For the upper and lower tracks, open the door, wipe the track clean and then
lubricatewithLubriplate@WhiteGrease.
For the outside middle track, close the door after you finish the upper and
lowertracks.Then,wipethetrackcleanandlubricatewithLubriplateBWhite
Grease.
Body
Normaluse ofyourvehiclewillcausemetal-to-metalwearatsomepointson
the cab and body if theyarenotlubricated.
tor exposedsurfaces,suchasdoorchecks,doorlockbolts,lockstriker
of engineoilshould
plates,dovetailbumperwedges,etc.,athinfilm
applied.
be
Whereoilholesareprovidedinthebodyorcab,adriplessoilcanbeused.
Theseatadjustersandseattrackshould
be lubricatedwithchassisgrease.
Doorweatherstripsandrubberhoodbumpersshould
rubber lubricant.
Neveruse too muchofanylubricantandbesure
lubricantwhenyouarefinished.
be lightlycoatedwith
to wipeupanyextra
to getat.Windowregulatorsand
Somepartsthatneedlubricatingarehard
controlsareinsidethedoors.
You cangettothesebyremovingthetrim
panels.
6-40
a
TheMaintenanceSchedule will tell youhowoften to lubricatetheseitems.
See“RecommendedFluidsandLubricants”
in theIndexfortheproper
lubricant to use.
Lock Cylinders
To besureyourlocksoperateproperly,theymustbelubricated.The
MaintenanceSchedulewill tell youhow often to lubricatethem.See
“RecommendedFluidsandLubricants”intheIndexfortheproperlubricantto
use.
You shouldnotusepenetratingoilsbecausetheycouldwashoutthefactory
installedlubricantandcausethelocktobind.De-icerswhichcontainalcohol
so besure to lubricate the lock after
couldalsowashawaythelubricant,
using a de-icer of this type.
Exhaust System
To helppreventdamagetoyourexhaustsystem,
yourvehicle if younotice:
do notcontinuetodrive
Enginemisfiring
Loss of performance
Otherunusualoperatingconditions
Haveyourengineandexhaustsystemservicedregularly.
Three-Way Catalytic Converter
Your vehicle’s three-way catalytic converter is designed
to reduce the
pollutants in yourvehicle’sexhaust.Useonlyunleadedfuel
in yourvehicle. If
youuseleadedfuel,youcoulddamageyourthree-waycatalyticconverter,
andotheremissioncontrolcomponents.
Malfunction Indicator Lamp (SERVICE ENGINE SOON light)
TheMalfunctionIndicatorLamp(SERVICEENGINESOONlight)onyour
instrumentpanelletsyouknowwhenyouremissionsystemneedsservice.
Thelightwillcomeonbriefly
whenyou startyourenginetoletyouknow
If itdoesnotcomeonwhenyoustartyour
thatthesystemisworking.
engine,or if itcomesonandstaysonwhileyou’redriving,yoursystemmay
needservice. Your vehicleshould still bedriveable,butyoushouldhaveyour
systemservicedrightaway.
6-41
Service & Appearance Care
Loading Your Vehicle
K3651
The Certificationrrire label is foundontherearedge
of thedriver’sdoor.The
labelshowsthesize ofyour originaltiresandtheinflationpressuresneeded
to obtain the gross vehicle weight capacity ofyourvehicle.Thisis
called the
GVWR(GrossVehicleWeight
Rating).The GVWR includestheweight of the
vehicle,alloccupants,fuelandcargo.
The Certificationflire label also tells youthemaximumweightsforthefront
To find out the
andrearaxles,calledGrossAxleWeightRating(GAWR).
to go to aweighstation
actual loadsonyourfrontandrearaxles,youneed
to
andweighyourvehicle. Yourdealercan helpyouwiththis.Besure
spreadoutyour load equallyonbothsides of thecenterline.
NeverexceedtheGVWRforyourvehicle,ortheGrossAxleWeightRating
(GAWR) for either the front or rear axle.
And, if you do haveaheavyload,youshouldspread
I
it out.
Do not load your vehicle any heavier than the GVWR or the
maximumfrontandrearGAWRs.
If you do, partsonyourvehicle
can break, or it can change the way your vehicle handles. These
couldcauseyou to losecontrol. Also, overloadingcanshortenthe
life of yourvehicle.
6-42
Usingheaviersuspensioncomponents to getaddeddurabilitymightnot
change your weight ratings. Ask your dealer
to help you load your vehicle the
right way.
i
NOTICE
I Yourwarrantv
does notcover Darts or componentsthat fail because of
If youputthingsinsideyourvehicle-likesuitcases,
tools, packages,or
as thevehiclegoes. If youhave to stop
anything else-theywillgoasfast
or turnquickly,or if thereisacrash,they’llkeepgoing.
A
Thingsyouputinsideyourvehiclecanstrikeandinjurepeople
suddenstoporturn,or
in acrash.
Putthings in the cargoareaofyourvehicle.
weightevenly.
in a
Try to spreadthe
Neverstackheavierthings,likesuitcases,insidethevehicleso
of the seats.
that some of them are above the tops
When you carrysomethinginsidethevehicle,secure
whenever you can.
it
Don’tleaveaseatfoldeddownunlessyouneedto.
Pay/oad
ThePayloadCapacity is shownonthe CertificationRire label.Thisisthe
maximumloadcapacitythatyourvehiclecancarry.Besuretoincludethe
weightof thepeopleinsideaspart
ofyourload. If youaddedany
accessoriesorequipmentafteryourvehicleleftthefactory,remember
to
subtract the weight of these things from the payload.
Your dealer can help
youwiththis.
6-43
m i c e & Appearance Care
Trailering Package
PO471
If yourvehiclecomeswiththeTraileringPackage,there
is alsoa load rating
whichincludestheweight of the vehicle and the trailer it tows.Thisrating is
calledtheGrossCombinationWeightRating(GCWR).
Whenyouweighyourtrailer,besure
to includetheweight of everything you
put in it.And,remember to figure the weight of thepeopleinside as part of
yourload.
Yourdealer can help you determine your GCWR.
Add-on Equipment
Whenyoucarryremovableitems,youmayneed
people you carry inside your vehicle. Be sure
youbuyandinstallthenewequipment.
to putalimit on howmany
to weighyourvehiclebefore
NOTICE
Yourwarrantydoesn'tcover
~ r t or
s components that fail because of
Tires
Wedon'tmaketires.Yournew
vehiclecomeswithhighqualitytiresmade
a leading tire manufacturer.Thesetiresarewarrantedbythetire
manufactu'rersand theirwarrantiesaredeliveredwitheverynewvehicle.If
yoursparetireis a different brand than your road tires, you will have a tire
warrantyfolderfromeachofthesemanufacturers.
6-44
by
A Poorlymaintainedandimproperlyusedtiresaredangerous.
Overloading your tires can cause overheating
as a result of too
muchfriction. You could haveanair-outandaseriousaccident.
See“Loading Your Vehicle” in theIndex.
Underinflated tires pose the same danger as overloaded tires.
Theresultingaccidentcouldcauseseriousinjury.Checkalltires
frequently to maintain the recommendedpressure.Tirepressure
shouldbecheckedwhenthetires
are cold.
Overinflated tires are morelikely to be cut,punctured, orbroken
bysuddenimpact(aswhenyouhitapothole).Keeptiresatthe
recommendedpressure.
Worn, old tirescancauseaccidents. If yourtreadisbadlyworn,
or if yourtireshavebeendamaged,replacethem.
Don’t drive over 85 mph (135 km/h)even if it’slegal,unlessyou
havethecorrect high speedratedtires.
Inflation-Tire
Pressure
TheCertification/Tire label whichison the rearedge of the driver’sdoor
shows the correct inflation pressures for your tires, when they’re cold. “Cold”
meansyourvehiclehasbeensittingforatleastthreehoursordrivenno
morethanamile.
6-45
Senrice & Appearance Care
on’tletanyonetellyouthatunderinflation
or overinflationis all right. It’s
When to Check: Checkyourtiresonceamonthormore.
compactsparetire. It shouldbeat 60 psi (420 kPa).
Don’t forget your
How to Check: Useagoodqualitypocket-typegage
to checktirepressure.
if you
Simply looking at the tires will not tell you the pressure, especially
if they’re
haveradialtires-whichmaylookproperlyinflatedeven
underinflated.
If yourtireshavevalvecaps,besuretoputthemback
preventleaksbykeepingoutdirtandmoisture.
6-46
on. Theyhelp
Tire Inspection and Rotation
To makeyourtireslastlonger,havetheminspectedandrotatedatthe
mileagesrecommended in the MaintenanceSchedule.See“Scheduled
MaintenanceServices” in theIndex.
Use thisrotationpattern.
If yourvehiclehasfronttireswithdifferent
load ratings or tread designs(such
asallseasonvs.on/offroad)thanthereartires,don’trotateyourtiresfront
to rear.
Afterthetireshavebeenrotated,adjustthefrontand
rear inflationpressure
as shownonthe CertificationRire label.Makecertainthatallwheelnuts
are
properlytightened.See“WheelNut
Torque” in theIndex.
CAUTION
I
Rustordirtonawheel,oron
the parts to which it is fastened, can
makewheelnutsbecomelooseafteratime.Thewheel
could come
..
offandcauseanaccident.Whenyouchangeawheel,removeany
- - .-..-rust.-o,r dit-.from places where the wheel attaches
to the vehicle. In
anemergency, youcanusea cloth orpapertowel to do this;butbe
if you need to, to get all
sure to useascraperorwirebrushlater,
therustordirtoff.(See“Changing
Flat
a Tire”
in the
Index.)
6-47
I
Sewice & Appearance Cam
When lt3 Time for New Tires
K1656
Oneway to tell whenit’stimefornewtires
is to check the treadwear
2/32 inch (1.6 mm)or
indicators,whichwillappearwhenyourtireshaveonly
less of treadremaining.
You needanewtire
Youcansee
if:
the indicatorsatthreeplacesaroundthetire.
You canseecordorfabricshowingthroughthetire’srubber.
Thetread or sidewall is cracked,cutorsnaggeddeepenough
cord or fabric.
to show
The tire has a bump, bulge or split.
The tire hasapuncture,cut, orotherdamage thatcan’tberepaired
because of the size or location of the damage.
Buying New Tires
To find out what kind and size of tiresyouneed,lookatthe
CertificationRire
it wasnewhadaTire
label.Thetiresinstalledonyourvehiclewhen
PerformanceCriteriaSpecification(TPCSpec)numberoneachtire’ssidewall.
Whenyougetnewtires,getoneswiththatsameTPCSpecnumber.That
way, your vehicle will continue to have tires that are designed to give proper
endurance,handling,speedrating,traction,rideandotherthingsduring
normal service on your vehicle. Ifyour tireshaveanall-seasontreaddesign,
“MS” (formudandsnow).
the TPC numberwillbefollowedbya
6-48
If youeverreplaceyourtireswiththosenothavingaTPCSpecnumber,
makesuretheyarethesamesize,loadrange,speedratingandconstruction
type(bias,bias-belted or radial)asyouroriginaltires.
A
Mixingtirescouldcauseyou
to losecontrolwhiledriving. Ifyoumix
tires of different sizes or types(likeradialandbias-beltedtires)the
vehicle maynothandleproperly,andyoucouldhaveacrash.Be
the
same
size
and
type
tires
on
all wheels.
sure to use
It’s all right to drive with your compact spare, though.
limited use on your vehicle.
It wasdevelopedfor
Uniform Tire Quality Grading
Thefollowinginformationrelates to thesystemdevelopedbytheUnited
StatesNationalHighwayTrafficSafetyAdministrationwhichgradestiresby
to
treadwear,tractionandtemperatureperformance.(Thisappliesonly
vehiclessoldintheUnitedStates.)
Treadwear
The treadwear grade is a comparative rating based on the wear rate
of the
tire whentestedundercontrolledconditionsonaspecifiedgovernmenttest
(142)
course. For example,a tire graded 150 wouldwearoneandahalf
timesaswellonthegovernmentcourseasa
tire graded 100. Therelative
of theiruse,
performance of tiresdependsupontheactualconditions
however,andmaydepartsignificantlyfromthenormduetovariationsin
drivinghabits,servicepracticesanddifferencesinroadcharacteristicsand
climate.
Traction-A, B, C
Thetractiongrades,fromhighest
to lowestare: A, B, and C. Theyrepresent
the tire’s ability to stop on wet pavement as measured under controlled
A
conditionsonspecifiedgovernmenttestsurfacesofasphaltandconcrete.
tire marked C mayhave poor tractionperformance.
to thistireisbasedonbraking
Warning:Thetractiongradeassigned
(straight-ahead)tractiontestsanddoesnotincludecornering(turning)traction.
Temperatur+A, B, C
Thetemperaturegradesare A (thehighest), B,andC,representingthetire’s
resistance to the generation ofheat and its ability to dissipate heat when
tested under controlled conditions on a specified indoor laboratory test wheel.
Sustainedhightemperaturecancausethematerial
of the tire to degenerate
to sudden tire
andreducetirelife,andexcessivetemperaturecanlead
6-49
I
failure.Thegrade C correspondstoalevelofperformancewhich
all
passengercartiresmustmeetundertheFederalMotorVehicleSafety
Standard No. 109. Grades B and A representhigherlevelsofperformanceon
thelaboratorytestwheelthantheminimumrequiredby
law.
Warning:Thetemperaturegradeforthistireisestablishedfora
tire that is
or
properlyinflatedandnotoverloaded.Excessivespeed,underinflation,
excessiveloading,eitherseparately or in combination,cancauseheatbuildup
and possibletirefailure.
Thesegradesaremoldedonthesidewallsofpassengercartires.
or optionalequipmentonGeneralMotors
While the tires available as standard
vehiclesmayvarywithrespecttothesegrades,
all suchtiresmeetGeneral
MotorsperformancestandardsandhavebeenapprovedforuseonGeneral
to Federal
Motorsvehicles. All passengertype (P Metric)tiresmustconform
safetyrequirements in addition to thesegrades.
Wheel Alignment and lire Balance
Thewheelsonyourvehiclewerealignedandbalancedcarefullyatthe
factorytogiveyouthelongesttirelifeandbestoverallperformance.
to haveyourwheelsalignedagain.
Inmostcases,youwillnotneed
or yourvehiclepullingoneway
or
However, if you notice unusual tire wear
theother,thealignmentmayneed
to bereset. If younoticeyourvehicle
vibratingwhendrivingonasmoothroad,yourwheelsmayneed
to be
rebalanced.
Wheel Replacement
Replaceanywheelthatisbent,cracked
or badlyrusted. If wheelnutskeep
bolts, andwheelnutsshouldbereplaced.
If
comingloosethewheel,wheel
thewheelleaksairout,replaceit(exceptsomealuminumwheels,whichcan
sometimesberepaired).SeeyourGMdealerifanyoftheseconditionsexist.
Your dealerwillknowthekindofwheelyouneed.
Eachnewwheelshouldhavethesameloadcarryingcapacitydiameter,width,
it replaces.
offset,andbemountedthesamewayastheone
If youneedtoreplaceany
ofyourwheels,wheelbolts,
or wheelnuts,
replacethemonlywithnewGMoriginalequipmentparts.This
way,you will
for your
besureyouhavetherightwheel,wheelbolts,andwheelnuts
vehicle.
6-50
CAUTION
Usingthewrongreplacementwheels,wheelbolts,orwheelnutson
yourvehiclecanbedangerous.Itcouldaffectthebrakingand
handling of yourvehicle,makeyourtiresloseairandmakeyoulose
control. You couldhaveacollisioninwhichyou
or otherscould be
injured.Alwaysusethecorrectwheel,wheelbolts,andwheelnuts
forreplacement.
NOTICE
I
I
Thewrongwheelcanalsocauseproblemswithbearinglife,brakecooling,
speedometer/odometercalibration,headlightaim,bumperheight,
vehiclc
groundclearance,andtire or tire chainclearance to thebodyandchassi
Used Replacement Wheels
1
Putting a used wheel on your vehicle
is dangerous. Youcan’tknow
how it’s been used or how many miles it’s been driven. It
could fail
If youhavetoreplaceawheeluse
suddenlyandcauseanaccident.
a new GM original
equipment
wheel.
Tire Chains
f your vehicle has PqA
iamage your vehicle
f youhaveothersizetires,use
tire chainsonlywhenyou
...s t . seon
SAE Class “S” type chains that are the proper size for your tires. lnst
as tightlyas PO
hemontherearaxletiresandtightenthem
heendssecurelyfastened.Driveslowlyandfollowthechain
nanufacturer’sinstructions. If youcanhearthechainscontactingyour
If thecontactcontinues, slow d8
rehicle,stopandretightenthem.
t stops. Driving too fast with chains
on will damageyourvehicle.
6-51
I
I
Cleaning the Inside of Your Vehicle
Useavacuumcleaneroften
aclean,dampcloth.
to getrid of dustandloosedirt.Wipevinylwith
two GMcleaners-asolvent-typespotlifteranda
YourGMdealerhas
foam-typepowderedcleaner.Theywillcleannormalspotsandstainsvery
well.
Here are some cleaning tips:
Alwaysreadtheinstructionsonthecleanerlabel.
Cleanupstainsassoonasyoucan-beforetheyset.
Useacleanclothorsponge,andchange
to acleanareaoften.
if stainsarestubborn.
brushmaybeused
Usesolvent-typecleaners in awellventilatedareaonly.
don’t saturate the stained area.
If youusethem,
If aringformsafterspotcleaning,cleantheentireareaimmediatelyorit
willset.
Using Foam-Type Cleaner on Fabric
Vacuum and brushthearea to removeanyloosedirt.
Alwayscleanawholetrimpanelorsection.Masksurroundingtrimalong
stitch or welt lines.
MixMulti-PurposePowderedCleanerfollowingthedirectionsonthe
container label.
Usesudsonlyandapplywithacleansponge.
Don’tsaturatethematerial.
Don’trub it roughly.
6-53
A soft
As soonasyou’vecleanedthesection,useasponge
suds.
to removethe
Rinsethesectionwithaclean,wetsponge.
Wipe off what’sleftwithaslightlydamppapertowel
Thendry it immediatelywithanairhose,ahairdryer
or cloth.
or aheatlamp.
I
Wipewith acleancloth.
Using Solvent-Type Cleaner on Fabric
First,see if youhave to usesolvent-typecleanerat all. Somespotsand
stains will clean off better with just water and mild soap.
If youneed to use it, then:
Gentlyscrapeexcesssoilfromthetrimmaterialwithaclean,dullknife
or scraper.Usevery little cleaner,lightpressureandcleancloths
(preferably cheesecloth). Cleaning should start at the outside of the stain,
“feathering”towardthecenter.Keepchangingtoacleansection
of the
cloth.
Whenyoucleanastainfromfabric,immediatelydrytheareawithanair
hose,hairdryer, or heatlamp to helppreventacleaningring.(See
previous NOTICE.)
Fabric Protection
Your vehiclehasupholsterythathasbeentreatedwithScotchgardTMFabric
Protector,a3Mproduct.ScotchgardTMprotectsfabricsbyrepellingoiland
water,which arethecarriers ofmoststains.Evenwiththisprotection,you
still need to cleanyourupholsteryoftentokeepitlookingnew.
Furtherinformationoncleaningisavailablebycalling1-800-433-3296
Minnesota, 1-800-642-61 67).
(in
Special Cleaning Problems
Greasy or Oily Stains: Likegrease,oil,butter,margarine,shoepolish,coffee
withcream,chewinggum,cosmeticcreams,vegetableoils,
waxcrayon,tar
andasphalt.
Carefullyscrape off excessstain.
Thenfollowthesolvent-typeinstructionsabove.
6-54
Shoepolish,waxcrayon,tarandasphaltwillstain
if leftonavehicle
seatfabric.Theyshouldberemovedassoon
as possible.Becareful,
to bleed.
becausethecleanerwilldissolvethemandmaycausethem
Non-GreasyStains: Likecatsup,coffee(black),egg,fruit,fruitjuice,milk,
soft drinks,wine,vomit,urineandblood.
Carefullyscrapeoffexcessstain,thenspongethesoiledareawithcool
water.
If astainremains,followthefoam-typeinstructionsabove.
If anodorlingersaftercleaningvomit
or urine,treattheareawitha
1 cup
watedbakingsodasolution: 1 teaspoon (5 ml)ofbakingsodato
(250 ml)oflukewarmwater.
Finally, if needed,cleanlightlywithsolvent-typecleaner.
CombinationStains: Likecandy,icecream,mayonnaise,chilisauceand
unknownstains.
Carefullyscrape off excessstain,thencleanwithcoolwater
dry.
If astainremains,cleanitwithsolvent-typecleaner.
Cleaning Vinyl or Leather
Just use warm water and a clean cloth.
Rubwithaclean,dampcloth
more than once.
to removedirt.Youmayhave
and allowto
to do it
Thingsliketar,asphaltandshoepolishwillstainifyoudon’tgetthem
off quickly.Useacleanclothandsolvent-typevinyl/leathercleaner.
Cleaning the Top of the Instrument Panel
Useonlymildsoapandwatertocleanthetopsurfaces
of the instrument
or waxesmaycauseannoyingreflectionsin
panel.Sprayscontainingsilicones
to seethroughthewindshieldunder
thewindshieldandevenmakeitdifficult
certainconditions.
Care of Safety Belts
Keepbeltscleanand
dry.
CAUTION
*
Do notbleach or dye safety’belts. If youdo, it mayseverelyweaken
c L them. In acrashtheymightnotbeable
to provide,adequate
protection.Cleansafetybeltsonlywithmildsoapandlukewarm
water.
6-55
I
I
Service & Appearance Care
Glass
Glassshouldbecleanedoften.
GMGlassCleaner (GM Part No. 1050427) or
aliquidhouseholdglasscleanerwillremovenormaltobaccosmokeanddust
films.
Don’tuseabrasivecleanersonglass,becausetheymaycausescratches.
Avoidplacingdecalsontheinsiderearwindow,sincetheymayhave
scraped off later.
to be
If abrasivecleanersareusedontheinsideoftherearwindow,anelectric
defoggerelementmaybedamaged.Anytemporarylicenseshouldnotbe
attached across the defogger grid.
Cleaning the Outside of fhe Windshield, Backglass and Wiper
Blades
If thewindshield is notclearafterusingthewindshieldwasher,or
if the wiper
blade chatters whenrunning,waxorothermaterialmaybeonthebladeor
windshield.
Cleantheoutside of thewindshieldwithGMWindshieldCleaner,Bon-Ami
if beadsdo not
Powder@ (GM Part No. 1050011). Thewindshieldisclean
formwhenyourinseitwithwater.
Cleanthebladebywipingvigorouslywithaclothsoaked
in fullstrength
windshield washersolvent.Thenrinsethebladewithwater.
Wiperbladesshouldbecheckedonaregularbasisandreplacedwhenworn.
Cleaning the Outside of Your Vehicle
Thepaintfinishonyourvehicleprovidesbeauty,depth
retentionanddurability.
ofcolor,gloss
Washing Your Vehicle
The best way to preserveyourvehicle’sfinish
is to keep it cleanbywashing
it often withlukewarm or cold water.
Don’twashyourvehicleinthedirectrays
of thesun.Don’tusestrongsoaps
or chemicaldetergents.Useliquidhand,dishorcarwashing(non-detergent)
or abrasives.Allcleaning
soaps.Don’tusecleaningagentsthatcontainacid
or
agentsshouldbeflushedpromptlyandnotallowedtodryonthesurface,
they could stain.Drythefinishwitha
soft, cleanchamoisora 100% cotton
towel to avoid surface scratches and water spotting.
to enter your vehicle.
High pressure vehicle washes may cause water
Finish Care
Occasionalwaxing or mild polishing ofyourvehiclemaybenecessaryto
removeresiduefromthepaintfinish.
You canget GM approvedcleaning
productsfromyourdealer.(See“AppearanceCareandMaterials”inthe
Index.)
6-56
Your vehiclehasa“basecoat/clearcoat”finish.Theclearcoatgivesmore
depth and glosstothecoloredbasecoat.
-
-
NU I I L t
Machine compounding or aggressive polishing on a basecoatklearcoat
paintfinishmaydullthefinish
or leaveswirlmarks.
Protecting Exterior Bright Metal Parts
Brightmetalpartsshouldbecleanedregularlytokeeptheirluster.Washing
GM Chrome
withwateris allthatisusuallyneeded.However,youmayuse
Polishonchrome or stainlesssteeltrim,ifnecessary.
Usespecialcarewithaluminumtrim.
To avoiddamagingprotectivetrim,never
useauto or chromepolish,steam or causticsoap to cleanaluminum. A
coating ofwax,rubbedtoahighpolish,
isrecommendedforallbrightmetal
parts.
Aluminum Wheels (If So Equipped)
Youraluminumwheelshaveaprotectivecoatingsimilartothepaintedsurface
or other
ofyourvehicle.Don’tusestrongsoaps,chemicals,chromepolish,
abrasivecleanersonthembecauseyoucoulddamagethiscoating.After
rinsingthoroughly,awaxmaybeapplied.
NOTICE
Weatherstrips
Theseareplaceswhereglass
or metalmeetsrubber.Siliconegreasethere
or squeak.Applysilicone
willmakethemlastlonger,sealbetter,andnotstick
greasewithacleanclothatleasteverysixmonths.
Sheet Metal Damage
If yourvehicleisdamagedandrequiressheetmetalrepair
or replacement,
makesurethebodyrepairshopappliesanti-corrosionmaterialtotheparts
repaired or replaced to restorecorrosionprotection.
Foreign Material
Calciumchlorideandothersalts,icemeltingagents,roadoilandtar,tree
sap,birddroppings,chemicalsfromindustrialchimneys,andotherforeign
if theyremainonpaintedsurfaces.
matter can damage your vehicle’s finish
Usecleanersthataremarkedsafeforpaintedsurfacesforthesestains.
6-57
Service & Appearance Cam
Finish Damage
Any stone chips, fractures or deep scratches
in the finish should be repaired
rightaway.Baremetalwillcorrodequicklyandmaydevelopintoamajor
repair expense.
Minorchipsandscratchescanberepairedwithtouch-upmaterialsavailable
fromyourdealer or other service outlets. Larger areas of finish damage can
becorrectedinyourdealer'sbodyandpaintshop.
Underbody Maintenance
Chemicalsusedforiceandsnowremovalanddustcontrolcancollectonthe
underbody. If thesearenotremoved,acceleratedcorrosion(rust)canoccur
ontheunderbodypartssuchasfuellines,frame,floorpan,andexhaust
systemeventhoughtheyhavecorrosionprotection.
Atleasteveryspring,flushthesematerialsfromtheunderbodywithplain
water.Cleananyareaswheremudandotherdebriscancollect.Dirtpacked
in closedareasoftheframeshouldbeloosenedbeforebeingflushed.Your
do thisforyou.
dealer or anunderbodyvehiclewashingsystemcan
Fiberglass Springs
I NOTICE
Don'tusecorrosive or acidiccleaningagents,enginedegreasers,aluminum
. ' an
fiberglasssprings;
t' r'll
cleaningagents or 0'' r hars'solven'
damage the springs.
Chemical Paint Spotting
Someweatherandatmosphericconditionscancreateachemicalfallout.
Airbornepollutantsfalluponandattackpaintedsurfacesonyourvehicle.This
damagecantake two forms:blotchy,ringlet-shapeddiscolorations,andsmall
irregular dark spots etched into the paint surface.
will repair, at
Althoughnodefectinthepaintjobcausedthis,GeneralMotors
nocharge to theowner,thesurfacesofnewvehiclesdamagedbythisfallout
conditionwithin 12 months or 12,000 miles (20 000 km)ofpurchase,
whichever comes first.
6-58
Appearance Care Materials Chart
I
II
SIZE
16 oz.
(0.473L)
16 oz.
(0.473L)
16 oz.
1050174
(0.473L)
32 oz.
1050214 (0.946L)
16 02.
1050244
(0.473L)
23 oz.
1050427 (0.680L)
6 Ibs.
1050429
(2,72kg)
c
I
1050729
1051055
8 oz.
(0.237L)
16 oz.
(0.473L)
8 oz.
(0.237L)
16 oz.
(0.473L)
16 oz.
(0.473L)
DESCRIPTION
Tar andRoad
OilRemover
ChromeCleaner
andPolish
WhiteSidewall
TireCleaner
VinyVLeather
Cleaner
Fabric Cleaner
USAGE
Removesoldwaxes,polishes,tar
androad oil
Removesrustandcorrosionon
chromeandstainlesssteel
Cleans white and black tires
Vinyl Top
Cleaner
Preservatone
Cleaning of vinyl tops
Spotandstainremovaloncloth
and fabric
Glass cleaning and spot cleaning
GlassCleaner
on vinyls
Multi-Purpose
Cleansvinylandclothondoortrim,
Powder Cleaner seats,andcarpet-also
tiresand
SpotLifter
Wash-Wax
(conc.)
MagicMirror
Cleaner-Polish
I
I
pExterior
olish
6-59
cleaner
Vehicle Identification Number (VIN)
-
.
.
KO641
Thisisthelegalidentifierfor
yourvehicle. It appearsonaplateinthefront
You cansee it if you
corner of theinstrumentpanel,onthedriver'sside.
look throughthewindshieldfromoutsideyourvehicle.TheVINalsoappears
onthe Vehicle CertificationandServicePartslabelsandthecertificatesof
titleandregistration.
Engine Identification
The eighth character in yourVIN is the engine code for your GM engine.
Thiscodewillhelpyouidentifyyourengine,specifications,andreplacement
parts in thissection.
6-60
.
.
I
5
Y
I
7
I I
PO
6-61
Service & Appearance Care
Service Parts Identification Label
I Service
Parts Identification
DO NOT REMOVE
K2680
You’ll findthislabel ontheinsideofthegloveboxdoor.It’sveryhelpful
you everneedtoorder
parts. Onthislabelis:
if
Your VIN.
Its modeldesignation.
Paintinformation.
A list of allproductionoptionsandspecial
Besurethatthislabel
equipment.
is notremovedfromthevehicle.
Add-on Electrical Equipment
Don’t add anything electrical to your vehicle unless you check with your
dealer first. Some electrical equipment can damage your vehicle and the
can jl keep
damage
wouldn’t
be
covered
by
your
wart
Some
other things from working as they should.
*
Fuses and Circuit Breakers
Thewiringcircuits in your vehicle are protected from short circuits
by a
combinationoffuses,circuitbreakers,andfusiblethermallinks
in thewiring
itself.Thisgreatlyreducesthechance
of firescausedbyelectricalproblems.
See“FusesandCircuitBreakers”intheIndexformoreinformation.
6-62
Headlights
Theheadlightwiringisprotectedbyacircuitbreaker
in thelightswitch. An
to goonand off, orinsomecasesto
electricaloverloadwillcausethelights
remain off. If thishappens,haveyourheadlightwiringcheckedrightaway.
Windshield Wipers
Thewindshieldwipermotor is protectedbyacircuitbreakerandafuse.
themotoroverheatsduetoheavysnow,etc.,thewiperwillstopuntilthe
motorcools.Iftheoverloadiscausedbysomeelectricalproblemandnot
snow,etc.,besure
toget it fixed.
If
Power Windows and Other Power Options
Circuitbreakersinthefusepanelprotectthepowerwindowsandotherpower
accessories.Whenthecurrentloadistooheavy,thecircuitbreakeropens
or goesaway.
andcloses,protectingthecircuituntiltheproblemisfixed
Trailer Wiring Harness
Theoptionalseven-wiretrailerwiringharnessisprotectedbyanin-linefuse
inthebatteryfeedwire.Thisfuseisnearthejunctionblock.See“Trailer
WiringHarness”intheIndex.
Fuse Block
K3629
Thefuseblockisundertheinstrumentpanelonthedriver’sside.
You can
removethecoverwith a screwdriverandthenremovefuseswithafuse
extractor. To removefuses if youdon’thave one, holdtheend of thefuse
betweenyourthumbandindexfingerandpullstraightout.
6-63
Service & Appearance Cam
Besuretousethecorrectfuse.
If youeverhaveaproblemontheroadand
don’thaveasparefuse,youcan“borrow”one
of thecorrectvalue.Justpick
some feature of your vehiclethatyoucangetalongwithout-liketheradioor
it
cigarette lighter-and useitsfuse, if it is of thevalueyouneed..Replace
in theIndexformore
assoon as youcan. See“FusesandCircuitBreakers”
information.
Capacities and Specification Charts
Replacement Parfs
Replacementpartnumberslisted in thissectionarebasedonthelatest
If a
information available at the time of printing, and are subject to change.
part listed in thismanual is notthesameasthepartused
in your vehicle
GM
when it wasbuilt,or if youhaveanyquestions,pleasecontactyour
dealer.
Engine Identification
IGINEIDENTIFICATION
VIN
Liter
Fuel
Engine
Type
System
Displacement
Code
Z
TBI*
V6
4.3L
CPI**
V6 4.3L W
* ThrottleBodyElectronicFuelInjection
** CentralPortElectronicFuelInjection
Produced
Emissions
BY
us.
L.D.
L.D.
U.S.
~0004
Wheel Nut Torque
I
Optional
Wheel
or
Base
I
I
100 ft.(140
Ibs.
N-m)
I
TO216I
Cooling System
QUANTITY
WithRearHeater
WithoutRearHeater
ENGINE VIN CODE
(12.8 Liters) 16.5 Quarts (I 5.5 Liters) 13.5 Q
4.3L I
Z
13.5 Quarts (12.8 Liters) 16.5 Quarts (15.5 Liters)
4.3L I
w
All quantitiesareapproximate.
MUST bechecked.
Afterrefill,thelevel
TO006
6-64
Air Conditioning Refrigerants
Not all air conditioning refrigerants are the same.
If the air conditioning
system in yourvehicleneedsrefrigerant,besuretheproperrefrigerant
used. If you’renotsure,askyourGMdealer.
is
Air Conditioning Refrigerant Capacity
TYPE
R-12
R-12
3.00 Ibs. (1.4 kg)
3.75 Ibs. (1.7 kg)
Crankcase
QUANTITY
Without
Filter
ENGINE VINCODE
Z
4.3L
4 Quarts (3.8 Liters)
4.3L
W
4 Quarts (3.8 Liters)
All quantitiesareapproximate.
MUST bechecked.
Afterrefill,thelevel
I
Filter
With
4.5Quarts (4.3 Liters)
4.5Quarts (4.3 Liters)
TO18E
Fuel Tank
TYPE
I
QUANTITY
27 Gallons (102 Liters)
Standard
Quantity is approximate.
TO187
6-65
I
Service & Appearance Care
Light Bulb Data
LamporBulb
ExteriorLights:
Headlamps
Quantity
Trade
No.
PowerRating
at 12.8V, Watts
2
2
6052
H6054
65/55
65/35
CandlePower
3212
3212
2
32
2
Halogen
Park, Signal Lamp 2 2057
Tail,StopLamps
MarkerLamps
Lamp
InteriorLights:
DomeLamps(w/oRoofConsole)
DomeLamps (with Roof Console)
I Glove Box LamD
Lamps
Mirror
Vanity
I Visor
StepwellLamp
ReadingLamp(with Roof Console)
ReadingLamp (wlo RoofConsole)
AshtrayLamp
Heater or N C Control
InstrumentCluster Lightst
GeneratorIndicatorLamp’
InstrumentClusterIllum.’
HeadlampBeamIndicatorLamp’
HeadlampBeamIndicatorLamp‘
MalfunctionIndicator Lamp
(Service EngineSoon)’
MalfunctionIndicator Lamp
(ServiceEngineSoon)*
DirectionalIndicator‘
DirectionalIndicato?
BrakeWarning Indicator Lamp’
BrakeWarning Indicator Lamp2
TransmissionIndicatorDial2
2
2057
4
1 94
2Back-upLamp
1156
1License 194
3
I
I
l
4
3
4
2
1
1
1
1
1
l
I
211-2
194
194
1-2
I
I
161
194 2
PC74
PC94 6
PC74
PC161
PC74
12 211-2 2
12
2
2
6 21
6 906
6 906
1
2
.?
2
.7
1
.7
2 PC1 94 1
2
2
1
1
1
6-66
PC74
PC194
PC74
PC1 94
PC1 94
.?
2
.7
2
2
'With StandardInstrumentCluster
'WithDigitalInstrumentCluster
t A PC partnumberindicatesthatthebulb
mustbereplacedassuch.
and baseareoneassemblyand
TO-
6-67
Service & Appearance Care
Fuses and Circuit Breakers Usage
Name
Inst.Lps.
Pwr.Acc.
Horn-Dm.
Gages
Aux.Htr. N C
Stop-Haz.
TailLps.
Turn BIU
Htr. NC
Radio
ECM B
ECM I
Pwr. Wdo.
Wiper
Brake
CircuitsProtected
InstrumentPanelLamps,RadioDial
Lamps,HeaterLamps
PowerDoorLocks,PowerSeat
HornRelay, Digital Clock,Cigarette
Lighter,DomeLights,RadioMemory,
GloveBoxLamp
InstrumentClusterGages,Brake
Switch,AudioAlarm,HeadlightSwitch
Illumination, AshTrayIllumination,
CruiseControl
AuxiliaryHeater-Rear N C (if equipped)
StopLamps,HazardFlash,
Digital
InstrumentCluster
HeadlampSwitch,TailandParking
Lamps
DirectionSignalFlash,BackUp
Lamps
FrontHeater & Air Conditioning
Radio
Engine ControlModule
EngineControlModule
Power Windows
WindshieldWiper
Anti-LockBrakeSystem,
Speedometer
FogLamps
CanadianDaytimeRunningLights
PowerMirror
TrailerWirinaHarness
Fog Lamps***
DRL**
Pow. Mirrors*
Trailer*
*In-line fuse.
**Canada only.
“*In-linefuse(certainmodels).
Fuse
10 Amp
Circuit
Breaker
30 Amp
30 Amp
20 Amp
25 Amp
20 Amp
20 Amp
20 Amp
20 Amp
10 Amp
10 Amp
10 Amp
30 Amp
25 Amp
15 Amp
15 Amp
10 Amp
3 Amp
30 Amr,
TO007
6-68
lo
I
1
RNA
I
I
- smzi.I,
I
I
TURN
RADIO
.-
ECM B
ECMI
30 PWR WDO
WIPER 1
[IIII
PO470
6-69
Service & Appearance Care
Service Replacement Parf and Filter
Recommendations Table
Air
PCV
Cleaner
Valve
Filter
CV789C
4.3L (Z) PF51 A773C
A1163C PF51
4.3L (W)
*Use copper-cored resistor type spark plugs.
Engine
(VIN)
Oil
Filter
Spark"
Plugs
Fuel
Filter
CR43TS
.CR43TS CV892C
Radiator
cap
RC36 GF48
RC36 GF48
TO005
6-70
This section covers the maintenance required for
your vehicle. Your vehicle
needs these services to retain its safety.dependability.andemissioncontrol
performance.
A Word About Maintenance .................................................................................
7-2
Your Vehicle and the Environment ......................................................................7-2
Scheduled Maintenance Services ........................................................................
7-3
Selecting The Proper Maintenance Schedule .................................................7-3
Maintenance Schedule I ................................................................................7-4
Maintenance Schedule II ...............................................................................
7-6
Explanation of Scheduled Maintenance Services ...........................................7-8
Owner Checks and Services ..............................................................................
7-11
At Least Once a Month ..................................................................................7-11
At Least Once a Year ....................................................................................7-11
Periodic Maintenance Inspections ......................................................................
7-13
Recommended Fluids & Lubricants................................................................... 7-14
Maintenance Record ........................................................................................... 7-16
Service Station Checks .......................................................................................7-17
Have you purchased
the
GM Protection
Plan?
The Plan
supplements your new vehicle warranties . See your GM dealer
for details.
TO248
7-1
Scheduled Maintenance Services
A Word About Maintenance
Weat GeneralMotorswant to helpyoukeepyourvehicleingoodworking
condition.But we don’tknowexactlyhowyou’lldriveit.
Youmay drivevery
shortdistancesonlyafewtimesaweek.Oryoumaydrivelongdistancesall
vehicleinmaking
thetime in veryhot,dustyweather.Youmayuseyour
it towork, to doerrands,or in manyotherways.
deliveries.Oryoumaydrive
Because of allthedifferent wayspeopleusetheirGMvehicles,maintenance
needs vary.Youmay evenneedmorefrequentchecksandreplacementsthan
youwillfind in theschedules in thissection. So pleasereadthissectionand
to keepyourvehicle
notehowyoudrive.Ifyouhaveanyquestionsonhow
GM ownerschoose
in goodcondition,seeyour GMdealer,theplacemany
to havetheirmaintenanceworkdone.
Yourdealercanbe
reliedupon to use
proper parts and practices.
Your Vehicle And The Environment
Propervehiclemaintenancenotonlyhelpskeepyourvehicle
in goodworking
All recommendedmaintenance
condition,but it alsohelpstheenvironment.
proceduresareimportant.Impropervehiclemaintenanceortheremovalof
important components can significantly affect the quality
of the air we breathe.
Improperfluidlevelsoreventhewrongtireinflationcanincreasethe
level of
emissionsfromyourvehicle. To helpprotectourenvironment,and
to help
keepyourvehicleingoodcondition,pleasemaintainyourvehicleproperly.
CAUTION
.
Performingmaintenanceworkonavehiclecanbedangerous.
trying to dosome jobs,youcanbeseriouslyinjured.
Do yourown
maintenanceworkonly if youhavethereauiredknow-howandthe
IOU have ar
doubt. have
proper tools andequipmentfortheiob.
aqualifiedtechniciandothe WOrK.
...
If youareskilledenough
to dosomeworkonyourvehicle,youwillprobably
want to gettheserviceinformation GM publishes. You will find alist of
publicationsand how to getthem in Section 8, “CustomerAssistance
Information”.See“ServicePublications’’
in theIndex.
TheMaintenanceRecordprovidesaplaceforyou
to recordthemaintenance
performedonyourvehicle.Wheneveranymaintenance
is performed,besure
to write it down in thissection.Thiswillhelpyoudeterminewhenyournext
maintenanceshouldbedone. In addition, it is agoodidea to keepyour
maintenancereceipts.Theymaybeneeded
to qualifyyourvehiclefor
warrantyrepairs.
7-2
I
Scheduled Maintenance Services
Thispart tells youthemaintenanceservicesyoushouldhavedoneandwhen
you should schedulethem. Your GM dealer knows your vehicle best and
wantsyou to be happywith it. If yougo to yourdealerfor all yourservice
needs,you’llknowthatGM-trainedandsupportedservicepeoplewillperform
the work usinggenuineGMparts.
These schedules are for vehicles that:
carrypassengersandcargowithintherecommendedlimits.
theselimitsonyourvehicle’sCertificationLabel.See“Loading
Vehicle” in theIndex.
You will find
Your
aredrivenonregularroadsurfaces,andwithinlegaldrivinglimits,as
described in Section 4, “Your DrivingandtheRoad”.
use theproperfuel.See“Fuel”
in theIndex.
Selecting The Proper Maintenance Schedule
Your drivingconditionsandhowyouuseyourvehicle
whichschedule to use.Theschedulesarefoundlater
will helpyoudetermine
in this section.
MAINTENANCESCHEDULE I
Is anyone of these true for your vehicle?
Mosttripsarelessthan
4 miles (6 kilometers).
Mosttripsarelessthan
10 miles (16 kilometers)andtheoutside
temperaturesarebelowfreezing.
Theengine is atlowspeedmost
of thetime(as
door-to-door delivery, or othercommercialuses).
in stop-and-gotraffic,
You operate in dustyareasfrequently.
Youtow
atrailer.
If anyone(ormore)oftheseistrueforyourdriving,followSchedule
chartforSchedule I has plus signs (t).
I. The
MAINTENANCESCHEDULE II
Follow Schedule II ONLY if none of theaboveconditionsaretrue.Thechart
forSchedule II hasdots (.).
7-3
-
Scheduled Maintenance Services
1 MAINTENANCE SERVICESFOR
I
I Ifyour
driving conditionsmeet those specified in “ScheduledMaintenance
FOOTNOTES:
*AnEmission Control Service
**See“Explanation of ScheduledMaintenanceServices”
in thissection.
TO281
7-4
MAINTENANCESCHEDULE I
t
t
THESERVICESSHOWNONTHISCHART
UP TO 60,000 MILES (100000 km)
ARE TO BE DONE AFTER 60,000 MILES AT THESAMEINTERVALS.
TO282
7-5
xle
Scheduled Maintenance Services
SCHEDULEDMAINTENANCESERVICES FOR
I
If yourdrivingconditionsmeetthosespecifiedin“ScheduledMaintenance
Services”inthisSection,useMaintenance
Sc
SparkPlugWireInspection*
EngineTimingCheck*
FuelTank,CapandLinesInspection*
EngineAccessoryDriveBeltInspection*
and 13 Tire
14 Drive
15 Brake Systems Inspection**
FOOTNOTES:
*AnEmissionControlService
**See“Explanation of ScheduledMaintenanceServices”
-
e
e
-
in thissection.
TO285
7-6
MAINTENANCESCHEDULE II
36 37.5 39
60 62.5 65
e
0
€€€
e
0
THESERVICESSHOWNONTHISCHART
UP TO 60,000 MILES (100000 km)
ARETOBE DONE AFTER 60,000 MILES AT THESAMEINTERVALS.
T028t
7-7
Scheduled Maintenance Services
Explanation Of Scheduled Maintenance Services
Belowareexplanations of theserviceslistedinthemaintenancecharts.
Theproperfluidsandlubricants
to usearelistedinthissection.Makesure
whoeverservicesyourvehicleusesthese.Allpartsshouldbereplacedand
allnecessaryrepairsdonebeforeyouoranyoneelsedrivesthevehicle.
1. ENGINEOILAND
OIL FILTERCHANGE* -ALWAYSUSE SG OR
SG/CEQUALITY,ENERGYCONSERVING
II OILS OF THEPROPER
VISCOSITY. To determinethepreferredviscosityoilforyourvehicle’s
engine(e.g.SAE5W-30).See“EngineOil”
in theIndex.
2. CHASSISLUBRICATION -Lubricatethefrontsuspension,kingpin
bushings,steeringlinkage,transfercaseshiftlinkage,parkingbrakecable
guides,propshaftsplines,universaljointsandbrakepedalspringsatthe
intervalsspecifiedonthepropermaintenancescheduleoratevery
engineoilchange,whichevercomesfirst.
Balljointsandkingpinbushingsshouldnotbelubricatedunlesstheir
iscold,let
temperatureis 10°F (-12”C),or higher.Whentheweather
themwarmupbeforelubricationortheycouldbedamaged.
Also, besuretocheckallthevehiclefluidlevelsatthistime.
3. COOLINGSYSTEMSERVICE* -Drain,flushandrefillsystemwithnew
coolant.SeetheIndexunder“EngineCoolant”forthepropercoolant
andmixture to useinyourvehicle.
if theyarecracked,swollen,or
Alsoinspectthehosesandreplacethem
deteriorated.Tightenallhoseclamps.Cleantheoutside
of theradiator
andairconditioningcondenser. Wash theradiatorneck. To ensureproper
operation,pressuretesttheradiatorandcap.
4. AIRCLEANERFILTERREPLACEMENT*
-Replaceatspecified
intervals.Replacemoreoftenunderdustyconditions.Askyourdealerfor
theproperreplacementintervalsforyourdrivingconditions.
5. FRONTWHEELBEARINGREPACK(2-WHEELDRIVEONLY)
-Clean
andrepackthefrontwheelbearingsateachbrakerelining,
oratthe
specifiedinterval,whichevercomesfirst.
* AnEmissionControlService
6. TRANSMISSIONSERVICE
Changethetransmissionfluidandfilterevery15,000miles(25
000 km).
If the vehicle is mainlydrivenunderoneormoreoftheseconditions:
Inheavycitytraffic.
Wheretheoutsidetemperatureregularlyreaches90°F(32°C)or
higher.
Inhillyormountainousterrain.
Frequenttrailerpulling.
Usessuchastaxi,police,deliveryorothercommercialservice.
If thevehicleisnotusedmainlyunderany
of theseconditions,change
(50 000 km).See“Automatic
thefluidandfilterevery30,000miles
TransmissionFluid’’intheIndexformoreinformation.
7. FUELFILTERREPLACEMENT*
intervalorsooner if clogged.
-Replacethefuelfilteratthespecified
8. SPARKPLUGSREPLACEMENT* -Replacesparkplugswiththetype
listed in Section 6. See“SpecificationCharts’’ in theIndex.
9. SPARKPLUGWIREINSPECTION*
-Cleanwiresandinspectforburns,
fit atthedistributorandat
cracksorotherdamage.Checkthewireboot
thesparkplugs.Replacewiresasneeded.
10. ENGINETIMINGCHECKANDDISTRIBUTORCHECK
-Adjusttiming
underhoodlabelspecifications.Inspecttheinsideandoutside
of the
distributorcapandrotorforcracks,carbontrackingandcorrosion.Clean
orreplaceasneeded.
-Inspectthefueltank,
11. FUELTANK,CAPANDLINESINSPECTION*
capandlinesfordamageorleaks.Removefuelcap,inspectgasketfor
anevenfillerneckimprint,andanydamage.Replacepartsasneeded.
-Inspectbelt.Look
12. ENGINEACCESSORYDRIVEBELTINSPECTION*
forcracks,fraying,wear,andpropertension.Adjustorreplaceas
needed.
* AnEmissionControlService
7-9
to
13. TIRE AND WHEEL ROTATIONAN-INSPECTION
-Forproperwear
6,000 miles(1 0 000
andmaximumtirelife,rotatetiresatthefirst
kilometers)forSchedule I or 7,500 miles(12 500 kilometers)for
Schedule II andthenevery 7,500 miles(12 500 kilometers)thereafter.
6. Checktiresfor
FollowtheinstructionsandpatternsshowninSection
unevenwearordamage. If irregularorprematurewearisapparent,
in
checkwheelalignment. Also, checkfordamagedwheels.See“Tires”
theIndexformoreinformation.
14. DRIVEAXLESERVICE -Check readfrontaxlefluidlevelandaddas
needed.Checkconstantvelocityjointsandaxlesealsforleaking.
Lockingdifferential -Drain fluidatfirstoilchangeandrefill.Check
fluidlevelandaddasneededatsubsequentoilchanges.Industy
areas,or trailertowingapplicationsdrainfluidat
every15,000miles
(24135kilometers)andrefi1l.t
Standarddifferential -Check fluidlevelandaddasneededat
everyoilchange.Industyareas,ortrailertowingapplications,drain
fluidevery 15,000 miles(24135kilometers)andrefi1l.t
15. BRAKESYSTEMINSPECTION -When theengineoilischanged,
inspectthelinesandhosesforproperhookup,binding,leaks,cracks,
chafing,etc.Checktheparkingbrakeadjustment,andthefluidlevel
themastercylinder. A lowfluidlevelcanindicateworndiscbrakepads
whichmayneed to be serviced$
in
Whenthewheelsareremovedforrotation,inspectdiscbrakepadsfor
Also inspectdrumbrakeliningsfor
wearandrotorsforsurfacecondition.
wearandcracks.Inspectotherbrakeparts,includingdrums,wheel
cylinders,parkingbrake,etc.,atthesametime.
Inspectbrakesmoreoften if drivinghabitsorconditionsresultin
frequentbraking.
t A fluid loss inthesesystemsmayindicateaproblem.Havetheminspected
andrepairedatonce.
7-1 0
Owner Checks and Services
Listedbelowareownerchecksandserviceswhichwould
bemadeatthe
time period specified to helpensurepropersafety,emissionperformance,and
dependability ofyourvehicle.
Besureanynecessaryrepairsarecompletedatonce.Wheneveranyfluids
or lubricantsareaddedtoyourvehicle,makesuretheyaretheproperones,
asshown in thissection.
At Least Once a Month
Tireinflationpressurecheck -Check thetiresforproperinflation.
If they
are low, inflatethem to the levelspecified on the CertificationRire label or in
Section 6. See“Inflation-TirePressure”intheIndex.
At
Least Once a Year
Key lock cylinderlubrication -Lubricatekeylockcylinderswithone
lubricantsrecommended in thissection.
of the
Transmissionneutralstartswitchoperation
I
A
L
Whenyouaredoingthischeck,thevehiclecouldmovesuddenly.
it does,you or otherscouldbeinjured.Followthesteps
1. Beforeyoustart,besureyouhaveenough
If
below.
roomaroundthevehicle.
2. Firmlyapply both themanualparkingbrakeandtheregularbrake.See
“Brakes”and“ParkingBrake”
in the Index. Do notusetheaccelerator
pedal.
3. Beready to turn off theengineimmediately
4. Try to starttheengineineach
(Park)or N (Neutral).
if it starts.
gear.The startershould workonly in P
Steeringcolumnlockoperation -Whileparked,try
to turn thekey to Lock
in eachgearshiftposition.Thekeyshouldturn
to Lock onlywhenthegear
in Lock.
shiftis in P (Park).Thekeyshouldcomeoutonly
7-1 1
I
I
Scheduled Maintenance Services
Parkingbrakeandtransmission
P (Park)mechanismoperation
-
I CAUTION
/i\
I
Whenyouaredoingthischeck,yourvehiclecouldbegintomove.
Youor otherscouldbeinjuredandpropertycouldbedamaged.
Makesurethereisroominfrontofyourvehicleincaseyoubegin
to roll.Bereadytoapplytheregularbrakeatonceshouldthe
vehiclebegintomove.
Parkonafairlysteephill,withthevehiclefacingdownhill.Keepingyourfoot
ontheregularbrake,setthemanualparkingbrake.
To checktheparkingbrake:Withtheenginerunningandthe
transmissionin N (Neutral),slowlyremovefootpressurefromtheregular
brakepedal. Do thisuntilthevehicleisheldbytheparkingbrakeonly.
To checkthe P (Park)mechanism’sholdingability:Applytheregular
P (Park).Releasethemanualparkingbrake,then
brakeandshiftto
slowlyreleasetheregularbrake.
Lapandshoulderbeltsconditionandoperation
-Inspectbeltsystem,
including:webbing,buckles,latchplates,retractors,guideloopsandanchors.
if thewebbinghasbeencutorotherwise
Haveabeltassemblyreplaced
damaged.
Body LubricationService -Lubricateallbodydoorhingesincludingthe
tailgate,tailgatehandlepivotpoints,andtailgatemountedsparetirecarrier
equipped),lubricatethebodyhood,fueldoorandrearcompartmenthinges,
latches,anylocksandanymovingseat-hardware.Lubricatethehoodsafety
leverpivotandproprodpivot.Morefrequentlubricationmayberequired
whenexposedtoacorrosiveenvironment.
7-1 2
(if
Periodic Maintenance Inspections
Listedbelowareinspectionsandserviceswhichshould
beperformedatleast
twice a year (for instance, each spring or fall).
You should let your GM
dealer’s service department or other qualified service center
do these jobs.
Makesureanynecessaryrepairs
are completedatonce.
SteeringandSuspension lnspectiont -Inspect frontandrearsuspension
andsteeringsystemfordamaged,looseormissingparts,signs
ofwear or
lack of lubrication.Inspectpowersteeringlinesandhosesforproperhook-up,
binding,leaks,cracks,chafing,etc.(Onvehiclesequippedwithmanual
steering gear,check forsealleakage.)Lubricatethesteeringlinkage.
AcceleratorControl System -Lubricateallpivotpointswithengineoil,
exceptthe TBI throttleshaft. Do notlubricatethecampulley.Removeall
externaldepositsfrompulley. Do not oil anyacceleratororcruisecontrol
cables.Replaceanycablesthathave
high effortorexcessivewear.
ExhaustSystemInspection -Inspect thecompletesystemincludingthe
three-waycatalyticconverter.Inspect the bodyneartheexhaustsystem.Look
forbroken,damaged,missingorout-of-positionparts,aswellasopenseams,
holes,looseconnectionsorotherconditionswhichcouldcauseaheatbuildup
in the floor pan or could letexhaustfumesseepintothepassenger
compartments.
DriveAxleService -Check readfrontaxlefluidlevelandadd
Check constant velocity joints and axle seals for leaking.
as needed.
TransferCase(all-wheeldrive)
lnspectiont -Every 12 monthsorat oil
changeintervals,checkfrontaxleandtransfercaseandaddlubricantwhen
L Van)and allexposed
necessary. Oil thecontrolleverpivotpoint(except
controllinkage.Checkventhoseattransfercaseforkinksandproper
installation.
t A fluid loss in thesesystemsmayindicateaproblem.Havetheminspected
andrepairedatonce.
7-1 3
Scheduled Maintenance Services
Recommended Fluids & Lubricants
or
NOTE: Fluidsandlubricantsidentifiedbelowbyname,partnumber
specificationmaybeobtainedfromyour
GM Dealer.
FLUID/LUBRICANT
USAGE
Engine Oil
Goodwrench
GM Motor
Oil
equivalent
or
Service
API
for
SG
or SGlCE of therecommendedviscositv.
EngineCoolant
glycol base
Mixture of waterandagoodqualityethylene
antifreezeconforming to GM-6038-M(GMPartNo.1052103).
Hydraulic
Brake
Systems
Delco
Supreme
~
~~
I
ll@
brake
fluid
(GM
Part
No.
1052535
or
DOT-3).
ChassislubricantmeetingrequirementsofGM-6031-M(GM
PartNo.1052497).
ParkingBrakeCables
Power
Steering
System
GM
Power
Steering
Fluid
(GM
Part
No.
1050017)
or
equivalentconforming to GMspec9985010.
Manual
Steering
Gear
GM
Lubricant
(GM
Part
No.
1052182)
equivalent.
or
Automatic
Transmission
DEXRONB IIE Automatic
Transmission
Fluid
(GM
Part
No.
1051 855).
Differential:
a.
Standard
Axle
Rear
b. Locking
- Frontanda.SAE-80W-90gearlubricant(GMPartNo.1052271).
b. SAE-80W-90
lubricant
gear
1052271).
No.
Part
(GM
Transmission
No.
Part
Fluid
(GM
DexronB IIE Automatic
1051 855).
Transfer
Case
ColumnShift,PropellerShaftChassislubricantmeetingrequirementsofNLGlGrade
Slip Splines
and
Universal
Category
LB
or
GC-LB
(GM
Part
No.
1052497).
Joints.
2,
Hood Latch Assembly
a. Pivotsandspringanchora.Engine
b. Release
Chassis
Pawl
b.lubricant
meeting
requirements
oil (GM
Part
No.
1050109).
of GM-6031-M
(GMPartNo.1052497).
Front
Wheel
Bearings
Wheel
bearing
lubricant
meeting
requirements
NLGl
ofGrade
2,CategoryGCor
Constant
Velocity
U
GC-LB (GMPartNo.1051344).
I Joint
Chassislubricantmeetingrequirements
of
GM-6031-M
(GM
Part No. 1052497)
Automatic
Transmission
Shift
Engine
Linkage,FloorShiftLinkage,
HoodandDoorHinges,Body
DoorHingePins,FoldingSeat,
FuelDoorHinge
oil
(Continuednextpage)
TO279
7-1 4
Recommended Fluids & Lubricants
(Cont’d.)
I
USAGE
I
I
FLUID/LUBRICANT
KeyLockCylinders
GM Multi-Purposelubricant(GMPart No. 12345120)ora
synthetic light weight engine oil (SAE 5W-30).
ChassisLubrication
Chassislubricantmeetingrequirements
Part No. 1052497).
of GM-6031,(GM
No. 1051515)or
WindshieldWasherSolventandGMOptikIeenDwashersolvent(GMPart
Anti-freeze
No. 1052863) or equivalent.
Weatherstrip
Silicone
Part
grease
(GM
No. 1051516)
Part
De-lcer
(GM
Line
Gas
Line
Gas
No. 1052277)
Weather
Spray-A-Squeek
Strips Part
(GM
TO280
7-1 5
Scheduled Maintenance Services
Maintenance Record
Aftereach of theprecedingScheduledMaintenanceServicesisperformed,
recordthe date,odometerreading,servicesperformed(listitemnumbers)and
In addition,retain
whoperformedtheservicesintheappropriatecolumn.
copies ofyourreceipts. It issuggestedthatreceiptsbekeptwithyour
Owner’sManual.
I
TO260
7-1 6
Service Station Checks
It is important for you or asenricestationattendanttoperformthese
fill.
under-hoodchecksateachfuel
Checktheengine
oil levelandadd
ifnecessary.
Checktheenginecoolantlevelandaddifnecessary.
Checkthewindshieldwasherfluidlevel
and add ifnecessary.
See theseitems in theIndexforinformationonhow
7-1 7
to checkthem.
Scheduled Maintenance Services
Hood Release,
Lever
SW Parnn6-8
1
Engine Oil
See Page 6-9
I
PO466
Customer Assistance Information
Section
I
I .
HereyouwillfindouthowtocontactChevrolet
if youneedassistance.This
section also tellsyouhowtoobtainservicepublicationsandhowtoreport
anysafetydefects.
Customer Satisfaction Procedure .........................................................................
8-2
Customer Assistance for HearinglSpeech Impaired ...........................................
8-3
GM Participation in Better Business Bureau MediatiodArbitration Program....8-3
Reporting Safety Defects ......................................................................................
8-4
Roadside Assistance.............................................................................................
8-5
Service Publications .............................................................................................. 8-6
8-1
Cusfomer Assistance hformafion
Customer Satisfaction Pmcedum
Your satisfaction and goodwill are important to yourdealerandChevrolet.
Normally,anyconcernwiththesale,s
transaction or the operation ofyour
vehiclewillberesolvedbyyourdealer’sSalesorServiceDepartments.
of allconcerned,
Sometimes,however,despitethebestintentions
to your
misunderstandingscanoccur. If yourconcernhasnotbeenresolved
satisfaction,thefollowingstepsshouldbetaken:
STEP ONE -Discussyourconcernwithamemberofdealership
management.Complaintscanoftenbequicklyresolvedatthatlevel.
matterhasalreadybeenreviewedwiththeSales,Service,orPartsManager,
contact the owner of thedealership or theGeneralManager.
If the
STEP TWO -If aftercontactinga memberofDealershipManagement,
it
appears your concern cannot be resolved by the dealership without further
help, contact Chevrolet’s Customer Assistance Center by calling
1-800-222-1 020. In Canada, contact the GM ofCanadaCustomerAssistance
Center in Oshawabycalling 1-800-263-3777(English) or 1-800-263-7854
(French).
In PuertoRicoor U. S. VirginIslands, call
In Mexico,call(525)254-3777.
1-809-763-1315.Inallotheroverseaslocations,contactGMInternational
ExportSales in Canada by calling 1-416-644-4112 .
Forpromptassistance,pleasehavethefollowinginformationavailabletogive
theCustomerAssistanceRepresentative:
Yourname,address,telephonenumber
Vehicle Identification Number(This is availablefromthevehicle
registration or title, or the plate attached to the left top of the instrument
panel and visible through the windshield.)
Dealershipnameandlocation
Vehicledeliverydateandpresentmileage
Nature of concern
We encourageyoutocallthetoll-freenumberlistedpreviously
in order to
giveyourinquirypromptattention.However,
if youwishtowriteChevrolet,
writeto:ChevroletMotorDivision,ChevroletCustomerAssistanceCenter,
P.O.
Box7047,Troy, MI 48007-7047.
Alisting of all Chevroletofficesandofficesoutsidethe
U.S. whichcanassist
youcanalsobefoundinthewarrantybooklet.Theseservicesarenot
available in Canada.
8-2
WhencontactingChevrolet,pleaserememberthatyourconcernwilllikelybe
resolved in the dealership,usingthedealership'sfacilities,equipmentand
follow StepOnefirst if youhavea
personnel. That is whywesuggestyou
concern.
Customer Assistance for the Hearing or
Speech Impaired (TOO)
To assistownerswhohavehearingdifficulties,Chevrolethasinstalledspecial
TDD(TelecommunicationsDevicesfortheDeaf)equipmentatitsCustomer
or speechimpairedcustomerwhohasaccess
AssistanceCenter.Anyhearing
to aTDDorconventionalteletypewriter (TTY) cancommunicatewithChevrolet
bydialing:
.....................................................................1-800-TDD-CHEV
1-800-263-3830
In Canada ..........................................................................................
In the United States
GM Participation in Better Business
Bureau Mediation/Arbitration Program"
*Thisprogrammaynotbeavailable
in allstates,dependingonstate
Canadian owners refer to your warranty booklet.
GeneralMotorsreservestherighttochangeeligibilitylimitationsand/or
discontinueitsparticipation in thisprogram.
law.
to
OurexperiencehasshownthattheCustomerSatisfactionProcedure
describedearlier in thissectionhasbeenverysuccessful
in achieving
customersatisfaction. However, if youhavenotbeensubstantiallysatisfied,
Chevroletwantsyou to beaware ofGM's voluntaryparticipation in a
no-chargemediationlarbitrationprogramcalledBBB AUTOLINE. Thisprogram
is administered by theCouncil of BetterBusinessBureausthroughlocal
BetterBusinessBureaus.Theprogramcanresolveindividualdisputes
involvingvehiclerepairsandtheinterpretation
ofyourNewVehicle
Limited
Warranty.
We preferthatyounotresorttoBBB
AUTOLINE untilafterafinaldecision
is madeundertheCustomerSatisfactionProcedure.However,youmayfilea
claimatanytimebycontactingyourlocalBetterBusinessBureau
(BBB) at
the following toll-free number: 1-800-955-5100. For further information about
filingaclaim,you may alsowrite to: BBBAUTOHOTLINE, Council of Better
BusinessBureaus, 4200 WilsonBoulevard,Suite800,Arlington,Virginia
22203.
8-3
Customer Assistance lnformation
In ordertofileaclaim,youwillhave
to provideyournameandaddress,the
vehicleidentificationnumber(VIN) ofyourvehicle,and
astatementof the
nature ofyour complaint. BBB staffmaytry to helpresolveyourdispute
to
throughmediation. If mediation is notsuccessful,or if youdonotwish
participate in mediation,eligiblecustomersmaypresenttheircasetoan
impartialthird-partyarbitratorat an informalhearing.Thearbitratorwillrender
If youaccepta
adecisionin yourcase,whichyoumayacceptorreject.
validarbitratordecision, GM willbeboundbythatdecision.Theentiredispute
40 daysfromthetimeyoufile
settlementprocessshouldordinarilytakeabout
47 days if you did not
yourcomplaint to thetimeadecisionisrendered(or
first contact your dealer or Chevrolet).
We encourageyoutousethisprogrambeforeorinstead
of resorting to the
in mostjurisdictions
courts. We believe it offersadvantagesovercourts
because it isfast, free ofcharge,and informal(lawyersarenotusually
if youchoose).
present,althoughyoumayretain oneatyourexpense
Arbitrators make decisionsbased on theprincipals offairnessandequity,and
are not required to duplicate the functions of courts by strictly applying state
orfederal law. If youwish to go to court, however,wedonotrequirethat
youfirstfile a claimwith BBB AUTOLINE*unless state lawprovides
if youare
othetwise. Whateveryour preference maybe,rememberthat
unhappywiththeresults of BBB AUTO LINE, youcanstillgo to court
becauseanarbitrator’sdecision is bindingonGMbutnot
onyou,unlessyou
accept it.
Eligibility is limitedbyvehicleage/mileage,andotherfactors.Forfurther
BBB at 1-800-955-5100. Youmay
informationconcerningtheprogram,callthe
also call the Chevrolet Customer Assistance Center.
*Somestates mayrequirethatyoufileaclaimwith
resortingtostate-operatedprocedures(includingcourt).
BBB AUTOLINE before
Reporting Safety Defects to the United
States Government
If you believe that your vehicle has a defect which could cause a crash
or
couldcauseinjuryordeath,youshouldimmediatelyinformtheNational
HighwayTrafficSafetyAdministration(NHTSA),
in additiontonotifyingGeneral
Motors.
If NHTSAreceivessimilarcomplaints,
it mayopenaninvestigation,and
if it
findsthat a safetydefectexists in agroupofvehicles,
it mayordera recall
andremedycampaign.However,NHTSAcannotbecome
involved in individual
problemsbetweenyou,yourdealer,orGeneralMotors.
8-4
To contact NHTSA,youmayeithercalltheAutoSafetyHotlinetoll-freeat
1-800-424-9393 (or 366-01 23 in the Washington, DCarea)orwriteto:
NHTSA, U.S. Department of Transportation,Washington, D.C. 20590. You can
also _obtain other information about motor vehicle safety from the Hotline.
Reporting Safety Defects to the
Canadian Government
If youlive in Canada,andyoubelievethatyourvehiclehas
a safetydefect,
youshouldimmediatelynotifyTransportCanada,
in additiontonotifying
GeneralMotors of CanadaLimited. Youmay writeto:TransportCanadaat
Box8880,Ottawa,OntarioK1G3J2.
Reporting Safety Defects to General
Motors
In addition to notifying NHTSA(orTransportCanada)in
a situationlikethis,
we certainlyhopeyou’llnotifyus.Pleasecallusat1-800-222-1020,
orwrite:
ChevroletMotorDivision,CustomerAssistanceCenter,PostOfficeBox7047,
Troy, Michigan48007-7047. In Canada,pleasecallusat1-800-263-3777
(English)or1-800-263-7854(French). Or, write:GeneralMotorsofCanada
Limited,CustomerAssistanceCenter,1908ColonelSamDrive,Oshawa,
Ontario L1H8P7.
Chevmlet/Geo Roadside Assistance
To enhanceChevrolet’sstrongcommitmenttocustomersatisfaction,Chevrolet
is excited to announcetheestablishment of theChevroleVGeoRoadside
AssistanceCenter. As theownerof a 1993ChevroleVGeo,membershipin
RoadsideAssistanceisfree.
RoadsideAssistanceisavailable 24 hours a day,365days a year,by calling
1-800-CHEV USA (1-800-243-8872).Thistoll-freenumberwillprovideyou
If your
over-the-phoneroadsideassistancewithminormechanicalproblems.
problemcannotberesolvedoverthephone,ouradvisorshaveaccessto
a
nationwide network of dealerrecommendedserviceproviders.Thefollowing
services are available:
Towing
Locksmith
Tirerepair
Glassreplacement
Rentalcarortaxi
Additionalservices asnecessary
8-5
Customer Assistance lnformation
The Roadside Assistance Center uses companies that will provide you with
qualityandpriorityservice.Whenroadsideservicesarerequired,ouradvisors
will explainanypaymentobligationsthatmaybeincurredforutilizingoutside
services.
Forpromptassistancewhencalling,pleasehavethefollowingavailable
givetheadvisor:
to
VehicleIdentificationNumber
Licenseplatenumber
Vehiclecolor
Vehiclelocation
Telephonenumberwhereyoucan
bereached
Description of problem
Please refer to theRoadsideAssistancebrochureinsideyourportfolioforfull
programdetails.
In Canada,call1-800-268-6800fordetailsonRoadsideAssistance.
Service Publications
lnformationonhow to obtainProductServicePublications,Subscriptionsand
Indexesasdescribedbelow is applicable only in the fifty U.S. states (and the
District ofColumbia) and only for light trucks with
GVWR lessthan 10,000
pounds (4536 kg).
In Canada,informationpertaining to ProductServiceBulletinsandIndexes
to: GeneralMotors of CanadaLimited,Service
canbeobtainedbywriting
PublicationsDepartment,1908ColonelSam
Dr., Oshawa,OntarioL1 H 8P7.
Chevrolet regularly sends its dealers useful service bulletins about Chevrolet
products.Chevroletmonitorsproductperformance
in thefield. We then
preparebulletinsforservicingourproductsbetter.
Now,youcangetthese
bulletins too.
Bulletins cover various subjects. Some pertain
to theproperuseandcareof
yourvehicle.Somedescribecostlyrepairs.Othersdescribeinexpensive
repairs which, if done on time with the latest parts, may avoid future costly
to repairaneworunexpected
repairs.Somebulletinstellatechnicianhow
condition. Others describe a quickerway to fix yourvehicle.Theycanhelpa
technician service your vehicle better.
84
Most bulletins apply to conditions affecting a small number of cars ortrucks.
Your Chevrolet dealer oraqualifiedtechnicianmayhave
to determine if a
specific bulletin applies to yourvehicle.
You cansubscribeto all ChevroletbulletinsbycallingHelm,Inc.at
1-800-782-4356.Thiswayyou’llgetthem
as theycomeout.
lndividual PSP’s
If you don’t want to buyallthePSP’sissued
by Chevrolet for all car and
truckmodels in themodelyear,youcanbuyindividualPSP’s,suchasthose
whichmaypertain to aparticularmodel. To dothis,youwillfirstneed
to see
ourindex ofPSP’s. It providesavariety of information.Here’swhatyou’ll find
in theindexandhowyoucangetone:
What You’ll Find in the Index:
A list of all PSP’spublished by Chevrolet in amodelyear(1989or
later). PSP’s covering all modelsof Chevroletcarsorlighttrucksless
GWVR are listed inthesameindex.
than 10,000pounds(4536kg)
Orderinginformation so youcanbuythespecificPSP’syoumaywant.
Priceinformationforthe
PSP’syoumaywant
to buy.
How You Can Get an Index:
Indexes are publishedperiodically. Most of the PSP’swhich couldpotentially
apply to themostrecentChevroletmodelswillbelisted
in themostrecent
publicationforthatmodel year.Thismeansyoumaywant
to wait until the
if you are interested in
end of themodelyearbeforeorderinganindex,
buyingPSP’spertaining to acurrentmodelyeartruck.
SomePSP’s pertaining to aparticularmodelyearvehiclemaybepublished
lateryears,andthesewouldbelisted
in thelateryear’sindex.Whenyou
order anindexforamodelyearthatisnotoveryet,we’llsendyouthemost
recentlypublishedissue.Checktheorderingformforindexesforearliermodel
years.
in
fill it out,andmail it in. We willthenseeto
it that
Cutouttheorderingform,
anindexismailedtoyou.There
is nochargeforindexesforthe1989-1993
modelyears.
Toll-Free Telephone Number
If youwantanadditionalorderingformforanindexorasubscription,just
call toll-free andwe’llbehappytosendyouone.Automatedrecording
to call is
equipment will takeyournameandmailingaddress.Thenumber
1-800-551 -4123.
8-7
Customer Assistance lrtformation
Copies at Participating Dealers
CopiesofIndexesandindividualPSP’sareatyourparticipatingChevrolet
dealer. You canask to seethem.
A VERY IMPORTANTREMINDER: ThesePSP’saremeant
for technicians.
for the“do-it-yourselfer.”Technicianshavetheequipment,
Theyarenotmeant
tools,safetyinstructions,andknow-how
to do a job quicklyandsafely.
Chevroletreservestheright
to changetheseprocedureswithoutnotice.
Service Publications
You cangettheseProductServicePublicationsbyusingtheorderformat
theend of thissection. You canalsogetServiceManualsandOwner
Publications.
8-8
a
INDEX
.
.
I
A
Air Cleaner.................................... 6-19
Air Conditioning .............................. 3-6
Fan Lever .................................... 3-6
Function Lever ............................ 3-6
Maintenance .............................. 6-39
Rear ............................................. 3-8
Refrigerant Capacity .................6-65
Temperature Lever ......................3-6
All-Wheel Drive ............................. 6-23
Antenna, Fixed Mast .................... 3-29
AntilockBrakes(See“Brakes”)
Appearance Care ......................... 6-52
Materials .................................... 6-59
Arbitration Program ........................8-3
Ashtrays ........................................2-50
Assist Handles .............................. 2-68
Audio Systems................................ 3-9
AM Radio .................................. 3-11
AM-FMStereoAudioCassette
System with Equalizer .......... 3-18
AM-FMStereoAudio
Cassette System ...................3-15
AM-FMStereoAudio
Compact Disc (CD) System ....3-23
AM-FM Stereo Audio System ..3-13
Anti-Theft Feature ..................... 3-26
Cassette Tape Player ..... 3-21, 3-22
Compact Disc Care ..................3-28
Automatic Transmission ...............2-17
Fluid ........................................... 6-20
Axle
Front...........................................
Rear ...........................................
6-24
6-23
B
Battery ...........................................
6-34
Belts(See“SafetyBelts”)
BetterBusinessBureau
Mediation ..................................... 8-3
Blizzard.......................................... 4-42
Brakes
Adjustment ................................. 4-17
Antilock ......................................4-14
Fluid ........................................... 6-32
Hydro-BoostSystem
(Hydraulic Pump)................... 6-34
Master Cylinder ......................... 6-32
Parking....................................... 2-20
Pedal Travel ..............................4-17
Rear Drum................................. 4-17
Replacing Parts.........................6-33
System Warning Light ....2-58, 4-16
Trailer ......................................... 4-46
Wear Indicators......................... 4-17
Braking .......................................... 4-12
In Emergencies .........................
4-18
Break-In, New Vehicle .................. 2-13
Bulb Replacement ........................ 6-35
Halogen...................................... 6-35
Replacement Chart ...................6-66
9-1
c
D
Carbon Monoxide .....2.24.4.42.
4-47
Capacities and Specifications...... 6-64
Cassette TapePlayer
(See“AudioSystems”)
Catalytic Converter ....................... 6-41
Certification/Tire Label..................6-42
Changing A Flat Tire .. 5.16.5.17.
5-21
Charging System Light ................2-65
Chemical Paint Spotting .............. 6-58
Child Restraints............................ 1-33
Cigarette Lighter/Ashtrays ............2-50
Cleaning
Glass .......................................... 6-55
Inside of Vehicle .......................6-53
Instrument Panel....................... 6-55
Outside of Vehicle .................... 6-56
Special Problems ...................... 6-54
Vinyl or Leather ........................6-55
Windshield ................................. 6-56
Clock .....3-12, 3-14. 3-17, 3-20, 3-24
Comfort Controls ............................3-3
Constant Velocity Joints
(All Wheel Drive Only) .............6-40
Coolant(See“Engine”)
Cooling System ............................6-64
Crankcase ..................................... 6-65
Cruise Control............................... 2-35
Increase Speed......................... 2-38
On Hills ..................................... 2-39
Passing ......................................2-39
Reduce Speed .......................... 2-39
Resume a Set Speed ..............2-37
To Get Out of ........................... 2-40
To Set ....................................... 2-36
Customer Assistance for the
Hearing or Speech Impaired ..... 8-3
Customer Satisfaction
Procedure .................................... 8-2
Damage
Finish ......................................... 6-57
Sheet Metal ............................... 6-57
DaytimeRunningLights
(Canada Only) .................... 2-43, 2-66
Indicator Light..................2-43, 2-66
Defogger,RearWindow ................. 3-8
Dome Lights.................................. 2-44
Doors ............................................... 2-5
Locks.......................................... 2-10
Power Locks.............................. 2-11
Rear ............................................. 2-7
Side .............................................. 2-5
Side, Sliding ................................ 2-6
Sliding Tracks............................ 6-40
Driving
At Night ........................... 4-23, 4-25
City ............................................. 4-30
Control Of A Vehicle ................4-12
Defensive..................................... 4-8
Highway Hypnosis..................... 4-34
Hydroplaning.............................. 4-27
In A Blizzard ............................. 4-42
In Deep Snow ........................... 4-43
In Fog, Mist and Haze .............4-28
In Sand, Mud, Ice or Snow ..... 5-32
In The Rain ..................... 4-26, 4-28
Long Distance ...........................4-33
Loss of Control ......................... 4-22
Night Vision ............................... 4-24
On Curves ................................. 4-18
On Grades ................................. 4-48
On Hill and Mountain Roads ...4-35
On Snow or Ice........................ 4-40
On The Freeway ....................... 4-31
Skidding ..................................... 4-22
Through Deep Water ................2-16
Winter ......................................... 4-40
With a Trailer ............................ 4-47
Drunken Driving .............................. 4-9
9-2
. .
E
G
Engine
Block Heater ..................... 2.16. 3-9
Coolant ............................ 5.11. 6-26
Coolant Temperature Gage ...... 2-60
Cover ......................................... 6-15
Exhaust............................ 2.24. 6-41
Fan Noise.................................. 5-16
Identification..................... 6.60. 6-64
Oil(See“Oil”)
Overheating ................................. 5-8
Running While Parked ...2.22. 2-25
Equipment. Add-on ...................... 6-44
Exhaust System............................ 6-41
Gages
Fuel ............................................ 2-63
Voltmeter .................................... 2-64
Gasolines for Cleaner Air .............. 6-5
....
H
Hatch Release Switch .................. 2-27
Hazard Warning Flashers ..............5-2
Head Restraints ............................ 1-11
Headlights...................................... 6-35
High Beams ..................... 2.66. 4-24
High-Low Beam......................... 2-31
Reminder Light .......................... 2-44
Heating System .............................. 3-5
Block Heater., ............................ 2-16
Fan Lever .................................... 3-5
Function Lever ............................ 3-5
Rear ............................................. 3-7
Temperature Lever ...................... 3-5
Highway Hypnosis ........................ 4-34
Hitches........................................... 4-46
Hood
Latches and Hinge ...................6-40
Release........................................ 6-8
Horn ............................................... 2-28
Hydroplaning ................................. 4-27
F
Finish
Care ...........................................6-56
Damage ..................................... 6-57
Fluid
Automatic Transmission ............6-20
Brake ......................................... 6-32
Capacities .................................. 6-64
Coolant ............................ 5.11. 6-26
Leak Check ............................... 6-34
Power Steering ......................... 6-30
Transfer Case ........................... 6-23
Windshield Washer ...................6-31
Fog Lamps.................................... 2-42
Four-wheel Antilock ..................... 4-15
Front Seats ..................................... 1-2
Fuel ................................................. 6-4
Filling Your Tank ......................... 6-6
Gage .......................................... 2-63
In Foreign Countries ...................6-6
Regulator ...................................2-15
Tank Capacity ........................... 6-65
Fuse Block.................................... 6-63
Fuses and Circuit Breakers .........6-68
.
I
If You’reStuck inSand.Mud.
Ice or Snow .............................. 5-32
Ignition Switch............................... 2-13
Inflation-Tire Pressure...................6-45
Instrument Cluster ........................ 2-52
Digital ......................................... 2-52
Standard .................................... 2-55
J
Jack Storage.................................
Jump Starting..................................
9-3
5-18
5-3
fNDEX
K
Keys ................................................
0
Odometer....................................... 2-56
Trip ............................................. 2-57
Off-Road Recovery .......................4-20
Oil ....................................................
6-9
Additives .................................... 6-14
Disposal of Used ...................... 6-15
Pressure Gage.......................... 2-62
To Check ................................... 6-10
What Kind to Use..................... 6-12
When to Change ...................... 6-14
Owner Checks and Services .......7-11
2-3
L
Lights............................................. 2-40
Dome .........................................2-44
2-42
Fog Lamps ................................
Front Parking ............................ 6-36
Indicator..................................... 2-64
Taillights .....................................6-37
Interior Override Switch ............2-45
2-31
Operation...................................
Reading .....................................2-44
Turn Signal ................................ 6-36
Loading Your Vehicle ...................6-42
Lubrication..................................... 6.39
Accelerator Control System ..... 6-39
Body...........................................6-40
Front Suspension and
Steering Linkage ...................6-38
FrontWheelBearings
(Two-Wheel Drive) ................. 6-38
Latches and Hinge ...................6-40
Lock Cylinders .......................... 6-41
Propeller Shaft Slip
SplinesAJniversal Joints ........ 6-40
Rear Axle .................................. 6-23
Transfer Case ........................... 6-23
Luggage Carrier............................ 2-49
P
Parking
Brake.......................................... 2-20
Downhill ..................................... 4-38
On Hills ............................ 4-37, 4-49
Over Things That Burn ............2-23
Uphill .......................................... 4-38
Passing Other Vehicles ......4-21, 4-48
Pavement Markings ........................ 4-7
Payload Capacity.......................... 6-43
PeriodicMaintenanceInspections7-13
Power
Mirrors........................................ 2-47
Other Options............................ 6-38
Seat .............................................. 1-2
Visor Vanity ............................... 2-48
Windows .................................... 2-26
Power Steering ............................. 4-18
Fluid ........................................... 6-30
Product Service Publications .........8-6
M
Maintenance.................................... 7-2
Other Items ............................... 6-38
Periodic Inspections..................7-13
Record ....................................... 7-16
Scheduled Maintenance ..... 7.3. 7-8
Underbody ................................. 6-58
When Towing a Trailer ............. 4-49
2-45
Mirrors ...........................................
2-45
Inside .........................................
Outside ............................ 2.46. 2-47
Vanity ......................................... 2-48
Model Reference ............................... iii
R
Radiator Pressure Cap ................6-29
Radio(See“AudioSystems”)
Reading Lights.............................. 2-44
Rear Defogger ................................ 3-8
Rear Hatch/Split-Panel Doors........2-8
Rear WiperNVasher ...................... 2-34
Recommended Fluids/Lubricants.7-14
Reporting Safety Defects ............... 8-4
9-4
Road Signs .....................................
4-2
Roadside Assistance ......................8.5
Rocking Your Vehicle ...................5-32
Roof Console ................................ 2-51
S
Single Belt Accessory Drive ........6-38
Spare Tire .....................................
5-19
Specification Charts......................6-64
Speedometer ................................. 2-56
Springs, Fiberglass .......................6-58
Starting Your Engine .................... 2-14
Steering
In Emergencies ......................... 4-19
Tips ............................................ 4-18
Storage Compartment ..................2-51
Storing the JacWSpare Tire .........5-30
Sun Visors .................................... 2-48
Safety Belts .................................. 1-12
Adults .........................................1-18
Care Of ..................................... 6-55
Checking Restraint Systems .... 1-43
Driver Position...........................1-1 8
Extender ....................................1-42
Lap-Shoulder Belt ..................... 1-19
T
Larger Children ......................... 1-40
Passenger Positions .......1-26, 1-30Theft .............................................. 2-12
6-29
Proper Wear..............................
1-1 8 Thermostat ....................................
Questions and Answers ........... 1-16 Tilt Wheel ......................................
2-28
Reminder Light.......................... 1-1 7
Tires ...............................................
6-44
Chains ........................................ 6-51
Replacing After a Crash .......... 1-43
Changing A Flat..A-16,5.17, 5-21
Shoulder Belt Height Adjuster ....1-21
Smaller Children and Babies ... 1-32
Compact Spare ......................... 5-31
Use During Pregnancy ............. 1-25
Inspection and Rotation............6-47
Why They Work ........................ 1-13
Loading ...................................... 6-42
Safety Chains ...............................4-46
New ............................................
6-48
Safety Warnings .............................
0-2
Pressure..................................... 6-45
ScheduledMaintenance
Uniform Tire Quality Grading ...6-49
...............................
7-3,
7-8
Services
Top Strap ...................................... 1-34
Seats ...............................................1-2 Towing Your Vehicle ....................... 5-7
Bench........................................... 1-5 Towing a Trailer ............................ 4-43
Controls ....................................... 1-2
Backing Up ................................4-48
Head Restraints ........................1-1 1
Following Distance ....................4-48
Rear ............................................. 1-5
Making Turns............................. 4-48
Power Driver’s............................. 1-3
Turn Signals .............................. 4-48
Reclining Bucket ......................... 1-3 Traffic Lights ...................................4-6
Removable...................................1-8 Trailer
Seatback Latches ....................... 1-7
Brakes ........................................4-46
Service ............................................6-3
Wiring Harness.......................... 2-67
Do-It-Yourself............................... 6-3 Trailering Package........................ 6-44
Parts Identification Label ..........6-62 Transfer Case ............................... 6-23
Publications ......................... 8-6, 8-8Transmission, Automatic...............2-17
ReplacementParVFilter
Add Fluid ................................... 6-22
Recommendations.................6-70
Check Fluid ...............................6-20
Service Station Checks ................ 7-17
Torque Lock............................... 4-39
Shifting IntolOut Of Park ...2-21, 2-23
9-5
INDEX
Trip Odometer ............................... 2-57
Turn SignaVMultifunction Lever ... 2-29
Lane Change Indicator ...2-30, 2-67
V
Vehicle
Damage Warnings ...................... 0-3
Identification Number................6-60
Storage ...................................... 6-34
Symbols ...................................... -0-4
Ventilation System .......................... 3-3
Air Vents ...................................... 3-4
Tips ..............................................3-3
Voltmeter .......................................2-64
W
Warning Lights and Gauges .......2-57
Antilock Brake ................. 2-59, 4-16
Devices, Other ............................ 5-3
Service Engine Soon ...... 2-61, 6-41
Washing Your Vehicle ..................6-56
9-6
Weatherstrips ................................ 6-57
Wheels
Alignment and
Tire Balance .......................... 6-50
Aluminum ................................... 6-57
FrontBearings
(Two-Wheel Drive) .................6-38
Nut Torque................................. 6-64
Replacement.............................. 6-50
Windows ........................................ 2-26
Rear Defogger............................. 3-8
Swing-Out .................................. 2-26
Windshield Washer ....................... 2-33
Fluid ........................................... 6-31
Rear Washer .............................2-34
Windshield Wipers ..............2-32,6-39
Blade Chatter ............................ 6-56
Blade Inserts ............................. 6-39
Cleaning Blades ........................6-56
Low Speed Delay ..................... 2-32
Rear Window ............................. 2-34
Winter Driving ...............................4-40
NOTES
NOTES
Part No. C-9310
:A>=
CERTIFIED
WE SUPPORT
VOLUNTARY TECHNICIAN
CERTIFICATIONTHROUGH
National lnstltute for
AUTOMOTIVE
SERVICE
EXCELLENCE
FI
I
L
CHEVROLET
m