1
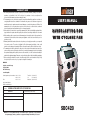
??? CARD
WARRANTY
1. KH Trading machines and tools are covered by 6/24 months warranty, starting on the date of
purchase, as described in the Civil Code (proof of purchase or invoice receipt must be
enclosed with the warranty card when making a claim).
2. This warranty does not cover defects caused by unprofessional handling, machine overloads, not
complying with instructions contained in this manual, using accessories that are not approved,
unauthorized repair, regular wear and tear and damages occurred during transport. Further, this
warranty does not cover parts and accessories such as the motor, carbon brushes, seals and
hot-air operated parts and parts that need to be changed regularly.
3. If the repair is to be found as not covered by the warranty policy, all costs including the repair and shipping to and from the repair centre will be paid by the customer, according to valid price list. See www.
4. When making a claim, you must present the warranty card, showing the date of the purchase, the
serial number of the machine, vendor stamp and signature of sales clerk, as well as the proof of
purchase receipt.
5. Warranty claim shall be made at the vendor shop where you bought your machine or you may mail
it to a service centre. The vendor is obligated to fill out the warranty card (date of sale, serial
number, vendor stamp and signature). All these information must be filled in at the time of sale.
6. The warranty period will be extended for the period of time for which the machine has been in the
service centre possession. If the repair or defect is not covered by the warranty policy, all costs including
the repair and shipping will be paid by the owner of the machine / tool. We recommend sending the
machine in its original packaging. Please, also enclose brief description of the defect with the packaging.
7. Before sending the machine for repair, clean it thoroughly. If the received machine is dirty, it may
be rejected by the service shop or you may be charged a cleaning fee.
USER'S MANUAL
SANDBLASTING BOX
WITH CYCLONE FAN
SERVICE
Logistic centre Klecany
Topolová 483
250 67 Klecany
Czech Republic
Claim department phone number: 266 190 156
266 190 111
Fax:
260 190 100
http://www.KHnet.cz
Email: [email protected]
Product:
Type:
T-mobile: 603 414 975
O2:
601 218 255
Vodafone: 608 227 255
SANDBLASTING BOX WITH CYCLONE FAN
Serial number (product series):
SBC420
Date of manufacture:
Repair centre notes:
Date of sale, stamp, signature:
SBC420
Without the correctly filled warranty card or without proof of purchase receipt, including
the product type (invoice, purchase receipt) no warranty claim will be processed.
Dear customer. Thank you for purchasing sandblasting box from KH Trading, s.r.o.
Before first use, please read this manual carefully. It is your responsibility to study all instructions,
necessary for safe use and operation and to understand all risks that may be involved during the use
of power machines.
This product and information contained herein are for experienced users who know how to use
sandblasting equipment, abrasive equipment and other auxiliary accessories. This manual may not
be used for suggestions or proposals. The user is responsible for the quality of the surface of the
finished product, as well as for the current machine productivity. All these facts depend largely on
the user experience, knowledge and machine setting. This manual may not be use for suggestions
or proposals. The user is responsible for the quality of the surface of the finished product, as well
as for the current machine productivity. All these facts depend largely on the user experience,
knowledge and machine setting. Store this manual so it could be easily reached by the operating
personnel. The owner of the machine is responsible for appropriate staff training so the operating
personnel is capable of using the machine safely. He is also responsible for proper maintenance
and use of the machine.
WARNING! Do not try to use this machine before reading this entire manual and before you know
how to handle it. Keep this manual for future reference. Pay special attention to safety instructions.
Not complying with safety rules may cause injury to the operating person or to people standing by
or it may cause damage to the machine and to the work piece. Pay special attention to safety notes
and safety labels on the machine. Never remove or damage them.
Please, write information such as the invoice number
and the number of the sale receipt here in this box.
INTRODUCTION
Use only after you have red the entire manual and are certain that you have understood all information contained in this manual. Due to the work type, accessories such as sandblasting pistol, blasting nozzles, sandblasting box, gloves, suction hose and protective foil are considered as expandable supplies. Due to continuous
improvements and modifications, the manufacturer may change the product design or modify it according to
technological requirements. Such changes have no effect on the product functionality. Therefore, the pictures
and technical specifications contained in this manual may be slightly different from your machine.
TECHNICAL SPECIFICATION
Voltage . . . . . . . . . . . . . . . . . . . . . . . . . . . . . . . . . . . . . . . . . . . . . . . . . . . . . . . . . . . .~230V/50 Hz
Engine input . . . . . . . . . . . . . . . . . . . . . . . . . . . . . . . . . . . . . . . . . . . . . . . . . . . . . . . . . . . .1,200 W
Lights . . . . . . . . . . . . . . . . . . . . . . . . . . . . . . . . . . . . . . . . . . . . . . . . . . . . . . . . . . . . . . . .2 × 18 W
Operational pressure . . . . . . . . . . . . . . . . . . . . . . . . . . . . . . . . . . . . . . . . . . . . . . . . . . .3,5 - 5,5 bar
Feeding pressure . . . . . . . . . . . . . . . . . . . . . . . . . . . . . . . . . . . . . . . . . . . . . . . . . . . . . . . . . . .8 bar
Air consumption . . . . . . . . . . . . . . . . . . . . . . . . . . . . . . . . . . . . . . . . . . . . . . . . .1,000 l/h (400kPa)
Working area . . . . . . . . . . . . . . . . . . . . . . . . . . . . . . . . . . . . . . . . . . . . . . . .1,210 × 600 × 580 mm
Outside dimensions . . . . . . . . . . . . . . . . . . . . . . . . . . . . . . . . . . . . . . . . . .1,800 × 1,250 × 940 mm
Weight . . . . . . . . . . . . . . . . . . . . . . . . . . . . . . . . . . . . . . . . . . . . . . . . . . . . . . . . . . . . . . . . . .150 kg
Due to continuous improvements and modifications, the manufacturer may change the product design or
modify it according to technological requirements. Such changes have no effect on the product functionality.
The accuracy of instructions, graphs and information contained herein, depends on the printing date.
2
REPAIR AND MAINTENANCE REPORT
Report and maintenance report:
DATE
REPAIR AND MAINTENANCE REPORT
SERVICE SHOP
REVISION REPORT
???
SAFETY INSTRUCTIONS
The user is obligated to perform tests and revisions of electrical equipment of the machine
in accordance with valid rules and regulations. Result report:
DATE
REVISION REPORT
REVISION TECHNICIAN
Number / SIGNATURE
• This device may be used by a qualified person, 18 years or older who has been
trained in work and environmental safety procedures.
• Any person using this equipment must possess a medical certificate
demonstrating his eligibility to operate this equipment.
Symbols used in this manual
Warning!
This symbol informs you about the risk of personal injury or damage to the machine
or materials.
Caution! You are using electrically powered machine!
Risk of injuries by electrical current.
Risk of being caught by spinning machine parts!
Caution! Loose clothing or body parts may get caught by moving machine parts.
Warning!
Danger of damage.
Note:
Additional information.
General instructions
• Make sure you know how to control your tool or machine and that you are familiar with its operating
procedure. Know the hazards that may occur, if not used correctly.
• If other person is using this machine make sure that he knows how to safely operate this equipment and
that he is familiar with hazards and risk that may occur, if not used correctly.
• Pay special attention to safety notes and safety labels on the machine. Do not remove or damage them.
If the warning label becomes unreadable, please contact your vendor.
• Dirty and disorganized workplace may cause accidents.
• Never work in poorly lit, narrow or too crowded rooms. Always keep stable posture.
• Maintain your tools clean and in safe working conditions.
• Handles must be kept free of grease and dirt.
• Make sure no children, unauthorized persons or animals have access to your workshop.
• Use only for purposes for which it has been designed.
• Use personal protective gear such as safety goggles, ear protection, respirator, safe working shoes etc.
• Do not overreach, use both hands.
• Never work under the influence of alcohol or other drugs.
• Do not use the machine/tool if you feel dizzy or week.
3
• Any modifications or improvements to the machine are strictly prohibited. DO NOT USE if you discover
bent part, crack or other damage.
• Never perform any maintenance during operation.
• If you see any unusual sign or hear any strange sound, switch off the machine immediately.
• Do not forget to remove all wrenches and screwdrivers from the machine after use.
• Before use, make sure all screws are tightened securely.
• Perform maintenance regularly. Before use make sure the machine is in good working conditions
and without any damage.
• Use only original spare parts during repairs.
• Using extension pieces or accessories not approved by the manufacturer may cause injuries to
the operating personnel.
• Use suitable tool for particular type of work. Do not overload tools, accessories or the machine. For large
work volume use more powerful machine.
• Do not overload your device. Measure the work load in such way, so it could be done with comfortable
speed. Damages due to machine overload are not covered by the warranty policy.
• Do not expose to extremely high temperature or direct sunlight.
• This machine is not designed for use in humid environments or under water.
• If you are not using your machine, store it in a dry and safe place, out of reach of children.
• Before use make sure that all safety elements work correctly and efficiently. Make sure all moving parts
are in good working conditions.
• Before use make sure that no part is cracked or stuck, Make sure all parts are attached and assembled
as designed. Beware of all other conditions that may have a negative effect on the proper functioning of
your machine.
• If not stated otherwise in this manual, all damaged parts and safety elements must be repaired or
changed.
•
•
•
•
•
•
•
Electrical equipment
Observe all basic safety rules when using electrical equipment to prevent risk of fire, injuries by electrical
shock and other hazards. Before using this device, read this manual entirely and follow all safety
instructions.
Make sure the power cable plug is plugged into the correct wall outlet. The voltage in the wall outlet must
be the same as shown on the specification label to prevent damage to the electric motor. Too low voltage
will not provide your machine with enough power.
Before connecting the machine to the wall outlet make sure that the main switch is in the "OFF" position.
When you finished your work, disconnect the power plug from the wall outlet and switch off the main
switch.
Never carry electrical tools and appliances by their power cord. When disconnecting the plug from the
wall outlet, never pull the cable by its cord.
Protect the power cable from high temperatures, oils, paint thinners and make sure that the cable is not
hanging over sharp edges.
Inspect the power cable regularly. If damaged have it replaced by qualified technician. Inspect extension
cables regularly. If damaged, have it replaced.
If you need to use an extension cable, use cable with appropriate power rating. Use only completely
unwound. Inspect extension cables regularly. Damaged cable must be repaired or changed immediately.
4
PART???
LISTING
Box part listing
Position numb.
1
1A
2
3
4
5
6
7
8
9
10
11
12
13
14
15
16
17
18
19
20
Decription
Position numb.
Lighting unit cover
21
Switch
22
Lighting unit body 2 light bulbs 23
Lighting unit
24
Lighting unit window
25
Window seal with ribbon PE
26
Side door
27
Latch
28
Pressure gauge 1", 10 bar
29
Air flow regulator 3/8"
30
Air pressure hose 1"
31
Complete pedal 3/8"
32
Dosage measuring valve plug 33
Dosage measuring valve
31
Clamp, gloves
35
Gloves
36
Window frame cover
37
Glass
39
Protective foil, PE
39
Plastic desk
40
Assembly ring, gloves
Number part
49021
49022
49023
49024
49025
49026
49027
49028
49029
49030
49031
49032
49033
49034
49035
49036
49037
49038
49039
49040
Decription
Cover, box
Box
Leg supports, box
Dust separator top
Vacuum pump engine
Screws
Cover, engine
Power cable
Dust filter
Cylindrical dust separator
Sealant tape
Platform suction
Rod
Cap, cylindrical dust separator
Side door column
Opening
Cover
Screw
Net
Rubber belt
Pistol part listing
POSITION NUMBER
1
2
3
4
5
6
7
8
9
10
11
12
13
DESCRIPTION
Nozzle mounting nut, brass
Ceramic nozzle set
Ceramic nozzle 6 mm (2 pc)
Ceramic nozzle 7 mm (2 pc)
O-ring, nozzle
Pistol body, Mod-U-Blast (only)
Air nozzle hexagonal nut, brass
Casing, air nozzle
Air nozzle
Rotating air supply armature, 3/8"
Inlet substance armature, mouthpiece 3/8"
Substance hose 1"
Air hose 1"
Seal
Ring
13
???
DETAILED
DRAWING
• Before performing any maintenance, repair or adjustment, switch off the main switch and disconnect the
power cable from the wall outlet.
• Make sure no one may switch you machine incidentally on. Do not keep your fingers close to the main
switch, unless absolutely necessary.
• If you mount your machine to the work table, release the safety button after installation.
• Do not use in environments where explosives are stored or used (paint shops, warehouse with flammables etc.).
• Do not use in humid environments or if wet.
Compressed air
• The supplied air must be compressed according to the required specifications and the air flow supply
must be sufficient. Higher supply pressure decreases the life expectancy of the machine and increases
the possibility of injuries.
• The coupling that connects the machine with the supply apparatus must have the prescribed dimensions.
• Take extra caution if using the machine near water. Water may seriously damage your tools or machine.
Do not forget to drain the condensed water from the pressure container. Also completely dry out the air
supply hose.
• Make sure no dirt can enter the inside of the machine. Keep inlet and outlet openings clean.
Sandblasting boxes
• Sandblasting box is a rather heavy object and must be installed properly to avoid incidental slippage or
movement during operation. Severe injuries to your legs or hands (if you hands are inside the box during
a fall) may occur.
• Make sure dust is vacuumed out sufficiently. Inspect air ducts for leakage. If dust accumulates, it may
catch on fire or cause explosion.
• We recommend not to sandblast objects that are flammable or may explode during operation.
• Based on local safety regulations and local environmental conditions, use personal protective gear
such as goggles and ear protection. After you open the sandblasting box door, use respirator to protect
yourself against inhaling small particles. We recommend using hand lotions. Do not wear jewellery, wrist
watch or rings during operation.
• Never sandblast an object with the box door open.
electrical drawing connection
12
5
ASSEMBLY
???
If your sandblasting box came disassembled, read the assembly instructions carefully. Before the assembly
make sure that you have all necessary parts as listed in the part list.
1. Remove all parts from the inside of the box, including the floor grille on the bottom of the shipping box.
2. Take all parts from the inside of the box.
3. Place the box on its top (22) - upside down .
4. Using four screws, mount the four leg supports.
a) The left front support is marked with label.
b) To fix the supports in place you need two self-cutting screws per each leg.
5. Stand the box on its support legs.
6. Mount the console with the pressure gauge (8) to the left front leg support using two screws, safety
washers and nuts.
The upper observation window is covered on the inside by a protective foil. You may change the foil if worn
out for a new one. Order number SBC420GF - window and SBC420LF - lighting unit. Inspect the blasting
nozzle regularly. If worn out too much, it may damaged the mixing chamber, which is not available as an
individual spare part. Some boxes comes with spare blasting nozzles. Spare nozzles are available for abovestandard models only. Spare nozzle order number SBC420N - set of 4 pieces. The abrasive blasting
substance disintegrates into smaller pellets and get mixed up with dirt from the work piece, which decreases
the efficiency of the blasting process. That is why you should change the substance regularly. Use the
opening on the bottom of the box to drain the substance out. Used substance is a waste that must be death
with in accordance with waste management rules and regulations.
Additional information
The abrasive blasting substance disintegrates into smaller pellets and get mixed up with dirt from the work
piece, which decreases the efficiency of the blasting process. That is why you should change the substance
regularly. Use the opening on the bottom of the box to drain the substance out. Used substance is a waste that
must be dealt with in accordance with waste management rules and regulations.
7. Place the pedal between the two front supports.
8. Mount the dosage measuring valve (13) to the lower, rear part of the box using three self-cutting screws.
The valve will fit into the door opening.
9. Using four screws, mount the left and right door (6) in place.
10.Loosen the screws on the door hinges (20) and pull the hinges out as far as possible. Carefully adjust the
door seal and tighten the screws again.
11. Fix glass (19) on the top of the box.
12.Mount the lighting unit (1) on the glass with the switch on the right side. Use four screws with flat washers
to secure it in place.
13.Dust cyclone fan
a) Mount the cyclone body 30 to the rear panel (right side). Straighten the piping so it is directed towards
the opening. Use screws and flat washers.
b) Place the top of the cyclone (with engine 27 and filter 28) on the top of the unit. Close the two clamps.
c) Remove the inlet cover 32 covering the cyclone pipe inside the box and seal the pipe with sealing tape
or bonding sealant. Place the cover back and secure it in place.
DISPOSAL
Used hydraulic fluids must be disposed off in accordance with the Law of waste disposal management.
When the operational life of your device is over, dispose off it in accordance with valid rules and regulations.
Your product is made of metal and plastic parts that may be recycled when separated.
1. Disassemble all parts.
2. Separate all parts according to the material they are made of (e.g. metals, rubber, plastics, etc.).
Take the separated parts to the recycling facility near you for further processing.
3. Electrical waste (used electrical power tools, electric motors, recharging equipment, electronics,
accumulators, batteries etc.).
Dear customer. In accordance with the valid regional rules and regulations describing the management of
electrical waste, electrical waste is considered dangerous. Disposal of electrical waste must be therefore
handled as dangerous waste in accordance with waste management rules valid in the state you are in.
It is prohibited to mix electrical waste with regular household waste.
You may return your used electrical appliance to a recycling facility near you. More information about
electrical and dangerous waste disposal may be obtained from your local authority or from the Internet.
14.Tighten all clamps, nuts and screws.
15.Place the floor grill with the cut corner to the right front side of the box. Push hoses through the opening.
16.Connect the cyclone plug to the terminal on the lighting unit. Connect the power cable of the lighting unit
to a wall plug 230 V / 50 Hz. Turn the lighting unit and the cyclone on by turning the switch on the box on.
17. The operational substances are fed to the machine through the floor grill.
CAUTION
If the machine breaks down, send it back to the vendor for quick repair.
Please, enclose brief description of the defect. That makes repair easier. If the machine is still covered by
warranty, enclose the warranty card and proof of purchase receipt. After the warranty period expires, we
repair your machine for a special price.
To prevent possible damages during shipping, packed the machine carefully or use the original packaging
material. We are not liable for shipping damages due to incorrect packaging of your machine. If making a claim
at the shipping company the level and method of packaging plays a major role during claim evaluation process.
Note: Pictures and contents in this manual may slightly differ from the actual product or accessories. It is due
to continuous improvement of our products. Such small differences have no effect on the product functionality.
6
11
RECOMMENDATION
???
OPERATION
???
The longer the supply pipe is the more losses in pressure you will experience. Therefore it is necessary to
chose the correct diameter of the compressed air supply piping that leads from the compressor. Keep in
mind that each pipe coupling and elbow coupling contribute to the losses in pressure. To figure it out
properly use the following chart.
Pipe air flow (m3/min)
Pipe
length
(m)
0.7
0.85
1
1.15
1.4
1.7
2
2.25
2.8
3.5
0.63
0.75
0.75
0.75
0.75
1
1
1
1.25
1.25
1.25
1.27
0.75
0.75
0.75
1
1
1
1
1.25
1.25
1.25
1.90
0.75
0.75
1
1
1
1
1
1.25
1.25
1.25
2.54
0.75
0.75
1
1
1
1
1.25
1.25
1.25
1.25
3.81
0.75
1
1
1
1
1.25
1.25
1.5
1.5
1.5
5.08
1
1
1
1
1
1.25
1.25
1.5
1.5
1.5
6.35
1
1
1
1
1
1.25
1.25
1.5
1.5
1.5
7.62
1
1
1
1
1
1.25
1.25
1.5
1.5
1.5
Sandblasting
Pour the abrasive material into the sandblasting container. Do not overfill or under fill. The vacuum hose must be
completely submerged in the substance. If the box is equipped with an opening, usually located on the sidewall
of the box, you may use it for inserting various poles inside the box, to adjust the position of the sandblasting
piece or to utilize auxiliary vacuum effect. If none of these options will be used, close the opening. Place the
piece to be blasted on the box grill. Place the nozzle in the sandblasting pistol if needed. Push the suction hose
through the opening in the grill and submerge it in the substance. (Or fix the suction hose on the suction pipe,
depending on the sandblasting box model). Close all sandblasting box walls. Push your hands through the hand
openings into the built-in gloves, take the pistol and / or hold the work piece in a position so you can avoid
being blasted as much as possible. Start sandblasting the piece and observe the results.
Detailed description of the use of this device is not included in this manual, because the manufacturer /
distributor assumes that the user is experienced in similar type of work. Also according to the applicable
law, this device is considered as a commonly sold and used tool. If the user is unfamiliar with the use of
this device, we recommend finding out more information about using this device at the Department of
work safety.
MAINTENANCE
To ensure trouble-free operation and to comply with all safety rules do the following:
• Change used, old and worn out substance regularly.
• Change blasting nozzles regularly.
• Inspect all parts that are subject to be worn out or used up due to the abrasive effect of the substance.
• Air hoses
• Change the shielding foil and gloves.
10
1. Work piece preparation for blasting
All parts or work pieces must be dry, free of oils and lubricants. Dry the parts to be blasted completely before placing them in the box.
2. Air pressure
Operational pressure: 3.5 - 5.5 bar. You may use higher pressure (max. 8.6 bar) but some blasting substances
may not last as long as desired (e.g. glass pellets). Set the air pressure to 5.5 bar. Most parts may be cleaned
adequately using this pressure. To clean calibrated parts made of steel, aluminium and other precision parts use
lower pressure first and increase the pressure gradually to achieve the desired surface finish.
3. The compressed air must by free of condensed water and grease. We recommend using water separation unit.
WARNING: DO NOT CONNECT THE SANDBLASTING BOX TO A BOTTLE WITH
COMPRESSED GAS, BECAUSE IT MAY CRACK AND EXPLODE.
3. Blasting distance angle
Aim the sandblasting pistol towards the blasted part under angle of 40 - 60° utilizing the reverse bounce
of the rear wall. Do not hold the pistol under 90° angle because the reverse bounce comes directly back,
slowing down the blasting process. Using this angle causes excessive wear and tear of the pistol and the
viewing window. Hold the pistol about 15 cm from the blasted piece.
WARNING: THE PISTOL MUST BE ALWAYS DIRECTED AWAY FROM THE OPERATING
PERSONNEL AND TOWARD THE BLASTED PIECE. THE BOX DOOR MUST BE
ALWAYS CLOSED. DURING PLACING OR REMOVING THE BLASTED PIECE
FROM THE BOX NO ONE MAY STAND IN FRONT OF THE OPERATING PERSON.
4. Blasting substances
Use only dry and high quality blasting substances. Wet substance may clog the nozzles, damage the valve
and substance container. NEVER USE SAND FOR BLASTING. Sand contains dirt and organic particles that absorb water quickly. We supply various types of high quality, synthetic blasting substances for various surface finishes, packed in 50 kg bags, order number: bag 040, bag 060, bag 090, bag 220 or
1 kg bags, order number P040, P060, P090, P220. If you use other types of substances then the
above described materials, we cannot guarantee the quality of the surface finishing, machine function and
operational live and you are risking cancellation of your warranty policy.
5. Dosage measuring valve
The dosage measuring valve measures the substance amount that is sucked into the diffuser pistol.
The valve is located on the bottom of the substance container. After you press the pedal, the compressed
air starts to flow to the pistol creating a suction pressure that sucks the substance and feeds it to the
pistol through the supply hose. Use the adjusting screw 7/16", located on the dosage measuring valve
to regulate the air flow. If the valve is closed too much, the sucked substance contains small amount of air
and the pistol will pulsate. If the valve is opened too much, the sucked air will contain small amount of the
blasting substance and the efficiency is reduced.
6. Nozzle size
If you use bigger nozzle the efficiency is greatly increased. Using bigger nozzle puts higher demand on your
air compressor, since it must be able to supply your machine with higher air volume.
7
1. Sandblasting pistol
- After 10 - 12 hours of blasting check the nozzle. If the nozzle is worn out unevenly, turn it one turn every
10 hours.
2. Blasting substance melting
- Melting of blasting substance usually occurs when the supplied air is not dry or the blasted piece is dirty
from grease. If you do not take a proper action immediately, the substance will not flow evenly and may
clog the dosage measuring valve and the pistol. Check the supplied air. If it is not dry enough, install
appropriate humidity absorber. Clean and dry lubricated pieces thoroughly before blasting.
3. Reverse pressure
- If the flow stops during blasting, choke the pistol and press the pedal for a few second. This will force
the flow to go back, which cleans all obstacles.
4. Pressure drop in the blasting pistol
- Using the pressure gauge on the regulator, set the air pressure to 5,5 bar. Press the pedal and hold the
pistol. Observe if the pressure drops significantly. Pressure decline indicates an obstacle in the supply
piping. Other reason for insufficient air flow may be incorrectly set reduction valve, speed coupling, dirty
filter or clogged piping. Pressure may also go down if the sandblasting box is too far from the compressor. The diameter of the air pipe must be at least 1" or more.
5. Low visibility - dusty environment
- The air inlet located on the left front side of the box and above the regulator must be free of obstacles.
- The dust collection container is full and must be emptied. (Slide the plug on the bottom of the dust cyclone aside or remove the back cover of the vacuum pump).
- The filter is dirty. (Clean or change the cyclone filter, part number 29).
- Bad or poor quality blasting substance. Too small particles or dust-like particles in the substance.
Change the medium and clean the dust cyclone.
6. Low visibility - observing window
- Windows are protected by shielding foil with a self-adhesive tape. If you notice small dents in the foil,
change the foil for a new one. This way you protect the window lifespan. You may change the
window too.
7. Small substance flow
- Check if the substance is dry enough. If needed, install humidity absorber. Change the wet substance
for a dry one and clean the hoses and the substance container.
- Small or insufficient substance flow may be caused by small holes in the feeding hose. Change the hose.
- Foreign particles in the substance. Strain the substance with a fine strainer or change for a new one.
KEEPING THE SUCTION EFFECTIVE WITH SIMPLE PREVENTIVE
MEASURES.
The most common problem with diffuser sandblasting boxes is decrease in the efficiency.
The lifespan of a properly maintained machine should be several years. If the production efficiency is going
down, you should be able to find out the reason for the decline.
1. Air supply
- If the air pressure gauge on the regulator is showing no "no load" (the machine is not working) press the
pedal. If the pressure goes down to a few tenths of a bar, the air supply is limited or insufficient. Clean
the entire piping from the compressor, the filters and the humidity cyclone. Straighten out bent piping.
Check the air pressure with a certified pressure gauge. If you have doubts about the accuracy of your
old pressure gauge, change it for a new one.
2. Sandblasting pistol
- The nozzle will wear out in time. If the diameter of the nozzle gets bigger, about 1/16" from its original
size or if the nozzle is unevenly worn out, change it. Adjust the nozzle according to the used substance
or working conditions. Correctly working nozzle indicates mercury column height between 38 - 43 cm
on the pressure gauge.
3. Cyclone
- Insufficient box ventilation also lowers the cleaning efficiency of the nozzle and decreases the inside
visibility. When the box is switched off, use every 20 - 30 minutes (more often in dusty environment)
cyclone dust knocker (33). Empty the cyclone at least once a day. Also clean or change the filters
regularly. That way the cyclone efficiency remains stable. If needed, change the filter.
4. Blasting substances
- Use only high quality substances with pellets suitable for the particular type of work. Wet or dirty
substance may interrupt the blasting process immediately. Store the substance in appropriate volumes
and in a dry place. Refill the substance through the floor. There should be about 15 cm of substance
above the dosage measuring valve. If you need to refill the substance during the blasting process, fill the
substance so the circulation in the pistol may work properly. The substance will break down eventually
or it is too dirty. The less of substance is in the system the less you need to change.
5. Supply of the blasting substance
- Change each damaged or worn out hose. Set the dosage measuring valve to a suitable flow. Too reach
substance mixture will cause the pistol to fluctuate. Unusually loud noise during the blasting process
indicates too much air and not enough substance - poor mixture. Too reach mixture lowers the impact
speed and poor mixture lowers the number of pellet impacts. Both mixtures decrease the efficiency of
the blasting or cleaning process.
If all is set correctly and you still feel that the efficiency is poor, contact the vendor or the distributor.
If the suction system works properly, you may need to do a pressure system overhaul or change the substance for new one.
8
9