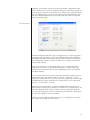
1
Owner’s Manual
Wisdom Audio
System Controller
SC-1
WARNING: TO REDUCE THE RISK OF FIRE OR ELECTRIC SHOCK, DO NOT
EXPOSE THIS APPLIANCE TO RAIN OR MOISTURE.
CAUTION
RISK OF ELECTRIC SHOCK
DO NOT OPEN
CAUTION: TO REDUCE THE RISK OF ELECTRICAL SHOCK, DO NOT
REMOVE COVER. NO USER-SERVICEABLE PARTS INSIDE. REFER SERVICING
TO QUALIFIED PERSONNEL.
Danger
The lightning flash with arrowhead symbol, within an equilateral
triangle, is intended to alert the user to the presence of uninsulated
“dangerous voltage” within the product’s enclosure that may be of
sufficient magnitude to constitute a risk of electric shock to persons.
Important
The exclamation point within an equilateral triangle is intended
to alert the user to the presence of important operating and
maintenance (servicing) instructions in the literature accompanying
this equipment.
Marking by the “CE” symbol (shown left) indicates compliance of
this device with the EMC (Electromagnetic Compatibility) and LVD
(Low Voltage Directive) standards of the European Community.
Manufactured under license from Audyssey Laboratories. U.S. and foreign patents pending. Audyssey™, Audyssey Labs™ are trademarks of Audyssey
Laboratories. MultEQ® XT is a registered trademark of Audyssey Laboratories.
Note: This equipment has been tested and found to comply with the limits for
a Class B digital device, pursuant to part 15 of the FCC Rules. These limits are
designed to provide reasonable protection against harmful interference in a
residential installation. This equipment generates, uses and can radiate radio
frequency energy and, if not installed and used in accordance with the instructions, may cause harmful interference to radio communications. However, there
is no guarantee that interference will not occur in a particular installation. If
this equipment does cause harmful interference to radio or television reception, which can be determined by turning the equipment off and on, the user
is encouraged to try to correct the interference by one or more of the following
measures:
• Reorient or relocate the receiving antenna
• Increase the separation between the equipment and the receiver
• Connect the equipment into an outlet on a circuit different from
that to which the receiver is connected
• Consult the dealer or an experienced radio/TV technician for help
2
Important Safety Instructions
Please read all instructions and precautions carefully and completely before operating your Wisdom Audio equipment.
1. Read these instructions.
2. Keep these instructions.
3. Heed all warnings.
4. Follow all instructions.
5. Do not use this equipment near water.
6. Clean only with a dry cloth.
7. Do not block any ventilation openings. Install in accordance with the manufacturer’s instructions.
8. Do not install near any heat sources such as radiators, heat registers, stoves,
or other apparatus (including amplifiers) that produce heat.
9. Do not defeat the safety purpose of the polarized or grounding-type plug. A
polarized plug has two blades with one wider than the other. A grounding
type plug has two blades and a third grounding prong. The wide blade of
the third prong are provided for your safety. If the provided plug does not
fit into your socket, consult an electrician for replacement of the obsolete
outlet.
10. Protect the power cord from being walked on or pinched particularly at
plugs, convenience receptacles, and the point where they exit from the apparatus.
11. Only use attachments/accessories specified by the manufacturer.
12. Unplug this apparatus during lightning storms or when unused for long periods of time.
13. Refer all servicing to qualified personnel. Servicing is required when the apparatus has been damaged in any way, such as power-supply cord or plug is
damaged, liquid has been spilled of objects have fallen into the apparatus,
the apparatus has been exposed to rain or moisture, does not operate normally, or has been dropped.
14. ALWAYS disconnect your entire system from the AC mains before connecting or disconnecting any cables, or when cleaning any component.
15. NEVER operate this product with any covers removed.
16. NEVER wet the inside of this product with any liquid.
17. NEVER pour or spill liquids directly onto this unit.
18. NEVER bypass any fuse.
19. NEVER replace any fuse with a value or type other than those specified.
20. NEVER operate this product in an explosive atmosphere.
21. ALWAYS keep electrical equipment out of the reach of children.
3
Table of Contents
Important Safety Instructions..........................................................................3
Unpacking the SC-1.........................................................................................6
Warm up/break-in period........................................................................................6
Placement Considerations................................................................................7
Ventilation..............................................................................................................7
Operating Voltage............................................................................................8
Special Design Features...................................................................................9
Advanced Room Correction....................................................................................9
Multiple Setup Memories........................................................................................9
Bi- or Tri-amplification............................................................................................9
System-Specific EQ...............................................................................................10
Remote Setup via Modem.....................................................................................10
Front Panel..................................................................................................... 11
Rear Panel......................................................................................................13
Using single-ended preamplifiers...................................................................14
Using single-ended amplifiers........................................................................14
Using single-ended amplifiers........................................................................15
Using single-ended amplifiers........................................................................16
Remote turn-on
tip polarity.....................................................................................................17
Introduction to Room Acoustics....................................................................20
Start With the Room.............................................................................................20
Rigid Walls.....................................................................................................20
Main Speaker Placement.......................................................................................21
Subwoofer Placement...........................................................................................22
Room Treatment...................................................................................................22
Professional Acoustic Design................................................................................23
References............................................................................................................23
Getting Ready to Calibrate.............................................................................24
System Connections..............................................................................................24
Overview of the Process.......................................................................................24
Before Calibration ................................................................................................25
During Calibration................................................................................................25
Wisdom System Configuration.......................................................................26
Connecting the PC................................................................................................26
Wisdom System Configuration ......................................................................26
Basic Setup...........................................................................................................26
Basic Setup tab..............................................................................................27
6.x Phantom..................................................................................................27
Multi-Zone Setup (part 1)...............................................................................28
Speaker Selection.................................................................................................28
Speaker Selection screen 1............................................................................28
Speaker Selection screen 2............................................................................29
Room Calibration..................................................................................................29
Determining the trim value............................................................................30
Room Calibration tab....................................................................................30
4
Bass Management..........................................................................................31
Post Calibration Trims....................................................................................32
Audyssey MultEQ® Pro...................................................................................33
Launching MultEQ Pro.........................................................................................33
Room Calibration..........................................................................................33
MultEQ Pro Welcome screen.........................................................................34
Job Information..............................................................................................34
Options/Microphone Selection......................................................................35
Multi-Zone Setup (part 2)..............................................................................35
Zone Configuration........................................................................................35
Room Dimensions.........................................................................................36
Equipment Info..............................................................................................37
Measurement........................................................................................................37
Microphone position.....................................................................................37
Measuring additional positions.......................................................................38
Detection Results..................................................................................................39
Target Sound Options...........................................................................................41
Disconnect the microphone...........................................................................42
Save Results..........................................................................................................43
Advanced Calibration Tip..............................................................................43
Calibration Completed...................................................................................45
Care & Maintenance......................................................................................47
North American Warranty.............................................................................48
Five Year Warranty...............................................................................................48
Obtaining Service..........................................................................................49
Specifications.................................................................................................50
Dimensions....................................................................................................51
5
Unpacking the SC-1
Please exercise caution when unpacking your new Wisdom Audio SC-1 to
ensure that you do not strain yourself.
Caution!
Do not attempt to lift your SC-1 while bending or twisting from the
waist. Use your legs for lifting, not your back.
Always stand as straight as possible and keep the SC-1 close to your
body.
After unpacking your SC-1, keep all packing materials for future transport. In
the event that you need to ship your SC-1, only the original, purpose-designed
shipping carton is acceptable. Any other method of shipping this product runs
a significant risk of damage to the SC-1—damage that would not be covered by
the warranty.
Carefully inspect your SC-1 for possible damage due to shipping. If you discover
any, contact your Wisdom Audio dealer immediately.
Warm up/break-in period
Although your Wisdom Audio SC-1 delivers outstanding performance straight
out of the box, you should expect to hear it continue to improve as it reaches
its normal operating temperatures and its various components “break in.” It has
been our experience that the greatest changes occur within the first 25-50 hours,
but that the SC-1 will continue to improve in sound quality for about 300 hours,
after which time it remains quite constant.
The only exception to this rule is if power is removed from the unit, allowing it
to cool down. In this case you should expect a brief warm-up period before the
SC-1’s sound quality is at its best. (Fortunately, you will never have to repeat the
full 300 hour break-in period.)
6
Placement Considerations
PRECAUTION
For your protection, review “Important Safety Instructions” and
“Operating Voltage” before you install your SC-1.
Note that adequate clearance for the AC cord and connecting signal cables
must be left behind your SC-1. We suggest leaving at least six inches (15 cm) of
free space behind your SC-1 so all cables have sufficient room to bend without
crimping or undue strain.
If possible, the SC-1 should also be placed in such a way that the power switch
on the rear panel is easily accessible. This switch disconnects power from the
unit completely, resulting in effective disconnection of the SC-1 from the AC
mains. You might think of this as a “vacation switch,” should you wish to turn
off your system completely when you will be away from home for a prolonged
period of time. Just remember to turn it back on again when you return.
Ventilation
Your Wisdom Audio SC-1 contains many active devices and a great deal of
signal processing. It will run quite warm under normal operation. It should not
be placed directly on top of another component that generates significant heat,
such as most power amplifiers. Do not block the vents on the sides of the unit.
Mechanical drawings are included in this manual to facilitate special installations where necessary (see “Dimensions” at the end of this manual).
7
Operating Voltage
For compatibility with existing household outlets, a standard three prong, 15
ampere plug is provided on the removable, IEC-standard AC mains cable.
The Wisdom Audio SC-1 may be set for 100-120V or 200V-240V AC mains operation. Outside the United States, and depending on local electrical codes and
regulations, the AC mains cord may need to be replaced with one that conforms
to local plug/outlet standards.
The operating voltage of the SC-1 may not be changed by the user. Your SC-1
has been preset at the factory for the voltage of the country for which it was
built. If you move to a country with a different AC mains voltage, please contact
your local Wisdom Audio distributor or Wisdom Audio for assistance.
8
Caution!
Always make sure the SC-1 is set for the correct voltage before
connecting it to AC mains power! Failure to do so can permanently
damage the unit. The voltage setting of the unit is determined by the
country for which it was manufactured, and is clearly marked on the
packaging.
Special Design Features
Advanced Room Correction
Multiple Setup Memories
Audyssey MultEQ® XT is a room equalization solution that calibrates any audio
system so that it can achieve optimum performance for every listener in a large
listening area. MultEQ® XT captures acoustical information at multiple locations
throughout a listening area in both the time and frequency domains. It uses a
sophisticated clustering algorithm to combine this information so that acoustical problems are accurately analyzed. Based on these measurements, MultEQ
XT calculates an equalization solution that corrects for both time and frequency
response problems in the listening area and also performs a fully automated surround system setup. The result is clear, well-balanced sound for every listener.
We then went further and provided support for recalling up to three complete
and independent setup calibrations, any of which can be selected as needed.
While a single setup is all that is necessary, having the ability to recall any of
multiple setups can solve some otherwise difficult situations. For example, you
might want to have selectable setups for
• different room conditions (e.g., drapes open vs. closed)
• slightly different target curves (e.g., music vs. gaming)
• various seating arrangements
Only you and your dealer can decide whether you would benefit from taking
advantage of any of these possibilities. Most people obtain everything they need
from a single setup; but having the flexibility to address unusual circumstances
can be invaluable.
Bi- or Tri-amplification
People who have wanted to extract the highest performance from their systems
have known for a long time that driving each section of the speaker directly and
separately yields the finest results. Of course, this requires having a dedicated,
active crossover to divide the frequency range appropriately before the power
amplifiers, so that they can then drive the speakers directly.
Biamplification makes use of two channels of amplification to drive different
portions of a single channel. The most common instance of “bi-amping” today
is in home theater applications, wherein a dedicated subwoofer handles the
deepest bass, while the remaining audible range is handled by the various front
and surround speakers. But you can also biamplify a full range loudspeaker,
driving the woofer separately from the drivers that handle the midrange and
treble frequencies.
Logically, you can combine these two approaches, and the result is “triamplification.” A “tri-amped” system uses separate amplification for three audible
ranges. In our case, the three ranges are:
• deepest bass (one or more subwoofers)
• mid-bass (the woofers in the front and surround speakers)
• midrange and treble (the planar magnetic panels)
9
Since each channel of the amplifier is delivering current into its load only over
a limited range of frequencies, several forms of distortion are reduced as compared to each channel handling the full range of musical information.
The SC-1 supports up to a “7.3 channel” system, meaning that up to seven main
speakers can be supported (all of which are biamplified), plus up to three independent subwoofer channels. All of these outputs benefit from room correction,
described above.
System-Specific EQ
Wisdom Audio speakers deliver extraordinary performance from slim, elegant
enclosures. However, we cannot cheat the rules of physics. Delivering powerful
bass from such small enclosures places unusual demands on both the woofers
and the amplifiers used to drive them.
Specifically, equalization is used to compensate for the unusually small enclosure volume behind the woofer. This approach is used in almost all dedicated
subwoofers today, and we use it in our full range speakers. Doing so allows us
to achieve the bass performance usually associated much larger speakers, but in elegant enclosures that support modern lifestyle choices.
10
Front Panel
1
Power Switch, Standby Indicator and Input Clip Indicator
The SC-1 features a sculpted front panel that conceals two switches under
the flexible ends of the middle section. On the left side, gently pressing
the end of the center section will engage a microswitch under the face of
the SC-1, which will in turn toggle the unit between operate and standby
modes. The international symbol for power is inscribed in this location
to designate its purpose.
The amber LED indicator on the left side of the center section is lit when
the SC-1 is in standby to indicate that it is receiving power; it is off when
the SC-1 is either fully on or when there is no power being supplied to the
unit. (When the SC-1 is fully on, one of the setup memory LEDs will be lit
to indicate both power and which setup memory is being used. If all the
LEDS are off, no power is being supplied to the unit.)
The SC-1 requires several seconds to “boot up” when coming out of standby. The amber LED flashes during this startup process, turning off when it
is complete. One of the Setup Memory LEDs will turn on at this point to
indicate which memory is active).
Finally, if the SC-1 detects input clipping on any of its channels, the
Standby LED will flash rapidly for three seconds. If the clipping continues
(at least once per three-second interval), it will continue flashing. In the
unlikely event that you see this indication, you should turn the system
volume down to reduce distortion and potential damage to your speakers.
2
Setup Memory LED Indicators
The Wisdom System Controller incorporates the latest version of
Audyssey MultEQ® XT room correction to enable it to address roomspecific problems that would otherwise compromise performance. Under
11
most circumstances, a single calibration of the system for the room and
your preferred listening positions is all that is necessary. But the SC-1
provides storage of up to three complete and independent calibrations to
address various situations.
These three LEDs indicate which of the three setup memories is currently
active. They also serve to indicate that the unit is powered up and operating normally. (When the unit is in standby, only the amber standby LED on
the left side of the front panel is lit; the blue memory LEDs are off.)
The LEDs indicate which of the three setup memories is active:
•
•
•
•
LED 1 on = Setup memory #1 enabled
LED 2 on = Setup memory #2 enabled
LED 3 on = Setup memory #3 enabled
LED 1 blinking slowly = MultEQ® bypassed temporarily
The bypass mode is available so you can hear the difference room correction has made on your system. When the room correction subsystem is
bypassed, the active crossover and other system-specific circuitry is still
engaged. This allows you to easily hear only what the room correction
software is doing for your system.
You can cycle through the available memories and bypass mode by pressing the Setup Calibration Switch to the right of these indicators. (See 3,
below.)
In addition, there is one special case:
•
3
During room correction calibration (only), all three LEDs will
be on, and the LED for the setup memory you are working
on will blink for the duration of the calibration. The LEDs will
return to their normal operation as described above once the
results of the calibration are saved permanently to memory.
Setup Calibration Selector Switch
Pressing the right side of the center section of the SC-1 front panel will
activate a microswitch that cycles the unit through the available setup
memories.
If only one memory has been set up (which is fairly typical), pressing this
button will toggle MultEQ XT on and off. If multiple setups have been
stored, pressing this button will cycle through the available setups in order,
ending in the same bypass mode for the room correction prior to starting
the cycle over again:
•
•
•
•
12
Setup Memory 1
Setup Memory 2 (if available)
Setup Memory 3 (if available)
Bypass MultEQ® XT
R
L
C
SL
SR
SBL
SBR
Sub1
Sub2
Sub3
INPUT
CAUTION--RISK OF ELECTRIC SHOCK--DO NOT OPEN
ON/OFF
Please refer to owner's manual
for fuse replacement
Manufactured under license from Audyssey Laboratories.
U.S. and n patents pending.
HIGH OUT
MultEQ XT is a trademark of Audyssey Laboratories.
SUB
OUTS
O 100-120V, 50-60 Hz, @ < 0.5A
FUSE REPLACEMENT
O 200-240V, 50-60 Hz, @ < 0.25A
100-120V
200-240V
T 500mA L 250V T 250mA L 250V
Voltage set at factory for destination country
LOW OUT
in
SC-1 System Controller
made in USA
www.wisdomaudio.com
R
L
C
SL
SR
SBL
s/n:
USB
RS232
12v trigger
~ AC INPUT
SBR
out
Rear Panel
Caution!
Turn off your power amplifiers before attempting to connect
anything to your Wisdom Audio SC-1.
1
7.3 Channel Inputs
The SC-1 supports multichannel systems of up to 7.3 channel configurations; that is, you may have as many as seven main channels and three
independent subwoofer channels controlled by the SC-1. These ten balanced audio inputs accept signals from a preamplifier/processor with
balanced outputs via high quality XLR connectors.
The pin assignments of these XLR-type female input connectors are:
2 1
3
Pin 1: Chassis ground
Pin 2: Signal + (non-inverting)
Pin 3: Signal – (inverting)
Connector ground lug: chassis ground
These pin assignments are consistent with the standards adopted by the
Audio Engineering Society. Refer to the operating manual of your balanced-output preamplifier to verify that the pin assignments of its output
connectors correspond to your Wisdom Audio SC-1. If not, wire the
cables so that the appropriate output pin connects to the equivalent input
pin, in order to preserve the polarity of the musical signal.
Connect the output of your preamp/processor to these balanced XLR
inputs. The inputs are in the following order, from left to right as seen from
behind the SC-1: Left, Right, Center, Surround Left, Surround Right, Surround Back Left, Surround Back Right, Sub1, Sub2, Sub3.
13
During calibration, the Left input (in the top left corner as seen from
behind the unit) is also used by your installer for connecting the output of
the calibrated microphone that measures the room’s response.
Caution!
Do not connect the calibrated microphone to the Left input input
of the SC-1 until instructed to do so a part of the MultEQ® Pro
software application.
Doing so before completing the Product Selection screen as part
of the MultEQ Pro application (see Product Selection, page 31)
will cause microphone feedback at levels that could damage the
speakers.
If your preamplifier/processor does not have balanced outputs, the adapter
used to convert from balanced to single-ended should tie Pin 1 and Pin 3
(the inverted signal) together. This can easily be checked with an ohmmeter: the impedance between Pin 1 and Pin 3 should approach zero. Note
that the most suitable adapter on the input side of the SC-1 is different
than the appropriate adapter on the output side, due to the SC-1’s high
input impedance. Should you need them, properly wired adapters are
available from Wisdom Audio for a nominal charge.
Using single-ended preamplifiers
2
7 Channel High (Planar) Output
These seven balanced audio outputs carry the room-corrected “high pass”
portion of the audio spectrum, and must be connected to the amplifiers
that drive the planar magnetic panels.
The pin assignments of this XLR-type male output connector are:
1
2
3
Pin 1: Chassis ground
Pin 2: Signal + (non-inverting)
Pin 3: Signal – (inverting)
Connector ground lug: chassis ground
These pin assignments are consistent with the standards adopted by the
Audio Engineering Society. Refer to the operating manual of your power
amplifier to verify that the pin assignments of its input connectors correspond to your Wisdom Audio SC-1. If not, wire the cables so that the
appropriate output pin connects to the equivalent input pin, in order to
preserve the polarity of the musical signal.
Using single-ended amplifiers
14
If your power amplifier does not have balanced inputs, the adapter used
to convert from balanced to single-ended must “float” Pin 3 (the inverted
signal). This can easily be checked with an ohmmeter: the impedance between Pin 3 and either the center pin or the shield skirt on the RCA should
be infinite. Tying the output of Pin 3 to ground (as many adapters do) will
compromise the performance of the SC-1, due to its low output impedance. Note that the most suitable adapter on the input side of the SC-1 is
different than the appropriate adapter on the output side, due to the SC-1’s
low output impedance. Should you need them, properly wired adapters
are available from Wisdom Audio for a nominal charge, or they can be
purchased online at
http://www.markertek.com/Connectors-Adapters/Audio-Adapters/XLR-toRCA-Adapters/Switchcraft-Corporation/322X.xhtml
3
7 Channel Low (Woofer) Output
These seven balanced audio outputs carry the room-corrected “low pass”
portion of the audio spectrum, and must be connected to the amplifiers
that drive the woofer sections of the loudspeakers.
The pin assignments of this XLR-type male output connector are:
1
2
3
Pin 1: Chassis ground
Pin 2: Signal + (non-inverting)
Pin 3: Signal – (inverting)
Connector ground lug: chassis ground
These pin assignments are consistent with the standards adopted by the
Audio Engineering Society, and are used with the purpose-designed SAseries power amplifiers from Wisdom Audio. If you elect to use a different
amplifier for your woofers, please refer to the operating manual of your
power amplifier to verify that the pin assignments of its input connectors
correspond to your Wisdom Audio SC-1. If not, wire the cables so that the
appropriate output pin connects to the equivalent input pin, in order to
preserve the polarity of the musical signal.
If your power amplifier does not have balanced inputs, the adapter used
to convert from balanced to single-ended must “float” Pin 3 (the inverted
signal). This can easily be checked with an ohmmeter: the impedance between Pin 3 and either the center pin or the shield skirt on the RCA should
be infinite. Tying the output of Pin 3 to ground (as some adapters do) will
compromise the performance of the SC-1. Should you need them, properly wired adapters are available from Wisdom Audio for an additional
charge, or they can be purchased online at
Using single-ended amplifiers
http://www.markertek.com/Connectors-Adapters/Audio-Adapters/XLR-toRCA-Adapters/Switchcraft-Corporation/322X.xhtml.
4
3 Channel Subwoofer Output
These three balanced audio outputs carry the room-corrected subwoofer outputs, and must be connected to the amplifiers that drive the
subwoofer(s) in the system.
The pin assignments of this XLR-type male output connector are:
1
2
3
Pin 1: Chassis ground
Pin 2: Signal + (non-inverting)
Pin 3: Signal – (inverting)
Connector ground lug: chassis ground
These pin assignments are consistent with the standards adopted by the
Audio Engineering Society. Refer to the operating manual of your power
amplifier to verify that the pin assignments of its input connectors correspond to your Wisdom Audio SC-1. If not, wire the cables so that the
appropriate output pin connects to the equivalent input pin, in order to
preserve the polarity of the musical signal.
15
If your power amplifier does not have balanced inputs, the adapter used
to convert from balanced to single-ended must “float” Pin 3 (the inverted
signal). This can easily be checked with an ohmmeter: the impedance between Pin 3 and either the center pin or the shield skirt on the RCA should
be infinite. Tying the output of Pin 3 to ground (as some adapters do) will
compromise the performance of the SC-1. Should you need them, properly wired adapters are available from Wisdom Audio for an additional
charge, or they can be purchased online at
Using single-ended amplifiers
http://www.markertek.com/Connectors-Adapters/Audio-Adapters/XLR-toRCA-Adapters/Switchcraft-Corporation/322X.xhtml.
5
USB Port
This USB port is used by your installer to connect a Windows-compatible
PC for setup and calibration. It provides two-way communication between
the SC-1 and the computer that is used for adjusting the many parameters
of the system controller.
6
RS232 Interface
The RS232 interface allows an external control system such as AMX, Control4, Crestron, or Savant to control the SC-1. All basic operational modes
are supported (operate, standby, selecting setup memories).
When the SC-1 is first powered up, it will identify itself to the control
system via the RS-232 port, sending either
Wisdom Audio SC-1 Ready...
or
Wisdom Audio SC-1
ERROR
…depending on whether there is at least one setup memory that has been
calibrated and is available for use. (For proper operation, at least one setup
memory must be saved into the SC-1’s non-volatile memory.)
The RS232 port is wired as a DCE, and connects via a straight cable to a
DTE, or via a null modem/crossover cable to another DCE (uncommon).
•
•
•
Pin 2 is the TRANSMIT for data FROM the SC-1 TO the control
system, and carries RS232 signal name RxD
Pin 3 is the RECEIVE for data FROM the control system TO the
SC-1, and carries RS232 signal name TxD
Pin 5 is the GROUND/COMMON for the pin 2 and pin 3 signals
The other pins are not connected, the shell is grounded at the same point
as pin 5. Signal names RxD and TxD are named from the point of view of
the DTE and that’s why the names appear to be backward but are not per
the standard.
Off the shelf USB->RS232 adapters plug right in to the port and work as
expected without special configuration.
The commands available to your control system programmer are as follows:
16
•
•
•
•
•
•
•
OPERATE
STANDBY
EQ1 (will also bring SC-1 out of Standby if needed)
EQ2 (will also bring SC-1 out of Standby if needed)
EQ3 (will also bring SC-1 out of Standby if needed)
EQOFF (will also bring SC-1 out of Standby if needed)
STATUS (will provide a listing of current status to the control
system)
Commands are terminated by either a CR (carriage return) or LF (line feed)
character. Communication parameters are 9600, N, 8, 1. Responses to
all commands are either OK or ERROR (as when trying to address a nonexistent setup memory).
If any of the inputs are clipped due to excessive incoming signal voltage,
the RS-232 will send a message indicating which ADC has experienced
clipping. It will also send a message when clipping has stopped.
The calibration routines are not supported via the RS-232 port. Your installer will need to use the USB port for the calibration process.
7
12v Trigger In and Out
These 12v trigger jacks provide compatibility with a wide range of products to facilitate remote turn-on and turn-off in systems. These 1⁄8" (3.5
mm) “mini-jacks” allow other components to bring the SC-1 in and out of
standby. Two such mini-jacks are provided to allow “daisy-chaining” of
this turn-on signal with other components, such as amplifiers.
The remote trigger input will be operated by any positive-polarity DC
signal between 3–20 volts (only a few milliamps are required), with tip polarity as shown below:
Remote turn-on
tip polarity
–
+
Input Signal: 3-20 volts @ less than 10 mA
Output Signal: 12 volts @ 100 mA
The DC Trigger Input has priority over the front panel switch. Therefore, if
a trigger voltage is present at this input connector, the unit will be forced
on and the front panel switch will be ignored. When the voltage transitions from high to low (off), the unit will go into standby.
When there is no voltage present at the trigger input (either because the
controlling device is not sending, or because the plug is removed), the
front panel switch will operate the SC-1 as you would expect.
The 12v Trigger Output jack is driven to a “high” state of 12 volts a few
seconds after the SC-1 is turned on, and can source as much as 100 mA of
current at 12 volts. This signal may be used in turn to control other components, such as the Wisdom Audio SA-series of amplifiers. Each Wisdom
Audio component has a short delay built into its DC trigger system to facilitate a staggered turn-on sequence.
Your Wisdom Audio dealer can help you take advantage of these design
features to maximize your system’s convenience and versatility.
17
8
Warning!
AC Mains Input, Switch and Fuse Assembly
A conventional, 15-ampere IEC standard power cord is used with the SC-1.
A high quality AC mains cord is included with the product, although the
use of the standardized IEC receptacle means that you may easily substitute another high quality AC mains cord if you wish.
Your new Wisdom Audio SC-1 has been safety-tested and is
designed for operation with a three-conductor power cord. Do not
defeat the “third pin” or earth ground of the AC power cord.
An AC mains switch is located just above to the power cord on the rear
panel of the SC-1. This switch may be used to disconnect the unit from the
AC mains without having to actually unplug the SC-1 from the wall outlet.
If you plan to be away for an extended period, or have any other reason to
turn the SC-1 completely off, you may either unplug the SC-1 or you may
use the AC mains switch.
Danger!
Potentially dangerous voltages and current capabilities exist within
your SC-1. Do not attempt to open any portion of the SC-1’s cabinet.
There are no user-serviceable parts inside your SC-1. All service of
this product must be referred to a qualified Wisdom Audio dealer or
distributor.
We recommend that care be taken to ensure that all AC plugs for the equipment
in the system be wired so as to ensure proper AC polarity. Doing so will minimize noise in the system.
In the U.S., a simple AC mains tester (found at any hardware store) can test to
ensure that your electrical outlets are wired properly. Elsewhere in the world
(for example, in European Union countries), the AC mains plugs themselves are
not always polarized. Your dealer can test for the proper orientation of the plug
in the outlet. In such a case, it is good practice to mark both plug and outlet to
ensure that all products remain in the proper orientation should it become necessary to temporarily disconnect the system (as for example, during an electrical
storm).
Finally, the Wisdom Audio SC-1 incorporates a fuse block that protects both the
live and neutral (ground) sides of the circuit. If your SC-1 is plugged into an AC
outlet that you know is live (plug a lamp into it as a test), and yet appears to be
off, check the following:
1
2.
3.
4.
18
Check the AC cord to make sure it is not damaged.
Check the AC mains switch to ensure that it is On (the side
with the straight line is depressed, not the “O” side).
If that does not resolve the problem, turn Off the AC mains
switch (“O”) and then disconnect the power cord from the AC
mains receptacle.
Using a small screwdriver, gently pry open the fuse block cover
at the top edge of the assembly. (You may be able to do it with
just your fingernail.)
5.
Pull out the red fuse block, and check both fuses. If either is
blown, please contact your local Wisdom Audio dealer (or
Wisdom Audio) for service.
19
Introduction to Room Acoustics
Wisdom Audio believes in equalization. Assume for a moment that you had
a “perfect” loudspeaker: as soon as you place it in your room, its perfection is
gone. In fact, even good rooms often introduce deviations of 20 dB to the response of the system.
It seems strange to us to worry about tenths-of-a-decibel differences between
one component and another when there are 10-20 dB problems right there in
the room with you.
At the same time, room equalization is not a panacea. It does not solve all problems. In fact, and somewhat paradoxically, EQ works best when it has the least
to do. It is best used as the “finishing touch” on an otherwise good system. Unfortunately, most people do not understand that the most important component
in their system is their room.
This manual does not have the space for a full description of everything that
goes into creating excellent room acoustics; doing so would require a textbook
of several hundred pages. Instead, we will give you some ideas, and some references to pursue should you want to learn more.
Start With the Room
There are many myths floating around pertaining to what a “good room” should
be like. One of the most common is that it should have non-parallel walls.
Without going into the details, we recommend staying with rectangular rooms
whose dimensions do not share common divisors.
Thus a room with dimensions of 8' by 16' by 20' would be quite poor (since the
dimensions are all divisible by a length of 4', and 16 is also multiple of 8). By
contrast, a room whose dimensions are 9' by 16' by 29' would be much better,
since none of the dimensions are mathematically related to one another.
There are infinite variations on this idea. If you have the flexibility to choose (or
modify) your room dimensions to avoid such problems, do so. Either way, our
room correction will be a big help.
Rigid Walls
Another myth that should be dispelled is the notion that the walls (and ceiling
and floor) of the room should be extremely rigid in order to reproduce good
bass. Rigid, inflexible walls reflect energy extremely well; thus you will keep
more of the bass energy in the room. This much is true. However, those rigid
walls will only increase the amplitude of the standing waves that your room
naturally supports. In simple terms, you will have more bass, but it will also be
more irregular, with larger peaks and valleys in the response.
Walls that flex a bit (but do not rattle) are much better. Coincidentally, traditional American residential construction standards (sheet rock on wooden studs) are
not a bad place to start. You can do better still with professional help, but studs
and sheet rock are better than poured concrete. (If your listening room is in the
basement, a false wall can easily be built in front of the concrete. You probably
need something like this for insulation and aesthetics anyway.)
The ultimate in dedicated listening room construction involves the design and
construction of floating walls, ceiling and floor. This approach yields the added
20
benefit (when done properly) of providing outstanding acoustic isolation from
adjacent spaces as well as superb bass reproduction. This approach goes well
beyond the scope of an owner’s manual; if you are interested, you should contact a professional acoustician who has specialized in domestic listening room
design.
Main Speaker Placement
Within the room itself, placement of the speakers and the listener will have a
profound effect on the performance of the system, particularly below 300 Hz
or so. There is no “perfect” position that will solve all problems, but finding the
best compromise will make it easier to solve the remaining problems with the
SC-1.
Your Wisdom Audio dealer can help you with optimizing your speaker placement, which is never quite as simple as it seems it should be. The characteristics
you should listen for are several:
• Stable, 3-dimensional stereo imaging
This usually requires reasonable symmetry within the room, and
a bit of space between the speakers and adjacent side walls (to
minimize the adverse effects of early first reflections). Mono
(correlated) pink noise can help here, though it does not replace
listening to music. With pink noise playing in both speakers, you
should hear a tightly-defined little “ball” of pink noise floating in
space exactly halfway between the speakers.
• Smooth, consistent bass
Oft-cited rules of thumb for smoother bass reproduction include
both “placing the speakers at different distances from the side
walls vs. the wall behind them,” and “placing them at ‘odd fractions’ of the room’s dimensions” (e.g., fractions in which the
denominator is an odd number, like 1⁄ 3, 2⁄5, 2⁄ 7, etc.). But nothing
replaces your experience in your room, combined with your dealer’s experience in a variety of rooms. Playing pink noise through
the woofer sections of your Wisdom Audio speakers (with the microphone at the listening position, and prior to doing any equalization) and watching the results on a Real Time Analyzer (RTA)
will let you see the results of your labors.
• Center channel height
Once you have a solid stereo image up front (when listening only
to the Left and the Right speakers), you need a center channel
speaker for multichannel reproduction. It should be centered between the Left and Right, and centered on the screen’s location,
preferably at the same height as the Left and Right speakers. This
presents an obvious problem: you cannot place a speaker in front
of your television screen. One solution is to locate it behind an
acoustically transparent front projection screen. Apart from such
an arrangement, try to minimize the change in image height as a
sound is panned across the front stage.
• Surround channel geometry
In a 5.x channel system, the surround should be placed either directly to the sides of or slightly behind the listening area (90°–115°
from the center channel, as seen from above). In a 7.x system, the
surround speakers should be closer to 90° from the center speaker, and the surround back speakers should be at approximately
130°–150° from the center speaker. This conforms to industry
standards, and ensures that you hear what was intended from a
spatial placement point of view. (Too often, the surround speakers
21
are all behind the listeners, creating a big “hole” in the soundfield
between the front and the back.)
a 7.2 channel system layout
Subwoofer Placement
Subwoofers offer somewhat greater flexibility in placement, since the frequencies they reproduce are not readily localizable by the human ear. This is due to
the fact that the wavelengths they reproduce are more than ten feet (3 meters)
long, but our ears are located only about 6-7 inches (≈ 17 cm) apart. Thus these
extremely long waves do not contribute meaningfully to the imaging that the
main speakers create.
However, this fact does not mean that the placement of the subwoofers has no
effect on the sound quality in the room. Far from it. The subwoofers are the
most likely to suffer from the response irregularities introduced by the room
itself, operating as they do below approximately 80 Hz in most systems.
Recent research into the behavior of rooms as a function of speaker placement
has concluded that — if you have the freedom to do so — there are significant
advantages to placing several smaller subwoofers around the room, rather than
relying on a single large woofer. Moreover, the optimum placement is usually centered on each of the four walls. If you have the luxury of doing so, this
simple placement strategy can reduce the size of the room’s response irregularities from 20 decibels down to perhaps as little as 6-8 decibels.
Reducing the room’s inherent problems to this degree is a huge advantage. It
allows the SC-1 to put its considerable abilities to work on perfecting your system’s response, rather than on trying to perform major corrective surgery.
Room Treatment
Rectangular rooms have six reflecting surfaces (four walls, ceiling and floor)
that reflect sound to the listener, after various delays introduced by the indirect
routes the sound waves take on their way to the listener. These first reflections are particularly damaging to sound quality. Looking at the simplest case
of stereo reproduction, you have a minimum of twelve first reflection points in
your room that deserve some attention.
Unfortunately, it is often difficult to do much about the ceiling and floor reflections, even though they are arguably the most destructive. (The minimization of
these reflections is one of the strongest arguments for the tall, line source loudspeakers that Wisdom Audio builds.) This leaves you with eight “first reflections”
that you should consider minimizing somehow. These points are easily found by
having a friend move a small mirror along the four walls of the room, while you
sit at the listening position. Any place on the wall where you can see a reflec-
22
tion of any speaker is a first reflection point. Concentrate on those for the Left
and Right speakers first.
If you can, arrange to apply either absorption or diffusion at these eight points
(don’t forget the wall behind you). Absorption can be as simple as heavy, insulated drapes; diffusion can be provided by a well-stocked bookcase with books
of varied sizes. Alternatively, you can buy purpose-designed room treatments
(some sources listed under References, below).
The important things to remember are these: a good room should have a balance of absorption and diffusion; and if you are going to treat only a few areas
of the room, the first reflection points are the most important ones to treat.
Professional Acoustic Design
Does this all sound too complicated? For good reason. It is complicated.
The difference between the average listening room and one that is professionally
designed and implemented is huge. A great listening room will disappear to an
astonishing degree, letting the experiences captured in your recordings speak to
you directly. A well-designed room is also quieter and more comfortable. It can
easily become a favorite retreat for peace and rejuvenation.
If you decide to investigate the possibility of improving your room with the help
of a professional, it is important to find someone who focuses on domestic/
residential spaces. Most acousticians are trained to deal with large spaces — airports, auditoriums, lobbies in commercial buildings, etc. The problems seen in
“small” rooms (residential spaces) are quite different, and outside the experience
of most acousticians. Find someone who specializes in and has lots of experience designing home studios, home theaters, and the like. Your Wisdom Audio
dealer may be such a person; failing that, he/she can help you find such a professional.
References
Books on Acoustics:
The Master Handbook of Acoustics, F. Alton Everest, TAB Books
Sound Reproduction: The Acoustics and Psychoacoustics of Loudspeakers and
Rooms by Dr. Floyd Toole
Suppliers of Acoustic Treatments:
Acoustic Innovations, http://www.acousticinnovations.com/
Acoustic Sciences Corporation, http://www.acousticsciences.com/
Echo Busters, http://www.echobusters.com
MSR Acoustics, http://www.msr-inc.com/home_theater/hometheater.html
RPG Diffusor Systems, http://www.rpginc.com/
23
Getting Ready to Calibrate
System Connections
Before you start to calibrate your SC-1, double-check the connections:
• All the balanced outputs of your preamp/processor to the corresponding Main Inputs of the SC-1.
• All the corresponding balanced High Outputs of the SC-1 to the
amplifier channels that are driving the planar (high frequency) sections of your Wisdom Audio loudspeakers.
• All the corresponding balanced Low Outputs of the SC-1 to the
amplifiers that are driving the woofer sections of your Wisdom
Audio loudspeakers.
• One, two or three of the Sub outputs of the SC-1 (depending
on how many subwoofer inputs you used) connected to the
amplifier(s) of your subwoofers.
If you have not done so already, now would be a good time to also make sure
that all loudspeaker cable connections are snug and cleanly made, with proper
attention being paid to polarity (+ to +, and – to –) everywhere.
As in any system, we recommend that the power amplifiers be the last components turned on, and the first components to be turned off. That way, if any
“upstream” components in the system emit a turn-on transient of some sort, the
speakers cannot be damaged. If you “daisy chain” your DC triggers from the
SC-1 to the Wisdom Audio SA-series amplifiers, the amplifiers will turn on automatically in series, one after another, after short delays. (See Rear Panel, item 7.)
Overview of the Process
Your Wisdom Audio SC-1 must be set up by your dealer, who has the requisite
equipment and software on a laptop computer. Briefly, the process is as follows:
1 Using the Wisdom Audio supplied System Configuration software,
configure the SC-1 to match the specifics of your system (so it
knows which speakers it is working with).
2 Calibrate the system to the room using the Audyssey MultEQ® Pro
software (integrated with the Wisdom Audio program) and an Audyssey Installer Kit. This calibration process uses multiple sets of
measurements taken with a professionally calibrated microphone
(that is included in the Audyssey Installer Kit) to achieve a more
accurate correction that results in clear, well-balanced sound
within the measured listening area.
3 If needed, repeat the room calibration process, saving the results
in up to three memories in the SC-1. This capability allows you
to optimize the system to the room under different conditions (for
example, drapes open vs. drapes closed).
For the purposes of this manual, we will assume that the installer already owns
a registered Audyssey Installer Kit and has installed the Wisdom Setup Configuration program prior to arriving on site. This is necessary before he can proceed
with the calibration of the system.
24
Caution!
Do NOT connect the output of the microphone to the SC-1 until the
software explicitly instructs you to do so in the calibration process.
Connecting the microphone with the SC-1 and amplifiers on at the
wrong time can cause dangerous feedback that may damage your
loudspeakers.
Before Calibration
Any subwoofer low-pass filter (crossover) should be defeated, or set to the THX
setting. Sometimes subwoofers have a special input that bypasses any internal
crossover, often called the “LFE input.” The elimination of the subwoofer’s own
low pass filter must be done before MultEQ® Pro measurements are made so
MultEQ Pro can see what every part of the system is truly capable of doing.
If the subwoofer low-pass filter cannot be defeated, set it to its maximum frequency. Any subwoofer gain controls should be set to their nominal settings,
such as at the THX position, or at 12 o’clock on a conventional level control.
Also, if the subwoofer has any sort of “Auto Standby” or sleep mode that turns
the power to the subwoofer off after it does not receive any signal for some
period of time, please disable this mode for the duration of the calibration.
Doing so will ensure that the subwoofer is always on and always outputting a
signal, which is important when taking accurate measurements.
During Calibration
Audyssey MultEQ® XT Room Correction performs more than equalization. It
also measures various parameters that should be set within the associated preamplifier/processor so that the entire system is optimized. Among the items
measured are:
• the acoustic distance from each loudspeaker to the Main Listening
Position (or position 1) microphone location;
• the recommended crossover frequency for each channel to the
subwoofer;
• the level trim for each loudspeaker channel, and
• an indication of the polarity of each loudspeaker.
Consult the documentation of the connected processor to set the parameters
given by the results of MultEQ Pro. Use the findings of MultEQ Pro to set the
time delay, the crossover frequency, and the level trim for each loudspeaker, as
these setting will be optimized for the room.
25
Wisdom System Configuration
Connecting the PC
Important: Turn on both your PC and the SC-1. Wait approximately thirty seconds for the
SC-1 to finish its startup routines, and for as long as it takes for Windows to
completely start up.
Do not connect the the PC to the SC-1 until both are fully “on”
(meaning neither Off nor in Standby). Also, do not Shut Down your
PC while its USB cable is still connected to the SC-1.
Using the USB A-B cable in the Audyssey™ Installer’s Kit, connect the SC-1 to
the PC on which is installed the WisdomSysConfig and Audyssey MultEQ® Pro
software. (Note that the SC-1 must be allowed to finish its startup process before
connecting it to the PC via USB.)
Launch the WisdomSysConfig application. You should see a splash screen for a
few seconds that looks like the following:
Wisdom System Configuration
If the connection between the PC and the SC-1 is not made for any reason, you
will see an error notification on your PC screen:
Double-check your USB cable, click OK, and retry the connection. When communication is established, you will be taken to the next screen.
Basic Setup
26
If this is the first time the SC-1 has been set up, you will receive the following
error message.
Click “OK” to be taken to the first screen in the setup process:
Basic Setup tab
The screen above allows you to configure the SC-1 for the number and nature of
the channels in your system. Select the appropriate configuration from the dropdown menu, wherein the normal conventions are used to describe the system,
e.g., a “5.1 Multichannel” system includes left, center, right, two surround channels, and a “0.1” subwoofer channel.
If you have already configured an identical system and saved the configuration,
you can load it by pressing the button below the drop-down menu.
If you are returning to set up an SC-1 that has already been set up at least once,
this screen will be skipped. The software will instead read the current settings of
the SC-1 and display the third panel (Room Calibration). If you need to return to
this screen to change the basic system configuration, you can click the Previous
button on the third and second screens to return, or click directly on the appropriate tab.
6.x Phantom
A special case exists in this menu system, that being the “6.x Phantom” system
configurations. This is intended to describe the case of what amounts to a 7.x
system minus its center channel. This configuration may be used in situations
where using a center channel is simply not practical.
Instead, the surround processor folds the center channel information into both
the left and right speakers equally, creating a “phantom” center channel image.
It is called out separately in this menu because there is also a “6.x Multichannel”
configuration which includes a center channel and a single, rear surround channel. In either case, the SC-1 needs to know which channels are being used so it
can produce the correct test signals during calibration.
When you have selected the basic system description that fits your situation,
click the Next button.
27
Multi-Zone Setup (part 1)
If you are setting up more than a single zone, choose the setting in this menu
that is the sum of all zones. For example, if you have a primary zone with a 5.1
theater, and a secondary zone with a 2.1 music system, select a 7.2 system. If
you want to have three 2.1 systems, we recommend choosing “6.3 Phantom”
since it keeps things a bit simpler later on. (See pp. 32–33.)
This step is important, since System Configuration passes along information to
MultEQ Pro about which channels of hardware are going to be used. You will
finish the process of defining which channels are used for which speaker, and
which zones, later when you get to MultEQ Pro.
Speaker Selection
The second tab provides visual confirmation that the basic system description
you selected is appropriate, and a graphic way to tell the SC-1 which loudspeakers you are using on each channel.
Follow the on-screen instructions, as shown below.
Speaker Selection screen 1
When you select a particular speaker location, the chosen speaker will be highlighted and the right-hand panel will change to show you the various possibilities available for that speaker, as seen below.
28
Speaker Selection screen 2
Select both the model (e.g., L75, P20) and the Speaker Mount type (e.g., In-wall,
On-Wall, or Freestanding), found in the top right corner. Repeat this process
for each speaker location in turn. This information is important, as it automatically loads important traits and capabilities of each speaker into the appropriate
channel of the SC-1’s processing. As an example, this identification is how the
SC-1 determines what crossover frequency to use between the midwoofers and
the planar magnetic sections of the selected speaker. (Note that the list of available speakers may change to reflect only valid options. Thus, you would not be
presented with the option of using a normal speaker as a subwoofer.)
While you should always use Wisdom Audio speakers when possible (since the
SC-1 is specifically designed to support them), a “Generic” speaker model is
provided in case you need to integrate non-Sage speakers into the system. For
example, you may have a situation in which architectural constraints mandate
in-ceiling speakers for the surround channels. Wisdom Audio does not manufacture in-ceiling speakers. In this case, select the “Generic” speaker type for those
locations and connect the High Pass outputs of the SC-1 for those channels to
the amplifier used to drive the non-Sage speakers. (The Low Pass outputs will
be deactivated for “Generic,” single-amplified speakers, and a full-range signal
will instead be routed out the High Pass outputs.)
A “GenSW” option is also provided, so as to accommodate the use of one or
more non-Wisdom Audio subwoofers.
When you are finished defining which speakers are being used in each location,
click on the “Commit to SC-1” button to download all of the relevant information to the system controller.
Room Calibration
On the third tab of WisdomSetupConfig.exe, the left two-thirds of the screen
is devoted to adjusting for the potential difference in overall level between the
woofer and planar magnetic sections of the system, while the right side concerns itself with room correction. We discuss the left side first.
There are two reasons why the woofers and the planar magnetic sections of the
speakers might not match one another in volume.
First of all, the planar sections tend to be more sensitive than the woofer sections, that is, they play more loudly for the same amount of power. This is a
29
function of both our unusually sensitive planar magnetic drivers and the small
enclosure volumes behind the woofers. The magnitude of this difference varies
among the different models, and with varying room placement.
The second reason for a difference in overall level between upper and low frequency sections of the speakers is that the amplifier chosen to drive the planars
may or may not have the same input sensitivity as the one used to drive the
woofers.
The best solution for both situations is the same: measurement the response of
the speaker, both above and below the crossover frequency. Then adjust the
planar magnetic side of the speaker up or down as needed to match the output
of the woofer section. This adjustment can be made on the left side of the
Room Calibration window, in the area labeled “High Crossover Volume Trim.”
(See below. Note that you will see fewer trims if you are using fewer than seven
main channels.)
Determining the trim value
Room Calibration tab
The SC-1 itself provides a high resolution measurement system, used in the
MultEQ Pro calibration process.
Without getting too far ahead of ourselves (since we have not yet discussed
MultEQ Pro), the idea is to take three measurements of what is happening in
your room, and to look at the resulting response curve. Comparing the average
level above and below the crossover frequency will tell you how much you
need to adjust the planar section up or down. This process “roughs in” the response of the system so that MultEQ has less work to do.
The cardinal rule of all equalization is that it is most effective when
it is least needed. Anything you can do to get the system closer to
where you want it to be before Audyssey is asked to fix the rest is a
Good Thing.
Once the trim values have been entered, click the “Save Speaker Trim” button
to download them to the SC-1.
30
Optionally, your installer may also save the basic speaker configuration at this
point to an XML file on your PC’s hard disk. Doing so saves having to repeat the
process if he ever needs to set up another SC-1 with the same associated equipment, as might happen if your system were damaged in an thunderstorm. This
XML file would be loaded by the “Load Config From File” button on the Basic
System Description page.
Bass Management
The Bass Management tab allows you to configure the SC-1 to derive an appropriate subwoofer output from a pair of Left and Right inputs. This capability is
used only in situations where no surround processor is available to provide the
bass management function, as is the case when you are using a conventional
stereo preamp instead.
In the screen shot above, we have previously set up a 6.3 Phantom system,
intending to use the SC-1 to provide three different 2.1 channel zones. (The
number of zones shown on this tab varies, depending on how many speakers
have been defined.)
You may create either mono or stereo subwoofer channels to complement your
main speakers, up to the hardware limit of a total of 7.3 channels. as an example, you could use the SC-1 as a three-way stereo crossover to create a single,
triamplified stereo system, and still have 5.1 channels left over for a home theater (e.g., a 2.2 zone and a 5.1 zone).
Define how you want the SC-1 to treat the available channels using the pulldown menus. You must specify whether you want the SC-1 to derive one or two
subwoofer channels (None, Mono, or Stereo), and you must specify both the
low pass and the high pass crossover frequencies (normally 80 Hz, although we
give you other options in 10 Hz increments).
Finally, you must send these selections to the SC-1 by clicking the “Commit to
SC-1” button on the right side of the screen.
31
Post Calibration Trims
The Post Calibrations Trims tab allows you to adjust the relative volumes of the
various channels in the system when you are not using a surround processor. It
complements the Bass Management tab in the previous section, and allows you
to make the type of level adjustments that are taken for granted in surround systems when using a stereo preamp instead.
All these values should be left at 0.0 if you do have a surround processor in the
system. (All such adjustments should be made in only one place; doing them in
two places would ensure confusion and a poor result.)
MultEQ Pro will provide you with recommended settings after taking all your
measurements. After the calibration process in MultEQ Pro is complete, return
to this tab to enter the data that is provided on the Detection Results page of
MultEQ Pro.
32
Audyssey MultEQ® Pro
Launching MultEQ Pro
Note:
At this point, the SC-1 knows all the critical information about the associated
equipment with which it is working, except for the most important component
of all: your listening room.
Your installer has been trained and has a thorough knowledge of
the Audyssey MultEQ Pro software. Additional information about
its recommended use and detailed explanations of the technology
is available in the Audyssey MultEQ Pro User Guide for the Sound
Equalizer.
Moving to the right side of the Room Calibration screen, select the EQ 1 radio
button and click the Launch Room Calibration button.
Room Calibration
Doing so will launch MultEQ Pro in a window that sits in front of the WisdomSetupConfig window.
33
MultEQ Pro Welcome screen
Warning!
Do not connect the microphone to the SC-1 at this time, since
feedback may result that could potentially damage your
loudspeakers.
Click the right-facing triangle to move to the Job Information screen.
Job Information
Complete the form above (and several to come) so as to document the installation properly, and then move on to the measurements of your room.
34
Options/Microphone Selection
Important: choose the serial number of the microphone you are using. All measurements are filtered through a calibration file that ensures their accuracy.
Multi-Zone Setup (part 2)
In System Configuration, you established the total number of main and subwoofer channels being used. (See pages 26-27.) In our example, Zone 1 had 5.1
channels, and Zone 2 had 2.1 channels, for a total of 7.2 channels used (out of
the 7.3 that the SC-1 supports). MultEQ Pro initially assumes that all speakers are
in Zone 1, as shown below.
Zone Configuration
The Zone Configuration screen allows you to reassign specific channels to either
a second or a third zone, using the radio buttons and pulldown menus. In this
case, for example, you might put channels 5, 6, and 9 into Zone 2. This would
give you a 5.1 system for your main theater that uses the Left, Center, Right, and
Surround outputs along with Subwoofer 1, while the second zone utilized the
“Back” channels and Subwoofer 2.
This Zone Configuration process is critical, since it defines when the speakers
are “chirped” for measurements by breaking them into groups. You can thus
“chirp” all of Zone 1 and then move the microphone to the second zone before
resuming with the measurements.
35
Important!
We strongly recommend that you leave the pulldown menus as they
are, in their default settings, since nothing you do here will change
the silkscreened labeling on the back of the SC-1. These labels
correspond to how the SC-1 is labeled; changing something here is
likely only to create confusion later.
Instead, it is easiest to use the first several channels for your theater, and then
to use any remaining channels in pairs (Surround L&R, Back L&R) for additional
stereo zones.
Similarly, you could have three 2.1 systems set up on a single SC-1. Select “6.3
Phantom” on the first screen of System Configuration, and then set up as follows:
• Zone 1 = Left, Right, Subwoofer1
• Zone 2 = Left Surround, Right Surround, Subwoofer 2
• Zone 3 = Left Back, Right Back, Subwoofer 3
Using the “6.3 Phantom” option skips the Center channel entirely, which is simpler when trying to remember which channel is being used in which room.
Room Dimensions
Providing the information on the room dimensions can be done in either English
or metric system measurements. It does not alter the nature of the room correction being done now; rather, when these results are uploaded to the Audyssey
website, it provides Audyssey with an enormous database of actual measurements in real rooms, along with pertinent data about those rooms. Audyssey
now has tens of thousands of these measurements, which enables them to improve their algorithms over time.
36
Equipment Info
This information will be included on the certificate that is available from the installer section of the Audyssey web site.
Measurement
The Measurement screen is where MultEQ® Pro collects the data it requires for
accurate room correction. At this point, your installer will connect an XLR cable
between the microphone preamplifier LINE OUT connector and the Left input
of the SC-1 (the top-left corner as seen from behind).
The mic preamp should be placed as close to the microphone as possible (e.g.,
the shortest cable length). Use any additional XLR cables between the mic
preamp and the SC-1, where they will carry the line level signal.
Microphone position
Place the microphone in a vertical position with the capsule pointing directly at
the ceiling for all room measurements. Make sure there are no nearby obstructions or large reflecting surfaces.
(artwork courtesy of Audyssey Laboratories™)
The Measurement screen includes a help section of scrolling text to provide
more details. (See below.) Some important notes:
• The microphone should be positioned as far out from the stand
as possible to minimize the effect of stand reflections. The micro37
phone was calibrated at “grazing incidence” and should point to
the ceiling, not at any of the speakers.
• Make the room as quiet as possible. Background noise can disrupt
the room measurements. Close windows, silence cell phones,
televisions, radios, air conditioners, fluorescent lights, home appliances, light dimmers, or other devices.
• Cell phones should be turned off or placed away from all audio
electronics during the measurement process as Radio Frequency
Interference (RFI) may cause measurement disruptions (even if the
cell phone is not in use).
• Refrain from talking and don’t sit or stand directly between any of
the speakers and the microphone during the room measurements.
Each speaker emits a series of test signals during the measurements and your body and background noise can disrupt the microphone’s ability to record the room response to the test signal.
The first (Position 1) measurement must be located at the primary listening position, as this is the measurement that establishes both distance and level settings
for your surround processor. Place the microphone’s tip at a location halfway
between where the primary listener’s ears would be, pointing at the ceiling.
Click the Measure button. Each speaker will be “chirped” ten times, followed by
a brief pause during which it remains important to be quiet. This is because the
system is measuring background noise levels to ascertain the quality of the data
it just obtained.
Measuring additional positions
38
When the system has successfully measured each speaker, the application will
be ready to measure the next measurement position. Start at the center of the
listening area and then take measurements around it spaced by 1-2 feet. The
idea is to sample multiple points throughout the listening area. Measurements
near the side and back walls should be avoided even if people may sit there.
Note:
Measuring some distant corner where no one would be listening,
or close to a room boundary such as a wall or floor, is actually
counterproductive. It will compromise the quality of the resulting
room correction by introducing irrelevant data.
A minimum of three measurements must be taken before the application will
allow you to move on to the next step. Up to 32 measurements may be taken,
although most rooms can be characterized quite well with 7-10 measurements
(depending on the size of the listening area).
The measurement process takes several minutes depending on the number of
channels MultEQ Pro will have to measure. It is essential to accurate room correction, and it actually goes quite quickly. Think of it: in a 7.3 channel system,
using ten listening positions, one thousand measurements are being made. (Ten
speakers, times ten locations, times ten chirps per speaker is 1000 measurements.) This is far more data than any human technician could master, and
allows the SC-1 to do a far better job of ascertaining what problems are most
characteristic of the room (rather than idiosyncratic to a single microphone location).
Click the forward (right-pointing) triangle to move to the next screen after you
are satisfied that you have made all the relevant measurements.
Detection Results
This screen displays the speaker Distance and Trim results derived from your Position 1 measurement and the recommended Crossover derived from all of your
position measurements. MultEQ® Pro lists individual speaker crossovers.
Note:
You must manually enter the information on this screen into the
preamplifier/processor’s settings.
Speaker Type indicates the approximate size of the detected loudspeaker as determined by its native in-room bass response.
39
Distance can be displayed in feet, in milliseconds, or in meters (cycle among
these choices by clicking the blue underlined column label). Which one is best
depends on the information your surround processor’s menu system needs. Use
the appropriate value to set the distance (delay) in the preamp/processor.
Note:
The distance measurement returned by Audyssey MultEQ Pro when
using Wisdom Audio’s unique Regenerative Transmission Line™
(RTL™) subwoofers is often inaccurate. If and when the subwoofer
distance seems wrong, please enter and use the actual, measured
distance as determined by a tape measure between the primary
listening position and the bass vent of the RTL subwoofer.
Trim is displayed in dB. This number is not a dB SPL number; it is a relative
Trim. The Trim information provided here must used to configure the channelto-channel speaker level trims in the preamp/processor. Simply copy these
numbers over to the corresponding output level adjustment settings in the setup
menu of your processor.
Crossover is displayed in Hz, listed in order of preference. Use these numbers
to enter the crossover frequency for each of your speakers. Depending on your
preamplifier/processor, follow one of the below three steps:
1 If your preamplifier/processor allows for individual speaker crossover settings, use the crossover frequency suggested for each
speaker.
2 If your preamplifier/processor pairs the crossover settings for your
front and surround speakers, then using the drop-down menus on
the MultEQ® Pro find the highest-on-the-list recommended crossover shared by your Left Front and Right Front speakers. Input that
as your “Front” speaker crossover setting on the preamplifier/processor. Use the same method for your surround speakers.
3 If the preamplifier/processor only allows one crossover setting for
the entire system then use the first crossover number MultEQ® Pro
lists for the center channel.
You should rarely choose the “Large” setting for the crossover in your surround
processor. This setting means that the deepest bass for that channel will not be
sent to the subwoofer. This choice makes sense only if your system does not
have a subwoofer. A high quality subwoofer will go deeper and exhibit better
power handling in the lowest frequency range than most speakers.
After you have entered all the information in the Detection Results screen into
your surround processor, click the forward triangle to move to the next screen.
40
Target Sound Options
Once the room measurements are completed, MultEQ® Pro calculates an equalization filter for each loudspeaker channel, including the subwoofer(s). The role
of these filters is to achieve a particular frequency response within the entire
listening area for each loudspeaker. This curve is determined based on several
acoustical and program material considerations and is called a target or calibration curve.
Contrary to popular belief, a target curve that is flat from 20 Hz to 20 kHz is not
always the one that will produce optimal sound. There are several reasons for
this including the fact that most loudspeakers are much more directional at high
frequencies than they are at low frequencies. This means that the balance of
direct and reverberant room sound is very different at the high and low ends of
the frequency spectrum — something that should be accounted for in selecting
an appropriate target curve.
The Target Sound Options screen allows you to determine the end result you
would like to hear, after MultEQ® Pro has finished calculating the corrections
needed to get you there. The four curves are used as follows:
• The Flat curve creates equalization filters that correct the response to flat from the low frequency cutoff point that MultEQ®
Pro has determined to the upper frequency limit of the tweeters.
This setting must be used in a THX system in order to allow THX
re-equalization to operate as it was intended. It is also recommended for very small or highly treated rooms in which the listener is seated close to the loudspeakers (where most of the sound
heard is directly from the speakers, rather than from subsequent
reflections within the room).
• The Standard HF Rolloff curve introduces a gentle attenuation
of high frequencies that accounts for the balance between direct
and reflected sound for most domestic rooms. This is the recommended curve for Wisdom Audio speakers under most circumstances.
• The Gaming curve adds some boost below about 40 Hz to enliven the gaming experience. While technically less “accurate” than
the Standard HF Rolloff curve, this option is unquestionably fun
and exciting. Be certain your subwoofers can handle a little extra
41
boost in the bottom octave before you get too carried away with
this setting.
• The SMPTE 202M curve is also known as the “X-curve” and is an
international standard for the high frequency roll-off applied in a
typical 500-seat movie theater. It is appropriate for professional
mixing spaces and dubbing stages that must be calibrated for film
sound postproduction. It can also be used in extremely large playback spaces (room volume greater than 5000 cu. ft.)
With the three setup memories available in the SC-1, it is possible to take advantage of multiple target curves.
For example, it is a relatively simply matter to use EQ 1 for movies, in which a
Flat target curves and THX processing in the surround processor is most appropriate; EQ 2 could be used for music listening, where the Standard HF Rolloff is
usually the more desirable target; and EQ 3 might include the Gaming curve for
your XBox or Playstation 3 exploits, or simply when you would like a little more
perceived “weight” in your music. Accessing these settings can even be fully
automated by means of a home automation controller (Crestron, AMX, Control4,
etc.) via the RS-232 port on the rear panel of the SC-1.
Disconnect the microphone
42
Warning! Having selected your target curve, it is now time to let MultEQ® Pro do the calculations needed to fully optimize the system in the room. Before you do anything else, however, it is essential to disconnect the measurement microphone
and reconnect the normal Left channel input. A warning dialog will pop up on
the PC screen to remind you of this fact.
You must remove the Calibrated Microphone Preamplifier’s XLR
connection from the SC-1’s Left input before continuing. Not doing
this will cause microphone feedback to be played on the system at
levels that could damage the speakers.
Save Results
Once the software finishes calculating the optimal correction filters for the
target curve you have selected, you will be presented with the Save Results
screen shown above.
If you would like to audition the new correction without overwriting anything
that may already exist in the EQ setup memory you have selected (e.g., EQ 1),
click the Transfer to SC-1 button. After a short delay to download the needed
information to the SC-1, you will be able to listen to whatever content you
like (music, movies, etc.). You can also turn MultEQ® room correction on and
off using the buttons on this screen to hear the difference room correction is
making in your system.
If you like what you hear, click on the Save Permanently to SC-1 button to
transfer the same filter to a non-volatile section of memory in the SC-1 that will
survive power outages and the like. Writing to this memory takes a little longer,
but once it is done you can access this setting at any time from the front panel
of the SC-1, or by way of RS-232 and your favorite home automation system.
You can also view the before-and-after results in your default browser by clicking on the View Results... button. This page can also be printed out for subsequent review and comparison with other setup memories you may elect to
calibrate.
Advanced Calibration Tip
The View Results... button can be an invaluable tool for diagnosing unusual
room and/or equipment problems. Get in the habit of doing your first three
position measurements at the primary listening position and two other positions nearby (e.g., the two next-most popular chairs). Then advance to the Save
Results page and look at your Before curves in View Results.... (Note that the
vertical scale in View Results... is 5 dB per division.)
The overall, average level of the area below about 250 Hz and the area above
1000 Hz should be just about the same. If not, disconnect the microphone,
close MultEQ Pro and adjust the HF Trim on the last screen of Wisdom SysConfig for any speakers that seem out of adjustment. Some rooms absorb bass
terribly, especially ones that have hung ceilings. Others may reinforce the bass
while absorbing the mids and highs (especially those that have been treated
with excessive absorption). Being able to adjust the midbass and bass relative to
43
the midrange and treble regions is a powerful tool that allows you to “home in”
on a good setting that is specific to the room at hand prior to MultEQ Pro doing
the finer adjustments.
As an example, we have seen rooms that worked perfectly at the recommended
starting setting of a –9 dB HF Trim for the L75i, and another room that required
only –2 dB for the exact same speaker. (This was a traveling demo system one
of our salespeople was taking from one dealer showroom to the next.) Without
the ability to get the system in the right “ballpark” for these extremely different
rooms, even MultEQ Pro would have been hard-pressed to yield the results we
were looking to achieve.
As an example, we’ll look at the same system, in the same room, with three different HF Trim settings, showing both Before and After results using the View
Results... button. To keep things simple, the microphone was never moved (not
recommended for normal calibrations).
First up is an L75i system with the HF Trim untouched, at 0.0 dB. You can see
that the planar section is significantly louder overall than the woofer section.
MultEQ respects what it interprets as a low frequency roll off, and there is little
energy below about 150 Hz.
This manual suggests an HF Trim of -9.0 dB for the L75i; so our intrepid installer
realizes his mistake and resets the system accordingly. The resulting curve now
looks like this:
While this isn’t bad (and would be further improved by measuring more positions in the room), it is probably overkill in this room. You are losing more
dynamic headroom in the system than is really necessary by pulling down the
planar magnetic drivers by the full 9 dB. This would be even more true if there
is a subwoofer in the system, since it would be reproducing all the deep bass.
Looking at an HF Trim setting of -5.0 dB yields the following, with the same microphone position.
44
This response would blend nicely with a subwoofer, crossing over at 50 Hz. So,
from these quick measurements you can see that an HF Trim of about -5.0 dB is
best suited to this particular room.
The final performance will be improved by moving the microphone around as
you normally do, so as to give the system more information about what is going
on in the room. In fact, the same speaker, in the same position, but with a total
of ten measurements in the room, looks like this:
Giving MultEQ Pro more information about what is happening in the room
really does improve its ability to correct for room problems.
Calibration Completed
Congratulations – your system is fully set up and calibrated.
45
You can use the close box shown at the top right corner of the screen (shown
above) to exit MultEQ® Pro, returning you to the last page of WisdomSystemConfig.exe.
If you would like to calibrate another setup memory, select the next one in
order (e.g., EQ 2 after you have saved EQ 1) and repeat the MultEQ® Pro portion of the setup process. This allows you to take advantage of multiple target
curves, or different seating arrangements, or different acoustic conditions such
as having heavy drapes open or closed.
46
Care & Maintenance
To remove dust from the cabinet of your SC-1, use a feather duster or a lint-free
soft cloth. To remove dirt and fingerprints, we recommend isopropyl alcohol
and a soft cloth. Dampen the cloth with alcohol first and then lightly clean the
surface of the SC-1 with the cloth. Do not use excessive amounts of alcohol that
might drip off the cloth and into the SC-1.
Caution!
At no time should liquid cleaners be applied directly to the SC-1,
as direct application of liquids may result in damage to electronic
components within the unit.
47
North American Warranty
Five Year Warranty
When purchased from and installed by an authorized Wisdom Audio dealer,
Wisdom Audio® electronic products are warranted to be free from defects in
material and workmanship under normal use for a period of five years from the
original date of purchase.
During the warranty period, any Wisdom Audio component exhibiting defects
in materials and/or workmanship will be repaired or replaced, at our option,
without charge for either parts or labor, at our factory. The warranty will not
apply to any Wisdom Audio component that has been misused, abused, altered,
or installed and calibrated by anyone other than an authorized Wisdom Audio
dealer.
Any Wisdom Audio component not performing satisfactorily may be returned to
the factory for evaluation. Return authorization must first be obtained by either
calling or writing the factory prior to shipping the component. The factory will
pay for return shipping charges only in the event that the component is found to
be defective as mentioned above. There are other stipulations that may apply to
shipping charges.
There is no other express warranty on this component. Neither this warranty nor
any other warranty, express or implied, including any implied warranties of merchantability or fitness, shall extend beyond the warranty period. No responsibility is assumed for any incidental or consequential damages. Some states do not
allow limitations on how long an implied warranty lasts and other states do not
allow the exclusion or limitation of incidental or consequential damages, so the
above limitation or exclusion may not apply to you.
This warranty gives you specific legal rights, and you may also have other rights
which vary from state to state. This warranty is applicable in North America
only. Outside of North America, please contact your local, authorized Wisdom
Audio distributor for warranty and service information.
48
Obtaining Service
We take great pride in our dealers. Experience, dedication, and integrity make
these professionals ideally suited to assist with our customers’ service needs.
If your Wisdom Audio component must be serviced, please contact your dealer.
Your dealer will then decide whether the problem can be remedied locally, or
whether to contact Wisdom Audio for further service information or parts, or to
obtain a Return Authorization. The Wisdom Audio Service Department works
closely with your dealer to solve your service needs expediently.
Important!
Return authorization must be obtained from Wisdom Audio’s Service
Department BEFORE a unit is shipped for service.
It is extremely important that information about a problem be explicit and complete. A specific, comprehensive description of the problem helps your dealer
and the Wisdom Audio Service Department locate and repair the problem as
quickly as possible.
A copy of the original bill of sale will serve to verify warranty status. Please include it with the unit when it is brought in for warranty service. This step is not
necessary if the warranty is registered at the time of purchase. (Another reason
to register your purchase at http://www.wisdomaudio.com/registration/.)
Warning!
All returned units must be packaged in their original packaging,
and the proper return authorization numbers must be marked on
the outer carton for identification. Shipping the unit in improper
packaging may void the warranty, as Wisdom Audio cannot be
responsible for the resulting shipping damage.
Your dealer can order a new set of shipping materials for you if you need to
ship your component and no longer have the original materials. There will be a
charge for this service. We strongly recommend saving all packing materials in
case you need to ship your unit some day.
If the packaging to protect the unit is, in our opinion or that of our dealer, inadequate to protect the unit, we reserve the right to repackage it for return shipment
at the owner’s expense. Neither Wisdom Audio nor your dealer can be responsible for shipping damage due to improper (that is, non-original) packaging.
49
Specifications
All specifications are subject to change at any time, in order to improve the
product.
■
■
■
■
■
■
■
■
■
■
■
■
■
Signal to Noise ratio:
Input impedance:
Output impedance:
–110 dB (ref 2.5V rms A-wtd.)
25 kΩ (balanced)
50 Ω
Recommended minimum load impedance:
600 Ω
Maximum output voltage:
2.5V rms
Maximum input voltage:
2.5V rms
Power consumption:33W
Thermal load:
2 BTU/minute
DC trigger input sensitivity:
3-20V @ 10 mA
DC trigger output signal:
12V @ 100 mA
Mains voltage ranges:
100-120V or 200-240V
Overall dimensions:
See “Dimensions”
Shipping weight:
34 lbs. (15.4 kg)
For more information, see your Wisdom Audio dealer, or contact:
Wisdom Audio
1572 College Parkway, Suite 164
Carson City, NV 89706
www.wisdomaudio.com
[email protected]
Ph: 775.887.8850
Fax: 775.887.8820
50
Dimensions
17" (43.2 cm)
33⁄8"
(8.6 cm)
33⁄4"
(8.57 cm)
3
⁄8"
(.95 cm)
151⁄2" (39.4 cm)
11⁄4"
(3.2 cm)
11⁄4"
(3.2 cm)
167⁄8" (42.9 cm)
13"
(33 cm)
135⁄8"
(34.7 cm)
5
⁄8"
(1.7 cm)
17" (43.2 cm)
135⁄8" (34.7 cm)
33⁄8"
(8.6 cm)
33⁄4"
(8.57 cm)
3
⁄8"
(.95 cm)
111⁄8" (28.3 cm)
11⁄4"
(3.2 cm)
11⁄4"
(3.2 cm)
51
is a registered trademark of Wisdom Audio, Inc.
Wisdom Audio
1572 College Parkway, Suite 164
Carson City, Nevada 89706 USA
Telephone: 775.887.8850
Fax: 775.887.8820
http://www.wisdomaudio.com
WSC1OM-1.8
© 10/2012 Wisdom Audio, Inc. All rights reserved.
Printed in U.S.A.