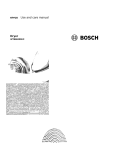
1
Use and Care Manual
Bosch Gas Ranges
with Mechanical Controls and Standard Convection
Table of Contents
About This Manual
...............................................
How This Manual Is Organized
Safety
.........................................................
.........................................................
..................................................
Parts and Accessories
................................................................
Control (Panel) ......................................................................
Before Using the Appliance for the First Time .............................................
Operation
- Cooktop
.............................................
About the Cooktop ..................................................................
Operation .........................................................................
Operation
1
1
Important Safety Instructions ............................................................
Getting Started
1
- Oven ................................................
1
5
5
8
12
12
12
13
13
About the Oven .....................................................................
14
Operation
14
.........................................................................
Getting the Most Out of Your Appliance
..............................
Getting the Most Out of Your Cooktop ...................................................
Getting the Most Out of Your Oven .....................................................
Cleaning and Maintenance
........................................
Cleaning - Cooktop ..................................................................
Cleaning - Oven ....................................................................
Cleaning - Drawer ...................................................................
Maintenance .......................................................................
Service
.......................................................
16
18
22
22
24
27
27
28
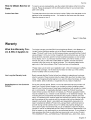
Before Calling Service ...............................................................
Waranty ..........................................................................
Questions?
1-800-944-2904
www.boschappliances.com
5551 McFadden Ave.
Huntington Beach, CA 92649
We look forward
16
to hearing from you!
28
31
About This Manual
How This Manual Is Organized
This manual contains several sections:
•
•
•
•
•
The Getting Started section describes the features and functionality of the
range, including a description of how to set up the range and operate the control panel.
The Operation sections describe how to operate each range component.
The Getting the Most out of Your Appfiance section includes information
about the modes, cooking charts and tips for improving performance.
The Cleaning and Maintenance section describes how to clean and maintain
your appliance.
The Service section includes troubleshooting tips and your Warranty.
Before using your range, be sure to read this manual. Pay special attention to the
Safety Sections located at the beginning of the manual.
Safety
Important
Safety Instructions
READ AND SAVE THESE INSTRUCTIONS
Important
tions
Fire Safety
Safety Instruc-
•
•
•
•
•
•
•
•
•
Do not use aluminum foil or protective liners to line any part of an appliance,
especially surface unit drip bowls or oven bottom. Installation of these liners
may result in a risk of electric shock or fire.
Set the burner control so that the flame does not extend beyond the bottom of
the pan.
If materials inside an oven or warming drawer should ignite, keep door closed.
Turn off the appliance and disconnect the circuit at the circuit breaker box.
Use this appliance only for its intended use as described in this manual. For
example, never use the appliance for warming or heating the room. Never use
the appliance for storage.
Do not allow aluminum foil, plastic, paper or cloth to come in contact with a
hot burner or grate. Do not allow pans to boil dry.
If the cooktop is near a window, forced air vent, or fan, be certain that flammable materials such as window coverings do not blow over or near the burners or elements. They could catch on fire.
Always have a working smoke detector near the kitchen.
Never leave the cooktop unattended when in use. Boilovers cause smoking
and greasy spillovers may ignite.
WARNING - TO REDUCE THE RISK OF A RANGE TOP GREASE FIRE:
English 1
,_Safety
a)
Never leave surface units unattended at high settings. Boilovers cause
smoking and greasy spillovers that may ignite. Heat oils slowly on low or
medium settings.
b) Always turn hood ON when cooking at high heat or when flambeing food
(i.e. Crepes Suzette, Cherries Jubilee, Peppercorn Beef Flambe').
c) Clean ventilating fans frequently. Grease should not be allowed to accumulate on fan or filter.
d)
•
•
•
•
d) Use proper pan size. Always use cookware appropriate for the size of
the surface element.
In the event that personal clothing or hair catches fire, drop and roll immediately to extinguish flames.
Smother flames from food fires other than grease fires with baking soda.
Never use water on cooking fires.
Take care that drafts like those from fans or forced air vents do not push the
flames so that they extend beyond the edges of the pan.
WARNING - TO REDUCE THE RISK OF INJURY TO PERSONS IN THE
EVENT OF A RANGE TOP GREASE
ING:
a)
FIRE, OBSERVE
THE FOLLOW-
SMOTHER FLAMES with a close-fitting lid, cookie sheet, or metal tray,
then turn off the burner. BE CAREFUL TO PREVENT BURNS. If the
flames do not go out immediately, EVACUATE AND CALL THE FIRE
DEPARTMENT.
b)
c)
•
NEVER PICK UP A FLAMING PAN - You may be burned.
DO NOT USE WATER, including wet dishcloths or towels - a violent
steam explosion will result.
d) Use an extinguisher ONLY if:
1) You know you have a Class ABC extinguisher, and you already know
how to operate it.
2) The fire is small and contained in the area where it started.
3) The fire department is being called.
4) You can fight the fire with your back to an exit.
5) Have an appropriate fire extinguisher available, nearby, highly visible
and easily accessible near the oven.
Whenever possible, do not operate the ventilation system during a cooktop
fire. However, do not reach through fire to turn it off.
Gas Safety
Do not store or use combustible materials, gasoline or other flammable vapors and liquids in the vicinity of this or any other appliance.
WHAT TO DO IF YOU SMELL GAS:
•
•
•
•
•
Do not try to light any appliance.
Do not touch any electrical switch.
Do not use any phone in your building.
Immediately call your gas supplier from a neighbor's phone.
Follow the gas supplier's instructions.
If you cannot reach your gas supplier, call fire department.
Installation and service must be performed by a qualified installer,
authorized service agency or the gas supplier.
•
English 2
Have the installer show you where the gas shut-off valve is located.
,_
•
•
•
•
Burn Prevention
•
•
•
•
•
•
•
•
Child Safety
•
•
•
•
Cleaning Safety
Safety
If a burner goes out and gas escapes, open windows and doors. Wait until
gas dissipates before using the appliance.
If you smell gas, your installer has not done a proper job of checking for leaks.
If the connections are not perfectly tight, you can have a small leak and,
therefore, a faint smell. Finding a gas leak is not a "do-it-yourself" procedure.
Some leaks can only be found with the burner control in the ON
position and this must be done by a qualified service technician. See "WHAT
TO DO IF YOU SMELL GAS:" on page 2.
During a power failure, only the cooktop burners can be lit manually.
DO NOT TOUCH SURFACE UNITS OR AREAS NEAR UNITS - Surface
units may be hot even though they are dark in color. Areas near surface units
may become hot enough to cause burns. During and after use, do not touch,
or let clothing, potholders, or other flammable materials contact surface units
or areas near units until they have had sufficient time to cool. Among these
areas are the cooktop and areas facing the cooktop.
DO NOT TOUCH HEATING ELEMENTS OR INTERIOR SURFACES OF
OVEN - Heating elements may be hot even though they are dark in color.
Interior surfaces of an oven become hot enough to cause burns. During and
after use, do not touch, or let clothing, potholders, or other flammable materials contact heating elements or interior surfaces of oven until they have had
sufficient time to cool. Other surfaces of the appliance may become hot
enough to cause burns. Among these surfaces are oven vent openings, surfaces near these openings and oven doors.
Exercise caution when opening the appliance. Standing to the side, open the
door (or drawer) slowly and slightly to let hot air and/or steam escape. Keep
your face clear of the opening and make sure there are no children or pets
near the unit. After the release of hot air and/or steam, proceed with your
cooking. Keep doors shut unless necessary for cooking or cleaning purposes.
Do not leave open doors unattended.
Do not heat or warm unopened food containers. Build-up of pressure may
cause the container to burst and cause injury.
Always place oven racks in desired location while oven is cool. tf a rack must
be moved while oven is hot, do not let potholder contact the heating elements.
Always turn hood ON when cooking at high heat or when flambeing food (i.e.
Crepes Suzette, Cherries Jubilee, Peppercorn Beef Flambe').
Use high heat settings on the cooktop only when necessary. To avoid bubbling and splattering, heat oil slowly on no more than a low-medium setting.
Hot oil is capable of causing extreme burns and injury.
Never move a pan of hot oil, especially a deep fat fryer. Wait until it is cool.
When children become old enough to use the appliance, it is the legal responsibility of the parents or legal guardians to ensure that they are instructed in
safe practices by qualified persons.
Do not allow anyone to climb, stand, lean, sit, or hang on any part of an appliance, especially a door, warming drawer, or storage drawer. This can damage
the appliance, and the unit may tip over, potentially causing severe injury.
Do not allow children to use this appliance unless closely supervised by an
adult. Children and pets should not be left alone or unattended in the area
where the appliance is in use. They should never be allowed to play in its
vicinity, whether or not the appliance is in use.
CAUTION - Items of interest to children should not be stored in an appliance,
in cabinets above an appliance or on the backsplash. Children climbing on an
appliance to reach items could be seriously injured.
IMPORTANT SAFETY NOTICE: The California Safe Drinking and Toxic
Enforcement Act requires the Governor of California to publish a list of substances known to the state to cause cancer, birth defects or other reproductive harm, and requires businesses to warn customers of potential exposure
to such substances.
English 3
,_kSafety
a)
The burning of gas cooking fuel and the elimination of soil during selfcleaning can generate small amounts of Carbon Monoxide.
b) The fiberglass insulation in self-clean ovens gives off very small amounts
of formaldehyde during the first several cleaning cycles. California lists
formaldehyde as a potential cause of cancer. Carbon Monoxide is a
potential cause of reproductive toxicity.
c) Exposure to these substances can be minimized by:
1) Providing good ventilation when cooking with gas.
2) Providing good ventilation during and immediately after self cleaning
the oven.
•
•
•
•
•
Cookware Safety
•
•
•
•
•
•
Proper Installation and Maintenance
•
•
•
3) Operating the unit according to the instructions in this manual.
Do not clean the appliance while it is still hot. Some cleaners produce noxious
fumes when applied to a hot surface. Wet clothes or sponges can cause
burns from steam.
When self-cleaning, confirm that the door locks and will not open. If the door
does not lock, do not run Self-Clean. Contact service.
Birds have very sensitive respiratory systems. Keep pet birds out of the
kitchen or other rooms where kitchen fumes could reach them. During self
clean, fumes are released that may be harmful to birds. Other kitchen fumes
such as overheating margarines and cooking oils may also be harmful.
After a spill or boilover, turn off the burner and allow the cooktop to cool.
Clean around the burner and burner ports. After cleaning, check for proper
operation.
Keep oven free from grease build up.
Do not place food directly on oven bottom.
Follow the manufacturer's directions when using cooking or roasting bags.
Hold the handle of the pan when stirring or turning food. This helps prevent
spills and movement of the pan.
Use Proper Pan Size. The use of undersized cookware will expose a portion
of the heating element or burner to direct contact and may result in ignition of
clothing. Select cookware having flat bottoms large enough to cover the surface heating unit. This appliance is equipped with one or more surface units of
different size. Proper relationship of cookware to heating element or burner
will also improve efficiency.
Always position handles of utensils inward so they do not extend over adjacent work areas, burners, or the edge of the cooktop. This reduces the risk of
fires, spills and burns.
Adjust burner flame size so that it does not extend beyond the edge of the
cookware. Proper relationship of cookware to burner flame reduces safety
risks.
Have the installer show you the location of the circuit breaker or fuse. Mark it
for easy reference.
This appliance must be properly installed and grounded by a qualified technician. Connect only to properly grounded outlet. Refer to Installation Instructions for details.
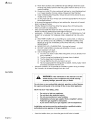
All ranges can tip. Injury to persons could result. Install anti-tip device packaged with range. Verify that the anti-tip devices are engaged. See installation
instructions.
Figure 1: Tipping Precautions
English 4
,_
Safety
•
This appliance is intended for normal family household use only. tt is not
approved for outdoor use. See the Warranty. tf you have any questions, contact the manufacturer.
•
Do not store or use corrosive chemicals, vapors, flammables or nonfood products in or near this appliance, tt is specifically designed for use when heating
or cooking food. The use of corrosive chemicals in heating or cleaning will
damage the appliance and could result in injury.
Do not operate this appliance if it is not working properly, or if it has been
damaged. Contact an authorized servicer.
Do not obstruct oven vents.
•
•
•
Do not repair or replace any part of the appliance unless specifically recommended in this manual. Refer all servicing to a factory authorized service center.
•
In the event of an error the display flashes and beeps continuously. If this
happens during self-clean, disconnect appliance from the power supply and
call a qualified technician.
In the event of an error the display flashes and beeps continuously. Disconnect appliance from the power supply and call a qualified technician.
Do not operate oven without oven bottom in place.
•
•
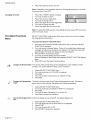
Getting Started
Parts and Accessories
Table 1 Parts and Accessories
1
1
Oven
2
Burner
Caps
3
Burner
Grates
4
Cooktop
5
Rack
Positions/Rack
6
Oven
Racks,
7
Oven
Door Gasket
8
Storage
9
Model # and Serial
10
Oven
11
Anti-Tip
12
Cooktop
Control
Panel
and Knob
(4)
(2)
Control
Knob
Guides
Flat (3)
Drawer
# Plate
Vent
Bracket
(not shown)
Scraper
(glass
ceramic
models
only) (not
shown)
13
Broiler
14
Oven
15
Literature
16
Broil
Burner
17
Oven
Lights
18
Convection
Pan (not shown)
Door Lock (not visible)
Package
(not shown)
(not shown)
(top of oven
(2) (oven
Fan (oven
interior)
(not shown)
back wall) (not shown)
back wall;
not shown)
English 5
GettingStarted
Sealed Gas Burners
The cooktop has sealed gas burners. As a result, there are no parts under the
cooktop to clean, disassemble or adjust. Spills stay on top of the cooktop where
they are easier to wipe up.
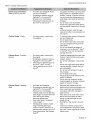
Burner Grate
I
I
_ _
Burner Cap
I
Burner
I
Cooktop
Ignitor
Figure
Burner Caps
2: Right
Side
Burner
- Side View
The cooktop has four burner caps. Match the size of the burner cap to the size of
the burner. Burner caps are not interchangeable.
Make sure the burner cap is completely seated on the burner base before
attempting to light the burner. If the burner cap is not placed correctly, the burner
may not light or the flame may not burn completely or correctly. The appliance is
equipped with two types of burners: standard and diffusion.
Burner Grates
,_
Warning: To prevent flare-ups, do not use the cooktop without all burner
caps and all burner grates properly positions. Do not use a grate if the feet
are missing or damaged.
There are two burner grates: one for the left side of the cooktop and one for the
right side of the cooktop. Position them so that the circular opening is over the
burner cap. Burner grates should rest flat on the cooktop. The rubber feet on the
grates should rest in the indents on the cooktop.
B
!
_-,NI/=_
m
Left Side
Burner Grate
Right Side
Burner Grate
Figure
Electronic Ignitor
English 6
m
3: Grates
for
Free-standing
Models
The cooktop uses electronic ignitors to light the burners, There is no pilot light.
Each burner has its own ignitor. For proper operation, keep the ignitor clean and
dry. It is necessary to clean these when there is a boilover or when the burner
does not light even though the ignitor clicks.
Getting Started
,_
Caution: All ignitors spark when any single burner is turned on. Do not
touch any of the burners when the cooktop is in use.
High Power Burner
The high power burner is the largest burner. It is the most powerful burner on the
cooktop, tt retains heat longer than normal burner caps and, at low settings, prohibits the flame from touching the cookware. This results in a gentle, more predictable heat. Use the low settings on this burner to simmer large amounts of sauces
or soups. Use the high settings to quickly bring large amounts of water to a boil.
Precision Burner
The precision burner is the smallest burner on the cooktop. It is well suited for
gentle cooking of small amounts of food. Use the burner to melt butter or chocolate or to prepare delicate sauces.
Flat Oven Racks
The racks are designed with a stop so they will stop before coming completely out
of the oven and not tilt.
CAUTION
To avoid burns, place oven racks in desired positions before turning
oven on. Always use oven mitts when the oven is warm.If a rack must
be moved while the oven is hot, do not let oven mitts contact hot burners.
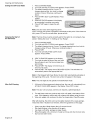
Inserting Racks Into Oven
1.
2.
3.
Grasp rack firmly on both sides.
Tilt rack up to allow stop into rack guide.
Bring rack to a horizontal position and press the rest of the way in. Rack
should be straight and flat, not crooked.
Back of rack
Insert rack with the back of the rack
toward the back wall of the rancle.
Figure 4: Inserting a Rack
Oven Bottom
Oven Vent
Automatic
Caution: Do not place food directly on oven bottom. Do not use aluminum
foil or protective liners to line any part of an appliance, especially surface
unit drip bowls or oven bottom. Installation of these liners may result in a
risk of electric shock or fire.
The oven vent is located below the display above the rear left cooktop burner. It is
normal to see steam escaping from the vent and condensation may collect on the
backguard and cooktop. This area may become hot when the oven is in use. To
prevent carbon monoxide build-up, do not block the vent. The oven vent is also
important for air circulation.
Shutoff
Self Cleaning
The oven will automatically shut off after 12 hours (24 hours if the time format is
set for 24 hour in the Select Function section).
The oven features a self-cleaning function that eliminates the manual labor
involved with cleaning your oven.
English 7
GettingStarted
Indicators and Other Features
Beep - Signals that more information must be entered or confirms the receipt of
an entry. A Beep also signals the end of a program or an oven error.
End-of-Cycle Indicator - To indicate when a mode is finished, 3 consecutive
beeps will sound.
Default Settings - The cooking modes automatically select the default temperature. These can be changed when a different one is needed.
Flashing Symbol or Number - Signals an incomplete setting and calls for
another step or START to be pressed.
F Number Codes -These codes display when there is a problem with the range.
Convection
Fan
The convection fan operates during any convection mode. When the oven is operating in the convection mode, the fan will turn off automatically when the door is
opened. The convection fan does run during self-clean, although not at the beginning of the mode.
Note: On some models, the convection fan also runs during preheat for the bake
mode.
Control (Panel)
Oven Control
Panel
Clock
l
Light
I HR:MIN:SEC
_
PM
Time
T,MER
l
Off
'°°
luu
/
Preheat
Control
Oven Temperature
Temperature
N 350°0
L. BROil/
Knob
CookingMode
F
/
z/
Cooking
Mode indicator
D_
--
Temperature
O)
Start
/
Lock indicator
Figure 5: Oven Control
English 8
Panel
GettingStarted
Table2: OvenControlPanel
Clock-Showsthetimeofdaywitha 12or24houroption.
Alsodisplaysthetimerandtimesassociated
withdelayed
cookingandcleaningmodes.Turnthecontrolknobtotogglebetweentimerandclockdisplay.PressTimeandturn
the controlknobto changethetime of dayor the
timer.
Light- Presspadtoturnovenlightonor off.
Off- Presspadtoturnoffovenand/orwarmingdrawer.
OvenTemperature
- Showstheoventemperature.
PreheatTemperature-Displaystemperature
ofovenduringpreheatmode.
CookingMode- Presspadtodisplaycookingmode.
Start- Presspadtocompleteanentry.
CookingModeIcon- Showsthecookingburnersthat
- Presspadtoselectcookingtemperature.
areactiveforthemodethatisselected.Theiconwillalso Temperature
displaya faniftheconvection
fanis utilizedintheselected Time- Presspadtosetorchangethetimeofdayor the
mode.
timer.
ControlKnob- Usedtosettheclock,timers,selectcook- Timer- Therearetwotimers- TIMER1ANDTIMER2;
ingmodeandtemperature.
Turnclockwise
toincreaseand Eachcountsdownthetimeinhoursandminutes.With
turncounterclockwise
todecrease.
lessthan60minutesremaining,
thetimeralsodisplays
seconds.PressTimeto accessthetimers.
DoorLockingIndicator- Iconis displayedduringthe
self-clean
modewhenthedoorislocked.DONOTattempt
toopenthedooruntilthelocksymbolis nolongerpresent.
Youcontroltheoperation
oftherangebyusingthetouchpads,dialandcontrol
knobs.
Thetouchpads,
in conjunction
withthedial,areusedtoselectanovenmode,set
theoventemperature,
setthetime(s)andtosetupyourrange.Tousethetouchpad,pressthecenterpartofthepadwiththeflatpartofyourfingertip.A beepwill
soundtoindicatethattheselectionhasbeenmade.Turnthedialtothedesired
settingandpressstart.
Theknobsareusedtocontroltheheatleveloftheburners.Pushdownandturn
tothe _ symboltolightandthentothedesiredheatsetting.
Seethesectionson UsingtheCooktopandUsingtheOvenfordetailedinstructions.
The Clock
About the Clock
•
•
•
•
•
Setting the Clock
1.
2.
3.
Always set the clock after installation or after a power failure. Once power
returns to the oven, the clock defaults to 12:00 am.
The time of day is displayed in hours and minutes.
The clock time will appear during all oven operations except when the timer is
running.
The oven is preset to a 12 hour clock and indicates AM and PM. To switch to
a 24 hour clock, see "Select Function" section.
If you do not complete the operation of setting the clock, the oven will beep
periodically as a reminder to set the clock time. Press OFF to stop the beeping.
CLOCK will be displayed and the hour digits
will flash. Turn knob to select hour and AM or
PM.
Press Time. CLOCK will still be displayed
and the minute digits will flash.
Turn knob. Set minutes.
English 9
GettingStarted
4.
Press Time and the clock is now set.
Note: If operation is not completed, the oven will beep periodically as a reminder
to set clock time. Press OFF.
Changingthe Clock
1.
2.
Press Time. TIMER 1 flashes in display.
Turn knob to select CLOCK.
3.
4.
5.
6.
7.
Press Time and hour digits flash.
Turn knob to change hours.
Press Time again and minute digits flash.
Turn knob to change minutes.
Press Time again and the clock is set.
Note: To cancel the TIME selection when setting the clock, press OFF at any time
while in the clock mode.
The Select Functions
Menu
SELECT FUNCTIONS is the section of the menu where you can set or change
the range features listed below.
To
1.
2.
3.
4.
5.
_
Change the Beep Volume
access the SELECT FUNCTION menu
Press and hold COOKING MODE press pad for five (5) seconds. SELECT
FUNCTION is displayed.
Turn knob slowly to desired feature. There will be a slight delay before each
message (or feature) can be seen in the display. Turn knob slowly and wait
approximately one second for display to show next feature.
Press START to choose the function.
Turn knob to desired setting and press START.
When all settings for the function are complete, SELECT FUNCTION flashes
again.
Press OFF to exit the Select Functions Menu.
The volume of the control beep can be changed from LOW (softest) to HIGH
(loudest). The control default for beep volume is Medium.
1. Access SELECT FUNCTIONS Menu.
f
Change the Temperature
Scale
2.
3.
Turn knob clockwise until VOLUME is displayed.
Press Start.
4.
5.
Turn knob to select volume level Low, Medium or High.
Press Start.
The oven has been preset to the Fahrenheit temperature scale. The feature
allows you to switch between Fahrenheit and Celsius temperature.
1. Access SELECT FUNCTIONS Menu.
2.
3.
Turn knob clockwise until SELECT TEMP F-C is displayed.
Press Start.
4.
5.
Turn knob to select Fahrenheit (F) or Celsius (C).
Press Start to accept new selection.
Turn Clock Display ON or Clock time display can be turned off. The default display is on.
OFF
1. Access SELECT FUNCTIONS Menu.
English 10
2.
3.
4.
Turn knob clockwise until CLOCK DISPLAY is displayed.
Press START.
Turn knob to select ON or OFF
5.
Press START to accept new selection.
Getting Started
D_,,M0
ABC
Access Demo Mode
The demo mode is for appliance store use only.
Change the Display Language
Language choices are English, Spanish, and French. English is the default language. Note: The SELECT FUNCTIONS menu is displayed in English only,
regardless of which language is selected.
1. Access SELECT FUNCTIONS Menu.
2. Turn knob clockwise until desired language is displayed.
3. Press Start.
4. Turn knob clockwise to select a different language.
5. Press Start to accept a language change.
Lock / Unlock the Oven
Control Panel
The oven keypad can be locked for safety purposes. This feature can be used to
prevent changes to the oven function. This function DOES NOT lock the oven
door.
1. Access SELECT FUNCTIONS Menu.
2. Turn knob clockwise until LOCK KEYS is flashing.
3. Press Start. KEY PAD LOCKED is displayed. The display will beep if a key is
pressed to indicate that the keypad is locked.
4. To unlock keypads, press Cooking Mode and hold for 5 seconds. Display will
read UNLOCKING KEY PAD.
5. When unlocked, the clock will again appear in the display.
Change the Oven
Temperature Offset
This feature allows the adjustment of the oven temperature if food is consistently
too brown or too light.
1. Access SELECT FUNCTIONS Menu.
2. Turn knob clockwise until OVEN TEMP OFFSET is displayed.
3. Press START. 0° F is displayed.
4. Turn the knob to increase temperature in 25 ° F increments.
5. Press START to accept a temperature change.
O
Reset the Factory Settings
This feature is used to change all the "Select Functions" settings back to the original factory settings (or defaults).
1. Access SELECT FUNCTIONS Menu.
2. Turn knob clockwise until RESET DEFAULTS is displayed.
3. Press START. Display reads SELECT FUNCTIONS.
Set the Sabbath Feature
About the Sabbath Feature
The Sabbath Feature is for religious faiths with "no work" requirements on the
Sabbath.
•
•
•
•
•
The oven will bake for 73 hours before automatically turning off.
While baking in Sabbath mode, the display will show SABBATH and the
BAKE icon will be displayed. The clock will be off and no temperature will
show in the display.
During the Sabbath mode, only the OFF key will operate. Press OFF at any
time during the Sabbath mode to end the mode and turn off the oven.
At the end of 73 hours, the oven will turn off automatically and the display will
show SABBATH END. Press Off to return to time of day.
The probe CANNOT be used during the Sabbath mode.
Setting the Sabbath Feature for the Oven
1.
Verify that the oven is turned off.
English 11
2.
3.
4.
5.
6.
AccessSELECTFUNCTIONS
Menu.
TurnknobclockwiseuntilSABBATH
OPTIONappears.
PressSTART.BAKEwillshowindisplayandtemperature
willflash.
Turnknobtosetoventemperature.
Turnovenlighton ifdesired(pressLIGHT).
Note:Thelightcannotbechangedafterthispoint.Itwillstayonor off,as
selected,
duringtheentireSabbathmode.
7. PressSTART.Ovenstartsafter5 seconds.
Theovenoperatesfor73hoursandthenturnsoffautomatically.
®
Change the Time Format
The clock can be set to a 12 hour or 24 hour format. The default for clock format is
12 hour.
1. Access SELECT FUNCTIONS Menu.
2. Turn knob clockwise until TIME FORMAT is displayed.
3. Press _art.
4. Turn knob to select 12 hour or 24 hour format.
5. Press Start to accept new selection.
%
Turn Automatic Convection Conversion ON or
OFF
This feature automatically converts package or recipe temperatures for use with
the convection bake mode. The default setting is "on".
1. Access SELECT FUNCTIONS Menu.
2. Turn knob clockwise until AUTO CONVECT BAKE is displayed.
3. Press Start.
4. Turn knob to select ON or OFF.
5. Press Start to accept new selection.
Before Using the Appliance for the First Time
•
•
•
•
•
Operation
Remove all packing materials and labels from range. Remove packing materials from inside the oven and inside the drawer.
While cool, wipe with a clean, damp sponge and dry.
For models with a glass ceramic cooktop, apply the glass ceramic cooktop
cleaner. Buff with a clean cloth. See Care and Cleaning Section.
There may be a slight odor during first uses; this is normal and will disappear.
Read and understand all safety precautions and Use and Care Manual information prior to operating.
- Cooktop
This section explains how to operate the cooktop. See "Getting the Most Out of
Your Cooktop" on page 16 for guidelines to improve cooktop results.
About the Cooktop
Use the cooktop for surface cooking applications such as boiling, frying, simmering, steaming and sauteing.
English 12
Operation
Setting the Burner Heat
Level
Burner Control Knob
OFF
Figure
Lighting the Burner
Push in an turn the knob counterclockwise
6: Burner Control Knob
to the _ symbol.
Note: If the burner does not light within four seconds, turn the burner off. Verify
that the burner cap is positioned correctly on the burner base and that the ignitor
is clean and dry. If the burner still fails to ignite, see "Cooktop Troubleshooting
Chart" on page 28
,_
Lighting
Caution: All ignitors spark when any single burner is turned on. Do not
touch any of the burners when the cooktop is in use.
the Burner during a Power Failure
Cooktop burners can be lit manually during a power failure. Hold a match at the
port and turn the knob to the HI position. Wait until the flame is burning all the way
around the burner before adjusting the flame to the desired setting.
Setting the Flame Size
After lighting, turn the knob counterclockwise to the desired flame size. See
"Cooking Guide" on page 17 for recommended burner settings.
Caution: To prevent possible burns or possible damage to the pan or the appliance, the flame should not extend beyond the edge of the pan.
Turning the Burner off
Turn knob clockwise to the OFF position.
Note: an "pop" may be heard when the burner is turned off. The "pop" may be
louder with LP gas than with natural gas. This is normal.
Operation
- Oven
This section explains how to operate the oven. See "Getting the Most Out of Your
Oven" on page 18 for guidelines to improve oven results.
English 13
Operation
- Oven
About the Oven
Operation
CAUTION
Do not use aluminum foil or protective liners to line any part of an appliance, especially surface unit drip bowls or oven bottom. Installation of
these liners may result in a risk of electric shock or fire.
Setting the Cooking
and Temperature
Mode
Note: To back out of a current mode, press OFF. (Selecting OFF when not setting
the cooking mode will turn the oven off.)
.
2.
3.
.
5.
6.
.
.
9.
Press COOKING MODE.
BAKE will flash in the display.
If no change is made within 5 seconds,
control will beep and flash. If this occurs,
press START.
To change the cooking mode, turn knob.
Press START.
The selected mode will appear in the display, along with the default temperature for that mode, which will be blinking.
To select a different temperature, turn knob to the right or left (in 5° increments) to desired temperature.
Press START. If not pressed, oven automatically turns on in 5 seconds.
The display alternates between the cooking mode and preheat.
The preheated temperature is displayed, starting at 100°R The actual temperature increases until set temperature is reached, at which point the oven will beep.
10. To change temperature during cooking, press Temperature. Turn the knob to
select new temperature and press START.
11. Once cooking has been completed, press OFF to turn off oven.
Automatic Convection Conversion
(models with convection bake)
In the convection bake mode, the temperature is automatically reduced 25 ° F
from the package or recipe temperature. Simply enter the package or recipe temperature when setting the mode and the range calculates the correct temperature.
The Automatic Convection Conversion feature can be turned off to allow for manual temperature adjustment. See "Turn Automatic Convection Conversion ON or
OFF" on page 12 for details.
When the Automatic Convection Conversion feature is activated, the display will
read AUTO CONV BAKE. When the feature is turned off, it will read CONV BAKE.
Hot Oven Indicator
After the oven has been turned off, HOT appears in the display where the cooking
mode was to indicate that the oven is off but still hot. When the oven temperature
drops below 176 ° F, HOT is no longer seen in the display.
Using the Timer
Notes:
•
•
English 14
If you do not finish setting the timer, the oven will beep periodically as a
reminder to set the time. Press OFF to exit the TIMER mode. (Selecting OFF
when not setting the timer will turn the oven off.)
Turn the knob to display the time of day or further information about the oven
mode when the timers are in use.
Operation - Oven
To set the timer:
1.
Press TIME and TIMER 1 will flash in display.
Turn clockwise and TIMER 2 will be displayed.
Select TIMER 1 or 2, then press TIME. SET
TIMER 1 (2) appears in display. Minutes flash.
.
.
4.
5.
6.
Changing the Timer/s
Press TIME again. The TIMER is now set.
If TIME or START is not pressed, oven will begin beeping and timer display
will begin flashing.
.
Press TIME. TIMER 1 will appear in display.
Select either TIMER 1 or 2.
.
4.
5.
6.
Press TIME. RESET TIMER 1 (2) appears in
the display. Minute digits flash.
Turn knob clockwise or counterclockwise to change minutes.
Press TIME again and hour digits will flash.
Turn knob clockwise or counterclockwise to change hours.
Press TIME and new time is set.
1.
Press TIME once. TIMER 1 flashes.
2.
Turn knob to select CLEAR TIMER 1(2).
Press TIME.
3.
If Time pad is not pressed, range will beep and
display will continue flashing.
Press TIME to return to the main screen.
.
Clearing the Timer/s
Turn knob to set minutes, tf setting only minutes,
press START. Otherwise, continue to step 4.
Press TIME again and the hours will flash.
Turn knob to set hours.
4.
Cancelling
If operation is not completed, the oven will beep periodically as a reminder to set
time. Press OFF to exit the Timer mode. Selecting OFF when not in a setting
mode will turn off the oven.
Using Timed or Delayed
Cook
The TIMED COOK feature sets the oven to a cooking mode for a set period of
time and then turns it off. The TIMED COOK feature is available for each of the
following oven modes: Bake, Convection Bake and Convection Roast.
•
Be sure that the time-of-day clock displays the correct time before beginning.
See "Changing the Clock" on page 10 to adjust the time.
At end of the programmed cooking time, the oven will automatically turn off.
Delayed cooking is not recommended for foods that need to rise (i.e.; cookies,
cakes, breads, souffles, etc.)
•
•
Setting a Timed Mode
1.
2.
3.
4.
Press COOKING MODE.
BAKE will be displayed. To select a different cooking mode, turn the knob.
Press START.
Turn knob to select desired temperature.
Note: Time required for the oven to reach temperature must be included in
the set cooking time.
.
6.
.
8.
9.
Press TIME. TIMED BAKE appears.
Press TIME. SET BAKE TIME appears in the
display and minutes flash.
Set minutes. Press TIME.
Hours Flash. Set hours. Press START.
TIMED BAKE appears in display and the oven begins to preheat.
After cooking is complete, display flashes TIME COOK END and reminder beeps
will sound. Press OFF to clear.
English 15
Delaying the Start of a Timed Mode
.
2.
3.
.
5.
6.
7.
8.
9.
Follow steps 1 through 5 above.
Turn knob until DELAYED BAKE appears.
Press Time. SET BAKE TIME appears in display and minutes flash.
Set minutes and then press TIME. Hours Flash.
Set hours and then press TIME. SET BAKE END appears in the display.
Press TIME.
Use knob to enter the time of day the oven will stop cooking or turn off.
Set hours and then press TIME.
Set minutes and then press TIME.
Note: The clock automatically calculates time of day at which cooking mode
starts and stops. The displayed cooking time counts down by the minute.
10. At the end of the programmed cooking time, the oven will automatically turn
off. Display will show TIME COOK END and reminder beeps will sound. Press
OFF to clear.
Note: Remove food from oven immediately after cycle has finished to prevent
overcooking. Food left in the oven will cook even after the cycle is complete.
To Check the Cooking Time and Stop 1.
Time After a Delay Has Been Set
2.
3.
Setting the Sabbath Feature
Press Time.
Turn knob to BAKE END or BAKE TIME.
Press Time.
See "Set the Sabbath Feature" on page 11.
Getting the Most Out of Your Appliance
Getting the Most Out of Your Cooktop
Cooktop
Cooking
Boiling Water
Guide
Time to boil can vary greatly depending on environmental
lowing tips to decrease boil time:
•
Use a lid.
•
Use a pan that is appropriately sized for the amount of water and the size of
the burner.
Select a pan with a flat base (See "Cookware Selection Guide" on page 17 for
details).
Choose a medium-weight pan (rather than a heavy-weight one).
Start with water that is already warm.
Boil the smallest amount of water necessary. Smaller volumes will boil faster
than larger volumes.
•
•
•
•
Recommended
Settings
Use this chart as a guide for heat settings. A range of heat settings are listed
because the actual setting depends on:
•
•
•
English 16
conditions. Try the fol-
type and quality of pan (See "Selecting Cookware"),
type, quantity and temperature of the food,
burner used and
GettingtheMostOutofYourAppliance
•
thecook'spreference.
Table3: CookingGuide
Bringing
water to boil
Pan frying,
Selection
browning
Most frying,
eggs, pancakes,
Simmering,
finish
Melting
Cookware
sauteing,
9 - High
butter
cooking,
meat,
slow
covered
deep
fat frying
6-8 - Med-High
4-5 - Med
boil
foods,
2-3 - Med Low
steaming
1 - Low
and chocolate
Guide
Cookware Characteristics
Pan selection directly affects cooking speed and uniformity. For best results select
pans with flat bases. When a pan is hot, the base (pan bottom) should rest evenly
on the surface without wobbling (rocking). Flat, medium-to-heavy-weight pans are
best.
To Test the Flatness of Your Pans
Turn the pan upside down on the countertop and place a
ruler flat against the bottom of the pan. The bottom of the
pan and the straight edge of the ruler should be flush
against each other.
Another simple test to determine even heat distribution across the cookware bottom is to place 1"
(25.4 mm) of water in the pan. Bring the water to a
boil and observe the location of the bubbles as the
water starts to boil. Good, flat cookware will have
an even distribution of bubbles over the bottom
surface area.
Match Pan Diameter to Flame Size
(
The flame should be the same size as the bottom of the pan or smaller. Do not
use small pans with high flame settings as the flames can lick up the sides of the
pan.
Place oversized pans that span two burners front to rear, not side to side.
Tight Fitting
pot.
Cookware Tips
•
•
•
Specialty Pans
Lids - A lid shortens cooking/boiling
time by holding heat inside the
Use of pots and pans with rounded (either concave or convex) warped or
dented bottoms should be avoided. See drawings.
Make sure the bottom of the pot or pan being used is clean and dry.
Use pots and pans with thick, smooth metal bottoms.
Specialty pans such as griddles, roasters, pressure cookers, woks, water bath
canners and pressure canners must have the same features as described above.
Use only a flat-bottomed wok.
English 17
GettingtheMostOutofYourAppliance
Getting the Most Out of Your Oven
Oven Cooking
Guide
Rack Position
•
•
•
•
•
•
RACK POSITION 6 (highest position) - melting cheese, broiling thin foods
RACK POSITION 5 - broiling most meats, toasting bread
RACK POSITION 4 - broiling thicker meats
RACK POSITION 3 - most baked goods when baking on one rack, such as
on cookie sheet or baking pan, cakes, frozen foods, biscuits, brownies,
muffins
RACK POSITION 2 - Used for pies, casseroles, breads, bundt or pound
cakes, small roasts or poultry.
RACK POSITION 1 (lowest position) - Use for angel food cake, large
roasts, turkey.
Figure 7: Rack Positions
Multiple Rack Cooking
When using multiple racks, follow the placement recommendations
•
•
Pan Placement
below.
Two rack: Use rack positions 2 and 5.
Three rack: (for convection bake): Use positions 1, 3 and 6.
Baking results are better if pans are placed in the center of the oven. If baking
more than one pan on a rack, allow at least 1" to 1 ½" of air space around the pan.
When baking four cake layers at the same time, stagger pans on two racks so that
one pan is not directly above the other. To allow for best baking results stagger
pans as shown in the graphic below.
Figure 8: Pan Placement
Baking Pans
Here are some tips for cooking with baking pans:
•
•
•
•
•
Preheating the Oven
English 18
Glass baking dishes absorb heat, therefore reduce oven temperature 25°F
when baking in glass.
Shiny, smooth metal reflects heat resulting in lighter, more delicate browning.
Dark, rough or dull pans will absorb heat resulting in browner, crisper crust.
Some manufacturers recommend reducing temperature 25 ° F when using
these pans. Follow manufacturer recommendations.
Use glass or dark metal pans for pies.
Insulated baking pans may increase the recommended baking time.
Preheat the oven if the recipe recommends it. Preheating is necessary for good
results when baking cakes, cookies, pastry and breads. Setting a higher temperature does not shorten preheat time. Place oven racks in proper position before
preheating. A beep will confirm that oven is preheated and selected oven temperature will be displayed.
Getting the Most Out of Your Appliance
Oven Cooking
D
Modes
Bake, Proof and Warm
Baking is cooking with dry, heated air. The lower
burner cycles to maintain the oven temperature.
Bake mode can be used to prepare foods like
pastries and casseroles as well as to roast
meats.
r
Note: Depending on the model, you may hear
the convection fan while the oven is preheating
for the bake mode. This is normal.
In the Proofing mode, the oven will use the lower burner to maintain a low temperature to proof bread.
•
•
•
•
Proofing is the rising of a yeast dough.
The Proofing mode temperatures are 85 ° to 110 ° E The default temperature
is 100 ° R
Loosely cover the bowl or pan and use any rack that accommodates the size
of the container.
Keep the door closed and use the oven light to check the rising of the dough.
In Warming mode, the lower burner maintain a low temperature in the oven cavity
in order to keep food at serving temperature.
•
•
•
Use the Warming setting on the oven to keep foods hot until ready to serve.
Warming mode temperatures are 140 ° - 220 ° F. Default temperature is 170 °.
Foods that must be kept moist should be covered with a lid or aluminum foil.
CAUTION
When using Warm mode, follow these guidelines:
•
Do not use the Warm Mode to heat cold food.
•
Be sure to maintain proper food temperature. The USDA recommends holding hot food at 140°F or warmer.
DO NOT warm food for longer than one hour.
•
Convection Bake
Convection baking is similar to baking. Heat
comes from the lower heating burner. The main
difference in convection baking is that the heat is
circulated throughout the oven by the convection
fan.
The Convection Bake mode is well-suited for
baking large quantities of food on multiple racks
It can be used to prepare cookies, pies, cupcakes, pastries, breads, snack foods and appetizers among other items. The benefits of Convection Baking include:
•
•
•
•
Slight decrease in cooking time
Three rack cooking (more even browning)
Higher Volume (yeast items rise higher)
Ability to cook more items at once
For Best Results:
Reduce recipe temperature by 25 ° F. Refer to Convection Baking chart.
Place food in low-sided, uncovered pans such as cookie sheets without sides.
Center baking pans side to side on the oven rack
English 19
GettingtheMostOutofYourAppliance
AutomaticConvectionConversion Intheconvection
bakemode,thetemperature
isautomatically
reduced25° F
fromthepackageor recipetemperature.
Simplyenterthepackageor recipetemperaturewhensettingthemodeandtherangecalculates
thecorrecttemperature.
TheAutomaticConvection
Conversion
featurecanbeturnedofftoallowformanualtemperature
adjustment.
See"TurnAutomaticConvection
Conversion
ONor
OFF"onpage12fordetails.
WhentheAutomaticConvection
Conversion
featureis activated,
thedisplaywill
readAUTOCONVBAKE.Whenthefeatureis turnedoff,it willreadCONVBAKE.
Table4: Convection
BakingChart
Cake
Pie
Cookies
Cupcakes
Bundt Cake
3
2
350
350
18-21
37-43
Angel
1
350
39-43
Food
2 Crust,
fresh,
9"
2
400-450
45-55
2 Crust,
frozen
fruit, 9"
2
400
68-78
3
375-400
6-11
3
3
375-400
375
10-15
29-36
Sugar
Chocolate
Brownie
Breads
Pizza
Yeast
Yeast
Chip
bread,
rolls
loaf, 9x5
2
3
400
400-425
20-24
14-18
Quick bread,
Biscuits
loaf, 8x4
2
3
375-400
400-425
45-55
11-15
Muffins
3
450
16-20
Frozen
3
425-475
23-26
Fresh
3
450-475
12-15
a. This temperature must be manually reduced by 25 ° F if the Automatic Convection Conversion
feature has been turned off.
b. This chart is a guide. Actual times depend on the mixes or recipes baked. Follow recipe or
package directions.
Broil
Broiling uses intense heat radiated from the
upper burner. The Broil mode is best suited to
cooking thin, tender cuts of meat (1" or less),
poultry and fish. It can also be used to brown
breads and casseroles. Always broil with the
door closed.
............................................................................... J
The benefits of Broiling include:
•
•
•
Fast and efficient cooking
Cooking without the addition of fats or liquids
Browning as the food cooks
For Best Results:
•
•
•
•
•
•
English 20
Preheat oven 3-4 minutes. Do not preheat for more than 5 minutes.
Steaks and Chops should be at least 3/4" thick
Brush fish and poultry with butter or oil to prevent sticking
Use the broil pan and grid included with your range
Do not cover the broiler grid with foil. It is designed to drain fats and oils away
from the cooking surface to prevent smoking and spattering
Turn meats once halfway through the recommended cooking time (see Broil
Chart for examples).
GettingtheMostOutofYourAppliance
Whentopbrowningcasseroles,
useonlymetalor glassceramicdishessuch
asCorningware®.
Neveruseheat-proof
glass(Pyrex®);
theycan'ttoleratethehightemperature.
•
•
Table5:BroilingChart
Beef
Steak
(3/4"-1 ")
Medium
5
high
145
6-7
5-6
Medium
Rare
5
high
160
7-8
6-7
Well
5
high
170
8-9
7-9
5
high
160
9-11
8-10
4
low
170
18-20
18-19
Hamburgers
(3/4"-1")
Poultry
Breast
in)
Pork
Pork chops
(bone
Sausage
Ham slice
Seafood
- Well
(1")
4
high
160
8-9
7-8
- fresh
3
high
160
7-9
6-8
(1/2")
5
high
160
5-6
5-6
5
low
Cook until
12-14
Do Not Turn
2-4
Do Not Turn
Fish filets (3/4"-1")
buttered
opaque
flakes
Bread
a.
Garlic
Broiling
bread
times
are
slices
(1")
5
approximate
and
may
high
vary
slightly,
Times
and
easily
N/A
are
based
on
cooking
with
a
preheated
broil
burner.
Convection
Roast
Convection Roast uses intense heat from the
lower burner as well as heat circulated by the
convection fan. The result is a crispier exterior
that seals in juices. The Convection Roast mode
is well suited to preparing tender cuts of meat
and poultry.
The benefits of Convection Roasting, include:
•
•
As much as 25% faster cooking than standard Roasting/Baking
Rich, golden browning
For Best Results:
•
•
•
•
•
•
•
Use the same temperature as indicated in the recipe.
Check aloneness early as roasting time may decrease by as much as 25%.
Refer to Convection Roast Chart for examples.
Do not cover meat or use cooking bags.
Use the broil pan and grid provided with the range for roasting. A low-sided,
uncovered pan can also be used.
Use a meat thermometer to determine the internal temperature of the meat.
If the meat is browned to your liking, but is not yet done, a small strip of foil
can be placed over the meat to prevent overbrowning.
Let meat stand covered with foil 10-15 minutes after removing from the oven.
Table 6: Convection Roast Chart
Beef
Rib roast
4-6
Rib eye roast (boneless)
Rump,
eye, tip, sirloin
Tenderloin
roast
4-6
(boneless)
3-6
2-3
325
325
325
425
25-32
145 (med.
28-32
160 (medium)
rare)
24-32
145 (med.
27-32
160 (medium)
25-30
145 (med.
28-32
160 (medium)
15-25
145 (med.
rare)
rare)
rare)
English 21
Table6: Convection
RoastChart
Pork
Loin roast (boneless
Shoulder
Poultry
Chicken
or bone in)
- whole
5-8
3-6
350
350
15-25
20-30
160
160
3-4
375
14-20
180
Turkey
- unstuffed**
12-15
325
10-14
180
Turkey
- unstuffed**
16-20
325
9-13
180
Turkey
- unstuffed**
21-25
325
6-10
180
Turkey
breast
3-8
325
20-25
Cornish
hen
1-1 1/2
350
45-75
170
(total time)
180
* Roasting times are approximate and may vary depending on shape of the meat.
** Stuffed turkey requires additional roasting time. The minimum safe temperature for stuffing in poultry is 165°F.
Cleaning and Maintenance
Cleaning - Cooktop
Caution:
Do not use any cleaner on the cooktop while the surface is hot; The
resulting fumes can be hazardous to your health. Heated cleaner can
chemically attack and damage surface.
Caution: All ignitors spark when any single burner is turned on. Do not
touch any of the burners when the cooktop is in use.
Daily Cleaning
Cleaning
Wipe with a warm soapy water; Rinse and dry. After a spill or boilover, turn off the
burner and allow the cooktop to cool. Clean around the burner and burner ports.
Reassemble burner(s) and check for proper operation.
Guidelines
Avoid these Cleaners
•
•
•
•
•
Glass cleaners which contain ammonia or chlorine bleach. These ingredients
may permanently etch or stain the cooktop.
Caustic Cleaners
Oven cleaners such as Easy Off@ may etch the cooktop surface.
Abrasive Cleaners
Metal scouring pads and scrub sponges such as Scotch Brite® can scratch
and/or leave metal marks.
•
Soap-filled scouring pads such as SOS ® can scratch the surface.
•
Powdery cleaners containing chlorine bleach can permanently stain cooktop
Table 7: Cooktop Cleaning Chart
Burner Base / Enameled
Steel
Detergent and hot water; rinse
and dry.
detergent-filled steel wool pads
such as Brillo ® or S.O.S. ®. Rinse
and dry.
English 22
•
•
Clean ports with a stiff nylon bristle
toothbrush to clean port openings.
Do not scratch or gouge the port
openings
CleaningandMaintenance
Table7:CooktopCleaningChart
BurnerCapsandGrates/
•
Matte Finish on Cast Iron
•
•
Hot water and detergent. Rinse
and dry immediately
Nonabrasive cleaners such as
Fantastic ® or Formula 409 ¢ .
Rinse and dry immediately.
Mild abrasive cleaners such as
Bon Ami ® or Soft Scrub ®.
The grates are heavy; use care when
lifting. Place on a protected surface.
Blisters / crazing / chips are common
due to the extreme temperatures on
grate fingers and rapid temperatures
changes.
Do not wash in the dishwasher
Acidic and sugar-laden spills deteriorate the enamel. Remove soil immediately
Abrasive cleaners, used too vigorously or too often, can eventually mar
the enamel.
Control
Knobs / Plastic
•
Hot sudsy water; rinse and dry
immediately.
To remove knobs, place in off position
and pull straight out.
Do not soak knobs.
Do not force knobs onto valve shaft.
Line up D-shaped opening with the
valve shaft.
Do not use abrasive scrubbers or
cleansers, such as BonAmi ®, Ajax ®,
or Comet ®. They may permanently
damage the finish.
Exterior finish / Porcelain
Enamel
•
•
•
•
Exterior
Steel
Finish / Stainless
•
•
•
•
•
•
Hot sudsy water; rinse and dry
thoroughly.
Nonabrasive cleansers such as
Fantastic ® or Formula 409 ¢ .
Mild abrasive cleansers such as
Bon Ami ®, Ajax ®, Comet ®.
Liquid cleaners such as Soft
Scrub ®.
Carefully reassemble the burner when
finished. Verify that the burner cap is
properly seated.
Do not use a toothpick; it may break
Hot water and detergent
Non-abrasive cleaners such as
Fantastic ® or Formula 409 ¢ .
Stainless steel resists most food
Rinse and dry immediately.
Cleaner polish such as Stainless
Steel Magic ® to protect the finish
from staining and pitting;
enhances appearance.
Hard water spots: Household
white vinegar.
Mild Abrasive Cleaners: Kleen
King ® stainless steel liquid
cleaner, Cameo ® aluminum &
stainless steel cleaner, Bon Ami ®.
Heat discoloration: Bar Keepers
Friend ®.
off.
Acidic and sugar-laden spills deteriorate the porcelain enamel. Remove
soil immediately.
Do not use wet sponge or towel on
hot porcelain.
Do not soak burner caps.
Always apply minimal pressure with
abrasive cleaners.
Never use oven cleaners, caustic
cleaning agents or abrasive cleaning
agents on exterior of range.
stains and pit marks providing the surface is kept clean and protected.
Use clean, soft cloths, sponges or
paper towels.
Wipe area dry to avoid water marks.
Never allow food stains or salt to
remain on stainless steel for any
length of time.
Rub lightly in the direction of polish
lines.
Chlorine or chlorine compounds in
some cleaners are corrosive to stainless steel. Check ingredients on label
before using.
English 23
CleaningandMaintenance
Table7:CooktopCleaningChart
Igniters/ Ceramics
•
•
Cleaning
Keep the ignitor ports clean for proper
performance. It is necessary to clean
these when there is a boilover or
Formula 409 ¢ .
Gently scrape soil off with a toothpick.
when the burner does not light even
though the electronic ignitors click.
A damp igniter will prevent burner
from igniting. For proper burner performance, keep ignitors clean and
dry.
Remove any lint that may remain after
cleaning.
- Oven
Daily Cleaning
Cleaning
Carefully wipe with a cotton swab
dampened with water, ammonia
or a non-abrasive cleaner such as
Daily cleaning of the inside of the oven is not necessary. When soil builds up, use
the self-clean function as explained in "Self Cleaning the Oven" on page 24. See
"Oven Cleaning Chart" on page 24 for instructions for specific surfaces and items.
Guidelines
Avoid these cleaners
•
•
Do not use caustic cleaners such as Easy Off®. They may etch the surface.
Flammable cleaners such as lighter fluid or WD-40
Table 8: Oven Cleaning Chart
Racks
Wash
with hot sudsy
pads as directed.
water.
If racks
ish and may not glide
Rinse
thoroughly
are cleaned
smoothly.
and dry, or gently
in the oven during
If this happens,
rub with cleansing
the self-clean
wipe the rack edges
mode,
powder
or soap filled
they will lose their shiny fin-
with a small amount
of vegetable
oil,
then wipe off excess.
Fiberglass
Glass
Door Gasket
(other
than cook-
top)
Painted
Surfaces
Porcelain
Surfaces
DO NOT
HAND
CLEAN
GASKET.
Wash with soap and water or glass cleaner.
and stubborn
stains.
Clean with
hot sudsy
wipe clean.
Avoid
Immediately
wipe
spongeltowel
to a damp
water
using
or apply
powdered
Fantastik®
cleansers,
sponge.
Rinse
When
Surfaces
Always
Formula
wipe
409®
cloth. Remove water spots
remove heat discoloration.
Plastic & Controls
Self Cleaning
the Oven
When
cool, clean
water,
409®
to a clean
to remove
sponge
with a dry towel.
with hot sudsy
stains,
with a soapy
Protect
dampened
water or apply
use soap filled
to heat and food
towel.
with a cloth
with soapy
grease
or paper
spatters
towel and
sponge
Do not use a moistened
Bon-Ami®
pads. It is normal
or Soft Scrub®
for porcelain
to
soil.
then
and polish
rinse and dry, or wipe with Fantastik®
with Stainless
with white vinegar.
Steel
Magic®
Use Bar Keeper's
or
and a soft
Friend®
to
rinse and dry.
The oven features a self-cleaning function that eliminates the manual labor
involved with cleaning your oven. During self-cleaning, the oven uses a very high
temperature to burn away food soil and grease.
•
English 24
Clean
onto a paper
409®
milk and tomatoes
cool, clean
and dry. For stubborn
or rub with grain.
sprayed
or Formula
or Formula
steel wool pads and oven cleaners.
up acid spills like fruit juice,
on hot porcelain.
show fine lines with age due to exposure
Stainless
Use Fantastik®
Do not clean parts or accessories in the self-clean oven.
Cleaning and Maintenance
•
•
•
•
•
•
•
•
•
Preparingthe
It is common to see smoke and/or an occasional flame-up during the SelfClean cycle, depending on the content and amount of soil remaining in the
oven. If a flame persists, turn off the oven and allow it to cool before opening
the door to wipe up the excessive food soil.
The oven door locks at the beginning of the self-clean cycle.
The oven light does not operate during this mode.
During Self-Clean, the kitchen should be well ventilated to help eliminate
odors associated with Self-Clean. Odors will lessen with use.
Four hours is the preset length of cleaning. The range can also be set to clean
for 3 or 5 hours.
The mode automatically stops at the end of the clean hours.
When the oven cools after cleaning, the automatic door lock will release and
the door can be opened.
To cancel or stop while the mode is operating, press OFE
The door will not unlock until the oven reaches a safe temperature.
Oven for Self Clean
,_
WARNING
A flexible door gasket is necessary for a good seal. Do not clean, rub,
damage or move the gasket.
1.
2.
3.
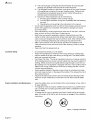
Remove all utensils and bakeware.
Remove oven racks. If oven racks are left in the oven during the self-clean
cycle, they will permanently lose the shiny finish and change to a dull dark finish. See Oven Cleaning Chart for proper care.
Wipe up excessive soil, spills and grease before self-cleaning the oven.
Excess grease will cause flames and smoke inside the oven during self-cleaning.
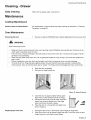
Do hand-clean
1 1/2 inches from
rack guides to front of oven cavity.
Do not hand-clean
the gasket.
Do hand-clean
frame
area outside the gasket,
Do hand-clean
door
area outside the gasket.
Figure 9: Cleaning Guidelines
4.
5.
Review illustration above. Some areas of the oven must be cleaned by hand
before the cycle begins. Use a soapy sponge or plastic scrubber or a detergent-filled S.O.S. ® pad. Hand-clean the oven door edge, oven front frame and
up to 1-1/2 inches inside the frame with detergent and hot water. Do not clean
or rub the gasket on the oven. The gasket is designed to hold in heat during
the self-clean cycle. Rinse all areas thoroughly then dry.
Be sure oven light is turned off and the light bulbs and lens covers are in
place. Do not operate oven without light bulb and cover in place.
Important: Do not use Commercial Oven Cleaners on the self-clean oven or any
part because they will damage the finish or part.
English 25
CleaningandMaintenance
Settingthe Self-CleanMode
.
2.
.
.
5.
.
Press COOKING MODE.
Turn knob until SELF CLEAN mode appears. Press START.
The default cleaning time is 4 hours. To
change cleaning time, turn knob to change
number of hours. Otherwise, continue to
step 4.
Press START. SELF CLEAN flashes. Press
START.
REMOVE RACKS appears in the display
as a reminder to remove oven racks.
Press START again to begin the selfclean.
Note: The door locks at the beginning of the
cycle; The door lock symbol will appear in the display at this point. If door does not
lock, press OFF and do not self-clean; phone service.
Delayingthe Start of
the Self-Clean
Note: The time of day must be correctly set for this option to work properly. See
section "Setting the Clock" in "Setting Up Your Range".
1.
Press COOKING MODE.
2.
3.
Turn knob until SELF CLEAN mode appears. Press START.
The default cleaning time is 4 hours. To change cleaning time, turn knob to
change number of hours. Otherwise, continue to step 4.
Press START.
Turn knob until DELAYED CLEAN mode
appears. Press START.
4.
5.
.
7.
.
9.
SELF CLEAN END appears in the display.
Turn knob to enter the time of day you want
the self-clean to end: Set hours, press time,
set minutes.
Press START. The display will remind you to
remove oven racks.
Press START. The display shows DELAYED CLEAN. The self-clean will
automatically start at the appropriate time.
Note: In the Delayed Self-Clean Mode, the door latch automatically activates at
the beginning of the cycle. The door lock symbol will appear in the display.
Note: The oven lights do not operate in the Self-Clean mode.
After Self-Cleaning
1. At the end of the programmed cleaning time, the oven will automatically turn
off. SELF CLEAN END appears in the display. Press OFF to clear.
Note: The door will not unlock until the oven reaches a safe temperature.
2.
3.
The self-clean mode may produce ash which will settle in the bottom of the
oven. tf this happens, remove ash with a damp cloth before using the oven.
Wipe rack edges with cooking oil to allow for proper glide. Wipe off excess.
After self-cleaning, the entire oven can be safely cleaned with a soapy sponge,
rinsed and dried. If stubborn soil remains, follow the guidelines on this page.
•
•
•
•
•
English 26
Always use the mildest cleaner that will remove the soil.
Rub metal finishes in the direction of the grain.
Use clean, soft cloths, sponges or paper towels.
Rinse thoroughly with a minimum of water so it does not drip into door slots.
Dry to avoid water marks.
Cleaning and Maintenance
Cleaning - Drawer
Daily Cleaning
Wash with hot soapy water, rinse and dry.
Maintenance
Cooktop
Maintenance
Stainless Steel Cooktop Models
No maintenance is required other than daily cleaning as described in "Cleaning
Guidelines" on page 22
Oven Maintenance
Removing the Door
_
1.
Be sure to read the WARNING below before attempting to remove oven door.
WARNING
When removing the door:
•
•
•
•
•
Make sure oven is cool and power to the oven has been turned off before removing the door. Failure to do so
could result in electrical shock or burns.
The oven door is heavy and fragile. Use both hands to remove the oven door. The door front is glass. Handle
carefully to avoid breaking.
Grasp only the sides of the oven door. Do not grasp the handle as it may swing in your hand and cause damage or injury.
Failure to grasp the oven door firmly and properly could result in personal injury or product damage.
To avoid injury from hinge bracket snapping closed, be sure that both levers are securely in place before
removing door. Also, do not force door open or closed - the hinge could be damaged and injury could result.
2.
3.
Open the door completely.
Flip lever on hinge toward you.
Figure 10: Hinge Positions
4.
5.
6.
Close the door to approximately halfway open.
Stop when you feel resistance from the hinge..
Holding the door firmly on both sides using both
hands, pull the door straight out of the hinge
slots. Hold firmly, the door is heavy.
Place the door in a convenient and stable location for cleaning.
Replacing the Oven Door
1.
2.
Holding the door firmly in both hands, place hinges in hinge slots.
Open door all the way to expose hinges and slots. Push lever (one on each
hinge) away from you (back toward range).
English 27
3.
After moving the hinge brackets back down into position, be sure to close and
open the door slowly to assure that it is correctly and securely in place.
Door should be straight, not crooked.
4.
Replacing an Oven Light
Each light assembly consists of a removable lens, a light bulb and a light socket
housing that is fixed in place.
WARNING
Make sure the appliance and lights are cool and power to the appliance
has been turned off before replacing the light bulb(s). Failure to do so
could result in electrical shock or burns.
The lenses (if equipped) must be in place when using the appliance.
The lenses (if equipped) serve to protect the light bulb from breaking.
The lenses (if equipped) are made of glass. Handle carefully to avoid
breaking. Broken glass could cause an injury.
Light socket is live when door is open
i•
if"
.
2.
3.
4.
5.
.
7.
Read the WARNING above.
Turn off power at the main power supply (fuse or breaker box).
Remove the lens by unscrewing it.
Remove the light bulb from its socket by unscrewing it.
Replace the bulb with a new 40 watt appliance bulb. Avoid touching the bulb
with fingers, as oils from hands can damage the bulb when it becomes hot.
Screw the lens back on.
Turn power back on at the main power supply (fuse or breaker box).
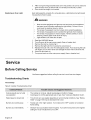
Service
Before Calling Service
Use these suggestions before calling for service to avoid service charges
Troubleshooting
Charts
The Cooktop
Table 9: Cooktop Troubleshooting
Chart
Cooking results are not what
was expected.
•
•
The cooktop is not level. Adjust leveling legs on bottom of range.
Cooking pan is not the appropriate size or type. See "Cookware Selection Guide".
Water takes too long to boil
•
Time to boil can vary greatly depending on environmental conditions. See "Boiling
Water" on page 16 for tips to decrease time to boil.
Burners click continuously
°
Knob(s) are in the "light" position. Turn knobs to the "OFF" position or to desired
flame setting.
Burners click intermittently
•
Moisture has accumulated insdie the ignitor. Turn both front burners to the highest
setting for 15-20 minutes then turn to OFF.
English 28
::
Service
Table9: CooktopTroubleshooting
Chart
Surfaceburnersdonotlight
•
•
•
•
•
•
•
Unevenor toohighflame;
burneris hardto light
•
•
•
Unevenflame- LPgasusers •
Gasisturnedoff.Makesurethegasshut-offvalveis intheONpositionandthegas
supplyto thehouseis notshutoff.
Unitisnothookeduptothegassupply.Callgascompany.
Plugis notcompletely
insertedintooutletor thehousewiringis incorrect.
Check
thepowersupply,verifythattheunitis groundedwiththecorrectpolarity,make
suretheunitis pluggedin.
Circuitbreakeris tripped.Checkcircuitbreakerandresetif necessary.
Checkand/
or replacefuse.
Burnerportsareclogged.Turnthecooktopoffandallowtheburnersto cool.
Removeburnercapsandusea stiffnylonbristletoothbrush
to pushdebristhrough
burnerports.
Misaligned
burnercap.Verifythatburnercapsareproperlypositioned
overburners.
Ignitoris wet,damaged
ordirty.Checkignitorformoisture.If wet,allowtoairdry
beforeusing.Checkforburned-on
foodor grease.Seecleaningrecommendations.
Burnerwillnotlightif ignitoriswet,damaged
or dirty.
Burnerportsareclogged.Turnthecooktopoffandallowtheburnerstocool.
Removeburnercapsandusea stiffnylonbristletoothbrush
to pushdebristhrough
burnerports.
Misaligned
burnercap.Verifythatburnercapsareproperlypositioned
overburners.
Burnercapiswet.Turnoffburnerandallowtocool.Dryburnercapandbasethoroughly.
Callservice
TheOven
Table 10: Oven Troubleshooting
Chart
The oven mode or temperature selected
or the numbers selected do not appear in
the display
The knob was turned too rapidly. Turn knob slower until correct wording or
temperature appears. Review manual instructions when setting clock,
timer, or Self-Clean.
Oven door is locked and will not release,
even after cooling
Turn the oven off at the circuit breaker and wait 5 minutes. Turn breaker
back on. The oven should reset itself and will be operable.
Oven is not heating
Check circuit breaker or fuse box to your house. Make sure there is proper
electrical power to the oven. Be sure oven temperature has been selected.
Oven is not cooking evenly
Adjust oven calibration if necessary (see "Change the Oven Temperature
Offset" on page 11). Refer to cooking charts for recommended rack position.
Baking results are not as expected
Refer to cooking charts for recommended rack position. Check "Getting the
Most Out of Your Oven" on page 18 for tips and suggestions. Adjust oven
calibration if necessary (see "Change the Oven Temperature Offset" on
page 11).
Food takes longer to cook than expected
The oven is carefully calibrated to provide accurate results. However, the
temperature can be offset if food is consistently too brown or too light. See
"Change the Oven Temperature Offset" on page 11.
English 29
Service
Table10:OvenTroubleshooting
Chart
Foodisovercooked
Theoveniscarefullycalibrated
to provideaccurateresults.However,
the
temperature
canbeoffsetif foodis consistently
toobrownor toolight.See
"ChangetheOvenTemperature
Offset"onpage11.
Convection
BakeResultsarenotas
expected
If theAutomaticConvection
Conversion
Featureisturnedoff,thetemperaturemustbemanuallyreducedby25°EIf thefeatureisactive,thetemperatureisautomatically
adjusted.See"TurnAutomaticConvection
Conversion
ONorOFF"onpage12formoreinformation.
Refertocooking
chartsandtipsforrackpositions,cookingtimesandpanselection.Adjust
ovencalibrationif necessary.
See"ChangetheOvenTemperature
Offset"
onpage11.
Oventemperature
is toohotortoocold
Theoventhermostat
needsadjustment.
SeeOvenTemperature
Offset.
Ovenlightis notworkingproperly
Replaceor reinsertthelightbulbiflooseordefective.Touching
thebulb
withfingersmaycausethebulbtoburnout.
Ovenlightwillnotturnoff
Checkforobstruction
in ovendoor.Checktoseeif hingeisbent.Whenthe
Sabbathfeatureis activated,
theovenlightwillstayonor off(asselected
duringset-up)duringtheentireSabbathmode.
Cannotremovelenscoveronlight
Theremaybesoilbuild-uparoundthelenscover.Wipelenscoverarea
witha cleandrytowelpriortoattempting
to removethelenscover.
OvenwillnotSelf-Clean
properly
AllowtheoventocoolbeforerunningSelf-Clean.
Alwayswipeoutloose
soilsor heavyspillovers
beforerunningSelf-Clean.
If ovenis badlysoiled,
setovenfora five-hourSelf-Clean.
SeePreparing
theOventoSelf-Clean.
Clockandtimerarenotworkingproperly Makesurethereis electricalpowertooven.SeeClockandTimersections.
Porcelain
chips
Whenovenracksareremovedandreplaced,alwaystiltracksupwardand
donotforcethemto avoidchippingtheporcelain.
"F"anda numberappearsindisplayand
controlbeeps
Thisisa faultcode.PressOfftoclearthedisplayandstopbeeping.Reset
ovenif necessary.
Iffaultcoderemainsandbeepcontinues,
recordfault
code,cancelovenandcallauthorized
servicetechnician.
Witha newrangethereis a strongodor
whenovenis turnedon
Thisis normalwitha newrangeandwilldisappearaftera fewuses.Operatingtheself-clean
cyclewillalso"burn-off'thesmellmorequickly.
Controldoesnotreactwhenthepadis
touched
Besurethatpadis clean.Touchthecenterofthetouchpad.Usetheflat
partofyourfinger.
Fanis notrunningduringa convection
mode
Onsomemodes,theconvection
fandoesnotcomeonatthebeginning
of
the cyle.Thisis normal.Ifthefanis notrunningatthebeginingofthecyle,
wait15minutesandthencheckagain.If thefanis stillnotrunning,call
service.
Fanturnsoffandonduringthecycle
Theconvection
fanturnsoffwhiltheovendoorisopen.It resumeswhen
thedooris closedagain..
Fanis runningduringmodesthatdon't
useconvection
Onsomemodels,theconvection
fanwill runwhiletheovenis preheating
forthebakemode.Thisis normal.
Warmairorsteamescapesfromoven
vent
It is normaltoseeor feelsteamorwarmairescaping
fromtheovenvent.
Donotblockthevent.
English30
Service
How to Obtain Service or
Parts
To reach a service representative, see the contact information at the front of the
manual. Please be prepared with the information printed on your product data
plate when calling.
Product Data Plate
The data plate shows the model and serial number. Refer to the data plate on the
appliance when requesting service. It is located on the frame near the drawer.
Open the drawer to view it.
Data Plate_
Figure 11: Data Plate
Waranty
What this Warranty Covers & Who it Applies to:
The limited warranty provided BSH Home Appliances Bosch in this Statement of
Limited Product Warranty applies only to the Bosch freestanding and slide-in
range, ("Product") sold to you, the first using purchaser, provided that the Product
was purchased: (1)for your normal, household (non-commercial) use, and has in
fact at all times only been used for normal household purposes; (2) new at retail
(not a display, "as is", or previously returned model), and not for resale, or commercial use; and (3) within the United States or Canada, and has at all times
remained within the country of original purchase. The warranties stated herein
apply only to the first purchaser of the Product and are not transferable.
-Please make sure to return your registration card; while not necessary to effectuate warranty coverage, it is the best way for Bosch to notify you in the unlikely
event of a safety notice or product recall.
How Long the Warranty Lasts:
Bosch warrants that the Product is free from defects in materials and workmanship for a period of three hundred sixty-five days (365) days from the date of purchase. The foregoing timeline begins to run upon the date of purchase, and shall
not be stalled, tolled, extended, or suspended, for any reason whatsoever.
Repair/Replace as Your Exclusive
Remedy:
During this warranty period, Bosch or one of its authorized service providers will
repair your Product without charge to you (subject to certain limitations stated
herein) if your Product proves to have been manufactured with a defect in materials or workmanship. If reasonable attempts to repair the Product have been
made without success, then Bosch will replace your Product (upgraded models
may be available to you, in Bosch's sole discretion, for an additional charge). All
removed parts and components shall become the property of Bosch at its sole
option. All replaced and/or repaired parts shall assume the identity of the original
part for purposes of this warranty and this warranty shall not be extended with
respect to such parts. Bosch's sole liability and responsibility hereunder is to
repair manufacturer-defective Product only, using a Bosch -authorized service
provider during normal business hours. For safety and property damage concerns, Bosch highly recommends that you do not attempt to repair the Product
yourself, or use an un-authorized servicer; Bosch will have no responsibility or liability for repairs or work performed by a non-authorized servicer. If you choose to
have someone other than an authorized service provider work on your Product,
THIS WARRANTY WILL AUTOMATICALLY BECOME NULL AND VOID. AuthoEnglish 31
Service
rizedserviceprovidersarethosepersonsor companies
thathavebeenspecially
trainedon Boschproducts,
andwhopossess,in Bosch'sopinion,a superiorreputationforcustomerserviceandtechnicalability(notethattheyareindependent
entitiesandarenotagents,partners,affiliatesor representatives
of Bosch).Notwithstanding
theforegoing,Boschwillnotincuranyliability,orhaveresponsibility,
fortheProductif it is locatedina remotearea(morethan100milesfroman
authorized
serviceprovider)or is reasonably
inaccessible,
hazardous,
threatening,or treacherous
locale,surroundings,
or environment;
in anysuchevent,ifyou
request,Boschwouldstillpayforlaborandpartsandshipthepartstothenearest
authorized
serviceprovider,butyouwouldstillbefullyliableandresponsible
for
anytraveltimeor otherspecialchargesbytheservicecompany,
assuming
they
agreeto maketheservicecall.
Out of Warranty
Warranty
Product:
Exclusions:
Bosch is under no obligation, at law or otherwise, to provide you with any concessions, including repairs, pro-rates, or Product replacement, once this warranty has
expired.
The warranty coverage described herein excludes all defects or damage that are
not the direct fault of Bosch, including without limitation, one or more of the following: (1) use of the Product in anything other than its normal, customary and
intended manner (including without limitation, any form of commercial use, use or
storage of an indoor product outdoors, use of the Product in conjunction with air or
water-going vessels); (2) any party's willful misconduct, negligence, misuse,
abuse, accidents, neglect, improper operation, failure to maintain, improper or
negligent installation, tampering, failure to follow operating instructions, mishandling, unauthorized service (including self-performed "fixing" or exploration of the
appliance's internal workings); (4) adjustment, alteration or modification of any
kind; (5) a failure to comply with any applicable state, local, city, or county electrical, plumbing and/or building codes, regulations, or laws, including failure to install
the product in strict conformity with local fire and building codes and regulations;
(6) ordinary wear and tear, spills of food, liquid, grease accumulations, or other
substances that accumulate on, in, or around the Product; and (7) any external,
elemental and/or environmental forces and factors, including without limitation,
rain, wind, sand, floods, fires, mud slides, freezing temperatures, excessive moisture or extended exposure to humidity, lightning, power surges, structural failures
surrounding the appliance, and acts of God. In no event shall Bosch have any liability or responsibility whatsoever for damage to surrounding property, including
cabinetry, floors, ceilings, and other structures or objects around the Product.
Also excluded from this warranty are scratches, nicks, minor dents, and cosmetic
damages on external surfaces and exposed parts; Products on which the serial
numbers have been altered, defaced, or removed; service visits to teach you how
to use the Product, or visits where there is nothing wrong with the Product; correction of installation problems (you are solely responsible for any structure and setting for the Product, including all electrical, plumbing or other connecting facilities,
for proper foundation/flooring, and for any alterations including without limitation
cabinetry, walls, floors, shelving, etc.); and resetting of breakers or fuses. TO
THE EXTENT ALLOWED BY LAW, THIS WARRANTY SETS OUT YOUR
EXCLUSIVE REMEDIES WITH RESPECT TO PRODUCT, WHETHER THE
CLAIM ARISES IN CONTRACT OR TORT (INCLUDING STRICT LIABILITY, OR
NEGLIGENCE) OR OTHERWISE. THIS WARRANTY IS IN LIEU OF ALL
OTHER WARRANTIES, WHETHER EXPRESS OR IMPLIED. ANY WARRANTY
IMPLIED BY LAW, WHETHER FOR MERCHANTABILITY OR FITNESS FOR A
PARTICULAR PURPOSE, OR OTHERWISE, SHALL BE EFFECTIVE ONLY
FOR THE PERIOD THAT THIS EXPRESS LIMITED WARRANTY IS EFFECTIVE. IN NO EVENT WILL THE MANUFACTURER BE LIABLE FOR CONSEQUENTIAL, SPECIAL, INCIDENTAL, INDIRECT, "BUSINESS LOSS", AND/OR
PUNITIVE DAMAGES, LOSSES, OR EXPENSES, INCLUDING WITHOUT LIMITATION TIME AWAY FROM WORK, HOTELS AND/OR RESTAURANT MEALS,
REMODELLING EXPENSES IN EXCESS OF DIRECT DAMAGES WHICH ARE
DEFINITIVELY CAUSED EXCLUSIVELY BY Bosch, OR OTHERWISE. SOME
English 32
Service
STATES DO NOT ALLOW THE EXCLUSION OR LIMITATION OF INCIDENTAL
OR CONSEQUENTIAL DAMAGES, AND SOME STATES DO NOT ALLOW LIMITATIONS ON HOW LONG IMPLIED WARRANTY LASTS, SO THE ABOVE LIMITATIONS MAY NOT APPLY TO YOU. THIS WARRANTY GIVES YOU
SPECIFIC LEGAL RIGHTS, AND YOU MAY ALSO HAVE OTHER RIGHTS,
WHICH VARY FROM STATE TO STATE. No attempt to alter, modify or amend
this warranty shall be effective unless authorized in writing by an officer of BSH.
How to Obtain Warranty Service:
To obtain warranty service for your Product, you should contact the nearest Bosch
authorized service center.
BSH Home Appliances - 5551 McFadden Avenue, Huntington Beach, CA 92649 /
800-944-2904
English 33
Invented
for life
5551 McFadden Avenue, Huntington Beach, CA 92649 • 800-944-2904 • www.boschappliances.com
9000155061 • 10098A • 3/06 © BSH Home Appliances Corporation