1
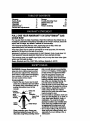
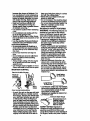
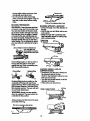
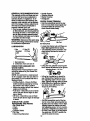
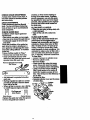
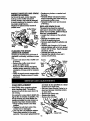
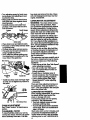
Operator's Manual
CRRFTSMRN
2.4 cu. in./40cc 2-Cycle
GASOLINE CHAIN SAM/
Model No.
358.350080 - 18 In. Bar
@
Read and follow all Safety Rules and Operating
WARNING:
Instructions before first use of this product.
For answers
to your
questions
thispm,
product:
Call
7 am-7 pm,
Mon.-Sat.,
or about
10 am-7
Sun.
•
1-800-235-5878
(,o..,_mc._.)
m
Se_ebuck
530087614
08/:19/98
and Co., Hoffman Estates, IL 60179 USA
Warranty
Safety Rules
Assom.b!y
Maintenance"
_
Service and Adjustments
2
2
5
6
11
14
Storage
Trouble Shooting Chart
Raper Parts Us[
Spanish
.
Pads & Ordenng
16
17
21
24
Back
FULL ONE YEAR WARRANTY ON CRAFTSMAN® GAS
CHAIN SAW
For one year from the date of purchaee, when this Craftsman Gas Chain Saw is
maintained, lubricatedand tunsd-up according to the owner's manual, Sears will
repair, free of Charge, any defect In matedal or wodonanship.
This warranty excludes the bar, chain, spark plug and air filter, which are
expendable parts, and become worn duringnormal use.
If this Gas Chain Saw is used for commercial or rental purposes, this warranty
applies for 30 days from the date of purchase.
WARRANTY SERVICE IS AVAILABLE BY RETURNING THIS CHAIN SAW TO
THE NEAREST SEARS SERVICE CENTER IN THE UNITED STATES.
This warranty gives you specific legal rights, and you may also have other rights
which vanj from state to state.
Sears, Roebuck and Co., D/817 WA, Hoffman Estate's, IL 60179
WARNING: Always disconnectspark
plug wire when making repairs except
for carburetor adjustments. Because a
chain saw is a high-speed woodcutting
tool, careless or improperuse of this
tool can cause serious injury.
PLAN AHEAD
• Restrictthe use of your saw to adult
users who understand and can follow
the safety rules, precautions, and opersting instructions found =nthis
manual.
duty, non-slip gloves;eye protection
such as non-fogging,vented goggles
or face screen; an approved safety
hard hat;,and sound barriers (ear
plu_ or mufflers) to protect your
heenng. Regular users should have
heedng checked regularly as chain
saw noise can damage headng. Secure hair above shoulder length.
• Keep all parts of your body away from
the chain when the engine is running.
• Keep children, bystanders, and animals at least 30 feet (10 meters)
away from the work area when startng and using the saw.
• Do not handle or operate a chain saw
HeavyDuty when you are fatigued, ill, or upset, or
Oothlng
Gloves
if you have taken alcohol, drugs, or
medication. You must be in good
_hysical conditionand mentally alerL
you have any conditionthat might
_. SafetyChaps
be aggravated by strenuous work,
check with doctorbefore operating.
NM
• Do not start cuffing untilyod..bave a
•_Vear protective gear. Always use
clear work area, secure footing, and
steel-toed safety footwear with nonespecially if you are felling a tree, a
retreat path.
slip soles; snug-fitting clothing;,heavy2
Safety
H,t
\
OPERATE YOUR SAW SAFELY
• Stemthe unitandfuelin a cool, dry
• Do not operate with one hand. Sarious injuryto the operator, helpers, or
bystanders may result from onehanded operation. A chain saw is in" tended for two-handed use.
-......
• Operate the chain saw only in a wellventilated outdoor area.
• Do not operate saw from a ladder or
in a tree, unless you are specifically
trained to do so.
• Make sure the chain will not make
contact with any object while starting
the engine. Never try to start the saw
when the guide bar is in a cut.
• Do not put pressure on the saw, especially at the end of the cut. Doing
so can cause you to lose control
when the cut is completed.
• Stop engine before setting saw down.
• Hand carry saw only when engine is
stopped. Cany with muffler away from
body;,guide bar & chain projecting behindyou; guide bar preferably covered with a scabbard.
well ventilated space where fuel vapore cannot reach sparks or open
flames from water heaters, electric
motors or switches,furnaces, etc.
GUARD AGAINST KICKBACK
MAINTAIN YOUR SAW IN GOOD
WORKING ORDER
• Have all chain saw service performed
by a qualifiedservice dealer except
the items listed in the maintenance
sectionof this manual.
• Make certain the saw chain stops
moving when the throttle trigger is released. For correction, refer to "CarburetorAdjustments."
• Keep the handles dry, clean, and free
from oil or fuel mixture.
• Keep caps and fasteners securely
tightened.
• Use only Craftsman accassories and
- replacei;ilentparts as recommended.
Never modifyyour saw.
Follow all safety mlea to helpavoid
kickbackand other forces whichcan
result in sarious injury.
ClearThe WoddngArea
WARNING: Rotational Kickback can
occur when the moving chain contacts
an object at the upper portion of the tip
ofthe guidebar.Contactatthe upper
portion of the,tip of the guide bar can
cause the chin to dig intothe object,
which stops the chain for an instant.The
result isa lightningfast, reverse reaction
which kicksthe guide bar up and back
toward the operator.
Pinch-Kickback and Pull-in occur when
the chain is suddenly stopped by being
pinched, caught, or by contacting a foreign object in the wood. This sudden
stopping of the chain results in a reversal of the chain force used to cut wood
and causes the saw to move in the opposite directionof the chain rotation.
Pinch-Kickback drivesthe saw stndght
back toward the operator. Pull-In pulls
the saw away from the operator.
REDUCE THE CHANCE OF
KICKBACK
HANDLE FUEL WITH C-AU'rlON
: Do not smoke while handling fuel or
while operatingthe saw.
• Recognize.that
kickbackcanhappsn.
• EUminate_ sources of spsrks or_e
W'_ha basicundemta_
of_
- in areas where fuel is rnixedorpoured.
you can reducethe eleme_ of surpnsa
• Mix and pour fuel in an outdoor area
whichcontrbutes to acddents.
and use an approved, marked container for all fuel pu.q:_.. s. Wipe up
i ..any
Never
object
let the
at the
movingchain
tip Ofthe guide
contact
bar.
all fuel spills before starting saw.
Rasp working area free from obstruc• Move at least 10 feet (3 meters) from
tions such as other traes, branches,
fueling site before starting,
rocks,fences, stumps, etc. Eliminate
• Tum th_-e_gine off and let saw cool in
or avoid any obstructionthat your saw
a non-_----oed)ustible
area, not on dry
onam sould hit while outting.
leaves, straw, paper, etc. Slowly re• Kee0 saw chain sharp aml-proPerly
move fuel _ and refuel uniL
tans|oned. A loose or dull chain can
'3
increase the chance of kickback.Follow manufacturer's chain sharpening
and maintenance instructions.Check
tension at regular intervals, but never
with engine running.Make sure D.ar
_an?p.nuts.are secure_ffghteneo,
• ueg=nand cormnue cumn9 at full
speed. If the_halr_b moving at a
slower speed, them is greater chance
of kickback accumng.
.
• Use extreme caution when reentanng
e cut.
D.onot attempt cuts starting with the
_tip of the
cuts),
Watch forber'_ungeal_ling
logs orother force,s.
that could dose a cut ano pinch or ra,
into chain. .
• Use
theBar
spacif!_
Reduced-Kickbeck
Guide
and Low
K]ckbeck Chain.
keep your body .frombeing in a direct
linew]th.the cumng cru_n.
• Stand _
your weight evenly balanced on I:k_ feat.
• Do not overreach. You could be drawn
or thrownoff balance and lose control
• Do not cutabove shoulder height. It Is
, difficultto maintain control of saw
above shoulder height.
KICKBACK SAFETY FEATURES
WARNING: The lot|owing features are
includedon your saw to help reduce .
hazard of k_.kback; however, such fee
tures will not totally eliminate this darv
get. Do not rely only on safety devices.
• Handguerd: dealgned to reduce.the
chance
ofyour
hand
cor_tctmg
the chain
ifyourle]t
hand
slips
off the
Avoid Plnoh-K]okbeok:
front handlebar.
• Pos_on of front and rear handlebars:
• Be extremely aware of sltu_ionc or
designed with d_ce
b@_._n h_anobstructions that can cause material
dies and "inqlne" with sac_ omer. ] ne
to pinch the top of or otherwise stop
spread and =in-line" _positionof the
the chain.
hands provided bY this desl_lnwork
• Do not cut more than one log 8t a
together to give balance ana resistime..
tance in controlling the pivot of the
• Do not twbt saw es ber b withdrawn
saw back toward the operator if kickfrom an undemut when bucking.
back occurs,
Avoid Pull-in:
• Reduced-KiCkback Guide Bar:.de• Always begin cutting with the engine
signed with a small radius tip which
at full speed and the saw housing
reduces the size of the kickback denagainst wood.
_er zone. This type bar has been
• Use wedges made of plastic or wood.
emDnstratedto slgnfficentlyredu_
Never use metal to hotd the cut open.
the number and seriousness of kiCK
MAINTAIN CONTROL
backs when tested In accordance with
ANS! B175.1.
Stand to the left of the saw
Thumb on
TipGuideBar
\l
_._
Elbow
locked
SrnallRadius
TipGuideBar
• Low.Kk_ck Chain: hes mat _
on a represer_=__, earn.pp or cnam
sews below3.8 cubic inch
• A good, firm gflp on the _
with b.oth LdiSp_. ent s_
in ANSI B175,1.
hands will help you mmmaJncontrol
ow-K]ckback
Chain
Don'tJet go. Gdp the rear handle .with
Contoured
Oep_Gauge
your right hand whether .you are ngin
or left handed. Wrap me,ngers or
your left hand over and arotmd the
FomeAndAllows
front handlebar, and your left thumb
WoodToGradually
under the front han.d[eher.Keep your
RideIntoCu'der
leftann straight withthe elbow locked.
SAFETY NOTICE: Exposure to
• Positionyour left hand on .t_. front.
handlebar so It is in a strmgnt,he w_n vibrationsthrough pro|onged.,',saof
gasoline Powered hand tools .cou]a .
your dght hand on the _
handle
cause bloodvessel or nerve aamage_ln
When making oucking outs. Stand
the fingers,hands, and joints of peopke
stlghtlyto the left side ofthe sawm
4
Never reverse hand-poslffonF.
proneto circulationd_orders.or .
abnormalswelling.Prolongeause in
muffler and spark arresting screen
which meets the requirementsof
cold weather has been linked to blood
Caiifomla Codes 4442 and 4443. All
vessel damage in othmwisa healthy
U.S. forest land and the states of
people. If symptoms occur suchas
California, Idaho, Maine, Minnesota,
- numbness, pare, loss of str_angm,
New Jersey, Oregon, and Washington
change in skin color or tex_re, 6t loss
require b.ylaw _at many internal .
of feeling in the fingers, hands, or joints, combustion engines be equipped Witha
discontinue the use of this tool and
sparkarrestor screen. If you operate a
" seek medk_l attention. An
chain saw in e state or IocaJewhere
anti-vibrationsystem does not
such regulationsexist, you am legally
guarantee the avoidance of these
responsiblefor maintainingthe
problems. Usam who operate power
operating
conditionofthesa pads.
tools on a continual and regular basis
Failure to do so is a wolatlon of the law.
must closely monitortheir physical
condifion and the condition of this tool. Refer to Customer Responsibil_es
CHAIN BRAKE If this saw is to be used chart in the MAINTENANCE_;ection.
for commercial logging, you must order STANDARDS: This chain saw is listed
and installa chain brake to complywith by Undsr_vdtersLaboratories, Inc. in
Federal OSHA Regulations for Comaccordance wi_ American National
Standards for Gasoline-Powered Chain
mercial Logging. Contact your Sears
Service Center or call 1-800-235-5878.
Saws Safety Requlmmants (ANSI
SPARK ARRESTOR: Your saw is
B175.1-1991).
equipped with a temperature limiting
CARTON
CONTENTS
Check carton contents against the following list.
Model 358.350080
• Chain Saw (fully assembled)
• Chain adjustment tool
• 2-cycle engine oil
• Chain
• Carrying Case
• Bar Oil
• Examine pa)ts foi damage. Do not
use damaged parts.
• If you need assistance or find that
paris are missing or damaged, please
call 1-800-235-5878.
NOTE: It is normal to hear the fuel filter
rattle in an empty fuel tank.
Your unit has been factory tested and
the carburetorpreciselya_usted. As a
resultyou may smell gasoline or find a
drop of oil/fuel residue on the muffler
when you unpackthe unit.
ASSEMBLY
Your saw is fully assembled, and no
assembly is necessary.
KNOW YOUR SAW
READ THIS OPERATOR'S MANUAL AND SAFETY RULES BEFORE OPERATING YOUR CHAIN SAW. Compare the illustrationswith your unit to farnillarize
yourseff wlth the locationof the various controlsand adjustments, Save this
manual for future reference,
Bar Tool
Front Handle
Starter Rope
Primer
Bulb
CRIWI'ZMRN"
sarO_Fmcap Hou_ng
FudMb¢Fe Cap
Cylinder Cover
Fast Idle _
Adjusting
Screw
Lockout
Rear
Handle
Throt_e
Trigger
i
i
•
_C:lx_k'eBarClamP Ct_in Bar Clamp Nuts GuldeBar
Catcher
i
i
ON_-'roP SWITCH
The ON/STOP Switch is used to stop
_-_+ engine.
THROTTLE TRIGGER
The throttletdgger contro!sengine
speed.
THROTTLE LOCKOUT
The throttle lockout must be pressed
before
youc?nsquee thethro e
get. Jn= testure prevents you _rom accidentallysqueezing the tngger.
FAST IDLE LOCK
The.fast idle .l_.k hol_ the throttle trigger m the sta_ng pos._on,Activate the
fast idle lock by p_.mg the throtUe
, 19¢_ut and squesTJng.thethrottle tdg"_er. W'_hthe throttle trigger squeezed,
press the fast Idle lock. Release the
i
i
i
i
i
i i
throttlelockoutand trigger white holding
the fast Idle lockbutton.
CHOKE K_OB
The Choke Knob activates the choke to
provide edditional fuel to the engine
duringcold starting.
PRIMER BULB
The Primer Bulb circulatesfuel to the
carburetorto provide quicker starting.
CHAIN TENSION
It is normalfor a new chain to stretch
duringfirst 30 minutes of operation. You
should check your chain tension trequently,See Chain Tensionunder the
Servic_ and Adjustmentssection.
6
the fuel lines and carburetor are empty.
Use fresh fuel next season. See STORWARNING: Be sure to read the fuel
AGE instructionsfor additionalinformahandlinginformation in the safety rules tion.
section of this manuel before you begin.
Never use engine or cad0uretorcleaner
. If you do not understand _ fuel hanproducts in the fuel tank or permanent
dling informationdo not attiBtnptt6 rue]
damage may occur.
your unit. Seek help from someone that See the STORAGEsectionfor additional
cloesunderstand the informationor call information.
the customer assistance help line at
STOPPING YOUR ENGINE
1.800-235-5878.
* Move On/Stop switchto the STOP
GUIDE BAR AND CHAIN OIL
pcait_.n.
The chain oiler provides continuous lu- • if eng,nedoesnotstop, pullchoke
bricationto the chain and guide bar. Be
knoboutfully.
sure to fill the bar o, tank when you ml
STARTING YOUR ENGINE
the fuel tank (Capacity = 6.8 fl. o.z.).
For maximum guide bar and chain life, COLD ENGINE OR WARM ENGINE
AFTER RUNNING OUT OF FUEL
we recommend you use Craftsman
chain saw bar oil. If Craftsman bar oil is • Fuel engine with 40:1 fuel mix.
• Fill bar oil tank with bar oil.
not available, you may use a good
* Move On/Stop switchto ON.
grade SAE 30 oil untilyou are able to
obtain Craftsman brand. The oil output
PrirnerBulb
is automatically metered during operation. Your saw will use approximately
one tank of bar oil for every tank of fuel
mix. Always fill the bar oil tank when
you fill the fuel tank.
BEFORE STARTING ENGINE
i
FUEUNG ENGINE
This engine is certified to operate on
unleaded gasoline. Before operation,
gasoline must be mixed with a good
Off Full
quality 2-cycle air-cooled engine oil. We
recommend Craftsman brand oil. Mix
• Actuate choke by pullingchoke knob
gasoline and oil at a ratio of 40:1 (A
fully out.
40:1 ratio is obtained by mixing 3.2
• Prime engine by slowly pressing primounces of oil with I gallon of unleaded
er bulb six times.
gasoline). DONOT USE automotive oil
• Set saw on the ground. Grip front
or beat oil. These oils will cause engine
handle with your left hand and place
damage. When mixing fuel follow the
rightfoot through rear handle.
instructionspdnted on the container.
Once oil _sadded to the gasoline,
StarterRopeHandle
shake container momentarily to assure
that the fuel is thoroughly mixed.
. Always read and follow the safety rules
Left Hand
misting to fuel before fueling your unit.
on Front
_t
IMPORTANT
- Experience indicates that alcohol
blended fuels (called gesohoi or using
ethanol or methanol) can attract moisture which leads to separation and
formationof acids during storage. Acidic gas can damage the fuel system of
an engine_whilein atomge.
,
To aVoid.engine problem.s,the fuel system should be emptied before storage
for 30 days or longer. Drain the gas
tank, start the engine and let it run until
t
k5
Handle
FootThroughRearHandle
• Bet fast idle by depressingthe throttle
lock with your righthand. Then,
squeeze and holdthrottle rigger. W'_
your thumb, press the fast idle lock
down and hold. Next, release the
throttle trigger.
• DO NOTsqueeze throttle rigger during starting; otherwise, it will be necessary to reset the fast idle lock.
fer to the TROUBLESHOOTINGchart or
call 1-800-235-5878.
OPERATING TIPS
• Check chain tension before first use
and after I rnin.uteof operation. See
Chain Tension m the Maintenance
• section.
• Cut wood 0nly. Do not cut metal, plastics, masonry, non-wood buildingmatedais, etc.
• Stop the saw if the chain stdkee a foreign object. Inspectthe saw and repair parts as necessary.
• Keep the chain out of dirtand sand.
Even a small amount of dirtwill quickly dull a chain and increase the possibilityof kickback.
• Practice cuttinga few sm_l logs using
the followingstep_;...This wdl help you
get the "feel"of umngyour sew before
you begin a major sewing operation.
• Squeeze the throttle rigger and allow the engine to roach full speed
before cutting.
• Begin cuttingwith the sew frame
againstthe tog.
STARTING A WARM ENGINE
Keep the engine at full .speedthe
DONOT use the choke to start a warm
i
entire timb you are cutting.
engine or flooding and hard starting
Allow the chain to cut for you. Exert
may occur.
only light downward pressure.
• Move On/Stop switchto ON.
• Release the throttle trigger as soon
• Set fast idle lock.
as the cut is completed, allowingthe
• Be sure choke is inthe OFFposition.
engine to Idle. If you runtha sew at
• W'_h saw on ground, grip front handle
full throttle without a cuttingload,
with left hand and place your dght foot
unnecassarywear can occur.
through roar handle.
• To avoid losingcontrol when cut is
• Pull starter rope handle until engine
complete, do not put pressure on
starts.
sew at end of cut.
• Squeeze and release throttle rigger
• Stop the engine before setting the
to retum engine to idle speed.
sew down.
NOTE: When pullingthe starter rope,
do not use the fullextent of the rope.
Do not let starter rope snap beck. Hold
handle. Let roPll rewind slowly.
• Pull starter rope handle firmlyand
quicklywith your dght hand untilthe
engine attempts to start, but no morn
than 5 pulis.Then, push in choke
knob fully. Resume pulhnghandle until engine starts.
• Above 40•F, allow engine to run for
approximately 5 seconds.Then
squeeze and mlsaee throttletrigger to
allow engine to idle.
• Below 40°F, allow engine to warm up
for 30 seconds to I minute with choke
at partielposition. Push choke knob in
to the OFF pueltion; then squeeze and
mlsese throttle trigger to allow engine
to idle.
• To stop engine, move On/Stop switch
to the STOPposition.
DIFRCULT STARTING OR
.. _STARTING A FLOODED ENGINE
The engine may be flooded if it has not
started after 10 pulis=-Rooded engines
can be cleared of excess fuel with the
followingprocedure:
Engage the fast idle lock.
Verify that the On/Stop switch is m the
ON position.
• Push choke knob to the OFF position.
• W_...dh
saw on ground, gdp front handle
with left hand and place dght foot
through roar handle.
• Pull starter rope handle until engine
starts.
j-Starting could require many pulls depending on how badlythe unit is
flooded. If engine stillfails to start, re-
TREE FELLING TECHNIQUES
WARNING: Check for broken or dead
branches which can fall while cutting
causing serious injury.Do not cut near
buildingsor electricalwires if you do not
know the directionof tree fall, nor cut at
night since you will not be able to see
well, nor dudng bad weather such as
rain, snow, or strongwinds, etc.
Carefully plan your sawing operation in
advance. Clear the work area. You
need a clear area all around the tree so
you can have secure footing. Study the
natural cond'dionethat can cause the
tree to fall in a pedloular direction,such
conditions include:
• The wind directionand speed.
8
Final cut here
• The lean of the wee. The lean of a
,/
tree might not be apl_. rant due to uneven or sloping terrain. Use a plumb
or level to determine the direction of
tree lean.
....
"• Weight and branches on ane side., Surroundingbees and obstacles.
Look for decay and rot. If the trunk is
• rotted,it can snap and fall toward the
operator.
Make sure there is enough room for the
tree to feel.Maintain a distance of 2-112
tree lengths from the nearest person or
other objects. Engine noise can drown
out a warning call.
Remove dirt, stones, loose bark, nails,
staples, and wire from the tree where
cuts are to be made.
Hingeholdstreeon stumpendhelps ,
controlfall
Opon
off¢_
Closing of
notch
Plana clearretreatpath
NOTE: Before felling cut is complete,
use wedges to open the cut when
_--_ -O-I"'lkDirectionofFal;
nece..e..e..e..ess_.m/..to
controlthe direction of feel.
To avoid Idckbeckand chain damage,
use wood or plasticwedges, but never
steel or iron wedges.
• Be alert of slgnsthat the bee is ready
to fall: crackingsounds,widening of
FELLING LARGE TREES
the fellingcut, or movement in the up(6 inches in diameter or larger)
per branches.
• As tree starts to fall, stop sew, put it
The notch method is used to fell large
trees. A notch is cut on the side of the
down, and get away quicklyon your
tree in the desired direction of fall. After
planned retreat path.
• Be extremely cautiouswith partially
a felling cut is made on the opposite
fallen trees that may be poorlysupside of tree, the tree should fall in the
directionof the notch.
ported. When e bee doesnl fall cornpletely,set the saw aside and pull
NOTE: If the tree has large b.ut_.
downthe tree with a cable winch,
roots, remove them before meedngthe
block and tackle, or tractor. Do not
notch.
use your saw to cut down a partially
NOTCH _
AND FELUNG TREE
fallen tree.
• Make notch cut by cuttingthe top of
CUTTING A FALLEN TREE
the notch first. Cut through 1_ of the
(eUCmNG)
diameter of the tree. Next complete
BuckingB the term used for cuttinga
the notch by cutting thebottom. See
fallen
tree to the desired log size.
illustration.Once the notch is cut reWARNING: Do not stand on the log
move the wedge of wood from the
tree.
being cut. Any portioncan rollcausing
• After removing the wood, make the
loss of footing and control Do not stand
downhillof the log being cut.
felling cut on the opposite side of the
IMPORTANT POINTS
notch.Thb. m done by making a cut
about two inches higher than the cenCutonly
onelogat
averycarefully;,
time.
ter of the notch. This will leave
Cutshattered
wood
sharp pieces of wood could be flung
en£u_
wood betweenlthe felltoward operator.
ing.cdtTar_lthe notch to form a hinge.
Th_shinge will help prevent the tree
• Use a sewhorsa to cut small logs,
from falling in the wrong direction.
Never allow another parson to hold
0
the logwhile cuffing and never hold
the logwith your leg or fooL
• Do not cut in an area where logs,
limbs, and rootsare tangled. Drag the
logs intoa clear area before cutting
them.
Rrst cut on pressure side of log
BUCKING TEI_HNIQUES
BUCKING WITHOUT A SUPPORT
WARNING: If saw becomes pinched
• Overcut through 1/3of the diameter of
or hung in a log, don'ttry to force it ouL
thelog.
You can lose control of the saw result• Roll the log over and finishwith a secing in injuryand/or damage to the saw.
ond ovemut.
Stop the saw, drive a wedge of plastic
• Watch for logs with a pressure side.
or wood intothe cut untilthe saw can
See illustrationabove for cutting logs
be removed easily. Restart the saw and
with a pressure side.
carefully reenter the cut. Do not use a
Using• log
,,_ ,,..,.
metal wedge. Do not attempt to restart
ya(_Uo;.eaw
when it le plnched or hung in
for luppolt
_ "2_'
__ _
Usea wedgeto removepinchedsaw
_j_
_, TurnsawOFFand
_.-_.._
usaa plasticorwooden
to forcecutopen.
. l=Cu t
=
Overcuttlng begins on the top side of
the
logwithlog.
the bottom
of the saw
againstthe
When overcuttinguse
lightdownward pressure.
OvemtdSog
Undercutting
Undercutting involvescuttingon the
underside of the logwith top of saw
against the log. When undemuttinguse
lightupward pressure. Hold saw firmly
-a_ maintain control. The saw will tend
to push back toward-you.
WARNING: Never turn em.wupside
down to undercut. The saw cannot be
controlledIn this position.
._-_,
U
----
-2-
.
..
-_r
,_'_/_2
ndCut -"_',_._'_
__"
"":-"- "
BUCKING USING A LOG OR
SUPPORT STAND
• Remember your first cot is always on
the pressure side of the log.
(Refer to the illustrationbelow for your
first and second cut)
• Your first cut should extend 1/3 of the
diameter of the log.
• Finish with your second cut.
Always make your first cut on the pressure side of the log.
Rrstcuton pressuresideoflog
I0
LIMBING AND PRUNING
WARNING: Neverclimbinto a tree to
with the 1/3,2/3 cuttingtechniques descdbed in the buckingsection.
• Always use an overcut to cut small
and freely hanging limbs. Undercutting could cause limbsto fall and
limb or prune. Do not stand on ladders,
platforms, a log, or in any position
which can cause you to lose your balpinchthe saw.
"ance or control of the saw.+_,,
: ....
PRUNING
IMPORTANT POINTS
• Watch out for epringpolee.
WARNINGi Limit pruningto limbs
Springpolee am small size limbs
shoulderheight or below. Do not cut if
which can whip toward you, or pull
branches are higherthan your shoulyou off .ba_lance.Use extreme caution der. Get a profasslonalto do the job.
when cuttingsmall size limbs.
• Make yourflrst out 1/3 of the way
• Be alert for spdngback. Watch out for
through the bottom of the llmb.
branches that am bent or under pres- • Next make a second cut ell the way
sure. Avoid being struck by the
through the limb.
.
branch or the saw when the tension in . Rnish the pruningoperation by using
the wood fibers is released,
an overcutso that the stump of the
• Frequently clear branches out of the
limb protrudes 1 to 2 inches from the
way to avoid tripping on them.
trunk of the tree.
UMBING
• Limb a tree only after it is cut down.
• Leave the larger limbs underneath the
felled tree to support the tree as you
Second cut
work.
Rrst cut
• Start at the base of the felled tree and
1/3
of way
work toward the top, cutting branches
and limbs. Remove small limbs with
one cut.
3rd cut 1to 2in.
• Keep the tree between you and the
from _unk of tree
chain.
• Remove larger, supporting branches
CUSTOMER RESPONSIBILITIES
Fill in dates as you complete
Before After Every Every
Service
regular service
Use Use 5 hrs. 25 hrs i Ysady Dates
Check for damaged/wom parts
v"
Cheekier_loose fastenere/parts
Check chain tension
,,
v"
Check chain sharpness
v"
Check guide bar
Clean unit & labels
Clean air filter
v"
p,,
Clean/inspect spark arrestor
soman & inspect muffler
v"
Replace spark plug
,I,I
GENERAL RECOMMENDATIONS
The warranty on this unit does not cover items that have been subjected to
operator abuse or negligence. To recaive full value from the warranty, the
operator must maintain unitas Instruct.
ed in this man_,ai. Vadous adjustments
will need to be made pedndicailyto
propertymaintain your unit.
• Once a year, replaoe the spark plug,
air filter element, and check guide bar
and chain for wear. A new spark plug
and air filter element assures proper
air-fuel mixture and helps your engine
run better and last longer.
WARNING: Disconnect the spark plug
before Performing maintenance except
for carburetor ao'justments.
•
•
•
•
LUBRICATION
• Loosen bar clamp nuts unt, they are
finger tight against the bar damp.
•Tum adjustingscrew clockwise until
chain barely touches the bottom of
guide bar.
1 Bar
2 Bar Oil
Sprocket
Fill Cap
Lube
Handle Screws
VibretionMounts
Starter Housing
Handguard
CHECK CHAIN TENSION
• Use the screwdriver end of the bar
tool to move chain around guide bar
to ensure Idnksdo not exist. The
chain should rotate freely.
Bar ClampNuts
_
Adjusting
/
1 Sprocket lube
2 Craftsman chain saw bar oil
• Usingbar tool, rollchainaround guide
CHECK FOR DAMAGED OR
barto ensure all linksare in bar groove.
WORN PARTS
Adjusting
Screw- 1/4 Turn
Replacement of damaged/worn parts
should be referred to your Sears Service Center.
NOTE: It is normal for a small amount
• Lift up tip of guide bar to check for
of oil to appear under the saw after ensag. Release tip of guide bar, then
igseldine
stops. Do not confuse this with a
turn adjustingscrew 1/4 turn dock.
ng o, tank.
wi.se. Repeat undlsag does not exist.
• On/Stop Switch - Ensure On/Stop
• Wh,le liftingtip of guide bar,tighten
switchfunctionspropedy b_.moving
bar clamp nuts with the bar tool.
the switchto the "Stop"position.
Torque to 10-15 ft-lbs.
-._ Make sure engine stops;then restart
engine and continue.
• Fuel Tank- Di_con'tinueuse of chain
sew if fuel tank shows signs of damage or leaks.
• Oil Tank- Discontinue use of chain
sew if oil tank shews signs of damage
or leaks.
• Use the screwdriverend of the bar
CHECK FOR LOOSE
toolto move chain around guide bar.
FASTENERS AND PARTS
• If chain does not rotate, it istoo tight.
• Bar Clamp Nuts
Slightlyloosen bar clamp nutsend
• Chain
turn adjustingscrew 1/4 rum counter• Muffler
clockwise.Reifghtan bar cisinp nuts.
-Cylinder Shield
• If chain is too loose, it will sag below
Air Filter
the guide bar. DO NOT operate the
sew ifthe chain is loose.
• Clutch Drum/Sprocket
12
CHECK CHAIN SHARPNESS
A sharpchainmakeswoodchips.A
dullchainmakesa sawdustpowder
andcutsslowly.
•CHAINSHARPENING
Chainsharpeningrequires_oecial tools. You can purchase sharpening
tools at Sears or go to a professional
chain sharpener.
CHECK GUIDE BAR
Conditionswhich require guide bar
maintenance:
• Saw cuts to one side orat an angle
• Saw hes to ba forced through the cut
• Inadequate supply of oil to the bar
and chain.
Check the conditionof the guide bar
each time the chain is sharpened. A
wom guide bar will damage the chain
and make cuffingdifficulLTo maintain
guide bar:.
• Move On/Stop switch to "Stop."
• Remove bar and chain from saw.
• Clean all sawdust and any other
debrisfrom the guide bar groove and
sprocket hole after each use.
RemoveSawdustFromGuide
BarGropve
_
_/_
_
SprocketHole
•
_'_,,
• Add lubricantto sprocket hole after
cracked, or when excess heating or
burringof the rails occurs. If reple._. •
ment is necessary, use only the guide
bar specified for your saw in the repair
parts list,also specifiedon the replacement bar _ chain decal loP.ted on
the chain saw.
CLEAN UNIT & LABELS
• Cleanthe unitusinga dampclothwith
a milddetergent.
• Wipeoffthe unitwith a dieandry
cloth.
CLEAN AIR FILTER
A dirty air filter decreases the life and
performance of the en_ne and Increases fuel consumptionand harmful
emissions. Always dean your air filter
after 15 tanks of fuel or 5 hoursof operation, whichever comes first. Clean
more frequently in dusty conditions,it is
advisable to replace your air filter with a
new one after every 50 hours of operation, or annually,whichever comes firsL
To clean tilter.
• Loosen 3 screws on cylindercover•
- Remove cylindercover.
Remove a|r 4'ilter.
Clean the a_rfilter using hot soapy
water• Rinse with clean cool water.
Air dry completely before reinstalling.
Lightlyoil air filter before installing.
Use 2-cycle engine oil or motoroil
filter.This
improvethe
(SAE 30). will
Squesze
excesaefficiencyof
oil from
the air filter.
• Reinstall air filter.
• Burringof
• Reinstall
cylindercover and 3 screws
each use. guide bar rails is a normal
(15-20 in-lbs.).
process of railwear. Remove these
burrs with a fiat file.
AirRlter
• When J_i_top is uneven, usa a fiat file
Screws
to restore square edges and sides.
TL_
Rle
sidesSquare
Edgesand -
Wom Groove
Correct Groove
Replace the guide bar when the groove
• is wom, the guide bar is benf or
4_
INSPECT MUFFLER AND SPARK
ARRESTOR SCREEN
As the unit is used, carbon deposits
build up on the muffler and spark
arrestor screen, and must be removed
to avoid creating a fire hazard or affectingengine pedkormar)_ce,_
.
Replace the spark arrestor screen if
breaks occur.
MufflerDiffuser
Screen
Mumer
• Replace any broken or cracked muf-
f rpar
• Reunstaildiffuserand spark arrestor
screen assembly with holes facing up
and towards muffler cover.
• Reinstall muffler cover and 2 screws
(7-8 ft-,_s.).
REPLACE SPARK PLUG
The spark plug should be replaced
each year to ensure the engine starts
easier and runs better. Ignitiontiming is
fixed and nonadjustable.
• Loosen the 3 screws on the cylinder
cover.
Cover
Screws • Remove the cylindercover.
Pull off the spark plug boot..
: Remove spark plugfrom cylinderand
discard.
•
Replace with Champion CJ7Y spark
Body
Muffler
plug and tighten with a 3/4 inch socket
Cover
wrench (10-12 ft.lbs). Spark pluggap
should be .025 in.
CLEANING THE SPARK
•
Reinstallthe spark plug boot.
ARRESTOR SCREEN
•
Reinstall the cylinder cover and 3
Cleaning is requiredevery 25 hours of
screws
(15-20 in-lbs).
operation or annually, whichever comes
tirsL
• Loesen and remove the 2 muffler coy- Screws
er screws.
• Remove the muffler cover (cover
snaps off muffler body).
Plug
• Remove muffler d'_fuserand spark
Boot
arrestor screen assembly. Notice the
ohentation of these parts for raassem.
bring.
• Clean the spark arrestor screen with a
Spark
wire brush. Replace screen if breaks
Plug
are found.
CHAIN REPLACEMENT
"-;-CAUTION: Wear protective gloves
when handling chain. The chain is
sharp and can cut you even when it is
not moving.
It is normalfor a new chainto sbetchduringthe first 15 ndnutasof operation You
should recheckyour chaintendon frequentlyand adjustthe chaintensionas
required.See Chain Tensionsection.
• Move On/Stop switchto the Stop
position.
• Replace the old chain when itbecomes worn or damaged.
_.J,Jse only the Low-Wackbackreplacement chain specified in the repair
parts list.The correct replacement bar
•
•
•
•
and chain is also specified on a decal
located on the cha0nsaw.
See your Sears Service Center to replace and sharpen individualcutters
on your chain.
Remove bar clamp nuts.
Remove bar clamp.
Remove the oldchain.
Bar
Clamp
Bar
Nuts
14
•Tum adjustingscrewby handcounterclockwiseuntiladjustingpinjust
fromtankandremovefromline.Clean
withmilddetergentand dnee. Dry thor-
touches the stop.
• Slide guide bar behind clutch drum
untilguide bar stops against clutch
drum sprocket.
....
• Carefully remove new chai_ from
package. Hold chain with the drive
links as shown,
oughly, reassemble.
CARBURETORADJUSTMENT
WARNING: The chain will be moving
dudng most of this procedure. Wear
your protective equipment and observe
all safety precautions.Dudng the low
speed mixture adjustment rechack.idle
speed after each turn of the screw. The
Cutters
Dept_Gauge
chain must not move at idle speed.
Carburetor adjustmentis cdticaland if
done improperlycan permanently damage the engine as weg as the carburetor. If you require further assistance or
D_ Unks
are unsureabout performing this procedure, call our customerassistance help
: Place
chain
over
and
behind,clutch.
Fit bottom of drive links between teeth lineat 1-800-235-5878.
in sprocket nose.
Old fuel, a dirty air f'dtar,dirtyfuel filter,
• Fit chain drive links into bar groove.
or floodingmay give the impressionof
• Pull guide bar forward until chain is
an improperlyadjusted carburetor.
snug in guide bar groove.
Check these conditionsbefore adjust• Now, install bar clamp making sure
ing the carburetor.
the adjustingpin is positioned in the
The carburetorhas been carefullyset at
lower hole in the guide bar.
the factory.Adjustmentsmay be necessary if you notice any of the following
conditions: .'
• Chain moves at idle. See "Idle Speed"
under adjustingprocedure.
• Saw will not idle. See "Idle Speed"
and "Low Speed Mixture'under adjusting procedure.
Lower
• Engine dies or hesitates when it
Hole
should accelerate. See "Acceleration
Guide Bar
AdjRus_ng
Check" under adjustingprocedure.
• Loss of cuffingpower. See "High
• Install bar clamp nuts and finger tightSpeed Mixture H" under adjusting
en only. Do not tighten any further at
procedure.
this poinL
There are three adjustment screws on
the carburetor.They are labeled H, L,
and T. They are located In the area just
abovethe primerbulb.
CARBURETOR PRESETS
Bar _
Nuts
CHAIN ADJUSTMENT
See "Chain Tension"in Maintenance
section.
CLEAN.._L
FILTER
'
To clean fuel tilter,drain your unit by
runningdry of fuel, remove fuel caldretainer assembly from tank. Pull tilter
When make."
g adjustments, do not force
the plasticI,mitercaps beyond the
stops or damage will occur.
If carburetorpresets are not needed,
proceed to "Idle Adjustments."
• Turn both mixturescrews counterdockwisa untilthey stop.
• Turn the idle speed screw clockwise
untilit stops. Now turn counterclockwise 4-1/2 turns.
Start motor,let it run for 3 minutes, and
procesd to the edjustmant sactlon. If
engine does not start, refer to troubleshootingchart or cell 1-800-235-5878.
11;
If engine performance is scceptable at
the preset positionsand there is no
chain movement at idle, no furtheradjustment is necessary.
ADJUSTING PROCEDURE
Idle Speed "1"
Allow engine t_ldle..Adjust speed until
engine rune without Chainmovement or"
stalling.
• Turn clockwise to increase engine
speed if engine stalls or dies.
• Turn counterclockwiseto decrease
High Speed Mixture =H"
DO NOT operate engine at full throttle
for prolonged pedods while making adjustments. Damage to the engine can
occur.Make a test cut. Based on performance of the sew while cutting,adjust the high speed mixturesetting in
1116-tumincrements as follows:
• Clockwise untilthe sew has good
power in the cut with no hesitation.
Do not adjust by sound or speed, but
judge by how well the saw performs in
the cut;
• Counterclockwiseif the saw has
NOfurther adjustmentsare nscassmy if
speed, but dies in the cut or lacks
chain does not move at idle speed and
power in the cut.
if performance b satisfactory.
After
completingadjustments, check for
Low Speed Mixture "L"
acceleration end chain movement at
Allow engine to idle. Then accelerate
the engine and note performance. If en- idle. Reset if necessary.
Acceleration Check
gine hesitates, bogs down, or smokes
dudng acceleration, rum mixturescrew If the engine dies or hesitates instead of
clockwise in 1/16-tum incrementsuntil
accelerating, tum the low speed mixture
performance is setisfactory. Repeat this adjustment counterclockwise, until you
have smooth acceleration with no chain
procedure as necessary for proper adjustment. After completingadjustments, movement at idle. Recheck and adjust
check for acceleration and chain move- as necessary for acceptable performance.
ment at idle. Reset if necessary.
./
Prepare your unitfor storage at the end
of the season or if it will not be used for
30 days or more.
WARNING:
• Allow the engine to cool, and secure
the unitbefore storing ortransporting.
• Store chain saw and fuel in a well
ventilated area where fuel vapors
cannot reach sparks or open flames
from water beaters, electric motors or
_'witches, fumases, etc.
• Store chain sew with all guards in
place and position-chainsaw so that
any sharp object cannot accidentally
cause injury.
• Store.chain sew well out of the reach
of children.
FUEL SYSTEM
Under Fueling Engine in the'Operating
Section of this manual, see message
labeled IMPORTANTregardingthe use
of gasoholin your chain saw.
Fuel stabilizeris an acceptable aitemative in minimizingthe formationof fuel
gum depositsdudng storege. Add stabilizer to the gasoline in the fuel tank or
fuel storage container. Followthe mix
instructionsfound on stabilizer containers. Run engine at least 5 minutes after
add',ngstabilizer.
CRAFTSMAN 40:1, 2-cycle engine oil
(air cooled) is especially blended with
fuel stabilizer,If you do not use this
Sears oil, you can add a fuel stabilizer
to your fuel tank.
EXTERNAL SURFACES
INTERNAL ENGINE
If your chain sew is to be stored for a
• Remove spark plug and pour 1 teaperiod of time, dean itthoroughly bespoon of 40:.1,2-cycte engine og (air
cooled) throughthe spark plug openfore storage. Store in a clean dry area.
• Lightly oil external metal surfaces and
ing. Slowly pull the starter rope 8 to
10 times to d,stributeod.
:.guide bar.
Oil the chain and wrap it in heavy pa- • Replace spark plug with new one of
recommendedtype and heat range.
per or cloth.
16
• Cleanairfilter.
• Checkentireunitfor loosescrews,
nuts,and bolts. Replace any damaged, broken, or wom parts.
• At the beginning of the next season,
use only fresh fuel havingjhe proper
gasoline to oil ratio.
OTHER
• Do not store gasoline from one season to another.
• Replace your gasoline can if it starts
to rusL
TROUBLE SHOOTING CHART
I
TROUBLE
CAUSE
REMEDY
Enginewlilnot • Ignitionswitchoff.
startorwillrun • Engineflooded.
onlya few
seconds after
starting.
Fuel tank empty.
Spark plug not firing.
• Fuel not reaching
carburetor.
•
•
Engine will not
idle properly;
•
I : Install new spark plug.
Check for dirty fuel filter;,replace.
Check for kinkedor spilt fuel line
repair or replace.
• See "carburetor Adjustments."
Carburetor requires
adjustment.
None of the above.
• Contact Sears Service.
Idle speed set too high • See "CarburetorAdjustments."
•
or too low.
Low Speed Mixture
requires adjustment.
Crankshaft seals worn
•
•
Compression low.
None of the above.
•
Engine will not
accelerate,
lacks power,
or dies under
a load.
Move Ignitionswitchto ON.
•" See "Starling Instructions."
• RII tank with correct fuel mixture.
• Air filter dirty.
• Spark plug.fouled.
• Carburetor requires
adjustment.
• Exhaust parts or muffler outlets plugged.
• Compression low.
• None of the above.
• See "Carburetor
Adjustments."
• Contact.Sears Service.
• Contad Sears Service.
• Contact Sears Service.
• Clean or replace air filter.
• Clean or replace plug
and regal).
• See "carburetor Adjustments.•
• Contact Sears Service.
• ContactSearsService.
• ContactSearsService.
• Adjustchoke.
Engine smokes • Choke partially on.
Fuel mixture incorrect.
• Air filter dirty.
• High Spe_d Mixture
requires adjustment.
• Crankcase leak.
1"7
• Empty fuel tank and refillwith
correct fuel mixture.
• Clean or replace air filter.
• See "CarburetorAdjustments."
• Contact Sears Service.
TROUBLE
SHOOTING
CHART - Continued
TROUBLE
CAUSE
REMEDY
Engine runs
hoL
• Fuel mixtureincorrect.
• Spark plug incorrecL
• HighSpeed Mixture
set too lean.
I• Exhaust ports or muffler outlets plugged.
!• Carbon build-up on
muffler outletscreen.
• Fan housing/cylinder
fins dirty.
• None of the above.
i
Q
Oil Inadequate
for bar and
chain
lubrication.
Replace
with correct
plug.
ee "FuelingYour
Unit."
See "CarburetorAdjustments."
i
• Contact Sears Service.
• Clean spark arrestor screen.
• Clean area.
• Contact Sears Service.
• RII oil tank.
• Contact Sears Service.
Oil pump or ell filter
Oll tank emp_
dogged.
.
Guide bar o=lhole
blocked
* Remove bar and clean.
Chain moves
at idle speed.
• Idle speed requires
adjustmenL
• Clutch requires repair.
• See "CarburetorAdjustments."
Chain does
not move
when engine
is accelerated.
•
• See =ChainTension."
Chain clatters
or cuts roughly.
Chain tension too
tight.
• Carburetor requires
adjustment.
• Guide bar rails
pinched.
• Clutch slipping.
•
•
•
•
• Contact Sears Service.
• See .'Carburetor Adjustments."
• Repair or replace.
• Contact Sears Service.
Chain tension incorrect.
Cutters damaged.
Chain worn.
Cutters dull, impropedy
sharpened, or depth
gauges too high.
Sp.r_.et worn.
Chain installed
backwards.
•
•
•
•
See =ChainTensionS"
Contact Sears Service.
Resharpen or replace chain.
See "SharpeningChain."
• ContaCt Sears Service.
• Install chain in right direction.
• See "Sharpening Chain."
• Chain cutter tops not
Chainstops
!withinthecut. - Jiled flat.
I• Guide bar burred or
• Repair or replace guide bar
• bent;,mils
uneven.
Clutch slipping
• Contact Sears Service
• Cutters damaged on
one side.
• Chain dull on one side.
• Guide bar bent or wom.
• See =Sharpening Chain"
I
Chain cuts at
an angle.
• Sea "Sharpening Chain"
• Replace guide bar
If situationsoccur which am not covered in this manual, use care and good
judgement, ff you need assistance, contact Sears Service orthe CUSTOMER
ASSISTANCE HELPUNE at 1-800-235-5878.
18
U. S. EPA/CALIFORNIA
EMISSION CONTROL
WARRANTY STATEMENT
YOUR WARRANTY
RIGHTS AND
OBLIGATIONS
The U. S. Environmental Protection
Agency/California Air Resources Board
and SEARS, ROEBUCKAND CO., USA
are pleased to explain the emissions
control system warranty on your lawn
and garden equipment engine. All new
utility and lawn and garden equipment
eng!nes must be designed, built, and
equipped to meet the stringent antismog standards. SEARS must warrant
the emiasioncontrolsystem onyour lawn
and garden equipment engine for the ped0ds of time listed below provided there
has been no abuse, neglect, orimproper
maintenance of your lawn and garden
equipmentengina.
Your emission control system includes
parts such as the carburetorand the ignition system,
Where a warrantable condition exits,
SEARS will repair your lawn and garden
equipment engine at no cost to you. Expenses covered under warranty include
diagnosis, parts and labor,
MANUFACTURER'S
wARRANTY
COVERAGE -If any emissions related part on your engine (as listed under Emissions Control
Warranty Parts List) |s defective or a defect in the materials or workmanship of
the engine causes the failure of such an
emission related part, the part willbe rep=airedor re laced b SEARS.
OWNER'_°WARW/_NTY
RESPONSlBILITIES-As the lawn and garden equ!pment engine owner, you are respons|ble for the
"performance of the required maintenance listed in your Owner's Manual.
SEARS recommends that you retain all
yeceipts covedng maintenance on your
lawn and garden equipment engine, but
SEARS cannot deny warranty solely for
the lack of receipts or foryour failure to
ensure the performance of all scheduled
maintenance.
As the lawn and garden equipment engine owner, you should be a_are that
SEARS-may-deny you warranty coverage if your lawn and garden equipment
engine or a part of it has failed due to
abuse, neglect, improper maintenance,
unapprovedmodifications,or the use of
parts not made or approved by the originat equipment manufacturer.
You are responsiblefor presenting your
lawn and garden equipment engine to a
SEARS authodzedrepair center as soon
as
a problem
exists. Warranty
repairs
should
be completed
in a reasonable
amount of time, not to exceed 30 days.
Ifyou have any quastionsr.e_ard...!ngyour
warranty nghtsand raspon=bilitk_, you
should contact your nearest authorized
service center or call SEARS at
1-800-473-7247.
WARRANTY
COMMENCEMENT
DATE-The warranty period begins on the date
thelawnandgardenequ|pmantenginels
purchased.
LENGTH OF COVERAGE -This warranty shall be for a penod of two
years fromthe initialdate of purchase.
WHAT IS COVERED-REPAIR OR REPLACEMENT
OF PARTS -Repair or replacement of any warranted
part willbe performedat no charge to the
owner at an al_provedSEARS servicing
center.
IfyouhaveanyquestJonsre,cjp,rdingyour
warranty rightsand respons|bilitlas,you
should contact your nearest authorized
service
center or call
1-800-473-7247.
SEARS
at
WARRANTY PERIOD -Any warranted part which is not scheduled for replacement as requiredmaintenance, orwhichisscheduisdonlyfor.rogular inspectionto the effect of =repa=ror
replace as necessary" shall be warranted for 2 years..Any
warranted part whichksscheduled for replacement as requir..ed maintenance
shall be warranted for meperiod
of time upto the first scheduled replacement point for that part.
DIAGNOSIS-The owner shall not be charged for diagnostic labor which leads to the determinationthat a warranted part
is defective if the diagnosticwork is performed at an approvedSEARS servicing
center.
CONSEQUENTIAL
DAMAGES-SEARSmaybellablefordamagastootherenginecemponentscausedbythefailure ot
a warranted part stillunder warranty.
lO
WHAT IS NOT cOVERED --
MNNTENANCE,
REPLACEMENT
All failures caused by abuse, neglect, or AND REPAIR OF EMISSION
improper maintenance are not covered. LATED PARTS __
ADD-ON OR MODIRED PARTS -The use of add-on or modifiedparts can
be grounds for _
a wammty
claJm.SEARS_
, ....
,
is not liableto cover failures ofwarranted
pa.rtscaused by theuse of add-on or toodified parts.
HOW TO FILE A CLAIM -Ifyou have any questions reg.a__.ngyour
warranty rights and rssponaibdities,you
should contact your nearest authorized
service center or call SEARS at
1-800-473-7247.
WHERE
SERVICE
TO
--
GET
WARRANTY
RE-
Any SEARS approved replacement part
us_lntheperformanceoranywarranty
maintenance or repair on emission related parts w=ll bepmvided.without
charge to the owner if the part ksunder
warranty.
EMISSION
CONTROL WARRANTY PARTS LIST-1. Carburetor
2. IgnitionSystem
a. Spark Plug, covered up to
rnaintenanceschedule.
b, IgnitionModule
MAINTENANCE
STATEMENT--
Warrantyservices or repairsshall be pro- The owner is msp?.nsiblefor the parforvided at all SEARS at 1-800-473-7247
mance of all required maintenance as
servicecente_
defined in the owner's manual.
2O
REPAIR PARTS
I
38
6
1
7
3
47
2 lS
43
60
I
32 3334
Part No.
W
Trigger&lockoutKit
Dw._p_
Rel
Plut No.
24,
5300"t12._
Kit
:_,ut_h
Sp_O
::tutchDrumA_'y-
530015611 N_her_ _ C_tch
53(X)14949 _lutchASS_.
S3_3_27
Sw_hLever
530016149
53OO38264 _Ven_
530015_2
,530QL_8_ _mdnCatch_
530015814
Screw
530015907 _tMhe_- Thrust
530015826 _n .-BsrAd_Uno
S3OO_Slt gist_
SCrew
Kit
530(_38
Bar_
Plate
FIM. Pan No.
W48S
(u_, s).31&4,,-)
(Indudll
P_)
•530_.61"1.9.,
_mck Valve
26.i$30010e_ oa ca_;'y.
5300_7a_ Wlnl- 11vot_
28.J530016080_sonny
53_53711
Cl_chCover
29. 530O16064 Screw
530015917 _lut- B_ Moun_g
-30.. :'530019206 SealI_,o_
5300479_
Lever
31. 530049477 iElbow-_F'_kup
530a_406
3_-nmet-CtrrOkeKnob32. 530088373 Pk_V,-Up
Oee_
530094188
530047061
6t
33. 5,._0_7e21 O_ F_t_
34. S300_01_ PIu9-O_Fdte_
35. 530015775 Scmv
FuelLineIQI
(LatinC_)
38. 5300471_2 F,_ CapA._/.
wn_ek_r
Bolt- B_u"
41.
A_
40. 5,_0476_
530016133 Oe-Pk_up
36.
5300_47
42.
43.
44.
45.
46.
47.
48.
53_016_0
530016132
530015814
SaOOaT_O
530019_31
53(X_n_
5300e_24
Scmv
Scmv
Screw
WormGearS_no
DustS_d
FromHandle
21
54.
_6.
56.
57.
58.
50.
60.
61.
De_
Sorew
8UuWH_
F_m_
530027531 _S_
830037817 SurerP_
I_
530015127
53001r_0 S_mv
S_qOO161a4
71,-3619
Ctudn- 18"
71-38374
BM- 18"
530087614
53OO49246
Ir4tmct_
$30(_
Dece_
53OO63834 Deck-earC_n_
S30_
I
REPAIR PARTS
I
14 12 13
II
18
$
4
27
5 e
I
34
36
37
i
35
29
_fo
1.
2.
-S.
6.
7.
8.
9.
10.
11.
12.
13.
14.
15.
16.
17.
18.
19.
2O.
21.
41
I_t
NO.
8300_1183
8300_/793
530016101
530_7804
53O069703
53001_
630015810"
530049700
580018187
8_00161 r,n
830063184
' 8300_318
• SSI_13
De_dptkxt
BarWrwtch
Foent-Ak'Fgtw
Nut
Nr Rltw Hom_
Cedo_n_. Kit
(Ind. 12 & 13)
Ctrb. Guket
--'Screw
_
Adapter
Sc:rmv
Sa'mv
Cy_der Shield
Lfmt_ Cap-High
_
_
_y.
Flit'.
Part No.
24.
25.
26.
27.
28.
29.
5300470_
5,30047827
5,300_/9_5
S30016136
830047442
530069608
30.
31.
_
83.
34.
35.
53_
$3G014_2
830019221
830049e'70
5._047207
Mulf,
er_ll_
87.
I_._1_
sl_t/w_t_
n¢l. 6,17,19&
33)
Hiram/_'y.
I-I_t Inlufe_
Mufflw Back Plate
S_en
Screw
530015780
_,-ese4o
53001SI_.49
5_007'I_4.
8(:n_v
Spark P_a (C,_-7'_
(3_
Adllptor
_
I_I
40.
41.
412.
43.
On_.22&2_)
53001_14
_n
530049714
S3004_'/15
C_ln Broke
_
s_o.
Adlpm'(La,,,,,er)
.S_d,-Ca_Adaptlr
(Upl:_)
Module
No_Stw,
m
P_mnnmo
I
22
Can_
Cale
REPAIR PARTS
I
4
3
P_N_
1.
2.
3.
5300_8318
530_17
5300e_28
4.
,S300e_14
5.
6.
7.
8.
U
/
W
U
_Nmdp_
Um_rCap-.-H_h
Um_lr
(*,, C_x_)
NeeCe-Low
Speed
N_-H_
S_
N_ ,Slx_-LowS_
N_ S_€_
S_
23
:or the repair or replacement parts you need
telivered directly to your home
3all 7 am - 7 pm, 7 days a week
1-800-366-P.&RT
-
1-800-366-7278)
_ara ordenar piezas con entrega a
iomicilio - 1-800-659-7084
•"orin-house major brand repair service
_all 24 hours a day, 7 days a week
1-800-4-REPAIR
1-800-473-7247)
)ara pedir servicio de reparaci6n a
Iomicilio - 1-800-676-5811
:or the location of a Sears Parts and
:lepair Center in your area
3all 24 hours a day, 7 days a week
!-800-488-1222
l-.l=-._.__.
:or information on purchasing a Sears
vlaintenance Agreement or to inquire
lbout an existing Agreement
.3all9 am - 5 pm, Monday-Saturday
1-800-827-6655
Vhen requesting service or ordering
,arts, always provide the following
lformation:
ProductType
• Part Number
_'M_d-elNumber • Part Description
SEARS
_r_k_a_P.epae
_