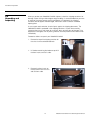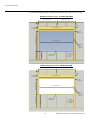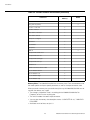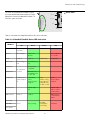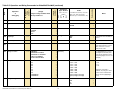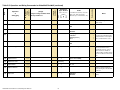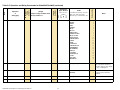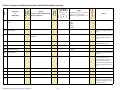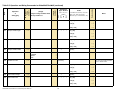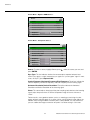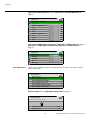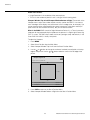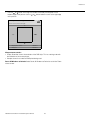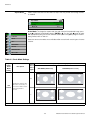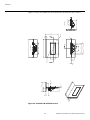
1
I NSTALLER/ I NTEGRATOR M ANUAL VideoWall™ VW-100HD CineWall™ CW-95HD Full HD, In-Wall Display Online Product Registration and Warranty To register your Runco product and obtain information about warranty and service offerings, please visit http://www.runco.com/info.html. COPYRIGHT AND TRADEMARKS: © Copyright 2008 Runco International, LLC (“Runco”). This document contains proprietary information protected by copyright, trademark and other intellectual property laws. All rights are reserved. No part of this manual may be reproduced by any mechanical, electronic or other means, in any form, without prior written permission of Runco. The trademarks reproduced in this Runco Owner’s Manual and used on the Runco Products are either owned by Runco or are licensed by Runco. You may not reproduce or use the trademarks without the prior written consent of Runco. Runco Products are manufactured under one or more of the following patents: US. Patent 6755540 and Other Patents Pending. Important Safety Instructions Thank you for your purchase of this quality Runco video product! It has been designed to provide you with the quality of video that is expected in a home theater. For the best performance, please read this manual carefully as it is your guide through the menus and operation. 1. Read these instructions. 2. Keep these instructions. 3. Heed all warnings. 4. Follow all instructions. This symbol is intended to alert the user to the presence of important operating and maintenance (servicing) instructions in the literature accompanying the appliance. EL IM IN A R CAUTION: TO REDUCE THE RISK OF ELECTRIC SHOCK DO NOT REMOVE COVER (OR BACK) NO USER SERVICEABLE PARTS INSIDE. REFER SERVICING TO QUALIFIED SERVICE PERSONNEL. Y CAUTION RISK OF ELECTRIC SHOCK DO NOT OPEN WARNING This symbol is intended to alert the user to the presence of uninsulated “dangerous voltage” within the product’s enclosure that may be of sufficient magnitude to constitute a risk of electric shock. 5. Do not use this apparatus near water. 6. Clean only with a dry cloth. 7. Do not block any of the ventilation openings. Install in accordance with the manufacturer’s instructions. 8. Do not install near any heat sources such as radiators, heat registers, stoves, or other apparatus (including amplifiers) that produce heat. PR 9. Do not defeat the safety purpose of the polarized or grounding type plug. A polarized plug has two blades with one wider than the other. A grounding type plug has two blades and a third grounding prong. The wide blade or the third prong is provided for your safety. When the provided plug does not fit into your outlet, consult an electrician for the replacement of the obsolete outlet. 10. Protect the power cord from being walked on or pinched particularly at plugs, convenience receptacles and the point where they exit from the apparatus. 11. Only use the attachments/accessories specified by the manufacturer. 12. Use only with a cart, stand, tripod, bracket or table specified by the manufacturer or sold with the apparatus. When a cart is used, use caution when moving the cart/apparatus to avoid injury from tip-over. 13. Unplug this apparatus during lightning storms or when unused for long periods of time. 14. Refer all servicing to qualified service personnel. Servicing is required when the apparatus has been damaged in any way, such as power supply cord or plug is damaged, liquid has been spilled or objects have fallen into the apparatus, the apparatus has been exposed to rain or moisture, does not operate normally, or has been dropped. 15. Keep the packing material in case the equipment should ever need to be shipped. 16. The lamp becomes extremely hot during operation. Allow the display to cool down for approximately 45 minutes prior to removing the lamp assembly for replacement. 17. Do not operate lamps beyond the rated lamp life. Excessive operation of lamps beyond rated life could cause them to explode in rare occasions. 18. Never look directly into the lens when the lamp is on. VideoWall™/CineWall™ Installer/Integrator Manual iii Compliance Information DECLARATION OF CONFORMITY: Manufacturer’s Name: Runco International, LLC Manufacturer’s Address: 1195 NW Compton Drive, Beaverton, OR 97006-1992 hereby declares that the Products’ Model Numbers: EL IM IN A R conform with the provisions of: Y VideoWall™ VW-100HD and CineWall™ CW-95HD Council Directive 2004/108/EC on Electromagnetic Compatibility; EN 55022 “Limits and methods of measurements of radio interference characteristics of information technology equipment” 1998; EN 55024 “Limits and methods of measurements of immunity characteristics of information technology equipment” 1998; Including: • EN 61000-4-2 “Electromagnetic compatibility (EMC) Part 4: Testing and measurement techniques Section 2: Electrostatic discharge immunity test” • EN 61000-4-3 “Electromagnetic compatibility (EMC) Part 4: Testing and measurement techniques Section 3: Radiated, Radio-Frequency, Electromagnetic Field Immunity Test” • EN 61000-4-4 “Electromagnetic compatibility (EMC) Part 4: Testing and measurement techniques Section 4: Electrical fast transient/burst immunity test” Note PR • EN 61000-4-5 “Electromagnetic compatibility (EMC) Part 4: Testing and measurement techniques Section 5: Surge immunity test” During high-voltage spikes in AC power, this product's surge protection circuit may require re-starting the unit. This behavior is normal. • EN 61000-4-6 “Electromagnetic compatibility (EMC) Part 4: Testing and measurement techniques Section 6: Conducted disturbances induced by radio-frequency fields immunity test” • EN 61000-4-8 “Electromagnetic compatibility (EMC) Part 4: Testing and measurement techniques Section 8: Conducted disturbances induced by power frequency magnetic fields immunity test” • EN 61000-4-11 “Electromagnetic compatibility (EMC) Part 4: Testing and measurement techniques Section 11: Voltage dips, short interruptions and voltage variations immunity tests” iv VideoWall™/CineWall™ Installer/Integrator Manual And: • EN 61000-3-2 “Electromagnetic compatibility (EMC) Part 3, Section 2: Limits for harmonic current emissions (equipment input current up to and including 16 A per phase)” 2000; • EN 61000-3-3 “Electromagnetic compatibility (EMC) Part 3, Section 3: Limitations of voltage changes, voltage fluctuations and flicker in public low-voltage supply systems, for equipment with rated current up to and including 16 A and not subject to conditional connection” 1995; Council Directive 2006/95/EC and amended by M1 and C1 on Low Voltage Equipment Safety; EN 60950 “Safety of information technology equipment, including electrical business equipment” Y The Technical Construction file required by this Directive is maintained at the corporate headquarters of Runco International, LLC, located at 1195 NW Compton Drive, Beaverton, OR 97006-1992. FCC PART 15: EL IM IN A R Date of Declaration: October 2008 NOTE: This equipment has been tested and found to comply with the limits for a Class B digital device, pursuant to Part 15 of the FCC Rules. These limits are designed to provide reasonable protection against harmful interference in a residential installation. This equipment generates, uses and can radiate radio frequency energy and, if not installed and used in accordance with the instructions, may cause harmful interference to radio communications. However, there is no guarantee that interference will not occur in a particular installation. If this equipment does cause harmful interference to radio or television reception, which can be determined by turning the equipment off and on, the user is encouraged to try to correct the interference by one or more of the following measures: • Reorient or relocate the receiving antenna. • Increase the separation between the equipment and receiver. • Connect the equipment into an outlet on a circuit different from that to which the receiver is connected. PR • Consult the dealer or an experienced radio/TV technician for help. INDUSTRY CANADA (ICES-003): This Class B digital apparatus complies with Canadian ICES-003. Cet appareil numérique de la classe B est conforme à la norme NMB-003 du Canada. VideoWall™/CineWall™ Installer/Integrator Manual v PRODUCT DISPOSAL: The Product contains small amounts of tin, lead and/or mercury. Disposal of these materials may be regulated due to environmental considerations. IMPORTANT RECYCLE INSTRUCTIONS Lamp(s) inside this product contain mercury. This product may contain other electronic waste that can be hazardous if not disposed of properly. Recycle or dispose in accordance with local, state, or federal Laws. Y For more information, contact the Electronic Industries Alliance at WWW.EIAE.ORG. EL IM IN A R For lamp specific disposal information check WWW.LAMPRECYCLE.ORG. DISPOSAL OF OLD ELECTRICAL AND ELECTRONIC EQUIPMENT (Applicable throughout the European Union and other European countries with separate collection programs) PR This symbol found on your product or on its packaging, indicates that this product should not be treated as household waste when you wish to dispose of it. Instead, it should be handed over to an applicable collection point for the recycling of electrical and electronic equipment. By ensuring this product is disposed of correctly, you will help prevent potential negative consequences to the environment and human health, which could otherwise be caused by inappropriate disposal of this product. The recycling of materials will help to conserve natural resources. This symbol is only valid in the European Union. If you wish to discard this product, please contact your local authorities or dealer and ask for the correct method of disposal. vi VideoWall™/CineWall™ Installer/Integrator Manual 1 Table of Contents Important Safety Instructions ........................................................................................ iii Compliance Information ................................................................................................ iv 1. Introduction ...............................................................................................................1 About This Manual .......................................................................................................1 Target Audience .....................................................................................................1 If You Have Comments About This Manual... ..........................................................1 Textual and Graphic Conventions ...........................................................................1 Using This Manual ........................................................................................................2 Description, Features and Benefits ...............................................................................3 Key Features and Benefits ......................................................................................4 Parts List ................................................................................................................4 Required Personnel, Tools and Materials ......................................................................4 VideoWall/CineWall System Components .....................................................................5 Chassis Assembly...................................................................................................5 Input Connectors and LEDs....................................................................................6 Remote Control ......................................................................................................7 Screen Assembly....................................................................................................8 Chassis Installation Brackets...................................................................................8 Other System Components ....................................................................................9 2. Installation Preparation ..........................................................................................11 Site Requirements ......................................................................................................11 Infrastructure ........................................................................................................11 Power Requirements ............................................................................................12 Site Access...........................................................................................................12 Environmental Considerations...............................................................................13 Unpacking and Inspecting ..........................................................................................14 Site Preparation ..........................................................................................................16 3. Installation ...............................................................................................................21 Overview ....................................................................................................................21 Mounting the VideoWall/CineWall Chassis ..................................................................22 Install Top Flange and Bottom Brackets on Chassis Assembly .............................22 Install Chassis Assembly into Wall.........................................................................23 Secure Chassis to Wall .........................................................................................23 VideoWall™/CineWall™ Installer/Integrator Manual vii Table of Contents Connections to the VideoWall/CineWall ......................................................................26 Connecting Source Components to the VideoWall/CineWall .................................26 RS-232 Controller Connection ..............................................................................28 Connecting to AC Power ......................................................................................29 Installing the Screen ...................................................................................................29 Installing Batteries in the Remote Control ...................................................................32 Notes on Remote Control Operation .....................................................................32 Turning on the Power .................................................................................................32 Aligning the Image ......................................................................................................33 Color Balancing the VideoWall/CineWall .....................................................................34 Picture Adjustments ...................................................................................................35 Selecting a Source................................................................................................36 Input Levels – Analog RGB Sources .....................................................................37 Input Levels – HDMI, Digital, Component, Composite or S-Video Sources............40 Adjusting Image Position.......................................................................................43 Saving Your Work and Recalling a Memory...........................................................44 Memory: What is Saved and Where ......................................................................47 4. Maintenance and Troubleshooting ........................................................................49 Cleaning .....................................................................................................................49 Cleaning the Screen, Mirrors and Lens .................................................................49 Where is the dirt?..................................................................................................50 Lamp Replacement ....................................................................................................51 Removing the Old Lamp .......................................................................................51 Installing the New Lamp........................................................................................52 Resetting Lamp Hours ..........................................................................................52 How to Maintain Lamp Life ...................................................................................52 Filter Replacement .....................................................................................................52 Determining a Changing Schedule ........................................................................52 Removing the Air Filter ..........................................................................................52 Troubleshooting Tips ..................................................................................................53 On-Screen Codes.................................................................................................53 Status LEDs..........................................................................................................55 Isolating Faulty Parts.............................................................................................56 5. Serial Communications ..........................................................................................57 RS-232 Connection and Port Configuration ...............................................................57 How to Form Commands ...........................................................................................57 Types of Commands ..................................................................................................58 viii VideoWall™/CineWall™ Installer/Integrator Manual Table of Contents Key Commands....................................................................................................58 Operation Commands ..........................................................................................58 String Commands.................................................................................................58 Addresses in Commands ...........................................................................................58 Direct Addressing .................................................................................................58 Command Structure ...................................................................................................59 Using the Operation Commands Table .......................................................................61 Operations and Operation Numbers .....................................................................61 Target...................................................................................................................61 Command Types Allowed.....................................................................................61 Values...................................................................................................................62 Reading the Response..........................................................................................62 Using Key Commands ...............................................................................................64 Command Word Key Commands .........................................................................64 Numeric Equivalent Commands............................................................................65 Examples of Operation Commands ............................................................................66 Recalling Memories...............................................................................................66 Asking (Get) and Telling (Set) ................................................................................68 Types of Responses .............................................................................................68 Operation Commands ................................................................................................71 6. Reference .................................................................................................................91 On-Screen Display (OSD) Menus ................................................................................91 Main Menu............................................................................................................93 Picture ..................................................................................................................93 Size & Position......................................................................................................96 Aspect Ratio .......................................................................................................100 ISF Memories......................................................................................................105 Memory ..............................................................................................................106 Diagnostics.........................................................................................................108 Advanced Options ..............................................................................................111 Program Information ...........................................................................................115 VideoWall/CineWall Specifications ............................................................................116 Dimensions ..............................................................................................................117 Supported Timings ...................................................................................................119 VideoWall™/CineWall™ Installer/Integrator Manual ix Table of Contents Notes: x VideoWall™/CineWall™ Installer/Integrator Manual 1 List of Figures 1-1. Chassis Installation Brackets (Model CW-95HD shown)................................................8 3-1. Installing the Top Flange and Bottom Brackets...........................................................22 3-2. HDMI/DVI Source Connections ..................................................................................26 3-3. VGA Connections.......................................................................................................27 Y 3-4. Component Video Connections..................................................................................27 EL IM IN A R 3-5. Composite and S-Video Connections.........................................................................28 3-6. RS-232 Control System Connection...........................................................................28 3-7. VideoWall/CineWall Screen Assembly – Rear View .....................................................29 3-8. Typical PLUGE Pattern for Adjusting Brightness .........................................................40 3-9. Typical Gray Bar Pattern for Adjusting Contrast ..........................................................41 3-10. Typical Color Bar Pattern for Adjusting Color Saturation and Hue .............................41 5-1. Remote Control Button Names Used in Serial Commands .........................................64 5-2. Remote Control Button Numeric Equivalents ..............................................................65 6-1. VideoWall/CineWall OSD Menu Structure ...................................................................92 6-2. Typical Test Pattern for Adjusting Sharpness..............................................................95 6-3. VideoWall VW-100HD Dimensions ...........................................................................117 PR 6-4. CineWall CW-95HD Dimensions...............................................................................118 VideoWall™/CineWall™ Installer/Integrator Manual xi PR EL IM IN A R Y Notes: xii VideoWall™/CineWall™ Installer/Integrator Manual 1. Introduction 1.1 About This Manual This Owner’s Manual describes how to install, set up and operate a Runco VideoWall/CineWall™ Full HD, In-Wall Display. Y Throughout this manual, the Runco VideoWall/CineWall™ Full HD, In-Wall Display is referred to as the “VideoWall/CineWall.” EL IM IN A R Runco has prepared this manual to help home theater installer/integrators safely install and optimize the performance of the VideoWall/CineWall. Target Audience Runco has made every effort to ensure that this manual is accurate as of the date it was printed. However, because of ongoing product improvements and customer feedback, it may require updating from time to time. You can always find the latest version of this and other Runco product manuals on-line, at www.Runco.com. Runco welcomes your comments about this manual. Send them to [email protected]. If You Have Comments About This Manual... Text Conventions: The following conventions are used in this manual, in order to clarify the information and instructions provided: Textual and Graphic Conventions • Remote and built-in keypad button identifiers are set in upper-case bold type; for example, “Press PREV to return to the previous menu.” PR • Computer input (commands you type) and output (responses that appear on-screen) is shown in monospace (fixed-width) type; for example: “To switch to the Component input, type op 00 select.source = 2 <Enter>.” • All keys with functional names are initial-capped, set in bold type and enclosed in angle brackets. These keys are the following: <Enter>, <Spacebar>, <Control>, <Esc> and <Tab>. • <Enter> indicates that you may press either the RETURN or ENTER key on your keyboard if it has both keys. In addition to these conventions, underlining, boldface and/or italics are occasionally used to highlight important information, as in this example: Note A carriage return must be used after each command or string. VideoWall™/CineWall™ Installer/Integrator Manual 1 Introduction Graphic Conventions: These symbols appear in numerous places throughout the manual, to emphasize points that you must keep in mind to avoid problems with your equipment or injury: Note NOTES emphasize text with unusual importance or special significance. They also provide supplemental information. Caution CAUTIONS alert users that a given action or omitted action can degrade performance or cause a malfunction. Y TIPS highlight time-saving short cuts and helpful guidelines for using certain features. EL IM IN A R 1.2 Using This Manual Tip WARNING WARNINGS appear when a given action or omitted action can result in damage to the equipment, or possible non-fatal injury to the user. DANGER! DANGER appears when a given action can cause severe injury or death. Use the following table to locate the specific information you need in this manual. PR If you need... ... Turn to page: General information about the VideoWall/CineWall™ Full HD, In-Wall Display 3 Installation preparation guidelines 11 Installation instructions 21 First-time configuration instructions 33 Maintenance and troubleshooting and information 49 Information on using serial commands 57 Instructions for using the on-screen menus 91 Specifications for the VideoWall/CineWall™ Full HD, In-Wall Displays 116 2 VideoWall™/CineWall™ Installer/Integrator Manual Introduction Runco, the leading brand in luxury video solutions, proudly announces its new VideoWall™ VW-100HD and CineWall™ CW-95HD in-wall video displays, which offer custom home theater design and installation professionals new levels of installation versatility and convenience while achieving full-HD imagery perfection. Combining the best of front projection’s exceptional image with the aesthetic of a giant flat-screen display, the VideoWall/CineWall provides a high-performance, in-wall display solution for rooms of distinction where high ambient lighting conditions exist, but nothing less than an exceptional Runco cinema experience will suffice. EL IM IN A R Y The VideoWall/CineWall combines an advanced, high-contrast ambient light-rejecting screen with cinema-grade optics and a powerful display engine in a single, self-contained system. It is designed for quick and easy installation into a dedicated, framed wall with a large opening. The VideoWall/CineWall display engine provides a “Full-HD” (up to 1920 x 1080p) image with stunning color fidelity, vivid whites, deep blacks and unmatched uniformity. The VideoWall/CineWall features Runco’s SuperOnyx™ DMD™ chipset with ConstantContrast™ frame-by-frame contrast correction to provide stellar black levels and rich color saturation even in bright ambient light viewing. Runco’s exclusive CinOptx™ lens system incorporates O-Path™ light path enhancement for sharp-looking video, while Vivix II™ internal processing ensures the best video performance. Two VideoWall/CineWall models are available: • The Model VW-100HD features a 100-inch diagonal measure, 16:9 screen (approximately 88.75 inches wide by 50.5 inches high). PR • The Model CW-95HD features a 95-inch diagonal measure, 2.35:1 screen (approximately 88.75 inches wide by 37.88 inches high). The CW-95HD provides uncompromising widescreen reproduction of movies originally filmed in the “scope” (2.35:1) format, with no black bars above or below the picture. In addition to wider viewing angles with increased brightness and colorimetry consistencies, the VideoWall/CineWall provides significant technology and video quality enhancements when compared to like-sized plasma or LCD products. The system’s passive cooling allows for virtually silent operation and uses 80 per cent less energy than comparably-sized flat panels. The VideoWall/CineWall has been engineered to comply with Imaging Science Foundation™ (ISF) standards for maximum home theater image quality. Runco's sophisticated parameters for white balance and color gamut control have also been implemented for precise balance of gray scale and color. The VideoWall/CineWall incorporates Runco-proprietary de-interlacing technology that provides exceptional scaling and film-to-video (3:2 pulldown) conversion for the most artifact-free images possible. Discrete IR and RS-232 control make custom installation seamless, while discrete source and aspect ratio selection accommodate any automation control system. VideoWall™/CineWall™ Installer/Integrator Manual 3 1.3 Description, Features and Benefits Introduction Key Features and Benefits ➤ The VideoWall/CineWall offers these key features and benefits: • Native Resolution: 1920 x 1080 (VW-100HD; 16:9 Native Aspect Ratio) or 1920 x 817 (CW-95HD; 2.35:1 Native Aspect Ratio) • 156/180W UHP-type Lamp, 6000-hour median life • ConstantContrast™ provides for infinitely variable adjustment of the light path through the optics, enabling the perfect balance of black and white levels for any type of video source material Parts List ➤ Your VideoWall/CineWall is shipped with the following items. If any items are missing or damaged, please contact your Runco dealer or Runco Customer Service at (800) 23-RUNCO. Y • VideoWall/CineWall™ Full HD, In-Wall Display: EL IM IN A R • Chassis Assembly • Screen Assembly • Remote Control Unit and two (2), AAA-size batteries • AC Power Cord (North America), 1.83 meters (6.0 feet) • VideoWall™/CineWall™ Installer/Integrator Manual (this document) 1.4 Required Personnel, Tools and Materials Installing the VideoWall/CineWall requires the following personnel, tools and materials: • Two or more people familiar with complex mechanical installations. Only authorized, Runco Academy-trained dealers should install the VideoWall/CineWall. • Circular saw • Drill with ¼” bit PR • Screwdrivers • Socket and crescent wrenches (various sizes) • Level • Tape measure • Stud sensor • Wood screws, bolts, nails, washers and other hardware, as dictated by the installation method • For color balancing the display, it is recommended that you use a computer-based color analyzer (Sencore ColorPro 5000 software and ColorPro III sensor, or equivalent), hand-held colorimeter or ISF optical comparator • AVIA or Digital Video Essentials test DVD (or equivalent), for calibrating individual inputs/sources 4 VideoWall™/CineWall™ Installer/Integrator Manual Introduction This section briefly describes the various VideoWall/CineWall system components. PR EL IM IN A R Y The Chassis Assembly is a sheet metal assembly that contains all of the active components of the VideoWall/CineWall, as shown below. The lower middle section of the chassis assembly contains all of the active components described below. A fold mirror mounted at the rear of the chassis reflects light from the display engine. Several sets of handles are provided on the chassis to aid installation. The outer handles are for carrying the unit to the installation wall; the inner handles are for lifting the unit up and into the wall opening. Display Engine: The display engine mounts directly to a shelf in the center bottom of the chassis that makes up a plenum for intake air. VideoWall™/CineWall™ Installer/Integrator Manual 5 1.5 VideoWall/CineWall System Components Chassis Assembly Introduction Input Connectors and ➤ LEDs The VideoWall/CineWall interface board provides connections for up to six video sources, as well as an RS-232 serial connection for personal computer (PC) or automation/control system interface. For a list of supported display modes on each input, refer to Supported Timings on page 119. DVI TO ENGINE Option Key ICP AUX RS-232 POWER Y 1. RS-232 A female, RJ-45 connector for interfacing with a PC or automation/control system. For more information, refer to Serial Communications on page 57. 3. DIGITAL (HDMI) 4. ANALOG (RGB) A 15-pin VGA connection to a personal computer. The VideoWall/CineWall automatically detects the signal resolution. CUBE CONTROL Two (2), HDCP-compliant digital video inputs for connecting a DVD player, personal computer or HD tuner with a DVI or HDMI output. 1 RS-232 IR SENSOR EL IM IN A R +5V OUT 2. DIGITAL (DVI) 2 DIGITAL DVI Fan - System Fan - DMD DIGITAL HDMI 3 Fan - Lamp Ballast Status Engine Status Lamp Saver Serial Cmd ANALOG 4 Serial Data PR Remote IR 5. STATUS LEDs These provide information about the current state of various VideoWall/CineWall system components. For information on how to interpret them, refer to Status LEDs on page 55. 6. COMPONENT Standard- or high-definition, YPrPb component input from a DVD player, gaming console or other component video source. Lamp Source Ready INPUT 5 COMPONENT 6 S-VIDEO 7 COMPOSITE 8 7. S-VIDEO Standard S-Video input for connecting a DVD player, satellite receiver or Super VHS (S-VHS) VCR. 8. COMPOSITE Standard composite video input for connecting a VCR, camcorder, laser disc player or other composite video source. 6 VideoWall™/CineWall™ Installer/Integrator Manual Introduction The VideoWall/CineWall remote control unit, shown below, allows you to perform the following tasks: Remote Control 1. ON Press to turn the VideoWall/CineWall on. 2. Source Select Buttons Use these buttons to select a video source (Analog, Digital DVI, Digital HDMI, Component, S-Video or Composite). HDMI DVI ANALOG CPONENT OFF SVIDEO CPOSITE 4:3 16:9 L BOX V WIDE CINEMA V CINE ON 1 2 EL IM IN A R Y 3 3. OFF Press to turn the VideoWall/CineWall off. 4. Aspect Ratio Selection Buttons Use thee buttons to select an aspect ratio (or “scale mode”) directly. 5. MENU Press this button to show or hide the on-screen display (OSD) menus. 5 7 9 MENU PREV ENTER 6 ISF DAY 11 13 ISF NIGHT 8 10 12 CUST 1-2 6. ENTER Press to select a highlighted menu item or confirm a changed setting. PR 7. PREV Press this button to exit the current menu and return to the previous one. 8. UP Use this button to move the menu cursor up in the OSD. 9. ISF DAY Press to recall the “ISF Day” memory slot. 10.RIGHT Use this button to move the menu cursor to the right in the OSD. 11.LEFT Use this button to move the menu cursor to the left in the OSD. 12.CUST 1-2 Press to recall the “Custom 1” or Custom 2” memory slot. 13.ISF NIGHT Press to recall the “ISF Night” memory slot. 14.DOWN Use this button to move the menu cursor down in the OSD. VideoWall™/CineWall™ Installer/Integrator Manual 4 7 14 Introduction Screen Assembly ➤ The Screen Assembly comprises all of the components associated with the screen which is attached on the outer side of the installation wall. The Screen Assembly is packaged separately from the Chassis Assembly, to facilitate unpacking and installation. Southco-type latches at the bottom of the screen secure the screen in the closed position. A hinge system is provided at the top of the screen assembly that interfaces to the top flange of the chassis assembly. This hinge allows the screen assembly to be “hooked” from the top during initial installation. Two, small retaining brackets attach to the top rear of the screen frame. These prevent the screen from “hopping” out of the hinge hook and thus secure the screen. Y To reduce the overall depth of the chassis assembly for shipping, the installation brackets that secure the chassis and screen to the wall are packaged separately. These brackets are installed at the customer site right before installing the chassis assembly into the wall opening: EL IM IN A R Chassis Installation ➤ Brackets Top Flange Side Light Block, Left Bottom Light Blocks, Right Side (2) Side Light Block, Right PR Bottom Light Blocks, Left Side (2) Bottom Brackets (4) Figure 1-1. Chassis Installation Brackets (Model CW-95HD shown) 8 VideoWall™/CineWall™ Installer/Integrator Manual Introduction Bottom Brackets: The bottom brackets support all of the weight of the chassis assembly, and provide a pivot point while the chassis is “rotated into” the wall opening. Once installed, these can be screwed into the wall opening with sheet rock screws. Top Flange: The top flange locks the top of the chassis into position and stops the rotation of the chassis as it is being installed. An installation tool is provided to set the exact distance between the bottom brackets and the top flange, as this is a critical dimension. Shims can be used along the top of the flange if necessary to compensate for any wall irregularities. Y Bottom and Side Light Blocks: Light blocks at the bottom and sides of the screen complete the chassis-wall-screen interface. These are installed right before installing the screen, and minimize stray light leakage from behind the screen. EL IM IN A R Power Supply: The Power Supply converts incoming 100-240 VAC power to the internal working voltages required by the lamp ballast, video processor and other system components. A switch is provided to connect or disconnect the system from the AC power source. Cooling Fans: Cooling of the VideoWall/CineWall is accomplished by a combination of forced air and radiant cooling. The power supply is cooled by its own integral fans. Cover: The center chamber of the chassis where all the active components are housed is covered by an interlocked sheet metal cover, secured by several quarter-turn screws. Removing this cover exposes all the serviceable parts, including the display engine, the lamp system, the power supply and the interface electronics. This cover is electrically interlocked so that the lamp and 380V supply cannot be activated while the cover is open. Air Filter: As mentioned above, the air filter is installed in the plenum at the bottom center of the chassis. This filter can be accessed and replaced by a service person by opening the screen and reaching in to replace it. The air filter is Runco part number 379-0012-00. PR Fold Mirror: The fold mirror reflects light from the display engine and directs it towards the screen. This fold mirror is mounted using a three-point mount system. Three large (5”x5”) mirror mounts and adhesive pads are used along with springs to provide an adjustable mounting scheme. Four safety catches secure the fold mirror in place, in case of adhesive failure of the mirror mounts. The fold mirror is mounted to hat sections on the slant back wall of the chassis. The mirror is calibrated at the factory, and is not intended to be adjusted in the field. VideoWall™/CineWall™ Installer/Integrator Manual 9 Other System Components Introduction PR EL IM IN A R Y Notes: 10 VideoWall™/CineWall™ Installer/Integrator Manual 2. Installation Preparation Y Prior to installing the VideoWall/CineWall, confirm that the installation site meets the requirements described in this section. EL IM IN A R The VideoWall/CineWall is designed for installation into a dedicated, framed, structurally capable wall with at least 32.50 inches (826 mm) of distance between the user-viewable surface of this wall and anything immediately behind the open framed area. The chassis protrudes approximately 30.75 inches (781 mm) from the front of the dedicated wall into the cavity. 32.50” minimum PR 30.75” AX ”M 48 AC Outlet U IM M VideoWall™/CineWall™ Installer/Integrator Manual 11 2.1 Site Requirements Infrastructure Installation Preparation Site Access ➤ The VideoWall/CineWall requires clean, noise-free AC power. The power cord provided with the VideoWall/CineWall is 6 feet (1.83 meters) long. In order to use it, the power outlet must be no more than 48 inches (1.22 meters) from the cable openings on the right side of the chassis. If the outlet is farther away, substitute a longer power cord for the one provided with the VideoWall/CineWall; do not use a power strip or extension cord. If you use a substitute power cord, ensure that it is a UL- or CSA-approved, three-conductor (18 AWG or heavier), shielded cord rated at 10 amps minimum. The VideoWall/CineWall is shipped in two containers: one for the screen assembly and one for the chassis and related hardware. The shipping container dimensions are as shown below. Y Power Requirements ➤ Chassis/Hardware 10 1.1 3i n. (2, 56 8m 86. 25 in. m) 61.5 in. (1,562 mm) PR 7.5 in. (190 mm) (2,1 91 mm ) 58.5 in. (1,486 mm) EL IM IN A R Screen 30.0 in. (762 mm) Ensure that the site has a “carry-in” path with sufficient clearances leading to the installation location. This is particularly important in corners in stairways, landings and hallways. Minimum Stair/Landing Clearances B E C F A A D D A B C 2,000 mm 4,000 mm 1,900 mm D E F 12 1,200 mm 2,400 mm 3,700 mm VideoWall™/CineWall™ Installer/Integrator Manual Installation Preparation Also confirm that doorways and elevators (if used) provide sufficient clearances: Minimum Doorway/Elevator Clearances Width min. 2,000 mm min. 900 mm WARNING EL IM IN A R Depth Y Height 900 900 900 900 2,000 2,800 1,700 2,700 2,800 2,000 2,700 1,700 Do not store or transport the VideoWall/CineWall on its side! It should only be placed on its side if absolutely necessary during loading and unloading. Here are some other considerations and tips that can help improve your installation, avoid damage, prevent personal injury and prolong operating life: PR • Keep the ambient temperature constant and below 35°C (95°F). Keep the display away from heating and/or air conditioning vents. Changes in temperature may cause drifts in the display circuitry, which may affect performance. • Keep the VideoWall/CineWall away from devices that radiate electromagnetic energy such as motors and transformers. Common sources of these include slide projectors, speakers, power amplifiers and elevators. • Handle the unit carefully when installing or carrying it. Use the built-in handles; DO NOT touch or hold the screen face. • Set the unit away from heat, excessive dust, and direct sunlight. • Protect the inside of the unit from liquids and small metal objects. • Do not hit or scratch the screen surface as this causes flaws on the surface of the screen. • DO NOT spray liquid of any kind on the screen. It can drip down the screen and wick up between the layers. When liquid gets between the screen layers, it is impossible to remove and the screen is ruined! VideoWall™/CineWall™ Installer/Integrator Manual 13 Environmental Considerations Installation Preparation 2.2 Unpacking and Inspecting When you receive your VideoWall/CineWall shipment, check the shipping containers for damage. If there are signs of damage or rough handling, it is recommended that you have an agent of the carrier present when the equipment is unpacked. If the shipping containers do not appear to be damaged, move them to the installation site before opening them. Y As you unpack each container, check all parts against the shipping documents. The VideoWall/CineWall is protected in the shipping containers. Unpack them carefully, inspecting the chassis and screen for scratches, dents or other signs of damage. If the equipment is damaged, save all packing materials and notify both Runco and the carrier immediately. EL IM IN A R Proceed as follows to unpack your VideoWall/CineWall: 1. Remove the top of the shipping container for the chassis and associated hardware. Hardware Box PR 2. Lift the box containing the hardware up off of the foam inserts and set it aside. 3. Remove the foam inserts on the top corners of the chassis and set them aside. Foam Inserts 14 VideoWall™/CineWall™ Installer/Integrator Manual Installation Preparation 4. With the help of your assistant, grasp the chassis by the handles on either side and lift it straight up and out of the shipping container. EL IM IN A R Y Handles 5. Carefully unpack the screen by opening one end of the shipping container and sliding the screen out of the box. 6. Unpack the chassis hardware and verify that you have received all of the parts listed and shown below. 1 3 PR 2 4 7 5 Item Number 6 Description Quantity 1 Top Flange 1 2 Light Blocks (Left/Right Sides) 2 3 Bottom Brackets (Left Center, Right Center) 2 4 Bottom Brackets (Left, Right) 2 5 Light Blocks (Bottom Left Center/Bottom Right Center) 2 6 Center Light Block/Strut Catch 1 7 Light Blocks (Bottom Left/Bottom Right) 2 (not shown) Mounting Screws VideoWall™/CineWall™ Installer/Integrator Manual (various) 15 Installation Preparation 2.3 Site Preparation Because every home theater installation is unique, it is impossible to provide detailed, step-by-step instructions that are applicable to every situation. Instead, this manual provides general guidelines for site construction and product installation. Review this information carefully and adapt it as needed to your installation requirements. The instructions in this section describe how to prepare a dedicated home theater for a VideoWall/CineWall installation. Throughout these instructions, the following “typical” conditions are assumed: • Ceiling Height: 8 feet • Stud spacing: 24 inches EL IM IN A R • Screen position: Y • Theater Width: 12 feet, minimum • VideoWall VW-100HD – Centered vertically between floor and ceiling (bottom edge of screen approximately 24 inches from floor) • CineWall CW-95HD – Bottom edge of screen approximately 36 inches from floor • Centered horizontally between two studs 96 inches apart • Supported from below by either three (if 24 inches apart) or five (if 16 inches apart) studs, cut down 1.5 in. and with a 2x6 x 88.75 in. stud nailed to the tops PR Construct a dedicated, framed wall: Shown below is a typical wall frame, viewed from the rear. It is 12 feet wide, with the studs spaced 24 inches apart. The shaded area represents the opening you will need to create for the VideoWall/CineWall. For maintenance purposes, provide some means of accessing the rear of the VideoWall/CineWall when installed. If the theater is greater than 12 feet wide, the gap between the side walls and the dedicated wall edges may be sufficient. Otherwise, you will need to create a second opening at one end of the dedicated wall for maintenance access. 48.000" (1219.2 mm) 48.000" (1219.2 mm) 94.750" (2406.7 mm) Screen Area (CW-95HD - 2.35:1) Screen Area (VW-100HD - 16:9) 144.000" (3657.6 mm) 16 VideoWall™/CineWall™ Installer/Integrator Manual Installation Preparation Create opening in dedicated wall: 1. Locate three studs 48 inches apart. 2. At the center of the middle stud, mark the location of the screen center based on the desired screen height. 3. From this point, measure/mark 44.375 inches to the left and to the right and the appropriate distance above and below (25.25 inches for a VW-100HD; 18.94 inches for a CW-95HD). 4. Using a laser level, determine and mark the locations of the opening corners. Y 5. Double-check your measurements. “Measure twice, cut once” is always a great rule of thumb to follow. EL IM IN A R 6. Using the marks as a guide, cut a rectangular opening 88.75 inches wide and of the appropriate height (50.5 inches tall for a VW-100HD or 37.875 inches tall for a CW-95HD). PR 36.625" (930.3 mm) 24.000" (609.6 mm) CineWall CW-95HD: 37.875" (962.0 mm) VideoWall VW-100HD: 50.500" (1282.7 mm) 88.750" (2254.3 mm) Reinforce opening in dedicated wall: 1. At the rear of the dedicated wall, cut away the intermediate studs (three or five, depending on spacing) 1.5 inches below the bottom edge and 11.5 inches from the top edge of the opening. 2. If you are installing a VW-100HD: Reinforce each outer stud with two, 2x6 x 73 in. reinforcing studs and one, 2x6 x 21 in. reinforcing stud. (This assumes that the bottom edge of the opening is 24 inches from the floor.) – OR – If you are installing a CW-95HD: Reinforce each outer stud with two, 2x6 x 73 in. reinforcing studs and one, 2x6 x 33.625 in. reinforcing stud. (This assumes that the bottom edge of the opening is 36.625 inches from the floor.) VideoWall™/CineWall™ Installer/Integrator Manual 17 Installation Preparation 3. Reinforce the bottom of the wall opening from behind with a 2x6 x 88.75 in. stud. Wall Opening Reinforcement - VideoWall VW-100HD 48.000" (1219.2 mm) 8.500" (215.9 mm) 48.000" (1219.2 mm) 94.750" (2406.7 mm) 88.750" (2254.3 mm) 21.000" (533.4 mm) 22.500" (571.5 mm) EL IM IN A R 50.500" (1282.7 mm) Y 11.500" (292.1 mm) Support stud, 2 x 6 x 88.75 in. Reinforcing studs, 2 x 6 x 73 in. (2 per side) Reinforcing stud, 2 x 6 x 21 in. (1 per side) 48.000" (1219.2 mm) 8.500" (215.9 mm) 48.000" (1219.2 mm) 94.750" (2406.7 mm) 37.875" (962.0 mm) 11.500" (292.1 mm) 88.750" (2254.3 mm) Reinforcing studs, 2 x 6 x 73 in. (2 per side) 33.625" (854.1 mm) 35.125" (892.2 mm) PR Wall Opening Reinforcement - CineWall CW-95HD Support stud, 2 x 6 x 88.75 in. 18 Reinforcing stud, 2 x 6 x 33.625 in. (1 per side) VideoWall™/CineWall™ Installer/Integrator Manual Installation Preparation 4. Reinforce the top of the wall opening from behind with two (2), 2x12 x 94.75 in. studs. Secure them to the outer studs using 1/4x4-in. lag bolts and washers (two per side), or a suitable equivalent. For additional stability, secure the 2x12 studs to each other using suitable hardware. Lag Bolt, 0.25” x 2.00 in. (3x) EL IM IN A R Y Lag Bolt, 0.25” x 4.00 in. and Washers (4 per side) or equivalent hardware PR Reinforcing studs, 2 x 12 x 94.75 in. VideoWall™/CineWall™ Installer/Integrator Manual 19 Installation Preparation PR EL IM IN A R Y Notes: 20 VideoWall™/CineWall™ Installer/Integrator Manual 3. Installation Table 3-1 gives a quick overview of the VideoWall/CineWall installation process. The sections following this one provide detailed instructions. Y Table 3-1. Installation Overview For Details, Refer to page... EL IM IN A R Step Procedure Install Top Flange and Bottom Brackets on Chassis Assembly 22 2 Place Chassis Assembly with brackets installed into opening in dedicated wall 23 3 Secure Chassis Assembly to wall 23 4 Connect signal sources to the VideoWall/CineWall 26 5 Connect PC or control system to VideoWall/CineWall via RS-232 28 6 Connect AC power to the VideoWall/CineWall 29 7 Install Screen Assembly: • Fix screen in open position using fold-out strut • Secure top of screen frame to hinge with safety catches 29 8 Power up the VideoWall/CineWall: • Set main power switch to ON • Close screen • Turn on source components • Use remote control to turn on system 32 10 Align image corners with screen corners 33 11 Adjust color balance 34 12 Adjust input levels for each individual source 37 PR 1 VideoWall™/CineWall™ Installer/Integrator Manual 21 3.1 Overview Installation 3.2 Mounting the VideoWall/CineWall Chassis This section provides detailed instructions for installing the VideoWall/CineWall chassis. Install the Top Flange as shown in Figure 3-1. Then, install the Left and Right Bottom Brackets (the ones with the latches on them) at the bottom corners of the chassis, and install the Left Center and Right Center Bottom Brackets in the two intermediate locations. The illustration below shows the Bottom Brackets for a CineWall CW-95HD. The VideoWall VW-100HD brackets are slightly different but the installation method is the same. Y Install Top Flange and ➤ Bottom Brackets on Chassis Assembly EL IM IN A R Note Top Flange Screw, Phillips Pan-Head, 0.164-32 x 0.25 x 0.25 (5x) PR Self-cliching Nut (5x) Screw, Phillips Pan-Head, 1/4-20 x 0.5 x 0.5 (2 per bracket) Bottom Bracket, Left Bottom Brackets, Left Center/ Right Center Bottom Bracket, Right Figure 3-1. Installing the Top Flange and Bottom Brackets 22 VideoWall™/CineWall™ Installer/Integrator Manual Installation With the help of your assistant(s), lift the Chassis Assembly by the handles. EL IM IN A R Y While tilting the Chassis Assembly downward, carefully move the Chassis Assembly into the wall opening. Allow the bottom brackets to come to rest on the bottom of the wall opening. Then, rotate the chassis into the opening until the top flange makes contact with the top of the opening. Install Chassis Assembly into Wall Once the chassis is correctly positioned in the wall opening, you are ready to secure it. Before you secure the VideoWall/CineWall chassis to the wall, it is absolutely critical that the Top Flange be perfectly level and properly positioned relative to the Bottom Brackets. If it is not, the screen – when installed – won’t open and close properly. PR Caution VideoWall™/CineWall™ Installer/Integrator Manual 23 Secure Chassis to Wall Installation The VideoWall/CineWall includes a special spacing tool to make it easier to level the Top Flange and ensure that it is the correct distance from the Bottom Brackets. Spacing Tool 1. Place the Spacing Tool on either the Left Center or Right Center Bottom Bracket, as shown. Y Hinge Barrel EL IM IN A R 2. Engage the slot at the top of the spacing tool with the hinge barrel on the Top Flange. Top Flange Ensure that the spacing tool is perpendicular to the top and bottom of the wall opening. 90° PR 3. Using wood screws of the appropriate size – two for each bottom bracket (8 total) – secure the bottom of the VideoWall/CineWall Chassis Assembly to the opening frame. 4. Secure the Top Flange to the opening frame, using five wood screws. (Use the Spacing Tool at each attachment point, as described above.) 24 VideoWall™/CineWall™ Installer/Integrator Manual Installation EL IM IN A R Y 5. Secure the Left and Right Side Light Blocks to the chassis and the opening frame. 6. Secure the Bottom Center Light Block/Strut Catch to the opening frame, between the two Center Bottom Brackets. PR 7. Install the other Bottom Light Blocks (left, left center, right center, right) as shown below. Light Block, Bottom Left Light Block, Bottom Right Light Block, Bottom Left Center Center Light Block/ Strut Catch VideoWall™/CineWall™ Installer/Integrator Manual Light Block, Bottom Right Center 25 Installation 3.3 Connections to the VideoWall/CineWall Proceed as follows to connect the VideoWall/CineWall to your video sources, external controller(s) – if present – and AC power. When connecting your equipment: • Turn off all equipment before making any connections. • Use the correct signal cables for each source. EL IM IN A R Route all cables through the cable openings on the right side of the VideoWall/CineWall chassis. Y • Ensure that the cables are securely connected. Tighten the thumbscrews on connectors that have them. PR Connecting Source ➤ Components to the VideoWall/CineWall ROUTE CABLES THROUGH THESE OPENINGS Connect your video sources to the VideoWall/CineWall as shown and described in the sections that follow. HDMI/DVI Connections: Connect your digital video sources to the HDMI and DVI inputs. See Figure 3-2. Tip Use the digital inputs whenever possible. This ensures the highest video quality because the signal is carried in the digital domain throughout the entire signal path, from source component output into the VideoWall/CineWall. RS-232 DIGITAL DVI DIGITAL HDMI Figure 3-2. HDMI/DVI Source Connections 26 VideoWall™/CineWall™ Installer/Integrator Manual Installation VGA (RGB PC) Connections: Connect your personal computer or other RGB source to the ANALOG input; see Figure 3-3. DIGITAL DVI Y DIGITAL HDMI EL IM IN A R ANALOG INPUT Figure 3-3. VGA Connections Component Video Connections: Connect your progressive component source (DVD player or HD set top box) to the COMPONENT input as shown in Figure 3-4. PR INPUT Pr DVD/DTV STB Pb COMPONENT Y S-VIDEO COMPOSITE Figure 3-4. Component Video Connections VideoWall™/CineWall™ Installer/Integrator Manual 27 Installation Composite/S-Video Connections: Connect your Composite and S-Video sources to the VideoWall/CineWall as shown in Figure 3-5. VCR COMPONENT Camcorder S-VIDEO Y COMPOSITE EL IM IN A R Gaming Console Figure 3-5. Composite and S-Video Connections RS-232 Controller ➤ Connection Connect a PC or home theater control/automation system (if present) to the RS-232 port as shown in Figure 3-6. Use a standard, straight-through Category 5 cable with RJ-45 plugs at each end. At the PC/control system end, use an RJ-45 to DB-9 adapter wired as shown. Such adapters are readily available at electronics or computer supply stores. PR For more information about using this connection, refer to Serial Communications on page 57. Standard Cat. 5 Cable, RJ-45 Male to RJ-45 Male 8 Wire the Adapter as follows: 1 RJ-45 Pin Wire Color DB-9 Pin 6 5 3 Yellow Green Black RS-232 3 5 2 To/From Control System or PC AL DVI HDMI Adapter, RJ-45 Female to DB-9 Female Figure 3-6. RS-232 Control System Connection 28 VideoWall™/CineWall™ Installer/Integrator Manual Installation To install the screen: 1. Remove the Spacing Tool (used to install the chassis; see page 24). PR EL IM IN A R Y 2. With the help of your assistant(s), lift the screen and position it in front of the Chassis Assembly. 30 VideoWall™/CineWall™ Installer/Integrator Manual Installation To install the screen: 1. Remove the Spacing Tool (used to install the chassis; see page 24). PR EL IM IN A R Y 2. With the help of your assistant(s), lift the screen and position it in front of the Chassis Assembly. 30 VideoWall™/CineWall™ Installer/Integrator Manual Installation EL IM IN A R Y 3. Use the hooks to hang the frame on the hinge at the top of the chassis. PR 4. Use the strut at the bottom of the frame to prop the screen in the open position. VideoWall™/CineWall™ Installer/Integrator Manual 31 Installation 5. Install the safety catches at the top rear corners of the screen. These prevent the screen from separating from the hinge when the screen is opened or closed. b Place the safety catch on the exposed screw shaft where you removed the nut. Safety Catch Remove this nut, install Safety Catch and replace Hinge Wing Y a Remove the nut at one end of the hinge wing on the back of the screen. EL IM IN A R c Secure the catch using the nut that you removed in Step 5a. d Repeat Steps 5a through 5c to install the other safety catch. 3.5 Installing Batteries in the Remote Control To install batteries in the remote control: 1. Slide the battery compartment cover down to remove it. 2. Install two AAA batteries with the correct polarity. 3. Replace the cover. Notes on Remote Control ➤ Operation • Make sure that the battery polarities are correct when installing the batteries. • Do not mix an old battery with a new one or different types of batteries. PR • If you will not use the remote control for a long time, remove the batteries to avoid damage from battery leakage. 3.6 Turning on the Power • If the effective range of the remote control decreases, or it stops working, replace the batteries with new ones. • The remote control may fail to operate if the infrared remote sensor is exposed to bright sunlight or fluorescent lighting. 1. Turn on your source components. 2. Set the main power switch on the VideoWall/CineWall to the ON position. 3. Return the strut the closed position and close the screen. 4. Gently press on the bottom left and right corners to engage the latches at the bottom of the screen. 5. Press the ON button on the remote control to turn on the VideoWall/CineWall. 32 VideoWall™/CineWall™ Installer/Integrator Manual Installation The VideoWall/CineWall optical engine was perfectly adjusted when it left the factory. However, vibration in transit may have moved it. Before performing any other image adjustments, proceed as follows to confirm proper image alignment. To align the optical engine: 1. Press MENU on the remote control and enter the Installer Menu passcode. 2. Select Advanced Options from the Main Menu. 3. Select Image Alignment from the Advanced Options menu. EL IM IN A R Y 4. Highlight Test Pattern in the Image Alignment menu and choose Grid. This pattern shows all the pixels in the optical engine. 5. Highlight Adjust Corners in the Image Alignment menu and press ENTER or . 6. Use the , , and buttons to precisely position the upper-left corner of the displayed grid pattern in the upper-left corner of the screen. 7. Press ENTER and repeat Step 6 for the other three corners. 8. Press PREV to save the corner position settings and exit the Adjust Corners menu. PR 9. Press PREV again to turn off the test pattern and exit the Image Alignment menu. VideoWall™/CineWall™ Installer/Integrator Manual 33 3.7 Aligning the Image Installation 3.8 Color Balancing the VideoWall/CineWall What does Color Balance do? Color balancing is the process of ensuring that whites appear truly white and grays appear truly gray, without any trace of color. Displays differ from one another because of very small differences in the color of the light produced by the lamp and by differences in the dyes used to make the color in a DLP™ optical engine. Although it may be possible to achieve satisfactory results using the naked eye, it is recommended that you use a computer-based color analyzer (Sencore ColorPro 5000 software and ColorPro III sensor, or equivalent), hand-held colorimeter or ISF optical comparator to color balance the VideoWall/CineWall. For more information, visit http://www.isfcalibration.com/Intro.htm. EL IM IN A R Y Tip In color balancing, you use the display’s internal test patterns of white, first, then gray. The internal pattern assures that a pure white is used. 1. Turn on the VideoWall/CineWall and let it warm up for at least five minutes. The lamp must be thoroughly warm before you color balance. 2. Press MENU on the remote control and enter the Installer Menu passcode. To obtain this passcode, contact Runco Technical Support. 3. Select Advanced Options from the Main Menu. 4. Select Color Balance from the Advanced Options menu. 5. Set Gamma at the bottom of the menu to either Video or Film. 6. Set the Color Temperature to 6500K. PR 7. Set White Boost to Off. 8. Set Test Pattern to White. Note Always use the internal Test Patterns for color balancing, not an external pattern. 9. Look at the Color Balance values. All the White Balance (Gain) values should be 100, and all the Gray Balance (Offset) values should be 8. If they are not, select Reset to Defaults and press ENTER. This is where you should always start color balancing. 10. Stand far enough away from the screen so you are looking almost squarely at it. Pay attention to the large central area, not the edges. 11. Using an optical comparator or other D6500 reference – or a color analyzer – adjust the White Balance values either individually or together (using the “All” slider) to achieve a neutral, D6500 white point. 12. Set Test Pattern to Gray. 13. The gray values range from 0 to 15, and they are all now set at 8. Adjust them up or down as needed to eliminate any trace of color from the test pattern. 14. When you have finished color balancing, set Test Pattern to None. 34 VideoWall™/CineWall™ Installer/Integrator Manual Installation Note Copy to Clipboard saves all the current settings to a temporary memory. You can then make more adjustments to see if it gets better or worse. Recall from Clipboard restores these saved settings. The Clipboard is only for testing. These values are not saved when AC power is off. While color balancing, change the White value by a lot, not just one step. It’s difficult to see one step in White. A large change will tell you if you are heading in the right direction. Output brightness Changes in the White value moves this end point. Changes in the White values affect the Gray values. 100 31 0 Output brightness Bright EL IM IN A R Y If you can’t decide which way to go, try any change. If it is the wrong change, it will be quickly obvious and you can undo it using the Clipboard. Changes in the Gray values do not affect the White values. Changes in the Gray value move this mid point. 15 0 Dark Black Input Signal White Input Signal PR The VideoWall/CineWall has been designed to incorporate setup and calibration standards established by the Imaging Science Foundation (ISF). The ISF has developed carefully crafted, industry-recognized standards for optimal video performance and has implemented a training program for technicians and installers to use these standards to obtain optimal picture quality from Runco video display devices. Accordingly, Runco recommends that setup and calibration be performed by an ISF certified installation technician. All signal types require separate processing. Therefore, you need to calibrate each input separately. The source picture is not always optimal in its size or strength; it does not always conform exactly to a standard. The VideoWall/CineWall provides numerous controls to compensate for this. Although it may be possible to obtain satisfactory picture quality using the naked eye and regular program material, Runco recommends using the following calibration tools for best results: • External test pattern source – Ovation Multimedia, Digital Video Essentials or AVIA test DVD or equivalent. • A blue filter (provided with many test DVDs), for color level and hue (tint) adjustments. (Alternatively, you can use the Blue Only option in the Input Levels menu.) Connect your test pattern source to the input that you are calibrating and proceed as follows. Perform the adjustments in the order listed here. VideoWall™/CineWall™ Installer/Integrator Manual 35 3.9 Picture Adjustments Installation Selecting a Source ➤ 1. Press MENU on the remote. 2. Select Picture and press ENTER. 3. Select Source and press the button. 4. Choose the source you want and press ENTER. 5. Press MENU again to close all menus. You must enter a passcode to access the Memory, Diagnostics and Advanced Options menus. Otherwise, they are hidden. To obtain this passcode, contact Runco Technical Support. Y Note EL IM IN A R Main Menu Picture Size & Position Aspect Ratio ISF Memories Memory Diagnostics Advanced Options Program Information Picture Source PR Vertical Frequency (frame locked) Horizontal Frequency Pixel Frequency Component (YPbPr) 60 Hz 43.36 kHz 66.02 MHz Horizontal Resolution 1280 Vertical Resolution Analog 768 Frequency Digital1344 Phase HDMI Sharpness Input Levels 22.5° 7 Component (YPbPr) S-Video Composite 36 VideoWall™/CineWall™ Installer/Integrator Manual Installation Computer sources vary greatly from computer to computer and even between video outputs on the same video card. Video sources vary more. Use the Input Levels controls to make the VideoWall/CineWall respond correctly to these non-standard sources. Note Input Levels and Color Balance (described on page 34) do not affect each other, but they both affect the final picture. What does Input Level do? For analog computer sources, adjusting to the computer’s picture output means determining what that computer means by “black” and “white.” Y Black is supposed to be a voltage of zero coming from the computer’s video card, but it almost never is. White is supposed to be a voltage of 0.7 volts, but it usually isn’t either. For best results, use a white field coming from the computer you will use with the VideoWall/CineWall. PR Tip EL IM IN A R The Input Level adjustment process asks you to provide an all-white picture from the computer. By doing so, you can quickly and automatically make the display “learn” what this computer means by black and white. The result is good pictures, using all the dynamic range of color coming from the computer. VideoWall™/CineWall™ Installer/Integrator Manual 37 Input Levels – Analog RGB Sources Installation Main Menu Picture Size & Position Aspect Ratio Picture Memory Source ISF Memories Sync Type Analog Separate H&V Program Information Vertical Frequency 60 Hz Pixel Frequency Node iD: 123 43.36 kHz Y Horizontal Frequency HPer: 1563 66.02 MHz VLines: EL IM IN A R Horizontal Resolution 1066 1280 Vertical Resolution 768 Frequency 1344 Phase 22.5° Sharpness 7 Input Levels Input Levels Menu – Analog Sources Input Levels Auto White Level (Gain) Center Point 2 PR Black Level (Offset) - All 1 4 55 Red 55 Green 55 Blue 55 White Level (Gain) - All 127 Red 127 Green 127 Blue 127 The best way to adjust levels is the semi-automatic method. Adjusting levels semi-automatically: This is quick and easy if you can get a black picture and a white picture from the source computer. 1. Display a white picture from the source. This must come from the computer source that will be used for the program. It does no good to use your laptop for this adjustment, then connect to a different computer for the program. Nor can you use the VideoWall/CineWall internal white test pattern. Make a white screen using the Windows® Paint program. Tip 2. Press MENU. 38 VideoWall™/CineWall™ Installer/Integrator Manual Installation 3. Select Picture from the Main Menu. 4. Select Input Levels from the Picture Menu. 5. Select Auto White Level (Gain) and press ENTER. The VideoWall/CineWall is now adjusted to the white levels of this computer using this video card. If you change computers or video output cards in the computer, you must do this again. EL IM IN A R Y What is a “completely” new source? The VideoWall/CineWall remembers all the values in the last 10 pictures. If a new picture comes from a different source, such as from a different computer, and that picture has almost exactly the same resolution, number of active lines, number of blanking lines et cetera, the VideoWall/CineWall assumes that this is a source it has seen before and use the remembered setup values. This is a different sort of memory from the 40 numbered memories described in Memory on page 106. On the other hand, if the new source is sufficiently different, the VideoWall/CineWall will engage all the checked processes in the Auto Setup Options menu (described on page 114). When a saved memory is recalled from the Recall menu, the VideoWall/CineWall does not do any auto setup. When to re-adjust levels: You should re-adjust black and white levels whenever: • the computer is changed; • the video card in the computer is changed, or you switch the source to a different video card output in the same computer; • you replace the electronics module. Adjusting to computer sources manually: In the unlikely event that you need to adjust input levels manually, proceed as follows: PR 1. Display an all-black picture from the source computer. 2. Press MENU on the remote. 3. Select Picture and press ENTER. 4. Select Input Levels and press the button. 5. Select Black Level (Offset) and adjust it up or down with the +/– keys to make the three CENTER POINT values go to zero. If they do not all touch zero at the same time, use the individual colors under Black Level (Offset) to adjust them. Note Do not go beyond the point where the Minimum just goes to zero. The idea is to just touch the zero level. 6. Display an all-white picture from the source computer. 7. Select White Level (Gain) and adjust the levels until the CENTER POINT values just touch 255, adjusting the individual colors as necessary. VideoWall™/CineWall™ Installer/Integrator Manual 39 Installation Input Levels – HDMI, ➤ Digital, Component, Composite or S-Video Sources The Input Levels menu for HDMI, Digital, Component, Composite and S-Video sources, shown below, is simpler than that for Analog sources, but serves the same basic purpose: maximizing contrast without “crushing” (where lighter areas appear white or darker areas appear black). Input Levels Brightness 55 Contrast 55 Saturation 55 Hue 55 Y Blue Only EL IM IN A R Brightness: On your external test pattern source, select a PLUGE pattern. (PLUGE is an acronym for “Picture Line-Up Generation Equipment.”) Figure 3-8 shows a typical PLUGE pattern. Below Black PR Above Black Figure 3-8. Typical PLUGE Pattern for Adjusting Brightness PLUGE patterns vary but generally consist of some combination of black, white and gray areas against a black background. The example above includes two vertical bars and four shaded boxes. Select Brightness from the Picture menu and press ENTER. Adjust the level so that: • The darkest black bars disappear into the background. • The dark gray areas are barely visible. • The lighter gray areas are clearly visible. • The white areas are a comfortable level of true white. • The image contains only black, gray and white (no color). 40 VideoWall™/CineWall™ Installer/Integrator Manual Installation EL IM IN A R Y Contrast: On your external test pattern source, select a stepped, gray-bar pattern like the one shown in Figure 3-9. Figure 3-9. Typical Gray Bar Pattern for Adjusting Contrast Select Contrast from the Picture menu and press ENTER. Adjust the contrast to a point just below which the white rectangle starts to increase in size. Brightness and Contrast controls are interactive. A change to one may require a subtle change to the other in order to achieve the optimum setting. Note Saturation: blue red magenta green cyan PR yellow gray 1. On your external test pattern source, select a color bar pattern like the one shown in Figure 3-10. Figure 3-10. Typical Color Bar Pattern for Adjusting Color Saturation and Hue VideoWall™/CineWall™ Installer/Integrator Manual 41 Installation 2. Select Blue Only from the Input Levels menu and press ENTER. 3. Select Saturation from the Input Levels menu. blue EL IM IN A R Y red magenta green cyan yellow gray 4. Adjust the color saturation level until the outermost (gray and blue) color bars appear to be a single shade of blue: Hue: Hue or “tint” is essentially the ratio of red to green in the color portion of the image. When Hue is decreased, the image appears redder; when it is increased the image appears greener. To set the tint: 1. Select Blue Only from the Input Levels menu and press ENTER. 2. Select Hue from the Input Levels menu. PR 3. Adjust the tint level until the cyan and magenta color bars (on either side of the green bar) appear to be a single shade of blue. Note Like the Brightness and Contrast controls, the Saturation and Hue controls are interactive. A change to one may require a subtle change to the other in order to achieve the optimum setting. 42 VideoWall™/CineWall™ Installer/Integrator Manual Installation Use the Picture Position controls to center the picture on the screen. (This is NOT the same as optical engine alignment.) Picture Position Use arrow keys to move image Horizontal Position 234 34 Y Vertical Position 1. Press MENU. EL IM IN A R To adjust the image position: 2. Select Size & Position from the Main Menu. 3. Select Picture Position from the Size & Position Menu. 4. Use the four arrow keys move the picture on the screen. The numbers for Horizontal and Vertical Position refer to the number of pixels from sync to the first displayed pixel. These numbers get smaller as the picture moves up and to the left. If you see a black edge on the screen and you can’t move the picture to cover the black, you must adjust the optical engine position. Refer to Aligning the Image on page 33 to do this. PR Note VideoWall™/CineWall™ Installer/Integrator Manual 43 Adjusting Image Position Installation Saving Your Work and ➤ Recalling a Memory Using ISF Memories: Four memory slots are reserved for use by ISF-certified technicians. These are named “Day,” “Night,” “Custom 1” and “Custom 2.” The ISF Memories are functionally similar to the other, numbered memory slots (described below), but provide some additional useful capabilities: • The ISF Memories can be recalled by pressing a single button on the remote control, or via the ISF Memories menu. You do not need to enter a menu passcode or use the Memory menu (although it is possible to recall them this way). • The “Custom 1” and “Custom 2” ISF Memories can be saved to – or their contents deleted – via the ISF Memories menu. You do not need to enter a menu passcode or use the Memory menu (although it is possible to save to or delete them this way). Y • When you select an input, the previously-selected ISF memory slot is automatically recalled. The other, numbered memory slots are recalled only on command. EL IM IN A R If you change sources (switch to another input) and then switch back, everything you did before is “recalled.” Things will look like they did before. Suppose you make adjustments to an SVGA source on the Analog input and save the settings. Then, you feed a UXGA source to the Analog input, make new adjustments and save the settings again. Then you switch to the S-Video input and do some more setup for it. Later you switch to the Analog input again, and this time it has the SVGA source from before. The VideoWall/CineWall will recognize that it has seen this source before, or at least a source with these characteristics, and will recall the ISF memory slot with the SVGA settings you established before. Manually saving to memory slots: Some saving is done automatically, but there are big advantages to saving your work manually. PR The VideoWall/CineWall has 40 numbered memory slots, and this is the best way to save. Recall is fastest from memory slots. 1. First, set up the VideoWall/CineWall the way you want it, including all the adjustments listed in this section. 2. Press MENU. 3. Select Memory from the Main Menu. 4. Select Save from the Memory Menu. This opens the Save grid. Save ; 1 9 17 25 33 ; 2 ; 10 18 26 34 ; 3 11 19 27 35 ; 4 12 20 28 36 5 13 21 29 37 6 14 22 30 38 ; 7 15 23 31 39 8 16 24 32 40 44 VideoWall™/CineWall™ Installer/Integrator Manual Installation 5. Navigate to an unchecked slot number, or to a checked slot if you want to overwrite what’s already saved. Press ENTER. 6. This menu shows all the data that will be saved. You can change the slot name in this menu but you can’t change anything else. Save Save to Slot Save Now 1 (Overwrite) Name RGB 1024x768 Source Analog 1024x768 Scale/Justify 16x9/Center 328,4 Zoom UL/LR Viewport UL/LR Frequency/Phase Sharpness Black Level (Offset) White Level (Gain) EL IM IN A R Position Y Resolution +1, +0 / -1, +2 +0, +0 / +0, +0 1344 / 0° 7 52 50 104 178 131 135 7. To save immediately, press ENTER. The appearance of this menu is somewhat different for digital and video sources, reflecting what is saved for them. To change the name of the memory slot: The default memory slot name is an abbreviated description of its contents. If your customer wants or needs a more descriptive name, select the Name line and press ENTER. PR Use the left-right arrow keys to navigate along the line. Use the up-down keys to change the character at that point. Press PREV when finished. Then select Save Now and press ENTER again. If you have RS232 control, there are commands to send a string name to a memory slot, saving time. VideoWall™/CineWall™ Installer/Integrator Manual 45 Installation To manually recall a memory slot: 1. Press MENU. 2. Select Memory from the Main Menu. 3. Select Recall from the Memory Menu. 4. Navigate to the slot you want to recall. You can only land on slot numbers that are not empty (have checks). 5. Press ENTER to open the Recall detail menu. If this slot number has exactly the same settings are currently being used, a (Current) message appears on the top line. Recall Now Y Recall Name RGB 1024x768 EL IM IN A R Slot to Recall Source Resolution Scale/Justify 1 Analog 1024x768 16x9/Center Position 328,4 Zoom UL/LR +1, +0 / -1, +2 Viewport UL/LR +0, +0 / +0, +0 Frequency/Phase 1344 / 0° Sharpness Black Level (Offset) White Level (Gain) 7 52 50 104 178 131 135 PR 6. The only line you can select is Recall Now. Press ENTER. Note The best practice is to recall settings from memory slots. It is faster. 46 VideoWall™/CineWall™ Installer/Integrator Manual Installation Some parameters (values) are associated with a display “mode” – the horizontal and vertical resolution and the vertical frequency of the incoming source picture. (There are other characteristics that define the display “mode,” but those are the primary ones.) Some parameters are associated with a physical input: Analog, Component, Digital DVI, Digital HDMI, S-Video or Composite Video. Some parameters are global; that is, they are not associated with a specific mode or input. They are universal. Table 3-2 lists all saved parameters and their associations. Saved to ISF Memory Global EL IM IN A R Parameter Y Table 3-2. Saved Parameter Associations Adjust Corners (Image Alignment) x ASCII Response Term. x ASCII Response Type Auto Codes x Auto Lamp On x Baud Rate x Beeper x Black Level: R, G, & B Brightness (video) Do Frequency PR Curtain Pattern x x Color Balance (all values) Contrast (video) x x x x x Do Phase x Do Position x Frequency x Gamma x Group ID x Hue x Justify x Lamp Saver x Menu H Position x Menu Timeout x Menu V Position x Overscan VideoWall™/CineWall™ Installer/Integrator Manual x 47 Memory: What is Saved and Where Installation Table 3-2. Saved Parameter Associations (continued) Saved to ISF Memory Parameter Phase x Plug and Play (EDID) x x Position, Vertical x Resolution, Horizontal x Y Position, Horizontal Resolution, Vertical EL IM IN A R Retry On Lost Signal x x Saturation x Scale Mode x Sharpness x Unit ID x Viewport Window Bottom x Viewport Window Left x Viewport Window Right x Viewport Window Top x White Boost PR Global x White Level: Red / Green / Blue x Zoom Window Bottom x Zoom Window Left x Zoom Window Right x Zoom Window Top x Memory Slots: The VideoWall/CineWall has 40 memory slots. Each slot memorizes all of the mode-specific and input-specific parameters as well as the input connector used. When you recall a memory slot, you recall exactly the way the VideoWall/CineWall was set up when the memory was saved. • The change is immediate. There is no waiting for the VideoWall/CineWall to Do Frequency or Do Phase or anything else. • The switch includes the correct input connector. • You can give the memory slots descriptive names: “COMPUTER XL-61,” “MAIN DVD PROGRAM.” • And there are 40 of them, not just 10. 48 VideoWall™/CineWall™ Installer/Integrator Manual 4. Maintenance and Troubleshooting 4.1 Cleaning Dirt is everywhere, and unless the VideoWall/CineWall is in a super-clean room, from time to time you will need to clean the screens, mirrors and/or lens. EL IM IN A R Y Cleaning products and how to use them: For mirrors and screens, a foam spray cleaner works well. It is sold under different names in different parts of the world. It is available from many janitor supply companies or building maintenance supply companies. Ask for Claire #50 glass cleaner, or Sprayway #50 glass cleaner. It is probably sold under a local name, but it all comes from one company. If you ask for either of the two names above (it is sold under both), you will get this cleaner under the local name. This cleaner contains no ammonia and works well on glass (screens, lenses, mirrors) and acrylic (screens). Spray it on the mirror, but not on the screen. For screens, spray it on the cloth, not the screen. WARNING DO NOT wipe the inside of the screen for any reason. This can cause immediate and permanent damage to the screen. PR WARNING DO NOT spray liquid of any kind on the screen. It can drip down the screen and wick up between the layers. When liquid gets between the screen layers, it is impossible to remove, and the screen is ruined! Wipe the mirror or screen gently with a lint-free cloth or lint-free paper (refer to Cloth to use, below). Turn the cloth over to the dry side and continue wiping to take up the haze. • Glass Wax™ is another good cleaner for mirrors and glass screens, but it does not work well on acrylic screens. It is a liquid in a can. You spread it on, let it dry, then wipe it off. • Windex™ works well, too. Just don’t spray it on the screen. Cloth to use: White cotton cloth is better for cleaning than colored cloth. The dyes in some colored cloth tend to make it less absorbent. Paper towels tend to leave lint and are therefore not recommended for cleaning lenses. A better paper towel for cleaning is Scott® Shop Towels. These blue, lint free, paper towels are widely available at auto parts stores, home improvement stores and hardware stores. Cheesecloth is another good choice. This open-weave cotton material is light and absorbent. VideoWall™/CineWall™ Installer/Integrator Manual 49 Cleaning the Screen, Mirrors and Lens Maintenance and Troubleshooting Removing dry dust: Often the cleaning problem is just dust, not fingerprints or other oily dirt. If it’s just dust, wiping with a dry cheesecloth or a dry Shop Towel will usually do the job. Or use one of the cleaning products designed specifically for picking up dust. • Pledge Grab-It™, from Johnson • Swiffer™, from Proctor and Gamble. These are synthetic wipes that have a static charge that holds onto dust. They do a very good job of picking up dust and leaving no lint behind. However, they will not wipe away grease or oil, such as fingerprints, and they can’t be used with liquid cleaners. EL IM IN A R Y Cleaning lenses: Clean lenses as you would the glass mirrors. Use a soft, absorbent cotton cloth rather than a paper towel. Because the lens is small, it is easier to spray the cleaner (if you use one) on the cloth, not the lens itself. Where is the dirt? ➤ When you see dirt in the picture, you can sometimes tell where it is by its focus. Use a white test pattern to see the dirt most easily. Small specs of dirt or dust that are in very sharp focus are on the screen itself. If the dirt is in soft focus, it is probably a smudge on the large mirror. PR Dirt on the output lens cannot be seen in the picture. However, that does not mean you should not clean this lens. Dirt here will reduce the brightness of the picture, but it won’t show up as specs in the picture. 50 VideoWall™/CineWall™ Installer/Integrator Manual Maintenance and Troubleshooting Change the lamp after 6,000 hours of use, or sooner if you notice a significant decrease in brightness. 1. Open the screen. 4.2 Lamp Replacement Removing the Old Lamp 2. Turn off the AC power switch and remove the power cord. EL IM IN A R Y 3. Loosen the six screws holding the display engine compartment cover in place. Then, remove the cover. PR 4. Loosen the lamp screw to the right rear of the lamp. 5. Disconnect the lamp cable. 6. Pull the lamp away from you, then straight up. VideoWall™/CineWall™ Installer/Integrator Manual 51 Maintenance and Troubleshooting Installing the New Lamp ➤ 1. Re-connect the lamp cable you disconnected in Step 5 above. Make sure it is fully seated. If the lamp cable is not fully seated on the lamp plug, the lamp will WARNING not operate properly. Overheating may occur. 2. Mount the lamp in its place. Note the two pins opposite the lamp screw. These fit into holes in the optical engine. 3. Tighten the screw you loosened in Step 4 above. 4. Replace the display engine compartment cover. Y 5. Re-connect the AC power cord and set the main power switch to the “on” position. EL IM IN A R 6. Close the screen. Resetting Lamp Hours ➤ ALWAYS reset the lamp hours to zero when you install a new lamp. To do this: 1. Turn on the VideoWall/CineWall using the remote control. 2. Press MENU on the remote control and select Diagnostics from the Main Menu. 3. Select Hours from the Diagnostics menu, highlight Reset Lamp Hours and press ENTER. How to Maintain Lamp ➤ Life There are some actions that can shorten lamp life: • Turning off AC power when the lamp is on. (Turn off the lamp with the remote and let it cool until the fans stop; then turn off AC.) PR • Turning a lamp on and off rapidly. (The lamp should be allowed to heat up fully before turning it off, at least three minutes.) 4.3 Filter Replacement Clean, cool air is essential for proper VideoWall/CineWall operation. When the air filter gets dirty, change it. Unfortunately, there is no absolute rule about when to change an air filter. For some installations the environment has clean, dust-free air, in which case the air filter may be good for a year or more. In other environments, the air full of dust and dirt all the time. The air filter might have to be changed every month. Of course, it also depends on how many hours per day or per week the lamp is on. Determining a Changing ➤ Schedule Remove and inspect the air filter after three months of operation. Make a note of the air filter’s condition. Check it again after six months of operation. These two inspections will give you some idea of how often the filter needs changing. If it doesn’t need changing after six months, inspect it again in a year. As long as the environment doesn’t change, you can build an appropriate schedule in this way. If new construction occurs in the vicinity of the VideoWall/CineWall, beware; new construction usually means DUST. Removing the Air Filter ➤ 1. Open the screen. 2. Turn off the AC power switch and remove the power cord. 3. Lift the air filter up and toward you. Then, replace it with a new one (Runco part number 379-0012-00). 52 VideoWall™/CineWall™ Installer/Integrator Manual Maintenance and Troubleshooting The VideoWall/CineWall provides several features for identifying and resolving product performance issues. If the solutions suggested here fail to resolve your issue or if you encounter an issue not described, please contact Runco Technical Support. The On-Screen code is a sequence of red and amber lights that flash on the screen to indicate what is wrong. These flashing lights are particularly helpful when the lamp won’t turn on. Turning on the On-Screen Codes: To view the On-Screen codes, do one of the following: Y • Select Unit Status from the Diagnostics menu. EL IM IN A R • On the remote control, press and hold the ISF NIGHT button while simultaneouly pressing the MENU button. (Use this method if the lamp won’t turn on.) You should see the red or amber lights flashing on the screen. You should also see the Unit Status menu, unless of course the lamp is off. If the picture is bright, it may be difficult to see these lights. They are soft, out of focus lights. Move around to see them. Or, send the RS-232 command CURTAIN to make the screen black so they will be easier to see. (For more information on RS-232 commands, refer to Serial Communications on page 57.) If you see a steady, unblinking, amber light, it means the lamp is on and there are no alarm conditions. If the screen is black at this time, it could be for any of the following reasons: • The curtain is on and black. • The source itself is a black picture. • There is no source, which turns the screen black. PR • There is some foreign object blocking the light path. Automatic On-Screen code display: If Auto Codes is checked in the Miscellaneous Options menu, the code appears whenever there is a fault event that forces the lamp off. VideoWall™/CineWall™ Installer/Integrator Manual 53 4.4 Troubleshooting Tips On-Screen Codes Maintenance and Troubleshooting Table 4-1 lists the On-Screen codes and describes their meaning. Table 4-1. VideoWall/CineWall On-Screen Codes Each block represents 0.2 seconds Door open 1 R Power Supply Fan failed 2 R DLP™ Fan failed 3 R 380V failed 4 R R Optical Engine failed 5 R R Lamp failed Lamp off (wait, auto off) 4 Wait (lamp off, cooling) Fan Failed (non-critical) Lamp off (lamp saver) 5 Lamp off (ready to turn on) R R R Amber Y Amber R R 7 R R 8 R R 9 10 11 Lamp striking (starting) 12 Lamp on, no alarms 13 Amber R Amber Amber R R R R Amber Amber Amber Amber Amber Amber (Note 3) Amber 6 PR Starts with Amber Priority EL IM IN A R Starts with Red Lamp is off Condition Amber R Amber Amber on continuously Notes: 1. R = Red 2. To view on-screen codes, select Unit Status from the Diagnostics menu, or press and hold the ISF NIGHT button while simultaneouly pressing the MENU button on the remote control. 3. With Priority 1 through 6 events, to turn the lamp on, cycle AC power off, then on. If Auto Codes in the Miscellaneous Options menu is checked, events with Priority 1 through 5 start the On-Screen Code automatically. 4. Lamp Saver turned lamp off; lamp is cooling and will turn on at end of cooling period. 5. A Lamp On command from the remote control or via RS232 turns the lamp on. 54 VideoWall™/CineWall™ Installer/Integrator Manual Maintenance and Troubleshooting The LEDs on the electronics module can give you more detailed information about the current operational state of the VideoWall/CineWall. To see them, open the screen. Status LEDs DIGITAL DVI Fan - System Fan - DMD DIGITAL HDMI Fan - Lamp Ballast Status Engine Status Lamp Saver ANALOG Serial Cmd Serial Data Remote IR Lamp Source Ready Table 4-2 describes the VideoWall/CineWall LED status indications. EL IM IN A R Table 4-2. VideoWall/CineWall Status LED Indications Y INPUT When the LED is... LED Name Off Green Ready Lamp is on (or no power) Source Source absent Valid source present Lamp Lamp off Lamp on Remote IR Not receiving IR now Serial Cmd Lamp Saver PR Serial Data No command received Lamp Saver not active or lamp is off Engine Status Ballast Status Amber Red Source absent or not valid Lamp striking Lamp failed Active Lamp is cooling Source present Lamp will come on when cooled Active Source absent Lamp off Receiving IR signal Received any command Received command addressed to “this” unit Lamp Saver active Source present Lamp on Optical engine OK Optical engine fault or communication failure Lamp off Lamp on Ballast fault or communication failure Fan off Fan is running Fan-Lamp Fan-DMD Fan failed recently but is now running Fan-System VideoWall™/CineWall™ Installer/Integrator Manual 55 Fan failed Maintenance and Troubleshooting Isolating Faulty Parts ➤ If you suspect that a part may be faulty, replace it with a known-good one if available. This is a very effective way to find a problem. If the problem goes away, the original part was at fault. If the problem persists, you haven’t found the problem yet, but you have learned something: the original part was not the problem. Re-install it and try something else. If the Lamp Won’t Light: Check to make sure the lamp is actually not lit. If the lamp is lit, you can usually see light come through spaces between parts if you look carefully. Many things can make the screen black, even though the lamp is lit: • The Curtain may be on. If the curtain is black and it is on, the screen will be black. Y • There is no source picture. With no valid picture coming in, the display will be black. • There is something blocking the light to the screen. Is the lens cap on? EL IM IN A R • There are parts missing in the optical path. If someone was working on the display, maybe he or she forgot to put something back in. If the lamp is not lit: • The VideoWall/CineWall may not be receiving AC power. Check the main AC switch on the display. It should be lit. • The lamp ballast may not be receiving power. Some displays have a green LED near the main AC switch that lights when the 380-volt part of the power supply is working. It should be lit. Other displays may have an LED on the electronics module to show when this high voltage power is available. PR WARNING Always turn off the AC power and remove the power cord before working inside the display and before removing a lamp. • If the lamp is OK, try swapping the ballast in the same way. The lamp ballast provides power to the lamp. It is an electronic part, and all electronic parts are eventually subject to failure. • A fan may have failed. Most fans are sensed. That means the electronics module knows whether they are running or not. If they don’t run when they should, the electronics module turns off the lamp and prevents it from striking (turning on) again. Swapping other parts: You can swap electronics modules or fans in the same way to see if one is bad. Note When you swap fans, always exchange fans of the same size. Why not use a new part out of the box? It may seem like a good idea to take a new part out of the box and substitute it for a suspected part in the display. However, there is a very tiny chance that the part in the box doesn’t work. If you test a part by putting in a known good part, you get better information. 56 VideoWall™/CineWall™ Installer/Integrator Manual 5. Serial Communications To interface the VideoWall/CineWall with a home theater automation/control system or a PC running terminal emulation software: 1. Connect it to your control system or PC as shown in Figure 3-6. 5.1 RS-232 Connection and Port Configuration 2. Press MENU on the remote control and enter the Installer Menu passcode. 4. Select Serial Port Settings from the Advanced Options menu. EL IM IN A R 5. Note the Baud Rate setting; change it if desired. Y 3. Select Advanced Options from the Main Menu. 6. Start a terminal session on your PC using a terminal-emulation program, such as HyperTerminal. 7. Configure the RS-232 controller or PC serial port as follows: no parity, 8 data bits, 1 stop bit and no flow control. Set the baud rate to match that of the VideoWall/CineWall RS-232 port (see Step 5). 8. To test your serial connection, type ky 00 menu and press <Enter>. If the Main Menu appears on-screen, the connection is active and working correctly. The VideoWall/CineWall also responds with ACK in the terminal session window. Here are some basic rules for composing serial commands: • RS232 commands consist of a string of ASCII characters. PR • All numeric values are decimal; you do not need to use hex or binary digits in the commands. • Spaces or tabs may be used in the commands to separate the parts and make them easier for humans to read. This “white space” is ignored by the command reader in the VideoWall/CineWall. • You cannot use commas, slashes, or other punctuation as separators. Periods have a special purpose in commands. • Commands are not case sensitive, so you can use upper and lower case letters as you wish, EXCEPT the first two letters of every command must be both upper or both lower case. After that, it doesn’t matter. • When a command requires a response, wait for the response before sending another command to another display. • All commands must end with a carriage return character, shown as <code>[CR] in the rest of this document. Depending on your serial communications program, commands may automatically be ended with a <code>[CR]. If you are uncertain whether your application automatically does this, send a test command such as ky 00 menu without a <code>[CR]. If the menu displays on screen, you will not need to insert a <code>[CR]. If nothing happens, you will need to add a <code>[CR] at the end of each command. VideoWall™/CineWall™ Installer/Integrator Manual 57 5.2 How to Form Commands Serial Communications 5.3 Types of Commands The VideoWall/CineWall supports two types of commands: key commands and operation commands. Key Commands ➤ Operation Commands ➤ Key commands mimic pressing a button on the remote control. This is only useful if you can see the screen, otherwise you won’t know where the selector is in the menu. Operation commands tell the display exactly what to do, allowing more flexible and direct control of the display. For example, with operation commands, you can: • Set green in the white color balance to 27 Y • Turn off the lamp EL IM IN A R • Save the current settings into memory slot 23 • Recall memory slot 7 Operation commands can ask questions and get answers, such as: • What is the state of the lamp? (on, off, failed, etc.) • Is the Auto Lamp feature on or off? • Which connector is used if memory slot 3 is recalled? String Commands ➤ String commands send strings of characters to the display. String commands can also retrieve information from the display. For instance, ST 00 BUILD.DATE? <code>[CR] returns the build date of the firmware: ST 00 BUILD.DATE= "SEP 17 2008 at 17:41:49" PR 5.4 Addresses in Commands All commands must be addressed. Each display has a two-character ID that is unique to it. The two characters can be 0 - 9, A - Z. The first character is the Group ID, and the second one is the Unit ID. The default Group ID and Unit ID are both 0. When communicating with only one display, it is not necessary to change either ID. Note Whenever a command is sent to an individual ID, wait for the response before sending a second command. You can also use the “wild card” character (**) to address a display. Direct Addressing ➤ There is another way to address displays: direct addressing. When the address is two hyphens ( -- ), the first connected display receives and executes the command. Direct addressing is handy when you want to control a display, but you don’t know its ID. Just connect a serial cable straight to the display and use direct addressing. 58 VideoWall™/CineWall™ Installer/Integrator Manual Serial Communications 5.5 Command Structure All commands start with two letters: OP or op for operations commands (but not Op or oP) KY or ky for key commands (but not Ky or kY) ST or st for string commands (but not St or sT) The next two characters are the address. Y The next section of the command is the operation, the remote key, or the string, the main part of the command telling the display what to do. EL IM IN A R A few commands have a ‘target.’ For example, to adjust white balance, you must state which color to change: red, green, blue, or all. Or to determine whether a memory slot is empty, you must target the memory slot number. The target is always in (parentheses). The next character is the command function symbol. There are five function symbols: Operations Control Commands Function Command Action on unit = <value> Makes the unit take that value. Get ? Asks what the current value is. Increment + Decrement - Execute PR Set (none) Adds 1 to the current value. Subtracts 1 from the current value. Performs an action such as a reset. The command type can be one of 5 functions: • Some commands are Execute only, such as resetting the lamp hours. • Others are Set and Get only, such as setting the curtain pattern or asking what the curtain pattern is. • Some are Get only, such as getting the horizontal frequency of the source. • And some are Set, Get, Increment, Decrement, such as color balance. • The last part of the command, for Set commands only, is the value. The value may be a number or one or two words. VideoWall™/CineWall™ Installer/Integrator Manual 59 Serial Communications Sample Operation Commands Command Example (Note) Explanation Disable the auto position feature in display 00 op 00 auto.position.disable ? [CR] Is the auto position feature enabled or disabled in display 00? op 00 brightness + [CR] Increment the brightness in all displays with Group ID 0 Y op 00 auto.position.disable = DISABLED [CR] EL IM IN A R op 00 curtain [CR] op 00 center.point (red) ? [CR] Turn on (or off, if it is already on) the curtain What is the value for the red pixel at the center (sampling) point? Note: The command line must always end with a carriage return character, noted in the examples above as [CR]. The VideoWall/CineWall will not act on the command unless the last character is a carriage return character (ascii hex value: 0D). Sample Key Commands PR Command Example (Note) Explanation (Note) ky 00 menu [CR] Press the MENU button on the remote for display 00 ky 00 down [CR] Press the down arrow on the remote for display 00 ky 00 enter [CR] Press the ENTER button on the remote for display 00 Note: As you can see from Sample Key Commands sequence, if you are not looking at the screen, you won’t know what you just did. You don’t know where the cursor was at the start. Sample String Command Command Example (Note) st 00 revision ?<code>[CR] 60 Explanation What is the revision level of unit 00? VideoWall™/CineWall™ Installer/Integrator Manual Serial Communications 5.6 Using the Operation Commands Table The Operation Commands table starts on page 71. EL IM IN A R op 38 auto.level.status ? [CR] op38auto.level.status? [CR] op 38 1115 ? [CR] op381115? [CR] OP 38 aUto.LEveL.STAtus ? Operations and Operation Numbers Y The commands are listed in alphabetical order by Operation. In a command, you may use either the ascii text of the operation or its Operation Number. For instance, to get the aspect status, all these commands are equivalent: [CR] If the Target column has anything in it, the command must use one (and only one) of the targets, and it must be in parentheses. Use either the ascii text or the Target Number. These are equivalent commands: Target op2a center.point (red) ? [CR] op2A1110(0)? [CR] Table 5-1 describes the allowed command types. Command Types Allowed Table 5-1. Command Types Meaning Example Result = Set PR Symbol tells the display to take the value that follows op 4* white.balance (all) = 100 [CR] All displays with a Group ID of 4 (and Unit ID of anything) will set their white balance levels for red, green and blue to their maximum of 100 ? Get asks for the value op 09 contrast ? [CR] Tells display 09 to send the value of contrast to the host computer. Note that the display will only respond if it is addressed individually. + Increment increments the value op ** gray.balance(red) + [CR] Makes all the displays increase their Gray Balance value by one. Note that any display whose value is already at the top (in this case 15) will not increase it. – Decrement decrements the value op ** white.balance(green) - [CR] Makes all the displays decrease their White Balance value by one. Any display that had a white balance of 1 before the decrement will not change. VideoWall™/CineWall™ Installer/Integrator Manual 61 Serial Communications Table 5-1. Command Types Symbol Execute means the command is executed. No character follows the command (or the Target, if it has one) Example Result op 04 lamp.hours.reset [CR] Resets the lamp hours meter for the Lamp in unit 04. Y [none] Meaning Any word or character or phrase that appears between [square brackets] is for information or clarification only. It is not sent to the display or received from it. EL IM IN A R Note Values ➤ The Value may be sent as text or as a value number. In this column, some values have no text, such as the command auto.level.status. This command takes a value of 0 through 4, not “idle” or “working with black”, etc. It replies with the same numerals, never words. Text values can be sent in upper or lower case or with mixed case. They are listed in UPPER CASE in the table to make it easier to see the difference between the value and any [explanation]. [varies] means the range of acceptable values and replies varies with the type of source. PR Reading the Response ➤ Two commands establish the features of the replies. (Remember the displays only reply when individually addressed.) ascii.eol determines the End Of Line character the display will send at the end of every command. ascii.response determines how you want the replies to look when they come back to you. • Symbolic means the replies will come back as ascii characters, if the value column allows them. • Numeric means that the Value Number will come back • Data means that only the value is returned, not the preceding information The following table shows examples of each setting for ascii.response and three possible responses: 62 VideoWall™/CineWall™ Installer/Integrator Manual Serial Communications Command Sent Response Explanation OP 00 ASCII.RESPONSE=SYMBOLIC The unit received the command and has set the response type to symbolic and replies will be ascii characters op 00 curtain.pattern ? <code>[CR] OP 00 CURTAIN.PATTERN=BLACK The curtain pattern is set to black. op 00 ascii.response = numeric <code>[CR] OP 00 1137=1 The unit received the command and has set the response type to numeric and will reply with the value number EL IM IN A R Y op 00 ascii.response = symbolic <code>[CR] op 00 curtain.pattern ? <code>[CR] OP 00 OP 00 1036=6 The curtain pattern is set to black. op 00 ascii.response = data <code>[CR] ACK The unit received the command and has set the response type to data and will reply with only a number op 00 curtain.pattern ? <code>[CR] 6 The curtain pattern is set to black. Responses are always in ALL CAPS, regardless of how the query was sent. PR Note VideoWall™/CineWall™ Installer/Integrator Manual 63 Serial Communications 5.7 Using Key Commands Command Word Key ➤ Commands Key commands always start with ky or KY. There are two kinds of key commands, command word and numeric equivalent commands. Command word key commands simulate pressing a button on the remote. For example, the command: ky 00 menu [CR] simulates pressing the menu button for display 00. All the other named buttons on the remote control can be “pressed” in this manner by using the name on the remote. EL IM IN A R Y Figure 5-1 shows the command word for each named key. ON HDMI hdmi DVI dvi on ANALOG CPONENT OFF SVIDEO CPOSITE 4:3 16:9 L BOX V WIDE CINEMA V CINE MENU PREV ENTER component analog off PR 4x3 16x9 virtualwide menu prev day composite svideo letterbox cinema virtualcinema enter ISF DAY up right left custom night ISF NIGHT CUST 1-2 down Figure 5-1. Remote Control Button Names Used in Serial Commands 64 VideoWall™/CineWall™ Installer/Integrator Manual Serial Communications Numeric equivalent commands also simulate pressing a remote button. For example, the command: ky 00 r50 [CR] simulates pressing the MENU key on the remote. All the keys have “R” numbers associated with them. HDMI DVI ANALOG CPONENT OFF SVIDEO CPOSITE 4:3 16:9 L-BOX V-WIDE CINEMA V-CINE MENU PREV ENTER ON R00 R01 R02 R11 R12 R20 R21 R22 R30 R31 R32 R40 R41 R42 R50 R51 R52 ISF DAY R60 R61 R72 PR R70 EL IM IN A R Y Figure 5-2 shows the numeric equivalents for the remote control buttons used in serial commands. R80 R81 R82 ISF NIGHT CUST 1-2 Figure 5-2. Remote Control Button Numeric Equivalents VideoWall™/CineWall™ Installer/Integrator Manual 65 Numeric Equivalent Commands Serial Communications 5.8 Examples of Operation Commands Recalling Memories ➤ Remember: The slot target number used in the command is one less than the memory slot number as seen in the menus. For example, to recall memory slot #40, in commands you’d specify slot.target = 39. Likewise, to recall the first slot, you’d specify slot.target = 0. ( ). Put the memory number Y Recalling Memories Directly: Use slot.recall (minus 1) in the parentheses. EL IM IN A R What is the difference between slot.recall.target and slot.target? Assume that memory slots #1, #2, and #6 are used (full). Memory slots #3, #4, and #5 all the others are empty, as shown in the illustration below: 1 2 3 4 5 6 7 8 The following series of example commands show the difference between slot.target and slot.recall.target and which memory slot the command is pointing to. This sets the memory slot to #4 in unit 17. Any further commands that need a memory slot will use this one until it is changed. PR op 17 slot.target = 3 [CR] 1 2 3 4 5 6 7 8 ▲ This saves all the current settings into memory slot #4 with the default memory name. op 17 slot.action (save) [CR] 1 2 3 4 5 6 7 8 ▲ This sets the memory slot to #5, which is empty. op 17 slot.target = 4 [CR] 1 2 3 4 5 6 7 8 ▲ 66 VideoWall™/CineWall™ Installer/Integrator Manual Serial Communications This action fails, because there is nothing in slot #5. Nothing happens to the picture on the screen; it does not change. op 17 slot.action (recall) [CR] 1 2 3 4 5 6 7 8 ▲ Sets the memory slot to #6. 2 3 4 EL IM IN A R 1 Y op 17 slot.recall.target = 5 [CR] 5 6 7 8 ▲ This recalls slot #6 because the target was set to #6 in the previous command. op 17 slot.action (recall) [CR] 1 2 3 4 5 6 7 8 ▲ Recalls settings from memory slot #1. 1 2 PR op 17 slot.action (recall) [CR] 3 4 5 6 7 8 ▲ VideoWall™/CineWall™ Installer/Integrator Manual 67 Serial Communications Asking (Get) and Telling ➤ (Set) To ask about a value or condition, use a question mark [ ? ]. No character should follow the question mark. To set a value or condition, use an equal sign [ = ]. A value must follow the equal sign. Command Example (Note) Explanation asks whether the auto lamp feature is on or off for display 00. op 1* auto.lamp = on [CR] turns on the auto lamp feature for each display that has a Group ID of 1 (and any Unit ID). op 0* auto.lamp ? [CR] won’t work. All queries [ ? ] must be addressed to individual displays only; no asterisks [ * ] in the command line. EL IM IN A R Y op 00 auto.lamp ? [CR] Note: The command line must always end with a carriage return character ([CR]). The VideoWall/CineWall will not act on the command unless the last character is a carriage return character (ascii hex value: 0D). Types of Responses ➤ Responses from the display can be Symbolic (mostly text), Numeric (mostly numbers), or Data Only. Whenever a command is sent to an individual ID, wait for the response before sending a second command. Table 5-2. Symbolic Response Examples PR Command and Response Examples Explanation op 50 auto.lamp ? [CR] would get the Symbolic response OP 50 AUTO.LAMP=DISABLE Text in responses are all caps, regardless of what you sent. Table 5-3. Numeric Response Examples Command and Response Examples Explanation op 50 auto.lamp ? [CR] would get the Numeric response OP 50 1037=0 Notice that you can send commands as text and get the response as numeric. 1037 is the Operation Number for auto.lamp, and 0 means Disabled. It works the other way, too. Ask the question with all numbers and get a text response, if ascii.response is set to Symbolic. 68 VideoWall™/CineWall™ Installer/Integrator Manual Serial Communications Table 5-4. Data-Only Response Examples Command and Respond Examples Explanation would get the Data-Only response 0 You get only the answer and only in numeric form. This is used mainly when a sequence of commands is sent and the data is acted upon by the program. For instance, the program might query each display as to its lamp state, on or off, then send a Lamp On command to just those displays that are off. Keep in mind that displays only respond when they are individually addressed. PR Note EL IM IN A R Y op 00 auto.lamp ? [CR] VideoWall™/CineWall™ Installer/Integrator Manual 69 Serial Communications PR EL IM IN A R Y Notes: 70 VideoWall™/CineWall™ Installer/Integrator Manual 5.9 Operation Commands All commands are Operation commands which should start with “op”, except those marked with [ST] which are String commands. For String commands, use the form ST -- build.date ?, and substitute the unit ID for the --. There is no target for string commands. 2 ascii.response 1137 3 aspect 1054 4 aspect.status 1092 5 auto.codes 1132 ? EL I Value number dec Notes CR CRLF LF LFCR 0 1 2 3 Determines the End Of Line character used in replies. 0 1 2 Determines the style of the reply: SYMBOLIC replies with the Value [except for what is in square brackets]; NUMERIC replies with the Operation number and Value number; DATA replies with the Value number only. = ? SYMBOLIC NUMERIC DATA [only] = ? FILL 16X9 ONE.TO.ONE 4X3 VIRTUAL.WIDE VIRTUAL.CINEMA LETTERBOX CINEMA ? EQUAL TALLER WIDER 0 1 2 ? DISABLE ENABLE 0 1 PR VideoWall™/CineWall™ Installer/Integrator Manual inc get set = Value If numbers listed first, use numbers only. Data in [square brackets] is for information only. A R Y 1138 IN ascii.eol Command types allowed (Use only one symbol) M 1 (Target) Target or Target number must be in parentheses. ( Target number ) Row Operation or String [ ST ] Operation or String number Table 5-5. Operation and String Commands for VideoWall/CineWall = 71 0 3 4 5 7 8 9 10 FILL SCREEN 16x9 ONE TO ONE 4x3 VIRTUALWIDE VIRTUAL CINEMA LETTERBOX CINEMA TALLER and WIDER refer to the source picture being taller than or wider than the aspect ratio of the screen. auto.lamp 1037 = 8 auto.level 1116 = 9 auto.level.disable 17423 = 1115 auto.level.status 11 auto.phase.disable 17420 12 auto.position.disable 17422 13 auto.resync.disable 17438 14 auto.setup 16899 15 ballast.dim.level 1210 16 ballast.ratio 1215 ? EL I PR VideoWall™/CineWall™ Installer/Integrator Manual Notes 0 1 2 DISABLE ENABLE 0 1 BLACK WHITE 1 2 NOT.DISABLED DISABLED TOGGLE 0 1 2 ? 0 [idle] 1 [working on black] 2 [working on white] 3 [error black] 4 [error white] = ? NOT.DISABLED DISABLED TOGGLE 0 1 2 = ? NOT.DISABLED DISABLED TOGGLE 0 1 2 = ? NOT.DISABLED DISABLED TOGGLE 0 1 2 M 10 ? IN 7 NOT.DISABLED DISABLED TOGGLE Value number ? dec = auto.frequency.disable inc 17421 6 Value If numbers listed first, use numbers only. Data in [square brackets] is for information only. A R Y get Command types allowed (Use only one symbol) set (Target) Target or Target number must be in parentheses. ( Target number ) Operation or String [ ST ] Operation or String number Row Table 5-5. Operation and String Commands for VideoWall/CineWall (continued) Initiates the Auto Level process of either Black Level or White Level. “error” means the sample pixel is not black (or white). This has a wide tolerance, but prevents auto black level operating on a white pixel, or auto white operating on a black pixel. [execute] = ? ? 72 + – 0 = minimum wattage 255 = maximum wattage For maximum lamp life, use the minimum wattage. Instead of 0 or 255, the number returned is the wattage of the lamp in your system; for example, 156. 0 – 999 Current x 100 (800 = 8.0 amps) Value If numbers listed first, use numbers only. Data in [square brackets] is for information only. Value number dec inc get Command types allowed (Use only one symbol) set (Target) Target or Target number must be in parentheses. ( Target number ) Row Operation or String [ ST ] Operation or String number Table 5-5. Operation and String Commands for VideoWall/CineWall (continued) Notes ballast.status 1239 ? 0 – 255 Waveform ID 18 ballast.sw.version 1216 ? 0 – 65535 Ballast firmware revision 19 ballast.temp 1214 20 ballast.voltage 1213 21 baud 1143 22 beep 1074 23 beep.enable 1076 24 beep.force 1075 25 blue.only 1057 26 brightness 27 build.date [ST] 1 28 bytes.received 1140 ? 0 – 130 temperature in Celsius ? 0 – 255 voltage at the lamp ? 2400 4800 9600 19200 baud rate CAUTION: The baud rate changes immediately after a set (=) command, so the response will be unreadable. In order to restore RS-232 communication, you must change your terminal program to use the new baud rate after you send a baud rate set command. EL I M IN = A R Y 17 = ? 0 [single beep] 1 [triple beep] 0 1 = ? DISABLE ENABLE 0 1 0 [single beep] 1 [triple beep] 0 1 DISABLE ENABLE 0 1 PR = 16387 = ? = ? + – 0 – 255 ? RS232 AUX232 VideoWall™/CineWall™ Installer/Integrator Manual 0 2 ? 73 Forces a beep whether beep is enabled or not. Applies to composite, component and S-video sources only. This will only go to 223 for composite and S-video. Retrieves text: firmware compilation date and time. 0 – 32767 Used only to indicate that bytes have been received. Resets to zero upon reaching its maximum value. bytes.sent 1141 RS232 AUX232 0 2 30 center.point 1110 RED GREEN BLUE ALL 0 1 2 3 31 clear.input.memory 32 clipboard.gray.balance 1163 33 clipboard.recall 1161 34 clipboard.save 1162 35 clipboard.white.balance 1164 36 color.temp 1268 37 commands.received 1107 38 contrast 16902 Value number dec inc get ? Value If numbers listed first, use numbers only. Data in [square brackets] is for information only. Notes 0 – 32767 Used only to indicate that bytes have been sent. Resets to zero upon reaching its maximum value. A R Y 29 Command types allowed (Use only one symbol) set (Target) Target or Target number must be in parentheses. ( Target number ) Operation or String [ ST ] Operation or String number Row Table 5-5. Operation and String Commands for VideoWall/CineWall (continued) ? 0 – 255 The center point is the one pixel used by auto level. IN [execute] EL I PR RED GREEN BLUE ALL M RED GREEN BLUE ALL RS232 AUX232 16388 VideoWall™/CineWall™ Installer/Integrator Manual 0 1 2 3 ? Makes the display “forget” any sources it has seen before. 0 – 15 [execute] [execute] 0 1 2 3 = 0 2 = 74 ? 0 – 100 ? 3200K 5500K 6500K 8500K NATIVE CUSTOM ? 0 – 32767 Used only to indicate that commands have been received. Resets to zero upon reaching its maximum value. 0 – 255 Applies to composite, S-video and Component video sources only. ? + – 0 1 2 3 4 5 39 curtain 1035 [execute] 40 curtain.pattern 1036 = 41 custom.pattern 1237 42 display.power 1094 43 dynamic.black 1350 44 engine.on 1277 45 fan.state 1096 ? IN M EL I PR POWER.SUPPLY LAMP DMD SYSTEM VideoWall™/CineWall™ Installer/Integrator Manual = ? NONE WHITE RED GREEN BLUE BLACK LOGO + – Value number Value If numbers listed first, use numbers only. Data in [square brackets] is for information only. A R Y 0 1 2 3 RED GREEN BLUE ALL dec inc get Command types allowed (Use only one symbol) set (Target) Target or Target number must be in parentheses. ( Target number ) Row Operation or String [ ST ] Operation or String number Table 5-5. Operation and String Commands for VideoWall/CineWall (continued) Notes 0 1 3 4 5 6 12 0 – 255 = ? OFF ON 0 1 = ? DISABLE ENABLE 0 3 ? OFF ON 0 1 ? ON OFF FAILED WAS.FAILED 0 1 2 3 0 1 4 6 75 0 = no pattern displayed now This turns on/off lamps.For queries, system.state provides more information. WAS.FAILED means the fan failed and was restored to operation, but the AC power was not recycled. fault.state 1175 ? 47 frame.lock.enable 1292 48 frame.locked 1275 49 frequency 50 frequency.horizontal 1070 51 frequency.pixel 1069 52 frequency.vertical 53 frequency.vertical.half 1291 54 gain.all 1033 55 gain.blue 16394 56 gain.green 16392 FAN LAMP WAIT.THEN.ON WAIT LAMP.SAVER READY OK DLP STRIKING ENG.FAN WARMING.UP FAN.NONCRITICAL EL I M = 16403 = PR 16404 VideoWall™/CineWall™ Installer/Integrator Manual Value number dec Value If numbers listed first, use numbers only. Data in [square brackets] is for information only. A R Y 46 inc get set Command types allowed (Use only one symbol) IN (Target) Target or Target number must be in parentheses. ( Target number ) Operation or String [ ST ] Operation or String number Row Table 5-5. Operation and String Commands for VideoWall/CineWall (continued) Notes 1 4 5 6 10 11 12 13 14 15 16 18 ? DISABLE ENABLE 0 1 ? DISABLE ENABLE 0 1 ? + – When disabled, unit will not try to frame lock. [varies] ? [KHz*100] ? [MHz*100] ? [Hz] ? [Hz] ? + – 0 – 255 For ?, returns the average of red, green, and blue. For + and –, adjusts red, green and blue. Applies to analog sources only. = ? + – 0 – 255 Gain.whatever adjusts the White Level; Offset.whatever adjusts the Black Level. Applies to analog sources only. = ? + – 0 – 255 Default value varies and is set at factory. Applies to analog sources only. 76 inc dec 57 gain.red 16390 = ? + – 58 gamma 1232 = ? 59 gray.balance 1031 60 highbright 1071 61 horizontal.period 1264 62 hue 63 image.cal.action 1339 64 image.cal.corner 1338 65 image.cal.target = FILM VIDEO + – ? IN = ? Notes 0 – 255 A R Y 0 1 2 3 RED GREEN BLUE ALL Value If numbers listed first, use numbers only. Data in [square brackets] is for information only. Value number get Command types allowed (Use only one symbol) set (Target) Target or Target number must be in parentheses. ( Target number ) Row Operation or String [ ST ] Operation or String number Table 5-5. Operation and String Commands for VideoWall/CineWall (continued) 0 2 0 – 15 OFF ON 0 1 Turns On-Screen Code LEDs on and off ? = EL I M 16395 PR NOMINAL RESTORE.FACTORY RESTORE.CLIPBOARD COPY.CLIPBOARD APPLY.BRIGHTNESS X1 X2 X3 X4 Y1 Y2 Y3 Y4 CURRENTX CURRENTY 1 3 5 6 9 + – 0 – 180 Used with composite, S-video and component video sources. This controls the color hue. Default value is 90. [execute] 0 1 2 3 4 5 6 7 8 9 Use apply.brightness to restore the brightness uniformity after changing the adjustment in any way (using image.cal.corner, for example). -192 – +192 -192 – +192 -192 – +192 -192 – +192 -108 – +108 -108 – +108 -108 – +108 -108 – +108 [set by image.cal.target] [set by image.cal.target] 1340 VideoWall™/CineWall™ Installer/Integrator Manual ? UL UR LL LR 77 1 = UL 2 = UR 3 = LL 4 = LR If brightness uniformity is enabled, any changes to these values must be followed with image.cal.action(apply.brightness). 0 1 2 3 inc dec = ? + – 66 index.delay 1218 67 interlaced 1065 68 ir.remote 1095 = 69 justify 1053 = 70 lamp 1063 71 lamp.hours.high 1111 72 lamp.hours.low 1102 73 lamp.hours.reset 1104 74 lamp.minutes 1103 75 lamp.on.minutes 1312 76 lamp.saver 1105 0 – 1800 Index delay in degrees x 10 (750 = 75.0°) 0 1 ? DISABLE ENABLE 0 1 ? LEFT [top] CENTER RIGHT [bottom] FILL 0 1 2 3 0 1 A R Y IN M EL I PR Notes OFF ON ? VideoWall™/CineWall™ Installer/Integrator Manual Value If numbers listed first, use numbers only. Data in [square brackets] is for information only. Value number get Command types allowed (Use only one symbol) set (Target) Target or Target number must be in parentheses. ( Target number ) Row Operation or String [ ST ] Operation or String number Table 5-5. Operation and String Commands for VideoWall/CineWall (continued) = ? OFF ON = ? [hours / 10000] = ? [hours mod 10000] The values LEFT and RIGHT are used for top and bottom justification when the source aspect ratio is wider than the screen. Do not set lamp, runtime or system hours/minutes unless actual time was lost, such as when electronics module is replaced. Note: Product warranties are not based on these timers. [execute] = ? 0 – 59 ? = 78 ? Number of minutes lamp has been running since the last time it was off. DISABLE ENABLE 0 1 This enables/disables DPMS delay. 1145 79 lamp.saver.delay.minutes 1144 80 lamp.saver.state 1146 81 native.frequency 1351 82 offset.all 1032 83 offset.blue 0MIN 5MIN 10MIN 15MIN 30MIN 45MIN 1HR 2HR 4HR 6HR 8HR 12HR 24HR IN M VideoWall™/CineWall™ Installer/Integrator Manual Notes 0 1 2 3 4 5 6 7 8 9 10 11 12 Sets Lamp Saver Timeout value. = ? + – 0 – 23 This is DPMS delay = ? + – 0 – 59 This is DPMS delay with fine control. EL I PR 16393 Value number lamp.saver.delay.hours ? dec 78 = inc 1286 Value If numbers listed first, use numbers only. Data in [square brackets] is for information only. A R Y lamp.saver.delay.discrete get 77 (Target) Target or Target number must be in parentheses. Command types allowed (Use only one symbol) set Operation or String [ ST ] ( Target number ) Row Operation or String number Table 5-5. Operation and String Commands for VideoWall/CineWall (continued) = = 79 ? DISABLED USER.OFF AUTO.OFF ON WAIT.ON ? 50HZ 60HZ 0 1 2 3 4 USER.OFF = the lamp is turned off because the user turned it off AUTO.OFF = lamp is off because lamp saver turned it off. ON = the lamp is on and Lamp Saver is on. WAIT.ON = the lamp is off, waiting for the cool-down timeout to end so it can come on. 50 60 ? + – 0 – 127 For ?, returns the average of red, green, and blue. For + and –, adjusts red, green and blue. Applies to analog sources only. ? + – 0 – 127 Offset.whatever adjusts Black Level. Gain.whatever adjusts the White Level. offset.green 16391 = ? + – 0 – 127 85 offset.red 16389 = ? + – 0 – 127 86 offset.reset 1177 87 opt.eng.horizontal.resolution 1125 88 opt.eng.vertical.resolution 1126 89 opt.engine.state 1271 90 osd.enable 1360 91 overscan 1184 92 part [ST] 2 Value number dec 84 Notes Default value varies and is set at factory. Not used with digital sources. A R Y inc Value If numbers listed first, use numbers only. Data in [square brackets] is for information only. get Command types allowed (Use only one symbol) set (Target) Target or Target number must be in parentheses. ( Target number ) Operation or String [ ST ] Operation or String number Row Table 5-5. Operation and String Commands for VideoWall/CineWall (continued) VideoWall™/CineWall™ Installer/Integrator Manual Sets offset.red, offset.green and offset.blue to mid levels. ? OK COMM.FAULT FAULT 0 1 2 = ? DISABLE ENABLE 0 1 = ? ? PR EL I M IN [execute] 80 + – Use if no OSD is desired. OSD will be re-enabled after AC power cycle. 0 – 20 [% of image hidden at edges] Retrieves firmware part number phase 95 plug.and.play 96 97 NONE WHITE GRAY RED GREEN BLUE BLACK RED.SCALE GREEN.SCALE BLUE.SCALE GRAY.SCALE COLOR.BARS LOGO GRID CHECK4X4 COLORSCALE UNIFORMITY ALIGNMENT FOCUS CUSTOM X.ON.WHITE CYAN YELLOW MAGENTA IN M EL I PR 16400 = ? 1152 = ? position.horizontal 16398 = ? + – [varies] position.vertical 16399 = ? + – [varies] VideoWall™/CineWall™ Installer/Integrator Manual 81 + – Value number dec ? inc = Value If numbers listed first, use numbers only. Data in [square brackets] is for information only. A R Y 94 1028 get pattern Command types allowed (Use only one symbol) set 93 (Target) Target or Target number must be in parentheses. ( Target number ) Row Operation or String [ ST ] Operation or String number Table 5-5. Operation and String Commands for VideoWall/CineWall (continued) Notes 0 1 2 3 4 5 6 7 8 9 10 11 12 18 20 21 22 24 25 26 27 28 29 30 [Range 0–31] DISABLE ENABLE Value for = or ? commands is 0 – 31. In the menu, the value is shown in degrees. Each step (0 – 31) is 11.25 degrees. 0 1 Enables/Disables DDC (EDID) response; factory default is enabled. product [ST] 5X4 4X3 15X9 16X9 2.35X1 3 ? 100 replies.sent 1139 0 2 101 reset.balance 1034 102 resolution.horizontal 16401 103 resolution.vertical 16402 104 revision [ST] 105 runtime.hours.high 1113 106 runtime.hours.low 4100 107 runtime.hours.reset 4613 [execute] 108 runtime.minutes 4101 = ? 109 saturation 16396 = ? ? 0 – 32767 IN RS232 AUX232 EL I M [execute] PR 4 VideoWall™/CineWall™ Installer/Integrator Manual Notes 12 13 16 17 23 Retrieves text: display product name. Used only to indicate that replies have been sent. Resets to zero upon reaching its maximum value. Resets color balance values to 100/8 (white 100; gray 8). = ? [varies] = ? [varies] ? Retrieves text: firmware revision number. = ? [hours / 10000] = ? [hours mod 10000] 82 Value number dec ? inc = Value If numbers listed first, use numbers only. Data in [square brackets] is for information only. A R Y 99 1288 get preferred. source.detection Command types allowed (Use only one symbol) set 98 (Target) Target or Target number must be in parentheses. ( Target number ) Operation or String [ ST ] Operation or String number Row Table 5-5. Operation and String Commands for VideoWall/CineWall (continued) Do not set lamp, runtime or system hours/minutes unless actual time was lost, such as when electronics module is replaced. Note: Product warranties are not based on these timers. 0 – 59 + – 0 – 255 This controls color saturation. Default value is 128. Used with composite, S-video and component video sources. 112 serial.port 1305 113 sharpness 16397 114 slot.action 1082 115 slot.current 1150 116 slot.delete 1174 117 slot.full 1114 118 slot.group 1353 0 2 RS232 AUX232 = 0 1 2 3 0 [slot 1] 1 [slot 2] : 39 [slot 40] VideoWall™/CineWall™ Installer/Integrator Manual ? ANALOG DIGITAL [DVI] COMPONENT S.VIDEO COMPOSITE HDMI 0 1 2 3 4 5 RS232 AUX232 0 2 + – 0-15 [execute] ? 0 [slot 1] 1 [slot 2] : 39 [slot 40] 255 [current target] Notes [execute] ? SAVE RECALL DELETE NONE Value number dec inc ? Value If numbers listed first, use numbers only. Data in [square brackets] is for information only. A R Y 1188 = IN serial.diagnostics.clear M 111 EL I select.source get 17409 110 Command types allowed (Use only one symbol) set ( Target number ) (Target) Target or Target number must be in parentheses. PR Row Operation or String [ ST ] Operation or String number Table 5-5. Operation and String Commands for VideoWall/CineWall (continued) Performs the action (save, recall, delete) on the currently targeted slot. 0 – 39 [slot number - 1] 255 [none now used] [execute] 0 1 : 39 = 83 ? 0 [empty] 1 [full] ? DEFAULT NIGHT DAY CUSTOM1 CUSTOM2 TARGET 0 1 2 3 4 255 1357 120 slot.group.delete 1356 DEFAULT NIGHT DAY CUSTOM1 CUSTOM2 TARGET 0 1 2 3 4 255 [execute] 121 slot.group.recall 1355 DEFAULT NIGHT DAY CUSTOM1 CUSTOM2 TARGET 0 1 2 3 4 255 [execute] 122 slot.group.save 1354 DEFAULT NIGHT DAY CUSTOM1 CUSTOM2 TARGET 0 1 2 3 4 255 [execute] 123 slot.group.target 1358 124 slot.name. [ST] 5 125 slot.name.clear 1081 0 1 IN M EL I = ? PR VideoWall™/CineWall™ Installer/Integrator Manual DISABLE ENABLE Notes A R Y slot.group.auto Value If numbers listed first, use numbers only. Data in [square brackets] is for information only. Value number ? 119 dec = inc get Command types allowed (Use only one symbol) set (Target) Target or Target number must be in parentheses. ( Target number ) Operation or String [ ST ] Operation or String number Row Table 5-5. Operation and String Commands for VideoWall/CineWall (continued) DEFAULT NIGHT DAY CUSTOM1 CUSTOM2 TARGET 0 1 2 3 4 255 Returns the name that will be used when saving the target slot. [execute] 84 Operates on the currently selected slot (see slot.target and slot.recall.target) 1079 128 slot.recall 1173 129 slot.recall.target 1077 130 slot.save 1172 0 [slot 1] 1 [slot 2] : 39 [slot 40] 255 [current target] EL I [execute] PR VideoWall™/CineWall™ Installer/Integrator Manual Value number [one ascii character value] Notes The target is the nth letter of the 24-character string: 0 – 23. The value is the ascii character to send: numbers, letters, punctuation. Not all punctuation is available. [execute] = 0 [slot 1] 1 [slot 2] : 39 [slot 40] 255 [current target] dec ? inc = Value If numbers listed first, use numbers only. Data in [square brackets] is for information only. A R Y slot.name.letter.target get 127 0 1 : 23 0 [1st char] 1 [2nd char] : 23 [last char] set 1080 IN slot.name.letter Command types allowed (Use only one symbol) M 126 (Target) Target or Target number must be in parentheses. ( Target number ) Operation or String [ ST ] Operation or String number Row Table 5-5. Operation and String Commands for VideoWall/CineWall (continued) 85 0 [slot 1] 1 [slot 2] : 39 [slot 40] 0 1 : 39 Slot.save, slot.recall and slot.delete are more direct ways of accomplishing what slot.action does. OFFSET.RED GAIN.RED OFFSET.GREEN GAIN.GREEN OFFSET.BLUE GAIN.BLUE BRIGHTNESS CONTRAST SHARPNESS HUE PHASE SATURATION SELECT.SOURCE FREQUENCY VERT.TOTAL POSITION.HORIZONTAL POSITION.VERTICAL RESOLUTION.HORIZONTAL RESOLUTION.VERTICAL ASPECT JUSTIFY OVERSCAN VIEWPORT.WINDOW.BOTTOM 132 slot.setting (continued) 1078 VIEWPORT.WINDOW.LEFT VIEWPORT.WINDOW.RIGHT VIEWPORT.WINDOW.TOP WALL.HEIGHT ZOOM.WINDOW.BOTTOM ZOOM.WINDOW.LEFT ZOOM.WINDOW.RIGHT ZOOM.WINDOW.TOP 133 slot.status 1083 Value number dec inc get Notes ? Returns the value of the setting for the target slot that was set with slot.target. A R Y 1078 Value If numbers listed first, use numbers only. Data in [square brackets] is for information only. PR EL I M slot.setting set 16389 16390 16391 16392 16393 16394 16387 16388 16397 16395 16400 16396 17409 16404 16405 16398 16399 16401 16402 1054 1053 1184 1042 131 Command types allowed (Use only one symbol) IN (Target) Target or Target number must be in parentheses. ( Target number ) Operation or String [ ST ] Operation or String number Row Table 5-5. Operation and String Commands for VideoWall/CineWall (continued) 0 [slot 1] 1 [slot 2] : 39 [slot 40] VideoWall™/CineWall™ Installer/Integrator Manual 1039 1040 1041 1049 1047 1044 1045 1046 0 1 : 39 ? 86 EMPTY FILLED FILLED.AND.CURRENT NAME.EDITED 0 1 2 3 1068 135 source.search.status 1133 136 sync.type 1064 137 system.hours.high 1112 138 system.hours.low 4098 139 system.hours.reset 4612 [execute] 140 system.minutes 4099 = 0 [slot 1] 1 [slot 2] : 39 [slot 40] A R Y slot.target Value If numbers listed first, use numbers only. Data in [square brackets] is for information only. 0 1 : 39 0 1 2 3 4 5 6 7 8 ? UNKNOWN SOG COMPOSITE SEPARATE 0 1 2 3 = ? [hours / 10000] = ? [hours mod 10000] IN M EL I PR Notes VIDEO.DISPLAYED GRAPHICS.DISPLAYED AUTO.RUNNING AUTO.SETUP.COMPLETE OUT.OF.RANGE SEARCHING DETECTED HOLDING IDLE ? VideoWall™/CineWall™ Installer/Integrator Manual Value number ? 134 dec = inc get Command types allowed (Use only one symbol) set (Target) Target or Target number must be in parentheses. ( Target number ) Operation or String [ ST ] Operation or String number Row Table 5-5. Operation and String Commands for VideoWall/CineWall (continued) 87 ? 0 – 59 Sets (or recalls) the target slot number for other actions. The target slot is used by slot.action, slot.name.clear, slot.name.letter, and slot.setting.) SOG = sync on green SEPARATE = separate H and V sync Do not set lamp, runtime or system hours/minutes unless actual time was lost, such as when electronics module is replaced. Note: Product warranties are not based on these timers. 141 system.state 1059 142 temperature.c 1153 BOARD DLP 0 5 143 uart.clear 1187 RS232 AUX232 0 2 [execute] 144 uart.errors 1186 RS232 AUX232 0 2 145 uart.overflows 1185 RS232 AUX232 0 2 146 uniformity.correction 1352 147 vertical.lines 1263 148 video.standard 149 viewport.window.bottom 1042 150 viewport.window.height 1100 WAIT READY ON FATAL.FAULT FAULT UNKNOWN ? = = Value number 0 1 2 3 4 5 WAIT = waiting for lamp to cool READY = ready for ON command ON = at least on lamp is on FAULT = AC power must be cycled at the display to restart lamps Temperature, in Celsius. DLP = engine ? 0 – 32767 Resets to zero upon reaching its maximum value. ? 0 – 32767 Resets to zero upon reaching its maximum value. ? DISABLE ENABLE ? 0 – 65535 ? NTSC NTSC.60.443 PAL.50.358 PAL SECAM N/A ? ? 88 Notes 0 – 125 IN M EL I VideoWall™/CineWall™ Installer/Integrator Manual Value If numbers listed first, use numbers only. Data in [square brackets] is for information only. A R Y ? PR 17426 dec inc get Command types allowed (Use only one symbol) set (Target) Target or Target number must be in parentheses. ( Target number ) Operation or String [ ST ] Operation or String number Row Table 5-5. Operation and String Commands for VideoWall/CineWall (continued) + – 0 [–100] : 100 [0] : 200 [+100] [pixels] 0 1 Raw number of lines detected by display. 1 3 4 6 8 22 0 : 100 : 200 If the format is completely unknown, or it is not a video source, the response in N/A. dec viewport.window.left 1039 = ? + – 152 viewport.window.right 1040 = 153 viewport.window.top 1041 154 viewport.window.width 1099 155 white.balance 1285 156 window.reset.size 1091 157 zoom.window.bottom 1047 158 zoom.window.height 1098 159 zoom.window.left 1044 ? IN PR RED GREEN BLUE ALL EL I M = VideoWall™/CineWall™ Installer/Integrator Manual = 0 [–100] : 100 [0] : 200 [+100] 0 : 100 : 200 ? + – 0 [–100] : 100 [0] : 200 [+100] 0 : 100 : 200 + – 0 [–100] : 100 [0] : 200 [+100] 0 : 100 : 200 ? 0 1 2 3 Value number inc 151 Value If numbers listed first, use numbers only. Data in [square brackets] is for information only. A R Y get Command types allowed (Use only one symbol) set (Target) Target or Target number must be in parentheses. ( Target number ) Operation or String [ ST ] Operation or String number Row Table 5-5. Operation and String Commands for VideoWall/CineWall (continued) ? [pixels] + – 0 – 100 [execute] = ? Sets zoom and viewport window back to default values. + – ? = 89 ? Notes 0 [–100] : 100 [0] : 200 [+100] 0 : 100 : 200 [pixels] + – 0 [–100] : 100 [0] : 200 [+100] 0 : 100 : 200 get inc dec 1045 = ? + – 161 zoom.window.top 1046 = 162 zoom.window.width 1097 IN ? PR EL I M ? VideoWall™/CineWall™ Installer/Integrator Manual 90 Value If numbers listed first, use numbers only. Data in [square brackets] is for information only. 0 [–100] : 100 [0] : 200 [+100] 0 : 100 : 200 0 [–100] : 100 [0] : 200 [+100] 0 : 100 : 200 A R Y set zoom.window.right (Target) Target or Target number must be in parentheses. ( Target number ) 160 Row Operation or String [ ST ] Operation or String number Command types allowed (Use only one symbol) Value number Table 5-5. Operation and String Commands for VideoWall/CineWall (continued) + – [pixels] Notes 6. Reference • Press the MENU button on the remote control to display the Main Menu. To select a menu item, use the and buttons on the remote control to highlight it. Press ENTER or to confirm your selection. Y • Use the arrow buttons to select menu items or change settings. EL IM IN A R • Press PREV to return to the previous menu. If you are in the Main Menu, pressing PREV turns off the OSD menu. • Press MENU to turn off the OSD menu. PR The VideoWall/CineWall OSD menus are arranged hierarchically, as shown in Figure 6-1. Depending on the selected input source and signal characteristics, some menu options may not be available. VideoWall™/CineWall™ Installer/Integrator Manual 91 6.1 On-Screen Display (OSD) Menus Reference Analog, Digital, HDMI, Component, S-Video or Composite Source NTSC or PAL (read-only) Sync Type (VGA sources only) Separate H & V, Composite or Sync-on-Green Vertical Frequency Horizontal Frequency Pixel Frequency Horizontal Resolution Vertical Resolution Frequency Phase Sharpness (read-only) Size & Position (passcode required) Lamp Ballast Hours Color Balance Miscellaneous Options Fill Screen, Letterbox, 16x9, 4x3, VirtualwIde, Cinema, Virtual Cinema or One to One Top/Left, Center or Bottom/Right 0% ... 20% Advanced Options (passcode required) PR Justify ISF Memories Setup Summary 0 ... 15 Auto White Level (Gain) White Level (Gain) (All / Red / Green Blue) Black Level (Offset) (All / Red / Green Blue) Brightness Contrast Saturation Hue Blue Only Horizontal Vertical Zoom Window Top & Left Zoom Window Bottom & Right Viewport Window Top & Left Viewport Window Bottom & Right Reset All Windows to Default Scale Mode Aspect Ratio Diagnostics EL IM IN A R Picture Position Test Patterns (Analog sources only) Input Levels (Analog RGB sources) Input Levels (All other sources) (passcode required) Recall Save Delete Unit Status Serial Port Status Change Name (read-only) White, Black, Gray, Custom Color, Red, Green, Blue, Cyan, Yellow, Magenta, Red Scale, Green Scale, Blue Scale, Gray Scale, Colors, Color Bars, Logo, Grid, 4x4 Contrast, Uniformity, Focus (read-only) Voltage, Temperature, software version etc. (read-only) System Time Running Time (read-only) Lamp Reset Lamp Hours 3200K, 5500K, 6500K, 8500K or Color Temperature Native White Balance (Gain) Red/Green/Blue/All Gray Balance (Offset) Test Pattern (see above) Hide Menu Copy to Clipboard Recall From Clipboard Reset to Defaults Gamma Film or Video White Boost High or Off Beeper Black, Logo, White, Red, Green or Curtain Pattern Blue Auto Codes EDID (Plug and Play) Native Frequency 50 Hz or 60 Hz Preferred Source Detection 16:9, 4:3, 5:4 or 15:9 Allow Frame Lock Auto Lamp On Lamp Saver Lamp Saver Timeout 5 ... 45 min., 1 ... 24 hours Group ID / Unit ID 0 ... 9, A ... Z ASCII Response Type Symbolic, Numeric or Data Only ASCII Response Terminator CR, CR+LF, LF or LF+CR Baud Rate 2400, 4800, 9600 or 19200 Retry on Lost Signal Do Frequency Do Phase Do Position Enable ISF Auto Slot Recall Test Pattern (see above) Hide Menu Adjust Corners Copy to Clipboard Recall From Clipboard Set Corners to Factory Position Set Corners to Nominal Brightness Uniformity Correction H Position V Position 5 secs., 15 secs., 60 secs. or Never Menu Timeout Time Out Y Picture Video Standard (Composite or S-Video sources only) Memory Overscan Night Day Custom 1 Custom 2 Save/Delete Night (must enter Installer menu passcode) Save/Delete Day Save/Delete Custom 1 Save/Delete Custom 2 Lamp Settings Serial Port Settings Auto Setup Options Image Alignment Menu Options Program Information Native Resolution, Firmware version etc. (read-only) Figure 6-1. VideoWall/CineWall OSD Menu Structure 92 VideoWall™/CineWall™ Installer/Integrator Manual Reference The Main Menu is the starting point for accessing all VideoWall/CineWall functions. Main Menu You must enter a passcode to access the Memory, Diagnostics and Advanced Options menus. Otherwise, they are hidden.To obtain this passcode, contact Runco Technical Support. Note Main Menu Picture Size & Position Y Aspect Ratio Memory Diagnostics Advanced Options Program Information EL IM IN A R ISF Memories Use the controls in the Picture menu to calibrate your VideoWall/CineWall for optimum picture quality. To access the Picture menu, press MENU, highlight Picture and press ENTER. To adjust a setting, use the or button to highlight it and press ENTER. Use the or button to change the setting. The Picture menu has different items depending on the current source type. You cannot adjust Frequency in Digital pictures, so that item is not in the Picture menu when the selected source is HDMI or Digital. PR You cannot adjust Horizontal Frequency for VGA or Component sources, because that is determined by the source, so it is grayed out. In the Source line, the left-right keys choose the source. Other items can be adjusted if they are not grayed out. Picture Menu – Analog Sources Picture Source Analog Sync Type Separate H&V Vertical Frequency (frame locked) Horizontal Frequency Pixel Frequency Node iD: 123 60 Hz 43.36 kHz 66.02 MHz HPer: 1563 VLines: Horizontal Resolution Vertical Resolution 1066 1280 768 Frequency 1344 Phase 22.5° Sharpness 7 Input Levels VideoWall™/CineWall™ Installer/Integrator Manual 93 Picture Reference Picture Menu – Digital or HDMI Sources Picture Source Digital Vertical Frequency 60 Hz Horizontal Frequency 43.36 kHz Horizontal Resolution 1280 Vertical Resolution 768 Sharpness 7 EL IM IN A R Y Input Levels Picture Menu – Component Sources Picture Source Component (YPbPr) Vertical Frequency (frame locked) 60 Hz Horizontal Frequency 43.36 kHz Horizontal Resolution 1280 Vertical Resolution 720 Frequency 1344 Phase 22.5° Sharpness 7 PR Input Levels Source: To select a source, highlight Source, press press ENTER. , select the source you want and Sync Type: This line indicates whether the source outputs separate horizontal and vertical sync signals, a single, composite sync signal or a “sync-on-green” signal. In most cases, the Sync Type is Separate H&V. Vertical Frequency/Horizontal Frequency/Pixel Frequency: These lines indicate the Vertical Frequency, Horizontal Frequency and Pixel Frequency of the incoming signal. Horizontal Resolution/Vertical Resolution: These lines indicate the Horizontal Resolution and Vertical Resolution of the incoming signal. Phase: This control adjusts the phase of the pixel sampling clock relative to the incoming signal. Adjust the phase when an RGB or Component image still shows shimmer or “noise.” For best results, use a good test pattern such as a smooth gray consisting of a clear pattern of black and white pixels, or a similar “half on, half off” graphic image. Adjust the slidebar until the image stabilizes and each pixel is clearly defined. You may notice that you can stabilize the image at more than one point. Use either setting in such cases. 94 VideoWall™/CineWall™ Installer/Integrator Manual Reference EL IM IN A R Y Sharpness: “Sharpness” is the amount of high-frequency detail in the image. To adjust sharpness, select Sharpness from the Picture menu and press ENTER. On your external test pattern source, select a pattern like the one shown in Figure 6-2. Adjust as needed, looking for white edges around the transitions from black to gray and differently-sized lines in the “sweep” patterns at the top and bottom. Lower the sharpness setting to eliminate them. PR Figure 6-2. Typical Test Pattern for Adjusting Sharpness Picture Menu – Composite or S-Video Sources Picture Source Video Standard Composite PAL 50Hz/4.43MHz Vertical Frequency Horizontal Frequency Sharpness 60 Hz 43.36 kHz 7 Input Levels Video Standard: For Composite and S-Video sources, this line indicates the video standard of the incoming signal (NTSC or PAL, 50 or 60 Hz). VideoWall™/CineWall™ Installer/Integrator Manual 95 Reference Input Levels (Analog Sources): Refer to Input Levels – Analog RGB Sources on page 37. Input Levels Auto White Level (Gain) Center Point 2 1 4 Black Level (Offset) - All 55 Red 55 Green 55 Blue 55 127 Y White Level (Gain) - All Red 127 127 EL IM IN A R Green Blue 127 Input Levels (HDMI, Digital, Component, Composite or S-Video Sources): Refer to Input Levels – HDMI, Digital, Component, Composite or S-Video Sources on page 40. Input Levels Brightness 55 Contrast 55 Saturation 55 Hue 55 Blue Only PR Size & Position ➤ To fine-tune the displayed image size and position for each input, select Size & Position from the Main Menu. Size & Position Picture Position Zoom Window Top & Left Zoom Window Bottom & Right Viewport Window Top & Left Viewport Window Bottom & Right Reset All Windows to Default Picture Position: Refer to Adjusting Image Position on page 43. Picture Position Use arrow keys to move image Horizontal Position 234 Vertical Position 34 96 VideoWall™/CineWall™ Installer/Integrator Manual Reference Zoom Window Top & Left/Zoom Window Bottom & Right: Zoom enlarges or reduces the picture. It is primarily used to eliminate black edges at the sides of the picture that cannot be removed using the Picture Position controls. To adjust the zoom: 1. Press MENU. 2. Select Size & Position from the Main Menu. 3. Select Zoom Window Top & Left from the Size & Position Menu. or EL IM IN A R Zoom Top & Left Arrows move top and left button Y 4. Use the or button to move the top edge of the picture. Use the to move the left edge of the picture. +0 +0 +0 +0 Image Resolution This Unit 1920x1080 1920x1080 PR 5. Press PREV to return to the Size & Position Menu. 6. Select Zoom Window Bottom & Right from the Size & Position Menu. 7. Use the or button to move the bottom edge of the picture. Use the button to move the right edge of the picture. Zoom Bottom & Right Arrows move bottom and right +0 +0 +0 +0 Image Resolution 1920x1080 This Unit 1920x1080 VideoWall™/CineWall™ Installer/Integrator Manual 97 or Reference Zoom menu entries: • Image Resolution is the resolution of the source picture. • This Unit is the number of pixels this unit is using of all the incoming pixels. Viewport Window Top & Left/Viewport Window Bottom & Right: The controls in the Viewport menus adjust the number of pixels actually used on the DMD™. Use them to mask the edges of the display area (to eliminate “snow” or edge noise, for example). You cannot increase these values beyond 1920 pixels horizontal or 1080 pixels vertical (817 pixels vertical on the CineWall CW-95HD), but you can decrease them. EL IM IN A R Y What is the DMD? DMD stands for Digital Micromirror Device. It is a Texas Instruments trademark for their patented chip that produces the pictures in a Digital Light Processing (DLP™) system. The DMD chip is about the size of a postage stamp and contains, in the case of the VW-100HD, 1920 by 1080 pixels. To adjust the Viewport: 1. Press MENU. 2. Select Size & Position from the Main Menu. 3. Select Viewport Window Top & Left from the Size & Position Menu. 4. Use the or button to change the number of masked (unused) pixels at the top edge of the picture. Use the or button to do the same at the left edge of the picture. Viewport Top & Left Arrows move top and left PR +0 -100 +100 +0 Display Resolution 1920x817 Viewport 1289x817 5. Press PREV to return to the Size & Position Menu. 6. Select Viewport Window Bottom & Right from the Size & Position Menu. 98 VideoWall™/CineWall™ Installer/Integrator Manual Reference 7. Use the or button to change the number of masked (unused) pixels at the bottom edge of the picture. Use the or button to do the same at the right edge of the picture. Viewport Bottom & Right Arrows move bottom and right +0 Y +100 EL IM IN A R -100 +0 Display Resolution Viewport 1920x817 1289x817 Viewport menu entries: • Display Resolution shows the resolution of the DMD chip. This has nothing to do with the resolution of the source picture. • Viewport shows the number of DMD pixels being used. PR Reset All Windows to Default: Select Reset All Windows to Default to set all four Zoom values to zero. VideoWall™/CineWall™ Installer/Integrator Manual 99 Reference Aspect Ratio ➤ Select Aspect Ratio from the Main Menu to adjust the size, position and scaling method, as needed. Aspect Ratio Scale Mode Fill Screen Justify Center Overscan Scale Mode: To change the aspect ratio (size and shape) of the projected image, press or to highlight Scale Mode and press ENTER or . Use the or button to select the appropriate aspect ratio for the selected screen option and type of program material being viewed; refer to Table 6-1. Y Fill Screen Letterbox 16 x 9 EL IM IN A R ; 0% Note that some scale modes are unavailable and/or not useful with certain types of source material. 4x3 Virtual Wide Cinema Virtual Cinema One to One Table 6-1. Scale Mode Settings Description PR Aspect Ratio/ Scale Mode Setting Aspect Ratio of Source Signal Geometry of Projected Image (Note) VW-100HD (16:9 Screen) CW-95HD (2.35:1 Screen) 16:9 Fill Screen Fill Screen stretches the picture as necessary on one axis to fill the screen. All of the picture is shown. 4:3 Note: These illustrations show the image position when Justify is set to Center. 100 VideoWall™/CineWall™ Installer/Integrator Manual Reference Table 6-1. Scale Mode Settings (continued) Aspect Ratio/ Scale Mode Setting Description Letterbox Letterbox mode scales (zooms in on) a 4:3 image linearly (by the same amount on all sides) to fill a 16:9 display, cropping the top and bottom of the image. (This setting has no effect on 16:9 source material.) Aspect Ratio of Source Signal Geometry of Projected Image (Note) VW-100HD (16:9 Screen) EL IM IN A R Y 16:9 4:3 16:9 16:9 linearly scales the source active image horizontally and vertically to fill a 16:9 screen. PR 16:9 CW-95HD (2.35:1 Screen) 4:3 Note: These illustrations show the image position when Justify is set to Center. VideoWall™/CineWall™ Installer/Integrator Manual 101 Reference Table 6-1. Scale Mode Settings (continued) Aspect Ratio/ Scale Mode Setting Aspect Ratio of Source Signal Description Geometry of Projected Image (Note) VW-100HD (16:9 Screen) CW-95HD (2.35:1 Screen) (available with 480i/480p souce material only) 4:3 linearly scales the source active image horizontally and vertically to fill a 4:3 screen. EL IM IN A R 4:3 Y 16:9 4:3 16:9 PR VirtualWide VirtualWide scales a 4:3 image NON-linearly (more on the sides than in the center) to fit a 16:9 screen. (This setting has no effect on 16:9 source material.) 4:3 Note: These illustrations show the image position when Justify is set to Center. 102 VideoWall™/CineWall™ Installer/Integrator Manual Reference Table 6-1. Scale Mode Settings (continued) Aspect Ratio/ Scale Mode Setting Aspect Ratio of Source Signal Description Geometry of Projected Image (Note) VW-100HD (16:9 Screen) CW-95HD (2.35:1 Screen) Y 2.35:1 Cinema EL IM IN A R Select Cinema to view 2.35:1 source material in its native aspect ratio. Cinema masks the upper and lower portions of the screen to create a viewable area with a 2.35:1 aspect ratio. The geometry of the active image area is unchanged. 16:9 PR 4:3 16:9 Virtual Cinema (720p and lower resolutions only) Virtual Cinema scales a 16:9 image NON-linearly (more on the sides than in the center) to fit a 2.35:1 screen. 4:3 Note: These illustrations show the image position when Justify is set to Center. VideoWall™/CineWall™ Installer/Integrator Manual 103 Reference Table 6-1. Scale Mode Settings (continued) Aspect Ratio of Source Signal Description Geometry of Projected Image (Note) VW-100HD (16:9 Screen) CW-95HD (2.35:1 Screen) 1080i HDTV Image 1080i HDTV Image EL IM IN A R Y Aspect Ratio/ Scale Mode Setting 16:9 Select One to One to display the source signal in its native resolution, with no re-sizing or overscan. One To One This means, for example, that 720p HDTV programs will display with unused pixels on all sides: 320 on the left and right sides and either 180 (VW-100HD) or 48 (CW-95HD) above and below. 720p HDTV Image 720p HDTV Image 480i SDTV Image 480i SDTV Image 1024x768 PC Image 1024x768 PC Image PR 4:3 Note: These illustrations show the image position when Justify is set to Center. Justify: Justify moves the picture to the top-left corner, center or bottom-right corner of the screen. Note Certain combinations of resolution and Scale Mode (for example, 1920x1080 and One to One, or any resolution with Fill Screen) do not allow the Justify setting to be changed. Overscan: Some SDTV/EDTV programs are produced based on the assumption that older television sets may not display the outer edges of the broadcast picture area. Overscan effectively hides these inactive, outer edges of the image. Select up to 20% of overscan, as needed. (For HDTV, DVDs and other sources, overscan is generally not necessary or desirable.) 104 VideoWall™/CineWall™ Installer/Integrator Manual Reference Select ISF Memories from the Main Menu to recall, save or delete the contents of the ISF memory slots. For more information about using the ISF memory slots, refer to Using ISF Memories on page 44. ISF Memories Night Day Custom 1 Custom 2 Y ; Save Day Save Custom 1 Save Custom 2 Delete Night Delete Day Delete Custom 1 Delete Custom 2 EL IM IN A R Save Night Night/Day/Custom 1/Custom 2: To manually recall an ISF memory slot, press to highlight Night, Day, Custom 1 or Custom 2. Then, press ENTER. or Note PR Save Night/Day/Custom 1/Custom 2: To save the current settings to an ISF memory slot, press or to highlight Save Night, Save Day, Save Custom 1 or Save Custom 2. Then, press ENTER. You must enter a passcode to access the Save Night or Save Day menu items. Otherwise, they are hidden. Delete Night/Day/Custom 1/Custom 2: To delete the current contents of an ISF memory slot, press or to highlight Delete Night, Delete Day, Delete Custom 1 or Delete Custom 2. Then, press ENTER. Note You must enter a passcode to access the Delete Night or Delete Day menu items. Otherwise, they are hidden. VideoWall™/CineWall™ Installer/Integrator Manual 105 ISF Memories Reference Memory ➤ The VideoWall/CineWall provides 40 memory locations or slots for storing settings. To manage these stored settings, select Memory from the Main Menu. Note You must enter a passcode to access the Memory menu. Otherwise, it is hidden. To obtain this passcode, contact Runco Technical Support. Memory Recall Y Save Recall EL IM IN A R Delete Recall: In the Recall grid menu, use the arrow keys to navigate through the memories that have something stored in them. The empty memory slots are grayed out and you can’t select them. Press ENTER to open the Recall detail menu. ; 1 9 17 25 33 ; 2 ; 10 18 26 34 Recall ; 3 11 19 27 35 Slot to Recall ; 4 12 20 28 36 Recall Now 5 13 21 29 37 Name 6 14 22 30 38 Source ; 7 15 23 31 39 Resolution PR 8 16 24 32 40 1 RGB 1024x768 Analog 1024x768 Scale/Justify 16x9/Center Position 328,4 Zoom UL/LR +1, +0 / -1, +2 Viewport UL/LR +0, +0 / +0, +0 Frequency/Phase 1344 / 0° Sharpness 7 Black Level (Offset) White Level (Gain) 52 50 104 178 131 135 The detail menu shows what is recalled when you press ENTER. When (Current) appears in the Slot to Recall line, it means that the VideoWall/CineWall is already doing exactly what this slot would tell it to do. 106 VideoWall™/CineWall™ Installer/Integrator Manual Reference Save: In the Save grid, use the arrow keys to cycle through the available memories. As you navigate through all 40 memories, Save Now will show (Overwrite), as shown here, if the slot already has something in it. Save ; 1 9 17 25 33 ; 2 ; 10 18 26 34 Save Save to Slot ; 4 12 20 28 36 (Overwrite) Name RGB 1024x768 5 13 21 29 37 Analog 6 14 22 30 38 1024x768 ; 7 15 23 31 39 Source Resolution Scale/Justify Y Save Now ; 3 11 19 27 35 1 16x9/Center 328,4 Zoom UL/LR EL IM IN A R Position +1, +0 / -1, +2 Viewport UL/LR Frequency/Phase Sharpness +0, +0 / +0, +0 1344 / 0° 7 Black Level (Offset) White Level (Gain) 52 50 104 178 131 135 For each empty memory, the Name of the memory is the default name for this slot. You can change this name as described below. Most items are grayed out because you can’t change anything here except the memory slot name. (Overwrite) appears if the Save to Slot number currently has something saved in it. To save, highlight Save Now and press ENTER. PR A (Current) notice will appear in Save to Slot to indicate that the save was successful and that the slot now contains the settings that the VideoWall/CineWall is currently using. To change the Name of a memory slot, highlight Name and press ENTER. A bar appears below the name indicating the character position. Press or to move the yellow highlight in this bar. Press or to change the character at that position. Memory slot names can be up to 24 characters long. The default memory slot name is an abbreviation of the memory contents (input and resolution); for example, HDM 1920x1080. Delete: The Delete menu looks like the Recall menu. You do not need to delete a memory slot before saving something new. VideoWall™/CineWall™ Installer/Integrator Manual 107 8 16 24 32 40 Reference Diagnostics ➤ To see current VideoWall/CineWall status information, select Diagnostics from the Main Menu. Should you ever need to contact Runco Technical Support, this information will help them answer your questions and/or resolve product performance issues. Note You must enter a passcode to access the Diagnostics menu. Otherwise, it is hidden.To obtain this passcode, contact Runco Technical Support. Diagnostics Y Unit Status EL IM IN A R Serial Port Status Test Patterns Setup Summary Lamp Ballast Hours Unit Status: Select Unit Status from the Diagnostics menu to see information about the current operational state of various VideoWall/CineWall components such as the fans, lamp and electronics module. Serial Port Status: Select Serial Port Status from the Diagnostics menu to see statistics relating to recent activity on the VideoWall/CineWall serial port. PR Serial Port Status RS232 <ENTER> to clear; +/- to select different serial port Commands Received 20 Replies Sent 18 Last Packet Type None Last Packet Address 00 Bytes Received 2048 Bytes Sent 2122 UART Framing Errors 0 UART Overflow Errors 0 Group 0 Unit 0 19200 Baud Most Recent ...0, 0, 0, 0, 0, 0, 0, 0, 0, . . . . . . . . . . . . . . . . . . . . . . . . . . . . . . . . . . Press ENTER on the remote control to reset these counters to zero. 108 VideoWall™/CineWall™ Installer/Integrator Manual Reference Test Patterns: The VideoWall/CineWall has numerous internal test patterns that are useful to technicians for advanced calibration, measurement and fault isolation purposes. To access them, select Test Patterns from the Diagnostics menu. Test Patterns <ENTER> to select, None to show picture Red Red Scale Logo White Green Green Scale Grid Black Blue Blue Scale 4x4 Contrast Gray Cyan Gray Scale Uniformity Custom Color Yellow Colors Focus Magenta Color Bars EL IM IN A R Y None To select a test pattern, use the , , highlight its name. Then, press ENTER. or buttons on the remote control unit to To exit test pattern mode, select None and press ENTER. Setup Summary: To see which input is currently active and a summary of settings currently in effect for that input, select Setup Summary from the Diagnostics menu. Setup Summary Current Setup Information Source HDMI Resolution 1920x1080 Scale/Justify 16x9 / Center Zoom UL/LR Viewport UL/LR Sharpness 100,100 PR Position/Overscan Black Level (Offset) White Level (Gain) 0% +1, +0 / -1, +2 +0, +0 / +0, +0 7 52 50 178 131 Group 0 104 135 Unit 0 White Balance (Gain) 100 100 100 Gray Balance (Offset) 7 7 7 VideoWall™/CineWall™ Installer/Integrator Manual 109 Reference Lamp Ballast: To see current lamp ballast status information, select Lamp Ballast from the Diagnostics menu. Ballast Voltage 89 V Current -or- P/P Ratio 1.75 Temperature 59°C Software Version 1109 13 Y Waveform ID -or- Status EL IM IN A R Hours: To see current system and lamp uptime information, or to reset the current lamp hour counter, select Hours from the Diagnostics menu. Hours System Time 00007:30 Running Time 00004:35 Lamp 00004:30 Reset Lamp Hours • System Time is the number of hours the electronics module has received power. • Running Time is the total number of hours any lamp has been on. PR • Lamp is the total number of hours this lamp has been on (that is, if someone reset lamp hours when they changed the lamp). When you replace the projector lamp (refer to Lamp Replacement on page 51), you should also reset the lamp hour counter. To do this, highlight Reset Lamp Hours in the Hours menu and press ENTER. Note 1. Reset Lamp Hours does not affect the System Time or Running Time counters. 2. Reset the Lamp Hours ONLY after you replace the lamp. Otherwise, the reported Lamp usage will be inaccurate. 110 VideoWall™/CineWall™ Installer/Integrator Manual Reference To adjust the lamp, configure the serial communications port and perform numerous other advanced, installation-related tasks, select Advanced Options from the Main Menu. You must enter a passcode to access the Advanced Options menu. Otherwise, it is hidden. To obtain this passcode, contact Runco Technical Support. Note Advanced Options Color Balance Y Miscellaneous Options Serial Port Settings Auto Setup Options Image Alignment Menu Options EL IM IN A R Lamp Settings Color Balance: Refer to Color Balancing the VideoWall/CineWall on page 34. Color Balance Color Temperature White Balance (Gain) - All Red 100 Green 70 Blue 53 Green Blue Test Pattern PR Gray Balance (Offset) - All Red 6500K 15 13 7 Off Hide Menu Copy to Clipboard Recall From Clipboard Reset to Defaults Gamma White Boost Film Off • Color Temperature: To choose a color temperature setting, highlight Color Temperature from the Color Balance menu. (Color temperature defines the “color of gray.”) The choices are 3200K, 5500K, 6500K, 8500K and Native. The fixed temperatures have preset values for all the White and Gray settings. Native is not fixed but equates to a color temperature of approximately 9,000K. The 6500K setting is appropriate for most situations. Higher settings produce a “bluer” picture; lower ones impart a reddish hue to the image. VideoWall™/CineWall™ Installer/Integrator Manual 111 Advanced Options Reference • Test Pattern: Refer to Test Patterns on page 109. • Gamma: Gamma changes the colors slightly for Film or Video display. Use Film for deeper reds. Use Video for optimal brightness. • White Boost: White Boost can increase the brightness of the brightest parts of the picture. Set it to Off or High. Using this control may alter slightly some of the brighter colors. Set White Boost to Off before making White Balance or Gray Balance adjustments. Y Tip EL IM IN A R Miscellaneous Options: Select Miscellaneous Options from the Advanced Options menu to enable or disable the following settings: • Beeper: Beeper makes the VideoWall/CineWall make a chirping sound each time a remote control button is pressed (and received by the VideoWall/CineWall). The display always beeps three times when you press a button that tells the VideoWall/CineWall to do something it can’t do, such as turn on the lamps when they are already on. • Curtain Pattern: Curtain Pattern chooses what appears on the screen when the VideoWall/CineWall receives the serial command op ** curtain (refer to page 75). The choices are Black, Logo, White, Red, Green or Blue. • Auto Codes: Auto Codes causes the VideoWall/CineWall to start flashing the On Screen Codes whenever an event causes the lamps to go out, such as a fan failure. PR • EDID (Plug and Play): Plug and Play enables the Extended Display Identification Data (EDID) that is used by many computers to determine the capabilities of the monitor. This is a complicated standard, and not all video card drivers and operating systems act the same. If you are having trouble getting your video card to output a picture when connected to the VideoWall/CineWall, try disabling Plug and Play and rebooting the computer, to see if it acts any better. Normally, Plug and Play should be enabled. • Preferred Source Detection: Preferred Source Detection tells the VideoWall/CineWall which aspect ratio to use when the incoming signal may have several choices. For instance, 1024x768 and 1366x768 have similar signal timings, and the VideoWall/CineWall might choose the wrong one. If you application sometimes has 1024x768 but never 1366x768, set this control for 4x3. • Native Frequency/Allow Frame Lock: Select Native Frequency from the Miscellaneous Options menu to choose the DLP frame rate when the VideoWall/CineWall is not frame-locked to a source. It takes a few seconds for the VideoWall/CineWall to change between frequencies, so if you are using it with 50-Hz sources primarily or exclusively, set the Native Frequency to 50 Hz. Likewise, set it to 60 Hz if most or all of your sources are 60 Hz. Doing so can reduce the time it takes to switch inputs. When Allow Frame Lock is enabled, the VideoWall/CineWall DLP frame rate is exactly matched to the frame rate of the incoming source. This helps ensure smooth panning of the input signal with no dropped or repeated frames. Only sources between 48 Hz and 60 Hz are frame-locked. If a source is not frame-locked, the DLP frame rate will be the selected “Native Frequency” (50 Hz or 60 Hz). 112 VideoWall™/CineWall™ Installer/Integrator Manual Reference Lamp Settings: Select Lamp Settings from the Advanced Options menu to enable or disable the following settings: • Auto Lamp On: Auto Lamp On makes the lamp turn on soon after AC power is applied. The VideoWall/CineWall must always go through its initialization and sometimes wait for the lamp to cool. • Lamp Saver/Lamp Saver Timeout: Lamp Saver causes the lamp to turn off if there is no source for the specified Lamp Saver Timeout period. When a valid source is re-acquired, the lamp turns on again. When the lamp turns off, it must cool down. If the source is acquired during this cool-down period, the lamp will turn on after the cool-down period. Y The Lamp Saver Timeout value ranges from 5 minutes to 24 hours. EL IM IN A R Serial Port Settings: Select Serial Port Settings from the Advanced Options menu to view or change the following serial communication parameters. For more information on serial communications, refer to Serial Communications on page 57. • Group ID / Unit ID: Group ID and Unit ID combine to make the two-character ID for the display. The range of each is 0-9 and A-Z. ASCII Response Type and ASCII Response Terminator control the format of the responses to RS-232 commands the VideoWall/CineWall receives, as follows: • ASCII Response Type: ASCII Response Type determines how you want the replies to look when they come back to you. Choose one of the following: • Symbolic means the replies will come back as ASCII characters, if the value column allows them. • Numeric means that the Value Number will come back. Both of these will be preceded by the full string you sent. PR • Data Only means that only the value is returned, not the preceding information. For example, if you send op 00 curtain.pattern ? [CR] and the current Curtain Pattern setting is “Green,” the VideoWall/CineWall responds as follows: OP 00 CURTAIN.PATTERN=GREEN (ASCII Response Type = Symbolic) OP 00 1036=4 (ASCII Response Type = Numeric) 4 (ASCII Response Type = Data Only) Note Replies are always in ALL CAPS, regardless of how the query was sent. • ASCII Response Terminator: ASCII Response Terminator determines the End Of Line character the display sends at the end of every command. The correct setting for your installation depends on what program you use to send commands and receive replies. VideoWall™/CineWall™ Installer/Integrator Manual 113 Reference Select Program Information from the Main Menu to see information that uniquely identifies your display: the native resolution, the installed firmware version and the firmware version build date. Should you ever need to contact Runco Technical Support, this information will help them answer your questions or resolve product performance issues. Program Information Runco International 1195 NW Compton Drive Y Beaverton, OR 97006-1992, USA +1.800.237.8626 CineWall 100 EL IM IN A R www.runco.com 1920 x 1080 010-0989 Rev 1.0 Code Generated Date: Aug 10 2008 at 12:18:57 August 10, 2008 at 12:18:27 PR GUI Generated Date: VideoWall™/CineWall™ Installer/Integrator Manual 115 Program Information Reference 6.2 VideoWall/CineWall Specifications Table 6-2 lists the VideoWall/CineWall specifications. Table 6-2. VideoWall/CineWall Specifications Model VW-100HD: 1920 x 1080 (16:9) Model CW-95HD: 1920 x 817 (2.35:1) Aspect Ratios: 4:3, Letterbox, 16:9, Fill Screen, VirtualWide, Cinema, Virtual Cinema, One to One Video Standards: NTSC, PAL, ATSC Video Compatibility: 480i, 480p, 576i, 576p, 720p, 1080i, 1080p Picture Size (16:9 Screen): Model VW-100HD: 100 inches (2540 mm), diagonal Model CW-95HD: 95 inches (2413 mm), diagonal Lamp: 156/180W P-VIP UHP type, with 3AC Lamp Driver Estimated Lamp Life: 6000 hours, median Video Inputs: (1) Composite Video, (1) S-Video, (1) Component Video (3 x RCA), (1) HDMI, (1) DVI with HDCP, (1) VGA (15-pin D-sub) Control Options: - Discrete IR remote - Serial commands via RS-232 RS-232 Communication Parameters: 2400, 4800, 9600 or 19200 bps, no parity, 8 data bits, 1 stop bit, no flow control Power Requirements: 100 to 240 VAC (auto-sensing), 47 to 63 Hz 290 Watts (989.8 BTUs/hour) Operating Environment: 41°F to 95°F (5°C to 35°C), 20% to 80% humidity (non-condensing) Dimensions: Model VW-100HD: See Figure 6-3 Model CW-95HD: See Figure 6-4 Weight (approximate): Chassis and Mounting Hardware: 165 lbs. (74.84 kg) Screen: 95 lbs. (43.09 kg) Shipping Container/Packaging: 255 lbs. (115.67 kg) Regulatory Approvals: Complies with FCC Class B, CE, C-Tick, cTUV-US PR EL IM IN A R Y Native Resolution: Specifications are subject to change without notice. 116 VideoWall™/CineWall™ Installer/Integrator Manual Reference 6.3 Dimensions Figure 6-3 shows the VideoWall VW-100HD dimensions (all dimensions are in inches). Y 82.45 50.45 WALL CUT OUT SECTION A-A WALL .41 EL IM IN A R 104.00 B 8.00 A A 6.00 54.01 PR 30.71 3.36 1.17 30.73 30.00 26.74 117 88.24 B 16:9 DISPLAY 72.00 VideoWall™/CineWall™ Installer/Integrator Manual 75.63 38.04 92.14 144.00 100.00 88.68 WALL CUT OUT SECTION B-B Figure 6-3. VideoWall VW-100HD Dimensions Reference Figure 6-4 shows the CineWall CW-95HD dimensions (all dimensions are in inches). 82.45 38.50 WALL CUT OUT SECTION A-A A A 88.46 75.63 38.04 94.72 92.14 EL IM IN A R .41 B Y WALL 104.00 8.00 144.00 88.68 WALL CUT OUT SECTION B-B 30.71 42.07 B 6.00 PR 2:35 DISPLAY 15.30 1.17 72.00 30.73 30.00 26.74 Figure 6-4. CineWall CW-95HD Dimensions 118 VideoWall™/CineWall™ Installer/Integrator Manual Reference 6.4 Supported Timings Table 6-3 lists the signal types supported by each input on the VideoWall/CineWall. Table 6-3. Supported Signal Timings by Input 800x600 Supported? (√ = Yes, – = No) Refresh Rate (Hz) Horizontal Frequency (kHz) Pixel Frequency (MHz) RGB Component HDMI/ DVI Composite S-Video 60.00 31.469 25.175 √ – √ – 72.00 37.861 31.500 √ – √ – 75.00 37.500 31.500 √ – √ – 85.00 43.269 36.000 √ – √ – 56.00 35.156 36.000 √ – √ – 60.00 37.879 40.000 √ – √ – 72.00 48.077 50.000 √ – √ – 75.00 46.875 49.500 √ – √ – 85.00 53.674 56.250 √ – √ – 640x480 800x600 Y 640x480 Resolution EL IM IN A R Format 848x480 848x480 60.00 31.017 33.684 √ – √ – 852x480 852x480 60.00 31.726 34.010 √ – √ – 60.00 47.816 63.500 √ – √ – 60.00 48.363 65.000 √ – √ – 70.00 56.476 75.000 √ – √ – 75.00 60.023 78.750 √ – √ – 85.00 68.677 94.500 √ – √ – 1024x768 PR 1024x768 1024x1024 1024x1024 60.00 32.331 42.677 √ – √ – 1152x864 1152x864 75.00 67.500 108.000 √ – √ – 50.00 37.490 74.250 √ – √ – 1280x720 1280x720 60.00 44.960 74.250 √ – √ – 60.00 47.776 79.500 √ – √ – 75.00 60.289 102.250 √ – √ – 85.00 68.633 117.500 √ – √ – 60.00 60.000 108.000 √ – √ – 85.00 85.938 148.500 √ – √ – 60.00 63.981 108.000 √ – √ – 75.00 79.976 135.000 √ – √ – 85.00 91.146 157.500 √ – √ – 60.00 47.720 84.750 √ – √ – 1280x768 1280x960 1280x1024 1360x768 1280x768 1280x960 1280x1024 1360x768 VideoWall™/CineWall™ Installer/Integrator Manual 119 Reference Table 6-3. Supported Signal Timings by Input (continued) Format Resolution Supported? (√ = Yes, – = No) Refresh Rate (Hz) Horizontal Frequency (kHz) Pixel Frequency (MHz) RGB Component HDMI/ DVI Composite S-Video 1366x768 60.00 50.000 80.000 √ – √ – 1400x1050 1400x1050 60.00 65.317 121.750 √ – √ – 60.00 74.537 161.200 √ – √ – 1600x1200 1600x1200 60.00 75.000 162.000 √ – √ – 50.00 67.521 148.550 √ – √ – 60.00 66.587 138.500 √ – √ – 60.00 67.158 173.000 √ – √ – 60.00 67.470 148.550 √ – √ – EL IM IN A R 1920x1080 480/60i 720x487 59.94 15.734 13.500 – √ √ √ 480/60p 720x483 59.94 31.469 27.000 √ √ √ – 576/50i 720x576 50.00 15.625 14.750 – √ √ √ 576/50p 720x576 50.00 31.250 27.000 √ √ √ – 720/50p 1280x720 50.00 37.500 75.250 √ √ √ – 720/60p 1280x720 59.94 44.964 74.250 √ √ √ – 1080/24i 1920x1080 24.00 26.997 74.250 √ √ √ – 1080/25i 1920x1080 25.00 28.125 74.250 √ √ √ – 1080/30i 1920x1080 30.00 33.749 74.250 √ √ √ – 1080/24p 1920x1080 24.00 26.990 74.250 √ √ √ – 1080/25p 1920x1080 25.00 28.200 74.250 √ √ √ – 1080/30p PR 1920x1080 Y 1366x768 1920x1080 30.00 33.750 74.250 √ √ √ – NTSC 3.58 – 59.94 15.734 3.580 – – – √ NTSC 4.43 – 59.94 15.734 4.430 – – – √ PAL-B/G – 50.00 15.625 4.430 – – – √ PAL-N – 50.00 15.625 3.580 – – – √ 120 VideoWall™/CineWall™ Installer/Integrator Manual SERIAL NUM BER 020-0963-00 Rev. A October 2008 Runco International • (800) 23RUNCO • Fax (503) 748-8161 • www.runco.com