1
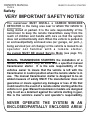
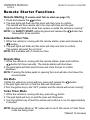
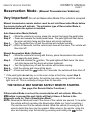
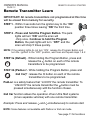
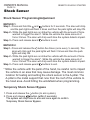
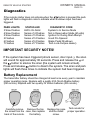
OWNER’S GUIDE
Covers All 22xx and 23xx Series
Advanced Remote Starter/Alarms
www.ultrastarters.com
Warning!!
The system must be placed into Service Mode before any service work is started on the
CARBON
MONOXIDE MAY CAUSE SERIOUS INJURY, EVEN DEATH!
vehicle. It is the sole responsibility of the vehicle owner to ensure that this is done. The
manufacturer accepts no liability or responsibility for accidental starting of the vehicle.
It is the
soleMONOXIDE
responsibility
to place
system
inetc...)
Service Mode
CARBON
- Never of
Startthe
in anuser
Enclosed
Buildingthe
(Garage,
Carport
when- The
parking
inSafety
an enclosed
garage, partially enclosed area
Hood Pin
Switch Must area
Alwaysex:
be Installed!
ex: carport, or when the vehicle is being serviced.
OWNER’S MANUAL
REMOTE VEHICLE STARTER
PAGE 2
Table Of Contents
Table Of Contents
Page 2
Welcome
Page 3
About Ultra Start
Feature List
Safety
Page 4
Remote Transmitters & Antenna
Page 5
Remote Starter Functions
Page 6
Remote Starting
Extended Runtime
Remote Stop
Idle Mode
Turbo Timer Mode
Reservation Mode (Manual Transmissions Vehicles only)
Page 7
Alarm Functions/ Optional Features
Page 8-9
Trunk Release*
Lock Doors
Constant Lock
Car Finder*
Unlock Doors
Garage Door Interface*
Panic
Silent Lock and Unlock
Timer Mode
Page 10
PadLoc/ 2nd Car Functions
Page 11
Examples Of PadLoc/ 2nd Car Operations
Remote Transmitter Learn
Page 12
Page 13
Service Mode
Activating & Deactivating Service Mode
Shock Sensor
Page 14
Shock Sensor Programming
Temporary Shock Sensor Bypass
Diagnostics
Page 15
Important Security Notes
Battery Replacement
Product Warranty
Page 16
FCC Notice
*
Button Programmable
REMOTE VEHICLE STARTER
OWNER’S MANUAL
PAGE 3
Welcome
Congratulations on your purchase of an Ultra Start remote vehicle
starter. Ultra Start remote vehicle starters will provide years of comfort
and convenience. To utilize and understand this system to the fullest,
PLEASE READ THIS MANUAL IN DETAIL.
About Ultra Start
It is our continuing objective to design and manufacture the absolute
best Remote Car Starters, Vehicle Security Systems, Keyless Entry
Systems and Security Bypass units available in today’s competitive
market. This objective is met by utilizing installation professionals with
decades of industry experience to assist in each step of the design
process. This has allowed us to build products that are very installer
and user friendly yet offer advanced and innovative features. Our
systems utilize intelligent programming and auto learning systems
and are designed to work properly in every vehicle. Our systems are
also designed wherever possible to be easily enhanced, allowing the
consumer and the retailer to enjoy easy and cost effective upgrades
and additions to their system down the road. Our limited lifetime
warranty provides one of the best protection plans in the industry,
giving both the consumer and the retailer confidence when they
invest in an Ultra Start product.
Feature List
- Remote Keyless Entry.
- Ignition Auto Locks.
- Engine Idle Mode.
- Turbo Timer Mode.
- Starter Disable.
- Anti-Grind Protection.
- Panic Mode. (Personal Protection)
- Car Finder
- System Override Protection.(Service Mode) - Safety Start Mode.
- Park Light Diagnostics.
- Window Roll-up
- Up to 4 Different Transmitter Codes.
- Dual Car Operation.
- Instant Start*
- PadLoc
- Timer Mode. (3 Different Start Intervals)
- Siren or Horn Output
- Built in Dual Stage Shock Sensor
- Multi Tone Siren
*23xx MODELS ONLY
OWNER’S MANUAL
REMOTE VEHICLE STARTER
PAGE 4
Safety
VERY IMPORTANT SAFETY NOTES!
The owner/user MUST INSTALL a CARBON MONOXIDE
DETECTOR in the living area near to where the vehicle is
being stored or parked. It is the sole responsibility of the
owner/user to keep the remote transmitters away from the
reach of children and handle with care so that the system
does not unintentionally start. When the vehicle is parked in
an enclosed/partially enclosed area (ex: garage, car port...),
being serviced (ex: oil change) or the vehicle is loaned to an
o p e r a t o r n o t f a m i l i a r w i t h a r e m o t e s t a r t e r,
the system MUST BE placed Service Mode (see page 10).
MANUAL TRANSMISSION STARTERS the installation of a
remote starter MUST only be done with a specified manual
transmission starter. It is the sole responsibility of the
vehicles owner to insure that the vehicle is left with the
transmission in neutral position when the remote starter is in
use. The manual transmission starter is designed to be an
added measure of safety ONLY! The manufacturer does not
guarantee or insure against any damages or loss of life that
could result in the event of a remote starter starting while the
vehicle is in gear. Manual transmission models are designed
only to act as a deterrent against the vehicle starting in gear,
this is the vehicle’s owner’s and operator’s responsibility.
NEVER OPERATE THE SYSTEM IN AN
ENCLOSED/PARTIALLY ENCLOSED AREA!
REMOTE VEHICLE STARTER
OWNER’S MANUAL
PAGE 5
Remote Transmitters and Antenna
OE series
XR series
Program Button
LEDs
Active RF antenna with built in LEDs and Program Button.
NOTE: Remote transmitter’s and antenna may not be exactly as shown.
OWNER’S MANUAL
REMOTE VEHICLE STARTER
PAGE 6
Remote Star ter Functions
Remote Starting (if remote start fails to start see page 15)
1. Press and release the
button.
2. The park lights will flash and the siren will chirp once to confirm.
The vehicle will then remote start, the siren will chirp and the park
lights will then flash four times then remain on while the vehicle is running.*
NOTE: For SAFETY START (optional) press and release the
button two
times within three seconds.
Extended Run Time
1. While the vehicle is running with the remote starter, press and release the
button.
2. The park lights will flash and the siren will chirp one time to confirm.
The system will reset the run time.*
NOTE: Not available with 4 minute run time.
Remote Stop
1. While the vehicle is running with the remote starter, press and hold the
button for three seconds. The remote starter will shut down.
2.The park lights will flash and the siren will chirp 2 times to confirm
shutdown.
NOTE: Pressing the brake pedal or opening the hood will also shut down the
remote starter.
Idle Mode
1.While the vehicle is running with key, press and release the
button.
2.The park lights will turn on and the siren will chirp twice.
3.Turn the ignition key to the “OFF” position and the vehicle will remain running*
Turbo Timer Mode
1. While the vehicle is running with key, press the button.
2. The park lights will turn on and the siren will chirp twice.
3. Turn the ignition key off and the vehicle will continue to run for approximately
2 minutes.
NOTE: Reservation Mode on “M” series will not set if Idle mode or Turbo Timer
mode are being used.
*(Default 15 minutes)
REMOTE VEHICLE STARTER
OWNER’S MANUAL
PAGE 7
Reservation Mode - (Manual Transmission Vehicles)
Very Important! Do not set Reservation Mode if the vehicle is occupied.
Manual transmission remote starters must be set into Reservation Mode before
the remote starter will activate. The activation type of Reservation Mode is
determined when the system is installed.
Auto Reservation Mode (Default)
Step 1 - While the vehicle is running, place into neutral and apply the park brake.
Step 2* - Press and release the brake pedal twice. The park lights will flash twice,
the siren will chirp twice and the doors will unlock (optional).
Step 3 - Turn the ignition key off and the vehicle will continue running.
Step 4** - Within 30 seconds, exit the vehicle and close all the doors. The vehicle will
then shut off .
Manual Reservation Mode (Optional)
Step 1 - While the vehicle is running with the key, place transmission into neutral
and apply the park brake.
Step 2 - Press and release the button. The park lights will flash twice, the siren
will chirp twice and the doors will unlock (optional).
Step 3 - Turn the ignition key off and the vehicle will continue running.
Step 4 - Exit the vehicle and close all the doors.
Step 5** - Press and hold the
button for 3 seconds, the vehicle will then shut off.
* If the park lights do not stay on or the siren chirps a third time, repeat Step 2.
** If the vehicle has dome light delay, the vehicle may stay running until the dome
light turns off. This is normally no longer than 30 seconds.
THE VEHICLE MAY NOW BE SAFELY REMOTE STARTED.
(See page 4 for Remote Starter Functions.)
If Reservation Mode is not set, the remote starter will not activate. When the
button is pressed the park lights will flash 4 times. 4 flashes is the
diagnostic code for “Not in Reservation Mode”
NOTE: Reservation Mode will reset if the doors of the vehicle are opened. To re-enter
the vehicle without canceling the Reservation Mode (ex: forgot something..)
The vehicle must first be remote started. While the vehicle is running by the
remote starter the door may be opened. When done in the vehicle, close the
door and remotely stop the vehicle by pressing and holding the
button.
OWNER’S MANUAL
REMOTE VEHICLE STARTER
PAGE 8
Alarm Functions
Arm
1. Press and release the button.
2. The park lights will flash and the siren will chirp one time.
3. The doors will lock (optional).
NOTE: The LEDs on the antenna will start flashing within five seconds.
If installed, the starter disable will activate.
Disarm
1.Press and release the
button on the remote transmitter.
2.The park lights will flash and the siren will chirp two times.
3.The doors will unlock (optional).
NOTE: The LEDs on the antenna will stop flashing. If installed, the starter
disable will deactivate.
Silent Arm/Disarm
1. Press and release the and
buttons simultaneously.
a) If the doors are in the locked position: The park lights will flash two times
to confirm the doors have unlocked, without siren chirps.
b) If the doors are in the unlocked position: The park lights will flash one
time to confirm the doors have locked, without siren chirp.
Panic
1. Press and hold the button on the remote transmitter.
2. The park lights will flash and the siren will sound.
3. Press and release the or the
button to deactivate*.
*Panic will be active for 60 seconds or until disabled by the remote transmitter.
REMOTE VEHICLE STARTER
OWNER’S MANUAL
PAGE 9
Optional Remote Features
Trunk (default
button)
1. Press and hold the
button.
2. The doors will unlock (optional), continue holding
until the Trunk Release
activates.
NOTE: The trunk release output will stay active for 5 seconds as long as the
button is pressed. This feature may be used to roll down power
windows or to open a power sunroof on select vehicles.
Trunk (optional button)
1. Press and hold the button.
2. The doors will unlock (optional), continue holding
until the Trunk Release
activates.*
NOTE: The trunk release output will not activate when the ignition key is in the
“ON” position.
* The trunk release will be confirmed by one park light flash and siren chirp.
or
Car Finder (Default Setting)
1. Press and hold the button for 3 seconds.
2. The park lights will flash and the siren will chirp 5 times.
NOTE: This feature can be used to locate the vehicle in a crowded parking lot.
or
Garage Door Activation (Requires Garage Door Interface)
1. Press and hold the button for 3 seconds. The optional garage Door
Interface will activate. (Dealer programming)
NOTE: The system will have no conformation for Garage Door Activation.
Constant Lock (optional)
1. Press and release, then press and hold the button.
2. The doors will lock. The park lights will flash and the siren will chirp one time.
3. The lock output from the system will stay active until the button is released.
*This feature can be used on select vehicles to roll up the power windows or
to close a power sunroof.
OWNER’S MANUAL
REMOTE VEHICLE STARTER
PAGE 10
Timer Mode
Timer Mode will start the vehicle at a user selectable start interval. The vehicle
can be set to start once every 2, 3 or 4 hours for a maximum of 12 starts.
The vehicle will start at the selected start interval and run for the programmed
runtime**.
EXAMPLE: If the 4 hour start cycle was selected, the vehicle will start once
every 4 hours and run for the programmed runtime**.
To Enter Timer Mode.
Method 1- Press and release the button, then press and hold the
button
for 6 seconds or until park lights turn on.
Method 2 - Press the and
buttons at the same time for 3 seconds or
until the park lights will turn on.
While the park lights are on the start cycle can be selected.
2 hours
3 hours
4 hours
Press
Press
Press
button
button
button
2 Park light flashes
3 Park light flashes
4 Park light flashes
NOTE: Timer Mode must be set each time the user wishes to use this feature.
To Cancel Timer Mode
Method 1- Press and release the button, then press and hold the
button
for 6 seconds.
Method 2- Press the and
buttons at the same time for 3 seconds.
NOTE: Pressing the brake pedal or turning the ignition to the ON position will
cancel Timer Mode. Cancellation will be confirmed with 2 park
light flashes and 2 siren chirps .
Never remote start or set the Timer Start Mode if the vehicle is parked in a
Garage or Attached Carport! (see page 4 SAFETY)
**Default 15 minutes
REMOTE VEHICLE STARTER
OWNER’S MANUAL
PAGE 11
PadLoc/ 2nd Car Remote Functions
NOTE: Some features not available with PadLoc or 2nd car mode.
Remote Starting (if remote start fails to start see page 15)
1. Press and release the and
buttons.
2. The park lights will flash and the siren will chirp once to confirm.
The vehicle will then remote start, the siren will chirp and the park
lights will then flash four times then remain on while the vehicle is running.*
Remote Stop
1. While the vehicles is running with the remote starter, press and hold
the and
button for three seconds.
2.The remote starter will shut down. The park lights will flash and the
siren will chirp 2 times to confirm shutdown.
NOTE: Pressing the brake pedal or opening the hood will also shut down
the remote starter.
Lock (optional)
1. Press and release the and buttons at the same time.
2. The doors will lock.
The park lights will flash and the siren will chirp once to confirm.
3. The LEDs on the antenna will start flashing within five seconds.
NOTE: If installed the starter disable will activate.
Unlock (optional)
1. Press and release the and
buttons at the same time.
2. The doors will unlock (optional).
The park lights will flash and the siren will chirp two times.
3. The LEDs on the antenna will stop flashing
NOTE: If installed the starter disable will deactivate.
*(default 15 minutes)
OWNER’S MANUAL
REMOTE VEHICLE STARTER
PAGE 12
Remote Transmitter Learn
IMPORTANT! All remote transmitters not programmed at this time
will be erased from memory for security.
STEP 1 - Within 3 seconds turn the ignition key to the “ON”
position three times leaving “ON” the third time.
STEP 2 - Press and hold the Program Button. The park
lights will turn “ON” and the siren will
chirp once. Continue to hold the Program
Button, the park lights will turn “OFF” and the
siren will chirp 5 times quickly.
NOTE: If the parking lights do not turn “ON”, release the Program Button and
turn the ignition to the “OFF” position, wait 5sec and repeat steps 1 & 2.
STEP 3a (Default) - While holding the Program Button, press and
release the button on each of the remote
transmitters to be programmed.
STEP 3b (PadLoc/ - While holding the Program Button, press and
2nd Car)* release the button on each of the remote
transmitters to be programmed.
PadLoc is a safety feature that “LOCKS” the remote transmitter. To
“UNLOCK” the remote transmitter the button must be
pressed simultaneously with the function chosen.
or
2nd Car function allows the operation of two Ultra Start systems
(in two separate vehicles) with one remote transmitter.
Example: Press and release
and
simultaneously to remote start.
NOTE: Some features not available with PadLoc or 2nd car mode.
*see page 11 for functions
OWNER’S MANUAL
REMOTE VEHICLE STARTER
PAGE 13
System Service Mode (Valet Mode)
System Service Mode will disable the remote starter. This will only effect the
remote start portion of the system. The optional lock, unlock and trunk release
features will still be operational. When the vehicle is to have any under hood or
service work done, the system must be placed into Service Mode. This feature
may also be used if a transmitter is lost, damaged or if the system malfunctions.
ENTERING SERVICE MODE
1. Turn the ignition key to the On position.
2. Press and hold the Program Button (Located on the antenna) for 5 seconds
or until the siren chirps five times.
NOTE: The LEDs on the antenna will turn on solid to confirm Service Mode.
If the
button is pressed while the system is in Service Mode the
park lights will flash 3 times slowly.
EXITING SERVICE MODE
1.Turn the ignition key to the On position.
2. Press and hold the Program Button (Located on the antenna) for 5 seconds
or until the siren chirps two times.
NOTE: The LEDs on the Antenna will turn off and the remote starter functions
will be re-enabled.
5sec
ATTENTION:
TO AVOID SERIOUS INJURY, this remote start system must be set into
Service Mode before any under hood servicing is started. Service Mode
will prevent the vehicle from starting while the vehicle is being serviced.
It is the sole responsibility of the vehicle’s owner to place the system into
Service Mode. The manufacture accepts no responsibility for accidental
starting of the vehicle while the vehicle is being serviced.
OWNER’S MANUAL
REMOTE VEHICLE STARTER
PAGE 14
Shock Sensor
Shock Sensor Programming/Adjustment
METHOD 1:
Step1 - Press and hold the and
buttons for 3 seconds. The siren will chirp
and the park lights will flash 3 times and then the park lights will stay ON.
Step 2 - While the park lights are on strike the vehicle with the amount of force
wanted to trigger the alarm*. Strike the vehicle the same amount of
force 3 times. The siren will chirp each time the system detects impact.
Step 3 - Press and release and
buttons to exit.
METHOD 2:
Step1 - Press and release the button five times (once every ½ second). The
siren will chirp and the park lights will flash 3 times and then the park
lights will stay ON.
Step 2 - While the park lights are on strike the vehicle with the amount of force
wanted to trigger the alarm*. Strike the vehicle the same amount of
force 3 times. The siren will chirp each time the system detects impact.
Step 3 - Press and release and
buttons to exit.
* Strike the vehicle with the palm of the hand, be careful not to impact
the vehicle in an area that may cause damage. The most common
location for testing and setting the shock sensor is the A-pillar. The
A-pillar is the metal support that runs from the roof of the vehicle to
the hood area. Avoid hitting the windshield when programming.
Temporary Shock Sensor Bypass
1. Press and release the button (to arm system).
button (within 3 seconds).
2. Press and release
The system will chirp once to arm and once again to confirm
Temporary Shock Sensor Bypass.
OWNER’S MANUAL
REMOTE VEHICLE STARTER
PAGE 15
Diagnostics
If the remote starter does not activate when the
button is pressed the park
lights will flash a diagnostic code to indicate what shutdown input has been
triggered.
PARK LIGHTS
3 Slow Flashes
4 Slow Flashes
5 Slow Flashes
5 Flashes
6 Flashes
7 Flashes
STATUS LED
LED’s On Solid
Series of 4 Flashes
Series of 5 Flashes
Series of 5 Flashes
Series of 6 Flashes
Series of 7 Flashes
DIAGNOSTIC CODE
System Is In Service Mode
Not in Reservation Mode (M units)
Ignition On During Start Attempt
Hood Pin Opened
Brake Pedal Shutdown
Tach Lock-Out(see dealer)
IMPORTANT SECURITY NOTES!
If the system has been triggered (shock sensor, door input..), the siren
will sound for approximately 60 seconds. Press and release the or
the
button to silence the siren (the system will remain armed).
Press and release
button to disarm the system. The siren and park
lights will flash three times to indicate the system had been triggered.
Battery Replacement
The transmitter battery should be changed at least once every year to maintain
proper operating range. Replace with a quality 23A 12volt Alkaline battery
(OE remote). Replace with two quality 3V lithium batteries (XR remote).
Remove the top
Replace top case
Carefully remove
and Re-install
the screw from the case, then replace
the battery.
screw.
back of the remote.
Test remote for
proper operation.
OWNER’S MANUAL
REMOTE VEHICLE STARTER
PAGE 16
Limited Lifetime Warranty
The manufacturer warrants to the original purchaser of their remote starters and alarms, that the product shall
be free from defects in material and workmanship. However, should this product be proven to be defective,
within a two year period from the original date of purchase, the manufacturer will, without charge to the
purchaser (excluding any charges incurred to have the product delivered to the manufacturer), repair or replace
any part of the remote starter and/or alarm which the manufacturer agrees to be defective. After the initial 2
year period the manufacture shall repair or replace defective products with a nominal processing fee of $30.00
USD. All warranties apply to the original purchaser and the vehicle in which it was originally installed ONLY.
Repairs or replacement of defective modules shall remain at the discretion of the manufacturer. All other parts,
components, accessories and/or optional equipment pertaining to the remote starter and alarm are not
included in the manufacturer’s warranty. This warranty is non-transferable. Request for warranty service
from any Factory Authorized Dealer must be accompanied with the original purchase receipt or have
product registered by authorized dealer on manufacturer’s website. Failure to comply with any of these
conditions may result in warranty being voided. This warranty does not cover the following: removal and
reinstall labor charges, shipping charges, abuse, misuse, or accidental damages to the remote starter and
alarm, automobile, and/or parts there of. This warranty is void upon modification, repairs, or alterations of any
part of the product. The manufacturer does not guarantee or insure against theft of the vehicle or its contents.
Alarm models are designed only to act as a deterrent against possible theft. This alarm may qualify for auto
insurance discounts, contact your Insurance Agent for further information . The manufacturer shall not be held
liable for any consequential damages due to breach of this or any other warranty, expressed, or implied. This
warranty gives you specific legal rights. Your specific legal rights may vary for each region.
CERTAIN DAMAGES EXCLUDED - The manufacturer expressly disclaims any liability or responsibility for
incidental damages caused by the product, including economic loss, loss of use of the product, car rentals, or
any other costs relating to the care and custody of the product. The manufacturer disclaims liability or
responsibility for any consequential damages caused by the product or resulting from its use, including the cost
of repairing or replacing other property damaged by the product or caused by its use, whether or not the
product is working properly. The product is intended to deter unauthorized use of the vehicles in which it is
installed. The manufacturer does not warrant that the product is fool-safe against theft and/or vandalism and/or
human error or misuse. The manufacturer accepts no liability or responsibility for any damage of any kind
whatsoever caused to any vehicle in which the product is installed or any resulting damage from its use. The
manufacturer accepts no responsibility or liability for any damage resulting to or theft of the vehicle or its
contents, caused or alleged to be caused, directly or indirectly, by failure of the product.
MANUAL TRANSMISSION STARTERS the installation of a remote starter MUST only be done with a
specified manual transmission starter. It is the sole responsibility of the vehicles operator to insure
that the vehicle is left with the transmission in neutral position when the remote starter is in use. The
manual transmission starter is designed to be an added measure of safety ONLY! The manufacturer
does not guarantee or insure against any damages or loss of life that could result in the event of a
remote starter starting while the vehicle is in gear. Manual transmission models are designed only to
act as a deterrent against the vehicle starting in gear, this is the vehicle’s owner’s and operator’s
responsibility.
FCC Notice
This device complies with Part 15 of the FCC rules. Operation of this device is subject to the following
conditions:
(1) This device may not cause harmful interference, and
(2) This device must accept any interference received, including interference that may cause undesired
operation.
CAUTION: Changes or modifications not expressly approved by the part responsible for compliance
voids the users authority to operate this device.