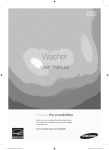
1
the possibilities
Thank you for purcnas_ngth_sSamsung Droab3t,
TO receive more complete service.
please register ;,our product at
www, samsu ng. com/g Iobal/reg ister
WF338AA-02562A-01
EN.indd
1
2008-03-10
;_2_L2_3:35:31
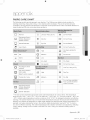
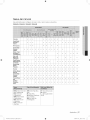
1. SilverCare
TM
Washing in cold water is energy efficient and better for your clothes.
2. Steam Washer
Injects steam directly onto your laundry to increase the water temperature and enhance the
Soak effect, improving the wash performance.
3. Diamond
Drum
With inside holes 36% smaller than those of conventional drums, the diamond drum prevents
fabrics from sticking out and consequently being damaged.
4. Extra Large Capacity
Even bulky garments and blankets get super clean. The large capacity leaves enough room
for a more thorough, cleaner wash.
5. High Efficiency
Energy
& Water Saving
The SilverCare TM system uses 92% less energy than traditional heat sanitization.
6. Direct Drive Inverter
Motor
The power to handle anything! Our direct-drive inverter motor delivers power right to the
washer tub from a variable speed, reversible motor. A beltless direct-drive motor generates
a higher spin speed of 1,300rpms for more effective, quiet operation. The washer also has
fewer moving parts.
7. Woolmark
Certified
The machine wash wool cycle on the Samsung SilverCare TM machines has been tested and
passed the required Woolmark Company specification for machine washable wool products.
Fabrics should be washed according to the instructions on the garment label as specified by
Woolmark and Samsung.
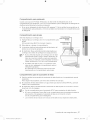
8. Pedestal
with Storage Drawers (Model No : WE357A7W/S/R/L/G/B)
An optional 15" pedestal is available to raise the washer for easier loading and unloading.
It also offers a built-in storage drawer that can hold a 100 oz. bottle of detergent
9. Stacking
(Model
No : SK-3A1/XAA,
SK-4A/XAA,
SK-5A/XAA)
Samsung washers and dryers can be stacked to maximize usable space. An optional
stacking kit is available for purchase from your Samsung retailer.
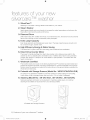
<Pedestal with Storage Drawers>
<Stacking>
2 Features of your new s Ivercare rM washer
WF338AA-02562A-01
EN.indd
2
2008-03-10
;_2_L2_3:35:32
salty
nform
.J
on
Congratulations on your new Samsung SilverCare TMWasher. This manual
contains important information on the installation, use and care of your
appliance. Please take time to read this manual to take full advantage of your
Washer's many benefits and features.
WHAT YOU NEED TO KNOW ABOUT
SAFETY INSTRUCTIONS
Warnings and Important Safety Instructions in this manual do not cover all possible conditions and
situations that may occur. It is your responsibility to use common sense, caution, and care when installing,
maintaining, and operating your Washer.
IMPORTANT
SAFETY SYMBOLS
//_
AND PRECAUTIONS
Hazards or unsafe practices that may result in severe personal
death.
injury or
WARNING
CAUTION
Z_
CAUTION
Hazards or unsafe practices that may result in minor personal injury or
property damage.
To reduce the risk of fire, explosion, electric shock, or personal injury when
using your washer, follow these basic safety precautions:
Do NOT attempt.
Do NOT disassemble.
Do NOT touch.
Follow directions explicity.
Unplug the pwer plug from the wall socket.
Make sure the machine is grounded to prevent electric shock.
Call the service center for help.
®
Read all instructions before using the appliance.
As with any equipment using electricity and moving parts, potential hazards exist.
To safely operate this appliance, become familiar with its operation and exercise care when
using it.
Install and store your washer inside, away from exposure to weather.
Install and level your washer on a floor that can support its weight.
washer must be properly grounded. Never plug it into an ungrounded
@ Your
7 for more information on grounding your washer.
outlet. See page
Safety informaton
WF338AA-02562A-01
EN.indd
3
3
2008-03-10
;_2_L2_3:35:33
Z_
WARNING
To reduce the risk of fire or explosion:
•
Do not wash items that have been washed, soaked, or treated with gasoline, dry
cleaning solvents, or other flammable or explosive substances. They give off vapors that
could ignite or explode. Rinse by hand any material that has been exposed to cleaning
solvent or other flammable liquids or solids before putting in your washer. Be sure that
all traces of such liquids, solids, and fumes have been removed. Dangerous substances
include acetone, denatured alcohol, gasoline, kerosene, certain liquid household
cleaners and spot removers, turpentine, waxes, and wax removers.
Do not put gasoline, dry cleaning solvents, or other flammable or explosive substances
into the washer.
Under certain conditions, hydrogen gas may be produced in a hot water system-such
as your hot water heater-- that has not been used for two weeks or more. HYDROGEN
GAS IS EXPLOSIVE. If your hot water system has not been used for two weeks or
more, turn on all hot water faucets in your home, and let the water flow for several
minutes before using your washer. This will release any hydrogen gas build-up. Since
hydrogen gas is flammable, do not smoke or light an open flame during this time.
@ Unplug the power cord before servicing your washer.
G Do not reach into the appliance when the tumbler is moving.
WARNING
Do not let children play on or in your washer. The washer door isn't easily opened from the
inside, and a child could be seriously injured if trapped inside.
Do not tamper with the controls.
Do not repair, replace, or service any part of your washer yourself unless you fully
understand the recommended user-repair instructions and have the skills to carry them
out. Work done by an unauthorized person may void your warranty.
Store laundry detergents and other laundry supplies in a cool, dry place out of children's
reach.
Do not wash or dry items that are soiled with vegetable or cooking oil. These items may
contain some oil after laundering. Due to the remaining oil, the fabric may smoke or catch
fire by itself.
/_
Do not use chlorine bleach, ammonia, or acids (such as vinegar or rust remover) in the
.......
_
same wash. Hazardous fumes can form.
Do not machine wash fiberglass materials. Small particles can stick to fabrics washed in
subsequent loads and cause skin irritation.
A
WARNING
Before disposing of your washer, remove the door so that children or small animals cannot
get trapped inside.
Do not sit on top of your Washer.
Inlet hoses are subject to damage and deterioration over time. Check the hoses periodically
for bulges, kinks, cuts, wear or leaks, and replace them every five years.
Ensure pockets are free from small irregularly shaped hard objects or foreign materials,
such as coins, knives, pins, etc. These objects could damage your washer.
Do not wash clothing with large buckles, buttons, or other heavy metal.
4 Safety informaton
WF338AA-02562A-01
EN.indd
4
2008-03-10
;_2_L2_3:35:33
ontent
INSTALLING
OPERATING
YOUR WASHER
INSTRUCTIONS
Unpacking your washer
6
7
Overview of your washer
Electrical
7
Grounding
7
Water
8
Drain facility
8
Flooring
8
Location considerations
8
Alcove or closet installation
9
Important note to installer
11
Loading your washer
i
11
Getting started
A LOAD OF LAUNDRY
12
14
Overview of the control panel
Child lock
i
WASHING
6
i
14
MAINTAINING
YOUR WASHER
i
,
TROUBLESHOOTING
APPENDIX
Garment+
15
For SilverCare
15
Using Steam Wash
16
16
Detergent use
Features
18
Cleaning the exterior
18
Cleaning the interior
18
Cleaning the dispensers
19
Cleaning the debris filter
20
Storing your washer
21
Check these points if your washer...
23
Information codes
25
Fabric care chart
26
Helping the environment
26
26
Declaration of conformity
SPECIFICATIONS
27
Cycle chart
TM
washing
Contents 5
WF338AA-02562A-01
EN.indd
5
2008-03-10
;_2_L2_3:35:33
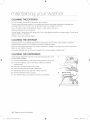
UNPACKING
YOUR WASHER
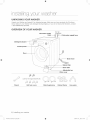
Unpack your Washer and inspect it for shipping damage. Make sure you have received all of the items
shown below. If your Washer was damaged during shipping, or you do not have all of the items, contact
1-800-SAM SU NG(7267864).
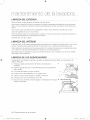
OVERVIEW
OF YOUR WASHER
Hot water supply
hose --
Detergent
--
Cold water supply hose
drawer
Control
panel --
--
Drain hose
Debris filter
Drain tube
Adjustable
Filter cover
leg
( use for the Upper Bolt Hole )
Bolt hole covers
Wrench
6 hstaling
WF338AA-02562A-01
EN.indd
Water Supply
Hose
Rubber Washer
Hose guide
your washer
6
2008-03-10
;_2_L2_3:35:35
BASIC LOCATION
REQUIREMENTS
Electrical
•
120 Volt 60 Hz 15 AMP fuse or circuit breaker
Individual branch circuit serving only your Washer is recommended.
Your Washer is equipped with a power cord.
Z_
NEVER USE AN EXTENSION CORD.
CAUTION
Grounding
ELECTRICAL
GROUNDING
IS REQUIRED
ON THIS APPLIANCE.
This appliance must be grounded. In the event of malfunction or breakdown, grounding will
reduce the risk of electric shock by providing a path of least resistance for electric current.
This appliance is equipped with a power cord having a three-prong grounding plug for use in a
properly installed and grounded outlet.
Z_ Improper connection of the equipment-grounding conductor can result in a risk of electrical
....... shock. Check with a qualified electrician or serviceman if you are in doubt as to whether the
appliance is properly grounded. Do not modify the plug provided with the appliance - if it
does not fit the outlet, have a proper outlet installed by a qualified electrician.
IMPORTANT
SAFETY PRECAUTIONS
To prevent unnecessary risk of fire, electrical shock or personal injury, all wiring and
grounding must be done in accordance with the National Electrical Code ANSI/FNPA, No.
70 Latest Revision and local codes and ordinances. It is the personal responsibility of the
appliance owner to provide adequate electrical service for this appliance.
Z_ NEVER CONNECT GROUND WIRE TO PLASTIC PLUMBING LINES, GAS LINES, OR HOT
....... WATER PIPES.
Water
To correctly fill your Washer in the proper amount of time, water pressure of 20 - 120 psi is
required.
Water pressure less than 20 psi may cause water valve failure, not allowing the water valve
to shut off completely. Or, it may extend the fill time beyond what your Washer controls allow,
resulting in your Washer turning off. A time limit is built into the controls in the event of an internal
hose becoming loose and flooding your home.
The water faucets must be within 4 feet/122cm of the back of your Washer for the inlet hoses
provided with your Washer.
Accessory
inlet hoses
are back
available
in various
lengths up to 10 feet/305cm for faucets that
are further away
from the
of your
Washer.
To avoid the possibility of water damage:
Have water faucets easily accessible
Turn off faucets when the washer is not in use.
Periodically check that there is no leakage from the water inlet hose fittings.
Z_
CHECK ALL CONNECTIONS AT THE WATER VALVE AND FAUCET FOR LEAKS.
WARNING
hstNing
WF338AA-02562A-01
EN.indd
7
your washer 7
2008-03-10
;_2_L2_3:35:36
Drain facility
The recommended height of the standpipe is 18 in/46 cm. The drain hose must be routed
through the drain hose clip to the standpipe. The standpipe must be large enough to accept the
outside diameter of the drain hose. The drain hose is attached at the factory.
Flooring
For best performance, your Washer must be installed on a solidly constructed floor. Wood floors
may need to be reinforced to minimize vibration and/or unbalanced load situations. Carpeting
and soft tile surfaces are contributing factors in vibration and/or tendency for your washer to
move slightly during the spin cycle.
Never install your washer on a platform or weakly supported structure.
Location
considerations
Do not install your washer in areas where water may freeze, since your washer will always
maintain some water in its water valve, pump, and hose areas. This can cause damage to the
belts, pump, hoses and other components. Operating temperature should be above 60°F/16°C.
Alcove or closet installation
MINIMUM
CLEARANCES
Sides - 1 in / 25 mm
Rear - 4 in / 102 mm
FOR CLOSET AND ALCOVE
INSTALLATIONS:
Top - 17 in / 432 mm
Closet Front - 2 in / 51 mm
If the washer and dryer are installed together, the closet front must have at least 72 in2or 465
cm 2 of an unobstructed air opening. Your washer alone does not require a specific air opening.
8 hstaling
WF338AA-02562A-01
EN.indd
your washer'
8
2008-03-10
;_2_L2_3:35:36
IMPORTANT
NOTE TO INSTALLER
Please read the following instructions carefully before installing your Washer.
These instructions should be retained for future reference.
We recommend you hire a professional for installation of this washer.
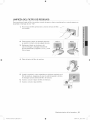
STEP 1
Removing
the Shipping
Bolts
Before using your Washer, you must remove the four
shipping bolts from the back of the unit.
1.
Loosen all four bolts with the supplied wrench.
2. Slide the bolt and spacer up and remove the bolt with
the spacer through the hole in the rear wall of your
washer. Repeat for each bolt.
3.
Fillthe holes with the supplied plastic covers.
4.
Keep the shipping bolts and spacers for future use.
STEP 2
Selecting
a Location
Before you install your washer, make sure the location:
•
Has a hard, level surface
Is away from direct sunlight
Has adequate ventilation
Will not be freezing (below 32°F or O°C)
,,
Is away from heat sources such as oil or gas
Has enough space so that your Washer need not stand on its power cord
Doesn't have any carpeting that will obstruct ventilation openings.
STEP 3
Installing
1.
your Washer
Place the drain hose in the drain facility. Be
sure an airtight connection is NOT made
between the drain hose and the standpipe.
The standpipe must be at least 18 in or 46
cm high.
must always be exercised to
% Caution
avoid collapsing or damaging the drain
hose. For best results, the drain hose
should not be restricted in any way - by
elbows, couplings, or excessive lengths.
For situations where the drain hose
cannot be conveniently elevated to at
least 18 in or 46 cm, the drain hose must
be supported.
Laundry tub
Stand pipe
0_..Mo,
hstNing
WF338AA-02562A-01
EN.indd
9
your washer 9
2008-03-10
;_2_L2_3:35:38
2,
Insert new rubber washer (supplied) into each end of the
inlet hoses. Firmly seat the washers in the couplings.
3,
Check the inlet hose to ensure a washer is inside each fill
hose.
Thread the inlet hoses to the HOT and COLD faucet
connections.
On the other end of the hose, check for one rubber washer
per hose and install each fill hose to the water valve. Make
sure the hose with the Hot printed line is attached to the
HOT faucet. Tighten by hand until snug, then two-thirds of a
turn with pliers.
Cold
For correct water use, connect both HOT and COLD water
valves. If one is not connected, an "nF" (no fill) error can
occur.
Cold printed
Hot
_Rubberwasher
Hot printed
4, Turn on the "HOT" and "COLD "water supply and check all
connections at the water valve and the faucet for leaks.
5.
Plug the power cord into a 3-Prong, well grounded 120 volt
60 Hz approved electrical outlet protected by a 15-amp fuse
or comparable circuit breaker.
Your washer is grounded through the third prong of the
power cord when plugged into a three-prong grounded
receptacle.
6.
Slide your washer into position.
7.
Level your washer by turning the leveling legs in or out as
necessary by hand or wrench included with your washer.
When your washer is level, tighten the nuts using the wrench
or (-) driver.
®
Your Washer must be leveled on all four sides. A carpenter's
level should be used on all four corners of your Washer. It's
a good idea after the first dozen washes to recheck your
washer's levelness.
Avoid the damage of legs, Do not
move the Washer unless the Lockingnuts are fastened to the bottom of the
Washer.
10 hstaling
WF338AA-02562A-01
EN.indd
your washer
10
2008-03-10
;_2_L2_3:35:41
£7 >ora1
nq nstr(]ot©ns
I
LOADING
YOUR WASHER
•
You can fill the tub with dry, unfolded clothes; but DO NOT OVERLOAD the tub.
,,
Overloading may reduce washing efficiency, cause excess wear, and possibly cause creasing or
wrinkling of the load.
Wash delicate items such as bras, hosiery, and other lingerie in the Delicates cycle with similar
lightweight items.
When washing big bulky items or a few smaller items that don't fill the tub completely - a rug, a pillow,
stuffed toys, or one or two sweaters, for example - add a few towels to improve tumbling and spin
performance.
During
the drum.
spin cycle, the washer may add additional water to redistribute the excessive unbalance
inside the
,,
When washing heavily soiled loads, not overloading your Washer is very important to assure good
cleaning results.
To add a forgotten item:
1, Press the Start/Pause Button.
2, Wait for the Door Lock light to go out (5 seconds)
3, Add the item, close the door, and press the Start/Pause Button.
After a pause of 10 seconds, the cycle will resume.
To ensure thorough cleaning, add items within five minutes of starting the wash cycle.
Try washing bedding, towels, undergarments, and other articles that usually have close body
contact using the SilverCare TM Option, which sanitizes using cold water,
G ETTi NG STARTE D
1. Load your Washer.
2, Close the door.
3, Add detergent and additives to the dispenser (see pages 16-17).
4,
5,
Select the appropriate cycle and options for the load (see pages 12-15).
Press the Start/Pause Button.
6, The Wash Indicator light will illuminate.
7, The estimated cycle time will appear in the display.
The time may fluctuate to better indicate the time remaining in the cycle.
8,
Before your washer starts to fill, it will make a series of clicking noises to check the door lock and do a
quick drain.
o
hen the cycle is complete, the Door Lock light will go out and "End" will appear in the display.
DO NOT attempt to open the door until the Door Lock light is off. To add a forgotten item, see
"Loading your Washer" section. (page 11)
When your Washer is restarted after a pause, expect a delay of up to 15 seconds before the cycle
continues.
Pressing Power cancels the cycle and stops your washer.
The Pre Wash, Wash, Rinse and Spin indicator lights will illuminate during those portions of the
cycle.
Operatng
WF338AA-02562A-01
EN.indd
11
instructions 11
2008-03-10
;_2_L2_3:35:42
\
OVERVIEW
OF THE CONTROL
PANEL
P//weF
DEEP STEAM'_
Start / Pause
Temp,
@ ©@
Spin
'_Steam
®
®
Soil Level
Signal
@ ® @
®
®
@
Displays the remaining cycle time, all cycle information, and error messages.
Pressthe button repeatedlyto cycle through the different water temperature options.
Extra Hot/Cold - Heavilysoiled, colorfast items. Only availablewith the Sanitizecycle.
Hot/Cold - Whites and heavily soiled, colorfast items.
Warm/Warm - Colorfast items. When warm rinse is selected, only the final rinse will
be warm.
The other rinses will be cold to conserve energy.
Warm/Cold - Moderately soiled, colorfast items; most wrinkle-free items.
Cold/Cold - Brightly colored, very lightly soiled items.
Press the button repeatedly to cycle through the different spin speed options.
Extra High - Removes more water from loads during spin.
To minimize wrinkling of wrinkle-free and no-iron fabrics, DO NOT use
the Extra High spin option for these loads, nor overload your Washer.
High - Use for underwear, t-shirts, jeans and sturdy cottons.
Medium - Use for jeans, wrinkle-free or wash-and-wear items and synthetics.
Low - Use for delicate items needing a slow spin speed.
No Spin - Drains your Washer without spinning. Use for extremely delicate
items that cannot tolerate any spin.
Press the button to add steam to your laundry.
When steam is added, steam fills the inside of the washer, the door glass
mists up and the sound of steam is heard.
The door does not open during or after the steam operation if the internal
temperature is too high.
Steam is only available when a Steam cycle is selected.
Press the button to select the Soil Level/washing time.
Heavy - For heavily soiled loads.
Normal - For moderately soiled loads. This setting is best for most loads.
Light - For lightly soiled loads.
Press the button to increase or decrease the end of cycle signal volume or
turn off the signal.
JJJJ_
12 Washng a cad of aundry
WF338AA-02562A-01
EN.indd
12
2008-03-10
L_2_L2_3:35:43
Press these buttons to select different cycle options.
Delay Start - Any cycle can be delayed for up to 24 hours in one-hour
increments. Displayed hour indicates the time at which the wash will be started.
Extra Wash - Add additional time to the wash cycle for better stain removal.
Extra Rinse - Add an additional rinse at the end of the cycle to more
thoroughly remove laundry additives and perfumes.
Extra Spin - Add additional time to remove more water from loads.
Silver Care - The SilverCare TM system uses 92% less energy than traditional
heat sanitization.
Pre Wash - To use this feature add detergent to the Pre Wash section of the
detergent compartment. When turned on, the washer fills with cold water and
detergent, tumbles, then drains and advances to the selected wash cycle.
Some cycles cannot be selected with this option.*
*
You cannot select the PreWash option in the Delicate, Wool and Quick
Wash cycles.
iiiiiiiiiiiiiiiiiiiiiiiiiiiiiiiiiiiiiiiiiiiiiiiiiiiiiiiiiiiiiiiiiiiiiiiiiiiiiiiiiiiiiiiiiiiiiiiiiiiiiiiiiiiiiiiiiiiiiiiiiiiiiiiiiiiiiiiiiiiiiiii
iiiiiiiiiiiiiiiiiiiiiiiiiiiiiiiiiiiiiiiiiiiiiiiiiiiiiiiiiiiiiiiiiiiiiiiiiiiiiiiiiiiiiiiiiiiiiiiiiiiiiiiiiiiiiiiiiiiiiiiiiiiiiiiiiiiiiiiiiiiiiiii
iiiiiiiiiiiiiiiiiiiiiiiiiiiiiiiiiiiiiiiiiiiiiiiiiiiiiiiiiiiiiiiiiiiiiiiiiiiiiiiiiiiiiiiiiiiiiiiiiiiiiiiiiiiiiiiiiiiiiiiiiiiiiiiiiiiiiiiiiiiiiiii
iiiiiiiiiiiiiiiiiiiiiiiiiiiiiiiiiiiiiiiiiiiiiiiiiiiiiiiiiiiiiiiiiiiiiiiiiiiiiiiiiiiiiiiiiiiiiiiiiiiiiiiiiiiiiiiiiiiiiiiiiiiiiiiiiiiiiiiiiiiiiiii
iiiiiiiiiiiiiiiiiiiiiiiiiiiiiiiiiiiiiiiiiiiiiiiiiiiiiiiiiiiiiiiiiiiiiiiiiiiiiiiiiiiiiiiiiiiiiiiiiiiiiiiiiiiiiiiiiiiiiiiiiiiiiiiiiiiiiiiiiiiiiiii
Select the appropriate cycle for the type of load.
This will determine the tumble pattern and spin speed for the cycle.
iiiiiiiiiiiiiiiiiiiiiiiiiiiiiiiiiiiiiiiiiiiiiiiiiiiiiiiiiiiiiiiiiiiiiiiiiiiiiiiiiiiiiiiiiiiiiiiiiiiiiiiiiiiiiiiiiiiiiiiiiiiiiiiiiiiiiiiiiiiiiiii
iiiiiiiiiiiiiiiiiiiiiiiiiiiiiiiiiiiiiiiiiiiiiiiiiiiiiiiiiiiiiiiiiiiiiiiiiiiiiiiiiiiiiiiiiiiiiiiiiiiiiiiiiiiiiiiiiiiiiiiiiiiiiiiiiiiiiiiiiiiiiiii
iiiiiiiiiiiiiiiiiiiiiiiiiiiiiiiiiiiiiiiiiiiiiiiiiiiiiiiiiiiiiiiiiiiiiiiiiiiiiiiiiiiiiiiiiiiiiiiiiiiiiiiiiiiiiiiiiiiiiiiiiiiiiiiiiiiiiiiiiiiiiiii
iiiiiiiiiiiiiiiiiiiiiiiiiiiiiiiiiiiiiiiiiiiiiiiiiiiiiiiiiiiiiiiiiiiiiiiiiiiiiiiiiiiiiiiiiiiiiiiiiiiiiiiiiiiiiiiiiiiiiiiiiiiiiiiiiiiiiiiiiiiiiiii
iiiiiiiiiiiiiiiiiiiiiiiiiiiiiiiiiiiiiiiiiiiiiiiiiiiiiiiiiiiiiiiiiiiiiiiiiiiiiiiiiiiiiiiiiiiiiiiiiiiiiiiiiiiiiiiiiiiiiiiiiiiiiiiiiiiiiiiiiiiiiiii
iiiiiiiiiiiiiiiiiiiiiiiiiiiiiiiiiiiiiiiiiiiiiiiiiiiiiiiiiiiiiiiiiiiiiiiiiiiiiiiiiiiiiiiiiiiiiiiiiiiiiiiiiiiiiiiiiiiiiiiiiiiiiiiiiiiiiiiiiiiiiiii
iiiiiiiiiiiiiiiiiiiiiiiiiiiiiiiiiiiiiiiiiiiiiiiiiiiiiiiiiiiiiiiiiiiiiiiiiiiiiiiiiiiiiiiiiiiiiiiiiiiiiiiiiiiiiiiiiiiiiiiiiiiiiiiiiiiiiiiiiiiiiiii
iiiiiiiiiiiiiiiiiiiiiiiiiiiiiiiiiiiiiiiiiiiiiiiiiiiiiiiiiiiiiiiiiiiiiiiiiiiiiiiiiiiiiiiiiiiiiiiiiiiiiiiiiiiiiiiiiiiiiiiiiiiiiiiiiiiiiiiiiiiiiiii
iiiiiiiiiiiiiiiiiiiiiiiiiiiiiiiiiiiiiiiiiiiiiiiiiiiiiiiiiiiiiiiiiiiiiiiiiiiiiiiiiiiiiiiiiiiiiiiiiiiiiiiiiiiiiiiiiiiiiiiiiiiiiiiiiiiiiiiiiiiiiiii
{_To
minimize wrinkling of laundry, select the Perm Press cycle.
Heavy Duty - For sturdy, colorfast fabrics and heavily soiled garments.
Normal - For most fabrics including cottons, linens, and normally soiled garments.
Whites - For white fabrics with or without bleach.
Deep Steam - A wash course for extremely soiled laundry.
Delicates - For sheer fabrics, bras, lingerie silk, and other handwash-only
fabrics. For best results, use liquid detergent.
Wool - For machine-washable
Woo
wool. Loads should be under 8 pounds.
The wool wash cycle of this machine has been approved by
Woolmark for the washing of machine washable Woolmark
products provided that the products are washed according
to the instructions on the garment label and those issued by
LM AR K
the manufacturer of this washing machine, M0509.
Quick Wash - For lightly soiled garments needed quickly.
Sanitize - For heavily soiled, colorfast garments. This cycle heats the water to
150°F to eliminate bacteria.
If Pause is selected during the heating portion of the Sanitize Cycle, your
Washer door will remain locked for your safety.
Rinse + Spin - Use for loads that need rinsing only or to add rinse-added
fabric softener to a load.
Spin Only - Provides a spin to remove more water.
Towels - For bath towels, washcloths and mats.
Hand Wash - A very light wash course similar to a hand wash.
Press to pause and restart programs.
Press once to turn your washer on, press again to turn your washer off. If
the washer is left on for more than 10 minutes without any buttons being
touched, the power automatically turns off.
Wash ng a cad of aundry 13
WF338AA-02562A-01
EN.indd
13
2008-03-10
&2_L2_3:35:45
\
Child lock
A function that prevents children from playing with your washer.
ACTIVATI NG/D EACTIVATI NG
If you want to activate/deactivate the Child Lock function, press the Soil Level and Signal
buttons at the same time for 3 seconds.
How It Works:
1. "Child Lock" can be activated while your Washer is running.
2.
Once you activate "Child Lock", all controls (except for the Power button) will be locked
until you deactivate "Child Lock".
3. The Child Lock button will be lit while it is in effect.
When
Lock" buttons,
function other
is on. than the Power button, do not respond, please check if the "Child
Garment+
You can add or take out laundry items even after the wash has started, as long as the
"Garment+" light is on. Pushing the Start/Pause
button unlocks the door, unless the water is
too hot or if there is too much water in your Washer. If you are able to unlock the door and wish
to continue the wash cycle, close the door and press the Start/Pause
button.
14 Washng a cad of aundry
WF338AA-02562A-01
EN.indd
14
2008-03-10
;_2_L2_3:35:45
FOR SILVERCARE
TM WASHING
Extra delicate blouses, shirts, or even lingerie that can't be washed in hot water can now be sanitized
effectively without the adverse effects of hot water. The silver plates can easily be replaced by a Service
Technician if needed.
To use
'
1. Load the washer.
2.
Press the Power button.
3.
Select a Cycle by turning the Cycle Selection dial.
4.
Press the SilverCare
TM
button.
5. Add detergent in the dispenser tray for main washing, and add fabric softener up to the marked line.
6. Press the Start/Pause button.
: The washer automatically selects optimal washing conditions by sensing the laundry's weight.
FOR
HOME USE
ONLY- COMMERCIAL
USERS SHOULD NOTIFY THEIR LOCAL WASTE
TREATMENT
AUTHORITIES
BEFORE USE
To display the total number of silver cycles performed by the washer, press both the Signal and SilverCare TM
buttons at the same time and hold them down for 3 seconds.
LU1 : less than 1000 times
LU0 : 1000 times
You should replace the SilverCare TM kit when the display reads "LU0" as the electrodes are near the end of
their useful life. Contact 1-800-SAMSUNG.
_You
cannot choose the SilverCare
TM
option with the Wool cycle.
USING STEAM WASH
Injects steam directly onto the laundry in the wash tub to increase the wash temperature and enhance the
Soak effect, improving the wash performance.
1. Load the washer.
2.
Press the Power button.
3. Turn the Cycle Selector and select a Steam Cycle. (The Deep Steam course automatically selects
Steam.)
4. Press the Steam button.
5. Add detergent into the dispenser tray for a wash, and add fabric softener up to the marked line.
6. Press the Start/Pause
button.
: The washer automatically selects the optimal wash conditions by sensing the weight of the laundry.
lf steam in
wash
selected,
steam
is injected
the most effective time for the detected amount of
laundry
orderis to
maximize
the effect
of theatsteam.
Steam is injected 8 minutes after the start of the cycle. Steam is injected for 1.5 seconds and then
stops for 13 seconds. This operation is repeated for the next 16 minutes. The Steam function can
selected with standard cycles (except pre-wash).
Wash nga oad of aundry _15
WF338AA-02562A-01
EN.indd
15
2008-03-10
;_2_L2_3:35:45
\
DETERGENT
USE
Your Washer is designed to use high efficiency (HE) detergents.
•
For best cleaning results, use a high efficiency detergents such as Tide
HE, Wisk HE, Cheer HE or Gain HE*. High efficiency detergents contain
suds suppressors that reduce or eliminate suds. When fewer suds are
produced, the load tumbles more efficiently and cleaning is maximized.
Z_ Regular detergent is NOT recommended. Please use HE detergents
wAR.,.G
only.
_
educing the amount of detergent may reduce cleaning quality. It is important to pre-treat stains, sort
carefully by color and soil level, and avoid overloading.
*
Brand names are trademarks of their respective manufacturers.
FEATURES
Automatic
dispenser
Your Washer has separate compartments for dispensing
detergent and color-safe bleach, chlorine bleach, and fabric
softener. All laundry additives are added to their respective
compartments before starting your Washer.
The automatic dispenser MUST ALWAYS be in place before
starting your Washer.
•"q Detergent
compartment
I
Pre wash
compartment
|
Detergent
selector
DO NOT open the automatic dispenser when your Washer is
running.
To use:
1. Pull out the dispenser drawer on the left side of the control
panel.
2.
Add
recommended
of additivebeing
to thecareful
appropriate
compartments
with quantity
laundry additives,
not to
overfill or spill.
3.
Slide the dispenser drawer carefully and completely back
into the compartment.
Detergent
compartment
1.
Pour the recommended amount of laundry detergent directly into the detergent compartment
before starting your Washer.
2.
If color-safe bleach is to be used, it should be added with detergent to the detergent
compartment.
When adding color-safe bleach with detergent, it is best if both laundry products are in
the same form - granular or liquid.
lf using liquid detergent, lower the detergent selector and add the detergent to the
detergent compartment.
16 Washng a oad of aundry
WF338AA-02562A-01
EN.indd
16
2008-03-10
;_2_L2_3:35:46
Pre wash compartment
When using the Pre Wash option, detergent should be added to both the Pre Wash
compartment and the detergent compartment. The detergent will automatically be dispensed
during Pre Wash.
•
If high efficiency (HE) detergent is used, add 1/3 of the recommended amount to the Pre
Wash compartment and 2/3 of the recommended amount to the detergent compartment.
Bleach compartment
Fabric
(Liquid chlorine bleach only)
Softenerl-_
compartment
1. Add chlorine bleach to the bleach compartment.
Bleach
compartment-
DO NOT exceed the MAX FILL line.
2. Avoid splashing or over-filling the compartment.
!
the appropriate time.
3. Your Washer automatically dispenses bleach into the tub at
4. The dispenser automatically dilutes liquid chlorine bleach
uL_
• Never
pour undiluted
before
it reaches
the wash liquid
load. chlorine bleach directly
onto the load or into the tub. It is a powerful chemical
i__
_-,,-
_
__
the fibers or color loss, if not used properly.
If you prefer to use color-safe, non-chlorine bleach,
add it to the appropriate detergent compartment.
and NOT
can cause
fabric damage,
of
DO
pour color-safe
bleachsuch
into as
theweakening
Bleach
compartment.
Fabric softener
_
,
compartment
1.
Pour the recommended amount of liquid fabric softener into the softener compartment.
For smaller loads, use less than one capful.
2.
Fabric softener should be diluted with water until it reaches MAX FILL in the compartment.
3. The dispenser automatically releases liquid fabric softener at the proper time during the rinse
cycle.
,
se the softener compartment ONLY for liquid fabric softeners.
DO NOT use a Downy Ball* in the Fabric softener Compartment with this Washer. It will
not add fabric softener at the appropriate time.
Use the detergent Compartment.
*
Brand names are trademarks of their respective manufacturers.
Wash nga oad of aundry 17
WF338AA-02562A-01
EN.indd
17
2008-03-10
;_2_L2_3:35:46
CLEANING
THE EXTERIOR
Turn off the water faucets after finishing the day's washing.
This will shut off the water supply to your Washer and prevent the unlikely possibility of damage from
escaping water. Leave the door open to allow the inside of your Washer to dry out.
Use a soft cloth to wipe up all detergent, bleach or other spills as they occur.
Clean the following as recommended:
Control Panel - Clean with a soft, damp cloth. Do not use abrasive powders or cleaning pads. Do not spray
cleaners directly on the panel.
Cabinet - Clean with soap and water.
CLEANING
THE INTERIOR
Clean the interior of your Washer periodically to remove any dirt, soil, odor, mold, mildew, or bacterial
residue that may remain in your Washer as a result of washing clothes.
Failure to follow these instructions may result in unpleasant conditions, including odors and/or permanent
stains on your Washer or laundry.
Hard water deposits may be removed, if needed. Use a cleaner labeled "Washer safe".
CLEANING
THE DISPENSERS
The Automatic Dispenser may need to be cleaned periodically due to
laundry additive buildup.
1. Press the release lever on the inside of the dispenser and pull out.
2. Remove the Siphon Cap from the fabric softener and bleach
compartments.
3. Wash all of the parts under running water.
4. Clean the dispenser recess with a soft brush.
5. Reinsert the Siphon Cap, and push it firmly into place.
6. Push the dispenser back into place.
7. Run a Rinse & Spin cycle without any load in your Washer.
18 Washng a cad of aundry
WF338AA-02562A-01
EN.indd
18
2008-03-10
;_2_L2_3:35:47
CLEANING
THE DEBRIS FILTER
We recommend cleaning the debris filter when water does not drain well or the "ND" error message is
displayed.
1, Open the filter cover by pressing and pulling the handle of the
filter cover with your finger.
2,
Unscrew the drain cap by turning it
counterclockwise.
3,
Hold the cap on the end of the drain tube and
slowly pull it out about 6 inches (15 cm) and
drain off all the water.
4.
Remove the debris filter cap.
step
1
Step2
5. Wash any dirt or other material from the debris filter. Make sure
the drain pump propeller behind the debris filter is not blocked.
6.
Replace the debris filter cap.
7.
Replace the filter cover.
Maintain ng your washer 19
WF338AA-02562A-01
EN.indd
19
2008-03-10
;,2_L2_3:35:50
STORING YOUR WASHER
Washers can be damaged if water is not removed from hoses and internal components before storage.
Prepare your Washer for storage as follows:
•
Select the Quick Wash cycle and add bleach to the automatic dispenser. Run your Washer through the
cycle without a load.
Turn the water faucets off and disconnect the inlet hoses.
Unplug your Washer from the electrical outlet and leave your Washer door open to let air circulate inside
the tumbler.
If your Washer has been stored in below-freezing temperatures, allow time for any leftover water in your
Washer to thaw out before use.
20 Maintainng
WF338AA-02562A-01
EN.indd
20
your washer
2008-03-10
;_2_L2_3:35:50
troLAbe hootncj
CHECK THESE POINTS
will not start..
has no water or not enough
wate r..
IF YOUR WASHER...
,,
Make sure the door is firmly closed.
•
Make sure your Washer is plugged in.
•
Make sure the water source faucets are turned on.
•
Make sure to press the Start/Pause Button to start your Washer.
•
Make sure the Child Lock is not activated; see page C4.
•
Before your Washer starts to fill, it will make a series of clicking noises
to check the door lock and do a quick drain.
•
Check the fuse or reset the circuit breaker
•
Turn both faucets on fully.
•
Make sure the door is tightly closed.
•
Straighten the water inlet hoses.
•
Disconnect hoses and clean screens. Hose filter screens may be
clogged.
o
Open and close the door, then press the Start/Pause Button.
has detergent remains in
the automatic dispenser
after the wash cycle is
complete.
Make sure your Washer is running with sufficient water pressure.
(1 kgf/cm 2 or higher)
vibrates or is too noisy,
Make sure your Washer is set on a level surface. If the surface is not
level, adjust your Washer feet to level the appliance.
stops
Make sure the Detergent Selector dial is in the upper position when
using granular detergent.
•
Make sure that the shipping bolts are removed.
•
Make sure your Washer is not touching any other object.
•
Make sure the laundry load is balanced.
•
•
Plug the power cord into a live electrical outlet.
Check the fuse or reset the circuit breaker.
•
Close the door and press the Start/Pause Button to start your
Washer.
For your safety, your Washer will not tumble or spin unless the door is
closed.
•
Before your Washer starts to fill, it will make a series of clicking noises
to check the door lock and do a quick drain.
•
There may be a pause or soak period in the cycle. Wait briefly and it
may start.
•
Check the screens on the inlet hoses at the faucets for obstructions.
Clean the screens periodically.
Troubleshooting
WF338AA-02562A-01
EN.indd
21
21
2008-03-10
;,2_L2_3:35:50
fills with the wrong
temperature water.
•
Turn both faucets on fully.
Make sure the temperature selection is correct.
Make sure the hoses are connected to the correct faucets.
Flush water lines.
Check the water heater. It should be set to deliver a minimum 120°
F (49° C) hot water at the tap. Also check the water heater capacity
and recovery rate.
Disconnect the hoses and clean the screens. The hose filter screens
may be plugged.
As your Washer is filling, the water temperature may change as
the automatic temperature control feature checks incoming water
temperature. This is normal.
While your Washer is filling, you may notice just hot and/or just
cold water going through the dispenser when cold or warm wash
temperatures are selected. This is a normal function of the automatic
temperature control feature as your Washer determines the
temperature of the water.
door locked or will not
Press the Start/Pause button to stop your washer.
open.
Your Washer door will remain locked during the heating portion of the
Sanitize Cycle
It may take a few moments for the door lock mechanism to
disengage.
does not drain and/or spin.
Check the fuse or reset the circuit breaker.
Straighten the drain hoses. Eliminate kinked hoses. If there is a drain
restriction, call for service.
Close the door and press the Start/Pause Button. For your safety,
your Washer will not tumble or spin unless the door is closed.
load is too wet at the end of
the cycle.
Use the High or Extra High spin speed.
Use high efficiency detergent to reduce over-sudsing.
Load is too small. Very small loads (one or two items) may become
unbalanced and not spin out completely.
leaks water.
Make sure the door is firmly closed.
Make sure all hose connections are tight.
Make sure the end of the drain hose is correctly inserted and secured
to the drainage system.
Avoid overloading.
Use high efficiency detergent to prevent over-sudsing.
has
excessive
suds.
Use high efficiency detergent to prevent over-sudsing.
Reduce the detergent amount for soft water, small or lightly soiled
loads.
Non-HE detergent is NOT recommended.
22 Troub eshooting
WF338AA-02562A-01
EN.indd
22
2008-03-10
;_2_L2_3:35:51
INFORMATION
CODES
Information codes may be displayed to help you better understand what is occurring with your Washer.
FL
Unbalanced load prevented your
Washer from spinning.
Redistribute the load, press the Start/Pause
Button.
Door is unlocked when Washer is
running.
Press the Power button to turn off your Washer,
then restart the cycle. If the code reappears, call
for service.
Door is open when Washer is
running.
Close the door tightly and restart the cycle.
i door.
our
Washer
fai,edto
,ock
the
Close the door tightly and restart the cycle.
Water temperature control
problem.
If the code reappears, call for service.
If the code reappears, call for service.
Call for service.
(Heater Control problem)
Call for service.
hE
Yourhas
not
Washer
reached
hasthe
triedproper
to fill but
water
level.
U-J
The door will not unlock.
Make sure the door is firmly closed.
Push the Power button to turn off your Washer,
then turn it on again. If the code reappears, call
for service.
Motor not running properly.
Restart the cycle pressing the Start/Pause
Button. If the code reappears, call for service.
Your washer is not draining.
Before calling for service, check the following.
It can also mean that the unit
senses a small clog while draining.
1, Clean the filter. (see page 19)
or
1. Turn off the unit for 10 seconds and then turn
it on again.
2, Select only the Spin Cycle.
3, Press the Start/Pause to drain the water.
If it still does not drain, call for service.
t-IF
I,_IC
Your Washer has tried to fill but
was unsuccessful.
Make sure the water faucets are open all the
way. Check for kinked hoses.
Check the inlet screens on the fill hoses.
Problem with control.
Call for service.
Electric service was lost when
Washer was running.
Restart the cycle by pressing the Start/Pause
Button.
A fault is detected in the water
level sensor.
Call for service
Jammed Key.
Call for service
Troub eshooting 23
WF338AA-02562A-01
EN.indd
23
2008-03-10
;_2_L2_3:35:54
I
r
J_IC
Motor speed sensor problem.
I r
i_-iX
Temperature sensor problem.
Restart the cycle.
If the code reappears, call for service.
Restart the cycle.
If the code reappears, call for service.
High current detected.
JC
Restart the cycle.
If the code reappears, call for service.
Sr
I_C
High/Low voltage detected.
Restart the cycle.
If the code reappears, call for service.
Too many suds are detected
during the washing session.
To prevent it, cut down on detergents.
The unit is put on hold until the
suds are reduced. Then, the unit
will go back to the operation.
When it finishes washing, End and
SUdS codes will blink in turn.
For any codes not listed above, call 1-800-726-7864
(1-800-SAMSUNG)
24 Troubleshooting
WF338AA-02562A-01
EN.indd
24
2008-03-10
;_2_L2_3:35:55
FABRIC CARE CHART
The following symbols provide garment care direction. The Clothing care labels include symbols for
washing, bleaching, drying and ironing, or dry cleaning when necessary. The use of symbols ensures
consistency among garment manufacturers of domestic and imported items. Follow care label directions to
maximize garment life and reduce laundering problems.
m
Permanent Press /
Wrinkle Resistant/
Wrinkle Control
Drip Dry
Gentle/Delicates
Dry Flat
_
Do Not Wring
Do Not Bleach
DO Not Tumble Dry
Hand Wash
No Steam (added to
iron)
Hot
o®
Warm
(3
Low
Cold
O
Any Heat
Dry Clean
No Heat/Air
Do Not Dry Clean
_i
Medium
Do Not Iron
coo
O
Any Bleach (when
needed)
Line Dry/Hang
to Dry
Only Non-Chlorine
(color-safe)
Bleach (when needed)
High
Drip Dry
Tumble Dry Cycle
Medium
Dry Flat
Low
For
wool.machine-washable
Loads should be
under 8 pounds.
Permanent Press/
Wrinkle Resistant/
Wrinkle Control
Gentle/Delicates
** The dot symbols represent appropriate wash water temperatures for various items. The temperature
range for Hot is 105 ° - 125 ° F/41 ° - 52°C, for Warm 85 ° - 105 ° F/29 ° - 41 ° C and for Cold 60 ° - 85 ° F/16 °
- 29 ° C. (Wash water temperature must be a minimum of 60 ° F/16°C for detergent activation and effective
cleaning.) The clothes Washer may not ensure these temperatures because the actual water temperatures
entering your Washer are dependent on water heater settings and regional water supply temperatures. For
example, cold water entering the home in the northern states during winter may be 40 ° F/4 ° C which is
too cold for effective cleaning. The water temperature in this situation will need to be adjusted by selecting
a warm setting, adding some hot water to the MAX FILL line or using your Washer's heating option, if
available.
'_¥T338AA-02562A-01
EN.indd
25
2008-03-10
;_2_L2_3:35:56
HELPING
THE ENVIRONMENT
o
Your Washer is manufactured from recyclable materials. If you decide to dispose of it, please observe
local waste disposal regulations. Cut off the power cord so that the appliance cannot be connected
to a power source. Remove the door so that animals and small children cannot get trapped inside the
appliance.
o
Do not exceed the detergent quantities recommended in the detergent manufacturers' instructions.
o
Use stain removal products and bleaches before the wash cycle only when necessary.
o
Save water and electricity by only washing full loads (the exact amount depends upon the program used).
o
Use SilverCare TM instead of Hot Water Sanitization to save energy.
DECLARATION
OF CONFORMITY
This appliance complies with UL2157.
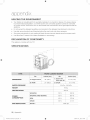
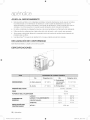
SPECIFICATIONS
"
_l
DiV
DIMENSIONS
I
A. Height-Overall
38" (9¢.5)
C. Depth with
door open 90 °
B. Width
27" (68.6)
D. Depth
WATER PRESSURE
50 kPa - 800 kPa
95 kg
HEATER RATING
900 W
SPIN REVOLUTION
51.18"(130)
31.1 "(79)
WEIGHT
POWER
CONSUMPTION
inches (cm)
WASHING
120V
226 W
WASHING AND HEATING
120V
997 W
SPIN
120V
379 W
DRAIN
120V
41W
WF338 *
1300 rpm
26 Append x
WF338AA-02562A-01
EN.indd
26
2008-03-10
;,2_L2_3:36:08
CYCLE CHART
Use this chart to set the best cycle and option for you laundry.
338AAW,
338AAG,
Delicates
338AAR,
_
_
338AAB
_
_
_
_
_
41
Hand Wash
41
Wool
57
Quick Wash
35
Rinse + Spin
2O
Spin Only
11
Deep
102
Steam
Heavy Duty
92
Norrnal
51
Whites
68
Quick
35
Wash
Towels
66
Sanitize
112
EH/C: Extra Hot/Cold
H/C: Hot/Cold
W/W: Warm/Warm
W/C: Warm/Cold
EH: Extra High
H: High
M: Medium
L: Low
C/C: Cold/Cold
NS: No Spin
WF338AA-02562A-01
EN.indd
27
H: Heavy
N: Normal
L: Light
2008-03-10
;_2_L2_3:36:10
\
SAMSUNG SILVERCARE
TM
WASHER
LiMiTED WARRANTY TO ORiGiNAL
PURCHASER
This SAMSUNG brand product, as supplied and distributed by SAMSUNG ELECTRONICS AMERICA, INC.
(SAMSUNG) and delivered new, in the original carton to the original consumer purchaser, is warranted by
SAMSUNG against manufacturing defects in materials and workmanship for a limited warranty period of:
One (1) year part and labor
Two (2) years control panel parts
Three (3) years stainless tub parts
Five (5) years motor parts.
This limited warranty begins on the original date of purchase, and is valid only on products purchased and
used in the United States. To receive warranty service, the purchaser must contact SAMSUNG for problem
determination and service procedures. Warranty service can only be performed by a SAMSUNG authorized
service center. The original dated bill of sale must be presented upon request as proof of purchase to
SAMSUNG or SAMSUNG's authorized service center. SAMSUNG will provide in-home service during the
warranty period at no charge, subject to availability within the contiguous United States. In-home service is
not available in all areas.
To receive in-home service, product must be unobstructed and accessible to the service agent. If service
is not available, SAMSUNG may elect to provide transportation of the product to and from an authorized
service center.
SAMSUNG will repair, replace, or refund this product at our option and at no charge as stipulated herein,
with new or reconditioned parts or products if found to be defective during the limited warranty period
specified above. All replaced parts and products become the property of SAMSUNG and must be returned
to SAMSUNG. Replacement parts and products assume the remaining original warranty, or ninety (90)
days, whichever is longer.This limited warranty covers manufacturing defects in materials and workmanship
encountered in normal, noncommercial use of this product and shall not apply to the following: damage
that occurs in shipment; delivery and installation; applications and uses for which this product was not
intended; altered product or serial numbers; cosmetic damage or exterior finish; accidents, abuse, neglect,
fire, water, lightning, or other acts of nature or God; use of products, equipment, systems, utilities, services,
parts, supplies, accessories, applications, installations, repairs, external wiring or connectors not supplied
or authorized by SAMSUNG that damage this product or result in service problems; incorrect electrical
line voltage, fluctuations and surges; customer adjustments and failure to follow operating instructions,
maintenance and environmental instructions that are covered and prescribed in the instruction book;
product removal and reinstallation; problems caused by pest infestations. This limited warranty does not
cover problems resulting from incorrect electric current, voltage or supply, light bulbs, house fuses, house
wiring, cost of a service call for instructions, or fixing installation errors. SAMSUNG does not warrant
uninterrupted or error-free operation of the product.
28 Warranty
WF338AA-02562A-01
EN.indd
28
2008-03-10
;,2_L2_ 3:36:11
EXCEPT AS SET FORTH HEREIN, THERE ARE NO WARRANTIES ON THIS PRODUCT EITHER EXPRESS
OR IMPLIED, AND SAMSUNG DISCLAIMS ALL WARRANTIES INCLUDING, BUT NOT LIMITED TO, ANY
IMPLIED WARRANTIES OF MERCHANTABILITY, INFRINGEMENT OR FITNESS FOR A PARTICULAR
PURPOSE.
NO WARRANTY OR GUARANTEE GIVEN BY ANY PERSON, FIRM, OR CORPORATION WITH RESPECT
TO THIS PRODUCT SHALL BE BINDING ON SAMSUNG. SAMSUNG SHALL NOT BE LIABLE FOR LOSS
OF REVENUE OR PROFITS, FAILURE TO REALIZE SAVINGS OR OTHER BENEFITS, OR ANY OTHER
SPECIAL, INCIDENTAL OR CONSEQUENTIAL DAMAGES CAUSED BY THE USE, MISUSE, OR INABILITY
TO USE THIS PRODUCT, REGARDLESS OF THE LEGAL THEORY ON WHICH THE CLAIM IS BASED,
AND EVEN IF SAMSUNG HAS BEEN ADVISED OF THE POSSIBILITY OF SUCH DAMAGES.
NOR SHALL RECOVERY OF ANY KIND AGAINST SAMSUNG BE GREATER IN AMOUNT THAN THE
PURCHASE PRICE OF THE PRODUCT SOLD BY SAMSUNG AND CAUSING THE ALLEGED DAMAGE.
WITHOUT LIMITING THE FOREGOING, PURCHASER ASSUMES ALL RISK AND LIABILITY FOR LOSS,
DAMAGE, OR INJURY TO PURCHASER AND PURCHASER'S PROPERTY AND TO OTHERS AND THEIR
PROPERTY ARISING OUT OF THE USE, MISUSE, OR INABILITY TO USE THIS PRODUCT. THIS LIMITED
WARRANTY SHALL NOT EXTEND TO ANYONE OTHER THAN THE ORIGINAL PURCHASER OF THIS
PRODUCT, IS NONTRANSFERABLE AND STATES YOUR EXCLUSIVE REMEDY.
Some states do not allow limitations on how long an implied warranty lasts, or the exclusion or limitation
of incidental or consequential damages, so the above limitations or exclusions may not apply to you. This
warranty gives you specific rights, and you may also have other rights, which vary from state to state.
To obtain warranty service, please contact SAMSUNG at:
SAMSUNG ELECTRONICS AMERICA, INC. - CONSUMER ELECTRONICS
400 Valley Road, Suite 201, Mt. Arlington, NJ 07856
1-800-SAMSU NG{726-7864)
www,
WF338AA-02562A-01
CUSTOMER
SERVICE
samsung,com
EN.indd
29
2008-03-10
;_2_L2_3:36:11
QUESTIONS
OR COMMENTS?
U.S.A
1-800-SAMSUNG(726-7864)
www,samsung,oom
MEXICO
01-800-SAMSUNG(726-7864)
www,samsung.com
Code
WF338AA-02562A-01
EN.indd
30
No. DC68-02562A-01_EN
2008-03-10
;_2_L2_3:36:11
las posibilidades
Gracias Dot comDrar este Droducto Samsung.
Para recibir un servlclo mas comDleto.
reglstre su oroauoto en
www, samsu ng. co m/g Iobal/reg ister
'_¥T338AA-02562A-01
MES.indd
1
2008-03-10
;,_L2_ 3:34:31
oaraote st oas de s
rlUOVc
l vad©da s V FQ ,,FOTM
1. SilverCare
TM
Lavar con agua fria ahorra energia yes mejor para su ropa.
2. Lavadora
a vapor
Inyecta vapor directamente en su ropa para aumentar la temperatura del agua e incrementar
el efecto Remojo y de este modo mejorar el desempeflo del lavado.
3. Tambor
Diamante
Con orificios internos un 36% menores que los de los tambores convencionales, el tambor
diamante evita que los tejidos se enganchen y como consecuencia se deterioren.
4. Capacidad
extra grande
Aun las prendas y mantas voluminosas quedan superlimpias. La gran capacidad de deja
suficiente espacio para un lavado ma,s profundo y limpio.
5. Alta eficiencia
en energia y ahorro
de agua
El sistema SilverCare TM desinfecta usando un 92% menos de energia que la desinfecci0n
termica tradicional.
6. Motor
inversor
de accionamiento
directo
iEI poder de manejarlo todo! El motor inversor de accionamiento directo suministra energia
al tambor de la lavadora desde un motor reversible de velocidad variable. Un motor de
accionamiento directo sin correa genera una velocidad de centrifugado ma,s alta de 1.300
rpm para un funcionamiento ma,s eficiente y silencioso. La lavadora tambien posee menos
piezas moviles.
7. Certificado
Woolmark
El ciclo de lavado de lana en las ma,quinas Samsung SilverCare TM ha sido probado y cumplio
con la especificaci0n de Woolmark Company requerida para productos de lana lavables en
lavadora. Las prendas deben lavarse de acuerdo con las instrucciones que figuran en sus
etiquetas, tal como Io establecen Woolmark y Samsung.
8. Pedestal con cajones
WE357 A7W/S/R/L/G/B)
de almacenamiento
(Modelo
N.°:
Hay disponible un pedestal de 15" opcional para elevar la lavadora y Iograr asi una carga y
descarga ma,s sencilla.
Tambien ofrece un cajon de almacenamiento incorporado que puede sostener una botella de
detergente de 100 oz.
9. Apilamiento
(Modelo
N.°: SK-3A1/XAA,
SK-4A/XAA,
SK-5A/XAA)
Las lavadoras y las secadoras Samsung pueden apilarse para maximizar el espacio
aprovechable. Puede adquirir un kit de apilamiento opcional en su comercio minorista de
productos Samsung.
<Pedestal con cajones de almacenamiento>
<Apilamiento>
2 Caraoter sticas de su nueva avadora stvercare TM
_,¥T338AA-02562A-01
MES.indd
2
2008-03-10
;,2XL2_3:34:32
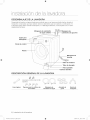
nformac On sobre see(Jrdad
Felicitaciones por la compra de la nueva lavadora SilverCare TMde Samsung.
Este manual contiene informaciOn importante acerca de ia instaiaciOn, ei uso y
ei cuidado dei eiectrodomestico.
Lea detenidamente estas instrucciones a fin de
aprovechar
al maximo los mOitipies beneficios y funciones
de ia iavadora.
LO QUE NECESITA SABER SOBRE LAS INSTRUCCIONES
SEGURIDAD
DE
Las advertencias y las instrucciones de seguridad importantes de este manual no cubren todas las posibles
condiciones y situaciones que pueden ocurrir. Es su responsabilidad actuar con sentido comun, precaucion
y cuidado cuando instale, realice el mantenimiento y ponga en funcionamiento la lavadora.
SiMBOLOS
Y PRECAUCIONES
DE SEGURIDAD
IMPORTANTES
Peligros
o pra,cticas inseguras que pueden causar lesiones
la muerte.
fisicas
graves o
ADVERTENCIA
//_
Peligros
o pra,cticas inseguras que pueden causar lesiones fisicas
daSos materiales.
PRECAUCION
PRECAUCION
G
leves o
Para
delavadora,
incendio, siga
explosion,
descargas electricas
o lesiones
fisicasreducir
cuandoel riesgo
usa esta
estas instruccionesde
seguridad
ba,sicas:
NO intente hacer nada.
NO desarme.
NO toque.
Siga las instrucciones fielmente.
Desenchufe el cable de alimentaci6n del tomacorriente de pared.
Asegurese de que lama, quina tenga buena conexion a tierra para evitar
descargas electricas.
Llame al centro de servicio tecnico para obtener asistencia.
®
Lea todas las instrucciones antes de usar el electrodomestico.
AI igual que con cualquier equipo que utilice electricidad y piezas moviles, existen peligros
potenciales.
Para usar este electrodomestico de manera segura, familiaricese con su funcionamiento y
manejelo con cuidado cuando Io use.
Instale y guarde la lavadora adentro, en un lugar alejado de la exposicion a los factores
clima,ticos.
Instale y nivele la lavadora sobre una superficie que pueda soportar su peso.
debe conectarse a tierra correctamente. Nunca la enchufe a un tomacorriente
@ Lasin lavadora
conexion a tierra. Consulte la pa,gina 7 para obtener ma,s informacion sobre como
conectar la lavadora a tierra.
HnformaciOn sobre segurdad 3
WT338AA-02562A-01
MES.indd
3
2008-03-10
;,2_L2_3:34:32
A
Para reducir el riesgo de incendio o explosi6n:
...........•
No lave prendas que hayan sido lavadas, remojadas o tratadas con gasolina, solventes
de limpieza en seco u otras sustancias inflamables o explosivas. Emiten vapores
que se pueden prender fuego o explotar. Enjuague a mano todo material que haya
estado expuesto a un solvente de limpieza o a Iiquidos o s61idos inflamables antes de
colocarlo en la lavadora. Asegurese de que se haya eliminado todo vestigio de tales
Iiquidos, s61idos y vapores. Entre las sustancias peligrosas se encuentran la acetona, el
alcohol desnaturalizado, la gasolina, el queroseno, ciertos limpiadores Iiquidos de uso
domestico y quitamanchas, el aguarra,s, las ceras y los removedores de cera.
No vierta gasolina, solventes de limpieza en seco u otras sustancias inflamables o
explosivas en el agua del lavado.
En ciertas circunstancias, se puede producir gas hidr6geno en un sistema de agua
caliente -pot ejemplo el calentador de agua- que no se ha usado durante dos semanas
o ma,s. EL GAS HIDROGENO ES EXPLOSIVO. Si el sistema de agua caliente no se ha
usado durante dos semanas o ma,s, abra todas las Ilaves de agua caliente de su casa
y deje que el agua fluya durante varios minutos antes de usar la lavadora. Esto disipara,
el gas hidr0geno acumulado. Dado que el gas hidr0geno es inflamable, no fume ni
encienda una llama abierta en ese momento.
_
Desconecte el cable de alimentaci6n antes de realizar el mantenimiento de la lavadora.
_No
introduzca su mano en el electrodomestico
cuando el tambor este en movimiento.
//_
No permita que los ninos jueguen sobre la lavadora o dentro de ella. La puerta de la
.....
"--'%,EN
,Alavadora no se abre con facilidad desde el interior, y un nino se podria lastimar gravemente
si queda atrapado adentro.
No modifique los controles.
No repare, ni reemplace, ni realice el mantenimiento de ninguna pieza de la lavadora pot
su propia cuenta, salvo que entienda acabadamente las instrucciones de reparaci0n
recomendadas para el usuario y que usted tenga la habilidad para Ilevarlas a cabo. El
trabajo efectuado pot una persona no autorizada puede invalidar su garantia.
Guarde los detergentes de ropa y dema,s productos para el lavado en un lugar frio y seco,
alejado del alcance de los ninos.
No lave ni seque prendas que tengan manchas de aceite vegetal o aceite de cocina.
Dichas prendas pueden tenet vestigios de aceite despues del lavado. A causa de los restos
de aceite, la tela puede despedir humo o prenderse fuego.
/_
No use lejia que contenga cloro, amoniaco o a,cidos (tales como vinagre o removedores de
.....
""_u0,
N6xido) en el mismo lavado. Se pueden generar vapores peligrosos.
No lave con la lavadora materiales de fibra de vidrio. Se pueden adherir pequenas
particulas a telas lavadas en las cargas subsiguientes y causar irritaci6n en la piel.
/_
Antes de disponer de la lavadora, retire la puerta para que los ninos o los animales
Ao_,Apequenos no puedan quedar atrapados dentro de la lavadora.
No se siente encima de la lavadora.
Las mangueras de entrada esta,n sujetas a danos y deterioro con el transcurso del tiempo.
Verifique peri6dicamente que las mangueras no presenten protuberancias, no esten
enroscadas, no presenten cortes, desgaste o perdidas, y reempla,celas cada cinco anos.
Asegurese de que los bolsillos no contengan objetos pequenos, s61idos y de forma
irregular, o materiales extranos, como monedas, cuchillos, alfileres, etc. Tales objetos
podrian danar la lavadora.
No lave ropa que contenga hebillas grandes, botones u otros objetos de metal pesado.
4 hformaci6n
'_¥T338AA-02562A-01
MES.indd
4
sobre seguridad
2008-03-10
;_2_L2_3:34:32
onbndo
INSTALACION
MANUAL
DE LA LAVADORA
DE INSTRUCCiONES
i
LAVADO
DE UNA CARGA
i
DE ROPA
i
MANTENIMIENTO
DE LA LAVADORA
i
GUIA DE SOLUCION
,
,
DE PROBLEMAS
6
Desembalaje de la lavadora
6
7
Descripci6n general de la lavadora
Instalaci0n electrica
7
Conexi0n a tierra
7
Agua
8
Drenaje
8
Piso
8
Consideraciones acerca de la ubicaci0n
8
Instalaci0n del electrodomestico
gabinete o en un hueco
9
Nota importante
11
11
C6mo cargar la lavadora
C6mo comenzar
12
Descripci6n
14
en un
para el instalador
general del panel de control
Child lock (Seguro contra Ninos)
14
15
Garment+ (Ma,s prendas)
Para lavar con SilverCare TM
15
Uso del Steam Wash (Lavado a vapor)
16
Uso del detergente
16
Caracteristicas
18
Limpieza del exterior
18
Limpieza del interior
18
Limpieza de los dosificadores
19
Limpieza del filtro de residuos
20
C6mo guardar la lavadora
21
Controle estos puntos si su lavadora...
i
23
C6digos de informaci6n
APENDICE
25
Tabla de indicaciones del tejido
26
26
Ayuda al medioambiente
Declaraci6n de conformidad
26
27
Especificaciones
Tabla de ciclos
Conten do 5
'_¥T338AA-02562A-01
MES.indd
5
2008-03-10
;,2_L2_3:34:32
DESEMBALAJE
DE LA LAVADORA
Desembale la lavadora e inspecci0nela para controlar que no se hayan producido daflos durante el
transporte. Compruebe que haya recibido todos los elementos que se muestran a continuaci0n. Si
la lavadora sufri0 daflos durante el transporte, o si falta algun elemento, comuniquese con el 1-800SAMSUNG(7267864).
Manguera de suministro
de agua caliente --
Manguera de
--suministro
de agua fria
Caj6n para
detergente
Panel de control
--
Puerta --
__
Manguera de
drenaje
Filtro de residuos
Tubo de desagLie
Pata ajustable
Cubierta del filtro
DESCRIPCION
GENERAL
DE LA LAVADORA
(use para el orificio del tornillo
superior)
Llave inglesa
6 hstaaciOn
WT338AA-02562A-01
MES.indd
Tapones para los orificios de
los tornillos
Manguera de
suministro de agua
Arandela de
goma
Guia de la
manguera
de a avadora
6
2008-03-10
;,2_L2_3:34:34
REQUISITOS
BASICOS
Instalaci6n
•
,,
ACERCA
DE LA UBICACi0N
electrica
Fusible o disyuntor de 120 voltios, 60 Hz, 15 A
Se recomienda contar con un circuito derivado individual destinado unicamente a la lavadora.
La lavadora esta, equipada con un cable de alimentacion.
NUNCA UTILICE UN CABLE PROLONGADOR.
PRECAUCION
Conexion
a tierra
ES PRECISO QUE ESTE ELECTRODOMESTICO
ESTE CONECTADO A TIERRA.
Este electrodomestico debe conectarse a tierra. En caso de que el electrodomestico funcione
real o se descomponga, la conexion a tierra reducira, el riesgo de descarga electrica al ofrecer
una via de menos resistencia a la corriente electrica.
Este electrodomestico esta, equipado con un cable de alimentacion que cuenta con un enchufe
de tres pines con conexion a tierra para utilizar en un tomacorriente con conexion a tierra.
A
La conexion inadecuada del conductor de conexion a tierra del equipo puede dar como
......
_E, ,Aresultado un riesgo de descarga electrica. Consulte a un electricista o tecnico calificado si
le surgen dudas acerca de si la conexion a tierra del electrodomestico es adecuada. No
modifique el enchufe provisto con el electrodomestico; si no entra en el tomacorriente,
solicite a un electricista calificado que instale el tomacorriente adecuado.
PRECAUCIONES
DE SEGURIDAD
IMPORTANTES
Para evitar el riesgo de incendio, descarga electrica o lesiones fisicas innecesarias, todo
el cableado y la conexion a tierra deben realizarse en conformidad con el Codigo Electrico
Nacional, ANSI/FNPA, Nro. 70, la revision mo,s reciente, y los codigos y ordenanzas locales.
Es exclusiva responsabilidad del propietario del electrodomestico proveer los servicios
electricos adecuados para este electrodomestico.
//_ NUNCA CONECTE UN CABLE A TIERRA ALAS TUBER[AS BE PLASTICO, LAS
PR_-_'_,o,TUBERIAS
DE GAS O LAS CAiqER[AS DE AGUA CALIENTE.
Agua
Para Ilenar correctamente la lavadora en el tiempo correcto, se requiere una presion de agua de
20 a 120 psi.
Una presiOnde agua inferiorpuede ocasionar fallas en la vNvula de agua e impedir que la vNvula de agua
se cierre completamente. O puede prolongar el tiempo de Ilenadoma,s alia,de Io permitido per los controles
de la lavadora y que, come resultado, lalavadora se apague, En loscontroles se establece un limite de
tiempo en case de que una manguera intema se afloje y se inunde la casa,
Las Ilaves de agua deben estar colocadas dentro de los 4 pies (122 cm) de distancia de la parte
posterior de la lavadora para las mangueras de entrada provistas con ella.
Las mangueras de entrada accesorias esta,n disponibles en varias longitudes hasta 10 pies
(305 cm) para Ilaves que se encuentren alejadas de la parte posterior de la lavadora.
Para evitar la posibilidad de que se produzcan danos a causa del agua:
,,
Las Ilaves de agua deben set de f4_cilacceso
Cierre las Ilaves cuando no use la lavadora.
Verifique periodicamente que no haya perdidas de agua que provengan de los
accesorios de la manguera de entrada de agua.
/_
CONTROLE QUE TODAS LAS CONEXIONES DE LA VALVULA Y DE LA LLAVE DE AGUA
...........
""" NO PRESENTEN PI2RDIDAS.
hstaaci6n
'_¥T338AA-02562A-01
MES.indd
7
de a avadora 7
2008-03-10
;,2_L2_3:34:35
Drenaje
La altura recomendada de la toma de agua es de 18 pulg. (46 cm). La manguera de drenaje
debe colocarse a traves del gancho para dicha manguera y dirigirse hacia la toma de agua. La
toma de agua debe tenet la suficiente Iongitud como para aceptar el dia,metro exterior de la
manguera de drenaje. La manguera de drenaje viene conectada de f_tbrica.
Piso
Para un mqor desempeno, la lavadora debe estar instalada sobre un piso de construcci0n
solida. Posiblemente los pisos de madera necesiten reforzarse para minimizar la vibraci0n y/o los
desequilibrios de la carga. Las superficies alfombradas o con revestimiento sintetico son factores
que contribuyen a la vibraci0n y/o a la tendencia de que la lavadora se mueva levemente durante
el ciclo de centrifugado.
Nunca instale la lavadora sobre una plataforma o sobre una estructura con soportes poco
resistentes.
Consideraciones
acerca de la ubicacion
No instale la lavadora en _treas donde el agua se congele, dado que la lavadora siempre
mantendr_t algo de agua en el _trea de la v_tlvula de agua, la bomba y la manguera. Esto puede
ocasionar danos a las correas, la bomba, las mangueras y otros componentes. La temperatura
de funcionamiento debe set superior a los 60 °F (16 °C).
Instalacion
del electrodomestico
en un gabinete
o en un hueco
DEJE UN ESPACIO LIBRE MiNIMO CUANDO INSTALE EL
ELECTRODOMESTICO
EN UN GABINETE O EN UN HUECO:
Laterales: 1 pulg. (25 mm)
Parte superior: 17 pulg. (432 mm)
Parte posterior: 4 pulg. (102 mm)
Frente del gabinete: 2 pulg. (51 mm)
Si la lavadora y la secadora se instalan una junto a la otra, el frente del gabinete debe contar pot
Io menos con una abertura sin obstrucciones de 72 pulg 2 (465 ore2). La lavadora unicamente no
requiere una abertura especifica.
8 hstaaciOn
'_¥T338AA-02562A-01
MES.indd
de a avadora
8
2008-03-10
;,2_L2_3:34:35
NOTA IMPORTANTE
PARA EL INSTALADOR
Lea las siguientes instrucciones con detenimiento antes de instalar la lavadora.
Estas instrucciones se deben conservar para consultas futuras.
Le recomendamos que contrate a un profesional para la instalacion de esta lavadora.
PASO 1
Retirar los tornillos de transporte
Antes de utilizar la lavadora, debe quitar los cuatro tornillos
de transporte de la parte posterior de la unidad.
1. Afloje los cuatro tornillos con la Ilave inglesa provista.
2.
Deslice el tornillo y el separador hacia arriba y retire el
tornillo con la arandela a traves del orificio de la parte
posterior de la lavadora. Repita el proceso para cada
tornillo.
3. Cubra los orificios con los tapones de pla,stico
suministrados.
4. Conserve los tornillos de transporte y las arandelas en
caso de que los necesite en el futuro.
PASO 2
Seleccionar
una ubicacion
Antes de instalar la lavadera, asegurese de que la ubicacbn:
•
tenga una superficie resistente y nivelada
•
este alejada de la luz solar directa
,,
tenga suficiente ventilaci0n
,,
no se congele (que la temperatura no sea inferior a los 32 °F (0 °C))
,,
este alejada de las fuentes de calor, tales como el aceite o el gas
tenga suficiente espacio como para que la lavadora no quede apoyada sobre su cable
de alimentaci0n
no tenga alfombras que obstruyan los orificios de ventilaci0n.
PASO 3
Instalacion
de la lavadora
Coloque la manguera de drenaje en el
drenaje. Asegurese de que NO haya una
conexi0n hermetica entre la manguera de
drenaje y la toma de agua.
La toma de agua debe estar a una altura de
18 pulgadas o 46 cm como minimo.
1.
se debe tenet la precauci0n de
@ Siempre
evitar plegar o danar la manguera de
Tambor de lavado
Toma de agua
drenaje. Para obtener mejores resultados,
la manguera de drenaje no debe presentar
obstrucciones de ninguna indole: codos,
96..,ax.
acoplamientos o longitudes excesivas.
En caso de que no se pueda colocar la
manguera de drenaje convenientemente a
una altura de 18 pulg. o 46 cm, col0quele
un soporte.
hstaaciOn
WT338AA-02562A-01
MES.indd
9
de a avadora 9
2008-03-10
;,2_L2_3:34:36
2,
Coloque la nueva arandela de goma (que se suministra) en
cada uno de los extremos de las mangueras de entrada.
Apoye las arandelas en los acoplamientos con firmeza.
3.
Controle la manguera de entrada para asegurarse de que
haya una arandela dentro de cada manguera de carga.
Enrosque las mangueras de entrada alas conexiones de las
Ilaves de agua CALIENTE y FR[A.
En el otto extremo de la manguera, verifique que haya una
arandela de goma pot manguera y conecte cada manguera
de carga a la v_tlvula de agua. Asegurese de conectar la
manguera con la leyenda impresa que dice "HOT" (Caliente)
a la Ilave de agua CALIENTE. Ajuste a mano hasta que
quede cenido, a continuaci0n, de dos tercios de giro con la
pinza.
®
/_,>,,
Fria
Caliente
Para usar el agua correctamente, conecte tanto lava,lvula
Leyenda
de agua CALIENTE como la de agua FR[A. Si una de elias impresa "Fria"
no esta, conectada, aparecera, el error "nF" (no hay carga).
Arandela
de goma
Leyenda impresa
"Caliente"
4. Abra el suministro de agua "CALIENTE" y "FR[A" y controle
todas las conexiones a la v_tlvula y a la Ilave de agua para
verificar si hay p6rdidas.
5.
Enchufe el cable de alimentaci0n a un tomacorriente
aprobado de tres pines, correctamente conectado a tierra,
de 120 voltios y 60 Hz, protegido pot un fusible o un
disyuntor de 15 A.
La lavadora esta, conectada a tierra a traves del tercer
pin del cable de alimentaci0n cuando se Io enchufa a un
tomacorriente de tres pines con conexi0n a tierra.
6.
Deslice la lavadora hasta dejarla en su lugar.
7.
Nivele la lavadora girando manualmente las patas
niveladoras hacia adentro o hacia afuera segun sea
necesario o para ello use la Ilave incluida con la lavadora.
Cuando la lavadora este nivelada, ajuste las tuercas usando
la Ilave o una herramienta de ajuste.
Lasdebe
cuatrousar
caras
la lavadora
deben quedar
Se
un de
nivelador
de carpintero
en las niveladas.
cuatro
esquinas de la lavadora. Es una buena idea volver a
controlar si la lavadora esta, nivelada despues de los
primeros doce lavados.
Evite el dano de las patas. No mueva
la lavadora a menos que las tuercas
de bloqueo esten sujetadas a la parte
inferior de la lavadora.
®
10 hstalacOn
WT338AA-02562A-01
MES.indd
10
de a avadora
2008-03-10
;,2_L2_3:34:40
COMO CARGAR
LA LAVADORA
•
Puede cargar el tambor con ropa seca, sin doblar; pete NO L© S©BRECARGUE.
•
La sobrecarga puede reducir la eficacia del lavado, causar desgaste adicional y posiblemente causar
pliegues o arrugas en las prendas.
•
Lave prendas delicadas, tales como los brassieres, los calcetines y dema,s lenceria, en el ciclo Delicates
(Prendas delicadas) con prendas livianas similares.
•
Cuando lave articulos voluminosos o algunos articulos ma,s pequenos, no cargue el tambor
completamente, coloque, por qemplo, un tapete, una almohada, munecos de peluche, o uno o dos
sueteres, agregue algunas toallas para que el lavado y el centrifugado resulten ma,s eficaces.
Durante el ciclo de centrifugado, la lavadora puede agregar agua adicional para redistribuir el
desequilibrio excesivo dentro del tambor.
•
Cuando lava cargas muy sucias, no sobrecargar la lavadora es muy importante para garantizar un
lavado de Optima calidad.
•
Para agregar una prenda que se habia olvidado:
1. Presione el boron Start/Pause (Inicio/Pausa).
2. Espere hasta que la luz de la Traba de la puerta se apague (5 segundos)
3. Agregue la prenda, cierre la puerta y presione el boron Start/Pause Inicio/Pausa).
Luego de una pausa de 10 segundos, se reanudara, el ciclo.
Para
garantizar
un lavado
a fondo, agregue la prenda dentro de los clnco minutos posteriores al
comienzo
del ciclo
de lavado.
Trate de lavar la ropa de cama, las toalJas, la ropa interior y demAs artJculos que, por Io general,
tienen contacto directo con el cuerpo con la opci6n SilverCare TM, que desinfecta usando agua fria.
COMO COMENZAR
1. Cargue la lavadora.
2.
Cierre la puerta.
3. Vierta detergente y aditivos en el dosificador (consulte las pa,ginas 16-17).
4.
Seleccione el ciclo apropiado y las opciones para la carga (consulte las pa,ginas 12-15).
5.
Presione el boton Start/Pause (Inicio/Pausa).
6.
Se iluminara, la luz del indicador Wash (lavado).
7. El tiempo del ciclo calculado aparecera, en la pantalla.
Es posible que el tiempo fluctue para indicar mejor el tiempo restante en el ciclo.
8. Antes de que la lavadora comience a Ilenarse, se escuchara, una serie de sonidos semejantes a un "clio"
para controlar la traba de la puerta y que se efectue un drenaje ra,pido.
,
Cuando haya finalizado el ciclo, la luz de la traba de la puerta se apagara, y la palabra "End" (Fin)
aparecera, en la pantalla.
•
NO intente abrir la puerta hasta que la luz de la Traba de la puerta se haya apagado. Para agregar
una prenda que se haya olvidado, consulte la secci6n "C6mo cargar la lavadora". (pa,gina 11)
•
Cuando la lavadora reinicia el funcionamiento despues de una pausa, espere a que produzca una
demora de hasta 15 segundos antes de que el ciclo continue.
•
Si presiona Power (Encendido), se cancelara el ciclo y la lavadora se detendra.
•
Las luces del indicador Pre Wash (Prelavado), Wash (Lavado), Rinse (Enjuague) y Spin
(Centrifugado) se iluminaran durante dichas fases del ciclo.
Manual de nstrucciones
WT338AA-02562A-01
MES.indd
11
11
2008-03-10
;,2_L2_ 3:34:41
DESCRIPCi0N
GENERAL
DEL PANEL DE CONTROL
DEEP STEAM _ ..............................
Delkate_
Start/Pause
Temp.
@ ©@
Spin
@ Steam
®
@
Soil Level
®
Signal
@ ©
®
@ @
Muestra el tiempo restante del cicIo, toda la informaci6n del cicIo y los
mensajes de error.
Presione este boton repetidamente para rotar entre las distintas opciones
disponibles de temperatura del agua.
Extra Hot/Cold (Muy caliente/fria): prendas muy sucias que no destihen. Disponible
solo con el ciclo Sanitize (DesinfecciOn).
Hot/Cold (Caliente/fria):ropa blanca y prendas muy sucias que no destinen.
Warm/Warm (Ca,lida!ca,lida): prendas que no destinen. Cuando se selecciona
enjuagar con agua tibia, solo el enjuague final se realizara,con agua tibia.
Los dema,s enjuagues se efectuara, n con agua fria para preservar la energia.
Warm/Cold (Ca,lida/fria):- prendas moderadamentesucias, que no destinen;
la mayoria de las prendas sin arrugas.
Cold/Cold (Fria/fria): prendas de colores vivos, ligeramente sucias.
Presione este boton repetidamente para rotar entre las distintas opciones de
velocidad de centrifugado.
Extra High (Muy alta): extrae ma,s agua de las cargas durante el centrifugado.
Para
minimizar
la formacion
telas sin arrugas
y que(Muy
no
necesitan
planchado,
NO usedelaarrugas
opcion de
de las
centrifugado
Extra High
alta) para dichas cargas y tampoco sobrecargue la lavadora.
High (Alta): use para la ropa interior, las camisetas, los jeans y los algodones
resistentes.
Medium (Mediana): use para los jeans, las prendas sin arrugas o que no
necesitanplanchado y las telas sinteticas.
Low (Baja): use para las prendas delicadas que necesitan un centrifugado a
velocidad lenta.
No Spin (Sin centrifugado): drena la lavadora sin centrifugar. Utilicela para
prendas extremadamente delicadas que no puedan tolerar el centrifugado.
Presione el boton para agregar vapor a la ropa.
Cuando se agrega vapor, el interior de la lavadora se Ilena de vapor, la puerta
de vidrio se empana y se oye el sonido del vapor.
La puerta no se abre durante o despues del funcionamiento del vapor si la
temperatura interna es demasiado alta.
El vapor esta, disponible Onicamente cuando se selecciona el ciclo Steam
(Vapor).
Presione el boton para seleccionar el nivel de suciedad y el tiempo de lavado.
Heavy (Muy sucia): para prendas muy sucias.
Normal: para prendas moderadamente sucias. Esta opcion es la mejor para
la mayoria de las cargas.
Light (Ligeramente sucia): para prendas ligeramente sucias.
Presione el boton para aumentar o disminuir el volumen de la serial de final
del ciclo o apagar la serial.
12 Lavado de una carga de ropa
WT338AA-02562A-01
MES.indd
12
2008-03-10
;,_L2_3:34:42
Presione estos botones para seleccionar diferentes opciones del ciclo.
Delay Start (Inicio retardado): cualquier ciclo puede retardarse hasta 12
horas en incrementos de una hora. La hora en pantalla indica el tiempo en el
cual comenzara, el lavado.
Extra Wash (Lavado extra): agregue tiempo adicional al ciclo de lavado para
una mejor remocion de las manchas.
Extra Rinse (Enjuague extra): agregue un enjuague adicional al final del ciclo
para remover los aditivos y perfumes del lavado conmayor eficacia.
Extra Spin (Centrifugado extra): agregue tiempo adicional para extraer ma,s
agua de las cargas.
Silver CareTMEI sistema SilverCare TM desinfecta usando un 92% menos de
energia que la desinfeccion termica tradicional.
Pre Wash (Prelavado): Para usar esta funcion, coloque detergente en la
seccion de prelavado del compartimiento para el detergente. Una vez que
se enciende, la lavadora se Ilena de agua fria y detergente, rota, luego drena
y avanza al ciclo de lavado seleccionado. Algunos ciclos no pueden set
seleccionados con esta opcion.*
*
No puede seleccionar la opcion PreWash (Prelavado) en los ciclos
Delicates (Ropa delicada), Wool (Lana), Quick Wash (Lavado ro,pido).
iiiiiiiiiiiiiiiiiiiiiiiiiiiiiiiiiiiiiiiiiiiiiiiiiiiiiiiiiiiiiiiiiiiiiiiiiiiiiiiiiiiiiiiiiiiiiiiiiiiiiiiiiiiiiiiiiiiiiiiiiiiiiiiiiiiiiiiiiiiiiiii
iiiiiiiiiiiiiiiiiiiiiiiiiiiiiiiiiiiiiiiiiiiiiiiiiiiiiiiiiiiiiiiiiiiiiiiiiiiiiiiiiiiiiiiiiiiiiiiiiiiiiiiiiiiiiiiiiiiiiiiiiiiiiiiiiiiiiiiiiiiiiiii
iiiiiiiiiiiiiiiiiiiiiiiiiiiiiiiiiiiiiiiiiiiiiiiiiiiiiiiiiiiiiiiiiiiiiiiiiiiiiiiiiiiiiiiiiiiiiiiiiiiiiiiiiiiiiiiiiiiiiiiiiiiiiiiiiiiiiiiiiiiiiiii
Seleccione el ciclo apropiado para el tipo de carga.
Esto determinara, el patron de lavado y la velocidad de centrifugado del ciclo.
iiiiiiiiiiiiiiiiiiiiiiiiiiiiiiiiiiiiiiiiiiiiiiiiiiiiiiiiiiiiiiiiiiiiiiiiiiiiiiiiiiiiiiiiiiiiiiiiiiiiiiiiiiiiiiiiiiiiiiiiiiiiiiiiiiiiiiiiiiiiiiii
iiiiiiiiiiiiiiiiiiiiiiiiiiiiiiiiiiiiiiiiiiiiiiiiiiiiiiiiiiiiiiiiiiiiiiiiiiiiiiiiiiiiiiiiiiiiiiiiiiiiiiiiiiiiiiiiiiiiiiiiiiiiiiiiiiiiiiiiiiiiiiii
iiiiiiiiiiiiiiiiiiiiiiiiiiiiiiiiiiiiiiiiiiiiiiiiiiiiiiiiiiiiiiiiiiiiiiiiiiiiiiiiiiiiiiiiiiiiiiiiiiiiiiiiiiiiiiiiiiiiiiiiiiiiiiiiiiiiiiiiiiiiiiii
iiiiiiiiiiiiiiiiiiiiiiiiiiiiiiiiiiiiiiiiiiiiiiiiiiiiiiiiiiiiiiiiiiiiiiiiiiiiiiiiiiiiiiiiiiiiiiiiiiiiiiiiiiiiiiiiiiiiiiiiiiiiiiiiiiiiiiiiiiiiiiii
iiiiiiiiiiiiiiiiiiiiiiiiiiiiiiiiiiiiiiiiiiiiiiiiiiiiiiiiiiiiiiiiiiiiiiiiiiiiiiiiiiiiiiiiiiiiiiiiiiiiiiiiiiiiiiiiiiiiiiiiiiiiiiiiiiiiiiiiiiiiiiii
iiiiiiiiiiiiiiiiiiiiiiiiiiiiiiiiiiiiiiiiiiiiiiiiiiiiiiiiiiiiiiiiiiiiiiiiiiiiiiiiiiiiiiiiiiiiiiiiiiiiiiiiiiiiiiiiiiiiiiiiiiiiiiiiiiiiiiiiiiiiiiii
iiiiiiiiiiiiiiiiiiiiiiiiiiiiiiiiiiiiiiiiiiiiiiiiiiiiiiiiiiiiiiiiiiiiiiiiiiiiiiiiiiiiiiiiiiiiiiiiiiiiiiiiiiiiiiiiiiiiiiiiiiiiiiiiiiiiiiiiiiiiiiii
iiiiiiiiiiiiiiiiiiiiiiiiiiiiiiiiiiiiiiiiiiiiiiiiiiiiiiiiiiiiiiiiiiiiiiiiiiiiiiiiiiiiiiiiiiiiiiiiiiiiiiiiiiiiiiiiiiiiiiiiiiiiiiiiiiiiiiiiiiiiiiii
Para
la formacion
de arrugas de la ropa, seleccione el ciclo
Perm minimizar
Press (Plancha
permanente).
Heavy Duty (Potencia extra): para telas resistentes que no destinen y
prendas muy sucias.
iiiiiiiiiiiiiiiiiiiiiiiiiiiiiiiiiiiiiiiiiiiiiiiiiiiiiiiiiiiiiiiiiiiiiiiiiiiiiiiiiiiiiiiiiiiiiiiiiiiiiiiiiiiiiiiiiiiiiiiiiiiiiiiiiiiiiiiiiiiiiiii
iiiiiiiiiiiiiiiiiiiiiiiiiiiiiiiiiiiiiiiiiiiiiiiiiiiiiiiiiiiiiiiiiiiiiiiiiiiiiiiiiiiiiiiiiiiiiiiiiiiiiiiiiiiiiiiiiiiiiiiiiiiiiiiiiiiiiiiiiiiiiiii
________________________________________________________________________________________________________________________________________________
Normal: para la mayor parte de las telas, entre elias, el algod6n, el line y las
prendas moderadamente sucias.
iiiiiiiiiiiiiiiiiiiiiiiiiiiiiiiiiiiiiiiiiiiiiiiiiiiiiiiiiiiiiiiiiiiiiiiiiiiiiiiiiiiiiiiiiiiiiiiiiiiiiiiiiiiiiiiiiiiiiiiiiiiiiiiiiiiiiiiiiiiiiiii
iiiiiiiiiiiiiiiiiiiiiiiiiiiiiiiiiiiiiiiiiiiiiiiiiiiiiiiiiiiiiiiiiiiiiiiiiiiiiiiiiiiiiiiiiiiiiiiiiiiiiiiiiiiiiiiiiiiiiiiiiiiiiiiiiiiiiiiiiiiiiiii
________________________________________________________________________________________________________________________________________________
Whites (Ropa blanca): para telas blancas con o sin lejia.
Deep Steam(Vaporizacion
extremadamente sucia.
profunda): un ciclo de lavado para la ropa
Delicates (Ropa delicada): paratelas finas, brassieres, lenceria de seda y
otras telas para set lavadas a mano. Para obtener mejores resultados, use
detergente liquido.
Wool (Lana): para lana que se pueda lavar en lavadora. Las cargas deben
tenet un peso inferior a las 8 Ib (3,62 kg).
El ciclo de lavado de lana de este artefacto ha sido
Woolmark
lavables
en lavadora
y cuando
los
aprobado pot
Woolmark
para elsiempre
lavado de
productos
productos se laven conforme alas instrucciones de la
etiqueta de la prenda y aquellas delfabricante de la lavadora,
M0509.
________________________________________________________________________________________________________________________________________________
________________________________________________________________________________________________________________________________________________
________________________________________________________________________________________________________________________________________________
________________________________________________________________________________________________________________________________________________
________________________________________________________________________________________________________________________________________________
iiiiiiiiiiiiiiiiiiiiiiiiiiiiiiiiiiiiiiiiiiiiiiiiiiiiiiiiiiiiiiiiiiiiiiiiiiiiiiiiiiiiiiiiiiiiiiiiiiiiiiiiiiiiiiiiiiiiiiiiiiiiiiiiiiiiiiiiiiiiiiii
________________________________________________________________________________________________________________________________________________
________________________________________________________________________________________________________________________________________________
________________________________________________________________________________________________________________________________________________
________________________________________________________________________________________________________________________________________________
________________________________________________________________________________________________________________________________________________
________________________________________________________________________________________________________________________________________________
________________________________________________________________________________________________________________________________________________
iiiiiiiiiiiiiiiiiiiiiiiiiiiiiiiiiiiiiiiiiiiiiiiiiiiiiiiiiiiiiiiiiiiiiiiiiiiiiiiiiiiiiiiiiiiiiiiiiiiiiiiiiiiiiiiiiiiiiiiiiiiiiiiiiiiiiiiiiiiiiiii
iiiiiiiiiiiiiiiiiiiiiiiiiiiiiiiiiiiiiiiiiiiiiiiiiiiiiiiiiiiiiiiiiiiiiiiiiiiiiiiiiiiiiiiiiiiiiiiiiiiiiiiiiiiiiiiiiiiiiiiiiiiiiiiiiiiiiiiiiiiiiiii
iiiiiiiiiiiiiiiiiiiiiiiiiiiiiiiiiiiiiiiiiiiiiiiiiiiiiiiiiiiiiiiiiiiiiiiiiiiiiiiiiiiiiiiiiiiiiiiiiiiiiiiiiiiiiiiiiiiiiiiiiiiiiiiiiiiiiiiiiiiiiiii
iiiiiiiiiiiiiiiiiiiiiiiiiiiiiiiiiiiiiiiiiiiiiiiiiiiiiiiiiiiiiiiiiiiiiiiiiiiiiiiiiiiiiiiiiiiiiiiiiiiiiiiiiiiiiiiiiiiiiiiiiiiiiiiiiiiiiiiiiiiiiiii
iiiiiiiiiiiiiiiiiiiiiiiiiiiiiiiiiiiiiiiiiiiiiiiiiiiiiiiiiiiiiiiiiiiiiiiiiiiiiiiiiiiiiiiiiiiiiiiiiiiiiiiiiiiiiiiiiiiiiiiiiiiiiiiiiiiiiiiiiiiiiiii
WOOI_MARK
Quick Wash (Lavado ro,pido): para prendas ligeramente sucias que se
necesitan con urgencia.
Sanitize (Desinfeccion): para prendas muy sucias y que no destinen. Este
ciclo calienta el agua a 150 °F (65 °C) para eliminar las bacterias.
iiiiiiiiiiiiiiiiiiiiiiiiiiiiiiiiiiiiiiiiiiiiiiiiiiiiiiiiiiiiiiiiiiiiiiiiiiiiiiiiiiiiiiiiiiiiiiiiiiiiiiiiiiiiiiiiiiiiiiiiiiiiiiiiiiiiiiiiiiiiiiii
iiiiiiiiiiiiiiiiiiiiiiiiiiiiiiiiiiiiiiiiiiiiiiiiiiiiiiiiiiiiiiiiiiiiiiiiiiiiiiiiiiiiiiiiiiiiiiiiiiiiiiiiiiiiiiiiiiiiiiiiiiiiiiiiiiiiiiiiiiiiiiii
iiiiiiiiiiiiiiiiiiiiiiiiiiiiiiiiiiiiiiiiiiiiiiiiiiiiiiiiiiiiiiiiiiiiiiiiiiiiiiiiiiiiiiiiiiiiiiiiiiiiiiiiiiiiiiiiiiiiiiiiiiiiiiiiiiiiiiiiiiiiiiii
iiiiiiiiiiiiiiiiiiiiiiiiiiiiiiiiiiiiiiiiiiiiiiiiiiiiiiiiiiiiiiiiiiiiiiiiiiiiiiiiiiiiiiiiiiiiiiiiiiiiiiiiiiiiiiiiiiiiiiiiiiiiiiiiiiiiiiiiiiiiiiii
iiiiiiiiiiiiiiiiiiiiiiiiiiiiiiiiiiiiiiiiiiiiiiiiiiiiiiiiiiiiiiiiiiiiiiiiiiiiiiiiiiiiiiiiiiiiiiiiiiiiiiiiiiiiiiiiiiiiiiiiiiiiiiiiiiiiiiiiiiiiiiii
iiiiiiiiiiiiiiiiiiiiiiiiiiiiiiiiiiiiiiiiiiiiiiiiiiiiiiiiiiiiiiiiiiiiiiiiiiiiiiiiiiiiiiiiiiiiiiiiiiiiiiiiiiiiiiiiiiiiiiiiiiiiiiiiiiiiiiiiiiiiiiii
iiiiiiiiiiiiiiiiiiiiiiiiiiiiiiiiiiiiiiiiiiiiiiiiiiiiiiiiiiiiiiiiiiiiiiiiiiiiiiiiiiiiiiiiiiiiiiiiiiiiiiiiiiiiiiiiiiiiiiiiiiiiiiiiiiiiiiiiiiiiiiii
iiiiiiiiiiiiiiiiiiiiiiiiiiiiiiiiiiiiiiiiiiiiiiiiiiiiiiiiiiiiiiiiiiiiiiiiiiiiiiiiiiiiiiiiiiiiiiiiiiiiiiiiiiiiiiiiiiiiiiiiiiiiiiiiiiiiiiiiiiiiiiii
iiiiiiiiiiiiiiiiiiiiiiiiiiiiiiiiiiiiiiiiiiiiiiiiiiiiiiiiiiiiiiiiiiiiiiiiiiiiiiiiiiiiiiiiiiiiiiiiiiiiiiiiiiiiiiiiiiiiiiiiiiiiiiiiiiiiiiiiiiiiiiii
iiiiiiiiiiiiiiiiiiiiiiiiiiiiiiiiiiiiiiiiiiiiiiiiiiiiiiiiiiiiiiiiiiiiiiiiiiiiiiiiiiiiiiiiiiiiiiiiiiiiiiiiiiiiiiiiiiiiiiiiiiiiiiiiiiiiiiiiiiiiiiii
iiiiiiiiiiiiiiiiiiiiiiiiiiiiiiiiiiiiiiiiiiiiiiiiiiiiiiiiiiiiiiiiiiiiiiiiiiiiiiiiiiiiiiiiiiiiiiiiiiiiiiiiiiiiiiiiiiiiiiiiiiiiiiiiiiiiiiiiiiiiiiii
iiiiiiiiiiiiiiiiiiiiiiiiiiiiiiiiiiiiiiiiiiiiiiiiiiiiiiiiiiiiiiiiiiiiiiiiiiiiiiiiiiiiiiiiiiiiiiiiiiiiiiiiiiiiiiiiiiiiiiiiiiiiiiiiiiiiiiiiiiiiiiii
iiiiiiiiiiiiiiiiiiiiiiiiiiiiiiiiiiiiiiiiiiiiiiiiiiiiiiiiiiiiiiiiiiiiiiiiiiiiiiiiiiiiiiiiiiiiiiiiiiiiiiiiiiiiiiiiiiiiiiiiiiiiiiiiiiiiiiiiiiiiiiii
________________________________________________________________________________________________________________________________________________
iiiiiiiiiiiiiiiiiiiiiiiiiiiiiiiiiiiiiiiiiiiiiiiiiiiiiiiiiiiiiiiiiiiiiiiiiiiiiiiiiiiiiiiiiiiiiiiiiiiiiiiiiiiiiiiiiiiiiiiiiiiiiiiiiiiiiiiiiiiiiiii
iiiiiiiiiiiiiiiiiiiiiiiiiiiiiiiiiiiiiiiiiiiiiiiiiiiiiiiiiiiiiiiiiiiiiiiiiiiiiiiiiiiiiiiiiiiiiiiiiiiiiiiiiiiiiiiiiiiiiiiiiiiiiiiiiiiiiiiiiiiiiiii
iiiiiiiiiiiiiiiiiiiiiiiiiiiiiiiiiiiiiiiiiiiiiiiiiiiiiiiiiiiiiiiiiiiiiiiiiiiiiiiiiiiiiiiiiiiiiiiiiiiiiiiiiiiiiiiiiiiiiiiiiiiiiiiiiiiiiiiiiiiiiiii
Si
selecciona
Pause (Pausa)
durante
fase de calentamiento
del ciclo
Sanitize
(Desinfeccion),
la puerta
de lalalavadora
permanecera, trabada
pot su seguridad.
Rinse + Spin (Enjuague + centrifugado): uselo para cargas que necesitan
unicamente enjuague o para agregar a la carga suavizante de telas que se
anade durante el enjuague.
Spin Only (S01ocentrifugado): ofrece un centrifugado para extraer mo,s agua.
Towels (Toallas): para toallas de bano, toallas pequenas y alfombrillas.
Hand Wash (Lavado a mano): ciclo de lavado muy suave similar al
lavado manual.
Lavado de una carga de ropa 13
'_¥T338AA-02562A-01
MES.indd
13
2008-03-10
;_2_L2_3:34:44
Presi6nelo para detener y reiniciar los programas.
Presione una vez para encender la lavadora y presi0nelo nuevamente para
apagarla. Si la lavadora permanece encendida durante ma,s de 10 minutos
sin que se toque ninguno de los botones, se apagara, automa,ticamente.
Child lock (Seguro contra
Ni_os)
Una funci6n que evita que los ninos jueguen con la lavadora.
ACTIVACI0
N/D ESACTIVACI0
N
Si quiere activar/desactivar la funci6n Child Lock (Seguro contra ninos), presione los botones
Soil Level (Nivel de suciedad) y Signal (Serial) simulta,neamente durante 3 segundos.
C6mo funciona:
1. "Child Lock" (Bloqueo contra ninos) puede activarse mientras la lavadora esta, en
funcionamiento.
2.
Una vez que activa la funci6n "Child Lock" (Bloqueo contra ninos), todos los controles
(salvo el bot6n Power (Encendido)) quedara,n bloqueados hasta que desactiva dicha
funci0n.
3.
El bot6n Child Lock (Seguro contra ninos) se iluminara, mientras la funci6n este activa.
Cuando
los botones,
distintoscontra
del bot6n
(Encendido), no respondan, verifique si el
bot6n "Child
Lock" (Seguro
ninos)Power
esta, encendido.
Garment+
(Mas prendas)
Puede agregar o retirar prendas para lavar incluso despues de que haya comenzado el lavado,
siempre y cuando este encendida la luz de Garment+ (Mils prendas). AI presionar el bot6n
Start/Pause
(Inicio/Pausa) se destraba la puerta, salvo que el agua este demasiado caliente o
que no haya mucha agua en la lavadora. Si puede destrabar la puerta y desea continuar el ciclo
de lavado, cierre la puerta y presione el bot6n Start/Pause
(Inicio/Pausa).
14 Lavado de una carga de ropa
'_¥T338AA-02562A-01
MES.indd
14
2008-03-10
;,2_L2_3:34:44
PARA LAVAR CON SILVERCARE TM
Las blusas, las camisetas e incluso la lenceria extremadamente delicadas que no se pueden lavar con
agua caliente ahora se pueden desinfectar con eficacia sin los efectos adversos del agua caliente. Si fuera
necesario, un tecnico de servicio puede reemplazar fa,cilmente las la,minas de plata.
Rata usar:
1. Cargue la lavadora.
2.
Presione el bot0n Power (Encendido).
3.
Seleccione un ciclo girando el disco del Selector de ciclos.
4.
Presione el bot0n SilverCare TM.
5. Vierta detergente en la bandeja del dosificador para el lavado principal y vierta suavizante de telas hasta
la linea marcada.
6.
Presione el bot0n Start/Pause (Inicio/Pausa).
: La lavadora selecciona automa, ticamente las condiciones de lavado 0ptimas al detectar el peso de la
ropa.
SOLO
PARA USO
DOMIeSTICO.
LOS USUARIOS
DEBEN
NOTIFICAR
A LAS
AUTORIDADES
LOCALES
RESPONSABLES
DEL COMERCIALES
TRATAMIENTO DE
RESIDUOS
ANTES
DEL USO.
Para vet el numero total de ciclos de lavado con iones de plata realizados pot la lavadora, mantenga
pulsados los botones Signal (Senal) y SilverCare TM al mismo tiempo durante 3 segundos.
LU1 : menos de 1000 veces
LU0:1000
veces
Debe reemplazar el kit SilverCare TM cuando en pantalla aparece la leyenda "LU0", puesto que esta, pot
finalizar la vida util de los electrodos. Comuniquese con el 1-800-SAMSUNG.
No puede seleccionar la opci0n SilverCare TM
con
el ciclo Wool (Lana).
USO DEL STEAM WASH (LAVADO A VAPOR)
Inyecta vapor directamente en su ropa, en el tambor de lavado para aumentar la temperatura del lavado e
incrementar el efecto Remojo y de este modo mejorar el desempeno del lavado.
1. Cargue la lavadora.
2.
Presione el bot0n Power (Encendido).
3. Active el Cycle Selector (Selector de ciclos) y seleccione Steam Cycle (Ciclo de vapor). (El programa
Deep Steam (Vaporizacion profunda) selecciona automa,ticamente la funcion Steam (Vapor)).
4.
Presione el bot0n Steam (Vapor).
5. Vierta detergente en la bandeja del dosificador para el lavado y vierta suavizante de telas hasta la linea
marcada.
6.
Presione el boton Start/Pause
(Inicio/Pausa).
: La lavadora selecciona automa, ticamente las condiciones de lavado optimas al detectar el peso de la
ropa.
Si se selecciona el lavado a vapor, el vapor se inyecta en el momento m_ts efectivo para la cantidad de
ropa detectada y asi maximizar el efecto del vapor.
El vapor se inyecta 8 minutos despues de iniciado el ciclo. El vapor se inyecta durante 1,5 segundos y
se detiene durante 13 segundos. Esto se repite durante los 16 minutos siguientes. La funci0n Steam
(Vapor) puede seleccionarse con los ciclos esta,ndar (excepto el prelavado).
Lavado de una carga de ropa 15
WT338AA-02562A-01
MES.indd
15
2008-03-10
;,2_L2_3:34:44
USO DEL DETERGENTE
La lavadora fue disenada para usar detergentes de alta eficacia (HE, pot su sigla en ingles).
•
Para obtener un lavado de Optima calidad, use un detergente de alta
eficacia, pot ejemplo: Tide HE, Wisk HE, Cheer HE o Gain HE*. Los
detergentes de alta eficacia contienen supresores de la espuma que
reducen o eliminan la espuma. Cuando se produce menos espuma, la
carga se mueve con mayor eficacia y el lavado se maximiza.
/_
NO se recomienda un detergente convencional. Use unicamente
.....
-"_,E,,Adetergentes de alta eficacia.
Reducir
cantidad de detergente
reducir
calidad pot
delcolor
lavado.
Es importante
tratar
las
manchaslapreviamente,
clasificar laspuede
prendas
con la
cuidado
y nivel
de suciedad,
y evitar
sobrecargar la lavadora.
*
Los nombres de las marcas son marcas comerciales de sus respectivos fabricantes.
CARACTERiSTICAS
Dosificador
automatico
La lavadora cuenta con compartimientos separados para
dosificar el detergente y la lejia con proteccion para ropa
de color, la lejia que contenga cloro y el suavizante de telas.
Todos los aditivos del lavado se colocan en sus respectivos
compartimientos antes de encender la lavadora.
El dosificador automa,tico SIEMPRE DEBE estar en su sitio
antes de encender la lavadora.
•_ Compartimiento
el detergente
para
"'4 Compartimiento
para prelavado
Selector
de
detergente
NO abra el dosificador automa,tico cuando la lavadora este en
funcionamiento.
Rata usar:
1. Abra el cajon dosificador del lado izquierdo del panel de
control.
2. Agregue la cantidad recomendada de aditivos en los
compartimientos correspondientes para los aditivos del
lavado, con cuidado de no sobrecargar o derramar los
aditivos.
3.
Deslice el cajon dosificador cuidadosamente hasta volver a
colocarlo pot completo en el compartimiento.
Compartimiento
para el detergente
1.
Vierta la cantidad recomendada de detergente para ropa directamente en el compartimiento
para el detergente antes de encender la lavadora.
2.
Si se usa lejia con proteccion para ropa de color, debe agregarse con el detergente en el
compartimiento para el detergente.
Cuando agregue lejia con proteccion para ropa de color junto con el detergente, Io mejor
es que ambos productos tengan la misma consistencia: granulada o liquida.
Si
usa detergentepara
liquido,
baje el selector de detergente y vierta el detergente en el
compartimiento
el detergente.
16 Lavado de una carga de ropa
WT338AA-02562A-01
MES.indd
16
2008-03-10
;,2_L2_3:34:45
Compartimiento
para prelavado
Cuando usa la opcion Pre Wash (Prelavado), se debe verter el detergente tanto en el
compartimiento para prelavado, como en el compartimiento para el detergente. El detergente se
dosificara, automa, ticamente durante el prelavado.
,,
Si se usa un detergente de alta eficacia (HE), agregue 1/3 de la cantidad recomendada en el
compartimiento para prelavado y 2/3 de la cantidad recomendada en el compartimiento para
el detergente.
Compartimiento
para la lejia
(S01olejia liquida que contenga cloro)
1. Agregue lejia que contenga cloro en el compartimiento
la lejia.
NO exceda la linea MAX FILL (Llenado ma,ximo).
2,
Compartimiento I"-para el suavizante
de telas
para
Compartimiento _-para la lejia
Evite salpicar o rebasar el compartimiento.
/
3. tambor
La lavadora
la lejia dentro del
en eldosificara,
momento automa,ticamente
apropiado.
4. El dosificador diluye automa, ticamente la lejia liquida que
_,
_//
!_
..............
_
contenga cloro antes de que Ilegue a la carga para lavar.
directamente
sobre la carga o dentro del tambor.diluir
Se
Nunoaviertalejialiquidaquecontengaolorosin
•
para la tela, pot ejemplo, puede desgastar las fibras o
trata
dedecoloracion,
un quimico potente
puede
set perjudicial
causar
si no sey Io
usa correctamente.
Si prefiere usar lejia sin cloro, con proteccion para
ropa de color, agreguela al compartimiento para el
detergente apropiado.
NO vierta lejia con proteccion para ropa de color
directamente en el compartimiento para la lejia.
Compartimiento
para el suavizante
de telas
1.
Vierta la cantidad recomendada de suavizante de telas liquido en el compartimiento
suavizante.
Para cargas ma,s pequenas, use menos del contenido de una tapa.
2.
El suavizante de telas debe diluirse con agua hasta que alcance la linea MAX FILL (Llenado
ma,ximo) del compartimiento.
3.
El dosificador libera automa,ticamente el suavizante de telas liquido en el momento correcto
durante el ciclo de enjuague.
@.
Use el compartimiento
para el
para el suavizante SOLO para suavizantes de telas liquidos.
o
NO use un dosificador Downy Ball* en el compartimiento para el suavizante de telas de
esta lavadora. No agregara, el suavizante de telas en el momento correcto.
Use el compartimiento para el detergente.
*
Los nombres de las marcas son marcas comerciales de sus respectivos fabricantes.
Lavado de una carga de ropa 17
WT338AA-02562A-01
MES.indd
17
2008-03-10
;,2_L2%3:34:46
LIMPIEZA
DEL EXTERIOR
Cierre las Ilaves de agua despues de finalizar el lavado del dia.
Esto cerrara, el suministro de agua a la lavadora y evitara, la improbable posibilidad de que se produzcan
danos a causa del derrame de agua. Deje la puerta abierta para permitir que el interior de la lavadora se
seque.
Use un pano suave para limpiar todo el detergente, la lejia u otros derrames a medida que ocurran.
Limpie Io siguiente tal como se recomienda:
Panel de control: limpie con un pano suave y humedo. No use polvos abrasivos ni panos de limpieza. No
rode el panel directamente con limpiadores en aerosol.
Gabinete: lave con agua y jab0n.
LIMPIEZA
DEL INTERIOR
Limpie el interior de la lavadora peri0dicamente para eliminar todo vestigio de suciedad, polvo, olor, moho,
hongos o bacterias que pueda permanecer en la lavadora como consecuencia del lavado de ropa.
El incumplimiento de estas instrucciones puede dar como resultado situaciones poco satisfactorias, tales
como olores y/o manchas permanentes en la lavadora o en la ropa para lavar.
Se pueden retirar los dep0sitos de agua dura si fuera necesario. Use un limpiador con el r0tulo "Washer
safe" (Seguro para lavadoras).
LIMPIEZA
DE LOS DOSIFiCADORES
Posiblemente, el dosificador autom_,tico necesite una limpieza peri6dica debido a la acumulaci6n de
aditivos del lavado.
1. Presione la palanca de liberaci0n del interior del dosificador y
extra,igalo.
2. Retire la tapa del sif0n de los compartimientos
telas y la lejia.
para el suavizante de
3. Lave todas las partes con agua corriente.
4. Limpie el hueco del dosificador con un cepillo suave.
5. Vuelva a colocar la tapa del sif0n y aj0stela con firmeza.
6. Introduzca de nuevo el dosificador en su sitio.
7. Ejecute un ciclo de Rinse & Spin (Enjuague y centrifugado) sin ninguna
carga en la lavadora.
18 Mantenmentode
WT338AA-02562A-01
MES.indd
18
2
Tapa del sifOn i.--1
_____
|
a avadora
2008-03-10
;,2_L2_3:34:47
LIMPIEZA
DEL FILTRO DE RESIDUOS
Recomendamos limpiar el filtro de residuos cuando el agua no drena correctamente o cuando aparece en
la pantalla el mensaje de error "ND".
1.
Abra la tapa del filtro presionando y tirando del asa del filtro .......
2.
Desenrosque el tap0n de desag0e giro,ndolo
en sentido contrario al de las agujas del reloj.
3.
Mantenga el tap0n en el extremo del
tubo de desag0e y extra,igalo lentamente
aproximadamente 6 pulgadas (15 cm) y vacie
todo el agua.
4.
Retire el tap0n del filtro de residuos.
5.
Limpie la suciedad u otros materiales que hubieran quedado en el
filtro de residuos. Aseg0rese de que no este bloqueada la bomba
de desag0e ubicada detra,s del filtro de residuos.
PaSo1
:
Paso
2
6. Vuelva a colocar el tap0n del filtro de residuos.
7. Vuelva a colocar la tapa del filtro.
Manten miento de a avadora 19
WT338AA-02562A-01
MES.indd
19
2008-03-10
;,2_L2_3:34:50
COMO GUARDAR
LA LAVADORA
Las lavadoras se pueden daflar si no se extrae el agua de las mangueras y de los componentes internos
antes de guardarla. Prepare la lavadora para guardar de la siguiente manera:
•
Seleccione el ciclo Quick Wash (Lavado ra,pido) y agregue lejia al dosificador automa, tico. Ejecute ese
ciclo en la lavadora sin carga.
,,
Cierre las Ilaves de agua y desconecte las mangueras de entrada.
Desenchufe la lavadora del tomacorriente y deje la puerta de la lavadora abierta para que circule aire
pot el tambor.
Si su lavadora ha estado guardada en lugares con temperaturas pot debajo del punto de congelaciOn,
deje transcurrir un tiempo para que los testes de agua se derritan antes de usarla.
20 Mantenmentode
WT338AA-02562A-01
MES.indd
20
a avadora
2008-03-10
;,2_L2_3:34:50
CONTROLE
ESTOS PUNTOS SI SU LAVADORA...
no enciende...
•
,,
Asegurese de que la puerta este bien cerrada.
Verifique que la lavadora este enchufada.
Compruebe que las Ilaves de salida de agua esten abiertas.
Asegurese de presionar el bot0n Start/Pause (Inicio/Pausa) para
encender la lavadora.
Asegurese de que la funci0n Child Lock (Seguro contra ninos) no este
activada; consulte la pe,gina C4.
Antes de que la lavadora comience a Ilenarse, se escuchare, una serie
de sonidos semejantes a un "clic" para controlar la traba de la puerta
y que se efectue un drenaje re,pido.
Controle el fusible o reinicie el disyuntor.
no tiene agua o no tiene
suficiente agua...
Abra las dos Ilaves completamente.
,,
Asegurese de que la puerta este bien cerrada.
Enderece las mangueras de entrada de agua.
Desconecte las mangueras y limpie los filtros. Posiblemente los filtros
de las mangueras esten tapados.
Abra y cierre la puerta y, a continuaci0n, presione el bot0n Start/
Pause (Inicio/Pausa).
tiene restos de detergente
en el dosiflcador
automfitico despu6s de
que ha finalizado el ciclo de
lavado.
Asegurese de que la lavadora funcione con suficiente presi0n de
agua. (1 kgf/cm 2o superior)
vibra o hace demasiado
ruido.
Compruebe que la lavadora este ubicada sobre una superficie
nivelada. Si la superficie no este, nivelada, ajuste las patas de la
lavadora para nivelar el electrodomestico.
Asegurese de que se hayan retirado los tornillos de transporte.
Asegurese de que el disco Selector de detergente se encuentre en la
posici0n superior cuando usa detergente granulado.
o
o
o
se detiene
o
o
o
Asegurese de que la lavadora no toque ningun otto objeto.
Verifique que la carga de ropa sea equilibrada.
Enchufe el cable de alimentaci0n a un tomacorriente que funcione.
Controle el fusible o reinicie el disyuntor.
Cierre la puerta y presione el bot0n Start/Pause (Inicio/Pausa) para
hacer funcionar la lavadora.
Pot su seguridad, la lavadora no lavare, ni centrifugare, salvo que la
puerta este cerrada.
Antes de que la lavadora comience a Ilenarse, se escuchare, una serie
de sonidos semejantes a un "clic" para controlar la traba de la puerta
y que se efectue un drenaje re,pido.
Es posible que se produzcauna pausa o que haya un periodo de
remojo en el ciclo. Espere unos pocos instantes hasta que comience
a funcionar.
Controle que los filtros de las mangueras de entrada a la altura de las
Ilaves no presenten obstrucciones.
Limpie los filtros peri0dicamente.
Gua de solucion de prob emas 21
WT338AA-02562A-01
MES.indd
21
2008-03-10
;,2_L2_3:34:50
/
se llena con agua a una
temperatura incorrect&
•
,,
Abra las dos Ilaves completamente.
Asegurese de que la seleccion de temperatura sea la correcta.
Asegurese de que las mangueras esten conectadas alas Ilaves
correctas.
Purgue las canerias.
Controle el calentador de agua. Deberia estar configurado para
proveer agua caliente en la salida de agua a una temperatura minima
de 120 °F (49 °C). Asimismo, verifique la capacidad del calentador de
agua y la velocidad de recuperacion.
,,
Desconecte las mangueras y limpie los filtros. Posiblemente, los filtros
de las mangueras esten tapados.
A medida que la lavadora se Ilena, la temperatura del agua
puede variar debido a que la funcion automa, tica de control de la
temperaturacontrola la temperatura del agua que ingresa. Esto es
normal.
Mientras la lavadora se Ilena, es posible que observe que pot el
dosificador pasa s01o agua caliente y/o s01oagua fria cuando se
seleccionan las temperaturas de lavado fria o c_tlida. Esta es una
funcion normal que cumple el control de temperatura automa, tico
dado que la lavadora determina la temperatura del agua.
tiene ia ouerta trabada o no
se abre.
Presione el boton Start/Pause (Inicio/Pausa) para detener la lavadora.
La puerta de la lavadora permanecera, trabada durante la fase de
calentamiento del ciclo Sanitize (Desinfeccion).
Puede Ilevar algunos minutos que el mecanismo de cierre de la
puerta se desconecte.
no drena y/o no centrifuga.
,,
Controle el fusible o reinicie el disyuntor.
,,
Enderece las mangueras de drenaje. Elimine las mangueras
enroscadas. Si existe alguna restricci6n en cuanto al drenaje,
comuniquese con el servicio tecnico.
Cierre la puerta y presione el bot6n Start/Pause (Inicio/Pausa). Pot
su seguridad, la lavadora no lavara, ni centrifugara, salvo que la puerta
este cerrada.
deja la carga demasiado
hQmeda al finNizar el ciclo.
,,
plerde
agua.
,,
,,
tiene espuma en exceso.
,,
,,
Use la velocidad de centrifugado High (Alta) o Extra High (Muy alta).
Use un detergente de alta eficacia para reducir la formaci6n de
espuma en exceso.
Tiene una carga demasiado pequena. Las cargas muy pequenas
(una o dos prendas) se pueden desequilibrar y no centrifugarse en
absoluto.
Asegurese de que la puerta este bien cerrada.
Asegurese de que todas las conexiones de las mangueras esten
ajustadas.
Asegurese de que el extremo de la manguera de drenaje este
correctamente conectado y asegurado al sistema de drenaje.
Evite sobrecargar la lavadora.
Use un detergente de alta eficacia para evitar la formaci6n de
espuma en exceso.
Use un detergente de alta eficacia para evitar la formaci6n de
espuma en exceso.
Reduzca la cantidad de detergente para el agua blanda, las cargas
ligeramente sucias o pequenas.
NO se recomienda un detergente de baja eficacia.
22 Gua de soIuc6n de prob emas
WT338AA-02562A-01
MES.indd
22
2008-03-10
;,2_L2_3:34:51
CODIGOS
DE INFORMACi0N
Pueden aparecer c0digos de informacion para ayudarle a comprender mejor que ocurre con la lavadora.
1-11-
Un desequilibrio en la carga
impidio que la lavadora
centrifugara.
Redistribuya la carga y presione el boton Start/
Pause (Inicio/Pausa).
La puerta no queda trabada
cuando la lavadora esta, en
funcionamiento.
Presione el boton Power (Encendido) para
apagar la lavadora, luego reinicie el ciclo. Si el
codigo vuelve a aparecer, comuniquese con el
servicio tecnico.
La puerta esta, abierta cuando la
lavadora esta, en funcionamiento.
Cierre la puerta firmemente y reinicie el ciclo.
No se Iogra cerrar la puerta de la
lavadora.
Cierre la puerta firmemente y reinicie el ciclo.
Problema con el control de la
temperatura del agua.
Solicite servicio tecnico.
Si el codigo vuelve a aparecer, comuniquese con
el servicio tecnico.
Si el codigo vuelve a aparecer, comuniquese con
el servicio tecnico.
(Problema con el control del
calentador.)
La lavadora intento Ilenarse,
pero no alcanzo el nivel de agua
adecuado.
Solicite servicio tecnico.
La puerta no se puede abrir.
Asegurese de que la puerta este bien cerrada.
Presione el boton Power (Encendido) para
apagar la lavadora y, a continuacion, vuelvala
a encender. Si el codigo vuelve a aparecer,
comuniquese con el servicio tecnico.
El motor no funciona
correctamente.
Reinicie el ciclo presionando el boton Start/
Pause (Inicio/Pausa). Si el codigo vuelve a
aparecer, comuniquese con el servicio tecnico.
La lavadora no esta, drenando.
Antes de comunicarse con el servicio tecnico,
verifique Io siguiente:
Tambien puede significar que
la unidad percibe una pequena
obstruccion mientras drena.
!
i
_i _ i_ ii
1.
Limpie el filtro. (vease la pa,gina 19)
O
1. Apague la unidad durante 10 segundos y
luego vuelva a encenderla nuevamente.
Seleccione s01o el ciclo Spin (Centrifugado).
3. Presione Start/Pause (Inicio/Pausa) para que
el agua drene.
2.
i
i
i
ii
i
i
_i _
i
ii
i
Si no drena, comuniquese con el servicio
tecnico.
Gua de solucion de prob emas 23
'_¥T338AA-02562A-01
MES.indd
23
2008-03-10
;,2_L2_3:34:53
La lavadora intent0 Ilenarse pero
no Io Iogr0.
Asegurese de que las Ilaves de agua esten
completamente abiertas. Controle que no haya
mangueras enroscadas.
Controle los filtros interiores de las mangueras
de carga.
FHw
UC
Problema con el control.
Solicite servicio tecnico.
El servicio electrico se interrumpi0
cuando la lavadora estaba en
funcionamiento.
Reinicie el ciclo presionando el bot6n Start/
Pause (Inicio/Pausa).
Se detecta una falla en el sensor
del nivel de agua.
Comuniquese con el servicio tecnico.
Tecla atascada.
Comuniquese con el servicio tecnico.
Problema con el sensor de la
velocidad del motor.
Reinicie el ciclo.
Problema con el sensor de
temperatura.
Reinicie el ciclo.
Se detect0 alta corriente.
Reinicie el ciclo.
ZiC
Si el c6digo vuelve a aparecer, comuniquese con
el servicio tecnico..
Si el c6digo vuelve a aparecer, comuniquese con
el servicio tecnico.
Si el c6digo vuelve a aparecer, comuniquese con
el servicio tecnico..
Se detect0 alto/bajo voltaje.
Reinicie el ciclo.
Si el c6digo vuelve a aparecer, comuniquese con
el servicio tecnico..
Sedetect0 demasiada espuma
durante la sesi0n de lavado.
Para evitar que esto suceda, reduzca la cantidad
de detergente.
La unidad ingresara, en estado de
espera hasta que disminuya la
espuma. A continuaci0n, la unidad
volvera, a funcionar.
Cuandolostermine
lavado,
pot su
oarte,
c6digosel End
y SUdS
se
iluminara,n.
Para los c6digos que no figuran ma,s arriba, Ilame al 1-800-726-7864
(1-800-SAMSUNG).
24 Gua de soluc6n de prob emas
WT338AA-02562A-01
MES.indd
24
2008-03-10
;,2_L2_3:34:56
ap nd ae
TABLA DE INDICACIONES
DEL TEJIDO
Los siguientes simbolos ofrecen indicaciones acerca de las prendas. La etiqueta de indicaciones de la prenda
incluye simbolos para lavado, blanqueado, secado y planchado, o limpieza a seco cuando sea necesaria. El
uso de simbolos garantiza la consistencia entre los fabricantes textiles de articulos nacionales e importados.
Siga las indicaciones de la etiqueta para prolongar la vida 0til de la prenda y reducir los problemas del lavado.
Normal
Plancha permanente/
Antiarrugas / Control de
arrugas
[]
Ropa suave/Delicada
Lavado
amano
s
Secar colgado/tender
No lavar
Colgar para que escurra
No retorcer
Secar en posicion
horizontal
No usar lejia
...........................................
...........................................................................................................................
_
No secar en secadora
_8
G A,
to
ooe
Caliente
Mediano
co
Ca.lida
Bajo
O
Fria
O
Cualquier calor
Sin calor/aire
Cualquier lejia (cuando
sea necesaria)
No planchar
O
_
Limpiar en seco
No limpiar en seco
_
Secar colgado/tender
proteccidn
para ropa de
color)
Lejia(cuando sea necesaria)
Alto
Colgar para que escurra
Ciclo
de secado en
secadora
Mediano
Secar en posici6n
horizontal
S01olejiasin cloro (con
_h_
Sin vapor (agregado a la
plancha)
i
Bajo
Para lanas que se
puedan lavar en lavadora.
--_.---- Las cargas deben tenet
un peso inferior alas 8 Ib
(3,62 kg).
Plancha permanente/
Antiarrugas / Control de
arrugas
Ropa suave/Delicada
** Los dmbolos con punto representan las temperaturas del agua del lavado apropiadas para diversas prendas.
El tango de temperatura para Caliente es de 41 °C a 52 °C (105 °F a 125 °F), para Ca.lidaes de 29 °C a 41 °C
(de 85 °F a 105 °F) y para Fr[aes de 16 °C a 29 °C (de 60 °F a 85 °F). (La temperatura del agua del lavado debe
alcanzar un m[nimo de 16 °C (60 °F) para que se active el detergente y se Iogre un lavado eficaz). Posiblemente
la lavadora no garantice estas temperaturas porque las temperaturas reales del agua que ingresa en la lavadora
dependen de la configuraci6n del calentador de agua y de las temperaturas del suministro de agua regional.
Pot ejemplo, el agua fria que ingresa en las casas de los Estados del Norte durante el inviemo puede set de 4
°C (40 °F), la cual es demasiado fr[a para que se Iogre un lavado eficaz. En este caso, sera. preciso ajustar la
temperatura del agua seleccionando la opci6n de temperatura ca.lida,agregando algo de agua caliente a la I[nea
MAX FILL (Llenado ma.ximo)o usando la opci6n de calentamiento de la lavadora, si se dispone de ella.
'_¥T338AA-02562A-01
MES.indd
25
2008-03-10
;,2%L2%3:34:57
I
AYUDA AL MEDIOAMBIENTE
i1t
Esta lavadora se fabrica con materiales reciclables. Si decide deshacerse de ella, siga la normativa
local relacionada con la eliminacion de desechos. Corte el cable de alimentacion para que el
electrodomestico no pueda conectarse a una fuente de alimentacion. Quite la puerta para que los
animales y los ninos pequenos no puedan quedar atrapados dentro del electrodomestico.
•
No utilice cantidades de detergente mayores alas recomendadas pot el fabricante del detergente.
Utilice productos quitamanchas y lejias antes del ciclo de lavado y sOIo cuando sea necesario.
Ahorre agua y electricidad utilizando la capacidad total de la lavadora (la cantidad exacta depende del
programa que se utilice).
,,
Use SilverCare TM en lugar de la desinfeccion con agua caliente para ahorrar energia.
DECLARACi0N
Este electrodomestico
DE CONFORMIDAD
cumple con la norma UL2157.
ESPECIFICACIONES
-- ._[
Pulgadas (Cm)
Div
A. Altura-General
38" (96.5)
C. Profundidad
con la puerta
abierta 90 °
B. Ancho
27" (68.6)
D. Profundidad
Div
DIMENSIONES
PRESION DEL AGUA
' Pulgadas (cm)
31.1 "(79)
50 kPa - 800 kPa
PESO
95 kg
POTENCIA DEL CALENTADOR
CONSUMO
EN ERGiA
51.18"(130)
DE
REVOLUCION DEL
CENTRIFUGADO
900 W
LAVADO
120V
226 W
LAVADO Y CALENTAM lENTO
120V
997 W
CENTRIFUGADO
120V
379 W
DRENAJE
120V
41W
WF338
1300 rpm
26 Apend ce
WT338AA-02562A-01
MES.indd
26
2008-03-10
;,2_L2_ 3:35:10
TABLA DE CICLOS
Use esta tabla para configurar el mejor ciclo y opci0n para su lavadora.
338AAW, 338AAG, 338AAR, 338AAB
_c:
.......................................
;; ;:
;:a
_
;;;;
_M
..................................
_o_................................................................
_ra
Delicada
_
41
_
41
HandWash
_
(Lavade a
_
_
nlano)
Wool
57
(Lana)
Quick
Wash
_
35
_
_
20
_
_
102
(Lavado
r_pido)
Rinse ÷ Spin
(Enjuague +
centrifugado)
_
_
_
_
Spin on!y
($610
cen_
trifugado)
Deep Stream
(Vaporizaci6n
profunda}
_
_
Heavy Duty
(Super
Pesado)
Normal
Whites(Ropa
blanca}
Quick Wash
(Lavado
r_pido)
Towels (Teal*
las}
Sanitize
(Desinfec,
ci6n)
EH/C: Extra Hot/Cold
(May caliente/fria)
H/C: Hot/Cold
(Caliente/fria)
W/W: Warm/Warm
(Cb.lida/cb.lida)
W/C: Warm/Cold
(Cb.lida/fria)
C/C: Cold/Cold
EH: Extra High (Muy
alta)
H: High (Alta)
M: Medium (Mediana)
L: Low (Baja)
NS: No Spin (Sin
centrifugado)
H: Heavy (May sucia)
N: Normal
L: Light (Ligeramente
sucia)
(Fria/Fria)
WT338AA-02562A-01
MES.indd
27
2008-03-10
;,2_L2_ 3:35:12
ga,ra,ntia
LAVADOAA SAMSUNG
SILVERCARE
TM
GARANTJA LIMITADA PARA EL COMPRADOR
ORIGINAL
El presente producto de la marca SAMSUNG, tal como Io provee y distribuye SAMSUNG ELEOTRONIOS
AMERICA, INC. (SAMSUNG) y Io entrega como nuevo, en su embalaje de cart6n original al comprador o
consumidor original, esta garantizado por SAMSUNG contra defectos de fabricaci6n de los materiales y la
mano de obra durante el periodo limitado de la garantia de:
Un (1) aflo para las piezas y la mano de obra
Dos (2) aflos para las piezas del panel de control
Tres (3) aros para las piezas del tambor inoxidable
Cinco (5) aros para las piezas del motor
La presente garantia limitada comienza en la fecha original de compra yes va,lida unicamente para
productos comprados y usados en los Estados Unidos. Para recibir el servicio tecnico de la garantia,
el comprador debe comunicarse con SAMSUNG con el fin de que se determine el problema y los
procedimientos del servicio. El servicio tecnico de la garantia sOIo puede set prestado pot un centro de
servicio tecnico autorizado de SAMSUNG. Se debe presentar la factura de compra original como prueba
de compra a SAMSUNG o al servicio tecnico autorizado de SAMSUNG. SAMSUNG prestara, servicio
tecnico a domicilio durante el periodo de la garantia sin costo, sujeto a la disponibilidad dentro de los
Estados Unidos contiguos. El servicio tecnico a domicilio no esta, disponible en todas las a,reas.
Para recibir el servicio tecnico a domicilio, el producto no debe presentar obstrucciones y debe set
accesible para el agente del servicio tecnico. Si el servicio tecnico no esta, disponible, SAMSUNG puede
optar pot transportar el producto hasta y desde el servicio tecnico autorizado.
SAMSUNG reparara,, reemplazara, el producto u ofrecera, un reembolso a nuestra discrecion y sin
cargo adicional, tal como se establece en la presente garantia, con piezas o productos nuevos o
reacondicionados si se comprueba que es defectuoso durante el periodo limitado de la garantia
especificado anteriormente. Todas las piezas y los productos reemplazados pasan a set propiedad de
SAMSUNG y deben set devueltos a SAMSUNG. Las piezas y los productos reemplazados asumen la
garantia original que testa, o noventa (90) dias, el periodo que sea el ma,s prolongado. La presente garantia
limitada cubre defectos de fabricacion de los materiales y la mano de obra encontrados durante el uso
normal y domestico de este producto y no sera,va,lida para Io siguiente: daros que ocurran durante el
envio; entrega e instalacion; aplicaciones y usos para los cuales el presente producto no fue destinado;
producto o numeros de serie alterados; daro cosmetico o acabado exterior; accidentes, abuso, descuido,
incendio, inundacion, caida de rayos, u otros casos fortuitos o de fuerza mayor; uso de productos, equipo,
sistemas, utilidades, servicios, piezas, suministros, accesorios, aplicaciones, instalaciones, reparaciones,
cableado externo o conectores no provistos ni autorizados pot SAMSUNG que darien este producto o
que acarreen problemas en el servicio; voltaje de la linea electrica incorrecto, fluctuaciones y sobretension;
ajustes del cliente e incumplimiento de Io establecido en el manual de instrucciones, instrucciones de
mantenimiento y ambientales que esta,n cubiertas y recomendadas en el manual de instrucciones; traslado
y reinstalacion del producto; problemas causados pot plagas. La presente garantia limitada no cubre
problemas derivados de la corriente, el voltaje o el suministro electrico incorrectos, las bombillas de luz,
los fusibles de la casa, el cableado de la casa, el costo del servicio tecnico para recibir instrucciones o
corregir errores en la instalacion. SAMSUNG no garantiza el funcionamiento ininterrumpido o sin errores del
producto.
28 Garantia
'_¥T338AA-02562A-01
MES.indd
28
2008-03-10
;,2_L2_ 3:35:12
SALVO LO ESTABLECIDO EN LA PRESENTE GARANT[A, NO EXISTEN GARANT[AS SOBRE EL
PRESENTE PRODUCTO, YA SEAN EXPRESAS O TACITAS, Y SAMSUNG DESCONOCE TODAS LAS
GARANT[AS QUE INCLUYEN, AUNQUE NO EN CARACTER TAXATIVO, CUALQUIER GARANT[A
TACITA DE QUE EL PRODUCTO SE ENCUENTRA EN CONDICIONES APTAS PARA LA VENTA, DE
DEFRAUDACION DE DERECHOS O DE QUE EL PRODUCTO SE ADECUA A LOS FINES ESPECiFICOS
PARA LOS CUALES SE ADQUIERE.
NINGON AVAL O GARANT[A OTORGADOS POR PERSONA, COMPAN[A O CORPORACION
ALGUNA CON RESPECTO AL PRESENTE PRODUCTO REVESTIRA CARACTER VINCULANTE PARA
SAMSUNG. SAMSUNG NO SERA RESPONSABLE POR PI2RDIDA DE INGRESOS O LUCRO CESANTE,
IMPOSIBILIDAD DE GENERAR AHORROS U OBTENER OTROS BENEFICIOS, O CUALQUIER DANO
DERIVADO DE CIRCUNSTANCIAS ESPECIALES, DANO IMPREVlSTO O DERIVADO CAUSADO
POR EL USO, USO INCORRECTO, O INCAPACIDAD PARA USAR EL PRESENTE PRODUCTO,
INDEPENDIENTEMENTE DE LA TEOR[A LEGAL EN QUE SE FUNDE EL RECLAMO Y AUN CUANDO SE
LE HAYA NOTIFICADO A SAMSUNG DE LA POSIBILIDAD DE TALES DANOS.
NINGON RESARCIMIENTO DE NINGUNA [NDOLE CONTRA SAMSUNG SUPERARA EL MONTO
DEL PRECIO DE COMPRA DEL PRODUCTO VENDIDO POR SAMSUNG Y CAUSANTE DEL
PRESUNTO DANO. SIN LIMITAR LO PRECEDENTE, EL COMPRADOR ASUME TODO EL RIESGO Y
LA RESPONSABILIDAD POR PERDIDA, DANO O LESION AL COMPRADOR Y A LOS BIENES DEL
COMPRADOR Y A TERCEROS Y A SUS BIENES DERIVADOS DEL USO, USO INCORRECTO O
INCAPACIDAD PARA USAR EL PRESENTE PRODUCTO. LA PRESENTE GARANT[A LIMITADA NO
SE EXTENDERA A NINGUNA PERSONA DISTINTA DEL COMPRADOR ORIGINAL DEL PRESENTE
PRODUCTO, ES INTRANSFERIBLE Y ESTABLECE SU EXCLUSIVA REPARACION.
Algunos Estados no permiten limitaciones en cuanto al plazo de una garantia implicita, o la exclusion o
limitacion de daflos imprevistos o derivados, pot Io tanto las limitaciones o exclusiones antedichas pueden
no aplicarse en su caso. Esta garantia le otorga derechos especificos, y adema,s puede tenet otros
derechos que varian segun el Estado en el que se encuentre.
Para recibir un servicio t_cnico de garantia, comuniquese con SAMSUNG a:
SAMSUNG ELECTRONICS AMERICA, INC. - CONSUMER ELECTRONICS CUSTOMER
400 Valley Road, Suite 201, MtoArlington, NJ 07856
1=800=SAMSU NG(726=7864}
www,
'_¥T338AA-02562A-01
SERVICE
samsung,con3
MES.indd
29
2008-03-10
;,2_L2_ 3:35:12
sTiENE PREGUNTAS O COMENTARiOS?
U.S.A
1-800-SAMSUNG(726-7864)
www,samsung,com
MEXICO
01-800-SAMSUNG(726-7864)
www,samsung.com
N.° de c0digo:
'_¥T338AA-02562A-01
MES.indd
30
DC68-02562A-01_MES
2008-03-10
;,2_L2_ 3:35:13