1
Owner's Manual
Nlodei No. 875.198650
1/2-in. Composite impact Wrench
Unpacking
When
unpacking
during
transit,
product
into
this
Make
product,
sure
any
carefully
loose
inspect
fittings,
for any
bolts,
etc,
damage
that may
are tightened
before
have
occurred
putting
this
service,
WARNING:
Please read and save these safety and operating instructions.
Read carefully
before attempting
to assemble,
install, operate or maintain
the product
described.
Protect yourself
and others by observing
all safety information.
Failure to comply with
instructions
could result in personal
injury and/or property
damage!
Retain instructions
for future reference.
102109
Sears, Roebuck and Co,, Hoffman
www.CRAFTSMAN.com
Estates,
IL 60179
Owner's
Manual
Model
No.
875.198650
Owner's
Manual
Model
No.
875.198650
90 PSI Maximum
This tool is designed to operate at an air
ONE YEAR FULL WARRANTY
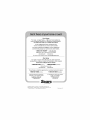
Features
& Benefits
CRAFTSMAN
ON
TOOL
_, Specifications
Product Warranty
_, Exploded View Drawing & Parts List
If this Craftsman tool fails to give
complete satisfaction within one year
from the date of purchase, RETURN IT
TO ANY SEARS STORE OR PARTS &
REPAIR CENTER OR OTHER
CRAFTSMAN OUTLET IN THE UNITED
_, Troubleshooting
STATES FOR FREE REPAIR (or
_, Compressor
Important
Requirements
Safety Instructions
Installation and Operation
Maintenance
replacement
if repair proves impossible).
Read Operating
Please become familiar with all the
gauge pressure (90 PSi) maximum,
instructions
tool. Use of higher air pressure can, and
and warnings before
tool is ever used for
commercial or rental purposes, this
warranty applies for only 90 days from the
The Craftsman
composite
Model 875.198650
impact wrench features
hitting, twin hammer
produces
air pressure places the internal
Always Wear Approved
date of purchase.
torque.
This warranty does not include
expendable parts, such as lamps,
batteries, bits or blades.
fast 1,100 impacts per
minute and 8,000 RPM free speed gets
the job done quickly. High impact
This warranty gives you specific legal
rights, and you may also have other rights
resistant
which vary from state to state.
composite
magnesium
4.25 Ibs.
hammer
housing
and
case weighs
Eye Protection
Impact resistant eye protection
should
meet or exceed the standards
ANSI Z87.1, Occupational
only
Sears, Roebuck and Co.,
Hoffman Estates, IL 60179
components
under loads and stresses
they were not designed for, causing
set forth in
premature
tool failure.
California
Prop 65
and
Eye and Face Protection.
Look for marking Z87.1 on your eye
protection
to ensure that it is an approved
style.
Some dust created by power sanding,
sawing, grinding, drilling and other
construction
activities contains
a hard
design that
725 ft. Ibs. of maximum
Exceptionally
1/2-in.
Hearing
Protection
Hearing protection
is Recommended
should be used when
the noise level exposure
equals or
exceeds an 8 hour time-weighted
average
chemicals
known
to cause cancer,
Lead from lead based paint, crystalline
silica from bricks and cement and other
reflective surfaces, other tools being
operated
nearby, all add to the noise level
in a given work area. If you are unable to
recommend
we
masonry products,
arsenic and
chromium
from chemically-treated
lumber,
the use of hearing protection.
Your risk from those exposures
1/2"
Free speed (No Load) .......... 8,000 RPM
Maximum torque ..................... 725 ft. Ibs.
Weight ..........................................
4.251bs.
Overall length .............................
5-7/8 in.
Average air consumption ........ 5.0 SCFM
Recommended
hose size .......... 3/8"1.D.
Air inlet .......................................
1/4" NPT
Maximum Air Pressure .................. 90 PSI
Light Use - 26 Gallon
Avoid
Prolonged
Exposure
to Vibration
Pneumatic tools can vibrate during use.
Typical
Use - 33 Gallon
Prolonged exposure
repetitive
Heavy Use - 60 Gallon
Professional
to vibration or very
hand and arm movements
cause injury. Discontinue
tool if you experience
discomfort
resuming
can
the use of any
tingling, numbness,
depending
varies,
on how often you do this
type of work. To reduce your exposure
to these chemicals:
work in a well
ventilated
area, and work
with approved
safety equipment,
such as dust masks
that are specifically
designed to filter
out microscopic
particles.
or pain in your hands or arms.
You should consult your physician
ENG-2
birth
defects or other reproductive
harm.
Some examples of these chemicals are:
sound level of 85dBA. Process noise,
determine your noise level exposure,
Drive size ...........................................
at the
may cause injury. Also, the use of higher
operating any pneumatic tool.
Educational
If this Craftsman
pressure of 90 pounds per square inch
Instructions
before
use of tool.
ENG-3
Owner's
Manual
Disconnect
Model
No.
875.198650
the air tool from air supply
Use attachments
and during non-operation,
Do not wear loose fitting
air powered
clothing,
tool.
designed
for use with
Always
examine
scarves, or neck ties in work area, Loose
accessories
before mounting
cracks, or signs of damage.
clothing may become caught in moving
Never use mounted points or other
parts and result in serious personal
accessories
Do not wear jewelry
injury,
when operating
Manual
Some materials
before changing tools or attachments,
servicing
Owner's
for chips,
such
Model
as adhesives
and
Tools which cut, shear, drill, staple,
prolonged
punch,
exposure.
Always
work in a
hands and body.
or
temperature
to operate the tool in a protected
enclosure for one minute after mounting
Tools which
any accessory.
or drive other moving tools, such as
grinding wheels, sockets, sanding
Do not depress
trigger
changes, it is a good practice
when connecting
contain
the air supply hose,
discs,
Never trigger
hair, clothing,
the tool when not applied
to a work object,
Always
Attachments
must be securely
attached, Loose attachments can cause
rating
use accessories
with an RPM
that meets or exceeds
the tool
RPM rating,
jewelry
resulting
entangled
and other
in
loose
in severe injury.
Never wear loose fitting
loose straps
tangled
elements,
apparel
Never point an air tool at oneself
or any
other person, Serious injury could occur,
Never carry a tool by the hose or pull
the hose to move the tool or a
Check
compressor,
for weak or worn
conditions
before each use, Make sure all
connections
are secure,
Keep hoses
heat, oil and sharp
during
through
the exhaust
the first few seconds
oil
port
of
operation.
Thus, the exhaust
be covered
with a towel before applying
port must
which
in moving
parts of the
Keep hands away from moving
parts,
an air tool has been lubricated,
will discharge
or ties, that could
Tie up or cover long hair.
Use Only Impact Sockets & Accessories
Only use sockets designated "FOR USE
WITH IMPACT WRENCHES. "' Hand tool
sockets
away from
edges. Replace
hose that is damaged,
tool.
After
air pressure,
tool Remove any jewelry, watches, etc,,
which might become caught by the
puncture.
air hoses
objects,
become
damage or
moving
etc., can become
contains
serious injury,
Protect air lines from
serious injury. Keep the
part of the tool away from
exposed to water, solvent or extreme
moving parts and result in serious
injury,
chisel, etc. are capable of
causing
working
area.
any tool, Jewelry may become caught in
personal
875.198650
tar, contain chemicals whose vapors
could cause serious injury with
clean, dry, well ventilated
that have been dropped
No.
can break, creating
from flying pieces. Always
any
a hazard
check
sockets, retainers and drives regularly
for wear or damage and replace when
weak or worn,
Improperly
maintained
necessary.
tools and
accessories
can cause serious injury.
Maintain the tool with care. A properly
Release all pressure from the system
Inhalation
before
as grinders,
attempting
relocate
to install, service,
or perform
any maintenance.
generate
which
Keep all nuts, bolts
and ensure equipment
condition,
and screws
tight
is in safe working
hazard: Abrasive
sanders
tools, such
and cut-off
dust and abrasive
can be harmful
tools
materials
to human
maintained
tool, with sharp cutting
edges, reduces the risk of binding
is easier to control,
lungs
and respiratory
system.
MSHA/NIOSH approved,
Always wear
properly fitting
damaged.
face mask or respirator
such tools,
when
binding
using
There is a risk of bursting
if the tool is
Check for misallgnment
of moving
parts, breakage
or
of
parts and any other condition
that
affects the tool's operation,
if damaged,
have the tool serviced
ENG-4
and
before
using,
ENG-5
Owner's
Manual
Model
No.
875.198650
Owner's
Manual
be a flexible
Air Tool Hook Up
movement
Model
No.
875.198650
hose in order to isolate
of the compressor,
This tool features a power regulator valve
Route the initial take-off
as straight
up the shop wall and as
high as possible,
minimize
line (pipe)
This will help
water leaving the
compressor
and traveling
(fig. 2), Rotate regulator
output is achieved,
regulator
until desired
The settings on the
are only for reference and do not
denote a specific power output, Turn
through
system
regulator
to a position with the sinlge
circle being the least amount of power and
Slope the main lines down at least
the three circles being the most amount of
3/4 inch per 10 feet of pipe away
power,
from air compressor; this will draw
the condensate with the flow of air
and away from the compressor,
Place the first drop as far from the
compressor
Before the tool is connected
to the air
supply, clear the air hose of accumulated
dust and moisture
will allow (50 feet is optimal,
although
hose to move the tool or a compressor.
unrealistic
The
Keep hoses away from heat, oil and sharp
further the drop, the more that
edges, Replace any hose that is damaged,
weak or worn.
condensation
can occur, and the
drier the air will be when it reaches
the water separator,
Small (home)
shop hard piping:
A piping diagram for a typical home shop
1 Illustrates a recommended
air
is shown,
Some helpful tips are:
Always use hoses and pipes rated for
A 3/8 inch ID air hose is required up to a
length of 25 feet, A 3/8 inch ID hose
higher pressure
encounter.
than your system will
longer than 25 feet will cause a pressure
If
more length is required, a ½ inch ID air
hose is recommended,
Be sure all hoses
and fittings are the correct size and
before using the tool,
explosion
air piping systems
and serious
as
injury may
result,
The connection
from the compressor
Lever
that get into
install the take-
off line on the top of the main air
supply line for each air drop,
Once a bolt or fastener
A drain line should be placed at the
impacting
for longer than five (5)
seconds will cause excessive wear and
end of the main line for condensate
Never use PVC pipes for
compressed
Forward/Reverse
water and contaminants
the water separator,
hose hook up,
drop and may impede performance,
Figure 2
Regulator Valve
In order to reduce the amount of
Air Hoses for your Air Tools
correctly secured
for a small shop),
by running air freely
through the air hose for 5-10 seconds,
Figure
as the size of your shop
Never carry a tool by the hose or pull the
drainage.
possible damage to the impacting
mechanism,
ff it takes longer than five
seconds
Drain valves should be placed at the
end of branch lines and the drain
is seated,
to tighten
or loosen
or fastener, we recommend
larger size impact
your bolt
the use of a
wrench,
line, and drained daily,
to the initial take-off hard pipe must
ENG-6
ENG-7
Owner's
Manual
Model
No.
875.198650
Owner's
Manual
Model
No.
875.198650
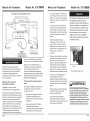
Lubrication
An in-line filter-regulator-lubricator
(fig 1)
is recommended as it increases tool life
and keeps the tool in sustained operation.
The in-line lubricator should be regularly
checked and filled with air tool oil. Proper
adjustment of the in-line lubricator is
performed by placing a sheet of paper
next to the tools exhaust ports and holding
the throttle open approximately 30
seconds. The lubricator is properly set
when a light stain of oil collects on the
paper,
2')......
/
Excessive amounts of oil should be
avoided. In the event that it becomes
necessary to store the tool for an
extended period of time (overnight,
weekend, etc.), it should receive a
generous amount of lubrication through
the air inlet (Figure 3). The tool should be
run for approximately 30 seconds to
ensure oil has been evenly distributed
throughout the tool. The tool should be
stored in a clean and dry environment.
Recommended
Parts List
Lubricants
Use air tool oil or any other high grade
turbine oil containing moisture absorbent,
rust inhibitors, metal wetting agents and
an EP (extreme pressure) additive. See
Figure 3 for location/air inlet.
IMPACT MECHANISM
LUBRICATION
The impact mechanism transfers power
from the tool to a nut or bolt.
The impact mechanism is grease
lubricated and does not require
re-greasing under normal usage.
Lubricate
impact mechanism here.
Lubricate
Figure
ENG-8
/
3
air motor here
Ref#
Part
Ref#
Part
1
9638001M
No,
Description
AIR INLET
Q'ty
1
24
9611224
HAMMER
2
90R2002
O-RING
I
25
9611225
HAMMER
3
4
9287608
9287609
O-RING
DEFLECTOR
I
I
26
27
9611226
90R7718
ANVIL
O-RING
5
9287610
SPRING
I
28
9328830-4
SOCKET
6
9328804V
VALVE
STEM
I
29
9611229
7
8
9328835
9328835S
THROTTLE VALVE SEAT
SPACER
I
I
30
31
9611230
90RI 315
BUSHING
HAMMER
9
10
9287614
9611210
RETAINER
RING
MOTOR
HOUSING
I
1
32
33
9611232
9287617
VALVE STEM
O-RING
11
9SP0326
SPRING
1
34
9611234
VALVE
12
9611212
SCREW
1
35
9611235
13
14
9611213
9611214
BOLT
SCREW
4
3
36
37
9611236
9611237
VALVE BODY
RETAINER
1S
9SP2520
SPRING
1
38
9611238
REVERSE VALVE LEVER
16
17
18
19
9BA001Z
9611217
9611218
9611219
BALL BEARING
END PLATE
ROTOR
BLADE
1
1
1
6
39
40
9611239
9611240
SPRING
POWER MANAGEMENTKNOB
41
9589039
SPRING
20
21
22
9611220
9611221-B
9B6002
CYLINDER
GASKET
BALL BEARING
I
I
I
42
43
9611242
90R8501
TRIGGER
O-RING
44
90R1301
O-RING
23
9611223
HAMMER
2
45
46
9SBOO03-1
9638047
STEEL BALL
GREASE FITTING
PIN
PIN
PIN
No.
Description
Q 'ty
FRAME
2
RETAINER
CASE
O-RING
BUSHING
REVERSE
VALVE
PIN
ENG-9
Owner's
Tool runs
slow or will
not operate.
Manual
Model
1. Grit or gum in tool
No. 875.198650
1. Flush the tool with air tool oil, gum
solvent, or an equal mixture of SAE 10
motor oil and kerosene. Lubricate the tool
Owner's
Manual
2. Lubricate the tool according
to the
lubrication
instructions
in this manual
3. Low air pressure
3a. Adjust the regulator on the tool to the
maximum setting (If applicable).
3b. Adjust the compressor regulator to tool
maximum while the tool is running free.
4. Air hose leaks
4. Tighten and seal hose fittings if leaks are
found. Use pipe thread tape where possible.
5. Pressure
drops
5a. Be sure the hose is the proper size.
Long hoses or tools using
large volumes of air may require a hose with
an I.D. of 1/2" or larger depending on the
total length of the hose.
5b. Do not use multiple number of hoses
connected
together with quick connect
fittings. This causes additional
pressure
drops and reduces the tool power. Directly
connect the hoses together.
1. Water
in tank
1. Drain tank. (See air compressor
manual).
Oil tool and run until no water is evident. Oil
tool again and run 1-2 seconds.
2. Water in the air lines/
hoses
2a. Install a water separator/filter.
NOTE: Separators
only work properly when
the air passing through the separator is
cool. Locate the separator/filter
as far as
possible from the compressor.
Moisture
out
set in
wrong
position
Impacts rapidly
will not remove
1. Lubricate
No.
875.198650
the air motor and the
impact mechanism.
(See
section of this manual)
2. Tool regulator
Does not impact
blowing
of tool
1. Lack of lubrication
Impacts slowly
or will not impact
after cleaning
2. No oil in tool
Model
but
bolts
2. Adjust the regulator on the tool to
the maximum setting
3. In-line regulator or
compressor
regulator
set too low
3. Adjust
1. Worn impact
mechanism
1. Replace worn impact
components
1. Broken
1. Replace
mechanism
impact
Lubrication
regulators
broken
in the air system
mechanism
impact
mechanism
components
Notes:
2b. Install an air dryer.
2c. Anytime water enters the tool, the tool
should be oiled immediately.
ENG-10
ENG-11
IPROFESSIONAL
Llave
de impacto
I
compuesta
de 112 pulg
Desempaquetar
Despues
de desempaquetar
el
examinelo
cuidadosamente
par_
dafios que pudieron
durante
el transporte.
apretar cualquier
haber ocurr
Cerci6res
accesorio,
antes de poner este producto
per
er
ADVERTENCIA: Lea y guarde estas instrucciones de seguridad y operaci6n. Lea
detafladamente antes de tratar de ensamblar, instalar, operar o mantener el producto
Prot6jase usted y protega a los demos respetando toda la informaci6n de seguridad.
incumplimiento
con estas instrucciones
podria resultar en una lesi6n personal, un
propiedad o ambos. Conserve las instrucciones
como referencia futura.
Manual
dei Hropietarlo
Modeio
No.
75. 19 6bU
Manual
dei
Hropietarlo
Modeio
No.
75. 1
90 PSIG M,&XIMO
Caracteristicas y operaci6n
Especificaciones
Garantia del producto
Requisitos del compresor
Instrucciones de seguridad importantes
Instalaci6n y operaci6n
Mantenimiento
Piano de vista despiezada y lista de
piezas
Localizaci6n y soluci6n de fallas
Craftsman Modelo 875,198650 1/2-in.
Ilave inglesa compuesta de impacto
representa un golpear duro, dise_o
gemelo de martillo que produce 725 Ibs.
de Pies de momento de torsi6n maximo.
Excepcionalmente rapidamente 1.100
impactos por minuto y 8.000 RPM libertan
velocidad consigue el trabajo hecho
rapidamente. El impacto alto envoltura
que resistente de compuesto y caso de
martillo de magnesio pesan s61o4,25 Ibs.
]-ama_o del accionador ...............................
GARANTiA COMPLETA POR UN ANO DE
HERRAMIENTA CRAFTSMAN
Si esta herramienta Craftsman falla en
proporcionarle una satisfacci6n completa
dentro de un a_o a partir de su fecha de
compra, DEVUELVALAA CUALQUIER
TIENDA O CENTRO DE PIEZAS Y
REPARACION DE SEARS U OTROS
ESTABLECIMIENTOS DE SEARS EN LOS
ESTADOS UNIDOS, PARA UNA
REPARACION GRATIS (o reemplazo si la
reparaci6n es imposible).
Siesta herramienta Craftsman alguna vez se
usa para fines comerciales o de alquiler, esta
garantia se aplica solamente por 90 dias a
partir de la fecha de compra. Esta garantia
no incluye las piezas consumibles, como
I_mparas, baterias, brocas u hojas.
Esta garantia le proporciona derechos legales
especificos, y usted puede tener tambi6n
otros derechos que varian de estado a
estado.
Sears, Roebuck and Co.,
Hoffman Estates, IL 60179, EE.UU.
Lea las instrucciones
de operaci6n
Familiaricese con todas las instrucciones y
advertencias antes de usar cualquiera
herramienta neumatica.
Use siempre proteccion adecuada para
los ojos
La protecci6n ocular resistente al impacto
debera satisfacer o superar las normas
especificadas en ANSI Z87.1, bajo el titulo
Protecci6n ocular y facial ocupacional y
educativa. Busque la marca Z87.1 en su
protector de los ojos para asegurar que es
un estilo aprobado.
Se recomienda proteccion de los oidos
La protecci6n de los oidos debe usarse
cuando la exposici6n de nivel de sonido
iguala o excede un nivel promedio
ponderado por tiempo, de 8 horas, de
85dBA. El ruido del proceso, superficies
reflectoras, otras herramientas operadas
en la cercania, todos agregan al nivel de
ruido en un area determinada de trabajo. Si
no es posible determinar la exposici6n al
nivel de ruido, se recomienda usar
protecci6n auditiva.
Evite la exposicion
vibracion.
1/2"
delocidad libre (sin carga) ................ 8,000 RPM
Par torsor final ........................ 725 pies por libra
Peso .................................................... 4.25 libras
Longitud total ...........................................
5-7/8"
Consumo promedio de aire ............... 5.0 SCFM
1-ama_o recomendado
3ara la manguera .............. Dia. int. de 3/8 pulg
_,dmisi6n de aire .......................... 1/4 pulg NPT
Presi6n de aire maxima .......................... 90 PSI
Poco uso -26 galones
Uso regular - 33 galones
Uso pesado - 60 galones profesional
prolongada a la
Las herramientas neumaticas pueden
vibrar durante su uso. La exposici6n
prolongada a las vibraciones o los
movimientos muy repetidos de manos y
brazos pueden causar lesiones. Interrumpa
el uso de cualquier herramienta si
experimenta cosquilleo, adormecimiento,
malestar o dolor en las manos o brazos.
Debera consultar con su m6dico antes de
seguir usando la herramienta.
Esta herramienta est_fidise5ada I
operar a una presi6n neumatica r
indicador de 90 libras por pulgads
(90 PSI), en la herramienta. El us
presi6n de aire mayor puede y po
causar lesiones. Tambi6n, el uso
presi6n neumatica mayor sometc
componentes internos a cargas y
para las cuales no fueron dise5ac
causando una falla prematura de
herramienta.
Proyecto de ley 65 de Californi_
Algunos polvos creados por el
aserrado, desgastado, taladraa
actividades de construcci6n co
substancias quimicas conocid_
causantes de cancer, defectos _
nacimiento u otras lesiones en
sistema de reproducci6n. Algu_
ejemplos de esas sustancias qd
SOn:
Plomo de pinturas que contien
silice cristalino de ladrillos, cer
otros productos de albabileria
y cromo de madera quimicamE
tratada
Su riesgo de esas exposicione,.
dependiendo de cuan a menud
electra este tipo de trabajo. Pa
su exposici6n a estos material_
en un area bien ventilada y con
equipos de protecci6n aprobac
mascaras de polvo que esten
especificamente
disebadas pat
particulas microsc6picas.
Manual
del Propietario
Modelo
Desconecte Ja herramienta del
suministro de aJre antes de cambiar
herramientas o accesorios, darle servicio o
durante el tiempo que no est6 funcionando.
No use ropa suelta, bufandas o corbatas
en el _rea de trabajo. La ropa suelta podria
quedar atrapada en las piezas en
movimiento y resultar en una lesi6n
personal grave.
No use joyas mientras usa la
herramienta. Las joyas podrian quedar
atrapadas en las piezas en movimiento y
resultar en una lesi6n personal grave.
No presione el disparador cuando est6
conectando la manguera de suministro de
aire.
No apriete eJ disparador de la
herramienta cuando no se aptique a un
objeto de trabajo.
Los accesorios deben acopJarse de
forma
segura.
Los
accesorios
sueltos
pueden causar una lesi6n grave.
Protega Jas JJneas de aJre contra Jos
da_os y puncJones.
Nunca apunte una herramienta
neum_tica a sus propJa persona ni a
ninguna otra persona. Podria ocurrir una
lesi6n grave.
Revise Jas mangueras de aJre en busca
de condicJones d_bJles o de desgaste
antes de cada uso. AsegOrese de que todas
las conexiones est@ bien afianzadas.
Libere toda Ja presi6n del sistema
de tratar de instalar, dar servicio,
reubicar o realJzar cualquier
mantenJmiento.
antes
Mantenga todas las tuercas, pemos y
tomillos apretados, y asegure que el
equipo est6 en condiciones de trabajo
seguras.
SPA-4
No. 875.198650
Use accesorios disehados para utilizar
con la herramienta el_ctrica neumatica.
Siempre examine los accesorios antes
del montaje en busca de astiflas, grietas
o indicios de alg_n daho.
Nunca use puntos montados u otros
accesorios que se ban caido o se ban
expuesto al agua, disolventes o cambios
extremos de temperatura. Es bueno usar la
herramienta en un alojamiento protegido por
un minuto despu6s de montarle cualquier
accesorio.
Siempre use accesorios clasificados
para revoluciones
por minutos (RPM)
que cumplan o excedan con la
dasificaci6n
de RPM de la herramienta.
Nunca Ileve una herramienta por la
manguera ni nunca tire de la manguera
para mover una herramienta o un
compresor. Mantenga /as mangueras
alejadas del calor, aceite y bordes
afilados. Reemplace cualquier manguera
que est_ dahada, d_bil o desgastada.
Peligro de inhalaci6n: Las herramientas
abrasivas, como mofinillos, lijadoras y
herramientas de corte, generan polvo y
materiales abrasivos que pueden ser
dabinos para los pulmones y el sistema
respiratorio de las personas. Siempre
use una mascara facial o respirador con
buen ajuste, que este aprobado por
MSHA/NIOSH, cuando utifice tales
herramien tas.
Manual
del Propietario
AIgunos materiales, como adhesivos y
alquitr&n, continen compuestos
quimicos cuyos vapores podrian causar
una grave lesi6n con la exposici6n
prolongada.
Trabaje siempre
en un area
limpia, seca y bien ventilada.
Las herramientas que contienen piezas
m6viles, o que impulsan a otras
herramientas m6viles, como ruedas
amoladoras, cubos, discos lijadores,
etc., pueden enredarse en el pelo, ropa,
joya y otros objetos sueltos, resultando
en una grave lesi6n.
Nunca use ropa suelta que contengan
correas o corbatas, que podrian quedar
atrapados en las piezas m6viles de la
herramienta. Quitese cualquierjoya,
reloj, etc. que podria ser atrapado por la
herramienta.
Mangenga las manos
alejadas de las piezas m6viles. Rec6jase
o c_brase el pelo.
Las herramientas y accesorios mal
mantenidos pueden causar una lesi6n
grave. D_le mantenimiento
a la
herramienta con cuidado. Estas
herramientas
de corte con el
mantenimiento
adecuado, con bordes
de corte afilados, reducen el riesgo de
atasco y son mas faciles de controlar.
Modelo
No. 875.198650
Las herramientas que cortan, cizallan,
barrenan, apilan, punzonan, cincelan,
etc. pueden causar una lesi6n grave.
Mantenga la pieza de trabajo de la
herramienta alejada de las manos y el
cuerpo.
Despubs de lubricar la herramienta
neumatica, el aceite sera descargado
por el puerto de escape durante los
primeros segundos de operaci6n.
Por
Io tanto, el puerto de escape debe estar
tapado con una toalla antes de apficar
presi6n de aire.
Use solamente los casquillos y accesorios
clasificados para impactos
Use solamente aquellos casquillos que
estbn marcados como "PARA USAR
CON LLAVES DE IMPACTO". Los
casqufllos para herramientas de mano
pueden romperse y crear el riesgo de
despedir proyectiles. Siempre verifique
el estado de los casquillos, retenedores
y elementos de accionamiento
para
detectar desgastes o averias.
Reemplacelos cuando sea necesario.
Si la herramienta esta dabada existe el
peligro de que explote repentinamente.
Revise los desajustes o atascos de las
piezas m6viles, roturas de las piezas y
cualquier otra condici6na que afecte el
funcionamiento
de la herramienta. Si la
misma esta dabada, haga que se le d_
mantenimiento
antes de usarla.
SPA-5
Manual
del Propietario
Conexidn
Modelo
de la manguera
No. 875.198650
•
de aire
Linea principal
= Dia, int, min, 1/2 pulg
Inclinado
hacia abajo y alejandose
Linea
Dia,
Lubricador
Regulador
bifurcaci6n
int,
1 =
Linea
de admisi6n
Filtro
Manguera
de
aislamiento
de
drenaje
Compresor
Figura 1
Cone×i6n de la
rnanguera de aire
Mangueras
de aire para sus
herramientas
neum_ticas
La Figura 1 ilustra la conexi6n
recomendada de una manguera de aire.
Se requiere una manguera neum_tica de un
di_metro interior de 3/8 pulg hasta un largo
de 25 pies. Una manguera con un di_metro
interior de 3/8 pulg m_s larga de 25 pies
causar_ una caida de presi6n, Io que podria
impedir el rendimiento. Si se requiere un
mayor Iongitud, se recomienda usar una
manguera de aire de un di_metro interior de
1/2 pulg. Aseg0rese de que todas las
mangueras y accesorios sean del tamaSo
SPA-6
Nunca Ileve una herramienta por la
manguera ni nunca tire de la manguera
para mover una herramienta o un
compresor. Mantenga las mangueras
alejadas del cator, aceite y bordes afilados.
Reemptace cualquier manguera que est6
daSada, d6bil o desgastada.
Tuber{a
para taller
peque_o
Modelo
No. 875.198650
Este instrumento
representa una v_lvula
de regulador de poder (Fig. 2). Gire
regulador hasta que salida deseada sea
Iograda. Los ajustes en el regulador son
s61o para referencia y no denotan una
salida especifica del poder. Gire reguladora una posici6n con el circulo de
sinlge que es Io menos cantidad del
poder y los tres circulos que son la m_is
cantidad del poder.
el flujo de aire que sale del
compresor.
de aire
correcto y que est6n bien conectados
antes de usar la herramienta neum_tica.
Antes de conectar la herramienta al
suministro de aire, limpie la manguera de
aire para quitarle el potvo y la humedad
acumulados. H_gato pasando aire
libremente por la manguera por un tiempo
de 5 a 10 segundos.
La conexi6n desde el compresor a
la tuberia rigida de admisi6n iniciat
debe ser a trav6s de una manguera
flexible para aislar el movimiento del
compresor.
Incline hacia abajo las lineas
principates por Io menos 3/4 de
pulg por cada 10 pies de tuberia
atej_ndose del compresor de aire.
Esto extraer_ la condensaci6n con
Valvula
de
drenaje
Valvula
de
cierre
de drenaje
del Propietario
Encamine la tuberia de admisi6n
inicial recta hacia hacia arriba por la
pared del taller y Io m_s alto posibte.
Esto ayudar_ a minimizar que el agua
que sale del compresor viaje por el
sistema.
1/2 pulg
Valvula
Linea
Manual
(para
la
casa):
Se muestra un diagrama de tuberia para
un taller tipico de una casa. Algunos
consejos 0tiles son:
Siempre use mangueras y tuberias
que est6n clasificadas para una
presi6n mayor que la que su sistema
necesitar_.
Nunca use tuberias de PVC para
sistemas de tuberia de aire
comprimido porque pueden resultar en
una exptosici6n o una lesi6n grave.
Cotoque el primer bajante Io m_s lejos
posibte del compresor que el tamaSo
de su taller permita (50 pies es Io
6ptimo, aunque poco reatista para un
taller pequedo). Entre m_s atejado
est6 el bajante, mayor condensaci6n
puede ocurrir, y m_s seco ser_ el aire
cuando alcance el separador de agua.
Para reducir la cantidad de agua y
contaminantes que entran at
separador de agua, instale la tinea de
admisi6n arriba de la tinea principal de
suministro de aire para cada bajante
de aire.
Se debe colocar una linea de drenaje
al final de la linea principal para
evacuar la condensaci6n.
Las v_lvulas de drenaje deben
colocarse at final de las lineas de
ramificaci6n y la linea de drenaje, y se
deben evacuar diariamente.
Figura 2
Palanca Valvuladel
regulador
y Rev_s.
I ,ADVERTENCIA
1
Una vez asentado un perno o sujetador,
la acci6n de impactar por mas de cinco
(5) segundos producir& desgaste en
exceso y posibles dabos a! mecanismo
de impactaci6n Si tarda m&s de cinco
segundos para ajustar o aflojar su perno
o sujetador, recomendamos
el uso de
una flare de impacto de tamaho mayor.
SPA-7
Manual
del Propietario
Modelo
No. 875.198650
Manual
del Propietario
Modelo
No. 875.198650
Piano de vista
Lubricaci6n
Se recomienda
lubricador
usar un filtro-regulador-
en linea (Fig.1) ya que incrementa
la
duraci6n de la herramienta y mantiene la
herramienta en una operaci6n sostenida. Debera
comprobar el lubricador en linea con regularidad
y Ilenarlo con aceite para herramientas de aire
comprimido. El ajuste correcto del lubricador en
linea se realiza colocando una hoja de papel
pr6xima a los orificios de escape de la
herramienta y manteniendo abierto el acelerador
durante 30 segundos aproximadamente.
Se
ajusta correctamente el lubricador cuando el
papel queda manchado con una ligera mancha
de aceite.
Deberan evitarse las cantidades
aceite. En caso de ser necesario
excesivas de
almacenar la
herramienta durante un largo tiempo (de la noche
a la manana, un fin de semana, etc.), debera
lubricarla abundantemente
a trav6s de la entrada
de aire (Fig, 3). Debera operar la herramienta
durante 30 segundos aproximadamente
para
asegurar la distribucion pareja del aceite en toda
la herramienta. Debera almacenarse la
herramienta
Lista
en un medio limpio y seco.
Lubricantes
recomendados
Use un aceite de herramienta
neumatica
u
cualquier otro aceite de grado elevado de turbina
que contenga absorbente de humedad,
inhibidores
de 6xido, agentes humidificadores
Lubrique el
mecanismo
de impactaci6n
poraqui.
del metal y un aditivo EP (presi6n extrema). Vea
la Fig. 3 para la ubicaci6n y entrada de aire.
LUBRICAClON
IMPACTACK]N
El mecanismo
DEL MECANISIVIO DE
de impactaci6n
transfiere potencia
desde la herramienta a una tuerca o perno.
El mecanismo del impacto es grasa lubricada
no requiere acerca de-engrasando
bajo uso
normal.
y
Lubrique el motor neum_tico
Figura 3
SPA-8
\
por aqui
de piezas
Ref#
Part
1
9638001M
No.
Description
CALAAEREA
Q'ty
1
Ref#
24
Part
9611224
No.
Description
MARCO
Q'ty
2
90R2002
O-ANILLO
1
255
96112255
MARTILLO
2
3
4
55
9287608
9287609
9287610
O-ANILLO
DEFLECTOR
PRIMAVERA
1
1
1
26
9611226
YUNQUE
1
27
28
90R7718
9328830-4
O-ANILLO
IGUALA de ENCHUFE
1
1
6
9328804V
TALLO de VALVULA
1
7
8
93288355
932883555
ASIENTO de VALVULA d ADMISION 1
ESPACIADOR
1
29
30
9611229
9611230
BUJE
CASO de MARTILLO
1
1
9
10
9287614
9611210
ANILLO de IGUALA
ENVOLTURA MOTRIZ
1
1
31
32
33
90R1315;
9611232
9287617
O-ANILLO
TALLO de VALVULA
O-ANILLO
1
1
1
11
95P0326
ALFILER de PRIMAVERA
1
34
9611234
BUJE de VALVULA
1
12
13
9611212
9611213
TORNILLO
CERROJO
1
4
355
36
96112355
9611236
CUERPO de VALVULA
IGUALA
1
1
14
9611214
TORNILLO
3
37
9611237
VALVULA
1
1.5
16
9SP25520
9B6001Z
ALFILER de PRIMAVERA
COJINETE
1
1
38
39
9611238
9611239
VALVULA INVERSAPALANCA 1
PRIMAVERA
3
17
9611217
FINAL CHAPA
1
40
9611240
PODER
1
18
19
9611218
9611219
ROTOR
HOJA
1
6
41
42
955589039
9611242
ALFILER de la PRIMAVER
DISPARADOR
1
1
20
9611220
CILINDR
1
43
90R85501
O-ANILLO
1
21
9611221-B
0 LaJUNTA DE CULATA
1
44
90R1301
O-ANILLO
1
22
23
9B6002
9611223
COJINETE
ALFILER de MARTILLO
1
2
455
46
9SBOOO3-1
9638047
PELOTA de ACERO
ACCESORIO de GRASA
3
1
de MARTILLO
INVERSA
1
SPA-9
Manual
del Propietario
La herramienta
funciona
lentamente o
no funciona.
1. En la herramienta hay
polvo, arena o resina.
2. En la herramienta
no
Modelo
No. 875.198650
1. Irrigue la herramienta con aceite para
herramientas neum_ticas, diluyente de resinas, o
una mezcla de igual proproci6n de aceite de motor
SAE 10 y queroseno. Lubrique la herramienta
despues de la limpieza.
hay aceite.
2. Lubrique la herramienta de acuerdo a las
instrucciones de lubricaci6n indicadas en este
manual.
3. La presi6n del aire
est_ baja.
3a. Ajuste el regulador de la herramienta
m_ximo (si corresponde).
Manual
Modelo
del Propietario
Impactos lentos
o no hay
impacto en Io
absoluto.
1. Falta de lubricaci6n.
2. El regulador de la
herramienta esta puesto
en la posici6n incorrecta.
No. 875.198650
1. Lubrique el motor del aire y el mecanismo
de impactaci6n. (Consulte la secci6n
Lubricaci6n de este manual).
2. Ajuste el regulador de la herramienta a su
valor m_ximo.
3. Regulador en linea o
regulador del compresor
fijado muy bajo
3. Ajuste los reguladores
del sistema de aire.
1. Mecanismo
impactaci6n
desgastado.
de
1. Reemplace los componentes desgastados
del mecanismo de impactaci6n.
1. Mecanismo
de
1. Reemplace los componentes rotos del
mecanismo de impactaci6n.
a su valor
3b. Ajuste el regulador del compresor al m_ximo
de la herramienta mientras que la herramienta
funciona libre.
4. Fugas de la manguera
de aire
4. Apriete y selle los accesorios de la manguera si
ha encontrado escapes.
Utilice cinta de hilo de tubo donde posible.
5. Caidas de presi6n.
5a. Asegt]rese de que la manguera que est_
usando tenga el tama_o correcto. Las mangueras
largas o las herramientas que usan grandes
volt]menes de aire podrian requerir una manguera
con un di_metro interno de 1/2 pulgada o m_s,
dependiendo de la Iongitud total de la manguera.
Proyecta impactos
r_pidamente pero
no quita los pernos,
No da impactos
impactaci6n roto.
N otas:
5b. No use varias mangueras conectadas una a la
otra a traves de accesorios de conexi6n rgpidos.
Esto causa caidas de presi6n adicionales
y reduce la potencia de la herramienta. Conecte
las mangueras una con la otra directamente.
Humedad
sale de la
herramienta
1. Agua en el tanque.
1. Drene el tanque. (Consulte el manual del
compresor). Engrase la herramienta y h_gala
funcionar hasta que no vea agua. Engrase la
herramienta otra vez y dejela funcionar de 1 a 2
segundos.
2. Agua en las lineas de aire
o mangueras.
2a. Instale un separador/filtro de agua.
NOTA: Los separadores s61o funcionan bien
cuando el aire que pasa por los mismos est_ frio.
Ubique el separador/filtro Io m_s
separado posible del compresor.
2b. Instale un secador de aire.
2c. Cada vez que entra agua a la herramienta,
herramienta debe engrasarse inmediatamente.
SPA-1 0
la
SPA-11
Your
Home
For repair - in your home - of all major brand appliances,
lawn and garden equipment,
or heating and cooling systems,
no matter who made it, no matter who sold it!
For the replacement
parts, accessories
and
owner's manuals that you need to do-it-yourself.
For Sears professional
installation of home appliances
and items like garage door openers and water heaters.
1-800-4-MY-HOME ® (1-800-469=4663)
Call anytime, day or night (U.S.A. and Canada)
www.sears.com
www.sears.ca
For expert home solutions advice: www.managemyhome.corn
Our
Home
For repair of carry-in items like vacuums,
lawn equipment,
and electronics,
call or go on-line for the location of your nearest
Sears
Parts
1-800-488-1222
& Repair
(U.S.A.)
Service
Center
1-800-469-4663
(Canada)
Call anytime, day or night
www.sears.com
www.sears.ca
To purchase
a protection
1-800-827-6655
agreement
on a product
(U.S.A.)
Para pedir servicie de reparaci6n
a domicilio, y para ordenar piezas:
1-888-SU -HOGAR ®
(1-888-784-6427)
® Registered
® Marca
u¢ Marque
Trademark
Registrada
] _M Trademark
/ T_ Marca
de commerce
/s_ Service
de F&brica
/ #D Marque
/ sr_ Marca
d{_pos_e
Mark
Brands,
by Sears:
(Canada)
Au Canada pour service en fran_ais:
1-800-LE-FOYER
_c
(1-800-533-6937)
www.sears.ca
of Sears
de Se_,icio
de Sears
serviced
1-800-361-6665
Brands,
de Seam
LLC
LLC
Brands,
LLC
@ Sears
Brands,
LLC