1
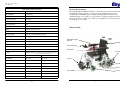
USER MANUAL
Days Verb Power Chair
Warranty
Information
User Manual
Days Healthcare Verb Powerchairs are warranted for 12months (24 months frame)from
the date of purchase on side frames and crossbars.
(NB Batteries are warranted for 12 months.)
• During the warranty period any parts that have become defective due to faulty
•
•
•
•
workmanship or material will be repaired or replaced without charge by Days
Healthcare supplier/dealer
The warranty excludes tyres, punctures and items that become worn due to normal
wear and tear such as upholstery and armrest pads
The warranty excludes all items that have been subject to undue wear and tear and
misuse
Unauthorised changes or modifications will forfeit your warranty
If a defect or fault is discovered, the Days Healthcare supplier/dealer from whom the
Wheelchair was purchased should be notified immediately
Limitation of Liability
The warranty does not extend to the consequential costs resulting from fault clearance,
in particular freight and travel costs, loss of earnings, expenses, etc.
The manufacturer will not accept responsibility for any damage or injury caused by
misuse or non-observance of the instructions set out in this user manual.
VERB
Dealer Stamp
Days Healthcare Ltd • North Rd • Bridgend Industrial Estate • Bridgend • CF31 3TP
Verb
Folding Powerchair
Tel: +44 (0) 1656 664700 • Fax: +44 (0) 1656 664750 • Email: [email protected]
www.dayshealthcare.com
- 24 -
Days Healthcare Ltd reserves the right to change the specifications without prior notice.
D/N: P1-109-01
-1-
Days Verb Power Chair
User Manual
-2-
- 23 -
Days Verb Power Chair
User Manual
Notes:
Table of Contents
- 22 -
Introduction
4
Armrests
14
Intended Use
4
Negotiating Inclines
15
Legal & General Responsibilities
4
Anti Tippers
15
Technical Description
5
Kerb Climber
15
Feature Guide
5
Transferring to and from the chair
15
Safety Guidelines
6
Circuit Breaker
15
Safe Operation
7
Freewheel Operation
16
Electromagnetic Interference
7
Wheels and Tyres
16
Adjustment Procedures
8
Disassembly & Storage
16
Footrest Adjustments
8
Transportation
17
Arm Adjustments
8
Batteries & Battery Charging
18
Seat Belt
8
Batteries
18
Control Box Adjustment
9
Battery Charging
18
Operations of Use
10
Battery Gauge
19
Control Box
10
Safety & Maintenance Inspection
20
Driving, Steering, & Braking
10
Cleaning
20
Joystick Control
11
Troubleshooting Guide
21
Control System Status
12
Technical Specifications
22
Locking / Unlocking the Wheelchair
13
Instructions For Disposal
23
Footrests
14
-3-
Days Verb Power Chair
User Manual
Introduction
Welcome to the Days Healthcare Verb Powerchair and thank you for choosing
our product. This latest model has been designed with specific practical user
needs in mind. It combines solid, rugged construction and high-tech electronics,
safety and performance. We are confident that it will prove a reliable companion
in your home as well as outdoors.
This manual contains some useful tips and information on safety, operation and
maintenance. Please read it carefully to ensure that you get maximum enjoyment
and benefit from your new independence and mobility.
INSTRUCTIONS FOR DISPOSAL
TO COMPLY WITH NATIONAL LAW, THE FOLLOWING
Whenever you require special advice and attention do not hesitate to contact your
local Days Healthcare dealer. He has all the equipment and know-how to provide
an expert service and assistance on technical and clinical applications to suit your
particular need.
INSTRUCTIONS ARE GUIDELINES FOR THE DISPOSAL OF YOUR
PRODUCT AT THE END OF ITS LIFE OR WHEN IT CEASES TO
FUNCTION ECONOMICALLY.
RECENT LEGISLATION ON ELECTRICAL EQUIPMENT INDICATES
Intended Use
THAT THE EQUIPMENT MUST BE DISPOSED OF IN A PROPER
The Verb Powerchairs are intended to assist and improve mobility for those
individuals who are less able or have walking difficulties who wish to maintain
their independence and freedom.
MANNER.
• THE PRODUCT AND /OR ITS COMPONENTS ARE NOT TO ENYour day to day activities will depend on your physical capabilities and your own
specific circumstances. If in doubt seek medical advice first.
TER THE SYSTEM OF LANDFILL SITES.
• THE PRODUCT AND/OR ITS COMPONENTS ARE NOT TO BE DISPOSED OF IN DOMESTIC HOUSEHOLD WASTE.
The information is this booklet provides a general guide on how to use your chair
safely and correctly. Do not use the chair without reading this manual first.
• THE ELECTRICAL AND MATERIAL PARTS ARE TO BE DISPOSED
Legal & General Responsibilities
• LOCAL WASTE COLLECTION DEPOTS ARE AVAILABLE TO
As a Powerchair user you must be aware of the risks involved to both yourself
and others. We recommend that you take out ‘Third Party Liability’ insurance to
cover you against any possible claims. Advice and policies are available from
general insurance companies or alternatively ask Days Healthcare dealer/supplier
for details.
Although by law you are not required to hold a driving licence you are responsible and fully liable for proper operation and use of your Powerchair. You must
ensure that your chair is maintained and is in a good condition at all times.
-4-
OF AS SCRAP OR RECYCLING MATERIALS.
ADVISE AND DISPOSE OF ELECTRICAL PRODUCTS.
• BATTERIES WHICH CONTAIN LIQUID ACID MUST BE STORED
AND DISPOSED OF SEPERATELY AT THESE DEPOTS.
• PLEASE ENQUIRE ABOUT DISPOSAL DEPOTS WITH YOUR
LOCAL AUTHORITY.
• SHOULD YOU REQUIRE FURTHER ADVICE, PLEASE CONTACT
YOUR SUPPLIER OR NEAREST DEALER.
- 21 -
Days Verb Power Chair
User Manual
TECHNICAL SPECIFICATIONS
Technical Description
The Days Healthcare Verb Powerchair is a Class ‘B’ indoor/outdoor vehicle with
a maximum carrying capacity of 115 kg (18 stone) which must never be exceeded. It has a maximum speed of 4 mph (6.5 km/h) and is classified as an
‘Invalid Carriage’ for use indoors, on pavements, footpaths, pedestrian zones and
areas free from motor traffic. Use on the road or highway is not allowed except
for the purpose of crossing.
Classification
Class ‘B’ Indoor/Outdoor
Overall Weight
67 kg (147 lb)
Weight Heaviest Part
35 kg (77 lb)
Wheel Size (Front)
20 cm (8”)
Wheel Size (Rear)
31 cm (12”)
Electrical System
24 V
Brakes
Electronic, Regenerative; Magnetic
Battery
30 A/h Deep-Cycle 12V × 2
Battery Charger
240 V - 24 V 4 Amp
Obstacle Ability
5 cm (2”) : 10 cm (4”) with kerb climber
Maximum User Weight
115 kg (253 lb)
Maximum Speed
4 mph (6.5 km/h)
Ground Clearance
10 cm (4”)
Turning Radius
93 cm (36½”)
Maximum Safe Slope
12° (1:5)
Maximum Climbing Angle
12° (1:5)
Range
15 miles (25 Km) - Varies with passenger weight, temperature, battery
Feature Guide
Adjustable Height
Armrest
Folding Backrest
Joystick Control
Skirt Guard
Anti -Tipper
type and condition, ground surface, etc.
46 cm (18”)
41 cm (16”)
Seat Width
46 cm (18”)
41 cm (16”)
Seat Depth
41 cm (16”)
41 cm (16”)
Seat Height
52 cm (20½”)
52 cm (20½”)
Backrest Height
42 cm (16½”)
42 cm (16½”)
Footrest Length
43 - 55 cm (17-21½”)
43 - 55 cm (17-21½”)
Overall Length
120 cm (47”)
120 cm (47”)
Overall Width
64 cm (25”)
59 cm (23”)
Overall Height
91 cm (36”)
91 cm (36”)
Footrest
Rear Wheel
Drive Train
Kerb Climber
- 20 -
Front Castor
-5-
Days Verb Power Chair
User Manual
Safety Guidelines
Do not use on the road, except when crossing between pavements. When
crossing the carriageway of a public road always take extra care and observe
the Highway code
Do not turn off the controls by switching the ON/OFF button when moving at
speed. This will bring the brakes on immediately and could cause damage to
the controls
Do not ride over deep, soft terrain (soft dirt, loose gravel, deep grass)
Do not attempt to mount a kerb higher than specified
Do not carry passengers
Do not sit in your Powerchair if the unit is in freewheel mode
We recommend that you do not sit on your Powerchair when in a vehicle, but
transfer to a vehicle seat
Always stop before making a sharp change of direction
Always engage a slow speed when going down gradients
Do not use the joystick in an erratic manner when going up or down an incline
Do not drive in reverse down a slope or kerb
Always keep your feet on the footplate when moving
Do not stand on the footplate when getting in or out of the chair
Do not expose the Powerchair to direct rain or high humidity (i.e. in the bathroom) as it may cause it to malfunction (electrically or mechanically)
We recommend the use of safety belt
Always keep your pneumatic tyres to the correct pressures
Always make sure that the batteries are sufficiently charged before setting out
on a journey
Do not use parts, accessories or adapters other then those authorised by Days
Healthcare Ltd
Keep the Powerchair away from children. It is not intended to be used as a toy
The manual parking brakes are not designed for slowing-down
Troubleshooting Guide
The following information is intended to assist in the location of a fault that may
occur in a certain part of your Powerchair’s electronics. Go to the number in the
list which matches the number of flashing bars and follow the instructions.
If the problem persists after you made the checks described below contact your
-6-
- 19 -
dealer. Do not use the Powerchair and turn-off the power.
1 Bar The battery needs charging or there is a bad connection to the battery.
Check the connections to the battery. If the connections are good, try
charging the battery
2 Bar The left hand motor has a bad connection. Check the connections to the
left hand motor
3 Bar The left hand motor has a short circuit to a battery connection. Contact
your service agent
4 Bar The right hand motor has a bad connection. Check the connections to the
right hand module
5 Bar The right hand motor has a short circuit to a battery connection. Contact
your dealer
6 Bar The Powerchair is being prevented form driving by an external signal.
The exact cause will depend on the type of Powerchair you have, one
possibility is the battery charger is connected
7 Bar A joystick fault is indicated. Make sure that the joystick is in the center
position before switching on the control system
8 Bar A control system fault is indicated. Make sure that all connections are
secure
9 Bar The parking brakes have a bad connection. Check the parking brake and
motor connections. Make sure the control system connections are secure.
10 Bar An excessive voltage has been applied to the control system. This is
usually caused by a poor battery connection. Check the battery connections
Days Verb Power Chair
User Manual
Safety & Maintenance Inspection
Safe Operation
We recommend that your Powerchair is serviced by your local dealer every six
months. It is in your best interests, not only to ensure your personal safety but
also to ensure long life and reliability. Regular service will identify early damage
and worn components avoiding unnecessary faults occurring.
When using indoors beware of narrow doors, steps, high surfaces, protruding
wall fittings and everyday household items such as children’s toys, electrical
appliances etc. Take extra care in kitchen environments.
Weekly check that:
• Check all connectors are secure properly, properly mated and free from damage
• Castor bolts are tight and all fasteners are secure
• Adjustable height arms operate and lock securely
• The drive wheels mounting bolts are secure and there is no excessive side
movement or binding when spun
• Tyres do not show excessive wear or damage
• Castors for proper tension, i.e. spinning castors should come to gradual stop
To ensure stability and safe control you must maintain proper balance at all
times. The Powerchair is designed to remain stable during normal use as long as
you do not move you centre of gravity outside the normal seating position.
When reaching/bending forward do not lean your body out of the Powerchair further
than the length of the armrests. Do not attempt to reach objects by sliding forwards to
the edge of the seat.
When reaching/bending backwards do not reach any further than your arm will
extend without changing your seating position.
Never attempt to use an escalator or stairway, always use a lift.
Occasionally check that the adjustments of the footrests, armrests and controller
are secure and are set in the most comfortable position for use.
We recommend the use of the safety belt provided with the chair.
Monthly check that:
• Check joystick gator around the base of the joystick for damage or splitting
• Motor parking brakes function correctly
• The chair rolls straight (no excessive drag or pull to one side)
• Pivot points are free of wear or looseness
• Seat and backrest upholstery is not for ripped or sagging
• Frames are not worn or bent
Cleaning
Paintwork and plastic mouldings can be cleaned with a damp soft cloth of warm
soapy water. Do not use any harsh abrasive cleaners, bleach base fluids or
solvents.
Seat and back upholstery can be cleaned with a general purpose upholstery
cleaner or sponged with warm soapy water.
- 18 -
Avoid use in rain, to avoid the possibility of water penetration into the
electrically operated equipment.
Electromagnetic Interference
Powerchairs may be susceptible to electromagnetic interference (EMI) which is
energy emitted from sources such as radio stations, TV stations, two-way radio,
and cellular phones.
Avoid coming into close contact to them whilst the Powerchair is turned-on.
Switch off immediately to avoid possible abnormal, erratic movement and control
of your Powerchair.
-7-
Days Verb Power Chair
User Manual
Adjustment Procedures
Footrest Adjustments
Length
Using the hexagon key provided, remove the screw, nut
and bush on the footrest outer tube.
Slide the footrest inner tube up or down to the required
height and secure in place with the screw and nut,
ensuring the bush is in the larger hole in tube work and
clamped in place underneath the nut.
Note - The height adjustment screw must always be fitted through one of the
holes in the body of plastic support moulding.
CAUTION! • The charger is for indoor use only
• Do not use an open flame whilst batteries are being charged
• Do not use the battery charger if it has been dropped or misused as damage to
the electronics could occur
• Do not leave the charger plugged in the mains supply and switched-off. Always remove the plug
Battery Gauge
The battery gauge works in the following way:
Located on the control box, the battery gauge has three colour bars:
When you switch on the control system, the battery gauge shows an estimate of
the remaining battery charge.
If the battery shows red, yellow and green, the batteries are charged.
If the battery shows just red and yellow, then you should charge the batteries as
soon as you can.
If the battery gauge shows just red, either steady or flashing slowly, then you
should charge the batteries immediately.
Seat Belt
Hold the bayonet end in one hand, and pull on the webbing to increase or
decrease belt length with the other. When length is correct, adjust slide buckle to
suit.
-8-
At full charge all eight lights will be on. As the battery charge drops during
Powerchair operation successive bars will extinguish. Except in emergency, do
not drive on discharged batteries. If you ignore the warning (the bottom bars
flashing) and the battery charge drops further to a level where there is no longer
sufficient charge to allow safe driving, the controller will automatically cut the
power supply to the motors and the power chair will come to abrupt stop.
- 17 -
Days Verb Power Chair
User Manual
Batteries & Battery Charging
Joy Stick Adjustment
Batteries
The Joy Stick can be adjusted so that it is in a convenient position for use. To
adjust the unit forward and backwards immediate underneath the armrest pad
there is a hand knob which when loosened allows the horizontal tube to be adjusted to the required position.
The Powerchair is supplied with two sealed deep cycle, maintenance free
batteries. These are fitted under the seat in the centre of the Powerchair. For easy
handling, Velcro carrying straps are provided to assist in fitting or removal.
These batteries are different from ordinary car batteries and should be charged
with the charger specifically for this type and make of battery.
CAUTION! - Using incorrect battery size and/or voltage may cause damage to
the Powerchair and have an adverse effect on the performance
specifications.
To ensure long battery life, do not allow the batteries to become totally
discharged. If the Powerchair is not used for a length of time the batteries must
receive a full charge once a month and remain fully charged during storage.
Battery charging
The battery charger supplied with your Powerchair is fitted with an automatic
electronic switch that terminates the charge when the batteries are fully charged.
To avoid reducing battery life always fully charge new batteries before initial
use. Please note that the batteries will not perform to their peak until first six to
ten charging cycles have been completed.
The front panel of the battery charger has two lights - red and green. Steady red
light indicates that charger is on from the mains and is ready to charge. Flickering
red light signifies incorrect or bad connection. The other light is yellow/orange
when charging, which turns to green when charging is complete.
To re-charge the batteries, connect one end of the battery charger power cord to
the charging socket and the other end to a 3-pin grounded wall outlet and switch
on at the mains.
Do not switch off or interrupt the charging cycle before charging is complete
(typically from 8 to 12 hours depending on depth of discharge).
When charging is complete always disconnect from the main supply first followed by unplugging the charger from the chair.
The charger also has its own ON/OFF switch located in the opposite end to the
two-way display lights. Ensure this is switched on to charge your batteries.
- 16 -
To adjust the unit vertically, there is a hexagon key screw in a hexagon nut attached to the tubular construction supporting the Joy Stick. Using the hexagon
key provided loosen the screw, adjust unit to the required height and re-tighten
screw to secure.
Joy Stick conversions to left hand
1)
Remove Joy Stick and horizontal tube from right hand arm by releasing hand
knob and hexagon screw
2)
Remove the two screws holding the support tube to the Joy Stick and rotate
the tube through 180° to the opposite side and secure to the Joy Stick with
the screws
3)
Remove both armrest pads by removing the securing hand knobs. Both pads
are right and left handed
4)
To convert to opposite hands remove support brackets from pads and rotate
through 180° and align with opposite screw holes and re-secure with screws
5)
Secure the original right hand armrest to the left hand arm and repeat for the
other hand
6)
Re-position Joy Stick unit to left hand side of chair and assemble and secure to left hand arm
7)
Adjust heights and position as previous paragraphs
-9-
Days Verb Power Chair
User Manual
Transportation
We recommend that you do not sit on your Powerchair when in a vehicle, but
transfer to a vehicle seat. A Powerchair secured in a vehicle will not provide the
equivalent safety level and security as the vehicle’s seating systems.
However, when transfer is not practical or impossible, ensure the following:
1) Check that the vehicle is suitably designed, insured and equipped to transport
a passenger seated in a Wheelchair
2) Remove any part of the Wheelchair (accessories, etc.) that can be easily detached
and store it in the vehicle’s luggage hold
3) Make sure the Wheelchair is transported in a forward facing direction. Rearward
facing is only acceptable if the passenger’s head and back can be supported by a
suitable bulkhead
4) Use the buckle seat belt (if fitted) with your chair as additional restraint
We recommend that the powerchair is secured within the vehicle using the 4point webbing tie-down system with Karibiner, model no WWR/ATF/K/R
(available from Unwin Safety Systems based in Yeovil, U.K.)
Note: Although safety during transportation largely depends upon the diligence
of the person securing the tie-downs and passenger restraints it is the user’s responsibility to ensure that the powerchair has been safely secured.
- 10 -
- 15 -
Days Verb Power Chair
User Manual
Freewheel Operation
To push the Powerchair by hand or in the event of a fault or
battery failure the motors/gear boxes can be released allowing
the Powerchair to be pushed.
The levers should be switched to the freewheel position. On
the gearbox by rotating them through 90°. Use the manual
brakes to park the chair.
Drive mode
CAUTION! - Always re-engage the freewheeling device after
use. Failure to do so may result in injury
Freewheel mode
Wheels and Tyres
Regularly check the condition of front and rear tyres for wear and tear. Contact
your supplier for replacements. Your Powerchair may have split rim wheels
which are held together by screws or bolts. When these are removed the wheel
rim separates for easy access to carry out puncture repairs or tyre replacements.
Disassembly & Storage
Your Powerchair can be disassembled and folded for storage:
1)
Fold the two footrest plates upwards
2)
Remove kerb climber unit (if fitted)
3)
Disconnect plug and socket between battery boxes and remove rear box
4)
Pull to slide front box and disconnect main loom plug and socket. Remove
second battery box
5)
Pull the rings of the four release pins holding the battery support basket in
place. Remove basket.
6)
Using both hands, grip front and rear of the seat upholstery and pull up to
fold the chair
7)
To unfold the chair, place each hand on both seat tubes and push downward firmly. Lock the front and rear release pins to secure battery basket in
place. Slide batteries into position and reconnect
- 14 -
Please refer to Shark user guide for full instructions at the end of this user
guide.
- 11 -
Days Verb Power Chair
User Manual
Footrests
Adjustment Procedures
Swing-away Footrest
Length Adjustment
Adjustments are made with the user sitting in
the wheelchair with feet on footplates.
1) Use a spanner to loosen the bolt at the rear of the footrest support hanger.
2) Adjust the footplate up or down as needed to provide maximum support of
thighs on the seat upholstery, then re-tighten the bolt.
WARNING!
Ensure that desired front rigging adjustment does not cause pressure to legs
at front of seat upholstery.
Folding Back
This is available to reduce the overall height of the chair. Whilst at the rear of the
chair, grip the small lever and push down to release pin allowing the handle section to be folded.
Negotiating Inclines
The Powerchair has climbing power that enables you to
overcome gradients
of up to 12° (1:5).
Always approach an incline directly, not at an angle, and follow it
up or down directly avoiding zigzag movement.
CAUTION! - Never attempt to climb or descend an incline
which has a slippery or icy surface.
BE CAREFUL
While going uphill or downhill there is no need for drastic corrective joystick movements. The electronic controller ensures
that the extra power required for climbing is automatically applied to the motors, so that the selected speed is maintained. This
is achieved by the micro-computer of the electronic controller
compensating automatically for any extra power required.
The same applies when you travel downhill. The electromagnetic safety brake
gives you full control over your Powerchair at all times. This unique brake system enables you to descend at a constant slow speed.
- 12 -
You can stop at any time while you are climbing or descending. Simply release the
joy-stick as on the flat. The electromagnetic safety brake will ensure that the
Powerchair is positively locked and secured in parking position until you are ready
to continue your journey.
Anti Tippers
These are fitted at the rear of the chair, adjacent to the rear drive wheels and must
be fitted at all times when driving outdoors. Especially when climbing kerbs and
gradients.
Kerb Climber (Std)
This is attached at the front of the chair from one side frame to the other. The centre
climbing shoe is set at 10 mm clearance and is designed to lift the front of the chair
over a kerb higher than this as you drive forward, returning to its original position
due to its spring action.
Approach the kerb head-on slowly. Shortly before the front wheels make contact
with the kerb push the joystick fully forward for maximum power.
Do not allow the power chair to come to a halt midway through manoeuvre. If possible, use gentle upper body movement to assist motion.
CAUTION! - Ensure all wheels have mounted the kerb before changing direction.
When climbing kerbs you will find that your Powerchair will smoothly overcome
the kerb without the need for drastic speed variations.
Transferring to and from the chair (Ensure chair is switched off)
Circumstances and individual needs will vary from person to person, but if there
are difficulties we advise you to consult your therapeutic adviser who will help to
develop your skill for appropriate transfer method that suit your individual requirements.
During transfer always make sure that the brakes are in a locked position and the
Powerchair is manoeuvred as close as possible to the transfer seat .
Circuit Breaker
If your chair stops for no apparent reason, it is probably due to the circuit breaker.
The circuit breaker can be located on the top of each battery box.. On rare occasions, it happens that there is a temporary overload on the electric circuit. If this
occurs, the circuit breaker button will pop out. To reset, turn the key to the OFF
position, press circuit breaker button and then turn the key to the ON position.
- 13 -