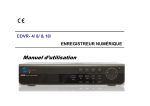
1
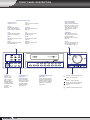
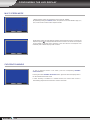
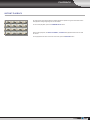
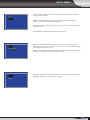
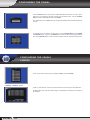
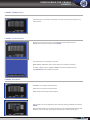
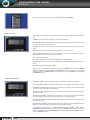
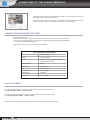
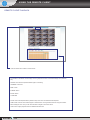
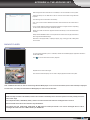
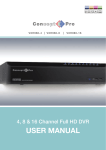
H.264 16 Channel Digital Recording System VXH264-16 ! DISPLAY SEQ HOLD PANIC ± ZOOM LOCK ARCHIVE SETUP SEARCH RW . ZOOM OUT + PTZ PWR REC NET 1 2 3 4 5 6 7 10 11 12 13 14 15 16 FF . ZOOM IN IRIS FOCUS RETURN ENTER 8 9 NEAR FAR User Manual CLOSE OPEN CONTENTS Before installing Key features Front panel description Rear panel description Getting started Connect and switch on Configuring the live display Multi-screen mode Choosing channels Digital zoom Log Playback Search Pano Event Search Instant Playback Archiving Telemetry Control Key lock function Panic recording Sequence mode Shutdown Quick Menu Configuring the VXH264 – System Setup Camera Audio Colour Setup PTZ Setup Motion Sensor Area Setup Display OSD Monitor Sequence Spot Out Sound Audio Buzzer System Date / Time System Management Control Device User Management Authority Log-out Network IP Setup DDNS E-mail 1 2 3 4 5 6 7 7 7 8 8 9 9 10 11 12 13 15 15 15 15 15 16 17 17 18 18 18 19 19 21 21 21 22 23 24 24 24 25 25 25 26 27 27 28 28 29 29 29 29 CONTENTS Event / Sensor HDD Event Alarm Input Alarm Out Buzzer Out Email Noti PTZ Preset Disk Manage Recording Continuous / Motion Setup Size / FPS / Quality Schedule Alarm setup Panic setup Connecting to the VXH264 remotely Connect using Internet Explorer How to connect Remote client controls Using the remote client Live display modes Audio monitoring Audio talkback Saving to AVI file Status Log PTZ Remote client playback controls Controlling playback Audio monitoring Backup Search by event Print an image Remote VXH264 setup Entering setup Loading and saving VXH.264 Smart Phone Remote Viewing Appendix A: The Archive Set Backup player Controls Appendix B: Configuring a Netgear DG834 router for use with the VXH264 Appendix C: Connecting external devices Appendix D: Specifications Notes 30 30 30 30 31 31 31 32 32 33 33 34 36 36 37 37 37 39 40 40 40 40 41 41 41 42 43 44 44 45 45 45 46 46 46 47 48 48 49 50 53 54 55 BEFORE INSTALLING BEFORE INSTALLING • Installation should be carried out only by qualified personnel and in accordance with electrical regulations in force. • The DVR must be placed on a stable surface or mounted in an approved cabinet. Adequate ventilation must be provided, taking particular care not to block any of the air vents on the DVR. • Adequate protection against lightning strikes and power surges must be installed to prevent damage to the DVR. 1 • Any safety warnings on the DVR and in these instructions must be adhered to. • If cleaning is necessary, shutdown the DVR and disconnect the power source first. Use a soft dry cloth only – never use an abrasive cleaner. • Do not attempt to service or repair the DVR as opening or removing covers may expose dangerous voltages or other hazards. Refer all servicing to qualified service personnel. KEY FEATURES KEY FEATURES ENHANcEd GRApHIcAL USER INTERFAcE (GUI) The VXH264 menu structure and on-screen display is presented in a simple to use and logical GUI format. ENHANcEd REcORdING Any operation performed on the VXH264 will not affect the recording including local playback, local set-up, multi-user remote viewing and playback, remote setup and archiving. TwO-wAY AUdIO 4 audio inputs are supported which can be assigned to any video channel. Live and recorded audio can be monitored remotely over the internet and remote audio transmission for PA broadcast on-site is supported. The viewer can hear the audio from the camera they are viewing on full-screen. REmOTE cONNEcTION Web connection is provided using a standard browser e.g. connection for up to 4 VXH264 units in one session. Depending on the user level, full control of the VXH264 is available over the internet as well as the ability to remotely configure the VXH264. The VXH264 allows remote log-on users to see the current status of the recorder by showing: “C” continuous, “M” Motion, “A” Alarm, “R” Relay out. ARcHIVE Recorded footage (including audio) can be archived to a USB memory stick, CD or DVD. Playback software is embedded with the back-up files and the back-up also contains the system event log and back-up log for full traceability. Save your setup to USB to make future installations even more simple and time efficient. cOmpREHENSIVE REcORdING SETUp Recording can be scheduled, alarm activated or motion activated. For each type of recording, frame rates, image quality and audio recording properties can be adjusted, per hour, per day and for each individual channel. The VXH264 also has a panic recording feature (from the front panel or external input) which overrides all other recording settings to provide the best quality recording in the event of an emergency. TELEmETRY cONTROL Full telemetry control is available from the front panel or remote connection with a wide number of speed dome protocols supported. Protocols can be set individually for each channel and telemetry speed can be adjusted to suit particular speed domes. The telemetry will allow more than one camera to go to a preset from an alarm activation. EXTENSIVE mONITOR SUppORT The VXH264 has 4 main monitor outputs (Composite, VGA, S-Video and HDMI) which can be used simultaneously. The VXH264 is provided with 4 spot monitor outputs. Each spot monitor output can be programmed in the VXH264 set-up. LIVE dISpLAY The VXH264 displays single or multi-screen images and has several sequence modes (standard and user definable). cONFIGURATION BAcKUp All configuration settings on the VXH264 can be saved to USB memory stick or a PC file remotely. The saved data can then be uploaded to other VXH264 units allowing rapid deployment where more than one VXH264 is being installed. EmAIL SUppORT The VXH264 can send emails to specific users to notify events such as alarm activation, motion detection, hard drive failure. JOG SHUTTLE The Jog / Shuttle wheel provides precise playback control on the VXH264 and allows 1x - 64x playback speeds in forward or reverse play and frame by frame advance. REmOTE USERS Ip AddRESS LOGGEd The IP address of any remote log-on activity can be shown as part of the activity log. 2 FRONT PANEL DESCRIPTION SySTem conTRol keyS SHUTTle wHeel lock locks the front panel buttons (page 15) PoweR bUTTon (page 6 & page 15) DISPlAy Selects various display modes in live display and playback (page 7 & page 9) ARcHIVe Displays the archive menu (page 13) SeQ calls the currently defined sequence mode (page 15) PTZ Selects PTZ mode in live display (page 15) PAnIc Selects panic recording mode (page 15) SeTUP Displays the setup menus (page 17) Zoom Selects digital zoom mode in live display (page 8) SeARcH Displays the search menu (page 9) Used to quickly adjust playback speed and direction (page 10). It is used to control camera zoom when in PTZ mode (page 15), and digital zoom level in live display (page 8) JoG RInG when playback is paused, the job ring is used to move footage forwards or backwards, frame by frame (page 10) HolD locks the current function of the SHUTTle wHeel so it can be released (page 10) ! DISPLAY SEQ PANIC LOCK ARCHIVE SETUP SEARCH HOLD ± ZOOM RW . ZOOM OUT + PTZ PWR REC NET 1 2 3 4 5 6 7 10 11 12 13 14 15 16 FF . ZOOM IN IRIS FOCUS RETURN ENTER 8 9 NEAR USb ports Supports a wide variety of USb memory stick for archive, system setting backup and firmware upgrade. An additional USb port is also provided on the rear panel 3 cURSoR keyS, enTeR and ReTURn buttons Used for navigating setup menus, search and archive screens. Also used when the VXH264 is in PTZ mode (page 15) cHAnnel SelecTIon bUTTonS Used to display individual channels in live display and playback (page 7 & page 9) Also used to enter numeric passwords for the various login screens FAR CLOSE Increases reverse playback speed Selects reverse playback Pauses / resumes playback Selects forward playback and also accesses the instant playback feature Increases forward playback speed OPEN REAR PANEL DESCRIPTION cAmeRA InPUTS and looP oUTPUTS comPoSITe AnD S-VIDeo mAIn monIToR connecTIonS PAnIc / ReSeT Panic button & Alarm Reset connect up to 16 camera inputs RelAy oUT loop outputs can be used for connection to other equipment Up to 4 no - nc zero voltage connecions can be made both outputs can be used at the same time if more than one main monitor connection is required SPoT monIToR oUTPUTS Up to 4 spot monitors can be connected as necessary RS485 connection to external telemetry devices GND 485 - 485 - 485 + 485 + ALARM IN + ARI / PANIC 100-240V AC, 50/60HZ NO COM NC NO COM NC NO COM NC NO COM NC ARI PANIC PAL e-SATA AlARm InPUTS Up to 16 alarm inputs can be connected and configured as high or low inputs with common ground 1 NTSC AUDIo InPUTS & oUTPUTS AlARm oUTPUTS Up to 4 audio inputs and one audio output can be connected as necessary Up to 16 alarm outputs can be connected and configured as high or low outputs with common ground HD MONITOR HDmI / VGA SeRIAl PoRT lAn HDmI/VGA main monitor connection to a Pc monitor or HDmI screen. can be used simultaneously with the comPoSITe and SVIDeo main monitor connections RS232 Serial Port is not used. It is for factory use only lAn connection to a router or internal network 4 GETTING STARTED PleASe noTe: All neceSSARy connecTIonS mUST be mADe beFoRe APPlyInG PoweR To THe VXH264! THe VXH264 IS PRe-conFIGUReD wITH THe FollowInG SeTTInGS: 25FPS continuous recording rate per channel at cIF (352 x 288) resolution and highest image quality. • Time and date set to correct local time • Audio inputs 1-4 assigned to video channels 1-4 respectively • Telemetry devices set to Pelco-D, 2400 baud • based on average image recording, the above settings will provide around 5 days recording on a 250Gb drive before the footage starts to be overwritten. Please note your VXH264 can be controlled via the front panel buttons, IR remote control or a USb mouse. when a USb mouse is installed an on-screen pointer will appear. This can be used to navigate the system. SeTUP: open system setup menu PoweR System on/oFF channel Selection buttons enTeR: Apply / Select / Go to next screen ID bUTTon Select DVR ID nAVIGATIon bUTTonS: Used for Playback control, menu naviagtion, and PTZ/Focus control ReTURn cancel / Deselect Previous Screen DISP: change display screen SeARcH: Go to search mode PTZ: Go to PTZ menu PAnIc: Record by panic setting keylock: lock the keys (Remote / Front) SeQUence: change to sequence screen Zoom: Go to zoom mode ARcHIVe: Go to back-up menu * If there are multiple DVRs used in a system, each DVR can be set with a different ID. The remote controller sets each ID per DVR. This allows all the DVRs to be controlled with one remote controller by selecting the appropriate ID. HOw TO SET THE ID ON THE REmOTE CONTROLLER Program each DVR accordingly to system ID (see page 26 ) Press the ID button, this will display “INPUT ID” on screen. Using the channel selection buttons, input the system ID, press “ENTER” then the “RETURN” button To reset the ID to factory default, press the ID button and input ID 255 and press the “ENTER” button followed by pressing the “RETURN” button. 5 GETTING STARTED connecT AnD SwITcH on • connect up to 16 cAmeRA InPUTS. The VXH264 also has looP oUTPUTS so that any signals can be fed to other equipment if required. Termination is automatically set by the VXH264 depending on connection type • connect one or more monitors to the VXH264 using the comPoSITe, VGA, S-VIDeo oR HDmI connections • connect power to the VXH264. The VXH264 checks for proper power connection and emits a beep. Press the PoweR bUTTon on the front panel of the VXH264 to begin operation. The VXH264 startup screen detects and checks the status of hard drives and the cDRw / DVR-Rw drive After startup diagnostics are complete, the operator must log-on to the system. The default user name is ‘ADmIn’. Using the CHANNEL SELECTION buttons, key in the default password of ‘1234’ and press the ENTER button The VXH264 begins normal operation and shows the default display of all 16 channels. The status bar at the bottom of the screen shows current time and date. The status bar includes menu, Archive, Search, Display, PTZ & Zoom control along with the ‘log’. A title for each channel is shown The red square and letter ‘c’ in the top right of each channel display shows that the channel is recording in Timer / Schedule mode. If audio recording is enabled, an audio icon showing 1,2,3 or 4 is displayed. 6 CONFIGURING THE LIVE DISPLAY mULTI ScREEN mOdE 7 different display modes are supported by the 16 channel VXH264. by repeatedly pressing the DISPLAY button, the operator can choose between single, 4, 6, 8, 9, and 16 screen as well as basic sequence modes. All the display modes are static with the exception of the sequence mode. In this mode, the sequence symbol ( ) is displayed and each channel is shown in full screen for a set period of time (default 5 seconds) before switching to the next channel. The sequence runs indefinitely until a different display mode is chosen. cHOOSING cHANNELS To view a particular channel in full screen, press the corresponding CHANNEL SELECTION button. Pressing the same CHANNEL SELECTION button again will switch the display back to the last selected multi screen mode. If audio recording is enabled for a selected channel, the chosen audio source is automatically played when that channel is viewed in full screen. 7 CONFIGURING THE LIVE DISPLAY dIGITAL ZOOm when viewing a channel in full screen, the operator can zoom in to a particular area by up to 14 times. To use digital zoom, select the required channel and press the ZOOm button. The small window at the bottom right of the screen shows the full image whilst the main display area shows the zoomed portion. To adjust the zoom level, turn the SHUTTLE wHEEL clockwise to increase zoom or anticlockwise to decrease zoom. To move the zoom area around the image, use the CURSOR KEYS to adjust the position of the zoom square. Press the RETURN button to return to normal live display mode. LOG After selecting the symbol the event log is shown on the display. by selecting a particular event the recorded footage from this event is played in the playback window. Please note: There is no playback controls. 8 PLAYBACK SEARcH To search for a particular section of recorded footage, press the SEARCH button. To protect unauthorised viewing of footage, only authorised users can playback footage. To log-in as ADmIn, enter the default password of 1234 and press ENTER The VXH264 uses a calendar and timeline search method for quick access to recorded footage. The calendar displayed on the left shows the current month. The days highlighted in blue contain recorded footage. The timeline on the right shows a 24 hour status of all channels for the selected day. The recorded timeline will be displayed with different colours. Timer = Sky blue motion = Green Alarm = Red Panic = white Press ENTER to select the calendar and use the CURSOR KEYS to move to the required day. As different days are selected, the timeline display also changes to show recorded footage on that day. Press ENTER to choose the day and to move to the timeline. Use the CURSOR KEYS to move the timeline cursor left or right to select the time segment required. each movement of the timeline cursor increases or decreases the time by 10 minutes. The currently selected time is displayed underneath the calendar. Press PLAY to begin playback from the selected time. The default playback mode is 16 screen display. by pressing DISPLAY or using the CHANNEL SELECTION buttons, it is possible to display single screen or other multi screen formats in a similar way to the live display mode. when viewing playback in single screen mode, any associated audio recorded with that channel can be heard. 9 PLAYBACK SEARcH continued During playback, turning the SHUTTLE wHEEL steadily clockwise increases the playback speed by up to 64 times. Turning steadily anticlockwise will reverse play by up to 64 times. when the SHUTTLE wHEEL is released, playback is paused. If the HOLD button is pressed and released during SHUTTLE wHEEL operation, the last shuttle function is held, even if the wheel is released when playback is paused, the JOG RING can be used to accurately move the footage forward or backwards, frame by frame. The playback speed and direction can also be controlled using the five playback buttons located under the jog wheel. To exit the playback mode and return to the search screen to choose another time and date, press RETURN. To exit the search screen and go back to the last selected live view, repeatedly press RETURN. pANO Pano search allows the operator to quickly review a single channel of playback over a 24 hour period divided into 3 hour displays. Using the calendar only, choose the desired day to review. Then select PANO. The playback screen shows 8 different playback windows, each showing a 3 hour time display. (For example: 00:00 – 03:00, 03:00 – 06:00 and so on) on the bottom right of the screen are the replay controls. These control all playback windows for fastforward, rewind, pause and play. 10 PLAYBACK EVENT SEARcH The VXH264 event log stores events such as motion and alarm activated recording and video loss. To search for an event and playback the recorded footage, press the SEARCH button and log in as ADmIn with the default password of 1234 / or authorised user. To display the event log screen, press the right CURSOR KEY to select SeARcH by eVenT and press ENTER. Various filters can be used to limit the number of events displayed. Using the CURSOR KEYS and ENTER button, select the FRom and To date / time and the events and channels required. Highlight SeARcH and press ENTER to display the event log for the criteria selected. To playback footage for a particular event, select the event from the list using the CURSOR KEYS and press ENTER. Playback resumes from the moment the selected event occurred and continues until stopped by the operator. During event search playback, the SHUTTLE wHEEL, JOG RING and playback buttons can be used as normal. To stop playback and return to the live view mode, repeatedly press RETURN. Note: The event log search contains the following selectable entries: n ALL: Select all of the above n SET-UP: All set-up changes are shown n mOTION: All motion detection events are displayed for the chosen date range n HDD: Displays HDD errors n SYSTEm: All system events are displayed (Such as Log-on/off, Remote Connects, Boot/System Start n ALARm: All alarm input events are displayed for the chosen date range n VIDEO LOSS: Displays any video loss & channel number n RECORD: All recording operations are displayed for the chosen date range 11 PLAYBACK INSTANT pLAYBAcK For quick review of recent footage, this feature allows the operator to bypass the search screen and playback footage beginning five minutes earlier. To use instant playback, press the FORwARD PLAY button. During instant playback, the SHUTTLE wHEEL, JOG RING and playback buttons can be used as normal. To stop playback and return to the live view mode, press the RETURN button. 12 ARCHIVING To archive recorded footage to USb memory stick or cD, press the ARCHIVE button. To protect unauthorised viewing and distribution of footage, only the authorised user or ADmIn user can archive footage. To login as ADmIn, enter the default password of 1234 and press ENTER. The Archiving screen allows the operator to choose exactly what to back-up and to which storage device. Use the CURSOR KEYS to navigate around the Archiving screen. To change any value or setting: Press ENTER to change the blue cursor to yellow. Use the up and down CURSOR KEYS to change the value Press ENTER to accept the value or ReTURn to cancel To change a tick box setting, press ENTER to toggle on or off SelecT DeVIce: choose between DVD-Rw or USb back-up device FRom / To: Start and end time to back-up TAG nAme: The name of the archive set loG: when selected, the event log for the particular archive time period is included once all the desired archive options have been selected, highlight the QUeRy button and press ENTER. The VXH264 displays the total archive size. If the oRIGInAl SIZe is larger than the available space on the backup media, the unit will prompt the user to insert another DVD / USb to finish the archive process. Press BURN to continue the archive process Press RESERVE to reserve the data for future archiving 13 ARCHIVING A small window opens showing: TAG nAme: The name of the Archive DeVIce: choose between DVD or USb bURnInG TyPe: choose between bURnInG or eRASe & bURn. Press START to begin the archive process. The footage is extracted to a temporary area on the hard drive. once extracted, the footage is copied to DVD or USb. note that depending on the amount of footage selected for archive, the extracting and burning process may take some time, during which the VXH264 cannot be used. normal recording is unaffected by the archive process. ReSeRVeD DATA mAnAGemenT: This will display only recorded footage that has been reserved. Selected footage can be deleted, burn or information viewed. For further details on archiving, see Appendix A on page 48. 14 TELEmETRY CONTROL TELEmETRY cONTROL Speed domes and other telemetry devices connected to the VXH264, can be fully controlled from the front panel. In live display mode, press the PTZ button. SELECTION buttons. To select a camera to control, use the CHANNEL when PASSwoRD is set to on only authorised users or ADmIn users can control the PTZ. Pan and tilt movement is controlled by the CURSOR KEYS. Zoom is controlled by turning the SHUTTLE wHEEL. tt & t controls focus, u & uu controls the iris. Press PANIC or ARCHIVE buttons to decrease or increase the preset number. Press PAUSE to program the preset, or ENTER to call an existing preset. Press RETURN to exit PTZ mode and return to live view. 15 KEY LOcK FUNcTION pANIc REcORdING An operator with ADmIn rights can choose to lock the VXH264 front panel to prevent any unauthorised control. Press the LOCK button, enter the default password ‘1234’ and press ENTER. All buttons are now disabled. To unlock, press any button and enter the default password ‘1234’. Panic recording will override all standard recording settings, PAnIc record settings are configured in the recording set-up. (Page 36) Press the PANIC button. The top right of the display shows a red P to indicate that the VXH264 is in panic recording mode. Press the PANIC button again to return to normal recording mode. SEQUENcE SHUT dOwN Press the SEQ button. each channel is shown in full screen for a set period of time (default 5 seconds) before switching to the next channel. To stop the sequence on a particular channel, press the SEQ button again. more complex sequences can be programmed through the setup menu. (Page 22) only an operator with ADmIn rights can shut down the VXH264. Press the POwER button, use the cursor key to select POwER OFF then ENTER key. you can then enter the default password ‘1234’ and press ENTER. The VXH264 shuts down and emits two beeps to indicate that power can be safely removed. QUICK mENU If you are using the USb mouse to control the VXH264 pressing the right hand mouse will bring up the Quick menu. FReeZe: Selecting FReeZe on will freeze the live view picture for the selected channel. To go back to live view select FReeZe oFF. PTZ: Selecting PTZ will bring up the PTZ control screen. PTZ can only be controlled by an authorised user. Zoom: Selecting Zoom will bring up the digital zoom control. PlAybAck: Selecting PlAybAck will allow the user to view instant playback of the selected camera from 10, 20, 30 seconds or 1 minute ago. If Go To is selected the user can select the time they wish to view. when a time is selected the recorded footage is played back in a playback window within the main live view screen. This contains playback controls. PAnIc Rec START: Starts the panic record mode. Use the right mouse click to select. PAnIc RecoRD SToP to stop the panic record mode. 16 CONFIGURING THE VXH264 Press the SETUP button to bring up the SySTem / RecoRD setup option on screen. (If the status bar is not visible you will need to press the setup button twice). Use the CURSOR KEYS to select SySTem SeTUP and press ENTER. only authorised users or ADmIn users can configure the VXH264. enter the default password of ‘1234’. To navigate around any items in the setup menu, use the CURSOR KEYS and the ENTER and RETURN buttons. In general, the ENTER button is used to select and change a particular item and the RETURN button is used to cancel a change or exit from a particular setup screen. CONFIGURING THE VXH264 CAmERA To set-up the various camera options, highlight cAmeRA and press ENTER. cAmeRA: cAmeRA TITle TITle: For each camera, a title of up to 8 characters can be set using the virtual keyboard. coVeRT: when set to on, the camera image is not displayed in live display but continues to be recorded. 17 CONFIGURING THE VXH264 CAmERA cAmeRA: cAmeRA AUDIo If audio devices are connected to the VXH264, any audio channel can be assigned to any video channels. cAmeRA: coloUR SeTUP brightness, contrast, tint and colour can be adjusted for each individual channel. Highlight which channel to modify and press ENTER. The selected channel is displayed in full screen. bRIGHTneSS, conTRAST, TInT and coloUR can be changed as necessary. To modify a different channel, highlight cAmeRA and choose the desired channel. Press RETURN when all changes are complete. cAmeRA: PTZ SeTUP ADDReSS: The unique ID of the PTZ device. PRoTocol: The protocol of the PTZ device. bAUD RATe: The baud rate of the PTZ device. PTZ properties can also be adjusted for each channel by selecting the DeTAIl and pressing ENTER. note that some settings, such as AUTo FocUS. may not be compatible with particular PTZ equipment. If this is the case, changing this value will have no effect on PTZ control. 18 CONFIGURING THE VXH264 CAmERA cAmeRA: moTIon SenSoR SenSITIVITy: between 1 (lowest) and 10 (Highest) determines the degree of motion required before recording is activated. AReA SeTUP AReA SeTUP: choosing this option allows the operator to define which areas of the image are monitored for motion detection. black grid squares represent detection areas, blank areas are ignored. The default is that motion will be detected across the entire image. To quickly select or deselect the entire grid, press RETURN to bring up the motion menu. Highlight SelecT All or DeSelecT All as appropriate and press ENTER. To select or deselect specific areas, press ENTER to bring up the yellow cursor square in the top left of the display. move the cursor using the CURSOR KEYS to the first corner of the area to be set and press ENTER – The grid square retains the yellow cursor square. 19 CONFIGURING THE VXH264 CAmERA Use the CURSOR KEYS to increase the size of the motion cursor as required. Press ENTER to change from selected to deselected (or vice versa). Repeat the above sequence as necessary to mask-off or include other areas of the image. once the detection area has been defined, press RETURN and choose SAVe & eXIT to save the area and return to the motion setup menu. Please note: a motion detection recording schedule must be defined in the RECORD mENU described on page 34. 20 CONFIGURING THE VXH264 DISPLAY To set-up the various display options, highlight DISPlAy and press ENTER. DISPlAy: oSD STATUS bAR: Turns the status bar at the bottom of the live display AlwAyS on or auto off delay time. cAmeRA TITle: Determines whether the camera title is displayed. RecoRDInG moDe Icon: Determines whether the VXH264 recording status is shown at the top right of each channel display window. boRDeR: Determines whether there is a border around each channel in multi screen display mode. boRDeR coloUR: If the border is on, the operator can choose the colour. moTIon SenSoR DISPlAy: If false motion recording is occurring, the operator can use this feature to determine and rectify the cause in realtime. oFF – normal display mode. on – Areas where motion is detected are highlighted with coloured blocks. moTIon coloUR: The colour of the blocks displayed when moTIon SenSoR DISPlAy is set to on. lAnGUAGe: Select the language of display. To change any of these settings, highlight oSD and press ENTER to select. Use the CURSOR KEYS to navigate to the option required. Press ENTER to select the option (the cursor changes to yellow) and use the CURSOR KEYS to change the setting. Press ENTER to save the setting or RETURN to cancel. DISPlAy: monIToR SeQUence Dwell: The time that each screen is displayed in a sequence operation. SPoT SeQUence Dwell: The time that each screen is displayed on the spot monitor outputs. De-InTeRlAce moDe: when recording any channels in D1 resolution (704 x 576) this should be set to on to prevent judder during playback. AlARm PoP-UP moDe: when set to on, an alarm input will cause the associated channel to display full screen. AlARm PoP-UP Dwell: Determines how long the full screen pop-up is displayed after an alarm input. If the alarm condition continues, the popup screen is displayed constantl . moTIon PoP-UP moDe: when set to on, motion detection will cause the associated channel to display full screen. moTIon PoP-UP Dwell: Determines how long the full screen pop-up is displayed after motion detection. If motion continues, the popup screen is displayed constantly. To change any of these settings, highlight monIToR and press ENTER to select. Use the CURSOR KEYS to navigate to the option required. Press ENTER to select the option (the cursor changes to yellow) and use the CURSOR KEYS to change the setting. Press ENTER to save the setting or RETURN to cancel. 21 CONFIGURING THE VXH264 DISPLAY DISPlAy: SeQUence when the SEQ button is pressed, the default sequence will cycle through all 16 channels, one by one. Sequence setup allows the operator to define a custom sequence using mixed multi screen views and any desired channels. To add a new sequence, highlight ADD and press ENTER. Sequence title is highlighted – press ENTER to bring up the virtual keyboard and key in a name or reference number for the new sequence. move around the virtual keyboard using the CURSOR KEYS and ENTER to select a character. To delete a character, use Á. To change keyboard case and use the A/a located on the bottom right of the virtual keyboard. To exit, press RETURN. Set ScHeDUle to on, highlight moDIFy and press ENTER to display the sequence programming screen. Press ADD to show the SeQUence SeT-UP SySTem screen. This represents the first sequence screen that will be displayed. Select the VIew TyPe (Single or various multiview) and press ENTER. when the correct screen type is displayed use the CURSOR KEYS to configure the channels required for each portion of the multi-screen. note: only one instance of each channel can be displayed. 22 CONFIGURING THE VXH264 DISPLAY DISPlAy: SeQUence continued when all the channels have been completed, press CONFIRm to save the sequence screen and begin creating the next one. Up to 16 different sequence screens can be created. To finish editing the sequence, press CLOSE and then APPLY to save & exit. The new sequence is now saved and can be started by pressing the SEQ button when in live view. DISPlAy: SPoT-oUT The VXH264 has 4 SPOT mONITOR OUTPUTS. each one displays a full screen sequence of particular channels, depending on the settings configured in this menu. For each spot monitor, the operator can decide which channels are displayed. For example, spot 1 could display channels 1-4, spot 2 could display channels 5-8 and so on. To change the behaviour of the spot monitor outputs, first choose the spot cHAnnel to modify, and then use the CURSOR KEYS and ENTER. To bring up the eDIT menu use the CURSOR KEYS to modify the TITle, ScHeDUle, on/oFF. Press ENTER when selecting SPoT TITle the virtual keyboard is displayed. Use the CURSOR KEYS to select moDIFy and then ENTER. A new configuration screen appears. Use the CURSOR KEYS to select ADD then ENTER to display SPoT SeQUence SeT-UP. Use the UP CURSOR KEYS to select the single view. Use the RIGHT HAnD CURSOR KEY to highlight the channel option (blue border). Press ENTER (yellow border). Use the UP/Down CURSOR KEYS to select the channel number to be viewed and press ENTER (blue border). Use the CURSOR KEYS to select conFIRm or cAncel. Press ENTER. Press RETURN then press APPLY to save settings. 23 CONFIGURING THE VXH264 SOUND To set-up the various sound options, highlight SoUnD and press ENTER. SoUnD: AUDIo lIVe AUDIo: when set to on, the selected audio channel can be monitored on the AUDIo oUTPUT when the VXH264 is in any multi screen mode. DeFAUlT AUDIo cHAnnel: Specify which one of the 4 AUDIo InPUTS is routed to the AUDIo oUTPUT when the VXH264 is in any multi screen mode. neTwoRk AUDIo TRAnSmIT: when set to on, live and playback audio is transmitted to a remote Pc connection. neTwoRk AUDIo ReceIVe: when set to on, allows a remote Pc connection to send audio back to the VXH264. SoUnD: bUZZeR FRonT PAnel keyPReSS: when set to on, each front panel button press is confirmed by a beep This setting will also turn the IR Remote confirmation beep on or off . 24 CONFIGURING THE VXH264 SYSTEm To set-up the various system options, highlight SySTem and press ENTER SySTem: DATe/TIme DATe TIme: Allows the operator to set or modify the current date & time. DATe FoRmAT: Determines how the date is displayed. TIme FoRmAT: Determines how the time is displayed. neTwoRk TIme SeRVeR SeTUP: If the VXH264 is connected to the Internet, the time and date can be accurately set by selecting Sync and pressing ENTER. TIme Zone SeTUP: Should be set according to the region that the VXH264 is used in. D.S.T.: when set to on, the VXH264 will automatically adjust the time by one hour on the relevant date in spring and autumn. SySTem: SySTem mAnAGemenT Select InFo to display F/w VeRSIon: Shows the firmware version of the VXH264. H/w VeRSIon: Shows the hardware version of the VXH264. VIDeo SIGnAl TyPe: The VXH264 can be selected between PAl and nTSc via a selector switch on the rear panel (Default PAl). DISk cAPAcITy: Shows the total hard drive capacity installed. IP ADDReSS: Shows either the manual IP address entered in neTwoRk setup or the IP address assigned by a DHcP server if enabled. mAc ADDReSS: Shows the mAc (media Access control) address of the VXH264. It is unique – no other network device has this mAc address. DDnS DomAIn nAme: If DDnS is enabled, the host DDnS server is specified here. RTSP SeRVIce PoRT: The port number the DVR uses for internal networks. web SeRVeR PoRT: The port number that the DVR uses to support remote I.e conections. note this is for information only not for the setup. 25 CONFIGURING THE VXH264 SYSTEm SySTem nAme: A system name of up to 15 characters can be defined. It is used so that notification emails can be identified. F/w UPGRADe: Firmware updates may be released periodically to enhance system performance and add extra features. The operator can upgrade the firmware using a USb memory stick. FAcToRy DeFAUlT: If settings have been changed which causes erratic behaviour, the factory default settings can be loaded. SySTem DATA: System settings can be saved to a USb memory stick. The settings can be reloaded in case of accidental factory reset or can be transferred to another VXH264 if multiple units need to be installed with the same settings. All information is saved including network settings and system name. PASSwoRD: Selects if a password is required ‘on / oFF’. Please note: Password must be selected to ‘on’ if USeR mAnGemenT options are required. SySTem: conTRol DeVIce The VXH264 can be remotely controlled using a concept Pro VA-kbDPRo+ keyboard. Up to 254 VXH264s can be controlled using a single VA-kbDPRo+ PTZ controller. SySTem ID: If more than one VXH264 is connected on the same RS485 bus, each one must have a unique ID. PRoTocol: must be set to VA-kbDPRo+. bAUD RATe: must be set to match the baud rate of the VA-kbDPRo+ PTZ controller. 26 CONFIGURING THE VXH264 USER To set-up User management options, highlight USeR and press ENTER. USeR: USeR mAnAGemenT by default the VXH264 is configured with a USeR ID of ADmIn belonging to the ADmIn group and with a password of 1234. As well as the ability to add new users, existing users defaults can be modified. The maximum number of users that can be created is 8. To modify user details, highlight the user with the blue cursor or press ENTER. The eDIT screen appears. USeR ID: edit the user ID using the virtual keyboard. (max 10 characters). PASSwoRD: change the password using the virtual keyboard. (max 8 characters) Please note: To delete the existing password use the Á on the virtual keyboard. GRoUP: Users can be assigned by one of three groups. ADmIn, mAnAGeR, USeR. e-mAIl: enter the user’s email address if email notifications are required. e-mAIl noTI: enable or disable email notification for the particular user. PLEASE NOTE: For security reason, it is recommended that the ADmIN user password is changed as soon as possible. To add users: Highlight ADD or press enTeR. The new user can be added using the steps outlined above. 27 CONFIGURING THE VXH264 USER USeR: USeR AUTHoRITy User authority (except ADmIn) can be selected. Using the CURSOR KEYS select the functions you want and the mAnAGeR and USeR groups to have. (blue square = on) Press APPLY to save settings. PleASe noTe: Any user can be deleted except the default ADmIn user. USeR: loG oUT AUTo loGoUT: Selects if auto log-out is on or oFF. DURATIon: If auto log is set to on this determines the time. (in 1 - 10 min) Press APPLY to save settings. 28 CONFIGURING THE VXH264 NETwORK To set-up network options hightlight neTwoRk and press ENTER. neTwoRk: IP SeTUP DHcP: when selected the DVR will obtain an IP address automatically if connected to a DHcP server or router. IP ADDReSS: If DHcP is not being used the IP address can be manually set. GATewAy: If DHcP is not being used the Gateway IP address can be manually set. SUbneT mASk: If DHcP is not being used the subnet mask can be set manually. 1ST DnS SeRVeR: If DHcP is not being used the 1st DnS server can be manually set. 2nD DnS SeRVeR: If DHcP is not being used the 2nd DnS server can be manually set. RTSP PoRT: The port number that the VXH264 uses to support video streaming to the remote browser. Please note: for further information on network settings and remote connections please refer to pages 50 - 52. web SeRVeR PoRT: The port number that the VXH264 uses to support remote connection from Internet explorer or other web browsers. mAX TX SPeeD: Specifies the maximum bandwidth that the VXH264 can use during a remote connection. Please Note: both RTSP & web SeRVeR PoRT will need a firewall rule creating for remote connection. neTwoRk: DDnS DDnS: when enabled the VXH264 can be accessed through a dynamic DnS server. commonly used if a broadband connection does not have a static IP address. Press APPLY to save settings. The DDnS host name is selected as the mAc address of the DVR. If the user wishes to select their own host name (eg myhome) enter the name in the field “DDnS HoST nAme” and press “cHeck” to see if available. Then Press ENTER. neTwoRk: e-mAIl DeFAUlT SeRVeR: Selects on or oFF. Default server is used if you do not have an outgoing e-mail server. SeRVeR: The SmTP outbound email server that should be used to send email notifications. PoRT: The outbound email port number. SecURITy: Set to oFF if the SeRVeR does not require a username and password to connect. USeR: enter a username to identify the VXH264 in email messages. PASSwoRD: If SecURITy is set to on, enter the password here. FRom: Input an email address or text. Please note: A USeR must be entered for the mail function to operate correctly. The username must not contain spaces. 29 CONFIGURING THE VXH264 EVENT / SENSOR To set-up the event handling options, highlight eVenT/SenSoR and press ENTER. eVenT / SenSoR: HDD eVenT The VXH264 can monitor the hard drives and detect problems that may be developing. S.m.A.R.T. AlARm: enables SmART disk monitoring. cHeck InTeRVAl: can be adjusted as desired. DISk FUll eVenT: can be set as on or oFF. eVenT / SenSoR: AlARm InPUT Determines the behaviour of each of the 16 alarm inputs. oPeRATIon: Alarm inputs can be enabled or disabled. TyPe: Alarm inputs can be set as normally open or normally closed. TeXT: Allows the indivdual alarm to be named. This name will appear in the log. eVenT / SenSoR: AlARm oUT Determines the behaviour and actions that will trigger each of the 16 alarm outputs or 4 relay outputs. Behaviour settings cHAnnel: choose which alarm output to configure including relay outputs R1 to R4. oPeRATIon: The selected alarm output can be enabled or disabled. moDe: can be either TRAnSPARenT (the output is active only when the trigger criteria is present) or lATcHeD. (the output is active for a set period of time after a trigger) DURATIon: In lATcHeD mode, the time that the alarm output remains active after it has been triggered. TyPe: can be set to low (0V to +5V when activated) or high. (+5V to 0V when activated) HDD eVenT: Determines whether a hard drive event triggers the alarm output. Action settings AlARm: Determines whether alarm inputs will trigger the alarm output. VIDeo loSS: Determines whether video loss on any of the selected channels will trigger the alarm output. moTIon: Determines whether motion detection on any of the selected channels will trigger the alarm output. Press APPLY to save settings. 30 CONFIGURING THE VXH264 EVENT / SENSOR eVenT / SenSoR: bUZZeR oUT Determines the behaviour and actions that will trigger the internal buzzer. Behaviour settings oPeRATIon: The internal buzzer can be enabled or disabled. HDD eVenT: Determines whether a hard drive event sounds the buzzer. moDe: can be either TRAnSPARenT (the buzzer sounds only when the trigger criteria is present) or lATcHeD. (the buzzer sounds for a set period of time after the trigger) DURATIon: In lATcHeD mode, the time that the buzzer sounds after it has been triggered. Action settings AlARm: Determines whether alarm inputs will sound the buzzer. VIDeo loSS: Determines whether video loss on any of the selected channels will sound the buzzer. moTIon: Determines whether motion detection on any of the selected channels will sound the buzzer. Press APPLY to save settings. eVenT / SenSoR: emAIl noTI Determines the behaviour and actions that will send an email to a remote user. Behaviour settings noTIFIcATIon: email notification can be turned on or oFF. (when on panic event will send emails) SeTUP cHAnGe: Determines whether a setup change event sends an email. HDD eVenT: Determines whether a hard drive event sends an email. booTInG eVenT: Determines whether system power-up event sends an email. Action settings AlARm: Determines whether alarm inputs will send an email. Email settings must also be configured in mAIL and USER mANAGEmENT settings described on page 27. VIDeo loSS: Determines whether video loss on any of the selected channels will send an email. moTIon: Determines whether motion detection on any of the selected channels will send an email. eVenT / SenSoR: PTZ PReSeT Determines what event actions will send specified PTZ devices to specified presets. cHAnnel: Select the channel that the desired PTZ device is connected to. oPeRATIon: Set to enAble to make the PTZ device respond to the specified actions. AlARm / PTZ PReSeT: Tick the appropriate box and choose the desired preset number required. For example, to send the PTZ device to preset 57 when alarm input 5 is detected, tick the cH 5 box and enter PTZ PReSeT 57. VIDeo loSS / PTZ PReSeT: Tick the appropriate box and choose the desired preset number required. For example, to send the PTZ device to preset 32 when video loss is detected on channel 2, tick the cH 2 box and enter PTZ PReSeT 32. moTIon / PTZ PReSeT: Tick the appropriate box and choose the desired preset number required. For example, to send the PTZ device to preset 9 when motion detection is detected on channel 4, tick the cH 4 box and select PTZ PReSeT 9. notes: For an alarm input to call a preset, alarm recording must be enabled in the VXH264 record menu. For motion detection to call a preset, motion recording must be enabled in the VXH264 record menu. 31 DISK mANAGEmENT DISk mAnAGe To manage the internal hard drives, highlight DISk mAnAGe and press ENTER. RecoRD TIme lImIT: In certain circumstances, it may be necessary to limit the amount of footage stored on the VXH264 (to comply with data protection laws for example). Recording can be limited to 12 hours, 1 day, 2 days, 3 days, 4 days, 5 days, 6 days, 1 week, 2 weeks, 3 weeks 1 month or 2 month. once the VXH264 has this amount of footage stored, it will start to overwrite the earliest recorded footage. oVeRwRITe: when set to on, the VXH264 will start overwriting the earliest recorded footage once the hard drive becomes full or record limit time is reached. when set to oFF, the VXH264 will stop recording when the disk becomes full. The status bar will show the percentage of the HDD that is full. FoRmAT: If necessary, all footage can be erased from the VXH264 using this option. Please note: when OVERwRITE option is set to OFF the recording time limit can not be set RECORDING RecoRD menU To set-up the recording behaviour of the VXH264, highlight RecoRD menU and press ENTER. RecoRDInG oPeRATIonS ScHeDUle moDe: either DAIly (one schedule will apply to every day of the week) or weekly (each day of the week has its own schedule). PRe eVenT RecoRDInG TIme: when the VXH264 is not in continuous recording mode, this setting determines the amount of footage that is always recorded before an event occurs (motion detection, alarm input etc.) PoST eVenT RecoRDInG TIme: when the VXH264 is not in continuous recording mode, this setting determines the amount of footage that is always recorded after an event occurs (motion detection, alarm input etc.) PAnIc RecoRDInG: can be set to mAnUAl (panic recording continues indefinitely after it has been triggered until the PANIC button is pressed again), AUTo (when the PANIC button is pressed, the unit only records in panic mode for the time specified in PAnIc RecoRDInG TIme) or DISAble (panic recording is disabled). PAnIc RecoRDInG TIme: when PAnIc RecoRDInG is set to AUTo itdetermines the amount of time the VXH264 records in panic mode before reverting back to standard recording mode. InTenSIVe RecoRDInG moDe: when set to oFF, the VXH264 records as normal according to the conTInUoUS / moTIon SeTUP schedule. when set to on, the VXH264 records according to the conTInUoUS / moTIon SeTUP schedule, but will automatically increase the recording frame rate or resolution to the highest amount possible on any channel that has motion detection. RecoRDInG PRIoRITy: when InTenSIVe RecoRDInG moDe is set to on it determines whether the frame rate (FPS) or resolution (SIZe) is increased to the highest amount possible during motion detection. 32 RECORDING conTInUoUS / moTIon SeTUP This setup screen allows the operator to configure scheduled and motion detection recording. There are 2 sections: SIZe / FPS / QUAlITy: Recording settings for each channel can be defined across a 24 hour period, in blocks (for example between 09:00 and 18:00) or for each individual hour. note that when ScHeDUle moDe is set to weekly, each day of the week can also be selected. when any settings are changed, in the SIZe / FPS / QUAlITy table the estimated recording time in days is displayed by pressing cAlcUlATe. ScHeDUle: This section determines at what times the VXH264 will record and whether it is continuous recording or motion detection. SIZe / FPS / QUAlITy To change SIZe / FPS / QUAlITy settings, highlight conTInUoUS / moTIon RecoRDInG and press ENTER. ensure SIZe / FPS / QUAlITy is highlighted in blue and press ENTER again. The 24 hour time bar is highlighted in yellow. Press ENTER to display the orange cursor. The orange cursor shown represents one hour (in this case between 00:00 and 01:00). The table below the time bar shows the recording settings for this time period. example: To change the recording settings between 09:00 and 18:00: Use the CURSOR KEYS to move the orange cursor to the 09:00 position and press ENTER. Then use the CURSOR KEYS to stretch the orange cursor across to the 18:00 position. Press ENTER. Recording settings for the selected time period are displayed. 33 RECORDING ReSolUTIon: Recording resolutions of cIF (352x288), 2 cIF(704x288) or D1 (704x576) can be selected for each channel. FPS: Frame rates between 0 and 25 can be set for each channel. QUAlITy: Five different picture recording qualities can be set for each channel. AUDIo: If audio devices are connected to the VXH264 then you can select them to be on or oFF. During playback, when a particular channel is selected in full screen, the assigned audio channel will be played back at the same time. Remember that if SCHEDULE mODE is set to wEEKLY, recording settings need to be changed for each day as well as for each particular time. The default settings for all channels is CIF (352 x 288), 25FPS, HIGHEST quality. Adjust values as desired and select ok to finish and return to the parameter menu. other time periods can be configured in the same manner. Note: The VXH264 supports a maximum recording rate across all channels of 400 frames per second at CIF resolution. As settings are adjusted, the ‘frames available’ at bottom right displays the number of available frames still remaining and must always be zero or higher. If, whilst changing recording settings, this figure becomes negative, recording resolutions and / or frame rates must be lowered to increase the ‘frames available’ value to zero or above. ScHeDUle To change ScHeDUle settings, highlight conTInUoUS/moTIon RecoRDInG and press ENTER. Use the CURSOR KEYS to highlight ScHeDUle and press ENTER. The schedule box is highlighted in blue. Press ENTER to display the yellow cursor. example: To set all channels to motion detection recording only between 18:00 and 00:00. Use the CURSOR KEYS to move the orange cursor to the 18:00 position and press ENTER. This becomes the starting position. Use the CURSOR KEYS to stretch the orange cursor across and down to select all channels between 18:00 and 00:00. 34 RECORDING ScHeDUle continued Press ENTER. Using the CURSOR KEYS, highlight moTIon and press ENTER again. The small box next to motion will turn blue. Then press ok. The selected area now displays a blue block for motion recording. Repeat the above procedure to set different recording schedules for individual channels and time periods. conTInUoUS / moTIon SeTUP If intensive recording is defined, conTInUoUS / moTIon must be enabled in the ScHeDUle setup to for it to work. mixed continuous and motion recording is displayed on the ScHeDUle screen as an orange block. The schedule screen has 4 coloured blocks to show the different recording modes. Pink blocks: No scheduled or motion recording Green blocks: The VXH264 will record continuously Blue block: The VXH264 will only record when motion is detected Orange block: The VXH264 is in intensive recording mode (Continuous and motion) 35 RECORDING AlARm SeTUP This setup screen allows the operator to configure alarm input activated recording. SIZe / FPS / QUAlITy: Recording settings for each channel can be defined across a 24 hour period, in blocks (for example between 09:00 and 18:00) or for each individual hour. note that when ScHeDUle moDe is set to weekly, each day of the week can also be selected. ScHeDUle: This section determines at what times the VXH264 will monitor the alarm inputs and activate recording. Please refer to Timer / motion setup on page 33 for details on setting up SIZE / FPS / QUALITY and SCHEDULE. Alarm activated recording can be used in conjunction with continuous / motion recording. For example, the VXH264 could be configured to record continuously at a low frame rate (set in continuous / motion setup) and then increase to a higher frame rate during an alarm input (set in alarm setup). PAnIc SeTUP During panic recording mode, the VXH264 will override all other recording settings and record continuously on all channels at the settings configured here. 36 CONNECTING TO THE VXH264 REmOTELY The VXH264 can be viewed on a remote connection either on a direct lAn connection or over the Internet, simply by using Internet explorer. The remote browser allows full live viewing of the VXH264 including telemetry control of PTZ cameras. In addition, playback, remote setup, audio talkback, local and backup. connecT USInG InTeRneT eXPloReR beFoRe connecTInG when using web browsers remotely, the web Service Port and net client Port should be set-up correctly via the router by Port Forwarding. For more information regarding Port Forwarding please see APPenDIX b - configuring a neTGeAR DG834 Router. Refer to the manual of your Router for port forwarding settings. wEB RA mINImUm PC REQUIREmENT cPU P4 3.0 or Higher RAm 512mb or Higher VGA Geforce mS 400, Radeon 7500 or higher Gefore 8 series or higher VGA memoRy 64mb monIToR 1280X1024 oS windows XPSP2 Ie VeRSIon Ie6.0 or higher neTwoRk 100mbps DIRecT X V7.0 or higher How To connecT Input the IP Address and web Service port of the DVR in the Internet explorer Address bar. e.g. http://192.168.2.19:8080 (Web Port :6200) If you do not have a fixed IP address and are using the DDnS service, input the URl as below. e.g. http://1234.dvrlink.net:8080 (Web Port :6200) Please replace “1234” with the default mAc address of the DVR (located under System Information). 37 CONNECTING TO THE VXH264 REmOTELY A security window will then appear asking for log In credentials. Default ID and password are ‘ADmIn’ &’1234’. you will need to install Active-X, click Run Add-on as shown in the image. Please note, you will not have to repeat this step each time you connect remotely, unless a different computer is used. In case you are unable to install active-X, you will need to check the security options regarding activeX, on Internet Explorer security menu. To check security options, open Internet Explorer, Click Tools located on the menu bar at the top, then click Internet options. A new window will then appear Click Security tab then Custom level… Select enable for all ActiveX related options. (Including, Download signed control, Download unsigned control….) ActiveX ActiveX 38 REmOTE CLIENT CONTROLS RemoTe clIenT conTRolS lIVe VIew TAb 39 SeARcH TAb RemoTe SeTUP TAb InFoRmATIon TAb USING THE REmOTE CLIENT After successful connection, the remote client displays the current live view from the VXH264. For each channel, the title, time / date and resolution are displayed. lIVe DISPlAy moDeS Use the DISPLAY buttons to switch from a single, quad, 8, 9 or 16 split display. To sequence, select the screen you require (single or multi mode) and click the SEQUENCE button. click SEQUENCE again to to move to the next camera. The mANUAL SwITCH button shifts the positions of all channels by one place. For example, the following displays shows a 4 channel VXH264 in 16 screen mode. clicking mANUAL SwITCH has moved all channels back by one position. by clicking the FULL SCREEN button, the live display is shown in full screen without any of the remote client controls. To return to normal viewing, press the eSc key or double click the right mouse click on any part of the screen. To quickly select a particular channel, use the DISPlAy cHAnnel drop down box and click the channel you want to view. AUDIo monIToRInG During a remote client session, the operator can monitor audio connected to the VXH264. click the AUDIO button to toggle live audio on or off. Suitable speakers must be connected to the PC for audio monitoring to function. AUDIo TAlkbAck During a remote client session, the operator can ‘talkback’ to the VXH264. During talkback, audio is routed through the AUDIO OUT connector on the rear of the VXH264. To talkback, click and hold the TALKBACK button and speak normally in to the microphone. 40 USING THE REmOTE CLIENT SAVInG To AVI FIle The operator can choose to record all channels currently being displayed on the live view directly to the local Pc hard drive. click the button to immediately start recording. click the button to end recording. by pressing the printer symbol you can print the current view. by pressing the snapshot symbol image. you can create a JPeG still image of the selected camera by pressing the setup symbol you can set-up the archive setting, such as the location. The archive footage/snapshots will be stored to a local Pc. STATUS Internet explorer allows the user to quickly see the current status of all the cameras on the recorder. Under each channel number is a display that indicates: AlARm: If there is currently an alarm activation. moTIon: If the camera is detecting motion. VIDeo / loSS: If there is a video loss. RecoRDInG: Displays the current recording mode. (c : continuous, m: motion, A: Alarm, P: Panic Record) AlARm oUT: Show any alarm out functions being used. The status refresh time can be selected between 3 & 10 seconds. loG Internet explorer allows the remote user to view the log from the DVR 41 USING THE REmOTE CLIENT PTZ Internet explorer allows all telemetry control of devices connected to the VXH264, provided that the correct user authority has been set-up. click the appropriate channel and use the on screen directional buttons to control pan & tilt movements. Use the - / + keys next to the Focus, Zoom and Iris buttons to control these functions if available on the camera. PReSeTS Presets can be programmed and called remotely using the SeT and RUn buttons. example: To start pattern tour 1 running on a VHSD-770eXT speed dome, select preset 131 from the drop down list and click RUn. example: To program preset position 85, position the speed dome using the TelemeTRy controls, select preset 85 and click SeT. Telemetry control also allows remote setup of many telemetry devices. For example, to access the setup menu of the VHSD-770EXT speed dome, RUN preset 95 and then use the telemetry direction and focus + (to enter) and – (to exit) controls to navigate the speed dome menu. 42 USING THE REmOTE CLIENT RemoTe clIenT PlAybAck click the search tab to switch to search mode. The timeline at the bottom of the display shows a graphical overview of recorded footage for a particular day. Different colour blocks represent different types of recording. oRAnGe: continuous PInk: Panic PURPle: Alarm blUe: motion cyAn: PRe DATe: choose the required date by selection drop down box and select the date required. TIme: either use the same method again to select the time or drag the blue time bar along the timeline. when sliding this time bar you will notice the time changes in the boxes above. click PlAy to begin playback from the selected date and time. 43 REmOTE CLIENT PLAYBACK CONTROLS conTRollInG PlAybAck During playback at anytime click to pause the footage. click again to resume playback. Footage can be played in reverse by clicking Then to return playing back the footage normally click Fast Forward and Rewind can be clicked to speed up playback. AUDIo monIToRInG During playback click the AUDIO button to toggle audio on or off. Please note: Audio can only be heard when a single channel view is displayed. 44 REmOTE CLIENT PLAYBACK CONTROLS bAckUP Pre-recorded footage on a VXH264 can be archived to the local Pc hard disk or removable media depending on where the save destination is set. click the bAckUP button to show the archiving screen. choose start time, end time and which channels to archive. click START to begin archiving data to the Pc hard drive or removable media. The Archive screen shows the current status of the archiving process by showing a blue progress bar. The archived file format is AVI, this can be played on windows media player. SeARcH by eVenT To search for an event and to playback the recorded footage, click SEARCH BY EVENT. choose the ‘Start time’ and ‘end time’. Select which events to include in the search and click ‘Search’. The event log for the selected time period is displayed below, the ordered can be changed from nearest to farthest. by clicking any of the events, the recorded footage will begin playing automatically. PRInT An ImAGe During playback, a still image can be printed on the local Pc printer by clicking the PRINT button. The printed image is in the same style as the currently selected screen display, for example, quad screen. 45 REmOTE VXH264 SET-UP only authorised users or ADmIn users can configure a VXH264 remotely. with the exception of network settings and certain display options, any of the VXH264 settings can be changed. enTeRInG SeTUP click the SETUP tab to switch to the setup menu. The remote setup screen is displayed and the VXH264 settings can be changed as necessary using the main menu selection on the left hand side. click ok to save all changes made to each main menu page. A completed message appears to confirm the changes have been made. Any changes made will take effect immediately. 46 VXH264 SmART PHONE REmOTE VIEwING The VXH264 can be viewed remotely via smart phones such as the iPhone or blackberry. Select the web browser on the Smart Phone menu. iPhone Select the Safari browser. Blackberry Select the web browser. enter the IP address or URl into the web browser address bar example http:// 192.168.2.19:8080 or http:// 1234.dvrlink.net:8080 Please replace 1234 with the default mAc address of the DVR and press enTeR / Go (depending on type of phone used). iPhone enter the IP address or URl to connect. And click the [Go] button. Blackberry enter the IP address or URl to connect. And press the enter button. The Smart Phone remote log-in page will appear. enter the Username & Password to view the image from the DVR. iPhone 47 Blackberry APPENDIX A: THE ARCHIVE SET After footage has been archived from a VXH264, it can be reviewed on a Pc system. Insert the backup cD or USb stick in the Pc and view the contents using windows explorer. The following files are included in the backup: Arch_info: This file contains detailed information about the archive set. Double click to view it. ch01: An AVI video file containing the archive footage for a single channel. Depending on the archive, there will be upto 16 AVI files listed. Player: This folder contains the playback software necessary to view the archive files correctly. Setup: Installs the Imm4 codec. This is required if the user chooses to play back archive files using windows media Player. other files in the player folder, i:e bplayer, bplayer_logo, comfig, ijl15.aII, lAnG_enG are not used. bAckUP PlAyeR To view archives backed up from a VXH264, double click the backupplayer application located in the PlAyeR folder. click to choose which archive file to playback. Playback of the archive file begins. The controls under the display can be used to adjust playback direction and speed. Note: VXH264 archive files can also be viewed using windows media player but no on screen information (such as time and date) is displayed. For this reason, it is always recommended that Backupplayer is used to view archive files. Archive set file names when a backup is created on the VXH264, a folder is first created on the backup device so that the operator can easily identify the archive set at a later stage. For example the folder, F:\ARCHIVE_100803_115810 is an archive set that was created on 3rd August 2010 at 11:58:10. Each individual archive file is also named for easy identification. For example, US_ch01_10803115532_10803115632_00_8mB_admin is a backup of channel 1 from 11:55 on 3rd August 2010 to 11:56 on 3rd August 2010 with a file size of 8mB created by an ADmIN user. 48 REmOTE CLIENT PLAYBACK CONTROLS bAckUP PlAyeR During playback, a still image can be save to the local Pc hard disk by clicking the SNAPSHOT button located in the top left corner. Specify the file location, file name and choose bmP or JPG format. click ‘Save’. TAke ScReen SHoT oF cURRenT ScReen cAmeRA cHAnnel / nAme RecoRDeD ReSolUTIon FIle nAme oPen FIle PRInT cURRenT ScReen DATe oF ARcHIVe FooTAGe ToTAl DURATIon PlAybAck conTRolS TIme oF ARcHIVe FooTAGe 49 PlAybAck SPeeD APPENDIX B: CONFIGURING A NETGEAR DG384 ROUTER FOR USE wITH VXH264 ReQUIRemenTS 1. netgear DG834 router 2. A laptop or Pc to configure the DG834 3. An Internet connection and all required login details (username and password provided by your ISP) SeTUP STePS FoR InTeRneT connecTIon 1. The DG834 has a default IP address of 192.168.0.1, so configure your laptop or Pc with an IP address of 192.168.0.2 and gateway of 192.168.0.1 and connect to the DG834 using the standard cAT-5 patch lead supplied with the router. 2. open Internet explorer and enter http://192.168.0.1 to connect to the router. when prompted, enter user name of ‘admin’ and password ‘password’. 3. If the DG834 has never been set-up before, it will prompt whether you wish to use the setup wizard – do not do this. 4. choose ‘basic Settings’ from the menu on the left. Select yes for ‘Does your internet connection require a login’ and enter your username and password as provided by your ISP. other information required on this screen can be left at defaults. Apply these settings and then verify that you now have internet access from the Pc / laptop. SeTUP STePS FoR connecTInG A VXH264 locAlly 1. configure the VXH264 (refer to page 29 for details) so that it has a unique IP address, which is in the same range as the router and Pc/laptop. For example, in this case choose 192.168.0.3. Set the gateway IP on the DVR to the router’s IP address of 192.168.0.1. note that the default port number is 6200. 2. connect the VXH264 to the router using a standard cAT-5 patch lead and verify that it can be ‘pinged’ from the Pc as follows: a) To open a command prompt using windows XP use the following sequence: START-RUn - Type in cmD - ok For windows Vista / 7 users: START - Type in cmD -Press enter b) At the command prompt, type ‘PInG 192.168.0.3’. If you see 4 lines saying ‘reply from 192.168.0.3: ………..’ then the VXH264 is recognised on the local network. If not, work through the above steps again, but also check that the cAT-5 patch lead is ok. 3. At this point, the connection to the VXH264 can be tested locally. SeTUP STePS To Allow RemoTe VIewInG oVeR bRoADbAnD bASIc PRIncIPleS Imagine the netgear DG834 is split in to two halves - one half is the private side which serves the local network. This ‘half’ of the router has its own IP address (typically 192.168.0.1) and other devices (Pcs, laptops, VXH264 etc.) that are connected to it will all have a unique IP address of the form 192.168.0.XXX. because this is a private network, it cannot be accessed directly from the outside world. The other imaginary half of the DG834G is the public side - it also has its own IP address which is allocated to you by your ISP and can either be static (it never changes) or dynamic (your ISP could change it at any time). because this is a public network, in theory, anyone from the outside world who knows your public IP address can access the router and your private network. but, because the router has a security firewall built in, incoming traffic is severely limited to prevent this. For this reason, you need to configure the DG834 so that incoming traffic intended for the VXH264 is correctly routed instead of being blocked - this is known as port forwarding. you will notice on the VXH264 that in the network setup section, there is also a port number. This could technically be any value but you must avoid common Internet ports such as 80, 110, 25, 21 etc. In general, the default value on the VXH264 is acceptable. In this case, the VXH264 default port value is 6200 so a rule needs creating on the DG834 that channels all traffic coming in on port 6200 to the VXH264. 50 APPENDIX B: CONFIGURING A NETGEAR DG384 ROUTER FOR USE wITH VXH264 SeTTInG-UP PoRT FoRwARDInG This section assumes that you have already established a successful connection locally. log-on to the DG834 and select ‘Services’ from the menu. click ‘Add custom Service’ and enter the following values: name: VXH264 (or any other name of your choice) Type: TcP Start Port: 6200 Finish port: 6200 And click ‘Apply’ Then, create a firewall rule as follows: Select ‘Firewall Rules’ from the menu. Under the inbound services, click ‘Add’ and enter the following: Service: VXH264 (TcP:6200) – This is the service you created earlier. Action: leave at ‘Allow always’. Send to lAn server: 192.168.0.3 - This is the IP address of the VXH264. wan Users and log settings can be left unchanged. And click ‘apply’ to add the new rule. Repeat this process for the RTSP Port. once the firewall rules are set-up, anybody should be able to access the VXH264 from the outside world, as long as they are using the correct software and correct log in details. To configure the software, the IP address is the public static IP address of your router and the port number in this case will be 6200. The username and password must match those set-up on the VXH264. SeTTInG UP mUlTIPle VXH264s on one RoUTeR The setup steps in this case are identical but you will need to create a separate service and firewall rule for each VXH264 connected. note also that each VXH264 must have a unique port setting as well as a unique IP address. example – 2 VXH264s connected to a router 1st VXH264 settings IP address: 192.168.0.3 Port: 6200 RTSP: 554 Gateway: 192.168.0.1 on the DG834, configure a service on port 6200 and a firewall rule to direct this service to 192.168.0.3 2nd VXH264 settings: IP address: 192.168.0.4 Port: 6201 RTSP: 555 Gateway: 192.168.0.1 on the DG834, configure a service on port 6201 and a firewall rule to direct this service to 192.168.0.4 The remote client software can then be configured with one connection group containing two VXH264 connections to match the above and then both VXH264s can be accessed remotely at the same time. note: If connecting locally over a lAn, the unique 192.168.0.XXX IP address for each VXH264 has to be entered. If connecting over broadband, the same public IP address is entered for both VXH264s – port forwarding on the router takes care of the rest. 51 APPENDIX B: CONFIGURING A NETGEAR DG384 ROUTER FOR USE wITH VXH264 USInG DDnS To connecT DDnS (Dynamic Domain name Server) is generally used when your ISP provides you with a dynamic public IP address. The problem with a dynamic IP address is that because it can change regularly, any remote users that need to connect to the VXH264 do not know what IP address to enter in the remote client! Using DDnS solves this problem. when a VXH264 is correctly configured to use DDnS, it regularly interrogates the router and sends the current public IP address to a 3rd party database. The VXH264 also sends its mAc address, which is unique. before using DDnS, the VXH264 must be set up correctly by following the steps on page 37 and verifying that a local connection can be made. In addition, the following must be configured in the VXH264 neTwoRk setup menu (page 29) DDnS - enabled 1st DnS server - must be the local IP address of the router 2nd DnS server - must be the IP address of the ISP's 2nd DnS server DDnS server - leave set as DDnS.DVRlInk.neT note: if the ISP's DnS servers are not known, they can be identified as follows: A) To open a command prompt using windows XP use the following sequence: START-RUn - Type in cmD - ok For windows Vista / 7 users: START - Type in cmD -Press enter b) At the command prompt, type 'IPconFIG /All' and press enTeR. The ISP's DnS servers are listed at the bottom of the information screen. If only one server is listed, enter this in the VXH264 1st DnS server, and leave the 2nd DnS server as default Finally, make a note of the VXH264's unique mAc address - this can be found in the SySTem mAnAGemenT part of the VXH264 setup (page 25). For example, if the mAc address is 00-11-5F-00-9A-33, the following should be entered instead of an IP address when configuring a VXH264 connection group: 00115f009a33.dvrlink.net note: the entry should be mAc address.dvrlink.net, not mAc address.ddns.dvrlink.net when the remote client initiates a connection, it interrogates dvrlink.net for the actual public IP address that corresponds to the mAc address. It then uses the resulting IP address to connect to the VXH264. 52 APPENDIX C: CONNECTING EXTERNAL DEVICES ALARM IN A12 A13 A14 GND A11 A15 A16 A17 A18 GND A19 A20 A21 A22 GND A113 A114 A115 A116 GND AlARm InPUTS connect voltage free contacts from PIRs and beam break detectors etc. to the ‘GnD’ terminal and ‘AIXX’ terminals of choice. AlARm oUTPUTS connect the ‘GnD’ terminal and ‘AoXX’ terminal of choice to standard alarm inputs on other equipment, e.g. phone diallers and alarm panels etc. NO COM NC NO COM NC NO COM NC NO COM NC RelAy oUTPUT connect the ‘com’ and ‘no’ or ‘nc’ terminal of choice to activate low voltage sounders, strobes etc. ARI PANIC GND AlARm ReSeT connect an external push button switch to the ‘ARI’ and ‘GnD’ terminals. Pushing the switch will reset all system alarms. ARI PANIC GND PAnIc connect an external push button switch to the ‘Panic’ and ‘GnD’ terminals. Pushing the switch will activate the panic recording function. TelemeTRy AnD VA-kbDPRo+ connect RS485+ to the ‘+’ or ‘A’ terminal of any attached telemetry devices or VA-kbDPRo+ keyboard. connect RS485- to the ‘-’ or ‘b’ terminals. 53 APPENDIX D: SPECIFICATIONS MODEL Operation Video in Audio in Main displays Spot displays Audio out External alarm User interface Recording Playback Archiving Time PTZ System Network Remote Access Storage Event handling Security Physical Genuine Pentaplex Channels Connection Loop through Channels Connection BNC VGA S-Video HDMI Screen display modes Sequence Digital zoom Channels Connection Display mode Channels Connection Inputs Outputs On-screen display Control Video CODEC Resolution options for each channel Maximum total frame rate Image quality Pre-event recording Recording modes Frame rate options for each channel Schedule Configurable recording time limits Audio Motion detection Covert recording Camera title Speed Control Search method Split screen display modes Audio synchronization Storage Format Archive data Time zone DST Time synchronisation RS-485 Watchdog Abnormal shutdown detection HDD Error detection System data backup / restore Connection Simultaneous connections DHCP DDNS Two way network audio Bandwidth management I.E Browser Remote configuration Remote PTZ control Email event notification Maximum Capacity Storage Recording options Source Action User levels Key Lock Dimensions Weight VXH264-16 Simultaneous recording, playback, network live view, network playback, network remote set-up. Frame rate unaffected 16 BNC, 1.0Vpp composite 75ohm unbalanced BNC, 1.0Vpp composite 75ohm unbalanced, auto-termination 4 RCA, line level unbalanced 1.0Vpp composite 75ohm unbalanced 15 pin D-SUB 1024 x 768 @ 60Hz 4 pin mini din Y/C Single HDMI Socket. Max. 1024 x 768 @ 60Hz 1, 4, 6 (1+5), 8 (1+7), 9, 16 Adjustable dwell time, user-defined sequences Between 2x & 14x 4, fully programmable BNC, 1.0Vpp composite 75ohm unbalanced Full screen sequence, adjustable dwell-time 1 RCA, line level unbalanced 16, NO or NC common ground 16, high (+5V) or low (0V) selectable,common ground + 4 Relay Out GUI Mouse, Front panel, IR Remote and / or VA-KBDPRO+ PTZ Keyboard H.264 CIF (352 x 288), 2 CIF (704 x 288), D1 (704 x 576) 400 FPS (CIF) Super, Highest, High, Standard, Low 5 seconds max Schedule / motion detection / alarm / panic 25 - 13 - 7 - 3 - 2 - 1 - 0 Per channel, per hour, per day / week 12 hours, 1 day, 2 days, 3 days, 4 days, 5 days, 6 days, 1 week, 2 weeks, 3 weeks, 1 month, 2 month Audio inputs independently assigned to each channel 16 x 16 selectable grid with 10 levels of sensitivity Yes, selectable by channel 8 characters (max) Forward / reverse. 1x, 2x, 4x, 8x, 16x, 32x, 64x Front panel buttons and Jog / Shuttle ring, mouse Calendar / timeline, event log, instant playback, Pano 1, 4, 16 Yes, any frame rate CD-R (DVD±R option), USB Memory stick, Network Watermarked AVI Independent channel selection, back-up log, event log Worldwide, selectable Yes Internet time server Multi-protocol, baud rate and speed control for each channel Yes Yes, with system auto recovery Yes, SMART monitoring Yes, USB memory stick RJ45 4 (max) No Yes Yes Yes Yes Yes Yes Yes Currently 8TB 4 x HDD maximum Stop when full / overwrite Alarm in, motion detection, video loss, HDD error, Panic Record, alarm out, email notification, log, remote client pop-up, buzzer, full screen pop-up ADMIN, MANAGER*, USER* (*Configurable) Yes, password protected 428mm(w) x 475mm(d) x 93mm(h) 4.8kg (without HDD) 54 Notes 55 Notes 56 ! DISPLAY SEQ PANIC LOCK ARCHIVE SETUP SEARCH HOLD ± ZOOM RW . ZOOM OUT + PTZ PWR REC NET 1 2 3 4 5 6 7 10 11 12 13 14 15 16 FF . ZOOM IN IRIS FOCUS RETURN 8 ENTER 9 NEAR FAR CLOSE OPEN NO COM NC NO COM NC NO COM NC NO COM NC ARI PANIC PAL e-SATA 1 NTSC HD MONITOR GND 485 - 485 - 485 + 485 + ALARM IN + ARI / PANIC 100-240V AC, 50/60HZ