1
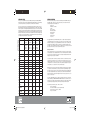
OWNER’S MANUAL
TXC6.1, TXC5.1, TXC4.1
MTX.COM
MTX002049 TXC Owners Manual.indd 1
4/6/05 3:30:41 PM
INTRODUCTION
BEFORE STARTING
Thank you for choosing MTX to help reach your ultimate goal with your vehicle. Adding MTX TXC
High-end Component speakers and a matching MTX amplifier with StreetWires connections will put
you in a better position to hear, feel, and experience all of the music the artist intended.
MTX recommends that you have your new speakers installed by an authorized MTX retailer, preferably MECP certified. If you do decide to do it yourself, make sure you have read the instructions
carefully and that you have the following tools:
• Electric drill
• Phillips bit or screwdriver
• 1/8” bit
• Door panel puller
• Wire cutters/crimpers
• Metal cutting tool
• Safety glasses
• 2mm hex wrench
• X-acto knife
SPECIFICATIONS
TXC series component speakers are the best in the MTX offering of full-range speakers. They offer
many added features that are designed for the distinguished listener. Five levels of tweeter attenuation, three positions of Off-axis adjustments, and Bi-amp inputs are just some of the features that will
help reproduce the music with exceptional dynamics and detail regardless on mounting location and
position within the vehicle. The TXC series also offers an add-on midbass driver and/or tweeter that
further define the musical experience. The TXC6.0 is an additional woofer that can change this 2-way
system into a true 3-way system, while the TXC.1 is an additional tweeter that adds a new dimension
to the imaging. Call 1-800-CALL-MTX for more information.
Model
TXC4.1
TXC5.1
TXC6.1
TXC6.0
TXC.1
Description
4”
Components
5-1/4”
Components
6-1/2”
Components
6-1/2”
Woofer
25mm
Tweeter
Cone
Glass
Fiber with
Aluminum
Deposition
Glass
Fiber with
Aluminum
Deposition
Glass
Fiber with
Aluminum
Deposition
Glass
Fiber with
Aluminum
Deposition
N/A
Tweeter
Teteron Dome
Teteron
Dome
Teteron
Dome
Teteron
Dome
Teteron
Dome
Impedance
4 Ohm
4 Ohm
4 Ohm
4 Ohm
4 Ohm
Frequency
Response
50Hz-25kHz
45Hz-25kHz
43Hz-25kHz
43Hz-250Hz
3.5kHz25kHz
Power (RMS)
100
125
150
150
75
Peak Music Power
200
250
300
300
150
Sensitivity @ 2.83V
88dB
90dB
91dB
91dB
91dB
Voice Coil
1.25”
1.5”
1.5”
1.5”
25mm
X-Max
2.5mm
4.8mm
4.8mm
4.8mm
N/A
Woofer Mounting
1-3/4”
2-1/4”
2-1/4”
2-1/4”
N/A
Woofer Cut-out Dia.
3-1/2”
4-1/2”
5-19/32”
5-19/32”
N/A
Tweeter Mounting
Depth
1”
1”
1”
N/A
1”
Tweeter Cut-out
Dia.
1-7/8”
1-7/8”
1-7/8”
N/A
1-7/8”
Tweeter Mounting
Options
Flush, Surface, Flush, Surface,
Angle
Angle
Flush, Surface,
Angle
N/A
Flush, Surface,
Angle
Crossover Adjustable
Tweeter Level
0, -1.5, -3,
-4.5, -6
0, -1.5, -3,
-4.5, -6
0, -1.5, -3,
-4.5, -6
N/A
0, -1.5, -3,
-4.5, -6
Off-axis
Compensation
0, 30, 60
Degree
0, 30, 60
Degree
0, 30, 60
Degree
0, 30, 60
Degree
N/A
Bi-amp Inputs
Yes
Yes
Yes
Yes
N/A
MTX002049 TXC Owners Manual.indd 2-3
Throughout installation, keep in mind the ultimate objective of creating an ideal soundstage and exceptional imaging. This refers to the experience you get when you sit in your seat with your head up
and shoulders straight, close your eyes, and listen. Where does the music seem to be coming from?
In an ideal world, you would hear all music from front and center, meaning it sounds like a band is
performing on your hood. Raising the soundstage is a very important process and every option should
be considered in order to have your sound as up and in front as possible.
Removing the Door Panel
Please be aware that today’s cars have door panels that are not designed to come apart easily; they
are designed by the factory to sit tight against the door and not rattle. It is important to note that if the
proper procedures are not followed, the door panels can easily become damaged and make them fit
improperly when you’re trying to reinstall them.
Use a door panel puller to remove the door panel, and be aware there are often hidden screws that,
if overlooked, can cause the panel to crack or break when force is applied to remove door panel. It
might be a good idea to do some research on your specific car to be sure they are all removed before
continuing. Even new car owner needs to be aware of this potential issue. Buying a new door panel
is an expensive process so please take note of the potential for damage.
With the door panel off, it is a perfect time to add sound dampener. The main goal of sound dampeners is to add mass to the metal in the door, causing less rattle and “ring” which will help to improve
the overall sound of your new speakers. It also helps prevent against outside noise by adding insulation. Sound dampening material can be purchased from your local retailer and is available in many
different forms, and kits, for many different applications. Please make sure you purchase the correct
type for your specific project.
Note: Before cutting anything, please use common sense and make sure that no wires or glass will
interfere with cutting tools. ALWAYS WEAR PROPER SAFETY GLASSES. Be sure all wires are clear of
moving parts such as window crank mechanisms and trunk hinges. Use rubber grommets when running wires through sharp edged metal holes, which may wear through the wire’s insulation.
Do not mount speakers where they could come in contact with:
• The door’s window glass
• The window crank handle or gear assembly when rotated
• The trunk springs, shock towers, or trunk lid
• The gas tank or fuel lines
4/6/05 3:30:42 PM
TWEETER MOUNTING
When positioning the tweeter for the best imaging, aim the passenger side tweeter toward where
the driver’s head will be. The same process should also be completed on the driver’s side tweeter but
this time you’ll aim the tweeter toward where the passenger’s head will be. Positioning the tweeters
in this manner will help to set up a very solid soundstage.
MIDRANGE MOUNTING
To get the best possible music reproduction, it is important to isolate the sound that is produced from
the rear of the speaker from the sound that is produced from the front of the speaker. To isolate the
front from the back wave, make sure the speaker is mounted in a baffle or plate, so that the back of
the speaker is in a sealed chamber.
WOOFER
WOOFER
STEALTH/O.E.M.
SURFACE MOUNT
GRILLE
Surface Mounting
• Select mounting location. Mark wire hole and screw locations using the surface cup as a template.
• Drill holes for tweeter wires and mounting screws
• Using the supplied screws, attach the surface cup to surface
• Run tweeter wires through the hole and twist the tweeter into the cup
• Connect the tweeter wires to the supplied crossover
ADAPTER RING
STEALTH/O.E.M.
WITH ADAPTER RING
WOOFER
FLUSH
MOUNT
RING
SPRING
CLIPS
MOUNTING ADAPTER RING
Use the included mounting adapter
ring to fit the TXC6.1 & TXC6.0 6½"
speaker in ≤ 6½" mounting locations
FLUSH
MOUNT
GRILLE
WOOFER
FLUSH
MOUNT
RING
SURFACE
MOUNT
RING
SURFACE
MOUNT
1 7/8"
Mounting
• Select the mounting location (door panels, rear side panels, rear deck, etc...)
• Using the supplied templates, mark the mounting holes on the door panel or rear deck
• Drill or cut the required holes as needed
• Install the units as illustrated in the diagrams
FLUSH MOUNT
INSTALLATION KEY
1 7/8"
ANGLE MOUNT
Flush and Angle Mounting
• Select mounting location and mark a 1-7/8” diameter hole with supplied template
• Cut out the 1-7/8” hole (a hole saw is recommended for metal and hard plastic surfaces;
an X-acto knife for any other surface)
• Place the supplied bevel headed screws through the flush/angle cup and thread into the
mounting clip, but do not tighten
• Take the assembled flush/angle cup and mounting clip and place them into the 1-7/8” diameter
hole, making sure the mounting clip goes completely through the hole
• Tighten the screw in the base of the flush cup until the cup is completely tight
• Split tweeter wires and run through the holes and twist the tweeter into the cup
MTX002049 TXC Owners Manual.indd 4-5
*Note: The TXC6.1 and TXC6.0 are supplied with plastic mounting adapters. The adapters are used
to convert the smaller basket sizes needed for European models to the larger domestic sizes. The
plates will allow a tight and accurate fit, decreasing the need to fabricate adapters out of MDF or
plastic.
For answers to further questions, please call 1-800-call-MTX
Three Way System
While the TXC sound quality is the best in the market, the addition of the TXC6.0 woofer can create an
even better musical experience with more precise reproduction. The TXC6.0 has a separate crossover, and the 2-way system can become a true 3-way system where it splits the lower frequencies
between the original midrange and this additional woofer. This makes each speaker responsible for
fewer frequencies and allows clearer, more accurate reproduction.
4/6/05 3:30:42 PM
CROSSOVER MOUNTING
When choosing the mounting location of the crossover, accessibility is important. Adjustments to
the on-/off-axis setting and tweeter attenuation are to be made after the components have been
installed, so convenient positioning of the crossover is crucial. Also, the crossover has electronic
components that must be mounted so it does not come in contact with moisture.
WIRING
When installing these separates consider the age of the factory wiring and gauge (size) of wire. If
the vehicle is an older model or was pre-wired with small wire (18 gauge or less), running new high
performance wire (http://www.streetwires.com/products/speakerCable/microUltraCable.cfm) will be
necessary. The speaker wire should run from the amplifier’s output terminals, under the carpet and
through the factory rubber boot (loom) that protects the wires in the inner door jam. If the factory
boot cannot be used, take other measures to protect these wires as best you can. Sometimes the
door has to be completely removed to use the factory boot. If this is something that you do not feel
comfortable doing, please ask a professional to help you. The wires should originate from the amplifier and attach to the crossover inputs.
CROSSOVER CONNECTIONS
Included with each TXC component system is a 2-way 18dB (tweeter)/12dB (midrange) octave
separate crossover network. The crossover networks allow each driver within the component system
to independently recreate frequencies within a precisely-designed range so that the speakers do
not become distorted by trying to reproduce frequencies that they are not physically able to. This
network ensures that the tweeter does not receive low bass notes and the mid-bass driver does
not receive high frequencies. The 18dB (tweeter)/12dB (mid) octave design complements both the
tweeter and mid and provides greater musical detail.
BI-AMP CONFIGURATION
These crossovers feature Bi-amp connections so that the components can be wired to drive the
tweeter and midrange independently using two amplifiers. When using the components in the BiAmp configuration you are going to need two stereo amps or one four channel amp to run a pair of
components. You will need to remove the Bi-amp jumpers from the input connection points of the
crossover. Connect the desired amp or channels to the tweeter input. The second amplifier, or third
and fourth channels of the 4-channel amplifier, will be connected to the woofer input on the crossover. When the crossover is set up in this configuration, the final load will be 4 ohms.
TW-
TW+
WF-
WF+
INTW- INWF- INTW+ INWF+
JUMPERS
REMOVED
Note: It is important to make sure the gain of each amplifier is matched. Final gain level adjustments
should be made using the crossover settings.
TW-
TW+
WF-
WF+
INTW- INWF- INTW+ INWF+
Note: Pay close attention to the markings on the crossover to be certain the correct speakers are in
the correct outlet. If a tweeter is accidentally asked to play the frequencies reserved for a mid-bass
driver, it will be damaged.
MTX002049 TXC Owners Manual.indd 6-7
4/6/05 3:30:43 PM
THREE LEVEL OFF-AXIS ADJUSTMENT
MTX designed the TXC components to compensate for undesirable factory mounting locations within
the vehicles by including a three level on-/off-axis adjustment feature. Since you cannot move the
factory speaker mounting locations within the vehicle, these adjustments will help to deliver sound
that is clear, deep, and positioned like it is coming from directly in front of you. The music will have
a sense of depth where it sounds like it is not confined by the windshield but rather coming from the
road in front of you.
TWEETER ATTENUATION ADJUSTMENT
When setting the attenuation of your tweeter, you are going to want to adjust this level by the distance from tweeter to listener as well as personal preferences. The attenuation has five levels that
range from 0dB to –6dB. Generally, this would be set up with 0dB being further away, and –6dB being
closer, to the listener’s ear. If you have the attenuation set at 0dB and the speakers seem too bright,
adjust the jumper downward until it matches your personal taste. If the speakers seem too dim or
quiet, adjust the tweeter upward.
There are three settings on the crossover for Off-axis adjustments- 0˚, 30˚, and 60˚. These positions
will compensate for the speaker placement and will use your vehicle’s unique environment to create
the best sounding system possible.
Note: The tweeter adjustments will also dramatically affect the balance between your tweeter and
the 0, 30, and 60 degree setting of your midrange. After setting the tweeter to a comfortable level,
you may need to readjust your midrange off-axis adjustment to achieve the optimum balance.
0
-6
-3
-4.5
0.0
-1.5
-3.0
-4.5
-6.0
60˚
0˚
30˚
Once the speakers are installed in their final locations, do the “sit in the seat and close your eyes
test.” The vocals should be jump out at you, be cleanly defined, and move from side to side while the
instrumentation should be full and distinct layers. If you don’t hear your music in this fashion, select
a different jumper position and repeat the “sit in the seat and close your eyes test” (The jumper
settings listed below are our recommended starting points). Take time to listen to the components in
each of the jumper settings in detail to determine which sound is best for your application.
-1.5
Note: For applications greater than 60˚, the 60˚ position setting is recommended
VOLTAGE VS. FREQUENCY
0
-5
-10
-15
-20
60˚
30˚
0˚
-25
-30
-35
-40
-45
TWEETER
MOUNTED LOW
MTX002049 TXC Owners Manual.indd 8-9
TWEETER
FLUSH MOUNTED
10 Hz
20
50
100
200
500
1K
2K
5K
10K
20K
40K
TWEETER ANGLED
TOWARD LISTENER
4/6/05 3:30:43 PM
WARRANTY STATEMENT
MTX Audio Thunder Axe High-End Components purchased in the United States from an authorized
MTX Audio dealer are guaranteed against defects in material and workmanship for a period of
ONE YEAR from the date purchased by the end user, and limited to the original retail purchaser of
the product. Product found to be defective during that period will be repaired or replaced by MTX
Audio at no charge. This warranty is void if it is determined that unauthorized parties have attempted
repairs or alterations of any nature. Warranty does not extend to cosmetics or finish. Before presuming a defect is present in the product, be certain that all related equipment and wiring is functioning properly. MTX Audio disclaims any liability for other incurred damages resulting from product
defects. Any expenses incurred in the removal and reinstallation of products are not covered by this
warranty. MTX Audio’s total liability will not exceed the purchase price of the product. If a defect
is present, your authorized MTX Audio dealer may be able to effect repairs. Proof of purchase is
required when requesting service. Please retain your sales receipt and take a moment to register
your product on line at mtx.com.
© 2005 MTX. All rights reserved. MTX, Thunder, Axe and StreetWires are trademarks of Mitek.
Designed and Engineered in the U.S.A.
Due to continual product development, all specifications are subject to change without notice.
MTX Audio, 1 Mitek Plaza, Winslow, IL 61089 U.S.A. MTX002043 RevA 3/05 21A7846
MTX002049 TXC Owners Manual.indd 10
4/6/05 3:30:44 PM