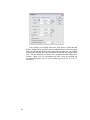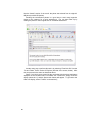
1
CIVIL AIR PATROL
U.S. Air Force Auxiliary
Mission Aircrew
Reference Text
Volume III
Airborne Photographer
and VIT Specialist
Revision April 2010
Introduction
The text sets forth the academic preparation and operational tasks
required for the Airborne Photographer and Videography Information
Technology Specialist positions, and supplemental training for qualified
SAR/DR Mission Pilots that concentrates on the unique aspects of imaging
(photography or video) missions. This text, instructor guides, PowerPoint
presentations and examinations comprise the CAP National Emergency
Services Academy Mission Aircrew School (NESA MAS) Airborne
Photographer (AP) and Videography Information Technology (VIT)
Specialist courses.
Airborne Photographer
The Airborne Photographer (AP) serves as a member of a Civil Air
Patrol (CAP) flight crew and is tasked with taking airborne photographs
and/or video of specified targets in such a way that we completely meet or
exceed our customer’s objectives and needs.
Videography Information Technology Specialist
The Videography Information Technology (VIT) Specialist manages
and operates camera and computer equipment in support of photography or
video imaging missions. This specialist will receive, transfer, organize and
manipulate photos or video as needed to accomplish mission objectives.
The specialist will also assist in maintaining cameras, camcorders,
computers, software and accessories, and training or assisting personnel on
computer-related tasks.
SAR/DR Mission Pilot
In addition to the normal duties and responsibilities of a SAR/DR
Mission Pilot (MP), the MP plans and flies aerial photo or video sorties
utilizing all available imaging sortie flight patterns and techniques. The
MP works closely with the Airborne Photographer to ensure the success of
each imaging sortie. NOTE: Mission Pilots who don’t wish to qualify as a
Airborne Photographer are encouraged to fly some sorties as a AP trainee
to better appreciate the needs of the AP and improve communications
between the crewmembers.
iv
Third Crewmember
A third crewmember is needed to act as a log keeper and assist the crew
in other imaging-related tasks. Any qualified Mission Pilot, Observer or
Scanner can be trained to perform these duties.
Operating the Satellite Digital Imaging System (SDIS) is covered in a
separate course and associated Task Guides. However, the skills and
knowledge needed to take the photos that are transmitted by SDIS are
covered in this text.
The ARCHER system is operated by a small number of specially
trained personnel, and is controlled by National HQ. Therefore it is not
covered in this text. If you are interested in this system, refer to CAP’s
ARCHER TRAC training courses and the Hyperspectral Imaging
Operations Manual.
Ownership of Photos
If you are taking photos or video on a training mission (i.e., not for
delivery to a specific customer), the pictures are the property of CAP. If
you want to post them or use them outside the training mission, please
contact your IC and get approval for the specific use of the photos
If you are taking photos or video for a customer (anyone other than
CAP) the images are the property of the customer. They may not be used
for any reason (including training) without the expressed written consent of
the customer. Contact your IC to get permission for the specific use, and
don’t be surprised that the customer may not want you to disseminate or
use the photos or video for other purposes.
v
How to Use this Text
As a reference text this document contains more material than is needed
to qualify. Objectives are listed at the beginning of each chapter. These
objectives match a task in the applicable Task Guide for each crew
position; the applicable tasks and the guides to which they belong are listed
in brackets next to the Objective. For example, [AP-P-001] next to an
Objective shows that the related task can be found in Airborne
Photographer Task Guide AP-P-001. If an Objective covers material found
in more than one Task Guide, it will appear like [AP-P-001; VIT-P-001],
which shows the Objective relates to both Airborne Photographer and VIT
Specialist Task Guides.
Microsoft PowerPoint slide presentations act as complementary
information to the text and associated Task Guides. Although developed
and organized for instructors, the slides contain many examples of photos
that are not found in the text and should be viewed by students studying the
text or task guides.
This is a mission-specific text. See the Mission Scanner and the
Mission Observer/SAR-DR Mission Pilot Reference Texts for the academic
knowledge and operational tasks required by the CAP Mission Scanner,
Mission Observer, and SAR/DR Mission Pilot specialty ratings.
This text and supporting material was developed by Lt. Col. Richard
Simerson with input and assistance from several valuable sources within
Texas Wing, particularly Lt Col Brooks Cima, Lt Col Don Fisher, and Lt
Col Jack Jackson. If you have any comments or suggestions or wish to
provide extra information or photos, please e-mail [email protected].
vi
Task Guides
Airborne Photographer tasks:
AP-P-001 Discuss Digital Camera Features
AP-P-002 Select Camera Settings
AP-P-003 Keep Camera and Accessories Mission Ready
AP-P-004 Describe Imaging Patterns and Communications
AP-P-005 Discuss Factors Affecting the Success of Imaging Sorties
AP-O-001 Compose an Photo
AP-O-002 Transfer Photos to a Computer and View the Photos
AP-O-003 Send Photos to the Customer
AP-O-004 Prepare for an Imaging Sortie
AP-O-005 Conduct an Imaging Sortie
VIT Specialist tasks:
VIT-P-001 Discuss Digital Camera Features
VIT-P-002 Select Camera Settings
VIT-P-003 Discuss Setup of a Camcorder for Imaging Missions
VIT-P-004 Keep Camera and Accessories Mission Ready
VIT-P-005 Maintain Computer and Accessories
VIT-O-001 Transfer, Organize, and Rename Photos
VIT-O-002 Send Photos to the Customer
VIT-O-003 Edit Photos on a Computer
The following tasks should be studied and practiced by SAR/DR Mission
Pilots:
AP-P-003 Keep Camera and Accessories Mission Ready
AP-P-004 Describe Imaging Patterns and Communications
AP-P-005 Discuss Factors Affecting the Success of Imaging Sorties
AP-O-004 Prepare for an Imaging Sortie
AP-O-005 Conduct an Imaging Sortie
The following tasks should be studied and practiced by the third crewmember:
AP-P-003 Keep Camera and Accessories Mission Ready
AP-P-004 Describe Imaging Patterns and Communications
AP-P-005 Discuss Factors Affecting the Success of Imaging Sorties
AP-O-004 Prepare for an Imaging Sortie
AP-O-005 Conduct an Imaging Sortie
vii
References
1.
2.
3.
4.
5.
6.
7.
8.
9.
10.
11.
12.
13.
14.
15.
16.
17.
18.
19.
20.
21.
22.
23.
24.
25.
26.
27.
28.
29.
30.
31.
32.
33.
34.
35.
viii
The following CAP Regulations (CAPR):
a. 60-1, CAP Flight Management, 5/13/10.
b. 60-3, CAP Emergency Services Training and Operational Missions, 8/17/09.
Adobe Photoshop & Photoshop Elements User Guides (www.adobe.com)
ArcSoft PhotoStudio (www.arcsoft.com/en-us/index.asp)
Ben Long, “Complete Digital Photography” (4th Edition, Charles River Media)
Canon Optura 20 Instruction Manual (www.usa.canon.com)
Canon PowerShot SD500 Instruction Manual (www.usa.canon.com)
CAP Image Processing Program, Tolga Tarhan (http://cap.ttar.org/imageprocessor/)
COSports.com Lat/Lon Coordinate Converter (www.cosports.com/tools/gps_coords.htm)
CuteFTP Lite (www.cuteftp.com/cuteftplite)
Dave Johnson, “How to Do Everything with Your Digital Camera” (McGrawHill/Osborne, 2003)
Digicamhelp (www.digicamhelp.com)
Digital Camera Resource Page (www.dcresource.com)
Digital Photography Review (www.dpreview.com) including Vincent Bockaert at
http://123di.com
dpMagic (http://www.dpmagic.com)
GIMP (www.gimp.org)
Globalscape CuteFTP (www.globalscape.com/products/ftp_clients.aspx)
Google Picasa (picasa.google.com)
IDrive (www.idrive.com)
Infanview (www.irfanview.com)
imaging resource (www.imaging-resource.com)
JPEGclub.org (www.jpegclub.org)
Kodak DC290 User Guide
Kodak EasyShare (www.kodak.com)
Kodak Tips and Projects (www.kodak.com)
LC Technology International Photorecovery (www.lc-tech.com)
Microsoft Windows XP Help
Mozy (http://mozy.com)
Nikon D-200 User Manual (www.nikonusa.com)
Nikon PictureProject (www.nikonusa.com)
Paint.net (www.getpaint.net)
Picasa (http://picasa.google.com)
Kelbytrainin.com (www.scottkelbybooks.com/elementsphotos.html)
WinZip Courier (http://winzip.yousendit.com)
Wikipedia (http://en.wikipedia.org)
Web Mission Information Reporting System (WMIRS)
Table of Contents
1.
Digital Cameras ______________________________________ 1
OBJECTIVES: _____________________________________________________ 1
2.
1.1
Basic Components _________________________________________ 3
1.2
Batteries _________________________________________________ 7
1.3
Media Cards ______________________________________________ 8
1.4
Photo File Formats ________________________________________ 11
Exposure and Settings _______________________________ 17
OBJECTIVES: ____________________________________________________ 17
3.
2.1
ISO, Shutter Speed, and Aperture ____________________________ 19
2.2
Metering System __________________________________________ 22
2.3
Exposure Lock (Pre-focus) __________________________________ 22
2.4
Exposure Modes __________________________________________ 23
2.5
White Balance ____________________________________________ 26
2.6
Photo Resolution and Quality ________________________________ 28
2.7
Histograms ______________________________________________ 31
Composition ________________________________________ 37
OBJECTIVES: ____________________________________________________ 37
4.
3.1
Isolate the Focal Point ______________________________________ 38
3.2
Framing _________________________________________________ 38
3.3
Depth Perception __________________________________________ 39
3.4
Depth of Field ____________________________________________ 39
3.5
Panoramas ______________________________________________ 40
Camcorders ________________________________________ 41
OBJECTIVES: ____________________________________________________ 41
4.1
Basic Terms and Features __________________________________ 42
4.2
Media File Formats ________________________________________ 44
4.3
Taking Movies with a Digital Camera __________________________ 45
4.4
Connecting to the Aircraft Audio System (Intercom) _______________ 46
4.5
Techniques ______________________________________________ 47
4.6
Getting the Video to the Customer ____________________________ 49
ix
5.
Computer Requirements ______________________________ 51
OBJECTIVES: ____________________________________________________ 51
6.
5.1
Hardware ________________________________________________ 52
5.2
Special Software __________________________________________ 54
5.3
Accessories ______________________________________________ 54
Transferring, Organizing and Renaming Photos __________ 57
OBJECTIVES: ____________________________________________________ 57
7.
6.1
Transferring Photos into a Computer __________________________ 58
6.2
Capturing Photos __________________________________________ 60
6.3
Organizing Photos on a Computer ____________________________ 63
6.4
Watermarking Photos ______________________________________ 64
6.5
Naming Photos ___________________________________________ 66
6.6
Backup and Archive Photos _________________________________ 68
Viewing and Editing Photos ___________________________ 69
OBJECTIVES: ____________________________________________________ 69
8.
7.1
Browsing Photos __________________________________________ 70
7.2
Editing Photos ____________________________________________ 73
Send Photos to the Customer _________________________ 87
OBJECTIVES: ____________________________________________________ 87
9.
8.1
Sending Photos by E-Mail ___________________________________ 88
8.2
Sending Photos by File Transfer Protocol_______________________ 92
8.3
Upload to an Internet Site ___________________________________ 93
8.4
Upload Photos to WMIRS ___________________________________ 95
8.5
Share Photos using Google Docs
8.6
Deliver Photos or Video via Messenger ________________________ 98
8.7
Digitizing 35mm Film Photos _________________________________ 99
®
___________________________ 97
Printing Photos ____________________________________ 103
OBJECTIVES: ___________________________________________________ 103
x
9.1
Printers and Image Resolution ______________________________ 104
9.2
Printer Adjustments _______________________________________ 105
9.3
Resizing ________________________________________________ 106
9.4
Supplies ________________________________________________ 107
10. Between Missions: Keeping the Camera and Accessories
Mission Ready_________________________________________ 109
OBJECTIVES: ___________________________________________________ 110
11.
10.1
Batteries _______________________________________________ 111
10.2
Lenses and LCD/Viewfinder ________________________________ 111
10.3
Filters __________________________________________________ 113
10.4
Media Cards ____________________________________________ 114
Preparing for an Imaging Sortie ______________________ 115
OBJECTIVES: ___________________________________________________ 115
12.
11.1
Briefings________________________________________________ 117
11.2
Imaging Flight Patterns ____________________________________ 122
11.3
Crew Communications in Imaging Patterns ____________________ 129
11.4
Factors Affecting Success of the Sortie _______________________ 130
11.5
Inventory Equipment and Check Camera Settings _______________ 132
11.6
Prepare the Aircraft _______________________________________ 135
Conducting an Imaging Sortie _______________________ 137
OBJECTIVES: ___________________________________________________ 137
12.1
Transit to the Target Area __________________________________ 137
12.2
Taking Photos ___________________________________________ 140
12.3
Recording Video with the Camcorder _________________________ 141
12.4
Determine Success or Failure _______________________________ 142
12.5
After the Sortie __________________________________________ 143
12.6
Debrief _________________________________________________ 144
12.7
Practice ________________________________________________ 145
Attachment 1, Customer Imaging Request Checklist ______ CXLVII
Attachment 2, Imaging Sortie Checklist ___________________ CLIII
1.
Aircrew Assignment / Briefing _______________________ CLV
Attachment 3, Circling Pattern Worksheet ________________ CLXIII
Attachment 4, 4-Square Pattern Worksheet 1 _____________ CLXV
Attachment 5, 4-Square Pattern Worksheet 2 ____________ CLXVII
Attachment 6, Overview Pattern Worksheet______________ CLXIX
Attachment 7, 45º Pattern Worksheet ___________________ CLXXI
xi
Intentionally blank
xii
Chapter
1. Digital Cameras
1
Airborne Photographers have to know the camera and how to use it, so they can
concentrate on planning, framing and taking aerial photos that will meet mission
objectives. When you are flying is not the time to be fiddling with the camera.
The Videography Information Technology (VIT) Specialist needs to know cameras so
they can maintain the camera and accessories between missions, download photos
from the camera, and help train Airborne Photographer trainees on camera use and
care.
There are an incredible number of digital cameras available, so we will cover the
basics using the Kodak DC290 and Nikon D200 as low- and high-end examples. To
get the best results from your camera, you’ll have to do the unthinkable: read the
User’s Manual!
OBJECTIVES:
1.
Discuss the difference between optical and digital zoom, and which to
use on CAP imaging missions. [AP-P-001; VIT-P-001]
Demonstrate operation of the optical zoom. [AP-P-001]
2.
Discuss the limitations of optical viewfinders, and describe the purpose
of the diopter correction.
Using the optical viewfinder, take a picture of a table or desk. Frame
the picture so the bottom edge of the table or desk is just at the bottom
of your view through the viewfinder. Then compare what you saw
through the viewfinder versus what you see in the LCD screen or on a
monitor, noting how much space below the bottom edge of the desk or
share (that you didn’t see in the viewfinder) was captured by the
camera. [AP-P-001; VIT-P-001]
3.
Discuss the limitations of using an electronic viewfinder or the LCD
screen during aerial imaging.
Demonstrate how to turn the screen on and off, take a picture and
display it on the camera’s LCD screen, then view the photo in varying
degrees of brightness (shadow to full sunlight).
[AP Task P-001; VIT-P-001]
1
4.
Discuss the purpose of formatting a media card and when this should
be done. [AP-P-001]
Format a media card in the camera. [VIT-P-001]
5.
Describe actions to avoid so that you won’t accidentally corrupt a
memory card.
Demonstrate the proper way to remove and insert a media card into a
camera and a media card reader. [AP Task P-001; VIT-P-001]
6.
Briefly describe the difference between lossless and lossy compression.
[AP Task P-001; VIT-P-001]
7.
Briefly describe the advantages and disadvantages of the JPEG, RAW
and TIF file formats. [VIT-P-001]
* Throughout this text, each objective is followed by:
a. The mission specialty rating to which the objective applies
(AP = Airborne Photographer and VIT = VIT Specialist).
b. The section in the text where the answer to the objective may be found.
2
1.1 Basic Components
"Pixel" stands for picture element. A single pixel is the basic building block of
a digital image. A photograph composed of more pixels will have more detail than
one made from fewer pixels. Digital camera capture levels are rated by
megapixel (one megapixel equals one million pixels). For example, the Kodak
DC290 is a 3-megapixel camera and the Nikon D200 is a 10.2-megapixel camera,
when set to the highest pixel resolution (more on this later).
Pixels (or megapixels) alone do not define a camera’s picture quality. Quality
is also determined by type of lens, zoom, shutter speed, and shooting modes.
These are covered later in the text.
1.1.1 Lens and Zoom
Digital “point-and-shoot” models have a single fixed focal length lens or a
fixed zoom lens. For example, the Kodak DC290 has a 3x zoom lens, making it
roughly equivalent to a 35mm camera with a 38 – 115 mm lens.
The Nikon D200 is a digital Single Lens Reflex (SLR) camera that can be
fitted with many types of lenses. The term Single Lens Reflex designates a type
of camera which incorporates a viewing system where the subject is seen through
the lens. The subject’s photo is reflected on a mirror which passes through a
prism that can be seen in the viewfinder. In fixed lens cameras, subjects are seen
through a viewfinder that is near the lens, which makes the photographer's view
different from the lens' view.
Digital cameras (as well as digital camcorders) offer two types of zoom optical and digital. We make good use of optical zoom and we try to forget we
ever heard about digital zoom.
•
Optical zoom means that the actual glass lens of the camera zooms
through a range that goes from a wide angle view of the scene in front of
the camera to a narrower (telephoto) view that makes a distant target look
bigger.
A zoom lens provides tremendous flexibility during framing. This will be
discussed later.
•
Digital zoom means that the camera's electronics provide an even larger
photo that can be captured optically; this is done by interpolating the
photo captured by the optical lens. Digital zoom simply crops a center
part of the captured photo; other slightly more sophisticated digital zoom
implementations take this same center crop and then interpolate it back
up to the cameras full (native) resolution. Because of this function, the
camera’s viewfinder cannot accurately depict a subject that is digitally
zoomed; you must use the LCD to preview the target.
On most cameras, digital zoom is activated when you hold the zoom
switch all the way to the maximum zoom, release the switch, and then
move it in the zoom direction again and hold it. While there may be times
3
when digital zoom is necessary to get a photo of a distant object, the truth
is that it does not create as good an image as can be recorded optically.
Don’t use digital zoom! Turn if off (if your camera has a setting for this),
or be careful not to activate it when you zoom.
Focal Length
Focal length is a measurement of the magnifying power of a lens, or the
distance (in ‘mm’) between the lens and the focal plane (the area upon which the
lens is focusing). The longer the focal length, the more magnification a lens will
provide. However, as magnification increase the field of view decreases.
The human eye has a field of view of 50°-55°; so a 55mm lens is considered
“normal.” When you “zoom in” on a subject you are increasing the focal length of
the lens. This produces more magnification and a narrower field of view. Zoom
lenses offer great flexibility in terms of framing and camera position.
All lenses project a circular image onto the focal plane. The image sensor
(sitting on the focal plane) records a rectangular crop from the middle of that
circle. Thus a larger image sensor will provide a larger crop. Because of this, the
same lens placed on a camera with a different sized sensor will yield a different
field of view.
The 35mm frame size has been the standard for so long that most think in
terms of 35mm when they consider a particular focal length. So, a 50 mm lens is
considered “normal,’ while a 28mm lens is considered wide-angle and a 200mm is
considered telephoto.
Since all point-and-shoot cameras and most SLR cameras have sensors that
are smaller than a 35mm frame, when you place the same lens on a camera with
this smaller sensor they will have the narrower field of view of a more telephoto
lens. To learn what the equivalent focal length is in terms of a 35mm camera, you
must multiply the actual focal length by a multiplication factor to determine the
35mm focal length equivalency. Most Nikon SLRs have a focal length multiplier of
1.5 (Canon EOS cameras are usually 1.6), so a 50mm lens placed on a Nikon
SLR will have the same crop as a 75mm lens on a full-frame camera (1.5 x 50mm
= 75mm).
NOTE: This cropping factor can be very handy when using telephoto lenses.
For example, if you place a full-frame 200mm lens on a Nikon SLR you get the
same crop as a 300mm lens (1.5 x 200mm = 300mm). [Conversely, when you fit
a 28mm wide-angle lens onto this camera it will have a full-frame equivalent crop
of 42mm, which is not very wide.]
Many camera vendors now make lenses specifically engineered for their
cameras that have smaller sensors. Nikon denotes these lenses with the “DX”
label (Canon uses “EF-S”).
Anything shorter than about a 24mm lens on a digital SLR will include the
plane's wing struts or landing gear in the photo. Medium lenses (most likely to
come with your camera) are useful for overall views, and those with a 3x optical
zoom work fine for CAP purposes. Long lenses work very well, and an 80-200
mm f/2.8 zoom is ideal. Lenses longer than 200 mm are tough to use since their
slower speeds tend to require longer shutter speeds, and the longer focal length
dictates even shorter shutter speeds.
4
Note: Some lenses don’t produce even edge-to-edge sharpness across their
range, so experiment with your lens to determine if there is any falloff in
sharpness at particular focal lengths.
Vignetting
Add-on lenses such as a telephoto lens can help improve your photos.
However, because these lenses are long they may cause vignetting. Vignetting is
what happens when the lens barrel itself gets into a picture, causing the frame to
lose its square shape. Subtle vignetting may cause the corners of you photo to be
dark, blurry or rounded; extreme vignetting can produce a round image (in this
case, the edge of the lens itself is included in the photo).
A digital camera converter lens may require an adapter so it mounts correctly
on the camera. In order to prevent vignetting, adapters may have to be removed
when the lens is no longer attached.
If you find that your camera with its add-on lens is prone to vignetting, keep
an eye on the camera’s LCD screen. If your see vignetting, try zooming farther
into the telephoto range and see if this eliminates the problem. As a last resort,
you can crop the darkened corners out of your photo using photo editing software.
1.1.2 Viewfinders
A. Optical Viewfinder
A camera’s optical viewfinder is normally positioned above the actual lens,
and there is also a horizontal offset. So what you see through the optical
viewfinder is different from what the camera’s lens projects onto its sensor. This
"parallax error" is most obvious at relatively small subject distances. Digital SLR
cameras have no parallax error, and exact focus can be confirmed by eye.
Optical viewfinders only allow you to see a percentage (80 to 95%) of what
the sensor will capture. Additionally, the viewfinder normally shows a lower
percentage (e.g., 85%) of the final image area at telephoto range (this percentage
increases to 89 - 95% at wide angle settings). So don’t be surprised if an
aircraft’s wheel, strut or wingtip shows up in your picture, even when you didn’t
see it in the viewfinder while you were framing the shot. With practice you can
anticipate this effect when framing your shot.
Note
This condition will be further complicated if the customer wants data imprinted
on the photos, such as time and/or date stamps or watermarking. This data is
usually superimposed at the bottom of the photo, so you will have to adjust
your framing to ensure this data doesn’t interfere with a clear view of the
target.
5
Time stamp in lower right-hand corner Watermark in lower left-hand corner
B. LCD Screen Instead of a Viewfinder
Many cameras also let you use (and some only have) the LCD screen to
frame a shot while avoiding the “parallax error.” Unlike the typical optical
viewfinder it is 100% accurate (what you see is what you’ll capture). If framing is
critical, you can use this feature. However, most LCD screens are small and hard
to view in bright sunlight, so it is preferable to use the viewfinder during CAP
missions. Additionally, using the LCD screen on all the time can quickly deplete
your batteries.
C. Electronic Viewfinder (EVF)
An electronic viewfinder is a viewfinder where the image captured by the lens
is projected electronically onto a miniature display. They essentially give you a
second LCD that's shielded from bright light, uses less battery power, and offers a
through-the-lens view of your whole image frame that shows both exposure and
focus changes. EVFs in digital still cameras are very similar to those in video
cameras.
Electronic viewfinders have some advantages over optical viewfinders, such
as the ability to show 100% coverage of the final image; this removes the chance
of an aircraft wheel, strut or wingtip showing up in your photo. They also allow
you to display (overlay) information about the scene, such as a histogram, directly
on the EVF display. Finally, shooting video with an EVF is as close to a
camcorder experience as you'll get with a still-image camera.
However, with EVFs there can be a noticeable lag between the changes in
the scene and what you see on the EVF display. And, when you depress the
shutter, the image is “frozen” on the EVF just as it is on the LCD screen; this
makes shooting several photos in quick succession more difficult, as you have to
halfway depress the shutter button in order to “refresh” the photo in your EVF (this
can be accomplished with a little practice).
D. Diopter Correction
If you're among those with less than perfect vision, being able to frame your
shot using the color LCD instead of looking through the small optical viewfinder
may seem best. But in aerial photography, you will use the viewfinder more often
than not because of the difficulties unique to the cockpit of a small airplane. And
6
when you use the viewfinder you may not be able to see the full frame if you have
to put your glasses on to look through it.
Diopter correction is a feature that allows you to focus the image in the optical
viewfinder, usually by means of a knob, slider, or dial located next to the
viewfinder. This feature is normally only found on larger cameras, like the D200.
Part of mission preparation includes setting up the camera, and this includes
setting the diopter correction. Look at something within shooting range, raise the
camera's viewfinder to your eye, and adjust the diopter until the scene is sharp.
For the D200, press the shutter-release button halfway and adjust the diopter until
the focus brackets are in sharp focus.
1.2 Batteries
One difference between digital cameras and film-based models is that most
digital cameras tend to consume a lot of power. This means that you need to use
high-performance batteries and that you'll probably want to buy a set of
rechargeable batteries that fit your camera and the portable GPS (usually ‘AA’
batteries) that attaches to the camera, if applicable.
Some cameras come with custom-designed rechargeable Lithium Ion battery
packs in the box. If this is the case, there's no decision of which brand and type
of batteries to buy; get an extra battery pack from the manufacturer and keep it
charged as a spare.
Older-style batteries (particularly Nickel Cadmium - NiCad) had what is
termed the memory effect: if you ran a rechargeable battery down only halfway
before recharging, the battery would eventually give you only half as much battery
life. This required users to drain them completely before recharging. This is no
longer an issue with the new Lithium Ion and NiMH batteries, so after the second
recharging you can top them off anytime (such as just before a mission).
Even the newer rechargeable batteries can only be expected to last about
three years (five at most). Once they are spent, you should dispose of them
properly (or recycle in the case of lithium ion batteries).
If battery charge becomes an issue during a sortie, remember that the two
biggest drains on the batteries are the camera’s LCD screen and the flash (not
applicable to CAP missions). Turning off the LCD screen will extend battery life
during a sortie.
Cold temperatures will shorten battery life. Lithium Ion batteries (not the
rechargeable types) often function much better in cold weather than do NiMH or
alkaline batteries.
Refer to the battery section in the “Between Missions” chapter for battery
care.
1.2.1 Lithium Ion
Lithium ion batteries are used in many digital cameras because they pack a
lot of energy into a small size, are lightweight, and performance is good even in
cold weather conditions. They cost more than NiMH batteries, but they usually
give you more pictures per battery (the new Energizer e Lithium battery allow you
to take so many pictures that the higher cost is offset by the number of photos you
get per battery).
7
Single-use lithium iron disulfide batteries make excellent backup batteries
because they maintain their charge for years. Use rechargeable lithium ion
battery packs for normal use.
1.2.2 Lithium Ion
The most common rechargeable battery used in cameras is the Nickel Metal
Hydride (NiMH) battery. They are not quite as powerful as lithium ion, but cost
less.
These batteries don’t reach their full level of performance until they’ve been
charged several times. On the other hand they are sensitive to overcharging, so
only use chargers specifically designed for NiMH batteries.
1.2.3 Alkaline
Only use traditional alkaline batteries for emergency backup. They are not
strong enough to power a high-drain instrument like a digital camera for more than
a few dozen photos, and they are harmful to the environment.
1.3 Media Cards
1.3.1 Types of Media Cards
Digital cameras use a variety of flash memory cards to store their photos, the
most popular being: Secure Digital (SD), MultiMediaCard (MMC), CompactFlash
(CF), Memory Stick (MS), Extreme Digital (xD), and SmartMedia (SM).
Media cards are great for storing photos or video. They don’t need electrical
power to hold data and they should hold data for about 100 years without
deterioration.
The type of memory card you use is dictated by which digital camera you buy.
These physically different cards are not interchangeable. Regardless of the
media, the table below gives an approximate number of photos that a particular
card will hold, depending on the resolution of the camera.
Camera
type
2-megapixel
3-megapixel
4-megapixel
5-megapixel
6-megapixel
File size *
900KB
1.2MB
2.0MB
2.5MB
3.2MB
32MB
64MB
128MB
256MB
512MB
1GB
2GB
4GB
35
26
16
12
10
71
53
32
25
20
142
106
64
51
40
284
213
128
102
80
568
426
256
204
160
1137
853
512
409
320
2275
1706
1024
819
640
4551
3413
2048
1638
1280
* Average file size using the camera’s highest resolution JPEG mode. The actual
number of photos per card will vary and depends on the camera model and
compatibility of the scene being photographed.
Cameras normally come with a small memory card (e.g., 32 MB or 64MB) but
this will not be sufficient for your needs. For CAP mission purposes, you should
8
have two memory cards for your camera. Using two cards instead of one gives
you more flexibility; you give the card you just used to the mission staff, load the
fresh card into your camera, and launch on your next sortie while the staff
processes your photos.
Fortunately, memory cards are not very expensive. For low megapixel
cameras, two 64MB cards should be sufficient for your needs; for large megapixel
cameras such as the D200, you should have two 2GB cards (at least).
Secure Digital (SD) cards currently range in size from 16MB up to 4GB. As
with other flash media, SD cards come in different transfer speed ratings. Most
SD cards (not marked "High Speed" or "Ultra High Speed") transfer photos at
approximately 2Mb/s, whereas the latest cards are capable of transferring data at
up to 20Mb/s. Transfer speed is an important factor if you record high frame rate
motion video or high quality audio tracks. [Many digital camera makers only
certify their 30fps VGA motion video capability when using "high speed" SD
cards.]
xD cards are touted as the SD card’s successor but offer few advantages
over SD. It is currently the smallest media card on the market, but carries quite a
price premium.
CompactFlash (CF) cards contain both memory chips and a controller. Most
digicams that use CF cards can use any capacity card up to 1GB (and probably
2GB) with no problems. CF cards above 2GB use the FAT32 file system, the
camera must be able to read this format or it won't work.
There are two types of CompactFlash cards: Type I (3.3mm thick) and Type II
(5mm thick). Cameras with Type I slots cannot use Type II cards, but cameras
with Type II slots can use either. These cards currently range from 8MB to 8GB.
Some digicams are equipped with a CompactFlash Type II card slot which
can hold either a Type I or II CF card, or memory devices like the IBM/Hitachi
Microdrive (rated at 340MB, 512MB, 1GB, 2GB, 4GB, or 6GB).
1.3.2 Formatting a Media Card
Digital cameras provide two ways of deleting photos from a memory card:
erasing and formatting. Erasing deletes photo and video files, but not other data
on the card. It does not remove photos that have been protected.
Formatting (also known as initializing) overwrites everything on the card,
including protected photos, directories and camera data. Formatting also sets up
new folders and data on the card. To help ensure the integrity of the folders and
data, it's important to format the card using your camera, not a computer.
When a card is formatted, files can still be recovered until they are
overwritten. To ensure no one will be able to read deleted photos, format the card
in your camera and then shoot random photos until the card is filled again; the
earlier photos will be thus rewritten by the new photos. Some digital cameras
have a “Low Level Format” option that completely erases data on a card, but this
type of formatting takes longer than regular formatting.
[Note: In the rare case where you have deleted a very important photo from a
media card, there is a software program that can recover the photo –
Photorecovery, a $40 utility that can be downloaded from www.lc-tech.com. If
you do delete a file you must recover, don’t add new photos to the card before
running the recover software.]
9
Format a card only after transferring your photos to a hard drive or other
storage device and then checking them. Additionally, you should regularly format
your memory cards to help prevent them from becoming corrupted.
1.3.3 Media Card Corruption
To understand how media cards can lose data, you need to understand how
photos are written to media cards and how this information is organized and
stored on the cards. When you press the camera’s shutter release button the
shutter opens, light hits the sensor, and the computer in your camera places this
information in its memory buffer; the buffer is a volatile, temporary storage area
where the camera's computer can hold the information while it writes it to your
flash media. The camera continuously and automatically saves photo information
from the buffer to your media card; when the buffer is full the camera must write
some information in the buffer to the media card to free up space. The camera
will not let you take any more pictures until the buffer has written enough data to
the media to allow space for another photo in the memory. [Note: When you’re
shooting in continuous mode the D200 can record up to 100 photos, although the
frame rate will drop once the buffer has filled.]
This data is organized on the memory card like files on a computer hard drive;
your memory card has a File Allocation Table (FAT) that is like a table of contents
for your memory card. Most cards have two copies of this FAT, either of which
can be used by your computer. However, since most cameras can only use the
first copy this means that, if the first copy of the FAT gets corrupted, your camera
will not be able to find any information on the card. In addition to the FAT there is
also a master boot record that is used to set up the "geometry" of the card.
Following the master boot record is the root directory, which is the filing cabinet of
your card; this contains sub-directories where information or data is stored. Each
of these areas has pointers to where the data is kept. The majority of problems
with media cards stem from corruption in one or more of these areas of the
memory card.
A corrupted media card has damaged data that prevents it from performing
properly, and may even become unreadable. Since media card corruption often
results from human error, understanding the main causes can help prevent it from
occurring.
• Turning off a camera before a photo is completely written to the memory
card. Wait a few seconds to let the camera finish writing the information
from the buffer to the card; if your camera has a blinking activity light,
make sure it has stopped blinking. Only then should you shut off the
camera and remove the card.
10
•
Removing the memory card from a camera while a photo is being written
to the card
•
Removing the card from a memory card reader while files are still being
transferred to a computer
•
Removing the card from a card reader while folders and files from the
card are open on a computer
•
Opening, deleting, renaming or moving files on the card while its contents
are open on a computer
•
Using a memory card which has not been formatted in the camera, or
using a memory card from one camera in a different camera without first
formatting it in the new camera
•
Formatting a card in a computer instead of the camera
•
Inserting a second memory card into a card reader before closing and
removing the first, when viewing photos on the card from a computer
•
Taking photos when camera batteries are nearly empty
•
Taking photos so rapidly that the camera cannot complete writing one
photo to the card before starting the next
•
Continually shooting and deleting photos when the card is full
•
Letting a media card get too full before downloading the photos to a
computer or storage device. Cards that are too full may overwrite the
card headers
•
Exposing media cards to powerful electrical sources (remember that static
electricity from walking on a carpet in winter can produce a very high
voltage charge that can damage a card) and strong magnetic fields (walkthrough x-ray machines and scanners at airports are safe, but some of
the new more powerful x-ray machines that they use on checked luggage
may damage your cards). If you have any doubt or concerns, carry your
media cards on the plane.
If your card becomes corrupted, try formatting the card in your camera and
see if this corrects future problems.
1.4 Photo File Formats
Digital cameras save photos onto memory cards, but you (the camera
operator) must choose how the photo is saved. Your choice will affect how the
photo can or cannot be used by our customers. In this chapter we’ll review the
basic photo file formats, and then discuss resolution and quality in more detail in
the following chapter.
For CAP missions, the photo format and size is usually determined by the
customer’s needs. Basically there are two factors to weigh when considering
formats: the output format (e.g., photos will be displayed on a computer monitor or
the Web, or the photos will be printed) and the format's specific features.
11
For CAP purposes, we need to realize whether or not our photos have been
compressed. If they were compressed, we need to know by how much so we can
determine if they still meet our customers' needs.
1.4.1 Compression
Lossless compression is similar to what WinZip or PKZip does. For instance,
if you compress a document into a ZIP file and later extract and open the
document, the content will be identical to the original. No information is lost in the
process. TIF and RAW are photo formats that can be compressed in a lossless
way.
Lossy compression reduces the image size by discarding information and is
similar to summarizing a document. For example, you can summarize a large
document into two-page document that represents the original, but you cannot recreate the original out of the summary because information was discarded during
summarization. JPEG is an photo format that is based on lossy compression.
The table shows how, on average, a 5-megapixel photo (2,560 x 1,920 pixels)
is compressed using the various photo formats.
Photo Format
Uncompressed TIF
Uncompressed 12-bit
RAW
Compressed TIF
Compressed 12-bit
RAW
100% Quality JPEG
Typical file
size
14.1MB
7.7 MB
Comments
Reference
Reference
6.0 MB
4.3 MB
Lossless compression
Lossless compression
2.3 MB
Hard to distinguish from
uncompressed
Sufficient quality for 4" x 6"
prints
Sufficient quality for viewing on
a computer and on the Web
Very low photo quality
80% Quality JPEG
1.3 MB
60% Quality JPEG
0.7 MB
20% Quality JPEG
0.2 MB
1.4.2 Common Photo Formats
A. JPEG (also JPG)
JPEG (Joint Photographic Experts Group) is the preferred photo format for
CAP purposes because the quality is almost the same as RAW but results in
much smaller-size files; this significantly reduces the time it takes to save,
convert, adjust, download or upload files. With JPEG you can shoot hundreds of
photos at a time and the files are ready for release with no further processing.
JPEG is not a file format, but rather a method of data encoding used to
reduce the size of a data file. Its compression can produce very small files for
speedy downloads, and it is supported by all popular digital cameras and Web
12
browsers. It is most commonly used within file formats such as TIF (described
below).
You may also see the terms “EXIF” (also “exif” or “Exif”) or “non-exif” used in
conjunction with JPF (e.g., a non-exif JPEG). The Exchangeable Image File
(EXIF) format is an international specification that lets imaging companies encode
information into the headers or application segments of a JPEG file; this
information includes shutter speed, aperture, and the date and time the photo was
captured. Cameras that store photos using EXIF-compressed files enable the
image data to be read by any application supporting JPEG, including Web
browsers and photo editing, desktop presentation, and document-creation
software programs.
JPEG is designed for compressing either full color or grayscale images of
natural, real-world scenes. It works well on photographs and for Web display, but
not so well on lettering or simple line art. It allows photos to be compressed by a
factor or 10 to 20, compared to the uncompressed original.
The JPEG format is adjustable for quality versus file size. Larger JPEGs
record enough data, even at the milder compression settings, so that artifacts
don't occur. JPEGs at the correct quality settings have no visible artifacts. Note:
If you set your camera to save at a low quality, you cannot get any of the original
quality back; this is why we recommend setting your camera’s quality at the
highest setting for CAP purposes.
A rule of thumb is that saving an uncompressed file (e.g., TIF) as a high
qualify JPEG results in a file 95% the size of the original; medium 75-85%; and
low 23%.
The file extension for JPEG is .jpg
Progressive JPEG
A regular or "baseline" JPEG file is stored as one top-to-bottom scan of the
image, whereas progressive JPEG divides the file into a series of scans. The first
scan shows the photo at the equivalent of a very low quality setting, and therefore
takes up very little space; following scans gradually improve the quality. Each
subsequent scan adds to the data already provided, so that the total storage
requirement is roughly the same as for a baseline JPEG photo of the same quality
as the final scan.
The advantage of progressive JPEG is that if a photo is being viewed (e.g., on
a computer monitor) as it is transmitted, the viewer can see an approximation of
the whole photo very quickly. As transmission continues the photo gradually
improves in quality. The disadvantage is that each scan takes about the same
amount of computation to display as a whole baseline JPEG file would. So
progressive JPEG only makes sense if one has a decoder that's fast compared to
the communication link, such as a modem-speed link (e.g., 56 kps).
Except for the ability to provide progressive display, progressive JPEG and
baseline JPEG are basically identical and both work well on the same kinds of
images. However, a progressive JPEG file is not readable by a baseline-only
JPEG decoder. It is possible to convert between baseline and progressive
representations of an photo without any quality loss, but specialized software is
needed to do this.
13
B. RAW
Unlike JPEG and TIF, RAW is not an abbreviation but literally means “raw” as
in “unprocessed.” Most digital cameras are designed to rapidly convert the raw
picture data into finished JPEG or TIF files. Most also include a raw format
setting, which switches off in-camera processing and instead writes the image
data directly to the card, with minimal or no photo processing whatsoever.
The camera processor makes several adjustments to each image before it
gets stored on the media card (or in RAM), such as interpolating colors. RAW
photos store the unprocessed, un-interpolated data; but don’t include the
camera’s white balance settings or any other effects such as sharpening. Also,
Raw files are not down-sampled to 8 bits of color per pixel as JPEGs are, so they
preserve all the color information your camera’s sensor is capable of capturing.
The RAW format, when processed on the computer into a finished photo, is
invariably of better quality than an in-camera processed equivalent. And because
a RAW photo contains the full range of color and tone captured by the camera, it’s
often possible to correct white balance and exposure mistakes after the fact in
imaging software, making pictures look exactly as if they were properly exposed
on the best white balance setting in the first place.
However, saving a photo in the RAW format (versus letting the camera
convert it to JPEG) results in very large files, and these files must be processed
on a computer using the manufacturer’s photo capture software (usually supplied
with the camera). Additionally, many photo browsers and editors don’t recognize
these proprietary RAW files so you may not be able to view them in the browser
or work on them in an editing program. So, if you shoot RAW you should also
archive everything in a standard JPEG or TIF format so you'll be assured of
having the best chance of being able to open and use the files in the future.
[Note: Photoshop Camera Raw (built into Photoshop and Photoshop Elements)
supports many camera types and can import RAW files from all the major camera
makers. Also, the Microsoft RAW Image Thumbnailer and Viewer download
provides thumbnails, previews, printing, and metadata display for RAW photos
from most Canon and Nikon digital cameras on Windows XP.]
You may want to save your photos in RAW + JPEG, which saves RAW and
JPEG files at the same time. Use the JPEG for quick review or use, and turn to
the RAW file for serious editing.
Note
When shooting RAW, it’s sometimes advisable to shoot with some
overexposure. This gives more flexibility when you gamma-correct the photo
in your photo editor, where you can redistribute the tones to push them down
into the shadow parts of the photo to create good shadows. Since there are
no set rules for overexposure when shooting RAW, you should practice to see
how much overexposure is needed for a particular situation. And don’t forget
the auto bracketing option (discussed later).
14
C. TIF or TIFF
TIF (Tagged Image File) format was developed specifically for saving photos
from scanners, frame grabbers, and paint/photo-retouching programs. It is
probably the most versatile, reliable, and widely supported bit-mapped format and
is great for photos you intend to print. It includes a number of compression
schemes and is not tied to specific scanners, printers, or computer display
hardware. However, TIF files are so large that you may only be able to fit a very
few on your media card.
Many digital cameras offer TIF output as an uncompressed alternative to
compressed JPEG. Although it is of lower quality than RAW, it does not require
processing by a photo editing program in order to be useful.
The TIF format does have several variations, however, which means that
occasionally an application may have trouble opening a TIF file created by
another application or on a different platform. However, TIFF files are at least
twice as large as RAW files but they don’t offer the editing flexibility and options
RAW files provide.
The file extension for TIF is .tif
D. GIF or GIFF
GIF (Graphics Interchange Format) is a raster format that uses a limited
palette (256 simultaneous colors at most, but usually uses fewer colors to reduce
file size). GIF is a good choice for graphics such as icons or logos. You can also
make GIF images display in interlace mode, which means that you can get an
overall impression of the picture even before it has fully downloaded, which can
help if you’re sending the image over a slow modem connection.
The file extension for GIF is .gif
E. PNG
PNG (Portable Network Graphics) is a format for storing bitmapped (raster)
images on computers. PNG was designed to replace the older and simpler GIF
format and, to some extent, the much more complex TIF format. PNG supports
full color photos and lossless compression.
For photo editing PNG provides a useful format for the storage of intermediate
stages of editing. Since PNG's compression is fully lossless, saving, restoring
and re-saving a photo will not degrade its quality (unlike standard JPEG, even at
its highest quality settings). Note that for transmission of finished true color
photos, JPEG is almost always a better choice.
Note that not all photo browsers can display PNG.
The file extension for PNG (pronounced “ping”) is .png
15
F. Native Files
Native files are proprietary formats specific to particular graphics programs.
16
•
The PICT format is native to the Macintosh. It is great for presentations,
screen displays, and video work.
•
EPS (Encapsulated PostScript) files are the standard format for storing
high-resolution PostScript illustrations. The EPS format allows both Mac
and Windows users to save bit-mapped screen representations of screen
images. These previews, however, don’t travel well across platforms. A
drawing saved in EPS format can be imported into other documents and
scaled and cropped, but its contents are often no longer editable, even by
the program that created it.
•
A PSD file is the native file format for Adobe Photoshop; a file saved in
this manner can only be opened and edited in Photoshop. However, the
user has the option to save the file in a variety of other formats that are
readable in both the Mac and PC environment.
•
A PSP file is the native file format for Jasc Paintshop. Like PSD, the user
has the option to save this file in a variety of other formats that are
readable in both the Mac and PC environment.
Chapter
2. Exposure and Settings
2
Airborne Photographers have to know the camera settings and how to set or change
them, so they can ensure the camera is properly set up for the mission and quickly
adjust to on-scene conditions. When you are flying is not the time to learn how to
change a camera setting.
The Videography Information Technology (VIT) Specialist needs to know how to set or
change camera settings in order to better understand what the camera can and
cannot do, and help train Airborne Photographer trainees on camera use.
Digital cameras work by opening their shutter for a brief time to allow light to enter and
interact with a light-sensitive photo-receptor; usually either a Charge Coupled Device
(CCD) or Complementary Metal Oxide Semiconductor (CMOS) sensor. Each pixel
notes the variation in light rays that travel through the lens and passes this information
on to the camera’s microprocessor in the form of varying electrical charges. The
electrical charges are converted into digital bits and stored on the memory card.
In addition to the camera shutter a camera lens can change the diameter of its
aperture, thus letting in more or less light. Thus sensor sensitivity setting (ISO), the
camera’s shutter speed and the size of the lens aperture all affect light sensitivity and
thus image exposure.
OBJECTIVES:
1.
Discuss the relationship between ISO, shutter speed and aperture.
Demonstrate how to set ISO, shutter speed and aperture on a camera.
[AP-P-002; VIT-P-002]
2.
Discuss the purpose and use of exposure lock (pre-focus).
Demonstrate how to use the exposure lock on a camera. [AP-P-002;
VIT-P-002]
3.
Discuss the various exposure modes.
Demonstrate how to select each mode. [AP-P-002; VIT-P-002]
17
4.
Discuss the effects of shutter delay (lag), and the use of continuous
(burst) shooting modes.
Demonstrate how to set and use single-frame and continuous shooting
modes on a camera. [AP-P-002; VIT-P-002]
5.
Discuss image resolution and quality, and what settings are best for
most CAP imaging missions.
Demonstrate how to set resolution and quality on a camera. [AP-P-002;
VIT-P-002]
6.
Discuss the information contained in a photo’s histogram.
Demonstrate how to display and interpret a photo’s histogram on a
camera. [AP-P-002; VIT-P-002]
18
2.1 ISO, Shutter Speed, and Aperture
Airborne Photographers have to know the camera settings and how to set or
change them, so they can ensure the camera is properly set up for the mission
and quickly adjust to on-scene conditions. When you are flying is not the time to
learn how to change a camera setting.
The Videography Information Technology (VIT) Specialist needs to know how
to set or change camera settings in order to better understand what the camera
can and cannot do, and help train Airborne Photographer trainees on camera use.
Digital cameras work by opening their shutter for a brief time to allow light to
enter and interact with a light-sensitive photo-receptor; usually either a Charge
Coupled Device (CCD) or Complementary Metal Oxide Semiconductor (CMOS)
sensor. Each pixel notes the variation in light rays that travel through the lens and
passes this information on to the camera’s microprocessor in the form of varying
electrical charges. The electrical charges are converted into digital bits and
stored on the memory card.
In addition to the camera shutter a camera lens can change the diameter of
its aperture, thus letting in more or less light. Thus sensor sensitivity setting
(ISO), the camera’s shutter speed and the size of the lens aperture all affect light
sensitivity and thus image exposure.
2.1.1 ISO
ISO defines how sensitive a camera’s sensor is to light. In digital cameras,
instead of changing film you can simply adjust the camera’s light sensitivity (ISO
rating). The higher the sensitivity, the less light is needed to make an exposure.
[Note: The International Organization for Standardization (ISO) has a
performance-based ISO speed standard for digital cameras, just as they have for
film. It defines ISO speed in terms of the amount of light needed to achieve a
certain quality.]
Lower ISO settings (where the sensor is less sensitive to light) are best used
in bright lighting conditions; higher ISO settings (the sensor is more sensitive to
light) can help in low-light situations such as early evening, winter or overcast
conditions. [However, higher sensitivity also amplifies undesired noise, which can
cause fringing or artifacts to appear in the photo. Most higher-end cameras don’t
show a noticeable increase in noise below ISO 800.]
Remember that changing the ISO setting affects aperture and shutter speed.
Some examples of when to use various ISO settings are:
Auto: The camera automatically sets the ISO speed according the brightness
of the scene, increasing or decreasing the sensitivity. You have no control over
which ISO number is used, but most digital cameras are set to ISO 100 (with
some as low as ISO 50). ISO 100 is the usual setting for most CAP videography.
50-80: For taking photos in bright light; excellent for close-ups, landscape,
and portraits, these settings produce fine detail and image quality
19
100: For extra sensitivity with little, if any, reduced image quality
200: For cloudy and overcast days, these settings produce acceptable image
quality with some visible noise
>400: For indoor photography whether or not a flash is used. These settings
are useful for "stop-action" and sports photographs, but produce high to very high
noise.
Note
Many cameras store your last ISO setting, even if you turn it off. Always
check the ISO setting before leaving for a mission!
2.1.2 Shutter Speed
Shutter speed determines how long the camera’s sensor is exposed to light.
The dimmer the light, the longer the camera needs to collect enough light to make
a good photo. Outdoors at night, without a flash, this can stretch into seconds or
minutes.
Digital cameras control shutter speed by switching on the light-sensitive
photo-receptors of the sensor for as long as is required. Some digital cameras
feature both electronic and mechanical shutters.
Shutter speeds are expressed in fractions of seconds, typically as
(approximate) multiples of 1/2, so that each higher shutter speed halves the
exposure by halving the exposure time: 1/2s, 1/4s, 1/8s, 1/15s, 1/30s, 1/60s,
1/125s, 1/250s, 1/500s, etc. Long exposure shutter speeds are expressed in
seconds (e.g., 1s, 2s, 4s, or 8s). If you want to change how motion is rendered
you can use different speeds: 1/30 of a second looks about natural for running
water while 1/500 of a second freezes everything.
In aerial photography you should use the fastest shutter speed you can (no
less than 1/250s) because short shutter speeds mean less jitter. You can also
manipulate the ISO setting to reduce shutter speeds for a given lighting situation.
For example, say you’re taking a picture in the fading light of late afternoon. At
ISO 100 the shutter may need to be open 1/30s to adequately expose the image,
and it is hard to hold the camera steady for 1/30th of a second (a situation made
worse by the vibration of the aircraft). If you increase the sensor’s sensitivity to
light by increasing the ISO to 200 (i.e., roughly twice as light sensitive as ISO
100), the shutter speed may be halved to 1/60s to take the same photo.
Increasing further to ISO 400 will result in a quick 1/125s shutter time.
2.1.3 Aperture
Aperture refers to the size of the opening in the lens (iris) and thus affects the
amount of light falling onto the camera’s sensor. Aperture affects exposure and
depth of field. The size of this opening is controlled by an adjustable diaphragm
of overlapping blades similar to the pupils of our eyes. Indeed, an aperture acts
much like the pupil of an eye. Your pupil opens wider as light decreases, letting in
more of the available light. Conversely, your pupil gets smaller when the amount
of light increases to reduce the amount of light entering your eye.
20
The size (diameter) of a lens’s aperture at any given moment is called the fstop (also f/stop or f/number), which is expressed in several different ways: f8, f/8,
f-8, and 1:8. A lower f-stop number (f2.8) opens the aperture and admits more
light onto the camera sensor, while higher f-stop numbers (f11) make the
camera's aperture smaller so less light hits the sensor.
Just like shutter speeds, each whole f-stop represents a doubling or halving
of the amount of light hitting the sensor, depending on whether you widen or
narrow the aperture; for example, going from f8 to f11 will reduce the light hitting
the sensor by one-half.
The example below (not to scale) shows some sample f-stops:
The maximum aperture of a lens is also called its lens speed. A lens with a
large maximum aperture (f2.8) is called a "fast" lens because the large aperture
allows you to use high (fast) shutter speeds and still receive sufficient exposure.
The big advantage of these lenses fast lenses is that they are ideal for shooting
moving subjects in low light conditions. Zoom lenses specify the maximum
aperture at both the wide angle and telephoto ends (e.g. 28 - 100mm f3.5 - 5.6).
A specification like 28 - 100mm f2.8 implies that the maximum aperture is f2.8
throughout the zoom range.
Note: As you stop your lens down (i.e., set a higher f-stop number), diffraction
effects can occur that result in a loss of sharpness. Take a few test shots with
your camera to determine how much you can stop your lens down before you
notice an unacceptable loss of sharpness.
2.1.4 Relationships
Aperture and shutter speed are related, and effect the exposure value
(discussed below). As you reduce the shutter speed you need to increase the
diameter of the aperture in order to have enough light to take a properly exposed
picture. The wider you open the iris the shorter the shutter speed needed to get
the correct exposure, because the camera chooses shutter speed based on how
much light gets into the camera. For example, the following settings result in the
same amount of light reaching the sensor: f4 at 1/1000s, f8 at 1/250s, and f16 at
1/125s.
At a given ISO setting you can take a picture with a specific aperture and
shutter combination. If you double the ISO setting without changing the lighting
conditions, you have to adjust the aperture and/or shutter speed so you still get a
properly exposed picture. For example, at ISO 100 you may have the aperture
set at f4 and the shutter speed at 1/250s; if you double the ISO to 200 you will
need to increase the shutter speed to 1/500s to get the same exposure under the
same lighting conditions.
Large apertures like f4 will tend to have just one thing in focus, while a smaller
aperture like f11 will tend to have everything in focus. How much of the image
that is in focus is called “depth of field,” and is also referred to as the contrast
between the foreground and the background. You can adjust the depth of field,
for example, to make the background more or less sharp compared to the
21
foreground; you do this by adjusting the aperture/shutter or by using the Aperture
Priority mode (discussed below).
2.2 Metering System
The metering system in a digital camera measures the amount of light in the
scene and calculates the exposure value based on the selected (or default)
metering mode. Automatic exposure is a standard feature in all digital cameras;
all you have to do is select the metering mode, point the camera and press the
shutter release. Most of the time, this will result in a correct exposure.
The metering method defines which information of the scene is used to
calculate the exposure value and how it is determined. Metering modes depend
on the camera and the brand, but are mostly variations of the following:
• Center-weighted Average Metering is probably the most common metering
method and is the default for those digital cameras which don't offer metering
mode selection. This method averages the exposure of the entire frame but
gives extra weight to the central part of the scene. Since this method
assumes that you are most interested in what is in front of the scene, the
camera tries to expose this part properly. This method is designed for
conditions where your subject is in the middle of the frame, and the
background contains bright lights, dark shadows or other extreme lighting
situations that may confuse the metering in the center of your image.
•
Matrix (also Multi-Segment or Evaluative) Metering offers the best exposure in
most circumstances. Essentially, the scene is split up into a matrix of
metering zones which are evaluated individually, instead of concentrating
primarily on the center. This method delivers outstanding results under a
broad range of conditions, and is the best choice for most situations where
you’re using the camera’s automatic features.
•
Spot (Partial) Metering measures only a small area of your image, usually the
center, thus allowing you to meter the subject in the center one percent of the
frame (or on some cameras at the selected AF point) while ignoring the rest of
the frame completely. This type of metering is most commonly used for
dealing with extremely backlit situations such as very light or very dark
backgrounds.
2.3 Exposure Lock (Pre-focus)
The exposure lock feature is one of the handiest features you can use in a
digital camera. It is usually activated by applying slight pressure to the shutter
release button – not enough to activate the shutter and take a picture, but enough
that you feel the button move and the camera respond. This is also referred to
pre-focusing.
Once you activate exposure lock, the camera’s autofocus lens locks the
subject into sharp focus and the exposure meter measures light and locks in the
exposure. As long as you hold the shutter button in this position the exposure is
22
locked, even if you move the camera. Pressing the shutter release the rest of the
way causes the camera to take the picture.
On most cameras, when you hold the shutter button halfway a steady ‘Ready’
or ‘In-Focus’ light or symbol next to the viewfinder illuminates. If you get a
blinking (or different colored) ‘Warning’ light rather than a steady ‘Ready’ light it
can indicate one of two things: 1) there is insufficient light (e.g., from cloud cover)
for the picture, or 2) the camera thinks it’s too close to the target because of a
reflection from the window (this is why we shoot photos through an open window).
This feature is handy when shooting from an airplane, as it allows you to
focus and lock onto your target at the earliest possible moment; you can then
concentrate on framing the target to best advantage before your press the shutter
release the rest of the way to capture the photo. Another advantage to using
exposure lock is that it reduces the time between pushing the shutter release and
the camera actually capturing the photo, which is a nice feature when you are
taking a picture from a moving airplane. This time lag (called shutter lag) can be
significant with low- to medium-priced digital cameras; during this wait, the
camera is subject to turbulence and the chance of a blurred shot increases.
Some cameras have separate focus lock and exposure lock controls; the
separate exposure lock is often labeled as the auto-exposure lock (AEL). Check
your camera’s manual on how to use this feature.
2.4 Exposure Modes
2.4.1 Auto
The Automatic mode of the camera determines the optimal combination of
aperture, shutter speed, and sensitivity based on the exposure value determined
by the camera’s light metering system (discussed below). The camera’s
microcomputer usually assumes that you want to take a picture using the fastest
available shutter speed because this minimizes camera shake and the blur that
can result from a moving object. As it chooses the shortest possible shutter
speed, it is only limited by how small the aperture can go given the current lighting
conditions and ISO setting. The only adjustment you can make is the exposure
compensation (see below) to over- or under-expose the image.
Weaknesses
Most camera autofocus systems rely on contrast detection: it will focus the
lens until the image has as much contrast as possible. In other words, contrast
detection is largely a function of the available light in your scene. If the area
you’re trying to focus on is too dark, or uniformly colored, the camera won’t be
able to detect any contrast and may be unable to lock on.
For example, the Nikon D200 user manual lists several situations where its
autofocus may not work well:
• There is little or no contrast between the subject and the background (i.e., the
subject is the same color as the background)
• The subject is dominated by regular geometric patterns, such as a row of
windows in a building
• The focus area contains areas of sharply contrasting brightness, such as
when the target is halfway in the shade
23
•
The subject contains many fine details, such as a field containing patches of
snow or light-colored soil or rock
In these cases, you may need to use Manual focus or use focus-lock to focus
on another subject at the same distance and then recompose the image.
2.4.2 Program
The Program (P) mode is similar to the automatic mode. Although the
camera selects aperture and shutter speed, you can modify some of the camera’s
selections by turning a dial or pressing a button. You can thus increase or
decrease shutter speed, and the camera will adjust the aperture to match; many
cameras also let you adjust ISO, white balance and exposure compensation.
Some consider this the best all-around setting to use.
Your camera’s light meter will try to capture a well-exposed photo by adjusting
shutter speed and aperture (and maybe ISO). It will always prioritize shutter
speed in order to prevent blurring caused by camera shake.
2.4.3 Manual
Most digital cameras feature a “Full Manual” (M) mode, allowing you to can
set both the aperture and the shutter speed. This can be useful to ensure that the
same exposure is used for a sequence of photos or when shooting in special
circumstances such as direct sunlight. When in full manual exposure mode, the
camera will often display a simulated exposure meter which will indicate how far
over- or underexposed the image is compared to the exposure value calculated
by the camera's metering system. If the camera has a “live” LCD preview it will
often simulate the effects of the exposure on the LCD.
In most point-and-shoot digital cameras these settings are made on the LCD
screen. Some professional style SLRs use traditional controls, where you turn the
aperture ring on the lens to change the f/stop and use a dial on the camera body
to set shutter speed.
2.4.4 Shutter or Aperture Priority
In the Automatic or Program modes your camera makes the assumption that
you want an evenly exposed image with a fast enough shutter speed to prevent
blurring. Sometimes, these assumptions are incorrect.
Two other modes act between the auto and manual modes: shutter or
aperture priority modes. In Shutter Priority (S) mode, the camera will adjust the
aperture to keep the exposure value (discussed below) constant; this can be used
to lock in a speed fast enough to freeze action scenes. In the Aperture Priority (A)
mode you to select the aperture over the available range and have the camera
calculate the best shutter speed for correct exposure; this is important if you want
to control depth of field (how much of the image is in focus). As you widen the
aperture the depth-of-field is lessened.
2.4.5 Scenes
Many digital cameras come with a variety of “scene” modes such as
landscape, night, portrait, sports, sand or snow. The sports mode will set a fast
24
shutter speed while sand or snow modes compensate for very bright backgrounds
which would otherwise underexpose your image. When used appropriately, these
scene modes work well for what they are designed to do, but aren’t very useful for
CAP missions.
2.4.6 Shutter Delay (Lag) and Shooting Modes
You will notice that, after pressing the shutter release, there is a delay before
you can take another picture (usually denoted by a flashing light next to the
viewfinder). The reason for this delay is that, after each shot, the camera must:
• Set the focus, exposure time and white balance
• Charge the sensor
• Copy the image out of the microprocessor into RAM
• Compress the image after it's been taken
• Write the image to the flash memory
The better (i.e., more expensive) the camera, the shorter is the delay between
pictures. So you must know your camera’s delay and make allowances for it,
particularly since you are shooting from an airplane that travels over the scene at
75 - 80 kts.
Normally, a camera is set for single frame mode, where the camera takes one
picture each time you press the shutter release button.
Most digital cameras have another shooting mode for capturing pictures
called the “continuous” or “burst” mode. If you set the camera for this type of
shooting mode and hold down the shutter button and don’t release it, the camera
will take pictures until you release the shutter or you fill the camera’s memory
buffer (the D200 can take up to 37 JPEG Fine Large photos in this mode). The
time between pictures varies with the camera; the more expensive the camera the
shorter the time between pictures.
Digital compact cameras typically allow 1-3 frames per second (fps) with
bursts of up to about ten photos, while DSLRs have fps of up to seven or more
and can shoot dozens of frames in JPEG and RAW. The D200 has two settings:
Continuous Low, which records at 1-4 fps; and Continuous High which records up
to 5 fps.
Using this feature with Medium and Standard resolution settings can make
the pictures appear less sharp. Also, you can quickly fill up a memory card; how
fast this occurs depends on the resolution and quality settings.
Note: Some cameras have an “auto-bracketing” feature that allows you to
take three pictures in quick succession when you press the shutter release. You
can then pick the best of the three to keep.
2.4.7 Exposure Value (EV) Compensation
A camera’s light meter only measures the luminance of the light reflected by
your subject. Whether it measures the luminance of the entire scene or just a part
of it depends on the type of meter you’re using. Sometimes, you may need to
over- or under-expose an image to get the best shot. By overexposing an image
the colors will become lighter; underexposing will make the colors darker.
25
Sometimes you take a photo of a black image, but upon review you notice the
camera rendered it more grayish. By underexposing the photo, you can restore
the blacks in the image. Conversely, if you take a photo of something white (such
as snow) and it appears grayish in the photo, you can overexpose the image to
restore the whites.
When the camera's metering system determines the wrong EV needed to
correctly expose the image, you can correct it by using the "EV Compensation"
feature (found in higher-end cameras such as the Nikon D200). Typically the EV
compensation lets you specify an amount of over- or under-exposure in steps of
½ or ⅓ stops (0.5 or 0.3 EV), and allow you to over- or under-expose by up to two
stops (-2.0 EV to +2.0 EV), while some Digital Single Lens Reflex (DSLR)
cameras have wider EV compensation ranges such as -5.0 EV to +5.0 EV.
It is important to understand that increasing the EV compensation by 1 is
equivalent to reducing EV by 1 and will therefore double the amount of light. To
use this feature, decide whether the image needs over- or under-exposure. When
the main subject is darker than a bright background, use a positive (+) exposure
value; if the subject is much lighter than the background, use a negative (-)
exposure value.
For example, when you need to use the EV control to underexpose a shot (as
when you’re taking a picture of a target resting on fresh, bright snow or when the
scene is lit with strong sunlight), try using an EV between 0 to +2. If you are
taking a photo just before sunset, you might try to overexpose the image by using
an EV between -1⅓ to -⅔.
Bracketing
Bracketing is a process where you shoot extra photos above and below your
target exposure. The easiest way to bracket is with your EV control: take a shot,
dial in an underexposure and take another shot, then do the same with
overexposure. Many cameras (such as the Nikon D200) have an “auto
bracketing” feature where the camera does the setting for you. For example, the
D200 Auto Exposure (AE) lets you set the number of shots you want to take (e.g.,
3); when you press the shutter the camera shoots the image with normal
metering, and then automatically adjusts for one stop of overexposure. This
setting is used for the next shot, while the shot after that will automatically be set
for one stop of underexposure. [If you activate the camera’s burst mode, simply
press and hold the shutter release for three shots, and the camera will shoot an
auto bracketed set.]
2.5 White Balance
White Balance (WB) is nothing more than an adjustment to get the colors you
want. White balance only adjusts far enough to make lights that look white to us
look white in photos. Most of the time you have the camera set for Automatic
White Balance (AUTO or AWB). Fortunately, digital cameras even make
manually setting WB easy; you just set the white balance to look good on the
color LCD.
Different light sources have different color temperatures, so a photo will
appear to have a slightly different color tone depending on how it is illuminated.
The color of artificial light is quite different from natural outdoor light. For example
26
when compared to outdoor light, ordinary light bulbs appear more yellow,
candlelight appears redder, and fluorescent lights appear greener.
If your camera is balanced for one kind of light source (e.g., daylight) and you
photograph a scene illuminated by tungsten light, the photo won’t reflect the true
colors in the scene. Fortunately your camera has a way to adjust for these
different light sources. The white balance setting on your camera allows you to
specify the color temperature of the scene.
In many cases, your camera will automatically adjust; however, it often
guesses wrong and gets the improper white balance. So, if your whites are not
white, you will have to make the setting yourself.
Typical White Balance Settings
In the AUTO mode the camera makes its best guess for each shot. Even
though it may or may not work well for normal photos, AUTO almost always works
great for under unusual mixed artificial lighting without flash. AUTO mode works
well with flash, both indoors and outdoors. Usually the photos will still be fairly
blue in shade and pleasantly warm indoors at night. When the flash is on most
cameras automatically switch to flash white balance.
Tungsten (the camera displays the symbol of a light bulb, and is also called
"indoor") is very, very blue most of the time except indoors at night, for which it
looks normal. "Tungsten" is the name of the metal out of which the bulb's filament
is made. Even indoors many people prefer the warmer AUTO setting.
Daylight (symbol of a sun) is bluish normal. Compare this setting to “cloudy”
and go with the one you prefer.
Cloudy (symbol of a cloud) is a little warmer than the daylight setting. If you
prefer photos on the warmer side, use this for most photos outdoors in direct
sunlight.
Flash (symbol of a lighting bolt) is almost identical to “cloudy” but sometimes
redder, depending on the camera. Settings are normally optimized for the little
on-camera flashes (which tend to be blue), so this setting tends to be warm to
compensate.
Shade (symbol of a house casting a shadow) is very orange. This is perfect
for shooting in shade, since shade is so blue. It's also for shooting when you are
under a cloud on a partly cloudy day, or for shooting in backlight, again since the
subject is lit more by the blue sky instead of the direct sunlight.
Fluorescent (symbol of a long rectangle or fluorescent tube) is used if your
photos are too green or under fluorescent, mercury, HMI or metal halide lights
(street lights). It will make other things look a bit purplish. With Nikons the finetuning adjustment (+-3) is much stronger in this setting and adjusts from fairly
warm to fairly cool; because of this you may not be able to get the exact color you
want under Fluorescent lighting, in which case try the AUTO setting.
Fine Tuning (+3 to -3) allows you to get the exact amount of coolness or
warmth: + is cooler and - is warmer. Nikons allow you to adjust this and
remembers your preference for every setting.
Manual, Custom or Preset (sometimes a symbol with a dot and two triangles)
allows you to point the camera at something you want to be neutral and it makes it
that way. Read the manual to your camera for specifics.
Remember, look at your subject on the color LCD and scroll through the
settings until you get the best photo!
27
NOTE: You can change white balance in almost any photo editing program.
As a rule, you select “Color Balance” and change color temperature by moving the
‘Cyan/Red’ slider one way and the ‘Yellow/Blue’ slider an equal amount the other
way until the photo looks right. To change green/magenta bias with fluorescent
and metal-halide lighting, simply move the ‘Green/Magenta’ slider until the photo
looks right.
2.6 Photo Resolution and Quality
Resolution and quality are two different things: resolution is the number of
pixels in the picture, and quality is how much you compress them. Based on
these two factors, some pictures will be of a higher quality than others. Also, the
resolution and quality settings you choose dictate how many pictures you can fit
on your memory card.
2.6.1 Resolution
The sensors in a digital camera are made up of millions of pixels
(megapixels), each one registering the brightness of the light striking it as the
photo is taken. The number of pixels in the image is about equal to the number of
pixels on the sensor; this number is referred to as the photo’s resolution. The
easiest way to visualize pixels is to compare them to a puzzle; pixels make up a
digital image much like the pieces of a puzzle are assembled to create the puzzle
image.
A digital camera records digital pixels onto a removable media card. A 3megapixel (MP) camera can process and record images that consist of
approximately three million pixels apiece.
Simply put, the greater the number of pixels in an image, the higher the
resolution. And the higher the resolution, the more detail you can see and the
better and larger the print you can make.
Most digital cameras allow you to change the resolution setting, so you can fit
more or fewer photos on your memory card. The table depicts resolution settings
for two cameras:
Kodak DC290
Resolution Setting
Ultra
High
Medium
Standard
28
Resulting size
3.36 megapixels (2240 x 1500)
2.15 megapixels (1792 x 1200)
1.38 megapixels (1440 x 960)
345,600 pixels (720 x 480)
Nikon D200
Resolution Setting
Large
Medium
Small
Resulting size
4.8 megapixels (3872 x 2592)
2.7 megapixels (2896 x 1944)
1.2 megapixels (1936 x 1296)
2.6.2 Quality
The quality setting indicates how much the picture is compressed to save
space on the memory card. The pictures are normally captured in a JPEG file
format, except for the “Uncompressed” quality setting which captures the picture
in an uncompressed TIF file format. With the uncompressed TIF file format, the
file size is very large and takes up a large amount of space on the memory card.
[Note: Newer cameras allow you to save photos in the RAW format, but this is not
recommended for CAP missions because the formats are often proprietary and
cannot be read or edited without the manufacturer’s special software.]
In other words, quality is inversely proportional to the amount of JPEG
compression the camera uses. Thus, a higher quality photo will have less
compression, and vice versa. As you lower the quality and increase the
compression, there will be more "artifacts" in your photo that are a result of the
higher JPEG compression. You will notice that edges will seem blurry or that little
squares (“jaggies”) will appear.
You can set your camera to take pictures with different quality settings. Many
cameras, such as the DC290, label these quality selections as:
•
‘Uncompressed’ is used when you want an image with no compression,
in a TIF file format. This produces photo quality suitable for large prints.
However, the photo file size is very large.
•
‘Best’ is used when image quality is very important, but you don’t need
the large file size of uncompressed images. This setting is ideal for most
CAP missions.
•
‘Better’ is used for standard quality picture taking and to store a large
number of pictures.
•
‘Good’ is used to store the greatest number of pictures on the memory
card and for photos you plan to display on a computer or use on the Web.
This setting has the most compression and provides the least image
quality, but the file size is very small and easy to e-mail.
The Nikon D200 gives you these options:
•
‘RAW’ images are saved in the Nikon Electronic Format (NEF)
•
‘JPEG Fine’ images are compressed at a ratio of ~1:4. This setting is
recommended for CAP missions.
29
•
‘JPEG Normal’ images are compressed at a ratio of ~1:8
•
‘JPEG Basic’ images are compressed at a ratio of ~1:16
Additionally, the D200 will allow you to record two copies of an image at the
same time: RAW + JPEG Fine, RAW + JPEG Normal, etc.
2.6.3 Resolution and Quality Settings
The following tables give you an idea of how the different combinations of
resolution and quality settings effect file size (and thus how many pictures you can
fit on a memory card).
The first table shows the DC290 recording to a 64MB card:
Resolution setting
Ultra (2240 x 1500)
Quality setting
Uncompressed
Best
Better
Good
File size
# of Photos
478 KB
319 KB
200 KB
61
108
175
High (1792 x 1200)
Uncompressed
Best
Better
Good
6.48 MB
353 KB
228 KB
147 KB
10
95
130
229
Medium (1440 x 960)
Uncompressed
Best
Better
Good
4.18 MB
308 KB
160 KB
109 KB
15
117
170
312
Standard (720 x 480)
Uncompressed
Best
Better
Good
1.07 MB
118 KB
83 KB
57 KB
60
312
467
698
30
This table shows the D200 recording to a 1GB card:
Resolution setting
Uncompressed
Quality setting
NEF (RAW)
File size (MB)
15.8
# of Photos
60
Large (3,872 x 2,592)
Medium (2,896 x 1,944)
Small (1,936 x 1,296)
JPEG Fine
JPEG Fine
JPEG Fine
4.8
2.7
1.2
167
294
650
L
M
S
JPEG Normal
JPEG Normal
JPEG Normal
2.4
1.4
0.63
332
578
1200
L
M
S
JPEG Basic
JPEG Basic
JPEG Basic
1.2
0.7
0.33
650
1100
2200
If the quality and image correction flexibility of the pictures is most
important, use Uncompressed/RAW (no compression) or Best/JPEG Fine
(little compression) quality setting and Ultra or High/Large resolution.
These are the best choices if you are printing your pictures on a highquality printer, the photo will be studied in detail (e.g., expanded or “blown
up”), or when you don’t know the end use of the photos (most flexibility).
Using the examples above, the best choice for the majority of CAP
imaging missions is Ultra resolution with Best quality (DC290) or JPEG
Fine Large (D200). This results in high-quality, low-compression JPEGs
of manageable file size while still allowing you sufficient memory card
space for most sorties.
If space on your memory card is limited or the pictures are to be
viewed on a monitor or posted on a Web page, use the Better or
Good/JPEG Basic quality setting (all compress the photos) and Medium or
Standard/Medium or Small resolution. [If you choose Standard/Good and
intend to fill your memory cards, make sure the plane has plenty of fuel.]
2.7 Histograms
Possibly the most useful tool available in digital photography is the
histogram. Virtually every digital camera, from the simplest point-andshoot to the most sophisticated digital SLR has the ability to display a
histogram directly or superimposed upon the photo just taken. On most
cameras the histogram displays on the rear LCD screen, and most cameras
can be programmed to do this both on the image that is displayed
31
immediately after a shot is taken, or later when single frames are being
reviewed.
Note: If your camera has a histogram feature, review the manual so that
you will interpret it correctly. Some cameras show the histogram ‘upside
down’ when compared to the histograms shown in this text; however, the
weighting (e.g., left side = dark) is usually the same.
The histogram is a simple graph that displays where all of the
brightness levels contained in the scene are found, from the darkest to the
brightest. These values are arrayed across the bottom of the graph from
left (darkest) to right (brightest). The vertical axis (the height of points on
the graph) shows how much of the image is found at any particular
brightness level.
The names of the five zones (or F-stops) containing the dynamic range
recordable by a camera is arbitrary.
A histogram that shows more weight at the left of the graph represents
a dark image (also called a low-key image); a histogram with more weight
to the right of the graph represents a bright (or high-key) image.
An image with a low-key histogram may be overexposed, and an image
with a high-key histogram may be underexposed, though this is not
necessarily always the case. For example, histograms of photos taken from
a high-wing aircraft such as a C172 usually shows more weight at the left
of the graph because the wing shadows the camera as you shoot pictures of
well-lighted targets on the ground. Your eye - not a histogram - should
always be your final judge.
32
This histogram shows a good distribution of tones, from deep shadows on the
left to bright highlights on the right. This indicates the image has a lot of contrast.
[The following is courtesy of Vincent Bockaert, at 123di.com]
Histograms are the key to understanding digital images. This 10 x 4 mosaic
contains 40 tiles which we could sort by color and then stack up accordingly. The
higher the pile, the more tiles of that color in the mosaic. The resulting
"histogram" would represent the color distribution of the mosaic.
33
A digital image is basically a mosaic of square tiles or "pixels" of
uniform color which are so tiny that it appears uniform and smooth.
Instead of sorting them by color, we could sort these pixels into 256 levels
of brightness from black (value 0) to white (value 255) with 254 gray
levels in between. Just as we did manually for the mosaic, imaging
software automatically sorted the pixels of the image below into 256
groups (levels) of "brightness" and stacked them up accordingly. The
height of each "stack" or vertical "bar" tells you how many pixels there are
for that particular brightness. "0" and "255" are the darkest and brightest
values, corresponding to black and white respectively.
On this histogram each "stack" or "bar" is one pixel wide. Unlike the
mosaic histograms, the 256 bars are stacked side by side without any space
between them, which is why for educational purposes, the vertical bars are
shown in alternating shades of gray, allowing you to distinguish the
individual bars. There are no blank spaces between bars to avoid confusion
with blank spaces caused by missing tones in the image. Normally all bars
will be black as indicated in the second histogram.
34
Typical Histogram examples:
Correctly exposed image
This is an example of a correctly exposed image
with a "good" histogram. The smooth curve
downwards ending in 255 shows that the subtle
highlight detail in the clouds and waves is
preserved. Likewise, the shadow area starts at 0 and
builds up gradually.
Underexposed image
The histogram indicates there are a lot of pixels
with value 0 or close to 0, which is an indication of
"clipped shadows". Some shadow detail is lost.
Unless there is a lot of pure black in the image,
there should not be that many pure black pixels.
There are also very few pixels in the highlight area.
Overexposed image
The histogram indicates there are a lot of pixels
with value 255 or close to 255, which is an
indication of "clipped highlights". Subtle highlight
detail in the clouds and waves is lost. There are also
very few pixels in the shadow area.
35
Image with too much
contrast
This image has both clipped shadows and
highlights. The dynamic range of the scene is larger
than the dynamic range of the camera.
Image with too little
contrast
This image only contains mid tones and lacks
contrast, resulting in a hazy image.
36
Chapter
3. Composition
3
Airborne Photographers have to know basic composition in order to understand the
framing requirements of aerial photo or video imaging. Composition concerns how
you arrange a subject in a picture and how you translate what your eyes see into a
digital image.
The key to composition is remembering that a digital camera doesn’t “see” the same
way that you do. How often have you taken a photo from an airplane, only to discover
later that the photo doesn’t look anything like what you remember seeing? This is the
first rule of photography – reality, as seen by your camera, is quite different from what
you see with your eyes. If you frame all your photos without taking this into account,
you will always get disappointing results.
One big difference between what you see and what the camera sees is that a camera
doesn’t have a brain. Your brain interprets, supplements, and/or enhances the image
it receives from your eyes. Also, a camera has a much more limited range of focus,
exposure, and composition than you do. Your eyes, in conjunction with your brain,
create scenes that are impossible to reproduce in a camera.
Also, remember that your eyes are more sensitive to contrast than to color. Since
low-angle sunlight gives more contrast than when the sun is high in the sky, photos
taken in the early morning or late afternoon look more textured and detailed due to the
longer shadows. However, large shadows can hide what we are looking for, so you
must strike a balance between getting photos with great contrast and missing
potential targets in the shadows.
When you look at something, your field of vision is a rectangle with rounded corners
(almost a wide ellipse). We see the world panoramically. Most of the time, the
camera doesn’t “see” a scene in this way. So it is your job to take the panorama and
translate it into an image that is suited to the mission. You can do this by using
guidelines for composition.
OBJECTIVES:
1.
Discuss how to compose a picture, including:
a.
Focal point and the “rule of thirds.”
b.
Filling the frame, including the three rules for framing.
Demonstrate image composition, particularly proper framing.
[AP-O-001]
37
3.1 Isolate the Focal Point
The focal point is the main subject of a photo, such as a downed aircraft
in a field or a breach in a levy. It is the main point that the viewer’s eye will be
drawn to when looking at the picture.
This is why it is so important to know exactly what the customer wants to
see in the photos you will be taking on a particular sortie. If you don’t know what
you are supposed to be taking a picture of, it will be difficult or impossible to
emphasize the right element in your photos. This can lead to a disappointed
customer, and that customer may decide CAP doesn’t know what they’re doing.
As a general rule you only want a single focal point in an image. But
sometimes the image will be required to show multiple focus points. For example,
the customer may want to know the condition of two roads leading into a
damaged power plant. In this case, you must compose the picture so that each
road can be clearly seen.
A useful rule to use in this case is the “Rule of Thirds,” where you
mentally draw two horizontal and two vertical lines through your viewfinder so that
you have divided the scene into thirds. This breaks up your image into nine
zones, with four interior corners where the lines intersect:
These four corners constitute the “sweet spots” in your picture. If you
place a subject in any of these intersections, you’ll usually end up with a
satisfactory photo. This holds true for a single focal point or with multiple focal
points, as in our example above.
In the case of a single focal point, such as the downed aircraft, placing the
aircraft at any of these spots (or dead center) will result in a satisfactorily
composed image.
3.2 Framing
You should always minimize the amount of dead (non-mission related)
space in an image. Once you have decided on the focal point, don’t relegate it to
a small portion of the picture. In aerial photography, this is most easily
accomplished with a combination of proper aircraft positioning, framing and use of
the zoom lens.
38
If you need to place the horizon in the photo to establish perspective,
never let the sky take up more than the top one-third of the image (note that this
also satisfies the rule of thirds). And try to keep the horizon straight in the photo.
You can correct for a slightly angled horizon in your editing software, but each
time you rotate the photo you degrade the photo slightly.
Filling the frame is very important when taking a digital photo. If the target
is too small in the frame you lose important detail because you wasted a lot of
pixels on extraneous details.
In CAP aerial photography, we try to follow three general rules for
framing:
• Frame the image so he target fills most of the frame (at least 75%)
• Frame the image so no aircraft parts (i.e., wingtip, strut, window sill or
wheel) show; don’t rely on software to crop your photo
• Whenever possible, position the aircraft so you can frame the target
without using the zoom feature. When this isn’t possible, use the zoom to
improve the framing or to concentrate on a specific portion of the target
(e.g., damage to one section of a power plant or a crack in a bridge
support).
Practice
An inexpensive way to practice framing is to take photos of objects from a
vehicle. Preferably, have a friend drive along a freeway where you can safely
drive ~ 55 mph; this most closely simulates the speed effect you’ll experience
during flight. Pick out “targets” of varying sizes along the roadway and
photograph them, practicing the three rules for framing. After you get proficient at
proper framing, take 2-3 photos of the same object as you pass; this also
simulates what you’ll be trying to accomplish while on imaging sorties.
3.3 Depth Perception
Sometimes when you frame your shot, the target appears small in relation to
its surroundings. This may be due to your height above the target and your angle
to the target. If the target is so small that it appears “flat” in your viewfinder, it is
likely that the photo won’t be useful to the customer. In these cases, reduce
altitude (within FAA and CAPR 60-1 regulations) and/or increase your angle to the
target (e.g., using the 45° Angle to Target pattern, discussed later). Placing the
target in the foreground of the image will add to a sense of depth and perspective.
Also, remember that you can take as many digital pictures as your media
card(s) can hold. If you have any doubt about a picture’s quality or suitability for
the mission, take more photos of the target from different angles and heights or try
different focal points.
3.4 Depth of Field
Depth of field refers to the region of proper focus available to you in any
image. When you focus the camera, there is some distance in front and behind
your subject that will also be in focus. This region of sharp focus is called depth of
field, or sometimes depth of focus.
39
Three factors contribute to the depth of field available to you for any picture:
• The aperture of your lens is the first major factor affecting depth of field.
The smaller the aperture (higher the f-number), the greater the depth of
field will be.
•
Focal length is a measure of your lens’s ability to magnify a scene. The
more you magnify your subject, the less depth of field you have available.
If you zoom in with a telephoto lens the depth of field drops dramatically.
•
The distance from the subject determines how much depth of field you
can get in your scene. If you shoot a subject that is far away, the depth of
field will be much greater than it is for a subject close to the camera. In
aerial photography, where you are always far away from your subject, a
large region in front and behind the target will be in sharp focus.
Using depth of field you can isolate your subject by making it the only sharply
focused object in the frame. In aerial photography the only practical means you
have to accomplish this is by using optical zoom, but depth of field is almost a
moot point from > 1000' AGL.
3.5 Panoramas
There will be times when you want to shoot a target (e.g., a dam) that just
can’t be captured with a single photo. By shooting a series of overlapping photos,
you can use special stitching software to create panoramic photographs.
It is best to shoot with shorter focal lengths (e.g., “landscape” mode) as this
wider angle lets you shoot fewer frames, which is necessary when shooting from
a moving aircraft. Fewer frames also means you have less chance of making a
mistake, and fewer frames means less “seams” in your panorama (and more
seams increase the chance of more artifacts in your photo).
Fortunately for CAP purposes, you don’t have to worry about panning the
camera to get your shots – the movement of the aircraft does the work for you.
You just hold the camera still while the target passes before your lens, taking
photos with the proper overlap. Most stitching software recommends a 15-30%
overlap between photos. [Some cameras have a panoramic assist mode that will
give you on-screen cues as to how much you need to overlap.]
There are many variables to consider when shooting photos to stitch into a
panoramic image, so practice is essential. One task you must master is how to
take a shot while looking ahead to where you’ll take your next shot, in order to
obtain the proper overlap between photos. This usually requires a planning pass
by the target, which allows you to determine how many shots you’ll need and look
for markers that will assist in obtaining the proper overlap between shots.
Another task to practice is controlling exposure if the scene isn’t evenly lit
(i.e., there are fairly dramatic changes in lighting between one frame and the
next). If your camera has an exposure lock feature, you can lock your exposure
after the first frame to ensure subsequent shots are exposed with the same values
(a panoramic assist mode does this for you).
40
Chapter
4. Camcorders
4
Airborne Photographers should study this chapter if they have to take video using a
digital camcorder.
The Videography Information Technology (VIT) Specialist needs to know how to set
up and maintain camcorders in order to better understand what the camera can and
cannot do, and help train Airborne Photographer trainees on camcorder use and care.
Camcorders come in two basic types, analog or digital, either of which is fine for CAP
purposes. And like digital cameras, there is a large number of each type of
camcorder to choose from. For this review, we will cover the basics using the Canon
Optura20 as an example. Since camcorders have more features than digital
cameras, it is even more important that you read the User’s Manual.
OBJECTIVES:
1.
Describe camcorder connections.
2.
Discuss common media formats.
3.
Describe how to connect a camcorder to the Aircraft Audio
System (Intercom). [VIT-P-003]
4.
Connect a camcorder to a monitor and play the video for
review. [VIT-P-003]
5.
Describe various methods of getting the video to the customer.
[VIT-P-003]
41
4.1 Basic Terms and Features
4.1.1 Lens and Zoom
Unlike digital cameras, camcorders normally just list the zoom power. For
example, the Optura20 has a 16x optical (320x digital) zoom lens; behind this lens
is a 1/4" CCD with 1.33 million pixels (690,000 pixels for videos and 1.23 million
for still photos). [Note that when you are saving stills to a memory card, the zoom
drops slightly (e.g., from 16x to 15X on the Optura20).]
Like we discussed in the section on digital cameras, you should turn off the
camcorder’s digital zoom feature for CAP missions.
4.1.2 Viewfinders
Like digital cameras, camcorders let you to frame your picture using a
viewfinder and an LCD screen. Remember that the optical viewfinder doesn’t
show the entire scene.
Most camcorder viewfinders have a diopter adjustment. This works the same
as discussed in the chapter on digital cameras.
4.1.3 Batteries
Camcorders consume even more power than digital cameras. You need to
use high-performance lithium ion or NiMH rechargeable batteries and you really
need a spare set. Also, an AC adapter is an even more important accessory for a
camcorder; you will need it to conserve your batteries when you view, edit or
transfer photos.
4.1.4 Tape Format
Camcorders record on several different types of film, such as MiniDV, Digital
8, MicroMV, DVD and HD. Each is discussed later.
Like digital cameras, many newer camcorders allow you to record still and
moving images onto a memory card. Most use the newer Secure Digital (SD)
and/or Multimedia Card (MMC) formats, while some use the Sony MemoryStick or
the SmartMedia. The size comparisons covered for the digital cameras are the
same. However, if you intend to record moving images onto the cards you need
large capacity cards and spares.
4.1.5 Connections
Most camcorders include USB, FireWire, S-Video, Microphone, A/V
(headphones), and DC-in ports. These connections allow video (or stills) from a
camcorder to be viewed on a monitor or transferred to a computer. [Note: Editing
digital video on a computer is not covered in this text.]
42
4.1.6 Image Stabilization
Camcorders with an image stabilization feature helps to reduce (but not
completely eliminate) camera shake that is most noticeable on telephoto photos.
This will give you noticeably better results when recording from aircraft.
The two most common types of image stabilization in use are:
• Electronic Image Stabilization (EIS) uses one of two methods to reduce
shake. The digital method increases the size of the image by digitally
"zooming" in on the image so that it is larger than the CCD; this
decreases picture resolution somewhat.
The other method uses
electronic motion sensors to sense the motion of the camera; this may
slow the autofocus function and may cause a slight “jump” at the
beginning of a scan.
•
Optical Image Stabilization (OIS) uses a lens/prism assembly moves in
opposition to camera shaking. This results in little or no change to
camcorder efficiency or quality.
Although image stabilization adds to the cost of the camcorder, it is a very
valuable feature. If you have a choice, choose OIS.
4.1.7 Autofocus
Although autofocus (AF) lenses can be a help in following moving subjects or
filming a target from a moving aircraft, you will encounter problems unless you
fully understand how they work.
Most autofocus devices assume that the area you want in sharp focus is in
the center of the picture. If the area you want to focus on does not remain in the
center of the frame, autofocus is not useful. Some camcorders allow you to
center the subject matter in the autofocus zone and then lock the autofocus on
this area; you can then reframe the scene for the best composition.
Autofocus systems have other weaknesses.
Most can be fooled by
reflections and by flat areas with no detail. Most autofocus systems also have
trouble determining accurate focus when shooting through glass (e.g., an aircraft
window). And, finally, autofocus devices (especially under low light) can keep
readjusting or searching for focus as you shoot, which can be quite distracting.
However, for most CAP uses autofocus is a valuable feature. Just be sure to
shoot through an open window and keep the target centered in the frame. [Note:
Many camcorders have an ‘infinity focus’ feature that helps alleviate this problem.]
4.1.8 Video Resolution
The term resolution refers to the ability of an imaging system to capture fine
details; the higher the resolution, the sharper the photos. In digital video,
resolution is calculated differently than it is for digital cameras.
The vertical resolution of a digital video image is determined by the number of
scan lines in the image. The horizontal resolution is the rate at which the moving
beam can turn on and off to paint "dots" of color on the screen (this can happen
only so fast because it takes time for the circuits to switch from black to white).
43
4.1.9 Still Photos and Short Movies
Most digital camcorders let you take still photos. This is a handy feature if
you need to take “snap photos” from your tape to e-mail, print small (4" x 6")
prints, or view on a computer.
In addition to still photos, you can also record short movies to the camcorder’s
memory card. On the Optura20, you can choose between 320 x 240 and 160 x
120 resolutions, with each movie being limited to 10 and 30 seconds, respectively.
Movies are saved in AVI format, using the M-JPEG codec.
4.2 Media File Formats
4.2.1 Video 8 (analog)
Video 8 was developed for the camcorder market in the late 1980s. The tape
is 8mm wide and has recording times of 90 minutes.
4.2.2 Hi8 (analog)
Hi8 produces better quality images in playback (significantly higher quality
than VHS and is on a par with S-VHS), and has a 90-minute maximum recording
time. Hi8 is considered to be the better analog format.
4.2.3 Digital8
Digital8 camcorders record digital video onto analog (non-digital) 8mm
videotapes, giving users all the advantages of digital video while still using
inexpensive analog tapes. These camcorders are bulkier than DV camcorders.
Digital8 camcorders will run tape at a faster speed when recording on Hi8
tapes digitally, providing for approximately 40 minutes of digital recording on one
60-minute Hi8 tape.
4.2.4 MiniDV
Of all the small consumer video formats currently available, the small MiniDV
format is by far the best. MiniDV tapes are inexpensive (60 minute tapes are
available for around $4), available in a variety of lengths, capable of recording
high quality video with 500-line horizontal resolution (about twice the resolution of
VHS and 8mm video and 25% better than S-VHS or Hi-8), reproduce colors
better, and produce clearer images with less static. DV utilizes a compression
system such that very high quality images can be recorded onto tiny tapes (a
typical 60-minute tape holds 13 GB of data). Sound is of a very high quality, too,
with 12-bit and 16-bit encoding being the norm - well up to CD audio quality.
MiniDV tapes are compatible with most video editing software applications,
and can also be played directly from MiniDV VCRs.
4.2.5 MicroMV
MicroMV was launched by Sony in late 2001, and record to a smaller format
of digital tape than even DV (about 70% the size). This format is completely
44
different to any of the existing formats in that it records an MPEG2 file, with a
maximum recording time of 60 minutes.
MicroMV tapes are more expensive than DV, and the MPEG-2 video
produced by MicroMV camcorders is not compatible with many video editing
software applications.
4.2.6 3” DVD
Some camcorders use 3-inch Mini DVD-R and DVD-RAM discs instead of
digital videotape. While the prospect of being able to record video and then play it
directly from a DVD player is appealing, this format has a couple of drawbacks.
DVD-R discs must be specially formatted by the camcorder before they can be
played back on a DVD player, after which they are locked and no more
information can be stored on them. DVD-RAM discs can be reused, but they are
expensive and their format makes them incompatible with some home DVD
players.
4.2.7 Microdrive
Some camcorders have built-in hard drives that allow recording standard or
high definition videos. However, they are not as durable as solid state media and
require a separate hard drive or DVD burner to store (archive) video.
4.2.8 SSD
Solid state drives are the alternative to hard drives, and function a lot like
flash memory. However, they have lower capacity than hard drives.
4.2.9 HD
The newest medium, with typical growing pains. High Definition gives a
substantial improvement in video quality due to higher resolution, broader color
space and advanced compression algorithms. Currently several competing media
types.
4.3 Taking Movies with a Digital Camera
Most digital cameras come with some sort of movie mode that allows you to
record a short video that can be played back on the camera, a monitor or a PC.
Most cameras set a fixed limit on how long you can record video (e.g., 15 or
60 seconds), while others are only limited by the amount of memory on your
media card.
Depending on the camera, the movie will either be recorded in the MPG, AVI
(also known as “Video for Windows”) or MOV (QuickTime) format. Even though
you can usually choose the resolution, even the biggest movie will still be fairly
small on the monitor.
Additionally, not all cameras have a microphone, so you may not be able to
capture sound with your video.
45
4.4 Connecting to the Aircraft Audio System
(Intercom)
It is essential to have a means of providing a running audio commentary of
what you are filming with the camcorder. A couple of methods are discussed
below.
4.4.1 Adapter Cable
An adapter cable, plugged into the aircraft’s intercom system via your
headset, will feed your commentary onto the video.
If this accessory is not available with your camcorder, you can make one
using parts available at most audio stores. As an example, you can get the
following parts at Radio Shack:
• Six feet of shielded audio cable (P/N 42-2444)
• One in-line 40 dB attenuating adapter, phono jack to two-conductor 1/8”
phone plug (P/N 274-300A)
• One 1/8” right-angle adapter (P/N 274-372A)
• One adapter miniature 1/8” phone jack to standard ¼” phone plug (P/N
274-325C)
The right-angle adapter is connected to one end of the six-foot audio cable:
this is the camera input end.
The in-line attenuator is connected to the other end of the six-foot cable, and
the 1/8” to ¼” adapter is plugged into the other end of the in-line attenuator: the
attenuator/adapter end is connected to the aircraft intercom system through your
headset connection.
NOTE: It is important that you test this connection with your headset. Some
active noise reduction (ANR) headsets interfere with the operations; test your
headset with ANR on and off to see which works.
4.4.2 Place an External Microphone in your Headset Earpiece
Another method is to connect an external microphone to your camcorder’s
microphone input, and place the (small) microphone in your headset’s earpiece.
You simply speak into your headset microphone and your conversation is
transmitted to the camcorder. Note that any other conversation coming over the
aircraft intercom will be picked up by the camcorder. A store such as Radio
Shack can make up a microphone that will connect to your camcorder’s mini 1/8inch stereo plug.
46
4.5 Techniques
Take a close look at a number of recent-model video camcorders and you’ll
notice that although many vary in their outward appearance, they have
remarkably similar functions. Every compact cam is designed for hand-held
usage, as well as having a zoom lens. Most of them will allow the user to override automatic functions like focus, exposure and white balance, too. An
increasing number of models sport fold-out color LCD screens in addition to their
built-in viewfinders, and offer the ability to add titles, fades and digital picture
effects to recordings. Many models allow users to record from external sources
just as you would with a VCR, too.
With a basic set of skills it’s possible to shoot video on virtually any target.
4.5.1 Learn your Camcorder Features
It’s important that you get to know what your camcorder can and cannot do,
and then set it up to meet your needs. The best camcorder in the world will give
you excellent pictures and sound, but it can’t think for you. Most budget-priced
late models have automatic control of focus, iris (exposure) and white balance
(color temperature). So, to begin with, switch off everything automatic and learn
what the effect is.
4.5.2 Supporting the Camcorder
It’s best to grip the camcorder firmly around the body and keep your elbows
tight to your sides when using the viewfinder. Don’t rest your arms or elbows
against the aircraft frame, as this will transmit aircraft vibrations to the camera. If
you wish to pan, you’ll find that you can achieve reasonable stability by literally
swiveling your hips as you pan. Smooth pans can’t be achieved without the
camcorder being held rigidly against the body.
For ground photos, the best means of acquiring stable photos is to use a
tripod. A good tripod will enable you to set up very smooth pan and tilting photos.
Though never intended as such, the folding LCD screen can be used as an
aid to stability. By holding the camcorder firmly around the body in the manner
already described, it’s possible to get some nice smooth photos by carefully
holding the LCD screen with the left hand. With practice you’ll be able swivel the
screen as you crouch down or stretch up and maintain good framing. Holding the
camcorder in this way can also result in a smoothing-out of walking photos.
Again, always shoot with the lens fully zoomed out for the best results.
4.5.3 Zoom
Professionals are trained to use zooms only when they have a relevance to
the shot and sequence. Another reason is that many camcorders have low-cost
lenses, so any zooming will often show up the inadequacies of the lens. Usually,
photos will be framed with the lens zoomed out fully.
Getting a close shot usually involves the operator physically moving in closer
to the target (e.g., circling close to the target and/or descending) rather than
zooming in on the target. With the lens set to full wide, you’ll find the general
depth of focus is better, too; something that’s immediately noticeable when
zooming around aimlessly, as can be seen in many videos which have been shot
47
at parties or at air shows. However, since CAP is limited to at least 1000' AGL
(and often higher if the airspace is restricted or crowded), knowing how to zoom
correctly may be the only way to capture the desired level of detail.
It’s a good idea to treat the video camcorder very much like a still camera;
look at the scene, select the shot, frame it and then hit the record button. If you
need to zoom, adjust the zoom until the image is “shaky” and then back off until
the image becomes stable. Once you’re happy that you’ve captured all you need,
count to three and pause the camcorder; always give a breather at the beginning
and end of the shot, as it helps in finding scenes and during editing.
4.5.4 Focusing
If conditions allow you to set the camcorder’s optical system to manual focus,
you’ll notice a marked improvement in the overall quality of your video. This could
be the case when you are circling a damaged power plant. But if you’re shooting
in a situation where there are rapid changes beyond your control (such as
shooting along a flooding river), it’s best to rely upon the camcorder’s auto-focus
capabilities. Just remember that the auto-focus is constantly evaluating the
nature of the image arriving through the lens, and will generally use the center of
the image as the reference point.
When attempting to zoom in to a target using auto-focus, you may notice the
target tends to go in and out of focus as you’re zooming. And once into your
close-up, you have to wait for the image to sharpen into focus. This is due to the
action of the auto-focus system working constantly to analyze the image even as
you are zooming. To prevent this, place the camcorder in Standby mode (before
recording) and:
a.
b.
c.
d.
e.
Switch off the auto-focus
Zoom in on the target (full zoom)
Adjust the focus manually
Zoom out and frame your starting shot
Start to record and commence your zoom
You’ll find that not only will the shot be sharp all the way down the zoom
(depending upon your camcorder’s optical system), but the shot will also be sharp
at the end of the zoom.
Most camcorder lenses have zoom controls that are extremely sensitive,
allowing the operator to start a zoom slowly and then speed up according to need.
Low-cost camcorders don’t have this feature and very smooth zooming comes
only after a lot of practice.
48
4.6 Getting the Video to the Customer
Although video from a camcorder can be downloaded into a computer, the file
is very large, making it difficult to transmit to a customer over the internet. As a
result, most video is currently delivered to the customer via messenger or mail.
With the advent of greater bandwidth and on-line storage sites, it is becoming
more likely that we will be able to make videos available to our customers on-line.
If you cannot deliver the video via the internet, the next best way is to copy
the video to DVD and deliver it to the customer (DVD Recorders are common in
Emergency Operations Centers). This can also be accomplished using highcapacity thumb drives. Software such as Pinnacle Studio or Photoshop Elements
makes this process easy.
Short JPEG movie clips (usually less than 15 seconds) can be captured on a
camcorder’s media card. These may be transferred to a computer and
transmitted via thumb drive, CD/DVD or e-mail.
Still photos (JPEG) taken on the camcorder’s media card are handled just as
if they were taken on a digital camera.
As a last resort, you can take the camcorder to the customer and play the
video on a monitor..
49
Intentionally blank
50
Chapter
5. Computer Requirements
5
The Videography Information Technology (VIT) Specialist needs to know computer
set up, operation and maintenance in order to ensure support for video imaging
missions. The VIT Specialist should also know how to install and maintain software
and accessories. The Specialist will also help train other personnel on basic
computer tasks.
Transferring, storing, viewing, and editing photos impose certain demands upon a
computer. You need plenty of RAM and disk space for these files.
CAP missions do not require (or even want) you to edit videos; video editing requires
a powerful computer with a very large hard drive and special hardware and software.
For these reasons, we will not be concerned with the demands of video editing. You
usually only need to view video on the camcorder’s LCD or on a TV or monitor to
ensure it meets mission requirements. However, you may need to download video
onto the computer in order to transfer it to a CD or DVD to send to the customer.
The Videography IT Specialist needs to be familiar with imaging mission requirements
so as to configure the base computer, install necessary special software, and maintain
the computer, computer accessories and camera/camcorder equipment.
The following discusses the minimum computer hardware, software, and accessories
needed to support aerial photography missions. Computer and camera/camcorder
maintenance is also discussed.
OBJECTIVES:
1.
Describe the minimum hardware requirements for a basic Windows PC
that will support imaging mission needs. [VIT-P-005]
2.
Describe special software needed for imaging missions. [VIT-P-005]
3.
Describe accessories needed for imaging missions and computer
protection. [VIT-P-005]
4.
Describe routine maintenance activities for computers and accessories.
[VIT-P-005]
51
5.1 Hardware
5.1.1 Monitor
As a minimum, use a 17" color monitor set for 24-bit color. As long as you
use a late model, it doesn’t matter if you go with a CRT or LCD screen.
5.1.2 RAM
Digital image editing makes demands on your computer's RAM. As an
absolute minimum, you need 256 MB if you’re running Microsoft Windows XP;
however, upgrading to 512 MB or 1 GB will allow you to edit photos must faster,
even on a slower processor. If you are using Microsoft Vista, you’ll need a
minimum of 1 GB of RAM (2 GB is preferable).
If you must make a choice, go for a less-expensive CPU and put your money
in extra memory (RAM).
5.1.3 Processor
Processor capability is important, but you can get by with systems running at
1 GHz or more. Of course, newer (and faster) processors are preferable as
working with images uses lots of processor capacity.
5.1.4 Video Card
For photography and video purposes, the video card's quality and efficiency
can impact performance more than any other component in the PC. Smooth
video depends on a high frame rate (how many times per second the screen is
updated with new information) and so is impacted far more by the choice of video
card than even by the choice of system CPU. Ensure the video card supports
1024x768 pixel resolution.
It is best to have memory on the video card itself; a big advantage of this is
that it provides greater efficiency and doesn’t use regular system RAM. Some
motherboard designs integrate the video chipset into the motherboard itself, and
then use part of the system RAM for the frame buffer; this is called integrated or
unified memory architecture and is done for cost savings. The result is almost
always much lower image manipulation and video performance, because in order
to use higher resolutions and refresh rates the video memory needs to have much
higher performance than the RAM normally used for the system. A similarsounding but different system is used by the new Accelerated Graphics Port
(AGP), which lets the video processor access the system memory for doing
graphics calculations, but keeps a dedicated video memory for the frame buffer.
This allows for more flexible memory use without sacrificing performance and is
becoming a new standard.
If you can afford the extra cost, consider using a video card with installed
memory rather than an integrated system.
52
5.1.5 Hard Drive
Even a two-gigabyte drive will fill up rapidly. Fortunately large hard drives are
inexpensive, so choose at least 40 GB with at least 15 GB of free space. If you
plan to do a lot of photography and editing, go for 80-100 GB. If you do not have
a large hard drive, consider an external USB hard drive.
The following gives some idea of the storage space you’ll need on your
computer for photos, based on 3-megapixel resolution with different quality
settings:
3-Megapixel image
format
TIF
High-quality JPEG
Typical JPEG
Highly-compressed JPEG
Storage per 100
photos
900 MB
150 MB
50 MB
25 MB
Capacity per
gigabyte
1,100 photos
670 photos
2,000 photos
4,000 photos
Typical video storage requirements:
Video
Digital video
MPEG-1 movie
(352x288)
MPEG-2 movie
(720x576)
MPEG-4 movie
(720x576)
PVR, highest quality
PVR, extended play
Storage per hour of
play
13 GB
620 KB
Capacity per
gigabyte
5 minutes
1.5 hours
3 GB
20 minutes
400 KB
3 hours
3 GB
1 GB
20 minutes
1 hour
Note: MPEG-1 is a CD video format and MPEG-2 is a DVD video format. These
compressed video formats allow you to store an hour of digital video on a CD or 2
hours on a DVD.
5.1.6 Ports
Most computers come with a serial port and one or more USB ports.
Transferring photos via the serial port is very slow, while the older USB 1 ports
are somewhat faster. The fastest ports used by today’s computers are the USB 2
port (which is backward compatible with USB 1 devices) and the FireWire (IEEE
1394 or i.Link) ports; both of these are excellent for downloading photos from a
camera or via a USB card reader (see Accessories, below).
53
5.2 Special Software
Windows XP and Vista/7 contain most of the software needed for aerial
imaging missions, such as a basic image viewer and an e-mail program.
However, a good photo editing software program is needed for advanced work.
Examples of this software are discussed in Chapter 7.
DeLorme Topo USA is also a good program to have to support mission
planning.
Install a good file compression program such as WinZip or PKZip. These
programs are a great aid in reducing file size (not compressed images) to send as
e-mail attachments, load onto a thumb drive, or burn onto a CD.
You should also install a good firewall, plus anti-virus and anti-spyware
programs.
5.3 Accessories
5.3.1 CD/DVD Burner
A burner serves as an easy and inexpensive way to backup data, including
photos and video. CDs are also a good, inexpensive media to send to customers.
They can be installed internally or connect via USB or FireWire.
Maintain a reasonable supply of both read and read/write discs.
5.3.2 Multifunction Printer/Copier/Scanner/Fax
These models offer the best functionality for the money, and are plentiful and
relatively inexpensive. Check how much the replacement ink costs.
5.3.3 Media Card Reader
One of the fastest ways to get your photos from a camera’s flash memory
card is to use a USB card reader. These inexpensive devices also have the
advantage of being accessible, as you can place the reader on a desktop.
Most card readers will read several types of media cards (e.g., 5-in1, 7-in1,
10-in-1) and all will read the two most common digital camera media cards: Smart
Media (SM) and Compact Flash (CF). Most will also read the Sony Memory
Sticks, MultiMedia Cards, and xD Picture Cards.
5.3.4 USB Thumb (Flash) Drives
You should keep a couple of USB thumb drives (also called flash drives) for
transporting data and photos and for quick backup. 1-2 GB thumb drives are very
inexpensive, and can even be bought in bulk.
One of these drives will hold all the files needed to run a mission remotely.
These inexpensive drives can also be loaded with a mission’s photos or even
short video and sent to the customer, without worrying about getting them back.
Note: You can also store your digital images on removable media such as
Iomega Zip drives.
54
5.3.5 Camera/Camcorder Accessories
The following are needed to maintain cameras and camcorders mission
ready. They are discussed in other chapters of the text.
• Batteries for the camera and portable GPS, if applicable (stored properly;
removed from camera/camcorder when not in use)
• Battery chargers
• Media cards (at least two per camera)
• Camcorder audio adapter
5.3.6 Surge Protection/Backup Power Supply
Surge protectors can protect your computer against minor power spikes or
surges. A backup power source (usually called an Uninterruptible Power Supply
or UPS) can do this, and will also keep your computer running until you can save
the files you are working on and properly shut down the computer.
The cheapest option is an ‘advanced’ surge protector that provides surge
protection and has a limited power supply that will keep your computer running for
a fairly short time. More advanced (and expensive) backup power supplies are
best; one of the most well-know companies that supply these units is American
Power Conversion.
5.3.7 Maintaining the Computer
•
Ensure the firewall is active, and that anti-virus and anti-spyware
programs are set for automatic scanning and updates. Set the OS for
automatic updates, but select the option to get your permission before
installation.
•
Periodically instruct members of your squadron on safe computing and
safe web browsing. Ask members not to download anything without
consulting you first. Prohibit web gaming and instant messaging on CAP
computers.
•
Limit e-mails to CAP business only, and ask members not to give out the
squadron e-mail address to just anyone.
•
Backup CAP and mission files periodically.
•
Periodically check for unneeded or obsolete files, especially photos and
video. If necessary, zip old files you need to keep to reduce space.
Defragment the hard drive periodically.
•
Ensure camera/camcorder batteries are properly charged and stored
(assign someone to do this). Remove batteries from the camera or
camcorder when they won’t be used for more than a couple of weeks.
•
Check the camera/camcorder bag to ensure it stays mission ready (refer
to Chapter 10).
55
Intentionally blank
56
Chapter
6. Transferring, Organizing and
Renaming Photos
6
Airborne Photographers must know how to transfer their photos onto a computer and
review photos on a monitor to ensure mission objectives were met.
The Videography Information Technology (VIT) Specialist must be able to transfer
photos, organize the photos in mission folders, and rename the photos for ease of
identification and retrieval. The VIT Specialist also needs to know how to backup and
archive mission photos.
OBJECTIVES:
1.
Discuss how to transfer photos to a computer.
Transfer several photos from a camera to a computer using the
camera’s cable and via a media card reader. [AP-O-002; VIT-O-001]
2.
Discuss the importance of organizing and renaming photos. Then:
[VIT-O-001]
a.
b.
c.
d.
3.
Set up a mission photo folder on a computer
Transfer several photos into this folder
Rename each photo
Backup the photos to a CD or thumb drive
Discuss the purpose of watermarking photos.
Describe what data must be recorded to complete the image processor
datasheet. [AP-O-002]
Demonstrate use of the CAP Image Processing program. [VIT-O-001]
Demonstrate how to view photos, enter photo data, and upload a photo
into WMIRS. [AP O-002; VIT-O-001]
4.
Demonstrate batch renaming. [VIT-O-001]
57
6.1 Transferring Photos into a Computer
There are two ways to transfer photos from most digital cameras onto a
computer: attaching the camera directly to the computer (also known as tethering)
or using a memory card reader.
6.1.1 Tethering
Most digital cameras provide a USB cable connection that offers a fast way to
transfer your photos (e.g., the D200 USB 2.0 cable can transfer images at about
5.3 MB/sec.). However, tethering ties up the camera and can deplete the
camera’s batteries. Some cameras include an AC adapter that can provide power
to the camera; if you choose to tether, use the AC adapter during photo transfer
sessions.
Note: Most camera manufacturers provide software that helps transfer photos
from a tethered camera to the computer. If your camera comes with such
software, you should install it before you attempt your first transfer (read the
manual). If your camera does not include photo transfer software, or you simply
prefer not to install it, you should still be able to transfer photos. Windows
includes built-in tethering support to many popular digital camera models, typically
via the computer’s USB port, and most of the photo editing programs (e.g.,
Elements or Photo Studio, discussed in the chapter on “Viewing and Editing
Photos”) will recognize and accept the pictures directly from your camera. This
example uses Canon’s transfer software:
58
This window appears the first time you connect your camera (after you have
installed Canon’s camera software).
You can begin the transfer from the camera or computer.
The photos are loaded into the browser of the software that came with the
camera.
59
Note: Most digital cameras show up as a removable drive in Explorer, so you
can just click the drive letter to open the drive. Your pictures will probably be in a
sub-folder rather than in the root of the drive. Drag the photos onto the applicable
‘Unedited Photos” sub-folder on your hard drive to copy them.
6.1.2 Memory Card Reader
The easiest and most versatile way to import pictures into your computer is
through a USB media card reader that plugs into your computer; this allows fast
and easy downloads from a camera’s memory card. The best choice is a USB
2.0 card reader that accepts multiple types of cards; those that read six or more
types can be found for $20 - $40 (e.g., Zio Corporation’s Dazzle series, the
SanDisk 8-in-1 ImageMate USB 2.0, and the Edge or SimpleTech 6-in-1 digital
media readers). This is handy during a large mission when crews may be using
different types of cameras with different media cards. [Note: A Firewire card
reader is almost twice as fast as a USB reader, but is much more expensive than
a USB reader. Also, many computers do not have a Firewire port.]
Another advantage to a card reader is that it enables a crew to drop off their
memory card and take the camera back out for another sortie, while the staff
processes the photos.
When you insert the card into the reader, a Windows pop-up asks you what
you want to do with the images on the card (slideshow, download to a folder, etc.).
You can also open Explorer where the card shows up as a drive; you can then
drag-and-drop the photos into the desired folder.
Some computers (laptops, in particular) come with slots that accept cards
directly into the computer or via a PC card adapter. These features essentially
function in the same way a card reader does, although much faster.
Some printers also come with built-in card readers. They allow you to print
photos without using a computer.
6.2 Capturing Photos
For ease of use and to make it simple to find all your photos, you may decide
to store all your photos in the ‘My Pictures’ folder (under ‘My Computer’) or in a
separate location. Either way, you should first create folders and sub-folders for
each use or mission; this is discussed in the next section, “Organizing Mission
Photos on a Computer.”
There are three basic ways to capture photos to your computer’s hard drive:
using the Windows Scanner and Camera Wizard, using the capture feature of an
photo editing program, or copying photos from your camera to your hard drive
using Windows Explorer (drag and drop).
6.2.1 Capturing Photos using the Scanner and Camera Wizard
If you’re using a USB cable and your camera is a “Plug-and-Play”, the
Scanner and Camera Wizard start once you connect your camera to one of the
computer’s USB ports. Click “Next” and follow the instructions in the wizard. If
you do not see the wizard you may have an older camera that is not Plug-and60
Play and should follow the instructions to install your camera manually. [Note: If
the wizard doesn’t appear as soon as you connect your camera, you can open it
by selecting Start > Control Panel > Scanners and Cameras and then selecting
your camera.]
If you’re using a memory card reader, simply insert your card into the proper
slot and the wizard will start:
1. If the wizard asks which action you would like to perform, select “Always
do the selected action.”
2. Click “Copy pictures to a folder” and then click OK.
3. If you want to transfer all the photos in your camera (or on your memory
card), click “Next.” If you want to choose which pictures to transfer, click
“Clear All” and check the images you want to transfer (or just un-check
the check boxes next to the photos you do not want to transfer), and then
click “Next.”
4. The wizard puts your photos in the ‘My Pictures’ folder on your computer
unless you choose another location, which you should (see the section on
“Organizing Mission Photos on a Computer” below). Choose the
‘Unedited Photos’ sub-folder in the particular mission’s folder and click
“Next.”
5. When the transfer is complete, select what you want to do next and click
“Next.” If you chose nothing in the previous step, click “Finish.” The folder
that contains your newly transferred photos opens.
61
6.2.2 Capturing Photos using an Photo Editing Program
If you have an photo editing program installed on your computer it will step
you through the process of transferring photos from your camera or the camera’s
media card (using a media card reader). In this example we have a Dazzle 6-in-1
USB Card Reader connected to one of our computer’s USB ports and we are
using Adobe Photoshop Elements:
1. Create a folder for the current use or mission (see the section on
“Organizing Mission Photos on a Computer” below). You may create an
“Unedited Photos” subfolder now, or wait and do this as part of the
transfer process as discussed below.
2. Insert your media card into the card reader. Remember to be gentle
when inserting the card; if you insert it improperly it will be obvious, so
don’t try to force the card into the slot – just remove the card and turn it
over and try again.
3. Once the card is inserted properly (usually denoted by a green light
illuminating on the card reader), the computer will automatically recognize
the card. In this example, Elements will display this download window:
4. Select the photos you want transferred to your computer. Note: Elements
automatically selects all the photos on the card for transfer, as denoted by
the checkmarks in the small boxes to the lower right of each image. If
you don’t want to transfer a particular photo, simply uncheck the box
associated with that image.
62
5. Select where (what folder) you want to send the photos. To the right
under “Location” you see that Elements has listed a default folder
(C:\...\2005-12-23-1125-47); to change this select “Browse” and navigate
to the folder you want.
You may create a subfolder at this time. Elements gives you the choice
to name it using the Date and Time of Import (default), or you can name
the subfolder by checking “New Name” under “Create Subfolder Using.”
Use this opportunity to create a subfolder named “Unedited Photos.”
6. You can rename the files at this time if you wish. Check “Rename files
to:” and type in the file name: Elements will automatically rename the files
and append ‘001, 002, 003, etc.’ to the file names.
7. Select “Get Photos” and Elements will transfer the images you selected.
6.3 Organizing Photos on a Computer
Once transferred to your computer, your digital images become computer
files. Just as you need to organize word processing files, you need to organize
photos as you import them or you will quickly lose track. You should set up your
folders under ‘My Documents’ as Windows is optimized to use ‘My Documents’ as
your root folder.
6.3.1 My Documents / My Pictures
You can put your photos in a folder anywhere under ‘My Documents’, such as
in a folder labeled ‘CAP Photos’. However, since Windows is optimized to use the
‘My Pictures’ folder for photos this may be the best place to set up your folders.
For example:
1. Go to ‘My Documents’ then to ‘My Pictures’ and create a “CAP Photos”
folder.
2. Create a ‘Missions’ category folder in “CAP Photos”. You may go further
and create an ‘Aerial Imaging Missions’ folder inside the ‘Missions’ folder.
You may also want to create folders for other types of missions (e.g., ELT
or SAR) under the ‘Missions’ folder.
3. Before you import photos from a particular mission, create a new subfolder in the “Missions” (or ‘Aerial Imaging Missions’ folder). Give the
folder a descriptive name, such as the mission number or the subject
(e.g., SWLR060001, May04 Power Plant Surveillance, or 13Sep03
Floods). Note: It is preferable to include the date in the folder name as
this makes finding the photos easier, both under Windows and when
using most photo browsers and editing programs.
63
4. Next, create a sub-folder in the mission folder you just created and name
it ‘Unedited Photos’ or ‘Original Photos’. Do this each time you create a
mission folder.
5. Import your photos into the ‘Unedited Photos’ sub-folder. This will be your
set of untouched photos, and will serve as a backup in case you make a
mistake during editing or need to go back to the original, untouched photo
for any reason.
6. Next, copy (not transfer) the photos from the ‘Unedited Photos’ sub-folder
into the mission folder. You can now rename these copies (see “Naming
Pictures” below) and perform any editing that is required. [Note: Each
time you edit a photo, it’s a good idea to use the “Save As” command
rather than “Save”; this makes it easy to recover from a mistake or to crop
the same photo differently.]
7. If you make a mistake, or the customer later asks for an unedited copy,
you can retrieve the original from the ‘Unedited Photos’ sub-folder.
6.4 Watermarking Photos
The CAP Image Processing Program is a simple application that
automatically watermarks digital imagery with geographically identifying details
(e.g., target name, latitude/longitude, time on target, and picture direction).
If the customer wants the photos watermarked, the aircrew is responsible for
collecting all of the required information during flight, and should know how to
enter the information into the image processor spreadsheet once back on the
64
ground (this task is usually performed by a Videography Information Technology
Specialist).
Refer to http://cap.ttar.org/imageprocessor/ to download the image processor
and Excel template picture spreadsheet, and for instructions on how to use the
program.
WMIRS
The Web Mission Information Reporting System (WMIRS) provides an easy
method of uploading photos from a mission. The program watermarks the photo
using information you enter while uploading the photo (details in Chapter 8).
65
6.5 Naming Photos
It can be challenging to find that one photo that you need, when you need it.
By renaming your files you make it easier to find a photo.
When you shoot a digital photo the camera assigns it a file name, but the file
name is not very descriptive; most cameras give photos sequential alphanumerical file names, such as P0000100 - P0000120. But three months after the
mission you need to retrieve the photo you took of the damaged power plant; do
you think you’ll remember that it was photo P0000110? This is why it is essential
that you assigning new, descriptive file names to your photos.
6.5.1 Naming Files
Here are some ways that you can name files for easy retrieval:
1. Use something obvious (e.g., the target’s name or the mission number
and the sortie number).
2. Include a date, even if it is simply the year the photo was taken. This is
especially important because each time you save a photo it changes the
date in the file details. [When you add the date in the title, place it at the
start of the file name; placing the year at the start of the file name and a
sequence of numbers at the end makes file names easier to read.]
[Your camera stores additional information within each image, but this
information is invisible and not part of the image itself. Some examples
are the date and time the photo was taken, the camera settings at the
time of the shooting, and information about the photographer or the
location where the photo was taken. Image management applications
allow you to display this information next to your images, giving you more
information to work with while you organize.]
3. Add a sequence of numbers to the end of multiple photos from the same
event.
For example, a single photo of a disaster reconnaissance sortie may be
Sep04Floods001. More photos from the same reconnaissance would be
named Sep04Floods002, Sep04Floods003, and so on.
As you saw in the Photoshop Elements example above and as you will see in
the next chapter, browsers or photo editors that enable you to “batch rename”
photo files makes this process quick and painless.
66
6.5.2 Batch Renaming
In Windows you can easily rename whole series of photos using a process
called “batch renaming”: [Most other photo browsers and editors can batch
rename.]
1. Click Start, and then click ‘My Pictures’ or whatever folder where you've
saved the pictures.
2. Switch the view to “Thumbnails” by clicking the ‘Views’ button on the
toolbar.
3. Select all the pictures you want to rename by highlighting the last picture
you want, then press and hold the Shift key as you move your mouse
over them until you include all to be renamed, ending with the first picture
in the list.
4. Right-click the first picture and then click “Rename.”
5. Rename the first picture (e.g., Sep04Floods01.jpg), then click in the white
space next to one of the pictures. Just like magic, all the pictures will be
renamed in sequence, Sep04Floods02.jpg, Sep04Floods03.jpg, and so
on.
This method can also be used to rename a batch of any files, not just
picture files.
NOTE
After a while you will accumulate hundreds of photos. You may want to keep
a file (e.g., Word, Excel or Access) in your ‘Missions’ folder with a short
description of each mission; this will enable you to quickly locate photos that
you took months or years ago. You should also periodically delete unneeded
photos (but, if in doubt, back them up as discussed below).
67
6.6 Backup and Archive Photos
Back up and protect your photos by burning them to a CD or DVD (for CAP
purposes, a CD burner is a valuable and inexpensive asset), or copy them to an
external hard drive or thumb drive. If the customer doesn’t get (or deletes) your
upload/e-mail or they lose an photo, you can always retrieve the photo from the
archived file.
USB thumb (flash) drives have become so inexpensive (e.g., < $12 for 4 GB
and < $30 for 16 GB) that they make an excellent backup drive. They also
provide a good way to transport photos to your customer (better than CD/DVD).
They can also be bought in bulk.
CDs or DVDs are lightweight, inexpensive, durable, and easy to store, mail or
transport. They can be labeled and organized in any way you want, making it
simple to create CDs/DVDs of a complete mission to mail, for safekeeping, or to
free up valuable space on the computer.
Most CDs have can hold 700MB, and are very inexpensive when bought in
bulk. DVDs are essentially a bigger, faster CD that can hold tons of still photos
and two hours of high-quality digital video (a double-sided, dual-layer disc can
hold about 8 hours of high-quality video, or 30 hours of VHS quality video).
Unless you plan to back-up or edit video, CDs will suffice for most CAP purposes.
When purchasing a package of CDs or DVDs to store photos, it’s important to
know the different kinds of blank CDs/DVDs you can buy. The one you want
depends on whether the computer has a -R or a -RW drive: [Note: This is greatly
simplified; there are many different types of competing formats.]
•
CD/DVD-R. These can be written to but not erased. Once your photos
reside on an -R disc they can be read many, many times, and you can’t
accidentally write over existing photos. This makes them the ideal
medium for storing your pictures long-term. While you can’t reuse them,
they are less expensive than -RW discs.
•
CD/DVD-RW. These can be written to, erased, and written to again,
much like a floppy disk or the hard drive in your computer. As a result, it
is possible to accidentally write over a collection of original photos stored
on an -RW. That makes this type of CD/DVD better suited for other
backup tasks. It also takes longer to write to an -RW disc than to an -R.
Many CD/DVD players can read all of the +/- format types.
Additionally, you can get up to 2GB of free backup from online services such
as Mozy (http://mozy.com) or IDrive (www.idrive.com).
68
Chapter
7. Viewing and Editing Photos
7
Airborne Photographers must know how to review photos on a monitor to ensure
mission objectives were met.
OBJECTIVES:
1.
Discuss how to browse photos on a computer.
Demonstrate browsing photos using a browser and/or editing program.
[AP-O-002]
2.
Discuss the importance of saving un-edited photos before editing and
not saving the photo as a JPEG until you’ve completed editing.
[VIT-O-003]
3.
Describe the sequence for editing CAP photos. [VIT-O-003]
4.
Discuss the basics of how to: [VIT-O-003]
a.
b.
c.
d.
Resize or crop a photo
Adjust brightness and/or contrast using the image’s histogram
Add text or symbols to a photo
Save an edited photo in the desired format at the desired file
size
Perform each of these functions using an editing program. [VIT-O-003]
69
7.1 Browsing Photos
Over time you can accumulate hundreds of pictures on your computer’s hard
drive, so it is important to keep them organized so you can find a picture you (or a
customer) is looking for. That is why we discussed organizing mission photos into
folders and carefully naming your photos in the previous chapter. However, it is
handy to be able to find and view photos quickly, such as when you want to
collect a set of photos that demonstrate how to photograph tornado damage.
Photo browsers are an ideal tool for this kind of task.
Photo browsers are programs that help you view, organize and file digital
photos in a number of different ways. A photo browser not only helps organize
photos, but it lets you see actual photos rather than just their file names. This
makes looking for a specific photo in a large collection of photos much simpler.
You can get a good photo browser cheaply (or for free), and many photo editors
(discussed separately) include a good thumbnail-based file browser.
Remember that photo browsers are designed to support only the photo
formats they understand. In other words, they contain the necessary code to
decompress a JPEG photo, plus show a thumbnail and large preview, since they
support the JPEG format. When an all-purpose photo browser comes up against
a RAW file, chances are it won’t be able to display it. For the browser to do more
than that, it has to be tuned with the RAW formats of specific cameras. Camera
manufacturers usually take care of this in the software that is packaged with the
camera.
While Windows provides a great basic browser for viewing and organizing
photos, if you are planning on managing photos for your unit (or you simply have
a lot of photos) you might consider downloading a simple (and free) photo
browser or purchasing an photo editing program that contains a browser.
7.1.1 Windows
In Windows (XP or 7), selections under the “View” menu enable you to view a
folder’s photos as filmstrip or thumbnails, not just as file names or document
icons. This photo browsing feature includes the ability to view large versions of
your photos and look at them in a slide show (using the mouse’s right-click
function you can also rotate photos, open them in an photo editor, print, or e-mail).
The example below shows folders and photos stored in the ‘My Pictures’ folder
using the thumbnail view:
70
Windows XP also includes the “Windows Picture and Fax Viewer” (Photo
Viewer in 7). This simple program automatically opens when you double-click on
an image (e.g., from My Pictures or Windows Explorer) and allows you to scroll
through a group of photos (or view them in a slide show), magnify an image for a
closer look, rotate photos, and delete, print or save photos. [Note: This program
is the default viewer that opens when you double-click on a photo; you can
change this so that your preferred program opens when you double-click on a
photo.]
71
Like the Windows Picture and Fax Viewer, most other browsers will let you
zoom in to check details (usually a magnifying glass symbol, as seen above).
This feature is what most Airborne Photographers will use to review their mission
photos to ensure they meet all mission objectives. You will also be looking for
proper framing, proper focus, and color and contrast. Again, be sure to review
your photos before deleting them from your camera’s media card.
Additionally, from the Windows Picture and Fax Viewer you can open an
image into Window’s basic “Paint” program. This simple editing program lets you
crop an image, adjust colors and insert lines, boxes or text. [Note: You can also
open Paint by choosing Start > All Programs > Accessories > Paint.]
7.1.2 Other Free Photo Browsers
Some basic photo browsers can be downloaded from the Web, such as
Paint.net
(www.getpaint.net),
Picasa
IrfanView
(www.irfanview.com),
These
(http://picasa.google.com) or Kodak EasyShare (www.kodak.com).
programs support most file formats, have a thumbnail/preview function, allow
batch renaming, and have basic editing features (e.g., cut or crop). You can print
or e-mail directly from the programs, and most let you make simple edits.
72
Additionally, most cameras, camcorders, printers and scanners include basic
browser and/or editing programs. Most are easy to use and allow you to quickly
review photos on your hard drive (as well as download them directly from a digital
camera) as moderate-sized thumbnails. They will normally enable you to rename
photos, set up new folders, group photos into categories and do some simple
processing. Most include many options for printing, including multiple photos on
a page and album pages.
Scaled-down editing programs may also come
bundled with a computer or camera/camcorder, such as Microsoft Picture It! or
Adobe Photo Deluxe.
More advanced browser/editing programs may be
packaged with your camera or camcorder, such as ArcSoft PhotoStudio; this
program has many of the advanced features found in Adobe Photoshop Elements
and Jasc Paint Shop Pro (discussed below).
7.2 Editing Photos
The Airborne Photographer must master airborne imaging so that the photos
do not require cropping or editing in order to meet the customer’s needs; this is
particularly true when customers want purely unedited photos or for SDIS
missions where there is no chance to edit the photo before it is transmitted to the
customer.
However, some customers allow (or request) cropping and editing. The
Videography Information Technology (VIT) Specialist may need to edit photos in
order to “save” an otherwise marginal photo, adjust a photo so it shows the true
color and contrast of a target, annotate an photo, or transform a good photo into a
great photo. These skills are also valuable in producing photos for initial and
proficiency training.
For CAP customers, we rarely need to get fancy with editing photos (in fact,
this can be detrimental). If the customer allows or asks and the photos need
73
editing, try and limit changes to cropping, adjusting brightness and/or contrast (the
difference in brightness between light and dark areas), resizing, and annotation
(adding text and/or symbols).
There are several low-cost (< $100) photo editing programs, the best of which
are Adobe Photoshop Elements and Jasc Paint Shop Pro. Also, GIMP is a very
good free editing program (www.gimp.org). As mentioned before, some cameras
come with very capable (and free) browser/editing programs such as ArcSoft
PhotoStudio. Different programs have different strengths and weaknesses, and
you may find yourself using more than one program.
Professional-level editing programs such as Adobe Photoshop offer a wide
range of capabilities, but they are expensive and take quite a while to learn.
These extensive and advanced capabilities are not necessary for the basic
operations we perform during CAP imaging missions.
7.2.1 Editing Sequence
Editing a photo is best done in a particular sequence (each adjustment is
discussed in more detail later).
1.
2.
3.
4.
Crop
Adjust Contrast and Tone
Add Text or Symbols
Save in Desired Format
As you edit a photo, one feature serves as your best friend: the “Undo”
function found in the “Edit” menu. “Undo” reverses the last editing action you
performed on the photo and gives you the freedom to experiment at will. Even if
you’ve made ten changes, selecting ‘Undo’ ten times will restore the photo to its
original state (unless you’ve saved the photo along the way).
7.2.1.1 Crop
Before you crop, ensure that you are viewing the image at 100% (e.g.,
select “View Actual Pixels” or its equivalent).
Cropping is easy to do and it removes extraneous information from a
photo so you can emphasize the most important aspect of the image. It can
be accomplished two different ways, but both involve the same principle: “Get
close, then closer.”
Cropping not only changes the composition of your photo, it removes
tones from your image. If you crop out tones you’re not interested in (e.g.,
areas of overexposed highlights such as the sky) you will change the
appearance of the image’s histogram and ease the editing process.
Cropping is useful when you want to enhance or center the target in a
photo or to trim out unwanted detail, and to crop to standard print sizes. If the
camera was slightly crooked when the shutter button was pressed, you may
also be able to correct horizon lines that are off-kilter by rotating the photo
first, then cropping.
74
Following are some cropping tips (examples are from Photoshop
Elements):
• Don’t mess with success. If you’ve successfully framed the photo at
the time it was taken, don’t automatically feel the need to trim more.
Often, leaving the photo just as it was captured by the camera is the
best crop of all.
However, if you do want to trim you just open the photo in your photo
editing program. In the example we want to crop the photo so the
aircraft strut is no longer in the photo.
•
Use the Crop tool’s adjustment handles. Trying to get the exact crop
by dragging the Crop tool with the mouse is difficult, and sometimes
impossible due to the invisible grids that govern mouse movement.
Instead, just get the picture you want inside the cropping box by
clicking and dragging the tool across the image to create a cropping
box that frames the picture. The area that you see inside the crop
box will be kept and anything outside the box will be cut away. Next,
release the mouse button and make the fine adjustments (height and
width) with the adjustment handles on the cropping box.
75
Another benefit of using the adjustment handles is that it shows you
the exact center of the selected image (usually a + symbol like in the
example). The center symbol moves as you move the borders; this
allows you to emphasize an object or area by centering it in the
cropped photo.
You may want to cut away certain parts of the photo to arrive at a
precise image size when creating online photo prints, especially if an
image is larger than the intended print size (e.g., a 5.25" x 7" image
may be cropped to precisely 5" x 7"). This is done by configuring the
Crop tool, where you can specify the aspect ratio for cropping; in the
example above you would select a width of 5 inches and a height of 7
inches.
•
Straighten crooked horizons. It’s not always possible to keep the
camera (or aircraft) level when taking a photo. In most cases its
appearance can be enhanced by straightening a horizon that is not
running parallel to the bottom of the photo. Some photo editors
enable you to crop and fix a horizon in one step. Others will require
use of the Ruler tool, and then cropping to produce a final photo.
7.2.1.2 Adjusting Contrast and Tone using the Histogram
Often the only adjustment needed can be accomplished by making tonal
adjustments to the image’s histogram (discussed in Chapter 2).
Tonal correction is the process of ensuring that the contrast in the photo
is good (i.e., the blacks, whites and other levels look the way you want them
to look). Because colors also have tones, many of the image’s color
problems will disappear with tonal correction.
76
This adjustment is best done with the person who took the photo present,
as it quickly enables you to make the photo match the colors and contrasts
the Photographer observed at the scene.
As we discussed in Chapter 2, there's no such thing as a good or bad
histogram. However, a histogram that shows a large flat area on either end of
the graph is most likely in need of some adjustment (see the example below).
From the histogram you can determine the image's darkest shadow and
brightest highlights, which are called the black point and white point. In fact,
it's the range between these two points that defines the dynamic range (also
called the tonal range, or contrast) of the image. If the image is low contrast,
you can also tell if it's low-key or high-key from the histogram. A low key
image has details concentrated at the dark end of the scale while a high-key
image has them concentrated at the light end.
If there is enough detail, even if the image is somewhat off, it can be
corrected in a program such as Photoshop Elements using the “Levels”
command or in “Picture Window” using the ‘Brightness Curve’. These
controls allow you to adjust the shadow, mid, and highlight areas
independently without affecting the other areas. This lets you lighten or
darken selected areas of your photos without losing detail.
In Photoshop Elements the ‘Levels’ dialog box (‘Tone Adjustment’ in
some programs) gives you five dragable triangles to adjust the distribution of
brightness in your image:
77
The three dragable triangles below the histogram work as follows:
• Dragging the left (black) triangle to the right darkens the shadows
• Dragging the right (white) triangle to the left lightens the shadows
• Dragging the middle triangle (gamma) to the left or right lightens or
darkens the image
The two dragable triangles below the Output Levels grayscale bar also
adjust the image, having almost the opposite effect of the triangles above.
• Dragging the left (black) triangle to the right lightens the shadows
• Dragging the right (white) triangle to the left darkens the highlights
First, make sure the “Preview” checkbox is checked.
To make
corrections, drag the left slider rightwards to the point where it meets the end
of the graph. You will see the change as you move the slider. If present, the
photographer can tell you if the image now matches what he saw when he
took the photo.
In the example below, we see a photo with its histogram displayed. Note
that the photo is slightly overexposed (the curve drops off before reaching the
left side of the graph, indicating that there are few pixels with very dark
colors).
78
Dragging the left (black) triangle to the right darkens the shadows and
makes the image noticeably sharper:
Technically, everything to the left of the new ‘black’ point is now
considered black.
Notice that the middle slider (gamma point) has automatically moved to
the right to preserve the relationship between black, midpoint and white. Also
notice that the right side has not changed. This is one of the great
advantages of the Levels adjustment – it allows you to edit different parts of
the tonal range independently while preserving the tonal relationships in the
image.
If you also need to adjust the ‘white’ point where the curve drops off
before reaching the right side of the graph, indicating that there are few pixels
with very light colors, the process works the same.
Note
You can’t make a white point adjustment as much as you can a black
point adjustment, because clipped highlights are much more noticeable
than clipped shadows.
Clicking the “Auto” button in the Levels control box automatically does
both adjustments (left and right). However, it’s best not to use this feature as
sometimes the rightmost point on the histogram is not what you want as white
in the image, particularly if the image contains a bright highlight (e.g., sky) or
a flare.
Another way to correct an overly dark or overly bright image is to use the
middle slider (gamma control). The gamma adjustment (sometimes called
mid tone contrast) changes the brightness of the mid tones of an image
79
without substantially affecting the highlights and shadows, where simply
brightening the image with a brightness slider tends to wash out the dark
regions and increase the intensity of the highlights. Using the middle slider
can often bring more detail out of a shadowy area, and you won’t have to
worry about your blacks or whites turning gray.
Correcting Color Cast
Most Levels controls provide another way to set black and white points
and neutralize color casts. Look in the histogram dialog boxes (shown above)
on the lower right side above the Preview checkbox and you’ll see three
eyedropper icons.
The White Point eyedropper lets you set the white point in the image by
simply clicking on something white in the image. Similarly, the Shadow
eyedropper lets you set the black point by clicking on a black area
The Gray Point (neutral) eyedropper lets you define something in the
image that’s supposed to be neutral (or gray). When you use this feature, the
program automatically performs separate Levels adjustments on the
individual red, green and blue color channels so the resulting tone is neutral.
This is analogous to white balance; by setting the neutral point correctly all
the other colors fall into line and the color cast is eliminated (in fact, this
technique can sometimes be used to correct bad white balance in JPEG
photos).
If you like the results, click on “OK” to accept the changes. If not, you
may have clicked the eyedropper on a pixel that wasn’t truly neutral: just click
again in a different area until you find a point that results in a neutral image.
[All eyedroppers work this way. If you don’t like the initial result, click again in
another location.]
With practice, you’ll learn which control adjustments work best for
particular situations.
Note
If you have Adobe Photoshop, the “Curves” tool (Image > Adjust > Curves)
does everything “Levels” does and also provides a few other capabilities.
Levels lets you edit the black, white and midpoints, whereas Curves allows
you to set up to 14 different points in any location along a curve to allow
precise edits of particular tonal ranges.
Data Loss
Adjusting Levels will remove data from an image, but this type of data
loss is not readily apparent on-screen and is not at all noticeable on a
printout. However, if you make two or three more edits after you make the
Levels adjustment, the photo might visibly degrade.
This is why it is important to think carefully about edits in order to
minimize data loss.
Automatic Enhancements
For CAP purposes, the only adjustment recommended is the tone
adjustment discussed above. However, you should familiarize yourself with
80
your editing program’s automatic features in the rare cases where they will be
useful. Just don’t overdo it; each adjustment involves data loss.
The automatic enhancement features of an photo editing program can fix
many problems quickly. Auto enhancement functions of one type or another
are included in nearly every photo editing application. There's no harm in
trying them often, as the “Undo” function allows you to reverse the last editing
action you performed.
Below is a short list of the most common auto enhancement features. As
you try out these features, improving some pictures and having little or no
effect on others, you'll begin to get a feel for diagnosing image quality ills and
prescribing editing cures.
Check your editing program to see which specific features it offers; they
will often be named something similar to the descriptions below. Remember,
don’t be shy about trying an adjustment; if it doesn’t work, just reverse it with
the “Undo” command (and you have previously saved an untouched version
of the photo, haven’t you?).
•
Auto brightness and contrast/auto levels. Use auto brightness and
contrast (and the similar auto levels) to fix underexposed (too dark)
photos, as well as ones and with too little contrast which will look dull
and muddy. You can also try it with overexposed photos or those
with too much contrast, but it's a lot less effective for those problems.
•
Auto color correct/color cast removal. Use this feature to correct color
casts, such as the overall blue tinge that can afflict a photo taken in
the shade, or the yellow cast of pictures taken indoors without flash.
Auto color correction is less reliable than auto levels, but that's mostly
because color correction is inherently tricky. One of the trickier
aspects of color correction is the fact that some of the most
spectacular pictures look best with their color cast left intact, or even
enhanced. Automatic color correction may remove the warmth of the
color, when the warmth is what makes the picture look its best. Not
all pictures are meant to be free of color casts; the trick is to judge
whether a picture appears most pleasing with its color cast retained or
removed.
NOTE: One more reliable way to adjust colors is by setting the white
point in an image, as long as your photo contains something that is
gray, white or black. In Photoshop Elements, go to Enhance > Adjust
Color > Remove Color Cast. Click on a part of the image that is
clearly gray, white or black and see the automatic result. If it works –
fine; if not, just cancel.
•
Auto color enhance/auto hue and saturation.
This command
increases the saturation, or vividness, of your picture's colors.
Sometimes the results are great, sometimes not. This is one feature
where the "try it out, undo it if it looks bad" strategy really applies. As
a general rule, you can pump up the vividness of colors the most
when the picture is to be viewed on-screen only. If the picture is to be
81
printed as well, then consider a more restrained approach, as you
may find that the vivid color you saw on your monitor takes on an
unnatural, overdone appearance when printed.
•
Auto focus. This feature really works in some cases.
•
Sharpen. Easier to use than a function like Photoshop's Unsharp
Mask, the standard “Sharpen” command in many photo editors gives
a quick-and-dirty boost to your photo's detail, and may well make it
look right for viewing on the Web or in an on-screen slide show.
Unfortunately, automatic sharpening isn't as effective when pictures
are destined to be printed, since the optimum amount of sharpening
will depend on the size of the print, the quality of the printer and other
factors. Your photo editor may include a function that varies the
sharpening applied based on certain printing parameters. If it doesn't,
learn to use the Unsharp Mask filter, which can be tricky to learn but
is a solid, sturdy sharpening tool.
Avoid sharpening low-quality images and highly compressed (smaller
file size) JPEG images. Low quality images often have small
imperfections (artifacts) which can become much more apparent
when sharpening them.
Only apply sharpening after you’ve performed all your other
corrections and edits, because sharpening can be a very destructive
operation.
Editing RAW Photos
By shooting in the RAW mode, you add an extra step to the editing
process. You have to use some form of a raw conversion process, because
all the processing that normally happens in the camera is sent to your
computer for processing. On the upside, you have more control and flexibility
because of this.
Different cameras produce different types of raw files, and there are no
generally accepted standards (as there is for JPEG or TIF files). That is why
camera vendors bundle a raw conversion program with their cameras.
Previewing
When you import your RAW images, some applications will allow you to
view thumbnails and previews from within Windows Explorer. For example,
dpMagic (www.dpmagic.com) makes a free program for Windows called
“dpMagicCommunity” that allows you to view thumbnails inside Explorer (a
$10.00 version adds full-screen previews and histograms, and supports
Adobe Digital Negative files). Photoshop Camera Raw (built into Photoshop
and Photoshop Elements) supports many camera types and can import RAW
files from all the major camera makers. Also, the free Microsoft RAW Image
Thumbnailer and Viewer download provides thumbnails, previews, printing,
82
and metadata display for RAW photos from most Canon and Nikon digital
cameras on Windows XP.
Browsers are built into most raw conversion programs (e.g., Photoshop,
Photoshop Elements, or the program supplied with your camera such as
Nikon Capture NX), so you can browse and compare thumbnails of your
photos just as you do with JPEG photos.
All cameras store a low-resolution JPEG preview of the RAW file inside
the file itself, and many applications can show this preview.
Some
applications also perform an initial raw conversion that yields a very good
image that you may not have to adjust further.
Editing
If you’re using Photoshop or your camera’s raw converter, you’ll convert
your image files, save them (usually as a TIF or Photoshop file), and then
perform any additional edits (if needed) in your normal photo editor.
The raw converter provides tools that will let you alter exposure, white
balance, color and other parameters your camera normally does automatically
when you’re shooting in JPEG mode. Some of the tools are no different that
what you find in your normal photo editor, but some provide capabilities not
found when working with non-RAW images. However, all the edits you make
in a raw converter are non-destructive (i.e., the original file is never altered),
because they don’t contain usable image data.
You usually approach raw conversion the same way you approach any
type of photo editing: Begin with cropping, then correct contrast and tone, and
then correct the color. [Some converters also let you remove dust and spots.]
With RAW files, you may first want to change the white balance of the
image before performing any other edits. Most provide a simple “White
Balance” slider (and eyedropper) that allows you to adjust the white balance
from blue to yellow. Since this adjustment is non-destructive, no tones are
deleted as you make the white balance adjustment. Note: If you use the
eyedropper, click on something that is neutral gray (not white). Therefore, if
possible, make your color adjustments using the white balance adjustment.
The “Exposure” slider in the raw converter is similar to the White Point
slider in the “Levels” dialog box we discussed previously. As you move the
slider the image will get brighter. Be careful not to clip any of the highlight
and shadow tones.
The “Brightness” slider is a midpoint (gamma) adjustment that brightens
or darkens the mid-tones of the image without altering the white and black
points. Again, be careful not to clip any highlights.
Some converters have a “Contrast” slider that simultaneously makes
black and white point adjustments. Watch for clipping on both ends of the
histogram.
Aside from these basic adjustments, many converters provide other
capabilities such as highlight recovery, shadow control, saturation
adjustments, sharpening and noise reduction. Practice with them to become
familiar with their usefulness.
83
7.2.1.3 Add Text or Symbols
Most editing applications let you insert text or graphic symbols on a photo.
Normally this done with a “Type” tool found in the program’s toolbox or on the
toolbar. You can insert text horizontally or vertically, and control the font,
style, size and color. Many programs also allow you to insert symbols such
as arrows, circles, and squares. You can use these features to describe the
photo, highlight a target’s location, to label a road, or to point out a highvoltage power line or tower. Just don’t overdo it.
Make sure the font type, size and color make the text/symbols readable
against the background, and that it does not cover or blend into the important
sections of the photo.
Note: Many editing programs allow you to edit the text initially, but if you
change tools and do something else the text is no longer editable. If you later
decide the color or font size isn’t right, you will have to select and delete the
text and begin anew.
7.2.1.4 Save in Desired Format
When you use “Save as JPEG” your application usually presents a sliding
scale of options marked on one end by Compression and the other by Quality.
But the scale is unique to each application. In some cases its numeric (from 0
to 4 or 0 to 100 or 100 to 0), while in others it's broadly descriptive (small to
high). Experiment with different settings on the same picture, then open them
after saving and look at the difference.
84
Resize
You can reduce file size using the 'resize' feature found in most photo
editing software. Plus, many programs give you the opportunity to reduce file
size during the “Save”' or “Save As” functions. Many editing programs also
show you the file size (and sometimes the transfer rate) of the result you have
selected when you use “Save As”. This is a very handy feature. In the
example above the ‘Save As’ dialog box shows the image file to be
approximately 124 KB, which would take about 22 seconds to send over a 56
Kbps modem. If you selected the drop-box and changed the speed to 512
Kbps it shows the file could be sent in about 2.4 seconds.
If all you need to do with an photo is e-mail it to a customer who is only
going to view it on a computer monitor, then you should resize it to a size that
will display easily on the typical monitor. One way is to shrink the file so that
its longest dimension (length or width) is no more than 600 pixels. In
Photoshop Elements, choose Image > Resize > Image Resize from the menu
and enter the change in the ‘Pixel Dimensions’ section on top of the dialog
box:
85
In the example, the original image was 1796 pixels in width and 968
pixels in height and the document was 25 inches wide and 13.44 inches high.
Once you entered 600 pixels in the pixel dimension width box, the program
automatically adjusted the other dimensions to maintain the proper aspect
ratio. Now the document is less than 8.5" x 5" which will easily display on a
monitor. [Note: You can accomplish the same result by reducing the
document dimensions, say 8.5" or 4" in width to get an 8.5" x 5" or 4" x 6"
document.]
86
Chapter
8. Send Photos to the Customer
8
Airborne Photographers have to know how to send photos to a customer using e-mail,
and how to transfer photos to a USB thumb drive.
The Videography Information Technology (VIT) Specialist must know all the methods
available to send photos and video to the customer, including electronic and by
messenger.
OBJECTIVES:
1.
Discuss how to send photos by e-mail, including potential problems
with large files and anti-spam software.
Send a photo via e-mail. [AP-O-003; VIT-O-002]
2.
Discuss File Transfer Protocol and the advantage it has over sending
photos by e-mail.
If you have access to an FTP site, up-load a photo to the site.
[VIT-O-002]
3.
Discuss how to upload photos to an internet site.
Upload a photo to a website (if available). [VIT-O-002]
4.
Discuss other methods to deliver photos or video if the internet is not
available. [VIT-O-002]
5.
Demonstrate how to transfer photos to a USB thumb drive. [AP-O-003;
VIT-O-002]
6.
Discuss how to digitize 35mm film photos. [VIT-O-002]
87
8.1 Sending Photos by E-Mail
Sending and receiving photos by e-mail can be challenging. Internet Service
Providers (ISPs) limit the size of individual files and attachments to 1 or 2 GB (you
can usually assume the limit is 1 GB) or if they do make it through the recipient
may have problems viewing them, especially if they are using an older computer.
[See the discussion on the WinZip Courier service at the end of this section for a
means of delivering files up to 100 MB.]
NOTE: If both your and the customer’s ISP allows large file transfers, just
ensure the number of photos you’re sending in each e-mail adds up to a number
lower than the limit.
NOTE: Many ISPs and/or users have anti-spam software installed. If the
recipient tells you they haven’t received your e-mail, ask them to ensure their ISP
and/or personal anti-spam program is set to receive files sent using your e-mail
address.
Before you send photos across the internet, get them into a form guaranteed
to be readable on the other end and that doesn't take up too much space. The
common JPEG format should be considered mandatory for e-mail; avoid BMP,
TIF, or RAW unless your customer has special requirements. If you have picture
in something other than JPEG, use your editing or e-mail software to convert it to
JPEG before you send it.
Intended use by customer
Photo viewed on computer only
Photo printed at 4" x 6"
Photo printed at 5" x 7"
Size to send
640 pixels x 480 pixels
800 pixels x 600 pixels
1024 pixels x 768 pixels
If you have trouble sending or receiving a group of digital photos over the
Internet, try sending each photo in a separate e-mail.
If you are sending uncompressed files (e.g., RAW or TIF) you can reduce the
image file by “zipping” it using Windows or a compression program such as
WinZip or PKZip. However, image files that are already compressed (e.g., JPEG)
won’t benefit, and WinZip can even increase the file size. Compressing large files
is easy to do in Windows XP: simply right-click a file or group of files, select Send
To > Compressed (zipped) Folder and then attach this folder to an e-mail. When
sending a bunch of pictures, it’s much easier to send a compressed folder than to
e-mail the photos individually.
8.1.1 Attach to E-Mail
The simplest way to attach a photo file to an e-mail is to open your e-mail
program and attach the image file. However Windows gives you an easy way to
resize (or not) your photos, attach them to your e-mail and send them.
Navigate to the folder containing your photos in Windows Explorer. You then
select the photo(s) you want to send, right-click on the photo(s), scroll down to
88
“Send To” and then select “Mail Recipient” from the list. When you release the
mouse key Windows will open a message box giving you two options:
If you want to sent the photos as is, select “Keep the original sizes” and click
“OK.”
All that’s left to do is to enter your customer’s e-mail address and hit Send.
If the customer just wants to view the photos on a computer screen or
monitor, leave the default “Make all my pictures smaller” selected and click “OK.”
89
Note the “Attach” section of the e-mail: the photo was reduced from its original 3
MB (above) to 69.4 KB (below).
Sending the reduced-size photos is a good way to send many large-size
photos to the customer for a quick assessment. You can then follow up by
sending the photos in their original size for a detailed assessment.
Another easy way to perform this task is by selecting “E-mail this file” from the
“File and Folder Tasks” section of Explorer (left-side of the screen, below). After
this, the process is the same as described above.
[Note: If you don’t see a screen like the one below with the picture task panes
displayed on the left-hand side, but instead see a folder tree, simply close this
display (select the ‘x’) and the picture task frames will appear. To go back to the
folder tree display, select “Folders” on the task bar.]
90
8.1.2 WinZip Courier Service
WinZip Courier (http://winzip.yousendit.com) has a free service that allows
you to send files up to 100 MB in size. These files can be downloaded by the
person or organization you send them to for up to seven days. There is a limit of
1 GB per month for this free service.
91
If you need to send multiple files, you can subscribe to the Plus service for
$4.99 per month. This increases the file size limit to 2 GB with a monthly limit of
40 GB, allows up to 200 downloads per file, backs up your files, and gives
recipients up to 14 days to download the files.
8.2 Sending Photos by File Transfer Protocol
File Transfer Protocol (FTP) is a standard way of sending and receiving files
between your computer and any other computer on the Internet that supports
FTP. There are many FTP applications out there that are simple and user friendly
such as CuteFTP Lite (www.cuteftp.com/cuteftplite). This application allows you
to connect to a defined site and send and receive files by simply dragging and
dropping.
8.2.1 Set up an FTP Site
The first step is to connect to an FTP site, which is usually provided by CAP
or the customer:
a. Click on the "Personal FTP Sites" folder.
b. Now click on the "Add Site" button, which will open an additional dialog
box.
c.
Label the site.
d. Type the address of the site.
e. You can login two ways:
1) If you have a user ID and password for the site, enter them in the
appropriate fields.
2) If you do not have your own account, enter "Anonymous" in the user
ID field and leave the password field empty.
f.
Change the transfer type to be binary or image.
g. Choose "Auto-Detect" for host type.
h. When all proper information has been entered, click O.K.
i.
Connect to the site, by choosing the label from the list, and clicking on
"Connect."
NOTE: The site you just connected to will appear in the FTP Site Manager
window. For future sessions you just select the site name and click the
connect button.
92
The next step is to send the photos:
a. A new window appears containing your local PC directories and files and
also the connected site's directories and files.
b. At this point you can transfer photos from your system to the FTP site, or
retrieve photos from the FTP site and drag them to your system.
c.
Navigate to the location where you want to put the image/file (either on
your system or the FTP site).
d. Navigate to the desired photo.
e. Select the photo you want transferred, and drag-and-drop it to the desired
location.
f.
Your file should appear, wherever you sent it.
8.2.2 Upload to a Configured FTP Site
a. Connect to the FTP site.
b. Enter the Username and Password provided by Mission Staff.
c.
Navigate to the location where you are to put your photos, if necessary.
d. Drag your photos onto the site (example drag & drop setup shown below).
8.3 Upload to an Internet Site
Sometimes a website is established for crews to upload their mission photos.
For example, Texas Wing Group 3 set up a site for a Distributed SAREX (07-T3600).
93
a. Enter the site’s URL in your browser and then enter a Username and
Password provided by Mission Base Staff. The site displays a list of
current missions.
b. When you select mission 07-T-3600 you are sent to the upload page.
c.
94
Simply fill in the blocks, browse to your photo, and submit the photo for
upload.
8.4 Upload Photos to WMIRS
When enabled by mission command, the Web Mission Information Reporting
System (WMIRS) provides an easy method of uploading mission images. The
program automatically watermarks the images using information you enter before
uploading the image.
a. Log into WMIRS and select “Current Missions/Sorties.”
b. Select the camera icon for the associated sortie.
c.
Mission images already uploaded will be displayed on a map or can be
selected by date.
d. When you select the icon on the map it will display a thumbnail image;
click on the image to enlarge.
95
e. When you scroll down you can display the images by date; click on the
image to enlarge.
f. To upload a new image, select "Add Image."
g. Fill in the image information and select "UPLOAD IMAGE."
96
h. The program automatically loads the image and displays it on the map
and at the bottom of the page (arranged by date).
i.
Note the watermarks added to the top- and bottom-left of the image.
8.5 Share Photos using Google Docs ®
®
If you have a Gmail account you can upload photos and share them via email invitation.
a. Select "Documents" from the Gmail tool bar.
b. Select the "Upload" button.
c. Select and upload your photos.
d. Select "Back to Google Docs"
e. Check the items you wish to share and select "Invite People" from the
"Share" drop-down menu.
f. Enter the e-mail address and write your message, then select "Send"
If the e-mail was sent to another Gmail account they will be delivered into the
account. If the e-mail goes to another account, they will receive a link to the
uploaded photos.
97
8.6 Deliver Photos or Video via Messenger
Sometimes the internet will not be working, but you still need to deliver your
photos or video to a customer.
a. Save the photos onto a USB thumb drive (also called flash or pen drives)
and send that to the customer. Since the price of these devices is so low,
you should consider keeping a couple 2G thumb drives for this purpose.
If the customer doesn’t return them, you can claim them as an expense
under “Comm/Other Cost Claimed” on the CAPF 108.
b. If you have a working computer with a burner, you can burn the
photos/video onto a thumb drive, CD or DVD. If you don’t have a working
computer, many stores have easy-to-use kiosks that will burn your digital
photos onto a CD.
c.
For video, if you have a working computer and the necessary software
you can transfer the video onto the computer and then transfer the video
onto a large thumb drive or burn it onto a CD or DVD. However, not all
bases have this capability.
In this case you will probably have to take the video camera to the customer.
Just sending the video tape may not work, as the customer may not have the
capability to display the type of media your camera uses.
98
8.7 Digitizing 35mm Film Photos
You may need to “digitize” photos taken with a 35mm film camera. There are
a couple of ways to do this.
8.7.1 Transfer the Photos to a CD
Several stores have services or kiosks that allow you to transfer 35mm film
onto a CD. You can then transfer these onto your computer and send them over
the internet, or deliver the CD by messenger.
8.7.2 Scan the Photos
Another way to digitize 35mm film is to scan the prints into your computer.
Scanner resolution is specified in dots per inch (dpi), and resolution is a rough
measure of the scanner's ability to capture small details in your film or print.
Optical resolution, as opposed to interpolated resolution, is the spec that matters.
You'll often see flatbed scanner resolution expressed as two numbers, such as
600 x 1200. The first number, the scanner's vertical optical resolution, is the most
important and should be at least 600 dpi for good quality scans of photographs. A
high quality film scanner, by comparison, will have a resolution of more than 2000
dpi, and top-notch units now go as high as 4000 dpi. Ignore the often astronomical
figures that scanner companies list for interpolated resolution; they're
meaningless.
Nearly all new scanners connect to your computer via USB or FireWire (IEEE
1394 or i.Link) interfaces, and most are Plug-and-Play compatible with Windows.
Windows also includes a handy Scanner and Camera Wizard (discussed in the
chapter on “Transferring and Organizing Images”), which will take you step-bystep through the process of getting your print and film pictures into your computer.
The wizard should appear as soon as you turn on your scanner, or you can open
it by selecting Start > Control Panel > Scanners and Cameras and then selecting
your scanner. For example, we’ll use the wizard to scan in a 35mm photo of an
aircraft crash:
99
Click ‘Preview’ (as was done in this example) and, if there is only one photo
on the scanner platen, the wizard will automatically select it. You can drag the
scanning boundaries to select and scan only a particular section of the image.
You can put several photos on your scanner at once and choose the scanning
area for each of them by hand. When you click ‘Scan’ the wizard asks for a group
name and the file type you want (i.e., BMP, JPEG, TIF and PNG). If you want to
scan several pictures one after another click ‘Back’ instead of ‘Finish’ on the final
screen.
Choosing ‘Custom’ and then ‘Custom settings’ enables you to pick the
brightness, contrast and resolution to scan at as well as setting whether it’s a
color, grayscale, or black and white photo. You can only use the optical resolution
of the scanner because the wizard can’t do interpolation, unlike the software that’s
designed to drive the scanner.
Scan at the size and resolution appropriate to the photo’s destination. If you
scan the photo at too large a size the file will contain a lot of unnecessary data,
resulting in overly long uploads and downloads. If you scan at too small a size the
photo won’t contain enough data. Both of these extremes can degrade image
quality.
Finally, give the file a descriptive name:
100
Today’s scanners support resolutions as high as 2800 dots per inch (dpi), but
at that resolution you’ll waste time and space creating files that are hundreds of
megabytes in size. Instead, set the photo’s physical dimensions (width and
height) to exactly what you need (e.g., 1.5" x 2.5"), and then set the resolution per
the chart below.
For:
E-mail
Web pages
Desktop printer
Optical Character Recognition (OCR)
Scan at:
72 dpi
72 – 100 dpi
72 – 100 dpi
300 dpi
Remember to clean the glass platen before and after you scan. Use antistatic
canned air or cloth, or a camel’s hair brush.
101
Intentionally blank
102
Chapter
9. Printing Photos
9
Printer technology has advanced to the point where you can now print photos that
look as good as those you get from a 35mm camera. And digital photos can be
adjusted so they print out in just about any way you want.
OBJECTIVES:
This chapter is for reference only.
103
9.1 Printers and Image Resolution
The two main types of printers are laser and inkjet. Laser printers are
generally faster and cheaper (per print); however, all but the most expensive ones
are better at printing text than they are at printing images. Inkjets are still the best
choice for printing photos, even though they are slower and usually cost more per
print. In this chapter we will discuss printing on inkjet printers.
9.1.1 Image Resolution
Image resolution plays a huge role when it comes to printing: the higher the
resolution the larger the printing options. In order to get the best prints from your
printer, you need to experiment. Choose a high-quality image and sample it at
different sizes; print each one and compare them to see where the quality
threshold lies with your printer. In our examples we’ll assume 200 dpi (printer
resolution is measured in dots per inch, and the better inkjet printers print at 200 300 dpi). Note: Setting the dpi larger than it needs to be doesn’t translate into
better quality pictures -- you’ll just make the file larger.
To determine how big your photo should be before you print it, just multiply
the output size (in inches) by 200. The following table illustrates the minimum
dimensions your photo needs to be in order to produce a certain print size:
To obtain this print size (inches)
4x6
5x7
8 x 10
11 x 17
You need this file size (pixels)
800 x 1200
1000 x 1400
1600 x 1200
2200 x 3400
As this table shows, it takes a lot of pixels to make a high-quality photo.
Luckily, many printers will still give you very good photos even if your use an
image with a lower than ideal resolution. See the “Resizing” section, below, for
directions on resizing an image with the proper resolution. And remember that if
the output size isn’t as important as having a sharp print, just print the photo
smaller.
You can determine a photo’s resolution in any folder in Windows, or in most
photo editing software programs. To find resolution information in a Windows
folder:
•
•
Navigate to the photo and move your cursor over the photo
A ‘balloon’ will appear containing the photo dimensions, type, and size
9.1.2 Photo Printing Wizard
Windows makes printing fast and easy with the help of the Photo Printing
Wizard. If your photo is in the ‘My Pictures’ folder, select the photo you want to
print, select ‘Print this picture’ under the “Picture Tasks” on the left side of the ‘My
Pictures’ window. If your photo is in a folder other than ‘My Pictures’, you get to
104
the Photo Printing Wizard by right-clicking on the photo and selecting ‘Print’. The
wizard then takes you through the printing set-up, including a wide variety of
layout options ranging from a contact sheet to one 8" x 10" photo or a sheet full of
nine wallet-size photos.
9.1.3 Printing Services
Printing kiosks now appear in stores such as Wal-Mart and Sam’s Club, drug
and grocery stores, and in stores that used to have dedicated photo services such
as One Hour Photo. The quality and low cost of these kiosks now rival the better
photo printers. If you rarely print photos, these services are the better choice for
you when you compare them against the cost of buying and maintaining a photoquality inkjet printer, inks, and paper.
9.2 Printer Adjustments
What you can control depends on the printer. In general, you should be able
to change the paper size and type, adjust the color so it better matches what’s on
the computer’s monitor, apply special effects, and so on. The key to trouble-free
printing is knowing what settings the printer needs to produce the quality
photograph you want. A little practice and a few test prints help you discover what
works best. Here are some things to consider:
•
Choose photo quality. If you use one printer for all your printing, the
printer driver may need to be switched to a "photo quality" setting. This
lets the printer know that you are printing photos and not just text
documents.
•
Adjust color and sharpness. Experiment with settings that affect how the
printer adjusts color and sharpness during the printing process. With
printers designed to deliver photographic quality, these settings are often
carefully tuned and can really improve your results. Find the right
combination of settings and your prints will improve dramatically.
•
Adjust paper type. While changing settings in the driver, check if there
are options for telling the printer what type of paper you are using. Letting
the printer know if you are using glossy, matte or luster surface paper
helps it apply the right amount of ink for the paper’s surface.
•
Use high quality paper. Remember that better paper makes better prints.
Always use a coated, photo-quality paper rather than regular copy paper.
Find a paper that fits your printing needs and stick with it.
•
Verify layout options. While editing, you may have cropped your photo to
something other than a standard size (e.g., 4" x 6" or 5" x 7"). Your
printer may automatically crop or resize the photo to fit a standard size,
which may or may not be what you want. Verify your layout options, or
see how the printer prints the photo through the “Print Preview” option if
your program or printer software offers that.
105
9.3 Resizing
Getting an image to the right size and with the appropriate resolution (dpi)
before you print it is an important step. Resizing and setting to the correct
resolution within your photo editing program before printing the photo must be
done for each photo that is printed. This is an important step before printing on
inkjet printers and when using online photo print services. When you use a digital
camera you will notice that all of your photos will come from your camera set at 72
dpi at a large print size. This relationship between print size and resolution (dpi)
must be set correctly.
As an example, the following shows how to resize an image using Photoshop
Elements.
Select Image > Resize > Image Size to make changes. When images come
directly out of a digital camera the image will appear as a 72 dpi file (see the left
figure, below). In order to print the image on paper clearly, you will need to resize
the image so that you have between 200 and 300 dpi (the closer to 300 dpi the
better the quality of the print; see the right figure, below).
When the ‘Image Size’ dialog appears, uncheck the “Resample Image” box;
this will prevent the image from being scaled or interpolated, and will keep all of
the image information (the details captured by the camera) just as they were when
taken by the camera.
To resize the image, set either the width or height to the print dimensions you
would like. Once you set one dimension, the other will adjust proportionally. You
will notice that the document size will change and become smaller and the
resolution will increase if you began with a 72 dpi file. To ensure that you have
sufficient resolution, select between 200 and 300 pixels per inch (you have to
experiment to determine your printer’s best settings).
If you know what image resolution is best for your printer, you can enter this
into the ‘Resolution’ field and press the Tab key. The program will then calculate
an image size. You can use this feature to ascertain if the image has too much or
too little data to print at a particular resolution.
106
Once you have the desired size, you can click ‘OK’ to accept these changes
to the image.
9.4 Supplies
Choosing the type of paper for printing your photos is often a cost-benefit
decision. Use plain paper for working copies and everyday printing, and move up
to specialty paper for your finished (deliverable) product.
Photo paper is available in many weights and surface textures, and your
choice of surface has a big impact on the look of the print. High-gloss or premium
glossy surfaces generally give the richest, most colorful prints and most often
resemble glossy prints from a photo lab. A semi-gloss, or satin, surface doesn't
enhance color richness quite as much, but it provides a lower contrast and is often
pleasing for pictures of people. Matte surface papers are the lowest contrast of all
and a perfect choice for black and white printing, although prints on matte paper
generally last longer before fading than glossy prints.
Give photos about an hour to dry after printing; if a print will come in direct
contact with another surface (e.g., an envelope), let it dry for at least 24 hours. If
the room is hot or humid, give prints more time to dry, and avoid storing prints in
hot and humid areas.
Some newer models of printers create prints with more light fastness than
older printers, which is intended to create prints that resist fading when exposed
to light. These models often give a general limit (in years) for prints on various
types of paper. For example, Epson photo papers are advertised to last from six
to 27 years, depending on the type of paper you use.
You also can buy many different kinds of ink for your printer. If you don’t print
pictures often, its best to stick with the ink recommended for your particular
printer. And always keep a spare set of ink cartridges (especially the black) on
hand.
One reason to check out after-market inks is to get a better deal; many are
cheaper than ink from your printer manufacturer. Be aware, though, that not all
inks are created equal: cheaper inks may not give you the same variety and
vibrancy in your colors, they may fade quicker than better inks, and you may also
void your printer's warranty by deviating from recommended inks (which are
invariably the inks sold by the printer's manufacturer).
107
Intentionally blank
108
Chapter
10. Between Missions: Keeping
the Camera and Accessories
Mission Ready
10
The Airborne Photographer and the Videography Information Technology (VIT)
Specialist both need to know how to properly store and maintain the
camera/camcorder and accessories between missions, so they will be ready on short
notice.
You never know when you’ll be called for a video imaging mission, so you need to
assume it will come at the most unexpected and inconvenient time. Therefore it is
important that the equipment you need will be ready to go.
The VIT Specialist will normally maintain photography equipment between missions,
but Airborne Photographers also need to know how to do this. The VIT Specialist
usually instructs AP trainees in the proper operation, maintenance and storage of
photography equipment and accessories, and periodically reviews these procedures
with Videography crew members.
Each camera and camcorder should be kept in a camera bag, along with its
accessories. As a minimum, your camera bag should contain spare batteries, a
battery charger, lens cleaners, and spare media cards or tapes. Additionally, your
camera/camcorder should have a sturdy wrist strap attached (try and explain how you
dropped an expensive digital camera out the aircraft’s window!).
It is also a good idea to create a one-page “camera set-up” card to put in your camera
bag. This quick-check item should list normal camera settings (e.g., exposure mode,
resolution and quality), checking the batteries, checking the media card, checking
cleanliness, checking the filter installed, etc. If you wish, you could also list the
camera bag inventory on the reverse. Once completed, trim and laminate the card
and keep it in the camera bag.
Don’t store your camera where it will be exposed to extreme heat or cold, or near a
strong magnetic field (e.g., TV set or radio).
Don’t put moth balls in your camera bag; take the camera out of storage every 4-6
weeks to help prevent mold and mildew.
Inspect the camera/camcorder periodically and inventory the camera bag contents.
Replenish as necessary.
109
OBJECTIVES:
1.
Describe the contents of a typical mission camera/camcorder bag.
[AP-P-003; VIT-P-004]
2.
Describe the storage requirements of a camera /camcorder/GPS and its
batteries, and discuss how to properly charge a battery.
[AP-P-003; VIT-P-004]
3.
Discuss how to clean a camera lens, LCD, and viewfinder.
Clean a camera LCD screen and viewfinder. [AP-P-003; VIT-P-004]
4.
Discuss the purpose and use of UV and polarizing filters.
Fit, clean and remove a filter on a camera lens.
[AP-P-003; VIT-P-004]
5.
110
Discuss the storage and use of media cards. [AP-P-003; VIT-P-004]
10.1 Batteries
Most manufacturers suggest removing the camera (and portable GPS)
batteries if the camera/GPS is not used for two weeks or longer. Even modern
batteries can leak or corrode (especially when discharged), and sometimes small
amounts of this material can coat the electric contacts, which can render the
camera inoperative.
Don’t mix fresh and used batteries in the camera, and don’t mix different kinds
of batteries (e.g., two regular alkaline and two rechargeable batteries, or to NiMH
and two lithium ion rechargeable batteries).
Be careful to insert the batteries (+ and - ends) according to the camera’s
polarity diagram, which is usually depicted on the inside of the battery cover.
When you insert batteries, turn on the camera – it should start normally and
shows a full charge. Otherwise, turn off the camera and check that the batteries
are inserted properly.
Don’t leave batteries plugged into a battery charger; once the batteries have
been fully charged, remove them from the charger and store them at room
temperature.
Use a charger that is designed for the battery: NiMH batteries should only be
charged in a charger designed for NiMH batteries, and high-capacity batteries
need a high-capacity charger.
Use standard chargers rather than “rapid” chargers; rapid chargers tend to
undercharge batteries by as much as 20%. Choosing the wrong charger can
make a big difference; the worst chargers (in terms of completeness-of-charge)
produce "charged" batteries with only half the stored energy of ones charged with
the best chargers.
Once charged, Lithium Ion batteries don’t lose very much of their power while
being stored; single-use Lithium Ion batteries are essentially unaffected by sitting
unused for several years. However, NiMH batteries don’t maintain their charge as
well; their charge gradually dissipates while sitting on the shelf. Get in the habit of
recharging batteries when you’re done shooting, and always have at least two
fully-charged sets of batteries: one in the camera and one in the camera bag so
you’re always ready for a mission. Also, it is best to charge batteries as a set so
that they grow old together.
Use the AC adapter when you perform extensive editing on pictures stored in
your camera or when you’re downloading your photos through the camera’s cable
connector.
Assign someone to check the batteries and charge them as needed (maybe
in conjunction with one of your periodic meetings).
10.2 Lenses and LCD/Viewfinder
The lens, LCD, and viewfinder must be kept clean and protected from
scratches. Ensure lens caps are kept in place anytime the camera isn’t being
used, and that the cap is secured to the camera with a strap. Cleaning supplies
(as recommended by the manufacturer) should be kept in the camera bag.
111
10.2.1 Cleaning the Lens
The best way to ensure a clean lens is not to let it get dirty in the first place!
Always keep a lens cover over the lens, and use the lens cap when the camera is
not in use.
Read your camera’s User Manual! Many recommend that you do not try to
clean the lens but instead take it to a dealer or other professional.
Most lenses are coated with a micro-thin anti-reflection coating. Although
lens coatings are resilient, they are still relatively easy to permanently scratch.
Once a lens is badly scratched, its sharpness is diminished and the image
contrast is reduced. A scratched lens is quite costly to repair; in fact, it's generally
less expensive to replace the lens than to try to repair it.
Each time the lens is cleaned there is the risk of tiny abrasive particles
present in the tissue, creating microscopic scratches in the coating. For this
reason a lens should not be routinely cleaned (the way you regularly wash your
hands, for example); a lens should only be cleaned when you see dirt or dust on
the lens surface.
Small quantities of dust on a lens will not appreciably affect image quality, but
fingerprints or oily smudges are a different matter. If not promptly removed, the
acids in fingerprints can permanently etch themselves into a lens coating.
And believe it or not, there is a right way and a wrong way to clean a lens.
Clean it correctly and you’ll maintain peak optical performance; clean it the wrong
way and you could scratch the lens.
a. Carefully blow off any dust or dirt, using a blower brush or (very carefully!)
compressed air. If you use a brush, do not let the fine bristles of the
brush touch your hand or fingers; oil from your skin will be transferred to
the bristles and then smeared on the lens.
b. Dampen a lens tissue with lens cleaner and very gently rub the lens in a
circular motion. While very gently rubbing, turn or roll the tissue slightly
so that any dirt will not be rubbed over the lens surface. [Note: Never drip
lens cleaner directly on a lens; it can easily seep behind lens elements
and create a major problem.]
c.
Gently wipe the lens surface from the edges toward the center of the lens,
with a lifting rather than rubbing action. A micro-fiber cleaning cloth is a
good alternative to lens tissue and requires no lens-cleaning fluid. Do not
reuse cleaning tissue, and keep any micro-fiber cleaning cloths in their
original containers to keep them clean. Micro-fiber cloths are washable
and can be tossed in with your laundry periodically. [Don't clean a lens
with silicon-treated lens tissues or the silicon-impregnated cloths
commonly sold for cleaning eyeglasses as the residue may permanently
discolor the coating. And don’t use a cotton T-shirt or other fabric, which
may have embedded grit in the material.]
10.2.2 Condensation
Condensation or raindrops on the lens can distort or even totally obscure an
image. When a camera is taken from a cool area into warm air, the lens
112
frequently fogs up; this can be a real problem in cool climates when camera
equipment is brought inside after being outside in the cold for some time.
Even though moisture may be wiped off the lens, the lens may continue to fog
up until its temperature equals the surrounding air.
Condensation can also take place within a camera or camcorder and cause
major problems. For this reason, most camcorders have a dew indicator that
detects moisture or condensation within the unit and shuts it down until the
moisture has evaporated. A message such as "DEW" will typically be displayed in
the viewfinder.
To control the effects of condensation, you should allow 20-30 minutes warmup time whenever you bring a camera or camcorder from a cold to a warm
environment. Also, putting the camera in a plastic bag will help prevent the lens
from becoming foggy; if condensation does form, it will do so on the bag instead
of the camera. [Note: Do not store your camera in a plastic bag; the case can
deteriorate.]
If condensation occurs, remove the memory card and battery from their
compartments and keep the doors open until everything dries out, and remove the
lens cap. Don't take the camera or camcorder out into the cold again until the
condensation is gone because the moisture may freeze, causing permanent
damage.
10.3 Filters
As a rule, filters are of little use with a digital camera except as a means to
physically protect your lens. Consider using a Skylight, 81A or UV filter, shooting
your pictures through it and removing it only when you're using another filter for
special effect. A damaged filter is much cheaper to replace than a lens.
Protection of this type is particularly important when the camera is used in high
winds where dirt or sleet can be blown into the lens.
10.3.1 UV Filter
Today's coated lenses don't transmit UV light, so a UV filter doesn’t add much
functionality. UV filters do slightly enhance image color and contrast, and can
reduce haze in distant scenes; this can bring the scene being photographed more
in line with what the eye sees. Video cameras tend to be rather sensitive to ultraviolet light, which can add a kind of haze to some scenes. This is the preferred
filter for CAP purposes, and mainly serves to protect the camera lens without
degrading quality or interfering with the camera’s automatic functions. Always use
a multicoated filter, which helps reduce glare and helps with light transmission
(which results in a brighter image).
10.3.2 Polarizing Filter
A polarizing filter is one that only passes light vibrating in a certain direction,
which is good for eliminating reflections from shiny surfaces such as glass or
water. Most autofocus cameras use polarization tricks as part of the autofocus
system. If needed, always use a ‘circular’ polarizing filter because ‘linear’
polarizing filters cannot be used effectively with most auto-exposure and
113
autofocus cameras. To use a polarizer, attach it to the end of your lens and rotate
it until the reflections are gone.
For CAP purposes, polarizing filters are usually only helpful when you are
shooting over or by water. You get a two-stop light penalty with a polarizer, and it
may be difficult to get a fast enough shutter speed when using the polarizer. Only
use a polarizer if you get more benefit from the polarizing action than the quality
loss from the longer shutter speeds required because of the light loss.
10.4 Media Cards
Keep your media cards (the one in the camera and the spares) empty
whenever possible. You don’t want to grab the camera for a mission, fly to the
target, and then discover that the card is full of photos from a previous mission.
Keep in the habit of transferring photos to a PC promptly, and then format or
erase the card before putting it back into the camera or into the camera bag as a
spare. Regularly formatting your memory cards will help prevent them from
becoming corrupted.
Avoid leaving media cards in direct sunlight, and don’t put them in your pocket
or other places where they can get bent or crushed.
Never write on media cards or put any kind of sticker on them to label their
contents. This can damage the card or the camera.
114
Chapter
11. Preparing for an Imaging
Sortie
11
The key to a successful imaging mission is preparation, planning, patience and
practice!
Airborne Photographers must know how to prepare for an imaging (photo or video)
sortie.
The great majority of our imaging missions are “fly back” missions, where we take
photos or video, return to base, and then transmit the photos/video to our customer.
Missions where we take photos and transmit them from the aircraft (the older Slow
Scan and the new Satellite Digital Imaging systems) require specialized equipment
and training. However, the way we plan and take the photos is the same whether it is
a fly back or SDIS mission.
Unique aspects of SDIS missions are discussed in a separate attachment.
OBJECTIVES:
1.
Discuss the basic difference between a “fly back” and SDIS mission.
2.
Discuss the importance of determining exactly what a customer expects
and needs from a particular imaging mission.
Using the Customer Imaging Request Checklist, discuss the importance
of determining exactly what a customer expects and needs from a
particular imaging mission. [AP-O-004]
3.
Concerning an aircrew briefing for an imaging mission, discuss:
[AP-O-004]
a.
Why it is important to be aware of the information necessary to
complete a successful mission, just as mission staff.
b.
Crewmember responsibilities during each phase of the flight.
c.
Factors to consider when determining sortie duration, including
rules of thumb for the time it takes to assess the target, fly
imaging patterns, review photos and re-shoot one photo.
115
d.
Effects of weather on an imaging sortie.
e.
The importance of the Photography Log.
f.
Special requirements for video sorties.
Obtain a briefing for an imaging sortie that includes both the “Four
Square” and “Bird’s Eye (Overview)” imaging patterns. [AP-O-004]
4.
Using diagrams, describe the basic types of imaging flight patterns and
when they are used. [AP-P-004]
5.
Discuss the importance of communications between the pilot and AP
and between the Photo Log keeper and AP, when proper
communication is of the greatest importance, and the types of
adjustments you may have to tell the pilot to make to properly frame a
target. [AP-P-004]
6.
Discuss factors that can affect the success of an imaging sortie,
including: [AP-P-005]
a.
b.
c.
d.
e.
7.
Artificial deadline
Vibration
Visibility
Focus
Wind
Using the Imaging Sortie Checklist, discuss:
a.
b.
c.
Inventorying your equipment
Adjusting the camera settings
Preparing the aircraft
Demonstrate equipment inventory and camera set up and aircraft
preparation using the Imaging Sortie Checklist. [AP-O-004]
116
11.1 Briefings
It is vital that the crew knows what the target is and what the customer wants,
so make sure that the customer has described both in order to avoid confusion
and cause the sortie to be re-flown because the results weren’t what the customer
expected. For example, the customer may ask you to take pictures of a levee
and, if there are any signs of flooding or seepage, to capture photos that show the
extent of the leakage. Also, the customer may dictate very strict requirements for
an imaging sortie, telling the crew what altitude to fly and the precise angle for the
photos or video. The customer may also require more than one picture be taken
from each direction or angle. Whatever the requirements, CAP aircrews can
deliver the desired results by getting a thorough briefing, which in turn allows you
to properly plan the sortie.
Sometimes the customer won’t spell out how they want the pictures taken, nor
will they tell you how many pictures to take. The orders you receive may just say
“Take pictures of the tornado damage” or “Get pictures of the Lake Meredith
dam.” In these cases, the mission briefer (or aircrew) must ask enough questions
to ensure the customer gets what they really want.
Note: Sometimes the customer really doesn’t know exactly what they want,
and truly mean for the crew to “Take pictures of the (whatever) damage.” In these
cases, the staff and imaging aircrews will use their knowledge of aerial imaging
and damage assessment to bring back pictures that will meet and usually exceed
the customer’s expectations.
Normally the mission staff will have obtained all the information the aircrew
needs and has prepared a thorough briefing. However, an imaging aircrew needs
to know all the information that is needed for a successful mission (and a satisfied
customer) so they can ask for any information that is missing from the prepared
briefing.
11.1.1 Determine the Customer’s Needs
You must know the purpose of the sortie and what the customer expects to
see as a result. The end use of the photos or video will determine what
equipment the aircrew needs to accomplish the mission, how they will set up the
camera/camcorder, and how they will plan and fly the sortie. Just as importantly,
understanding the customer’s objectives is vitally important for customer
satisfaction; if we don’t deliver they may never request CAP’s assistance again!
Mission command or staff is normally responsible for getting enough
information from the customer to conduct a thorough aircrew briefing, and satisfy
the customer’s needs. Some customers know exactly what they want and give
CAP a complete and detailed request. Some customers either assume you know
what they want or don’t give you enough information in the first place. Some
customers don’t really know what they want, but if the final product doesn’t meet
their (unvoiced) expectations they will be dissatisfied with CAP. So it is up to the
CAP to ensure they have enough information to plan and brief the imaging
mission.
117
Details you need include (the checklist is in Attachment 1):
a. What and where is the target? Get the exact location of the target(s).
Even though the customer just gives you a name or location (e.g., the
“Lake Meredith” dam or the “southwest part of Pampa”), try to define the
target location by at least two forms of navigational information such as
Lat/Long and VOR radial/DME. Also ensure that you get a good verbal
description of the target.
b. How the target and surrounding features should be photographed. Some
questions to ask are:
1) Is the target a single feature or facility, such as a building? If so, do
they want as close a picture as possible (e.g., completely filling the
frame)?
2) Does the customer want to see the target and its environs to allow a
larger perspective?
3) Does the customer want to see roads and/or power lines leading to or
from the target? If so, how far out from the target? You need this
information to determine if you can get the desired results in one
photo without losing the desired level of detail. You make have to
take several photos to get the desired results.
4) Does the customer want to see the extent of flooding below a dam or
levee, or the entire trail of debris from a tornado?
5) Does the customer want wide photos followed by close-ups?
6) Does the customer want the photos taken from a certain altitude
(AGL) or from a specific angle to the target? Or is it OK to change
altitudes and/or zoom as necessary to get the best shot? This will
affect how you plan and fly the imaging pattern.
c.
Does the customer care about lighting conditions over the target area?
The customer may not want photos taken under a heavy overcast, or in
early morning or late afternoon light.
Note: Commercial aerial
photography flight times are usually limited to between three hours after
sunrise and three hours before sunset; this ensures the sun angle is at
least 30° above the horizon.
d. What information do they want to accompany the photos (or be included
in a video’s audio commentary)? Accompanying information may include:
1) Altitude (MSL or AGL, or both)
2) Latitude and Longitude
3) Time (local or Zulu)
4) Distance from target (nautical or statue miles)
5) Direction to target (e.g., looking South)
6) Angle to target (e.g., 45°)
e. What photo format do they want?
Do they want JPEG or an
uncompressed photo (e.g., TIF or RAW) or both? This also helps you
118
determine how large (or how many) media cards you will need for the
sortie.
f.
What quality do they want (e.g., highest, medium or low)? This also helps
you determine how large (or how many) media cards you will need for the
sortie.
g. Do they mind if you crop photos, if needed? This will help you determine
if a particular photo you took is acceptable. If your photo contains part of
the wheel, wing tip or strut but is otherwise OK, and the customer doesn’t
mind you cropping the photo, then you won’t have to re-shoot the picture;
just crop the photo once you’re back at mission base.
h. Do they mind if you edit photos, if needed? This will also help you
determine if a particular photo or set of photos you took is acceptable. If
your photo was taken under cloud cover or some other condition that
affects lighting, but is otherwise OK, then you won’t have to re-shoot the
picture; just edit the photo once you’re back at mission base (assuming
the customer doesn’t mind you adjusting image brightness or contrast).
i.
Do they want you to add text or symbols to the photos? This may include
some of the information listed above, along with arrows or circles.
j.
How do they want you to name the photo files? Be specific, especially as
to the sequence of information contained in the file name. For example:
Date (dd//mm/yy) / mission number / sortie number / photo (sequential)
number.
k.
How do they want you to send the photos? If the customer wants you to
e-mail the photos this may affect file format and quality (file size) settings.
If you do e-mail the photos, ask what information the customer wants in
the “Subject” and “Remarks” areas of the e-mail.
l.
What is the e-mail address of the customer or customers? Do they want
you to cc: or bcc: anyone? Do they need to enter your e-mail address in
their “anti-spam” software so it isn’t blocked? Do they want you to call
before sending the photos, and if so, what is the phone number (plus a
backup)?
NOTE
The customer may ask for GPS coordinates to be written in either the
degrees/minutes or the decimal format. Just remember that there are 60
minutes in every degree of latitude or longitude.
To convert from degrees/minutes to the decimal format, just divide the
minutes by 60 (e.g., to convert 34° 30
′, divide 30 by 60; the result would
be written as 34.5). Usually the results are not written beyond three
119
decimal points. [Note: Seconds are usually not included, but may be
calculated in the same manner.]
To convert from the decimal to the degree/minute format, just multiply the
decimal by 60 (e.g., to convert 34.5 to degrees and minutes, multiply 60
by .5; the result would be written as 34° 30′).
Don’t worry about performing the conversions during the sortie; they can
be done once you’re back on the ground. Several converters can be
found
on
the
internet,
such
as
the
one
at
www.cosports.com/tools/gps_coords.htm.
11.1.2 Staff Briefing
Primarily IC/PSC and Briefers; IC/OSC and AOBD kept informed.
Once the mission staff is satisfied they have determined the mission
objectives, they will put together the briefing package for the aircrew(s). The staff
should also be careful not to pair an inexperienced pilot with an inexperienced
photographer; one or the other should be experienced in imaging missions. In
addition to the briefing items specific to the imaging mission (see above),
information should include:
• Terrain, obstacles and ground cover around the target(s).
• Weather (local and target area).
• Hazards to flight and military routes (local and search area).
• Aircraft separation (will others be in the area?).
• Communications call signs, frequencies and procedures.
• Time format (local or Zulu).
11.1.3 Aircrew Planning and Briefing
The Mission Pilot and Airborne Photographer should also be aware of the
information necessary to complete a successful mission, just as mission staff (see
above). This allows the aircrew to know whether or not they got a complete
briefing, and acts as a backup to mission staff. This information also is a factor in
deciding how the AP will set up the camera or camcorder. The Imaging Sortie
Checklist (Attachment 2) will help you in this process.
The AP and the Mission Pilot must work closely to ensure a successful
imaging mission. Planning the type of pattern(s) to be flown (see below for
examples) and reviewing the communications between the pilot and AP go a long
way in assuring a successful outcome. Preferably, a third crewmember should be
included to keep a photo log and assist the crew by monitoring the scene during
shooting and/or communicating with ground assets.
Make certain that each member of the crew knows their responsibilities during
each phase of the flight. The AP is normally the Mission Commander when the
aircraft is in the vicinity of the target, while the Mission Pilot retains responsibility
for the safety of the flight as Aircraft Commander.
When planning, allow time to look over the target during and after the ID pass
to decide what the best altitudes, angles and directions you’ll need to fly to get the
best photos. Also remember that the more pictures you take the better chance
120
you have of getting the required photos; therefore, allow for plenty of time over the
target. Then plan extra time to review the photos and reposition the aircraft to reshoot one photo. A good rule of thumb is to allow:
• 5-10 minutes to assess the target after the ID pass
• At least 15 minutes to fly an imaging pattern (the Bird’s Eye may take
more time to determine the proper altitude for the shot)
• 5 minutes to review the photos
• 15 minutes to re-position the aircraft to re-shoot one of the photos.
If the customer really doesn’t know exactly what they want (e.g., they just
want you to perform damage assessment and take video or pictures), plan extra
time after the ID Pass for an assessment survey of the damage; the crew will then
decide what pictures are needed and how to get them.
Plan to check fuel status (at least hourly) to determine if a refueling stop will
be necessary to safely complete the sortie. Also plan to check altimeter settings
at least hourly.
Weather can be more of a factor in video imaging than in other missions (e.g.,
overcast or high clouds can affect the quality of your photos). Get as much
information as you can, especially in the target area. If a front is passing through,
it may be best to delay launch in order to improve your chances for a successful
imaging mission.
Determine Photography Log requirements and brief the log keeper on data
needed and how the Mission Pilot and AP will communicate this information. If
necessary (you don’t know what damage to expect over the target area), discuss
whether or not to draw a sketch of the damage to aid in planning your imaging
patterns.
If shooting video, determine what needs to be included in the commentary
and discuss how to set up the Audio Panel and Intercom during the run in order to
minimize extraneous conversation (including ATC communications).
As with all CAP mission planning, the Mission Pilot and/or Observer must
ensure you get enough information to fill out the left front of the CAPF 104:
• Objectives and Search Area/Route
• Terrain and ground cover
• Direction of tracks, track spacing, search altitude and airspeed
• Hazards to flight and military routes (local and search area)
• Aircraft separation
• Weather (local and search area)
• Communications call signs, frequencies and procedures
• Actions to be taken if target sighted
• Estimated time of departure and time enroute
• Inbound and Outbound headings and altitudes
• Whether using Local (preferred) or Zulu time (synchronize crew watches)
• Type and location of ground assets, and how to contact them and when
121
Next, the Mission Pilot completes the flight planning and briefing portions of
the CAPF 104):
• Ensure your 'Route of Flight' clearly describes your intentions; include any
fuel or rest stops
• Double-check your estimated time enroute, fuel reserve and estimated
fuel burn
• Review your planning aids (marked-up charts and notes) for accuracy and
legibility
11.2 Imaging Flight Patterns
11.2.1 Types of Imaging Patterns and Use
The 4-Square imaging pattern is one of the standard imaging pattern for most
missions, as it is the simplest and most stable pattern that results in very good
photos.
The Bird’s Eye (Overview) pattern is another standard pattern that is used to
show an overview of a target or when photos need to show detail between
structures (e.g., between buildings or between trees). This pattern is also used
when the customer wants to use georeferencing.
The Circling pattern is more difficult to master, particularly if the photographer
is shooting out the right-side window. This pattern is good for taking quick shots
of multiple targets, and can be used if a quick survey of wide-spread damage is
needed by staff to determine resource needs and plan more detailed sorties.
The 45° Angle pattern is used when the customer specifically asks for these
types of photos.
See Attachments 3-7 for imaging pattern planning sheets to use on imaging
missions.
Both the Mission Pilot and the AP must be familiar with how any particular
imaging pattern will be approached and flown; that’s why planning is so essential
to a successful mission. Once you decide on which type of pattern to use, fill in all
the data you need (e.g., lat/long of all entry and turning points) to fly the pattern
using the GPS and/or VOR.
122
11.2.2 Basics Steps of an Imaging Pattern
Aerial Imaging flight patterns are always flown at 1000' AGL or higher, and
never at speeds below Vx.
How the Mission Pilot maneuvers the aircraft into the proper position for each
shot is very important. The approach to the pattern should be slow and stable,
and the AP must be given enough time to analyze current conditions and set up
for the photo or video imaging run.
Every imaging pattern starts with an “ID Pass” that allows you to verify the
target and note its coordinates. Examine the target, its surroundings, and lighting
conditions. Verify that what you see is what you planned for and that you can
properly frame the target; if not, have the Mission Pilot pick a safe location to loiter
and re-plan how to perform the imaging run (e.g., determine the altitude, angle
and directions you need to get the best photos) and how you wish to frame your
photos.
If you are performing damage assessment and didn’t know the extent or type
of damage to expect when you left on the sortie, the ID Pass will be followed by a
recon survey. The circling flight pattern (below) is a good pattern to use to survey
of damage. Also, you may want to sketch the damage to help you decide what
photos you need and what imaging flight patterns to use. Note: You may need a
combination of flight patterns and/or need to make several runs to capture all the
damage. Be sure to check your fuel status as you may need to refuel and return
to complete your sortie, and update Mission Base on your new sortie time
assumptions.
After the ID Pass (and damage survey, if needed), fly the patterns as shown
below. Remember to fly slowly enough so the photographer can get several
photos from each angle or side.
Photo examples of each type of the following imaging patterns can be found
in the Airborne Photographer Course Slides.
Note
The patterns shown below imply use of the cardinal compass points, which is
the norm. However, crews may adjust the patterns to face whatever
directions work best for the specific circumstances.
123
11.2.3 Circling Imaging Flight Pattern
Note: The AP should be looking north. The pattern shows an entry for aircraft
shooting from the right side of the aircraft; for aircraft shooting from the left side,
simply reverse the entries.
Note: The circling portion of the pattern is shown at the CAP lowest allowable
altitude (1000' AGL). Actual (higher) altitude depends upon customer needs and
the AP’s discretion.
124
11.2.4 4-Square Imaging Flight Pattern
This is a more stable variation to use in place of the circling pattern.
Note: The pattern shows an entry for aircraft shooting from the right side of the
aircraft. For aircraft shooting from the left side, enter at the lower left and exit at
the lower left.
Note: The pattern is usually flown to the cardinal points (i.e., north, south, east
and west), but actual orientation depends upon the target layout and the AP’s
discretion.
Note: This portion of the pattern is shown at the CAP lowest allowable altitude
(1000' AGL). Actual altitude depends upon customer needs and the AP’s
discretion.
125
11.2.5 Bird’s Eye (Overview) Imaging Flight Pattern
An imaging mission may require an overhead view (bird’s eye view) of a target
such as an unimproved runway or infrastructure such as water treatment or power
plants. These photos may also be used if the customer wants to geo-reference
the target. The intent is to get a photo looking “straight down” on the target. In
this case the crew will have to fly higher than the circling/4-square imaging pattern
height; altitudes of between 2500' and 4000' AGL (or higher) are typically needed
to get a bird’s eye view of the entire target area.
126
Basic steps:
a. Fly the “ID Pass” to verify the target and note its coordinates. Examine the
target and its surroundings, and decide how to frame your photos.
Use this opportunity to determine if your altitude will allow you to frame the
entire target area in one shot. Climb or descend as necessary to determine
the correct altitude.
Note: You may be tempted to turn the camera vertically in order to get the
target area in one photo – don’t. This type of shot often truncates the ‘far’
side of the photo (i.e., it looks as if it’s thinning or “falling away” in the finished
photo). Instead, climb higher so you can take the photo while holding the
camera normally (horizontally).
b. Note the direction that will result in the best shot. In this type of imaging sortie
you may only need a good shot from one direction (as opposed to taking
photos from at least four cardinal points in the circling or 4-square pattern).
c.
Once you’ve established the correct altitude and direction of flight, the pilot
will maneuver onto the desired heading at least one mile away and stabilize
the aircraft at approximately 75 knots (never below the aircraft’s published
best angle of climb speed Vx) with 10° flaps.
Note: Slowing down and putting in 10° of flaps allows for better control of the
aircraft when the pilot begins banking for the photo run. This minimizes the
amount of bank necessary to give the AP an overhead view of the target, and
makes it easier to put in up to full opposite rudder in order to maintain heading
while banking. [If you are shooting out of the front right-side window and have
it open, this speed and flap setting may cause the window to partially close.
Have the back-seat crewmember hold the window open in this situation.]
d. As you approach the target, the AP will inform the pilot to get into position.
The pilot will then put in approximately 10° bank and hold opposite rudder to
maintain the heading. The AP will continuously communicate with the pilot to
ensure the desired heading and angle to the target.
Note: The pilot may notice that she is losing some altitude while banking for
the photo run. The altitude loss should be minimal for the time it takes to get
the shot, so no effort need be made to maintain altitude during this time.
e. Once the AP takes the shot, inform the pilot so that she can return to normal
flight attitude. The AP will then review the results to see if another run is
required.
127
11.2.6 45° Angle to Target Imaging Flight Pattern
128
An imaging mission may require photos of a target from a specific angle, most
often 45 degrees. The diagram and table below shows how to obtain the proper
angle. The customer may specify the altitude, and all the crew needs to do is
consult the table to see how far from the target they need to be in order to
establish a 45° angle. If the customer doesn’t specify the altitude, then the crew
will have to determine what altitude/distance relationship is required to frame the
target properly.
Basic steps:
a. Fly the “ID Pass” to verify the target and note its coordinates. Note the
direction that will result in the best shot. In this type of imaging sortie you may
only need a good shot from one direction.
b. Enter the target’s coordinates into the GPS as a waypoint and select it. This
will allow you to determine the correct distance to the target per the table.
[Note: Even though the table gives distances to the 1/1000th of a nautical
mile, for practical purposes getting the distance to the nearest 1/100th nm will
suffice.]
Determine if the altitude you planned for (e.g., 2000 AGL) will allow you to
frame the entire target when shot from the required distance (as determined
from the table). If not, you will have to select another altitude/distance
relationship to frame the shot.
c.
Once you’ve established the correct altitude, the pilot will maneuver onto the
desired heading and stabilize the aircraft at approximately 75 knots (never
below the aircraft’s published best angle of climb speed Vx).
d. As you approach the target, the pilot will give a countdown so the AP will be
prepared to take the photos when the aircraft is at the proper distance from
the target.
e. Once the AP takes the photos, inform the pilot so that he can return to normal
flight attitude. The AP will then review the results to see if another run is
required.
11.3 Crew Communications in Imaging Patterns
The first pass by the target is very important. This is the time to
determine if you are at the correct altitude for best results; that you are at the
correct distance from the target; if you are flying at the correct speed; and
whether or not you need to (and can) use the zoom to properly frame the
photo. If any of these conditions aren’t met, have the pilot turn around,
correct the problem, and redo the first pass.
The Mission Pilot must put the AP in the proper position for a shot. Small
adjustments, not obvious to the pilot, must often be made to get the right
angle or position. Lifting the wing, moving the strut out of the frame or making
minor course (heading) changes are the most common adjustments. The
129
pilot must be aware these maneuvers may be necessary, and the AP must
know how to direct the pilot. Keep the directions clear and simple: “Lift your
wing” or “Move the strut forward” or “Left 10°” tells the pilot all she needs to
know. The pilot also needs positive feedback, especially if you are shooting
out of the right-side windows; use simple words such as “Good, good” to let
the pilot know they’re on the right track and speed. Finally, tell the pilot when
the adjustments are no longer required by saying something like “OK, I have
the photos”.
NOTE
Sometimes wind direction/speed forces the pilot to tilt the wings or crab
so much (in order to maintain the planned flight path) that the AP can’t
properly frame all of the photos as planned. In this case, try taking the
photos from another direction (e.g., from the northwest rather from the
north) or note the difficulty and discuss it during debriefing.
The AP also has to clearly and concisely communicate her intentions and
actions to the log keeper. Also, if the AP will be taking several photos per leg,
she should tell the log keeper “the following photos will be taken looking east
(or looking northeast or looking between the northern-most buildings), then
call out “shot 1, shot 2, etc.” This allows the log keeper to quickly and
accurately log the photos.
The AP must decide whether the pictures satisfy all mission requirements.
Don’t be afraid to admit that you didn’t get a particular shot, and ask the
Mission Pilot to reposition for another try. Never hesitate to make another
pass or to reposition the aircraft to ensure a good photo, and don’t let any
other crewmember rush you. Remember, you should take as many photos as
you think you need to fulfill mission requirements – there’s plenty of room on
your storage media, and the extra time you spend doing this on-scene is
much less expensive and time-consuming than having another sortie go back
to the target because you didn’t get the right photos.
Effective crew communications also depends on a thorough
understanding of the operation of the aircraft Audio Panel and Intercom,
especially when there is a third crewmember on board to keep the
Photo/Recon Log. Plan how you will set up these instruments during all
phases of flight, particularly when you are in the target area.
11.4 Factors Affecting Success of the Sortie
11.4.1 Artificial Deadline
If you don’t plan for enough time to assess the target after the ID Pass,
properly fly the imaging patterns, review the photos, and possibly re-shoot a photo
before returning to base, you can create an “artificial” deadline that may cause
you to hurry your shots and risk returning to base without all the photos you were
tasked to get. The result can be an unsuccessful sortie that will have to be reflown.
For example, assume your target is 50 nm from mission base and you’re
tasked to take photos from above (Bird’s Eye) and from all sides (4-Square). You
130
should plan for a transit time of one hour and allow at least 50 minutes for
assessing the target, obtaining the photos, reviewing the photos, and possibly reshooting one photo. Instead, you decide upon a total sortie time of 1.5 hours (an
artificial deadline), launching at 1100 and returning to base by 1230. Now
everyone (crew and mission base staff) is locked into the 1.5 hour sortie. You and
your crew has it in their minds that they have to be back at base by 1230 so the
next sortie using your aircraft can launch on time.
If you’re successful, you’ve saved 20 minutes. However, if you are so mindful
of being back by 1230 that you don’t take time to review your photos before
turning back to base you risk returning without all the quality photos you were
tasked to obtain. Another crew will have to go back to your target to obtain the
photos you failed to get. Instead of taking an hour and fifty minutes to obtain the
photos, it will now take at least three hours to get all the photos!
11.4.2 Vibration
Vibration comes from the airplane, its engine and air turbulence. To reduce
the effects of vibration, hold your camera properly and don't rest any part of the
camera or your body against the airframe. In particular, keep your arms and
elbows from coming in contact with the window sill or armrest. Ideally, the only
part of the airframe that will be in contact with your body is the seat cushion.
Normally the camera is set for the Automatic (or Program) mode, letting the
camera set the shutter speed and aperture. However, if you need to use the
Manual mode, keep these facts in mind:
•
Shutter speed is the biggest contributor to sharpness. Since CAP
imaging sorties are conducted at 75 - 80 knots from 1000 feet AGL, the
minimum shutter speed should be 1/250 second.
•
You can use very large apertures since there is no need for depth of field
(discussed below). You should experiment to learn the largest aperture at
which your lens is sharp and the highest ISO at which your digital camera
makes clean images. Once you've set ISO and f-stop, use whatever fast
shutter speed you get (he faster the better). Finally, compare these
results against those using the AUTO settings, and use this if possible.
11.4.3 Visibility
It’s best to wait for the best visibility instead of shooting through haze or other
obscuring conditions. Even on clear days visibility is rarely unlimited, so you
always have to adjust to actual conditions over the target.
Haze and fog are the most likely limits to visibility you have to deal with.
Ways to deal with these are:
•
When you fly over the target during or after the ID pass, see if there is a
difference between looking straight down at the target and looking at a
slant angle. With haze, lower angles to the target are often better. With
fog, the reverse may be true.
131
•
Set your digital camera to its highest contrast. Look at your histogram, if
available; you'll be surprised at how it tends to bunch up in the middle
(implying low contrast) even if things look normal to you while flying.
If allowed by the customer you can use an photo editing program to
increase contrast and cut through haze. The easy way is to use “Auto
Levels” which will take the dull grays and expand them to blacks and
whites; you can also use the “Levels” command and manually move the
blacks and whites or adjust the mid tones.
•
UV and haze filters don’t always work well in aerial photography so don’t
rely on them (except to use a UV filter to protect the camera lens).
11.4.4 Focus
Even though you’re flying at 80 knots your distance from the ground (altitude)
stays roughly the same. When using Autofocus (AF), try using the "S" AF
position; this focuses each shot perfectly, even if you change the zoom setting.
Otherwise, use exposure lock (pre-focus).
If you’re using Manual focus, set the lens at the “Infinity” stop unless you're
using a lens longer than 200 mm or are at less than 1,000' AGL. [Note: Most AF
lenses can focus past infinity and have to be focused with the AF system.]
11.4.5 Wind
The wind will knock your camera around if you let a telephoto lens extend
even a little bit out the window. You have to make a conscious effort to lean back
away from the window to keep your lens inside.
11.5 Inventory Equipment and Check Camera Settings
11.5.1 Inventory
Perform an inventory to make sure you have everything you need to
accomplish the mission. At a minimum check for:
132
•
Camera/GPS batteries charged (including spares). Note: If batteries get
too cold they will weaken and even stop working. If it’s cold keep the
camera and batteries with you; don’t leave them in the airplane overnight.
If it’s really cold, carry the spare batteries in your pocket where your body
will keep them warm.
•
Memory cards with sufficient capacity, including spares (you may also
include a 512MB or 1GB USB flash memory drive for extra storage).
•
Filters (as needed). A UV filter should normally be installed to protect the
lens.
•
Working condition of the camera and lens cap straps.
•
Photo Log, Recon Sketch Sheet, and Photo Pattern Planning sheets,
along with a good clipboard.
•
Cleaning supplies.
•
If you’re using a camcorder, ensure you have the microphone adapter.
•
If you intend to stop away from mission base between sorties, take the
battery charger along.
•
Seat cushion to improve your position when shooting through the rear left
window’s photo window.
•
A light jacket or XXL black T-shirt or equivalent to use as a “portable
darkroom” for reviewing photos on the LCD screen.
11.5.2 Adjust Camera Settings
a. Turn on the camera and check status. Look for a full battery charge,
sufficient space on the media card, and other settings as listed below.
b. Set the camera time to match your time hack.
c.
Set the exposure mode, usually Auto or Program. Also, determine
whether you will be shooting normally (single frame) or if you need to set
the burst (continuous) shooting mode.
1) You should use the fastest shutter speed you can (no less than
1/250s and at least 1/1000s when using telephoto) because short
shutter speeds mean less jitter. Normally, the Auto (Program) mode
will select a fast-enough shutter speed
2) In the Auto mode, make sure the focal point is set to ‘Infinite’ if
necessary
3) Check the ISO setting (should usually be ISO 100)
d. You may turn off the color LCD to save batteries. However, you will need
the LCD to review your photos before leaving the target area.
e. Disable (turn off) the digital zoom.
133
f.
Disable (turn off) the flash.
g. Disable (turn off) the AF-Assist Lamp. Usually located near the lens
barrel, an Autofocus Assist Lamp assists focusing when taking photos in
low-light conditions. When the shutter-release button is depressed halfway, a light beams from the camera to illuminate the area where the
camera is focusing. However, the lamp’s short range is useless for taking
photos from an aircraft. If you are shooting through a closed aircraft
window (you shouldn’t), the lamp may confuse the camera’s focus.
h. Disable (turn off) Digital (electronic) Image Stabilization, unless you know
it’s helpful. This feature, usually a high ISO sensitivity mode, is found in
many compact cameras and is designed for stabilizing hand tremor; it
may not correct for large amounts of wobble resulting from a moving
airplane. More importantly, most of today’s digital image stabilization
technology doesn’t prevent blur if the subject itself is moving (which is the
case when you are shooting from a moving aircraft). Some systems are
better than others: some help, but others may actually make things worse
(increased noise). Try taking photos with the digital stabilization both ON
and OFF to see which works better. If in doubt, turn it off. [Note: This
doesn’t apply to Optical Image Stabilization, whether lenses or sensors.]
i.
Check or set photo type, resolution and quality depending on how the
photos will be used. The best choice for the majority of CAP imaging
missions is JPEG with the highest resolution with the best quality. This
results in high-quality, low-compression files of manageable size.
1) Some customers want us to use the RAW photo format.
2) If you know that the customer won’t want to print the photo or
examine the target in great detail, you may choose lower settings. If
you only intend to e-mail the pictures (or the photos are only going to
be viewed on a monitor or posted to a Web page), you can use lesser
quality settings if you don’t want to bother to resize or compress the
photos before they are sent to the customer.
134
j.
If having the shortest time possible between pictures is important, you can
shorten (e.g., by about 0.5 seconds) or deactivate the instant photo
review function that automatically displays the image on the LCD
immediately after it’s taken. This saves time between photos and also
saves your batteries. This can be used in addition to selecting the
camera’s burst (continuous shooting) mode.
k.
Set the Diopter Correction. Look at something within shooting range,
raise the camera's viewfinder to your eye, and adjust the diopter until the
scene or the focus brackets are sharp.
11.6 Prepare the Aircraft
•
Clean the aircraft windows before you leave, and make sure you have
cleaning supplies on board. This is for safety reasons, not photography
purposes, as you should avoid shooting through windows. Windows are
made of Plexiglas and are not flat. With telephoto lenses they often will
cause distortion that makes the images wavy.
•
If you will be shooting out the right front window of the aircraft, remove the
window holding screw. Be careful to retain the screw’s bushing or washer
as you remove the screw; place the screw in a secure container (e.g., a
35mm camera plastic film case works great, or use a small zip-lock bag)
and put it where you can find it later (e.g., the aircraft glove compartment
or in the camera bag).
•
Enter any waypoints into the GPS before takeoff.
•
Set up the Audio Panel and Intercom. Check the operation of the
intercom (all positions) and perform a communications check of the CAP
FM radio from all positions.
•
If applicable, turn on the laptop and check for full battery charge and
proper settings.
•
If applicable, connect the portable GPS to the camera and check for
proper operation.
•
Check the imaging equipment. If you will be shooting video, test the
camcorder and audio connection for proper operation.
Note: A shot of the aircraft ‘N’ number with the camera or camcorder
provides a good “starting photo” for the sortie, particularly if there are
photos on your media card or tape from a previous sortie.
•
Arrange your equipment for easy access, but ensure lightweight objects
such as charts and logs are not lying loose where they can be blown
about the cabin when you open a window to take pictures.
135
Intentionally blank
136
Chapter
12. Conducting an Imaging Sortie
12
The key to a successful imaging mission is preparation, planning, patience and
practice!
Airborne Photographers must know how to conduct an imaging sortie.
You’ve spent lots of time planning the sortie and preparing your crew and equipment, so
don’t jeopardize the success of the sortie by rushing to obtain the photos. It isn’t “We’ve
got to get these pictures back ASAP,” but rather “We’ve got to get good pictures back
ASAP.” Take the time to do it right, and take the time to review the pictures before
returning to base.
OBJECTIVES:
1.
Using the Imaging Sortie Checklist (Attachment 2), discuss:
[AP-O-005]
a.
Transit to the target area
b.
Approaching the target
c.
ID Pass
d.
Damage assessment survey
e.
Preparing to enter the pattern
f.
Taking the photos
g.
Determining success or failure
h.
After-sortie actions
i.
Debrief, including the CAPF 104 [AP-O-005]
2.
Demonstrate actions during transit, target approach, the ID Pass, the survey,
preparations to enter the imaging pattern, taking photos, determining success or
failure, after-sortie actions, completing the CAPF 104 and receiving a debrief
using the Imaging Sortie Checklist. [AP-O-005]
3.
Use an photo browser to review the photos and determine whether or not they
meet mission objectives and requirements. [AP-O-005]
12.1 Transit to the Target Area
The Imaging Sortie Checklist (Attachment 2) is a mission-specific checklist.
See the Flight Guide (Attachment 2 of the Mission Aircrew Reference Text) for a
general, comprehensive mission checklist
137
12.1.1 Transit to the Target Area
a. Once you’re out of busy airspace, relax the sterile cockpit rules but maintain
situational awareness.
b. Double-check navigational settings to be used in the search area.
c.
Review search area terrain and obstacles.
d. Update in-flight weather and file a PIREP.
e. Review methods to reduce fatigue or combat high altitude effects during the sortie.
Note
Don’t set the camera on the glare shield or on a seat in direct sunlight. Image noise
doubles with every 6-8 °F increase in the temperature of the camera sensor.
12.1.2 Approaching the Target
a. Turn on exterior lights to maximize your visibility so others can "see and avoid."
NOTE: You may need to turn off the strobe lights so they will not affect the photos,
particularly in low-overcast conditions.
b. Review sortie objectives and crew communications, and set the audio panel and
intercom for imaging pattern communications.
c.
Double-check radio and navigational settings and check navigational equipment
against each other (detect abnormalities or failures).
d. Remember hourly updates - Altimeter setting (closest source) and fuel assumptions,
and times to report “Operations Normal.”
e. If applicable, connect the portable GPS unit to the camera and ensure it locks onto
the satellites (usually denoted by solid “GPS” symbol or letters on the camera
display).
f.
Stabilize at ‘Target ID Pass’ heading, altitude and airspeed (not < Vx) at least two
miles out. This allows time for everyone to get set for the photo or video run, and
gives everyone the opportunity to see what visibility and turbulence conditions will be
encountered over the target area. Implement sterile cockpit rules.
g. Log the time (and Hobbs) and report "In the Search Area."
138
12.1.3 The ID Pass
a. When you pass over the target, log the latitude and longitude and verify you have the
right target. If you have DME, log the radial and distance.
b. Enter the coordinates into the GPS as a ‘User Waypoint’, and display this waypoint in
the navigation mode. This will give the Mission Pilot an additional means to ensure
accurate distance from the target during passes.
c.
Examine the target, its surroundings, and lighting conditions. Verify that what you
see is what you planned for and that you can properly frame the target; if not, have
the Mission Pilot pick a safe location to loiter and re-plan how to perform the imaging
run (e.g., determine the altitude, angle and directions you need to get the best
photos) and how you wish to frame your photos.
d. If needed, perform a damage survey and plan the imaging pattern(s) necessary to
fully document the damage. Reassess your fuel status and plan a refueling stop if
needed. Update Mission Base on your new sortie time assumptions.
12.1.4 Prepare to Enter the Imaging Pattern
a. Fly at least 1000' AGL during daylight and no slower than Vx.
b. Ensure you’re flying slowly enough to allow the AP to get several photos from each
angle or side of the imaging pattern (usually 75 - 80 knots).
c.
While the Mission Pilot sets up for the first run, the AP should ensure the camera’s
neck or wrist strap is secured and the lens cap is removed. If the lens cap has a
strap attaching it to the camera, hold it in your hand so that it will not be blown in front
of the lens while shooting; if it has no strap, store the lens cap in the camera bag.
d. If you’re using a camcorder, make sure you have connected the microphone cable to
the intercom system. If you’re using an automatic noise reduction (ANR) headset
and know this feature interferes with the video’s audio commentary, turn ANR off.
e. Check that the camera is on; it may have automatically turned itself off. [Don’t
confuse this with the ‘sleep’ mode where the camera turns off the LCD to conserve
power; a quick touch of the zoom switch will wake the camera.] Verify portable GPS
connections and that the signal is stable, if applicable.
f.
The third crewmember readies the Photo Log. It is important to keep a log of the
photos you take, as it is not always obvious what and how you were looking at a
target after the fact. Which way was North? Was that access road oriented E-W or
ENE-WSW? Good communications between the AP and the Photo Log keeper will
ensure you have all the information you need to explain your photos.
h. Secure loose items (e.g., charts) in the cabin and then open the window.
139
12.1.5 Preparing to Take Photos or Video
a. Steady the camera or camcorder:
b. Choose a comfortable, sustainable posture. If you’re sitting in the front right seat,
slide the seat back so that you are centered in relation to the window (let your pilot
know before you slide your seat backwards or forward).
c.
Keep your body from contacting the aircraft (i.e., don’t rest your forearm or elbow
against the window frame).
d. Use both hands. Put one hand through the grip (especially true for camcorders) and
use your free hand to help support the camera.
e. Use the optical viewfinder, pressing the camera to your head and holding it against
your nose or cheek with both hands (but make sure your fingers don’t cover the
camera’s light sensor or brush against the camcorder audio plug).
f.
If you have tested it and know it helps, use the camera or camcorder image
stabilization feature. Otherwise, leave this feature turned off.
12.2 Taking Photos
A typical imaging pattern begins with a “panoramic view” of the target. The aircraft will be
at 1000' AGL and one nm south of the target, with the pilot flying so that the AP is looking to
the North. Once this image is captured you move in for close-up photos (not <1000' AGL) of
the target, usually (not always; it depends on the situation) from each of the four cardinal
points (North, South, East and West). This and other imaging patterns were discussed in the
previous chapter.
As the aircraft closely approaches the point where you intend to shoot, begin framing the
shot. Normally, this means centering the target in the viewfinder. Some missions require
different framing, as dictated by the circumstances or by the customer. For example, a
damage assessment of a power plant may require you to capture the plant plus a road
leading into the plant from the northwest. In this instance, you would place the plant in the
lower right corner of the frame in order to capture as much of the road as possible.
When you near the shot point, you should pre-focus on the target for faster camera
response; focus on an object that is currently the same distance away as the target will be
once you are lined up (i.e., in the same plane as the target). Once the target moves into
frame, press the shutter button the rest of the way down to take the picture.
You should take several photos on each leg of the imaging pattern (if your camera’s
shutter delay allows). This increases the chance you will get an excellent photo of the target.
[If proper exposure is a concern, consider bracketing.]
Keep the Photo Log keeper aware of what you are shooting, as you planned before the
sortie. It is easier on the log keeper if you tell them when you will be taking several photos
per leg. On each leg, tell the log keeper the following photos will be taken “looking east” or
“looking northeast” or “looking between the northern-most buildings,” then call out “shot 1,
shot 2, …..” This allows the log keeper to quickly and accurately log the photos.
If you are going to take photos of different targets on the same sortie, take a picture of
the aircraft wing, wheel, or interior between targets to act as a “target separator.”
140
Using the Zoom
Optical zoom should be used sparingly, but it can be a tremendous help in composing a
shot because you’ll rarely be in exactly the best location to take a photograph. Let the zoom
improve your framing, either by bringing the target a little closer (optically) or backing off a bit.
[Getting closer is the obvious attraction of any zoom, but zooming out can be very helpful by,
for example, revealing a road that may be used by emergency vehicles to get to the scene].
Zoom in until you get the frame you want or until the image in the viewfinder begins to
shake; if the image starts shaking, zoom out until the image becomes steady. [Note: Be
careful not to zoom in and out too much when using a camcorder. You can pause the
camcorder, zoom in or out to compose the next shot, and then start recording again.]
Note: If you do use the telephoto lens to zoom in on a target, we recommend you take
several photos to increase the chance that you will get a properly focused photo. Also, you
should carefully review the photo(s) before moving on to ensure the photo is sharply focused.
If available, use the camera’s magnifier function when reviewing the photos.
Minimize zooming during low light conditions.
12.3 Recording Video with the Camcorder
A typical imaging pattern begins with an overview of the target. The aircraft will be at
1000' AGL and one nm south of the target, with the pilot flying so that the AP is looking to the
North. Once this is completed, you move in for close-up video of the target, ensuring you
record views from each of the four cardinal points (North, South, East and West). This and
other patterns were discussed in the previous chapter.
Begin with a wide-angle (no zoom) setting and start recording about five seconds before
reaching the target or start point. When the target is abeam you can smoothly zoom in as
needed to frame the shot. Once you have the shot, zoom out for another wide-angle view
and stop recording (these wide-angle photos serve to show areas around the target and as
breaks between photos).
Play back the video of the overview to make sure you got the video you wanted. Once
the video is verified, the Mission Pilot proceeds to the target for the 360° close-up (not <1000'
AGL). Zoom in (smoothly) if necessary, but minimize zooming in and out while circling.
Once you have finished circling the target, zoom out to wide angle and then stop recording.
12.3.1 Audio Commentary
You should speak your commentary into your headset microphone using conversational
speech (i.e., use the same voice level and tempo that you would use in a normal
conversation). You should describe to the viewer what they are seeing through the
camcorder. This narrative will give the view all the information they need to understand what
they are looking at, along with supporting information such as aircraft altitude and speed,
location (e.g., latitude and longitude) and direction (e.g., “looking to the North”), date and time
of day, and weather conditions (e.g., clear or overcast).
Do not use abbreviations or acronyms in your narrative; you cannot assume that your
customer (or users from another agency) will understand what they mean.
You should begin your commentary by identifying the mission: this is CAP Flight 4239
flying mission number 06M1000, sortie #2. It is 1900Z on December 1, 2005.
Usually a video mission begins with an overview of the target (or target area) that is shot
from about one nm south of the target at an altitude of 1000' AGL. If the customer wants you
to start with a shot that shows a very large scene, but you can’t see the entire scene from this
141
distance and altitude, you will have to move further south and may have to increase your
altitude.
You may also use this opportunity to describe some of the video you will be shooting
later, such as access and egress roads or flooded areas downstream of a dam or levee. It
can also be helpful to point out major landmarks that can help ground teams as they arrive on
the scene, and the condition of the roads leading to the target area.
You may describe the overall scene as follows: “We are looking northwards at the fire
from about one mile distance, flying at 4400 feet mean sea level or approximately 1000 feet
above ground level” (note that it is important to include both MSL and AGL heights so that
annalists can relate details of the video to whichever charts or maps they need to use). “The
fire area appears to be approximately five miles by three miles. The western edge of the fire
appears to be approximately ten statue miles from the town of Pampa. The smoke is drifting
in a northwesterly direction. We’ll now move in for a closer look.”
As you begin to circle the fire, staying approximately one mile from the edge of the fire,
your commentary may go like the following: “We are flying northward at 90 miles per hour
and 1000 feet above ground level. Looking eastward, you can see a radio tower just inside
the southwestern edge of the fire area. The smoke is obscuring the northwestern part of the
fire area. You can see what appears to be a single home in the center of the fire area,
engulfed in flames. I am now zooming in to focus on the house. I don’t see any vehicles or
persons on the ground in the vicinity of the house.”
Your narrative continues as you circle the fire. Besides reporting what you see, report
any changes in altitude or wind direction.
These are just examples; you should be thoroughly briefed before you leave, and
knowing what is important to report will help you ask questions during the briefing.
12.3.2 Crew Commentary
Using the circling or 4-Square imaging pattern as an example, the Mission Pilot will set
up the aircraft with the AP looking one nm to the North. Once the pilot has the aircraft
stabilized and wings level she will announce “Aircraft ready.” Once the AP acquires the
target and is ready to shoot, he will announce “Video on.” At this time all non-essential
intercom talk ceases so as not to interfere with the AP’s commentary.
The AP should say “Video off” once he has acquired the video he needs for the overview
pass. Once the Mission Pilot enters the close-in circle or 4-Square pattern, the AP
announces “Video on” and begins the video and audio commentary. This process is
repeated until the video is complete.
NOTE: If communications with ATC are necessary during the video run, the Mission Pilot
may isolate herself from the intercom by using the audio panel. However, flying the entire
video run in this fashion will interfere with the coordination needed between the pilot and AP.
Safety considerations are foremost, but the pilot should try to stay on the intercom with the
AP whenever possible. If you are in busy airspace (e.g., Class B) where there is constant
chatter on the ATC frequency, the pilot may turn down the aircraft radio so the chatter will be
heard as “background” to the AP’s commentary; again, safety is foremost and it may become
necessary to isolate the AP and use hand signals to coordinate with the AP.
12.4 Determine Success or Failure
The AP usually knows whether she got all the required photos, and the third crewmember
can back her up by checking the Photo Log. However, you must check and make sure
because you don’t want to fly all the way back to mission base and then discover that you
missed a shot, or that your photos weren’t framed properly.
142
•
If time allows, you may check each shot as it appears on the camera’s LCD screen
after each shot. However, since the display is usually set to come on for only a few
seconds this may not be practical. Additionally, it may be so bright in the cabin that
you can’t see the image on the LCD.
In situations like disaster assessment, the time you spend reviewing each photo on
the LCD screen can make you miss the next one. Large memory cards let you shoot
scores of photos and review them when there is a break in the action, keeping only
the best and deleting the obvious duds. In these cases, it’s best to turn the LCD
review feature off.
•
After you have finished, have the Mission Pilot pick a safe spot nearby and circle
while you check the photos or video. If you are using a portable GPS, ensure the
coordinates were included with the photos. If you have difficulty seeing the images
on the LCD screen, look at it under a large dark T-shirt, jacket or blanket (i.e., a
portable dark room). [Note: A LCD hood helps minimize the glare on a digital camera
LCD monitor because it shields the monitor from bright overhead light and from light
coming from the side. Unless you buy a LCD hood made for a specific model,
universal LCD hoods attach to digital cameras by Velcro, an elastic strap or by
attaching it to the tripod thread.]
Most cameras offer a LCD magnification feature in the review mode that allows you
to zoom in on the image (anywhere from 2x to 12x) and scroll to look at different
parts of the image. This allows you to check finer details such as focus.
Note: LCD screens may not present an accurate representation of what the colors
and tones in your image actually look like, so you won’t necessarily be able to spot
over- and under-exposure or assess contrast and color. To check for correct
exposure in these cases, look at the image’s histogram. For example, the Nikon
D200 provides eight pages of information that can be superimposed on singleplayback photos; two of these are histogram information.
If using the portable GPS, ensure the coordinates were recorded with the images.
•
Log time (and Hobbs) and report "Out of the Search Area."
•
Double-check heading and altitude assigned for transit to next target or return to
base. Relax sterile cockpit rules.
12.5 After the Sortie
•
Make sure you have all your equipment before you leave the aircraft.
•
Clean the windows for the next sortie.
•
If no more imaging sorties will be flown in the aircraft, replace the aircraft window
screw (and bushing or washer) if it was removed for your flight.
143
12.6 Debrief
12.6.1 Transfer Photos
Transfer your photos to a computer as soon as possible. Verify that the pictures were
successfully and completely transferred by looking at each photo on a monitor before you
erase the photos on the media card. Then determine if the photos meet all the mission
objectives and requirements.
Some mission bases will just have you give them the media card and Photo/ Log. In this
case, be sure to put one of your spare cards back in the camera, check that it is empty, and
put the camera back in its bag.
12.6.2 Complete the CAPF 104 (WMIRS)
Take a short break and then meet to complete the Debriefing section of the CAPF 104:
144
•
Fill in or verify 'ATD' and 'Actual Landing Time'
•
The Summary section describes what you accomplished on the sortie
•
The Results/Deliverables section can be as simple as "no sightings" or "no damage
noted." However, you must list results such as sightings (including negative
sightings), the number of photos you took, etc.
•
The Weather Conditions section can be as simple as entering "as forecast."
However, if the weather was unexpected it is important to explain how the weather
conditions affected sortie effectiveness. This should include lighting conditions and
other factors that affected your imaging.
•
The Remarks section is for entering any information you think is pertinent or helpful
that was not entered elsewhere on the CAPF 104. It also gives the crew a chance to
comment on the effectiveness of the sortie in detail.
•
The Sortie Effectiveness section involves a quantitative assessment of how well you
accomplished your mission.
•
The Attachments & Documentation section is self-explanatory. Be sure to label any
attachments (e.g., mission and sortie number) so they can be related to the
mission/sortie if it accidentally becomes separated. Enter a description of what
photos or video was taken, and to whom and how they were sent. Also write “Photo
Logs attached” if mission base wants copies attached to the 104.
•
Ensure the 'Hobbs To/From' and 'Hobbs in Area' entries equal the 'Hobbs Total'
hours entry.
•
Ensure all entries and sketches/drawings are clear and legible.
12.6.3 Check in with the Debriefing Officer
•
Tell how you did your job and what you saw
•
Usually starts with a review of the information you entered in the Debriefing section of
the CAPF 104
•
Review the photos (and Photo Logs) or video, comparing them against mission
objectives and requirements
•
Answer all questions as best you can, and be very honest about conditions and your
actions
•
If you are scheduled for another sortie, find someplace to rest. Close your eyes; you
may even want to take a nap if there is time and a place to do so. Also, take in some
refreshment to give you sufficient energy for the next sortie.
12.7 Practice
Taking good photos or video takes practice. Many camera and camcorder models offer
so many features that they can be intimidating, so there is no better way to get to know your
camera or camcorder than by taking lots of pictures. Also, if many weeks have passed since
you last used the camera or camcorder you will forget some of the features and techniques.
Take the camera or camcorder with you each time you fly. Leave the camera in the Auto
mode and see what it can do on its own, or test a different feature of your camera each week.
The more you shoot, the more you can experiment with everything the camera has to offer.
Remember to use the manual!
Another great thing about experimenting with digital cameras or camcorders is the
immediacy of the response. The photos or video are right there on the LCD screen so you
can check your results in seconds. Both cameras and camcorders can be hooked up to a
monitor or TV for more detailed review.
Digital imaging allows for no excuses -- there’s no money wasted on developing lessthan-perfect photos and you get results instantly. So get out there and play with the camera
and camcorder. Don’t be afraid of it; if you make a mistake, just delete and try again.
145
Intentionally blank
146
Attachment 1, Customer Imaging
Request Checklist
This checklist assists mission staff in obtaining all the information necessary to determine
exactly what a customer wants, and enables the Airborne Photographer and Mission Pilot to
know what information to expect (and need) during briefings
CXLVII
Intentionally blank
CXLVIII
What and where is the target?
Define the target location by at least two forms
of navigational information (e.g., Lat/Long
and VOR radial/DME)
Also ensure that you get a good verbal
description of the target.
Note: If the crew will need to perform a
damage assessment/survey in order to decide
how to image the damage, at least try to define
the general area or boundaries of the suspected
damage.
How should the target and
surrounding features be imaged?
Some questions to ask are:
• Is the target a single feature or facility, such
as a building? If so, do they want as close a
picture as possible (e.g., completely filling
the frame)?
• Does the customer want to see the target and
its environs to allow a larger perspective?
• Does the customer want to see roads and/or
power lines leading to or from the target? If
so, how far out from the target?
• Does the customer want to see the extent of
flooding below a dam or levee, or the entire
trail of debris from a tornado?
• Does the customer want wide photos
followed by close-ups?
• Does the customer want the photos taken
from a certain altitude (AGL) or from a
specific angle to the target? Or is it OK to
change altitudes and/or zoom as necessary to
get the best shot?
Does the customer care about
lighting conditions over the target
area?
The customer may not want photos taken under
a heavy overcast, or in early morning or late
afternoon light.
CXLIX
What information do they want to
accompany the photos (or be
included in a video’s audio
commentary)?
Accompanying information may include:
• Altitude (MSL or AGL, or both)
• Latitude and Longitude
• Time (local or Zulu)
• Distance from target (nautical or statue
miles)
• Direction to target (e.g., looking South)
• Angle to target (e.g., 45°)
What photo format do they want?
Do they want JPEG or an uncompressed photo
(e.g., TIF or RAW) or both?
What quality and size photo file do
they want?
This is normally the largest and best quality
JPEG.
Do they mind if you crop photos, if
needed?
Do they mind if you edit photos, if
needed?
Do they want you to add text or
symbols to the photos?
This may include some of the information
listed above, along with arrows or circles.
How do they want you to name the
photo files?
Be specific, especially as to the sequence of
information contained in the file name. For
example: Date (dd/mm/yy) / mission number /
sortie number / photo (sequential) number or
description
CL
Do they want you e-mail the photos?
• What information do they want in the
“Subject” and “Remarks” areas of the email?
• What is the e-mail address of the customer or
customers?
• Do they want you to cc: or blind copy
anyone? What are the addresses?
• Do they need to enter your e-mail address in
their “anti-spam” software so it isn’t
blocked?
• Do they want you to call before sending the
photos? What is the phone number (plus a
backup)?
CLI
Intentionally blank
CLII
Attachment 2, Imaging Sortie
Checklist
This is an imaging mission-specific checklist. See the Flight Guide for a general,
comprehensive mission checklist
CLIII
Intentionally blank
CLIV
1. Aircrew Assignment / Briefing
A. Detailed briefing prior to each sortie; pay attention and ask
questions
B. Include entire aircrew, if space allows, but the Mission Pilot and
AP must attend
C. Ensure you get enough information to thoroughly understand the
mission objectives
1) Target(s), including description and exact locations
(approximate data if an on-scene damage survey will be
required)
2) Terrain, obstacles and ground cover around the target(s)
3) Weather (local and search area)
4) Acceptable lighting conditions over the target (e.g., no clouds
or midday only)
5) Type of imaging pattern wanted, including altitude and angle
to target
6) Hazards to flight, temporary flight restrictions, special use
airspace and military training routes (local and search area)
7) Aircraft separation (will others be in the area?)
8) Communications call signs, frequencies and procedures
9) Time format (local or Zulu)
D. Ensure you understand exactly what the customer wants
1) How the target and surrounding features should be imaged
2) Do they want all photos taken at the same altitude and/or
focal length, or is it OK to change altitudes and/or zoom as
necessary to get the best shot?
3) What photo format do they want (JPEG, TIF, RAW or
combination)?
4) What photo quality do they want? (High, Medium or Low)
5) Do they mind if you crop photos, if needed?
6) Do they mind if you edit photos, if needed?
7) What information do they want to accompany the photos (or
be included in a video’s audio commentary)?
8) Do they want you to add text or symbols to the photos?
9) How do they want you to name the photo files?
10) How do they want you to send the photos?
CLV
2. Plan the Sortie
A. The Airborne Photographer (AP) and Mission Pilot (MP) plan
while the third crewmember listens (may be briefed later)
1) Determine if the weather over the target will meet customer
specifications and/or needs
2) Determine type of imaging flight pattern(s) to be used and fill
in data needed to fly the pattern(s)
3) Consider time over the target, with a margin to re-shoot as
needed
4) If needed, plan time to perform a damage survey. Also,
decide if this extra time warrants a refueling stop.
5) Discuss and finalize AP/MP communications over the target,
including set up of the Audio Panel and Intercom
6) Determine Photography Log requirements and brief the log
keeper on data needed and communications with the AP
7) If shooting video, determine what needs to be included in the
commentary and discuss set up of the Audio Panel and
Intercom
8) As with all CAP mission planning, identify your routes to and
from the target area, define safe minimum altitudes, and
identify hazards, obstacles, temporary flight restrictions and
special use airspace. Identify all FAA, CAP and participating
agency communications requirements and frequencies.
Ensure you have the correct and current sectional charts
(and IFR charts and plates for unanticipated weather
conditions), plus any maps you may need (e.g., road maps,
DOT maps or topographical maps). Determine your fuel
reserve (CAPR 60-1) and determine if you'll need a refueling
stop.
B. Planning and Briefing portions of the CAPF 104 (WMIRS)
1) Ensure your 'Route of Flight' clearly describes your
intentions; include any fuel or rest stops
2) Synchronize watches (time hack)
3) Double-check your estimated sortie time, fuel reserve and
estimated fuel burn
4) Review your planning aids (marked-up charts, maps and
notes) for accuracy and legibility
5) After reviewing the plan with the crew, the crew takes the
form to the Briefer
6) After the Briefer checks your planning, the Flight Release
Officer will brief you on any changes and release your flight
CLVI
3. Inventory and Set Equipment
A. Inventory Equipment
1) Camera/GPS batteries charged (including spares)
2) Memory cards with sufficient capacity, including spares (you
may also include a 1 or 2GB USB flash memory drive for
extra storage)
3) Filters (as needed). A UV filter should normally be installed
to protect the lens
4) Working condition of the camera and lens cap straps
5) Photo Log, Recon Sketch and Imaging Pattern planning
sheets
6) Clipboard for logs and sketch sheets
7) Cleaning supplies
8) If you’re using a camcorder, ensure you have the microphone
adapter.
9) If you intend to stop away from mission base between sorties,
take the battery charger along
10) Seat cushion (to improve your position when shooting from
the left rear window)
11) A large dark T-shirt or jacket or equivalent to use as a
“portable darkroom” for reviewing photos on the LCD screen
B. Adjust Camera Settings
1) Turn on the camera and check status. Look for a full battery
charge, sufficient space on the media card, and other settings
as listed below.
2) Set the camera time to match your time hack
3) Set the exposure mode, usually Auto (Program). Also,
determine whether you will be shooting normally (single
frame) or if you need to set to burst (continuous) shooting
mode.
4) You may turn off the color LCD to save batteries
5) Disable (turn off) the digital zoom
6) Disable (turn off) the flash
7) Disable (turn off) AF-Assist
8) Turn Image Stabilization on or off, whichever works best for
your camera (doesn’t apply to image-stabilized lenses)
9) Check or set photo type, resolution and quality depending on
how the photos will be used. The best choice for the majority
of CAP imaging missions is JPEG with the highest resolution
with the best quality.
10) Set the Diopter Correction
CLVII
C. Prepare the Aircraft
1) Clean the aircraft windows before you leave, and make sure
you have cleaning supplies on board
2) If you will be shooting out the right front window of the
aircraft, remove the window holding screw. Place the screw
in a secure container.
3) Enter any waypoints into the GPS before takeoff
4) Set up the Audio Panel and Intercom. Check the operation of
the intercom (all positions) and perform a communications
check of the CAP FM radio from all positions.
5) If applicable, turn on the laptop and check for full battery
charge and proper settings
6) If applicable, connect the portable GPS to the camera and
check for proper operation
7) Check the imaging equipment. If you will be transmitting
pictures from the aircraft, take a test shot of the aircraft ‘N’
number and transmit it to the receiving station; this will test
the camera, laptop, and satellite phone. If you will be
shooting video, test the camcorder and audio connection for
proper operation. [A shot of the aircraft ‘N’ number with the
camera or camcorder also provides a good “starting photo”
for the sortie.]
8) Arrange your equipment for easy access, but ensure
lightweight objects such as charts and logs are not lying
loose where they can be blown about the cabin when you
open a window to take pictures
4. Fly Sortie
A. Transit to the Target Area
1) Relax sterile cockpit rules but maintain situational awareness
2) Double-check navigational settings to be used in the search
area
3) Review search area terrain and obstacles
4) Update in-flight weather and file a PIREP
5) Review methods to reduce fatigue or combat high altitude
effects during the sortie
CLVIII
B. Approaching the Target
1) Exterior lights on (maximize your visibility so others can "see
and avoid") NOTE: You may need to turn off the strobe lights
so they will not affect the photos, particularly in low-overcast
conditions
2) Review sortie objectives and crew communications, and set
the audio panel and intercom for imaging pattern
communications
3) Double-check radio and navigational settings, and check
navigational equipment against each other (detect
abnormalities or failures)
4) Remember hourly updates - Altimeter setting (closest source)
and fuel assumptions, and when to report “Operations
Normal”
5) If applicable, connect the portable GPS unit to the camera
and ensure it locks onto the satellites (usually denoted by
solid “GPS” symbol or letters on the camera display)
6) Stabilize at ‘Target ID Pass’ heading, altitude and airspeed
(not < Vx) at least two miles out. Implement sterile cockpit
rules.
7) Determine if lighting conditions are acceptable
8) Log time (and Hobbs) and report "In the Search Area"
C. The ID Pass
1) Log Lat/Long (and radial/DME) and verify you have the
correct target
2) Enter the coordinates as a ‘User Waypoint’ and display for
pilot use
3) Examine the target, its surroundings, and lighting conditions.
Verify that what you see is what you planned for and that you
can properly frame the target; if not, have the Mission Pilot
pick a safe location to loiter and re-plan how to perform the
imaging run (e.g., determine the altitude, angle and directions
you need to get the best photos) and how you wish to frame
your photos
4) If needed, perform a damage survey and plan the imaging
pattern(s) necessary to fully document the damage.
Reassess your fuel status and plan a refueling stop if
needed. Update Mission Base on your new sortie time
assumptions.
CLIX
D. Prepare to Enter the Imaging Pattern
1) Fly at least 1000' AGL during daylight and at least 2000' AGL
at night, and no slower than Vx
2) Ensure you’re flying slowly enough (~ 75-80 kts) to allow the
AP to get several photos from each angle or side
3) Secure camera neck and/or wrist strap and hold or store lens
cap
4) Check camcorder microphone cable connection to the
intercom
5) Check that the camera/camcorder is on
6) Ready the Photo Log
7) Secure loose items in the cabin and open the window
E. Taking Photos with the Camera
1) Steady the camera and give the log keeper a heads up
2) Frame and take the photos, keeping the log keeper informed
of your photos
F. Recording Video with the Camcorder
1) Steady the camcorder and set for wide angle (no zoom)
2) Begin recording and commentary about five seconds before
the target comes into frame
3) Zoom in (smoothly) when the target is abeam
4) Zoom out about five seconds beyond the target, and stop
recording
5) Play back the video before moving in towards the target to
make sure you got the video you wanted
6) Minimize zooming in and out while recording
7) Zoom out to wide angle when finished recording, and stop
recording
G. Determine Success or Failure
1) Pilot selects a safe area away from the target to circle the
aircraft
2) AP reviews the photos/video on the LCD screen (if using a
portable GPS, ensure the coordinates were recorded with the
images)
3) Plan and re-shoot as necessary
4) Log time (and Hobbs) and report "Out of the Search Area"
5) Double-check heading and altitude assigned for transit to
next target or return to base
CLX
H. After the Sortie
1) Remove all your equipment from the aircraft, if necessary
2) Clean the windows
3) If no more sorties will be flown in the aircraft, replace the
aircraft window screw (and bushing or washer) and secure
the aircraft
5. Debrief
A. Transfer your photos to a computer as soon as possible, and
then verify the pictures were successfully and completely
transferred by looking at each photo on the computer before you
erase the photos on the media card
Some mission bases will just have you give them the media
card. In this case, be sure to put one of your spare cards back in
the camera, check that it is empty, and put the camera back in its
bag.
B. Take a short break and then meet to complete the CAPF 104:
1) Fill in or verify 'ATD' and 'Actual Landing Time'
2) The Summary section describes what you accomplished on
the sortie
3) The Results/Deliverables section can be as simple as "no
sightings" or "no damage noted." However, you must list
results such as sightings (including negative sightings), the
number of photos you took, etc.
4) The Weather Conditions section can be as simple as entering
"as forecast." However, if the weather was unexpected it is
important to explain how the weather conditions affected
sortie effectiveness
5) The Remarks section is for entering any information you think
is pertinent or helpful that was not entered elsewhere on the
CAPF 104. It also gives the crew a chance to comment on
the effectiveness of the sortie in detail.
6) The Sortie Effectiveness section involves a quantitative
assessment of how well you accomplished your mission.
7) The Attachments & Documentation section is selfexplanatory. Be sure to label any attachments (e.g., mission
and sortie number) so they can be related to the
mission/sortie if it accidentally becomes separated.
6) Ensure the 'Hobbs To/From' and 'Hobbs in Area' entries
equal the 'Hobbs Total' hours entry
7) Ensure all entries and sketches/drawings are clear and
legible
CLXI
C. Check in with Debriefing Officer
1) Tell how you did your job and what you saw
2) Usually starts with a review of the information you entered on
the reverse of the CAPF 104
3) Review the photos or video (plus Photo Logs and sketches),
comparing them against mission objectives and requirements
4) Answer all questions as best you can, and be very honest
about conditions and your actions
5) If you are scheduled for another sortie, find someplace to
rest. Close your eyes; you may even want to take a nap if
there is time and a place to do so. Also, take in some
refreshment to give you sufficient energy for the next sortie.
CLXII
Attachment 3, Circling
Pattern Worksheet
CLXIII
Intentionally blank
CLXIV
Attachment 4, 4-Square
Pattern Worksheet 1
CLXV
Intentionally blank
CLXVI
Attachment 5, 4-Square
Pattern Worksheet 2
CLXVII
Intentionally blank
CLXVIII
Attachment 6, Overview
Pattern Worksheet
CLXIX
Intentionally blank
CLXX
Attachment 7, 45º Pattern
Worksheet
CLXXI
Intentionally blank
172
Index
4
D
45° Angle to Target Imaging Flight
Pattern · 128
4-Square Imaging Flight Pattern · 125
Debriefing · 144
Depth of Field · 39
Depth Perception · 39
Digital zoom · 3
Digitize 35mm film · 99
Diopter correction · 7
A
Add Text or Symbols · 84
Aircrew planning · 120
Aperture · 20, 21
Aperture Priority mode · 24
Automatic mode · 23
B
Batteries · 7
Battery maintenance · 111
Bird’s Eye Imaging Flight Pattern · 126
Briefing aircrews · 120
Briefing staff · 120
Briefings · 117
Browsing images · 70
Burst mode · 25
E
Editing images · 73
Electronic viewfinder (EVF) · 6
Exposure lock · 22
Exposure modes · 23
Exposure Value (EV) compensation · 25
F
File Transfer Protocol (FTP) · 92
Focal length · 4
Focal point · 38
Formatting media cards · 9
Framing · 38
C
G
Camcorders · 42
Camera settings · 133
CAP Image Processor program · See
Watermarking images
Capturing images · 60
Circling Imaging Flight Pattern · 124
Cleaning lenses · 112
Composition · 37
Computer requirements · 52
Conducting Imaging Sorties · 137
Continuous mode · See Burst mode
Crew Communications · 129
Crop images · 74
Customer needs · 117
GIF · 15
173
H
Histogram · 31, 77
I
ID pass · 139
Imaging Flight Patterns · 122
Inventory equipment · 132
ISO · 19
173
J
Q
JPEG · 12
Quality setting · 29, 30
L
R
Lens filters · 113
Lossless compression · 12
Lossy compression · 12
RAW · 14, 82
Recording video with a camcorder · 141
Resize images · 85
Resolution · 28, 30
M
S
Manual mode · 24
Media cards · 8
Memory Card Reader · 60
Memory cards · See Media cards
Metering system · 22
N
Scene modes · 24
Send images by e-mail · 88
Shutter delay · 25
Shutter Priority mode · 24
Shutter speed · 20, 21
Success determination · 142
Success factors · 130
Naming images · 66
T
O
Optical viewfinder · 5
Optical zoom · 3, 141
Organize images · 63
Overview Imaging Flight Pattern · See
Bird's Eye
Ownership of Images · v
Taking photos · 140
Tethering · 58
TIF · 15
U
Upload images · 93, 95, 97
P
V
Panorama · 40
Pixel · 3
Practice · 145
Pre-focusing · See Exposure Lock
Preparing the Aircraft · 135
Printing images · 104
Program mode · 24
PSD · 16
Viewing images · See Browsing images
Vignetting · 5
174
W
Watermarking images · 64
White Balance · 26
WMIRS · 65, 95