1
Micro I
Diagnostic
Spirometer
Operating Manual – English
Operating Manual – CareFusion USA
Mode d’emploi - Français
Bedienungsanleitung - Deutsch
Manual de funcionamiento – Español
Manual de Instruções do - Português
Gebruikshandleiding – Nederlands
Contents
I.
Introduction – English .......................................................9
Package contents ............................................................. 10
Contraindications, Warnings and Cautions ........................... 11
Intended Use................................................................... 12
Environment.................................................................... 12
Getting Started................................................................ 12
Configuration .................................................................. 13
Micro I PC Software.......................................................... 14
Operation ....................................................................... 18
Main Menu Overview ........................................................ 18
Quick Exam..................................................................... 19
Exam with Predicted values ............................................... 21
Post BD Exam.................................................................. 24
NLHEP Mode.................................................................... 24
NLHEP Quality Checks ...................................................... 25
NLHEP QC Grades ............................................................ 26
NLHEP Interpretation........................................................ 26
Switching Off................................................................... 27
Maintenance.................................................................... 27
Battery Management ........................................................ 27
Battery Replacement ........................................................ 28
Calibration Check ............................................................. 30
Cleaning the Transducer ................................................... 31
Servicing ........................................................................ 31
Trouble Shooting Information ............................................ 32
Electromagnetic Compatibility (EMC) .................................. 32
Safety Designation per IEC60601-1.................................... 33
Symbols ......................................................................... 34
Specification of the Micro I ................................................ 36
Accessories ..................................................................... 37
Customer Contact Information......................................... 212
1
Contents
II.
Introduction – CareFusion USA........................................ 38
Package contents ............................................................. 39
Contraindications, Warnings and Cautions ........................... 40
Intended Use................................................................... 41
Environment.................................................................... 41
Getting Started................................................................ 41
Configuration .................................................................. 42
Micro I PC Software.......................................................... 43
Operation ....................................................................... 47
Main Menu Overview ........................................................ 47
Quick Exam..................................................................... 48
Exam with Predicted values ............................................... 50
Post BD Exam.................................................................. 53
NLHEP Mode.................................................................... 53
NLHEP Quality Checks ...................................................... 54
NLHEP QC Grades ............................................................ 55
NLHEP Interpretation........................................................ 55
Switching Off................................................................... 56
Maintenance.................................................................... 56
Battery Management ........................................................ 56
Battery Replacement ........................................................ 57
Calibration Check ............................................................. 59
Cleaning the Transducer ................................................... 60
Servicing ........................................................................ 60
Trouble Shooting Information ............................................ 61
Electromagnetic Compatibility (EMC) .................................. 61
Safety Designation per IEC60601-1.................................... 62
Symbols ......................................................................... 63
Specification of the Micro I ................................................ 65
Accessories ..................................................................... 66
Customer Contact Information......................................... 212
2
Table des matières
III. Introduction - Français .................................................... 67
Contenu de l'emballage .................................................... 68
Contre-indications, avertissements et mises en garde .......... 69
Utilisation ....................................................................... 70
Conditions d'utilisation...................................................... 70
Première utilisation .......................................................... 70
Configuration .................................................................. 71
Logiciel Micro I PC Software .............................................. 72
Fonctionnement ............................................................... 76
Présentation du menu principal.......................................... 76
Examen rapide ................................................................ 77
Examen à l'aide de valeurs prédites ................................... 79
Examen Post BD .............................................................. 82
Mode NLHEP.................................................................... 82
Contrôles qualité NLHEP ................................................... 83
Niveaux de qualité NLHEP ................................................. 84
Interprétation NLHEP........................................................ 84
Mise hors tension ............................................................. 85
Entretien......................................................................... 85
Entretien de la batterie ..................................................... 85
Remplacement de la batterie............................................. 86
Contrôle de l'étalonnage ................................................... 88
Nettoyage du transducteur................................................ 89
Réparation ...................................................................... 89
Dépannage ..................................................................... 90
Compatibilité électromagnétique (CEM) .............................. 90
Classification selon la norme CEI 60601-1........................... 91
Symboles........................................................................ 92
Caractéristiques du Micro I................................................ 94
Accessoires ..................................................................... 95
Coordonnées du service client ......................................... 212
3
Inhalt
IV. Einführung – Deutsch ...................................................... 96
Packungsinhalt ................................................................ 97
Kontraindikationen, Warn- und Vorsichtshinweise ................ 98
Verwendungszweck .......................................................... 99
Umgebungsbedingungen................................................... 99
Inbetriebnahme ............................................................... 99
Konfiguration ................................................................ 100
Micro I PC Software........................................................ 101
Betrieb ......................................................................... 105
Übersicht Hauptmenü ..................................................... 105
Schnelluntersuchung ...................................................... 106
Untersuchung mit Prognosewerten ................................... 108
Untersuchung nach Bronchodilatator ................................ 111
NLHEP-Modus ................................................................ 111
NLHEP-Qualitätsprüfungen (QC)....................................... 112
NLHEP QC-Stufen........................................................... 113
NLHEP-Interpretation ..................................................... 113
Ausschalten des Gerätes ................................................. 114
Instandhaltung .............................................................. 114
Batteriemanagement...................................................... 114
Batterieaustausch .......................................................... 115
Kalibrationsprüfung ........................................................ 117
Reinigen des Transducers ............................................... 118
Wartung ....................................................................... 118
Informationen zur Fehlerbehebung................................... 119
Elektromagnetische Verträglichkeit (EMV) ......................... 119
Sicherheitsbestimmungen gemäß IEC60601-1 ................... 120
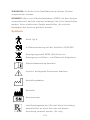
Symbole ....................................................................... 121
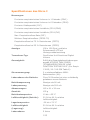
Spezifikationen des Micro I.............................................. 123
Zubehör........................................................................ 124
Kundendienst-Kontaktadressen........................................ 212
4
Contenido
V.
Introducción - Español .................................................. 125
Contenido del envase ..................................................... 126
Contraindicaciones, advertencias y precauciones................ 127
Uso indicado.................................................................. 128
Entorno ........................................................................ 128
Para comenzar............................................................... 128
Configuración ................................................................ 129
Micro I PC Software........................................................ 130
Funcionamiento ............................................................. 134
Descripción general del menú principal ............................. 134
Examen rápido .............................................................. 135
Examen con valores previstos.......................................... 137
Examen Post BD ............................................................ 140
Modo NLHEP.................................................................. 140
Revisiones de calidad del NLHEP ...................................... 141
Niveles de CC del NLHEP ................................................. 142
Interpretación del NLHEP ................................................ 142
Desconexión.................................................................. 143
Mantenimiento............................................................... 143
Gestión de la batería ...................................................... 143
Cambio de la batería ...................................................... 144
Comprobación de la calibración........................................ 146
Limpieza del transductor................................................. 147
Reparaciones................................................................. 147
Información sobre resolución de problemas....................... 148
Compatibilidad electromagnética (CE) .............................. 148
Designación de seguridad según IEC60601-1 .................... 149
Símbolos....................................................................... 150
Especificaciones del Micro I ............................................. 152
Accesorios..................................................................... 153
Información de contacto para el cliente ............................ 212
5
Índice
VI. Introdução - Português ................................................. 154
Conteúdo da Embalagem ................................................ 155
Contra-indicações, Avisos e Cuidados ............................... 156
Utilização Prevista.......................................................... 157
Ambiente ...................................................................... 157
Primeira Utilização ......................................................... 157
Configuração ................................................................. 158
Micro I PC Software........................................................ 159
Funcionamento .............................................................. 163
Descrição Geral do Menu Principal.................................... 163
Exame Rápido ............................................................... 164
Exame com Valores Previstos .......................................... 166
Exame Pós-BD............................................................... 169
Modo NLHEP.................................................................. 169
Controlos de Qualidade NLHEP......................................... 170
Grau de CQ do NLHEP..................................................... 171
Interpretação NLHEP ...................................................... 171
Desligar ........................................................................ 172
Manutenção .................................................................. 172
Manutenção das Pilhas.................................................... 172
Substituição das Pilhas ................................................... 173
Teste de Calibração........................................................ 175
Limpeza do Transdutor ................................................... 176
Assistência técnica ......................................................... 176
Informações sobre Resolução de Problemas ...................... 177
Compatibilidade Electromagnética (CEM) .......................... 177
Designação de Segurança segundo a norma IEC60601-1 .... 178
Símbolos....................................................................... 179
Especificações do Micro I ................................................ 181
Acessórios..................................................................... 182
Informação de Apoio ao Cliente ....................................... 212
6
Inhoud
VII. Inleiding - Nederlands .................................................. 183
Inhoud van de verpakking............................................... 184
Contra-indicaties, Waarschuwingen en aandachtspunten..... 185
Beoogd gebruik ............................................................. 186
Gebruiksomgeving ......................................................... 186
Aan de slag ................................................................... 186
Configuratie .................................................................. 187
Micro I pc-software ........................................................ 188
Bediening...................................................................... 192
Overzicht hoofdmenu ..................................................... 192
Snel onderzoek.............................................................. 193
Onderzoek met voorspelde waarden................................. 195
Postbronchodilatoronderzoek........................................... 198
NLHEP-modus................................................................ 198
Kwaliteitscontroles NLHEP ............................................... 199
Classificatie kwaliteitscontroles NLHEP.............................. 200
Interpretatie NLHEP ....................................................... 200
Uitschakelen.................................................................. 201
Onderhoud .................................................................... 201
Batterijbeheer ............................................................... 201
Batterij vervangen ......................................................... 202
Kalibratiecontrole........................................................... 204
De transducer reinigen ................................................... 205
Reparatie ...................................................................... 205
Informatie over probleemoplossing .................................. 206
Elektromagnetische compatibiliteit (EMC) ......................... 206
Veiligheidsaanduiding volgens IEC60601-126 .................... 207
Symbolen ..................................................................... 208
Specificatie van de Micro I .............................................. 210
Hulpstukken .................................................................. 211
Contactinformatie voor klanten........................................ 212
7
8
Micro I
Diagnostic
Spirometer
Operating Manual –
English
9
I. Introduction
The Micro I is a compact, rechargeable battery operated and fully
portable diagnostic spirometer. It is accurate to the requirements of
the ATS/ERS TASK FORCE: STANDARDISATION OF LUNG FUNCTION
TESTING 2005. Its ergonomic and user-friendly design allows
diagnostic spirometry measurements, including predicted values and
automatic interpretation, to be made quickly and simply.
The Micro I features include:
o
Measures FEV1, FVC(FEV6), FEV1/FVC, FEV1/FEV6, PEF,
FEF25, FEF75, and FEF 25-75
o
Fully configurable using software supplied
o
ECCS, Asian or NHANES III predicted values
o
Variation from norm as percentage or Z-score
o
NLHEP, NICE, or the ATS/ERS interpretation
o
Spirometry manoeuvre quality checks
o
Post bronchodilator comparison
o
NLHEP compliant mode
The spirometer uses the CareFusion Digital Volume Transducer, an
extremely stable form of volume transducer, which measures
expired air directly at B.T.P.S (Body Temperature and Pressure with
Saturated water vapour) thus avoiding the inaccuracies of
temperature corrections. This transducer is insensitive to the effects
of condensation and temperature and avoids the need for individual
calibration prior to performing a test.
CareFusion can supply spirometers to fulfil all your diagnostic and
monitoring spirometry needs. The Micro II spirometer is the sister
spirometer to the Micro I specifically designed for monitoring of
asthma and COPD either at home or in the work place.
9
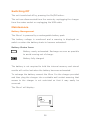
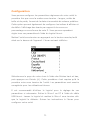
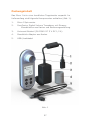
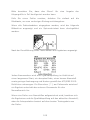
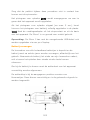
Package Contents
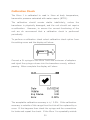
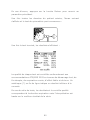
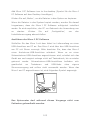
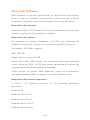
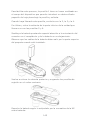
The Micro I is packaged in a convenient carrying case and comes
complete with the following items (Fig.1):
1.
Micro I spirometer
2.
CareFusion Digital Volume Transducer together with
disposable cardboard mouthpieces and instruction manual.
3.
Universal power supply (36-PSU1017 5VDC 1.2A)
4.
Cardboard mouthpiece adapter
5.
USB/Charging cable
Fig 1
10
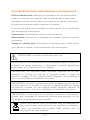
Contraindications, Warnings and Cautions
Contraindications: As performing spirometry might be physically
demanding, it is contraindicated in patients with recent myocardial
infarction. Also extensive exhalation might lead to syncope.
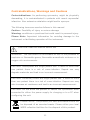
The following terms are used as follows in this manual
Caution: Possibility of injury or serious damage
Warning: conditions or practices that could result in personal injury.
Please Note: Important information for avoiding damage to the
instrument or facilitating operation of the instrument.
CAUTION: Read the manual before use
WARNING: The instrument is not suitable for use in the presence of
explosive or flammable gases, flammable anaesthetic mixtures or in
oxygen rich environments.
CAUTION: Mouthpieces are single patient use. If used on more than
one patient there is a risk of cross-infection. Repeat use may
degrade materials and lead to an incorrect measurement.
CAUTION: Pulmonary filters are single patient use. If used on more
than one patient there is a risk of cross-infection. Repeat use may
also increase air resistance and lead to an incorrect measurement.
CAUTION: Do not allow the patient to handle the spirometer when
connected to either the power supply for charging or to a PC when
configuring the unit.
PLEASE NOTE: The product you have purchased should not
be disposed of as unsorted waste. Please utilise your local
WEEE collection facilities for the disposal of this product.
11
Intended Use
The Micro I is used by clinicians and healthcare professionals for the
diagnosis of asthma and COPD in adults and children over the age of
3 years.
Environment
Please observe the following precautions:
•
•
Avoid exposing the Micro I to direct sunlight.
Avoid operating the spirometer in dusty conditions or near to
heating appliances or radiators.
•
Do not keep the spirometer in a damp place or expose it to
extreme temperatures.
•
Do not direct the transducer holder towards a strong light
source whilst operating the spirometer.
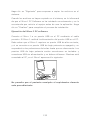
Getting Started
It is recommended that Micro I spirometer is fully charged before
use. The power supply is provided with separate UK, USA and
European plugs. Connect the required plug to the power supply and
plug in to a mains outlet. Connect the Micro I to the power supply
using the USB/charging cable and the charging symbol will appear
on the screen.
Fully charge for a minimum of 5 hours when used for the first
time.
Remove the protective film from the display screen before use.
12
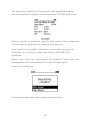
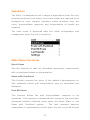
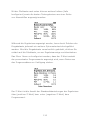
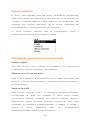
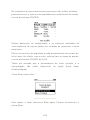
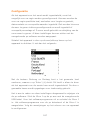
Configuration
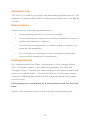
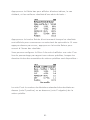
When the unit is first turned on it may be configured for your region.
This will set the language, height and weight units, date format and
predicted values set appropriate for your region. It will also
configure the indices to be displayed and whether percentage
predicted or Z-score is to be used to show variation from the norm.
However all of these settings may be customised using the PC
software supplied.
Turn the unit on by pressing the on/off button located at the top of
the device and the following will be displayed:
Use the up and down arrow keys to highlight the required country
and then press ‘Enter’ (↵). This procedure is only required when the
unit is first switched on and the selection will be stored for future
use.
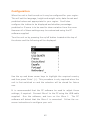
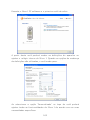
It is recommended that the PC software be used to adjust these
settings, if required. Connect Micro I to the PC using the USB cable
supplied.
Run the software, and turn on the Micro I.
software will detect that the Micro I is connected.
screen instructions to configure your unit.
13
The PC
Follow the on-
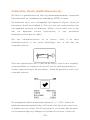
Micro I PC Software
This software allows you to customise the settings on your Micro I
spirometer. Once successfully installed, comprehensive help is
available through the Help menu when using the application.
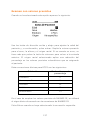
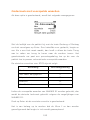
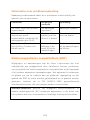
System Requirements
Micro I PC Software requires certain hardware and software
components in order to run properly.
PC Requirements
An IBM-compatible PC is required, with hardware that meets or
exceeds the following minimum requirements.
Processor: 800 MHz or above
RAM: 256 MB
Free Disk Space: 50 MB
Video: 800x600, 256 colours. It is recommended that a resolution of
at least 1280x1024 be used to enable the full benefits of the multiwindow interface.
At least one free USB port. (An additional USB port will be required
for USB enabled spirometers)
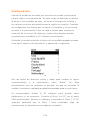
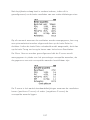
Operating System Requirements
Micro I PC Software will run on the following operating systems:
Windows XP
Windows Vista 32bit
Windows Vista 64bit
Windows Server 2003
Windows Server 2008
14
Installing Micro I PC Software
Before you begin, please ensure your computer meets the minimum
system requirements and the user installing the software has
administrative user rights.
Close any other applications that are running.
Insert the installation CD into your CD-Rom drive.
The setup program should launch automatically, displaying the
welcome dialog box, click ‘Next’ to continue. If the setup program
does not launch automatically use Windows Explorer to manually
select the CD drive then open the file named Micro I PC
Software.exe.
The license agreement will be displayed. Please read the complete
document and ensure you understand fully before accepting the
terms of the license. Click ‘Next’ to continue.
The select destination location dialog will be displayed showing the
directory where the Micro I PC Software will be installed. The default
location is:
C:\Program Files\CareFusion\Micro I PC Software
To change this location select ‘Browse’.
Click ‘Next’ to display the Select program manager group dialog.
This will be the location where the Micro I PC Software launch icon
will be placed under the Start Menu. Either a new location can be
entered or an existing location used.
Click ‘Next’ to display the installation options dialog containing the
following option:
Add Micro I PC Software icon to the desktop.
Click ‘Next’ to start copying the files to your system.
Once the files have finished copying to your system you will be
advised that the Micro I PC Software has been successfully installed
15
and that it would be advisable to restart your PC before using the
application. Click ‘Finish’ to complete the installation process.
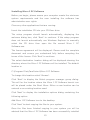
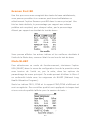
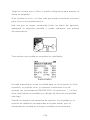
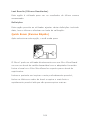
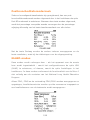
Running Micro I PC software
Connect your Micro I to a USB port on the PC using the cable
provided. The Micro I will take power from the USB port on the PC.
Please be advised that the Micro I requires a High Current USB port,
and if connected to a Low Power USB port the device will turn itself
off and fail to respond to any key presses until disconnected. Low
Power USB ports are commonly found on keyboards and unpowered
USB hubs and should not be used. Whilst connected to the PC the
Micro I will display:
Do not allow the patient to handle the spirometer during this
procedure.
16
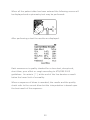
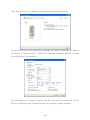
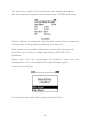
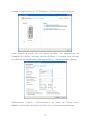
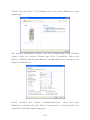
Run the Micro I PC software and the first screen will show:
From this screen you can either change the device settings or adjust
the Micro I internal clock. When the change settings options is used
the display will change to:
By selecting the ‘Custom’ option at the top of the screen all of the
Micro I features may be tailored to you specific requirements.
17
Operation
The Micro I is designed to suit a range of applications from the very
simplest spirometry test where only a few indices are required to be
displayed to more complex operation where deviation from the
norm, bronchodilator response, and interpretation of results are
required.
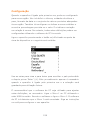
The main menu is displayed after the initial configuration and
subsequently when the unit is turned on:
Main Menu Overview
Quick Exam
Use this function to take an immediate spirometry measurement
with no predicted values or interpretation.
Exam with Predicted
This function requires the entry of the patient’s demographics so
that predicted values and interpretation may be calculated and
displayed.
Post BD Exam
This function allows the post bronchodilator response to be
measured. The response is measured with respect to the previously
measured baseline obtained using either the Quick Exam or the
Exam
with
Predicted
options.
The
last
recorded
baseline
examination is automatically stored when the unit is turned off and
18
will be available for a post bronchodilator comparison when the unit
is turned on.
Last Results
This option is used to view the results of the last stored
examination.
Settings
This option allows the user to adjust various settings including date,
time and language and to perform a calibration check.
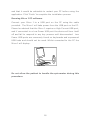
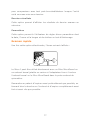
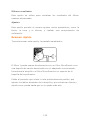
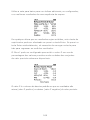
Quick Exam
After selecting this option the display will change to:
The Micro I may be used directly with a MicroGuard filter or with a
disposable cardboard mouthpiece with the adapter supplied. Insert
mouthpiece or MicroGuard filter into the mouthpiece holder of the
spirometer.
Instruct the patient to inhale as deeply as possible, seal their lips
around the mouthpiece and exhale as hard and as fast as possible
until no more air can be exhaled.
19
The spirometry results for that blow are then displayed together
with the manoeuvre quality check based upon ATS/ERS guidelines:
Further indices, if configured, and the best results from a sequence
of blows may be displayed by pressing the down key.
Each manoeuvre is quality checked for a slow start, abrupt end,
short blow, poor effort or cough according to ATS/ERS 2005
guidelines.
Please note that the percentage of predicted value and the
interpretation are not available for the Quick Exam option.
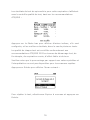
Press Enter to display:
To repeat the test select Blow Again and press Enter.
20
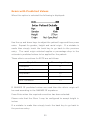
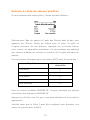
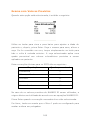
Exam with Predicted Values
When this option is selected the following is displayed:
Use the up and down keys to adjust the patient’s age and then press
enter. Repeat for gender, height and racial origin. If a mistake is
made then simply touch the back key to go back to the previous
entry.
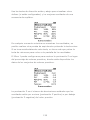
The racial origin selected applies a percentage drop to the
volumetric predicted values to be applied for the patient.
These ethnic corrections for ECCS are as follows:
Population
Percentage drop
Caucasian
0
Non-Specified
0
Polynesian
10
Asian
10
Afro Caribbean
13
If NHANES III predicted values are used then the ethnic origin will
be used according to the NHANES III equations.
Press Enter when the required correction has been selected.
Please note that the Micro I may be configured to accept height in
inches.
If a mistake is made then simply touch the back key to go back to
the previous entry.
21
When all the patient data has been entered the following screen will
be displayed and a spirometry test may be performed:
After performing a test the results are displayed:
Each manoeuvre is quality checked for a slow start, abrupt end,
short blow, poor effort or cough according to ATS/ERS 2005
guidelines. An asterix ( * ) at the end of the line denotes a result
below the lower limit of normality.
When a sequence of blows is recorded, the results and the quality
check refer to the current blow but the interpretation is based upon
the best result of the sequence.
22
Use the down arrow to see further indices, if configured, and the
best results from a sequence of blows:
At any time when the results are displayed another spirometer test
may be performed by touching the enter key. If the enter key is
touched accidently then simply press the back key to return to the
results screen.
The Micro I may be configured to display the Z score instead of the
percentage of predicted values where data from the predicted value
sets are available:
The Z score is the number of standard deviations that the results are
above (positive Z score) or below (negative Z score) the predicted
value.
23
Post BD Exam
Once satisfactory baseline tests have been recorded a post
bronchodilator examination may be performed by selecting the Post
BD Exam option from the main menu. When these tests are
performed the percentage of predicted value is replaced by the
percentage change from the best baseline result for each index:
Using the down key will display the other indices and the best
results as with the baseline blows.
NLHEP Mode
This mode of operation is obtained by selecting the USA (NLHEP)
option from the configuration menu when the unit is first turned on
or subsequently from the settings option on the main menu. In this
mode the functionality of the Micro I becomes fully compliant with
the National Lung Health Education Program requirements.
Only FEV1, FEV6 and the ratio, FEV1/FEV6, are displayed and
stored, quality checks are applied to every manoeuvre and a quality
grading score for the test session is displayed:
24
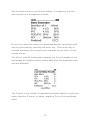
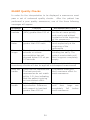
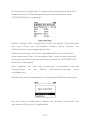
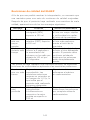
NLHEP Quality Checks
In order for the interpretation to be displayed a manoeuvre must
pass a set of enhanced quality checks.
After the patient has
performed a poor quality manoeuvre, one of the three following
messages will appear:
Message
Don’t
hesitate
Criteria
Back-extrapolated volume
(BEV) greater than 150 ml
Blast out
faster
Time until peak flow (PEFT)
greater than 120 msec
Blow out
longer
Expiration time less than 6
seconds or volume
accumulation has not
dropped below 100 ml per
0.5 seconds
Recommended action
The patient should blast
out the air more quickly
and evenly and without
hesitation at the beginning
of the manoeuvre
The patient must exhale
more explosively at the
beginning of the
manoeuvre
The patient stopped
exhaling too early. The
patient must exhale until
their lungs are completely
empty.
Once an acceptable manoeuvre has been performed, the following
consistency checks will also be applied to subsequent manoeuvres
Blast out
harder
Peak flow not reproducible.
The best previous
manoeuvres do not match
within 1.0 L/sec indicating
that the patient is giving
an inconsistent effort.
The patient must give
their maximum effort for
each manoeuvre
Deeper
breath
FEV1 or FEV6 not
reproducible. Difference
with respect to best test
greater than 150 ml
The patient must inhale
until
their
lungs
are
completely
full
before
each manoeuvre
25
When two manoeuvres fail either of the consistency checks, then the
best individual results of the two are saved (FEV1, FEV6, and PEF
individually).
When any of the above messages appear, instruct the patient on
how to improve their manoeuvre and demonstrate the correct
manoeuvre yourself.
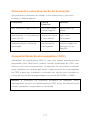
NLHEP QC Grades
The quality of each session is graded according to the following
criteria:
QC Grade
Criteria
A
at least two acceptable manoeuvres, with the
largest two FEV1’s matching better than 100mL and
the largest two FEV6’s matching better than 100mL
B
at least two acceptable manoeuvres, with the
largest two FEV1’s matching better than 150mL
C
at least two acceptable manoeuvres, with the
largest two FEV1’s matching between 200ml and
150mL
D
only one acceptable manoeuvre or two with the
largest two FEV1’s matching less than 200mL
F
No acceptable manoeuvres
NLHEP Interpretation
The interpretation is performed on the best spirometry results and is
based upon the predicted values for the forced expiratory ratio,
FEV1/FEV6, and FEV1. If airways obstruction is detected the level of
severity is reported in accordance with the NLHEP guidelines.
26
Switching Off
The unit is switched off by pressing the On/Off button.
The unit can disconnected from the mains by unplugging the charger
from the mains socket or unplugging the USB cable.
Maintenance
Battery Management
The Micro I is powered by a rechargeable battery pack.
The battery voltage is monitored and a warning is displayed on
switch on when the battery starts to become exhausted.
Battery Status Icons
Battery nearly exhausted. Recharge as soon as possible
to avoid running out of charge.
Battery fully charged.
The battery is not required to hold the internal memory and stored
results will not be lost when the battery becomes exhausted.
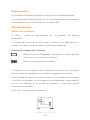
To recharge the battery connect the Micro I to the charger provided
and then plug the charger into a suitable wall socket ensuring that
access to the charger is not restricted so that it may easily be
removed.
The Micro I will display:
27
Do not allow the patient to handle the spirometer during this
procedure.
The charging icon (
) will display to indicate that the device is
charging.
Once the charging icon has switched off (up to 5 hours) it will be
replaced by the battery fully charged icon. (
) Remove the power
adapter from the wall socket and from the base of the unit. Micro I is
now ready for portable use.
Note: Micro I may be also charged from PC or laptop using the USB
cable provided.
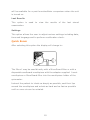
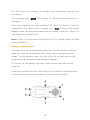
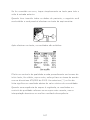
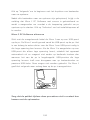
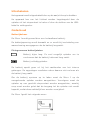
Battery Replacement
The lifetime of all rechargeable batteries is limited and the battery
pack will need to be replaced after a few years, depending upon
usage. As the battery nears the end of its life you will notice that
fewer tests can be performed between charges.
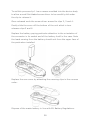
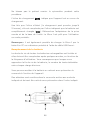
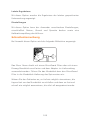
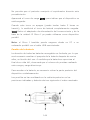
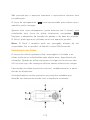
For access to the battery the rear of the device requires careful
removal.
Clips are moulded into the rear cover in the positions indicated and
should be carefully prised undone in the sequence shown.
28
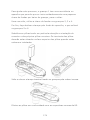
To aid this process clip 1 has a recess moulded into the device body
to allow a small flat bladed screw driver to be carefully slid under
the clip to release it.
Once released work the screw driver around to clips 2, 3 and 4.
Finally slide the cover off the bottom of the unit which in turn
releases clips 5 and 6
Replace the battery paying particular attention to the orientation of
the connector in its socket and of the battery itself in the case. Note
the leads coming from the battery should exit from the upper face of
the pack when installed.
Replace the rear cover by attaching the securing clips in the reverse
order.
Dispose of the waste battery in line with EU Battery Regulations.
29
Calibration Check
The Micro I is calibrated to read in litres at body temperature,
barometric pressure saturated with water vapour (BTPS).
The
calibration
should
remain
stable
indefinitely,
unless
the
transducer is physically damaged, and the unit should not require
re-calibration.
However, to ensure the correct functioning of the
unit we do recommend that a calibration check is performed
periodically.
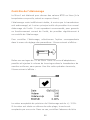
To perform a calibration check select calibration check option from
the setting menu and the display will show:
Connect a 3L syringe to the Micro I with the minimum of adapters
and inject the syringe volume into the transducer evenly, without
pausing. When complete the display will show:
The acceptable calibration accuracy is +/- 3.5%. If the calibration
accuracy is outside of this range then the tick will be replaced by a
cross. If this happens then check the syringe and the connections
for leaks and repeat the check. If the Micro I is repeatedly outside
30
the calibration range then the unit will have to be returned to
CareFusion for servicing.
Cleaning the Transducer
The transducer requires no routine maintenance or servicing.
To sterilise or clean the transducer it may be removed by means of
the following procedure:
1
Remove the transducer by gently rotating the transducer
anti-clockwise and then pulling from the main body.
2
The transducer may now be immersed in warm soapy water
for routine cleaning or immersed in cold sterilising solutions
e.g. Perasafe for a period not exceeding 10 minutes.
(Alcohol and chloride solutions should be avoided.) After
cleaning/sterilising, the transducer should be rinsed in
distilled water and dried. Perasafe is available from
CareFusion in convenient 81g plastic bottles, Cat No.
36-SSC5000A.
3
Re-assemble the transducer into the Micro I.
CAUTION: Do not attempt to wash or immerse the spirometer or
accessories in water or cleaning fluid, as there are electronic
components inside that will be permanently damaged
Servicing
If your unit requires service or repair please see page 212 for
contact details.
There are no user serviceable parts in the Micro I.
31
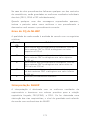
Trouble Shooting Information
Should you encounter problems operating your spirometer, please
consult the table below:
Problem
Possible
Cause
Solution
Micro I cannot be switched
on
Batteries are
flat
Recharge batteries
Every time you switch the
instrument on the time is
shown as 00:00
The internal
battery of Micro
I is defective
Contact your
dealer.
Micro I is outside of % when
conducting the calibration
check
There are leaks
in the syringe
or connections
Check the syringe
and connections for
leaks
Electromagnetic Compatibility (EMC)
Changes or modifications to the Micro I spirometer that are not
expressly approved by Carefusion can cause EMC issues with this or
other equipment. The device is designed and tested to comply with
applicable regulation regarding EMC and needs to be installed and
put into service as per interference exceeding levels specified in EN
50082-1:1992
WARNING: use of portable phones or other radio frequency (RF)
emitting equipment near the system may cause unexpected
adverse operation
32
or
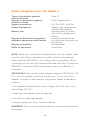
Safety Designation per IEC 60601-1
Class II
Type of protection against
electrical shock
Degree of protection against
electrical shock
Supply connection
Power Equipment
Type B applied part
Battery life:
Degree of Electrical connection
between equipment and Patient
Degree of mobility
Mode of operation
100-240 VAC, 50/60Hz
Adapter and rechargeable
internal NiMH battery.
Approximately 30 hours
with a fully charged new
battery.
Equipment designed as
non-electrical connection to
the patient.
Transportable
Continuous
NOTE: When you connect other equipment to the unit, always make
sure that the whole combination complies with the international
safety standard IEC 60601-1 for medical electrical systems. When
connecting to a PC with the supplied USB lead then the PC must be a
EN60950-1 compliant SELV limited power source or EN60601-1
compliant.
IMPORTANT: Only use the mains adapter supplied (36-PSU1017 5V
DC 1.2A) The adapter contains a transformer. Do not cut off the
adapter to replace it with another plug as this causes a hazardous
situation.
• The adapter transforms the mains voltage (100-240 Volts) to a
safe voltage (5V DC)
• Make sure the adapter does not get wet
• Do not use a damaged adapter
• Always unplug your Micro I before cleaning
WARNING: Do not connect devices that are not specified as part of
the system.
33
WARNING: No modification of this equipment is allowed.
NOTE: If an MPSO (Multiple Portable Socket Outlet) is used with the
system, the maximum permitted load should not be exceeded. Do
not connect electrical equipment that has not been supplied as part
of the system.
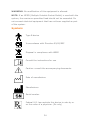
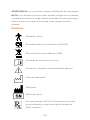
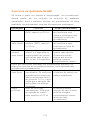
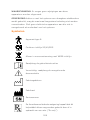
Symbols
Type B device
In accordance with Directive 93/42/EEC
0086
Disposal in compliance with WEEE
Consult the instructions for use
Caution: consult the accompanying documents
Date of manufacture
Manufacturer
Serial number
Federal U.S. law restricts this device to sale by or
on the order of a physician. (Rx only)
34
Please Note: Information in this manual is subject to change
without notice and does not represent commitment on the part of
CareFusion UK 232 Ltd. The software may be used or copied only in
accordance with the terms of that agreement. No part of this
manual may be reproduced or transmitted in any form or by any
means, electronic or mechanical, including photocopying and
recording for any purpose without the written permission of
CareFusion UK 232 Ltd.
35
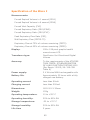
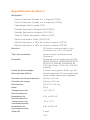
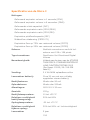
Specification of the Micro I
Measurements:
Forced Expired Volume in 1 second (FEV1)
Forced Expired Volume in 6 second (FEV6)
Forced Vital Capacity (FVC)
Forced Expiratory Ratio (FEV1/FEV6)
Forced Expiratory Ratio (FEV1/FVC)
Peak Expiratory Flow Rate (PEF),
Mid Expiratory Flow (FEF25-75)
Expiratory Flow at 75% of volume remaining (FEF75)
Expiratory Flow at 25% of volume remaining (FEF25)
Display:
128 x 128 pixel graphic backlit
monochrome LCD
Transducer type:
CareFusion Uni-Directional Digital
Volume
Accuracy:
To the requirements of the ATS/ERS
TASK FORCE: STANDARDISATION
OF LUNG FUNCTION TESTING 2005
(Eur Respir J 2005; 26: 319-338
Table 6)
2 X AA size NiMH rechargeable cells
Power supply:
Battery life:
Approximately 30 hours with a fully
charged new battery.
Operating current
Less than 90mA
Charging current
Less than 500mA
Dimensions:
162 X 61 X 30mm
Weight:
152g
Operating temperature:
10 to +35° C
Operating humidity:
20% to 80% RH
Storage temperature:
-20 to +70° C
Storage humidity:
30% to 90% RH
Life time
5 years
36
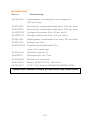
Accessories
Cat. No.
Description
36-PSA1000
Adult Disposable Mouthpieces (500 per box)
36-SST1250
One-way Safety Mouthpieces (250 per box)
36-SST1000
One-way Safety Mouthpieces (500 per box)
36-MGF1025
Microgard Pulmonary Filter (25 per box)
36-MGF1100
Microgard Pulmonary Filter (100 per box)
36-PSA1200
Paediatric Disposable Mouthpieces (250 per box)
36-PSA1100
Paediatric Adaptor
36-SSC5000A
PeraSafe Sterilising Powder 81g (to make up 5
litres of solution)
36-VOL2104
Nose Clips (pack of 5)
36-SM2125
3 Litre Calibration Syringe
36-MLD1621
Mouthpiece adaptor
36-BAT1043
Battery Pack (NiMH AA 2.4V, 1600mAh)
36-PSU1017
5V DC 1.2A (GlobTek WR9QA1200USBNR-G2267)
PLEASE NOTE: USE ONLY CAREFUSION ACCESSORIES
37
Micro I
Diagnostic
Spirometer
Operating Manual –
CareFusion USA
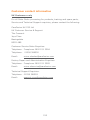
Federal (USA) law restricts this device to sale by or on the
order of a physician or licensed practitioner.
CareFusion,
22745 Savi Ranch Parkway,
Yorba Linda
CA 92887-4668
USA
38
II.
Introduction – CareFusion USA
The Micro I is a compact, rechargeable battery operated and fully
portable diagnostic spirometer. It is accurate to the requirements of
the ATS/ERS TASK FORCE: STANDARDISATION OF LUNG FUNCTION
TESTING 2005. Its ergonomic and user-friendly design allows
diagnostic spirometry measurements, including predicted values and
automatic interpretation, to be made quickly and simply.
The Micro I features include:
o
Measures FEV1, FVC(FEV6), FEV1/FVC, FEV1/FEV6, PEF,
FEF25, FEF75, and FEF 25-75
o
Fully configurable using software supplied
o
ECCS, Asian or NHANES III predicted values
o
Variation from norm as percentage or Z-score
o
NLHEP, NICE, or the ATS/ERS interpretation
o
Spirometry manoeuvre quality checks
o
Post bronchodilator comparison
o
NLHEP compliant mode
The spirometer uses the CareFusion Digital Volume Transducer, an
extremely stable form of volume transducer, which measures
expired air directly at B.T.P.S (Body Temperature and Pressure with
Saturated water vapour) thus avoiding the inaccuracies of
temperature corrections. This transducer is insensitive to the effects
of condensation and temperature and avoids the need for individual
calibration prior to performing a test.
CareFusion can supply spirometers to fulfil all your diagnostic and
monitoring spirometry needs. The Micro II spirometer is the sister
spirometer to the Micro I specifically designed for monitoring of
asthma and COPD either at home or in the work place.
38
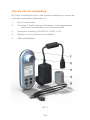
Package Contents
The Micro I is packaged in a convenient carrying case and comes
complete with the following items (Fig.1):
1.
Micro I spirometer
2.
CareFusion Digital Volume Transducer together with
disposable cardboard mouthpieces and instruction manual.
3.
Universal power supply (36-PSU1017 5VDC 1.2A)
4.
Cardboard mouthpiece adapter
5.
USB/Charging cable
Fig 1
39
Contraindications, Warnings and Cautions
Contraindications: As performing spirometry might be physically
demanding, it is contraindicated in patients with recent myocardial
infarction. Also extensive exhalation might lead to syncope.
The following terms are used as follows in this manual
Caution: Possibility of injury or serious damage
Warning: conditions or practices that could result in personal injury.
Please Note: Important information for avoiding damage to the
instrument or facilitating operation of the instrument.
CAUTION: Read the manual before use
WARNING: The instrument is not suitable for use in the presence of
explosive or flammable gases, flammable anaesthetic mixtures or in
oxygen rich environments.
CAUTION: Mouthpieces are single patient use. If used on more than
one patient there is a risk of cross-infection. Repeat use may
degrade materials and lead to an incorrect measurement.
CAUTION: Pulmonary filters are single patient use. If used on more
than one patient there is a risk of cross-infection. Repeat use may
also increase air resistance and lead to an incorrect measurement.
CAUTION: Do not allow the patient to handle the spirometer when
connected to either the power supply for charging or to a PC when
configuring the unit.
PLEASE NOTE: The product you have purchased should not
be disposed of as unsorted waste. Please utilise your local
WEEE collection facilities for the disposal of this product.
40
Intended Use
The Micro I is used by clinicians and healthcare professionals for the
diagnosis of asthma and COPD in adults and children over the age of
3 years.
Environment
Please observe the following precautions:
•
•
Avoid exposing the Micro I to direct sunlight.
Avoid operating the spirometer in dusty conditions or near to
heating appliances or radiators.
•
Do not keep the spirometer in a damp place or expose it to
extreme temperatures.
•
Do not direct the transducer holder towards a strong light
source whilst operating the spirometer.
Getting Started
It is recommended that Micro I spirometer is fully charged before
use. The power supply is provided with separate UK, USA and
European plugs. Connect the required plug to the power supply and
plug in to a mains outlet. Connect the Micro I to the power supply
using the USB/charging cable and the charging symbol will appear
on the screen.
Fully charge for a minimum of 5 hours when used for the first
time.
Remove the protective film from the display screen before use.
41
Configuration
When the unit is first turned on it may be configured for your region.
This will set the language, height and weight units, date format and
predicted values set appropriate for your region. It will also
configure the indices to be displayed and whether percentage
predicted or Z-score is to be used to show variation from the norm.
However all of these settings may be customised using the PC
software supplied.
Turn the unit on by pressing the on/off button located at the top of
the device and the following will be displayed:
Use the up and down arrow keys to highlight the required country
and then press ‘Enter’ (↵). This procedure is only required when the
unit is first switched on and the selection will be stored for future
use.
It is recommended that the PC software be used to adjust these
settings, if required. Connect Micro I to the PC using the USB cable
supplied.
Run the software, and turn on the Micro I.
software will detect that the Micro I is connected.
screen instructions to configure your unit.
42
The PC
Follow the on-
Micro I PC Software
This software allows you to customise the settings on your Micro I
spirometer. Once successfully installed, comprehensive help is
available through the Help menu when using the application.
System Requirements
Micro I PC Software requires certain hardware and software
components in order to run properly.
PC Requirements
An IBM-compatible PC is required, with hardware that meets or
exceeds the following minimum requirements.
Processor: 800 MHz or above
RAM: 256 MB
Free Disk Space: 50 MB
Video: 800x600, 256 colours. It is recommended that a resolution of
at least 1280x1024 be used to enable the full benefits of the multiwindow interface.
At least one free USB port. (An additional USB port will be required
for USB enabled spirometers)
Operating System Requirements
Micro I PC Software will run on the following operating systems:
Windows XP
Windows Vista 32bit
Windows Vista 64bit
Windows Server 2003
Windows Server 2008
43
Installing Micro I PC Software
Before you begin, please ensure your computer meets the minimum
system requirements and the user installing the software has
administrative user rights.
Close any other applications that are running.
Insert the installation CD into your CD-Rom drive.
The setup program should launch automatically, displaying the
welcome dialog box, click ‘Next’ to continue. If the setup program
does not launch automatically use Windows Explorer to manually
select the CD drive then open the file named Micro I PC
Software.exe.
The license agreement will be displayed. Please read the complete
document and ensure you understand fully before accepting the
terms of the license. Click ‘Next’ to continue.
The select destination location dialog will be displayed showing the
directory where the Micro I PC Software will be installed. The default
location is:
C:\Program Files\CareFusion\Micro I PC Software
To change this location select ‘Browse’.
Click ‘Next’ to display the Select program manager group dialog.
This will be the location where the Micro I PC Software launch icon
will be placed under the Start Menu. Either a new location can be
entered or an existing location used.
Click ‘Next’ to display the installation options dialog containing the
following option:
Add Micro I PC Software icon to the desktop.
Click ‘Next’ to start copying the files to your system.
Once the files have finished copying to your system you will be
advised that the Micro I PC Software has been successfully installed
44
and that it would be advisable to restart your PC before using the
application. Click ‘Finish’ to complete the installation process.
Running Micro I PC software
Connect your Micro I to a USB port on the PC using the cable
provided. The Micro I will take power from the USB port on the PC.
Please be advised that the Micro I requires a High Current USB port,
and if connected to a Low Power USB port the device will turn itself
off and fail to respond to any key presses until disconnected. Low
Power USB ports are commonly found on keyboards and unpowered
USB hubs and should not be used. Whilst connected to the PC the
Micro I will display:
Do not allow the patient to handle the spirometer during this
procedure.
45
Run the Micro I PC software and the first screen will show:
From this screen you can either change the device settings or adjust
the Micro I internal clock. When the change settings options is used
the display will change to:
By selecting the ‘Custom’ option at the top of the screen all of the
Micro I features may be tailored to you specific requirements.
46
Operation
The Micro I is designed to suit a range of applications from the very
simplest spirometry test where only a few indices are required to be
displayed to more complex operation where deviation from the
norm, bronchodilator response, and interpretation of results are
required.
The main menu is displayed after the initial configuration and
subsequently when the unit is turned on:
Main Menu Overview
Quick Exam
Use this function to take an immediate spirometry measurement
with no predicted values or interpretation.
Exam with Predicted
This function requires the entry of the patient’s demographics so
that predicted values and interpretation may be calculated and
displayed.
Post BD Exam
This function allows the post bronchodilator response to be
measured. The response is measured with respect to the previously
measured baseline obtained using either the Quick Exam or the
Exam
with
Predicted
options.
The
last
recorded
baseline
examination is automatically stored when the unit is turned off and
47
will be available for a post bronchodilator comparison when the unit
is turned on.
Last Results
This option is used to view the results of the last stored
examination.
Settings
This option allows the user to adjust various settings including date,
time and language and to perform a calibration check.
Quick Exam
After selecting this option the display will change to:
The Micro I may be used directly with a MicroGuard filter or with a
disposable cardboard mouthpiece with the adapter supplied. Insert
mouthpiece or MicroGuard filter into the mouthpiece holder of the
spirometer.
Instruct the patient to inhale as deeply as possible, seal their lips
around the mouthpiece and exhale as hard and as fast as possible
until no more air can be exhaled.
48
The spirometry results for that blow are then displayed together
with the manoeuvre quality check based upon ATS/ERS guidelines:
Further indices, if configured, and the best results from a sequence
of blows may be displayed by pressing the down key.
Each manoeuvre is quality checked for a slow start, abrupt end,
short blow, poor effort or cough according to ATS/ERS 2005
guidelines.
Please note that the percentage of predicted value and the
interpretation are not available for the Quick Exam option.
Press Enter to display:
To repeat the test select Blow Again and press Enter.
49
Exam with Predicted Values
When this option is selected the following is displayed:
Use the up and down keys to adjust the patient’s age and then press
enter. Repeat for gender, height and racial origin. If a mistake is
made then simply touch the back key to go back to the previous
entry.
The racial origin selected applies a percentage drop to the
volumetric predicted values to be applied for the patient.
These ethnic corrections for ECCS are as follows:
Population
Percentage drop
Caucasian
0
Non-Specified
0
Polynesian
10
Asian
10
Afro Caribbean
13
If NHANES III predicted values are used then the ethnic origin will
be used according to the NHANES III equations.
Press Enter when the required correction has been selected.
Please note that the Micro I may be configured to accept height in
inches.
If a mistake is made then simply touch the back key to go back to
the previous entry.
50
When all the patient data has been entered the following screen will
be displayed and a spirometry test may be performed:
After performing a test the results are displayed:
Each manoeuvre is quality checked for a slow start, abrupt end,
short blow, poor effort or cough according to ATS/ERS 2005
guidelines. An asterix ( * ) at the end of the line denotes a result
below the lower limit of normality.
When a sequence of blows is recorded, the results and the quality
check refer to the current blow but the interpretation is based upon
the best result of the sequence.
51
Use the down arrow to see further indices, if configured, and the
best results from a sequence of blows:
At any time when the results are displayed another spirometer test
may be performed by touching the enter key. If the enter key is
touched accidently then simply press the back key to return to the
results screen.
The Micro I may be configured to display the Z score instead of the
percentage of predicted values where data from the predicted value
sets are available:
The Z score is the number of standard deviations that the results are
above (positive Z score) or below (negative Z score) the predicted
value.
52
Post BD Exam
Once satisfactory baseline tests have been recorded a post
bronchodilator examination may be performed by selecting the Post
BD Exam option from the main menu. When these tests are
performed the percentage of predicted value is replaced by the
percentage change from the best baseline result for each index:
Using the down key will display the other indices and the best
results as with the baseline blows.
NLHEP Mode
This mode of operation is obtained by selecting the USA (NLHEP)
option from the configuration menu when the unit is first turned on
or subsequently from the settings option on the main menu. In this
mode the functionality of the Micro I becomes fully compliant with
the National Lung Health Education Program requirements.
Only FEV1, FEV6 and the ratio, FEV1/FEV6, are displayed and
stored, quality checks are applied to every manoeuvre and a quality
grading score for the test session is displayed:
53
NLHEP Quality Checks
In order for the interpretation to be displayed a manoeuvre must
pass a set of enhanced quality checks.
After the patient has
performed a poor quality manoeuvre, one of the three following
messages will appear:
Message
Don’t
hesitate
Criteria
Back-extrapolated volume
(BEV) greater than 150 ml
Blast out
faster
Time until peak flow (PEFT)
greater than 120 msec
Blow out
longer
Expiration time less than 6
seconds or volume
accumulation has not
dropped below 100 ml per
0.5 seconds
Recommended action
The patient should blast
out the air more quickly
and evenly and without
hesitation at the beginning
of the manoeuvre
The patient must exhale
more explosively at the
beginning of the
manoeuvre
The patient stopped
exhaling too early. The
patient must exhale until
their lungs are completely
empty.
Once an acceptable manoeuvre has been performed, the following
consistency checks will also be applied to subsequent manoeuvres
Blast out
harder
Peak flow not reproducible.
The best previous
manoeuvres do not match
within 1.0 L/sec indicating
that the patient is giving
an inconsistent effort.
The patient must give
their maximum effort for
each manoeuvre
Deeper
breath
FEV1 or FEV6 not
reproducible. Difference
with respect to best test
greater than 150 ml
The patient must inhale
until
their
lungs
are
completely
full
before
each manoeuvre
54
When two manoeuvres fail either of the consistency checks, then the
best individual results of the two are saved (FEV1, FEV6, and PEF
individually).
When any of the above messages appear, instruct the patient on
how to improve their manoeuvre and demonstrate the correct
manoeuvre yourself.
NLHEP QC Grades
The quality of each session is graded according to the following
criteria:
QC Grade
Criteria
A
at least two acceptable manoeuvres, with the
largest two FEV1’s matching better than 100mL and
the largest two FEV6’s matching better than 100mL
B
at least two acceptable manoeuvres, with the
largest two FEV1’s matching better than 150mL
C
at least two acceptable manoeuvres, with the
largest two FEV1’s matching between 200ml and
150mL
D
only one acceptable manoeuvre or two with the
largest two FEV1’s matching less than 200mL
F
No acceptable manoeuvres
NLHEP Interpretation
The interpretation is performed on the best spirometry results and is
based upon the predicted values for the forced expiratory ratio,
FEV1/FEV6, and FEV1. If airways obstruction is detected the level of
severity is reported in accordance with the NLHEP guidelines.
55
Switching Off
The unit is switched off by pressing the On/Off button.
The unit can disconnected from the mains by unplugging the charger
from the mains socket or unplugging the USB cable.
Maintenance
Battery Management
The Micro I is powered by a rechargeable battery pack.
The battery voltage is monitored and a warning is displayed on
switch on when the battery starts to become exhausted.
Battery Status Icons
Battery nearly exhausted. Recharge as soon as possible
to avoid running out of charge.
Battery fully charged.
The battery is not required to hold the internal memory and stored
results will not be lost when the battery becomes exhausted.
To recharge the battery connect the Micro I to the charger provided
and then plug the charger into a suitable wall socket ensuring that
access to the charger is not restricted so that it may easily be
removed.
The Micro I will display:
56
Do not allow the patient to handle the spirometer during this
procedure.
The charging icon (
) will display to indicate that the device is
charging.
Once the charging icon has switched off (up to 5 hours) it will be
replaced by the battery fully charged icon. (
) Remove the power
adapter from the wall socket and from the base of the unit. Micro I is
now ready for portable use.
Note: Micro I may be also charged from PC or laptop using the USB
cable provided.
Battery Replacement
The lifetime of all rechargeable batteries is limited and the battery
pack will need to be replaced after a few years, depending upon
usage. As the battery nears the end of its life you will notice that
fewer tests can be performed between charges.
For access to the battery the rear of the device requires careful
removal.
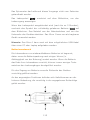
Clips are moulded into the rear cover in the positions indicated and
should be carefully prised undone in the sequence shown.
57
To aid this process clip 1 has a recess moulded into the device body
to allow a small flat bladed screw driver to be carefully slid under
the clip to release it.
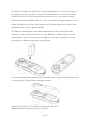
Once released work the screw driver around to clips 2, 3 and 4.
Finally slide the cover off the bottom of the unit which in turn
releases clips 5 and 6
Replace the battery paying particular attention to the orientation of
the connector in its socket and of the battery itself in the case. Note
the leads coming from the battery should exit from the upper face of
the pack when installed.
Replace the rear cover by attaching the securing clips in the reverse
order.
Dispose of the waste battery in line with EU Battery Regulations.
58
Calibration Check
The Micro I is calibrated to read in litres at body temperature,
barometric pressure saturated with water vapour (BTPS).
The
calibration
should
remain
stable
indefinitely,
unless
the
transducer is physically damaged, and the unit should not require
re-calibration.
However, to ensure the correct functioning of the
unit we do recommend that a calibration check is performed
periodically.
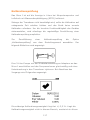
To perform a calibration check select calibration check option from
the setting menu and the display will show:
Connect a 3L syringe to the Micro I with the minimum of adapters
and inject the syringe volume into the transducer evenly, without
pausing. When complete the display will show:
The acceptable calibration accuracy is +/- 3.5%. If the calibration
accuracy is outside of this range then the tick will be replaced by a
cross. If this happens then check the syringe and the connections
for leaks and repeat the check. If the Micro I is repeatedly outside
59
the calibration range then the unit will have to be returned to
CareFusion for servicing.
Cleaning the Transducer
The transducer requires no routine maintenance or servicing.
To sterilise or clean the transducer it may be removed by means of
the following procedure:
1.
Remove the transducer by gently rotating the transducer
anti-clockwise and then pulling from the main body.
2.
The transducer may now be immersed in warm soapy
water for routine cleaning or immersed in cold sterilising
solutions e.g. Perasafe for a period not exceeding 10
minutes. (Alcohol and chloride solutions should be
avoided.) After cleaning/sterilising, the transducer should
be rinsed in distilled water and dried. Perasafe is available
from CareFusion in convenient 81g plastic bottles, Cat No.
36-SSC5000A.
3.
Re-assemble the transducer into the Micro I.
CAUTION: Do not attempt to wash or immerse the spirometer or
accessories in water or cleaning fluid, as there are electronic
components inside that will be permanently damaged
Servicing
If your unit requires service or repair please see page 212 for
contact details.
There are no user serviceable parts in the Micro I.
60
Trouble Shooting Information
Should you encounter problems operating your spirometer, please
consult the table below:
Problem
Possible
Cause
Solution
Micro I cannot be switched
on
Batteries are
flat
Recharge batteries
Every time you switch the
instrument on the time is
shown as 00:00
The internal
battery of Micro
I is defective
Contact your
dealer.
Micro I is outside of % when
conducting the calibration
check
There are leaks
in the syringe
or connections
Check the syringe
and connections for
leaks
Electromagnetic Compatibility (EMC)
Changes or modifications to the Micro I spirometer that are not
expressly approved by Carefusion can cause EMC issues with this or
other equipment. The device is designed and tested to comply with
applicable regulation regarding EMC and needs to be installed and
put into service as per interference exceeding levels specified in EN
50082-1:1992
WARNING: use of portable phones or other radio frequency (RF)
emitting equipment near the system may cause unexpected
adverse operation
61
or
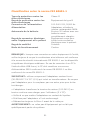
Safety Designation per IEC 60601-1
Class II
Type of protection against
electrical shock
Degree of protection against
electrical shock
Supply connection
Power Equipment
Type B applied part
Battery life:
Degree of Electrical connection
between equipment and Patient
Degree of mobility
Mode of operation
100-240 VAC, 50/60Hz
Adapter and rechargeable
internal NiMH battery.
Approximately 30 hours
with a fully charged new
battery.
Equipment designed as
non-electrical connection to
the patient.
Transportable
Continuous
NOTE: When you connect other equipment to the unit, always make
sure that the whole combination complies with the international
safety standard IEC 60601-1 for medical electrical systems. When
connecting to a PC with the supplied USB lead then the PC must be a
EN60950-1 compliant SELV limited power source or EN60601-1
compliant.
IMPORTANT: Only use the mains adapter supplied (36-PSU1017 5V
DC 1.2A) The adapter contains a transformer. Do not cut off the
adapter to replace it with another plug as this causes a hazardous
situation.
• The adapter transforms the mains voltage (100-240 Volts) to a
safe voltage (5V DC)
• Make sure the adapter does not get wet
• Do not use a damaged adapter
• Always unplug your Micro I before cleaning
WARNING: Do not connect devices that are not specified as part of
the system.
62
WARNING: No modification of this equipment is allowed.
NOTE: If an MPSO (Multiple Portable Socket Outlet) is used with the
system, the maximum permitted load should not be exceeded. Do
not connect electrical equipment that has not been supplied as part
of the system.
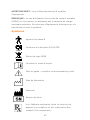
Symbols
Type B device
In accordance with Directive 93/42/EEC
0086
Disposal in compliance with WEEE
Consult the instructions for use
Caution: consult the accompanying documents
Date of manufacture
Manufacturer
Serial number
Federal U.S. law restricts this device to sale by or
on the order of a physician. (Rx only)
63
Please Note: Information in this manual is subject to change
without notice and does not represent commitment on the part of
CareFusion UK 232 Ltd. The software may be used or copied only in
accordance with the terms of that agreement. No part of this
manual may be reproduced or transmitted in any form or by any
means, electronic or mechanical, including photocopying and
recording for any purpose without the written permission of
CareFusion UK 232 Ltd.
64
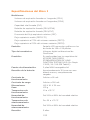
Specification of the Micro I
Measurements:
Forced Expired Volume in 1 second (FEV1)
Forced Expired Volume in 6 second (FEV6)
Forced Vital Capacity (FVC)
Forced Expiratory Ratio (FEV1/FEV6)
Forced Expiratory Ratio (FEV1/FVC)
Peak Expiratory Flow Rate (PEF),
Mid Expiratory Flow (FEF25-75)
Expiratory Flow at 75% of volume remaining (FEF75)
Expiratory Flow at 25% of volume remaining (FEF25)
Display:
128 x 128 pixel graphic backlit
monochrome LCD
Transducer type:
CareFusion Uni-Directional Digital
Volume
Accuracy:
To the requirements of the ATS/ERS
TASK FORCE: STANDARDISATION
OF LUNG FUNCTION TESTING 2005
(Eur Respir J 2005; 26: 319-338
Table 6)
2 X AA size NiMH rechargeable cells
Power supply:
Battery life:
Approximately 30 hours with a fully
charged new battery.
Operating current
Less than 90mA
Charging current
Less than 500mA
Dimensions:
162 X 61 X 30mm
Weight:
152g
Operating temperature:
10 to +35° C
Operating humidity:
20% to 80% RH
Storage temperature:
-20 to +70° C
Storage humidity:
30% to 90% RH
Life time
5 years
65
Accessories
Cat. No.
Description
36-PSA1000
Adult Disposable Mouthpieces (500 per box)
36-SST1250
One-way Safety Mouthpieces (250 per box)
36-SST1000
One-way Safety Mouthpieces (500 per box)
36-MGF1025
Microgard Pulmonary Filter (25 per box)
36-MGF1100
Microgard Pulmonary Filter (100 per box)
36-PSA1200
Paediatric Disposable Mouthpieces (250 per box)
36-PSA1100
Paediatric Adaptor
36-SSC5000A
PeraSafe Sterilising Powder 81g (to make up 5
litres of solution)
36-VOL2104
Nose Clips (pack of 5)
36-SM2125
3 Litre Calibration Syringe
36-MLD1621
Mouthpiece adaptor
36-BAT1043
Battery Pack (NiMH AA 2.4V, 1600mAh)
36-PSU1017
5V DC 1.2A (GlobTek WR9QA1200USBNR-G2267)
For further information or to place an order for Disposables/
Supporting products please contact CAREFUSION, your local
distributor or view our website www.carefusion.com/micromedical
For US Customer Care: Toll Free 1-800-231-2466, phone 1-714283-2228
PLEASE NOTE: USE ONLY CAREFUSION ACCESSORIES
66
Spiromètre de
diagnostic
Micro I
Mode d’emploi
67
III.
Introduction
Le Micro I est un spiromètre de diagnostic portable compact,
fonctionnant sur batterie rechargeable. Il est conforme aux
recommandations communes de l'ATS et de l'ERS sur les
explorations fonctionnelles respiratoires de 2005 (ATS/ERS TASK
FORCE: STANDARDISATION OF LUNG FUNCTION TESTING 2005).
Son design agréable et ergonomique permet une prise de mesure
simple et rapide de spirométrie, y compris en tenant compte de
valeurs prédites, et une interprétation automatique.
Les fonctions du Micro I incluent :
o
Mesure des indices FEV1, FVC(FEV6), FEV1/FVC, FEV1/FEV6,
PEF, FEF25, FEF75 et FEF 25-75
o
Entièrement configurable par le biais du logiciel fourni
o
Valeurs prédites ECCS, Asie ou NHANES III
o
Écart par rapport à la norme exprimé en pourcentage ou
note Z
o
Interprétation NLHEP, NICE ou ATS/ERS
o
Contrôle qualité des tests de spirométrie
o
Comparaison post-prise de bronchodilatateur
o
Mode conforme NLHEP
Le spiromètre est équipé du transducteur de volume numérique
CareFusion extrêmement stable, qui mesure l'air expiré directement
en valeur BTPS (à la température corporelle, saturé en vapeur
d'eau) afin d'éviter toute erreur liée à la correction de la
température. Le transducteur est insensible aux effets de
condensation et de température et ne nécessite aucun réglage
individuel avant le test.
CareFusion vous propose des spiromètres répondant à vos besoins
en diagnostic et en suivi. Le spiromètre Micro II est un modèle
similaire au Micro I, spécialement conçu pour la surveillance de
l'asthme et de la BPCO à domicile ou au travail.
67
Contenu de l'emballage
Le Micro I est emballé dans une mallette de rangement pratique et
est fourni avec les éléments suivants (Fig. 1) :
1.
Spiromètre Micro I
2.
Transducteur de volume numérique CareFusion, avec embouts
buccaux jetables en carton et mode d'emploi.
3.
Cordon d'alimentation et prise universelle
(36-PSU1017 5 V CC 1,2 A)
4.
Adaptateur d'embout buccal en carton
5.
Câble USB/de chargement
Fig. 1
68
Contre-indications, avertissements et mises
en garde
Contre-indications : les tests de spirométrie demandent un effort
physique et sont donc contre-indiqués pour les patients ayant
récemment souffert d'un infarctus du myocarde. L'effort intense
d'expiration peut également provoquer des syncopes.
Les termes suivants sont utilisés dans le manuel :
Mise en garde : risque de blessures ou de dommages graves.
Avertissement : conditions ou manipulations pouvant entraîner des
blessures.
Remarque :
informations
importantes
permettant
de
faciliter
l'utilisation de l'appareil ou d'éviter son endommagement.
MISE EN GARDE : lisez le manuel avant utilisation.
AVERTISSEMENT : cet appareil ne doit pas être utilisé en présence
de gaz explosifs ou inflammables, de produits anesthésiants
inflammables ou dans les environnements riches en oxygène.
MISE EN GARDE : les embouts buccaux sont à usage sur un seul
patient. L'utilisation sur plusieurs patients entraîne un risque de
surinfection. Une utilisation répétée peut entraîner une détérioration
des matériaux et fausser les mesures.
MISE EN GARDE : les filtres pulmonaires sont à usage sur un seul
patient. L'utilisation sur plusieurs patients entraîne un risque de
surinfection.
Une
utilisation
répétée
peut
entraîner
une
augmentation de la résistance à l'air et fausser les mesures.
MISE EN GARDE : ne laissez pas le patient manier le spiromètre
lorsqu'il est relié à l'alimentation pour être chargé ou à un PC pour
configuration.
REMARQUE : ce produit ne doit pas être mis au rebut dans
le circuit de traitement des déchets non triés. Veuillez
éliminer ce produit auprès des installations locales de
collecte des DEEE.
69
Utilisation
Le Micro I est prévu pour être utilisé par les médecins et
professionnels de la santé, pour le diagnostic de l'asthme et de la
BPCO chez l'adulte et l'enfant de plus de 3 ans.
Conditions d'utilisation
Veuillez prendre les précautions suivantes :
•
•
N'exposez pas le Micro I à la lumière directe du soleil.
Évitez d'utiliser le spiromètre dans un atmosphère
poussiéreuse ou près de chauffages ou radiateurs.
•
Ne conservez pas le spiromètre dans un endroit humide ou à
des températures extrêmes.
•
Ne dirigez pas le porte-transducteur vers une source de
lumière intense lors de l'utilisation du spiromètre.
Première utilisation
Il est recommandé de charger complètement le spiromètre Micro I
avant utilisation. La prise d'alimentation est fournie avec des fiches
britannique, américaine et européenne séparées. Connectez la fiche
appropriée à l'alimentation et branchez-la sur le secteur. Connectez
le Micro I à l'alimentation à l'aide du câble USB/de chargement. Le
symbole de chargement s'affiche à l'écran.
Rechargez l'appareil pendant au moins 5 heures la première
fois.
Retirez le film protecteur prévu sur l'écran avant utilisation.
70
Configuration
Vous pouvez configurer les paramètres régionaux de votre unité la
première fois que vous la mettez sous tension : langue, unités de
taille et de poids, format de la date et ensemble de valeurs prédites.
Cette option permet également de configurer les indices à afficher et
de définir l'affichage des écarts par rapport à la norme en
pourcentage ou sous forme de note Z. Vous pouvez cependant
régler tous ces paramètres à l'aide du logiciel fourni.
Mettez l'unité sous tension en appuyant sur le bouton marche/arrêt
situé sur le dessus de l'appareil. L'écran suivant s'affiche :
Sélectionnez le pays de votre choix à l'aide des flèches haut et bas,
puis appuyez sur Entrée (↵). Cette procédure n'est requise qu'à la
première mise sous tension de l'unité. Les paramètres sont ensuite
enregistrés pour les utilisations futures.
Il est recommandé d'utiliser le logiciel pour le réglage de ces
paramètres si nécessaire. Reliez le Micro I au PC à l'aide du câble
USB fourni. Lancez le logiciel et mettez le Micro I sous tension afin
que le logiciel le détecte. Suivez les instructions à l'écran pour
configurer votre unité.
71
Logiciel Micro I PC Software
Ce logiciel vous permet de personnaliser les paramètres de votre
spiromètre Micro I. Une fois le logiciel installé, vous avez accès à un
menu d'aide complet pendant l'utilisation de l'application.
Configuration requise
Certains matériels et logiciels sont nécessaires pour garantir le bon
fonctionnement du logiciel Micro I PC Software.
Configuration du PC
Vous devez disposer d'un PC répondant à la configuration minimale
suivante.
Processeur : 800 MHz minimum
Mémoire RAM : 256 Mo
Espace disque disponible : 50 Mo
Vidéo :
800x600,
1280x1024
est
256 couleurs.
recommandée
Une
résolution
d'au
moins
pour bénéficier pleinement des
avantages de l'interface à plusieurs fenêtres.
Au moins un port USB (un port USB supplémentaire pour les
spiromètres compatibles USB).
Système d'exploitation
Le logiciel Micro I PC Software est compatible avec les systèmes
d'exploitation suivants :
Windows XP
Windows Vista 32 bits
Windows Vista 64 bits
Windows Server 2003
Windows Server 2008
72
Installation du logiciel Micro I PC Software
Avant de commencer, assurez-vous que votre ordinateur répond à la
configuration minimale requise et que l'utilisateur procédant à
l'installation du logiciel dispose de droits d'administrateur.
Fermez toutes les autres applications en cours.
Insérez le CD d'installation dans votre lecteur de CD-ROM.
Le programme d'installation démarre automatiquement et la fenêtre
d'accueil s'affiche. Cliquez sur « Suivant » pour continuer. Si le
programme d'installation ne démarre pas automatiquement, ouvrez
l'explorateur Windows, sélectionnez le lecteur CD et ouvrez le fichier
appelé Micro I PC Software.exe.
Le contrat de licence s'affiche. Lisez l'ensemble du contrat et
assurez-vous de bien le comprendre avant d'en accepter les termes.
Cliquez sur « Suivant » pour continuer.
La fenêtre de sélection de l'emplacement de destination s'affiche et
montre dans quel répertoire le logiciel Micro I PC Software va être
installé. L'emplacement par défaut est :
C:\Program Files\CareFusion\Micro I PC Software
Pour choisir un autre emplacement, cliquez sur « Parcourir ».
Cliquez sur « Suivant » pour afficher la fenêtre de sélection du
groupe de gestionnaires de programme. Il s'agit de l'emplacement
de l'icône de lancement du logiciel Micro I PC Software dans le menu
Démarrer. Vous pouvez choisir un nouvel emplacement ou utiliser un
emplacement existant.
Cliquez
sur
« Suivant »
pour
afficher
la
fenêtre
d'options
d'installation présentant l'option suivante :
Ajouter l'icône du logiciel Micro I PC Software sur le bureau.
Cliquez sur « Suivant » pour lancer la copie des fichiers sur votre
système.
73
Une fois les fichiers copiés, une boîte de dialogue vous indique que
le logiciel Micro I PC Software a été correctement installé et qu'il est
recommandé de redémarrer votre PC avant d'utiliser l'application.
Cliquez
sur
« Terminer »
pour
mettre
fin
à
la
procédure
d'installation.
Logiciel Micro I PC software
Reliez votre Micro I à un port USB du PC à l'aide du câble fourni. Le
Micro I est alors alimenté par ce port. Attention, un port USB à haut
débit est requis pour alimenter le Micro I. S'il est relié à un port USB
à bas débit, il se met hors tension et ne répond plus aux pressions
des touches jusqu'à ce qu'il soit déconnecté. Les ports USB à bas
débit se trouvent en général sur les claviers et les concentrateurs
USB non alimentés. Ne les utilisez pas. Lorsque le Micro I est relié
au PC, l'écran suivant s'affiche :
Ne laissez pas le patient manier le spiromètre pendant cette
procédure.
74
Lancez le logiciel Micro I PC Software. L'écran d'accueil s'affiche :
Vous pouvez à partir de cet écran modifier les paramètres de
l'appareil ou régler l'horloge interne du Micro I. Lorsque vous utilisez
les options de modification des paramètres, l'écran suivant affiche :
Sélectionnez l'option « Personnalisé » en haut de l'écran pour
adapter toutes les fonctions du Micro I à vos besoins spécifiques.
75
Fonctionnement
Le Micro I est conçu pour une diversité d'applications, du test de
spirométrie le plus simple, avec affichage de seulement quelques
indices, à des opérations plus complexes, avec calcul de l'écart par
rapport à la norme, réponse au bronchodilatateur et interprétation
des résultats.
Le menu principal s'affiche après configuration initiale, puis à chaque
fois que l'unité est mise sous tension :
Présentation du menu principal
Examen rapide
Cette fonction permet de réaliser immédiatement une mesure de
spirométrie sans valeurs prédites ou interprétation.
Examen à l'aide de valeurs prédites
Cette fonction nécessite la saisie des informations démographiques
sur le patient, de sorte que les valeurs prédites et l'interprétation
puissent être calculées et affichées.
Examen Post BD
Cette fonction permet de mesurer la réponse à la prise d'un
bronchodilatateur. Elle est basée sur la valeur de base précédente,
obtenue à l'aide d'un examen rapide ou d'un examen avec valeurs
prédites. Le dernier test de base en mémoire est automatiquement
enregistré lorsque l'unité est mise hors tension et est disponible
76
pour comparaison avec test post-bronchodilatateur lorsque l'unité
est à nouveau mise sous tension.
Derniers résultats
Cette option permet d'afficher les résultats du dernier examen en
mémoire.
Paramètres
Cette option permet à l'utilisateur de régler divers paramètres dont
la date, l'heure et la langue et de réaliser un test d'étalonnage.
Examen rapide
Une fois cette option sélectionnée, l'écran suivant s'affiche :
Le Micro I peut être utilisé directement avec un filtre MicroGuard ou
un embout buccal jetable en carton et l'adaptateur fourni. Insérez
l'embout buccal ou le filtre MicroGuard dans le porte-embout du
spiromètre.
Demandez au patient d'inspirer aussi profondément que possible, en
fermant bien la bouche sur l'embout et d'expirer complètement aussi
fort et aussi vite que possible.
77
Les résultats du test de spirométrie pour cette respiration s'affichent
avec la contrôle qualité du test, basé sur les recommandations
ATS/ERS :
Appuyez sur la flèche bas pour afficher d'autres indices, s'ils sont
configurés, et les meilleurs résultats, dans le cas de plusieurs tests.
La qualité de chaque test est contrôlée conformément aux
recommandations ATS/ERS 2005 en termes de démarrage lent, de
fin abrupte, de respiration courte, d'effort faible et de toux.
Veuillez noter que le pourcentage par rapport aux valeurs prédites et
l'interprétation ne sont pas disponibles pour les examens rapides.
Appuyez sur Entrée pour afficher l'écran suivant :
Pour répéter le test, sélectionnez Expirer à nouveau et appuyez sur
Entrée.
78
Examen à l'aide de valeurs prédites
Si vous sélectionnez cette option, l'écran suivant s'affiche :
Sélectionnez l'âge du patient à l'aide des flèches haut et bas, puis
appuyez sur Entrée. Faites de même pour le sexe, la taille et
l'origine ethnique. En cas d'erreur, appuyez sur la touche Retour
pour revenir au paramètre précédent. Un pourcentage est appliqué
aux valeurs prédites de volume en fonction de l'origine ethnique du
patient.
Les corrections ethniques pour les valeurs ECCS sont les suivantes :
Population
Pourcentage de
réduction
Caucasien
0
Non spécifié
0
Polynésien
10
Asiatique
10
Afro-caribéen
13
Pour les valeurs prédites NHANES III, l'origine ethnique est utilisée
en fonction des équations NHANES III.
Appuyez sur Entrée une fois que vous avez sélectionné la correction
appropriée.
Veuillez noter que le Micro I peut être configuré pour accepter une
valeur en pouces pour la taille.
79
En cas d'erreur, appuyez sur la touche Retour pour revenir au
paramètre précédent.
Une fois toutes les données du patient saisies, l'écran suivant
s'affiche et le test de spirométrie peut commencer :
Une fois le test terminé, les résultats s'affichent :
La qualité de chaque test est contrôlée conformément aux
recommandations ATS/ERS 2005 en termes de démarrage lent, de
fin abrupte, de respiration courte, d'effort faible et de toux. Un
astérisque (*) en fin de ligne indique un résultat inférieur à la
normale.
En cas de série de tests, les résultats et le contrôle qualité
correspondent à la dernière expiration mais l'interprétation est
basée sur le meilleur résultat de la série.
80
Appuyez sur la flèche bas pour afficher d'autres indices, le cas
échéant, et les meilleurs résultats d'une série de tests :
Appuyez sur la touche Entrée à tout moment lorsque les résultats
sont affichés pour commencer un autre test de spirométrie. Si vous
appuyez dessus par erreur, appuyez sur la touche Retour pour
revenir à l'écran des résultats.
Vous pouvez configurer le Micro I de sorte à afficher une note Z au
lieu du pourcentage par rapport aux valeurs prédites, lorsque les
données tirées des ensembles de valeurs prédites sont disponibles :
La note Z est le nombre de déviations standard des résultats audessus (note Z positive) ou au-dessous (note Z négative) de la
valeur prédite.
81
Examen Post BD
Une fois que vous avez enregistré des tests de base satisfaisants,
vous pouvez procéder à un examen post-bronchodilatateur en
sélectionnant l'option Examen post BD dans le menu principal. Une
fois les tests réalisés, le pourcentage par rapport aux valeurs
prédites est remplacé, pour chaque indice, par le pourcentage
d'écart par rapport au résultat du test de base :
Vous pouvez afficher les autres indices et les meilleurs résultats à
l'aide de la flèche bas, comme c'était le cas lors du test de base.
Mode NLHEP
Pour sélectionner ce mode de fonctionnement, choisissez l'option
USA (NLHEP) dans le menu de configuration lors de la première mise
sous tension de l'unité ou, par la suite, dans les options de
paramétrage du menu principal. Ce mode permet d'utiliser le Micro I
en conformité totale avec les exigences du NLHEP (National Lung
Health Education Program).
Seuls les indices FEV1, FEV6 et le rapport FEV1/FEV6 s'affichent et
sont enregistrés. Des contrôles qualité sont appliqués à chaque test
et une note de qualité s'affiche pour la session de tests :
82
Contrôles qualité NLHEP
Pour pouvoir être interprété, un test doit réussir une série de
contrôles qualité. Si le test du patient est de mauvaise qualité, l'un
des trois messages suivants s'affiche :
Message
N'hésitez pas
Critère
Le volume obtenu par
extrapolation inverse
(BEV) est supérieur à
150 mL.
Expirez plus
vite
Action recommandée
Le patient doit expirer
l'air plus rapidement et
uniformément, sans
hésiter au début de
l'expiration.
Le patient doit expirer
plus fort au début de
l'expiration.
La durée écoulée
jusqu'au débit de
pointe (PEFT) est
supérieure à 120 ms.
Expirez plus
L'expiration a pris
Le patient a arrêté
longtemps
moins de 6 secondes
d'expirer trop tôt.
ou l'accumulation de
Le patient doit expirer
volume n'a pas chuté
jusqu'à ce que ses
sous 100 mL pour
poumons soient
0,5 seconde.
complètement vidés.
Une fois qu'un test acceptable a été réalisé, les contrôles de
cohérence suivants sont également réalisés sur les tests ultérieurs :
Expirez plus
fort
Respirez plus
profondément
Débit de pointe non
reproductible. Les
derniers meilleurs
tests ne sont pas
compris dans une
marge de 1,0 L/s, ce
qui indique que l'effort
du patient n'est pas
uniforme.
FEV1 ou FEV6 non
reproductible.
Différence
avec le meilleur test
supérieure à 150 mL.
83
Le patient doit fournir
un effort maximal pour
chaque test.
Le patient doit inspirer
jusqu'à ce que ses
poumons soient
complètement pleins
avant chaque expiration.
Lorsque deux tests échouent l'un des contrôles de cohérences, le
meilleur résultat des deux pour chaque indice est enregistré (FEV1,
FEV6 et PEF individuellement).
Si l'un des messages ci-dessus s'affiche, expliquez au patient
comment améliorer le test en le lui montrant vous-même.
Niveaux de qualité NLHEP
Une note est attribuée à la qualité de chaque session en fonction des
critères suivants :
Niveau de
qualité
A
Critère
Au moins deux tests acceptables, avec les deux plus
grandes valeurs FEV1 supérieures à 100 mL et les deux
plus grandes valeurs FEV6 supérieures à 100 mL.
B
Au moins deux tests acceptables, avec les deux
plus grandes valeurs FEV1 supérieures à 150 mL.
C
Au moins deux tests acceptables, avec les deux
plus grandes valeurs FEV1 entre 150 mL et 200 mL.
D
Seulement un ou deux tests acceptables, avec les
deux plus grandes valeurs FEV1 inférieures à 200 mL.
F
Aucun test acceptable
Interprétation NLHEP
L'interprétation est basée sur les meilleurs résultats de spirométrie
et repose sur les valeurs prédites pour le rapport expiratoire forcé,
FEV1/FEV6, et FEV1. En cas d'obstruction des voies respiratoires, le
niveau de sévérité est donné conformément aux recommandations
NLHEP.
84
Mise hors tension
Appuyez sur le bouton marche/arrêt pour mettre l'unité hors
tension.
Vous pouvez déconnectez l'unité de l'alimentation secteur en
débranchant le chargeur de la prise murale ou en déconnectant le
câble USB.
Entretien
Entretien de la batterie
Le Micro I est alimenté par une batterie rechargeable.
La tension de la batterie est surveillée et un message d'avertissement
s'affiche à la mise sous tension lorsque la charge de la batterie
est faible.
Icônes d’état des batteries
Batterie presque épuisée. Rechargez-la au plus vite pour
éviter toute interruption de l'alimentation.
Batterie complètement chargée.
La batterie n'est pas nécessaire pour maintenir la mémoire interne
et les résultats enregistrés ne sont pas perdus si la batterie se vide.
Pour recharger la batterie, reliez le Micro I au chargeur fourni, puis
branchez ce dernier sur une prise murale adaptée, à un endroit
permettant de facilement y accéder afin de le débrancher si nécessaire.
L'écran suivant s'affiche sur le Micro I :
85
Ne laissez pas le patient manier le spiromètre pendant cette
procédure.
L'icône de chargement (
) indique que l'appareil est en cours de
chargement.
Une fois que l'icône s'éteint (le chargement peut prendre jusqu'à
5 heures), elle est remplacée par l'icône indiquant que la batterie est
complètement chargée (
). Débranchez l'adaptateur de la prise
murale et de la base de l'unité. Le Micro I est prêt pour l'utilisation
en mode portable.
Remarque : il est également possible de charger le Micro I par le
biais d'un PC ou ordinateur portable à l'aide du câble USB fourni.
Remplacement de la batterie
La durée de vie de toutes les batteries rechargeables est limitée et
elles doivent être remplacées après quelques années, en fonction de
la fréquence d'utilisation. Vous remarquerez que lorsque vous
approchez la fin de vie de la batterie, le nombre de tests réalisables
entre chaque charge diminue.
Vous pouvez accéder à la batterie en retirant avec précaution le
couvercle à l'arrière de l'appareil.
Des attaches sont moulées dans le couvercle arrière aux endroits
indiqués et doivent être retirés avec précaution dans l'ordre indiqué.
86
Pour faciliter la procédure, un renfoncement est prévu sur l'appareil
au niveau de l'attache 1 de sorte à pouvoir insérer un petit tournevis
plat sous l'attache pour la libérer.
Une fois l'attache libérée, faites de même pour les attaches 2, 3 et 4.
Faites ensuite glisser le couvercle par le bas de l'unité de sorte à
libérer les attaches 5 et 6.
Remplacez la batterie en prenant soin de bien orienter le connecteur
dans le logement et la batterie dans le compartiment. Les fils de la
batterie doivent sortir par le côté supérieur de la batterie lorsqu'elle
est installée.
Replacez le couvercle arrière en fixant les attaches dans l'ordre
inverse.
Mettez la batterie au rebut conformément à la réglementation
européenne en la matière.
87
Contrôle de l'étalonnage
Le Micro I est étalonné pour donner des valeurs BTPS en litres (à la
température corporelle, saturé en vapeur d'eau).
L'étalonnage reste indéfiniment stable, à moins que le transducteur
soit endommagé, et il est en principe inutile de procéder à un nouvel
étalonnage de l'unité. Il est cependant recommandé, pour garantir
un fonctionnement correct de l'unité, de procéder régulièrement à
un contrôle de l'étalonnage.
Pour contrôler l'étalonnage, sélectionnez l'option correspondante
dans le menu de réglage des paramètres. L'écran suivant s'affiche :
Reliez une seringue de 3 L au Micro I avec le moins d'adaptateurs
possible et injectez le volume de la seringue dans le transducteur de
manière uniforme, sans pause. Une fois cette opération terminée,
l'écran suivant s'affiche :
La valeur acceptable de précision de l'étalonnage est de +/- 3.5%.
Si la valeur est située en dehors de cette plage, la coche est
remplacée par une croix. Dans ce cas, contrôlez l'absence de fuite
88
au niveau de la seringue et des connexions et recommencez. Si le
résultat est constamment en dehors de la plage acceptable, vous
devez renvoyer l'unité à CareFusion pour la faire réparer.
Nettoyage du transducteur
Le transducteur ne nécessite aucun entretien ou réparation régulier.
Vous pouvez néanmoins le stériliser ou le nettoyer. Pour ce faire,
retirez-le en suivant la procédure ci-dessous :
1
Retirez le transducteur en le faisant délicatement tourner
dans le sens antihoraire, puis en le sortant du boîtier.
2
Vous pouvez alors l'immerger dans de l'eau chaude
savonneuse pour un nettoyage de routine ou dans une
solution stérilisante froide comme du PeraSafe pendant
10 minutes maximum (évitez les solutions à base d'alcool ou
de chlorure). Une fois que vous l'avez nettoyé/stérilisé,
rincez le transducteur dans de l'eau distillée et séchez-le. Le
PeraSafe est disponible auprès de CareFusion en bouteilles
en plastique pratiques de 81 g, réf. 36-SSC5000A.
3
Replacez le transducteur dans le Micro I.
MISE EN GARDE : ne tentez pas de laver ou d'immerger le
spiromètre ou les accessoires dans de l'eau ou des liquides
nettoyants pour éviter d'endommager irrémédiablement des
composants électroniques qu'ils contiennent.
Réparation
Reportez-vous aux coordonnées indiquées en page 212 si votre
unité nécessite une réparation.
Aucune pièce interne du Micro I ne peut être réparée par
l'utilisateur.
89
Dépannage
En cas de problème avec votre spiromètre, veuillez consulter le
tableau suivant :
Problème
Cause
possible
Solution
Impossible de mettre le
Micro I sous tension
Batterie épuisée
Rechargez la
batterie.
L'heure affichée est 00:00
chaque fois que vous
mettez l'appareil sous
tension.
La batterie
interne du
Micro I est
défectueuse.
Contactez votre
revendeur.
La valeur du contrôle
d'étalonnage est en dehors
de la plage acceptable.
Fuite au niveau
de la seringue
ou des
connexions
Contrôlez l'absence
de fuite au niveau
de la seringue et
des connexions.
Compatibilité électromagnétique (CEM)
Toute
modification
du
spiromètre
Micro I
non
expressément
approuvée par CareFusion peut provoquer des problèmes de
compatibilité
électromagnétique
avec
l'appareil
ou
un
autre
équipement. Cet appareil a été conçu et testé pour être conforme à
la
règlementation
électromagnétique
en
et
vigueur
doit
être
en
matière
installé
et
de
mis
compatibilité
en
service
conformément aux niveaux d'interférences spécifiés dans la norme
EN 50082-1:1992.
AVERTISSEMENT : l'utilisation de téléphones portables ou autres
équipements émettant des radiofréquences près de l'unité peut
compromettre son fonctionnement correct.
90
Classification selon la norme CEI 60601-1
Type de protection contre les
chocs électriques
Degré de protection contre les
chocs électriques
Connexion de l'alimentation
Alimentation
Autonomie de la batterie
Degré de connexion électrique
entre l'équipement et le patient
Degré de mobilité
Mode de fonctionnement
Classe II
Équipement de type B
100-240 V CA, 50/60 Hz
Adaptateur et batterie
interne rechargeable NiMH.
Environ 30 heures avec une
batterie neuve
complètement chargée.
Équipement conçu pour
éviter toute connexion
électrique avec le patient.
Portable
Continu
REMARQUE : lorsque vous connectez un autre équipement à l'unité,
veillez toujours à ce que la combinaison ainsi obtenue soit conforme
à la norme de sécurité internationale CEI 60601-1 sur les dispositifs
et systèmes électriques médicaux. En cas de connexion à un PC à
l'aide du câble USB fourni, le PC doit constituer une source
d'alimentation SELV conforme à la norme EN 60950-1 ou être
conforme à la norme EN 60601-1.
IMPORTANT : utilisez uniquement l'adaptateur secteur fourni
(36-PSU1017 5 V CC 1,2 A) qui inclut un transformateur. Ne coupez
pas l'adaptateur pour le remplacer par une autre prise pour éviter
tout danger.
• L'adaptateur transforme la tension du secteur (100-240 V) en
tension continue sans danger pour l'utilisateur (5 V CC).
• Veillez à ne pas mettre l'adaptateur au contact de liquides.
• N'utilisez pas l'adaptateur s'il est endommagé.
• Débranchez toujours le Micro I avant de le nettoyer.
AVERTISSEMENT : ne reliez pas d'équipement qui ne fait pas
spécifiquement partie du système.
91
AVERTISSEMENT : vous n'êtes pas autorisé à modifier
l'équipement.
REMARQUE : en cas d'utilisation d'une prise de courant portable
(MPSO) sur le système, ne dépassez pas la capacité de charge
maximale autorisée. Ne reliez pas d'équipement électrique qui n'a
pas été fourni avec le système.
Symboles
Appareil de classe B
Conforme à la directive 93/42/CEE
0086
Déchet de type DEEE
Consulter le mode d'emploi
Mise en garde : consulter la documentation jointe
Date de fabrication
Fabricant
Numéro de série
la loi fédérale américaine limite la vente de cet
appareil à un médecin ou sur ordonnance d'un
médecin (Rx uniquement).
92
Remarque : les informations contenues dans ce manuel peuvent
être modifiées sans préavis et ne constituent en aucun cas une
garantie de la part de CareFusion UK 232 Ltd. Le logiciel peut être
utilisé et copié uniquement conformément aux termes du présent
contrat. Aucune partie de ce manuel ne peut être reproduite ou
transférée, sous quelque forme que ce soit et par quelque moyen
que ce soit, électronique ou mécanique, y compris par photocopie ou
enregistrement, dans quelque but que ce soit, sans la permission
écrite de CareFusion UK 232 Ltd.
93
Caractéristiques du Micro I
Mesures :
Volume expiratoire forcé en 1 seconde (FEV1)
Volume expiratoire forcé en 6 secondes (FEV6)
Capacité vitale forcée (FVC)
Rapport expiratoire forcé (FEV1/FEV6)
Rapport expiratoire forcé (FEV1/FVC)
Débit expiratoire de pointe (PEF)
Débit expiratoire moyen (FEF25-75)
Débit expiratoire avec 75 % du volume restant (FEF75)
Débit expiratoire avec 25 % du volume restant (FEF25)
Affichage :
Écran LCD monochrome avec
rétroéclairage 128 x 128 pixels
Type de transducteur :
Transducteur de volume numérique
unidirectionnel CareFusion
Précision :
Conforme aux recommandations
communes de l'ATS et de l'ERS sur les
explorations fonctionnelles
respiratoires de 2005 (ATS/ERS TASK
FORCE: STANDARDISATION OF LUNG
FUNCTION TESTING 2005) (Eur Respir
J 2005; 26: 319-338 Table 6)
Alimentation :
2 piles rechargeables NiMH AA
Autonomie de la batterie :
Environ 30 heures avec une batterie
neuve complètement chargée.
Intensité en
fonctionnement :
Inférieure à 90 mA
Intensité en chargement :
Inférieure à 500 mA
Dimensions :
162 x 61 x 30 mm
Poids :
152 g
Température de
fonctionnement :
10 à +35 °C
Humidité de
fonctionnement :
20 % à 80 % d'humidité relative
Température de stockage :
-20 à +70 °C
Humidité de stockage :
30 % à 90 % d'humidité relative
Durée de vie
5 ans
94
Accessoires
Réf.
Description
36-PSA1000
Embouts buccaux jetables pour adulte (boîte de 500)
36-SST1250
Embouts buccaux unidirectionnels de sécurité
(boîte de 250)
36-SST1000
Embouts buccaux unidirectionnels de sécurité
(boîte de 500)
36-MGF1025
Filtres pulmonaires Microgard (boîte de 25)
36-MGF1100
Filtres pulmonaires Microgard (boîte de 100)
36-PSA1200
Embouts buccaux jetables pour enfant (boîte de 250)
36-PSA1100
Adaptateur pédiatrique
36-SSC5000A Poudre stérilisante PeraSafe 81 g
(pour 5 litres de solution)
36-VOL2104
Pince-narines (lot de 5)
36-SM2125
Seringue d'étalonnage de 3 L
36-MLD1621
Adaptateur d'embout buccal
36-BAT1043
Batterie (NiMH AA 2,4 V, 1 600 mAh)
36-PSU1017
5 V CC 1,2 A (GlobTek WR9QA1200USBNR-G2267)
REMARQUE : UTILISEZ UNIQUEMENT DES ACCESSOIRES
CAREFUSION
95
Micro I
Diagnosespirometer
Bedienungsanleitung
96
IV. Einführung
Das Micro I ist ein kompaktes, vollständig tragbares
Diagnosespirometer für den Betrieb mit einer wiederaufladbaren
Batterie. Es erfüllt die Genauigkeitsanforderungen gemäß ATS/ERS
TASK FORCE: „STANDARDISATION OF LUNG FUNCTION TESTING
2005“. Das ergonomische und anwenderfreundliche Design
ermöglicht eine schnelle und einfache Durchführung diagnostischer
Spirometriemessungen, einschließlich Prognosewerten und
automatischer Interpretation.
Micro I Funktionsmerkmale:
o
Messungen: FEV1, FVC (FEV6), FEV1/FVC, FEV1/FEV6, PEF,
FEF25, FEF75 und FEF 25-75
o
Vollständig konfigurierbare Anwendersoftware im
Lieferumfang enthalten
o
ECCS-, Asiatische oder NHANES III-Prognosewerte
o
Variation von der Norm als Prozentsatz oder Z-Wert
o
Interpretation nach NLHEP, NICE oder ATS/ERS
o
Qualitätsprüfungen der Spirometrie-Atemmanöver
o
Vergleich nach Anwendung des Bronchodilatators
o
NLHEP-Modus
Das Spirometer verwendet den CareFusion Digital Volume Transducer,
einen extrem stabilen Volumen-Transducer, der die ausgeatmete Luft
direkt bei Körpertemperatur und Luftdruck mit Wasserdampfsättigung
(BTPS) misst. Dadurch werden Ungenauigkeiten aufgrund von
Temperaturkorrekturen vermieden. Dieser Transducer ist
unempfindlich im Hinblick auf Kondensation und Temperatur und muss
vor Durchführung eines Tests nicht separat kalibriert werden.
CareFusion kann Ihnen Spirometer für alle
Spirometrieanforderungen zur Diagnose und Überwachung zur
Verfügung stellen. Das Micro II Spirometer ergänzt das
Produktangebot des Micro I und wurde speziell für die Überwachung
von Asthma und COPD zuhause oder am Arbeitsplatz entwickelt.
96
Packungsinhalt
Das Micro I ist in einer handlichen Tragetasche verpackt. Im
Lieferumfang sind folgende Komponenten enthalten (Abb. 1):
1.
Micro I Spirometer
2.
CareFusion Digital Volume Transducer mit EinwegMundstücken aus Karton und Bedienungsanleitung
3.
Universal-Netzteil (36-PSU1017 5 V DC 1,2 A)
4.
Mundstück-Adapter aus Karton
5.
USB-/Ladekabel
Abb. 1
97
Kontraindikationen, Warn- und Vorsichtshinweise
Kontraindikationen: Die Durchführung von Spirometrietests kann
körperlich anstrengend sein und ist daher bei Patienten mit kürzlich
aufgetretenem Myokardinfarkt kontraindiziert. Zu langes Ausatmen kann
außerdem eine Synkope auslösen.
Die folgenden Begriffe werden in dieser Bedienungsanleitung verwendet:
Vorsicht: Risiko von Verletzungen oder schwerwiegenden Schäden
Warnung: Bedingungen oder Vorgehensweisen, die Verletzungen
verursachen können
Bitte beachten: Wichtige Informationen, um Schäden am Instrument
zu vermeiden und den Betrieb zu erleichtern
VORSICHT: Vor Gebrauch die Bedienungsanleitung lesen.
WARNUNG: Das Instrument darf nicht in Gegenwart von explosiven
oder entflammbaren Gasen, entflammbaren Anästhesiegemischen
oder in sauerstoffreichen Umgebungen verwendet werden.
VORSICHT: Die Mundstücke sind nur für die Verwendung an einem
Patienten vorgesehen. Wenn sie an mehr als einem Patienten
verwendet werden, besteht das Risiko einer Kreuzinfektion. Die
mehrfache Verwendung kann zu einer Abnutzung des Materials und
fehlerhaften Messwerten führen.
VORSICHT: Die Lungenfilter sind nur für die Verwendung an einem
Patienten vorgesehen. Wenn sie an mehr als einem Patienten
verwendet werden, besteht das Risiko einer Kreuzinfektion. Die
mehrfache Verwendung kann außerdem zu erhöhtem Luftwiderstand
und fehlerhaften Messwerten führen.
VORSICHT: Wenn das Spirometer zum Aufladen am Netzteil oder zur
Konfiguration des Gerätes an einem PC angeschlossen ist, darf das
Spirometer nicht vom Patienten gehandhabt werden.
BITTE BEACHTEN: Das erworbene Produkt darf nicht als
unsortierter Abfall entsorgt werden. Die Entsorgung dieses
Produktes sollte gemäß den örtlichen Bestimmungen für
Elektro- und Elektronik-Altgeräte (WEEE) erfolgen.
98
Verwendungszweck
Das
Micro
I
wird
von
Krankenhausärzten
und
medizinischen
Fachkräfte für die Diagnose von Asthma und COPD bei Erwachsenen
und Kindern über 3 Jahre eingesetzt.
Umgebungsbedingungen
Die folgenden Vorsichtsmaßnahmen sind zu beachten:
•
•
Das Micro I vor direktem Sonnenlicht schützen.
Das Spirometer nicht in staubiger Umgebung oder in der
Nähe von Heizgeräten und Heizkörpern betreiben.
•
Das Spirometer an einem trockenen Ort aufbewahren und
keinen extremen Temperaturen aussetzen.
•
Die Transducer-Halterung beim Betrieb des Spirometers
nicht gegen eine starke Lichtquelle halten.
Inbetriebnahme
Es wird empfohlen, das Micro I Spirometer vor Gebrauch vollständig
aufzuladen. Das Netzteil wird mit separaten GB-, US- und
europäischen Steckern geliefert. Den gewünschten Stecker mit dem
Netzteil verbinden und an eine Netzsteckdose anschließen. Das Micro
I mit dem USB-/Ladekabel am Netzteil anschließen. Das Ladesymbol
erscheint auf dem Bildschirm.
Vor dem ersten Gebrauch mindestens 5 Stunden lang
vollständig aufladen.
Vor Gebrauch die Schutzfolie vom Anzeigebildschirm abziehen.
99
Konfiguration
Wenn das Gerät zum ersten Mal eingeschaltet wird, kann es für das
jeweilige Land konfiguriert werden. Dabei werden die entsprechende
Sprache, Höhen- und Gewichtseinheiten sowie das Datumsformat und
die Prognosesätze für das jeweilige Land eingestellt. Außerdem
werden die Indizes zur Anzeige konfiguriert und es wird eingestellt, ob
der prozentuale Prognosewert oder der Z-Wert für Variationen von der
Norm angezeigt wird. Alle diese Einstellungen können auch über die
im Lieferumfang enthaltene PC-Software eingestellt werden.
Das Gerät mit dem Ein-/Aus-Schalter oben auf dem Gerät
einschalten. Die folgende Anzeige erscheint:
Mit
den
Pfeiltasten
nach
oben/unten
das
gewünschte
Land
auswählen und dann auf die ‚Eingabetaste‘ (↵) drücken. Dieser
Vorgang ist nur beim ersten Einschalten des Gerätes erforderlich.
Die Auswahl wird für die weitere Verwendung gespeichert.
Es wird empfohlen, die PC-Software zu verwenden, falls diese
Einstellungen geändert werden sollen. Das Micro I mit dem USBKabel im Lieferumfang an den PC anschließen. Die Software
ausführen und das Micro I einschalten. Die PC-Software erkennt,
dass das Micro I angeschlossen ist. Die Anweisungen auf dem
Bildschirm befolgen, um das Gerät zu konfigurieren.
100
Micro I PC Software
Mit dieser Software können die Einstellungen des Micro I Spirometers
geändert werden. Nach der Installation der Software bietet das HilfeMenü umfassende Hilfestellung beim Gebrauch der Anwendung.
Systemanforderungen
Damit die Micro I PC Software ordnungsgemäß ausgeführt werden kann,
sind bestimmte Hardware- und Softwarekomponenten erforderlich.
PC-Anforderungen
Es ist ein IBM-kompatibler PC erforderlich, dessen Hardware den
folgenden Mindestanforderungen entspricht oder darüber hinausgeht.
Prozessor: mindestens 800 MHz
RAM: 256 MB
Freier Speicherplatz: 50 MB
Video: 800 x 600, Farbtiefe: 256 Farben. Es wird empfohlen, eine
Mindestauflösung von 1280 x 1024 zu verwenden, um die Vorteile
der Benutzeroberfläche mit verschiedenen Fenstern vollständig
nutzen zu können.
Mindestens ein freier USB-Anschluss. (Ein weiterer USB-Anschluss ist
für USB-fähige Spirometer erforderlich.)
Betriebssystemanforderungen
Die Micro I PC Software kann mit den folgenden Betriebssystemen
verwendet werden:
Windows XP
Windows Vista 32-Bit
Windows Vista 64-Bit
Windows Server 2003
Windows Server 2008
101
Installation der Micro I PC Software
Stellen Sie vor Beginn der Installation sicher, dass Ihr Computer den
Mindestsystemanforderungen entspricht und dass der Anwender, der
die Installation der Software vornimmt, über Adminstratorrechte
verfügt.
Schließen Sie alle anderen laufenden Anwendungen.
Legen Sie die Installations-CD in das CD-ROM-Laufwerk ein.
Das Einrichtungsprogramm sollte automatisch gestartet werden und
das Willkommen-Dialogfenster anzeigen. Klicken Sie auf ‚Weiter‘, um
fortzufahren. Wenn das Einrichtungsprogramm nicht automatisch
gestartet wird, rufen Sie den Windows Explorer auf, um das CDLaufwerk manuell auszuwählen, und öffnen dann die Datei mit dem
Namen „Micro I PC Software.exe“.
Die Lizenzvereinbarung wird angezeigt. Lesen Sie das gesamte
Dokument durch und stellen Sie sicher, dass Sie alle Punkte
verstanden haben, bevor Sie die Lizenzbedingungen annehmen.
Klicken Sie zum Fortfahren auf ‚Weiter‘.
Das Dialogfeld „Select Destination Location“ (Zielort auswählen) wird
mit dem Verzeichnis angezeigt, in dem die Micro I PC Software
installiert wird. Der Standard-Speicherort ist:
C:\Programme\CareFusion\Micro I PC Software
Um diesen Speicherort zu ändern, wählen Sie ‚Durchsuchen‘ aus.
Klicken Sie auf ‚Weiter‘, um das Dialogfeld „Select Program Manager
Group“ (Programmgruppen auswählen) anzuzeigen. An dieser Stelle
wird das Symbol zum Aufrufen der Micro I PC Software im
Startmenü positioniert. Sie können entweder eine neue Gruppe
eingeben oder eine bestehende Gruppe verwenden.
Klicken
Sie
auf
‚Weiter‘,
um
das
Dialogfeld
mit
den
Installationsoptionen aufzurufen, das die folgende Option enthält:
102
Add Micro I PC Software icon to the desktop (Symbol für die Micro I
PC Software auf dem Desktop hinzufügen)
Klicken Sie auf ‚Weiter‘, um die Dateien in das System zu kopieren.
Wenn die Dateien in das System kopiert wurden, werden Sie darauf
hingewiesen, dass die Micro I PC Software erfolgreich installiert
wurde. Es wird empfohlen, den PC vor Gebrauch der Anwendung neu
zu
starten.
Klicken
Sie
auf
‚Fertigstellen‘,
um
den
Installationsvorgang abzuschließen.
Ausführen der Micro I PC Software
Schließen Sie das Micro I mit dem Kabel im Lieferumfang an einen
USB-Anschluss am PC an. Das Micro I wird über den USB-Anschluss
am PC mit Strom versorgt. Bitte beachten Sie, dass das Micro I
einen
Hochstrom-USB-Anschluss
erfordert.
Wenn
es
an einen
Schwachstrom-USB-Anschluss angeschlossen wird, schaltet sich das
Gerät aus und reagiert solange nicht auf Tastendruck, bis es wieder
getrennt
wurde.
gewöhnlich
an
Schwachstrom-USB-Anschlüsse
befinden
Tastaturen
ohne
und
USB-Hubs
sich
eigene
Stromversorgung und sollten nicht verwendet werden. Wenn das
Micro I am PC angeschlossen ist, wird folgendes Symbol angezeigt:
Das Spirometer darf während dieses Vorgangs nicht vom
Patienten gehandhabt werden.
103
Führen Sie die Micro I PC Software aus. Der erste Bildschirm wird
angezeigt:
Auf diesem Bildschirm können Sie die Einstellungen des Gerätes
ändern oder die interne Uhrzeit des Micro I einstellen. Wenn die
Option „Geräteeinstellungen ändern“ ausgewählt wird, erscheint der
folgende Bildschirm:
Durch Auswahl
der
Option „Benutzerdefiniert“ oben auf dem
Bildschirm, können Sie alle Micro I Funktionen im Hinblick auf Ihre
speziellen Anforderungen anpassen.
104
Betrieb
Das Micro I ist für eine Reihe von Anwendungen ausgelegt – vom
einfachen Spirometrietest, bei dem nur wenige Indizes angezeigt
werden, bis hin zu komplexen Betriebsfunktionen, bei denen
Abweichungen von der Norm, Reaktionen auf den Bronchodilatator
und eine Interpretation der Ergebnisse erforderlich sind.
Nach der anfänglichen Konfiguration und nachfolgend bei jedem
Einschalten des Gerätes wird das Hauptmenü angezeigt:
Übersicht Hauptmenü
Schnelluntersuchung
Verwenden Sie diese Funktion, um eine unmittelbare Spirometriemessung ohne Prognosewerte und Interpretation durchzuführen.
Untersuchung mit Prognosewerten
Diese Funktion erfordert die Eingabe der demografischen Patientendaten, damit die Prognosewerte und Interpretation berechnet und
angezeigt werden können.
Untersuchung nach Bronchodilatator
Diese Funktion ermöglicht die Messung der Reaktion nach Anwendung
eines Bronchodilatators. Die Reaktion wird in Bezug auf den vorher
gemessenen Basiswert (Baseline) gemessen, der entweder durch eine
Schnelluntersuchung oder eine Untersuchung mit Prognosewerten
ermittelt wurde. Die letzte aufgezeichnete Baseline-Untersuchung wird
automatisch gespeichert, wenn das Gerät ausgeschaltet wird, und steht
beim Einschalten des Gerätes für einen Vergleich nach Anwendung des
Bronchodilatators zur Verfügung.
105
Letzte Ergebnisse
Mit dieser Option werden die Ergebnisse der letzten gespeicherten
Untersuchung angezeigt.
Einstellungen
Mit dieser Option kann der Anwender verschiedene Einstellungen,
einschließlich Datum, Uhrzeit und Sprache ändern sowie eine
Kalibrationsprüfung durchführen.
Schnelluntersuchung
Bei Auswahl dieser Option wird der folgende Bildschirm angezeigt:
Das Micro I kann direkt mit einem MicroGuard Filter oder mit einem
Einweg-Mundstück aus Karton und dem Adapter im Lieferumfang
verwendet werden. Führen Sie das Mundstück bzw. den MicroGuard
Filter in die Mundstück-Halterung des Spirometers ein.
Weisen Sie den Patienten an, so tief wie möglich einzuatmen, die
Lippen fest um das Mundstück zu schließen und dann so fest und
schnell wie möglich auszuatmen, bis alle Luft ausgeatmet wurde.
106
Die Spirometrie-Ergebnisse für diesen Atemstoß werden daraufhin
zusammen mit der Qualitätsprüfung des Atemmanövers nach
ATS/ERS-Richtlinien angezeigt:
Weitere Indizes (falls konfiguriert) sowie die besten Testergebnisse
aus einer Reihe von Atemstößen können durch Drücken der
Pfeiltaste nach unten angezeigt werden.
Jedes Atemmanöver wird einer Qualitätsprüfung im Hinblick auf
einen langsamen Start, ein abruptes Ende, einen kurzen Atemstoß
sowie geringe Anstrengung und Husten gemäß den ATS/ERS 2005Richtlinien unterzogen.
Bitte beachten Sie, dass der prozentuale Prognosewert und die
Interpretation
bei
der
Option
„Schnelluntersuchung“
nicht
verfügbar sind.
Drücken Sie auf die Eingabetaste, um folgenden Bildschirm aufzurufen:
Um den Test zu wiederholen, wählen Sie „Erneuter Atemstoß“ aus
und drücken Sie auf die Eingabetaste.
107
Untersuchung mit Prognosewerten
Bei Auswahl dieser Option wird der folgende Bildschirm angezeigt:
Geben Sie das Alter des Patienten mit den Pfeiltasten nach
oben/unten ein und drücken Sie dann auf die Eingabetaste.
Verfahren Sie entsprechend mit den Angaben für Geschlecht,
Körpergröße und ethnische Zugehörigkeit. Falls Sie einen Fehler
machen, drücken Sie einfach auf die Rücktaste, um zum vorherigen
Eintrag
zurückzugehen. Je
nach der
ausgewählten ethnischen
Zugehörigkeit werden die volumetrischen Prognosewerte für den
Patienten um einen bestimmten Prozentsatz verringert.
Die ethnischen Korrekturen für ECCS sind wie folgt:
Population
Prozentualer Abzug
Kaukasisch
0
Nicht angegeben
0
Polynesisch
10
Asiatisch
10
Afro-karibisch
13
Falls NHANES III-Prognosewerte verwendet werden, wird die ethnische
Zugehörigkeit gemäß den NHANES III-Gleichungen angewendet.
Auf die Eingabetaste drücken, wenn die erforderliche Korrektur
ausgewählt wurde.
108
Bitte
beachten
Sie,
dass
das
Micro I
für
eine
Angabe
der
Körpergröße in Zoll konfiguriert werden kann.
Falls Sie einen Fehler machen, drücken Sie einfach auf die
Rücktaste, um zum vorherigen Eintrag zurückzugehen.
Wenn alle Patientendaten eingegeben wurden, wird der folgende
Bildschirm angezeigt und ein Spirometrietest kann durchgeführt
werden:
Nach der Durchführung eines Tests werden die Ergebnisse angezeigt:
Jedes Atemmanöver wird einer Qualitätsprüfung im Hinblick auf
einen langsamen Start, ein abruptes Ende, einen kurzen Atemstoß
sowie geringe Anstrengung und Husten gemäß den ATS/ERS 2005Richtlinien unterzogen. Ein Sternchen ( * ) am Zeilenende weist auf
ein Ergebnis unterhalb des unteren Grenzwerts für den
Normalbereich hin.
Wenn eine Reihe von Atemstößen aufgezeichnet wird, beziehen sich
die Ergebnisse und die Qualitätsprüfung auf den aktuellen Atemstoß,
aber die Interpretation basiert auf dem besten Testergebnis aus
der Reihe.
109
Mit der Pfeiltaste nach unten können weitere Indizes (falls
konfiguriert) sowie die besten Testergebnisse aus einer Reihe
von Atemstößen angezeigt werden:
Während die Ergebnisse angezeigt werden, kann durch Drücken der
Eingabetaste jederzeit ein weiterer Spirometertest durchgeführt
werden. Wird die Eingabetaste versehentlich gedrückt, drücken Sie
einfach auf die Rücktaste, um zur Ergebnisanzeige zurückzukehren.
Das Micro I kann so konfiguriert werden, dass der Z-Wert anstatt
der prozentualen Prognosewerte angezeigt wird, wenn Daten aus
den Prognosesätzen zur Verfügung stehen:
Der Z-Wert ist die Anzahl der Standardabweichungen der Ergebnisse
über (positiver Z-Wert) bzw. unter (negativer Z-Wert) dem
Prognosewert.
110
Untersuchung nach Bronchodilatator
Wenn zufriedenstellende Baseline-Tests aufgezeichnet wurden, kann
eine Untersuchung nach Anwendung eines Bronchodilatators
durchgeführt werden, indem die Option „Untersuchung nach
Bronchodilatator“ im Hauptmenü ausgewählt wird. Wenn diese Tests
durchgeführt werden, wird der prozentuale Prognosewert durch die
prozentuale Änderung im Vergleich zum besten Baseline-Ergebnis für
jeden Index ersetzt:
Mit der Pfeiltaste nach unten können wie bei den Baseline-Atemstößen
die weiteren Indizes und die besten Testergebnisse angezeigt werden.
NLHEP-Modus
Dieser Betriebsmodus wird durch die Auswahl der USA (NLHEP)-Option im
Konfigurationsmenü beim ersten Einschalten des Gerätes oder nachfolgend
über die Option „Einstellungen“ im Hauptmenü aufgerufen. In diesem Modus
erfüllen die Funktionen des Micro I alle Anforderungen des „National Lung
Health Education Program“ (NLHEP).
Es werden nur FEV1, FEV6 und das Verhältnis von FEV1/FEV6 angezeigt und
gespeichert. Jedes Atemmanöver wird einer Qualitätsprüfung unterzogen
und es wird ein Qualitäts-Einstufungswert für die Testsitzung angezeigt:
111
NLHEP-Qualitätsprüfungen
Ein Atemmanöver muss eine Reihe erweiterter Qualitätsprüfungen
bestehen, damit die Interpretation angezeigt wird. Falls der Patient
ein Atemmanöver mit unzureichender Qualität ausgeführt hat, wird
eine der folgenden drei Meldungen angezeigt:
Meldung
Nicht
zögern
Kriterien
Rück-extrapoliertes
Volumen (BEV) größer
als 150 ml
Schneller
ausatmen
Zeitdauer bis Peak Flow
(PEFT) länger als 120 msec
Länger
ausatmen
Exspirationsdauer kürzer
als 6 Sekunden bzw.
Volumenakkumulation
nicht unter 100 ml pro
0,5 Sekunden abgefallen
Empfohlene Aktion
Der Patient sollte die Luft
schneller und
gleichmäßiger und ohne
Zögern zu Beginn des
Atemmanövers ausatmen.
Der Patient muss zu
Beginn des Atemmanövers
mehr explosionsartig
ausatmen.
Der Patient hat das
Ausatmen zu früh beendet.
Der Patient muss so lange
ausatmen, bis die Lungen
komplett geleert wurden.
Wenn ein akzeptables Atemmanöver ausgeführt wurde, werden die
nachfolgenden Atemmanöver außerdem folgenden
Konsistenzprüfungen unterzogen:
Fester
Peak Flow (max.
Der Patient muss bei
ausatmen Atemfluss) nicht
jedem Atemmanöver die
reproduzierbar. Die besten
größtmögliche
vorhergehenden
Anstrengung
Atemmanöver stimmen
unternehmen.
nicht innerhalb von 1,0 l/s
überein. Daraus lässt sich
schließen, dass der Patient
keine konsistenten
Anstrengungen
unternimmt.
Tiefer
FEV1 oder FEV6 nicht
Der Patient muss vor
einatmen reproduzierbar. Differenz
jedem Atemmanöver so
in Bezug auf das beste
lange einatmen, bis die
Testergebnis größer als
Lungen komplett gefüllt
150 ml.
sind.
112
Wenn
zwei
bestehen,
Atemmanöver
werden
Atemmanöver
die
eine
der
besten
gespeichert
Konsistenzprüfungen nicht
Einzelergebnisse
der
beiden
(FEV1, FEV6 und PEF als einzelne
Testergebnisse).
Wenn eine der oben aufgeführten Meldungen erscheint, sollten Sie
den Patienten anweisen, wie das Atemmanöver verbessert werden
kann, und selbst ein korrektes Atemmanöver vorführen.
NLHEP QC-Stufen
Die Qualität jeder Testsitzung wird anhand der folgenden Kriterien
eingestuft:
QC-Stufe
Kriterien
A
Mindestens zwei akzeptable Atemmanöver, wobei
die beiden höchsten FEV1-Werte übereinstimmend
besser als 100 ml und die beiden höchsten FEV6Werte übereinstimmend besser als 100 ml ausfallen
Mindestens zwei akzeptable Atemmanöver, wobei
die beiden höchsten FEV1-Werte übereinstimmend
besser als 150 ml ausfallen
Mindestens zwei akzeptable Atemmanöver, wobei
die beiden höchsten FEV1-Werte übereinstimmend
zwischen 200 ml und 150 ml ausfallen
B
C
D
F
Lediglich ein akzeptables Atemmanöver oder zwei
akzeptable Atemmanöver, wobei die beiden
höchsten FEV1-Werte übereinstimmend geringer als
200 ml ausfallen
Kein akzeptables Atemmanöver
NLHEP-Interpretation
Die Interpretation wird anhand der besten Spirometrie-Testergebnisse
vorgenommen und basiert auf den Prognosewerten für das forcierte
exspiratorische Verhältnis FEV1/FEV6 und FEV1. Falls eine Obstruktion
der
Atemwege
festgestellt
wurde,
wird
der
Schweregrad
Übereinstimmung mit den NLHEP-Richtlinien angegeben.
113
in
Ausschalten des Gerätes
Das Gerät wird mit dem Ein-/Aus-Schalter ausgeschaltet.
Das Gerät kann von der Netzstromversorgung getrennt werden, indem das
Ladegerät aus der Netzsteckdose oder das USB-Kabel abgezogen wird.
Instandhaltung
Batteriemanagement
Das Micro I wird mit einer wiederaufladbaren Batteriepackung betrieben.
Die Batteriespannung wird überwacht und eine Warnmeldung wird beim
Einschalten des Gerätes angezeigt, wenn der Ladestand der Batterie
abnimmt.
Batterieladesymbole
Batterie fast leer. Batterie so bald wie möglich aufladen,
damit das Gerät mit Strom versorgt werden kann.
Batterie vollständig geladen.
Die Batterie ist nicht für den internen Speicher erforderlich, daher bleiben die
gespeicherten Ergebnisse erhalten, wenn die Batterie leer ist.
Um die Batterie wiederaufzuladen, das Micro I an das mitgelieferte Ladegerät
anschließen.
Dann
das
Ladegerät
an
eine
geeignete
Netzsteckdose
anschließen. Dabei sicherstellen, dass der Zugang zum Ladegerät nicht
eingeschränkt ist, sodass das Ladegerät problemlos entfernt werden kann.
Auf dem Micro I wird das folgende Symbol angezeigt:
114
Das Spirometer darf während dieses Vorgangs nicht vom Patienten
gehandhabt werden.
Das Ladesymbol (
) erscheint auf dem Bildschirm, um den
Ladevorgang anzuzeigen.
Wenn das Ladesymbol ausgeblendet wird (nach bis zu 5 Stunden),
erscheint das Symbol der vollständig geladenen Batterie (
) auf
dem Bildschirm. Das Netzteil aus der Netzsteckdose und von der
Unterseite des Gerätes abziehen. Das Micro I kann nun als tragbares
Gerät verwendet werden.
Hinweis: Das Micro I kann auch mit dem mitgelieferten USB-Kabel
über einen PC oder Laptop aufgeladen werden.
Batterieaustausch
Die Lebensdauer von wiederaufladbaren Batterien ist begrenzt,
daher muss die Batteriepackung nach einigen Jahren (in
Abhängigkeit von der Nutzung) ersetzt werden. Wenn die Batterie
das Ende ihrer Lebensdauer erreicht, können immer weniger Tests
zwischen den Ladevorgängen durchgeführt werden.
Für den Zugang zur Batterie muss die Rückseite des Gerätes
vorsichtig geöffnet werden.
An den angezeigten Positionen befinden sich Halteklemmen an der
hinteren Abdeckung, die vorsichtig in der angegebenen Reihenfolge
gelöst werden.
115
Um diesen Vorgang zu erleichtern, weist Halteklemme 1 eine Vertiefung im
Gerätegehäuse auf, sodass ein kleiner Schraubendreher mit flacher Spitze
vorsichtig unter die Klemme geschoben werden kann, um diese zu lösen.
Anschließend die Halteklemmen 2, 3 und 4 mit dem Schraubendreher lösen.
Dann die Abdeckung über das Unterteil des Gerätes abziehen, wodurch die
Halteklemmen 5 und 6 gelöst werden.
Die Batterie austauschen und dabei besonders auf die Ausrichtung des
Steckers in der Anschlussbuchse und der Batterie im Batteriefach achten.
Sicherstellen, dass die Kabel aus der Batterie nach der Installation an der
Oberseite der Batteriepackung herausführen.
Die hintere Abdeckung wieder am Gerät anbringen, indem die Halteklemmen
in umgekehrter Reihenfolge befestigt werden.
Batterien müssen in Übereinstimmung mit den EUBatteriebestimmungen entsorgt werden.
116
Kalibrationsprüfung
Das Micro I ist auf die Anzeige in Litern bei Körpertemperatur und
Luftdruck mit Wasserdampfsättigung (BTPS) kalibriert.
Solange der Transducer nicht beschädigt wird, sollte die Kalibration auf
unbegrenzte Zeit erhalten bleiben und das Gerät keine erneute
Kalibration erfordern. Um die korrekte Funktionsfähigkeit des Gerätes
sicherzustellen, wird allerdings die regelmäßige Durchführung einer
Kalibrationsprüfung empfohlen.
Zur
Durchführung
„Kalibrationsprüfung“
einer
aus
Kalibrationsprüfung
dem
Einstellungsmenü
die
Option
auswählen.
Der
folgende Bildschirm wird angezeigt:
Eine 3-Liter-Pumpe mit der Mindestausstattung an Adaptern an das
Micro I anschließen und das Pumpenvolumen gleichmäßig und ohne
Unterbrechung in den Transducer injizieren. Bei Abschluss des
Vorgangs wird Folgendes angezeigt:
Die zulässige Kalibrationsgenauigkeit liegt bei +/-3,5 %. Liegt die
Kalibrationsgenauigkeit nicht in diesem Bereich, erscheint ein Kreuz
117
anstelle des Häkchens. In diesem Fall müssen die Pumpe und
Anschlüsse auf Undichtigkeiten überprüft und die Prüfung wiederholt
werden. Falls das Micro I mehrere Male außerhalb des
Kalibrationsbereichs liegt, muss das Gerät zur Wartung an
CareFusion gesendet werden.
Reinigen des Transducers
Der Transducer erfordert keine Routinewartung oder -instandhaltung.
Zur Sterilisation oder Reinigung kann der Transducer wie folgt
entfernt werden:
1
Den Transducer vorsichtig gegen den Uhrzeigersinn drehen,
um ihn zu lösen, und dann vom Gehäuse abziehen.
2
Der Transducer kann jetzt zur routinemäßigen Reinigung in
warmes Seifenwasser getaucht werden oder zur Sterilisation
nicht länger als 10 Minuten in eine kalte Sterilisationslösung,
z. B. Perasafe, eingetaucht werden. (Alkoholhaltige und
Chloridlösungen sind zu vermeiden.) Nach der
Reinigung/Sterilisation wird der Transducer mit destilliertem
Wasser gespült und abgetrocknet. Perasafe ist von
CareFusion in handlichen 81-g-Kunststoffflaschen,
Bestellnr. 36-SSC5000A, erhältlich.
3
Den Transducer wieder in das Micro I einbauen.
VORSICHT: Das Spirometer und die Zubehörteile dürfen nicht in
Wasser oder Reinigungslösungen gereinigt oder eingetaucht werden.
Dadurch können die internen elektronischen Komponenten
permanent beschädigt werden.
Wartung
Falls Ihr Gerät Wartungs- oder Reparaturarbeiten erfordert, siehe
Kontaktinformationen auf Seite 212.
Das Micro I enthält keine Teile, die vom Anwender gewartet werden
können.
118
Informationen zur Fehlerbehebung
Falls beim Betrieb des Spirometers Probleme auftreten, können Sie
die folgende Tabelle zu Rate ziehen:
Problem
Mögliche
Ursache
Abhilfe
Das Micro I kann nicht
eingeschaltet werden
Batterien leer
Batterien aufladen
Bei jedem Einschalten des
Instrumentes wird die
Uhrzeit als 00:00 angezeigt
Interne Batterie
des Micro I ist
fehlerhaft
An den
Vertragshändler
wenden
Das Micro I liegt bei der
Kalibrationsprüfung
außerhalb des %-Bereichs
Undichtigkeiten
in der Pumpe
oder den
Anschlüssen
Pumpe und
Anschlüsse auf
Undichtigkeiten
überprüfen
Elektromagnetische Verträglichkeit (EMV)
Änderungen oder Modifikationen am Micro I Spirometer, die nicht
ausdrücklich von Carefusion genehmigt wurden, können Probleme mit
der elektromagnetischen Verträglichkeit (EMV) dieses Gerätes oder
anderer Geräte zur Folge haben. Das Gerät wurde in Übereinstimmung
mit den geltenden Bestimmungen hinsichtlich EMV entwickelt und
getestet und muss gemäß den Richtwerten zur Störfestigkeit nach EN
50082-1:1992 installiert und betrieben werden.
WARNUNG: Die Verwendung von tragbaren Telefonen oder anderen
Radiofrequenz (RF)-Geräten
in
der
Nähe
des
Systems
kann
unerwartete oder beeinträchtigte Betriebsfunktionen verursachen.
119
Sicherheitsbestimmungen gemäß IEC 60601-1
Schutz vor Stromschlag (Schutzart)
Schutz vor Stromschlag
(Schutzgrad)
Stromanschluss
Stromversorgung
Lebensdauer der Batterie:
Grad der elektrisch leitenden
Verbindung zwischen Gerät und
Patient
Mobilität
Betriebsmodus
Klasse II
Typ B Anwendungsteil
100-240 V Wechselstrom,
50/60 Hz
Netzteil und wiederaufladbare
interne NiMH-Batterie
Circa 30 Stunden bei einer
vollständig geladenen neuen
Batterie
Das Gerät ist so konzipiert,
dass keine elektrisch leitende
Verbindung zum Patienten
zustande kommt.
Transportierbar
Kontinuierlich
HINWEIS: Wenn andere Geräte an dieses Gerät angeschlossen werden,
muss sichergestellt werden, dass die Gerätekombination die
Anforderungen der internationalen Sicherheitsnorm IEC 60601-1 für
medizinisch-elektrische Systeme erfüllt. Beim Anschluss an einen PC mit
dem mitgelieferten USB-Kabel muss der PC eine begrenzte SELVStromquelle gemäß den Bestimmungen von EN60950-1 darstellen bzw.
die Anforderungen von EN60601-1 erfüllen.
WICHTIG: Nur das mitgelieferte Netzteil (36-PSU1017 5 V DC 1,2 A)
verwenden. Das Netzteil enthält einen Transformator. Das Netzteil nicht
abtrennen und mit einem anderen Anschlussstecker ersetzen. Dadurch
entsteht eine gefährliche Situation.
• Das Netzteil wandelt die Netzspannung (100-240 Volt) in eine sichere
Spannung (5V Wechselstrom) um.
• Sicherstellen, dass das Netzteil nicht feucht wird.
• Das Netzteil nicht verwenden, wenn es beschädigt ist.
• Vor der Reinigung das Micro I stets von der Stromversorgung trennen.
WARNUNG: Keine Geräte anschließen, die nicht als Bestandteil des
Systems angegeben sind.
120
WARNUNG: Es dürfen keine Modifikationen an diesen Geräten
vorgenommen werden.
HINWEIS: Wenn eine Mehrfachsteckdose (MPSO) mit dem System
verwendet wird, darf die maximal zulässige Last nicht überschritten
werden. Keine elektrischen Geräte anschließen, die nicht als
Bestandteil des Systems geliefert wurden.
Symbole
Gerät Typ B
In Übereinstimmung mit der Richtlinie 93/42/EEC
0086
Entsorgung gemäß WEEE (Richtlinien zur
Entsorgung von Elektro- und Elektronik-Altgeräten)
Gebrauchsanweisung beachten
Vorsicht: beiliegende Dokumente beachten
Herstellungsdatum
Hersteller
Seriennummer
Laut Bundesgesetz der USA darf diese Vorrichtung
ausschließlich an einen Arzt oder auf dessen
Anordnung verkauft werden. (Rx only)
121
Bitte beachten: Die Angaben in dieser Bedienungsanleitung können
ohne Vorankündigung geändert werden und stellen keine
Verpflichtung seitens CareFusion UK 232 Ltd. dar. Die Software darf
nur in Übereinstimmung mit den Bedingungen dieser Vereinbarung
verwendet oder kopiert werden. Kein Teil dieser Bedienungsanleitung
darf ohne schriftliche Genehmigung von CareFusion UK 232 Ltd.
In jeglicher Form auf elektronische oder mechanische Weise,
einschließlich Fotokopieren und Aufzeichnungen, für jeglichen
Zweck übertragen oder vervielfältigt werden.
122
Spezifikationen des Micro I
Messungen:
Forciertes exspiratorisches Volumen in 1 Sekunde (FEV1)
Forciertes exspiratorisches Volumen in 6 Sekunden (FEV6)
Forcierte Vitalkapazität (FVC)
Forciertes exspiratorisches Verhältnis (FEV1/FEV6)
Forciertes exspiratorisches Verhältnis (FEV1/FVC)
Max. Exspirationsfluss-Rate (PEF)
Mittlerer Exspirationsfluss (FEF25-75)
Exspirationsfluss bei 75 % Restvolumen (FEF75)
Exspirationsfluss bei 25 % Restvolumen (FEF25)
Anzeige:
128 x 128 Pixel, grafische
Schwarzweiß-LCD mit
Hintergrundbeleuchtung
Transducer-Typ:
CareFusion Uni-Directional Digital
Volume
Genauigkeit:
Erfüllt die Genauigkeitsanforderungen
gemäß ATS/ERS TASK FORCE:
„STANDARDISATION OF LUNG
FUNCTION TESTING 2005“ (Eur Respir
J 2005; 26: 319-338 Table 6)
Stromversorgung:
2 x wiederaufladbare NiMHBatteriezellen (AA)
Lebensdauer der Batterie:
Circa 30 Stunden bei einer vollständig
geladenen neuen Batterie
Betriebsspannung
Weniger als 90 mA
Ladespannung
Weniger als 500 mA
Abmessungen:
162 x 61 x 30 mm
Gewicht:
152 g
Betriebstemperatur:
10 bis +35 °C
Luftfeuchtigkeit (Betrieb):
20 % bis 80 % relative
Luftfeuchtigkeit
Lagertemperatur:
-20 bis +70 °C
Luftfeuchtigkeit
(Lagerung):
30 % bis 90 % relative
Luftfeuchtigkeit
Lebensdauer
5 Jahre
123
Zubehör
Bestellnr.
Beschreibung
36-PSA1000
Einweg-Mundstücke für Erwachsene (500 pro Packung)
36-SST1250
Einweg-Sicherheits-Mundstücke (250 pro Packung)
36-SST1000
Einweg-Sicherheits-Mundstücke (500 pro Packung)
36-MGF1025
MicroGuard Lungenfilter (25 pro Packung)
36-MGF1100
MicroGuard Lungenfilter (100 pro Packung)
36-PSA1200
Einweg-Mundstücke für Kinder (250 pro Packung)
36-PSA1100
Adapter für Kinder
36-SSC5000A PeraSafe Sterilisationspulver, 81 g
(zur Herstellung von 5 Litern Lösung)
36-VOL2104
Nasenklemmen (5er-Packung)
36-SM2125
3-Liter-Kalibrationspumpe
36-MLD1621
Mundstück-Adapter
36-BAT1043
Batteriepackung (NiMH AA 2,4 V, 1600 mAh)
36-PSU1017
5 V DC 1,2 A (GlobTek WR9QA1200USBNR-G2267)
BITTE BEACHTEN: NUR ZUBEHÖRTEILE VON
CAREFUSION VERWENDEN
124
Espirómetro
de diagnóstico
Micro I
Manual de funcionamiento
125
V. Introducción
El Micro I es un espirómetro de diagnóstico compacto y totalmente
portátil que funciona con batería recargable. Cumple con precisión
con los requisitos del ATS/ERS TASK FORCE: STANDARDISATION OF
LUNG FUNCTION TESTING 2005. Su diseño ergonómico y fácil de
usar permite realizar mediciones de espirometría de diagnóstico,
incluidos los valores previstos y la interpretación automática, de
manera rápida y sencilla.
Las funciones del Micro I incluyen:
o
Medición de los valores FEV1, FVC(FEV6), FEV1/FVC,
FEV1/FEV6, PEF, FEF25, FEF75, y FEF 25-75
o
Totalmente configurable mediante el software suministrado
o
Valores previstos ECCS, Asiáticos o NHANES III
o
Variación de la norma como porcentaje o puntuación Z
o
Interpretación del NLHEP, NICE, o ATS/ERS
o
Revisiones de calidad de la maniobra de espirometría
o
Comparación postbroncodilatador
o
Modo en cumplimiento con el NLHEP
El espirómetro utiliza el transductor de volumen digital de
CareFusion, una versión sumamente estable del transductor de
volumen, que mide el aire espirado directamente a B.T.P.S
(Temperatura corporal y presión con vapor de agua saturado), por lo
que se evitan las imprecisiones de las correcciones de la
temperatura. Este transductor no es sensible a los efectos de la
condensación ni de la temperatura, y evita la necesidad de una
calibración individual antes de realizar una prueba.
CareFusion puede suministrar espirómetros para satisfacer todas sus
necesidades en materia de espirometría de diagnóstico y de control.
El Micro II, espirómetro gemelo del Micro I, se ha diseñado
específicamente para el control del asma y de la enfermedad
pulmonar obstructiva crónica (EPOC) tanto en casa como en
el lugar de trabajo.
125
Contenido del envase
El Micro I viene envasado en un práctico estuche de transporte y
acompañado de los siguientes artículos (Fig.1):
1.
Espirómetro Micro I
2.
Transductor de volumen digital de CareFusion junto con
boquillas de cartón desechables y manual de instrucciones.
3.
Suministro eléctrico universal (36-PSU1017 5 V CC 1,2 A)
4.
Adaptador para boquilla de cartón
5.
Cable para carga/USB
Figura 1
126
Contraindicaciones, advertencias y precauciones
Contraindicaciones: dado que la realización de una espirometría
puede ser físicamente exigente, está contraindicada en pacientes
que hayan sufrido recientemente un infarto de miocardio. Asimismo,
la espiración extensa puede ocasionar un síncope.
Los términos siguientes se utilizan en este manual con el significado
que se explica a continuación
Precaución: Posibilidad de lesiones o daños graves
Advertencia: situaciones o prácticas que pueden provocar lesiones
personales.
Tenga en cuenta que: Información importante para evitar daños
en el equipo o facilitar el funcionamiento del instrumento.
PRECAUCIÓN: Lea este manual antes del uso
ADVERTENCIA: este instrumento no es adecuado para utilizarlo en
presencia de gases explosivos o inflamables omezclas anestésicas
inflamables, o en entornos ricos en oxígeno.
PRECAUCIÓN: Las boquillas están indicadas para uso en un solo
paciente. Si se usan en más de un paciente existe el riesgo de
infección cruzada. Su uso repetido puede degradar los materiales y
dar como resultado una medición incorrecta.
PRECAUCIÓN: Los filtros pulmonares están indicados para su uso en
un solo paciente. Si se usan en más de un paciente existe el riesgo
de infección cruzada. Su uso repetido puede aumentar también la
resistencia del aire y dar como resultado una medición incorrecta.
PRECAUCIÓN: no permita que el paciente manipule el espirómetro
cuando esté conectado al suministro eléctrico para cargarlo o a un
PC durante la configuración de la unidad.
TENGA EN CUENTA QUE: El producto que ha adquirido no
debe desecharse como parte de los residuos sin clasificar.
Utilice los servicios de recogida RAEE locales para la
eliminación de este producto.
127
Uso indicado
El Micro I es utilizado por médicos y profesionales sanitarios para el
diagnóstico del asma y de la enfermedad pulmonar obstructiva
crónica (EPOC) en adultos y niños de más de 3 años.
Entorno
Observe las siguientes precauciones:
•
•
No exponga el Micro I a la luz solar directa.
Evite utilizar el espirómetro donde haya mucho polvo o cerca
de calefactores o radiadores.
•
No guarde el espirómetro en un lugar húmedo ni lo exponga
a temperaturas extremas.
•
No dirija el soporte del transductor hacia una fuente de luz
intensa mientras utiliza el espirómetro.
Para comenzar
Es recomendable que el espirómetro Micro I esté completamente
cargado antes del uso. La fuente de alimentación se suministra con
distintos enchufes para el Reino Unido, EE.UU. y Europa. Conecte el
enchufe correspondiente a la fuente de alimentación y enchúfelo a la
toma del suministro de red. Conecte el Micro I a la fuente de
alimentación con el cable para carga/USB y el símbolo de carga
aparecerá en la pantalla.
Cárguelo completamente durante un mínimo de 5 horas
cuando se utilice por primera vez.
Retire la lámina protectora de la pantalla antes de su uso.
128
Configuración
Cuando la unidad se enciende por primera vez puede configurarse
para la región correspondiente. De este modo se definirán el idioma,
la altura y las unidades de peso, así como el formato de la fecha y
los valores previstos apropiados para la región en cuestión. También
se configurarán los índices que se vayan a visualizar y el porcentaje
previsto o la puntuación Z que se vaya a utilizar para mostrar la
variación de la norma. No obstante; todos estos ajustes pueden
personalizarse mediante el PC software suministrado.
Encienda la unidad pulsando el botón de encendido/apagado situado
en la parte superior del dispositivo y aparecerá lo siguiente:
Use las teclas de dirección arriba y abajo para resaltar la región
correspondiente
y,
a
continuación,
pulse
“Entrar”
(↵).
Este
procedimiento solo es necesario la primera vez que se enciende la
unidad y la selección realizada quedará almacenada para un uso futuro.
Es
recomendable
utilizar
el
PC
software
para
ajustar
estos
parámetros, si es necesario. Conecte el Micro I al PC con el cable
USB suministrado. Ejecute el software y encienda el Micro I. El PC
software detectará que el Micro I está conectado. Siga las
instrucciones en pantalla para configurar la unidad.
129
Micro I PC Software
Este software le permite personalizar los ajustes del espirómetro
Micro I. Una vez instalado correctamente, tendrá acceso a ayuda
completa a través del menú Ayuda cuando utilice esta aplicación.
Requisitos del sistema
Para que el Micro I PC Software funcione correctamente se necesitan
ciertos componentes de hardware y software.
Requisitos del equipo
Se requiere un equipo compatible con IBM que disponga de
hardware que cumpla o supere los siguientes requisitos mínimos:
Procesador: 800 MHz o superior
RAM: 256 MB
Espacio libre en disco: 50 MB
Vídeo: 800 x 600, 256 colores. Se recomienda usar una resolución
como mínimo de 1280 x 1024 para poder aprovechar al máximo las
ventajas de la interfaz de múltiples ventanas.
Como mínimo un puerto USB disponible (para los espirómetros
activados mediante USB se requiere un puerto USB adicional)
Requisitos del sistema operativo
El Micro I PC Software funciona en los sistemas operativos
siguientes:
Windows XP
Windows Vista 32 bit
Windows Vista 64 bit
Windows Server 2003
Windows Server 2008
130
Instalación del Micro I PC Software
Antes de comenzar, asegúrese de que su equipo cumpla con los
requisitos del sistema mínimos y de que el usuario que instale el
software disponga de derechos de usuario administrativos.
Cierre todas las aplicaciones en funcionamiento.
Introduzca el CD de instalación en la unidad de CD-Rom.
El programa de instalación se iniciará automáticamente y mostrará
el cuadro de diálogo de bienvenida; haga clic en “Siguiente” para
continuar.
Si
el
programa
de
instalación
no
se
inicia
automáticamente utilice el explorador de Windows para seleccionar
manualmente la unidad de CD y, a continuación, abra el archivo
llamado Micro I PC Software.exe.
Se mostrará el contrato de licencia. Lea todo el documento y
asegúrese de comprender su contenido antes de aceptar los
términos de la licencia. Haga clic en “Siguiente” para continuar.
Aparecerá el cuadro de diálogo Seleccionar ubicación de destino
donde se muestra el directorio en el que se instalará el Micro I PC
Software. La ubicación predeterminada es:
C:\Archivos de programa\CareFusion\Micro I PC Software
Si desea cambiar esta ubicación seleccione “Examinar”.
Haga clic en “Siguiente” para ver el cuadro de diálogo Seleccionar
grupo del administrador de programas. Esta será la ubicación en la
que se colocará el icono de lanzamiento del Micro I PC Software bajo
el menú Inicio. Puede introducir una ubicación nueva o usar una
ubicación existente.
Haga clic en “Siguiente” para ver el cuadro de diálogo Opciones de
instalación que incluye la siguiente opción:
Agregar el icono de Micro I PC Software en el escritorio.
131
Haga clic en “Siguiente” para empezar a copiar los archivos en el
sistema.
Cuando los archivos se hayan copiado en el sistema, se le informará
de que el Micro I PC Software se ha instalado correctamente y se le
recomienda que reinicie el equipo antes de usar la aplicación. Haga
clic en “Finalizar” para completar el proceso de instalación.
Ejecución del Micro I PC software
Conecte el Micro I a un puerto USB en el PC mediante el cable
provisto. El Micro I recibirá la alimentación del puerto USB en el PC.
Debe saber que el Micro I requiere un puerto USB de alta corriente,
y si se conecta a un puerto USB de baja potencia se apagará y no
responderá a las pulsaciones de teclas hasta que se desconecte. Los
puertos USB de baja potencia suelen encontrarse en teclados y
conectores USB sin alimentación y no deben utilizarse. Mientras esté
conectado al PC, en el Micro I aparecerá lo siguiente:
No permita que el paciente manipule el espirómetro durante
este procedimiento.
132
Ejecute el Micro I PC software y aparecerá la primera pantalla:
En esta pantalla, puede cambiar los parámetros del dispositivo o
ajustar el reloj interno del Micro I. Cuando se utilicen las opciones
para cambiar ajustes, la pantalla cambiará a:
Si selecciona la opción “Personalizado” en la parte superior de la
pantalla, todas las funciones del Micro I podrán personalizarse según
sus requisitos específicos.
133
Funcionamiento
El Micro I está indicado para una amplia variedad de aplicaciones,
desde las pruebas de espirometría más simples en las que solo es
necesario visualizar algunos índices hasta un funcionamiento más
complejo que precisa desviación de la norma, respuesta del
broncodilatador e interpretación de los resultados.
El
menú
principal
aparece
tras
la
configuración
inicial
y
posteriormente cuando se enciende la unidad:
Descripción general del menú principal
Examen rápido
Use esta función para obtener una medición de espirometría
inmediata sin valores previstos o interpretación.
Examen con valores previstos
Esta función requiere la introducción de los datos personales del
paciente, a fin de poder calcular y visualizar los valores previstos y
la interpretación.
Examen Post BD
Esta
función
La respuesta
permite
se
mide
medir
con
la
respuesta
respecto
al
postbroncodilatador.
valor
inicial
medido
previamente obtenido mediante las opciones Examen rápido o
Examen con valores previstos. El último examen del valor inicial
registrado se almacena automáticamente al apagar la unidad y
vuelve
a
estar
disponible
para
postbroncodilatador cuando esta se enciende.
134
una
comprobación
Últimos resultados
Esta opción se utiliza para visualizar los resultados del último
examen almacenado.
Ajustes
Esta opción permite al usuario ajustar varios parámetros, como la
fecha, la hora y el idioma, y realizar una comprobación de
calibración.
Examen rápido
Tras seleccionar esta opción, la pantalla cambiará a:
El Micro I puede usarse directamente con un filtro MicroGuard o con
una boquilla de cartón desechable con el adaptador suministrado.
Introduzca la boquilla o el filtro MicroGuard en el soporte de la
boquilla del espirómetro.
Pídale al paciente que inhale lo más profundamente posible, que
apriete los labios alrededor de la boquilla y que exhale tan fuerte y
rápido como pueda hasta que no le quede más aire.
135
Los resultados del espirómetro para dicho soplido aparecen junto
con la revisión de calidad de la maniobra en función a las pautas
de ATS/ERS.
Pulsando la tecla de dirección arriba es posible visualizar otros
índices (si están configurados) y los mejores resultados de una
secuencia de soplidos.
En cada maniobra se revisa la calidad para un inicio rápido, un final
repentino, un soplido corto, un esfuerzo insuficiente o tos de
acuerdo con las pautas de ATS/ERS 2005.
Tenga en cuenta que el porcentaje del valor previsto y la
interpretación no están disponibles para la opción Examen rápido.
Pulse Entrar para visualizar:
Para repetir la prueba seleccione Sople nuevamente y pulse Entrar.
136
Examen con valores previstos
Cuando se ha seleccionado esta opción aparece lo siguiente:
Use las teclas de dirección arriba y abajo para ajustar la edad del
paciente y, a continuación, pulse entrar. Repita la misma operación
para el sexo, la altura y el origen racial. Si se comete un error, no
tiene más que pulsar la tecla de retroceso para volver a la entrada
anterior. El origen racial seleccionado aplica una reducción del
porcentaje en los valores previstos volumétricos que se asignarán
al paciente.
Estas correcciones étnicas para ECCS son las siguientes:
Población
Reducción en el
porcentaje
Caucásico
0
No se especifica
0
Polinesio
10
Asiático
10
Afrocaribeño
13
En el caso de emplear los valores previstos de NHANES III, se utilizará
el origen étnico de acuerdo con las ecuaciones de NHANES III.
Pulse Entrar cuando se haya seleccionado la corrección requerida.
137
Tenga en cuenta que el Micro I puede configurarse para aceptar la
altura en pulgadas.
Si se comete un error, no tiene más que pulsar la tecla de retroceso
para volver a la entrada anterior.
Una vez que se hayan introducido todos los datos del paciente,
aparecerá la siguiente pantalla y puede realizarse una prueba
de espirometría:
Tras realizar una prueba se muestran los resultados:
En cada maniobra se revisa la calidad para un inicio rápido, un final
repentino, un soplido corto, un esfuerzo insuficiente o tos de
acuerdo con las pautas de ATS/ERS 2005. Un asterisco ( * ) al final
de la línea indica un resultado por debajo del límite de normalidad
más bajo.
Cuando se registra una secuencia de soplidos, los resultados y la
revisión de calidad se corresponden al soplido actual, pero la
interpretación se basa en el mejor resultado de la secuencia.
138
Use las teclas de dirección arriba y abajo para visualizar otros
índices (si están configurados) y los mejores resultados de una
secuencia de soplidos:
En cualquier momento mientras se muestran los resultados, es
posible realizar otra prueba de espirómetro pulsando la tecla entrar.
Si se toca accidentalmente esta tecla, no tiene más que pulsar la
tecla de retroceso para volver a la pantalla de los resultados.
El Micro I puede configurarse para mostrar la puntuación Z en lugar
del porcentaje de valores previstos, donde están disponibles los
datos de los conjuntos de valores previstos:
La puntuación Z es el número de desviaciones estándar que los
resultados están por encima (puntuación Z positiva) o por debajo
(puntuación Z negativa) del valor previsto.
139
Examen Post BD
Cuando se hayan registrado pruebas correctas del valor inicial, se
podrá efectuar una prueba postbroncodilatador seleccionando la
opción Examen Post BD en el menú principal. Cuando se hayan
realizado dichas pruebas, el porcentaje del valor previsto se
sustituirá por el cambio de porcentaje del resultado del mejor
valor inicial de cada índice:
Al pulsar la tecla de dirección abajo se mostrarán todos los índices y
los mejores resultados obtenidos con los soplidos iniciales.
Modo NLHEP
Este modo de funcionamiento se obtiene seleccionando la opción
EE.UU. (NLHEP) en el menú de configuración cuando se enciende la
unidad por primera vez o posteriormente en la opción Ajustes en el
menú principal. En este modo, la funcionalidad del Micro I cumple
estrictamente los requisitos del National Lung Health Education
Program (Programa Nacional de Educación en Salud Pulmonar).
Solo FEV1, FEV6 y la relación FEV1/FEV6 se visualizan y almacenan;
las revisiones de calidad se aplican a cada maniobra y se muestra
una puntuación por niveles de la calidad de la sesión de pruebas:
140
Revisiones de calidad del NLHEP
A fin de que sea posible mostrar la interpretación, es necesario que
una maniobra pase una serie de revisiones de calidad mejoradas.
Después de que el paciente haya realizado una maniobra de mala
calidad, aparecerá uno de los tres mensajes siguientes:
Mensaje
No vacile
Criterios
Volumen extrapolado
retrógrado (BEV)
superior a 150 ml
Acción recomendada
El paciente debe expulsar
el aire con mayor rapidez
y uniformidad sin vacilar
al inicio de la maniobra.
Expulse el
Tiempo hasta flujo
El paciente debe exhalar
aire con
máximo (PEFT) superior
el aire más explosivamayor
a 120 ms
mente al inicio de la
rapidez
maniobra
Sople
El tiempo de espiración
El paciente ha dejado de
durante más inferior a 6 segundos o
exhalar el aire demasiado
tiempo
la acumulación del
pronto. El paciente debe
volumen no ha caído por continuar exhalando
debajo de 100 ml por
hasta que los pulmones
0,5 segundos
estén completamente
vacíos.
Tan pronto se haya realizado una maniobra correcta, las siguientes
revisiones de uniformidad se aplicarán a las maniobras posteriores
Expulse el
aire con más
fuerza
Flujo máximo no
reproducible. Las
maniobras anteriores
mejores no coinciden en
un margen de 1,0 l/s, lo
que indica que el
paciente está realizando
esfuerzos desiguales.
FEV1 o FEV6 no
reproducibles.
La diferencia con
respecto a la mejor
prueba es superior a
150 ml
Respiración
más
profunda
141
El paciente debe
esforzarse al máximo
en cada maniobra
El paciente debe inhalar
hasta llenar los pulmones
por completo antes de
cada maniobra
Cuando
dos
maniobras
fallen
alguna
de
las
revisiones
de
uniformidad, se guardarán los mejores resultados individuales
de ambas (FEV1, FEV6, y PEF individualmente).
Cuando aparezca alguno de los mensajes anteriores, indíquele al
paciente
el
modo
de
mejorar
las
maniobras
y
hágale
una
demostración de una maniobra correcta.
Niveles del CC del NLHEP
La calidad de cada sesión se puntúa de acuerdo con los siguientes
criterios:
Nivel
del CC
A
B
C
D
F
Criterios
como mínimo dos maniobras aceptables, con las
dos correspondencias de FEV1 mayores superiores
a 100 ml y las dos correspondencias de FEV6
mayores superiores a 100 ml
como mínimo dos maniobras aceptables, con las
dos correspondencias de FEV1 mayores superiores
a 150 ml
como mínimo dos maniobras aceptables, con las
dos correspondencias de FEV1 mayores entre 200
y 150 ml
solo una maniobra aceptable o dos con las dos
correspondencias de FEV1 mayores inferiores a
200 ml
Ninguna maniobra aceptable
Interpretación del NLHEP
La interpretación se realiza sobre los mejores resultados de
espirometría y se basa en los valores previstos para la relación
de espiración forzada, FEV1/FEV6, y FEV1. Si se detecta obstrucción
de las vías respiratorias, el grado de gravedad se comunica de
acuerdo con las pautas del NLHEP.
142
Desconexión
La unidad se desactiva pulsando el botón de encendido/apagado.
La unidad puede desconectarse de la red desenchufando el cargador
del tomacorriente o desenchufando el cable USB.
Mantenimiento
Gestión de la batería
El Micro I recibe la alimentación de un paquete de batería
recargable.
El voltaje de la batería se supervisa y aparece una advertencia al
activar la unidad cuando la batería comienza a agotarse.
Iconos del estado de la batería
Batería próxima a agotarse. Recárguela lo antes posible
para que no se agote por completo.
Batería completamente cargada.
La batería no es necesaria para la memoria interna y los resultados
que se hayan almacenado no se pierden al agotarse la batería.
Para recargar la batería, conecte el Micro I al cargador suministrado
y enchufe el cargador en un tomacorriente adecuado, comprobando
que no se obstaculice el acceso al cargador y que éste pueda
extraerse con facilidad.
En el Micro I aparecerá lo siguiente:
143
No permita que el paciente manipule el espirómetro durante este
procedimiento.
Aparecerá el icono de carga (
) para indicar que el dispositivo se
está cargando.
Cuando este icono se apague (puede tardar hasta 5 horas en
hacerlo), lo sustituirá el icono de batería completamente cargada.
(
) Retire el adaptador de alimentación del tomacorriente y de la
base de la unidad. El Micro I ya puede utilizarse como dispositivo
portátil.
Nota: el Micro I también puede cargarse desde un PC o un
ordenador portátil con el cable USB suministrado.
Cambio de la batería
La duración de todas las baterías recargables es limitada, por lo que
será necesario cambiar el paquete de la batería después de varios
años, en función del uso. A medida que la batería se aproxima al
final de su vida útil, observará que el número de pruebas realizado
entre carga y carga disminuye.
Para acceder a la batería, es necesario retirar la parte posterior del
dispositivo cuidadosamente.
Las presillas se han moldeado en la cubierta posterior en las
posiciones indicadas y deberán abrirse siguiendo el orden mostrado.
144
Para facilitar este proceso, la presilla 1 tiene un hueco moldeado en
el cuerpo del dispositivo que permite introducir un destornillador
pequeño de hoja plana bajo la presilla y soltarla.
Cuando haya liberado esta presilla, continúe con la 2, la 3 y la 4.
Por último, retire la cubierta de la parte inferior de la unidad que
libera a su vez las presillas 5 y 6.
Sustituya la batería prestando especial atención a la orientación del
conector en el receptáculo y de la batería en su alojamiento.
Observe que los cables de la batería deben salir por la parte superior
del paquete cuando esté instalado.
Vuelva a colocar la cubierta posterior y enganche las presillas de
sujeción en el orden contrario.
Deseche la batería según lo estipulado por la normativa de la UE
sobre baterías.
145
Comprobación de calibración
El Micro I se calibra para ofrecer lecturas en litros a temperatura
corporal y presión barométrica saturada con vapor de agua (BTPS).
La calibración debe permanecer estable indefinidamente, a menos
que el transductor esté dañado, y no es necesario volver a calibrar
la unidad. No obstante, para garantizar el funcionamiento correcto
de la unidad, recomendamos que se realice una comprobación de la
calibración periódicamente.
Para realizar una comprobación de la calibración, seleccione la
opción Comprobación de la calibración en el menú Ajustes y en
la pantalla aparecerá:
Conecte una jeringa de 3 l al Micro I con el mínimo de adaptadores e
inyecte el volumen de la jeringa al transductor uniformemente y sin
efectuar ninguna pausa. Cuando termine en la pantalla se vera:
La precisión de la calibración es aceptable cuando se encuentra
a +/- 3,5%. Si la precisión de la calibración está fuera de este
intervalo, la señal de verificación será sustituida por una cruz.
146
Si esto ocurre, compruebe que no haya fugas en la jeringa y en las
conexiones, y repita la prueba. Si el Micro I está fuera del intervalo
de calibración repetidas veces, es necesario devolver la unidad a
CareFusion para reparación.
Limpieza del transductor
El transductor no requiere ninguna tarea de mantenimiento ni revisión.
Para esterilizar o limpiar el transductor, éste puede extraerse del
modo siguiente:
1
Extraiga el transductor girándolo suavemente en el sentido
contrario a las agujas del reloj y sacándolo del cuerpo principal.
2
Seguidamente, puede sumergirlo en agua templada
jabonosa para una limpieza rutinaria o en soluciones
esterilizantes frías, como por ejemplo Perasafe por un
periodo no superior a 10 minutos (deberán evitarse el
alcohol y las soluciones de cloruro). Tras limpiar/esterilizar
el transductor, deberá enjuagarse con agua destilada y
secarse. Perasafe está disponible a través de CareFusion
en prácticas botellas de plástico de 81 g, nº de catalogo
36-SSC5000A.
3
Vuelva a montar el transductor en el Micro I.
PRECAUCIÓN: No intente lavar ni sumergir el espirómetro o los
accesorios en agua o líquido de limpieza, ya que podrían dañarse
permanentemente los componentes electrónicos que se encuentran
en su interior.
Reparaciones
Si su unidad requiere mantenimiento o reparaciones, consulte la
página 212 para obtener la información de contacto.
El Micro I no cuenta con ninguna pieza que pueda reparar el usuario.
147
Información sobre resolución de problemas
Si le surge algún problema al utilizar el espirómetro, consulte la
tabla siguiente:
Problema
Causa posible
Solución
No es posible encender el
Micro I
Las baterías se
han descargado
Cargue las baterías
Cada vez que enciende el
instrumento, la hora
aparece como 00:00
La batería
interna del
Micro I está
defectuosa
Póngase en
contacto con
su distribuidor.
Micro I está fuera del %
cuando se lleva a cabo
una comprobación de
la calibración
Hay fugas en la
jeringa o en las
conexiones
Compruebe que no
haya fugas en la
jeringa ni en las
conexiones
Compatibilidad electromagnética (CE)
Los cambios o modificaciones realizados en el espirómetro Micro I que
no hayan sido expresamente aprobados por CareFusion pueden causar
problemas relacionados con la compatibilidad electromagnética con
éste u otro equipo. Este dispositivo se ha diseñado y probado para
cumplir con la normativa vigente en relación con los requisitos de
compatibilidad electromagnética y es necesario instalarlo y ponerlo en
servicio de conformidad con los niveles que superen las interferencias
especificados en EN 50082-1:1992
ADVERTENCIA: el uso de teléfonos móviles u otros equipos
emisores de radiofrecuencia (RF) cerca del sistema puede causar un
funcionamiento inesperado o desfavorable.
148
Designación de seguridad según IEC 60601-1
Clase II
Tipo de protección contra
descargas eléctricas
Grado de protección contra
descargas eléctricas
Conexión de alimentación
Equipo de alimentación
Parte aplicada tipo B
Duración de la batería:
Grado de conexión eléctrica entre
equipo y paciente
Grado de movilidad
Modalidad de funcionamiento
100-240 V CA, 50/60 Hz
Adaptador y batería de
NiMH interna recargable.
Aproximadamente 30 horas
con una batería nueva y
completamente cargada.
Equipo diseñado sin
conexión eléctrica con el
paciente.
Transportable
Continuo
NOTA: cuando conecte otro equipo a la unidad, compruebe siempre
que toda la combinación cumple la norma internacional IEC 60601-1
de seguridad para sistemas electromédicos. Cuando lo conecte a un
PC con el cable USB suministrado, el PC debe ser una fuente de
alimentación limitada SELV según la norma EN60950-1, o cumplir
la norma EN60601-1.
IMPORTANTE: utilice únicamente el adaptador de red suministrado
(36-PSU1017 5 V CC 1,2 A), que contiene un transformador.
No desprenda el adaptador para sustituirlo con otro enchufe,
porque provocaría una situación de peligro.
• El adaptador transforma el voltaje de la red (100-240 V) en un
voltaje seguro (5 V CC)
• Asegúrese de que el adaptador no pueda mojarse
• No utilice un adaptador deteriorado
• Desenchufe siempre el Micro I antes de su limpieza
ADVERTENCIA: no conecte dispositivos que no se hayan
especificado como componentes del sistema.
149
ADVERTENCIA: no se permite ninguna modificación de este equipo.
NOTA: si se utiliza un tomacorriente portátil múltiple con el sistema,
no deberá excederse la carga máxima permitida. No conecte equipo
eléctrico que no se haya suministrado como componente del
sistema.
Símbolos
Dispositivo tipo B
De conformidad con la directiva 93/42/CEE
0086
Eliminación de conformidad con RAEE
Consultar las instrucciones de uso
Precaución: consultar la documentación adjunta
Fecha de fabricación
Fabricante
Número de serie
las leyes federales (EE.UU.) sólo permiten la venta
de este dispositivo bajo prescripción facultativa.
(Sólo recepción)
150
Tenga en cuenta que: La información recogida en este manual
está sujeta a cambios sin previo aviso y no representa compromiso
alguno para CareFusion UK 232 Ltd. El software puede utilizarse y
copiarse solo de acuerdo con los términos de este acuerdo. Ninguna
sección de este manual puede reproducirse ni transmitirse de
ninguna forma o mediante ningún medio, electrónico o mecánico,
incluidos el fotocopiado y el registro, para ningún fin sin contar
con un permiso por escrito de CareFusion UK 232 Ltd.
151
Especificaciones del Micro I
Mediciones:
Volumen de expiración forzada en 1 segundo (FEV1)
Volumen de expiración forzada en 6 segundos (FEV6)
Capacidad vital forzada (FVC)
Relación de expiración forzada (FEV1/FEV6)
Relación de expiración forzada (FEV1/FVC)
Frecuencia del flujo espiratorio máximo (PEF)
Flujo espiratorio medio (FEF25-75)
Flujo espiratorio al 75% del volumen restante (FEF75)
Flujo espiratorio al 25% del volumen restante (FEF25)
Pantalla:
Pantalla LCD monocolor gráfica con luz
de fondo de 128 x 128 píxeles
Tipo de transductor:
Volumen digital unidireccional de
CareFusion
Precisión:
En conformidad con los requisitos del
ATS/ERS TASK FORCE:
STANDARDISATION OF LUNG
FUNCTION TESTING 2005 (Eur Respir
J 2005; 26: 319-338 Tabla 6)
Fuente de alimentación:
2 pilas NiMH recargables AA
Duración de la batería:
Aproximadamente 30 horas con una
batería nueva y completamente
cargada.
Corriente de
funcionamiento
Inferior a 90 mA
Corriente de carga
Inferior a 500 mA
Dimensiones:
162 X 61 X 30 mm
Peso:
152 g
Temperatura de
funcionamiento:
10 a +35 °C
Humedad de
funcionamiento:
Del 20% al 80% de humedad relativa
Temperatura de
almacenamiento:
De -20 a +70 °C
Humedad de
almacenamiento:
Del 30% al 90% de humedad relativa
Duración
5 años
152
Accesorios
N.° de cat.
Descripción
36-PSA1000
Boquillas para adulto desechables (500 por caja)
36-SST1250
Boquillas de seguridad de una vía (250 por caja)
36-SST1000
Boquillas de seguridad de una vía (500 por caja)
36-MGF1025
Filtro pulmonar Microgard (25 por caja)
36-MGF1100
Filtro pulmonar Microgard (100 por caja)
36-PSA1200
Boquillas para niños desechables (250 por caja)
36-PSA1100
Adaptador para niños
36-SSC5000A Polvo esterilizante PeraSafe
(para preparar 5 litros de solución)
36-VOL2104
Pinzas nasales (paquete de 5)
36-SM2125
Jeringa de calibración de 3 litros
36-MLD1621
Adaptador de boquilla
36-BAT1043
Paquete de baterías (NiMH AA 2,4 V, 1.600 mAh)
36-PSU1017
5 V CC 1,2 A (GlobTek WR9QA1200USBNR-G2267)
TENGA EN CUENTA QUE: SOLO DEBEN USARSE ACCESORIOS
DE CAREFUSION
153
Espirómetro
de
Diagnóstico
Micro I
Manual de Instruções do
VI. Introdução
O Micro I é um espirómetro de diagnóstico compacto, que funciona
com pilhas recarregáveis e é completamente portátil. Está em
conformidade com as exigências da TASK FORCE ATS/ERS:
UNIFORMIZAÇÃO DE TESTES DE FUNÇÃO PULMONAR DE 2005.
O seu design ergonómico e prático permite que as medições
de espirometria de diagnóstico, incluindo valores previstos e
interpretação automática, sejam feitas de forma rápida e simples.
As características do Micro I incluem:
o
Medidas FEV1, FVC(FEV6), FEV1/FVC, FEV1/FEV6, PEF,
FEF25, FEF75, e FEF 25-75
o
Totalmente configurável utilizando o software fornecido
o
Valores previstos ECCS, Asiático e NHANES III
o
Variação da norma como percentagem ou valor-Z
o
Interpretação NLHEP, NICE ou ATS/ERS
o
Controlos de qualidade de procedimento de espirometria
o
Comparação pós-broncodilatador
o
Modo compatível com NLHEP
O espirómetro utiliza o transdutor de volume digital da CareFusion,
uma forma extremamente estável de transdutor de volume que mede
o ar expirado directamente em B.T.P.S (Temperatura e pressão
corporal com vapor de água saturado), evitando desta forma
imprecisões nas correcções de temperatura. Este transdutor não é
sensível aos efeitos de condensação e temperatura e evita a
necessidade de calibração individual antes da realização de um teste.
A CareFusion pode fornecer espirómetros para satisfazer todas as
necessidades no que diz respeito à espirometria de diagnóstico ou
monitorização. O espirómetro Micro II pertence à família do Micro I
e foi especificamente concebido para a monitorização de asma e
DPOC, em casa ou no local de trabalho.
154
Conteúdo da Embalagem
O Micro I vem embalado com um prático estojo de transporte e os
seguintes itens (Fig.1):
1.
Espirómetro Micro I
2.
Transdutor de Volume Digital CareFusion, juntamente com
bocais descartáveis de cartão e manual de instruções.
3.
Fonte de alimentação universal (36-PSU1017 5 V CC 1,2 A)
4.
Adaptador de bocal de cartão
5.
Cabo USB/de carga
Fig. 1
155
Contra-indicações, Avisos e Cuidados
Contra-indicações: Dado que a realização de espirometria pode
ser fisicamente desgastante, está contra-indicada para pacientes
que tenham tido um enfarte do miocárdio recentemente. Além disso,
a exalação profunda pode dar origem a síncope.
Os termos que se seguem são utilizados da seguinte forma neste
manual
Cuidado: Possibilidade de lesões ou danos graves
Aviso: condições ou práticas que podem resultar em lesões corporais.
Atenção: Informações importantes para evitar danos no equipamento
ou para facilitar a utilização do equipamento.
CUIDADO: Leia o manual antes de utilizar
AVISO: O equipamento não é adequado para utilização na presença
de gases inflamáveis ou explosivos, de misturas anestésicas
inflamáveis ou em ambientes ricos em oxigénio.
CUIDADO: Os bocais destinam-se a utilização em apenas um
paciente. Se forem utilizados em vários pacientes, existe o risco de
infecção cruzada. A utilização repetida pode degradar os materiais e
resultar numa medição incorrecta.
CUIDADO: Os filtros pulmonares destinam-se a utilização em apenas
um paciente. Se forem utilizados em vários pacientes, existe o risco
de infecção cruzada. A utilização repetida pode aumentar a
resistência ao ar e resultar numa medição incorrecta.
CUIDADO: Não permita que o paciente manuseie o espirómetro
quando está ligado à fonte de alimentação para carregar ou a um PC
para configurar a unidade.
ATENÇÃO: O produto que comprou não deve ser eliminado
como lixo comum. Por favor, desloque-se ao Ponto de
Recolha REEE mais próximo para a eliminação deste
produto.
156
Utilização Prevista
O Micro I é utilizado por médicos e profissionais de saúde para o
diagnóstico de asma e DPOC em adultos e crianças com mais de 3 anos.
Ambiente
As seguintes indicações devem ser respeitadas:
•
Evite expor directamente o Micro I à luz solar.
•
Evite a utilização do espirómetro em ambientes poeirentos
ou perto de equipamento de aquecimento.
•
Não guarde o espirómetro num local húmido nem o exponha
a temperaturas extremas.
•
Não direccione o suporte do transdutor para uma fonte de
luz forte durante a utilização do espirómetro.
Primeira Utilização
É recomendável que o espirómetro Micro I esteja completamente
carregado antes de ser utilizado. A fonte de alimentação vem
acompanhada de fichas separadas para uso no Reino Unido, EUA e
Europa. Ligue a ficha adequada à fonte de alimentação e ligue-a à
tomada eléctrica. Ligue o Micro I à fonte de alimentação utilizando
o cabo USB/de carga e o símbolo de carga aparecerá no ecrã.
Carregue completamente por um mínimo de 5 horas aquando
da primeira utilização.
Retire a película de protecção do ecrã antes de utilizar o aparelho.
157
Configuração
Quando o aparelho é ligado pela primeira vez, pode ser configurado
para a sua região. Isto irá definir o idioma, unidades de altura e
peso, formato da data e o conjunto de valores previstos adequados
à sua região. Também irá configurar os índices a serem exibidos e
se será a percentagem prevista ou o valor-Z a indicar a variação
em relação à norma. No entanto, todas estas definições podem ser
configuradas utilizando o software de PC fornecido.
Ligue o aparelho pressionando o botão on/off situado na parte de
cima do dispositivo e o seguinte será exibido:
Use as setas para cima e para baixo para escolher o país pretendido
e depois prima ‘Enter’ (↵). Este procedimento apenas é necessário
quando o aparelho é ligado pela primeira vez e a selecção será
guardada para utilização futura.
É recomendável que o software de PC seja utilizado para ajustar
estas definições, se necessário. Ligue o Micro I ao PC utilizando o
cabo USB fornecido. Execute o software e ligue o Micro I. O software
de PC irá detectar que o Micro I está conectado. Siga as instruções
no ecrã para configurar o seu aparelho.
158
Micro I PC Software
Este
software
permite-lhe
configurar
as
definições
do
seu
espirómetro Micro I. Uma vez instalado com êxito, é disponibilizada
uma ajuda abrangente através do menu Ajuda quando utiliza
a aplicação.
Requisitos do Sistema
Para o seu funcionamento correcto, o Micro I PC Software requer
determinados componentes de hardware e de software.
Requisitos do PC
É necessário um PC compatível com IBM, com hardware que cumpra
ou exceda os seguintes requisitos mínimos.
Processador: 800 MHz ou superior
RAM: 256 MB
Espaço livre em disco: 50 MB
Vídeo: 800x600, 256 cores. Recomenda-se uma resolução mínima
de 1280x1024 para tirar partido de todas as vantagens da interface
de janelas múltiplas.
Pelo menos uma porta USB disponível. (Será necessária outra porta
USB para espirómetros alimentados por USB)
Requisitos do Sistema Operativo
O Micro I PC Software é compatível com os seguintes sistemas
operativos:
Windows XP
Windows Vista 32 bits
Windows Vista 64 bits
Windows Server 2003
Windows Server 2008
159
Instalar o Micro I PC Software
Antes de começar, certifique-se de que o computador cumpre os
requisitos mínimos do sistema e que o utilizador que instalar o
software possui direitos de administrador.
Feche todas as aplicações em execução.
Introduza o CD de instalação na unidade de CD-Rom.
O
programa
de
configuração
deve
abrir-se
automaticamente,
apresentando a caixa de diálogo de boas-vindas, clique em
‘Seguinte’ para continuar. Se o programa de configuração não se
abrir automaticamente, utilize o Explorador do Windows para
seleccionar manualmente a unidade de CD e, em seguida, abra o
ficheiro Micro I PC Software.exe.
É apresentado o Contrato de Licença. Leia e certifique-se de que
compreende o documento na íntegra antes de aceitar os termos da
licença. Clique em ‘Seguinte’ para continuar.
É apresentada a caixa de diálogo para seleccionar a localização de
destino, a qual indica o directório onde será instalado o Micro I PC
Software. A localização predefinida é:
C:\Program Files\CareFusion\Micro I PC Software
Para alterar esta localização, seleccione ‘Procurar’.
Clique em ‘Seguinte’ para visualizar a caixa de diálogo Seleccionar o
grupo de gestão do programa. Esta será a localização onde será
colocado o ícone para abrir o Micro I PC Software no Menu Iniciar.
Pode ser introduzida uma localização nova ou uma localização
existente.
Clique em ‘Seguinte’ para visualizar a caixa de diálogo das opções
de instalação com a seguinte opção:
Adicione o ícone do Micro I PC Software ao ambiente de trabalho.
Clique em ‘Seguinte’ para iniciar a cópia dos ficheiros para o sistema.
160
Quando a cópia dos ficheiros terminar, será informado de que o
Micro I PC Software foi instalado com sucesso e de que deverá
reiniciar o PC antes de utilizar a aplicação. Clique em ‘Concluir’ para
concluir o processo de instalação.
Executar Micro I PC Software
Ligue o seu Micro I a uma porta USB no seu PC utilizando o cabo
fornecido. O Micro I receberá energia da porta USB no seu PC. Por
favor, tenha em mente que o Micro I requer uma porta USB de
corrente elevada e que, se for ligado a uma porta USB de baixa
potência, o aparelho desligar-se-á e deixará de reagir a qualquer
premir de teclas até que seja desligado.
As portas USB de baixa
potência encontram-se frequentemente em teclados e hubs USB
sem alimentação e não devem ser utilizadas. Enquanto está ligado a
um PC, o Micro I irá apresentar:
Não permita que o paciente manuseie o espirómetro durante
este procedimento.
161
Execute o Micro I PC software e o primeiro ecrã irá exibir:
A partir deste ecrã poderá mudar as definições do aparelho ou
ajustar o relógio interno do Micro I. Quando as opções de mudança
de definições são utilizadas, o ecrã muda para:
Ao seleccionar a opção ‘Personalizado’ no topo do ecrã poderá
ajustar todas as funcionalidades do Micro I de acordo com as suas
necessidades específicas.
162
Funcionamento
O Micro I foi concebido para servir uma variedade de aplicações,
desde o mais simples teste de espirometria, onde apenas alguns
índices são necessários, a operações mais complexas, onde são
necessárias informações como o desvio à norma, resposta ao
broncodilatador ou interpretação de resultados.
O
menu
principal
é
exibido
após
a
configuração
inicial
e,
subsequentemente, quando o aparelho é ligado:
Descrição Geral do Menu Principal
Quick Exam (Exame Rápido)
Utilize esta função para fazer uma medição imediata de espirometria
sem valores previstos ou interpretação.
Exam with Predicted (Exame com Valores Previstos)
Esta função requer a introdução do perfil demográfico do paciente
para que a interpretação e os valores previstos possam ser
calculados e exibidos.
Post BD Exam (Exame Pós-BD)
Esta função permite a medição da resposta pós-broncodilatador.
A resposta é medida em função do valor de referência obtido através
da opção Quick Exam (Exame Rápido) ou Exam with Predicted
(Exame com valores previstos). O valor de referência do último
exame registado é automaticamente guardado quando o aparelho é
desligado
e
será
disponibilizado
para
pós-broncodilatador quando o aparelho é ligado.
163
uma
comparação
Last Results (Últimos Resultados)
Esta opção é utilizada para ver os resultados do último exame
armazenado.
Definições
Esta opção permite ao utilizador ajustar várias definições incluindo
data, hora e idioma e efectuar um teste de calibração.
Quick Exam (Exame Rápido)
Após seleccionar esta opção, o ecrã muda para:
O Micro I pode ser utilizado directamente com um filtro MicroGuard
ou com um bocal de cartão descartável com o adaptador fornecido.
Insira o bocal ou o filtro MicroGuard no suporte para o bocal do
espirómetro.
Instrua o paciente em inspirar o mais profundamente possível,
fechar os lábios em redor do bocal e expirar o mais forte e
rapidamente possível até que não possa expirar mais ar.
164
Os resultados de espirometria para esse sopro são, então, exibidos
juntamente com o controlo de qualidade de procedimento de acordo
com as directrizes ATS/ERS:
Índices adicionais, se configurados, e os melhores resultados de
uma sequência de sopros podem ser exibidos ao pressionar a tecla
para baixo.
É feito um controlo de qualidade a cada procedimento em termos de
início lento, fim súbito, sopro curto, esforço fraco ou tosse de acordo
com as directrizes ATS/ERS de 2005.
Tenha em atenção que a percentagem de valor previsto e a
interpretação
não
estão
disponíveis
na
opção
Quick
Exam
(Exame Rápido).
Prima Enter para exibir:
Para repetir o teste seleccione Blow Again (Soprar novamente) e
prima Enter.
165
Exame com Valores Previstos
Quando esta opção está seleccionada, é exibido o seguinte:
Utilize as teclas para cima e para baixo para ajustar a idade do
paciente e, depois, prima Enter. Faça o mesmo para sexo, altura e
raça. Se for cometido um erro, toque simplesmente na tecla para
trás e volte à entrada anterior. A raça seleccionada aplica uma
queda percentual aos valores volumétricos previstos a serem
aplicados ao paciente.
Estas correcções étnicas para os ECCS são as seguintes:
População
Queda percentual
Caucasiana
0
Não especificada
0
Polinésia
10
Asiática
10
Afro-caribenha
13
No caso de os valores previstos de NHANES III serem utilizados, a
origem étnica será utilizada de acordo com as equações NHANES III.
Prima Enter quando a correcção necessária tiver sido seleccionada.
Por favor, tenha em mente que o Micro I pode ser configurado para
aceitar a altura em polegadas.
166
Se for cometido um erro, toque simplesmente na tecla para trás e
volte à entrada anterior.
Quando tiver inserido todos os dados do paciente, o seguinte ecrã
será exibido e será possível efectuar um teste de espirometria:
Após efectuar um teste, os resultados são exibidos:
É feito um controlo de qualidade a cada procedimento em termos de
início lento, fim súbito, sopro curto, esforço fraco ou tosse de acordo
com as directrizes ATS/ERS de 2005. Um asterisco (*) no fim da
linha significa um resultado abaixo do valor mínimo de normalidade.
Quando uma sequência de sopros é registada, os resultados e o
controlo de qualidade referem-se ao sopro mais recente, mas a
interpretação baseia-se no melhor resultado da sequência.
167
Utilize a seta para baixo para ver índices adicionais, se configurados,
e os melhores resultados de uma sequência de sopros:
Em qualquer altura que os resultados sejam exibidos, outro teste de
espirómetro pode ser efectuado ao premir a tecla Enter. Se premir a
tecla Enter acidentalmente, só necessita de carregar na tecla para
trás para regressar ao ecrã dos resultados.
O Micro I pode ser configurado para exibir o valor-Z em vez da
percentagem dos valores previstos onde os dados dos conjuntos
de valor previsto estiverem disponíveis:
O valor-Z é o número de desvios padrão em que os resultados são
acima (valor-Z positivo) ou abaixo (valor-Z negativo) do valor previsto.
168
Post BD Exam (Exame Pós-BD)
Assim que se tenham registado testes referenciais satisfatórios,
pode ser efectuado um exame pós-broncodilatador seleccionando
a opção Post BD Exam (Exame Pós-BD) no menu principal. Quando
estes testes são efectuados, a percentagem do valor previsto é
substituída pela mudança percentual do melhor resultado referencial
para cada índice:
Utilizar a tecla para baixo irá exibir os outros índices e os melhores
resultados, bem como os sopros de referência.
Modo NLHEP
Obtém-se este modo de operação ao seleccionar a opção USA
(NLHEP) do menu de configuração quando o aparelho é ligado pela
primeira vez ou, subsequentemente, através da opção Definições no
menu principal. Neste modo, o Micro I fica a funcionar de acordo
com os requisitos do Programa Nacional de Educação para a Saúde
Respiratória (NLHEP).
Apenas é exibido e guardado o FEV1, o FEV6 e a relação FEV1/FEV6,
são aplicados controlos de qualidade a todos os procedimentos e é
exibido um resultado a classificar a qualidade dessa sessão de testes:
169
Controlos de Qualidade NLHEP
De forma a poder ser exibida a interpretação, um procedimento
deverá
passar
por
um
conjunto
de
controlos
de
qualidade
optimizados. Após o paciente efectuar um procedimento de fraca
qualidade, deverá aparecer uma das três seguintes mensagens:
Acção recomendada
O paciente deverá soprar
de uma forma mais
rápida e uniforme e sem
hesitação no início do
procedimento
Soprar
Tempo até ao débito
O paciente terá de exalar
mais rápido máximo (PEFT) superior
de uma forma mais
a 120 ms
explosiva no início do
procedimento
Soprar
O tempo de expiração é
O paciente deixou de
durante
inferior a 6 segundos ou
expirar cedo demais.
mais tempo a acumulação de volume
O paciente terá de
não baixou mais do que
expirar até os seus
100 ml por 0,5 segundos
pulmões estarem
completamente vazios.
Assim que tenha sido efectuado um procedimento aceitável, os
seguintes controlos de consistência também serão aplicados aos
procedimentos subsequentes
O paciente terá de fazer
Soprar com Débito máximo não
mais força
reproduzível. Os melhores o máximo de esforço em
procedimentos anteriores
cada procedimento
não se encontram dentro
do limite de 1,0 l/s, o que
indica que o paciente não
está a fazer um esforço
constante.
Sopro
FEV1 ou FEV6 não
O paciente deverá
profundo
reproduzíveis. Diferença
inspirar até que os seus
em relação ao melhor
pulmões estejam
teste superior a 150 ml
completamente cheios
antes de cada
procedimento
Mensagem
Não hesitar
Critérios
Volume retroextrapolado
(BEV) superior a 150 ml
170
No caso de dois procedimentos falharem qualquer um dos controlos
de consistência, serão guardados os melhores resultados individuais
dos dois (FEV1, FEV6 e PEF individualmente).
Quando qualquer uma das mensagens supracitadas aparecer,
instrua o paciente sobre como melhorar o seu procedimento e
demonstre você mesmo o procedimento correcto.
Grau de CQ do NLHEP
A qualidade de cada sessão é avaliada de acordo com os seguintes
critérios:
Grau de
CQ
A
B
C
D
F
Critérios
pelo menos dois procedimentos aceitáveis, com os
dois maiores FEV1 e FEV6 a atingirem um valor
superior a 100 ml
pelo menos dois procedimentos aceitáveis, com os
dois maiores FEV1 a atingirem um valor superior
a 150 ml
pelo menos dois procedimentos aceitáveis, com os
dois maiores FEV1 a atingirem um valor entre os
200 ml e os 150 ml
apenas um ou dois procedimentos aceitáveis com
os dois maiores FEV1 a atingirem um valor inferior
a 200 ml
Nenhum procedimento aceitável
Interpretação NLHEP
A interpretação é efectuada com os melhores resultados da
espirometria e baseia-se nos valores previstos para a relação
expiratória forçada, FEV1/FEV6, e FEV1. Se for detectada uma
obstrução das vias respiratórias, o nível de gravidade será referido
de acordo com as directrizes do NLHEP.
171
Desligar
A unidade é desligada premindo o botão On/Off.
A unidade pode ser desligada da rede eléctrica desligando o
carregador da tomada ou o cabo USB.
Manutenção
Manutenção das Pilhas
O Micro I é alimentado por um conjunto de pilhas recarregáveis.
A tensão das pilhas é monitorizada e é exibido um aviso, ao ligar,
quando as pilhas começam a ficar descarregadas.
Ícones de estado das pilhas
Pilhas quase descarregadas. Recarregue assim que seja
possível para evitar que o aparelho fique sem carga.
Pilhas totalmente carregadas.
As pilhas não são necessárias para manter a memória interna e os
resultados guardados não se perderão quando a carga das pilhas
acabar.
Para recarregar as pilhas, ligue o Micro I ao carregador fornecido e,
em seguida, ligue o carregador a uma tomada de parede adequada,
assegurando um fácil acesso ao carregador para o poder desligar
facilmente.
O Micro I irá apresentar:
172
Não permita que o paciente manuseie o espirómetro durante este
procedimento.
O ícone de carregamento (
) será apresentado para indicar que o
aparelho está a carregar.
Quando este ícone desaparecer (pode demorar até 5 horas), será
substituído pelo ícone de pilhas totalmente carregadas. (
)
Desligue o adaptador da tomada de parede e da base da unidade.
O Micro I pode agora ser utilizado como um aparelho portátil.
Nota: O Micro I também pode ser carregado através de um
computador fixo ou portátil, utilizando o cabo USB fornecido.
Substituição das Pilhas
O tempo de vida de qualquer pilha recarregável é limitado e as
pilhas terão de ser substituídas após alguns anos, dependendo da
utilização. Quando as pilhas estiverem a chegar ao fim da sua vida
útil irá notar que não consegue efectuar tantos testes entre cargas.
Para aceder às pilhas precisa de remover, cuidadosamente, a parte
de trás do dispositivo.
A tampa traseira contém grampos nas posições indicadas que
deverão ser abertos de acordo com a sequência mostrada.
173
Para ajudar este processo, o grampo 1 tem uma reentrância no
aparelho que permite que se insira cuidadosamente uma pequena
chave de fendas por baixo do grampo, para o soltar.
Uma vez solto, utilize a chave de fendas nos grampos 2, 3 e 4.
Por fim, faça deslizar a tampa pelo fundo do aparelho, o que soltará
os grampos 5 e 6
Substitua as pilhas tendo em particular atenção a orientação do
conector e das próprias pilhas na caixa. Os terminais das pilhas
deverão estar situados na face superior das pilhas quando estas
estiverem instaladas.
Volte a colocar a tampa traseira fixando os grampos pela ordem inversa.
Elimine as pilhas em conformidade com as respectivas normas da UE.
174
Teste de Calibração
O Micro I está calibrado para ler em litros à temperatura corporal, a
pressão barométrica saturada com vapor de água (BTPS).
A calibração dever-se-á manter estável indefinidamente, a não ser
que o transdutor sofra algum dano físico, e o aparelho não precise
de
uma
nova
calibração.
Contudo,
para
assegurar
o
bom
funcionamento do aparelho, recomendamos que se faça um teste de
calibração periodicamente.
Para efectuar um teste de calibração, seleccione a opção de teste de
calibração do menu de definições e o ecrã irá exibir:
Ligue uma seringa de 3 L ao Micro I com o mínimo de adaptadores e
injecte o volume da seringa no transdutor, de uma forma uniforme,
sem parar. Quando acabar, o ecrã irá exibir:
A precisão de calibração aceitável é de +/- 3,5%. Se o valor da
precisão de calibração se encontrar fora deste intervalo, o símbolo
de visto será substituído por uma cruz. Se isto acontecer, verifique
se a seringa ou as ligações têm fugas e repita o teste. Se o Micro I
estiver, repetidamente, fora do intervalo de calibração, o aparelho
terá de ser devolvido à CareFusion para reparação.
175
Limpeza do Transdutor
O transdutor não requer manutenção ou assistência de rotina.
Para esterilizar ou limpar o transdutor, é possível removê-lo da
seguinte forma:
1
Remova o transdutor rodando-o, cuidadosamente, no
sentido contrário aos ponteiros do relógio e puxando-o.
2
Pode, agora, mergulhar o transdutor em água quente com
sabão para uma limpeza de rotina ou em soluções de
esterilização frias, por exemplo, Perasafe, durante não mais
do que 10 minutos. (Soluções com álcool ou cloreto devem
ser evitadas.) Depois de limpo/esterilizado, o transdutor
deve ser enxaguado com água destilada e seco. Perasafe
pode ser encomendado à CareFusion em práticas garrafas
de plástico de 81 g, Ref. n.º 36-SSC5000A.
3
Volte a instalar o transdutor no Micro I.
CUIDADO: Não tente lavar ou mergulhar o espirómetro ou os
acessórios em água ou líquido de limpeza, uma vez que contêm
componentes electrónicos que ficarão permanentemente danificados
Assistência técnica
Se o seu aparelho necessitar de assistência técnica ou reparação,
consulte a página 212 para os detalhes de contacto.
Não existem peças que o utilizador possa reparar no Micro I.
176
Informações sobre Resolução de Problemas
Se encontrar problemas ao utilizar o seu espirómetro, por favor
consulte a tabela abaixo:
Problema
Causa
Possível
Solução
Não é possível ligar o Micro I
As pilhas estão
descarregadas
Recarregue as
pilhas
De cada vez que liga o
instrumento, a hora aparece
como 00:00
A bateria
interna do Micro
I tem defeito
Entre em contacto
com o seu
fornecedor.
O Micro I está fora da %
quando realiza o teste de
calibração
Existem fugas
na seringa ou
nas ligações
Verifique se
existem fugas na
seringa ou nas
ligações
Compatibilidade Electromagnética (CEM)
Alterações ao espirómetro Micro I que não sejam expressamente
aprovadas pela CareFusion podem causar problemas de CEM com
este ou com outro equipamento. O aparelho foi concebido e testado
para respeitar as normas aplicáveis relativamente às necessidades
de CEM e deve ser instalado e colocado em serviço sem exceder os
níveis de interferência especificados na norma EN 50082-1:1992.
AVISO: a utilização de telefones portáteis ou qualquer outro
equipamento emissor de radiofrequência (RF) perto do sistema pode
causar operações inesperadas ou adversas
177
Designação de Segurança segundo a norma
IEC 60601-1
Tipo de protecção contra choque
eléctrico
Grau de protecção contra choque
eléctrico
Ligação eléctrica
Equipamento de alimentação
Duração das pilhas:
Grau da ligação eléctrica entre o
equipamento e o paciente
Grau de mobilidade
Modo de funcionamento
Classe II
Peça aplicada do tipo B
100-240 V CA, 50/60 Hz
Adaptador e pilhas NiMH
internas recarregáveis.
Aproximadamente 30 horas
quando são novas e estão
totalmente carregadas.
Equipamento designado
como estabelecendo uma
ligação não eléctrica ao
paciente.
Transportável
Contínuo
NOTA: Quando ligar outro equipamento à unidade, certifique-se sempre
de que todo o conjunto cumpre com a norma de segurança internacional
IEC 60601-1 para sistemas médicos eléctricos. Ao ligar a um PC com o
cabo USB fornecido, o computador deve ser uma fonte de alimentação
limitada SELV, que cumpra com a norma EN60950-1 ou EN60601-1.
IMPORTANTE: Utilize apenas o adaptador de rede fornecido
(36-PSU1017 5 V CC 1,2 A). Este adaptador contém um transformador.
Não corte o adaptador para trocar a ficha; caso contrário, provocará
uma situação perigosa.
• O adaptador transforma a tensão da rede eléctrica (100-240 volts)
numa tensão segura (5 V CC)
• Certifique-se de que o adaptador não é molhado
• Não utilize o adaptador se estiver danificado
• Desligue sempre o Micro I antes de o limpar
AVISO: Não ligue aparelhos que não são especificados como fazendo
parte do sistema.
178
AVISO: Não são permitidas quaisquer alterações a este
equipamento.
NOTA: Se o sistema for utilizado com tomadas portáteis múltiplas,
a carga máxima permitida não deve ser excedida. Não ligue
equipamento eléctrico que não tenha sido fornecido como parte
do sistema.
Símbolos
Dispositivo tipo B
Em conformidade com a Directiva 93/42/CEE
0086
Eliminação de acordo com a directiva de REEE
Consulte as instruções de utilização
Cuidado: consulte a documentação fornecida
Data de fabrico
Fabricante
Número de série
A lei federal dos Estados Unidos restringe a venda
deste aparelho a médicos ou a pedido de um
médico. (Venda autorizada apenas mediante receita
179
Atenção: As informações contidas neste manual estão sujeitas
a alterações sem aviso prévio e não representam qualquer
compromisso por parte da CareFusion UK 232 Ltd. O software
apenas poderá ser utilizado ou copiado em conformidade com os
termos desse acordo. Nenhuma parte deste manual pode ser
reproduzida ou transmitida em qualquer formato ou por qualquer
meio, electrónico ou mecânico, incluindo fotocópias e gravações,
para qualquer propósito, sem a autorização por escrito da
CareFusion UK 232 Ltd.
180
Especificações do Micro I
Medições:
Volume Expirado Forçado em 1 segundo (FEV1)
Volume Expirado Forçado em 6 segundos (FEV6)
Capacidade Vital Forçada (FVC)
Relação Expiratória Forçada (FEV1/FEV6)
Relação Expiratória Forçada (FEV1/FVC)
Taxa de Débito Expiratório Máximo (PEF),
Débito Expiratório Médio (FEF25-75)
Débito Expiratório a 75% do volume restante (FEF75)
Débito Expiratório a 25% do volume restante (FEF25)
Monitor:
LCD gráfico monocromático retroiluminado com 128 x 128 píxeis
Tipo de transdutor:
Volume digital unidireccional da
Carefusion
Precisão:
De acordo com as exigências da TASK
FORCE ATS/ERS: UNIFORMIZAÇÃO DE
TESTES DE FUNÇÃO PULMONAR DE
2005 (Eur Respir J 2005; 26: 319-338,
tabela 6)
Fonte de alimentação:
2 pilhas recarregáveis NiMH, tipo AA
Duração das pilhas:
Aproximadamente 30 horas quando são
novas e estão totalmente carregadas.
Corrente de funcionamento
Inferior a 90 mA
Corrente de carga
Inferior a 500 mA
Dimensões:
162 X 61 X 30 mm
Peso:
152 g
Temperatura de
funcionamento:
10 a +35 °C
Humidade de
funcionamento:
20% a 80% HR
Temperatura de
armazenamento:
-20 a 70 ºC
Humidade de
armazenamento:
30% a 90% HR
Vida útil
5 anos
181
Acessórios
Ref. n.º
Descrição
36-PSA1000
Bocais descartáveis para adultos (500 por caixa)
36-SST1250
Bocais de segurança de via única (250 por caixa)
36-SST1000
Bocais de segurança de via única (500 por caixa)
36-MGF1025
Filtros pulmonares MicroGard (25 por caixa)
36-MGF1100
Filtros pulmonares MicroGard (100 por caixa)
36-PSA1200
Bocais pediátricos descartáveis (250 por caixa)
36-PSA1100
Adaptador pediátrico
36-SSC5000A Pó esterilizador PeraSafe 81 g
(produz 5 litros de solução)
36-VOL2104
Molas para o nariz (embalagens de 5)
36-SM2125
Seringa de calibração de 3 litros
36-MLD1621
Adaptador para bocal
36-BAT1043
Pilhas (NiMH AA 2,4 V, 1600 mAh)
36-PSU1017
5 V CC 1,2 A (GlobTek WR9QA1200USBNR-G2267)
ATENÇÃO: UTILIZE APENAS ACESSÓRIOS CAREFUSION
182
Micro I
diagnostische
spirometer
Gebruikshandleiding
183
VII. Inleiding
De Micro I is een compacte, geheel draagbare diagnostische
spirometer die werkt op een herlaadbare batterij. De spirometer
voldoet volledig aan de eisen van de ATS/ERS TASK FORCE:
STANDARDISATION OF LUNG FUNCTION TESTING 2005. Met het
ergonomisch en gebruiksvriendelijk ontwerp van de spirometer
kunnen op een snelle en eenvoudige wijze diagnostische
spirometriemetingen worden verricht, inclusief voorspelde waarden
en automatische interpretatie.
De Micro I omvat de volgende functies:
o
Metingen FEV1, FVC(FEV6), FEV1/FVC, FEV1/FEV6, PEF,
FEF25, FEF75 en FEF 25-75
o
Volledig configureerbaar met de meegeleverde software
o
Voorspelde waarden ECCS, Aziatisch of NHANES III
o
Afwijking van norm als percentage of Z-score
o
Interpretatie NLHEP, NICE, of ATS/ERS
o
Kwaliteitscontroles spirometriemanoeuvre
o
Postbronchodilatorvergelijking
o
NLHEP-conforme modus
De spirometer maakt gebruik van de digitale volumetransducer van
CareFusion, een uitermate stabiele volumetransducer waarmee
uitgeademde lucht onmiddellijk bij BTPS (Body Temperature and
Pressure with Saturated water vapour; lichaamstemperatuur,
heersende barometerdruk en verzadigd met waterdamp), waardoor
onnauwkeurigheden van temperatuurcorrecties worden vermeden.
Deze transducer heeft geen last van de effecten van condensvorming
en temperatuur. Ook hoeft de transducer niet telkens weer worden
gekalibreerd voordat een test wordt uitgevoerd.
CareFusion levert spirometers die voorzien in al uw behoeften op het
gebied van diagnostische spirometrie en van spirometriebewaking.
De Micro II-spirometer is het zusje van de Micro I, die speciaal is
bedoeld voor het bewaken van astma en COPD, thuis of op het werk.
183
Inhoud van de verpakking
De Micro I wordt geleverd in een handig draagtasje en omvat de
volgende onderdelen (afbeelding 1):
1.
Micro I-spirometer
2.
CareFusion Digital Volume Transducer met wegwerpbare
kartonnen mondstukken en instructieboekje.
3.
Universele voeding (36-PSU1017 5VDC 1,2A)
4.
Passtuk voor het kartonnen mondstuk
5.
USB-/oplaadkabel
Afb. 1
184
Contra-indicaties, Waarschuwingen en
aandachtspunten
Contra-indicaties: Omdat het uitvoeren van spirometrie fysiek
inspannend kan zijn, is dit gecontra-indiceerd voor patiënten die onlangs
een myocardinfarct hebben gehad. Bovendien kan intense uitademing
leiden tot flauwvallen.
De volgende termen worden in deze handleiding als volgt gebruikt:
Voorzichtig: Kans op letsel of ernstige schade
Waarschuwing: omstandigheden of gebruikswijzen die kunnen leiden
tot lichamelijk letsel.
N.B.:
Belangrijke
informatie
om
schade
aan
het
instrument
te
voorkomen of om gebruik van het instrument te vergemakkelijken.
VOORZICHTIG: Lees vóór gebruik de handleiding
WAARSCHUWING: Het instrument is niet geschikt voor gebruik in de
aanwezigheid van explosieve of ontvlambare gassen, ontvlambare mengsels
van anesthetica of in een zuurstofrijke omgeving.
VOORZICHTIG: De mondstukken zijn bedoeld voor gebruik bij één patiënt.
Bij gebruik bij meerdere patiënten bestaat het risico van kruisbesmetting.
Herhaald gebruik kan het materiaal aantasten en kan leiden tot een onjuiste
meting.
VOORZICHTIG: Pulmonale filters zijn bedoeld voor gebruik bij één patiënt.
Bij gebruik bij meerdere patiënten bestaat het risico van kruisbesmetting.
Herhaald gebruik kan bovendien de luchtweerstand verhogen en een
onjuiste meting tot gevolg hebben.”
VOORZICHTIG: Laat de patiënt niet in aanraking komen met de spirometer
als de spirometer op een voeding is aangesloten om te worden opgeladen of
met een pc is verbonden om het apparaat te configureren.
OPMERKING: Het door u gekochte product mag niet via het
ongesorteerde afval worden afgevoerd. Maak gebruik van de in uw
omgeving aanwezige voorzieningen voor de inzameling van
afgedankte elektronische en elektrische apparatuur om dit product
af te voeren.
185
Beoogd gebruik
De
Micro
I
wordt
gebruikt
door
clinici
en
gezondheidszorg-
professionals voor de diagnose van astma en COPD bij volwassenen
en bij kinderen die ouder zijn dan 3 jaar.
Milieu
Neem de volgende aandachtspunten in acht:
•
•
Vermijd blootstelling van de Micro I aan rechtstreeks zonlicht.
Vermijd gebruik van de spirometer in een stoffige omgeving
of nabij verwarmingstoestellen of radiatoren.
•
Bewaar de spirometer niet op een vochtige plaats en stel de
spirometer niet bloot aan extreme temperaturen.
•
Richt de houder van de transducer niet op een sterke
lichtbron terwijl u de spirometer gebruikt.
Aan de slag
Het is aan te bevelen de Micro I-spirometer volledig op te laden voordat
u het instrument gebruikt. Bij de voeding worden afzonderlijke stekkers
geleverd voor gebruik in het Verenigd Koninkrijk, de VS en Europa. Sluit
de benodigde stekker aan op de voeding en steek deze in een
stopcontact. Sluit met de USB-/oplaadkabel de Micro I aan op de
voeding. Op het scherm verschijnt nu het symbool voor het opladen.
Voordat u het apparaat voor de eerste keer in gebruik neemt,
moet de batterij minimaal 5 uur volledig worden opgeladen.
Verwijder voor gebruik de beschermfolie van het beeldscherm.
186
Configuratie
Als het apparaat voor het eerst wordt ingeschakeld, moet het
mogelijk voor uw regio worden geconfigureerd. Hiermee worden de
voor uw regio specifieke taal, eenheden voor lengte en gewicht,
datumnotatie en voorspelde waarden ingesteld. Ook worden hiermee
de weer te geven indices geconfigureerd en wordt ingesteld of
voorspeld percentage of Z-score wordt gebruikt om afwijking van de
norm weer te geven. Al deze instellingen kunnen echter met de
meegeleverde pc-software worden aangepast.
Schakel het apparaat in door op de aan/uitknop boven op het
apparaat te drukken. U ziet dan het volgende:
Met de toetsen Omhoog en Omlaag kunt u het gewenste land
markeren, waarna u op ‘Enter' (↵) drukt. Dit hoeft u alleen te doen
als het apparaat voor de eerste keer wordt ingeschakeld. De door u
gemaakte keuze wordt opgeslagen voor toekomstig gebruik.
Het is aan te raden om deze instellingen desgewenst te wijzigen via
de pc-software. Sluit de Micro I op de pc aan met de meegeleverde
USB-kabel. Voer het softwareprogramma uit en schakel de Micro I
in. Het softwareprogramma voor de pc detecteert of de Micro I is
aangesloten. Volg de aanwijzingen op het scherm om uw apparaat
te configureren.
187
Micro I PC Software
Met deze software kunt u de instellingen op uw Micro I-spirometer
aanpassen. Zodra de software is geïnstalleerd, kunt u tijdens
gebruik van de applicatie voor uitgebreider hulp het helpmenu
raadplegen.
Systeemvereisten
Micro I PC Software heeft bepaalde hardware- en softwareonderdelen
nodig om goed te werken.
Pc-vereisten
Er is een IBM-compatibele pc nodig met hardware die voldoet aan
minimaal de volgende vereisten.
Processor: 800 MHz of hoger
RAM: 256 MB
Vrije ruimte op de vaste schijf: 50 MB
Beeld: 800x600, 256 kleuren. Om ten volle te kunnen profiteren van
de interface met meerdere vensters, wordt een resolutie van ten
minste 1280x1024 aangeraden.
Ten minste één vrije USB-poort. (Voor USB-spirometers is een extra
USB-poort nodig)
Vereisten besturingssysteem
Micro I PC Software werkt met de volgende besturingssystemen:
Windows XP
Windows Vista 32 bit
Windows Vista 64 bit
Windows Server 2003
Windows Server 2008
188
Micro I PC Software installeren
Controleer voordat u begint of uw computer voldoet aan de
minimale systeemvereisten, en of de gebruiker die de software
installeert beheerdersrechten heeft.
Sluit alle andere programma’s die actief zijn, af.
Steek de installatie-cd in uw cd-romstation.
Het installatieprogramma hoort automatisch op te starten en het
welkomstvenster weer te geven. Klik op ‘Volgende’ om verder te
gaan. Als het installatieprogramma niet automatisch opstart, gebruik
dan de Verkenner van Windows om het cd-romstation handmatig te
selecteren
en
open het
bestand
met
de
naam
Micro
I PC
Software.exe.
De licentieovereenkomst wordt weergegeven. Lees het hele document
door
en
zorg
dat
u
het
volledig
begrijpt
voordat
u
de
licentievoorwaarden accepteert. Klik op ‘Volgende’ om verder te gaan.
Het dialoogvenster Kies doellocatie geeft aan in welke map Micro I
PC
Software
voor
de
pc
zal
worden
geïnstalleerd.
De
standaardlocatie is:
C:\Program Files\CareFusion\Micro I PC Software
Klik op ‘Bladeren’ om een andere locatie te kiezen.
Klik op ‘Volgende’. Het dialoogvenster Kies programmabeheergroep
verschijnt.
Dit
is
de
locatie
in
het
menu
Start
waar
het
opstartpictogram van de Micro I PC Software wordt geplaatst. U kunt
zowel een nieuwe locatie invoeren als een bestaande locatie
gebruiken.
Klik op ‘Volgende’ om het dialoogvenster met installatieopties op te
roepen. Dit venster geeft u de volgende optie:
Micro I PC Software-pictogram toevoegen aan het bureaublad.
189
Klik op ‘Volgende’ om te beginnen met het kopiëren van bestanden
naar uw systeem.
Nadat alle bestanden naar uw systeem zijn gekopieerd, krijgt u de
melding dat Micro I PC Software met succes is geïnstalleerd en
wordt u aangeraden om voordat u de toepassing gebruikt uw pc
opnieuw op te starten. Klik op ‘Voltooien’ om het installatieproces af
te ronden.
Micro I PC Software uitvoeren
Sluit met de meegeleverde kabel de Micro I aan op een USB-poort
op de pc. De Micro I wordt gevoed vanaf de USB-poort op de pc. Het
is van belang te weten dat er voor de Micro I een USB-poort nodig is
die hoge spanning kan leveren. Als de Micro I is aangesloten op een
USB-poort die alleen lage spanning levert, schakelt het apparaat
automatisch uit en reageert niet eerder op bediende toetsen dan
wanneer het van de pc is losgekoppeld. USB-poorten die lage
spanning leveren treft men doorgaans aan op toetsenborden en
passieve USB-hubs. Deze mogen niet worden gebruikt. De Micro I
geeft het volgende weer zolang deze op de pc is aangesloten:
Zorg dat de patiënt tijdens deze procedure niet in contact kan
komen met de spirometer.
190
Voer
Micro
I
PC
Software
uit.
Het
eerste
scherm
wordt
weergegeven:
Via dit scherm kunt u de instellingen van het apparaat wijzigen of de
interne klok van de Micro I afstellen. Als de optie voor instellingen
wijzigen wordt geselecteerd, krijgt u dit scherm te zien:
Door de optie ‘Aangepast' boven in het scherm te kiezen, kunnen
alle functies van Micro I aan uw specifieke eisen worden aangepast.
191
Bediening
De Micro I is bedoeld om te kunnen worden gebruikt voor een reeks
applicaties, van de eenvoudigste spirometrietest waar slechts een
paar indices hoeven te worden weergegeven, tot complexer gebruik,
waarvoor
afwijking
van
de
norm,
bronchodilatorrespons
en
interpretatie van resultaten vereist zijn.
Het hoofdmenu wordt weergegeven na de eerste configuratie en
daarna telkens wanneer het apparaat wordt ingeschakeld:
Overzicht hoofdmenu
Snel onderzoek
Deze functie wordt gebruikt voor een onmiddellijke spirometriemeting
zonder voorspelde waarden of interpretatie.
Onderzoek met voorspelde waarden
Voor deze functie is het nodig dat de demografische gegevens van de
patiënt zodanig worden ingevoerd dat dit de berekening en weergave
van de voorspelde waarden en interpretatie mogelijk maakt.
Postbronchodilatoronderzoek
Met deze functie kan de postbronchodilatorrespons worden gemeten. De
respons wordt gemeten ten opzichte van de eerder gemeten verkregen
baseline met ofwel de optie van snel onderzoek of de optie van
onderzoek
met
voorspelde
waarden.
Het
laatst
geregistreerde
baselineonderzoek wordt automatisch opgeslagen wanneer het apparaat
192
wordt uitgeschakeld en kan, wanneer het apparaat wordt ingeschakeld,
worden gebruikt voor een postbronchodilatorvergelijking.
Recentste resultaten
Met deze optie kunnen de resultaten van het als laatste opgeslagen
onderzoek worden weergegeven.
Instellingen
Met deze optie kan de gebruiker verschillende instellingen aanpassen,
onder meer datum, tijd en taal, en kan een kalibratiecontrole worden
uitgevoerd.
Snel onderzoek
Nadat deze optie is geselecteerd, krijgt u dit scherm te zien:+
De Micro I kan rechtstreeks worden gebruikt met een MicroGuardfilter of met een wegwerpbaar kartonnen mondstuk met het
meegeleverde passtuk. Breng het mondstuk of de MicroGuard-filter
in de mondstukhouder of de spirometer in.
Instrueer de patiënt om zo diep mogelijk in te ademen, hun lippen
rond het mondstuk te sluiten en zo hard en zo snel mogelijk uit te
ademen totdat er geen lucht meer is om uit te ademen.
193
De spirometrieresultaten voor die uitblazing worden vervolgens
samen met de kwaliteitscontrole van de manoeuvre op basis van
de ATS/ERS-richtlijnen weergegeven:
Verdere indices, indien dit zo is ingesteld, en de beste resultaten van
een reeks uitblazingen kunnen worden weergegeven door de toets
omlaag in te drukken.
De kwaliteit van elke manoeuvre wordt gecontroleerd op trage start,
abrupt einde, korte uitademing, slechte inspanning of kuch volgens
ATS/ERS 2005-richtlijnen.
Het is van belang te weten dat het percentage van de voorspelde
waarde en de interpretatie niet beschikbaar zijn voor de optie Snel
onderzoek.
Druk Enter om het volgende weer te geven:
Om de test te herhalen selecteert u Opnieuw uitblazen en drukt u
op Enter.
194
Onderzoek met voorspelde waarden
Als deze optie is geselecteerd, wordt het volgende weergegeven:
Stel de leeftijd van de patiënt bij met de toets Omhoog of Omlaag
en druk vervolgens op Enter. Doe hetzelfde voor geslacht, lengte en
ras. Als u een fout maat maakt, dan hoeft u alleen de toets Terug
aan te raken om terug te keren naar de eerdere invoer. Het
geselecteerde ras past een percentagedaling toe op de voor de
patiënt toe te passen volumetrische voorspelde waarden.
De etnische correcties voor ECCS zijn als volgt:
Bevolking
Percentagedaling
Blank
0
Niet nader aangegeven
0
Polynesisch
10
Aziatisch
10
Afro-Caribisch
13
Indien de voorspelde waarden van NHANES III worden gebruikt, dan
wordt de etnische herkomst gebruikt volgens de vergelijkingen van
NHANES III.
Druk op Enter als de vereiste correctie is geselecteerd.
Het is van belang op te merken dat de Micro I zo kan worden
geconfigureerd dat lengte in inch wordt geaccepteerd.
195
Als u een fout maat maakt, dan hoeft u alleen de toets Terug aan te
raken om terug te keren naar de eerdere invoer.
Wanneer alle patiëntgegevens zijn ingevoerd, wordt het volgende
scherm weergegeven en kan een spirometrietest worden uitgevoerd:
Nadat de test is uitgevoerd, worden de resultaten weergegeven:
De kwaliteit van elke manoeuvre wordt gecontroleerd op trage start,
abrupt einde, korte uitademing, slechte inspanning of kuch volgens
ATS/ERS 2005-richtlijnen. Een asterisk ( * ) aan het einde van de regel
duidt op een resultaat onder de ondergrens van het normale bereik.
Als een reeks uitblazingen wordt geregistreerd, verwijzen de
resultaten en de kwaliteitscontrole naar de huidige uitblazing, terwijl
de interpretatie is gebaseerd op het beste resultaat van de reeks.
196
Met de pijltoets omlaag kunt in verdere indexen, indien dit is
geconfigureerd, en de beste resultaten van een reeks uitblazingen zien:
Op elk moment wanneer de resultaten worden weergegeven, kan nog
een spirometertest worden uitgevoerd door op de toets Enter te
drukken. Indien de toets Enter onbedoeld wordt aangeraakt, druk dan
op de toets Terug om terug te keren naar het scherm Resultaten.
De Micro I kan zo worden geconfigureerd dat de Z-score wordt
weergegeven in plaats van het percentage voorspelde waarden, als
de gegevens van sets voorspelde waarden beschikbaar zijn:
De Z-score is het aantal standaardafwijkingen waarvan de resultaten
boven (positieve Z-score) of onder (negatieve Z-score) de
voorspelde waarde liggen.
197
Postbronchodilatoronderzoek
Zodra er bevredigende baselinetests zijn geregistreerd, kan een postbronchodilatoronderzoek worden uitgevoerd door in het hoofdmenu de optie
Post BD-onderzoek te selecteren. Wanneer deze tests worden uitgevoerd,
wordt het percentage voorspelde waarde vervangen door de percentagewijziging afkomstig van het beste baselineresultaat voor elke index:
Met de toets Omlaag worden de andere indexen weergegeven en de
beste resultaten, zoals bij de uitblazingen voor de uitgangsmeting.
NLHEP-modus
Deze modus wordt verkregen door - als het apparaat voor de eerste
keer wordt ingeschakeld - vanuit het configuratiemenu de optie USA
(NLHP) te selecteren, of daarna, vanuit de optie Instellingen in het
hoofdmenu. In deze modus conformeert de functionaliteit van de Micro I
zich volledig aan de vereisten van het National Lung Health Education
Program.
Alleen FEV1, FEV6 en de verhouding FEV1/FEV6 worden weergegeven en
opgeslagen, kwaliteitscontroles worden op elke manoeuvre toegepast en
een kwaliteitsscore voor de testsessie wordt weergegeven:
198
Kwaliteitscontroles NLHEP
Voor het weergeven van de interpretatie moeten manoeuvres een
reeks strengere kwaliteitscontroles ondergaan. Nadat de patiënt een
manoeuvre van slechte kwaliteit heeft verricht, verschijnt een van
de drie volgende berichten:
BERICHT
Niet
aarzelen
Criteria
Teruggeëxtrapoleerd
volume (BEV) hoger dan
150 ml
Aanbevolen handeling
De patiënt moet de lucht
sneller, gelijkmatiger en
zonder aarzeling aan het
begin van de manoeuvre
uitademen
Sneller
Tijd tot piekflow (PEFT)
De patiënt moet aan het
uitademen
langer dan 120 msec
begin van de manoeuvre
met meer kracht
uitademen
Langer
Uitademingstijd minder
De patiënt is te vroeg
uitblazen
dan 6 seconden of
gestopt met uitademen.
volumeaccumulatie is
De patiënt moet net
niet onder 100 ml per
zolang uitademen totdat
0,5 seconden gedaald
de longen geheel leeg
zijn.
Zodra er een acceptabele manoeuvre is uitgevoerd, worden de
volgende controles op consistentie ook op de daaropvolgende
manoeuvres toegepast.
Krachtiger
Piekflow niet
De patiënt moet voor elke
uitademen
reproduceerbaar. De
manoeuvre een maximale
beste voorgaande
inspanning leveren.
manoeuvres vallen niet
binnen 1,0 l/sec. Dit
duidt erop dat de
inspanning van de
patiënt niet consistent
is.
Diepere
FEV1 of FEV6 niet
De patiënt moet vóór elke
adem
reproduceerbaar.
manoeuvre net zolang
Verschil
inademen totdat de
ten opzichte van de
longen geheel zijn gevuld
beste test groter dan
150 ml
199
Als twee manoeuvres een van beide consistentiecontroles niet
doorstaan, dan worden de beste afzonderlijke resultaten van de
twee opgeslagen (FEV1, FEV6 en PEF afzonderlijk).
Wanneer een van bovenstaande berichten verschijnen, instrueer de
patiënt dan hoe hij/zij zijn/haar manoeuvre kan verbeteren en doe
de correcte manoeuvre voor.
Classificatie kwaliteitscontroles NLHEP
De kwaliteit van elke sessie wordt geclassificeerd aan de hand van
de volgende criteria:
Classificatie
kwaliteitscontrole
A
B
C
D
F
Criteria
ten minste twee acceptabele manoeuvres,
waarbij de grootste twee FEV1's beter zijn
dan 100 ml en de grootste twee FEV6's
beter zijn dan 100 ml
ten minste twee acceptabele manoeuvres,
waarbij de grootste twee FEV1's beter zijn
dan 150 ml
ten minste twee acceptabele manoeuvres,
waarbij de grootste twee FEV1's vallen
tussen 200 ml en 150 ml
alleen één acceptabele manoeuvre of twee
waarbij de grootste twee FEV1's minder
zijn dan 200 ml
Geen acceptabele manoeuvres
Interpretatie NLHEP
De interpretatie wordt uitgevoerd ten aanzien van de beste
spirometrieresultaten en is gebaseerd op de voorspelde waarden
voor de geforceerde expiratoire ratio, FEV1/FEV6, en FEV1. Indien er
geblokkeerde
luchtwegen
worden
waargenomen,
wordt
obstructieniveau gerapporteerd conform de NLHEP-richtlijnen.
200
het
Uitschakelen
Het apparaat wordt uitgeschakeld door op de aan/uit-knop te drukken.
He apparaat kan van het lichtnet worden losgekoppeld door de
oplader uit het stopcontact te halen of door de stekker van de USBkabel te ontkoppelen.
Onderhoud
Batterijbeheer
De Micro I wordt gevoed door een herlaadbare batterij.
De batterijspanning wordt bewaakt en er wordt bij inschakeling een
waarschuwing weergegeven als de batterij leegraakt.
Pictogrammen batterijstatus
Batterij bijna leeg. Zo snel mogelijk opladen om te
voorkomen dat de batterij helemaal leeg raakt.
Batterij volledig geladen.
De batterij speelt geen rol bij het vasthouden van het interne
geheugen. De opgeslagen resultaten raken daarom niet verloren als
de batterij leeg raakt.
Om de batterij opnieuw op te laden moet de Micro I op de
meegeleverde oplader worden aangesloten. Vervolgens moet de
oplader op een geschikt stopcontact worden aangesloten, waarbij
erop moet worden gelet dat de toegang tot de oplader niet wordt
beperkt, zodat deze makkelijk kan worden verwijderd.
De Micro I geeft het volgende weer:
201
Zorg dat de patiënt tijdens deze procedure niet in contact kan
komen met de spirometer.
Het pictogram voor opladen (
) wordt weergegeven om aan te
geven dat het apparaat wordt opgeladen.
Als het pictogram voor opladen uitgaat (na max. 5 uur), komt
hiervoor het pictogram voor batterij volledig opgeladen in de plaats.
(
) Haal de voedingsadapter uit het stopcontact en uit de basis
van het apparaat. De Micro I is nu gereed voor mobiel gebruik.
Opmerking: De Micro I kan met de meegeleverde USB-kabel ook
worden opgeladen via een pc of laptop.
Batterij vervangen
De levensduur van alle herlaadbare batterijen is beperkt en de
batterij moet na enkele jaren worden vervangen, afhankelijk van het
gebruik. Naarmate de batterij het einde van zijn levensduur nadert,
zult u tussen het opladen door steeds minder tests kunnen
uitvoeren.
Om bij de batterij te komen moet de achterkant van het apparaat
voorzichtig worden afgenomen.
De achterklep is bij de aangegeven posities voorzien van
klemmetjes. Deze dienen voorzichtig en in de getoonde volgorde te
worden losgewrikt.
202
Gemakshalve is er bij klem 1 een inkeping in het apparaat
aangebracht zodat een kleine, platte schroevendraaier voorzichtig
onder het klemmetje kan worden gebracht om deze los te maken.
Zodra het klemmetje is losgemaakt, doet u met de schroevendraaier
hetzelfde met de klemmetjes 2, 3 en 4.
Ten slotte schuift u de kap van de onderkant van het apparaat af,
waardoor de klemmetjes 5 en 6 los komen.
Vervang de batterijen en let daarbij met name op in welke richting
de connector in de mof wordt gestoken en de batterij in het
batterijvak. Let erop dat de draden die vanuit de batterij komen bij
plaatsing aan de bovenkant van de batterij naar buiten komen.
Plaats de achterklep terug door de borgklemmetjes in omgekeerde
volgorde aan te brengen.
Als een batterij niet meer kan worden gebruikt, voer deze dan af in
overeenstemming met Europese regelgeving betreffende batterijen
en accu's.
203
Calibration Check (kalibratiecontrole)
De Micro I is gekalibreerd om liters bij lichaamstemperatuur, heersende
barometerdruk en verzadigd met waterdamp (BTPS) te lezen.
De kalibratie hoort voor onbepaalde tijd stabiel te blijven, tenzij de
transducer fysiek beschadigd is. Ook zou het niet nodig moeten zijn
het apparaat opnieuw te kalibreren. Echter, om er zeker van te zijn
dat
het
apparaat
correct
functioneert,
is
een
periodieke
kalibratiecontrole aan te raden.
Om
een
kalibratiecontrole
uit
te
voeren,
vinkt
u
de
optie
kalibratiecontrole in het menu instellingen aan. U ziet dan het
volgende scherm:
Sluit een injectiespuit van 3 l aan op de Micro I met zo min mogelijk
verloopstukken en injecteer de inhoud van de spuit gelijkmatig en
zonder onderbreking in de transducer. Zodra dit gereed is, ziet u het
volgende scherm:
De acceptabele kalibratienauwkeurigheid is +/- 3,5%. Indien de
kalibratienauwkeurigheid buiten dit bereik valt, dan ziet u een kruis
in plaats van een vinkje. Als dit het geval is, controleer dan de spuit
en de aansluitingen op lekkage en herhaal de controle. Indien de
204
Micro I bij herhaling buiten het kalibratiebereik valt, moet het
apparaat voor reparatie aan CareFusion worden geretourneerd.
De transducer reinigen
Voor de transducer is geen routinematig onderhoud vereist.
Als u de transducer wilt steriliseren of reinigen, dan kunt u deze op
de volgende manier verwijderen:
1
Verwijder de transducer door deze voorzichtig linksom te
draaien en deze vervolgens van het hoofdapparaat af te
trekken.
2
De transducer kan nu voor routinematige reiniging max.
10 minuten worden ondergedompeld in een warm zeepsop
of in koude sterilisatieoplossingen, zoals Perasafe. (Vermijd
gebruik van alcohol of chlooroplossingen.) Na reiniging/
sterilisatie moet de transducer worden afgespoeld in
gedestilleerd water en afgedroogd. Perasafe is bij
CareFusion verkrijgbaar in handige plastic flacons van 81 g,
cat.nr. 36-SSC5000A.
3
Plaats de transducer terug in de Micro I.
VOORZICHTIG: Probeer niet de spirometer of de bijbehorende
accessoires te wassen of onder te dompelen in water of een
reinigingsvloeistof, aangezien de inwendige elektronische
componenten hierdoor permanent beschadigd zullen raken.
Reparatie
Op pagina 212 leest u waarmee u contact kunt opnemen als uw
apparaat onderhoud of reparatie nodig heeft.
De Micro I bevat geen onderdelen die door de gebruiker kunnen
worden gerepareerd.
205
Informatie over probleemoplossing
Raadpleeg onderstaande tabel als u problemen ondervindt bij het
gebruik van uw spirometer:
Probleem
Mogelijke
oorzaak
Oplossing
De Micro I kan niet worden
ingeschakeld
De batterijen
zijn dood
Batterijen opladen
Telkens waneer het
instrument wordt
ingeschakeld, wordt de tijd
weergegeven als 00:00
De inwendige
batterij van de
Micro I is defect
Neem contact op
met uw dealer.
Tijdens de kalibratiecontrole
ligt de Micro I buiten het
bereik van %
Er is sprake van
lekkage in de
spuit of bij de
aansluitingen
Controleer de spuit
en de aansluitingen
op lekken
Elektromagnetische compatibiliteit (EMC)
Wijzigingen en aanpassingen aan de Micro I-spirometer die niet
uitdrukkelijk zijn goedgekeurd door Carefusion kunnen problemen
op het gebied van elektromagnetische compatibiliteit bij dit apparaat
of bij andere apparatuur teweegbrengen. Het apparaat is ontworpen
en getest om om te voldoen aan de geldende regelgeving op het
gebied van EMC en moet worden geïnstalleerd en in gebruik worden
genomen
conform
de
in
EN
50082-1:1992
gespecificeerde
interferentieniveaus, die niet mogen worden overschreden
WAARSCHUWING: gebruik van draagbare telefoontoestellen of
andere radiofrequentie (RF) zendende apparatuur in de buurt van
het systeem kan een onverwachte of nadelige werking veroorzaken.
206
Veiligheidsaanduiding volgens IEC 60601-1
Klasse II
Type bescherming tegen
elektrische schokken
Type bescherming tegen
elektrische schokken
Voedingsaansluiting
Voedingsapparatuur
Levensduur batterij:
Mate van elektrische verbinding
tussen apparatuur en patiënt
Mate van mobiliteit
Gebruik
Toegepast onderdeel van
type B
100-240 VAC, 50/60 Hz
Adapter en oplaadbare
interne NiMH-batterij.
Circa 30 uur met een
volledig opgeladen nieuwe
batterij.
Apparatuur ontworpen als
niet-elektrische verbinding
met de patiënt.
Transporteerbaar
Continu
OPMERKING: Als er andere apparatuur op het apparaat wordt
aangesloten, moet altijd worden nagegaan of de totale combinatie
voldoet aan de internationale veiligheidsnorm IEC 60601-1 voor
medische elektrische systemen. Bij aansluiting op een pc met de
meegeleverde USB-kabel moet de pc een begrensde SELVspanningsbron zijn conform EN60950-1 of voldoen aan EN60601-1.
BELANGRIJK: Gebruik alleen de meegeleverde lichtnetadapter
(36-PSU1017 5V DC 1,2A) De adapter is voorzien van een
transformator. Snijd of knip de adapter niet af om deze met een andere
stekker te vervangen. Dit kan een gevaarlijke situatie opleveren.
• De adapter zet de netspanning (100-240 volt) om in een veilige
spanning (5V DC)
• Zorg dat de adapter niet nat wordt
• Gebruik geen beschadigde adapter
• Haal altijd de stekker uit het stopcontact voordat u de Micro I gaat
reinigen
WAARSCHUWING: Sluit geen apparaten aan die niet zijn
aangegeven als onderdeel van het systeem.
207
WAARSCHUWING: Er mogen geen wijzigingen aan deze
apparatuur worden uitgevoerd.
OPMERKING:Indien er met het systeem een draagbare stekkerdoos
wordt gebruikt, mag de maximaal toegestane belasting niet worden
overschreden. Sluit geen elektrische apparatuur aan die niet is
meegeleverd als onderdeel van het systeem.
Symbolen
Apparaat type B
Conform richtlijn 93/42/EEG
0086
Afvoer in overeenstemming met WEEE-richtlijn
Raadpleeg de gebruiksinstructies
Voorzichtig: raadpleeg de meegeleverde
documentatie
Fabricagedatum
Fabrikant
Serienummer
De Amerikaanse federale wetgeving bepaalt dat dit
hulpmiddel alleen mag worden gekocht door of in
opdracht van een arts. ("Rx only")
208
N.B.: De informatie in deze handleiding kan zonder kennisgeving
worden gewijzigd en vertegenwoordigt geen enkele verbintenis van
de kant van CareFusion UK 232 Ltd. De software mag alleen worden
gebruikt of gekopieerd in overeenstemming met de voorwaarden
van die overeenkomst. Niets van deze handleiding mag worden
gereproduceerd of in enige vorm of op enige wijze, elektronisch of
mechanisch, waaronder het maken van fotokopiën en opname voor
welk doel ook, worden overgedragen zonder de schriftelijke
toestemming van CareFusion UK 232 Ltd.
209
Specificatie van de Micro I
Metingen:
Geforceerd expiratoir volume in 1 seconde (FEV1)
Geforceerd expiratoir volume in 6 seconden (FEV6)
Geforceerde vitale capaciteit (FVC)
Geforceerde expiratoire ratio (FEV1/FEV6)
Geforceerde expiratoire ratio (FEV1/FEV)
Expiratoire piekflowfrequentie (PEF)
Middenflow uitademing (FEF25-75)
Expiratoire flow op 75% van resterend volume (FEF75)
Expiratoire flow op 25% van resterend volume (FEF25)
Scherm:
Grafisch monochroom verlicht lcdscherm met 128 x 128 pixels
Type transducer:
CareFusion Uni-Directional Digital
Volume
Nauwkeurigheid:
Voldoet aan de eisen van de ATS/ERS
TASK FORCE: STANDARDISATION OF
LUNG FUNCTION TESTING 2005
(Eur Respir J 2005; 26: 319-338
tabel 6)
Voeding:
2 X AA NiMH oplaadbare cellen
Levensduur batterij:
Circa 30 uur met een volledig
opgeladen nieuwe batterij.
Bedrijfsstroom
Minder dan 90 mA
Oplaadstroom
Minder dan 500mA
Afmetingen:
162 X 61 X 30 mm
Gewicht:
152 g
Bedrijfstemperatuur:
10 tot +35 °C
Relatieve vochtigheid
bedrijfsomgeving:
20% tot 80%
Opslagtemperatuur:
-20 tot +70 °C
Relatieve vochtigheid
tijdens opslag:
30% tot 90% rel. luchtvochtigheid
Levensduur
5 jaar
210
Accessoires
Cat. nr.
36-PSA1000
Beschrijving
Wegwerpbare mondstukken voor volwassene
(500 per doos)
36-SST1250
Eenrichtings-veiligheidsmondstukken (250 per doos)
36-SST1000
Eenrichtings-veiligheidsmondstukken (500 per doos)
36-MGF1025
Microgard pulmonaal filter (25 per doos)
36-MGF1100
Microgard pulmonaal filter (100 per doos)
36-PSA1200
Wegwerpbare mondstukken voor kind (250 per doos)
36-PSA1100
Passtuk voor kind
36-SSC5000A PeraSafe sterilisatiepoeder 81 g
(voor 5 liter oplossing)
36-VOL2104
Neusclips (pak van 5)
36-SM2125
Kalibratiespuit van 3 liter
36-MLD1621
Passtuk voor mondstuk
36-BAT1043
Batterij (NiMH AA 2.4V, 1600mAh)
36-PSU1017
5V DC 1,2A (GlobTek WR9QA1200USBNR-G2267)
OPMERKING: GEBRUIK ALLEEN ACCESSOIRES VAN CAREFUSION
211
Customer contact information
UK Customers only
For all Sales Order processing for products, training and spare parts,
Service and Technical Support enquiries, please contact the following:
CareFusion UK 232 Ltd
UK Customer Service & Support
The Crescent
Jays Close
Basingstoke
RG22 4BS
Customer Service Sales Enquiries:
Telephone: Freephone 0800 151 3584
Telephone:
Email:
01256 388550
[email protected]
Factory Repair and Administration Enquiries:
Telephone: Freephone 0800 151 3585
Email:
[email protected]
Technical Support Enquiries:
Telephone: 01256 388551
Email:
[email protected]
212
International customers only
For all Sales Order processing for products and Spare parts, Service
and Technical Support enquiries, please contact the following:
Carefusion Germany 234 GmbH
Customer Service & Support International
Leibnizstrasse 7
97204 Hoechberg
Germany
Customer Service Sales Enquiries:
Telephone: 0049 931 4972 670
Email:
[email protected]
Factory Repair and Administration Enquiries:
Telephone: 0049 931 4972 867
Email:
[email protected]
Technical Support Enquiries:
Telephone: 0049 931 4972 127
Email:
[email protected]
213
CareFusion UK 232 Ltd.
Quayside
Chatham Maritime
Kent ME4 4QY
U.K.
0086
JDE no. 36-MAN1290
Drg no. 122-14WW (PART 1)
Issue 1.0
March 2011
© CareFusion 2011