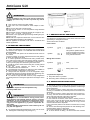
1
ARCTIC MANUALE D’ISTRUZIONE Deluxe 12L - 20L CARNET D’INSTRUCTIONS OPERATOR’S MANUAL GEBRAUCHSANWEISUNG MANUAL DE INSTRUCCIONES Arctic Deluxe 12-20 DICHIARAZIONE DI CONFORMITÀ CE Noi Ugolini spa, via dei Pioppi, 33 20090 Opera Milano ITALY dichiariamo, sotto la nostra responsabilità, che l’apparecchio DISTRIBUTORE DI BEVANDE FREDDE - Marca: UGOLINI S.p.A. - Fabbricante: UGOLINI S.p.A. - Modelli: ARCTIC DELUXE 1/12 - 2/12 - 3/12 - 4/12 - 1/20 - 2/20 - 3/ 20 - 4/20 sono conformi alle seguenti Normative: - EN62233:2008-11; EN62233:2009-04; - EN ISO 12100-1 (2010) - EN 55014 -1 (2006) + A1 (2009) + A2 (2011); - EN ISO 12100-2 (2010) - EN 55014-2 (1997) + A1 (2001) + A2 (2008) - EN60335-1 (2012) - EN 61000-3-2 (2006) + A1/A2 (2009); EN61000-3-3 (2008) - EN60335-2-24 (2010) - EN60335-2-75 (2004) + A1 (2005) + A11 (2006) + A2 (2008) + A12 (2010) In ottemperanza alle Direttive 2006/42/CE, 2006/95/CE, 2004/108/CE. EC DECLARATION OF CONFORMITY We Ugolini spa, via dei Pioppi, 33 20090 Opera Milano ITALY declare, under our responsibility, that the apparatus COLD DRINK DISPENSER Trademark: UGOLINI S.p.A. - Manufacturer: UGOLINI S.p.A. - Model: ARCTIC DELUXE 1/12 - 2/12 - 3/12 - 4/12 - 1/20 - 2/20 - 3/20 - 4/20 are in conformity with the following Standards: - EN62233:2008-11; EN62233:2009-04; - EN ISO 12100-1 (2010) - EN 55014 -1 (2006) + A1 (2009) + A2 (2011); - EN ISO 12100-2 (2010) - EN 55014-2 (1997) + A1 (2001) + A2 (2008) - EN60335-1 (2012) - EN 61000-3-2 (2006) + A1/A2 (2009); EN61000-3-3 (2008) - EN60335-2-24 (2010) - EN60335-2-75 (2004) + A1 (2005) + A11 (2006) + A2 (2008) + A12 (2010) Following the provisions of the Directives 2006/42/CE, 2006/95/CE, 2004/108/CE. DECLARATION DE CONFORMITE CE Nous Ugolini spa, via dei Pioppi, 33 20090 Opera Milano ITALY déclarons, sous notre responsabilité, que les appareil DISTRIBUTEUR REFROIDISSEUR DE BOISSONS - Marque: UGOLINI S.p.A. - Constructeur: UGOLINI S.p.A. - Modèle: ARCTIC DELUXE 1/12 - 2/12 - 3/12 - 4/12 - 1/20 2/20 - 3/20 - 4/20 sont conformes aux Normes suivantes: - EN62233:2008-11; EN62233:2009-04; - EN ISO 12100-1 (2010) - EN 55014 -1 (2006) + A1 (2009) + A2 (2011); - EN ISO 12100-2 (2010) - EN 55014-2 (1997) + A1 (2001) + A2 (2008) - EN60335-1 (2012) - EN 61000-3-2 (2006) + A1/A2 (2009); EN61000-3-3 (2008) - EN60335-2-24 (2010) - EN60335-2-75 (2004) + A1 (2005) + A11 (2006) + A2 (2008) + A12 (2010) Conformément aux Directives 2006/42/CE, 2006/95/CE, 2004/108/CE. EG-ÜBEREINSTIMMUNGSERKLÄRUNG Wir Ugolini spa, via dei Pioppi, 33 20090 Opera Milano ITALY erklären auf eigene Verantwortung, daß die Gerät KALTGETRÄNKE DISPENSER Marke: UGOLINI S.p.A. - Hersteller: UGOLINI S.p.A. - Modell : ARCTIC DELUXE 1/12 - 2/12 - 3/12 - 4/12 - 1/20 - 2/20 - 3/20 - 4/20 mit den folgenden Normen übereinstimmen: - EN62233:2008-11; EN62233:2009-04; - EN ISO 12100-1 (2010) - EN 55014 -1 (2006) + A1 (2009) + A2 (2011); - EN ISO 12100-2 (2010) - EN 55014-2 (1997) + A1 (2001) + A2 (2008) - EN60335-1 (2012) - EN 61000-3-2 (2006) + A1/A2 (2009); EN61000-3-3 (2008) - EN60335-2-24 (2010) - EN60335-2-75 (2004) + A1 (2005) + A11 (2006) + A2 (2008) + A12 (2010) Gemäß den EWG-Richtlinien 2006/42/CE, 2006/95/CE, 2004/108/CE. DECLARACIÓN DE CONFORMIDAD CE Nosotros Ugolini spa, via dei Pioppi, 33 20090 Opera Milano ITALY declararamos, bajo nuestra responsabilidad, que los aparato DISTRIBUIDOR DE BEBIDAS FRIAS - Marca: UGOLINI S.p.A. - Fabricante: UGOLINI S.p.A. - Modelo: ARCTIC DELUXE 1/12 - 2/12 - 3/12 - 4/12 - 1/20 - 2/20 - 3/ 20 - 4/20 responden con las siguientes Normativas: - EN62233:2008-11; EN62233:2009-04; - EN ISO 12100-1 (2010) - EN 55014 -1 (2006) + A1 (2009) + A2 (2011); - EN ISO 12100-2 (2010) - EN 55014-2 (1997) + A1 (2001) + A2 (2008) - EN60335-1 (2012) - EN 61000-3-2 (2006) + A1/A2 (2009); EN61000-3-3 (2008) - EN60335-2-24 (2010) - EN60335-2-75 (2004) + A1 (2005) + A11 (2006) + A2 (2008) + A12 (2010) En cumplimiento de las Normas 2006/42/CE, 2006/95/CE, 2004/108/CE. vedere targa dati sulla macchina see data plate on the machine voir la plaque sur l’appareil siehe Dispenser Typenschild ver la placa del distribuidor Ugolini spa L’Amministratore Delegato (luogo ed anno di prod. - place and mfr. year - lieu et an de production Produktionsort und Produktionsjahr - lugar y año de producción) 2 4 9 14 19 24 Ai sensi dell’art.13 del Decreto Legislativo 25 Luglio 2005, n.151 “Attuazione delle Direttive 2002/95/CE, 2002/96/CE e 2003/108/CE, relative alla riduzione dell’uso di sostanze pericolose nelle apparecchiature elettriche ed elettroniche, nonchè allo smaltimento dei rifiuti”. Il simbolo del cassonetto barrato riportato sull’apparecchiatura o sulla sua confezione indica che il prodotto alla fine della propria vita utile deve essere raccolto separatamente dagli altri rifiuti. La raccolta differenziata della presente apparecchiatura giunta a fine vita è organizzata e gestita dal produttore. L’utente che vorrà disfarsi della presente apparecchiatura dovrà quindi contattare il produttore e seguire il sistema che questo ha adottato per consentire la raccolta separata dell’apparecchiatura giunta a fine vita. L’adeguata raccolta differenziata per l’avvio successivo dell’apparecchiatura dismessa al riciclaggio, al trattamento e allo smaltimento ambientalmente compatibile contribuisce ad evitare possibili effetti negativi sull’ambiente e sulla salute e favorisce il reimpiego e/o riciclo dei materiali di cui è composta l’apparecchiatura. Lo smaltimento abusivo del prodotto da parte del detentore comporta l’applicazione delle sanzioni amministrative previste dalla normativa vigente. Pursuant to the European Directives 2002/95/EC, 2002/96/EC and 2003/108/ EC, on restricting the use of hazardous substances in electric and electronic equipment and on the disposal of waste material. The crossed out wheelie bin symbol applied to equipment or packaging means that the product should be collected separately from other types of waste at the end of its useful life. The separate collection of equipment that has reached the end of its life cycle is organised and managed by the manufacturer. A user that wishes to dispose of this product should therefore contact the manufacturer and follow the instructions given with respect to the separate collection of obsolete equipment. Correct separate collection and the subsequent recycling, treatment and environmentally compatible disposal of discarded equipment is of aid in avoiding possible negative effects for the environment and people's health and facilitates the re-use or recycling of the materials of which the equipment is made. Illegal disposal of this product on part of the owner will give way to the application of administrative fines as provided by current laws. Conformément aux Directives européennes 2002/95/CE, 2002/96/CE et 2003/ 108/CE, relatives à la réduction de l'utilisation de substances dangereuses dans les appareils électriques et électroniques, ainsi qu'à l'élimination conforme et au recyclage des déchets. Le symbole de la poubelle barrée indiqué sur l'appareil ou sur sa boîte indique qu'à la fin de sa vie utile ce produit doit être éliminé séparément des autres déchets et conformément aux lois en vigueur en la matière. La collecte différenciée de cet appareil à la fin de sa vie utile, est organisée et gérée par le producteur. Par conséquent, lorsque l'utilisateur souhaitera jeter cet appareil il devra contacter le producteur et respecter le système que ce dernier aura mis en place pour réal- GARANZIA 1. L'apparecchio è garantito per un periodo di dodici mesi dalla data di acquisto. Tale data viene certificata dalla ricevuta e/o fattura fiscale e/o da un documento attestante l'avvenuta consegna dell'apparecchio all'acquirente. 2. Per garanzia si intende la sostituzione o riparazione gratuita delle parti componenti l'apparecchio riconosciute difettose all'origine, per vizi di fabbricazione a condizione che: A- il difetto di funzionamento dell'apparecchio sia stato -a pena di decadenza- denunziato per iscritto dall'acquirente al produttore entro otto giorni dalla scoperta del difetto stesso; B-ove l'acquirente abbia diritto alla garanzia, sarà dovere di Ugolini s.p.a. provvedere -a sua insindacabile discrezione- alla sostituzione integrale dell'apparecchio, ovvero alla sostituzione o riparazione delle sole parti di esso riconosciute difettose all'origine, per vizi di fabbricazione. 3. Sono escluse dalla garanzia le parti dell'apparecchio aventi funzione estetica e/o ornamentale, nonché le parti che dovessero risultare difettose a causa -o per effetto- di circostanze non connesse a vizi di fabbricazione ovvero a negligenza, imperizia o trascuratezza nell'uso, installazione errata o, comunque, difforme rispetto le istruzioni fornite dal produttore, manutenzione errata o eseguita da personale non autorizzato da Ugolini s.p.a., o, comunque, effettuata in modo difforme rispetto alle istruzioni fornite dal produttore, (ivi) trasporto eseguito in modo inidoneo o, comunque, con modalità differenti rispetto quelle indicate dal produttore; sono altresì esclusi dalle prestazioni in garanzia gli interventi tecnici inerenti l'installazione e l'allacciamento agli impianti di alimentazione elettrica o idrica. 4. E' esclusa dalla garanzia la responsabilità del produttore per l'ipotesi in cui l'apparecchio determini la distruzione o il deterioramento di una cosa diversa dall'apparecchio stesso; è, inoltre, esclusa la responsabilità del produttore per eventuali danni che possano, direttamente o indirettamente, derivare a persone e/o cose per iser la collecte différenciée des appareils arrivés à la fin de leur vie utile. La collecte différenciée correctement effectuée, suivie de l'envoi des appareils éliminés au recyclage, avec traitement et élimination des déchets dans le plus strict respect de l'environnement, est une procédure fondamentale qui contribue à éviter les possibles effets négatifs sur notre environnement et sur notre santé, et qui favorise la réutilisation et/ou le recyclage des matériaux qui composent ces appareils. L'élimination abusive de ce produit par son propriétaire comporte l'application de sanctions administratives sévères, prévues par la réglementation en vigueur. Laut EG-Richtlinien 2002/95/EG, 2002/96/EG und 2003/108/EG zur Beschränkung der Verwendung gefährlicher Stoffe in elektronischen Geräten sowie zur Abfallentsorgung. Das Symbol des durchgestrichenen Abfallcontainers auf der Packung gibt an, dass das Produkt zum Ende seiner Lebensdauer getrennt von den anderen Abfällen entsorgt werden muss. Die getrennte Abfallsammlung dieses Geräts am Ende seiner Lebensdauer wird vom Hersteller organisiert und verwaltet. Der Nutzer, der das Gerät entsorgen möchte, muss sich daher mit dem Hersteller in Verbindung setzen und das System befolgen, das dieser angewendet hat, um das Altgerät der getrennten Abfallsammlung zuzuführen. Eine angemessene Mülltrennung, die das Altgerät zur Wiederverwertung und umweltverträglichen Entsorgung führt, trägt dazu bei, mögliche negative Auswirkungen auf die Umwelt und die Gesundheit zu vermeiden und fördert die Wiederverwendung bzw. das Recycling der Materialien, aus denen das Gerät besteht. Die unerlaubte Entsorgung des Produkts durch den Benutzer zieht die Anwendung der von der geltenden Richtlinie vorgesehenen Ordnungsstrafen nach sich. En virtud de las Directivas europeas 2002/95/CE, 2002/96/CE y 2003/108/ CE, relativas a la reducción del uso de sustancias peligrosas en los aparatos eléctricos y electrónicos, así como a la eliminación de residuos. El símbolo del contenedor tachado que aparece impreso sobre el aparato o sobre su embalaje indica que al finalizar la vida útil del producto éste nunca debe depositarse junto al resto de residuos. La recogida selectiva de este equipo cuando llegue al final de su vida útil la gestionará y organizará el fabricante. El usuario que desee deshacerse de este equipo deberá ponerse en contacto con el fabricante y seguir el sistema que éste haya adoptado para permitir la recogida selectiva del aparato que haya llegado al final de su vida útil. La recogida selectiva adecuada para el posterior reciclaje, tratamiento y eliminación del equipo inservible, compatible con el medio ambiente, contribuye a evitar posibles efectos negativos para el medio ambiente y para la salud y favorece la reutilización y/o el reciclaje de los materiales de los que está compuesto el equipo. La eliminación inadecuada del producto por parte de su propietario comportará la aplicación de las sanciones administrativas previstas por la normativa vigente. effetto della -e/o in correlazione alla- mancata o inesatta osservanza di tutte le prescrizioni indicate nel manuale di istruzioni allegato all'apparecchio; nelle ipotesi in cui il produttore sia tenuto a rispondere dei danni subiti dall'acquirente, il risarcimento non potrà in ogni caso comportare, a carico di Ugolini s.p.a., un esborso superiore al prezzo versato dall'acquirente per l'acquisto del prodotto. 5. Sono escluse dalla garanzia anche tutte le spese di trasporto. 6. L'intervento di riparazione dell'apparecchio deve essere effettuato presso Ugolini s.p.a., ovvero presso uno dei laboratori autorizzati dalla medesima; le spese di trasporto, ed i rischi ad esso connessi, sono interamente a carico dell'acquirente; ove l'intervento di riparazione sia effettuato a domicilio, l'acquirente sarà tenuto a corrispondere il diritto fisso di chiamata in vigore presso il produttore alla data dell'intervento. 7. Trascorsi dodici mesi dall'acquisto, decade il diritto di garanzia e l'assistenza verrà esplicata addebitando, oltre alle spese di manodopera, anche il costo delle parti sostituite e quelle di trasporto. 8. Sono esclusi la sostituzione dell'apparecchio ed il prolungamento della garanzia a seguito di intervenuto guasto. 9. E' escluso dalla garanzia l'apparecchio la cui targa di identificazione risulti manomessa, asportata o comunque in condizioni tali da non rendere possibile l'identificazione certa dell'apparecchio stesso. 10. Tale garanzia è valida solo nel territorio in cui l'acquirente ha la propria sede legale alla data dell'acquisto dell'apparecchio. Questo apparecchio è coperto da uno o più dei seguenti brevetti e/o altre domande di brevetto depositate: This dispenser is manufactured under one or more of the following U.S.patents and/or other pending patents: Cet appareil est couvert par un ou plusieurs des brevets suivants et/ou autres demandes de brevet déposées: Dieses Gerät ist durch eines oder mehrere der folgenden Patente und/oder andere eingetragene Patentanmeldungen geschützt: Este aparato está cubierto por una o varias de las siguientes patentes y/o otras solicitudes de patente ya registradas: US 2013,0263747 - US 2013,0152620 - US 2013,0098098 - US 2012,0234035 - US 6467,944 - US 5713,214 - US 6546,843 - DE 6010,0684 WO 2012,085692 - WO 2012,032425 - WO 2012,004687 - WO 2013,011078 - EP 2478,774 - EP 1155,622 - EP 0799,575 - EP 1162,168 3 Arctic Deluxe 12-20 3 INSTALLAZIONE 1 CARATTERISTICHE TECNICHE 1/12 1/20 2/12 2/20 3/12 3/20 1 Estrarre il distributore dall’imballo, che è consigliabile conservare per future necessità. 4/12 4/20 Contenitori trasparenti smontabili n 1 2 3 4 Capacità singolo contenitore, circa l 12 20 12 20 12 20 12 20 IMPORTANTE Dimensioni: larghezza cm 18 36 54 72 profondità cm 47 47 47 47 12 lt 20 lt cm 57 67 57 67 57 67 57 67 Peso netto, circa 12 lt 20 lt kg 17 18 23 26 37 42 50 53 Peso lordo, circa 12 lt 20 lt kg 19 20 26 29 40 45 55 56 n 1 2 3 4 altezza Termostati regolabili Nelle operazioni di trasporto o sollevamento, il distributore non deve mai essere afferrato per i contenitori trasparenti o i cilindri evaporatori. Il fabbricante non risponde dei danni provocati dalle suddette errate manovre. 2 Controllare che il distributore non abbia subito danni da trasporto. In caso contrario, provvedere immediatamente ad effettuare il reclamo presso il vettore. Motocompressore ermetico 3 Appoggiare il distributore su un banco in grado di sostenerne il peso, anche a carico completo, tenendo presente quanto detto all’avvertimento IMPORTANTE del precedente punto 1. Condensatore a ventilazione forzata Salvamotore Livello di rumorosità inferiore a 70 dB (A) 4 Lasciare uno spazio libero di almeno 15 cm attorno a tutto il distributore per non ostacolare il flusso d’aria di raffreddamento. IMPORTANTE 5 Controllare la stabilità dell’apparecchio regolando eventualmente i piedini in altezza. Caratteristiche elettriche: leggere i dati riportati sulla targa di ogni singolo distributore; questa è situata nella parte inferiore del pannello frontale, dietro il cassetto raccogligocce di destra. I numeri di matricola degli apparecchi (preceduti dal simbolo #) sono collocati dietro il rubinetto di destra. I dati riportati sulla targa sono sempre quelli a cui fare riferimento. 6 Nel caso di apparecchio dotato di rubinetto a gravità montare il rubinetto facendo riferimento a quanto illustrato al paragrafo 5.3.4 RIMONTAGGIO. 7 Prima di collegare elettricamente il distributore controllare che la tensione di rete sia quella corretta indicata in targa. Collegare il distributore a una rete monofase, servendosi di una presa completa di messa a terra secondo quanto stabilito dalle norme vigenti. Nel caso la disconnessione dell`apparecchio dalla rete elettrica sia affidata ad un interruttore onnipolare, tale interruttore deve garantire una distanza di apertura dei contatti che consenta la disconnessione completa nelle condizioni della categoria di sovratensione III. Non usare prolunghe per collegare elettricamente l'apparecchio. E’ riservato il diritto di modifica senza preavviso. 2 INTRODUZIONE E’ necessario di leggere attentamente questo libretto di istruzioni allo scopo di conoscere tutte le caratteristiche del distributore. Come tutti i prodotti meccanici, anche questo distributore richiede pulizia e cura. Il suo buon funzionamento inoltre può essere compromesso da eventuali errori compiuti dall'operatore durante le fasi di smontaggio e pulizia. Per questo motivo è importante che le procedure di smontaggio, lavaggio, sanitizzazione e rimontaggio, essendo operazioni giornaliere, siano conosciute senza possibilità di errore a chi utilizza il distributore. ATTENZIONE Assicurarsi che l’apparecchio sia correttamente collegato a terra; in caso contrario è possibile causare shock elettrici alle persone o danneggiare il distributore. 8 Il distributore non esce prelavato e sanitizzato dalla fabbrica. Prima dell’uso esso deve essere smontato, lavato e sanitizzato seguendo quanto previsto nelle presenti istruzioni al capitolo 5.3 PULIZIA. IMPORTANTE Posizionare l’apparecchio in maniera tale che la spina del cavo di alimentazione sia facilmente accessibile. 9 L'apparecchio deve essere installato dove possa essere controllato da operatori qualificati ad usarlo. 4 4 PER UN FUNZIONAMENTO SICURO E CORRETTO 6 Il distributore deve sempre funzionare con i coperchi montati al fine di prevenire un’eventuale contaminazione del prodotto. 7 Il distributore deve funzionare ininterrottamente: il gruppo frigorifero si arresterà automaticamente quando il prodotto sarà pronto per la distribuzione. I dispositivi di agitazione continueranno a funzionare. 1 Non usare il distributore prima di aver letto il presente libretto d’istruzioni. 2 Non usare il distributore se non correttamente collegato a terra. 3 Non usare prolunghe per collegare elettricamente il distributore. 4 Non mettere in funzione il distributore se i pannelli non sono al loro posto e bloccati con viti. 5 Non ostacolare il flusso d’aria di raffreddamento; lasciare uno spazio libero di almeno 15 cm attorno a tutto il distributore. 6 Non introdurre dita o oggetti nelle fessure dei pannelli e nell’apertura del rubinetto. 7 Non smontare la vasca, non rimuovere mescolatori o pannelli per pulizia o manutenzione senza assicurarsi che il distributore sia scollegato elettricamente. 8 Per la buona conservazione del prodotto il distributore deve funzionare anche di notte. IMPORTANTE Utilizzare il distributore solamente con prodotti alimentari. Utilizzare il distributore solamente con acqua potabile. IMPORTANTE Questo apparecchio non è fatto per essere utilizzato da bambini o persone con ridotte capacità mentali o sensoriali, o con mancanza di esperienza o sufficiente conoscenza a meno che venga predisposta una supervisione o istruzione sull'uso dell'apparecchio da una persone responsabile della loro sicurezza. I bambini devono essere controllati per evitare che giochino con l'apparecchio. ATTENZIONE Se il cavo di alimentazione è danneggiato, esso deve essere sostituito dal costruttore o dal suo servizio assistenza tecnica o , comunque, da una persona con qualifica similare, in modo da prevenire ogni rischio. 8 Apparecchio non idoneo per il funzionamento all'esterno. 9 Apparecchio non idoneo all'istallazione in zone nelle quali può essere utilizzato un getto d'acqua. 10 Per la pulizia, non utilizzare un getto d'acqua. 11 Per un corretto funzionamento, la temperatura ambiente deve essere compresa tra +5° e +32°C. 12 L’apparecchio deve essere posizionato verticalmente ad una altezza minima di 80cm e massima di 110cm da terra. 13 Utilizzare sempre guanti idonei per la manipolazione degli alimenti. 14 Non utilizzare all’interno dell’apparecchio sostanze esplosive come bombolette spray contenenti un propellente infiammabile . 15 Questo apparecchio è destinato all’utilizzo per applicazioni domestiche e simili. 9 Per spegnere le luci del coperchio è sufficiente ruotarlo di 180°.(vedere figura 1) figura 1 5 ISTRUZIONI PER L’USO 1 Lavare e sanitizzare il distributore prima di utilizzarlo seguendo quanto previsto nelle presenti istruzioni al capitolo 5.3 PULIZIA. 2 Riempire i contenitori con il prodotto desiderato fino e non oltre il livello massimo indicato sulle vasche. La quantità di prodotto nel contenitore (espressa in litri o in galloni) è indicata dagli appositi segni sul contenitore stesso. 3 Nel caso si vogliano distribuire prodotti concentrati da diluirsi con acqua potabile, versare nei contenitori l'acqua aggiungendo in seguito la dovuta quantità di concentrato, secondo le istruzioni del fabbricante. Volendo utilizzare spremute naturali è consigliabile filtrarle onde evitare che le parti solide in esse contenute possano ostruire il passaggio dal rubinetto. 4 Montare i coperchi sopra i contenitori accertandosi che questi siano posizionati correttamente 5 Agire sugli interruttori (vedere capitolo 5.1 DESCRIZIONE DEI COMANDI). 5. 1 DESCRIZIONE DEI COMANDI Il distributore è provvisto di un interruttore generale e, per ogni contenitore, di un interruttore per il comando del relativo dispositivo di agitazione. Le loro funzioni sono le seguenti: Interruttore generale Posizione 0 Posizione I Interruttore agitazione Posizione 0 5 : il distributore è spento. il distributore è abilitato al fun: zionamento. Ventilatore in funzione. : dispositivo di agitazione fermo. Arctic Deluxe 12-20 2 Togliere il contenitore vuoto sollevandolo dal lato rubinetto e sfilandolo dalla guarnizione (vedere figura 2). Posizione I : dispositivo di agitazione in funzione. Per il funzionamento del distributore: 1 Mettere l’interruttore generale in posizione I. 2 Mettere gli interruttori per agitazione in posizione I. 5. 2 SUGGERIMENTI 1 Il tempo necessario per ottenere la refrigerazione del prodotto varia a seconda di diversi fattori quali ad esempio la temperatura ambiente e la temperatura iniziale del prodotto. 2 Rabboccando i contenitori con prodotto già preraffreddato si aumenta ulteriormente l’efficienza del distributore. 3 Per diminuire ulteriormente i tempi di ripristino ed aumentare quindi l’autonomia del distributore, rabboccare le vasche quando il livello del prodotto è sceso a metà. 4 Ogni distributore di questo genere deve emettere calore. Se però tale emissione dovesse sembrare eccessiva, controllare che nessuna fonte di calore venga a trovarsi nei pressi del distributore stesso e, in particolare, in prossimità dei pannelli grigliati. Assicurarsi inoltre che il flusso d’aria non venga ostacolato dalla vicinanza di pareti, scatole o altro. Lasciare almeno 15 cm di spazio libero intorno al distributore. In ogni caso quando il prodotto all’interno dei contenitori è fredda si ha la certezza che tutto funziona regolarmente e che il calore emesso non è dannoso. figura 2 3 Togliere la guarnizione del contenitore. 4 Estrarre la girante pompa dalla sua sede. 5 Rubinetto a gommino: premere (1) la leva comando rubinetto e sfilare (2) il gommino dal foro d’uscita del contenitore (vedere figura 3). 5 Regolazione della temperatura: per eseguire tale operazione, rivolgersi esclusivamente ad un tecnico. La temperatura ottimale della bevanda è stata stabilita e regolata in fabbrica. 6 Per evitare rischi di cadute le parti intorno alla macchina deve essere mantenute asciutte. ATTENZIONE L'accesso alla zona di servizio è limitato alle persone che hanno la sicurezza / igiene conoscenza e la pratica sull'apparecchio. 5. 3 PULIZIA figura 3 6 Rubinetto a gravità: sfilare il pistone e quindi smontare la leva comando rubinetto (vedere figura 4). Pulizia e lavaggio sono fondamentali per garantire la perfetta conservazione del gusto della bevanda e la massima efficienza del vostro distributore. Le procedure descritte nel seguito devono essere considerate di carattere generale e possono variare per effetto della regolamentazione sanitaria vigente. Prima dello smontaggio per il lavaggio il distributore deve essere svuotato del prodotto. 5. 3. 1 SMONTAGGIO ATTENZIONE Prima di procedere allo smontaggio di qualsiasi componente disconnettere sempre elettricamente l’apparecchio togliendo la spina dalla presa o spegnendo l’interruttore esterno a parete. figura 4 1 Togliere il coperchio del contenitore. 7 Sfilare il cassetto raccogligocce e svuotarlo. 6 5. 3. 2 LAVAGGIO 5. 3. 4 RIMONTAGGIO 1 Inserire il cassetto raccogligocce nella sua sede. 2 Rubinetto a gommino: premere (1) la leva comando rubinetto e inserire (2) il gommino rubinetto nel contenitore. Tirare (3) verso il basso l’estremità del gommino fino ad assestarlo completamente (vedere figura 5). IMPORTANTE Non lavare alcun componente della macchina in lavastoviglie. ATTENZIONE Prima di qualsiasi intervento di pulizia disconnettere sempre elettricamente il distributore estraendo la spina dalla presa. 1 Preparare in una bacinella circa otto litri di acqua calda (4560°C) e detersivo specifico rispettando con attenzione le prescrizioni del fabbricante; una soluzione troppo concentrata può infatti causare danni alle parti da lavare, mentre una troppo diluita può non detergere a sufficienza. Non usare detersivi abrasivi. figura 5 IMPORTANTE 3 Rubinetto a gravità: montare la leva di comando rubinetto e quindi infilare il pistone dotato della propria guarnizione (vedere figura 6). Al fine di prevenire danni al distributore utilizzare solo detersivi compatibili con le parti in plastica. 2 Usare una spazzola adatta e lavare accuratamente con la soluzione detergente tutte le parti a contatto con la bevanda. ATTENZIONE Durante il lavaggio del distributore non usare eccessiva quantità di acqua in vicinanza dei componenti elettrici; in caso contrario è possibile causare shock elettrici o danneggiare il distributore. 3 Non immergere nella soluzione di lavaggio i coperchi con luce ma lavarli separatamente. Prestare attenzione al loro lavaggio nella parte inferiore. 4 Risciacquare tutte le parti lavate con acqua corrente. figura 6 5. 3. 3 SANITIZZAZIONE DEL DISTRIBUTORE SMONTATO 4 Rimontare la guarnizione di tenuta del contenitore sull’evaporatore, in modo che la corona di maggior larghezza risulti a contatto con il piano gocciolatoio (vedere figura 7). La sanitizzazione deve essere eseguita immediatamente prima di mettere in funzione il distributore; evitare che questo rimanga inattivo per lungo tempo dopo la sanitizzazione. 1 Prima di iniziare le procedure descritte nel seguito lavarsi le mani con un sapone antibatterico. 2 Preparare in una bacinella circa otto litri di soluzione di acqua calda (45-60°C) e prodotto sanitizzante approvato dalle autorità del vostro paese rispettando le specifiche del produttore. In mancanza di un prodotto sanitizzante specifico, preparare una soluzione di acqua e ipoclorito di sodio (varechina) in proporzione di 1 cucchiaio ogni 2 litri di acqua. 3 Immergere nella soluzione tutte le parti da sanitizzare per il tempo indicato dal fabbricante del prodotto. 4 Fare asciugare all'aria, su una superficie pulita, le parti sanitizzate. 5 Asciugare le parti esterne del distributore senza usare panni abrasivi. figura 7 5 Montare il contenitore sul distributore. Per facilitare l’operazione bagnare con acqua la guarnizione. 7 Arctic Deluxe 12-20 Assicurarsi che il fermo posteriore della vasca risulti inserito nella apposita sede del piano sgocciolatoio. (vedere figura 8) figura 9 figura 8 2 Ogni giorno: controllare il distributore e verificare che non ci siano perdite di prodotto dalle guarnizioni. Se si notano perdite, controllare prima di tutto che il distributore sia correttamente montato, quindi verificare che le guarnizioni non necessitino di lubrificazione e infine che non siano difettose o usurate, in tal caso sostituirle con ricambi originali del fabbricante. 6 Risciacquare con bevanda fresca in modo da eliminare ogni possibile residuo di soluzione sanitizzante dal fondo dei contenitori. Asciugare l'interno dei contenitori con un tovagliolo di carta del tipo “usa e getta”. 5. 4 SANITIZZAZIONE DEL DISTRIBUTORE MONTATO IMPORTANTE Per la manutenzione del prodotto il personale tecnico deve utilizzare guanti che abbiano almeno un grado di classificazione PL 0-4 (EN388). Ogni giorno: La sanitizzazione dell'apparecchio montato, precedente la sua messa in funzione, può essere eseguita, se necessaria, solo come ulteriore precauzione in aggiunta alla sanitizzazione dell'apparecchio smontato descritta in precedenza ma mai in sostituzione di essa. 6. 1 MANUTENZIONE (SOLO A CURA DEL SERVIZIO DI ASSISTENZA) 1 Preparare in una bacinella una soluzione di acqua e prodotto sanitizzante approvato dalle autorità del vostro paese rispettando le specifiche del produttore. In mancanza di un prodotto sanitizzante specifico, preparare una soluzione di acqua e ipoclorito di sodio (varechina) in proporzione di 1 cucchiaio ogni 2 litri di acqua. Ogni mese: eliminare la polvere accumulatasi sul condensatore. Prima di eseguire tale operazione scollegare elettricamente il distributore sfilando la spina dalla presa. Fare attenzione alle alette del condensatore in quanto taglienti. 2 Versare la soluzione nei contenitori. 3 Usando una spazzola adeguata strofinare la soluzione su tutte le parti al di sopra del livello della soluzione e sulla parte inferiore del coperchio. ATTENZIONE 4 Installare il coperchio e fare funzionare il distributore in modo da permettere alla soluzione di agitarsi per circa 2 minuti. L'operatore autorizzato a fare manutenzione deve verificare la corretta posizione dei cavi prima di dare tensione alla macchina dopo aver riposizionato il carter di protezione. (per manutenzione del prodotto). 5 Svuotare i contenitori dalla soluzione sanitizzante attraverso i rubinetti e poi eliminarla. 6 Risciacquare con bevanda fresca in modo da togliere ogni possibile residuo di soluzione sanitizzante dal fondo dei contenitori. Asciugare l'interno dei contenitori con un tovagliolo di carta del tipo “usa e getta”. 7 Non procedere ad ulteriori operazioni di risciacquo. 6 MANUTENZIONE 1 Sostituzione delle lampade del coperchio luminoso (vedere figura 9) : - Togliere le apposite viti poste nella parte superiore del coperchio, - estrarre la parte inferiore e sostituire le lampade (utilizzare lampade da 24-28V 21W max). - Rimontare il coperchio e chiuderlo con le apposite viti. 8 2 Inspect the uncrated unit for any possible damage. If damage is found, call the delivering carrier immediately to file a claim. 1 TECHNICAL CHARACTERISTICS 1/12 1/20 2/12 2/20 3/12 3/20 4/12 4/20 Transparent removable bowls n 1 2 3 4 Capacity of each bowl, approx. l 12 20 12 20 12 20 12 20 3 Install the unit on a counter top that will support the combined weight of dispenser and product bearing in mind what is stated in the preceding point 1 IMPORTANT warning. 4 A minimum of 15 cm (6”) of free air space all around the unit should be allowed to guarantee adequate ventilation. Dimensions: width cm 18 36 54 72 depth cm 47 47 47 47 12 lt 20 lt cm 57 67 57 67 57 67 57 67 Net weight, approx. 12 lt 20 lt kg 17 18 23 26 37 42 50 53 Gross weight, approx. 12 lt 20 lt kg 19 20 26 29 40 45 55 56 n 1 2 3 4 height Adjustable thermostats 5 Ensure that the legs are screwed tightly into the base of the machine. Replace the standard legs originally installed with the 100 mm (4”) legs whenever they are provided with the unit. 6 Before plugging the unit in, check if the voltage is the same as that indicated on the data plate. Plug the unit into a grounded, protected single phase electrical supply according to the applicable electrical codes and the specifications of your machine. The electrical disconnect switch shall have a contact separation in all poles , providing full disconnection under over Hermetic compressor Air-cooled condenser voltage category III conditions. Do not use extension cords. Overload protector Noise level lower than 70 dB (A) ATTENTION Failure to provide proper electrical ground according to applicable electrical codes could result in serious shock hazard. IMPORTANT Read electrical ratings written on the data plate of the individual units; the data plate is adhered on the dispensing side panel of the unit, just behind the drip tray (the right side drip tray in multiple bowl models). The serial number of the unit (preceded by the symbol #) is adhered just below the right bowl. Data plate specifications will always supersede the information in this manual. 7 The unit doesn’t come presanitized from the factory. Before serving products, the dispenser must be disassembled, cleaned and sanitized according to this handbook instructions (chapter 5.3 CLEANING AND SANITAZING PROCEDURES). Specifications are subject to change without notice. 2 INTRODUCTION IMPORTANT Install the dispenser so that the plug is easily accessible. It is necessary to read all sections of this manual thoroughly to familiarize yourself with all aspects of the unit. Like all mechanical products, this machine will require cleaning and maintenance. Besides, dispenser working can be compromised by operator’s mistakes during disassembly and cleaning. It is strongly recommended that personnel in charge of the equipment’s daily operations, disassembly, cleaning, sanitizing and assembly, go through these procedures in order to be properly trained and to make sure that no misunderstandings exist. 8 The appliances shall be installed only in places where qualified people could control them. 4 TO OPERATE PROPERLY AND SAFELY 1 Do not operate the dispenser without reading this operator’s manual. 2 Do not operate the dispenser unless it is properly grounded. 3 INSTALLATION 3 Do not use extension cords to connect the dispenser. 1 Remove the corrugate container and packing materials and keep them for possible future use. 4 Do not operate the dispenser unless all panels are restrained with screws. 5 Do not obstruct air intake and discharge openings: 15 cm (6”) minimum air space all around the dispenser. IMPORTANT 6 Do not put objects or fingers in panels louvers and faucet outlet. When handling the machine never grasp it by the bowls or by the evaporator cylinders. The manufacturer refuses all responsibilities for possible damages which may occur through incorrect handling. 7 Do not remove bowls, augers and panels for cleaning or routine maintenance unless the dispenser is disconnected from 9 Arctic Deluxe 12-20 its power source. ATTENTION In case of damages, the power cord must be replaced by qualified personnel only in order to prevent any shock hazard. 8 This unit is not meant to be used outside. 9 This unit is not to be installed in areas subject to waterspouts.. 10 Do not use water-jets to clean the unit. 11 This unit can work in a room temperature range between +5° and +32°C. 12 The device must be positioned vertically at a height of min. 80cm / max . of 110cm from the floor. 13 Remind to use appropriate gloves during handling and preparation of food. 14 Do not store explosive substances such as aerosol cans with a flammable propellant in this appliance. 15 This appliance is intended to be used in household and similar applications. figure 1 5. 1 DESCRIPTION OF CONTROLS The dispenser is equipped with a power switch and each bowl is operated by a mixing device switch. Their functions are as follows: Power switch 5 OPERATING PROCEDURES 1 Clean and sanitize the unit according to the instructions in this manual. See chapter 5.3 CLEANING AND SANITIZING PROCEDURES. 2 Fill the bowls with product to the maximum level mark. Do not overfill. The exact quantity of product (expressed as liters and gallons) is shown by marks on the bowl. 3 In case of products to be diluted with water, potable water, pour water into bowl first, then add correct quantity of product. In case of natural squashes, it is advisable to strain them, in order to prevent pulps from obstructing the faucet outlet. 4 Install the covers and check that they are correctly placed over the bowls. 5 Set the control switches as shown in chapter 5.1 DESCRIPTION OF CONTROLS. 6 The dispenser must always run with the covers installed to prevent a possible contamination of the product. 7 Always leave the dispenser on, as the refrigeration stops automatically when the beverage reaches the dispensing temperature. The mixing devices will continue to turn. 8 To maintain a high standard of flavour, keep refrigeration and mixing devices on during the night when beverage is in the bowl. 0 position : Power is turned OFF to all functions. I position This position operates the fan motor and makes the mixing : devices suitable to be turned on by relevant switches. Mixing device switch 0 position : OFF. I position : Mixing device runs. To operate the dispenser 1 Set power switch to I position. 2 Set mixing device switch(es) to I position. 5. 2 OPERATION HELPFUL HINTS IMPORTANT 1 The length of time for cooling down the product is governed by many variables, such as ambient temperature and beverage initial temperature. 2 To shorten product cooling down time and increase productivity, it is advisable to pre-chill the product to be used in the dispenser. 3 To shorten product cooling down time and increase productivity, the bowl should be refilled after the product level drops lower than half and at the start of each day. 4 The dispenser must be able to emit heat. In case it seems excessive, check that no heating source is close to the unit and air flow through the slotted panels is not obstructed by wall or boxes. Allow at least 15 cm (6”) of free clearance all around the dispenser. In any case if the product in the bowls is cold the unit is running properly. 5 How to reset beverage temperature:to reset beverage temperature please apply to a technician. The proper temperature is preset at the factory. 6 To avoid the risk of falling, the area around the machine Operate the dispenser with food products only. Fill with potable water. IMPORTANT This appliance is not intended for use by person (including children) with reduced physical sensory or mental capabilities, or lack of experience and knowledge unless they have been given supervision or instruction concerning use of the appliance by a person responsible for their safety. Children should be supervised to ensure that they do not play with the appliance. 9 On machine equipped with lighted top cover turn the cover for 180 degrees to switch light off. (see figure 1) 10 take the pinch tube off from its seat (2) (see figure 3). should remain dry. ATTENTION The access to the service area is restricted to persons having safety/hygiene knowledge and practical experience on the appliance. 5. 3 CLEANING AND SANITIZING PROCEDURES Cleaning and sanitizing of the dispenser are recommended to guarantee the conservation of the best product taste and the highest unit efficiency. This section is a procedural guideline only and is subject to the requirements of the local Health Authorities. figure 3 Prior to the disassembly and cleaning, the machine must be emptied of product. 6 Gravity faucet: extract the piston and then remove the dispensing handle (see figure 4). 5. 3. 1 DISASSEMBLY ATTENTION Before any disassembly and/or cleaning procedure make sure that the dispenser is disconnected from its power source by unplugging it. 1 Remove cover from the bowl. 2 Remove the empty bowl by lifting pulling lever (1) and its front side (faucet side) up and off bowl gasket (see figure 2). figure 4 7 Slide drip tray out and empty it. 5. 3. 2 CLEANING IMPORTANT Do not attempt to wash any machine components in a dishwasher. ATTENTION figure 2 Before any disassembly and/or cleaning procedure make sure that the dispenser is disconnected from its power source. 3 Remove the bowl gasket. 4 Remove the pump impeller from its location. 1 Prepare at least two gallons of a mild cleaning solution of warm (45-60 °C 120-140 °F) potable water and dishwashing 5 Pinch tube faucet: push the dispensing handle (1) and 11 Arctic Deluxe 12-20 (3) (see figure 5). detergent. Do not use abrasive detergent. Important: if present, follow label directions, as a too strong solution can cause parts damage, while a too mild solution will not provide adequate cleaning. IMPORTANT In order to prevent any damages to the dispenser use only a detergent suitable with plastic parts. 2 Using a brush, suitable for the purpose, thoroughly clean all disassembled parts in the cleaning solution. ATTENTION figure 5 When cleaning the machine, do not allow excessive amounts of water around the electrically operated components of the unit. Electrical shock or damage to the machine may result. 3 Gravity faucet: install the faucet handle and the piston with its gasket (see figure 6). 3 Do not immerge the lighted top covers in liquid. Wash them apart with the cleaning solution. Carefully clean their undersides. 4 In the same manner clean the evaporator plates using a soft bristle brush. 5 Rinse all cleaned parts with cool clean water. 5. 3. 3 SANITIZING Sanitizing should be performed immediately prior to starting the machine. Do not allow the unit to sit for extended periods of time after sanitization. figure 6 1 Wash hands with a suitable antibacterial soap. 2 Prepare at least two gallons of a warm (45-60 °C 120140 °F) sanitizing solution (100 PPM available chlorine concentration or 1 spoon of sodium hypoclorite diluted with two litres of water) according to your local Health Codes and manufacturer’s specifications. 4 Fit the bowl gasket to the evaporator. Note: the larger brim of the gasket must face against the drip plate (see figure 7). 3 Place the parts in the sanitizing solution for five minutes. 4 Do not immerse the lighted top covers in liquid. Carefully wash their undersides with the sanitizing solution. 5 Place the sanitized parts on a clean dry surface to air dry. 6 Wipe clean all exterior surfaces of the unit. Do not use abrasive cleaner. 5. 3. 4 ASSEMBLY figure 7 1 Slide the drip tray into place. 5 Place bowl on the unit. Wet the gasket for ease of insertion. 2 Pinch tube faucet: push the dispensing handle (1) and insert the pinch tube into its vertical seat in the bowl bottom(2). Lightly pull the pinch tube end downwards til itl is well arranged Please take care that the hook on the backside of the bowl be inserted properly in its seat on the upper drip plate. (see figure 12 2 Daily: inspect the machine for signs of product leaks past seals and gaskets. If proper assembly does not stop leaks around seals or gaskets, check for improper lubrication, worn or damaged parts. Replace parts as needed with original spare parts from the supplier. 8). IMPORTANT Use gloves of a minimum PL 0-4 class (EN388). 6. 1 MAINTENANCE (TO BE CARRIED OUT BY QUALIFIED SERVICE PERSONNEL ONLY) Montly: clean all internal components, primarily the condenser, using compressed air, in order to remove dust. To clean these internal parts, unplug the unit. Condenser fins are very sharp. Use extreme caution when cleaning. figure 8 6 Use fresh product to chase any remaining sanitizer from the bowl(s). Drain this solution. Do not rinse out the machine. 5. 4 IN-PLACE SANITIZATION ATTENTION Verify the correct position of the cable before closing the cabinet and before supplying electricity. Daily: The In-Place Sanitization prior to starting the machine may be performed, if needed, only as further precaution, in addition to the Disassembled Parts Sanitization described before, but never in lieu of it. 1 Prepare two gallons of a warm (45-60°C, 120-140 °F) sanitizing solution (100 PPM available chlorine concentration or 1 spoon of sodium hypoclorite diluted with two litres of water) according to your local Health Codes and manufacturer’s specifications. 2 Pour the solution into the bowl(s). 3 Using a brush suitable for the purpose, wipe the solution on all surfaces protruding above the solution-level and on the underside of the top cover(s). 4 Install the top cover(s) and operate the unit. Allow the solution to agitate for about two minutes. Drain the solution out of the bowl(s). 5 Use fresh product to chase any remaining sanitizer from the bowl(s). Drain this solution. Do not rinse out the machine. 6 ROUTINE MAINTENANCE 1 Replacement of lighted top cover bulbs (see figure 9) : - Remove the fixing screws placed in the upper part of the top cover, - remove the lower part and replace the bulbs (using a 2428V 21W max bulbs). - Reassemble the top cover and replace the fixing screws. figure 9 13 Arctic Deluxe 12-20 1 CARACTERISTIQUES TECHNIQUES 1/12 1/20 2/12 2/20 3/12 3/20 4/12 4/20 Réservoirs transparents démontables n 1 2 3 4 Capacité chaque réservoir, environ l 12 20 12 20 12 20 12 20 cm 18 36 54 72 2 Contrôler que le distributeur n'eit pas été endommagé pendant le transport. Si c'est le cas, faire immédiatement une réclamation au transporteur. 3 Placer le distributeur sur un comptoir en mesure d'en supporter le poids, y compris à pleine charge, en tenant compte de ce qui a été dit dans l'avertissement IMPORTANT du point 1 précédent. 4 Laisser un espace libre d'au moins 15 cm autour du distributeur pour ne pas empêcher le passage du flux d'air de refroidissement. 5 Contrôler la stabilité de l'appareil en réglant éventuellement les pieds en hauteur. 6 Robinet en inox à gravité. Monter le robinet en suivant les avertissements du paragraphe 5.3.4. REMONTAGE. 7 Avant de brancher le distributeur à l'électricité, contrôler que la tension de réseau est la même que celle indiquée sur la plaque. Brancher le distributeur à un réseau monophasé, en utilisant une prise avec mise à la terre conformément aux normes en vigueur. En cas d’utilisation d’un interrupteur unipolaire pour couper l’alimentation électrique de l’appareil, celui-ci doit garantir le respect d’une distance d’ouverture des contacts permettant un débranchement intégral dans des conditions de surtension de catégorie III. Ne pas utiliser de rallonges pour brancher électriquement l'appareil. Dimensions: largeur profondeur cm 47 47 47 47 12 lt 20 lt cm 57 67 57 67 57 67 57 67 Poids net, environ 12 lt 20 lt kg 17 18 23 26 37 42 50 53 Poids brut, environ 12 lt 20 lt kg 19 20 26 29 40 45 55 56 n 1 2 3 4 hauteur Thermostats réglables Motocompresseur hermétique Condenseur à ventilation mécanique Protège-moteur ATTENTION Niveau de bruit inférieur à 70 dB (A) S'assurer que l'appareil soit correctement branché à la terre; en cas contraire, il y a des risques d'électrocution pour les personnes et d'endommagement pour le distributeur. IMPORTANT 8 Quand le distributeur sort de l'usine, il n'est ni prélavé, ni désinfecté. Avant de l'utiliser, il faut le démonter, le laver et le désinfecter en suivant les instructions fournies dans ce carnet au chapitre 5.3 NETTOYAGE. 9 Installer l’appareil là où il peut être contrôlé et utilisé exclusivement par un personnel qualifié. Caractéristiques électriques: lire les données reportées sur la plaque de chacun des distributeurs; celle-ci est située dans la partie inférieure du panneau frontal, derrière le tiroir égouttoir de droite. Les numéros de matricule des appareils (précédés du symbole #) sont placés derière le robinet de droit. Les données reportées sur la plaque sont toujours celles auxquelles il faut se référer. 4 POUR UN FONCTIONNEMENT CORRECT ETSANS DANGER Nous nous réservons le droit d'apporter des modifications sans préavis. 2 INTRODUCTION 1 Ne pas utiliser le distributeur avant d'avoir lu ce carnet d'instructions. 2 Ne pas utiliser le distributeur s'il n'est pas branché correctement à la terre. 3 Ne pas utiliser de rallonges pour brancher électriquement le distributeur. 4 Ne pas mettre le distributeur en fonction si les panneaux ne sont pas à leur place et bloqués avec des vis. 5 Ne pas faire obstacle au flux d'air de refroidissement; laisser un espace libre d'au moins 15 cm autour du distributeur. 6 Ne pas introduire les doigts ou des objets dans les fissures des panneaux et dans l'ouverture du robinet. 7 Ne pas démonter le réservoir, ni enlever les mélangeurs ou les panneaux pour le nettoyage ou l'entretien sans s'être assuré que le distributeur est débranché de l'électricité. 8 L'appareil n'est pas indiqué pour l'installation à l'extérieur. 9 N'installez pas l'appareil en zones sujets à jets d'eau. 10 Ne pas employer des jets d'eau pour le nettoyage de l'appareil. 11 La température ambiante adapte pour le bon fonctionnement de l'appareil est entre +5° et +32°C. Il est nécéssaire de lire attentivement ce carnet d'instructions afin de connaître toutes les caractéristiques du distributeur. Comme tous les produits mécaniques, ce distributeur a besoin d'être nettoyé et entretenu. Son bon fonctionnement peut être compromis par d'éventuelles erreurs commises par l'opérateur pendant les phases de démontage et de nettoyage. Il est donc important que les procédures de démontage, lavage, d é s in f ec t i o n e t r e m o nt ag e , q u i s o nt d e s o p é r a t i o n s quotidiennes, soient connues sans possibilité d'erreur par tout le personnel chargé du distributeur. 3 INSTALLATION 1 Sortir le distributeur de son emballage et garder celui-ci pour toute nécessité future. IMPORTANT ATTENTION Pendant les opérations de transport ou de soulèvement, le distributeur ne doit jamais être saisi par les réservoirs transparents ou par les cylindres évaporateurs. Le fabricant ne répond pas des dommages provoqués par ce genre de manoeuvre erronée. Si le câble est endommagé, il doit être remplacé par le fabricant ou par son service technique ou de toute façon par du personnel qualifié pour éviter tout risque. 14 12 L’appareil doit être positionné verticalement à une hauteur de 80 cm minimum et 110 cm maximum au dessus du sol. 13 Toujours mettre des gants pour manipules les aliments. 14 Ne pas entreposer dans cet appareil de substances explosives, comme des aérosols contenant du gaz propulseur inflammable. 15 Cet appareil est conçu pour être utilisé dans le cadre d’applications domestiques et similaires. 5. 1 DESCRIPTION DES COMMANDES Le distributeur est équipé d'un interrupteur général et, pour chaque réservoir, d’un interrupteur pour le dispositif de mélange. Leurs fonctions sont les suivantes: 5 MODE D'EMPLOI Interrupteur général 1 Laver et désinfecter le distributeur avant de l'utiliser en suivant les instructions fournies dans ce carnet au chapitre 5.3 NETTOYAGE. 2 Remplir les réservoirs avec le produit choisi sans dépasser le niveau maximum indiqué sur les réservoirs. La quantité de produit dans le réservoir (exprimée en litres ou en gallons) est indiquée par les repères se trouvant sur le réservoir. 3 Si l'on désire distribuer des produits concentrés à diluer avec de l'eau, il faut verser l'eau dans les réservoirs et ajouter la quantité nécessaire de concentré en suivant les instructions du fabricant. Si l'on veut utiliser des jus de fruits pressés, il est conseillé de les filtrer afin d'éviter que les parties solides qu'ils contiennent puissent boucher le passage du robinet. 4 Monter les couvercles sur les réservoirs en s'assurant que ceux-ci sont positionnés correctement. 5 Agir sur les interrupteurs (voir chapitre 5.1 DESCRIPTION DES COMMANDES). 6 Le distributeur doit toujours fonctionner avec les couvercles montés afin d'éviter une éventuelle contamination du produit. 7 Le distributeur doit fonctionner sans interruption: le groupe frigorifique s'arrête automatiquement quand le produit est prêt. Les dispositifs de mélange continuent à fonctionner. 8 Pour garantir une bonne conservation de la boisson, le distributeur doit fonctionner également pendant la nuit. Position 0 : Le distributeur est éteint. Position I : Le distributeur peut fonctionner. Ventilateur en marche. Interrupteur de mélange Position 0 : Le dispositif de mélange est arrêté. Position I : Le dispositif de mélange est en marche. Pour le fonctionnement du distributeur: 1 Placer l'interrupteur général en position I. 2 Placer les interrupteurs de mélangel en position I. IMPORTANT Utiliser l’appareil seulement avec des produits alimentaires. N’utiliser l’appareil qu’avec de l’eau potable. 5. 2 SUGGESTIONS 1 Le temps nécessaire pour obtenir la réfrigération du produit varie en fonction de différents facteurs comme par exemple la température ambiante et la température initiale du produit. 2 L’efficacité du distributeur peut être augmentée en versant dans les réservoirs du produit pré-rafroidi. 3 Pour diminuer encore les temps de rafroidissement et augmenter ainsi l'autonomie du distributeur, rajouter du produit dans les réservoirs quand le niveau est descendu à la moitié. 4 Chaque distributeur de ce genre doit émettre de la chaleur. Cependant, si cette émission semble excessive, il faut contrôler qu'aucune source de chaleur ne se trouve près du distributeur et, en particulier, près des panneaux munis de grilles. S'assurer également que le passage du flux d'air ne soit pas empêché par la proximité de murs, boîtes ou autres. Laisser au moins 15 cm d'espace libre autour du distributeur. Dans tous les cas, quand le produit à l'intérieur des réservoirs est froid, on peut être certains que tout fonctionne normalement et que la chaleur émise ne crée pas de dommages. 5 Réglage de la température: pour cette opération s’adresser à un technicien. La température optimale de la boisson a été établie en usine. 6 Pour éviter tout risque de chute, la zone autour de la machine doit rester sèche. IMPORTANT L'appareil ne doit pas être utilisé par des enfants ou par toute personne ayant un déficit mental ou sensoriel, ou qui n'a pas l'expérience et la connaissance requise, sauf si une surveillance ou une formation complémentaire sur l'utilisation de l'appareil est donnée par la personne responsable de sa sécurité. Les enfant doivent être surveillés afin qu'ils ne puissent pas jouer avec l'appareil. 9 Tournez le couvercle de 180° pour l'éteindre. (voir figure 1) ATTENTION L’accès à la zone de service est exclusivement réservé aux personnes formées aux règles de sécurité/d’hygiène et à l’utilisation de l’appareil. figure 1 15 Arctic Deluxe 12-20 5. 3 NETTOYAGE 6 Robinet en inox à gravité: défiler le piston et démonter le levier de débit robinet (voir figure 4). Le nettoyage et le lavage sont fondamentaux pour garantir la parfaite conservation du goût de la boisson et l'efficacité maximale de votre distributeur. Les procédures décrites ciaprès doivent être considérées comme étant de caractère général et elles peuvent varier en fonction de la réglementation sanitaire en vigueur. Avant d'être démonté pour le lavage, le distributeur doit être vidé du produit. 5. 3. 1 DEMONTAGE figure 4 ATTENTION 7 Faire glisser le tiroir égouttoir et le vider. Avant toute intervention de demontage, débrancher toujours électriquement le distributeur en retirant la fiche de la prise. 5. 3. 2 LAVAGE 1 Enlever le couvercle du réservoir. 2 Enlever le réservoir vide en le levant du côte antérieur et en le défilant de son joint (voir figure 2). IMPORTANT Aucun composant de l’appareil ne peut être lavé dans la lave-vaisselle. ATTENTION Avant toute intervention de nettoyage, débrancher toujours électriquement le distributeur en retirant la fiche de la prise. 1 Préparer une bassine d'environ huit litres d'eau chaude (4560°C) et de détergent spécifique en respectant soigneusement les indications fournies par le fabricant; une solution trop concentrée peut en effet endommager les pièces à laver tandis que trop diluée elle risque de ne pas les nettoyer suffisamment figure 2 3 Enlever le joint du réservoir. 4 Enlever la turbine de la pompe de son siège. bien. Ne pas utiliser de détergents abrasifs. 5 Robinet avec tube en cautchou: pousser (1) le levier de débit robinet et défiler (2) le tuyau robinet de son siège sur le fond du réservoir (voir figure 3). IMPORTANT Afin d'éviter d'endommager le distributeur utiliser uniquement un détergent compatible avec les piéces en plastique. 2 Utiliser une brosse adéquate et laver soigneusement avec la solution détergente toutes les pièces qui sont en contact avec la boisson. ATTENTION Pendant le lavage du distributeur, il ne faut pas utiliser une quantité excessive d'eau en proximité des composants électriques; cela pourrait en effet entraîner des risques d'électrocution et d'endommagement du distributeur. figure 3 16 3 Ne pas immerger dans la solution de lavage les couvercles avec éclairage mais les laver séparément. Faire attention au lavage de leur partie inférieure. 4 Rincer toutes les pièces lavées à l'eau courante. 4 Replacer le joint du réservoir sur l’évaporateur, en laissant la couronne plus épaisse en contact avec le plan égouttoir (voir figure 7). 5. 3. 3 DESINFECTION DU DISTRIBUTEUR DEMONTE La désinfection doit être exécutée immédiatement avant de mettre le distributeur en fonction. Il faut éviter que celui-ci ne fonctionne pas, pour une longue période après avoir été désinfecté. 1 Avant de débuter les procédures décrites ci-après, se laver les mains avec un savon antibactérien. 2 Préparer dans une bassine environ huit litres de solution d'eau chaude (45-60°C) et de produit désinfectant, approuvé par les autorités de votre Pays, en respectant les indications du producteur. En l'absence d'un produit désinfectant spécifique, préparer une solution d'eau et d'hypochlorite de sodium (eau de javel) avec une proportion d'une cuillère tous les 2 litres d'eau. 3 Immerger toutes les pièces à désinfecter dans la solution pour la durée indiquée par le fabricant du produit. 4 Laisser sécher à l'air, sur une surface propre, les pièces désinfectées. 5 Essuyer les parties externes du distributeur sans utiliser de chiffons abrasifs. 5. 3. 4 figure 7 5 Placer le réservoir sur l’appareil. Pour faciliter cette opération, mouiller avec de l’eau le joint du réservoir. Veuillez contrôler que le crochet sur le coté postérieur de la cuve est bien placé dans son siège sur l'égouttoir supérieur. (voir figure 8). REMONTAGE figure 8 1 Introduire le tiroir égouttoir à sa place. 2 Robinet avec tube en cautchouc: Pousser (1) le levier de débit robinet et enfiler (2) le tuyau du robinet dans son siège sur le fond du réservoir. Tirer (3) doucement le tuyau vers le bas jusqu’à le bien placer (voir figure 5). 6 Rincer avec de l'eau fraîche de manière à éliminer tout résidu de solution désinfectante du fond des réservoirs. Essuyer l'intérieur des réservoirs avec une serviette en papier jetable. 5. 4 DESINFECTION DU DISTRIBUTEUR MONTE Quotidiennement: La désinfection de l'appareil monté, avant sa mise en fonction, peut être exécutée, si nécessaire, uniquement comme précaution supplémentaire, en plus de la désinfection de l'appareil démonté décrite précédemment. Elle ne peut jamais la remplacer. 1 Préparer dans une bassine une solution d'eau et de produit désinfectant, approuvé par les autorités de votre Pays, en respectant les indications du producteur. En l'absence d'un produit désinfectant spécifique, préparer une solution d'eau et d'hypochlorite de sodium (eau de javel) avec une proportion d'une cuillère tous les 2 litres d'eau. 2 Verser la solution dans les réservoirs. 3 A l'aide d'une brosse adéquate, frotter la solution sur toutes les parties au-dessus du niveau de la solution et sur la partie inférieure du couvercle. 4 Installer le couvercle et faire fonctionner le distributeur de manière à permettre à la solution d'être agitée pendant environ 2 minutes. 5 Vider la solution désinfectante des réservoirs par les robinets, et apres, la jetes. 6 Rincer avec de l'eau fraîche de manière à enlever tout résidu de solution désinfectante du fond des réservoirs. Essuyer l'intérieur des réservoirs avec une serviette en papier jetable. 7 Ne pas procéder à d'autres opérations de rinçage. figure 5 3 Robinet en inox à gravité: monter le levier de débit robinet et enfiler le piston avec son joint (voir figure 6). 6 ENTRETIEN 1 Substitution des ampoules du couvercle lumineux (voir figure 9) : - Enlever les vis placées dans la partie supérieure du couvercle, - Sortir la partie inférieure et remplacer les ampoules (utiliser figure 6 17 Arctic Deluxe 12-20 ampoules de 24-28V 21W max). - Remonter le couvercle et le fermer avec les vis. figure 9 2 Quotidiennement: contrôler le distributeur et vérifier qu'il n'y a pas de fuites de produit au niveau des joints. En cas de fuites, contrôler avant tout que le distributeur est monté correctement, puis vérifier que les joints n'ont pas besoin d'être lubrifiés et enfin qu'ils ne sont pas défectueux ou usés. Si c'est le cas, les remplacer par des pièces de rechange originales du fabricant. IMPORTANT Pour l’entretien du produit, le personnel technique doit utiliser des gants ayant un degré de classification au moins égal à PL 0-4 (EN388). 6. 1 ENTRETIEN (A EFFECTUER UNIQUEMENT PAR LE SERVICE D'ASSISTANCE) Mensuellement: éliminer la poussière qui s'accumule sur le filtre du condenseur. Avant de procéder à cette opération, débrancher électriquement le distributeur en enlevant la fiche de la prise. Faire attention aux ailettes du condenseur car elles sont affilées. ATTENTION Vérifier que les câbles sont correctement installés avant de mettre la machine sous tension et après avoir repositionné le carter de sécurité (pour l’entretien du produit). 18 2 Das Gerät auf eventuelle Transportschäden überprüfen. Alle Schäden unverzüglich beim Speditionsunternehmen reklamieren. 3 Den Dispenser auf eine Theke stellen, die das Gewicht auch bei kompletter Füllung sicher trägt. Dabei die unter WICHTIG im vorangegangenen Abschnitt 1 gegebenen Hinweise beachten. 4 Auf allen Seiten des Dispensers einen Raum von mindestens 15 cm freilassen, um den Kühlluftstrom nicht zu behindern. 5 Die Stabilität des Geräts überpüfen. 6 Bei einem mit einem Fallhahn versehenen Dispenser den Hahn unter Bezugnahme der Abbildungen in Abschnitt 5. 3. 4 MONTAGE befestigen. 7 Vor dem Anschluß des Dispensers an die Stromversorgung sicherstellen, daß die Netzspannung mit der Angabe auf dem Typenschild übereinstimmt. Das Gerät unter Verwendung einer nach den örtlichen Sicherheitsnormen geerdeten Steckdose an ein Einphasennetz anschließen. Sollte das Trennen des Geräts von der Stromversorgung über einen allpoligen Schalter erfolgen, muss dieser Schalter einen Öffnungsabstand der Kontakte garantieren, der die vollständige Unterbrechung zu den Bedingungen der Überspannungskategorie III gestattet. Für den elektrischen Anschluß des Geräts keine Verlängerungskabel verwenden. 1 TECHNISCHE DATEN Abnehmbare Klarsicht-Behälter Fassungsvermögen Einzelbehälter, ungefähr Abmessungen: Breite Tiefe Höhe 12 lt 20 lt Nettogewicht, ca 12 lt 20 lt Bruttogewicht, ca 12 lt 20 lt Einstellbare Thermostaten Hermetisches Kompressoraggregat Kondensator mit Zwangsbelüftung Motorschutzschalter Geräuschpegel unter 70 db (A) stück l cm cm cm kg kg stück 1/12 2/12 3/12 4/12 1/20 2/20 3/20 4/20 1 2 3 4 12 12 12 12 20 20 20 20 18 47 57 67 17 18 19 20 1 36 47 57 67 23 26 26 29 2 54 47 57 67 37 42 40 45 3 72 47 57 67 50 53 55 56 4 WICHTIG Elektrische Merkmale: Die Angaben auf dem Typenschild jedes einzelnen Dispensers lesen; das Typenschild ist im unteren Teil der Vorderwand, hinter der rechten Tropfschale angebracht. Die Seriennummern der Geräte (denen das Symbol # vorangeht) befinden sich auf der Hinterseite des rechten Hahns. Es muß immer auf die Angaben auf dem Typenschild Bezug genommen werden. ACHTUNG Sicherstellen, daß das Gerät korrekt geerdet ist; anderenfalls könnten Personen elektrische Schläge erleiden oder der Dispenser Schaden nehmen. Alle Änderungsrechte sind ohne vorherige Benachrichtigung vorbehalten. 8 Das Gerät wird im Werk nicht gewaschen und desinfiziert, bevor es geliefert wird. Es muß daher vor der Inbetriebnahme gemäß den Anleitungen im Kapitel 5. 3 REINIGUNG auseinander genommen, gewaschen und desinfiziert werden. 2 EINFÜHRUNG Es ist nötif, diese Bedienungsanleitung sorgfältig zu lesen, um sich mit allen Eigenschaften des Dispensers vertraut zu machen. Wie alle mechanischen Produkte, benötigt auch dieser Dispenser Reinigung und Pflege. Seine einwandfreie Arbeitsweise kann außerdem durch eventuelle Fehler des Bedieners bei der Demontage und Reinigung beeinträchtigt werden. Es ist daher wichtig, daß die Demontage-und Waschvorgänge, sowie die Hygienemaßnahmen und die erneute Montage, die täglich vorzunehmen sind, dem gesamten, für den Dispenser Personal ohne Fehlermöglichkeiten bekannt sind. WICHTIG Stellen Sie den Dispenser so auf, dass der Stecker leicht zugänglich ist. 9 Wenn Sie das Gerät für längere Zeit nicht nutzen sollten: Reinigen / desinfizieren Sie das Gerät und entfernen sie den Netzstecker. 4 SICHERHEITSMAßNAHMEN 1 Den Dispenser nicht verwenden, bevor diese Gebrauchsanleitung gelesen wurde. 2 Den Dispenser nicht verwenden, wenn er nicht korrekt geerdet ist. 3 Für den elektrischen Anschluß des Dispensers keine Verlängerungskabel verwenden. 4 Den Dispenser nicht in Betrieb nehmen, wenn die Wände nicht angebracht und mit Schrauben befestigt sind. 5 Den Kühlluftstrom nicht behindern; rund um den Dispenser einen Freiraum von mindestens 15 cm lassen. 6 Weder die Finger noch Gegenstände in die Schlitze der Wände oder in die Öffnung des Hahns stecken. 7 Zur Durchführung von Reinigungs-oder Wartungsmaßnahmen, den Behälter nicht abmontieren, 3 INSTALLATION 1 Den Dispenser aus seiner Verpackung nehmen. Die Verpackung für eventuellen späteren Bedarf aufbewahren. WICHTIG Beim Transport oder Heben, darf der Dispenser in keinem Fall an den Klarsicht-Behältern oder an den Verdampferzylindern angefaßt werden. Der Hersteller haftet nicht für Schäden, die durch die o.a. unsachgemäße Handhabung entstehen. 19 Arctic Deluxe 12-20 Schnecken oder Wände nicht entfernen, bevor die Stromversorgung des Geräts unterbrochen wurde. WICHTIG Dieses Gerät ist nicht für den Gebrauch von Personen, insbesondere Kindern, mit eingeschränkten physischen oder mentalen Fähigkeiten bestimmt. Ausserdem sollte das Gerät nicht mit einem Mangel an Erfahrung oder Verständnis bedient werden, bevor nicht eine Einweisung von einem Fachmann erfolgt ist. Es ist sicherzustellen, dass Kinder nicht unbeaufsichtigt in die Nähe der Maschine gelangen. ACHTUNG Sollte dieser beschädigt sein, muß das Stromkabel ausgetauscht werden, um der Gefahr eines Stromschlages vorzubeugen. Dieser Austausch darf nur vonqualifizierten Fachleuten ausgeführt werden. 9 Drehen Sie den Behälterdeckel um 180°, um das Licht auszuschalten.(Bild 1) 8 Das Gerät muss vertikal in einer Höhe von mindestens positioniert werden. 80cm / max. von 110cm aus dem Boden. 9 Dieses Gerät darf nicht in Bereichen aufgestellt werden, in denen Wassertropfen seien können. 10 Nicht mit einem Dampfstrahler reinigen. 11 Dieses Gerät kann bei Raumtemperaturen zwischen +5° und +32°C betrieben werden. 12 Das Gerät darf nur in Bereichen aufgestellt werden, in denen qualifizierte Personen es kontrollieren können. 13 Bei der Handhabe und Zubereitung von Lebensmitteln müssen adäquate Handschuhe getragen werden. 14 Keine explosive Substanzen wie Aerosoldosen mit entzündlichem Treibmittel in diesem Gerät verwenden. 15 Diese Gerät ist für die Verwendung im Haushalt oder ähnliche Verwendungszwecke bestimmt. Bild 1 5 GEBRAUCHSANLEITUNGEN Kapitel 5.3 REINIGUNG waschen und desinfizieren. 5. 1 BESCHREIBUNG DER BETRIEBSSCHALTER 2 Den Behälter bis und nicht über den angegebenen maximalen Stand mit dem gewünschten Produkt füllen. Der genaue Füllstand ist durch Markierungen auf dem Behälter in Litern oder Gallonen angezeigt. Der Dispenser ist mit einem Hauptschalter und für jeden Behälter mit einem Schalter für die Betätigung des jeweiligen Rührwerks versehen. Ihre Funktionen sind folgende: 1 Den Dispenser vor Gebrauch gemäß den Anleitungen in 3 Falls die Abgabe von konzentrierten Produkten gewünscht wird, trink-wasser, die mit Wasser zu verdünnen sind, das Wasser in den Behälter schütten und anschließend die gemäß den Anweisungen des Herstellers erforderliche Menge des konzentrierten Produkts hinzufügen. Natürliche, frisch gepreßte Säfte sollten gefiltert werden, um zu vermeiden, daß die im Saft enthaltenen festen Teile den Abfluß aus dem Hahn behindern. Hauptschalter 4 Die Deckel auf den Behälter setzen und die ordnungsgemäße Stellung der Behälter sicherstellen. Stellung 0 : Dispenser ausgeschaltet. Stellung I Dispenser betriebsbereit. Lüfter : läuft. Rührwerkschalter 5 Die Schalter betätigen (siehe Kapitel 5. 1 BESCHREIBUNG DER BETRIEBSSCHALTER). Stellung 0 : Rührwerk außer Betrieb. 6 Der Dispenser muß immer mit montierten Deckeln betrieben werden, um der eventuellen Verschmutzung des Produkts vorzubeugen. Stellung I : Rührwerk in Betrieb. 7 Der Dispenser muß ununterbrochen funktionieren: Das Kühlaggregat schaltet automatisch ab, sobald das Produkt abgabefertig ist. Die Rührwerke bleiben in Betrieb. Inbetriebnahme des Dispensers: 1 Den Hauptschalter auf Stellung I stellen. 2 Die Rührwerkschalter auf Stellung I stellen. 8 Zur guten Konservierung des Produkts, muß der Dispenser auch in der Nacht funktionieren. 5. 2 NÜTZLICHE HINWEISE WÄHREND DES GEBRAUCHS WICHTIG 1 Die zur Kühlung des Produkts erforderliche Zeit variiert in Funktion verschiedener Faktoren wie zum Beispiel die Umgebungstemperatur, die anfängliche Temperatur des Produkts, sein Zuckergehalt (Brix-Grad) und die Einstellung der Konsistenz. Betreiben Sie den Dispenser ausschließlich mit Lebensmitteln. Füllen Sie den Behälter mit Trinkwasser. 20 2 Die Auffüllung des Behälters mit schon vorgekühltem Produkt bewirkt eine Erhöhung der Leistungsfähigkeit des Dispensers. 3 Zur weiteren Herabsetzung der Nachfüllzeiten, die Behälter auffüllen, sobald der Produktstand auf die Hälfte den Behälter gesunken ist. 4 Der Dispenser ist mit einer Magnetkupplung für die Übertragung der Bewegung zu den Schnecken versehen. Zur Vorbeugung von Beschädigungen des Geräts, bewirkt die Magnetkupplung im Fall der Blockierung der Schnecken durch Eisklumpen oder andere Hindernisse im Inneren des Behälters, automatisch die Unterbrechung der Bewegungsübertragung. Diese Situation ist außer an der Blockierung der Schnecken a u c h d ar an e r k en n ba r , da ß d a s G e r ä t e i n z ei t w ei l ig aussetzendes Geräusch abgibt. In diesem Fall den Dispenser sofort anhalten, den betroffenen Behälter entleeren und die Ursache der Blockierung beseitigen. 5 Temperatureinstellung: Wenden Sie sich dazu ausschließlich an einen Fachmann. Die optimale Getränketemperatur wurde werkseitig eingestellt. 6 Das Gerät darf nicht in Bereichen eigesetzt werden, in denen es mit Spritzwasser in Berührung kommen könnte. des Behälters lösen (2) (Bild 3). Bild 3 5 Schwerkraftsventil: den Kolben herausziehen und danach den Betätigungshebel des Ventils abmontieren (Bild 4). ACHTUNG Der Zugang zum Servicebereich ist auf Personen beschränkt, die Kenntnisse in Bezug auf Sicherheit und Hygiene besitzen und praktische Erfahrung mit dem Gerät haben. 5. 3 REINIGUNG Reinigen und Waschen des Geräts sind grundlegende Maßnahmen zur perfekten Erhaltung des Geschmacks der Getränke und der maximalen Leistunsfähigkeit Ihres Dispensers. Die im folgenden beschriebenen Verfahren sind allgemeiner Natur und können sich in Funktion der jeweils gültigen Gesundheitsvorschriften ändern. Bevor der Dispenser zur Reinigung auseinander genommen wird, müssen die Behälter entleert werden. 5. 3. 1 DEMONTAGE Bild 4 6 Die Tropfschale herausziehen und entleeren. 5. 3. 2 WASCHEN ACHTUNG Vor der Demontage jeder beliebigen Komponente, immer die Stromversorgung des Geräts unterbrechen. Dazu den Netzstecker ziehen. WICHTIG 1 Den Deckel vom Behälter abnehmen. 2 Leeren Behälter lösen durch Anheben an der Rückseite (gegenüber der Ausgabe) und nach oben abheden (Bild 2). Keine Teile des Gerätes in der Geschirrspülmachine waschen. ACHTUNG Vor jeder Reinigungsarbeit immer die Stromversorgung des Geräts unterbrechen. Dazu den Netzstecker ziehen. 1 Eine Schüssel mit ungefähr acht Liter heißem Wasser (4560°C) füllen und unter Beachtung der Vorschriften des Herstellers spezielles Reinigungsmittel hinzufügen; eine zu stark konzentrierte Lösung kann die zu waschenden Teile schädigen, während die Reinigung mit einer zu sehr verdünnten Lösung nicht ausreichend sein kann. Keine Bild 2 3 Behälterdichtung abnehmen. 4 Ausschlauchventil: den Betätigungshebel des Hahns drücken (1) und den Gummischlauch aus der Auslauföffnung 21 Arctic Deluxe 12-20 (3) bis er genau sitzt (Bild 5). scheuernden Spülmittel verwenden. WICHTIG Um Schäden am Dispenser zu vermeiden, benutzen Sie ausschließlich ein Reinigungsmittel, welches für Plastikteile dieser Art geeignet ist. 2 Eine geeignete Bürste verwenden und alle mit dem Getränk in Berührung kommenden Teile sorgfältig mit der Waschlauge waschen. Bild 5 3 Schwerkraftsventil: den Betätigungshebel des Hahns befestigen und dann den mit einer eigenen Dichtung versehenen Kolben einfügen (Bild 6). ACHTUNG Beim Waschen des Dispensers, in der Nähe der elektrischen Komponenten nicht übermäßig viel Wasser verwenden. Anderenfalls können elektrische Schläge oder die Beschädigung des Dispensers verursacht werden. 3 Alle gewaschenen abspülen. Teile unter fließendem Wasser 5. 3. 3 DESINFEKTION DES DEMONTIERTEN DISPENSERS Bild 6 Die Desinfektion muß unmittelbar vor der Inbetriebnahme des Dispensers vorgenommen werden. Darauf achten, daß zwischen der Desinfektion und der Inbetriebnahme des Dispensers kein zu langer Zeitraum verstreicht. 4 Behälterdichtung auf den Verdampfer aufsetzen. Achtung! die dicke Seite der Dichtung zeigt dabei nach unten zur Tauwasserschale (Bild 7). 1 Bevor mit den im folgenden beschriebenen Verfahren begonnen wird, sich mit keimtötender Seife die Hände waschen. 2 In einer Schüssel ungefähr acht Liter einer Lösung aus heißem Wasser (45-60°C) und einem von den Behörden Ihres Landes genehmigten Desinfektionsmittel zubereiten. Die Vorschriften des Herstellers des Desinfektionsmittels beachten. Falls kein spezifisches Desinfektionsmittel erhältlich ist, eine Lösung aus Wasser und Natriumhypochlorit (Chlorbleichlauge) zubereiten, im Verhältnis von 1 Eßlöffel Natriumhypochlorit pro 2 Liter Wasser. Bild 7 5 Der Behälter auf dem Dispenser montieren. Um den Vorgang zu erleichtern, die Dichtung mit Wasser leicht befeuchten. Bitte beachten Sie, dass der Haken an der Rückseite des Behälters in die entsprechende Aufnahme der oberen Tropfschale richtig eingesetzt wird. (Bild 8). 3 Alle zu desinfizierenden Teile in die Lösung tauchen. Dabei die vom Hersteller angegebene Zeit einhalten 4 Die desinfizierten Teile auf einer sauberen Fläche an der Luft trocknen lassen. 5 Die äußeren Teile des Dispensers trocknen. Dabei dürfen keine scheuernden Tücher verwendet werden. 5. 3. 4 MONTAGE 1 Die Tropfschale in ihren Sitz einsetzen. 2 Ausschlauchventil: den Betätigungshebel des Ventils drücken (1) und den Ausschlauch in den Behälter einfügen (2). Am unteren Ende des Ausschlauchs leicht nach unten ziehen Bild 8 22 6 Mit frischem Getränk spülen, so daß eventuelle Rückstände der Desinfektionslösung vom Boden der Behälter entfernt werden. Die Behälter innen mit einer Einweg-Papierserviette trocknen. Originalersatzteilen des Herstellers austauschen. WICHTIG 5. 4 DESINFEKTION DES MONTIERTEN DISPENSERS Für die Wartung werden Schutzhandschube benötigt, die mindesten einen Grad von PL Klassen 0-4 (EN 388) besitzen müssen. Täglich: Die Desinfektion des montierten Geräts vor seiner Inbetriebnahme kann, falls erforderlich, als zusätzliche Vorsichtsmaßnahme nach der oben beschriebenen Desinfektion des demontierten Geräts durchgeführt werden. Allerdings ist dies kein Ersatz für eine Desinfektion des demontierten Dispensers. 1 In einer Schüssel eine Lösung aus Wasser und einem von den Behörden Ihres Landes genehmigten Desinfektionsmittel zubereiten. Die Vorschriften des Herstellers des Desinfektionsmittels beachten. Falls kein spezifisches Desinfektionsmittel erhältlich ist, eine Lösung aus Wasser und Natriumhypochlorit (Chlorbleichlauge) zubereiten, im Verhältnis von 1 Eßlöffel Natriumhypochlorit pro 2 Liter Wasser. 2 Die Lösung in die Behälter schütten. 3 Mit einer geeigneten Bürste, die Lösung auf allen Teilen, die aus der Lösung herausragen, und auf der Unterseite des Deckels verreiben. 4 Den Deckel aufsetzen und den Dispenser laufen lassen, so daß die Lösung sich ungefähr 2 Minuten lang hin-und herbewegen kann. 5 Die Desinfektionslösung über die Hähne aus den Behältern ablassen. 6 Mit frischem Getränk spülen, um eventuelle Rückstände der Desinfektionslösung vom Boden der Behälter zu entfernen. Die Behälter innen mit einer Einweg-Papierserviette trocknen. 7 Keine weiteren Spülungen vornehmen. 6. 1 WARTUNG (MUSS VOM AUTORISIERTEN KUNDENDIENSTDURCHGEFÜHRT WERDEN) Monatlich: Den auf dem Kondensatorfilter angesammelten Staub entfernen. Vor jeder Reinigungsarbeit immer die Stromversorgung des Geräts unterbrechen. Dazu den Netzstecker ziehen. ACHTUNG Überprüfen Sie die korrekte Position des Kabels, bevor Sie das Gehäuse schließen und bevor das Gerät mit Strom versorgt wird. 6 INSTANDHALTUNG 1 Austausch der Birnen im beleuchteten Deckel (Bild 9) : - Entfernen Sie die Halteschrauben der oberen Abdeckung, - Entfernen Sie den unteren Teil - Untersetzen Sie die Birnen (24-28V 21W max.). - Setzen Sie die obere Abdeckung wieder auf und befestigen Sie die Halteschrauben. Bild 9 2 Täglich: Den Dispenser kontrollieren und sicherstellen, daß bei den Dichtungen keine Produktverluste vorliegen. Falls Verluste festgestellt werden, zuerst kontrollieren, ob der Dispenser korrekt montiert ist. Anschließend überprüfen, ob die Dichtungen eine Nachfettung benötigen oder defekt oder abgenutzt sind. In diesem Fall die Dichtungen mit 23 Arctic Deluxe 12-20 3 INSTALACION 1 CARACTERISTICAS TECNICAS 1/12 1/20 2/12 2/20 3/12 3/20 4/12 4/20 Contenedores transparentes desmontables n 1 2 3 4 Capacidad de cada contenedor, aproximada l 12 20 12 20 12 20 12 20 ancho cm 18 36 54 72 largo cm 47 47 47 47 12 lt 20 lt cm 57 67 57 67 57 67 57 67 Peso neto, aproximado 12 lt 20 lt kg 17 18 23 26 37 42 50 53 Peso bruto, aproximado 12 lt 20 lt kg 19 20 26 29 40 45 55 56 n 1 2 3 4 1 Quitar el distribuidor del embalaje: guardar este último por si hubiera cualquier eventualidad. IMPORTANTE Dimensiones: alto Termostatos regulables En la operación de transporte o levantamiento no se debe coger nunca el distribuidor por sus contenedores transparentes o por los cilindros evaporadores. El fabricante no responde de los daños acarreados por estas maniobras equivocadas. 2 Controlar que el distribuidor no haya sufrido daños durante el transporte. De haberlos sufrido, reclamar inmediatamente al transportista. 3 Colocar el distribuidor en un mostrador en grado de sostener su peso incluso con la carga completa, teniendo en cuenta cuanto indicado en IMPORTANTE, del punto 1. Motocompresor hermético 4 Dejar un espacio libre de por lo menos 15 cm alrededor del aparato para no impedir el flujo de aire de refrigeración. Condensador a ventilación forzada Guardamotor 5 Controlar la estabilidad del aparato, regulando la altura de los pies. Nivel de ruido inferior a 70dB (A) 6 Grifo en acero inox por gravedad. Montar el grifo, teniendo en cuenta cuanto indicado en 5.3.4. REMONTAJE. 7 Antes de enchufar el aparato con la toma de corriente controlar que la tensión de la red sea aquella indicada en la placa. Enchufar el distribuidor a una red monofásica, sirviéndose de una toma completa de tierra, según lo previsto por la normativa vigente. Si la desconexión del aparato de la red eléctrica se realiza mediante un interruptor omnipolar, este debe garantizar una distancia de apertura de los contactos que permita la desconexión completa, en las condiciones previstas para la categoría de sobretensión III. No utilizar cordones conectores para enchufar el aparato al suministro de corriente IMPORTANTE Características eléctricas: leer los datos detallados en la placa del distribuidor; ésta se encuentra en la parte inferior del panel frontal, detrás del cajón recoge-gotas de la derecha. Los números de matrícula de los aparatos (precedidos por el símbolo#) están colocados dentro del alojamiento portatinterruptores de izquierda. Los datos detallados sobre la placa son aquellos a los que se debe siempre hacer referencia. Se reserva el derecho de efectuar modificaciones sin previo eléctrica. aviso. ATTENCION 2 INTRODUCCION Cerciorarse que el aparato esté correctamente conectado a tierra; en caso contrario es posible causar shock eléctricos a las personas o dañar el distribuidor. Es necesario que lean atentamente este manual de 8 El distribuidor no sale de fábrica prelavado e higienizado. Antes de utilizarlo debe ser desarmado, lavado e higienizado siguiendo cuanto dicho en las presentes instrucciones del capítulo 5.3 LIMPIEZA. instrucciones para conocer todas las características del distribuidor. 9 El aparato tiene que instalarse donde pueda estar controlado por operadores expertos en su uso. También este distribuidor, como todos los productos mecánicos, necesita de limpieza y cuidado. Se corre el riesgo de impedir su buen funcionamiento si se verificasen errores 4 PARA UN FUNCIONAMIENTO SEGURO Y CORRECTO cometidos por el usuario durante la fase de desmontaje y limpieza. Por dicho motivo es importante que los 1 No utilizar el distribuidor antes de haber leído el presente manual de instrucciones. procedimientos de desmontaje, lavado, higienización y limpieza, siendo operaciones cotidianas, sean conocidas sin 2 No utilizar el distribuidor si no está correctamente conectado a tierra. posibilidad de error a quieh va a utilizar distribuidor. 24 3 No utilizar cordones conectores para enchufar el distribuidor al suministro de corriente. 4 No poner en funcionamiento el distribuidor si los paneles no se encuentran en su lugar y fijados con los tornillos. 5 No impedir el flujo de aire de refrigeración, dejar un espacio libre de por lo menos 15 cm alrededor del distribuidor. 6 No introducir los dedos u objetos en las ranuras de los paneles y en la apertura del grifo. 7 No desmontar el contenedor, no quitar los mezcladores o paneles para limpieza o manutención sin cerciorarse que el producto esté listo para ser distribuido. Los dispositivos mezcladores seguirán funcionando. 8 Para la buena conservación del producto, el distribuidor deberá funcionar también durante la noche. IMPORTANTE Utilizar el distribuidor solamente con productos alimenticios. Utilizar el distribuidor sólo con agua potable. distribuidor esté desenchufado del suministro de corriente. IMPORTANTE ATTENCION Este aparato no es apto para ser manipulado por niños o personas con deficiencias mentales o sensoriales, o falta de experiencia o suficiente conocimiento del mismo, a no ser que se ponga a disposiciòn una supervisiòn o instrucciòn por parte de una persona responsabile de su seguridad. Los niños deben ser controlados para evitar que jueguen con el aparato. Si el cable de alimentación está dañado, debe ser substituito por el fabricante o desde su servicio de asistencia técnica o, en cualquier caso, por una persona cualificada con el fin de evitar cualquier tipo de riesgo. 8 Aparato no apto para uso exterior. 9 Aparato no apto en instalaciones donde haya cercano fuentes de agua . 10 Para la limpieza no utilizar chorros de agua. 11 Para el correcto funcionamiento, coma la temperatura ambiente debe estar comprendida ientre 5°C y 32°C. 12 El aparato tiene que colocarse vertical a una altura mínima de 80 cm y máxima de 110 cm del suelo. 13 Utilizar siempre guantes adecuados para la manipulación de los alimentos. 14 No conserve sustancias explosivas en el aparato (por ejemplo, aerosoles con propelentes inflamables). 15 Este aparato está diseñado para ser utilizado en aplicaciones domésticas y similares. 9 Para apagar las luces de la tapa es suficiente girarlo de 180°.(ver figura 1) figura 1 5 INSTRUCCIONES DE EMPLEO 5. 1 DESCRIPCION DE LOS MANDOS 1 Lavar e higienizar el distribuidor antes de utilizarlo siguiendo cuanto se ha dicho en las presentes instrucciones en el capítulo 5.3 LIMPIEZA. 2 Llenar los contenedores con el producto deseado hasta que alcance el nivel máximo indicado (no superar dicho nivel). La cantidad de producto presente en el contenedor (en litros o en galones) está indicada con señales específicas situadas en el contenedor mismo. 3 Si se quiere distribuir productos concentrados a diluirse con agua, verter en los contenedores el agua agregando a continuación la cantidad necesaria de producto concentrado, según las instrucciones del fabricante. Si se quieren emplear zumos naturales se recomienda filtrarlos para evitar que las partes sólidas puedan obstruir el pasaje del grifo. 4 Montar las tapas sobre los contenedores cerciorándose que queden bien colocadas. 5 Accionar los interruptores (ver capítulo 5.1 DESCRIPCIÓN DE LOS MANDOS). 6 El distribuidor debe funcionar siempre con las tapas montadas para prevenir una posible contaminación del producto. 7 El distribuidor debe funcionar ininterrumpidamente: el grupo frigorífico se parará automáticamente cuando el El distribuidor está provisto de un interruptor general y, para cada contenedor, de un interruptor para el mando del dispositivo de agitación. A continuación describimos la variedad de las funciones de los interruptores: Interruptor general Posición 0 : el distribuidor está apagado. Posición I el distribuidor está habilitado : para el funcionamiento. Ventilador en función. Interruptor agitación Posición 0 25 : dispositivo de agitación parado. Arctic Deluxe 12-20 5. 3. 1 Posición I DESMONTAJE : dispositivo de agitación en función. ATTENCION Antes de proceder con el desmontaje de cualquier componente, desenchufar de la toma de corriente eléctrica el enchufe del aparato. Para el funcionamiento del distribuidor: 1 Colocar el interruptor general en posición I. 2 Colocar el interruptor agitación en posición I. 1 Quitar la tapa del contenedor. 2 Quitar el contenedor vacío levantándolo por la parte anterior y desprendiendolo de la junta (ver figura 2). 5. 2 SUGERENCIAS 1 El tiempo necesario para obtener la refrigeración del producto varía en función de distintos factores como por ejemplo la temperatura ambiente y la temperatura inicial del producto. 2 Llenando los contenedores con producto ya enfriado previamente se incrementa la eficiencia del distribuidor. figura 2 3 Para disminuir ulteriormente los tiempos de restablecimiento y, por lo tanto, aumentar la autonomía del distribuidor, volver a llenar cuando el nivel del producto desciende a mitad evaporador. 3 Quitar la junta del contenedor. 4 Sacar la turbina pompa. 5 Grifo con tubo de goma: empujar la palanca mando grifo (1) y sacar (2) el tubo goma de salida desde su situación vertical en el fondo del contenedor (ver figura 3). 4 Todos los distribuidores de este tipo deben despedir calor. Si el calor producido fuera excesivo, controlar que ninguna fuente de calor se encuentre cerca del distribuidor y, en modo particular, cerca de las rejillas de los paneles. Cerciorarse además, que el flujo de aire no esté obstaculizado por paredes cercanas, cajas u otras cosas. Dejar por lo menos 15 cm de espacio libre alrededor del distribuidor. En todo caso cuando el producto dentro de los contenedores está frio, es señal de que todo funciona bien y que el calor producido no es alarmante. 5 Regulación de la temperatura: para este tipo de operación, dirigerse exclusivamente al técnico.La temperatura ideal de las bebidas ha sido establecida y regulada en la fábrica. 6 Para evitar riesgos de caídas, las partes alrededor de la máquina tienen que mantenerse secas. figura 3 ATTENCION El acceso a la zona de servicio está limitado a personas preparadas en materia de seguridad e higiene y que disponen de conocimientos prácticos sobre el aparato. 5. 3 LIMPIEZA La limpieza y el lavado son fundamentales para garantizar la perfecta conservación del gusto de la bebida y la máxima eficiencia de vuestro distribuidor. Los procedimientos descritos a continuación deben ser considerados de carácter general y pueden variar por efecto de la reglamentación de higiene vigente. Antes del desarmado para el lavado del distribuidor debe quitarse todo el producto. 26 6 Grifo en acero inox por gravedad: Sacar el pisón y bebida. desmontar la palanca mando grifo (ver figura 4). ATTENCION Durante el lavado del distribuidor no usar mucha cantidad de agua cerca de los componentes eléctricos; en caso contrario es posible que se verifiquen shock eléctricos o también se dañe el distribuidor. 3 Enjuagar todas las partes con agua corriente 5. 3. 3 REMONTAJE figura 4 1 Colocar el cajón recoge-gotas en su alojamiento. 2 Grifo con tubo de goma: empujar la palanca mando grifo (1) y insertar el tubo de goma de salida en su situación vertical en el fondo del contenedor (2). Tirar (3) ligeramente hacia abajo la extremidad del tubo de goma hasta ajustarlo completamente (ver figura 5). 7 Sacar el cajón recoge-gotas y vaciarlo. 5. 3. 2 LAVADO IMPORTANTE No lavar ningún componente de la maquina en lavavajillas. ATTENCION Antes de efectuar cualquier tipo de limpieza, desenchufar de la toma de corriente eléctrica el enchufe del aparato. figura 5 1 Poner en una palangana aproximadamente ocho litros de 3 Grifo en acero inox por gravedad: montar la palanca mando grifo y enfilar el pisón unido a la su junta (ver figura 6). agua caliente (45°-60°C) y detergente apropiado respetando con atención las instrucciones del fabricante; una solución demasiado concentrada de detergente puede provocar daños en las partes a lavar, en vez una solución demasiado diluida puede no limpiar bastante. No utilizar detergentes abrasivos. IMPORTANTE Para prevenir daños al distribuidor utilizar solamente un detergente compatible com las partes de plastico. 2 Emplear un cepillo apropiado y lavar minuciosamente con figura 6 la solución detergente todas las partes en contacto con la 27 Arctic Deluxe 12-20 2 Verter la solución en los contenedores. 3 Usando un cepillo apropiado fregar con la solución todas las partes sobre el nivel de la solución y sobre la parte inferior de la tapa. 4 Colocar la tapa y poner en función el distribuidor de modo que permita a la solución agitarse 2 minutos. 5 Vaciar los contenedores de la solución para higienizar por medio de los grifos y luego eliminarla. 6 Enjuagar con bebida fresca para quitar del fondo de los contenedores todo residuo posible de solución para higienizar. Secar la parte interior de los contenedores con una servilleta de papel desechable. 7 No efectuar más operaciones de enjuague. 4 Poner la junta al evaporador, de modo que el borde de mayor ancho se quede en contacto con el plano recoge-gotas (ver figura 7). 6 MANUTENCION figura 7 1 Substitución de las lámparas de la tapa luminosa (ver figura 9) : - Quitar los tornillos colocados en la parte superior de la tapa, - Extraer la parte inferior y substituir las lámparas (utilizar lámparas de 24-28 V 21W max). - Volver a montar la tapa y cerrarla con sus tornillos. 5 Poner el contenedor sobre el distribuidor. Por facilitar esta operación, mojar la junta con un poco de agua. Asegurarse que el gancio posterior del contenedor estè insertado en el lugar correcto del piano recoge-gotas. (ver figura 8) figura 8 figura 9 6 Enjuagar con bebida fresca para eliminar todo residuo posible de solución para higienizar del fondo de los contenedores. Secar la parte interior de los contenedores con una servilleta de papel desechable. 2 Cada día: controlar el distribuidor y que no se verifiquen pérdidas de producto de las juntas. Si se notasen pérdidas, controlar , antes de todo, que el distribuidor esté montado correctamente, luego que las juntas no necesiten lubricación y, por último, que dichas juntas no sean defectuosas o estén gastadas, si es así reemplazarlas con recambios originales del 5. 4 HIGIENIZACION DEL DISTRIBUIDOR MONTADO fabricante. Cada día: La higienización del aparato montado, antes de ser puesto en funcionamiento, puede ser efectuada, si es necesario, solamente como una ulterior prevención adicional a la higienización del aparato desmontado descrito anteriormente, pero no debe sustituir jamás a la efectuada con el aparato desmontado. 1 Poner en una palangana una solución de agua o producto para higienizar aprobado por las autoridades de vuestro país, respetando las especificaciones del fabricante. Si se carece de un producto para higienizar específico, preparar una solución de agua e hipoclorito de sodio (lejía uso alimenticio) en la proporción de 1 cucharadita por cada 2 litros de agua. IMPORTANTE Para el mantenimiento del producto, el personal técnico tiene que utilizar guantes que dispongan por lo menos de un grado de clasificación PL 0-4 (EN388). 6. 1 MANUTENCION (SOLAMENTE POR EL SERVICIO POSTVENTA) Cada mes: eliminar el polvo que se acumula sobre el filtro del condensador. Antes de efectuar dicha operación desenchufar el 28 distribuidor de la toma de corriente. Prestar atención a las aletas del condensador porque tienen filo. ATTENCION El operador autorizado para efectuar el mantenimiento tiene que comprobar la posición correcta de los cables antes de dar tensión a la máquina tras haber colocado de nuevo el cárter de protección. (para mantenimiento del producto). 29 Arctic Deluxe 12-20 ELENCO RICAMBI SPARE PARTS LIST LISTE DES PIECES DE RECHANGE ERSATZTEILLISTE DESCRIPCION PIEZAS DE REPUESTO 30 2407_99 V 3.4 14I22 1 2 3 22900-00100 22900-00100 22900-00200 Coperchio contenit. 20 It. Coperchio contenit. 12 It. Tubo mandata 20 lt 20 It bowl cover 12 It bowl cover Spray tube for 20 l bowl Couvercle réservoir 20 It Couvercle réservoir 12 It Tuyau de la pompe 20 l Behälterdeckel 20 It Tapa contenedor 20 It Behälterdeckel 12 It Tapa contenedor 12 It Gekrumtes Sprudelrohr für Tubo de flujo para conteneBehälter 20 l dor 20 l 4 22900-04800 Contenitore 20 It. per pompa 20 l bowl for pump Cuve 20 l pour pompe Behälter 20 l für Pumpe Contenedor 20 l para bomba 5 22900-00201 Tubo mandata 12 lt Spray tube for 12 l bowl Tuyau de la pompe 12 l Gekrumtes Sprudelrohr für Tubo de flujo para conteneBehälter 12 l dor 12 l 6 22900-00000 Contenitore 12 It. per pompa 12 l bowl for pump Cuve 12 l pour pompe Behälter 12 l für Pumpe Contenedor 12 l para bomba 7 33900-01200 Girante pompa 50Hz Impeller 50Hz Turbine de la pompe 50Hz Pumpenrad 50Hz Turbina bomba 50Hz 7 33900-01204 Girante pompa 60Hz Impeller 60Hz Turbine de la pompe 60Hz Pumpenrad 60Hz Turbina bomba 60Hz 8 22800-17200 Guarnizione contenitore Bowl gasket Joint du réservoir Behälterdichtung Junta contenedor 9 22900-00600 Perno centrale Central pivot Pivot central Mittescharnierstift Pivote central 10 22040-00000 OR per perno centrale Central pivot OR OR du pivot central Mittescharnierstift OR OR del pivote central 11 21125-00000 Interruttore Switch Interrupteur Schalter Interruptor 12 22800-05100 Protezione interruttore Switch cap Capuchon interrupteur Schalterabdeckung Protección interruptor 13 21087-00000 Termostato Thermostat Thermostat Thermostat Termostato 14 33800-00803 Magnete motore Motor magnet Aimant du moteur Motorrad Embrague magnetico 15 22800-04800 Staffa supporto motore Motor bracket Support du moteur Motorhaltebuegel Placa soporte motor 16 Motore Motor Moteur Motor Motor 17 Pannello posteriore Back panel Panneau arriére Rückwand Panel posterior 17A Pannello posteriore bianco White back panel Panneau arriére blanche Rückwand weiß Panel posterior blanco 18 22800-00300 Pannello laterale Side panel Panneau latéral Seitenwand Panel lateral 18 22800-33100 Pannello laterale bianco White side panel Panneau latéral blanche Seitenwand weiß Panel lateral blanco 19 22800-12700 Protezione passabloccacavo Terminal block cover Protection borne Schutzkappe Protección pasacable 20 Passabloccacavo Terminal block with cable Borne et fixage du câble Anschlußklemme m. Kabe- Pasacable clamp leinfürung 21 Salvamotore Overload protector Protége moteur Motorsicherung Guardamotor 22 Relé Relay Relais Start-Relais Relé 23 Motore ventilatore per 12 lt. Fan motor for 12 lt. Moteur ventilateur pour 12lt. Lüftermotor für 12 l Motor ventilador por 12lt. 23A Motore ventilatore per 20 lt. Fan motor for 20 lt. Moteur ventilateur pour 20 Lüftermotor für 20 l Motor ventilador por 20 lt. lt. 23B Mot vent 1 contenitore Fan motor for 1 bowl Mot vent pour 1 cuve Lüftermotor für 1 behalter Mot vent para 1 contenedor 24 Ventola per 12 lt. Fan for 12 lt. Hélice pour 12lt. Lüfterflügel für 12 l Aspas para 12lt. 24A Ventola per 20 lt. Fan for 20 lt. Hélice pour 20 lt. Lüfterflügel für 20 l Aspas para 20 lt. 25 10554-45001 Clip Clip Clip Klip Clip 26 22800-10000 Piedino Rubber leg Petit pied Justierfüße Pie nivelador 27 Pannello lato rubinetto Dispensing side panel Panneau côté robinet Front Panel lado grifo 27A Pannello lato rubinetto biancoWhite dispensing side panel Panneau côté robinet blan- Front weiß Panel lado grifo blanco che 28 10502-55010 V i t e i n o x p e r f i s s a g g i o Stainless steel fixing screw Vis inox de fixation du pan- Bolt for faucet side panel Tornillo inox fijacion paneles pannelli for panel neaux 29 22900-03700 Griglia cassetto raccogliDrip tray cover Couvercle tiroir égouttoir Tropfgitter Rejilla cajón gocce 2922900-03700-200Griglia cassetto raccogliWhite Drip tray cover Couvercle tiroir égouttoir Tropfgitter weiß Rejilla cajón blanco gocce bianco blanche 30 22900-03800 Cassetto raccogligocce Drip tray Tiroir égouttoir Tropfschale Cajón recoge-gotas 3022900-03800-200Cassetto raccogligocce White Drip tray Tiroir égouttoir blanche Tropfschale weiß Cajón recoge-gotas blanco bianco 31 22900-06200 Parte superiore cappello Top cover upper part Partie supérieure du cou- Deckel-Oberteil Parte superior de la tapa vercle 31 22900-06260 Parte superiore cappello White Top cover upper part Partie supérieure du cou- Deckel-Oberteil weiß Parte superior de la tapa bianco vercle blanche blanco 32 10028-04201 Piastrina per portalampada Plate holder for Planche de titulaire Plate für Inhaber Titular de la Plata 33 22800-11701 Contatto per luce bianco Top cover light contact Contact pour éclairage cou- Kontakt Contacto para luz vercle 34 10028-04200 Portalampada Bulb socket Douille Lampenhalter Portalampara 35 10028-03810 Lampada 28V 28V bulb Ampoule 28 V Birne 28 V Lampara 28 V 36 22900-06020 Parte inferiore cappello agita- Bottom hat mechanical agi- Chapeau bas agitation Bottom Hut mechanische Bottom sombrero agitación zione meccanica con luce tation with light mécanique avec la lumière Agitation mit Licht mecánica con la luz 36 22900-06030 Parte inferiore cappello agita- Bottom hat mechanical agi- Chapeau bas l'agitation Bottom Hut mechanische Bottom sombrero agitación zione meccanica senza luce tation without light mécanique, sans lumière Agitation ohne Licht mecánica sin luz 36 22900-06050 Parte inferiore cappello con Bottom hat with light insula- Bas chapeau à la lumière Bottom Hut mit Licht isoliert Bottom sombrero aislados luce coibentato ted isolés con la luz 36 22900-06051 Parte inferiore cappello senza Bottom hat without light Chapeau bas, sans lumière Bottom Hut ohne Licht isoliert Bottom sombrero sin luz luce coibentato insulated isolés aislado 36 22900-06000 Parte inferiore cappello senza Bottom hat without light not Chapeau bas, sans lumière Bottom Hut ohne Licht nicht Bottom sombrero sin luz no luce non coibentato insulated non isolé isoliert aislado 37 22900-06410 Fotografia Picture Photo Diamit Fotografia 37 22900-06400 Fotografia retroilluminata Picture for backlight Photo avec la lumière Diamit mit Licht Fotografia con luz 37 22900-06411 Fotografia macchina bianca White machine picture Photo blanche Diamit weiß Fotografia blanco 37 22900-06401 Fotografia retroilluminata White machine picture for Photo avec la lumière blan- Diamit mit Licht weiß Fotografia con luz blanco macchina bianca backlight che 38 33900-02100 Coperchio completo con luce Cover complete with light Couverture complète avec Cover komplett mit Licht iso- Cubra con luz aislado coibentato insulated la lumière isolés liert 38 33900-02160 Coperchio bianco completo White cover complete with Couverture blanche com- Cover komplett weiß mit Licht Cubra con luz aislado blanco con luce coibentato light insulated plète avec la lumière isolés isoliert 38 33900-02200 Coperchio completo senza Cover complete without light Couverture complète sans Cover komplett ohne Licht Cubierta completa sin luz luce coibentato insulated lumière isolés isoliert aislado 38 33900-02260 Coperchio bianco completo White cover complete Couverture blanche com- Cover komplett weiß ohne Cubierta completa sin luz senza luce coibentato without light insulated plète sans lumière isolés Licht isoliert aislado blanco 31 Arctic Deluxe 12-20 38 33900-02300 38 33900-02360 38 33900-01800 38 33900-01860 38 33900-01900 38 33900-01960 39 39 40 40 41 41 42 43 44 45 22900-05600 22800-14701 22900-05400 22900-05401 22900-05500 22900-05501 22900-05710 22900-05700 10533-01303 22900-04820 46 47 33900-01202 22900-00020 48 49 50 51 52 22800-21900 10028-02500 10029-00010 22900-00500 22900-06501 52 22900-06500 53 53 54 55 22800-22805 22800-22861 22800-23000 22900-00700 55 22900-00760 56 57 58 59 60 21703-00000 22900-00800 22800-02600 22900-00501 22900-05800 61 22900-02504 62 63 64 65 22900-02502 22900-02503 33900-01011 66 22900-02504 67 68 69 70 71 22900-04810 22900-00010 33900-01201 / Coperchio completo senza luce non coibentato Coperchio bianco completo senza luce non coibentato Coperchio completo con luce per agitatore meccanico Cover complete without light Couverture complète sans Cover komplett ohne Licht Cubierta completa sin luz no not insulated lumière non isolé nicht isoliert aislado White cover complete Couverture blanche com- Cover komplett weiß ohne Cubierta completa sin luz no without light not insulated plète sans lumière non isolé Licht nicht isoliert aislado blanco Cover with light to complete Recouvrir avec la lumière Cover mit Licht zu kompletten Cubra con la luz para commechanical shaker pour compléter agitateur mechanischen Schüttler pletar agitador mecánico mécanique Coperchio bianco completo White cover with light to Recouvrir blanche avec la Cover weiß mit Licht zu kom- Cubra con la luz para comcon luce per agitatore mecca- complete mechanical sha- lumière pour compléter agi- pletten mechanischen pletar agitador mecánico nico ker tateur mécanique Schüttler blanco Coperchio completo senza Cover complete without light Couverture complète sans Cover komplett ohne Licht für Cubierta completa sin luz por luce per agitatore meccanico for mechanical shaker lumière pour agitateur mechanische Schüttler agitador mecánico mécanique Coperchio bianco completo White cover complete Couverture blanche com- Cover weiß komplett ohne Cubierta completa sin luz por senza luce per agitatore mec- without light for mechanical plète sans lumière pour agi- Licht für mechanische agitador mecánico blanco canico shaker tateur mécanique Schüttler Albero trascinamento 12lt Driving shaft 12lt Arbre d'entraînement 12lt Antriebswelle 12lt Eje transmisión 12lt Albero trascinamento 20lt Driving shaft 20lt Arbre d'entraînement 20lt Antriebswelle 20lt Eje transmisión 20lt Agitatore 12lt Stirrer 12lt Brasseur 12lt Rührwerk 12lt Agitador 12lt Agitatore 20lt Stirrer 20lt Brasseur 20lt Rührwerk 20lt Agitador 20lt Albero centrale 12lt Central shaft 12lt Arbre central 12lt Zentralwelle 12lt Eje central 12lt Albero centrale 20lt Central shaft 20lt Arbre central 20lt Zentralwelle 20lt Eje central 20lt Guarnizione albero centrale Central shaft seal Joint d'arbre centrale Zentral-Wellendichtung Sello del eje central OR per albero centrale Central shaft OR. Joint OR pour arbre central 0-Ring für Zentralwelle OR para eje central Dado d’ottone brass nut écrou en laiton Messingnuß dado d’ottone Contenitore 20 It. per agita- 20 l bowl for stirrer Cuve 20 l pour brasseur Behälter 20 l für Rührwerk Contenedor 20 l para agitatore dor Agitatore Stirrer Brasseur Rührwerk Agitador Contenitore 12 It. per agita- 12 l bowl for stirrer Cuve 12 l pour brasseur Behälter 12 l für Rührwerk Contenedor 12 l para agitatore dor Pistone rubinetto Faucet piston Piston du robinet Kolben für Hahn Pistón del grifo Guarnizione rubinetto Faucet gasket Joint du robinet Dichtung Junta del grifo Fotografia Picture Photo Dia Fotografia Rubinetto Push handle Robinet Ausgabe Palanca de mando grifo Molla contatto elettrico 20lt light wire Ressort de contact 20lt Feder 20lt Muelle para contacto luz 20lt coperchio 20lt Molla contatto elettrico 12lt light wire Ressort de contact 12lt Feder 12lt Muelle para contacto luz 12lt coperchio 12lt Gommino con contatto Flexible contact Joint avec contact Kontakt Gomita con contacto Gommino con contatto biancoWhite flexible contact Joint avec contact blanche Kontakt weiß Gomita con contacto blanco Anello di ancoraggio Fixing ring Anneau de fixage Befestigungsring Anillo de fijacón Profilo di giunzione Plastic I-beam for conProfil plastique de jonction Fugeband Perfil de union nection Profilo di giunzione bianco White plastic I-beam for Profil plastique de jonction Fugeband weiß Perfil de union blanco connection blanche Gommino rubinetto Pinch tube Tuyau du robinet Ausgabeventilrohr Goma de grifo Coprirubinetto Faucet cover Couvercle du robinet Ventilkappe Cubre grifo Molla rubinetto Faucet spring Ressort du robinet Ventilfeder Muelle grifo Leva comando rubinetto Push handle Levier de débit Zapfhebel Palanca de mando grifo Perno filettato per albero cen- Threaded bolt shaft Central Boulon fileté du Central Gewindebolzen Welle Cen- Perno roscado del eje centrale tral tral Staffa supporto motore Pump motor bracket Support du moteur de la Motorhaltebuegel Placa soporte motor bomba pompe Motore agitatore Mixer motor Moteur du mélangeur Rürwerkmotor Motor agitador Perno centrale Central pivot Pivot central Mittescharnierstift Pivote central Ranella di rasamento Washer Rondelle Scheibe Arandela Girante motore agitatore Impeller mixer motor Turbine de moteur du Rad Rürwerkmotor Turbina motor agitador mélangeur Staffa supporto motore Pump motor bracket Support du moteur de la Motorhaltebuegel Placa soporte motor bomba pompe Motore agitatore Mixer motor Moteur du mélangeur Rürwerkmotor Motor agitador Contenitore 20 It. 20 It bowl Réservoir 20 It Behälter 20 It Contenedor 20 It Contenitore 12 It. 12 It bowl Réservoir 12 It Behälter 12 It Contenedor 12 It Girante pompa Impeller Turbine de la pompe Pumpenrad Turbina bomba Trasformatore Transformer Transformateur Transformator Transformador Ordinare con sigla riportata sul pezzo Please order what printed on piece Mentionner indicatif imprimé sur la Diese Teile bitte anhand der pièce aufgedruckten Nummern bestellen Pedir com la identificación marcada en la pieza Vedere tabella Voir tableau Ver tabla See table Siehe Tabelle 16 20 23 23 A 23 B 24 24A 62 67 71 230-240V 50Hz 22800-04705 22800-05501 21678-00000 21678-00000 22800-07600 21907-00000 21907-00000 33800-06700 22900-03500 22800-18206 115V 60Hz 22800-04706 22800-05500 22800-04706 22800-04709 33800-06901 21907-00000 22800-13200 33800-06701 22900-03501 22800-18203 220V 60Hz 22800-04708 22800-05500 21678-00000 21678-00000 22800-07600 21907-00000 22800-13200 33800-06700 22900-03500 22800-18206 17 17A 27 27A 32 1/.. 22800-06800 22800-06812 22800-21600 22800-30000 2/.. 22900-02310 22900-02312 22800-21700 22800-30200 3/.. 22900-02320 22900-02322 22900-04000 22800-30300 4/.. 22900-02330 22900-02332 22900-04100 22900-04102 ASSIEME FRULLINO OPZIONALE WHIPPER OPTION 1 22800-21902 Pistone rubinetto Faucet piston 2 10028-02500 Guanizione rubinetto Faucet gasket 3 33900-00020 Leva a tasto Push handle 4 22900-05000 Riduttore per leva Adaptation for push handle 5 22900-05011 Riduzione per corpo frullino Adaptation for whipper body 6 22600-01210 Camera di miscelazione grande Large mixing chambre 7 33900-01510 Motore frullino completo Whipper motor assembly 8 22900-05300 OR per motore motor OR 9 33900-02000 Supporto frullino Whipper support 10 22600-01250 Assieme basetta miscelatore Mixer board assembly 11 22600-01260 Nottolino per basetta Cam to board 12 22600-01240 Ventolina miscelazione super Super mixing impeller SCHEMA ELETTRICO WIRING DIAGRAM SCHEMA ELECTRIQUE SCHALTSCHEMA ESQUEMA ELECTRICO 1-2 3-4-5-6 7-8-9-10 11-12-13-14 15-16 17-18 19-20 21-22-23-24 Interruttore Termostato Interruttore pompa/agitatore Pompa/agitatore Ventilatore Compressore Trasformatore Lampada coperchio Switch Thermostat Pump/mixer switch Pump/mixer Fan Motor Compressor Transformer Top light Interrupteur Thermostat Interrupteur pompe/brasseur Pompe/brasseur Moteur ventilateur Compresseur Transformateur Ampoule du couvercle 33 Schalter Thermostat Pumpe-Mixerschalter Pumpe/Rührwerk Lüftermotor Kompressor Transformator Birne Interruptor Termostato Interruptor bomba/agitador Bomba/agitador Ventilador Motocompresor Transformador Lámpara tapa superior Arctic Deluxe 12-20 NOTE - NOTES- NOTES - ANMERKUNGEN - NOTAS: 34 NOTE - NOTES- NOTES - ANMERKUNGEN - NOTAS: 35 Ugolini spa 2407_99 V5.0 14I22 • Via dei Pioppi, 33 • 20090 Opera (MI) • Tel. 02.5300591 • www.ugolinispa.com