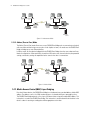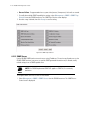
1
M
CB3000 Client Bridge
User’s Guide
© 2009 Motorola, Inc. All rights reserved.
MOTOROLA and the Stylized M Logo are registered in the US Patent & Trademark Office. Symbol is a registered
trademark of Symbol Technologies, Inc. All other product or service names are the property of their respective owners.
Contents
About This Guide
Introduction . . . . . . . . . . . . . . . . . . . . . . . . . . . . . . . . . . . . . . . . . . . . . . . . . . . . . . . . . . . . . . . . . . . . . . . . . . . . . . . . . . . . . . . .v
Document Conventions . . . . . . . . . . . . . . . . . . . . . . . . . . . . . . . . . . . . . . . . . . . . . . . . . . . . . . . . . . . . . . . . . . . . . . . . . . . . . . .v
Notational Conventions . . . . . . . . . . . . . . . . . . . . . . . . . . . . . . . . . . . . . . . . . . . . . . . . . . . . . . . . . . . . . . . . . . . . . . . . . . . . . . .v
Service Information . . . . . . . . . . . . . . . . . . . . . . . . . . . . . . . . . . . . . . . . . . . . . . . . . . . . . . . . . . . . . . . . . . . . . . . . . . . . . . . . . vi
Chapter 1: Introduction
1.1 General Overview . . . . . . . . . . . . . . . . . . . . . . . . . . . . . . . . . . . . . . . . . . . . . . . . . . . . . . . . . . . . . . . . . . . . . . . . . . . . . . . . . 1-1
1.1.1 Within the Network . . . . . . . . . . . . . . . . . . . . . . . . . . . . . . . . . . . . . . . . . . . . . . . . . . . . . . . . . . . . . . . . . . . . . . . . . . . . 1-2
1.1.2 Feature Summary . . . . . . . . . . . . . . . . . . . . . . . . . . . . . . . . . . . . . . . . . . . . . . . . . . . . . . . . . . . . . . . . . . . . . . . . . . . . . . 1-2
1.2 CB3000 Client Bridge Operational Principles . . . . . . . . . . . . . . . . . . . . . . . . . . . . . . . . . . . . . . . . . . . . . . . . . . . . . . . . . . . . 1-3
1.2.1 CB3000 Client Bridge Network Operating Modes . . . . . . . . . . . . . . . . . . . . . . . . . . . . . . . . . . . . . . . . . . . . . . . . . . . . . 1-3
1.2.2 Media Access Control (MAC) Layer Bridging . . . . . . . . . . . . . . . . . . . . . . . . . . . . . . . . . . . . . . . . . . . . . . . . . . . . . . . . . 1-4
1.2.3 DHCP Support . . . . . . . . . . . . . . . . . . . . . . . . . . . . . . . . . . . . . . . . . . . . . . . . . . . . . . . . . . . . . . . . . . . . . . . . . . . . . . . . . 1-5
1.2.4 Modulation . . . . . . . . . . . . . . . . . . . . . . . . . . . . . . . . . . . . . . . . . . . . . . . . . . . . . . . . . . . . . . . . . . . . . . . . . . . . . . . . . . . 1-5
1.2.5 Web Management Support . . . . . . . . . . . . . . . . . . . . . . . . . . . . . . . . . . . . . . . . . . . . . . . . . . . . . . . . . . . . . . . . . . . . . . 1-5
1.2.6 Wireless Security Support . . . . . . . . . . . . . . . . . . . . . . . . . . . . . . . . . . . . . . . . . . . . . . . . . . . . . . . . . . . . . . . . . . . . . . . 1-6
Chapter 2: Getting Started
2.1 Basic Requirements. . . . . . . . . . . . . . . . . . . . . . . . . . . . . . . . . . . . . . . . . . . . . . . . . . . . . . . . . . . . . . . . . . . . . . . . . . . . . . . . 2-1
2.2 Verifying the Package Contents . . . . . . . . . . . . . . . . . . . . . . . . . . . . . . . . . . . . . . . . . . . . . . . . . . . . . . . . . . . . . . . . . . . . . . 2-1
2.3 Observing Placement and Range Guidelines . . . . . . . . . . . . . . . . . . . . . . . . . . . . . . . . . . . . . . . . . . . . . . . . . . . . . . . . . . . . 2-2
2.4 Cabling the CB3000 . . . . . . . . . . . . . . . . . . . . . . . . . . . . . . . . . . . . . . . . . . . . . . . . . . . . . . . . . . . . . . . . . . . . . . . . . . . . . . . . 2-2
2.5 Logging into the CB3000 . . . . . . . . . . . . . . . . . . . . . . . . . . . . . . . . . . . . . . . . . . . . . . . . . . . . . . . . . . . . . . . . . . . . . . . . . . . . 2-4
2.5.1 Discovery Tool Login . . . . . . . . . . . . . . . . . . . . . . . . . . . . . . . . . . . . . . . . . . . . . . . . . . . . . . . . . . . . . . . . . . . . . . . . . . . . 2-4
2.5.2 Changing the IP address for a new Client Bridge. . . . . . . . . . . . . . . . . . . . . . . . . . . . . . . . . . . . . . . . . . . . . . . . . . . . . . 2-6
2.5.3 Web Interface Login . . . . . . . . . . . . . . . . . . . . . . . . . . . . . . . . . . . . . . . . . . . . . . . . . . . . . . . . . . . . . . . . . . . . . . . . . . . . 2-8
2.6 Viewing CB3000 Information. . . . . . . . . . . . . . . . . . . . . . . . . . . . . . . . . . . . . . . . . . . . . . . . . . . . . . . . . . . . . . . . . . . . . . . . . 2-9
2.7 CB3000 Antenna Settings . . . . . . . . . . . . . . . . . . . . . . . . . . . . . . . . . . . . . . . . . . . . . . . . . . . . . . . . . . . . . . . . . . . . . . . . . . 2-10
Chapter 3: Network Configuration
3.1 Understanding and Configuring Wireless Settings. . . . . . . . . . . . . . . . . . . . . . . . . . . . . . . . . . . . . . . . . . . . . . . . . . . . . . . . 3-1
3.1.2 Network Configurations . . . . . . . . . . . . . . . . . . . . . . . . . . . . . . . . . . . . . . . . . . . . . . . . . . . . . . . . . . . . . . . . . . . . . . . . . 3-3
3.1.3 Security Encryption Configurations. . . . . . . . . . . . . . . . . . . . . . . . . . . . . . . . . . . . . . . . . . . . . . . . . . . . . . . . . . . . . . . . . 3-8
3.2 Understanding and Configuring Ethernet Settings . . . . . . . . . . . . . . . . . . . . . . . . . . . . . . . . . . . . . . . . . . . . . . . . . . . . . . . 3-30
3.3 Client Management. . . . . . . . . . . . . . . . . . . . . . . . . . . . . . . . . . . . . . . . . . . . . . . . . . . . . . . . . . . . . . . . . . . . . . . . . . . . . . . 3-32
3.4 Configuring a Wired Ethernet ACL . . . . . . . . . . . . . . . . . . . . . . . . . . . . . . . . . . . . . . . . . . . . . . . . . . . . . . . . . . . . . . . . . . . 3-34
TOC-iv CB3000 Client Bridge User’s Guide
Chapter 4: Management Options
4.1 Statistics and Logs . . . . . . . . . . . . . . . . . . . . . . . . . . . . . . . . . . . . . . . . . . . . . . . . . . . . . . . . . . . . . . . . . . . . . . . . . . . . . . . . 4-1
4.1.1 Viewing Wireless Statistics . . . . . . . . . . . . . . . . . . . . . . . . . . . . . . . . . . . . . . . . . . . . . . . . . . . . . . . . . . . . . . . . . . . . . . 4-1
4.1.2 Viewing RF Statistics . . . . . . . . . . . . . . . . . . . . . . . . . . . . . . . . . . . . . . . . . . . . . . . . . . . . . . . . . . . . . . . . . . . . . . . . . . . 4-4
4.1.3 Viewing Ethernet Statistics . . . . . . . . . . . . . . . . . . . . . . . . . . . . . . . . . . . . . . . . . . . . . . . . . . . . . . . . . . . . . . . . . . . . . . 4-4
4.1.4 Viewing Event Log. . . . . . . . . . . . . . . . . . . . . . . . . . . . . . . . . . . . . . . . . . . . . . . . . . . . . . . . . . . . . . . . . . . . . . . . . . . . . . 4-6
4.2 Configuring Management Protocols . . . . . . . . . . . . . . . . . . . . . . . . . . . . . . . . . . . . . . . . . . . . . . . . . . . . . . . . . . . . . . . . . . . 4-8
4.2.1 HTTP, HTTPS Configuration Settings . . . . . . . . . . . . . . . . . . . . . . . . . . . . . . . . . . . . . . . . . . . . . . . . . . . . . . . . . . . . . . . 4-8
4.2.2 SNMP Settings . . . . . . . . . . . . . . . . . . . . . . . . . . . . . . . . . . . . . . . . . . . . . . . . . . . . . . . . . . . . . . . . . . . . . . . . . . . . . . . . 4-8
4.2.3 SNMP RF Trap Thresholds . . . . . . . . . . . . . . . . . . . . . . . . . . . . . . . . . . . . . . . . . . . . . . . . . . . . . . . . . . . . . . . . . . . . . . 4-12
4.2.4 DHCP Server Settings . . . . . . . . . . . . . . . . . . . . . . . . . . . . . . . . . . . . . . . . . . . . . . . . . . . . . . . . . . . . . . . . . . . . . . . . . . 4-13
4.2.5 Time Settings . . . . . . . . . . . . . . . . . . . . . . . . . . . . . . . . . . . . . . . . . . . . . . . . . . . . . . . . . . . . . . . . . . . . . . . . . . . . . . . . 4-14
Chapter 5: Administrative Options
5.1 Changing the Password. . . . . . . . . . . . . . . . . . . . . . . . . . . . . . . . . . . . . . . . . . . . . . . . . . . . . . . . . . . . . . . . . . . . . . . . . . . . . 5-1
5.2 Rebooting or Restoring a Device. . . . . . . . . . . . . . . . . . . . . . . . . . . . . . . . . . . . . . . . . . . . . . . . . . . . . . . . . . . . . . . . . . . . . . 5-2
5.2.1 Rebooting the Device . . . . . . . . . . . . . . . . . . . . . . . . . . . . . . . . . . . . . . . . . . . . . . . . . . . . . . . . . . . . . . . . . . . . . . . . . . . 5-2
5.2.2 Restoring the Device. . . . . . . . . . . . . . . . . . . . . . . . . . . . . . . . . . . . . . . . . . . . . . . . . . . . . . . . . . . . . . . . . . . . . . . . . . . . 5-3
5.3 Importing or Exporting the Configuration File . . . . . . . . . . . . . . . . . . . . . . . . . . . . . . . . . . . . . . . . . . . . . . . . . . . . . . . . . . . . 5-5
5.3.1 Using FTP. . . . . . . . . . . . . . . . . . . . . . . . . . . . . . . . . . . . . . . . . . . . . . . . . . . . . . . . . . . . . . . . . . . . . . . . . . . . . . . . . . . . . 5-5
5.3.2 Using HTTP . . . . . . . . . . . . . . . . . . . . . . . . . . . . . . . . . . . . . . . . . . . . . . . . . . . . . . . . . . . . . . . . . . . . . . . . . . . . . . . . . . . 5-7
5.4 Loading Firmware . . . . . . . . . . . . . . . . . . . . . . . . . . . . . . . . . . . . . . . . . . . . . . . . . . . . . . . . . . . . . . . . . . . . . . . . . . . . . . . . 5-10
5.5 Logging Settings . . . . . . . . . . . . . . . . . . . . . . . . . . . . . . . . . . . . . . . . . . . . . . . . . . . . . . . . . . . . . . . . . . . . . . . . . . . . . . . . . 5-12
5.6 Troubleshooting Options . . . . . . . . . . . . . . . . . . . . . . . . . . . . . . . . . . . . . . . . . . . . . . . . . . . . . . . . . . . . . . . . . . . . . . . . . . . 5-14
Appendix A: CB3000 Technical Specifications
Appendix B: SNMP MIB Support
Appendix C: Customer Support
Appendix D: Wireless Security Basics
D.1
D.2
D.3
D.4
WEP Security . . . . . . . . . . . . . . . . . . . . . . . . . . . . . . . . . . . . . . . . . . . . . . . . . . . . . . . . . . . . . . . . . . . . . . . . . . . . . . . . . . . . .D-2
WPA1 (TKIP) Security . . . . . . . . . . . . . . . . . . . . . . . . . . . . . . . . . . . . . . . . . . . . . . . . . . . . . . . . . . . . . . . . . . . . . . . . . . . . . .D-3
WPA2 (CCMP) Security . . . . . . . . . . . . . . . . . . . . . . . . . . . . . . . . . . . . . . . . . . . . . . . . . . . . . . . . . . . . . . . . . . . . . . . . . . . . .D-6
Secure 802.1x Security . . . . . . . . . . . . . . . . . . . . . . . . . . . . . . . . . . . . . . . . . . . . . . . . . . . . . . . . . . . . . . . . . . . . . . . . . . . . .D-7
About This Guide
Introduction
This guide provides configuration and setup information for the CB3000 Client Bridge.
Document Conventions
The following document conventions are used in this document:
NOTE
Indicates tips or special requirements
CAUTION: Indicates conditions that can cause equipment damage or data loss.
WARNING! Indicates a condition or procedure that could result in personal
injury or equipment damage.
Notational Conventions
The following notational conventions are used in this document:
• Italics are used to highlight specific items in the general text, and to identify chapters and sections in this
and related documents.
• Bullets (•) indicate:
• action items
• lists of alternatives
• lists of required steps that are not necessarily sequential
• Sequential lists (those describing step-by-step procedures) appear as numbered lists.
vi CB3000 Client Bridge User’s Guide
Service Information
If a problem is encountered with the CB3000, contact Motorola Customer Support. Before calling, have the
model number and serial number at hand. See Appendix C, Customer Support for more information.
If the problem cannot be solved over the phone, you may need to return your equipment for servicing. If that
is necessary, you will be given specific directions.
NOTE: Motorola is not responsible for any damages incurred during shipment if the
approved shipping container is not used. Shipping the units improperly can possibly void
the warranty. If the original shipping container was not kept, contact Motorola to have
another sent to you.
Introduction
This chapter introduces the Motorola CB3000 Client Bridge, and describes its operational environment and
its primary operating principles and features.
It includes the following sections:
• General Overview
• CB3000 Client Bridge Operational Principles
1.1 General Overview
The CB3000 Client Bridge is an IEEE 802.11a/b/g compliant wireless LAN Ethernet adapter. The CB3000
Client Bridge extends wireless networking capabilities to printers, scales, medical equipment,
manufacturing machinery, bar code readers, time clocks, point-of-sale and other data collection devices. It
provides a reliable, cost-effective interface between devices utilizing Ethernet ports and Motorola's wireless
LAN switches and access points.
Multiple devices can share one CB3000 Client Bridge using a 10BaseT Ethernet hub. This feature saves
equipment costs when several devices require wireless Ethernet connectivity. The CB3000 has an on-board
TCP/IP stack to provide a reliable transport mechanism. The CB3000 bridge can initiate a permanent client
connection to your server or accept datagrams from multiple sources. Use the CB3000 Client Bridge to
network devices that do not have a PC Card slot or PCI card slot (printers, scanners, Internet appliances etc.).
Up to 16 devices can be networked simultaneously by it.
The CB3000 Client Bridge uses frequency modulation to transmit digital data to the devices within its own
subnet. The transmission begins with a carrier signal that provides the center frequency. The digital data is
superimposed on the carrier signal (modulation). The radio signal propagates into the air as electromagnetic
waves.
The receiving antenna, in the path of the airwaves, absorbs the waves as electric signals. The receiving
device demodulates the signal by removing the carrier signal. The CB3000 Client Bridge uses the
environment as a transmission medium. The CB3000 Client Bridge can utilize both the 2.4 and 5.2 GHz
frequency ranges specified by IEEE.
1-2 CB3000 Client Bridge User’s Guide
1.1.1 Within the Network
A CB3000 Client Bridge establishes an average communication range with its associated device(s) called a
Basic Service Set (BSS) or cell. When in a particular cell, the devices can locate and communicate with the
CB3000 Client Bridge. Each cell has a basic service set identifier (BSS_ID). In IEEE 802.11, the CB3000 Client
Bridge MAC address represents the BSS_ID.
Figure 1.1 CB3000 Client Bridge within the Network
The CB3000 Client Bridge and its client devices appear as a single mobile unit to an associated access point
when operating in Infrastructure mode. For more information on CB3000 Client Bridge Infrastructure mode
operation, see Infrastructure Mode on page 1-3.
1.1.2 Feature Summary
The CB3000 Client Bridge Client Bridge has the following feature set:
• Device driver free installation
• Multi-functional status LEDs
• Updatable device firmware
• IEEE 802.11a/b/g device interoperability
• Automatic rate selection
• Robust statistical displays
• Advanced event logging capabilities
• Configuration file import/export capability
• Roaming support
• Upgradable device firmware
• DHCP client support
• Password-protected management interface
• 64 and 128-bit WEP encryption for network security
• WPA1 (TKIP) and WPA2 (CCMP) for advanced data protection
• Secure 802.1x authentication
• Discovery Tool support
Introduction 1-3
1.2 CB3000 Client Bridge Operational Principles
To improve CB3000 Client Bridge management and performance, users need to understand basic network
operating mode functionality and configuration options. These topics are described in the following sections:
• CB3000 Client Bridge Network Operating Modes
• Media Access Control (MAC) Layer Bridging
• DHCP Support
• Modulation
• Web Management Support
• Wireless Security Support
1.2.1 CB3000 Client Bridge Network Operating Modes
The CB3000 Client Bridge can be configured to operate in two different modes depending on the needs of
the network. Select the CB3000 Client Bridge operating mode based on device inter-operability requirements
and network conditions (DHCP support, security settings, etc.)
The CB3000 Client Bridge supports the following network modes:
• Infrastructure Mode
• Ad-hoc (Peer-to-Peer) Mode
1.2.1.1 Infrastructure Mode
In infrastructure mode, the CB3000 Client Bridge connects to a LAN through a wireless access point. Ethernet
client devices, such as PCs, printers, POS devices, and other Ethernet-capable devices connect to the CB3000
Client Bridge, either directly, or through a hub or switch.
The CB3000 Client Bridge associates with a nearby access point which sees the CB3000 Client Bridge and
its client devices as a standard mobile unit (MU). The access point then forms a wireless bridge between the
wired LAN and clients through the CB3000 Client Bridge.
The access point is a dedicated device wired into the LAN backbone, while the CB3000 Client Bridge can be
physically moved throughout the LAN. However, the CB3000 Client Bridge is designed to be placed in a single
location for optimal use.
WARNING! Do not connect a Client Bridge set to Infrastructure
mode directly to the LAN (for example, through a wall port). Such
a connection could cause a transmission loop between the client
bridge and access point, disrupting network operation.
1-4 CB3000 Client Bridge User’s Guide
Client
Bridge
Access
Point
Printer
Storage
CB3K007
Figure 1.2 Infrastructure Mode
1.2.1.2 Ad-hoc (Peer-to-Peer) Mode
The Ad-hoc (Peer-to-Peer) mode allows two or more CB3000 Client Bridge units to communicate exclusively
with one another without using an access point. In the simplest of terms, this mode uses the CB3000 Client
Bridge to bridge two or more Ethernet devices.
In Ad-hoc mode, all client devices bridged with the CB3000 Client Bridge share the same subnet and have
identical configurations. More specifically, the wireless LAN service area, channel selection, data preamble
settings, and security settings are required to be the same for the units to communicate.
Client
Bridge
Client
Bridge
Printer
CB3K008
Figure 1.3 Ad-hoc Mode
1.2.2 Media Access Control (MAC) Layer Bridging
Like other Ethernet devices, the CB3000 Client Bridge has a hardware factory encoded address called a MAC
address. The address consists of a 48-bit number written as six hexadecimal bytes separated by colons.
The CB3000 Client Bridge maintains a list of up to 16 Ethernet clients using their unique MAC address. This
information is stored in the CB3000 Client Bridge. This information is used to determine which device in the
device’s subnet is receiving or sending data and the appropriate action taken.
Introduction 1-5
1.2.3 DHCP Support
The CB3000 Client Bridge can use Dynamic Host Configuration Protocol (DHCP) to obtain a leased IP address
and configuration information from a remote server. DHCP is based on the BOOTP protocol and can co-exist
or interoperate with BOOTP.
Configure the CB3000 Client Bridge to send a DHCP request searching for a server to acquire the required IP
address information. If DHCP server support is unavailable, an IP address can also be assigned to the CB3000
Client Bridge manually (static).
If the CB3000 Client Bridge is configured to use DHCP, but there is no DHCP server to service the request, the
CB3000 Client Bridge by default takes the address 10.10.1.1. The IP address of the device must be set
manually if the device is not configured to use DHCP.
1.2.4 Modulation
Modulation is the process of adding a message (voice, data, etc.) on a carrier signal for transmission. The
carrier could be analog or optical signals. The carrier signal is of a constant value that is changed when a
message is added to it. This enables the data to be transmitted over a medium and successfully demodulated at the receiving end.
The 802.11b standard uses Direct Sequence Spread System (DSSS), while 802.11a/g uses Orthogonal
Frequency Division Multiplexing (OFDM) to accommodate higher data rates on any medium.
1.2.5 Web Management Support
The Motorola CB3000 Client Bridge contains a built-in browser interface that enables you to configure and
manage the device using a standard web browser such as Microsoft’s Internet Explorer version 5.0 or later
or Mozilla Firefox 2.0 or later or Netscape Navigator 6.0 or later. The interface also allows you to monitor the
CB3000 Client Bridge.
Connect to the CB3000 Client Bridge by directly entering the CB3000 Client Bridge’s IP address within the
Web browser or by using the Motorola CB3000 Client Bridge Discovery Tool to locate the CB3000 Client
Bridge within the network. You can launch the user interface from the Discovery Tool by double clicking on
the IP address of the discovered CB3000 Client Bridge.
NOTE: By default, only https access is allowed. However, http can be enabled
from the http management link.
NOTE: Web management of the CB3000 Client Bridge requires either Microsoft
Internet Explorer 5.0 or later or Mozilla Firefox 2.0 or later or Netscape Navigator
6.0 or later.
1-6 CB3000 Client Bridge User’s Guide
1.2.6 Wireless Security Support
CB3000 Client Bridge provides support for the following wireless security protocols.
• WEP Security
• WPA1 Security with TKIP algorithm
• WPA2 Security with TKIP / CCMP (AES) algorithms
• Secure 802.1x Security with MD5/MSCHAPV2/PEAP/TLS/TTLS EAP types
For more information on these security types refer Appendix D, Wireless Security Basics.
Getting Started
Before installing the CB3000 Client Bridge, review the installation guidelines in the following sections:
• Basic Requirements
• Verifying the Package Contents
• Observing Placement and Range Guidelines
• Cabling the CB3000
• Logging into the CB3000
• Viewing CB3000 Information
• CB3000 Antenna Settings
2.1 Basic Requirements
The following hardware and software resources are required to install and operate a CB3000:
• Networked PC to be used during device configuration. The PC must have an RJ-45 Ethernet port and a
CDROM drive. The PC must be running the following:
• Windows 2000 or XP operating system
• Microsoft Internet Explorer 5.0 or later, or Netscape Navigator 6.0 or later
• An access point (for infrastructure mode operation) or a networked client (for Ad-hoc peer-to-peer mode
operation).
2.2 Verifying the Package Contents
Before installing the CB3000, verify that the package contains the following components:
• CB3000 Installation Guide
• CB3000 Software and Documentation CDROM
• CB3000 Client Bridge with integrated radio
• Ethernet cable
• Power adapter
• Single detachable omni-pole antenna
• Mounting hardware
2-2 CB3000 Client Bridge User’s Guide
NOTE: Contact Motorola Support Center to report any components that are
missing or not functioning properly. For more information, see Appendix C,
Customer Support.
2.3 Observing Placement and Range Guidelines
Before installing the CB3000, verify the installation site meets the following requirements:
• The site should meet the Environmental Specifications as defined in Appendix A, CB3000 Technical
Specifications.
• The site should have access to a properly rated power source and antenna gain that meets the following
specifications:
• Peak Antenna Gain: 3 dBi at 2.4 GHz or 4 dBi at 5 GHz
• Power Supply: Switching DC 12V, 1A
• The site should be dry and near the devices (hub, telephone, computers, point-of-sale) you intend to
connect to the CB3000.
• The site should not be near other equipment (transformers, fluorescent lights etc.) that could interfere
with the CB3000’s radio transmissions.
The site should be within 330 ft. for 802.11a and 250 ft. for 802.11g of the LAN or wireless access point
connected to the CB3000.
2.4 Cabling the CB3000
To cable the CB3000, follow these steps:
1. Screw the antenna clockwise onto the antenna connector on the rear of the CB3000 as shown in
Figure 2.1.
WARNING! Do not connect a Client Bridge set to Infrastructure
mode directly to the LAN (for example, through a wall port). Such
a connection could cause a transmission loop between the client
bridge and access point, disrupting network operation.
Getting Started 2-3
Figure 2.1 Rear of the CB3000
2. Attach one end of an Ethernet cable to a RJ-45 jack on a networked computer or router.
3. Connect the other end of the Ethernet cable to the LAN connector on the rear of
the CB3000.
4. Plug the power adapter into the DC-IN connector on the rear of the CB3000.
WARNING! Only use the power adapter supplied by Motorola
with the CB3000. Using an incorrect power adapter could damage
the CB3000 and void the product warranty.
5. Connect the plug end of the power adapter into a power outlet. The built-in power converter
automatically selects and adjusts the power for the appropriate voltage.
6. Verify the installation by checking the status of the LEDs on the front of the CB3000.
Figure 2.2 Front of the CB3000
Table 2-1 describes the CB3000 LED indicators. If the CB3000’s LED functionality has been verified, log into
the CB3000 console to begin basic device configuration (see Logging into the CB3000 on page 2-4).
2-4 CB3000 Client Bridge User’s Guide
Table 2-1. CB3000 LEDs
LED Label
Activity
Description
Power LEDs
Status
OFF
Power OFF
Error
Orange ON
Hardware error
Status
Green ON
Power ON/Device ready
Status
Green Blinking
Booting, system self-test or firmware upgrade
Radio LEDs
802.11a, 802.11b/g OFF
Connectivity disabled
802.11a
Orange ON
802.11a radio associated
802.11a
Orange Blinking
802.11 a radio scanning
802.11b/g
Green ON
802.11b/g radio associated
802.11b/g
Green Blinking
802.11b/g radio scanning
LAN LEDs
100 Mbps, 10 Mbps OFF
No Ethernet activity
100 Mbps
Orange ON
100 Mbps connection over LAN
100 Mbps
Orange Blinking
100 Mbps transmit/receive
10 Mbps
Green ON
10 Mbps connection over LAN
10 Mbps
Green Blinking
10 Mbps transmit/receive
2.5 Logging into the CB3000
There are two ways to log into the CB3000 console:
• Using the CB3000 Discovery Tool included on the CB3000 product CD
• Using a Web browser such as Microsoft Internet Explorer 5.0 or later, or Mozilla Firefox 2.0 or later, or
Netscape Navigator 6.0 or later.
Typically, the CB3000 is located using the Discovery Tool. The discovered CB3000’s URL is then saved as a
browser “favorite” and the saved link is used to access the console directly through a Web browser.
NOTE: If you use the Discover Tool to connect to a CB3000, the session is opened
using https.
2.5.1 Discovery Tool Login
Included on the CB3000 Client Bridge CD is a utility called the Discovery Tool. When executed, the Discovery
Tool scans the network for all running CB3000 units and “discovers” them. When a unit is discovered, it is
listed within the Discovery Tool interface. By selecting a discovered unit within the Discovery Tool, you can
log into its console.
Getting Started 2-5
NOTE: If the subnet of the PC where the tool is run is different from the current ipaddress of the CB3000, a window displays with the option to change the IP
address of the Client Bridge. This is password protected (use admin/symbol). To
know how to change the IP address for a CB3000, refer Changing the IP address for
a new Client Bridge on page 2-6.
To run the Discovery Tool:
1. Locate the Discovery Tool (discover.exe) on the CB3000 CD and copy it to a desktop on the same network
as the CB3000 you wish to access.
2. Double-click on the discover.exe file to launch the utility, and run a network scan. The scan starts
immediately; when or if a CB3000 unit is discovered, a screen similar to Figure 2.3 is displayed.
Figure 2.3 Discovery Tool User Interface
3. Click on the IP address of the CB3000 you wish to log into.
4. A Security Alert dialog box displays. Click Yes to proceed.
Figure 2.4 Security Alert Dialog Box
5. A CB3000 Login dialog box displays. Enter a username and password to log onto the CB3000 console.
The default username and password are “admin” and “symbol” respectively.
2-6 CB3000 Client Bridge User’s Guide
Figure 2.5 Login Dialog Box
6. Upon logging in, the CB3000 Information screen displays. See Viewing CB3000 Information on page 2-9
for more details.
7. Proceed to the following sections to configure the CB3000:
• Understanding and Configuring Ethernet Settings – This includes configuring identification settings
for the CB3000 within the network.
• Understanding and Configuring Wireless Settings – This includes configuring wireless network
settings, as well as security policies for data received and transmitted through the CB3000.
2.5.2 Changing the IP address for a new Client Bridge
The CB3000 is factory configured with DHCP enabled and ready to associate with a wireless network using
an ESSID of 101. When the device is booted up, it tries to associate to a network with ESSID 101 and obtain
its IP address from the DHCP server.
If the device is unable to obtain and IP address then the IP address has to be manually configured.
1. Double click on the new CB3000. A warning is displayed and you are asked to change the IP address for
the CB3000.
Figure 2.6 Subnet Mismatch Warning Screen
2. Select Yes to change the IP address for the CB3000. The Set IP address of Cb3000 screen is displayed.
Getting Started 2-7
Figure 2.7 Set IP address of CB3000 screen
“
3. By default, the Use following IP Address option is selected. You must enter the IP address for the CB3000
and the Subnet mask for the network in their respective text boxes.
To obtain an IP address automatically from a DHCP server, select the Obtain IP address automatically
option.
4. If the PC you are connecting this CB3000 to has more than one network adapter, you can choose to select
the network adapter to connect to. To do so, select the appropriate network adapter from the Network
adapter drop-down list box.
NOTE: You can use the Suggest settings button on the Discovery tool to suggest
the IP address and Subnet mask appropriate to the device you are connecting the
CB3000 to.
5. Click the OK button to save the changes and close the dialog box. You are prompted for the password for
the ‘admin’ account for the CB3000.
Figure 2.8 Confirm IP Change by providing password here.
6. The information is saved to the CB3000. The Discovery Tool refreshes itself and the new IP address of
the CB3000 displays.
2-8 CB3000 Client Bridge User’s Guide
Figure 2.9 IP Changed
7. To continue, double click the IP address of the CB3000.
2.5.3 Web Interface Login
After logging into the CB3000 console using the Discovery Tool (See Discovery Tool Login on page 2-4), save
the IP address and log into the console in the future using the CB3000’s IP address.
To log into the CB3000 console using an IP address:
1. The CB3000 console is accessible via a Web browser using HTTP over SSL (secure socket layer) protocol.
Simply, this means you need to add an “s” in the intro of the URL. For example, https://
Enter the IP address URL for the CB3000 within your Web browser. The default CB3000 address is
10.10.1.1.
2. A Security Alert dialog box displays, click Yes to proceed.
Figure 2.10 Security Alert Dialog Box
3. A CB3000 Login dialog displays. Enter a username and password to log onto the CB3000 console. The
default username and password are “admin” and “symbol”, respectively.
Getting Started 2-9
Figure 2.11 Login Dialog Box
4. Upon logging in, the CB3000 Information screen displays. See Viewing CB3000 Information on page 2-9
for more details.
5. Proceed to the following sections to configure the CB3000.
• Understanding and Configuring Ethernet Settings – Includes configuring identification settings for
the CB3000.
• Understanding and Configuring Wireless Settings – Includes configuring wireless network settings,
as well as security policies for data received and transmitted through the CB3000.
2.6 Viewing CB3000 Information
Upon first logging into the CB3000, the CB3000 Information screen displays. The Information screen includes
four data fields:
• Client Bridge Information – Includes the factory settings such as device name, MAC address,
firmware version, radio version, and country of origin for the device.
• Ethernet Settings – Includes IP address information for the Ethernet port (and ultimately the IP address
of the device). Also, whether the device is assigned an IP through DHCP or a static IP. To modify these
settings, see Understanding and Configuring Ethernet Settings on page 3-30.
• WLAN Settings – Includes wireless LAN settings for the network that the CB3000 is a part of. To modify
any of these settings, see Understanding and Configuring Wireless Settings on page 3-1.
• Clients – Indicates the number of active devices attached to the CB3000.
Figure 2.12 displays the CB3000 Information screen.
2-10 CB3000 Client Bridge User’s Guide
Figure 2.12 CB3000 Information Screen
2.7 CB3000 Antenna Settings
A CB3000 ships with antenna model ML-2452-APA1-01. This is an 802.11 a/b/g omni directional dipole
antenna. However, if you intend to use a different model antenna, that antenna needs to be selected from
the Antenna Settings screen in order to adjust the transmit power accordingly.
To select an antenna for use with the CB3000:
1. Select Settings > Wireless Settings > Antenna Settings from the CB3000 menu tree. The Antenna
Settings screen displays.
2. Select an antenna from the Antenna Selection drop-down menu. To use an antenna not listed in the
menu, select ‘Other’.
Getting Started 2-11
3. Refer to the Antenna Gain parameter.
Information the CB3000 derives from the antenna look-up table is based on the antenna the user selects.
The antenna gain parameter is read-only with no user editable values.
If the user selects any antenna except ‘Other’, the gain value cannot be modified. If the user selects
‘Other’, the text entry field is blank and the user must enter a gain value. The gain is a positive value with
no more than 1 decimal place.
4. Refer to the Additional System Loss parameter.
If the user selects any antenna except ‘Other’, the loss value cannot be modified. If the user selects
‘Other’ then the text entry field is blank and the user must enter a loss value.
5. Click Apply to save the settings. The CB3000 is now ready to have its default configuration modified to
suit the requirements of its intended operation environment.
2-12 CB3000 Client Bridge User’s Guide
Network Configuration
This chapter discusses the network configuration required for the CB3000 Client Bridge to communicate with
network hosts, mobile units, access points, or other CB3000 Client Bridge devices. It includes the following
sections:
• Understanding and Configuring Wireless Settings
• Understanding and Configuring Ethernet Settings
• Client Management
3.1 Understanding and Configuring Wireless Settings
Configuring the wireless LAN includes configuring network settings (including network type declaration and
associated settings), security encryption configurations, and client list definitions for devices allowed on the
restricted LAN. Before beginning network configuration, review existing the networks and their parameters.
The following sections describe how to view existing networks, and then configure different aspects of a
wireless LAN:
• Available Networks
• Network Configurations
• Security Encryption Configurations
• Client Management
3.1.1 Available Networks
A Wireless Local Area Network (WLAN) is a data-communications system that flexibly extends the
functionality of a wired LAN. A CB3000 can locate WLANs within its radio coverage area and connect to
them.
A WLAN does not require lining up devices for line-of-sight transmission. Roaming users can be handed off
from one WLAN to another like a cellular phone system. WLANs can therefore be configured around the
needs of specific groups of users, even when they are not in physical proximity. Each WLAN has a unique
network address, signal strength, security and mode configurations that could either render it optimal or at
risk for a CB3000 connection.
To display the WLANs available to the CB3000, select Settings > Wireless Settings > Available
Networks from the CB3000 menu tree. The Available Networks screen displays.
3-2 CB3000 Client Bridge User’s Guide
Figure 3.1 Example of Available Networks
Table 3-1 describes the parameters in the Available Networks screen. Click Refresh to update the list, if
necessary.
If an access point or peer supported WLAN provides a better CB3000 connection option than the WLAN that
the CB3000 is currently connected to, change the CB3000 connection. See Network Configurations on page
3-3 for more details.
Table 3-1. Available Networks Parameters Descriptions
Parameter
Description
Network
The network mode for which the CB3000 is configured. Possible values
are:
• AP – Indicates infrastructure mode.
• Peer – Indicates ad hoc mode.
To change the network mode, see Network Configurations on page 3-3.
SSID
The Service Set Identifier (SSID) of the access point or peer device. The
name is case sensitive and cannot exceed 32 characters.
MAC Address
The MAC address for the access point or peer. A MAC address is a 48-bit
number written as six hexadecimal bytes separated by colons; it cannot be
modified.
RSSI
The Relative Signal Strength Indicator (RSSI) value between the access
point or peer and the CB3000. The RSSI is expressed as a dBm value. A
higher dBm constitutes a higher signal strength value.
Security
The security type configured for the access point or peer. Each option (off
[open], WEP, WPA1, WPA2 and Secure 802.1x) has its own unique benefits
and risks. See Security Encryption Configurations on page 3-8 for more
details.
Network Configuration 3-3
Table 3-1. Available Networks Parameters Descriptions (continued)
Parameter
Channel
Description
The direct-sequence channel that the access point or peer is currently
using. The CB3000 and its connected device are required to use the same
channel to interoperate.
NOTE: Ensure the channel selected is appropriate for the intended
country of operation, or risk operating the CB3000 illegally.
Band
The frequency band the CB3000 is operating in. Either a or b/g, for 802.11a
or 802.11b/g, respectively.
3.1.2 Network Configurations
The CB3000 can be configured to run within an infrastructure (access point) type network or ad hoc (peer-topeer) type network, based on configured communication settings. See one of the following sections,
depending on the network type you are configuring the CB3000 to run in.
• Configuring Infrastructure Settings
• Configuring Ad Hoc Settings
3.1.2.1 Configuring Infrastructure Settings
Within the infrastructure network, the CB3000 can roam freely between access point cells in the network or
transmit and receive across subnets. Infrastructure mode is the CB3000 default mode.
To configure the CB3000 Client Bridge within an infrastructure network, follow these steps:
1. Select Settings > Wireless Settings > WLAN Settings from the CB3000 menu tree. The WLAN
Settings screen displays.
2. For the Network Mode field, select Infrastructure (AP). The Infrastructure Configuration screen
displays.
3-4 CB3000 Client Bridge User’s Guide
Figure 3.2 WLAN Settings—Infrastructure Network Configuration
3. Configure the ESSID (Wireless LAN Service ID) field, as appropriate:
• Attach to any ESSID automatically – Select this radio button to enable the CB3000 to randomly
select a target WLAN for connection.
• Specify the ESSID – Select this button to enter the name of a target WLAN or use the drop-down
menu to select an existing WLAN. Click ‘View’ to display the available networks first, if unsure of
which network to connect to.
4. Select the Frequency Band. Options include ‘a/b/g’,’a’, or ‘b/g’.
Ensure the frequency band selected is consistent with the WLAN network. By restricting the Frequency
Band on the CB3000, you can reduce the time the CB3000 takes to search for available APs.
5. Click the ‘View’ Available Networks link to view the Available Networks screen.
Use this screen to view a list of available ESSIDs (networks), and possibly select an ESSID. For more
information, see Available Networks on page 3-1.
6. Select the Scan Mode as either Active Scan or Passive Scan.
Active Scan mode takes less time when searching for APs by sending probe requests. Passive Scan takes
more time during a scan, but only listens for AP beacons.
Network Configuration 3-5
7. In the Country/Region section, select the appropriate operating region/country.
NOTE: Each country has its own regulatory restrictions concerning
electromagnetic emissions and the maximum RF signal strength that can be
transmitted. Consequently, selecting a country different from the country you are
actually operating the CB3000 in results in the illegal operation of the CB3000.
8. Click Apply to apply and save the settings, or Cancel to exit the screen without saving your changes.
To configure the CB3000 into an ad hoc network, see Configuring Ad Hoc Settings on page 3-5.
3.1.2.2 Configuring Ad Hoc Settings
Ad hoc mode is used to form peer-to-peer CB3000 networks without access points. Use ad hoc mode to
create networks within established network coverage areas or networks free of the physical constraints of
access point provided radio coverage areas. The device starting the ad hoc network (the first device
transmitting a beacon) determines the channel and data rate used for the other devices within the network
using the same ESSID.
Ad hoc mode is an Independent Basic Service Set (IBSS) mode requiring no backbone infrastructure. The lack
of an access point results in devices alternating the duty of sending beacons. There are no relay functions in
an Ad Hoc network, and not all mobile units are capable of communicating with other mobile units due to
the range limitations. Consequently, all stations need to be within range of each other.
NOTE: The CB3000 must already be configured to run in ad hoc mode in order to
set data rates. If the unit is configured for infrastructure mode, the Data Rate
button is disabled.
The CB3000 and its connected devices are required to use the same channel to interoperate. However, a
channel has restrictions based on the country of operation. Ensure the channel selected is appropriate for
the intended country of operation, or risk operating your CB3000 illegally.
To configure the CB3000 for AD Hoc operation:
1. Select Settings > Wireless Settings > WLAN Settings from the CB3000 menu tree.
2. For the Network Mode field, select Ad-hoc (Peer-to-Peer). The Ad Hoc Configuration screen
displays.
3. Configure the remainder of the fields, as appropriate, per the following descriptions.
• IBSSID (Wireless LAN Service Area) – Select from one of the following radio buttons:
• Specify the IBSSID - Enables you to enter the name of a target WLAN or use the drop-down
menu to select an existing WLAN.
• Pick from the list of available IBSSIDs - Select the IBSSID from the drop down list of IDs.
• Frequency Band – Select either ‘a’ or ‘b/g’ for the 802.11 frequency band supported.
• Channel Selection – Select from one of the following radio buttons:
• Use default channel – Enables the CB3000 to use the default channel settings.
• Specify the channel to use – Enables you to select a channel approved for your operating
region and country.
• Country/Region – All countries have their own regulatory restrictions concerning electromagnetic
emissions and the maximum RF signal strength that can be transmitted. Select the appropriate
operating region/country.
3-6 CB3000 Client Bridge User’s Guide
• Click the ‘View’ Available Networks link to view the available networks first, if unsure of the
network options.
• Data Rate – See step 4 for more details on configuring the data rate.
NOTE: The CB3000 must already be configured to run in ad hoc mode in order to
set data rates. If the unit is configured for infrastructure mode, the Data Rate
button is disabled.
NOTE: To change the mode in which the CB3000 Client Bridge runs, select the
appropriate mode from the Network Mode drop-down and click apply.
4. To set data rates for the ad hoc configured CB3000, click the Data Rate button. The Set Data Rates
screen displays.
Network Configuration 3-7
Figure 3.3 Set Data Rates (for Ad Hoc Configured Devices Only)
Select at least one Basic Rate as a minimum transmit rate value for the CB3000 radio. Within the
Supported Rates, select the data rate the CB3000 radio defaults to if a higher selected data rate cannot
be maintained.
NOTE: Select supported rates in respect to the data rates supported by the peer
devices within the ad hoc network. For example, if several of the peers within the
network are 802.11b clients, supported data rates should include 11 Mbps,
5.5 Mbps, 2 Mbps and 1 Mbps.
5. Click Apply to apply and save the settings, or Cancel to exit the screen without saving your changes.
To configure the CB3000 into an Infrastructure network instead, see Configuring Infrastructure Settings on
page 3-3.
3-8 CB3000 Client Bridge User’s Guide
3.1.3 Security Encryption Configurations
Security measures for the CB3000 and its connected network devices is critical regardless of your operating
environment (retail, enterprise etc.). Use the available CB3000 security options to protect the CB3000
managed LAN from wireless vulnerabilities, and safeguard the transmission of RF packets between the
CB3000 and its connected devices.
Available CB3000 security provisions are described further in the following sections:
• Configuring Open Security Settings – No security settings applied.
• Configuring WEP Security Settings – 802.11 Wired Equivalent Privacy encryption.
• Configuring WPA1 (TKIP) Security Settings – WPA1 dynamic encryption.
• Configuring WPA2 (CCMP) Security Settings – WPA2 (CCMP) dynamic encryption.
• Configuring Secure 802.1x Security Settings – 802.1x EAP authentication.
3.1.3.1 Configuring Open Security Settings
Though having no security for data transmitted through the CB3000 is not recommended, the option to have
a open, no encryption, non-secure connection security is available among the CB3000 security options.
To set CB3000 security to Open (no data protection):
1. Select Settings > Wireless Settings > Security from the CB3000 menu tree. The Security screen is
displayed.
2. Select Open from the Security Mode drop-down menu.
3. Click Apply to save and apply the setting.
3.1.3.2 Configuring WEP Security Settings
WEP is an encryption security protocol specified in the IEEE Wireless Fidelity (Wi-Fi) standard, 802.11b, and
supported by the CB3000. WEP encryption is designed to provide a wireless device with a level of security
and privacy comparable to a wired LAN.
The level of protection provided by WEP encryption is determined by the encryption key length and algorithm.
An encryption key is a string of case-sensitive characters used to encrypt and decrypt data packets
transmitted between a mobile unit and the CB3000; the CB3000 and associated device must use the same
encryption key (typically 1 through 4) to interoperate. For further overview information on WEP, see
Appendix D, WEP Security.
To configure WEP encryption security settings:
1. Select Settings > Wireless Settings > Security from the CB3000 menu tree.
2. Select WEP from the Security Mode drop-down field.
Network Configuration 3-9
Figure 3.4 WEP Configuration
3. Configure the remainder of the fields, as appropriate, per the following descriptions.
Authentication Type
Specify whether a shared key is implemented between the CB3000 and its
connected device or no key is used (Open System). If a shared key is used,
both the CB3000 and its connected device are required to use the same key
(1 through 4) to interoperate. A shared key increases the level of security
within the network as opposed sending information without one.
Default Transmit Key
Specify which one key is used to transmit WEP algorithm information
between the CB3000 and its connected device.
WEP Encryption
Select a WEP encryption model:
• 64-bits - Encrypts using a 40-bit key. The keys are 10 hexadecimal
characters in length.
• 128 bits - More secure. Encrypts using a 104-bit key. The keys are 26
hexadecimal characters in length.
3-10 CB3000 Client Bridge User’s Guide
Passphrase Algorithm
Select the passphrase algorithm used to encrypt the passphrase.
• Symbol PassKey – With Symbol’s proprietary algorithm the CB3000 can
share a common passkey with other Symbol clients capable of decoding
it. The CB3000 decodes the PassKey into a set of 4 WEP keys using MD5
algorithms. The WEP keys display as alphanumeric text in the key fields
until saved or the user navigates away from the WEP screen. Like a
passphrase, the PassKey provides an easy to remember way of entering
WEP key data without having to manually enter the keys each time WEP
keys are created.
• Generic PassPhrase – A passphrase used as a standard means of
creating WEP keys between the Symbol CB3000 and non-Symbol clients.
The CB3000 decodes the passphrase into a set of 4 WEP keys, with the
length depending on the 64 or 128 bit key length. The WEP keys display
as alphanumeric text in the key fields until saved or the user navigates
away from the WEP screen. The PassPhrase provides an easy to
remember way of entering WEP key data without having to manually
enter the keys each time WEP keys are created.
Note: Both the CB3000 and its networked devices are required to use the
same key and key length to interoperate.
Passphrase
Specify a 4 to 32 character passphrase, then click the Generate Keys
button.
The CB3000, other proprietary routers and Symbol devices use an algorithm
to convert the ASCII passphrase string to the same hexadecimal number.
This conversion is not required for a wireless connection. Wireless devices
without Symbol adapters need to use WEP keys manually configured as
hexadecimal numbers.
4. Click Apply to apply and save the settings, or Cancel to exit the screen without saving your changes.
3.1.3.3 Configuring WPA1 (TKIP) Security Settings
WPA, referred to as WPA1 within the CB3000 console, provides more sophisticated data encryption than
WEP. The CB3000’s WPA encryption scheme uses Temporal Key Integrity Protocol (TKIP). TKIP addresses
WEP’s weaknesses with a re-keying mechanism, a per-packet mixing function, a message integrity check,
and an extended initialization vector with sequencing rules.
Also, WPA provides strong user authentication based on 802.1x EAP. The CB3000 supports three EAP types
suitable for deployments with wireless LANs. They are:
• TLS – Transport Layer Security
• TTLS – Tunneled Transport Layer Security
• PEAP – Protected EAP
For overview information on WPA1, see Appendix D, WPA1 (TKIP) Security.
Network Configuration 3-11
For more details on encryption types, pros and cons of different encryption types and required configuration
parameters, see the Wi-Fi Alliance Web site at:
http://www.wifialliance.org/knowledge_center_overview.php.
NOTE: Only ‘Open’ and ‘WPA’ security settings are available for the Ad-hoc (Peerto-Peer) network mode. Infrastructure (AP) network mode supports all the different
security settings.
To configure WPA1 (TKIP) security settings:
1. Select Settings > Wireless Settings > Security from the CB3000 menu tree.
2. Select WPA1 from the Security Mode drop-down menu.
Figure 3.5 WPA1 Configuration
3. Select a WPA1 Type of either WPA1 Personal or WPA1 Enterprise.
WPA1 Personal
In this mode, a pre-shared key (password) is used for authentication.
WPA1 Enterprise
In this mode, authentication is achieved via 802.1X and Extensible
Authentication Protocol (EAP).
3-12 CB3000 Client Bridge User’s Guide
Configuring WPA1 (TKIP) Personal Parameters
WPA1 Personal type is used for small and home offices. The WPA1 Personal type provides basic level of
security that is adequate for usage in the above organizations.
Figure 3.6 WPA1 Type Screen - Personal
Configure the fields as per the following description:
WPA1 Algorithm
WPA1 uses TKIP algorithm:
• TKIP – Defines a ‘wrapper’ that goes around an existing WEP encryption
algorithm. TKIP comprises the same encryption engine and RC4 algorithm
defined for WEP. However, the key used for encryption in TKIP is 128 bits
long.
TKIP changes the key used for each packet. The key is created by mixing
together a combination of things, including a base key (called a Pairwise
Transient Key), the MAC address of the transmitting station, and the serial
number for the packet.
WPA1 Shared Key
Enter the key (8-63 characters long) that is shared between the client and
CB3000.
Configuring WPA1 (TKIP) Enterprise Parameters:
WPA1 (TKIP) Enterprise type provides enterprise class security to the devices connected to the CB3000.
WPA1 Enterprise type provides a wide range of Extensible Authentication Protocol (EAP) types to ensure
secure WLAN connections.
Network Configuration 3-13
Figure 3.7 WPA1 Type Screen - Enterprise
Configure the WPA1 Enterprise type fields as per the following description:
Configuring WPA1 Enterprise - EAP-TLS
Extensible Authentication Protocol (EAP) is an authentication framework that provides common functions
and a method to negotiate a desired authentication medium. EAP-Transport Layer Security (EAP-TLS) uses
client side certificates to ensure that security is not compromised.
See Figure 3.7 for WPA1 Enterprise EAP-TLS security fields.
WPA1 Algorithm
WPA1 uses TKIP algorithm:
• TKIP – Defines a ‘wrapper’ that goes around an existing WEP encryption
algorithm. TKIP comprises the same encryption engine and RC4 algorithm
defined for WEP. However, the key used for encryption in TKIP is 128 bits
long.
TKIP changes the key used for each packet. The key is created by mixing
together a combination of things, including a base key (called a Pairwise
Transient Key), the MAC address of the transmitting station, and the serial
number for the packet.
WPA1 User ID
The User ID for authentication.
3-14 CB3000 Client Bridge User’s Guide
WPA1 Key Password
The key password.
WPA1 TLS Key /
WPA1 TLS Key Import
The WPA1 TLS Key. The key can be uploaded to the device by:
• Pasting the TLS key in the Paste TLS Key text area. To upload the key,
click the Apply button located at the bottom of the screen.
• By providing the path to the file containing the key in the Import text box.
Use the Browse button to display the Open File dialog box from where
the file can be selected. To upload the file containing the WPA1 TLS Key,
click the Apply Uploaded File button.
WPA1 User Certificate / The WPA1 User Certificate. The user certificate can be uploaded to the
WPA1 User Certificate device by:
Import
• Pasting the certificate in the Paste User Certificate text area. To upload
the certificate, click the Apply button located at the bottom of the screen.
• By providing the path to the file containing the WPA1 User Certificate in
the Import text box. Use the Browse button to display the Open File
dialog from where the file can be selected. To upload the file containing
the certificate, click the Apply Uploaded File button.
WPA1 Root Certificate / The WPA1 Root Certificate. The Root Certificate can be uploaded to the
WPA1 Root Certificate device by:
Import
• Pasting the certificate in the Paste Root Certificate text area. To upload
the certificate, click the Apply button at the bottom of the screen.
• Providing the path to the file containing the certificate in the Import text
box. Use the Browse button to display the Open File dialog box from
where the file can be selected. To upload the file containing the
certificate, click the Apply Uploaded File button.
Apply
Use the Apply button to update all the changes to the device.
Reset
Use the Reset button to reset the fields in this screen to their default
values.
Cancel
Use the Cancel button to cancel any changes made to the WPA1 TLS
screen.
Configuring WPA1 Enterprise - EAP-TTLS
Extensible Authentication Protocol (EAP) is an authentication framework that provides common functions
and a method to negotiate a desired authentication medium. EAP -Tunneled Transport Layer Security (EAPTTLS) is an authentication protocol that extends EAP-TLS. EAP-TTLS uses a server side certificate to create
a secured tunnel between the client and the server. It then uses the secured tunnel to authenticate the client.
Network Configuration 3-15
.
Figure 3.8 WPA1 Enterprise Type - EAP-TTLS
Inner Authentication
Method
Select the authentication method used inside the tunnel. Select from:
• CHAP – Challenge-Handshake Authentication Protocol (CHAP) provides
security by the Challenge-Response method of authentication.
• MS CHAP - Microsoft CHAP (MS CHAP) is Microsoft’s implementation of
the CHAP protocol.
• MS CHAP v2 – An enhanced version of MS CHAP that plugs some
security loopholes of MS CHAP.
• PAP – Password Authentication Protocol (PAP) is a basic authentication
protocol that transmits unencrypted ASCII passwords over the network.
• MD5 – Message Digest algorithm 5 (MD5) is a cryptographic hash
algorithm that uses a 128-bit hash value.
• GTC – Generic Token Card (GTC) is a protocol that enables the exchange
of clear-text authentication credentials across a network. This protocol
uses one-time password and therefore is not vulnerable to replay attacks.
EAP-GTC is generally used inside a tunnel created by TTLS or PEAP to
provide server authentication.
Validate Server
Certificate
Check to force the CB3000 to validate the Server Certificate.
Clean User ID and
Password
Check to prevent the CB3000 from saving the WPA user name and its
password in its cache.
3-16 CB3000 Client Bridge User’s Guide
WPA1 Algorithm
WPA1 uses TKIP algorithm:
• TKIP – Defines a ‘wrapper’ that goes around an existing WEP encryption
algorithm. TKIP comprises the same encryption engine and RC4 algorithm
defined for WEP. However, the key used for encryption in TKIP is 128 bits
long.
TKIP changes the key used for each packet. The key is created by mixing
together a combination of things, including a base key (called a Pairwise
Transient Key), the MAC address of the transmitting station, and the serial
number for the packet.
WPA1 User ID
The User ID for authentication.
WPA1 Password
The WPA1 user password.
WPA1 Root Certificate / The WPA1 Root Certificate. The Root Certificate can be uploaded to the
WPA1 Root Certificate device by:
Import
• Pasting the certificate in the Paste Root Certificate text area. To upload
the certificate, click the Apply button at the bottom of the screen.
• By providing the path to the file containing the certificate in the Import
text box. Use the Browse button to display the Open File dialog box from
where the file can be selected. To upload the file containing the
certificate, click the Apply Uploaded File button.
Note: These fields are only enabled when Validate Server Certificate
option is enabled.
Apply
Use the Apply button to update all the changes to the device.
Reset
Use the Reset button to reset the fields in this screen to their default
values.
Cancel
Use the Cancel button to cancel any changes made to the WPA1 TTLS
screen.
Network Configuration 3-17
Configuring WPA1 Enterprise - EAP-PEAP
Extensible Authentication Protocol (EAP) is an authentication framework that provides common functions
and a method to negotiate a desired authentication medium. EAP-Protected EAP (PEAP) is similar to EAPTTLS and uses a server side certificate to create a secured tunnel between the client and the server. It then
uses this tunnel to authenticate the client.
Figure 3.9 WPA1 Enterprise Type - EAP-PEAP
Validate Server
Certificate
Check to force the CB3000 to validate the Server Certificate.
WPA1 Algorithm
WPA1 uses TKIP algorithm:
• TKIP – Defines a ‘wrapper’ that goes around an existing WEP encryption
algorithm. TKIP comprises the same encryption engine and RC4 algorithm
defined for WEP. However, the key used for encryption in TKIP is 128 bits
long.
TKIP changes the key used for each packet. The key is created by mixing
together a combination of things, including a base key (called a Pairwise
Transient Key), the MAC address of the transmitting station, and the serial
number for the packet.
WPA1 User ID
The User ID for authentication.
WPA1 Password
The WPA1 user password.
Clean User ID and
Password
Check to prevent the CB3000 from saving the WPA user name and its
password in its cache.
3-18 CB3000 Client Bridge User’s Guide
WPA1 Root Certificate / The WPA1 Root Certificate. The Root Certificate can be uploaded to the
WPA1 Root Certificate device by:
Import
• Pasting the certificate in the Paste Root Certificate text area. To upload
the certificate, click the Apply button at the bottom of the screen.
• By providing the path to the file containing the certificate in the Import
text box. Use the Browse button to display the Open File dialog box from
where the file can be selected. To upload the file containing the
certificate, click the Apply Uploaded File button.
Note: These fields are only enabled when Validate Server Certificate
option is enabled.
Apply
Use the Apply button to update all the changes to the device.
Reset
Use the Reset button to reset the fields in this screen to their default values.
Cancel
Use the Cancel button to cancel any changes made to the WPA1 PEAP
screen.
3.1.3.4 Configuring WPA2 (CCMP) Security Settings
WPA2 (CCMP) is based on the concept of a Robust Security Network (RSN), which defines a hierarchy of keys
with a limited lifetime (similar to TKIP). Like TKIP, the keys the administrator provides are used to derive other
keys. Messages are encrypted using a 128-bit secret key and a 128-bit block of data. The end result is an
encryption scheme as secure as any that the CB3000 provides.
For further overview information on WPA2, see Appendix D, WPA2 (CCMP) Security.
For more details on encryption types, pros and cons of different encryption types and required configuration
parameters, see the Wi-Fi Alliance Web site at: http://www.wifialliance.org/OpenSection/index.asp.
To configure WPA2 (CCMP) security settings:
1. Select Settings > Wireless Settings > Security from the CB3000 menu tree.
2. Select WPA2 from the Security Mode drop-down field.
Figure 3.10 WPA2 Configuration
3. Select a WPA2 Type of either WPA2 Personal or WPA2 Enterprise menu.
WPA2 Personal
In this mode, a pre-shared key (password) is used for authentication.
WPA2 Enterprise
In this mode, authentication is achieved via 802.1X and Extensible
Authentication Protocol (EAP).
Network Configuration 3-19
4. Select an algorithm from the WPA2 Algorithm drop-down menu. The algorithms are described as
follows.
• TKIP – Defines a “wrapper” that goes around an existing WEP encryption algorithm. TKIP comprises
the same encryption engine and RC4 algorithm defined for WEP. However, the key used for
encryption in TKIP is 128 bits long.
TKIP changes the key used for each packet. The key is created by mixing together a combination of
things, including a base key (called a Pairwise Transient Key), the MAC address of the transmitting
station, and the serial number for the packet.
This mixing operation is designed to put a minimum demand on the CB3000 and its supported clients,
but enough cryptographic strength so it cannot easily be broken.
• CCMP (AES) – Utilizes an Advanced Encryption Standard (AES) 128-bit key algorithm with a 48-bit
initialization vector (IV) for replay detection. The Counter Mode (CM) component of CCMP is the
algorithm providing data privacy. The Cipher Block Chaining Message Authentication Code (CBCMAC) component of CCMP provides data integrity and authentication.
• Both – Select Both to enable the CB3000 to interoperate with both TKIP and CCMP supported
clients. This setting is recommended in coverage areas populated by numerous devices
3-20 CB3000 Client Bridge User’s Guide
Configuring WPA2 (CCMP) Personal Parameters
WPA2 Personal type is use for small offices and home offices. The WPA2 Personal type provides basic level
of security that is adequate for usage in the above organizations.
Figure 3.11 WPA2 Type Screen - Personal
Configure the fields as per the following description:
WPA2 Algorithm
Select the WPA2 algorithm to use:
• TKIP – Defines a ‘wrapper’ that goes around an existing WEP encryption
algorithm. TKIP comprises the same encryption engine and RC4 algorithm
defined for WEP. However, the key used for encryption in TKIP is 128 bits
long.
TKIP changes the key used for each packet. The key is created by mixing
together a combination of things, including a base key (called a Pairwise
Transient Key), the MAC address of the transmitting station, and the serial
number for the packet.
• CCMP (AES) – Utilizes an Advanced Encryption Standard (AES) 128-bit
key algorithm with a 48-bit initialization vector (IV) for replay detection.
The Counter Mode (CM) component of CCMP is the algorithm providing
data privacy. The Cipher Block Chaining Message Authentication Code
(CBC-MAC) component of CCMP provides data integrity and
authentication.
• Both – Select this option to enable CB3000 to support devices that use
both TKIP and CCMP algorithms. Use this option when the number of
devices is large.
WPA2 Shared Key
Enter the key (8-63 characters long) that is shared between the client and
CB3000.
Network Configuration 3-21
Configuring WPA2 (CCMP) Enterprise Parameters
WPA2 (CCMP) Enterprise type provides enterprise class security to the devices connected to the CB3000.
WPA2 Enterprise type provides a wide range of EAP types to ensure secure WLAN connections.
Figure 3.12 WPA2 Type Screen - Enterprise
Configure the WPA2 Enterprise type fields as per the following description:
3-22 CB3000 Client Bridge User’s Guide
Configuring WPA2 Enterprise - EAP-TLS
Extensible Authentication Protocol (EAP) is an authentication framework that provides common functions
and a method to negotiate a desired authentication medium. EAP-Transport Layer Security (EAP-TLS) uses
client side certificates to ensure that security is not compromised.
See Figure 3.12 for WPA1 Enterprise EAP-TLS security fields.
WPA2 Algorithm
Select the WPA2 algorithm to use:
• TKIP – Defines a ‘wrapper’ that goes around an existing WEP encryption
algorithm. TKIP comprises the same encryption engine and RC4 algorithm
defined for WEP. However, the key used for encryption in TKIP is 128 bits
long.
TKIP changes the key used for each packet. The key is created by mixing
together a combination of things, including a base key (called a Pairwise
Transient Key), the MAC address of the transmitting station, and the serial
number for the packet.
• CCMP (AES) – Utilizes an Advanced Encryption Standard (AES) 128-bit
key algorithm with a 48-bit initialization vector (IV) for replay detection.
The Counter Mode (CM) component of CCMP is the algorithm providing
data privacy. The Cipher Block Chaining Message Authentication Code
(CBC-MAC) component of CCMP provides data integrity and
authentication.
• Both – Select this option to enable CB3000 to support devices that use
both TKIP and CCMP algorithms. Use this option when the number of
devices is large.
WPA2 User ID
The User ID for authentication.
WPA2 Key Password
The key password.
WPA2 TLS Key /
WPA2 TLS Key Import
The WPA2 TLS Key. The key can be uploaded to the device by:
• Pasting the TLS key in the Paste TLS Key text area. To upload the key,
click the Apply button located at the bottom of the screen.
• By providing the path to the file containing the key in the Import text box.
Use the Browse button to display the Open File dialog box from where
the file can be selected. To upload the file containing the WPA2 TLS Key,
click the Apply Uploaded File button.
WPA2 User Certificate / The WPA2 User Certificate. The user certificate can be uploaded to the
WPA2 User Certificate device by:
Import
• Pasting the certificate in the Paste User Certificate text area. To upload
the certificate, click the Apply button located at the bottom of the screen.
• By providing the path to the file containing the WPA2 User Certificate in
the Import text box. Use the Browse button to display the Open File
dialog from where the file can be selected. To upload the file containing
the certificate, click the Apply Uploaded File button.
Network Configuration 3-23
WPA2 Root Certificate / The WPA2 Root Certificate. The Root Certificate can be uploaded to the
WPA2 Root Certificate device by:
Import
• Pasting the certificate in the Paste Root Certificate text area. To upload
the certificate, click the Apply button at the bottom of the screen.
• By providing the path to the file containing the certificate in the Import
text box. Use the Browse button to display the Open File dialog box from
where the file can be selected. To upload the file containing the
certificate, click the Apply Uploaded File button.
Apply
Use the Apply button to update all the changes to the device.
Reset
Use the Reset button to reset the fields in this screen to their default values.
Cancel
Use the Cancel button to cancel any changes made to the WPA2 TLS screen.
Configuring WPA2 Enterprise - EAP-TTLS
Extensible Authentication Protocol (EAP) is an authentication framework that provides common functions
and a method to negotiate a desired authentication medium. EAP -Tunneled Transport Layer Security (EAPTTLS) is an authentication protocol that extends EAP-TLS. EAP-TTLS uses a server side certificate to create
a secured tunnel between the client and the server. It then uses the secured tunnel to authenticate the client.
Figure 3.13 WPA2 Enterprise Type - EAP-TTLS
3-24 CB3000 Client Bridge User’s Guide
Validate Server
Certificate
Check to force the CB3000 to validate the Server Certificate.
Inner Authentication
Method
Select the authentication method used inside the tunnel. Select from:
• CHAP – Challenge-Handshake Authentication Protocol (CHAP) provides
security by the Challenge-Response method of authentication.
• MS CHAP - Microsoft CHAP (MS CHAP) is Microsoft’s version of the
CHAP protocol.
• MS CHAP v2 – An enhanced version of MS CHAP that plugs some
security loopholes of MS CHAP
• PAP – Password Authentication Protocol (PAP) is a basic authentication
protocol that transmits unencrypted ASCII passwords over the network.
• MD5 – Message Digest algorithm 5 (MD5) is a cryptographic hash
algorithm that uses a 128-bit hash value.
• GTC – Generic Token Card (GTC) is a protocol that enables the exchange
of clear-text authentication credentials across a network. This protocol
uses one-time password and therefore is not vulnerable to replay attacks.
EAP-GTC is generally used inside a tunnel created by TTLS or PEAP to
provide server authentication.
WPA2 Algorithm
Select the WPA2 algorithm to use:
• TKIP – Defines a ‘wrapper’ that goes around an existing WEP encryption
algorithm. TKIP comprises the same encryption engine and RC4 algorithm
defined for WEP. However, the key used for encryption in TKIP is 128 bits
long.
TKIP changes the key used for each packet. The key is created by mixing
together a combination of things, including a base key (called a Pairwise
Transient Key), the MAC address of the transmitting station, and the serial
number for the packet.
• CCMP (AES) – Utilizes an Advanced Encryption Standard (AES) 128-bit
key algorithm with a 48-bit initialization vector (IV) for replay detection.
The Counter Mode (CM) component of CCMP is the algorithm providing
data privacy. The Cipher Block Chaining Message Authentication Code
(CBC-MAC) component of CCMP provides data integrity and
authentication.
• Both – Select this option to enable CB3000 to support devices that use
both TKIP and CCMP algorithms. Use this option when the number of
devices is large.
WPA2 User ID
The User ID for authentication.
WPA2 Password
The WPA2 user password.
Clean User ID and
Password
Check to prevent the CB3000 from saving the WPA user name and its
password in its cache.
Network Configuration 3-25
WPA1 Root Certificate / The WPA1 Root Certificate. The Root Certificate can be uploaded to the
WPA1 Root Certificate device by:
Import
• Pasting the certificate in the Paste Root Certificate text area. To upload
the certificate, click the Apply button at the bottom of the screen.
• By providing the path to the file containing the certificate in the Import
text box. Use the Browse button to display the Open File dialog box from
where the file can be selected. To upload the file containing the
certificate, click the Apply Uploaded File button.
Note: These fields are only enabled when Validate Server Certificate
option is enabled.
Apply
Use the Apply button to update all the changes to the device.
Reset
Use the Reset button to reset the fields in this screen to their default values.
Cancel
Use the Cancel button to cancel any changes made to the WPA2 TTLS
screen.
Configuring WPA2 Enterprise - EAP-PEAP
Extensible Authentication Protocol (EAP) is an authentication framework that provides common functions
and a method to negotiate a desired authentication medium. EAP-Protected EAP (PEAP) is similar to EAPTTLS and uses a server side certificate to create a secured tunnel between the client and the server. It then
uses this tunnel to authenticate the client.
Figure 3.14 WPA2 Enterprise Type - EAP-PEAP
3-26 CB3000 Client Bridge User’s Guide
Validate Server
Certificate
Check to force the CB3000 to validate the Server Certificate.
WPA2 Algorithm
Select the WPA2 algorithm to use:
• TKIP – Defines a ‘wrapper’ that goes around an existing WEP encryption
algorithm. TKIP comprises the same encryption engine and RC4 algorithm
defined for WEP. However, the key used for encryption in TKIP is 128 bits
long.
TKIP changes the key used for each packet. The key is created by mixing
together a combination of things, including a base key (called a Pairwise
Transient Key), the MAC address of the transmitting station, and the serial
number for the packet.
• CCMP (AES) – Utilizes an Advanced Encryption Standard (AES) 128-bit
key algorithm with a 48-bit initialization vector (IV) for replay detection.
The Counter Mode (CM) component of CCMP is the algorithm providing
data privacy. The Cipher Block Chaining Message Authentication Code
(CBC-MAC) component of CCMP provides data integrity and
authentication.
• Both – Select this option to enable CB3000 to support devices that use
both TKIP and CCMP algorithms. Use this option when the number of
devices is large.
WPA2 User ID
The User ID for authentication.
WPA2 Password
The WPA2 user password.
Clean User ID and
Password
Check to prevent the CB3000 from saving the WPA user name and its
password in its cache.
WPA2 Root Certificate / The WPA2 Root Certificate. The Root Certificate can be uploaded to the
WPA2 Root Certificate device by:
Import
• Pasting the certificate in the Paste Root Certificate text area. To upload
the certificate, click the Apply button at the bottom of the screen.
• By providing the path to the file containing the certificate in the Import
text box. Use the Browse button to display the Open File dialog box from
where the file can be selected. To upload the file containing the
certificate, click the Apply Uploaded File button.
Note: These fields are only enabled when Validate Server Certificate
option is enabled.
Apply
Use the Apply button to update all the changes to the device.
Reset
Use the Reset button to reset the fields in this screen to their default values.
Cancel
Use the Cancel button to cancel any changes made to the WPA2 PEAP
screen.
5. Click Apply to apply and save the settings, or Cancel to exit the screen without saving your changes.
Network Configuration 3-27
3.1.3.5 Configuring Secure 802.1x Security Settings
The Secure 802.1x security option provides the CB3000 and its associated clients an additional measure of
security for data transmitted over the wireless network. Secure 802.1x uses (EAP) as an authentication
mechanism between devices that is achieved through the exchange and verification of certificates.
A client should not be able to access the network if not authenticated. Refer to the system administrator for
information on configuring a server for Secure 8021.x support. For information on configuring 802.1x, see
Appendix D, Secure 802.1x Security.
NOTE: This authentication scheme will not work properly unless the Time Settings
screen is set to the correct time.
For more details on encryption types, pros and cons of different encryption types and required configuration
parameters, see the Wi-Fi Alliance Web site at: http://www.wifialliance.org/OpenSection/index.asp
To configure Secure 802.1x security settings:
1. Select Settings > Wireless Settings > Security from the CB3000 menu tree.
2. Select Secure 802.1x from the Security Mode drop-down field.
Figure 3.15 Secure 802.1x Configuration
3. Use the EAP Type drop-down menu to select the authentication mechanism used between the CB3000
and a target device to exchange and verify certificates. Options include:
3-28 CB3000 Client Bridge User’s Guide
• MD5 – The MD5 authentication method takes a message of arbitrary length as input and produces
a 128-bit fingerprint. The MD5 algorithm is intended for digital signature applications, in which a
large file must be compressed in a secure manner before being encrypted with a private (secret) key
under a public-key cryptographic system.
• MSCHAPV2 – Microsoft Challenge Handshake Authentication Protocol Version 2. MS-CHAP-v2
[RFC2759] is an extension of, yet incompatible with, MSCHAPv1. It also supports mutual
authentication. MSCHAPV2 is the default authentication method used by the Microsoft Windows
2000 operating system. Support of this authentication method on the CB3000 enables Windows
2000 users to establish remote PPP sessions without needing to first configure an authentication
method on the client. MSCHAP V2 introduces a change password feature, allowing the CB3000 to
change the account password if the RADIUS server reports the password has expired.
• PEAP – Windows XP SP1 and Microsoft 802.1X Authentication Client support Protected EAP (PEAP).
Uses an encrypted TLS-Tunnel. Only the server certificates are required.
• TLS – Transport Level Security is an EAP type that is used in certificate-based security environments.
If you are using smart cards for remote access authentication, TLS authentication is the method to
use.
• TTLS – Tunneled TLS. Requires certificate-based RADIUS server authentication, but supports an
extensible set of user authentication methods.
NOTE: The CB3000 displays a read-only Cipher data which specifies the type of
data packet that follows it.
4. Use the Default Transmit Key checkboxes to specify which one key is used to transmit WEP algorithm
information between the CB3000 and its connected device.
NOTE: Both the CB3000 and its networked device are required to use the same
key and key length to interoperate.
5. Select either 64 bits or 128-bits from the WEP Encryption drop-down menu.
For WEP 64 (40-bit key), the keys are 10 hexadecimal characters in length. For WEP 128 (104-bit key), the
keys are 26 hexadecimal characters in length.
6. Select the Passphrase Algorithm used for encrypting the passphrase.
• Symbol PassKey – Symbol proprietary algorithm the CB3000 can share with other Symbol clients
capable of decoding it. The CB3000 decodes the PassKey into a set of 4 WEP keys using MD5
algorithms. The WEP keys display as alphanumeric text in the key fields until saved or the user
navigates away from the WEP screen. Like a passphrase, the PassKey provides an easy to remember
way of entering WEP key data without having to manually enter the keys each time WEP keys area
created.
• Generic PassPhrase – A passphrase used as a standard means of creating WEP keys between the
Symbol CB3000 and non-Symbol clients. The CB3000 decodes the passphrase into a set of 4 WEP
keys, with the length depending on the 64 or 128 bit key length. The WEP keys display as
alphanumeric text in the key fields until saved or the user navigates away from the WEP screen. The
PassPharase provides an easy to remember way of entering WEP key data without having to
Network Configuration 3-29
manually enter the keys each time WEP keys are created
7. Specify a 4 to 32 character Passphrase and click the Generate Keys button.
The passphase is helpful for entering keys without having to remember all of the characters comprising
the key. The pass key can be any alphanumeric string. The CB3000, other proprietary routers and Symbol
devices use the algorithm to convert an ASCII string to the same hexadecimal number. This conversion is
not required for a wireless connection. Wireless devices without Symbol adapters need to use WEP keys
manually configured as hexadecimal numbers.
8. Enter the User ID and Password to verify your user credentials against the user and password
credentials used by the authentication server.
9. Click Apply to apply and save the settings, or Cancel to exit the screen without saving your changes.
Only for PEAP and TTLS EAP Types
• By default, the User ID and Password are retained on the CB3000 Client Bridge. To prevent misuse
and to clear the User ID and Password used to access the network, check the Clean User ID and
Password check-box. This option is only available for the PEAP EAP type. Check the Validate
Server Certificate check box to validate the Server’s certificate.
3-30 CB3000 Client Bridge User’s Guide
3.2 Understanding and Configuring Ethernet Settings
Configuring the CB3000’s Ethernet Settings entails specifying a name and network address information for
the CB3000 device. To configure Ethernet settings for the CB3000:
1. Select Settings > Ethernet Settings from the CB3000 menu tree.
Figure 3.16 Ethernet Settings
2. Assign a CB3000 device name and set CB3000 network address information.
• Device Name – A device name for the CB3000. A suggestion is to use a name representative of
the CB3000 user base (for example, eng1, eng2, SF_retail, NY_retail, etc.).
• DHCP – Select a DHCP setting. The options are as follows:
• Obtain an IP address automatically – Select this option if the CB3000 is using a DHCP server
to obtain an IP address.
• Bootp for DHCP Discover – Select from Broadcast or Unicast. Default is Broadcast.
• Use the Following IP Address – Select this option if an IP address is entered manually (static).
• IP Address – If no DHCP resources are available, specify the static IP address of CB3000. This
IP address is visible to the Internet.
• Subnet Mask – If no DHCP resources are available, specify a subnet mask (or filter) for the
CB3000 IP address.
• Gateway IP Address – IP address of the device providing the connection to the Internet
(such as the IP address of a cable modem or DSL router).
• Spanning Tree Protocol – Select this checkbox to enable a technique that detects loops in a
network and logically blocks redundant paths, thus ensuring only one route exists between any
two LANs.
• Auto-Negotiate/Auto-Sense – Automatically select the connection speed and type. Select On
to enable Auto-Negotiate/Auto-Sense.
Network Configuration 3-31
• Speed Mode – The connection speed. This option is available when Auto Negotiate/AutoSense is Off.
• Duplex Mode – The connection type. This option is available when Auto Negotiate/AutoSense is Off.
3. Click Apply to apply and save the settings, or Cancel to exit the screen without saving your changes.
3-32 CB3000 Client Bridge User’s Guide
3.3 Client Management
The CB3000 can support a maximum 16 devices within the CB3000 supported subnet as prioritized devices.
Once located and added to the client prioritization list, clients can be moved off of the list in order to maintain
the maximum of 16 devices. Of the maximum 16 devices supported by the CB3000 client prioritization list,
only one can be a POS (point-of-sale) device.
CB3000 client prioritization employs an adoption rule for allowing or denying client access to the CB3000
supported WLAN by way of exception. By default, all located clients have the ability to connect and
interoperate with the CB3000. It is only when the client list exceeds 16 devices, that clients require removal
from the list. The list can be refreshed periodically to remove devices that have lost their CB3000.
To create a list of prioritized CB3000 client devices:
1. Select Settings > Client Management from the CB3000 menu tree. The Client Management screen
displays.
Figure 3.17 Client Management
2. Define the CB3000 Bridging Mode as either Single or Multi Client Bridging Mode
• Single Client Bridging Mode: In this mode, the CB3000 provides bridging functionality to support
Network Configuration 3-33
legacy devices. Only one client per CB3000 is supported. In this mode, the MAC address of the MU
is visible on the network.
• This option allows you to select the method by which the device attached to this CB3000 Client
Bridge is discovered. You can either opt to discover the device or add the client manually.
Figure 3.18 CB3000 Client Bridge Bridging Mode Selection
Select Auto-Detect Client for CB3000 Client Bridge to discover the client connected to it.
Select Add Client manually to add the client manually.
When Add Client manually is selected, the Add Active Client section consisting of the MAC
Address text boxes and Add Mac button is enabled.
Enter the MAC Address of the client into the text boxes. Click the Add Mac button to add the
client’s MAC address to the CB3000 Client Bridge’s list.
Only one client can be attached to the device at a time.
• Multi Client Bridging Mode: In this mode, the CB3000 can support a maximum 16 devices within
the CB3000 supported subnet. Of these devices, only one can be a point-of-sale (POS) device. Once
located and added to the client prioritization list, clients can be moved off of the list in order to
maintain the maximum of 16 devices. Device MAC addresses are not visible on the network in this
mode and are replaced by the CB3000's MAC address
3. To add a client, enter the client’s MAC address in the MAC Address field, then click Add MAC. The
device is added to a list of devices the CB3000 can use to allocate priority status.
4. The Preferred Clients List displays the (up to 8) devices receiving connection priority with the CB3000.
If the list is full, remove devices as necessary to free-up room for high priority connections.
5. Click the Move to ACL button to move a MAC address directly into the CB3000’s list of device MAC
addresses approved for operation with the CB3000. For more information on ACL operation, see
Configuring a Wired Ethernet ACL on page 3-34.
6. Add devices as required to build your list of devices with which the CB3000 frequently interoperates.
As devices are added, the screen displays a Configuration files updated message informing of the
additions.
3-34 CB3000 Client Bridge User’s Guide
3.4 Configuring a Wired Ethernet ACL
The CB3000 supports Ethernet MAC filtering. Only client devices with a MAC address within the range
specified can pass traffic through the CB3000. If the list is empty, all clients are allowed. The Client Bridge
allows all connected clients to configure the CB3000 through the User Interface and have access through
SNMP.
To create a list of prioritized CB3000 client devices:
1. Select Settings > Wired Ethernet ACL from the CB3000 menu tree. The Wired Ethernet ACL screen
displays.
2. To add a MAC address range, enter the client MAC address range in the MAC Address field (in both the start and
stop MAC address fields). Click Add.
The MAC address range is added to an Ethernet Access Control List
3. Delete the MAC address range from the Ethernet Access Control list to grant access to all clients.
As MAC address ranges are added, the screen displays a "Configuration files updated" message informing of the
additions. Continue to add MAC addresses as needed to complete the list of allowed and/or denied devices.
Management Options
This chapter describes the statistic tracking functionality included with the CB3000. This includes Ethernet
statistics, wireless, and client-related displays. A CB3000-specific event log is also continually maintained.
This chapter also discusses a number of management protocols that have specific settings to support
monitored statistics and logs. These include configuration settings related to SNMP, radio antennas, DHCP
functionality, time settings, and log files.
Management options include the following:
• Statistics and Logs
• Configuring Management Protocols
4.1 Statistics and Logs
The CB3000 includes functionality to display robust transmit and receive Ethernet statistics, including
transmit and receive errors, dropped packets and overruns. This information can be used to assess the
CB3000’s overall performance and whether an optimal data rate can be achieved and maintained in respect
to the devices with which the CB3000 is interoperating.
Transmit and receive statistics can also be displayed for the CB3000 radio. The wireless radio statistics
information is useful in assessing the CB3000‘s radio RF utilization and the level of RF interference currently
within the radio coverage area.
Use the CB3000 log to view an event timeline with each event or potential error condition defined. This
information is useful when troubleshooting broken device connections and unexpected network events.
See the following sections for more details:
• Viewing Wireless Statistics
• Viewing RF Statistics
• Viewing Ethernet Statistics
• Viewing Event Log
4.1.1 Viewing Wireless Statistics
Wireless Statistics include CB3000 radio traffic, status, and errors. To view CB3000 Ethernet statistics,
select Statistics > Wireless Statistics from the CB3000 menu tree.
4-2 CB3000 Client Bridge User’s Guide
Figure 4.1 Wireless Statistics Screen
The Wireless Statistics screen is partitioned into four detailed fields:
• Information – Displays basic device address and location information.
• Traffic – Displays statistics for cumulative packets, throughput, bit speed, RF utilization and other details
received and transmitted over the CB3000 radio.
• RF Status – Displays information including average MU signal, noise, and signal to noise ratio
information.
• Errors – Displays retry information as well as data transmissions the radio either gave up on or could not
decrypt.
Table 4-1 Describes the Wireless Statistics. Click Refresh to update to the latest statistics.
Table 4-1. Wireless Statistics Screen Details
Statistic
Description
Information Panel Details
Physical Address
MAC address of the CB3000 housing the radio. The MAC address is hardcoded into the device at the factory and cannot be changed.
Current Channel
Channel for communications between the CB3000 radio and its clients.
CB Roam Count
Displays the number of times the client bridge has roamed to another
device. Use this value as a metric of network stability, as a high roam
count could be an indicator of poor signal strength.
Frequency Band
Displays the radio type currently transmitting. Either 802.11a or
802.11b/g.
Management Options 4-3
Table 4-1. Wireless Statistics Screen Details (continued)
Statistic
Description
Power
The power level in dbm for RF signal strength.
a
Reset roam count Click this button to reset the roam count.
Traffic Panel Details
Pkts per second
The Total column displays the average total packets per second crossing
the radio. The Rx column displays the average total packets per second
received. The Tx column displays the average total packets per second
transmitted.
Throughput
Use this information to assess whether the current throughput is sufficient
to support required network traffic. The Total column displays average
throughput on the radio. The Rx column displays average throughput in
Mbps for packets received. The Tx column displays average throughput
for packets transmitted.
Avg. Bit Speed
Displays the average bit speed in Mbps for the radio, considering both
transmitted and received packets.
Approximate RF
Approximate RF utilization of the CB3000 radio. This value is calculated as
Utilization
the throughput divided by average bit speed.
% Non-unicast pkts Percentage of total radio packets that are non-unicast. Non-unicast
packets include broadcast and multicast packets.
RF Status Panel Details
Avg MU Signal
Average RF signal strength in dBm for all devices interoperating with the
CB3000.
Avg MU Noise
Average RF noise for all devices interoperating with the CB3000 radio. If
the noise level is excessive, consider moving the MUs closer to your
CB3000, or to an area with less conflicting network traffic.
Avg MU SNR
Average Signal to Noise Ratio (SNR) for all devices interoperating with the
CB3000 radio. The Signal to Noise Ratio is an indication of overall RF
performance on your wireless network.
Error Panel Details
Avg Num. of
Average number of retries for all devices interoperating with the CB3000
Retries
radio.
% Gave Up Pkts
Percentage of packets that the CB3000 gave up on for all devices
interoperating with the CB3000 radio.
% of
Percentage of undecryptable packets for all devices interoperating with
Undecryptable Pkts the CB3000 radio.
a. For CB3000 Client Bridge, the roam counter increments when the device moves from one AP to another
on the same channel. If the device has moved to a different AP on a different channel, the roam counter
is not incremented.
4-4 CB3000 Client Bridge User’s Guide
4.1.2 Viewing RF Statistics
RF Statistics track CB3000 activity over the device radio. To view CB3000 RF statistics, select
Statistics > RF Statistics from the CB3000 menu tree.
Figure 4.2 RF Statistics
1. Refer to the Packet Retry Histrogram field for an overview of the retries transmitted by the CB3000
radio and whether those retries contained any data packets. Use this information to assess overall radio
performance.
2. Scroll down through the content of the screen to display a Packets Sent Histogram for each of the
client bridge radios.
The Packets Sent Histogram displays a percentage of the packets sent over the CB3000 radio at the
data rate (Mbps) each was sent. If the majority of the packets sent are at a slower data rate then the one
configured for the CB3000 radio, network problems are preventing the CB3000 from transmitting at an
optimum speed and you need to troubleshoot the device.
3. Click the Refresh button at any time to update the content of the RF Statistics screen to the latest data
collected over the CB3000 managed network.
4.1.3 Viewing Ethernet Statistics
Ethernet Statistics track CB3000 activity over the Ethernet. To view CB3000 Ethernet statistics, select
Statistics > Ethernet Statistics from the CB3000 menu tree.
Management Options 4-5
Figure 4.3 Ethernet Statistics Screen
The Ethernet Statistics screen is partitioned into three detailed fields.
• Information – Displays basic device address information and link connection status.
• Received – Displays statistics for the cumulative packets, bytes, and errors received since the CB3000
was last rebooted or the data collection statistics refreshed.
• Transmitted – Displays statistics for the cumulative packets, bytes, and errors transmitted since the
CB3000 was last rebooted or the data collection statistics refreshed.
Table 4-2 describes Ethernet statistics. Click Refresh to update to the latest statistics.
Table 4-2. Ethernet Statistics Screen Details
Statistic
Description
Information Panel Details
Physical Address The MAC address of the CB3000. The MAC address is hard-coded into the
device at the factory and cannot be changed.
Subnet Mask
Subnet mask IP address for the CB3000.
Link
Status of the connection link. Possible values are:
• Up – The connection is active between the CB3000 and network.
• Down – The connection is interrupted or lost.
Auto-Negotiate/
Auto-Sense
Status of Auto-Negotiate/Auto-Sense. When On, CB3000 sets the
connection speed and connection type.
4-6 CB3000 Client Bridge User’s Guide
Table 4-2. Ethernet Statistics Screen Details (continued)
Statistic
Speed Mode
Description
The CB3000 network connection speed displayed in Mbps. For example,
100 Mbps. If the throughput speed is not achieved, examine the number of
transmit and receive errors, or consider increasing the supported data
rate.
Duplex Mode
The CB3000 connection type. For example, Full.
IP Addresses
IP address of the CB3000.
Received Panel Details
RX Packets
Data packets received by the CB3000 from its networked clients.
RX Bytes
Data bytes of information received for the CB3000’s networked clients.
RX Errors
Total of RX Dropped, RX Overruns and RX Frame errors. Use this
information to determine performance quality of the current CB3000
network connection.
RX Dropped
Number of data packets that fail to reach the CB3000. If this number
appears excessive, consider establishing a new connection to the client.
RX Overruns
Buffer overruns to the CB3000. These occur when packets are received
faster than the CB3000 can handle them. If the number seems excessive,
consider reducing the data rate (see Configuring Ad Hoc Settings on page
3-5 for more details).
RX Frame
Number of TCP/IP data frame errors received.
Transmitted Panel Details
TX Packets
Total packets transmitted by the CB3000 to networked clients.
TX Bytes
Data bytes of information transmitted by the CB3000.
TX Errors
Total of TX Dropped, TX Overruns and TX Carrier errors. Use this
information to re-assess the effectiveness of the CB3000’s location and
transmit speed.
TX Dropped
Number of data packets that fail to get sent from the CB3000.
TX Overruns
Buffer overruns on the WAN connection. These occur when packets are
sent faster than the WAN interface can handle. If the number seems
excessive, consider reducing the data rate.
TX Carrier
Number of TCP/IP data carrier errors transmitted.
4.1.4 Viewing Event Log
The CB3000 keeps a log of network events updated every time an event occurs. Use the log file to
troubleshoot network problems that could result from broken device connections between the CB3000 and
networked clients.
To display the CB3000 log, select Statistics > View Log from the CB3000 menu tree. Click Refresh to
update to the logged events.
Management Options 4-7
Figure 4.4 View Log Screen
4-8 CB3000 Client Bridge User’s Guide
4.2 Configuring Management Protocols
Numerous management protocol settings are required to support the monitoring and logging mechanisms of
the CB3000. To configure these management protocol settings, see the following:
• HTTP, HTTPS Configuration Settings
• SNMP Settings
• DHCP Server Settings
• Time Settings
4.2.1 HTTP, HTTPS Configuration Settings
The CB3000 supports both HTTP and HTTPS Web access mechanisms. This configuration sets the minimum
requirement for access. If you select HTTPS (default), then only HTTPS can access the CB3000. If you select
HTTP, then either HTTP or HTTPS will be able to access the CB3000. The Discovery Tool always launches
HTTPS pages.
To enable HTTP or HTTPS Web access:
1. Select Management > HTTP from the CB3000 menu tree.
Figure 4.5 HTTP HTTPS Configuration Settings
The HTTP/HTTPS Configuration Settings screen displays. By default, HTTPS is enabled.
2. To change Web access to HTTP, select the HTTP radio button. Click Apply.
This enables HTTP access to the Client Bridge.
If you select HTTP, the CB3000 is accessible through HTTPS as well. If HTTPS is selected however, access
is only permitted through HTTPS.
3. Click Apply. The appropriate access mechanism is enabled.
4.2.2 SNMP Settings
Simple Network Management Protocol (SNMP) facilitates the exchange of management information
between network devices. SNMP uses Management Information Bases (MIBs) to manage the device
configuration and monitor Internet devices that may be in remote locations. MIB information accessed via
SNMP is defined by a set of managed objects called object identifiers (OIDs). An object identifier (OID) is
used to uniquely identify each object variable of an MIB.
Management Options 4-9
SNMP allows a network administrator to manage network performance, find and solve network problems,
and plan for network growth. The CB3000 supports SNMP management functions for gathering information
from its network components, and communicating that information to specified users.
The CB3000 SNMP agent functions as a command responder and is a multilingual agent responding to
SNMPv1 and v2c managers (command generators). The factory default configuration maintains SNMPv1/2c
support of the community names, and thus provides backward compatibility.
To customize the SNMP capabilities provided by default with the CB3000, see the following:
• SNMP Trap Selection
• SNMP Access
• SNMP Destination
4.2.2.1 SNMP Trap Selection
SNMP provides the ability to send traps to notify the administrator that trap conditions are met. Traps are
network packets containing data relating to network devices, or SNMP agents, that send the traps. SNMP
management applications can receive and interpret these packets, and optionally perform responsive
actions. SNMP trap generation is programmable on a trap-by-trap basis.
By default, the following SNMP traps are enabled to capture network events that could impact your network,
as they relate to CB3000 operations:
• SNMP Cold Start – Trap generated whenever the CB3000 re-initializes while transmitting, possibly
altering the SNMP agent's configuration or protocol entity implementation.
• SNMP ACL Violation – Trap generated whenever a SNMP client cannot access SNMP management
functions or data due to an Access Control List (ACL) violation. This can result from a missing/incorrect
IP address entered within the Ethernet Settings screen.
• SNMP Authentication Failures – Trap generated whenever a SNMP-capable client is denied access
to the CB3000’s SNMP management functions or data. This can result from an incorrect login, or missing
or incorrect user credentials.
• Configuration Changes – Trap generated whenever changes to the CB3000’s configuration file are
saved.
• Ethernet Acl Violation - Trap generated whenever a device (not on the Wired Ethernet ACL) has
requested access to the CB3000 managed network. Only devices on the Wired Ethernet ACL can access
the CB3000 without trap generation.
• Firmware Upgrade Failure - Trap generated whenever errors are detected during the CB3000 firmware
upgrade process.
• Config File Update Failure - Trap generated whenever errors are detected during a CB3000
configuration file update operation.
• Invalid Text Config - Trap generated whenever an error is detected when reading a configuration file.
• Wireless Time Adopt Failure - Trap generated when the adoption threshold (limit) has been exceeded
for a device adoption operation.
• Rf Threshold Throughput - Trap generated when the defined RF throughout for the CB3000 has been
exceeded.
• Rf Average Retries - Trap generated when the defined number of device retry attempts has been
exceeded.
4-10 CB3000 Client Bridge User’s Guide
• Process Failure - Trap generated when a system critical process (Linux process) fails and is re-started.
1. To modify these default SNMP trap definition settings, select Management > SNMP > SNMP Trap
Selection from the CB3000 menu tree. The SNMP Trap Selection screen displays.
2. Unselect a trap, if desired, then click Accept to save the setting.
Figure 4.6 SNMP Trap Selection
4.2.2.2 SNMP Access
Use the CB3000 SNMP interface to restrict access using IP addresses. Those who are allowed access to the
CB3000 SNMP interface, have access to read the SNMP generated information and, if allowed, modify
related settings from an SNMP-capable client.
NOTE: The CB3000 implemented SNMP ACL applies to SNMP v1/v2c community
definitions.
To configure SNMP user access control for the CB3000:
1. Select Management > SNMP > SNMP Access from the CB3000 menu tree. The SNMP Access
Control screen is displayed.
Management Options 4-11
Figure 4.7 SNMP Access Control
2. Select the Enable SNMP Access checkbox to enable/disable the CB3000 SNMP interface
3. Enter a 4-32 character string for read-only SNMP permissions in the Read Only field. The default is
"public".
4. Enter a 4-32 character string for read/write SNMP permissions in the Read Write field. The default is
"private".
5. Enter Start IP and End IP addresses to specify a range of users that can access the CB3000 SNMP
interface. Use just the Start IP Address field to specify a single SNMP user. To leave access
unrestricted, do not enter an IP address.
For additional access control, an SNMP-capable client can be set up whereby only the administrator can
use a read/write community definition.
6. Click Add to add the specified IP address(es).
Once added, those IP addresses with an allowed designation display within the Allowed IP Addresses
table.
4-12 CB3000 Client Bridge User’s Guide
4.2.2.3 SNMP Destination
Traps generated by the CB3000 can be sent to one or more destinations. To configure a SNMP trap
destination for receiving SNMP traps generated by the CB3000:
1. Select Management > SNMP > SNMP Trap Destinations from the CB3000 menu tree. The SNMP
Trap Destinations screen displays.
Figure 4.8 SNMP Trap Destinations
2. Configure the remainder of the fields.
• Destination IP – Specify a destination IP address for receiving the traps sent by the CB3000 SNMP
agent.
• Port – Specify a destination User Datagram Protocol (UDP) port for receiving traps.
• Community – Enter a community name specific to the SNMP-capable client that receives the traps.
• SNMP Version – Use the SNMP Version drop-down menu to specify v1 or v2. Some SNMP clients
support only SNMP v1 traps, while others support SNMP v2 traps and possibly both, verify the
correct traps are in use with clients that support them.
3. For each specified destination IP, click Add to add the destination to the list of locations.
4. Select the checkbox for the destination IP address you wish to delete from the list and click the Delete
button.
5. Click the Refresh button to update the data displayed within the screen to the latest values.
4.2.3 SNMP RF Trap Thresholds
The CB3000 Client Bridge allows settings of SNMP RF threshold levels on reaching which the traps are fired.
To configure the SNMP RF Trap Thresholds:
1. Select Management > SNMP > SNMP RF Trap Thresholds from the CB3000 Client Bridge menu tree.
The SNMP RF Trap Thresholds screen displays.
Management Options 4-13
Figure 4.9 SNMP RF Trap Thresholds
2. Configure the fields.
• Pkts/s – Configure the number of packets per second value for 802.11b/g and 802.11a on exceeding
which the SNMP trap is set.
• Throughput – Configure the throughput value in Mbps on exceeding which the relevant SNMP trap
is set. This is set for both 802.11b/g and 802.11a.
• Average Retries – Configure the number of retires for 802.11b/g and 802.11a on exceeding which
the relevant SNMP trap is set.
3. Use the Minimum number of Packets required for a trap to fire text box to enter the minimum
number of packets that are required for the SNMP traps to fire.
4. Click Apply button to accept the changes to this screen. Click Undo Changes to revert back to older
values supplied for this screen.
4.2.4 DHCP Server Settings
A CB3000 in an Ad-hoc network can serve as a DHCP server to allocate IP addresses to other devices
comprising the Ad-hoc network.
NOTE: This feature is only relevant for Ad-hoc networks.
To configure CB3000 DHCP:
1. Select Management > DHCP Server from the CB3000 menu tree. The DHCP Server screen displays.
4-14 CB3000 Client Bridge User’s Guide
Figure 4.10 DHCP Server Settings
2. Select the Enable DHCP Server support radio button. This enables the CB3000 to act as a host server
to allocate IP addresses to those devices joining the CB3000 initiated Ad-hoc network.
3. Configure the DHCP server settings, as follows:
• IP Range for DHCP – This range provides a means of controlling a low and high value for the IP
addresses on the CB3000 network. Define the range of IP addresses you would like the CB3000 to
provide to DHCP clients joining the CB3000-initiated Ad-hoc network. The valid range of numbers is
between 1 and 254.
• Subnet Mask – IP address for the CB3000 DHCP server connection. This number is available from
the ISP for a DSL or cable-modem connection, or from an administrator if the CB3000 connects to a
larger network. A typical subnet mask is 255.255.255.0.
• Gateway – IP address of the DHCP server.
• First DNS – A DNS server translates human readable addresses (i.e, www.motorola.com) into an IP
address readable by a computer.
• Second DNS – Backup DNS server.
4. Click Apply to save the settings, or Cancel to exit the screen without saving your changes.
4.2.5 Time Settings
Time synchronization is recommended for the CB3000’s network operations. Therefore, setting the CB3000’s
internal time is required for network clock synchronization in a CB3000’s managed network environment.
The CB3000 (an NTP client) periodically synchronizes its time with a master clock (an NTP server). For
example, the CB3000 sets its clock to 07:04:59 upon reading a time of 07:04:59 from its designated NTP
server. Support for both of these options is available in the Time Settings screen.
WARNING! The time setting will be lost on a reboot, and it will
start with the default time, i.e., January 1, 2000.
To configure clock synchronization on the CB3000:
1. Select Management > Time Settings from the CB3000 menu tree. The Time Settings screen displays.
Management Options 4-15
.
Figure 4.11 Time Settings
2. Select either Manual Time Setting or Enable NTP on CB3000 to specify how CB3000 system time is
configured.
• Manual Time Setting – If selected, the CB3000 system time is based on the time entered within
the Local Time Settings fields.
• Local Time Settings – Current time based on the CB3000 system clock. If NTP is disabled or if
there are no servers available, the system time displays the CB3000 uptime. The time does not
automatically update. Click the Refresh button to update the date and time.
• Enable NTP on CB3000 – If selected, specifies the CB3000 time is based on the specified NTP
server entered within the Server Configuration fields.
• Preferred time Server – IP address and port of the primary NTP server. The default port is 123.
• First Alternate time Server – Optionally, specify the IP address and port of an alternative NTP
server to use for time synchronization if the primary NTP server goes down.
• Second Alternate time Server – Optionally, specify the IP address and port of yet another NTP
server for the greatest assurance of uninterrupted time synchronization.
3. Select the Enable Wireless Network Time Adoption on CB 3000 checkbox to enable the CB3000 to
obtain its system time from its associated switch.
• UTC Settings – Define the Hours and Minutes intervals the CB3000 uses to synchronize its system
time with its associated switch.
4. Click Apply to save the settings, or Cancel to exit the screen without saving your changes.
4-16 CB3000 Client Bridge User’s Guide
Administrative Options
This chapter discusses administrative options to configure support settings of the CB3000 rather than central
operational settings. These include:
• Changing the Password
• Rebooting or Restoring a Device
• Importing or Exporting the Configuration File
• Loading Firmware
• Logging Settings
• Troubleshooting Options
5.1 Changing the Password
Before setting CB3000 security options, verify that an administrative password exists for the CB3000 that is
different from the default password for the device (that can be easily obtained).
To password protect and restrict CB3000 device access:
1. Select Tools > Change Password from the CB3000 menu tree.
Figure 5.1 Change Password Screen
5-2 CB3000 Client Bridge User’s Guide
2. Enter the username and password used to log into the console in the Username and Old Password
fields.
3. Enter a new password in the New Password field. The new password can be from 0 - 8 characters
4. Enter the new password a second time in the Re-enter Password field.
5. Click Apply to save the settings, or Cancel to exit the screen without saving your changes.
To restore the username and password to default values, click the Restore Default button.
WARNING! While password protecting the CB3000 provides an
increased level of security for the device, the password is
transmitted over the network in clear text.
5.2 Rebooting or Restoring a Device
If the CB3000 Client Bridge stops responding to commands or is slow, it is easier to reboot the device to
restart all the process without changing the device settings.
If at any given time the administrator needs to restore the device to its original factory state, this is also a
viable option. Restoring the device wipes out all previously configured settings. Motorola recommends
saving a configuration file before restoring the device.
(See Importing or Exporting the Configuration File on page 5-5).
NOTE: The user also has the option of pressing the CB3000 Reset button for 10
seconds or longer to restore the device to its factory default configuration.
See the following for more information on rebooting or restoring the CB3000.
• Rebooting the Device
• Restoring the Device
5.2.1 Rebooting the Device
WARNING! Please wait 10 seconds before resetting the CB3000
after changing its configuration to avoid a disruption of operation
and possible device hang.
To reboot the CB3000:
1. Select Tools > Reset / Restore from the CB3000 menu tree. The Reset/Restore CB3000 screen displays.
Administrative Options 5-3
Figure 5.2 Reset / Restore CB3000 Screen
2. Click the Reboot button to restart the CB3000. The CB3000’s network connection is disrupted for a few
moments while the CB3000 reboots.
NOTE: If rebooting the CB3000 does not alleviate the device’s poor performance.
Consider restoring the CB3000’s out-of-box default configuration. For more
information, see Restoring the Device on page 5-3..
5.2.2 Restoring the Device
If problems persist with the operation of the CB3000, consider restoring the device’s out-of-box factory
configuration. Reverting the CB3000 back to its default configuration wipes out the current device
configuration. Consider saving the CB3000’s current configuration, and having it available to either port to
another CB3000 or download back to the same CB3000 after restoring the device.
See Importing or Exporting the Configuration File on page 5-5.
WARNING! Restoring the CB3000’s default configuration deletes
the device’s current configuration.
To restore the CB3000 to the out-of-box default configuration:
1. Save the CB3000’s current configuration before updating the firmware. After the firmware update, the
configuration file can be imported in order to restore the CB3000 to the configuration saved before the
update. See Importing or Exporting the Configuration File on page 5-5 for more information.
WARNING! Be sure to save a copy of the CB3000’s configuration
file before restoring the device’s default configuration.
2. Select Tools > Reset/Restore from the CB3000 menu tree. The Reset/Restore CB3000 screen displays.
5-4 CB3000 Client Bridge User’s Guide
Figure 5.3 Reset/Restore CB3000 Screen
3. Click the Restore button.
The CB3000’s network connection is disrupted for a few moments while the CB3000 loads its default (outof-box) configuration, then restores the screen. Once the default configuration is restored, restore the
last saved configuration or reconfigure the device.
NOTE: Restoring the device is the same as the “Reset to initial” option available
on the Troubleshooting screen.
Administrative Options 5-5
5.3 Importing or Exporting the Configuration File
A CB3000 configuration file can be saved and downloaded (exported) to be used later for importing to other
CB3000 units, or to restore a CB3000 temporarily reset to factory defaults. Using the file-based configuration
feature speeds up the setup process at sites using multiple CB3000s.
To create an import-able/export-able CB3000 configuration file, select Tools > Configuration File from the
CB3000 menu tree. The Config Import/Export screen displays.
Imports or exports can be conducted using either FTP or HTTP. FTP is useful for remote accessibility of
configuration files not located with the CB3000, but on an accessible FTP server. HTTP is useful to import/
export configuration files locally. Refer to the following depending on your import/export requirements.
• Using FTP
• Using HTTP
NOTE: When updating firmware from a FTP/TFTP server, provide the path to the
file relative to the root folder on the FTP/TFTP server. For example, if the image file
is located in the folder "CB3000\images" under the FTP/TFTP server's root folder,
enter "/CB3000/images/" in the File Path field.
NOTE: If the image file is located in the FTP/TFTP root directory, leave the File
Path field blank.
5.3.1 Using FTP
To import or export a CB3000 configuration file using an FTP server:
1. Select Tools > Configuration File Settings from the CB3000 menu tree. The Config Import/Export
screen displays. If using FTP, only the top panel of the screen is used.
5-6 CB3000 Client Bridge User’s Guide
Figure 5.4 Config Import/Export
2. Configure the FTP Import/Export settings to import or export a CB3000 configuration file.
• Configfile Type – Type of the file to export. Select from Binary or Text.
• Filename – Name of the configuration file written to the FTP server.
• File Path - Defines the path to the specified filename.
• Server IP – IP address of the destination FTP server where configuration file is imported or
exported.
• Username – Username used when logging in to the FTP server.
• Password – Password (associated with username) allowing access to the FTP server for the
operation.
Config File Types
CB3000 Client Bridge allows export of device configuration information as binary or text file types.
Binary files are used when upgrading CB3000 Client Bridge device firmware from version 1.0 to version 1.1.
Text files are human readable and are a important while troubleshooting the device. They can be read,
updated, and uploaded to change the device’s configuration.
3. Continue, as appropriate, depending on whether you are importing or exporting a configuration file from/
to the specified FTP or TFTP server with the specified filename and login information.
Administrative Options 5-7
• If importing, click the FTP Import or TFTP Import button.
The system displays a confirmation window indicating the administrator must log out of the CB3000
after the operation completes for the changes to take effect.
Click Yes to continue the operation, or No to cancel the configuration file import.
• If exporting, click the FTP Export or TFTP Export button.
The saved configuration file should be found/available on the specified FTP server.
5.3.2 Using HTTP
To import or export a CB3000 configuration file using HTTP settings (local machine import/exports):
1. Select Tools > Configuration File from the CB3000 menu tree. The Config Import/Export screen
displays. If using HTTP, only the bottom panel of the screen is used.
2. Continue, as appropriate, depending on whether you are importing or exporting a configuration file.
If importing, follow these steps:
• Click Browse to define a location on the system for the imported configuration file.
• Click the Apply Uploaded File button to apply the configuration. If successful, the following
message displays: Configuration file has successfully updated. Rebooting... Please wait.
WARNING! Please wait 10 seconds before resetting the CB3000
after changing its configuration to avoid a disruption of operation
and possible device hang.
If exporting, follow these steps:
• Click the Generate File button to generate the configuration data to export to a file (within the
console system’s clipboard).
• A few moments after a “Generate File done” message displays, click Download File. A File
Download pop-up window appears.
Figure 5.5 File Download Dialog Box
• Click Save. A dialog box prompts for a filename and location for the exported file
(on the local machine or networked machine). Once the configuration file is saved, the Download
Complete pop-up window appears.
5-8 CB3000 Client Bridge User’s Guide
Figure 5.6 Download Complete Dialog Box
• Click Open to open the file. As the file does not have an extension, the Open With pop-up window
opens.
Figure 5.7 Open With Dialog Box
• In the Open With pop-up window, select Internet Explorer and click OK to open the configfile with
Internet Explorer.
• Use Internet Explorer’s File > Save As dialog box to save the configfile as a text file.
Administrative Options 5-9
Figure 5.8 Save File As Dialog Box
• From the Save as Type drop-down, select Text File (*.txt). Click Save to save the file.
5-10 CB3000 Client Bridge User’s Guide
5.4 Loading Firmware
Motorola periodically releases updated versions of the CB3000 device firmware to the following URL:
http://support.symbol.com/support/product/softwaredownloads.do
If the CB3000 firmware version displayed on the Information or Troubleshooting screens are older than
the version on the Web site, Motorola recommends updating the CB3000 to the latest firmware for full
feature functionality.
NOTE: The firmware file must be available from an FTP or TFTP site, or a locally
networked machine to perform the update.
To conduct a CB3000 firmware update:
1. Save the CB3000 current configuration before updating the firmware. After the update, the configuration
file can be imported to restore the CB3000 to the settings before the update.
See Importing or Exporting the Configuration File on page 5-5 for more information.
WARNING! Be sure to save a copy of the CB3000’s configuration
file before updating the firmware.
2. Select Tools > Load Firmware from the CB3000 menu tree. The Load Firmware screen displays.
Figure 5.9 Load Firmware Screen
Administrative Options 5-11
3. Refer to the CB3000 Version displayed at the top of the screen to assess whether a firmware update is
required. Compare the installed version with the version available at:
http://support.symbol.com/support/product/softwaredownloads.do
If a firmware update is required, proceed to step 4.
4. Get the firmware file from either an FTP/TFTP server, or locally, via HTTP, by clicking on the appropriate
radio button in the upper and lower panels on the screen.
5. If loading the firmware file from a FTP/TFTP server, follow these steps (skip to step 6 for HTTP loads):
a. Specify the name of the target firmware file within the File name field. File names should be in the
format “cb3000_1.1.1.5”.
b. If the target firmware file resides within a directory (once downloaded from the Web site), specify a
complete path for the file within the File path field.
c. Select either the FTP or TFTP server radio button, as required, to define whether the firmware file
resides on a FTP or TFTP server.
d. Set the following parameters:
• IP Address – IP address for the FTP or TFTP server.
• Username (for FTP server only) – Username to log into the server.
• Password (for FTP server only) – Password associated with the username.
e. Continue with step 7.
6. If loading the firmware file from a locally stored file (getting firmware file from HTTP), click the Browse
button to navigate to the locally stored firmware update file. Continue with step 7.
7. Click the Upgrade button to initiate the update. Upon confirming the firmware update, the CB3000
reboots and completes the update.
8. Confirm the CB3000’s configuration is the same as before the firmware update.
If they are not, import the configuration file saved prior to performing the update (step 1). See Importing
or Exporting the Configuration File on page 5-5 for more details.
WARNING! Please wait 10 seconds before resetting the CB3000
after changing its configuration to avoid a disruption of operation
and possible device hang.
5-12 CB3000 Client Bridge User’s Guide
5.5 Logging Settings
The CB3000 continually logs system events which can prove useful later in assessing the throughput and
performance of the CB3000 or troubleshooting problems on the CB3000-managed LAN. The type of event
message and where they should be logged can also be configured from the CB3000 console.
To configure event logging for the CB3000:
1. Select Tools > Logging Configurations from the CB3000 menu tree. The Logging Configurations
screen displays.
Figure 5.10 Logging Configurations
2. Configure the logging level and log destination as required.
• Logging Level – Select the desired log level for tracking system events. Eight standard UNIX/LINUX
syslog levels are available:
• 0 - Emergency. The system is unusable.
• 1 - Alert. Action on these types of events must be taken immediately.
• 2 - Critical. States a critical condition.
• 3 - Errors. Describes an error.
• 4 - Warning. Action should be taken as soon as possible.
• 5 - Notice. A normal but important event.
• 6 - Info. Nothing to do, since information only.
• 7 - Debugging purposes only.
• saved locally – Select this radio button to save the log file to the host to which the CB3000 is
physically connected. Log entries are not saved in the CB3000. While the CB3000 is in operation, log
data temporarily resides in memory.
• syslog server – Select this radio button to enable an external syslog server to listen for incoming
syslog messages and decode the messages into a log for viewing. Enter the IP address of an external
syslog server in order to route the syslog events to that destination.
• email – Select this radio button to configure the CB3000 to route log files to the email address and
mail server designated. Configure the following parameters:
Administrative Options 5-13
• eMail address – Enter an email address as the target destination for the log file.
• Your Outgoing Mail Server– Enter the IP address of the outgoing mail server required to route the
log file to the destination email address.
3. Click Apply to save any changes.
4. Click Undo Changes to undo any changes made. Configurations revert to the last saved configuration.
5-14 CB3000 Client Bridge User’s Guide
5.6 Troubleshooting Options
The CB3000 console includes utilities for testing IP network or local network communication issues between
the device and host. These utilities (as well as a button to restore the CB3000 to its factory configuration)
are available in the CB3000 Troubleshooting screen.
Access the Troubleshooting screen by selecting Tools > Troubleshooting from the CB3000 menu tree. At
the top of the screen, the Firmware version, MAC address and CB3000 serial number display.
Figure 5.11 Troubleshooting Screen
The following options exist within the Troubleshooting screen:
Determine if a Firmware Update is Needed — Determine whether a firmware update is required by
comparing the existing version against the latest version available on the Motorola Web site. Go to
http://support.symbol.com/support/product/softwaredownloads.do to compare the versions. To update
the firmware, see Loading Firmware on page 5-10.
The MAC Address and Serial Number are hardcoded to the CB3000 during the manufacturing and are
located on the bottom of the CB3000. Keep the MAC address and the serial number readily available
since these addresses are required when contacting Symbol to report a problem.
• Ping an Associated Device – The CB3000 can verify its link with an associated access point or networked
peer (depending on the configured network mode) by sending WNMP ping packets to the device. To
conduct a ping test with an associated device:
a. Enter the IP address of the target device.
b. Specify the length of each data packet transmitted to the target device during the ping test. This
increment is defined in bytes. If you don’t know, enter a large arbitrary amount like 500.
c. Specify the number of ping packets to transmit (in other words, the number of ping tests to perform).
Administrative Options 5-15
d. Click the ICMP Ping Test button. Results of the ping test displays in the Status box.
Figure 5.12 Ping Test with Associated Device Status Example
Use the results to determine whether the device association should be maintained or replaced by a
device association providing better network coverage and signal strength.
• Ping the Host – The CB3000 can verify its link with its host by sending WNMP ping packets to the host’s
IP address. To conduct an ICMP ping test with the CB3000’s host:
a. Enter the IP address of the host.
b. Specify the length of each data packet transmitted to the target device during the test. This
increment is defined in bytes. If you don’t know, enter a large arbitrary amount like 500.
c. Specify the number of ping packets to transmit.
d. Click the Comm Connection Test button. Results of the test displays in the Status box.
Figure 5.13 Ping Test with Host Status Example
e. Use this information to determine whether the host connection should be maintained or replaced by
a host connection providing better connectivity with the CB3000.
5-16 CB3000 Client Bridge User’s Guide
CB3000 Technical Specifications
The CB3000 client bridge has the following technical specifications:
Weight (with antenna)
0.65 lbs (0.30 kg)
Dimensions
7 in. wide x 4 in. deep x 1.2 in. high
(17.78 cm. wide x 10.16 cm. deep x 3.05 cm high)
excluding external antenna and foot stand
Protocol Support
TCP/IP, DHCP
Standards Conformance
IEEE 802.11
IEEE802.3
IEEE802.1d
IEEE 802.11a
IEEE 802.11g
IEEE802.1x
IEEE802.3u
HTTP
Network Architectures
Infrastructure (Access Points)
Ad-Hoc (Peer-to-Peer)
Operating Frequencies
802.11a: 4.9 – 5.9 GHz
802.11b/g: 2.4 – 2.5 GHz
LAN (Ethernet) Connection
One 10/100 Base-T
Ethernet Frame
Ethernet_II and IEEE 802.3
Data Rate
IEEE 802.11a: 54, 48, 36, 24, 18, 12, 9, 6 Mbps
IEEE 802.11b: 11, 5.5, 2, 1 Mbps
IEEE 802.11g: 54, 48, 36, 24, 18, 12, 9, 6 Mbps
Modulation
IEEE 802.11a: Orthogonal Frequency Division Multiplexing
(64QAM, 16QAM, QPSK and BPSK)
IEEE 802.11b Direct Sequence Spread Spectrum (CCK, DQPSK,
DBPSK)
IEEE 802.11g Orthogonal Frequency Division Multiplexing
(64QAM, 16QAM, QPSK and BPSK)
A-2 CB3000 Client Bridge User’s Guide
Security
64/128-Bit WEP
IEEE 802.1x
WPA1 (TKIP)
WPA2 (CCMP)
Peak Antenna Gain
3 dBi at 2.4 GHz
4 dBi at 5 GHz
Operating Temperature
0 – 50° Celsius
Storage Temperature
- 20 – 70° Celsius
Operating Humidity
10 – 90% relative humidity, non – condensing
Storage Humidity
5 – 85% relative humidity, non – condensing
Power Supply
Switching DC 12V, 1A
Other Features
• Supports SNMP MIBs (Simple network management protocol)
• Features: Embedded HTTP Web management server in each
access point works with any web browser that supports HTML
and Javascript
SNMP MIB Support
The reference design has support for SNMP v2. The SNMP agents WILL be accessible through SNMP
manager applications such as HP Open View, MIB browsers. The SNMP agent WILL support read-write, read
only or disabled modes. The following are the supported SNMP MIBs.
MIB Name
Description
Supported
BRIDGE
Module for managing devices supporting
802.1D
.1.3.6.1.2.17
IEEE802dot11
Standard MIB for 802.11 devices and includes
entities for station management, MAC and PHY
settings.
.1.2.840.10036
IF-MIB
MIB module for managing objects for network
interface sub-layers. This is an updated version
of the MIB-II Table.
.1.3.6.1.2.1.2.2.1.1
IP-FORWARD-MIB
Module for managing CIDR multipath routes
.1.3.6.1.2.1.4.24
IP-MIB
MIB for managing IP and ICMP
implementations, excluding the management of
IP routes.
.1.3.6.1.2.1.4 (IP)
.1.3.1.6.2.1.5 (ICMP)
.1.3.1.6.2.1.48
XXX-DOT11EXT2-MIB
Vendor specific extensions to the standard
802.11 MIB for additional station management
objects, association table, enhanced security,
neighboring BSSs.
.1.3.6.1.4.1.yyy.3
SNMPv2-MIB
MIB module for managing SNMPv2 entities.
.1.3.6.1.6.3.x
TCP-MIB
MIB module for managing TCP
implementations.
.1.3.6.1.2.1.6
UDP-MIB
MIB module for managing UDP
implementations.
.1.3.6.1.2.1.7
SBL-MIB
Motorola-specific MIB information to be
implemented
B-2 CB3000 Client Bridge User’s Guide
Customer Support
Motorola’s Enterprise Mobility Support Center
If you have a problem with your equipment, contact Enterprise Mobility support for your region. Contact
information is available at: http://www.symbol.com/contactsupport.
When contacting Enterprise Mobility support, please provide the following information:
• Serial number of the unit
• Model number or product name
• Software type and version number
Motorola responds to calls by email, telephone or fax within the time limits set forth in support agreements.
If you purchased your Enterprise Mobility business product from a Motorola business partner, contact that
business partner for support.
Customer Support Web Site
Motorola's Support Central Web site, located at http://support.symbol.com/support provides information
and online assistance including developer tools, software downloads, product manuals and online repair
requests.
Downloads
http://support.symbol.com/support/product/softwaredownloads.do
Manuals
http://www.symbol.com/manuals
General Information
Obtain additional information by contacting Motorola at:
1-800-722-6234, inside North America
+1-516-738-5200, in/outside North America
http://www.motorola.com/
C-2 CB3000 Client Bridge User’s Guide
Wireless Security Basics
CB3000 Client Bridge provides support for the following wireless security protocols.
• WEP Security
• WPA1 (TKIP) Security
• WPA2 (CCMP) Security
• Secure 802.1x Security
D-2 CB3000 Client Bridge User’s Guide
D.1 WEP Security
All WLAN devices face possible information theft. Theft occurs when an unauthorized user eavesdrops to
obtain information illegally. The absence of a physical connection makes wireless links particularly
vulnerable to this form of theft. Most forms of security rely on encryption to various extents.
Encryption entails scrambling and coding information, typically with mathematical formulas called
algorithms, before the information is transmitted. An algorithm is a set of instructions or formula for
scrambling the data. A key is the specific code used by the algorithm to encrypt or decrypt the data.
Decryption is the decoding and unscrambling of received data. WEP may be all that a retail business needs
for the simple encryption of wireless data. However, networks that require more security are at risk from a
WEP flaw and should use a more sophisticated method for securing their CB3000 Client Bridge managed
network.
The same device, host computer or front-end processor, usually performs both encryption and decryption. The
data transmit or receive direction determines whether the encryption or decryption function is performed.
The device takes plain text, encrypts or scrambles the text typically by mathematically combining the key
with the plain text as instructed by the algorithm, then transmits the data over the network. At the receiving
end another device takes the encrypted text and decrypts, or unscrambles, the text revealing the original
message. An unauthorized user can know the algorithm, but cannot interpret the encrypted data without the
appropriate key. Only the sender and receiver of the transmitted data know the key.
WEP is an encryption security protocol specified in the IEEE Wireless Fidelity (Wi-Fi) standard, 802.11b and
supported by the CB3000 Client Bridge. WEP encryption is designed to provide a wireless device with a level
of security and privacy comparable to that of a wired LAN.
The level of protection provided by WEP encryption is determined by the encryption key length and algorithm.
An encryption key is a string of case sensitive characters used to encrypt and decrypt data packets
transmitted between a mobile unit (MU) and the CB3000 Client Bridge. An CB3000 Client Bridge and
associated device must use the same encryption key (typically 1 through 4) and the same WEP algorithm to
inter-operate.
For detailed steps on configuring WEP for the CB3000 Client Bridge, see Configuring WEP Security Settings
on page 3-8.
D-3
D.2 WPA1 (TKIP) Security
Wi-Fi Protected Access (WPA) is a robust encryption scheme specified in the IEEE Wireless Fidelity (Wi-Fi)
standard, 802.11i. WPA is a security standard for systems operating with a Wi-Fi wireless connection. WPA
is designed for corporate networks and small-business (retail) environments where more wireless traffic
allows quicker discovery of encryption keys by an unauthorized person.
WPA (referred to as WPA1 within the CB3000 Client Bridge Security Mode menu) provides more
sophisticated data encryption than WEP. WEP’s lack of user authentication mechanisms is addressed by
WPA. Compared to WEP, WPA provides superior data encryption and user authentication.
The CB3000 Client Bridge’s WPA encryption scheme can use Temporal Key Integrity Protocol (TKIP). TKIP
addresses WEP’s weaknesses with a re-keying mechanism, a per-packet mixing function, a message
integrity check, and an extended initialization vector with sequencing rules.
WPA also provides strong user authentication based on 802.1x EAP. Two requirements, strong encryption to
prevent eavesdropping and mutual authentication to ensure that sensitive information is transmitted only
over legitimate networks, must drive your wireless authentication strategy.
In practice, only methods based on the IETF's well-known Transport Layer Security (TLS) standard can satisfy
strict encryption and authentication requirements. Three TLS-based protocols have been developed for use
with EAP and are suitable for deployments with wireless LANs:
• EAP-Transport Layer Security (EAP-TLS)
• Tunneled Transport Layer Security (TTLS)
• Protected EAP (PEAP)
For detailed steps on configuring WPA1 for the CB3000 Client Bridge, see Configuring WPA1 (TKIP) Security
Settings on page 3-10.
D-4 CB3000 Client Bridge User’s Guide
Table D-1 summarizes the major differences between the protocols.
Table D-1. Detailed Comparison of TLS-based EAP Methods
EAP Type
TLS
(RFC 2716)a
TTLS
(Internet draft)b
PEAP
(Internet draft)c
Software
Supported Client
Platforms
Linux, Mac OS X,
Windows 95/98/ME,
Windows NT/2000/
XP
Linux, Mac OS X,
Windows XP
Windows 95/98/ME,
Windows NT/2000/
XP
Authentication Server
Implementations by
Cisco, Funk, HP,
FreeRADIUS (open
source),
Meetinghouse,
Microsoft
Funk, Meetinghouse
Cisco
Authentication
Methods
Client certificates
Any
Generic token card
Protocol Operations
Basic Protocol Structure Establish TLS session Two phases:
and validate
• Establish TLS
certificates on both
between client and
TTLS server
client and server
Two parts:
Fast Session Reconnect No
Yes
• Establish TLS
between client and
PEAP server
• Exchange attribute- • Run EAP exchange
value pairs between
over TLS tunnel
client and server
WEP Integration
Yes
Server can supply WEP key with external protocol (e.g. RADIUS
extension)
PKI and Certificate Processing
Server Certificate
Required
Required
Required
Client Certificate
Required
Optional
Optional
Certificate Verification
Through certificate chain or OCSP TLS extension (current Internet
draft)
Effect of Private Key
Compromise
Re-issue all server
Re-issue certificates for servers (and clients if
and client certificates using client certificates in first TLS exchange)
Client and User Authentication
D-5
Table D-1. Detailed Comparison of TLS-based EAP Methods (continued)
EAP Type
Authentication
Direction
Protection of User
Identity Exchange
TLS
(RFC 2716)a
TTLS
(Internet draft)b
PEAP
(Internet draft)c
Mutual: Uses digital
certificates both
ways
Mutual: Certificate
for server
authentication, and
tunneled method for
client
Mutual: Certificate
for server, and
protected EAP
method for client
No
Yes; protected by TLS Yes; protected by TLS
a. TLS is secure, but the requirement for client certificates is too big a hurdle for most institutions to
deal with.
b. TTLS, at least initially, is much more widely implemented than PEAP, and therefore has a slight
convenience advantage over the comparable PEAP method.
c. PEAP uses the TLS channel to protect a second EAP exchange. PEAP is backed by Microsoft.
D-6 CB3000 Client Bridge User’s Guide
D.3 WPA2 (CCMP) Security
WPA2 is a newer 802.11i standard that provides even stronger wireless security than Wi-Fi Protected Access
(WPA) and WEP. CCMP is the security standard used by the Advanced Encryption Standard (AES). AES serves
the same function TKIP does for WPA-TKIP. CCMP (Counter Mode with Cipher Block Chaining Message
Authentication Code Protocol) is the preferred encryption protocol in the 802.11i standard. CCMP computes
a Message Integrity Check (MIC) using the proven Cipher Block Message Authentication Code (CBC-MAC)
technique. Changing just one bit in a message produces a totally different result.
WPA2-CCMP is based on the concept of a Robust Security Network (RSN), which defines a hierarchy of keys
with a limited lifetime (similar to TKIP). Like TKIP, the keys the administrator provides are used to derive other
keys. Messages are encrypted using a 128-bit secret key and a 128-bit block of data. For detailed steps on
configuring WPA2 for the CB3000 Client Bridge, see Configuring WPA2 (CCMP) Security Settings on page 318.
D-7
D.4 Secure 802.1x Security
The Secure 802.1x security option feature provides the CB3000 Client Bridge and its associated clients an
additional measure of security for data transmitted over the wireless network. Secure 802.1x uses the
Extensible Authentication Protocol (EAP) as an authentication mechanism between devices achieved through
the exchange and verification of certificates.
The IEEE 802.1x standard ties the 802.1x EAP authentication protocol to both wired and wireless LAN
applications. EAP provides an effective authentication scheme with or without IEEE 802.1x Wired Equivalent
Privacy (WEP) encryption. EAP supports multiple authentication measures, allowing the authentication
server to exercise full control.
The EAP process begins when an unauthenticated supplicant (client device) tries to connect with an
authenticator (in this case, the CB3000 Client Bridge). The CB3000 Client Bridge passes EAP packets from
the client to an authentication server on the wired side of the CB3000 Client Bridge. All other packet types
are blocked until the authentication server (typically, a RADIUS server) verifies the MU’s identity.
Using Secure 802.1x, a user requests device connection through the CB3000 Client Bridge. The CB3000 Client
Bridge then requests the identity of the user and transmits that identity to an authentication server. The
server prompts the CB3000 Client Bridge for proof of identity (supplied to the CB3000 Client Bridge by the
user) and then transmits the user data back to the server to complete the authentication. A client should not
be able to access the network if not authenticated.
For detailed steps on configuring 802.1x for the CB3000 Client Bridge, see Configuring Secure 802.1x
Security Settings on page 3-27.
D-8 CB3000 Client Bridge User’s Guide
MOTOROLA INC.
1303 E. ALGONQUIN ROAD
SCHAUMBURG, IL 60196
http://www.motorola.com
72E-122702-01 Revision A
August 2009