1
Owner's
Manual
Chef's Washer
ZBD6605
ZBD6905
ZBD7005
ZBD7105
Monogram:
We bring good things to life.
www.monogram.com
Consumer
Infbrnmfion
( hqf',_
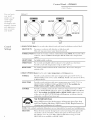
Introduction
Your
new
Monogrmn
kitchen
assiduous
blend
intormation
If vou
makes
you
on
the
an
eloquent
chose
it tot
fi)r all of these
of titan
and
following
reasons-you'll
flmction
pages
will
statement
its pm'ity
will
delight
hel I) you
of style,
of design,
find
you
operate
that
vom"
for years
and
convenience
practical
and
ti_atm'es
Monogram
or
Chef's
to come.
maintain
wmr
Chef's
properly.
have
Appliance
Care and
Consmner
Model
Washer
Whether
to detail-or
superior
_'asher
Contents
flexibility.
attention
_'asher's
The
Chef's
planning
119¢sher
anv
other
Registration
Cleaning
visit
............
3, 31, 32
18-21
..................
Number
Instructions
3, 26
i,ocation
...............
Control
Panel and Settings
ZBD6605
........................
tot
Control
Panel and Settings
ZBD6905
......................
for
Control
Panel
ZBD7005 and
T(me Silencing
ore" X_'ebsite
.................
Services
and Serial
Operating
questions,
3
8-17
8, 9
and settings ti)r
ZBD7105
...........
.....................
.......
at:
mom*e2'c,:m._om
Clean
Sensor
. .....................
14
Auto
Memorv
......................
14
Mode
14
Child
Water
Temperature
Rinse
Agent
14
.................
.......................
........................
Dishwasher
Racks
Solver
Safety Instructions
USA X_'arrantv
12, 13
................
Detergents
Problem
10, 11
i,ockout
Canada
Warranty
................
. ...................
...................
........................
.....................
15
15
15
16, 17
22-25
4-7
27
28
Consumer
Information
(k_(/'s
Read
]_e/ore
using"
this manual
carefldlv.
It is intended
to hel I) you operate
and maintain
Chef's Washer properly.
yore _ new
Keep
questions.
your
Chq
it handy
tot answe_
to wmr
If w)u don't understand
something
or need
more help, there is a list of toll-ti'ee consulner
service nmnbers
included
in tile back section
of this manual.
OR
VVas her
Visit
Wd te
down the
model
serial
Wasker
You
can
at the
find
inside
tile
upper
model
and
left
tub
serial
nmnbe_5
flange
our
X'\ ebsite
Before
sending
numbers
here:
at: monogram.corn
in this
card,
please
write
these
&
Model
Nmnber
nut'ibis
Serial
Nmnber
Lrse these
serxice
If you received
a damaged
Chef_
Washo
hmnediatelv
contact tile dealer (or builder)
that sold you tile Chef's _,Vasher.
Save
Befl)re )ou request serxice, check
Solxer in tile back of this manual,
time
& money
If you
need service
To obtain
service,
see tile Consumer
tile Problem
Setwices
page in tile back of this manual.
We're proud of our service and want w)u to be
pleased.
If for some reason w)u are not hai)py
with the se_wice you receive, here are steps to
tollow tot flu'tiler help.
For customers
nmnbers
calls
in any
concerning
correspondence
yore"
Chef's
It lists causes of minor operating
xou can correct yore'self.
For customers
NEXT if you are still not pleased,
write all the
details-including
yore" phone nmnber-to:
Manager,
Customer
GE Appliances
Appliance
Park
i,ouisxille,
KY 40225
Relations
X_asher.
problems
that
in Canada:
FIRST, contact tile people who serviced yore"
appliance.
Explain wily you are not pleased.
In most cases, this will solve tile problem.
NEXT, if w)u are still not pleased,
write all the
details-including
yore" phone
nmnber-to:
in the USA:
FIRST, contact tile people xd_o set\iced
yore"
appliance.
Explain wh} }ou are not pleased.
In most cases, this will solxe tile problem.
or
Manage_;
Coiis/liller
Camco Inc.
1 Factory
Moncton,
Relations
i,ane, Suite 310
N.B. El(; 9M3
IMPORTANT
SAFETY
MESURES DE SI CURITt
INSTRUCTIONS
IMPORTANTES
a, WARNING!
For your safety, the hfformation
in this manual
must be followed to minimize the risk of fire,
explosion,
electric shock, or to prevent property
dmnage, personal injury or loss of life.
• Do not tamper with c(mtrols.
• Do not abuse, sit on, or stand on tile door
dish rack of the Chef's Washer.
• Do not discard
relnovil_g
a Chef's
Washer
tile door or relnoving
without
or
first
the door latch.
• Do not store or use Colnbustible
matelJals,
gasoline or other flalmnable
\_q)ors and liquids
in the vicinity of this or any other appliance.
• Do not allow childrel_ to play inside, on or with
this appliance
or any discarded
appliance.
• Do not allow chikh'el_ to play aroul_d tile Chef's
Washer wllen opelfil_g and ch)sing tile door due
to possibility of slnall fingers being pinched in
tile dooi:
a, AVER TISSEMENT !
Pour votre s_curit&, veuillez suivre h la lettre les
directives dmm_es daa_s le present mmmel afin
de rOduire les risques d'incendJe,
d'explosion
ou
de chocs Olectriques,
et prOvmfir les dommages
matOriels et les blessures graves ou mortelles.
• Ne lnodifiez
C(llIllIl
pas le t01_cfiolmelnent
des
andes.
• Ne ill ontez pas Oil lie vo/is assoyez pas Sill" la
porte ou les paniel_ du lave-vaisselle du chef,
et ne les utilisez pas de thgon abusive.
• Nejetez
pas un lave-vaisselle (111chef sans
en avoir d'abord
enlev_ la porte ou enlevez
le verrou de la porte.
A WARNING!
RISK OF CHILD
PROPER
OF THE CHEF'S
DISPOSAL
• N'el_tl'eposez
pas et n'utilisez pas d'essence,
de vapeul_ Oil de liquides il_flamlnables
a
proxilnit0
de cet appareil
ou de tout autre
OlectrolnOlmgel:
• Ne laissez pas les el_fimtsjouel
_avec le lavewlisselle du chef ni lnonter
dessus. Ne les
laissez pas s'introduire
a l'int_fieur
de cet
appareil ou d'un vieil appareil
qui ne sert phls.
• Ne pem/ettezjalnais
a des enfimts dejouer
h proximit_ d'un lave-_;lisselle du chef quand
\,'OILS O/Ivrez
se coincer
Oil telIllez
les doigts
la porte.
• %lke off tile door
coinpai'tiilent
keeper
oi"
WASHER
DISPOSIJlON
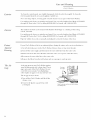
Your Old ChefX
of tile washing
tile
door
i'eiilove
Washer:
latch
RISQUE D 'ENFANT MIS A U PIEGE
DU IAVE-VAISSELId_2
DU CHEF
I.e lave-vaisselle
(111chef abandolm_
oujet_
est
dangereux...ln&ne
s'il est abandolm_
@lste
pendant
quelques jours,,. Si vous jetez votre
vieux lave-vaisselle
du chef, veuillez suivre les
il_structions
suivantes
pour pl'_venir tout
accident.
Avant
keeper
(as shown).
k, A VER TISSEMENT!
BONNE
petlvent
ENTRAPMENT
A junked
or abandoned
Chef's Washer is
dal_gerous...even
if it will sit t0r "just a
few days." If vou are getting rid of your old
Chef's X,Vasher, please t01h)w the il_structi(ms
below to help prevent
accidents.
BeJbre You Throw Away
Ils
darts la porte.
de jeter votre vieux lave-vaisselle
• Enlevez la porte du COlnpartilnent
Oil enlevez le rg_ceptacle a verrou
l'indique
l'ilhlstratiol_).
du chef:
de lavage
(colnlne
R6ceptacle
a verrou
tt WATER HEATER
SAFETY
Under certain conditions
hydrogen
gas may be
produced
in a water heater that has not been
used for two weeks or more. HYDROGEN
GAS IS ILXPLOS1VE.
.s
SECURITE
If the hot water
has not been
used tor two
weeks or nlore, i)revent
the possibility
of
daulage or ii_jury by turning
on all hot water
thucets and allowing theIn to Iun for several
uIinutes.
Do this betore
using anv electrical
ai)pliance
which is connected
to the hot water
svstein. This siiuple i)rocedure
will allow anv
built-u I) hydrogen
gas to escape. Since the gas
is flaniniable,
do not sinoke or use an open
flanie or ai)pliance
during this process.
.s
D U CHA UFFE-EA U
Dans
certaJnes
l'hydrogbne
conditions,
h l'hlt6rieur
il peut
d'ml
n'a pas servi pendmlt
deux
L'HYDROG]_:NE
EST UN
se former
chauffe-eau
de
qui
semaJnes
ou plus.
GAZ ILXPLOSIF.
Pour r&hlire les risques de douiulages
ou de
blessures loi_que l'eau chaude
n'a pas _t(_
ufilisg_e depuis deux seulaines
ou phis, ouvrez
tOllS les robinets
d'eau chaude et laissez l'eau
COllier i)endant
phisieui_ ininutes a\;Int
d'utiliser
un ai)pareil _lectfique
raccord_
au
svst&ine d'eau chaude. VoliS _liininerez
ainsi
l'll}drog&ne
qui i)ourrait s'y &tre aCCilinllle.
Puisqu'il s'agit d'un gaz inflaniulable,
ne funiez
pas ou n'utilisez
pas lille f]}lInIl/e lille }Ill CO/IYS
de ce l)i'ocess/is.
IMPORTANT
SAFETY
MESURES
DE SI CURITI
PROPER
INSTALLATION
This Chef's
and located
AND MAINTENANCE
Washer must
in accordance
be properly installed
with the Installation
Instructions
before it is used. If you did not
receive an Installation
Instructions
sheet with
your Chef's
visiting
Washer, you can receive
our Website
one by
at monogram.com.
• Connect
to a grounded
metal, pernmnent
wiring system; or _un an equipmentgrotmding
conductor
with the circuit
conductors
and connect
to the equipmentgrotmding
terminal
or lead of the appliance.
• hnproper
grounding
INSTRUCTIONS
IMPORTANTES
connection
conductor
of the equipmentcan result in a risk of
electric shock. Check with a qualified
electrician
or service representative
if vou are
in doubt whether
the appliance
is properly
• Dispose of discarded
or packing material
appliances
properly.
and shipping
• Do not attempt
to repair or replace any part
of your Chef's Washer mfless it is specifically
recommended
in this manual.
All other
servicing should
technician.
be refl_rred
to a qualified
• To minimize
the possibility
of electric shock,
disconnect
this appliance
from the power
supply before attempting
any maintenance.
NOTE: Turning
the Chef's _sher
off does
not disconnect
the appliance
from the power
supply: We recommend
having a qualified
technician
service yore" appliance.
grotmded.
INSTALLATION
ET ENTRETIEN
Avm_t de l'utiliser,
correctement
vous
devez
installer
ce lave=vaJsselle
conform6ment
aux
APPROPRIES
• Jetez de la ti_om appropri_e
les vieux
OlectromOnagers,
ainsi que le mat&'iel
d'emballage
et d'exp&lition.
du chef
directives
d'instaJlation
four,ties.
Si vous n'avez
pas regu mm feuille
de directives
d'instaJlation
avec votre lavevaisselle
du chef,
exemplaJre
vous
par visiter
pouvez
notre
en obtmfir
site Web
m_
h l'adress
monogram.com.
• Cet
appareil
cfiblage
(hilt
Sinon,
borne
dolt
ou
non
_'l la terre
des
de la qualit_
de votre
_lectrom_nage_;
du
qualifi_.
Service
de
chocs
_'lla
de l'appareil.
du
appareillage
doutez
_lectricien
fisques
et raccord_
appropfi_
p(mr
de
_'lla terre.
pore"
_'lla terre
Si vous
repr_sentant
mis
install_
raise
presenter
terre
_'l tm svst6me
_'lla terre
6tre
au fil de
raccordement
de raise
reli6
permanent,
tm fil de raise
appareillage
• Un
6tre
_lectrique
fil
peut
_lectfiques.
de la raise
consultez
apr_s-vente
ou
_'lla
tm
tm
• Ne tentez pas de r_parer ou de remplacer
toute pi&ce de votre lave-vaisselle du chef,
_'lmoins que cela ne soit sp_cifiquement
recommandO
dans le pr(_sent manuel.
Confiez
toutes les autres r_parations
fi un r_parateur
qualifi_.
• _Min de r&hfire les risques de chocs _lectriques,
d_branchez
tot/jours l'appareil
awmt de le
r_parer. REMARQUE
: i,m_que vous mettez
la commande
du lave-vaisselle du chef _'lOFF
(arr6t), le courant
qui alimente
l'appareil
n'est
pas coup_. Nous VO/IS I'eCoII/IIl_lndons
de
confier la r_paration
de votre appareil fi tm
r_parateur
qualifi_.
WHEN
USING YOUR CHEF'S WASHER
Use
this
purpose
applimace
only
as described
for
its intended
in this
Owner's
A CAUTION:
Manual.
C,,n_en_
w_,_hed
in the Sanitization
cycle may be hot to the
touch. Use care befl)re unloading.
• Use only powdeL tabs or liquid detergents
or wetting agents recommended
tot use in
a Chef's Washer and kee I) them out of the
reach of children.
tnlless
inarked
dishwasher s(_i_ or the equiwdent.
For
plastic items not so inarked,
check the
Ina
II tlt_l ct tlI'eI"S
i'ecoulule
ilda
the heating
after use.
elelnent
during
• Do not operate your Chef's X4_asher unless
all enclosure
panels are l)rol)erly in place.
• I,oad light plastic items so thev will not
become
dislodged
and drop to the bottom
of the Chef's X4'asher-they
ufight come into
contact with the heating
elelnent
and
be damaged.
• i,oad sharp knives with the handles
up
to reduce the risk of cut-type ii_juries.
cookware
• Do not touch
or ilnlnediatelv
• Close sui)ervision
is necessary
if this
ai)pliance
is used by or near children.
• i,ocate shar l) itelns so that thev are not
likely to dalnage
the door seal.
• Do not wash
• Non-Dishware
Itelns: Do not wash items such
as electronic
air cleaner filters, furnace
filters
and paint brushes ill wmr Chef's Washer
Dalnage to Chef's Washer and discoloration
or staining of Chef's Washer lnav result.
tiolis.
PJ'gAD AND FOLLOW THIS SAFETY
INFO RNIA TI ON CA REF UL L Y
SAVE THESE INSTRUCTIONS
LORSQUE
VOUS UTILISEZ
VOTRE LAVE-VAISSELLE
N'utilisez ce lave=vaisselle du chef que pour
l'usage auquel il est desth_6, COllune expliqu6
dm_s le pr6sent Mmmel d 9ulilisation.
ne i)ortent
aucmle
recolnlnandations
A MISE EN GARDE : Le_
les filtres
matg_iJaux
Articles
lax_s sehm le cxcle Sanifizafion
peuxent _tre chauds. Faites attention
xous videz xoti'e ulachiile.
quand
• N' ufilisez que des d6telgems
liquides, ell
I)oudI'e ou en pastilles et les produits de rindage
recolnlnandg_s pour lave-\:fisselle du chef. Gardez
tous ces produits hoi_ de port_e des enfimts.
• Placez les articles aiguis(_s de mani0re fi ce qu'ils
n'endommagent
pas lejoint de la porte.
• Placez les couteaux
les poign0es ve_ le haut afin
de r&hfire les fisques de COUl)ures.
• Ne lavez pas d'articles ell plasfique dans le
lave-;:fisselle du cheL fi u/oins qu'ils l)ortent
U/elltioI1
[gl_;(llJ[*'¢
&lui\:dente.
(IH
I,oi_que
[gI'U(¢-'U(li,%(¢[[("
()/l
route
la
I/lelltioI1
diveI_
t0urnaise
du cheL
\_fisselle
DU CHEF
mention,
lisez
(Ill thblJcant.
: Ne lavez
pas
des articles
a air 61ectroniques,
et les i)inceaux
les
les filtres
dans
votre
lave-\:fisselle
Ils i)ourraient
endolnlnager
le lavedu chet et dg_colorer
ou tacher
la ctwe.
• Ne touchez pas _'ll'_l(_inent chauflant
ou ilmn&liateulent
aprbs le lavage.
i)endant
• Ne tifites pas tonctionner
votre lave-vaisselle du
chef loi_que l'un de ses i)anneaux
est enlev_.
• I1 tiltlt exercer tide _ti'oim sur;'eillance
w)us tiffins toncfionner
le lave-;'aisselle
ell i)r6sence
loi_que
du chet
d'enfimts.
• Placez les articles 16gei_ ell plastique de tia¢on
qu'ils ne bougent pas ou ne tombent at! t0nd de
l'appareil
i)endant le lavage. Ils pourraient
&ti'e
endolnlnag6s
s'ils entrent ell contact avec
l'61&nent chattfliant.
les articles de plasfique
UILLEZ LIRE E 7" S UIVRE ]i IA LE TTRE_
CES MES URES DE SECURITE.
CONSERVEZ
CES DIRECTIVES
.,,
colnlne
de
.,,
Control
Panel
- ZBD6605
(h(/'s
}_>lt
_aH
lo_ate
/1%s ker
ZBD6605
your model
number
on the
inside
upper
HEAVY
tu b JTa ng'e.
Throughoul
this
manua 1, ./_¢at ures
HIGHTEMP.
NORMAL
DUTY
and appearance
may vary J)'om
)'our model.
CANCEL-HOLD3 SEC.
SPEE[
WASH
NORMAL
WASH
HIGHTEN
& HEATDRY
NORMAL
& HEATDRY
LIGHT
WASH
SANITIZE
D
Control
Settings
1. WASH
CYCLES
HEAVY DUTY
D
Knob-Use
For pans
This
NORMAL
WASH
to select
the desired
or cookware
cxcle
For loads
cookware,
I11_1_
IIot
wash cxcle based
with dried-on
rell/OXe
SOllle
on dishware
or baked-on
b/li'iled-oll
and
soil lexel.
soils.
toods.
of everyday cookware
with medimn
soils. NOTE: For heavily soiled
choose NORMAl, _\_SH I)lus HIGH TEMP water temperature
option.
LIGHT
WASH
For lightly
soiled
cookware,
SPEED WASH
For recently
used, lightly soiled cookware
to be washed in a short
Provides a wash with temperatures
of up to 125°F (51°C).
RINSE
For rinsing partial
with this cvcle.
2. H_T
ONLY
OPTIONS
lgamb-Used
loads
to select
that will be washed
water
temperature
latei:
time.
Do not use detergent
and drying
options.
NORMAL
Proxides a wash and rinse with water temperatm'es
up to 125°F (: 1 C) in
I,IGHT X4'ASH, 1.35: o_I_ (:5-o_
/ C) in the NORMAl, WASH cxcle and 155°F (68°C)
in HEAVY DUTY.
HIGH
Provides a wash and rinse
I,IGHT X_]_tSH, NORMAl,
TEMP.
SPEED
SANITIZE
WASH,
LIGHT
with water temperatures
up to 160°F (71°C) in
X_]__SHand HEAVY DUTY. Not available
for
WASH
or RINSE
ONLY
cycles,
Provides a sanitizing
wash and rinse with water temperatm'es
up to 160°F
(71 °C) in I,IGHT _;__SH and 171 °F (77°C) in NORMAI, __SH
and HEAVY
DUTY. Not available
for SPEED WASH or RINSE ONLY cycles. At the end
of the cycle, the HEAT OPTIONS
light will illuminate
to indicate
that the
sanitization
conditions
have been met.
NSF
INTERNATIONAL
Meets NSF Protocol for Performance
of Domestic
and Pans X4'ashing Machines
(NSF Protocol P180)
cleaning
and sanitization
of cookware.
NOTE:
NSF certified
HE&T DRY
_hen
residential
selected,
dishwashe_
tm'ns
the
are not intended
dr)ing
heater
for licensed
on for last drying.
extend the cycle bx 30 minutes.
_hen
this option
tan will t/li'ii oi1 to (li T }O/li" dishes without added
HEAT DRY is not axailable on RINSE ONI,Y.
Spray-Type Pots
Requirements
for
food
The
establishments.
option
is NOT selected,
the
heat-energ)
is saxed.
will
Operation
- ZBD6605
(t._/'s
Start a
wash load
/l?_s ker
To start the Chef's Washer, close the door until it locks in place. To start the last selected
press the START button.
To select a different
cycle, turn the knobs to the desired WASH
and HEAT OPTIONS
and press the START button.
NOTE:
Not all heat
selected,
the lights
options
axe available
will flash when
for all cycles.
the START
button
If a combination
is pressed,
cycles,
CY(:I,E
that is not available
is
and the cycle will not start.
HEAT OPTIONS
NOP.MAI.
& HEAT
DRY
X_ash Cxcles
HEAVY DUTY
HIGH
TEMP &
HEAT DRY
HIGH
TEMP
,/
,/
./
,/
,/
SPEED WASH
./
,/
RINSE
./
NORMAI,
WASH
SANITIZE
(includes
HEAT DRY)
I,IGHT X£__SH
ONI,Y
To interrupt/pause
flflly open the door
CAUTION:
a cycle, gently open the door just
tmtil the wash action ceases.
Be careflfl
opened
when
opening
may cause
ii_jm'ies.
attention
lorsque
enough
to turn
the door;
the hot steam
Stand
back as you open
off the wash motor.
that
escapes
the door
when
and
Do not
the door
is
allow the steam
to escape.
_ATTENT1ON
: Faites
xous omrez
la porte,
i,a xapeur
brfllante
qui
s'&'hapI)e
lorsque vous ouvrez la porte pendant
tm programme
de lavage peut
causer des brfllm'es.
I,orsque
vous ouvrez la porte, reculez et laissez la vapem"
s'0chai)per
de l'appareil.
To restart
the wash process,
up to a ti_w minutes
because
it restarts the wash cvcle.
To cm_cel
The
Chef's
wash
cycle
after
the
add
more
the cycle
after
_hsher
will
can
Chef's
it has
start
be selected.
_'asher
detergent
close the door tmtil it locks in place. There may be a time delay of
the temperature
inside your Chef's _,Vasher needs to stabilize betore
started,
to drain
If a new
drains
to the
press
and
cycle
completely.
detergent
and
the
hold
cwle
is not
If you
compartment
the
START/CANCEI,
indicator
selected,
have
lights
all the
selected
if required.
will
Cycle
a new
flash.
button
for
At this
point
Indicator
wash
cycle,
lights
3 seconds.
will
remember
a new
go out
to
Control
Panel
(h_/',s
- ZBD6905
I,l?_,sher
ZBD6905
your model
number
on
inside
the
upper
tub JTange.
Throughout
this
manual,
,fi_at ures
SENSING 0
WASHING
0
HEAVY
RINSINGO
DRYING 0
CLEAN ©
Settings
RINSE I SMART
DRY I WATER
TEMP I DELAY
START I START I
CycleSelections
1
_ rib
g_
ooo
o . o
_oto3sEcs
[
El
1. Cycle Status Indicators-This
display tells you what is hai)pening
while the Chef's _Vasher is in
operation.
All of the Cycle Status Indicators
will flash on and off if either the door is opened
during a cycle or if the cycle has been paused. Yore" wash is complete
when the CI,EAN light
is illmninated.
SENSING
Displayed
during
when
fill and
the
dishwasher
Displayed
dm'ing
the
RINSING
Displayed
during
rinse
DRYING
Displayed
dm'ing
the
CLF_N
Displayed
when
HI_VY
DUTY
NORMAL
WASH
is monitoring
temperatm'e
and
water
level
drain.
WASHING
2. Cycle Selections-The
selected.
10
LIGHT
I DUTY I _WASH I WASH I czz_
ONLY
and appearance
may vary J)'om
your model
Control
NORMAL
cycle
prewash
and
main
wash
periods.
periods.
dry period
is complete,
light on the selected
(if SMART
i,ight
DRY
remains
pad will illmninate
is selected),
ON
to indicate
m]til
the
which
door
is opened,
cycle has been
For pans or cookware
with dried-on
or baked-on
soils.
This cycle I/l[l_ not i'ell/OXe
soi/le
btli'ned-on
foods.
For loads
cookware,
of everyday cookware
with medimn
soils. NOTE: For heavily soiled
choose NORMAl, WASH I)lus HIGH water temperatm'e
option.
LIGHT
WASH
For lightly soiled cookware
or recently used, lightly soiled
utensils and cookware
to be washed in a short time.
cooking
RINSE
ONLY
For rinsing
this cycle.
use detergent
partial
loads
that
will be washed
later.
Do not
with
Control
Panel/Operation
- ZBD6905
( h_(/'_ Washer
3. SMART DRY-_4'hen selected, sensors detect the presence
temperature.
The drying heater and tim are then turned
optimum
drying results, saving energy over conventional
dry. SMART DRY is not available on RINSE ONI,Y.
of rinse aid and the final rinse
on fin" the minimum
time to achieve
heated d_T and time over non-heated
4. WATER TEMP-This
button
optimum
l)erfiwmance.
to increase
provides
extra
heat
options
water
temperature
for
NORMAL
This is the dethult setting-provides
a wash and rinse with water temperatures
up to 195°F (51°(:) in the I,IGHT _4;€SH, 135°F (57°C) in the NORMAl,
_'__SH cycle and 155°F (68°C) in HEAW DUTY.
HIGH
This water temp selection
provides
a wash and rinse with water temperatures
up to 160°F (71°C) in I,IGHT X_]__SH, NORMAI, WASH and HEAVY DUTY.
Use this option fin" heavily soiled dishes. Cannot be used with RINSE ONI,Y.
SAN1
This water temp selection
provides
a sanitizing
wash and rinse with water
temperatures
up to 160°F (71°C) in I,IGHT _?tSH
and I71°F (77°C) in
NORMAl, X_;A_SHand HEAVY DUTY. Cannot
be used with RINSE ONI,Y.
At the end of the _4%_SH cycle, the SANI OPTION
light will remain
to indicate
that the sanitization
conditions
have been met.
illuminated
NSF INTERNATIONAL
Meets NSF Protocol for Performance
of Domestic
and Pans h'ashing
Machines
(NSF Protocol P180)
cleaning
and sanitization
of cookware.
NOTE: NSF certified
residential
dishwashers
are not intended
5. DELAY START-This
option will allow wm to delay
RINSE ONIN fi_r up to 6 hours.
Spray-Type Pots
Requirements
for
fin" licensed
the start time
tood establishments.
of any wash cycle except
1. Select the delay start time wm want by pressing
the DELAY START button.
will alternate
the delav time between
2, 4 or 6 hours and OFE
2. The last programmed
cycle will automatically
be selected.
The DELAY START light/lights
3. The
Start a
wash load
flashing
Delay Start
Indicators
show
Multiple
be selected.
A new cycle and options
will flash to indicate
time selected.
how many
hom_
will elapse
befln'e
pressing
can also
washing
begins.
To start the Chef's Washer, close the door until it loc!<s in place. The last used cycle will be displayed.
To begin this cycle, push the START button.
To select a ditti_rent cycle, push the desired Cycle
Selection
and Option buttons,
and then press the START button.
The
door
must
be closed
To interrupt/pause
CAUTION:
and
a cycle,
latched
into
place
press the selected
to select
a cycle
cycle button.
or
an option.
The Stares
Indicators
will flash.
Be carefid when opening
the door; the hot steam that escapes when the door is
opened mav cause ii_juries. Stand back as vou open the door and allow the steam
to escape.
_ATTENTION
: Faites attention
hn_que xous ouxrez la porte. I,a xapeur brfilante qui s'_chai_pe
hn_que vous ouw'ez la porte pendant
un programme
de lavage peut causer des
b_filures. I,orsque vous ouwez la porte, reculez et laissez la vapeur s'_chal)per
de l'appareil.
To restart the wash process,
close the door until it locks in place. Re-press the cycle button. There
may be a time delay of up to a tew minutes, because the temperature
inside the Chef's _'asher
needs to stabilize bet0re it restarts the wash cvcle. During this time the SENSING light will be on.
To cmlcel
the
cycle
The
Chef's
X_asher
cycle
can
be selected.
Chef's
the
Washer
detergent
drains.
atter
will
it has started,
then
drain
If a new
If win
compartment
cycle
have
press
and
the
is not
selected
if required.
and
cycle
selected,
a new
hold
the
START/CANCEI,
indicator
all the
wash
cycle,
button
lights
will flash.
At this
Cycle
Indicator
lights
remember
to add
for
point
will go
more
3 seconds.
a new
out
detergent
wash
atter
the
to
11
Control
Panel-
ZBD7005
1.17_:,
k er
(k(_f's
Yolt
( (l?g
[o(
your model
number
o,
inside
at(¢
ZBD7005
&
& ZBD7105
ZBD7105
the
upper
tub jla,g'e.
Throughout
this
manual,
,fi_ature,s
and appeara,ce
may vary .)ore
your model.
Cont" 7:oI
Settings
CycleSelections
]
[
D
1. Cycle Selections-The
selected.
HI)_VY
DUTY
light on the selected
For pans
This
NORMAL
WASH
For
cycle
loads
cookware,
pad will illmninate
or cookware
I/la_
IlOt
of everyday
choose
with dried-on
i'ell/O_,e
SOi/le
LIGHT
WASH
For
and
lightly
soiled
cookware
cookware
to be washed
RINSE
ONLY
For
this
rinsing
cwle.
2. WATER
optimmn
TEMP-This
button
perti)rmance.
partial
provides
or baked-on
btlI'Iled-oIl
cookware
NORMAI,
with
_4;_SH
that
will
extra
heat
medimn
cycle has been
soils.
soils.
HIGH
used,
time.
be washed
options
which
toods.
plus
or recently
in a short
loads
to indicate
NOTE:
water
lightly
later.
to increase
For
heavily
temperatm'e
soiled
Do not
water
cooking
soiled
option.
utensils
use detergent
temperature
with
fl)r
NORMAL
This is the defimlt setting-provides
a wash and rinse with water temperatures
up to 125°F (51 °C) in I,IGHT X,\;__SH, 135°F (57°C) in the NORMAl,
X&;__SH
cycle and 155°F (68°C) in HEAVY DUTY.
HI TEMP
This water temp selection
provides
a wash and rinse with water temperatures
up to 160°F (71°C) in I,IGHT _4;__SH, NORMAl, WASH and HEAVY DUTY.
SANITIZE
This water temp selection
provides
a sanitizing wash and rinse with water
temperatures
up to 160°F (71°C) in I,IGHT _,\;__SH and 171°F (77°C) in NOPdMAI,
_4;__SH and HEAVY DUTY. This selection
cannot be used with RINSE ONI,Y.
At the end of the wash
illmninated
to indicate
cycle, the SANITIZE
that the sanitization
OPTION
conditions
light will remain
have been met.
NSF INTERNATIONAL
Meets NSF Protocol for Performance
of Domestic
and Pans Washing Machines
(NSF Protocol P180)
cleaning
and sanitization
of cookware.
NOTE: NSF certified
residential
dishwashers
are not intended
3. SMART DRY-_'hen
selected,
sensm_ detect the presence
temperature.
The drying heater and tim are then turned
optimmn
drying results, sa;'ing energy over conventional
dry: SMART DRY is not available
on RINSE ONI,Y.
12
Spray-Type Pots
Requirements
for
lot licensed tood establishments.
of rinse aid and the final rinse
on for the minimmn
time to achieve
heated dry and time over non-heated
Control
Panel/Operation
- ZBD7005
(h_(/'s
Control
Settings
4. DELAY START-This
option will allow you to delay
RINSE ONI,Y fl_r up to 6 hours.
the start time
1.1%sher
of any wash cycle except
• Select the delay start time you want by pressing
the DELAY START button.
will alternate
the delay time between
2, 4 or 6 hours and OFF.
Start a
FVash Load
& ZBD7105
Multiple
pressing
To start the Chef's Washer, open the Chef's X_'asher door so that the top-of door controls
are
visible. The last used cycle will be displayed.
To begin this cycle, press the START button.
To select
a dilterent
cycle, press the desired Cycle Selection
and Option buttons,
and then press the START
button. Atier the door is closed and latched,
the selected
cvcle will begin.
To hlterrupt/pause
flflly open the door
_WARN1NG:
a cycle, gently open the door
until the wash action ceases.
Do not flfll) open
door
while
just enough
the Chef's
to turn
_'asher
off the wash motor.
is in operation.
Quickly
Do not
oi)enin,*
the door while the Chef's _'asher
is operating
could result in serious scalding.
Be careflfl when opening
the door; the hot steam that escapes when the door
is opened
may cause injuries.
Stand back as wm open the door and allow the
stealll
to escape.
_AVERTISSEMENT
: N'omrez
pas conll)l_telnent
la porte
lorsque
la laxeuse
fonctionne.
Une
ouverture
rapide de la porte lorsque
l'appareil
est en tonctionnement
peut entrMner
de s_rieuses
bt filures. Faites attention
lorsque vous ouw'ez
la porte; la wlpeur brfilante
qui s'_chai)pe
lots de l'ouverture
de la porte
peut causer des blessures.
Tenez wins en arribre lorsque
wins ouw'ez la
porte afin de permettre
_'lla vapeur de s'_chai)per.
To restart the wash process,
up to a tew minutes
because
it restarts the wash cycle.
To cm_cel
The
Chef's
wash
cycle
atter
the
add
more
the cycle
after
X4'asher
will
can
Chef's
it has
start
be selected.
Washer
detergent
close the door until it locks
the temperature
inside the
started,
to drain
If a new
drains
to the
press
and
cycle
completely.
detergent
and
the
hold
cycle
is not
If win
compartment
in place. There may be a time delav of
Chef's Washer needs to stabilize beti)re
the
START/CAN(:EI,
indicator
selected,
have
lights
all the
selected
will flash.
Cycle
a new
button
fl)r
At this
point
Indicator
wash
cycle,
lights
3 seconds.
a new
will go
remember
out
to
if required.
13
Features-
ZBD6605,
ZBD6905,
Chief's
You can prevent
7bne
the beep
fl'om
Silencing
1. Press the START/(L4NCEI,
(072
2. To have sound again,
together
again.
SO_le
models)
Your Chef's Washer
HEAVY DUTY wash
automaticallv
select
Yi)u can change the
A u to
Memory
Child
Mode
SO?7_le
and NORMAI,
simply
press
The child lockout
and holding
both
NOTE:
_¢\;4SH buttons
settings.
together
and
prior
NORMAl,
to selecting
settings.
X*\]¢SH buttons
has the abiliw to remember
what options you like with NOP, MAI, X4;_tSH and
cycle. This means that if w)u select NORMAl, X,\]__SH, your Chef's W_sher will
the options that you selected last time w)u washed with the NORMAl, _4;€SH cvcle.
options that have been remembered
with a particular
wash cycle if wm desire.
Child
can be cancelled
by pressing
the START/CANCEl,
and HEAVY DUTY together
pressed
for two seconds
until a single BEEP is heard.
lockout
overrides
tone silencing.
APPROXIMATE
CYCLE TIME
With 120°F Water
(< xchgling drying time)
y
(°F)
Salfi
(on
Normal
CYCLES
Detergent
Usage
Guide
SOITI_
160
171
N()RMAL
135
143-160
160-171
125
133-160
160
WASIt
SPEED
WASt 1
RINSE
()NI 5
WATER USAGE
(Gallons)
Normal
High
Stuff
70
77
84
50
94
80
5.0
30
50
63
3.8
23
--
--
1.2
11
--
--
models)
155
7.4
5.0-11.2
115-125
CYCLES
or
High
I tE_ \k'Y DU'IY
I JGt tT \\7\St ]
SOFT WATER
MEDIUM WATER
HARD WATER
0-3 grains
3-7 gTains
7-12 grains*
Main Cup
Auxiliary
Cup
Main Cup
Auxiliary
Cup
Main
Cup
Auxiliary
t tlLA_N DU'IY
Full
None
Full
Full
Full
Full
N()RMAL
Full
None
Full
None
Full
Full
I
/ Full
None
Full
None
Full
Full
\\7\St 1
/ Full
None
Full
Full
Full
Full
I J(;t
WASt ]
IT \_\SI
SPEED
RINSE
()NI N
Use no detcrgem
*12 grains and ,11) is extremely hard wat_ 1;A water softener
is recommended.
Without it, lime call lmild up in tile water
xalxe. The water xalxe may stick and flooding could occuc
14
control
the START/CANCEl,
TEMPERATURE
(Powder
Liquid)
selecting
1,1%sher
This teature
can be enabled
by pressing both the START/CANCEl,
and HEAVY DUTY buttons
together
and holding
both tot two seconds. You will hear three BEEPS when the child lockout
is enabled.
models)
'
Cych? Chat
when
ZBD7105
To reduce the possibility
of children
starting
the Chef's X4'asher when unattended,
a child lockout
teature can be enabled.
Once enabled,
each button must be pressed and held tot two seconds until
you hear a BEEP, betore the Chef's Washer will respond.
While in this mode, the SENSING and
CI,EAN light will ilhmfinate
while the button is pressed.
Lockout
(on
sounding
ZBD7005,
Use no detergent
Use no detergent
NOTE: The aboxe chart is a general gtfide. Detergent
amounts should be a(/just_ d depending
on the an]ount
and type of soil until satisthctory results are achiexed.
Cup
Using the Chef's Washer
( h_ff s 1491sher
Use a Rinse
Agent
Tile entering
water must be at least 120°F
(49°C) and not more than 150°F (66°C), fin.
etti_ctive cleaning and to prevent dish damage.
Check the wz_ter temperature
with a candy or
i/leat thelllloilletei;
WIII'n
on
tile hot water
fimcet
A rinse agent improves
d_y peril)finance,
reduces
spots and prevents
new fihn buildup
on your dishes, glasses, flatware, cookware
and plastic.
• If rinse agent spills, wipe it up immediately.
It can kee I) yore" detergent
fl'om working.
Fill the rinse agent chamber
by rotating
the
round cap co/mterch)ckwise
and remove.
[qll
chamber
to maximmn
level. Replace and lock
tile cap into place.
To check if rinse agent is needed:
a solid black
indicator
indicates
sufficient
rinse agent; a clear
indicator
indicates
a low level and requires
adding more rinse agent.
nearest
the
Chef's
Washer,
the
thermometer
in a glass
rtm
continuously
into
temperatm'e
stops
the
and
glass
place
let the
until
water
the
rising.
• If atter washing you notice cloudy spots,
streaks or water marks on the glassware, and
tile rinse agent dispenser
is not empty, it may
be necessat T to increase the dispenser
settings.
To do so, remove the cap and using a butter
knite, rotate the indicator
arrow to a higher
nmnbe_: Replace the cap when done.
• If glasses appear smeared
or there is toam
present on the bottom
of tile glasses or tile
bottom of tile machine,
select a lower dosage
IltllllbeI:
• A flfll dispenser
should
last abo/it
one month.
• For
softened
water,
reduce
dispenser
setting.
Adjust to higheror lower number
Detergents
Use only detergent
specifically
made fi)r use in
dishwashers.
Keep your powdered
detergent
fl'esh and dry. Don't put powder detergent
into
the dispenser
tmtil you're readv to wash dishes.
Tile amo/mt
of detergent
to use depends
on
whether
vour water is hard or soli. With hard
water,
water,
Protect
you need
you need
wmr
extra detergent.
less detergent.
dishes
and Chef's
With
soti
recommended.
Without
it, lime can build up
in the water wflve, which could stick while open
and catlse flooding.
Too IllHch detergent
with
soft water can cause a perlilanent
cloudiness
of glassware,
called etching.
compartment,
push
Be sm'e tile Cycle Status Indicators
(on some
models)
are not lit befln'e adding detergent.
Otherwise,
the detergent
cup will not close and
latch properl>
Add detergent,
then close tile
main cup.
NOTE:
closed,
X&'_sher by
contacting
your water departmei_t
and asking
how hard vom" water is. Twelve or more grains
is extremely
hard water A water sotiener
is
To open the detergent
lever latch inward.
When using automatic
dishwashing
detergent
tabs, place one tab in the main cup and close.
To open detergent
cup at*er it has been
push the lever latch inward.
0mpartment
Auxiliaw
compartlrlent
[.ever
tile
15
I,oading
the
Racks
(1_ _/',s I.Yasher
This
Upper Rack
Chef's
Washer
is designed
for
dishwasher-safe
gourmet
cookware.
Tile upper rack is fin" small bowls and pans. This is
also a secure place tot dishwashe_sati
_ plastics.
Because
boMs and casserole
dishes
come in \:n'ious
sizes, after loading, slowly push in the rack to make sure
they will clear the top of the Chef's _\_lshe_:
The upper rack is also good tin" all kinds of oddl_
shaped utensils. Saucepans,
mixing bowls and other
items should be placed time down.
Make sure small plastic items are secure
fidl onto the heating element.
Adjusting
Upper Rack
He rht
so they can't
The upper rack can be raised or lowered to
provide extra room fin" different
sized items.
Empty the upper rack. Remove the rail pegs
in tile fl'ont of the rock i'tlnneiN by squeezing
and lifting the top of the peg, then slide the
rack ()ILL
Liftpegfrom
rackrunner
Upper
Take care not to obstruct
Wash
spray arm under the upper rack or cover the
_ater collector
in the center of the upper rack.
7bwo
16
the
of the
rack
in tile
replace
the pegs, . Check
free to rotate.
Re-adjust
upper rack
Squeeze
the rotation
Re-insert
chosen
position
that
sprm,
the
and
arm
is
Silvoware
and Utensil
Basket
Put flatware in the removable
basket with fin'k and knife handles
up to protect yore" hands. Place
spoons in the basket with handles down. Mix knives, fin'ks and spoons so thev don't nest together:
Distribute
evenly. Small plastic items, such as measuring
spoons and lids fi'om small containers,
should go in the bottom of the silverware basket with silverware on top.
Flip-down covers can be lowered to seem'e lightweight
action. The slots in the coveL_ can be used to separate
items fi'om the effects
silverware.
of the vigorous
wash
Don't let any item extend through bottom
Low
Rack
_\]]en loading the lm_w" _;mk, do not load tall platte_s
or mJys in the fl'ont left cornei: They may prevent
detergent
cup fl'om opening during the wash cycle.
The lower rack is best used fin" large
and cookware. There is l 5" clearance
trays, saucepans
Ira" tall items.
i,arge items such as broiler pans and racks should go
along the sides, i,oad platters, pots and bowls along
the sides, in corne_s or in the back. The soiled side
of items should lace down or the center of the rack.
Fold-down tray dividers provide
large and hard-to-tit
items.
flexibility
fi>r extra
The tray dividers may be left in the up position
folded down to customize
the lower rack.
or
TrayDivider
17
re and Cleaning
(h_/'s
Exterior
To
clean
the
exterior
Never
Use
use
sharp
stainless
through
Interior
control
painted
(;E
panel,
use a lightly
panels,
use
objects,
scom'ing
steel
cleaner
on
Parts
in the
USA,
The stainless steel
a clean, soft cloth.
a good
danq)ened
appliance
pads
or
stainless
harsh
steel
by calling
tub can be cleaned
cloth,
polish
then
You
on
can
800.626.2002.
In
with Stainless
Steel
any
part
order
Protect
Against
l }vezing
the rubber
If yore"
1. Cut
Chef's
door
Washer
is left
off electrical
2. Turn
off the
3. Drain
water
power
water
the
the
in an
the
water
filters
Chef's
and
water
inlet
fl'om
call
Washer.
line
line
and
to the
tub
water
The Air
An air gall protects your Chef's \,\_sl_e_"against
(;ap
_:_ter
gall
backing
is not
covered
codes
The
a
up into
part
of the
by yore" warrant)'.
reqtlire
air gap
1. Turn
chroI//e
Chet's
Not
air galls , so y()/i
is easy
off tile
clogs.
Washer
The
winter;
fuses
or
line
(Use
Magic
I)r°duct
trip
fl'om
a pan
# WX10X15
using,
Stainless Steel Magic
call 1.888.880.3030.
the
inlet
wdve.
Steel
of the doo_:
ask a service
circuit
the
# X,VX10X 15
breaker.
water
to catch
technician
wdve.
the
water.)
air
a
sponge
to soak up
Two types
water.
• 'i
_"
It is not
all plumbing
Illay
not
have
one.
to clean.
Chef's
X_asher
and
litt
off the
cover.
2. Unscrew
the plastic
a toothpick.
18
it if a drain
water
use
cap and
clean
the
_asher.
wdve.
and
bottom
dm'ing
water
clean
Chef's
Magic, or a similar
Remove
the
To
1.888.880.3030.
the seal at the bottom
place
disconnect
inlet
the
including
unheated
to the
supply
fl'om
4. Reconnect
5, Remove
seals occasionally,
of the
Stainless
Canada,
Use stainless steel cleaner on stainless steel panel. You can order
through
(;E Parts in the USA, by calling 800.626.2002.
In Canada,
Wipe
thoroughly:
wax.
cleaners
panel.
dry
Washer
with
Checkthe air gapany time your Chef'sWasher
isn't drainingwell.
to:
Removing
and Cleaning
the Spray
Arms and
Glass 7}ap
Periodically
remo_e
and clean
to make
sure that
none
of the
become
the spray arms
nozzles
ha_e
Pullup to remove
blocked.
To remove the lower spray arm, grasp the
center of the spray arm and pull upward; it will
tmcliI). When replacing,
make sure the spray
am_ is fifllv seated and spins.
The
plastic
cone
on the underside
of the
spray arm can be detached
counterclockwise.
by unscrewing
To
arm,
remove
the
tmscrew
the
To achieve
and
upper
spray
this,
unscrew
hold
the
replace
the spray
am/
counterclockwise
To clean
rinse
the
them
spray
arm
fl'om
the
inner
spray
arm
arm,
careflfllv
onto
the
upper
and
trader
spray
nozzles
are
The
filter
glass trap is located
at the base of wmr
lower
is used
to collect
fln'eign
objects,
big
to pass
rotate
the
lrap,
empty
the
reve_e
locks
the
glass
trap,
glass
trap
and
these
into
check
and
rinse
steps,
To
screw
inner
spray
the spray
tower.
%
arms,
and
make
stainless
_'asher.
larger
which
drain
the
twist
lift.
glass
items
be
For
too
best
trap
cotmterclockwise,
To dean
sure
steel
The
fl)od
mav
immp.
thoroughly.
making
to removecolle
i:i ::",",
in the
Chef's
trap
To remove
steady
clear.
other
wash i)ertormance,
occasionally.
tower.
tower
water
and
through
careflfllv
plastic
clockwise.
Hmning
sure
glass
the
it
the
glass
To replace,
the
glass trap
place.
19
re and (;leaning
( hr_f's 14_shr, r
The Wash
Filt s
In additi(m
to the glass trap, your
Washer has three fine filters-
Chef's
• a two piece round peril)rated
stainless
filter located in the base of the Chef's
• a finer
micro-mesh
stainless
filter
located
located
below
steel
X,_sher.
under
the
steel filter.
• a super
fine filter
Grip filter and lift
to remove
the lower
spray am/.
Remove the stainless steel filter bv first twisting
and removing
the glass trap. I,it* out the
stainless steel filter.
Perforatedstainless
steel filter
Micro-meshfilter
Attached
to the underside
of this filter is the
uficro-mesh
filter. To remove
the micro-mesh
filter, squeeze the two clips above the stainless
steel filter to release the micro-mesh.
To remove the super fine filter, remove the
lower spray arm. Grasp the super fine filter
around the outer edges. Remove by pulling
Squeezeclips to remove
micro-meshfilter
upward; it will uncliI). Unscrew the tower
cotmterclockwise.
The right half of the stainless
steel filter can now be removed.
To cleml filters, place under _unning water
and gently brash with a soft bristled
brush.
Be careflfl not to deflmn
filters while cleaning,
as this may prevent
them fl'om being properly
re-installed.
The
super
fine
no need
removed
of the
if you
stainless
Replace
your
starting
with
steel
the
filter.
place and
Reconnect
replace
are
2O
the right
reverse
order;
half
of the
stainless
screw
in the
outer
glass
only
in the
stainless
the
there
need
right
filter
it back
replaced
filter.
over
the
edge
until
reposition
the
the micro-mesh
of the
replacing
to remove
steel
filters
the
filter
want
the
fine
on
is self-clemfing;
it. This
Then
super
firmly
half
filter
to clean
steel
is
be
half
Replace
by pressing
it clips
Lift stainless steel
filter to remove
into
lower
spray arm.
filter to the lett
filter
into
the
trap.
Ensm'e
correctly
tower.
tower
prior
Cheffs
fl)r best
to
Washer.
that
Pullsuperfine
filter up to remove
Then
all filters
results.
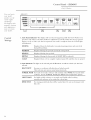
Water Fill
Level
For best i)e_timnance,
Chef's
_sher
Once
tile
Chef's
a complete
ensure
check
}\_sher
RINSE
pressure
situations,
models)
cycle
is flllly
ONIN
it is emptying
(on
and
mn
3 times,
tile
on
level
tile
is not
lower
1, Ensure
cycle,
inside
tile
Chef's
X_'asher
the _;kTER
the second
tile START/CANCEI,
as per chart
tower),
(65 seconds
to
For
low water
(on
some
final
water
level
(marked
tile fill level,
_unning
through
fin" ten
button
level
RINSE
TEMP
button
buzzer
sounds.
to select
is the tactory
Maximum_m
Chef's h_sher
_'\hshet;
If the
increase
is not
it through
cycle
the
pause
the
the Chef's
tile minimum
spray support
cycle. Depress
seconds
until
2. Press
above
ONIN
through
of}our
run
models)
correctl>
RINSE
Halflvay
fill lexel
connected,
some
filling
ONLY
(on some models)
and check
the water level
water
the x_ater
a
fill time,
Continue
to press tile
STAI),T/CANCEI,
button
until tile
desired indicator
is illuminated.
Cycle Status
Indicators
Fill time
SENSING
55 seconds
X&;__SHING
60 seconds
RINSING
65 seconds
DRYING
t:) seconds
CI,EAN
85 seconds
setting).
3. To test time, press DEI,AY START. The Chef's Washer
will start filling, i,isten fin" the Chef's Washer to
complete
filling. Once filled, the fill level must be
checked
to ensure fill time is correct.
4. Once complete,
press tile X4__TER TEMP
exit fill time mode.
button
to
21
Before You (;all For Service
( h_f's
Questions?
PROBLEM
POSSIBLE
Use this
Chef's Washer
will not run
prob&m
solT)gI"
CAUSE
WHAT
TO DO
Door not properly
closed
• Press
door
Door is opened
the cvcle when
• Relatch
Washer
dtwing
the water
is hot
Mode
Fuse is blown,
or the
circuit
noises
Soule
(loot: X*\'aita ti_w minutes;
Chef's
will start automatically
alter the
breaker
of
tile
will hear
• Reset
tripped
• Detergent
so/tn(ls
stabilizes.
• Press and hold desired button
seconds to actiw_te. See Child
section tot more details.
the circuit
• Replace
Remove
Power SUl)ply not
connected
Unusual
tmfil it clicks shut.
temperatm'e
Child I,ockout
is selected
14_sher
tor two
I,ockout
Mode
breaker.
fltse or reset circuit
a W other appliances
breaker;
fl'om tile circuit.
• Check that tile Chef's
and the switch is on.
Washer
is plugged
• Make sm'e evetTthing
Chef's Washer.
is secm'ed
in
volt
are nomml:
cup opening
• _'_ter draining
out of
the tub atter touching
a
keypad or starting a cycle
Lrtensils are not secm'e
the rack or something
small has dropped
into
the rack
Foreign
material
tile smnp
in
in
• Clean
Detergent
dispenser
left in
cups
Dishes are blocking
detergent
cups
Water
not pump
Disposer knock-out
plug
has not been removed
• Remove
Drain
• Clean
out
will
of the tub
tile
is clogged
tile filters/foreign
• Reposition
objects
in
covet'.
tile dishes.
knock-out
i)lug.
air gap (if applicable).
• If tile CheFs
ttm disposer
X_'asher drains into a disposer;
to assm'e it is draining
properly.
• Check to see if yore" kitchen sink is draining
well. If not, you may need a i)lmnber.
Suds
in the tub
Correct
detergent
not used
was
• Use only automatic
to avoid sudsing.
dishwasher
detergents
• To remove
suds fl'om tile tub, open tile
Chef's Washer and let suds evaporate.
Add
1 gallon of cold water to the tub.
For 7000 series
models:
• Pure I) out water by pressing
the NORMAl,
WASH button,
then press start.
• Close
the door
tmtil it locks into
• Wait tin" one minute,
then
open the door and hold
START/CANCEl,
button
22
place.
carefllllv
down the
tot three seconds.
Questions?
Use this
PROBLEM
POSSIBLE
CAUSE
WHAT TO DO
For all other
Suds in the tub (cont.)
models:
• Pump out water by closing
it locks into place.
prob#m
solT)eT"
• Press the NORMAl,
press
the door
_;__SH button,
three
IJISSe
ageIst
used
seconds.
rack loading
press and hold
button tot
if necessary.
rinse aid.
rinse aid setting.
• For soti water,
hnproper
Repeat
• Rein ove any spilled
• Reduce
Dishes and flatware
not clean
then
start.
• Wait ti)r one minute, then
down the START/CANCEl,
T()o IS/HcN
tmfil
rinse
aid iSS}lVbe tllSlsecessai'v;
• Make sure large dishware does not block
the detergent
dispenser
or the wash arm.
• _ssure
silverware
is not blocking
Filter or spray amss dirty
• Clean filte_
instructions
and spray ;runs
on page 90.
Inlet water temperature
is below 120°F
• Rms tap until water is hot, prior
Chef's Washer cycle.
• Raise the water heater
spray ares.
according
temperature
to
to starting
to 120°E
• Depending
on model, use X_;__TER TEMP
HIGH or X4?tTER TEMP SANI option if
suitable tot dish load.
Water leaks
door hmldle
through
Air gap is clogged
• Clean
the air gap.
Water pressure
is
temporarily
low
• TllI'IS
Opening
door during
cycle with out pa using
machine
first
• Pa use the cycle before opening
the door.
Follow inst_ uctions tot inten upting the
cycle tot yore" specific model.
oIS
}1 thtlcet.
]Is l_;IteI"
COlSSiisg
o/lt
ISSOI'e
slowly than usual? If so, wait until pressure
is normal betore using yore" Chef's Washe_:
23
Before
You Call For Service
( h_f's Washer
Questions?
PROBLEM
POSSIBLE
CAUSE
WHAT
Use this
Black or gray marks
on dishes
Ahuninunl
utensils have
• Remove
Dishes do not dry
HEAT/SMART D RY
not selected
• Depending
on model,
or SMART DR*d
select HE_T
Rinse agent
• Check
dispense*;
prob&m
sol_gI"
TO DO
marks
with a mild,
ab*vasive cleane*:
rubbed against dishes
dispenser
the rinse agent
D RY
is empty
Chef's
_\_sher
is paused
i,ow inlet water
• To restart the wash cycle, press the selected
wash button.
• Rml tap until water is hot prior
Chef's h_sher
cycle.
to starting
• Assure inlet water
least 120°E
is at
tempe*zmu'e
• Depending
on your model, select }\_ATER
TEMP HIGH & HEAT DRY or }\_ATER
TEMP SANI and HEkT
Chef's
Washer
won't
start
Door
not properly
Door
opened
closed
during
cycle
when water is hot
Child I,ockout
is selected
• Press door
• Reqatch
_'\_sher
mode
until it clicks shut.
do(n: Wait a tew minutes;
will restart
flashing
status
indicators
or beeping
• Press and hold desired button fi)r two
seconds. See Child I,ockout mode section
Power supply not connected
• Check that Chef's
switch is on.
Door
• Press door
not properly
closed
Chef's
automatically.
fi)r models ZBD6905,
All cycle
DRY options.
ZBD 7005 and ZBD 7105.
Washer
is plugged
in and
until it clicks shut.
every
30 seconds
(oil ZBD6905,
ZBD 7005
and ZBD 7105)
Motor starts but water
doesn't enter Chef's
Chef's }\hsher
_¢\hter
turned
supply
is paused
\_flve
• To restart the wash cycle, press the selected
wash button.
• Open water supply \Mve.
off
Washer (flashing POTS
LIGHT) (on models
ZBD 6905, ZBD 7005
and ZBD 7105)
Program taking too
long or not advancing
properly
ix)w inlet x_zlter tempe*vmu'e
• Rml tap until water is hot prior
Chef's }\_sher cycle.
• Allow time to heat water
• Check
• Connect
24
inlet water
to starting
(up to one hour),
teml)e*_mu'e.
to hot water supply
Questions?
Use this
prob#m
sofT JeT"
PROBLEM
POSSIBLE
Water does not empty
out of Chef's Washer
Outlet
CAUSE
blocked
WHAT
TO DO
• Check garbage
fi)r blockage
(flashing RINSE ONLY
light) (on models
ZBD6905, ZBD7005 and
• Check
outlet
disposal
and air gap
hose for kinks and shaq)
bends,
ZBD7105)
Chef's Washer continues
to drain indefinitely
Faulty
fill \:five
• First, tm'n off water sui)ply \:five, then tm'n
off circuit breaker and call fl>r service.
Yellow color on dishes
Water has iron or other
and glassware
mineral
content
• A special
the
onl}
Contact
White film on glasses;
tea and coffee stains
Hard
water
Brown spots or pitting
of stainless steel;
tarnishing
use
of Sani
Consistentl}
lm_ water
lmel in Chef's _sher
of silver
Light goes out
in the
a xsater
supply
line
is
this problem.
softener
increasing
t{) 6. See the
• Discontinue
xsater
to correct
• Tr} progressixely
setting
Repeated
filter
_a}
Rinse
company,
the
Agent
Rinse
Aid
section.
use of Sani option,
• Check that operating water level is between
the MIN. and MAX. indicators
on lower
spray arm support
Cleaning
section.
towei; See Care and
Electrobsis
folio,ring
contact xdth other metnls
• Wash sc_;ached or worn pieces by hand.
Polish silverware with a silve>plate cleane_:
Detergent
thrm_n over the
cutler) or saucepans
• i,oad detergent
Chef's Washer
properly.
section.
See [)sing the
• Call hw ser\'ice.
25
Consunmr
I?lO _tOg'Ffl
Services
(h_/'s
lIL _ O l?l
Washer
With the purchase
of your new Monogram
appliance,
receive the
assurance
that if you ever need information
or assistance from GE,
we'll be there. All you have to do is call-toll-free,
t
GE Answer
Center ®
In the USA:
800. 626.2000
Whatever
vom" question about any Monogrmn
major appliance,
GE Answer Center '_
information
service is awfilable to hell). Your call-and
yo/u" question-will
be answered
promptly
and com'teouslv.
And wm can call any time. GE Answer Center c setwice is open
24 ho/trs a day, 7 days a week.
OR
Visit o/u" X4'ebsite at: monogram.corn
In Canada,
call 1.888.880.3030.
In-Home
AGE
consmner
service
Repair
that's
convenient
for
Service
In the USA:
800.444.1845
service
today
to 2:00
p.m.
so most
or
profl_ssional
volt.
tomorro_;
Saturdays).
repairs
Many
can
will
GE
provide
or at your
handled
convenience
in just
repair
Service
Ore" factory-trained
be
expert
Consmner
(7:00
technicians
one
service,
scheduled
comi)any-operated
a.m.
know
at a time
locations
to 7:00
p.m.
offer
weekdays,
yore" appliance
9:00
inside
and
wm
a.m.
out-
visit.
In Canada:
1.888.880.3030
For Customers
GE offers Braille controls
for a xariet_ of GE appliances
and a
brochm'e
to assist in planning
a barrie>free
kitchen for persons
with limited mobility.
With Special
Needs...
Consmners
TDD
In the USA:
800. 626.2000
xdth
impaired
hearing
or a conxentional
(800.833.4322)
or speech
teletypewriter
to request
xsho haxe
may
inflmnation
access
to a
call 800.TDD.GEAC
or set\ice.
SECTION
Service
Contracts
M the USA:
800. 626.2224
You can have tile secure fl_eling that GE Consmner
Service will still be there after w)ur
warranty expires. Purchase
a GE contract
while w)ur warranty is still in effect and w)/Fll
receive a substantial
disco/mt.
With a umltiple-year
contract,
you're assured of fltttu'e
service at today's prices.
In Canada:
1.888.880.3030
Parts and
Accessories
Individuals
M the USA:
800. 626.2002
User
M Canada:
1.888.880.3030
26
to their
Renewal
qualified
home.
Parts
to service
their
Tile GE parts s)stem
are titlE' warranted.
maintenance
instructions
performed
by m_y user.
persmmel.
Caution
must
Other
be
own
contained
servicing
exercised,
applimaces
proxides
can
access
in this
generally
since
have
to oxer
manual
cover
should
improper
parts
47,000
or accessories
parts...and
procedures
be referred
servicing
may
sent
intended
to qualified
cause
directly
all GE Genuine
unsafe
to be
service
operation.
Warranty for custonmrs
YOUR
MONOGRAM
CHEF'S
WASHER
in the USA
WARRANTY
Staple sales slip or cancelled check here. Proof of original
date is needed to obtain service under warranty.
WHATIS
COVERED
P)vm the Date
of the Or_ginal
Purchase
purchase
0 N _YEAR
Any part of the Chef's Washer which tails due to a (leti_ct in materials
or workmanshii_.
this full one-year warranty, (;E will also provide,
free of charge, all labor and in-home
replace the defective
part.
Second
During
service to
Year
Any part of the Chef's Washer which tails due to a (lefl_ct in materials
or workmanship.
Dm+ing
this second-yeaac limited warranty,
you will be resi)onsible
ti>r anv labor or ii>home
service costs.
Five Years
The Chef's Washer rack, if it should rust, or the electronic
control module,
if it should tail due
to a defect in inaterials
or workmai_shii).
Dtu+ing this five-yeax limited warrmlty, you will be
resl)onsible
tot }lily labor or in-holue
selwice costs+
Lifetime
The stainless
workmai_shii).
and ii>holue
steel tub or door liner, if it tails to contain water due to a detect in inaterials
or
During this full lifetime warrm_ty, GE will also provide,
free of charge, all labor
selwice to replace the defective part.
ooooooooooooooooooooooooooooooooooooooooooooooooooooooooooooooooooooooo
o
This warranty is extended
to the original
purchaser
and any succeeding
owner t0r products
pro'chased
tot ordinary home use in the 48 mainland
states, ,Maska, Hawaii and _,\_shington,
Proof of original purchase
date is needed
to obtain service under the warranty.
All warranty service will be provided
bv our Factory Service
Customer
Care '_servicers during normal working
horn's.
Should
WHAT
IS NOT
COVERED
your
al)pliance
need
service,
• Service trips to your home
to use the product.
• hnproper
installation,
maintenance.
• Replacement
of
circuit
• Failure
of house
during
warran W period
to teach you how
or
fuses
of
or resetting
• Cleaning
the drain
the product
for
other
or used
commercially,
if it is abused,
thm_ the
intended
to the
floods
possible
misused,
• Damage
or bv ore" authorized
or beyond,
call 800.444.1845.
product
or acts
• Incidental
breakers.
or used
• Dmnage
fire,
delivery
Centers
of
caused
or
with
servicing
by accident,
God.
or consequential
defects
D.C.
dmnage
this
of
caused
by
applimlce.
the air
gap
device
in
line.
after
delivery.
purpose
Some states do not allow the exclusion
or linfitation
of incidental
or COlasequential
dalnages,
so the above limitation
or exclusion
Inay not apply to vou. This warranty gives you specific legal
rights, and you nlav also have other rights which vary froln state to state. To know what wmr
legal rights are in your
Attorney
General.
state,
consult
your
local
or state
coi_sumer
altairs
ottice
or your
state's
Warrantor:GeneralElectric Company,Louisville,KY 40225.
27
Warranty for customers in Ca n ada
(h_(f's
YOUR
MONOGRAM
CHEF'S
WASHER
Washer
WARRANTY
Staple sales slip or cancelled check here. Proof of original
date is needed to obtain service under warranty.
WHATIS
COVERED
purchase
ONE-YEAR
Any
part
of the
this
full
one-year
l_)vm the Date
replace
the
of the Or_ginal
Purchase
Second
Year
Chef's
_.L_sher
warranty,
detective
Any
part
this
second-yeaac
of the
Five
Years
The
Chef's
Chef's
_,L_sher
limited
tot
rack,
any
which
warranty,
in materials
responsible
fails
also
due
to a defect
provide,
free
of
in materials
charge,
or workmanship.
all labor
and
During
in-home
service
to
part.
Washer
to a defect
which
GE will
tails
you
if it should
be
Hlst,
or workmanship.
labor
due
will
to a detect
or the
service
fi_r any
electrmfic
During
or in-home
in materials
responsible
this
control
five-yeaac
or workmanship.
labor
or
in-home
module,
limited
During
service
if it should
warranty,
you
costs.
tail
will
due
be
costs.
Lifetime
The
stainless
steel
workmanship.
and
tub or door
During
in-home
this
se_wice
liner,
full
if it tails
lifetime
to replace
the
to contain
warrmaty,
defective
water
due
to a detect
also
provide,
free
GE will
in materials
of charge,
or
all labor
part.
eoooooooooooooooooooooooooooooooooooooooooooooooooooooooooooooooooooooo
This
warranty
is extended
to the
purchased
for ordinary
home
service
under
the warranty.
All warranty
service
Customer
Should
WHAT
IS NOT
COVERED
• Service
to use
Care
will be
'_ servicers
yore" appliance
trips
provided
home
purchaser
in Canada.
and
Proof
working
service,
during
to teach
you
Service
delivery
or
Centers
• Damage
of the product
or used
for other
than
or used
commercially.
fuses
• Incidental
or resetting
if it is abused,
the intended
misused,
or
for products
date
is needed
to obtain
or bv ore" authorized
• Clem_h_g
the drain
• Damage
beyond,
to the
floods
possible
• Replacement
of house
of circuit
breakers.
owner
pro'chase
period
fire,
installation,
succeeding
hours.
warranty
how
any
of original
by ore" Factory
normal
the product.
• Improper
maintenance.
• Failure
original
use
during
need
to your
•
call
product
or acts
of
1.888.880.3030.
caused
or consequential
defects
with
or servicing
line.
after
by accident,
God.
damage
this
appliance.
of
the air gap
caused
device
delivery.
purpose
Some provinces
do not allow the exclusion
or limitation
of incidental
or consequential
damages,
so the above limitation
or exclusion
may not apply to win. This warranty
gives you specific legal
rights, and wm may also have other rights which vary fl'om province
to province.
To know what
your legal rights are in your province,
consult your local or provincial
consumer
atiairs otiice.
Warrantor: Camco Inc., I Factory Lane, Suite 310, Moncton, N.B. EIC 9M3.
28
by
in
Notes
29
Notes
3O
x,_po±l_.,zr_
_tnz_aodtu I
uognx! .s__/d.ttlSaau_o
:lanpoa d aattmsuo D
saoue!lddv39
IIIII
Place
1st Class
I _etter
Sialnt_
I Iere
General Electric Company
Warranty Registration
Department
EO. Box 32150
Louisville,
KY 40232-2150
.....................................................................................................................
J
31
Consumer
Dear
Product
Ownership
Registration
Custon]er:
Thank
)ou fi_r I_urchasing
, our
haxe _ou as a CtIstoI//eI "_,
Follow
these
three
product
steps
and
thank
wm
to protect
fi_r I)lacin,, _ ,your
your
new
Complete
mad mall
your Consumer
Product
Ownership
Registration
today.
Iiaw' the t)eace ot mind
of knowing
we call
contact
you ill tile
/
appliance
ill us. We are
to
Read your "()wner's
Manual"
carefully.
It will hel t) }x)u
3
require service. The
service munt)er in the
USA: 800.444.1845.
In
Canada:
proud
investment:
After complethlg
dfts
regislratiou,
write your
model mad serial
ntunbers
ha this mmmal.
"_bu will need tl/is
in{bmmlion
should you
mdikcly
event of a
sal_'lv modification.
Important:
confidence
ot)erate
appliance
new
t)rot)erly.
1.888.880.3030.
To ensure that your product
is registered, mail the separate product
registration
product
registration
card is missing, fold and mail the form below. No envelope
If the separate
Veil1?
card.
is needed.
F()I A) t ]ERE
Consumer
Product
Ownership
Product
Registration
Model
Serial
Dishwasher
Nil= []
First]
Al)t. #
Mrs. []
Miss []
I
]
I
I
I
I
I
I
I
I INa]//e
_ast
I
l
I
I
I
I
I
I
I
I
I
I
I
I
I
I
I
I
I
I
I
I
I
I
I
I
I
I
I
I
I
x_,+,17I
I
I
Ha]lie
Street
Address
Ms. []
I
I
I
I
I
I
I
I
I
I
I
I
I
I
I
I
I
I
I
I
I
I
I
I
I
I
I
I
I
IState IL__t__l
I
I
I
,]ilvI , ,
I
llat_
Pla,:ed
Month
C
Izip
(:ode I
I
I
I
I
Day ]
Mono#ram
I
]
Phol]e
Nmnl)eri
,
,
i-I,,
]-I
i
+,,,,+,,.,,,e,egl+,,+ce,,,
General Electric Company
Louisville, KY 40225
TAPE C1,()SED
Monogram:
We bring good things to life.
General Electric Company
Louisville, KY 40225
165D4700P239
49-5913-2
0616400354
Printed in Australia
01-03 JR