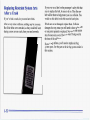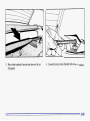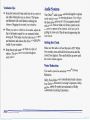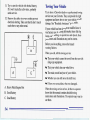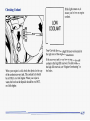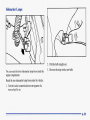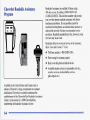
1
A
n
The 1996 Corvette Owner’s Manual
...............................................................
FeaturesandControls ..................................................................
This section explains how tostart and operate your Corvette.
Comfort Controls and Audio Systems .....................................................
Seats and Restraint Systems
1-1
This section tells you how to use your seats and safety belts properly.It also explains the air bag system.
2-1
3-1
This section tellsyou how to adjust the ventilation andcomfort controls and how to operate your
audio system.
..............................................................
Here you’ll find helpful information and tipsabout the road and howto drive under different conditions.
ProblemsontheRoad ..................................................................
This section tellsyou what to do if you have a problem while driving, such as a flat tire or overheated
YourDrivingandtheRoad
4-1
5-1
engine, etc.
..........................................................
Here the manual tells you howto keep your Corvette running properly and looking good.
Maintenanceschedule ..................................................................
This section tellsyou when to perform vehicle maintenance and what fluids and lubricants to use.
CustomerAssistanceInformation ........................................................
Service and Appearance Care..
6-1
7-1
8-1
This section tellsyou how to contact Chevrolet for assistance and how to get service and owner publications.
It also gives you information on “Reporting Safety Defects” on page 8-9.
Index
.................................................................................
9-1
Here’s an alphabetical listing of almost every subject in thismanual. You can use it to quickly find
something you want to read.
i
We support voluntary
technician certification.
GENERAL MOTORS, GM and the GMEmblem,
CHEVROLET, the CHEVROLET Emblem,
CORVETTE and the CORVETTE Emblem,are
registered trademarks of General Motors Corporation.
This manual includes the latest information at thetime it
was printed. We reserve the right to make changes in the
product after that time without further notice. For
vehicles first sold in Canada, substitute the name
“General Motors of Canada Limited” for Chevrolet
Motor Division whenever it appears in this manual.
Please keep this manual in your Corvette,so it will be
there if you ever need it when you’re on the road.If you
sell the.vehicle, please leave this manual in it so the new
owner can use it.
WE SUPPORT
VOLUNTARY TECHNICIAN
CERTIFICATION THROUGH
National Institute for
AUTOMOTIVE
SERVICE
EXCELLENCE
For Canadian OwnersWho Prefer a
French Language Manual:
Aux propri6taires canadiens:Vous pouvez vous
procurer un exemplaire de ce guide enfraqais chez
votre concessionaire ou au:
DGN Marketing Services Ltd.
1500 Bonhill Rd.
Mississauga, Ontario L5T lC7
Litho inU.S.A.
Part No. 10261162 B First Edition
ii
@CopyrightGeneral Motors Corporation 1995
All Rights Reserved
CORVETTE: THE AMERICAN
DREAM MACHINE
In the early OS, it was only a designer’s dream. Today
the Corvette stands alone as America’s dream car -- a
testament to its unmistakable charisma and the
excitement it inspires. Unique styling, powerful
performance and an undeniable panache havemade
Corvette one of the most celebratedsports cars in
the world.
In 1953, Corvette produced 300 new lightweight
fiberglass roadsters. A handful went to project
engineers, General Motors managers, and a select group
of movie stars and celebrities. Witha two-speed
Powerglide automatic transmission, Blue Flame
six-cylinder engine, and gleaming Polo White exterior,
the Corvette began its drive into the heart of America.
Designers freshened up the ’Vette in1956 by adding a
removable hardtop and the famous Corvette “coves.”
The sculptured body enhanced its sportylook, and a
standard 2 10-horsepower Chevy V8 engine solidified
Corvette’s reputation as a production race car.
iii
In 1963, Corvette hit the road with an eye-catching new
look -- the Sting Ray coupe. An instant success, the
now-classic Sting Ray featured concealed headlamps
and a unique split rear window. The split window would
only be offered in 1963, making this model among the
most prized Corvettes ever built.
L;
Restyled inside and out for 1968, this 'Vette sported a
lean and hungryshape, creating a senseof motion even
when standing still. And for the first time, Corvette
offered removable roof panels.
iv
For its 25th anniversary,the 1978 Corvette received a new fastback roofline with a wide expanse of glass that
wrapped around the sides. Emblenx front and rear identified the '78 'Vette a s a Silver Anniversary model.
V
Now in its 44th yearof production, Corvette only gets
better. From the Grand Sport 330-horsepower
LT4 engine
to state-of-the-art refinements standard on all Corvettes,
today’s Corvette is a premier driving machine.
In 1984, the fourth generationof America’s favorite
sports car anticipated the future with a sleek look and
advanced technology that provided superior handling
and performance. Windshield angle was the sheerest of
any domestic vehicle, cornering ability the tightest of
any production car. In short, the 1984 redesign enhanced
the Corvette’s reputation as a leader in the world sports
car market.
i
vi
CORVETTE ASSEMBLY PLANT
The Corvette Assembly Plant in Bowling Green,
Kentucky is one of the most sophisticated and
computerized automobile assembly facilities in the
world. To build your 1996 Corvette,over 1,200 employes
teamed up with the70 high-tech robots that assist in a
variety of processes, from welding to painting.
The Bowling Green facility is Corvette’s thirdhome
since 1953. Since beginning production in June of 1981,
it has become one of Kentucky’s mostpopular tourist
attractions.
Corvette Assembly Plant toursare conducted Monday
through Friday. Reservations are required for groups of
10 or more. For more information, call (502) 745-8228.
The new National Corvette Museum, located near the
assembly plant, opened its doors in September of 1994.
It is also attracting tourists to the area.
vii
How to Use This Manual
Many people read their owner’s manual from beginning
to end when they first receive their new vehicle. If you
do this,it will help you learn about the features and
controls for your vehicle. In this manual, you’ll find
that pictures and words work together to explain
things quickly.
Index
A good place to look for what you need
is the Index in
the back of the manual. It’s an alphabetical list
of all
that’s in the manual, and the page number where you’ll
find it.
Safety Warnings and Symbols
You will find a number of safety cautionsin this book. We
CAUTION to tell you about things
use a box and the word
that could hurt you if you were to ignore the warning.
These mean there is something that could hurt
you or other people.
In the caution area, we tell you what the hazard is. Then
we tell you what to do to help avoid or reduce
the
hazard. Please read these cautions. If you don’t, you or
others could be hurt.
You will also find a circle
with a slash through it in
this book. This safety
symbol means “Don’t,”
“Don’t do this,” or “Don’t
let this happen.”
L
Vehicle Damage Warnings
Also, in thisbook you will find these notices:
I NOTICE:
These mean thereis something that could
damage your vehicle.
In the notice area, we tell you about something that can
damage your vehicle. Many times, this damage would
not be covered by your warranty, and
it could be costly.
But the notice will tell you what to do to help avoid
the damage.
When you read other manuals, you might see
CAUTION and NOTICE warnings in differentcolors or
in different words.
You’ll also see warning labels
on your vehicle. They use
the same words, CAUTION or NOTICE.
ix
1
Vehicle Symbols
These are someof the symbols you mayfind on your vehicle.
For example,
these symbols
are used on an
original battery:
CAUTION
POSSIBLE
INJURY
PROTECT
EYES BY
SHIELDING
A
Q
CAUSTIC
BATTERY
ACID COULD
CAUSE
BURNS
X
UNLOCK
El
These symbols
have to do with
your lights:
TURN
SIGNALS
These symbols
are on some o f .
your controls:
These symbols
are used on
warning and
indicator lights:
ENGINE
COOLANT
TEMP
ee
Here are some
other symbols
you may see:
-,F-
FUSE
LIGHTER
WINDSHIELD
DEFROSTER
FASTEN
SEAT
BELTS
(0)
HORN
BRAKE
SPEAKER
AVOID
SPARKS OR
FLAMES
SPARK OR
FLAME
COULD
EXPLODE
BAllERY
These symbols
are important
for you and
your passengers
whenever your
vehicle is
driven:
POWER
WINDOW
,\I/,
DAYTIME *
RUNNING *
LAMPS - * *
FOG LAMPS
0
$0
ENGINE OIL
PRESSURE
VENTILATING
FAN
ANTI-LOCK
BRAKES
w,
(a)
FUEL
-
+
)cr
b
p3
e
Section 1 Seats and Restraint Systems
Here you’ll find informationabout the seats in your
Corvette and howto use your safety belts properly. You
can also learn about some things you should
not do with
air bags and safety belts.
Seats and SeatControls
This part tells you about theseats -- how to adjust them,
and also about reclining seatbacksand seatback latches.
Manual Seat
/d CAUTION:
I
You can lose controlof the vehicle if you try to
adjust a manual driver’s seat while the vehicle is
moving. The sudden movement could
startle and
confuse you,or make youpush a pedal when you
don’t want to. Adjustthe driver’s seat only when
the vehicle is not moving.
Move the lever under the front of the seat to unlock it.
Slide the seat to where you want it. Then release the
lever and try to move the seat with your body, to make
sure the seat is locked into place.
1-1
Power Seat (Option)
SEAT
A
RIDE CONT
SPORT
4D
4D
If ,you have the Sport
Seat, you must move the switch
next to the lumbar controls DR
to (driver) orPS
(passenger) before adjusting your power seat.
1-2
Different partsof the power seat control move different
parts of your seat.If you move the whole control, the
whole seat will move. The back
of the control will move
the back ofthe seat,and the front of the control will
move the frontof the seat.
Move the control to the front or to the back to move the
seat forward or backward. Move the control toward the
center of the vehicle to raise the seat and away from the
center of the vehicle to lower it.
Sport Seat (Option)
Reclining Seatbacks
RIDE CONTROL
SPORT
These switches letyou change the shape of your seat.
There are three lumbar supportsfor the upper, middle
and lower back. There’salso a side bolster thatadjusts
the sidesof the seat aroundyou to give you more
lateral support.
To adjust the seatback, push the lever back and move the
seatback to where you wantit. Release the lever to lock
the seatback in place.
First move the selector switch toDR (driver) or PS
(passenger). Then move theshaping switches until your
seat is comfortable. Forlumbar support, move each
switch left to inflateor right to deflate.
1-3
Sitting in a reclined position when your vehicle
is
in motion can be dangerous. Evenif you buckle
up, your safety belts can’tdo their jobwhen
you’re reclined likethis.
The shoulder belt can’t doits job because it
won’t be against your body. Instead, it will be in
front of you. In a crash you couldgo into it,
receiving neck or other injuries.
The lapbelt can’t do its job either. In a crash the
belt could go up over your abdomen. The belt
forces would be there, not
at your pelvic bones.
This could cause serious internal injuries.
But don’t have a seatback reclined if your vehicle is moving.
For properprotection when the vehicle is in
motion, have the seatback upright. Then sitwell
back in the seat and
wear your safety belt
properly.
1-4
Seatback Latches
CAUTION:
If the seatback isn’t locked, it could move
forward in a sudden stop or crash. That could
cause injury to the person sitting there. Always
press rearwardon the seatback to be sure
it is
locked.
Both seatbacks fold forward to giveyou access to the rear
area. To fold a seatback forward,lift this latch and push
the seatback forward. Whenyou return the seatback to its
original position, make sure the seatback is locked.
1-5
Safety Belts: They’re for Everyone
This part of the manual tells you how to use safety belts
properly. It also tells you some things you should not do
with safety belts.
1
Your vehicle has a light that
comes on as a reminder to
buckle up. (See “Safety Belt
Reminder Light” in the
Index.)
And it explains the air bag system.
Don’t let anyone ride where he or she can’t wear
a safety belt properly. If you are in a crash and
you’re not wearing a safety belt, your injuries
can bemuch worse. You can hit thingsinside the
vehicle or be ejected from it. You can be seriously
injured orkilled. In the same crash,you might
not beif you are buckled up. Alwaysfasten your
safety belt, and check that your passenger’s belt
is fastened properly too.
In most states and Canadian provinces, the law says
to
wear safety belts. Here’s why: They work.
You never know-if you’ll be in crash.
a
If you do have a
crash, you don’t know if it will be abad one.
A few crashes are mild, and some crashes can be so
serious that even buckled up a person wouldn’t survive.
But most crashes are in between. In manyof them,
people who buckle up can surviveand sometimes walk
away. Without belts they could have been badly hurt
or
killed.
After more than 25 years of safety belts in vehicles,
the facts are clear. In most crashes buckling up does
matter ... a lot!
Why Safety Belts Work
When you ridein or on anything, yougo as fast as it
goes.
Put someone on it.
Take the simplest vehicle. Suppose it's just
a seat onwheels.
1-7
J
Y
Get it up to speed. Then stop the vehicle. The rider
doesn't stop.
1-8
The person keeps going until stoppedby something.
In a real vehicle,it could be the windshield...
or the instrument panel...
or the safety belts!
With safety belts, you slow downas the vehicle does.
You get more time to stop. You stop over more distance,
and your strongest bones take the forces. That’s why
safety belts make such good sense.
Here Are Questions Many PeopleAsk
About Safety B,elts-- and the Answers
Won’t I be trapped in the vehicle after an.
accident if I’m wearing a safety belt?
A:
You could be -- whether you’re wearing a safety
belt or not. But you can unbuckle a safety belt,
even if you’re upside down. And your chance of
being conscious during and after an accident, so
you can unbuckle and get out, is much greater if
you are belted.
Q.’ If my vehicle has air bags, why shouldI have to
wear safety belts?
A:
Air bags are in many vehicles today and will be in
most of them in the future. But they are
supplemental systems only; so they work with
safety belts -- not instead of them. Every air bag
system ever offered for salehas required the use of
safety belts. Even if you’re in a vehicle that has air
bags, you still have tobuckle up to getthe most
protection. That’s true not only in frontal collisions,
but especially in side and other collisions.
1-10
&= If I’m a good driver, andI never drive far from
home, why shouldI wear safety belts?
A:
You may .be an excellent driver, butif you’re in an
accident -- even one that isn’t your fault -- you and
your passenger can be hurt. Being a good
driver
doesn’t protect you from things beyond your
control, such as bad drivers.
Most accidents occur within 25 miles (40 km) of
home. And the greatest numberof serious injuries
and deaths occur at speeds of less than 40 mph
(65 km/h).
Safety belts are for everyone.
How to Wear Safety Belts Properly
Adults
This part is only for people of adult size.
Be aware that there are special things to know
about
safety belts and children. And thereare different rules
for smaller children andbabies. If a child will beriding
in your Corvette,see the part of this manual called
“Children.” Follow those rules for everyone’s
protection.
First, you’ll want to know which restraintsystems your
vehicle has.
We’ll start with the driver position.
Driver Position
This part describes the driver’s restraint system.
Lap-Shoulder Belt
The driver has a lap-shoulder belt. Here’s how to wear
it
properly.
1. Close and lock the door.
2. Adjust the seat (to see how, see “Seats” in the Index)
so you can sit up straight.
3. Pick up the latch plateand pull the belt across you.
Don’t let it get twisted.
4. Push the latch plate into the buckle until it clicks.
Pull up on the latch plate to make sure it is secure.
If the belt isn’t long enough, see “Safety Belt
Extender” at the end of this section.
Make sure the release button on the buckle is
positioned so you would be able to unbuckle the
safety belt quickly if youever had to.
1-11
=,apBelt Cinch Featul
The lap part of the belt should be worn low and snugon
the hips, just touching the thighs. In a crash,
&us applies
force to thestrong pelvic bones. And you'd be less likely
to slide under the lap belt.If you slid under it, the belt
would apply force at your abdomen. This could cause
serious or even fatal injuries. The shoulder belt should go
over the shoulder and across the chest. These parts of the
body are best ableto take belt restraining forces.
The safety belt locks if there's a sudden stop or crash.
1-12
If you do not want the lap belt to move freely, push the
CINCH button. To loosen the belt, unbuckleit, let it
retract, and buckle up again.
Q:
What’s wrong with this?
You can be seriously hurt if your shoulder is
belt
too loose. In a crash, you would move forward
too much, which could increase injury. The
shoulder belt shouldfit against your body.
A:
The shoulder belt istoo loose. It won’t give nearly
as much protectionthis way.
1-13
@
What’s wrong with this?
lb
WTION:
You can be seriouslyinjured if your belt is
buckled in the wrong place like this.In a crash,
the belt would go up overyour abdomen. The
belt forces would be there, not at the pelvic
bones. This could causeserious internal injuries.
Always buckleyour belt into the buckle nearest
you.
A:
The belt is buckled in the wrong place.
1-14
I
@
What’s wrong with this?
‘I
You can be seriouslyinjured if you wear the
shoulder belt under your arm. In
a crash, your
body would movetoo far forward, which would
increase the chance of head andneck injury.
Also, the belt would apply too much force to the
ribs, which aren’t as strong as shoulderbones.
You could also severelyinjure internal organs
like your liver or spleen.
I
A:
The shoulder belt is worn under the arm. It should
be worn over the shoulder at alltimes.
1-15
&." What's wrong with this?
A CAUTION:
You can be seriously injured
by a twisted belt. In
a crash,you wouldn't have the full width of the
belt to spread impact forces.
If a belt is twisted,
make it straightso it can work properly,or ask
your dealer tofix it.
I
A:
The belt is twisted across the body.
1-16
Air Bag System
This part explains the air bag system.
Your Corvette has two air bags -- one air bag for the
driver and another air bag for the passenger.
Here are the most important things to know about the air
1
You can be severelyinjured or killed in a crash if
you aren’t wearing your safety belt even if you
have an air bag. Wearing your safety beltduring a
crash helps reduce your chance
of hitting things
inside the vehicle or being ejectedfrom it. The air
bag is only a “supplementalrestraint.” That is, it
works with safety beltsbut doesn’t replace them.
Air bags are designed to work only in moderate to
severe crashes where the
front of your vehiclehits
something. They aren’t designed
to inflate at all in
rollover, rear, sideor low-speed frontal crashes.
Everyone in your vehicle, includingthe driver,
should wear a safety belt properly whether or
not there’s an airbag forthat person.
--
To unlatch the belt,just push the button on the buckle.
The belt should go back out
of the way.
Before you close the door,be sure the belt is outof the
way. If you slam the dooron it, you can damage both the
belt and your vehicle.
--
1-17
e
Air bags inflate with great force, faster than the
blink of an eye. If you’re too close to an inflating
air bag, it could seriously injure you. Safety belts
help keep you in position for anair bag inflation
in a crash. Always wear yoursafety belt, even
with an airbag. The drivershould sit as far back
as possible whilestill maintaining controlof the
vehicle.
e
An inflating air bag can seriously injure small
children. Always secure children properlyin your
vehicle. To read how, see the part of this manual
called “Children” and the cautionlabel on the
passenger’s safety belt.
1-18
AIR
BAG
There is an airbag readiness
light on the instrument
panel, which showsAIR
BAG.
The system checks the air bag’s electrical system for
malfunctions. The light tellsyou if there is an electrical
problem. See “Air Bag Readiness Light” in the Index
for more information.
How the Air Bag System Works
I
The passenger’s air bag is in the instrument panel on the
passenger’s side.
Where is the air bag?
The driver’s air bag is in the middleof the steering wheel.
..
I -
‘ ,
Don’t put anythingon, or attach anything to, the
steering wheel or instrument panel. Also, don’t
put anything (suchas pets or objects) between
any occupant and the steering wheel or
instrument panel. If something is between an
occupant and an air bag, it could affect the
performance of the air, bag or worse,it could
cause injury.
-9
When shouldan air bag inflate?
The airbag is designed to inflate in moderate to severe
frontal or near-frontal crashes. The air bag will inflate
only if the impact speed is above the system’s designed
“threshold level.” Ifyour vehicle goes straight into a
wall that doesn’t move or deform, the threshold level is
about 9 to 15 mph (14 to 24 km/h). The threshold level
‘canvary, however, with specificvehicle design, so that
it can besomewhat above orbelow this range. If your
vehicle strikes something that will move or deform, such
as a parked car, the threshold level willbe higher. The
air bag is not designed to inflate in rollovers, side
impacts or rear impacts, because inflation would not
help the occupant.
It is possible that in a crash only one of theair
two
bags in
your Corvette will deploy.This is rare, butcan happen in a
crash just severe enough to make
an air bag inflate.
In any particular crash, no one can say whether an air
bag should have inflated simply because of the damage
to a vehicle or because of what the repair costs were.
Inflation is determined by the angleof the impact and
the vehicle’s deceleration. Vehicle damage is only one
indication of this.
What makes anair bag inflate?
In a frontal or near-frontal impact of sufficient severity,
the air bag sensing system detects that the vehicle is
suddenly stopping as a result of a crash. The sensing
system triggers a chemical reaction of the sodium azide
sealed in the inflator. The reaction produces nitrogen
gas, which inflates the air bag.The inflator, airbag and
related hardware are all partof the air bag modules
packed inside the steering wheel and in the instiument
panel in front of the passenger.
How does an air bag restrain?
In moderate to severe frontal or near-frontal collisions,
even belted occupants can contact the steering wheel
or
the instrument panel. Theair bag supplements the
protection provided by safety belts. Air bags distribute
the force of the impact more evenly over the occupant’s
upper body, stopping the occupant more gradually. But
air bags would not help you in many types
of collisions,
including rollovers, rear impacts and side impacts,
primarily because an occupant’s motion is not toward the
air bag. Air bags should never be regarded
as anything
more than a supplement to safety belts, and then only in
moderate to severe frontal or near-frontal collisions.
What will you see after an air bag inflates?
After the air bag inflates,it quickly deflates.This occurs
so quickly that some people may not even realize the air
bag inflated. Some components of the air bag module in
the steering wheel hub for the driver’s air bag,
or the
instrument panel for the passenger’s bag, will be hot
for a short time. The part of the bag that comes into
contact with you may be warm, but
it will never be
too hot to touch. There will be some smoke and dust
coming from ventsin the deflated air bags. Air bag
inflation will not prevent the driver from seeing
or from
being able to steer the vehicle, nor will
it stop people
from leaving the vehicle.
When an air bag inflates, there is dust inair.
the
This dust could cause breathing problems
for
people with a historyof asthma or other
breathing trouble.To avoid this, everyone in the
vehicle should get outas soon asit is safe to doso.
If you have breathing problems but can’t get out
of the vehicle after an air bag inflates, then get
fresh air by opening a window or door.
n many crashes severe enough to inflate an air bag,
windshields are broken by vehicle deformation.
Additional windshield breakage may also occur from the
passenger air bag.
0
The air bags are designed to inflate only once. After
they inflate, you’ll need some new parts for your air
bag system. If you don’t get them, theair bag system
won’t be there to help protect you in another crash.
A new system will include air bag modules and
possibly other parts. The service manual for your
vehicle covers the need to replace other parts.
1-21
Your vehicle is equipped with a diagnostic module,
which records information about the air bag system.
The module records information about the readiness
of the system, when the sensors are activated and
driver’s safety belt usageat deployment.
Let only qualified technicians work on your air
bag system. Improper service can mean that your
air bag system won’t work properly.See your dealer
for service.
Servicing Your Air Bag-Equipped Corvette
Air bags affect how your Corvette should be serviced.
There are parts of the air bag system in several places
around your vehicle. You don’t want the system to
inflate while someone is workingon your vehicle.Your
Corvette dealer and‘the Corvette Service Manual have
information about servicing your vehicle and the air
bag
system. To purchase a service manual, see “Service and
Owner Publications” in the Index.
NOTICE:
If you damage the cover for thedriver’s or the
passenger’s air bag, they may not work properly.
You may have to replace theair bag module in
the steeringwheel or both theair bag module and
the instrument panel for the
passenger’s air bag.
Do not open or breakthe air bag covers.
For up totwo minutesafter theignition key is
turned off and the batteryis disconnected, an air
bag can still inflate during improperservice. You
can be injured if you are close to an air bag when
it inflates. Avoid yellow wires, wireswrapped
with yellowtape oryellow connectors. Theyare
probably part of the air bag system. Be sure to
follow proper service procedures,and make sure
the person performing work for you is qualified
to do so.
The air bag system does not need regular maintenance.
1-22
Safety Belt Use During Pregnancy
Safety belts work foreveryone, including pregnant
women. Like all occupants, they are more likely to be
seriously injured if theydon’t wear safety belts.
The best way to protect thefetus is to protect the
mother. When a safety beltis worn properly, it’s more
likely that thefetus won’t be hurt in acrash. For
pregnant women, as foranyone, the key to making
safety belts effective is wearing them properly.
Passenger Position
The passenger’s safety belt works thesame way as
the driver’s safety belt. See “Driver Position,” earlier
in this section.
A pregnant woman should wear a lap-shoulder belt, and
the lap portion should be wornas low as possible, below
the rounding, throughoutthe pregnancy.
1-23
Children
Everyone in a vehicle needs protection! That includes
infants and all children smaller than adult size. In fact,
the law in every state in the United States and in every
Canadian province says children up to some agemust be
restrained while in a vehicle.
1-24
Smaller Children andBabies
I
A CAUTION:
A
Q
A very young child’ship bones are so small that a
regular belt might not stay low on the hips, as it
should. Instead, the belt will likely be overthe
child’s abdomen. In a crash, the belt would apply
force right on the child’s abdomen, which could
cause serious or fatal injuries. Smaller children
and babies should always berestrained in a child
restraint. However, infants, who should be
restrained in a rearfacing child restraint, cannot
ride safely in this vehicle. The instructions for the
restraint will say whether it is the right type and
size for yourchild. If a forward-facing child
restraint is suitable for your child, besure the
child is always properly restrained while riding in
this vehicle.
Never hold a baby in your arms while riding in a
vehicle. A baby doesn't weigh much until a
crash. During a crash baby
a will become so
heavy you can't hold it. For example, in a crash
at only 25 mph (40 km/h), a 12-lb. (5.5 kg) baby
will suddenly become a 240-lb. (110 kg) force on
your arms. Thebaby would bealmost impossible
to hold.
--
1-25
Child Restraints
Top Strap
Be sure the child restraint is designed to be used in a
vehicle. If it is, it will have a label saying that it meets
Federal Motor Vehicle Safety Standards.
Some child restraints have a topstrap. Don’t use a
restraint like that in your vehicle because the top strap
anchor cannot be installed properly. You shouldn’t
use this type of child restraint without anchoring the
top strap.
Then follow the instructions for the restraint. You may
find theseinstructions on the restraint itself or in a
booklet, or both. These restraints use the belt system in
your vehicle, but the child also has to be secured within
the restraint to help reduce the chance of personal injury.
The instructions that come with the child restraint will
show you how to do that.
The child restraint must be secured properly in the
passenger seat.
Keep in mind that an unsecured child restraint can move
around in a collision or sudden stop and injure people in
the vehicle. Be sure to properly secure any child
restraint in your vehicle -- even when no child is in it.
1-26
Securing a Child Restraint inthe Passenger
Seat Position
Your vehicle has a passenger air bag. Never put a
rear-facing child restraint in this vehicle. Here’s why:
a CAWTION:
A child in a rear-facing child restraint canbe
seriously injured if the passenger’s air bag
inflates. This is becausethe back of a rear-facing
child restraint would be very closeto the inflating
air bag. Do not usea rear-facing child restraint in
this vehicle.
If a forward-facing child restraint is suitable for
your child, always move
the passenger seat asfar
back as it will go.
You’ll be using the lap-shoulder belt. See the earlier part
about the top strap if the child restraint has one.
1. Because your vehicle has a passenger air bag, always
move the seat as far back as it will go before
securing a forward-facing child restraint. (See
“Seats” in the Index.)
2. Put the restraint on the seat. Follow the instructions
for the child restraint.
3. Secure the child in the child restraint as the
instructions say.
4. Pick up the latch plate, and run the lap and shoulder
portions of the vehicle’s safety belt through or
around the restraint. The child restraint instructions
will show you how.
If the shoulder belt goes in front of the child’s face or
neck, put it behind the child restraint.
1-27
5 . Buckle the belt. Make sure the release button is
positioned so you would be able to unbuckle the
safety belt quickly if you ever had to.
6. Push the CINCH button. See “Lap Belt Cinch Feature”
in the Index, wherewe describe the cinch feature.
7. To tighten the belt, feed the lap belt back into the
retractor while you push down on the child restraint,
8. Push and pull the child restraint in different
directions to be sure it is secure.
To remove the child restraint, just unbuckle the vehicle’s
safety belt and let it go back all the way.. The safety belt
will move freely again and be ready to work for an adult
or larger child passenger.
28
Larger Children
Children who have outgrownchild restraints should
wear the vehicle’s safetybelts.
Children who aren’t buckled up can be thrown out in
a crash.
0
Children who aren’t buckled up can strike other
people who are.
Never do this.
Here two children are wearing the same belt. The
belt can’t properly spread
the impact forces. In a
crash, the two children can be crushed together
and seriously injured.A belt must be used by
only one person at a time.
1-29
Q:
A:
What if a child iswearing a lap-shoulder belt,
but the child isso small that the shoulder belt is
very closeto the child’s faceor neck?
Move the child toward the center of the vehicle, but
be sure that the shoulder belt still is on the child’s
shoulder, so that in a crash the child’s upper body
would have therestraint that belts provide.
‘A
CAUTION:
Never do this.
a that has a
Here a child is sitting in seat
lap-shoulder belt, but the shoulderpart is behind
the child. Ifthe child wearsthe belt in thisway, in
a crash thechild might slideunder the belt. The
belt’s force would then be applied
right on the
child’s abdomen.That could cause seriousor
fatal injuries.
The lap portion of the belt should be worn low and snug
on the hips, just touching the child’s thighs. This applies
belt force to the child’s pelvic bones in a crash.
1-30
Safety Belt Extender
Checking Your Restraint Systems
If the vehicle’s safety beltwill fasten around you, you
should useit.
Now and then, make sure the safety belt reminder light
and all your belts, buckles, latch plates, retractors and
anchorages are working properly. Look for any other
loose or damaged safety belt system parts. If you see
anything that might keep a safety belt system from
doing its job, have
it repaired.
But if a safety beltisn’t long enough to fasten, your
dealer will orderyou an extender. It’s free. When you go
in to order it, take the heaviest coat you will wear, so the
extender will belong enough for you. The extender will
be just for you, andjust for the seat in your vehicle that
you choose. Don’tlet someone else use it, and use it
only for the seat it is made to fit. To wear it, just attach it
to the regular safety belt.
Tom or frayed safety belts may not protect you in a
crash. They can rip apart under impact forces. If a belt is
tom orfrayed, get a new one right away.
Also look for any opened or broken air bag covers, and
have them repaired or replaced. (The air bag system
does not need regular maintenance.)
1-31
Replacing Restraint System Parts
After a Crash
If you’ve had acrash, do you need new belts?
After a very minor collision, nothing may be necessary.
But if the belts were stretched, as they would be if worn
during a more severe crash, then you need new belts.
j
..
If you ever see a label on the passenger’s safety belt that
says to replace the belt, be sure todo so. Then the new
belt will be there to help protect you in a collision.You
would see this label on the belt near the latch plate.
If belts are cut ordamaged, replace them. Collision
damage also may mean you will needto have safety belt
or seat parts repaired or replaced. New parts and repairs
may be necessary even if the belt wasn’t being usedat
the time of the collision.
If an air bag inflates, you’ll need to replace air bag
system parts. See the part on the air bag system earlier in
this section.
1-32
e
n
Section 2 Features and Controls
Here you can learn about the many standard and
optional features on yourCorvette, and information on
starting, shifting and braking.Also explained are the
instrument panel and the warningsystems that tell you if
everything is working properly-- and what to do if you
have a problem.
Keys
A CAUTION:
I
Leaving young children in a vehicle with the
ignition key is dangerous for many reasons.A
child or others could be badly injured
or even
killed.
They could operate power windows or other
controls or even make the vehicle move. Don't
leave the keys in a vehicle with young children.
2-1
The square keys are for the
ignition only, and the oval
keys are for the doors and
all other locks.
Each plug, or tag has
a code on it that tells your dealer or
a qualified locksmith
how to make extra keys. Keep the
plugs in a safe place.
If you lose your keys, you’ll be
able to have new ones made easily using these plugs.
If your ignition keys don’t have plugs, go to your
Chevrolet dealer for the correct
key code if you needa
new ignition key.
I NOTICE:
When a new Corvette is delivered, the dealer removes
the plugs from the keys, and gives them to the first
owner. However, the ignition key may not have a plug.
If the ignition key doesn’t have a plug, there willabe
bar-coded key tag instead.
Your Corvette has a number of features that
can help prevent theft. But you can have a lot
of trouble getting into your vehicle if you ever
lock your keys inside.You may even have to
damage your vehicle to get in.
So be sure you
have extra keys.
2-2
~
Door Locks
There are several ways to lock and unlock your vehicle.
From the outside, use your door key or the Passive
Keyless Entry transmitter.
Unlocked doors can bc ,angerow.
Passengers especially children can easily
open the doors and fall out. When adoor is
locked, the inside handle won’t open it.
Outsiders can easilyenter throughan unlocked
door when you slow down
or stop your vehicle.
This may not beso obvious: You increase the
chance of being thrown out of the vehicle in a
crash if the doors aren’t locked. Wear safety belts
properly, lockyour doors, and you will befar
better off whenever you drive yourvehicle.
--
--
If your theft-deterrent system is armed, unlock the doors
only with the key or thetransmitter to avoid setting off
the alarm. See “Universal Theft-Deterrent”in the Index.
I
I
To lock the door from the
inside, move the lock
control on the door
backward. To unlock it,
move the lock controlon
the door forward.
2-3
Power Door Locks
Passive Keyless EntrySystem
Push the power door lock
switch on either door
backward to lock or
forward to unlock both
doors at once.
Your Corvette’s Passive Keyless Entry System (PKE)
allows you to lock and unlock your doors, unlock your
trunk or hatch, or disarm or arm your theft-deterrent
system from asmuch as threeto seven feet (one to
two meters) away when using the key chain transmitter
supplied with your vehicle.
Your Corvette comes
standard with onePKE
transmitter. An additional
transmitter is optional, and
up to three can be matched
to your vehicle.
Leaving Your Vehicle
If you are leaving the vehicle, take your keys, open your
door and set the locks from inside. Then get out and
close thedoor.
Your vehicle has a theft-deterrent system. See
“Universal Theft-Deterrent” in the Index.
See “Matching Transmitter(s) to Your Vehicle” later in
this section.
Your Passive Keyless Entry system operateson a radio
frequency subject to Federal Communications
Commission (FCC) Rules.
This device complies with Part15 of the FCC Rules.
Operation is subject to thefollowing two conditions:
(1) This device may not
cause harmful interference, and
(2) This device must accept any
interference received,
including interference that maycause undesired
operation.
Should interference to thissystem occur, try this:
0
Operation
You don’t have to do anything for PKE to work when
the passive feature is on. Just move toward your
vehicle with the PKE transmitter, and the systemwill
automatically disarm your theft-deterrent system and
unlock the doors. If it’s dark enough outside, your
interior lamps will come on.
Check to determine if battery replacement is
necessary. See the instructions on battery
replacement.
If you move out of range, thePKE system will:
Check the distance. You may be too far from your
vehicle. This producthas a maximum range.
2. Arm the theft-deterrent system.
Chkck the location. Other vehicles or objects may be
blocking the signal.
4. Turn off the interior lamps.
See your Chevrolet dealer or a qualified technician
for service.
Changes or modifications to thissystem by anyone other
than an authorized service facilitycould void
authorization to use thisequipment.
1. Lock the doors after five seconds.
3. Sound the horn to let you know the doors are locked.
You can also use the buttons on the transmitter. Press
DOOR to open the passenger’s door or HATCH to open
the hatch. The HATCH button will onlywork when the
ignition is off.
The system has a feature that makes it difficult for you
to lock your keys in your vehicle. If you leave your keys
in the ignitionand lock the doors, the system willunlock
the doors as soon as theyare closed. If you leave the
keys inthe ignition-and move away withthe transmitter,
the doors still will not lock. You should notice that the
horn doesn’t sound and return to get your keys.
The system will allow you to lock your keys in the
vehicle if you didn’t leave them in the ignition. You
should, however, be able to use the transmitter to get
them out. After 26 seconds of no motion, the transmitter
shuts down to save the battery. Wait about 30 seconds,
then rock the vehicle. The transmitter should “wake up”
and unlock the doors.
This systemcan’t guarantee that you’ll never be locked
out of your vehicle. If the battery is low or if the
transmitter is in a place where the signal can’t get to the
antenna, it won’t unlock the doors.Always remember to
take yourkeys with you.
PKE Settings
You can use the system for both doors or just the
driver’s door, or you can turn the system off.
Changing the Door Settings
1. Put the ignition key in the ignition, but don’t turn it
on.
II’urning theSystem Off
1. Take the ignition key out of the ignition.
2. Press DOOR on the transmitter until the door locks
cycle (abouttwo seconds).
To turn the systemback on, just repeat the steps.
To check that the system isoff, turn on the ignition. The
PASSIVE KEYLESS ENTRY light on the Driver
Information Center should not come on.If the light does
come on for a secondor two, then the PKE system
is
still on.
You can also check whether the system is on oroff by
closing the doorand moving away from the vehicle
with the keys and transmitter. If the doorslock, the
system is on.
If you are working around yourvehicle and keeping
your keys with you, you might want to turn thePKE
system off. If you don’t, the transmitter will keep
locking and unlocking your doors.
2. Press DOOR on the transmitter until the door locks
cycle (about two seconds).
2-6
~
Transmitter Range
1
I
WA
(1-1 'hm)
fl
-
(1'I5'-7'
2 2m)
The transmitter range depends on your vehicle and
where you are standing. The coupe
(A) has an antenna
in the driver's door and one in the rear area. The
convertible (B) has one antenna in each door. The
antennas do not require any maintenance.
Range also depends on how you hold the transmitter.
For best performance, when you come near your
vehicle, hold the transmitter straight up and down,
so the
keys hang down.
If the range seems to be decreasing, check the battery in
the transmitter. Range will decrease if the battery is low.
It will also decrease
if more than one transmitter is in
the area. Don't put the transmitter
in a metal container
because the transmitter won't work.
TYPICAL RANGE
2-7
3. Push TRIP OD0 on the Driver Information Center
twice.
5. Turn the ignition off, but leave the key in the
ignition. The PASSIVE KEYLESS ENTRY light
should begin to flash to show the system is in
programming mode.
6. Bring one transmitter into range. The light will stop
flashing and stay on to show that the codeis stored.
7. Move the transmitter out of range. The light should
start flashing again.
8. Repeat Steps 6 and 7 with each additional
transmitter.
The programming mode will shut off if
0 You don’t program any transmitters for two minutes.
0 You take thekey out of the ignition or turn the
ignition on.
0 You have programmed three transmitters.
4. Within five seconds,press and hold FUEL INFO
Battery Replacement
Matching Transmitter($)To Your Vehicle
Each key chain transmitter is coded to prevent another
transmitter from unlockingyour vehicle. If a transmitter
is lost orstolen, a replacement can be purchased through
your dealer. Remember to bring any remaining
transmitters with you when yougo to your dealer. When
the dealermatches the replacement transmitter to your
vehicle, any remaining transmitters must also be
matched. Once the new transmitter is coded,the lost
transmitter will not unlock your vehicle. Each vehicle
can haveonly three transmitters matched to it.
To match transmitters to your vehicle:
1. Move all transmitters out of range.
2. Turn the ignition key on.
until the PASSIVE KEYLESS ENTRY light
comes on.
Under normal use, the battery in your key chain
transmitter should last about 18 months.
You can tell the batteryis weak if the transmitter won’t
work at the normal range in anylocation. If you have to
get close to your vehicle before the transmitter works,
it’s probably time to change the battery.
Replacing Your Battery
Remote Hatch Release
1. Insert a screwdriverinto the slot on the back of the
transmitter and gently pryapart the front and back.
Press the switch in your center console to unlock the
hatch from inside your vehicle. If you have an automatic
transmission, your shift lever must be in PARK (P) or
NEUTRAL (N) to use the switch. If you have a manual
transmission, you must set the parkingbrake before you
can use the switch when the vehicle is running. If you
have a manual transmissionand the vehicle is not
running, you may use the switch in any gear.
2. Gently pry the battery out of the transmitter using the
screwdriver.
3. Put the new batteryin the transmitter, positive
(+) side up.
Use a Duracell@ battery, type DL2450,or equivalent.
4. Put the two halves back together. Make sure the
halves are together tightlyso water won’t get in.
5. Test the transmitter.
2-9
If you have a coupe, this
switch is on the rear
of the
driver’s door.It works with
the door open and the
transmission inany gear.
Push it down to release the
hatch.
The PKE transmitter will also release the hatch. See
“Passive Keyless Entry System’’ in the Index.
8
I
,
..
.
If you don’t have battery power, use the manual release
cable to open the hatch. The cable
is near the security
shade handle, between the carpet and the shade.
2-10
A CAUTION:
I
It can be dangerous to drive with the hatchopen
because carbon monoxide (CO)gas can come into
your vehicle. You can’t seeor smell CO.It can
cause unconsciousnessand even death.
If you must drive with the hatchopen or if
electrical wiringor other cableconnections must
pass through theseal betweenthe body and the
hatch:
Make sure all windows are shut.
0 Thrn the fan on your heating or cooling
system to its highest speed withthe setting
on bi-level or vent. That will force outside
air intoyour vehicle. See“Comfort
Controls” in the Index.
If you have air outlets on or underthe
instrument panel, openthem all theway.
See “Engine Exhaust” in the Index.
NOTICE:
I
If you put things in the hatchback area,
be sure
they won’t break theglass when you close it.
Never slam the hatchdown. You could break the
glass or damage thedefogger grid.
When you closethe hatch,make sure you pull
down from thecenter, not the sides. If you pull
the hatchdown from theside too often,the
weatherstrip canbe damaged.
1
Theft
Parking atNight
Vehicle theft is big business, especially in some cities.
Although your Corvette has a number of theft-deterrent
features, we,know that nothing we put on it can make it
impossible to steal. However, there are ways you can
help.
Park in alighted spot, close all windows and lock your
vehicle. Remember to keep your valuables out
of sight.
Put them in a storagearea, or take them with you.
Key in the Ignition
If you leave your vehicle with the keys inside, it’s an
easy target for joyriders or professionalthieves -- so
don’t do it.
.
’
When you park your Corvette and open the driver’s
door, you’ll hear a tonereminding you to remove your
key from theignition and take it with you. Alwaysdo
this. Your steering wheel will be locked, and so will
your ignition. If you have an automatic transmission,
taking your key out also locks your transmission. And
remember to lock the doors.
2-12
Parking Lots
If you park in a lot where someone will be watching
your vehicle, it’s bestto lock it up and take your keys.
But what if you have to leave your ignition key? What
if
you have to leave something valuable in your vehicle?
Put your valuables in a storage area, like your rear
storage compartment or center console.
Lock the rear storage compartment and center
console.
Lock all the doors except the driver’s.
Then take the door key with you.
Universal Theft-DeterrentSystem
SECURITY
Your Corvette has a
theft-deterrent alarm
system. With this system,
the SECURITY light will
flash as you open the door
(if your ignition is off). This
light reminds you to arm the
theft-deterrent system.
If your passenger stays in the vehcle when you leave
with the keys, have the passenger lock the vehicle after
the doors are closed. This way the alarm won’t arm, and
your passenger won’t set it off.
Always use your key or the Passive Keyless Entry
system to unlock a door.Unlocking a door any other
way will set off the alarm. If you do set off the alarm
accidentally, there are three ways to stop it:
Unlock any door with your key.
Put the ignition key in the ignition.
Use the Passive Keyless Entry system.
Here’s how to do it:
Testing the Alarm
1. Open the door.
1. Make surethe rear hatch is latched.
2. Lock the door with thepower door lock switch or
Passive Keyless Entrysystem. The SECURITY light
will come on.
3. Close all the doors. The SECURITY light shouldgo off.
Now, if a dooror the hatchis opened without the key or
Passive Keyless Entrysystem, the alarm will go off.
Your horn will sound forthree minutes, then it will go
off to save battery power.And, your vehicle won’t start.
The theft-deterrent system won’t arm if you lock the
doors with a keyor manual door lock, or if you lock the
vehicle after the doors are closed.
2. Lower a window.
3. Arm the system.
4. Close the doors and wait five seconds.
5 . Reach through the open window and unlock the door
from inside. The alarm should sound.
6. Turn off the alarm.
If the a l a m is inoperative, check to see if the horn
works. If not, check the horn fuse. See “Fuses and
Circuit Breakers” in the Index. If the horn does work,
but the alarm doesn’t go off, see your dealer.
2-13
PASS-Key@
Your vehicle is equipped
with the PASS-Key
(Personalized Automotive
Security System)
theft-deterrent system.
PASS-Key is apassive
theft-deterrent system. It
works when you insert or
remove the key from the
ignition.
PASS-Key uses a resistor pellet in theignition key that
matches adecoder in your vehicle.
When thePASS-Key system sensesthat someone is
using thewrong key, it shuts down thevehicle’s starter
and fuelsystems. For aboutthree minutes, the starter
won’t work and fuel won’t go tothe engine.If someone
tries to start your vehicle again or uses another key
during this time, the shutdown period will start over
again. This discourages someone fromrandomly trying
different keys with different resistor pellets in an attempt
to make amatch.
The ignition key must be clean and
dry before it’s
inserted in theignition or the engine may not start.If
the SECURITY light comes on, the keymay be dirty
or wet.
If this happens and the starter won’t work,turn the
ignition off. Clean and dry the key, wait three minutes
and try again. If the starter still won’t work, wait three
minutes andtry the other ignition key. At this time,you
may also want to check the fuses (see “Fuses and Circuit
Breakers” in the Index). If the starter won’t work with
the other key, your vehicle needs service.If your vehicle
does start, the first ignition key may be faulty. See your
Chevrolet dealer or locksmith
a
who can servicethe
PASS-Key.
However, if you accidentally use a key that hasa
damaged or missing resistor pellet,you will see no
SECURITY light. You don’t have to wait three minutes
before trying the proper key.
2-14
__
If the resistor pellet is damaged or missing, the starter
won’t work. Use the otherignition key, and see your
Chevrolet dealer or a locksmith who can service the
PASS-Key to havea new key made.
If the SECURITYlight comes on while driving, have
your vehicle serviced as soon as possible.
If you lose or damagea PASS-Key ignition key, see
your Chevroletdealer or a locksmithwho can service
PASS-Key. In an emergency, call theChevrolet
Roadside Assistance Programat 1-800-CHEV-USA
(1-800-243-8872).
New Vehicle “Break-In”
NOTICE:
Your modern Corvettedoesn’t need an elaborate
long
“break-in.” But it will perform better in the
run if you follow these guidelines:
0 Keep your speed at 55 mph (88 km/h) or
less for thefirst 500 miles (804 km).
0 Don’t drive at any one speed
fast or
slow for the first500 miles (804 km).
Don’t make full-throttle starts.
0 Avoid making hard stops for thefirst
200 miles (322km) or so. During this time
your new brake linings aren’t yet broken
in. Hard stopswith new linings can mean
premature wear and earlier
replacement.
Follow this “breaking-in”guideline every
time you get newbrake linings.
--
--
2-15
Ignition Positions
C
I
If you have an automatic transmission, the ignition
switch can't be turned to LOCK unless the shift lever
is
in the PARK(P) position.
OFF (C):Unlocks the steering wheel, ignition and
automatic transmission, but does not send electrical
power to any accessories. Use this positionif your
vehicle must be pushed or towed.
RUN (D): Position to which the switch returns after you
start your engine and release the switch. The switch
stays in the RUN position when the engine
is running.
But even when the engine is not running,you can use
RUN to operate your electrical power accessories and
to
display some instrument panel warning and indicator
lights.
With the ignition key in the ignition switch, you can turn
the switch to five positions.
ACC (A):Position in which you can operate your
electrical power accessories. Press in the ignition switch
as you turn the top of it toward you.
OCK (B): The only position in which you can remove
the key. This locks your steering wheel, ignition and
automatic transmission.
2-16
START (E): Starts the engine. When the engine starts,
release the key. The ignition switch will returnto RUN
for normal driving.
When the engine is not running, ACC and RUN
allow you to operate your electrical accessories, such
as the radio.
A warning tone will sound if you open thedriver's door
when the ignition is in OFF, LOCK or ACC and the key
is in the ignition.
Key Release Button
If you have amanual
transmission, your ignition
lock has a key release
button. You must press the
button before you can
take your key out of the
ignition lock.
I NOTICE:
If your key seemsstuck in LOCK and you can’t
turn it, be sure itis all theway in. If it is, then
turn the steeringwheel left and rightwhile you
turn the key hard. Butturn the key only with
your hand. Using a tool to force it could break
the key or the ignition switch. If none of this
works, then yourvehicle needs service.
Delayed AccessoryBus (DAB)
CAUTION:
On manual transmission vehicles, turning thekey
to LOCK will lock the steering column and result
in a loss of ability to steer thevehicle. This could
cause a colIision. If you need to turn the engine
off while the vehicle is moving,turn the key only
to OFF. Don’t press the key release button while
the vehicleis moving.
With DAB, your power windows and the audio system
will continue to work up to 15 minutes after the ignition
key is turned to OFF and neither door is opened.If a
door is opened, the audiosystem and power windows
will shut off.
Y
2-17
Starting Your Engine
Automatic Transmission
Move your shift lever to PARK (P) or NEUTRAL (N).
Your engine won’t start in any other position -- that’s a
safety feature. To restart when you’re already moving,
use NEUTRAL (N) only.
NOTICE:
Don’t try to shift to
PARK (P) if your Corvetteis
moving. If you do, you could damage the
transmission. Shift toPARK (P) only when your
vehicle is stopped.
Manual Transmission
The gear selector should be in NEUTRAL. (N). Hold the
clutch pedal to the floor and start the engine. Your
vehicle won’t start if the clutch pedal is not all the way
down -- that’s a safety feature.
NOTICE:
Holding your key in START for longer than
15 seconds at a time will cause your battery to be
drained much sooner. And the excessive heat can
damage your starter motor.
2. If it doesn’t start within 10 seconds, push the
accelerator pedal all the way tothe floor, while you
hold the ignition key in START. When the engine
starts, let go of the key and let up on the accelerator
pedal. Wait about 15 seconds between eachtry to
help avoid draining your battery.
When starting your engine in very cold weather (below
0°F or -18”C), do this:
Starting Your Engine
1. With your foot off the accelerator pedal, turn the
ignition key to START and hold it there. When the
engine starts, let go of the key. Use the accelerator
pedal to maintain engine speed, if you have to, until
your engine has run for a while.
1. Without pushing the accelerator pedal, turn the
ignition key to START. When the engine starts, let
go of the key. The idlespeed will go down as your
engine gets warm.
2. If your engine still won’t start (or starts but then
stops), it could be flooded with too much gasoline.
Try pushing your accelerator pedalall the way to the
floor and holding it thereas you holdthe key in
2-18
START for about threeseconds. If the vehicle starts
briefly but then stopsagain, do the same thing, but
this time keep the pedal down for five or six seconds.
This clears the extragasoline from the engine.
I NOTICE:
Your engine is designedto work with the
electronics in your vehicle.If you add electrical
parts or accessories, you couldchange the way
the engine operates. Beforeadding electrical
equipment, check withyour dealer. If you don’t,
your engine might notperform properly.
If you ever haveto have your vehicle towed, see
the part of this manual that tells howto doit
without damaging your vehicle. See “Towing
Your Vehicle” in the Index.
Racing or OtherCompetitive Driving
See your Warranty Book before using your Corvette for
racing or other competitive driving.
NOTICE:
If you use your Corvette for racing
or other
competitive driving, yourengine may usemore
oil than itwould with normal use. Low oil levels
can damage theengine. Be sure tocheck the oil
level often during racingor other competitive
driving andkeep the level at or near
the upper
mark on the engine oildipstick. You may need to
add oil. See “Engine Oil”in theIndex.
2-19
Engine Coolant Heater (Canada Only)
A CAUTION:
Plugging the cordinto an ungrounded outlet
could cause an electrical shock. Also,the wrong
kind of extension cord couldoverheat and cause
a fire. You could be seriouslyinjured. Plug the
cord intoa properly grounded three-prong
110-volt AC outlet. If the cord won’t reach, use a
heavy-duty three-prong extension cord rated for
at least 15 amps.
In very cold weather, 0°F (- 18 O C) or colder, the engine
coolant heater can help. You’ll get easier starting and
better fuel economy during engine warm-up. Usually,
the coolant heater should be plugged in a minimum of
four hours prior to starting your vehicle.
To Use the Coolant Heater
1. Turn off the engine.
2. Open the hood and unwrap the electrical cord.
3. Plug it into a normal, grounded 110-volt AC outlet.
4. After you’ve used the coolant heater, be sureto store
the cord as itwas before to keepit away from
moving engine parts. If you don’t,it could be
damaged.
How long should you keep the coolant heater plugged
in? Theanswer depends on the outside temperature, the
kind of oil you have, and some other things. Instead of
trying to list everything here, we ask that
you contact
your Chevrolet dealer in the area where you’ll be
parking your vehicle. The dealer can giveyou the best
advice for that particular area.
Automatic TransmissionOperation
a
R
It is dangerous to get out of your vehicle if the
shift lever is not fully in PARK (P) with the
parking brakefirmly set. Your vehiclecan roll.
Don’t leave your vehicle whenthe engine is
running unless you have to. If you have left the
engine running, the vehicle can move suddenly.
You or others could beinjured. To be sure your
vehicle won’t move, even when you’re
on fairly
level ground, always set your parking brake and
move the shift lever to PARK (P).
See “ShiftingInto PARK (P)” in the Index.
There are several different positionsfor your shift lever.
PARK (P): This locks yourrear wheels. It’s the best
position to use when you startyour engine because your
vehicle can’t move easily.
Ensure the shift lever is fully in PARK (P) range before
starting the engine. Your Corvette has a
brake-transmission shift interlock. You have to fully
apply your regular brakes beforeyou can shift from
PARK (P) when the ignition key is inthe RUN position.
If you cannot shift out of PARK (P), ease pressure on
the shift lever -- push the shift leverall the way into
PARK (P) and release the shift lever buttonas you
2-21
maintain brake application. Then press the shift lever
button and move the shift lever into the gear you wish.
See “Shifting Out of PARK (P)” in the Index.
REVERSE (R): Use this gear to back up.
Shifting out’ofPARK (P) or NEUTRAL (N)while
your engine is “racing” (running at high speed)is
dangerous. Unless your foot is firmly on the
brake pedal, your vehicle could move very
rapidly. You could losecontrol and hit people or
objects. Don’t shift outof PARK (P)or
NEUTRAL (N) while your engineis racing.
NOTICE:
Shifting toREVERSE (R) whileyour vehicle is
moving forward could damage your
transmission. Shift toREVERSE (R) onlyafter
your vehicle is stopped.
To rock your vehicle back and forth to get out of snow,
ice or sand without damaging your transmission, see
“Stuck: In Sand, Mud, Ice or Snow” in the Index.
NEUTRAL (N): In this position, your engine doesn’t
connect with the wheels. To restart when you’re already
moving, use NEUTRAL (N)only. Also, use
NEUTRAL (N) when your vehicle is being towed.
I NOTICE:
~~~
I
~
Damage to yourtransmission caused by shifting
out of PARK (P) or NEUTRAL (N) with the
engine racing isn’t coveredby your warranty.
AUTOMATIC OVERDRIVE (0):
This position is for
normal driving.If you need more power for passing, and
you’re:
Going less than about 35 mph (56 km/h), push your
accelerator pedal abouthalfway down.
Going about 35 mph (56 km/h)
or more, push the
accelerator all the way down.
You’ll shift down to the next gear and have more power.
DRIVE (D): This position is also used for normal
driving, however,it offers more power and lower fuel
economy than AUTOMATICOVERDRIVE (0).
Here are some times you might choose DRIVE (D)
instead of AUTOMATIC OVERDRIVE (0):
0
When driving on hilly, winding roads
When going down a steep hill
SECOND (2): This position gives you more power but
lower fuel economy. You can use SECOND (2) on hills.
It can help control your speed as you go down steep
mountain roads, but then you wouldalso want to use
your brakesoff and on.
FIRST (1): This position gives you even more power
(but lower fuel economy) than SECOND (2). You can
use it on very steep hills, or in deep snow or mud. If the
selector lever is put in FIRST (I), the transmission
won’t shift into first gear until the vehicle is going
slowly enough.
I NOTICE:
If your rear wheels can’t rotate, don’t try to
drive. This might happen if you were stuck in
very deep sandor mud or were up againsta solid
object. You could damage your transmission.
Also, if you stop when going uphill,don’t hold
your vehicle there with only the accelerator
pedal. This could overheat and damage the
transmission. Use your brakesor shift into
PARK (P) to hold your vehicle in position
on a hill.
Maximum engine speed is limited to protect driveline
components from improper operation.
2-23
Manual Transmission
6-Speed
3
5
This isyour shift pattern.
Here’s how to operate your
transmission:
SECOND (2): Press the clutch pedal as you let up on
the accelerator pedal and shift into SECOND (2). Then,
slowly let up on theclutch pedalas you press the
accelerator pedal.
THIRD(3),FOURTH(4),FIFTH(S)ANDSIXTH(6):
Shift into THIRD (3)’FOURTH (4), F’IFTH (5) and
SIXTH (6) the same way you dofor SECOND (2).Slowly
let upon the clutch pedal you
as press the accelerator pedal.
TO STOP: Let up on the accelerator pedal and press the
brake pedal. Just before the vehicle stops, press the
clutch pedal and the brake pedal, and shift to
NEUTRAL (N).
FIRST (1): Press the clutchpedal and shift into
FIRST (1). Then slowly let up on the clutchpedal as
you press the accelerator pedal.
You can shift into FIRST (1) when you’re going less
than 40 mph (64 km/h). If you’ve come to a complete
stop and it’s hard to shift into HRST (I), put the shift
lever inNEUTRAL (N) and let up on the clutch. Press
the clutch pedal back down. Then shift into FIRST (1).
2-24
NEUTRAL (N):Use this position whenyou start or
idle your engine. Your shift lever is in NEUTRAL (N)
when it is centeredin the shift pattern, not in any
other
gear.
REVERSE (R):To back up, press down the clutch
pedal and shift into REVERSE (R). Just apply pressure
to get the lever past
FIFTH (5) and SIXTH (6)into
REVERSE (R). Let up on the clutch pedal slowly while
pressing the accelerator pedal.
Shift Speeds (Manual Transmission)
This chart shows when to
shift to the next higher gear
for bestfuel economy.
Manual Transmission Recommended
Shift Speeds in mph (km/h)
Engine -
All
Engines
I
Acceleration Shift Speed
lto212to313to414to515to6
15
(24)
25
(40)
40
(64)
45
(72)
I NOTICE:
When you areshifting gears, don’t move the gear
shift lever around needlessly. This can damage
parts of the transmission and may require costly
repair. Shift directly into the next appropriate
gear.
One to Four Light (Manual Transmission)
50
(80)
If your engine speeddrops below 900 rpm, or if the
engine is not running smoothly, youshould downshift to
the next lower gear.You may have to downshift two or
more gears tokeep the engine running smoothly or for
good performance.
ONE TO
FOUR
When this light comes on,
you can only shift from
FIRST (1) to FOURTH (4)
instead of FIRST (1) to
SECOND ( 2 ) .You must
complete the shift into
FOURTH (4) to deactivate
this feature. This helps you
get the best possible fuel
economy.
After shifting to FOURTH (4), you may shift down to a
lower gear if you prefer.
2-25
NOTICE:
Do not try to force the shift lever into
SECOND (2) or THIRD (3) when the ONE TO
FOUR light comes on. Do not
try to re-engage
FIRST (1) after starting toshift into FOURTH (4).
You will damage your transmission. Shift only
from FIRST (1) to FOURTH (4) when the light
comes on.
Downshifting (Manual Transmission)
Do not downshift intothe gear shown below ata speed
greater than shown in the table:
FIRST (1) . . . . . . . . . . :. . . . . . . . . 44 mph (71 km/h)
SECOND (2) . . . . . . . . . . . . . . . . 64 mph (103 km/h)
THIRD (3) . . . . . . . . . . . . . . . . . . 90 mph (145 km/h)
FOURTH (4) . . . . . . . . . . . . . . . 116 mph (187 kmk)
This lightwill come on when:
The engine coolant temperature is higher than 120
OF
(49 O C).
0
You are going 15 to 19 mph (24 to 3 1 km/h), and
You are at 21 percent throttle or less.
If you skip more than one gear when you
downshift, you could lose control
of your vehicle.
And you couldinjure yourself or others. Don’t
shift from SIXTH (6) to THIRD(3), FIFTH (5) to
SECOND (2) or FOURTH (4) to FIRST(1).
NOTICE:
If you skip more than one gear when
you
downshift, or if you race the engine whenyou
downshift, you can damage the clutchor
transmission.
The six-speed transmission has a spring that centers the
shift lever near THIRD (3) and FOURTH (4). This
spring helps you know which gear you are in when you
are shifting. Be careful when shifting from FIRST(1) to
SECOND ( 2 ) or downshifting from SIXTH (6) to
FIFTH (5). The springs will try topull the gear shift
lever toward FOURTH(4) and THIRD (3). Make sure
you move the lever into SECOND (2) or FIFTH (5). If
you let the lever move in the direction of the pulling,
you may end up shifting from FIRST (1) to
FOURTH (4) or from SIXTH (6) to THIRD (3).
Ride Control (Option)
You may have a ride control system on your Corvette
called Real Time Damping (RTD). The system provides
the following performance benefits:
Reduced impact harshness
0
Improved road isolation
0
Improved high-speed stability
0
Improved handling response
RIDE CONTROL
SPORT
This knob is on the center console. Turn it to select the
ride control of your choice.
2-27
TOUR: Use for city and highway driving. Provides a
smooth, soft ride.
Parking Brake
SPORE Use where road conditions or personal
preference demand more control. Provides more “feel,”
or response to the road conditions.
PERF’: Use for performancedriving. Provides a tight,
firm rideand precise responseto road conditions.
You can select a setting at any time. Based on road
conditions and your vehicle speed, thesystem
automatically adjusts to provide the bestride and
handling. Select anew setting whenever driving
conditions change.
The SERVICE RIDE CONTROL light monitors the
system. Refer to “Service Ride ControlLight” in
the Index.
Limited-Slip RearAxle
Your rear axle can giveyou additional traction on snow,
mud, ice, sand or gravel. It works like a standard axle
most of the time, but when one of the rear wheels has no
traction and the other does, the
limited-slip feature will
allow thewheel with traction to move the vehicle.
2-28
To set the parking brake, hold the brake pedal down.
Pull the parking brake lever up, then move it back down.
This setsyour parking brake, even though the lever
is
down. If the ignition is on, the parking brake indicator
light will come on.
Shifting Into PARK (P) (Automatic
Transmission Mode’ 0 ly)
To release the parking brake,hold the brake pedal down.
Pull the parkingbrake lever up until you can push in the
release button. Hold therelease button in as you move
the brake leverall the way down.
It can be dangerous toget out of yqur vehicle if
the shiftlever is not fully in PARK (P) with the
parking brake firmly
set. Your vehiclecan roll.
If you have left the engine running, thevehicle
can move suddenly.You or others could be
injured. To be sure yourvehicle won’t move, even
when you’re on fairlylevel ground, use the steps
that follow.
NOTICE:
Driving withthe parking brake on can
cause
your rear brakesto overheat. You may have to
replace them,and you could also damage other
parts of your vehicle.
2-29
Leaving Your Vehicle With the Engine
Running (Automatic Transmission
Models Only)
1. Hold the brake pedal down with your right foot and
set the parking brake.
2. Move the shift lever into the PARK (P) position by
holding in the buttonon the lever and pushing the
lever all the way towardthe front of your vehicle.
3. Move the ignition key to LOCK.
4. Remove the key and takeit with you. If you can
remove the key from your ignition, your vehicle is in
PARK (P).
2-30
It can be dangerous to leave your vehicle with the
engine running. Your vehicle could move
suddenly if the shift lever is not fully inPARK (P)
with the parking brake
firmly set. And,if you
leave the vehicle with the engine running, it could
overheat and even catch fire.You or others could
be injured. Don’t leave your vehicle withthe
engine running unless you have to.
Torque Lock (Automatic Transmission)
If you are parking on a hill and you don’t shift your
transmission into PARK (P) properly, the weight of the
vehicle may put too muchforce on the parking pawl in
the transmission. You may find it difficult to pull the
shift lever out of PARK (P). This is called “torque lock.”
To prevent torque lock,set the parking brake and then
shift into PARK (P) properly before you leave the
driver’s seat. To find out how, see “Shifting Into
PARK (P)” in the Index.
When you are ready to drive, move the shift lever out of
PARK (P) before you release the parking brake.
If torque lock does occur,you may need tohave another
vehicle push yours little
a
uphill to take some of the
pressure from the transmission, so you can pull the shift
lever outof PARK (P).
Shifting Out ofPARK (P)
(Automatic Transmission)
Your Corvette has a brake-transmission shift interlock.
You have tofully apply your regular brake before you
can shiftfrom PARK (P) when the ignition is in the
RUN position. See “Automatic Transmission Operation”
in the Index.
If you cannot shift out of PARK (P),ease pressureon
the shift lever -- push the shift lever all theway into
PARK (P) and release the shift lever button as you
maintain brake application. Then press the shift lever
button and move the shift lever into the gearyou wish.
If you ever hold the brake pedal down but still can’t
shift out of PARK (P), try this:
1. Turn the key to the OFF position.
2. Apply and hold the brake until the end of Step 4.
3. Shift to NEUTRAL (N).
4. Start the engine and then shift to the drive gear
you want.
5. Have the vehicle fixed as soon as you can.
Parking Your Vehicle
(Manual Transmission)
Before you get outof your vehicle, put yourmanual
transmission in REVERSE (R) and firmly apply the
parking brake.
2-31
Parking Over Things That Burn
-
-1
Things that canburn could touch hot exhaust
parts underyOur vehicle and ignite. Don’tpark
over papers, leaves, dry grass or other things that
can burn.
2-32
Engine Exhaust
Engine exhaust can kill.It contains the gas
or
carbon monoxide (CO), which you can’t see
smell. It can cause unconsciousness and death.
You might have exhaust coming if:
in
0 Your exhaust system soundsstrange or
different.
0 Your vehicle getsrusty underneath.
0 Yqur vehicle was damaged in
a collision.
0 Your vehicle was damaged when driving
over highpoints on the road or over road
debris.
0 Repairs weren’t done correctly.
0 Your vehicleor exhaust systemhad been
modified improperly.
If you ever suspect exhaustis coming into your
vehicle:
Drive it only with all the windows down to
blow out anyCO; and
0 Have your vehicle fixed immediately.
Running Your. Engine
While You’re
Parked (Automatic Transmission)
It’s better notto park with the engine running. But if you
ever have to, here are some things
to know.
Idling the engine withthe air system control off
could allowdangerous exhaust into your
vehicle
(see the earlierCaution under “Engine
Exhaust”).
Also, idling in a closed-in placecan let deadly
carbon monoxide (CO)into yourvehicle evenif
the fan switch is at the highestsetting. One place
this canhappen is a garage. Exhaust with
CO can come in easily. NEVER park in a
garage with the engine running.
Another closed-in placecan be a blizzard. (See
“Blizzard” in the Index.)
--
--
rIt can be dangerous get
to out of your vehicle if
the shiftlever is not fully in PARK (P) with the
parking brake firmlyset. Your vehiclecan roll.
Don’t leave your vehicle whenthe engine is
running unless youhave to. If you’ve left the
engine running, thevehicle can move suddenly.
You or others could beinjured. To be sure your
vehicle won’t move, even when you’re
on fairly
level ground, always set your parkingbrake and
move the shiftlever to PARK (P).
Follow the proper steps to be sure your vehicle won’t
nove. See“Shifting Into PARK (P)” in the Index.
2-33
Windows
Power Windows
Express-Down Window
The switch for thedriver’s window has an express-down
feature. Press the switch for at least one third of a
second, and the window will lower completely. Tostop
express-down, press the switch again.
You can also open this window any amount by quickly
pressing and releasing the switch.
Horn
To sound the horn, press either horn symbol on your
steering wheel.
With power windows, switches on the door control each
window when the ignition is on or when DAB is
present. (See “Delayed Accessory Bus” in the Index.)
Tilt Wheel
Turn SignaYMultifunction Lever
A tilt wheel allows you to adjust the steering wheel
before you drive.
The multifunction lever on the leftside of the steering
column includes your:
You can also raiseit to the highest level to give your
legs more room when you exit and enter the vehicle,
0
To tilt the wheel, hold the
steering wheel and pull the
lever toward you. Move thesteering wheel to a
comfortable level, then release the lever to lock
the
wheel in place.
Turn Signal and Lane Change Indicator
Headlamp HighLow Beam Changer
WindshieldWipers
0
WindshieldWasher
0
Cruise Control
2-35
n r n and Lane Change Signals
The turn signal has two upward (for right) and two
downward (for left) positions. These positions allow you
to signala turn or a lane change.
To signal a turn, move the multifunction lever all the
way up or down. When the turn is finished, the lever
will return automatically.
A chime will remind you if you leave your turn signal
on formore than 1 mile (1.6 km) of driving.
An arrow on the instrument
panel will flash in the
direction of the turn or lane
change.
To signal a lane change, just raise or lowerthe lever
until thearrow starts to flash. Hold it there untilyou
complete your lane change. The lever will return by
itself when you release it.
As you signal a turn or a lane change, if the arrows don’t
flash but just stay on, a signalbulb may be burned out
and other drivers won’t see your turn signal.
If a bulb is burned out, replace it to help avoid an
accident. If the arrows don’t go on at all when you
signal a turn, check for burned-out bulbs and check
the
fuse (see “Fuses and Circuit Breakers”in the Index).
Headlamp High/Low Beam Changer
To change the headlamps
from low beam to highor
high to low, pull the turn
signal lever all theway
toward you. Thenrelease it.
When the high beamsare
on, this light on the
instrument panelalso
will be on.
Windshield Wipers
For a single wiping cycle, turn the band to MIST. Hold
it there until the wipers start, then let go. Thewipers will
stop after one cycle. If you want more cycles, hold the
band on MIST longer.
You can set the wiper speed for a long or short delay
between wipes. This can be very useful in light rain or
snow. Turn the bandto choose the delay time. The
closer to LO, the shorter the delay.
For steady wiping at low speed, turn the band away
from you to the LO position. For high speed wiping,
turn the band further, toHI. To stop the wipers, move
the band to OFF.
You control the windshield wipersby turning the band
with the wiper symbolon it.
Be sure to clear ice and snow from the wiper blades
before using them. If they're frozen to the windshield,
carefully loosen or thaw them. If your blades do become
damaged, get new blades or blade inserts.
Heavy snow or ice canoverload your wipers. A circuit
breaker will stop them until the motorcools. Clear away
snow or iceto prevent an overload.
2-37
Windshield Washer
At the topof the turn signal lever there’s a paddle with
the word PUSH on it. To spray washer fluid on the
windshield, justpush the paddlefor less than a second.
If you hold the paddle for more
than a second, the
washer will spray until you release the paddle. The
wipers will clear the window and stop or return to the
previous setting.
c
In freezing weather, don’t use your washer until
the windshield is warmed. Otherwise the washer
fluid can form ice on the windshield, blocking
your vision.
For information on the correct washer fluid mixture to
use, see “Windshield Washer Fluid” in the Index.
Cruise Control
t
LU-
With cruise control, you can
maintain a speed of about
25 mph (40 km/h) or more
without keeping your foot
on the accelerator. This can
really help on long trips.
Cruise control does not
work at speeds below about
25 mph (40 km/h).
When you apply your brakes or push the clutch pedal,
the cruise control shuts off.
I A CAUTION:
0
1
Cruise control can be dangerous where you
can’t drive safely at a steady speed. So,
don’t use your cruise control on winding
roads or in heavytraffic.
Cruise control can be dangerous on
slippery roads. Onsuch roads, fast changes
in tire tractioncan cause needless wheel
spinning, and you could lose control. Don’t
use cruise control on slippery roads.
Setting CruiseContra1
If you leave your cruise control switch on when
you’re not using cruise,you might hit a button and
go into cruise when you don’t want to. You could
be startled and even lose control. Keepthe cruise
control switchOFF until you want to use it.
1. Turn the cruise control switch to ON.
2. Get up to the speed you want.
If your vehicle is in cruise control when the ASR system
begins to limit wheel spin, the cruise control will
automatically disengage. (See “ASR System” in the
Index.) When roadconditions allow you to safely use it
again, you may turn thecruise control back on.
3. Push in the SET button
at the end of the lever
and release it.
4. Take your foot off the accelerator pedal.
2-39
Resuming a Set Speed
Increasing Speed While Using Cruise Control
Suppose you set your cruise control at a desired speed
and then you apply the brake or clutch pedal. This, of
course, shuts off the cruisecontrol. But you don't need
to reset it.
There are two ways togo to a higher speed:
Once you're going about
25 mph (40 kmih) or more,
you can move the cruise
control switch to
FUA (Resume/Accelerate)
for about half a second.
You'll go right back up to your chosen speed and
stay there.
Use the accelerator pedal to get tothe higher speed.
Push the button at the end of the lever, then release
the button and the accelerator pedal. You'll now
cruise at the higher speed.
Move the cruise switch to R/A. Hold it there until
you get up to the speed you want, then release the
switch. To increase your speed in very small
amounts, move the switch to R/A for less than half
a
second, then release it. Each time you do this, your
vehicle will go about 1 mph (1.6 km/h) faster.
Reducing Speed While Using Cruise Control
Using Cruise Controlon Hills
There are two ways to reduce your speed while using
cruise control:
How well your cruise control will work on hills depends
upon your speed, load and the steepness of the hills.
When going up steep hills, you may have to step onthe
accelerator pedal to maintain your speed. When going
downhill, you may have to brake or shift to a lower gear
to keep your speed down. Of course, applying the brake
takes you out of cruise control. Many drivers find this to
be too much trouble and don’t use cruise control on
steep hills.
Push in the button at the end of the lever until you
reach the lower speed you want,then release it.
To slow down in very small amounts, push the
button for less than half a second. Each time you do
this, you’ll go 1 mph (1.6 km/h) slower.
Passing Another Vehicle While Using Cruise Control
Use the accelerator pedal to increase your speed. When
you take yourfoot off the pedal, your vehicle will slow
down to thecruise control speed you set earlier.
Getting Outof Cruise Control
There are several ways to turn off the cruise control:
0
Step lightly on the brake pedal or push the clutch
pedal, if you have a manual transmission; or
0
Move the cruise switch to OFF.
Erasing Speed Memory
When you turn off the cruise control or theignition,
your cruise control set speed memory is erased.
2-41
Lamps
Headlamps
The headlamp knob controls these lamps:
0
Headlamps
0
Taillamps
Parking lamps
Sidemarker lamps
-g-Turn the knob to this symbolto turn on your
headlamps and other operating lamps.
Turn the knob to this symbol to turnon your
parking and other operating lamps without your
headlamps.
Turn the knob to OFF to turn off the lamps.
Your digital display will dim at dusk to remind you'to
turn on your headlamps.
To read your odometer and fuel level with the ignition
off, turn on your parking lamps. ,
Headlamp Doors
You can open the doors manually using the knobnext to
the headlamp assembly. Turn the knob counterclockwise
until the doors are open.
The headlamp doors should be open when driving inicy
or snowy conditions to prevent the doors from freezing
closed and when washing the vehicle to helpclean the
headlamps .
Lamps On Reminder
If you turn the ignition off and leave the headlamps or
parking lamps on, you will hear a chime.
The headlamp doorsare designed to open when you
turn the headlampson, and close when you turn the
headlamps and parkinglamps off. If you turn the
headlamps on, then turnthe headlamp switch back to
the parking lamps setting,the headlamp doors will
stay open.
2-43
Fog Lamps
Daytime Running Lamps (Canada Only)
Daytime Running Lamps ( D m ) can makeit easier for
others to see the front of your vehicle during the day.
DRL canbe helpful in many different driving
conditions, but they can beespecially helpful in the
short periods after dawn and before sunset.
1
I
A light sensor on top of the instrument panel makes the
DRL work, so be sure it isn’t covered.
Use your fog lampsfor
better vision in foggyor
misty conditions.Your
parking lampsor low-beam
headlamps must beon or
your fog lamps won’t work.
The D l U system will make your front turn signal lamps
come onwhen:
0
The ignition is on,
0
The headlamp switch is off, and
0
The parking brake is released.
When the DRL are on, only your front turn signal lamps
will be on. The taillamps, sidemarker and other lamps
won’t be on. Your instrument panel won’tbe lit up either.
When it’s dark enough outside, your front
turn signal lamps
will go out and your headlamps will come on. The other
lamps that come on with your headlampsalso
willcome on.
When it’s bright enough outside, the regular lamps will
go off, and your front turn signal lamps come on.
As with any vehicle, you should turn on the regular
headlamp system when youneed it.
2-44
To turn the fog lampson, push the button. Push the
button again to turn the fog lampsoff. A light above the
button will come on when the fog lamps areon.
Interior Lamps
Front Map Lamps
Instrument Panel Brightness Control
The DIMMER switch controls the brightness of your
instrument panel lights whenyour headlamps or parking
lamps are on. Move the switch upor down to brighten
or dim the lamps.If you turn the switch all the wayup,
your courtesy, reading, map and
cargo area lamps will
come on.Be sure to turn off the lamps when you leave
your vehicle.
. .. .
. .
. .
.
'
Courtesy Lamps
When any dooror the hatch is opened, the interior
lamps will go on (unless it's bright outside).
The lamps
will stay onfor about 30 seconds or until you turnon
the ignition.
Door Flood Lamps
There are flood lamps locatedabove the door handle
on each door which comeon with the headlamps or
parking lamps.
Your inside rearview mirror includes two map lamps.
The lamps will go on when adoor is opened. Whenthe
doors are closed and the ignitionis on, press the switch
to turn on the lamps.
There isalso an interiorconsole flood lamp located
underneath the rearview mirror which comes on with the
headlamps or parking lamps.
2-45
Mirrors
Power Remote Control Mirrors
Inside Daymight Rearview Mirror
An inside rearview mirror is attached aboveyour
windshield. The mirror has pivots
so that you can
adjust it.
You can adjust the mirror forday or night driving. Pull
the tab fornight driving to reduce glare. Push the tab for
daytime driving.
The electric mirror control is on the driver's door.
To adjust either mirror, turn the switch to LEFT (L)
or RIGHT (R).'Then use the control to adjust the
mirror. When youare done adjusting the mirrors,
move the controlback to thecenter to avoid
accidental adjustment.
2-46
Convex Outside Mirror
Your passenger’s side mirror is convex. A convex
mirror’s surface is curved so you can see more from the
driver’s seat.
A CAUTION:
A convex mirror can make things (like other
vehicles) look farther away than they really are.
If you cuttoo sharply into the right lane, you
could hit a vehicle on your right. Check your
inside mirror or glance over your
shoulder before
changing lanes.
Each doorhas a storage compartment below the armrest
which can be accessed by lifting up on the armrest.
2-47
Center Console
Security Shade (Coupe)
The security shade can provide hidden storage in
the
rear area of your vehicle.
Using the Security Shade
L
To use this storage area, push the button on the front end
of the console and lift.
You can use the door key to lock and unlock the
console. Don’t leave the key in thelock or itcould be
damaged when the driver sits down.
Your roof panelor hardtop wrench is stored inside the
console.
2-48
1. Pull the security shade by the center handle.
Rear Storage
V
2. Put the ends of the shade into the slots behind
the seats.
This compartment is in the floor behind the passenger’s
seat. To use it, push the button and lift the lid at the
same time. Use the door key to lock it.
The top tray can be removed. The jack(if equipped),
wheel lock key and wheel nut socketare stored below
the tray.
2-49
NOTICE:
NOTICE:
Your Corvette’sradio receiver is inthe rear
storage compartment. To help avoid damage to
the receiver:
Securely store the jack (if equipped) in the
foam container after use.
Store any other objects under the storage
tray carefully.
Do not store items such as liquids or sharp
objects that could puncture or cut the radio
receiver or wiring.
Also, to reducethe potential for radio receiver
interference, do not install anyother electronic
module under the storage tray.
Don’t put papersand other things that burninto
your ashtray. If you do, cigarettesor other
smoking materials could set them on fire, causing
damage.
Ashtray and Cigarette Lighter
To use the ashtray, pushon the right side of the door
next to the shift lever. To remove it, lift up on the
snuffer.
2-50
You can remove the ashtray and use the space aas
second cupholder. Whenyou put the ashtray back, first
put the ashtray into the rubber isolator, then be sure to
put the ashtray and isolator into the forward opening.
NOTICE:
Loose objects (suchas paper clips) can lodge
behind and beneath the ashtray lid and prevent
movement of the lid. Avoid putting smallloose
objects near theashtray.
To use the lighter, pushit in all theway and let go.
When it’s ready,it will pop back by itself.
NOTICE:
Visor Vanity Mirror
Don’t hold a cigarettelighter in with your hand
while it is heating. Ifyou do, it won’t be able to
back away from the heating element when it’s
ready. That can makeit overheat, damaging the
lighter and the heating element.
Sun Visors
To block out glare, you canswing down the visors.You
can also swing themto the side.
With the hardtop roof removedor the convertible top
down, you canflip the visors straight up tohelp reduce
wind turbulence.
Pull down the sun visor and lift the cover to expose the
vanity mirror. When the ignition is on, slide theswitch
next to the mirror up to turn the lamps on. Be sureto
turn the lamps off before closing the cover.
2-51
Accessory Plug
This plug is under the trim panel inthe front part of the
center console. The plug can be used to connect
electrical equipment such as a cellular phone or CB
radio. Be sure to follow the installation instructions
included with the equipment.
To use the accessory plug:
1. Open the center console and carefully pull the carpet
away from the coinholder to uncover the screws on
either side.
2. Remove the screws. (See the arrows in the following
illustration.)
3. Open the ashtray door, remove the ashtray and the
rubber insert from the forward location, and remove
the screw inside the cupholder.
4. Remove the four screws that attach the console door.
5. Remove the console door.
6. Remove the trim plate by pulling up and back.
7. Disconnect the plug by pulling forward on the plastic
locking tab and pull the plug into the console.
'
The plug has three separate wires:
The orange wire connects to the battery.
The pink wire connectsto the ignition. Power is only
available in the RUN position.
The black wire connects to the ground.
NOTICE:
When usingthe accessory plug:
Don’t splice wires directly into the accessory
plug wire.If done incorrectly, splicing might
cause damage to your electrical system.
The maximum load of any electrical
equipment should not exceed 10 amps.
0 Be sure to turn off any electrical equipment
when not in use. Leaving electrical
equipment on for extended periods can
drain your battery.
0 Do not use this plug if the electrical
equipment requires frequent connecting
and disconnecting. This may cause
excessive wear onthe accessory plug and
damage your electrical system.
Roof Panel (Coupe)
Until you are sure you can remove the panel alone, have
someone help you.
Removing theRoof Panel
A CAUTION:
Don’t try to remove the roof panel while the
vehicle is moving.Trying to remove the roof
panel while the vehicle is moving could cause an
accident. The panel could fall into the vehicle and
cause you to lose control, or itcould fly off and
strike anothervehicle. You or others could be
injured. Remove the roof panel only when the
vehicle isparked.
1. Park on a level surface, set the parking brake firmly
and shift an automatic transmission into PARK (P).
Shift a manual transmission into REVERSE (R).
Lower both windows, turn the ignition keyto LOCK
and move both sunshades to the side.
After you’ve installed the electrical equipment, put the trim
panel and console lid back in place and install the screws.
2-53
2. Remove the ratchet from the console.
3. Use the ratchet to loosen the front bolts. Don’t
remove them. They’ll stay in place whenloose.
St--in- the Roof Panel
If the roof panel is notstored properly, it could be
thrown about the vehicle in a crash or sudden
maneuver. People in the vehicle could beinjured.
Whenever you store the roof panel in the vehicle,
always be sure that it is stored securely in the rear
area using the storage brackets and latch pin.
4. The two rear bolts are on the roof, one above each
seat. You’ll see three bolts on each side. Loosen the
middle one. (The ratchet won’t work for the other
two.) The bolts will stay in the roof panel.
5. Stand on one side of the vehicle and have your
helper stand on the other side. Together, lift the front
of the panel up. Thenmove forward and lift the
panel off the vehicle.
2-55
1. Open the rear hatch and look for the two brackets
in the rear area. The bracketsare below the
courtesy lamps.
2. Store theroof panel withits top up and its rear
pointing forward. Slide the rear corners of the roof
panel into the brackets and push forward.
NOTICE:
Don’t lift the frontedge of the roof panel higher
than 8 inches (200 mm) when the cornersare in
the brackets.If you do, youcould damage the
roof panel.
3. Lower the front of the roof panel, centering it over
the latch pin.
4. Pull the release toward you and press down on the
roof panel.
Installing theRoof Panel
I
”
*
IJTION:
An improperly attachedroof panel may fall into
or fly off the vehicle. You or others could be
injured. After installing the roof panel, always
check that it is firmly attachedby pushing up on
the undersideof the panel near thebolts. Check
now and then tobe sure theroof panel is firmly
in place.
5. Push the release forward until it latches.
6. Gently lift up on the roofpanel to be sure it is locked
in place.
1. Park on a level surface, set the parking brake firmly
and shift an automatic transmission into PARK (P).
Shift a manual transmission into REVERSE (R).
Lower both windows, turn the ignition key to LOCK
and move both sunshades to the side.
2. If the roof panel is stored in the rear area, remove it
by reversing the steps described previously under
“Storing the Roof Panel.”
2-57
3. Lower the roof panel onto thevehicle, rear edge first,
and place the rear guide pins into the holes in the
roof opening.
4. Lower the front of the roof panel, and align the front
guide pins.
Convertible Top (Option)
The following procedures explain the proper operation
of your convertible top.
Lowering Your Convertible Top
5. Tighten the rear bolts part way.
NOTICE:
NOTICE:
If you tighten bolts that areimproperly started,
the threads canbecome stripped. Be sure allbolts
are properly startedbefore you tighten them.
6 . Use the ratchet to start the front bolts. If the bolts are
hard to start, tighten the rear bolts some more.
Holding down the panelon the outsidewill also
help.
7. Fully tighten the rear bolts, then the front bolts.
If you hear apopping noise when you drive, the
bolts may not be tight enough. Be sureto tighten
them securely.
Don’t leaveyour convertible out with the top
down for any long periodsof time. Thesun and
the rain candamage your seat material and other
things inside your vehicle.
1. Park on a level surface, set the parking brake firmly
and shift an automatic transmission intoPARK (P).
Shift a manual transmission into REVERSE (R).
Lower both windows and sunshades and turn
the
ignition key to LOCK.
I
~
NOTICE:
Before lowering the convertible top into the
storage area, be sure there are
no objects in the
way of the folded, stored top. The weight of a
stored top on items in thestorage area may cause
the convertible top back glassto break.
I
.
3. Unfasten the strips at the rear of each window
opening.
2. Unlock the frontof the convertible top by turning the
latch handles outward.Then lift the top off the
windshield slightly.
2-59
4. Tilt the driver’s seatback forward. The convertible
top release handle is behind the driver’s seat, beneath
the storage compartment lid. Pull the inside edge of
the handle forward.
5. From the driver’s side, lift and hold the rear
of the
top with your left hand. With your right hand, press
the storage compartment lid release button behind
the driver’s seaton the lid (the release switch in the
center console will also work). Raise the lid.
1
NOTICE:
Do not leave the convertible top on the closed lid
when lowering the top. This may result in paint
damage.
7. Lower the rear of the top. Then lift the front with a
slow, smooth motion. Fold the top into thestorage
compartment, making sure the fabric is folded
between bows.
6. If your Corvette has lost power (dead battery, for
example), you can still open the storage
compartment using themanual release handles. The
handles are near the sidewall, behind the safety belt
anchors on eachside of your vehicle. Move the
handles toward the rear of
the vehicle and upward.
NOTICE:
r
Do not lift the rear
of the convertible top when
lowering the top into the storage compartment
or
damage to the top may occur.
2-61
8. After the top is completely folded into the
compartment, turn the latch handles toward the
center of the vehicle. Close the storagecompartment
lid by pushing the front edge down on each side. Try
to lift the lid tomake sure it’s latched.
NOTICE:
I
When closing the storage compartment lid, make
sure the latch handles are turned back toward
the centerof the vehicle. If they aren’t, you may
damage the paint on the lid inner panel.
Raising Your Convertible Top
1. Park on a level surface, set the parking brake firmly
and shift an automatictransmission into PARK (P).
Shift amanual transmission into REVERSE (R).
Lower both windows and sunshades and turn the
ignition key to LOCK.
2. Press either the storagecompartment lid
release button behind the driver’s seat or in the
center console.
2-62
3. Turn the latch handles outward. Pull the top up and
forward until it lines up with the windshield.
4. Latch the top by turning the handles toward the
center of the vehicle. If needed, push down on the
outside corners.
5 . Lift the rear of the top and close the compartment
lid firmly.
6. Lower the rear of the top so the latch pins align with
the holes in the lid. To secure the rear of the top,
push down firmly on both corners.
7. Fasten the strips for the headliner at the rear of each
window opening.
2-63
Removing Your Convertible Hardtop
NOTICE:
~~
~~
Certain automatic car washes may cause damage
to your vehicle. The top fabric can be damaged
by top cleaning brushes.
1. Park on a level surface, set the parking brake firmly
and shift an automatic transmissioninto PARK (P).
Shift a manual transmission into REVERSE (R).
Lower both windows and sunshades and turn the
ignition key to LOCK.
Please be aware that when you raise the convertible top,
the bottom edge rests on a clear, protective tape strip.
This protective strip protects your Corvette from paint
damage so it should not be removed.
For careand cleaning of your convertible top, see
“Cleaning Your Convertible Top” in the Index.
Convertible Hardtop (Option)
The convertible hardtop is designed for extended use in
both warm and cold weather. The installation and
removal of this top requires two people and takes about
30 minutes. You will need the wrench and ratchet stored
in your center console. For information on cleaning your
convertible hardtop, see “Cleaning” in the Index.
2-64
2. Loosen the front bolts with the wrench.
Y
3. Move both seatbacks forward and remove the rear
trim panel.
4. Loosen the rear corner bracket bolts with the ratchet.
2-65
5. Using the wrench, remove the two lower bolts (A)
from the lock pillar bracket on each side.
6. Remove the bolt (B) from the bottom flange of each
lock pillar bracket.
7. Then remove the two upper bolts ( C ) from the
receiver bracket on each side.
2-66
8. Slide both lock pillar brackets down and forward
from the receiver brackets. You may need to lift the
hardtop slightly to removethe brackets.
9. Disconnect both wire connectors located behind the
lock pillar brackets. These are the rear window
defogger wires.
NOTICE:
To help avoid damaging the hardtop when not
in
use:
Store the hardtop inits normal position,
resting onits mounting brackets.
0 Store hardware and trim panel with
the hardtop.
12. Connect the rear window defogger electrical
connectors.
10. With one person oneach side, gently lift the hardtop
approximately 8 inches (200 mm) straight up.
Remove the hardtopover the rear of the vehicle.
11. Install the HATCH(45) fuse to enable the storage
compartment lid release button and
center console
release switch.You will need the fuse installed if
you have to raise yourconvertible top.
The fuse that enablesthese releases is not installed
at the assembly plantand should be in your center
console. See “Instrument Panel Fuse Block” in the
Index for locationof the fuse.
2-67
Installing Your Convertible Hardtop
1. Park on a level surface, set the parking brake firmly
and shift an automatic transmission into PARK (P).
Shift amanual transmission into REVERSE (R).
Lower both windows and sunshades. Turn off the
radio to lower the power antenna and turn the
ignition key to theLOCK position.
2. Disconnect both rear window defogger electrical
connectors behind the lock pillar.
3. Lower the convertible top. Refer to “Convertible
Top” in the Index.
4. With one person on each side, carefully position the
hardtop over the vehicle. Lower the hardtop slowly,
aligning the rear bolt spacers onto the bezels, and
front conical nutsinto the tapered receivers. Realign
the hardtop, if necessary.
NOTICE:
To help avoid damage, don’t force the rear
of the hardtopdown. The hardtop may rest
slightly above the storage compartment lid
until the release leveris pulled. See Step8 in
this procedure.
This procedure will require the use of the storage
compartment lid release button behind the driver’s seat
or the center console release switch.
The fuse that
enables these releases is not installed at the assembly
5. Move both seatbacks forward. Slide the lock pillar
plant and should be in your center console. See
bracket into the receiver bracket until the scribed
line
“Instrument Panel Fuse Block” in the Index for
is even with the lower edge of the receiver bracket.
location of the fuse. The fuse is labeled HATCH (45).
6. Connect the electrical connectors and make sure they
are inside the vehicle.
7. Insert the two upper bolts into both receiver
brackets. You may have to lift the hardtop slightly
to install the lock pillar bracket.
8. If the hardtop hasn’tlowered into position, pull the
release lever behind the driver’s seat (located under
the storage compartmentlid).
rear corner bracket
9. Secure but don’t tighten the
bolts using the ratchet.
10. Tighten the front bolts using the wrench.
11. Insert the lower boltinto the bottom flange of the
lock pillar brackets and tighten.Install and tighten
the remaining bolts into the lock pillar brackets.
12. Using the ratchet, tighten the rearcorner bracket
bolts. Do not over-tighten these bolts.
If the hardtop isn’t secure, it can’t give
as much
protection in a crash.A loose hardtop couldfly
off the vehicle in an accident or sudden
maneuver. You or others couldbe injured. Don’t
drive your vehicle until all the hardtop fasteners
are tight.
14. Remove the HATCH (45) fuse. Store it in the center
console while the convertible hardtop is inuse.
(This will prevent accidental unlatching of the
storage compartment lid.)
13. Slide the rear trim panel in place.
2-69
Instrument Panel
2-70
1. Acceleration Slip Regulation (ASR) Switch
12. Comfort Controls
2. Side Window Defogger Vent
13. Fuse Panel
3. Side Air Vent
14. Audio System
4. Turn SignaVMultifunction Lever
15. Ashtray/Lighter/Cupholder
5. Tilt Lever
16. Ride Control (Option)
6. Instrument Cluster
17. Power Seat Control (Option)
7. Ignition Switch
18. Shift Lever (Automatic Shown)
8. Trip Monitor Controls
19. Horn
9. Solar Sensor
20. Main Lamp Control
10. Center Air Vent
21. Fog Lamp Switch
11. Driver Information Center
2-71
Instrument Panel Cluster
LT1 Engine
Your instrument cluster and Driver Information Centerare designed to let you know at
a glance how your vehicleis
running. You’ll know how fast you’re going, about how much
fuel you have left and many otherthings you’ll need to
know to drive safely and economically. The center display in the cluster is controlled
by the trip monitor.
LT4 Engine
2-73
Speedometer and Odometer
Your speedometer lets you see your speed in either miles
per hour (mph) or kilometersp& how: (km/h). Your
odometer shows how far your vehicle has been driven, in
ENG MET button on
either miles or kilometers. Press the
the trip monitor to switch the display between English
units (miles) and metric units (kilometers).
Your Corvette’s odometer istamper-resistant. It will
read OD0 ERR if someone has tampered with it.
Tachometer
The tachometer displays the engine speed in thousands
of revolutions perminute (rpm).
Fuel will shut off at about 6400 rpm for theLT4 (Code 5)
engine and at about5850 rpm for theLT1 (Code P)
engine.
If you continue to drive your Corvette at the fuel shut
If a new odometer is installed, it will automatically reset to off rpm, youcould damage yourengine. Be sure to
the correct reading.If an electrical or other problem makes operate your Corvette below the fuel shut off rpm or
setting the odometer correctly impossible, then it’s set at reduce your rpm quickly when the fuel shuts off.
zero, but a label on the driver’s door must show the old
Warning Lights, Gaugesand
reading and when the new one was installed.
Indicators
Trip Odometer
The trip odometer can tell
you how far your Corvette has
been driven since you last set the trip odometer to zero.
To display the trip odometer, press TRIP O D 0 on the
Trip Monitor. To reset it, press and hold RESET TRIP
for two seconds.
This part describes thewarning lights and gauges that may
be on your vehicle. The pictures will help you locate them.
Warning lights and gauges can signal that something is
wrong before it becomes serious enough to cause an
expensive repair or replacement. Paying attention to
your warning lights and gauges could also save
you or
others from injury.
Warning lights come on when there may beor is a
problem with one of your vehicle’s functions.
As you will
see in the details on the next few pages, some warning
lights come on briefly when you
start the enginejust to let
you know they’re working. If you are farniliar withthis
section, you should notbe alarmed whenthis happens.
Gauges can indicate when there may be or is a problem
with one of your vehicle’s functions. Oftengauges and
warning lights work together tolet you know when
there’s a problem with your vehicle.
Safety Belt Reminder Light
When the key is turned to RUN or START, a chime will
come on for about eight seconds to remind people to
fasten their safety belts, unless the driver’s safetybelt is
already buckled.
The safety belt light will
also come on and stay on
until the driver’s belt is
buckled.
When one of the warning lights comes on and stays on
when you are driving, or whenone of the gauges shows
there may be a problem,check the section that tells you
what to do about it. Please follow this manual’s advice.
Waiting to do repairs can be costly -- and even
dangerous. So please getto know your warning lights
and gauges. They’re a big
help.
Your vehicle also has aDriver Information Center that
works along with the warning lights andgauges. See
“Driver Information Center” inthe Index.
2-75
Air Bag Readiness Light
There isan air bag readiness light on the instrument
panel, which shows AIR BAG. The system checks the
air bag’s electrical system for malfunctions. The light
tells you if there is an electrical problem. The system
check includesthe air bag sensors, the air bag modules,
the wiring and the diagnosticmodule. For more
information on the air bag system, see “AirBag” in
the Index.
AIR
BAG
You will see this light flash
for a few seconds when you
turn your ignition to RUN
or START. Then the light
should go out. This means
the system is ready.
If the airbag readiness light doesn’t come on when you
start your vehicle, or stays on, or comes on when you
are driving, your air bag system may not work properly.
Have your vehicle serviced right away.
2-76
Charging SystemIndicator Light
-+I
This light will come on
when you turn on the
ignition, but the engine is
not running, as a check to
show you it is working. It
should go outwhen the
engine starts.
If it stays on or comes on while youare driving, you
may have a problem with the electrical charging system.
It could indicate that you have a loose or broken drive
belt or another electrical problem. Have it checked
right away. Driving while this light is on could drain
your battery.
If you mustdrive a short distance with thelight on, be
certain to turn off all your accessories, such as the radio
and air conditioner.
Voltmeter
When the engine is not
running, the voltmeter
shows the voltage output
of your battery. When the
engine is running, it shows
the voltage outputof the
charging system.
El
VOLTS
18
If you must drive ashort distance with the voltmeter
reading in ashaded area, turn off all your accessories,
including your comfort controls and audio systems.
For numeric gauge
measurements, press the
GAUGES button on the
trip monitor until VOLT
appears. The numberthat
appears next to the fuel
gauge is the battery voltage.
Readings between the shaded areas show the normal
operating range. The reading will change as the rate of
charge changes (with engine speed, for example), but
if the
voltmeter reads in either shaded area, and it stays there,
you may have a problem with the charging system. Have it
checked right away. Driving with the voltmeter readingin
a shaded area coulddrain your battery.
2-77
Brake System Warning Light
Your Corvette’s hydraulic brake system is dividedinto
two parts. If one part isn’t working, the otherpart can
still work and stop you. For good braking, though, you
need both parts working well.
BRAKE
PRESSURE
This light should come
on when youturn the
ignition key to START. If
it doesn’t come on then,
have itfixed so it will be
ready to warn you if there’s
a problem.
If this warning light stays on after you start you engine,
there could be a brake problem. Have your brake system
inspected right away.
If the light comes onwhile you aredriving, pull off the
road and stop carefully. You may notice that the pedalis
harder to push. Or, the pedal may gocloser to the floor.
It may take longerto stop. If the lightis still on, have the
vehicle towed for service. (See “Towing Your Vehicle”
in the Index.)
A
T T - T ~ = T
Your brake system may not be working properly
if the brake warning light
is on. Driving with the
brake warning lighton can lead to an accident.
If
the lightis still on after you’ve pulled
off the road
and stopped carefully, have the vehicle towed for
v c e .
Parking Brake Indicator Light
PARK
When the ignition is on,this
light will come on when
you set your parking brake.
The light will stay on if
your parking brake doesn’t
release fully.
Anti-Lock Brake System Warning Light
With the anti-lock brake
system, this light willcome
on when you start your
engine and may stay on
for several seconds.
That’s normal.
SERVICE
I
This light shouldalso come on when you turn the
ignition key toSTART. If it doesn’t come onthen, have
it fixed so it will be ready to remind you if the parking
brake hasn’t released fully.
If the light stays on, turn the ignition off. Or, if the light
comes on when you’re driving, stop as soon as possible
and turn the ignition off. Then start the engine againto
reset the system. If the light still stays on, or comes on
again while you’re driving, your Corvette needs service.
If the regular brake system warning light isn’t on, you
still have brakes, but you don’t have anti-lock brakes. If
the regular brake system warning light is also on, you
don’t have anti-lock brakes and there’s a problem with
your regular brakes. See “Brake System Warning Light”
earlier in this part.
The anti-lock brake system warning light should come
on briefly when you turn the ignition key to RUN.
If the light doesn’t come on, have it fixed so it will be
ready to warn you if there is a problem.
2-79
Anti-Lock Brake System Active Light
ABS
ACTIVE
When your anti-lock system
is adjusting brake pressure
to help avoid a braking skid,
the anti-lockbrake system
active light will come on.
Slippery road conditions may exist if this light comes
on, so adjust your driving accordingly. The light will
stay on for a few seconds after the system stops
adjusting brake pressure.
The anti-lock brake system activelight also comes on
briefly when you turn the ignition key to RUN. If the
light doesn’t come on then, have it fixedso it will be
there to tell you when the systemis active.
2-80
ASR (Acceleration Slip Regulation) System
Warning Light
SERVICE
ASR
This warning light should
come on briefly asyou start
the engine. If the warning
light doesn’t comeon then,
have it fixed so it-willbe
ready to warn you if there’s
a problem.
If it stays on, orcomes on when you’re driving, there’sa
problem with your ASR system and your vehicle needs
service. When this warning light is on, the system will
not limit wheel spin. Adjust your driving accordingly.
(The ASR OFF light will also come on when theASR
system warning light comes on.)
ASR (Acceleration Slip Regulation) System
Active Light
ASR
ACTIVE
When your ASR system is
limiting wheel spin, this
light will come on. Slippery
road conditions may exist if
the ASR system active light
comes on, so adjust your
driving accordingly.
The light will stayon for a few seconds after the ASR
system stops limiting wheelspin.
The ASR system active light also comes on briefly when
you turn the ignition keyto RUN. If the light doesn’t
come on then, haveit fixed so it will be there to tell you
when the systemis active.
ASR (Acceleration Slip Regulation)
Off Light
ASR
OFF
This light will come on for
a few seconds when you
turn the ignition on. It also
comes on and stays onwhen
the ASR button is pressed to
turn the system off.
If the SERVICE ASR and ASR OFF lights come onand
stay on when you’re driving, there’s a problem with
your ASR system and your vehicle needs service. See
“Acceleration Slip Regulation System” in the Index.
2-8 1
Engine Coolant Temperature Gauge
185
-~
This gaugeshows the
engine coolant temperature.
If the gauge pointer
moves
into the shaded area, your
engine is too hot!
1--For
numeric gauge
measurements, p i e s
the GAUGES buttonon
H
H
TEMP
“F
The number that appears next to thefuel gauge is the
coolant temperature. If LO appears,thetemperature is
It means that your engine coolant has overheated. If you below
3 2 ” (0°C).
~
have been operating your vehicle under normal driving
conditions, you should pull off the road, stop your
vehicle and turn off the engineas soon as possible.
I
In “Problems on the Road,” this manual shows what to
do. See “Engine Overheating” in the Index.
2-82
Low Coolant Warning Light
~
LOW
COOLANT
~
~
This light comes on when
the coolant in the system is
low. You may need to add
coolant. See “Engine
Overheating” in the Index.
I NOTICE:
Driving with the LOW COOLANT lighton
could cause your Corvetteto overheat. See
“Engine Overheating” in the Index. Your
Corvette could be damaged andit wouldn’t be
covered by your warranty.
Low Tire Pressure Warning Light (Option)
The Low Tire Pressure Warning System (LTPWS) has a
sensor on each road wheel that transmitsto a receiver on
the instrument panel.
The system operates on a radio frequency subject to
Federal Communications Commission (FCC) Rules.
This device complies with Part 15 of the FCC Rules.
Operation is subject to the following two conditions:
(1) This device may not cause harmful interference,
and (2) This device must accept anyinterference
received, including interference that may cause
undesired operation.
Changes or modifications to this system byother than an
authorized service facility could void authorization to
use this equipment.
LOW/FLAT
TIRE
The LTPWS monitors air
pressure in each road tire
while you’re driving your
Corvette. The LOWELAT
TIRE light will come on
whenever tire pressure in
any road tire goes below
25 psi (170 kPa), and it will
stay on untilyou turn off
the ignition.
2-83
The light may come onif any LTPWS parts aren’t
working properly.
For LTPWS to work properly, you mustdrive your
Corvette faster than 25 mph (40 km/h) and for more
than 2 miles (4 km). The system will not warn you
before you begin to drive that a tire is flat.
When the LOWELAT TIRElight comes on, check the
tire pressure in all four road tires as soon as you can.
Adjust the tire pressure as needed to those shown onthe
Tire-Loading Information label on the driver’s door. If
the light stays on after the tire pressure is adjusted, see
your dealer.
I
When the LOWELAT TIRE warning
light is on,
your vehicle’s handling capabilities will be
reduced during severe maneuvers. If you drive
too fast, you could losecontrol of your vehicle.
You or others could beinjured. Don”t drive over
55 mph (90 km/h) when the LOWWLAT TIRE
warning light is on.Drive cautiously, and check
your tirepressures as soon as you can.
NOTICE:
Driving with a flat tire may damagethe tire, the
wheel or the tirepressure sensor installed inside
the tireon the wheel rim. Usingtire sealants may
also damage thesensor.
If you have EMTs, see “Extended Mobility Tires”
in the Index.
The LTPWS sensor is directly opposite the valve stem
on the tire. Takecare when servicing or having your
tires serviced. The sensors may not work properly
if
damaged. To prevent damageto the sensors, see the
1996 Corvette Service Manual for correct tire mounting
and dismounting procedures.
The LOW/FLAT TIRE light may come on
if your
vehicle is close to another vehicle that hasLTPWS and
has a tire with low pressure.
LTPWS can warn you about a low tire, but
it does
not replace normal tire maintenance. See “Tires” in
the Index.
Service LTPWS Light (Option)
SERVICE
LTPWS
The SERVICE LTPWSlight
comes on whenever a
LTPWS part is not working
properly. It may also come
on when you’re going less
than 25 mph (40 k m h ) or in
stop-and-go traffic.
The light willgo out when the electronic receiver gets a
signal from each sensor.
Check the system byturning the ignition on. The light
should come on and thengo out. See your dealer if the
light stayson or doesn’tcome on.
Here are two situations that cause the SERVICE LTPWS
light to come on and stay on. Both of these situations are
normal and do not indicate that anything is wrong with
your Corvette.
0
You turn the ignition on three times in a row within
half an hour without moving yourCorvette. Thelight
will then come on every time you turn the ignition
on until you move your Corvette.
0
You run your Corvette three times within half an
hour while all four sensors are missing. (All the
sensors would be missing, for example, if you put
different wheels on your Corvette without
transferring the sensors.)
If you would like to clear the SERVICE LTPWSlight
from your Driver Information Center permanently, see
your dealer.
If the light comes on and stays on, even when the
vehicle is driven, there may be a problem with LTPWS.
See your dealer.
2-85
Malfunction Indicator Lamp
(Service Engine Soon Light)
SERVICE
NOTICE:
Your Corvette is equipped
with a.computerwhich
monitors operation of the
fuel, ignition and emission
control systems.
If you keep driving your vehicle with this light
on, after a while, your emission controls won’t
work as well, your fuel economy won’t be as good
and your engine may not run as smoothly. This
could leadto costly repairs that may not be
covered by your warranty.
SOON
This systemis called OBD I1 (On-Board
Diagnostics-Second Generation)and is intendedto
assure that emissions are at acceptable levels for thelife
of the vehicle, helping to produce a cleaner
environment. (In Canada, OBD I1 is replaced by
Enhanced Diagnostics.) The SERVICE ENGINE SOON
light comes on to indicate that there is a problem and
service isrequired. Malfunctions oftenwill be indicated
by the system before any problem is apparent, which
may prevent more serious damage to your vehicle. This
system isalso designed to assist your service technician
in correctly diagnosing any malfunction.
2-86
This light should come on, as a check to show youit is
working, when the ignition is on and the engineis not
running. If the light doesn’t comeon, have it repaired.
This light will also come on during a malfunction in one
of two ways:
0
0
Light Flashing-- A misfire condition has been
detected. A misfire increases vehicle emissions and
may damage the emission control system on your
vehicle. Dealer orqualified service center diagnosis
and service is required.
Light On Steady-- An emission control system
malfunction has been detected on your vehicle.
Dealer or qualified service center diagnosis and
service may be required.
If the Light Is Flashing
The following may prevent more
serious damage to
your vehicle:
0
If the LightIs On Steady
You may be able to correct the emission system
malfunction by considering the following:
Reduce vehicle speed.
Did you just put fuel into your vehicle?
Avoidhard accelerations.
If so, reinstall the fuel cap, making sure to fully install
the cap. The diagnosticsystem can determine if the fuel
cap hasbeen left off or improperly installed. This will
allow fuel to evaporate into the atmosphere. A few
driving trips should turn the light off.
Avoid steep uphill grades.
If the lightstops flashing and remains on steady see “If
the Light IsOn Steady” following.
If the light continues to flash, when it is safe to do so,
stop the vehicle. Put your vehicle in PARK (P).Turn the
key off, wait at least 10 seconds and restart the engine.
If the light remains on steady,
see “If the LightIs On
Steady” following.If the light is still flashing follow the
previous steps, and drivethe vehicleto your dealer or
qualified service center for service.
Did you just drive through deep
a puddle of water?
If so, your electrical system may be wet.The condition
will usually be corrected when the electrical system
dries out. A few driving trips should turn the lightoff.
Are you low on fuel?
As your engine starts to run out of fuel, your engine may
not run as efficiently as designed since small amountsof
air are sucked into the fuelline causing a misfire.The
system can detect this. Adding fuel should correct this
condition. Make sure to install the fuel cap properly. It
will take afew driving trips to turn the lightoff.
2-87
Have you recently changed brands of fuel?
If so, be sure to fuel your vehicle with quality fuel (see
“Fuel” in the Index). Poor fuel quality will cause your
engine not to runas efficiently as designed.You may
notice this as stalling after start-up, stalling when you
put thevehicle into gear, misfiring, hesitation on
acceleration orstumbling on acceleration. (These
conditions may go away once the engine is
warmed up.)
This will be detected by the systemand cause thelight
to turn on.
If you experience this condition, change the fuelbrand
you use. It willrequire atleast one fulltank of the
proper fuel to turn the light off.
If none of the above steps have made the light turn off,
have your dealer or qualified service center check the
vehicle. Your dealer has the proper test equipment and
diagnostic tools to fix any mechanical orelectrical
problems that mayhave developed.
2-88
Low Oil Light
LOW
OIL
This light should come on
while you arestarting your
engine. If the light doesn’t
come on, have itrepaired. If
the light comes on while
starting your engine and
stays on, your engineoil
level may be too low.You
may need to add oil.See
“Engine Oil” in the Index.
Engine Oil Pressure Gauge
0
A CAUTIOh:
The engine oil pressure
gauge shows the engine
oil pressure in psi (pounds
per square inch) or
kPa (kilopascals) when
the engine is running.
Don’t keep driving if the oil pressure is low. If
you do,your engine can become so hot that it
catches fire. You or others could be burned.
Check your oil as soon as possible and have your
vehicle serviced.
W
A
OIL
PRESS
PSI
I
Oil pressure should be20 to 80 psi (140 to 550 Wa).
(In certain situations such as long, extended idles onhot
days, it could read as low as 6 psi (40 kPa) and still be
considered normal.) Itmay vary with engine speed,
outside temperature and oil viscosity, but readings above
the shaded area show thenormal operating range.
Readings inthe shaded areatell you that the engine is
low on oil, or that you mighthave some other oil
problem. See “Engine Oil”in the Index.
NOTICE:
1
Damage to yourengine from neglected oil
problems can be costly and is not covered by
your warranty.
2-89
Engine Oil Temperature Gauge
320
This gauge shows your
engine oiltemperature. Oil
temperature may vary with
the type of driving you do
and weather conditions.
OIL
TEMP
OF
If your gauge pointer moves close to or into
the shaded
area and stays there, your oil temperature is too high.
Check the engine coolant temperature and engine oil
level. If your engine is too hot, see “Engine
Overheating” in the Index. Your vehicle may need
service; see your dealer.
2-90
I,
For numeric gauge
measurements, press the
GAUGES button on the trip
monitor until OIL appears.
The number that appears nextto the fuel gauge is the oil
temperature. If LO appears, the temperatureis below
32°F (OOC).
Engine Oil Life Monitor
CHANGE
OIL
The CHANGE OIL light
comes on for a few seconds
when you turnthe ignition
on. It will come on and stay
on when it’s time to change
your oil.
Be sureto reset the monitor when your oil is changed,
even if the CHANGE OIL light didn’t come on. If you
don’t reset the monitor, it won’t work correctly. Follow
these steps:
1. Turn the key to RUN, but don’t start the engine.
2. Press ENG MET on the trip monitor. Then, within
five seconds, press it again.
3. Within five seconds, press and hold GAUGES on the
trip monitor. The CHANGE OIL light should flash.
The monitor usesoil temperature and engine revolutions
to decide when the oilis nearly worn out. The light is
only a reminder, though.
4. Hold the GAUGES button until the CHANGE OIL
light stops flashing and goes out. This should take
about 10 seconds.
When the light goes out, the monitor is reset. If
the monitor doesn’t reset, turn the ignition off, then
try again.
2-91
Service Ride Control Light(Option)
SERVICE
RIDE
CONTROL
If your vehicle is equipped
with Ride Control,this light
should come on for afew
seconds when you start
your vehicle.
If the light stays on or comeson while you’re driving,
there may be a problem with your Ride Controlsystem.
You can still drive, but you should see your dealer soon.
The SERVICE RIDE CONTROL light may also come
on if the selective ride control knob is not placed fully
into aposition. For example, if the selection position is
between TOUR and SPORTor SPORT and PERF,the
light may come on. If the light comes on for this reason,
move the select switch to the desired position and the
light should goout.
2-92
Passive Keyless Entry Light
PASSIVE
KEYLESS
ENTRY
This light will come onfor
about two seconds when ’
you turn the ignition on,
unless the passive feature of
the keyless entry system is
off. The light also comes on
and flashes when you are
programming transmitters.
See “Passive Keyless Entry System’’ in the Index.
Security Light
SECURITY
Check Gauges Light
This light comes onto
remind you to arm your
theft-deterrent system. If it
comes on and stays on when
your ignition is on,there
may be aproblem with your
theft-deterrent system.
See “Universal Theft-Deterrent” and “PASS-Key
System” in the Index.
CHECK
GAUGES
This light will come on
briefly when you are
starting the engine.If the
light comes on and stays on
while you are driving, check
your gauges to see if they
are in the warning areas.
This light can come on for:
0
High Engine Oil Temperature or Low oil Pressure
System Problems Light
High Coolant Temperature
If SYS flashes on the displaynear your fuel gauge,there
may be a problem withyour Corvette’s electrical
system. If the SECURITY light flashes at the same time,
there is a problem with yourtheft-deterrent system.
Have your vehicle checked by your dealer if SYS keeps
appearing.
High or Low Battery Voltage
0
Low Fuel Level
0
High Automatic Transmission Fluid Temperature
2-93
Door Ajar Light
DOOR
AJAR
Fuel Gauge
This light comes on when
you open one of the doors
with the ignition on. It stays
on until you fully close the
door. Have your vehicle
serviced if the light comes
on and stays on, even when
the doors arefully closed.
Your fuel gauge shows
about how much fuel
is in
your tank.The bars light
up'when the ignition is on
or, if the ignition is off,
when you turn on your
parking lamps.
When the display is down to the last two bars,
RESERVE will appear next to the gauge.
2-94
Here are three concerns some owners have had about the
fuel gauge. All thesesituations are normal and do not
indicate that anything is wrong with
the fuel gauge.
0
0
You can use the trip monitor to display more detailed
fuel information. Each timeyou press FUEL INFO, one
of the following will appear next to the fuel gauge.
At the gas station, the fuel pump shuts off before the
gauge reads FULL (F).
0
INST: The fuel economy calculated for your current
driving conditions.
It takes more (or less) fuel to fill up than the gauge
reads. Forexample, the gauge reads half full, but it
took more (or less) than halfof the tank’s capacity to
fill it.
0
AVERAGE: The fuel economy calculated for the
current tank of fuel, or since you last reset the
display.
The gauge moves a little when you turn, stop or
speed up.
RANGE: The distance you can drive before
refueling.
0
BLANK: The fuel gauge is displayed alone.
You should reset the fuel information displayevery time
you refuel. To reset the display, press FUEL INFO until
AVERAGE appears. Then, pressRESET FUEL on the
trip monitor.
2-95
Gauge Markings
The analog gauges provide a quick
visual reference to
the actual measurements of these gauges. However, you
must keep in mind that the gaugesaren't linear. This
means that the middle mark is not a temperature halfway
between the top and bottom temperatures on the gauge.
p
1
A
E
E
J
2-96
For your convenience, the following table gives the
exact reading for each mark.
For numeric gauge measurements, refer to the digital
readings by pressing GAUGES on the trip monitor.
Marking
D
C
E
250°F 285°F 320.F
(121'C) (145.C)
(102OC(160.C)
)
100.F 185OF 210'F 235'F 260'F
Coolant
Temperature (38'C) (85'C) (99'C) (113'C) .(127'C)
B
A
Gauge
100.F 215.F
Oil
Temperature (38-C)
Automatic Transmission Fluid Temperature
Reading
Automatic transmission
fluid temperature will
be displayed if you press
the GAUGES button on
the trip monitor until
AUTO appears.
The number that appearsnext to the fuel gauge is the
automatic transmission fluidtemperature. If LO appears,
the temperature is below32°F (0°C).
It’s normal for the transmission fluid temperature to
vary, depending on the type of driving you do and
weather conditions. If you drive on long grades on ahot
day, the transmission fluid temperature will be higher
than normal driving on a coldday. If you drive your
Corvette at high speeds with a lot of stop-and-go or fast
accelerations, your transmission fluid temperature may
also be higher.
If the transmission fluid exceeds 280”F (138 “C), the
CHECK GAUGES light will come on and HIAUTO
will be displayed next to the transmission fluid
temperature when you toggle through the GAUGES
button. You should move the shift lever to DRIVE (D)
and continue driving at a slower, constant speed.
Monitor the transmission fluid temperature and allow it
to cool to 180°F (82°C)to 200°F (93°C). Then, you
should check the transmission fluid level for alow fill or
overfill condition and bring your Corvette in for service
as soon as possibleif the oil is too low or overfilled.
(See “Automatic Transmission Fluid” in theIndex.)
Also, check the engine coolant temperature.
If it’s too
hot, see “Cooling System” in the Index.
2-97
Driver Information Center
SERVICE LTPWS (Low Tire Pressure Warning
System) (Option)
LOWELAT TIRE
SERVICE
ASR
ASR
OFF
ASR
ACTIVE
LOW
COOLANT
SERVICE
LTPWS
LOWFLAT
TIRE
LOW COOLANT
AIRSERVICE
ABS
BAG
ACTIVE
RIDE
CONTROL
PASSIVE
KEYLESS
ENTRY
ASR ACTIVE
SERVICE
0
SOON
SERVICE
(63)
LOW
OIL
AIRBAG
A B S ACTIVE (Anti-Lock Brake System Active)
SERVICE RIDE CONTROL (Option)
PASSIVEKEYLESSENTRY
The DriverInformation Center (DIC) gives you
important safety and maintenance facts. It will display
warning lights for the following:
SERVICE ASR (Acceleration Slip Regulation)
ASROW
2-98
(Charging System)
SERVICE ENGINE SOON
SERVICE A B S
LOWOIL
See “Lights”in the Index for additional information.
n
Section 3 Comfort Controls and Audio Systems
In this section you’ll find
out how to operate the comfort
control and audio systems offered
with your Corvette.
Be sure to read about the particular
systems supplied
with your vehicle.
Comfort Controls
System Controls
Fan Control Buttons
Press the arrows on the fan switch to select the force of
air you want.
Your vehicle also has theflow-through ventilation
system described later in
this section.
Temperature Control Lever
Move the lever to change the temperature ofthe air
flowing from the system. Move it to the right for
warmer air and to the left for cooler air.
Manual Climate Control System
Air Control Buttons
With these systems, you can control the heating, cooling
and ventilation in your Corvette.
OFF: The system is off.
eRECIRCULATE: Provides maximum cooling
I’
or quick cool-down on very hot days. This setting
recirculates most ofthe air inside your vehicle. If it is
used for long periods of time, the air may become dry.
This setting directs air through the upperair vents.
It will notwork when the outside temperature is
below freezing.
3-1
d
e
"'"JNORMAL N C : Use for normal cooling on hot
wg HEATER: This setting directs most of the air
days. This setting cools outside air and directs it through
the instrument panel vents.
through the floor ducts and some of the air through the
defroster vents. The air conditioning compressor does
not run in HEATER mode.
The air conditioning compressor operates in NORMAL
A/C, as well as RECIRCULATE,BI-LEVEL and
DEFROST. It only works when the outside temperature
is above freezing. When the air conditioning compressor
is on, you may sometimes notice slight changes in
your vehicle's engine speed and power. This is normal
because the system is designed to cycle the compressor
on and off to keep the desired cooling and help
fuel economy.
d
Heating
The heater works best if you keep your windows closed
while using it.
o
+,d BI-LEVEL: This setting cools or heats outside air
and directs it through the instrument panel vents and the
floor ducts.
d
DEFROST: This setting directs most of the
air through the windshield defrosterand side window
defogger vents and some of the air through the
floor ducts.
o
/I VENT: Air flows through the instrument panel
vents. The air conditioning compressor does not run in
VENT mode.
Press HEATER and FAN UP, then slide the temperature
control lever to a comfortable setting.
If your vehicle has an engine coolant heater andyou
use it in cold weather, 0°F (- 18 "C) or lower, your
heating system canprovide heat more quickly because
the engine coolant is already warmed. See "Engine
Coolant Heater" in the Index.
Bi-Level
You may want to use BI-LEVEL on cool, but sunny
days. This setting directsoutside air through the
instrument panel vents andthe floor ducts.
Press BI-LEVEL andFAN UP, then slide the
temperature control lever to a comfortable setting.
Ventilation
For mild outside temperatures, when little heating or
cooling is needed, you canstill direct outside air through
your vehicle.
Press VENT andFAN UP, then slide the temperature
control lever to a comfortable setting.
Defogging and Defrosting
Your vehicle has several settings for clearing your
windows. The air conditioning compressor will run to
help remove moisturefrom the air.
To defrost the windshieldquickly, press DEFROST and
FAN UP, then slide the temperature control lever all the
way to the rightor to theFULL HOT position.
To defrost the side windows quickly, press BI-LEVEL
and FAN UP. Then slide the temperature control lever
all the way to the right. Direct airflow through the air
conditioning outlets closest to the side windows.
Cooling
The air conditioner works best if you keep your
windows closed. On very hot days, open the windows
just long enough for the hot air to escape.
Press RECIRCULATE and FAN UP. Then slide the
temperature control lever to a comfortable setting.
Direct airflow through the air conditioning outlets
closest to the side windows.
After cool-down, adjust the air control buttons to
another setting. The compressor works in all settings
except VENT and HEATER and at all temperatures
above freezing.
When the air conditioning compressor is on,you may
notice slight changes in your vehicle’s engine speed and
power. This is normal because the system is designed to
cycle the compressor on and off to keep the desired
temperature and help fuel economy.
3-3
Automatic Electronic Climate
Control System (Option)
If
Temperature Control Switch
Press the mows on the TEMP SET switch to set the
temperature you want in your vehicle. The temperature
you select will show on the display for a few seconds,
then the outsidetemperature will show.
0
0
0
0
0
0
0
0
Air Control Buttons
OFF: The system isoff.
AUTO: The systemcontrols aifflow.
aRECIRCULATE: Provides maximum cooling
With this system,you set a temperatureand then either
let thesystem adjust aifflow and force to maintain the
temperature, oryou can manually adjust flow and force.
System Controls
Fan Control Buttons
Press thearrows on the fan switch to select the forceof
air you want. Press AUTO FAN to let the systemselect
the forceof air.
or quick cool-down on very hot days. This setting
recirculates most of the airinside your vehicle. If it is
used for long periods of time, the air may become dry.
This .setting directs air through the upper air vents.
It will not work when theoutside temperature is
below freezing.
A.
*fl
BI-LEVEL: This setting directs outside air
through the instrument panel and side window defogger
vents and the floor ducts.
d.
VENT: Outside air flows through the instrument
panel vents.
,d
3-4
wJ HEATER: This setting directs all of the air
through the floorducts.
DEFROST This setting directs most of the
air through the windshielddefroster and side window
defogger vents and someof the'air through the
floor ducts.
8 .
~ , DEFOG:
4
If you have the automatic system, this
setting directs airto the floor and defroster vents.
To turn on DEFOG,
push the HEATER and
DEFROST buttons at the
same time. Both green
lights above the buttons will
come onto let you know
that DEFOG is working.
Temperature Sensors
Sunload: This sensor is on top of the instrument panel.
When the inside temperature is increased by sunlight,
the system will lower the inside temperature up to 5 O F
(3 C ) below the setting on the display.
Outside Temperature:This sensor is on the right side
of the upper radiator support in the grille opening. This
is what you usually see on the display.
If the outside temperature goes up, the displayed
temperature will not change until:
0 Vehicle speed is above 25 mph (40 km/h) for at least
three minutes, or
0 Vehicle speed is above 45 mph (72 km/h) for one
and a halfminutes.
This delay helps prevent a false reading. If vehicle speed
remains above 25 mph (40 kmh) or the temperature
goes down, the display is updated immediately.
If your vehicle has been off for more than three hours,
the current outside temperature will be stored in the
system when you start the vehicle.
Inside Temperature:This sensor is in the center air
outlet on the passenger side.
I€ you block or cover either interior sensor (sunloador the
inside temperature), the system will give a false reading.
O
3-5
1
Automatic Control
Manual Bi-Level
The system will adjust to maintain the'temperature you
set. It will select the best fan speed and aifflow setting to
keep you comfortable with the least amount of noise.
BI-LEVEL can heat or cool outside air and direct it in
two directions.
Press the arrows on the TEMP SETswitch to set a
comfortable temperature. Then press AUTO and the fan
speed will adjust automatically unless you press the
arrows on the AUTO switch.
Manual Heating
The heaterworks best if you keep your windows closed
while using it.
Press thearrows on the TEMP SET switch
to set a
comfortable temperature. Then press HEATER and, if
you don't like the automatic setting, press the arrowson
the fan speed switch. In AUTO FAN on cold days, the
fan will stay off until the coolant warms up enough to
heat your vehicle.
If your vehicle has an enginecoolant heater and you use
it in cold weather, 0 "F (- 18 C) or lower, your heating
system can provide heat morequickly because the engine
coolant is already warmed.See "Engine Coolant Heater"
in the Index.
O
3-6
Press the arrows onthe TEMP SET switch to seta
comfortable temperature. Press BI-LEVELand, if you
don't like the automatic setting, press the arrows on the
fan speed switch.
Manual Ventilation
For mild outside temperatures, when little heating or
cooling is needed, you can still direct outside air through
your vehicle.
Press the arrows on the TEMP SET switch to seta
comfortable temperature. For ventilation, the system
can't cool the vehicle below the outside temperature.
Press VENT and, if you don't like the automatic setting,
press thearrows on the fan speed switch.
Manual Cooling
Defogging and Defrosting
The air conditioner works best if you keep your
windows closed. On very hot days, open the windows
just long enough for the hot airto escape.
Your vehicle has several settings for clearing your
windows. The air conditioning compressor will run to
help remove moisture from the air.
Press the arrowson the TEMP ,SET switch to set a
comfortable temperature.Press RECRCULATE. After
cool-down, adjust the airflow to another setting. The
compressor works in allsettings except VENT and
HEATER, and at all temperatures above freezing.
To defrost the windshield quickly, press the arrows on
the TEMP SET switch to set a comfortable temperature.
Press DEFROST and the fan will go to high speed. After
the windows are clear, you can lower the speed using the
downward arrow or AUTO FAN.
Press the arrows on the fan’
speed switch if you don’t
like the automaticsetting. In AUTO FAN on hot days,
the fan speed will be lowat first to help get rid of the
hot inside air.
With the automatic system, to warm passengers while
keeping the windshield clear, press the arrows on the
TEMP SETswitch to set a comfortable temperature.
Press HEATER and DEFROST at the same timeand, if
you don’t,likethe automatic setting, press the arrows on
the fan speed switch.
When the air conditioneris on, you may notice slight
changes in your vehicle’sengine speed and power. This
is normal becausethe system is designed to cycle the
compressor on andoff to keep the desired temperature
and helpfuel economy.
To defrost the side windows quickly, press the arrows on
the TEMP SET switch to set a comfortable temperature.
Then press DEFROST and, if you don’t like
the automatic
setting, press themows on the fan speed switch.
3-7
I
System Problems
If the light above an air control button flashes when you
turn on the ignition, your system mayhave an electrical
problem. The flashing will continue for one minute,
then stop.
The flashing light could also mean the refrigerant level
is too low in your system. The light will continue to
flash, even if refrigerant is added, until the system is
reset. Have your system checked and serviced if needed.
Rear Window Defogger
I
I
0
0
n
To reset your system:
1. Turn your ignition key to OFF or LOCK.
2. Remove the courtesy lamps and radio fuses from the
main fuse panel and wait one minute. See “Fuses and
Circuit Breakers” in the Index.
3. Put the fuses back in and start your vehicle.
The light shouldn’t come on and your system should be
working properly. If you stillhave a problem, see
your dealer.
3-8
The rear window defogger uses a warming grid to
remove fog from the rear window. The power mirrors
are also warmed when the rear window defogger
is on.
Press the button with the defogsymbol on it to turn on
the defogger. (The button is at the lowerright on the
manual system and at the upper right on
the automatic
system.) An indicator light willcome on to remind you
that the defogger is on.The defogger will turn off
automatically after about10 minutes of use. You can
also turn the defoggeroff by pressing the switch again
or by turning off the ignition.
Ventilation System
Do not attach anything likea temporary vehicle license
or a decal across the defogger gridon the rear window.
NOTICE:
Don’t use a razor blade or something
else sharp
on the insideof the rear window.If you do,you
could cut or damage the warming
grid, and the
repairs wouldn’t be covered by your warranty.
Adjust the direction of airflow by moving the
louvered vents.
Your Corvette’s flow-through ventilation system
supplies outside air into the vehicle when it is moving.
Outside air will also enter the vehicle whenthe heater or
the air conditioning fan isrunning.
3-9
Ventilation Tips
0 Keep the hood and front air inlet free of ice, snow or
any other obstruction (such as leaves). The heater
and defroster will work far better, reducing the
chance of fogging the inside of your windows.
0
0
When you enter a vehicle in cold weather, adjust the
fan tothe highest speed for a few moments before
driving off. This helps clear the intake ducts of snow
and moisture, and reduces the chance of fogging the
inside of your windows.
Keep the air path under the front seats clear of
objects. This helps air to circulate throughout
your vehicle.
Audio Systems
Your Delco@audio system has been designed to operate
easily and give years of listening pleasure.You will get
the most enjoyment out of it if you acquaint yourself
with it first. Find out what your Delco system can do
and how to operate all its controls, to be sure you’re
getting the most out of the advanced engineering that
went into it.
Setting the Clock
Make sure the radio is off and then pressSET. Within
five seconds, press and hold the down arrow until the
correct hour appears. Press and holdthe up arrow until
the correct minute appears.
Noise Reduction
Your audio system has automatic Dolby@B Noise
Reduction.
Dolby Noise Reduction is manufactured under a license
from Dolby Laboratories Licensing Corporation. Dolby
and the double-D symbol are trademarks of Dolby
Laboratories Licensing Corporation.
3-10
AM-FM Stereo with Cassette Tape Player
Finding a Station
AM-FM: Press this button to get AM or FM. The
lighted display shows your selection.
TUNE: Press the up or down arrow to choose radio
stations. For fast tuning, press and holdone sideof the
button, then press theother side.
AUTO: Press this button and then the upor down arrow
and the radio will tune to the nexthigher or lower
station and stay there.
PUSHBUTTONS: The six numbered pushbuttons let
you return to your previously played stations. You can
set up to 12 stations (six AM and six FM).
1. Tune in the desired station.
2. Press SET.
Playing the Radio
VOL-PROG-RCL: Turn the upper knob to turn the
system on or off, and to adjust the volume. Press the
knob to recall the stationbeing played or to display
the clock.
3. Press one of the six pushbuttons within five seconds.
Whenever you press that numbered button, the
station you set will return.
4. Repeat the steps for each pushbutton.
3-11
Setting theTone
BASS: Turn this knob to the right to hear more bass.
TREB: Turn this control behind the BASS knob to the
right to hear more treble.
Adjusting the Speakers
BAL: Turn the control behind the FADE knob to move
the sound between the right and leftspeakers.
FADE: Turn this knobto move the sound between the
front and rear speakers. Turnit counterclockwise to hear
more sound from the front speakers and clockwise to
hear more sound from the rear speakers. Note that if you
turn the knob all the wayto F or R, you may stillget
some sound from the opposite speakers.
Playing a Cassette Tape
Your tape player is builtto work best with tapes that are
30 to 45 minutes long on each side. Tapes longer than
that are so thin they may not work well in
this player.
The longer side with the tape visible goes in first. If you
hear nothing or hear just a garbled sound, it may not
be in squarely. Press EJCT to remove the tape and
start over.
Once the tape is playing, use the knobs for VOL, FADE
and BAL, just asyou do for the radio.
3-12
REV: Press this button to return to a previously played
passage rapidly. Press it again to play the passage. The
radio will play while the tape is rewinding.
FF: Press this button to fast forwardor advance the tape
rapidly. Press it again to play.The radio will play while
the tape is advancing.
REPT Press this button to goto the beginning of the
current selection after 10 seconds or more of play. After
five seconds or less of play, the player will return to the
beginning of the previous selection.
SRCH: Press this button to go to the beginning of the
next selection.
SCAN: Press this button to listen to the first eight
seconds of each passage. Press it again to stop scanning.
PROG-RCL: Press the upper knob to change the side
of the tape thatis playing. The lighted arrows show
which side is currently playing.
EJCT Press this button to remove the tape.
STOP-PLAY: Press this button to listen to the radio
without ejecting the cassette tape. Pressit again to go
back to the tape.
Cr02: Press this button when playing high-bias chrome
or metal tapes.
Delco-Bose' AM-FM Stereo with Cassette
Tape Player (Option)
Finding a Station
AM-FM: Press this button toget AM or FM. The
lighted display shows your selection.
TUNE: Press the upor down arrow to choose radio
stations. For fast tuning, press and holdone sideof the
button, then press theother side.
AUTO: Press this button and then the upor down
TUNE arrow and theradio will tune to the next higher
or lower station and stay there.
PUSHBUTTONS: The six numbered pushbuttons let
you return to your previously playedstations. You can
set up to 12 stations (six AM and sixFM).
1. Tune in the desired station.
2. Press SET.
Playing the Radio
VOL-PROG-RCL: Turn the upper knobto turn the
system on oroff, and to adjust the volume.Press the
knob to recall the station being playedor to display
the clock and to change tape direction when a tape
is inserted.
3. Press one of the six pushbuttons within five seconds.
Whenever you press that numbered button, the
station you set willreturn.
4. Repeat the steps for each pushbutton.
3-13
Setting theTone
BASS: Turn this knob tothe right to hear more bass.
TREB: Turn this control behind the BASS knob to the
right to hear more treble.
Adjusting the Speakers
BAL: With the DelcoBose system, your speakers are
electronically balanced.
FADE: Turn this knob to move the sound between the
front and rear speakers. Note that, with the Delco/Bose
system, if you turn the knob all the way to F or R, you
may still get some sound from theopposite speakers.
REV: Press this button to return to a previously played
passage rapidly. Press it again to play .the passage.The
radio will play while the tape is rewinding.
FF: Press this button to fast forward or advance the tape
rapidly. Press it again to playthe passage. The radio will
play while the tape is advancing.
REPT Press this button to go to the beginning of the
current selection after 10 secondsor more of play. After
five seconds or less of play, the player will returnto the
beginning of the previous selection.
SRCH: Press this button to go to the beginning of the
next selection.
Playing a Cassette Tape
SCAN: Press this button to listen to the first eight seconds
of each passage.Press it again to ,stop scanning.
Your tape player is built to work best with tapes that are
30 to 45 minutes long on each side. Tapes longer than
that are so thin they may not work well in this player.
PROG-RCL: Press the upper knob to change the side
of the tape that is playing. The lighted arrows show
which side is currently playing.
The longer side with the tape visible goes in first. If you
hear nothing or hear just a garbled sound, it may not
be in squarely. Press EJCT to remove the tape and
start over.
EJCT Press this button to remove the tape.
Once thetape is playing, use the knobs for VOL, FADE
and BAL, just asyou do for the radio.
3-14
STOP-PLAY: Press this buttonto listen to the radio
without ejecting the cassette tape. Press it again togo
back to the tape.
CrO2: Press this button when playing high-bias chrome
or metal tapes.
Delco-Bose AM-FM Stereo with Cassette
Tape and Compact Disc Players (Option)
has three SCV positions. H has a highermaximum
volume and gets louder faster than L. Use H when you
are driving with the roof panel off, the
convertible top
down or the windows open. If youdon't want to use
SCV, turn the control to OFF.
Finding a Station
AM-FM: Press this button to getAM or FM.The
lighted display shows your selection.
TUNE: Press the up and down arrows tochoose radio
stations. For fast tuning, press and holdone sideof the
button, then press the other side.
AUTO: Press this button and then the upor down
TUNE arrow and the radio will tune tothe next higher
or lower station and stay there.
Playing the Radio
VOL-PROG-RCL: Turn the upper knob to turn the
system on oroff, and to adjust the volume. Press the knob
to recall the station being played or to display the clock.
Your system also has a featurecalled
Speed-Compensated-Volume (SCV). With SCV, your
audio system makesup for road noise by gettinglouder
as you drive faster. The control behind the upper
knob
PUSHBUTTONS: The six numbered pushbuttons let
you return to your previously playedstations. You can
set up to 12 stations (six AM and six FM).
1. Tune in the desired station.
2. PressSET.
3. Press one of the six pushbuttons within five seconds.
Whenever you press that numberedbutton, the
station you set will return.
4. Repeat the steps for each pushbutton.
3-15
Setting theTone
BASS: Turn this knob to the right to hear more bass.
TREB: Turn this control behind the BASS knob to the
right to hear more treble.
Adjusting the Speakers
BAL: With the DelcoBose system, your speakers are
electronically balanced.
FADE: Turn this knob to move the sound between the
front and rear speakers. Note that if you turn theknob
all theway to F or R, you may still get some sound from
the oppositespeakers.
REV: Press this button to return toa previously played
passage rapidly. Press it again to play the passage. The
radio will play while the tapeis rewinding.
FF: Press this button to fast forwardor advance the tape
rapidly. Press it again to play. The radio will play while
the tape isadvancing.
REPT Press this button togo to the beginningof the
current selection after 10 seconds or moreof play. After
five seconds or lessof play, the player will return to the
beginning of the previous selection.
SRCH: Press this button to go to the beginningof the
next selection.
Playing a CassetteTape
SCAN: Press this button to listen to the first
eight
seconds of each passage. Press it again to stop scanning.
Your tape player is built to work best with tapes that are
30 to 45 minutes long on each side. Tapes ,longer than
that are so thin they may not work well in this player.
PROG-RCL: Press the upper knob to change the side
of the tapethat is playing. The lighted arrows show
which side is currently playing.
The longer side with the tape visible goes in first.If you
hear nothing or hear just a garbled sound, it may not
be in squarely. Press EJCT to remove the tape and
start over.
EJCT Press this button to removethe tape.
Once thetape is playing, use the knobs for VOL, FADE
and BAL, just asyou do forthe radio.
STOP-PLAY: Press this button to listen to the radio
without ejecting the cassette tape. Press it again go
to
back to thetape.
Cr02: Press this button when playinghigh-bias chrome
or metal tapes.
Playing a Compact Disc
Don’t use the mini-discs (three-inch singles). They
will eject, and they won’t play. Use only
full-size
compact discs.
With the audio system on,insert a disc into the slot with
the label side up.CD will appear on the display and
track one will begin to play.
If both a tape and compact
a
disc are loaded into the system, press
CNCD to select
the one you want.
If the disc comes backout and ERR appears on the
display, it could be that:
0
The disc is upside down.
0
It is dirty, scratched or wet.
There’s too much moisture in the air. (Wait about an
hour and try again.)
FF: Press and hold this buttonto fast forward or
advance through passages. The increasing elapsed time
will show on the display.
REPT: Press this button to go to the beginning of the
current track after eight seconds or more of play. After
eight seconds or less of play, the player will returnto the
beginning of the previous track.
SRCH: Press this button to go to the beginning of the
next track.
SCAN: Press this button to listen to the first eight
seconds of each track.Press it again to stop scanning.
COMP: Press this button to make loud andsoft passages
more nearly equal in volume. Press it again for normal play.
Stopping the Disc Player
0
Turn the power off or turn the ignition key tooff. The
disc stays in the player and will resume playing at the
point where it stopped when the ignition is turned on.
0
Press STOP-PLAY to stop playing the disc and
switch to the radio. Press it again to restart the disc at
the point where it stopped.
You are driving on a very rough road.
0
The temperature is toohot or too cold.
RCL: Press this button tosee what track is playing.
Press it again within five seconds to see how long it has
been playing, the elapsedtime (EL TIME).
REV: Press and hold this buttonto return to a
previously played passage rapidly.The decreasing
elapsed time will showon the display.
Press EJCT to eject the disc and switch to the radio.
If the ignitionor audio system is turned off, the
player will pull the disc back in if you don’t remove
it fromthe opening within 30 seconds.
3-17
Understanding Radio Reception
To help avoid hearing loss or damage:
FM,Stereo
Adjust the volume control to the lowest setting.
FM stereo will give you the best sound. But FM signals
will reach only about 10 to 40 miles (16 to 65 km). Tall
buildings or hills can interfere with FM signals, causing
the sound to come and go.
Increase volume slowly until you hear comfortably
and clearly.
NOTICE:
AM
The range for most AM stations is greater than for FM,
especially at night. The longer range, however, can
cause stations to interfere with each other. AM can pick
up noise from things like storms and power lines. Try
reducing the treble to reduce this noise if you ever getit,
Tips About Your AudioSystem
Hearing damage from loud noise is almost undetectable
until it istoo late. Your hearing can adapt to higher
volumes of sound. Sound that seems normal can beloud
and harmful to your hearing. Take precautions by
adjusting the volume control on your radio to a safe
sound level before your hearing adapts to it.
Before you add any sound equipmentto your
vehicle like a tape player, CB radio, mobile
telephone or two-way radio be sure you can add
what you want.If’you can, it’s very important to
do it properly. Added sound equipment may
interfere with the operation of your vehicle’s
engine, Delcoradio or other systems, and even
damage them. Your vehicle’s systems may
interfere with the operation of sound equipment
that hasbeen added improperly.
So, before adding sound equipment, check with
your dealer andbe sure to checkFederal rules
covering mobile radio andtelephone units.
--
--
I
3-18
Care of Your Cassette Tape Player
A tapeplayer that is not cleaned regularly can cause
reduced sound quality, ruinedcassettes or a damaged
mechanism. Cassette tapes should be stored in their
cases awayfrom contaminants, direct sunlight and
extreme heat. If they aren’t, they maynot operate
properly or may cause failure of the tape player.
Your tape player should becleaned regularly after every
50 hours of use. If you notice reduction
a
in sound
quality, try a known goodcassette to see if the tape or
the tape playeris at fault. If this other cassette has no
improvement in sound quality,clean the tape player.
Cleaning may bedone with a scrubbing action,
non-abrasive cleaning cassette with pads which scrub
the tape head as the hubs the
of cleaner cassette turn. It
is normal for the cassetteto eject while cleaning. Insert
the cassette at least three times to ensure thorough
cleaning. A scrubbing actioncleaning cassette is
available through yourCorvette dealer.
You may also choose a non-scrubbing action, wet-type
cleaner which uses a cassette with a fabric belt to clean
the tape head. This type of cleaning cassette will not
eject. It may not clean as thoroughly as the scrubbing
type cleaner.
Cassettes are subject to wear and the sound quality may
degrade over time. Always make sure that the cassette
tape is in good condition before you have your tape
player serviced.
Care of Your Compact Discs
Handle discs carefully. Store them in their original cases
or other protective cases and away from direct sunlight
and dust. If the surface of a disc is soiled, dampen a
clean, soft cloth in a mild, neutral detergent solution and
clean it, wiping from the center to the edge.
Be sure never to touch the signal surface when handling
discs. Pick up discs by grasping the outer edges or the
edge of the hole and the outer edge.
3-19
Power Antenna Mast Care
NOTICE:
Your power antenna will look its best and work well
if it’s
cleaned fiom time to@e. To clean the antenna mast:
1. Turn on the ignition and radio to raise the antenna.
2. Dampen a clean cloth with mineral spirits or
equivalent solvent.
3. Wipe the cloth over the mast sections, removing
any dirt.
4. Wipe dry with a clean cloth.
5. Make the antenna go up and down by turning the
radio or ignition off and on.
6. Repeat if necessary.
NOTICE:
Don’t lubricate thepower antenna. Lubrication
could damage it.
I
Before entering anautomatic car wash, turn off
your radio tomake the power antenna go down.
This will prevent the mast from possibly getting
damaged. If the antenna dqes not go down when
you turn the radiooff, it may be damagedor
need to be cleaned. In eithercase, lower the
antenna by hand by carefully pressingthe
antenna down.
If the mast portion of your antennais damaged, you can
easily replace it. See your dealerfor a replacementkit
and follow the instructions in thekit.
e
I
Section 4 Your Driving and the Road
I
Defensive Driving
The best advice anyone can give about driving is:
Drive defensively.
Please start with a very important safety device in your
Corvette: Buckle up, (See “Safety Belts” in theIndex.)
Defensive driving really means “be readyfor anything.”
On city streets, rural roadsor freeways, it means
“always expect the unexpected.”
Assume that pedestrians or other drivers are going to be
careless and make mistakes. Anticipate what they might
do. Be ready for their mistakes.
Here you’ll find information about driving on different
kinds of roads and in varying weatherconditions. We’ve
also included many other useful tips on driving.
Rear-end collisions are about the most preventable of
accidents. Yet they are common. Allow enough
following distance. It’s the best defensive driving
maneuver, in both city andrural driving. You never
know when the vehicle infront of you is going to brake
or turn suddenly.
4-1
Death and injury associated with drinking anddriving
is a national tragedy. It’sthe number one contributor to
the highway death toll, claiming thousands of victims
every year.
The obvious way to solve this highway safety problem
is for people never to drink alcohol and then drive. But
what if peopledo? How muchis “too much” if the
driver plans to drive? It’s alot less than many might
think. Although it depends on each person and situation,
here is some general information on the problem.
Alcohol affects four things that anyone needs to drive a
vehicle:
The Blood Alcohol Concentration(BAC) of someone
who is drinking depends upon four things:
Drunken Driving
Judgment
0
The amount of alcohol consumed
Muscular Coordination
0
The drinker’s body weight
Vision
The amount of food that is consumed before and
during drinking
Attentiveness.
Police records show thatalmost half of all motor
vehicle-related deaths involve alcohol. In most cases,
these deaths are the result of someone who was drinking
and driving. In recent years, some 18,000 annual motor
vehicle-related deaths have been associated with theuse
of alcohol, withmore than 300,000 people injured.
Many adults -- by some estimates, nearly half the adult
population -- choose never to drink alcohol, so they
never drive after drinking. For persons under 21, it’s
against the law in every U S . state to drink alcohol.
There aregood medical, psychological and
developmental reasons for these laws.
4-2
0
The length of time it has taken the drinker to
consume the alcohol.
According to the American Medical Association,a
180-lb. (82 kg) person who drinks three 12-ounce
(355 ml) bottles of beer in an hour will end up with a
BAC of about 0.06 percent. The person would reach the
same BAC by drinking three 4-ounce (120 ml) glasses
of wine or three mixed drinksif each had 1-1/2 ounces
(45 ml) of aliquor like whiskey, ginor vodka.
Since alcohol is carried in body water,this means that a
woman generally willreach a higher BAC level than a
man of her same body weight wheneach has the same
number ofdrinks.
The law in many U.S. states sets thelegal limit at a BAC
of 0.10 percent. In a growing number of U.S.states, and
throughout Canada, the limit is 0.08 percent. In some
other countries, it’s even lower. The BAC limit for all
commercial drivers in the United States is 0.04 percent.
The BAC will be over 0.10 percent after three to six
drinks (in one hour). Of course, as we’ve seen, it
depends on how much alcohol is in thedrinks, and how
quickly the person drinks them.
But the ability to drive is affected well below a BAC
of 0.10 percent. Research shows thatthe driving skills
of many people are impaired at a BACapproaching
0.05 percent, and that the effects are worse at night. All
It’s the amount of alcohol thatcounts. For example, if
drivers are impaired at BAC levelsabove 0.05 percent.
the same person drank threedouble martinis (3 ounces
Statistics show that thechance of being in a collision
or 90 ml of liquor each) within an hour, the person’s
increases sharply for drivers who have aBAC of
BAC would be close to0.12 percent. A person who
consumes foodjust before or during drinking will have a 0.05 percent or above. A driver with aBAC level of
0.06 percent has doubled his or her chance of having a
somewhat lower BAC level.
collision. At a BAC level of 0.10 percent, the chanceof
There is a gender difference, too. Women generally have
this driver having a collision is 12 times greater; at a
a lower relative percentage of body water than men.
level of 0.15 percent, the chance is25 times greater!
4-3
The body takes about an hour to rid itself of the alcohol
in onedrink. No amount of coffee or number of cold
showers will speed that up. :I’ll be careful” isn’t the
right answer. What if there’s an emergency, a need to
take sudden action, as when a child darts into the street?
A person with even a moderate BAC might not be able
to react quickly enough to avoid the collision.
There’s something else about drinking and driving that
many people don’t know. Medical research shows that
alcohol in a person’ssystem can make crash injuries
worse, especially injuries to the brain, spinal cord or
heart. This means that when anyone who has been
drinking -- driver or passenger -- is in a crash, that
person’s chance of being killed or permanently disabled
is higher than if the person had not been drinking.
4-4
I
Drinking and thendriving is very dangerous.
Your reflexes, perceptions, attentivenessand
judgment canbe affectedby even a small amount
of alcohol. You can havea serious or even
fatal collision if you drive after drinking.
Please don’t drink anddrive or ride with a driver
who has been drinking. Ride home in a cab; or if
you’re with a group,designate a driverwho will
not drink.
--
--
Control of a Vehicle
Braking
You have three systems thatmake your vehicle go where
you want it to go. They arethe brakes, the steering and
the accelerator. All three systemshave to do their work
at the places where the tires meet the road.
Braking action involves perception time and reaction
time.
First, you have to decide to push on the brake pedal.
That’s perception time. Then you have to bring up your
foot and do it. That’s reaction time.
Average reaction time is about 3/4 of a second. But
that’s only an average. It might be less withone driver
and as long as two or three seconds or more with
another. Age, physicalcondition, alertness, coordination
and eyesight all play a part. So do alcohol, drugs and
frustration. But even in 3/4 of a second, a vehicle
moving at 60 mph ( 100 km/h) travels 66 feet (20 m).
That could be a lot of distance in an emergency,so
keeping enough space between yourvehicle and others
is important.
And, of course, actual stopping distances vary greatly
with the surface of the road (whether it’spavement or
gravel); the condition of the road (wet, dry,icy); tire
tread; and thecondition of your brakes.
Sometimes, as when you’re driving on snow
or ice, it’s
easy to ask moreof those control systems than the tires
and road can provide. That means you canlose control
of your vehicle.
4-5
Avoid needless heavy braking. Some people drive
in spurts -- heavy acceleration followed by heavy
braking -- rather than keeping pace with traffic. This
is a mistake. Your brakes may not have time to cool
between hard stops. Your brakes will wear out much
faster if you do a lot of heavy braking. If you keep pace
with the traffic and allow realistic following distances,,
you will eliminate a lot of unnecessary braking. That
means better braking and longer brake life.
If your engine ever stops while you’re driving, brake
normally but don’t pump your brakes. If you do, the
pedal may get harder to push down. If your engine
stops, you will still have some power brake assist. But
you will use it when you brake. Once the power assist is
used up, it may take longer to stop and the brake pedal
will beharder to push.
Anti-Lock Brakes
Your vehicle has anti-lock brakes (ABS). ABSis an
advanced electronic braking system that will help
prevent a braking skid.
When you start your engine and begin to
drive away,
your anti-lock brake system will check itself.You may
hear a momentary motor or clicking noise while this test
is going on, and you may even notice that your brake
pedal moves a little. This is normal.
SERVICE
If there’s a problem with the
anti-lock brake system, this
warning light will stay on.
See “Anti-Lock Brake
System Warning Light” in
the Index.
The anti-lock system can change the brake pressure faster
than any driver could. The computer is programmed to
make the most of available tire and road conditions.
Here’s how anti-lock works. Let’s say the road is wet.
You’re driving safely. Suddenly an animaljumps out in
front of you.
You slam on the brakes. Here’s what happens withABS.
You can steer around the obstacle while braking hard.
A computer senses that wheels are slowingdown. If one
of the wheels is aboutto stop rolling, thecomputer will
separately work the brakes at each front wheel and at the
rear wheels.
As you brake, your computer keeps receiving updates on
wheel speed and controls braking pressure accordingly.
-
4-7
Remember: Anti-lock doesn’t change the time you need
to get your foot up to the brake pedal or always decrease
stopping distance. If you get too close to the vehicle in
front of you, you won’thave time to apply your brakes
if that vehicle suddenly slows or stops. Always leave
enough room up ahead to stop, even though you have
anti-lock brakes.
Using Anti-Lock
Don’t pump the brakes. Just hold the brake pedal down
and let anti-lock work for you. You may hear a motor or
clicking noid and feel the brake pedal move a little
during a stop, but this is normal.
ABS
ACTIVE
When your anti-lock system
is adjusting brake pressure
to help avoid a braking skid,
this light will come on. See
“Anti-Lock Brake System
Active Light” in the Index.
ASR (Acceleration Slip Regulation) System
Your vehicle has a traction control system calledASR
that limits wheel spin. This is especially useful in
slippery road conditions’. The system operates onlyif it
senses that the rear wheels are spinning too much orare
beginning to lose traction. When this happens, the
system works the rear brakes and reduces engine power
(by closing the throttle and managing engine spark) to
limit wheel spin.
ASR
ACTIVE
This light will comeon
when the ASR systemis
limiting wheel spin.See
“ASR System Active Light”
in the Index.You may feel
or hear the system working,
but thisis normal.
If your vehicle is in cruise control when the ASR system
begins to limit wheel spin, thecruise control will
automatically disengage. When road conditions allow
you to safely use it again, you may re-engage the cruise
control. (See “Cruise Control” inthe Index.)
J
SERVICE
ASR
This warning light will
come on to let you know if
there’s a problem withyour
ASR system. See “ASR
System Warning Light” in
the Index.
When this warning light ison, the system will not limit
wheel spin. Adjust your driving accordingly.(The ASR
OFF light will also comeon when the ASR system
warning light comes on.)
I
The ASR system automaticallycomes on whenever you
start your vehicle.To limit wheel spin, especially in
slippery road conditions, you should alwaysleave the
system on. Butyou can turn the ASR system off if you
ever need to. (You should turnthe system off if your
vehicle ever gets stuck insand, mud, ice or snow. See
“Rocking Your Vehicle”in the Index.)
To turn the system off, press the button locatedabove-the
headlamp switch. The ASROFF light will comeon and
stay on. If the ASR system islimiting wheel spin when
you press the button,the system will turnoff right away.
You can turn the system back on at any
time by pressing
the button again. The ASR OFF light should go off.
Braking in Emergencies
Use your anti-lock braking system whenyou need to.
With anti-lock, you can steer and brake at the same
time. In many emergencies, steering can help you more
than even the very best braking.
4-9
Steering
Power Steering
If you lose power steering assist because the engine
stops orthe system is not functioning, you can steer but
it will take much more effort.
Steering Tips
Driving qn Curves
It’s important to take curves at a reasonablespeed.
A lot of the “driver lost control” accidentsmentioned on
the news happen on curves. Here’s why:
Experienced driver or beginner, each of us is subject to
the samelaws of physics when driving on curves. The
traction of the tires against the road surface makes it
possible for the vehicle to change its path when you turn
the frontwheels. If there’s no traction, inertia will keep
the vehiclegoing in the same direction. If you’ve ever
tried to steer a vehicle on wet ice, you’ll understand this.
The traction you can get in a curve depends on the
condition of your tires andthe road surface, theangle at
which the curve is banked, and your speed.While you’re
in a curve, speed is theone factor you can control.
Suppose you’re steering through a sharp curve. Thenyou
suddenly accelerate.Both control systems -- steering and
acceleration -- have to do their work where the tires meet
the road. Unless yourASR system is on, adding the
sudden accelerationcan demand too muchof those
places. You can lose control.
What should you do if this ever happens? Easeup on the
accelerator pedal, steer the vehicle theway you want it
to go, andslow down.
Speed limit signs near curves warn that you should
adjust your speed. Of course, the posted speeds are
based on good weather and road conditions. Under less
favorable conditionsyou’ll want to go slower.
If you need to reduce your speed as you approacha
curve, do it beforeyou enter the curve, while your front
wheels are straight ahead.
Try to adjust your speed so you can “drive” throughthe
curve. Maintain a reasonable, steady speed.Wait to
accelerate until you are outof the curve, and then
accelerate gently into the straightaway.
Steering in Emergencies
There are times when steering
can be more effective
than bralung. For example, you
come over a hill and
find a truck stopped in your
lane, or a car suddenly pulls
out from nowhere,or a child dartsout from between
parked cars and stops rightin front of you. You can
avoid these problemsby braking -- if you can stop in
time. But sometimes you can’t; thereisn’t room.
That’s the time for evasive action-- steering around
the problem.
Your Corvette can perform very wellin emergencies like
these. First apply your brakes. (See “Braking in
Emergencies” earlier inthis section.) It is better to
remove as much speed as you canfrom a possible
collision. Then steer around the problem,
to the left or
right depending on the space available.
An emergency like this requires close attention and a
quick decision. If you are holding the steering wheel at
the recommended 9 and 3 o’clock positions, you can
turn it a full 180 degrees very quickly without removing
either hand. But you have to act fast,steer quickly, and
just as quickly straighten the wheel once you have
avoided the object.
The fact that such emergency situations are always
possible is a good reason to practice defensive driving at
all times and wear safety belts properly.
4-11
Off-Road Recovery
Passing
You may find sometime that your right wheels have
dropped off the edge of a roadonto the shoulder while
you’re driving.
The driver of a vehicle about to pass another on a
two-lane highway waits forjust the right moment,
accelerates, moves around the vehicle ahead, then goes
back into the right lane again.A simple maneuver?
OFF-ROAD RECOVERY
I
’
Not necessarily! Passing another vehicle on a two-lane
highway is a potentially dangerous move, since the
passing vehicle occupies the samelane as oncoming
traffic for several seconds. A miscalculation, an error in
judgment, or a brief surrenderto frustration or anger can
suddenly put the passing driver
face to face with the
worst of all traffic accidents -- the head-on collision.
So here aresome tips for passing:
I
y
/
edge of paved surfece
If the levelof the shoulderis only slightly belowthe
pavement, recovery should be fairly easy. Ease
off the
accelerator and then,if there is nothing in theway, steer
so that your vehicle straddles the edge of the pavement.
You can turn the steering wheel upto one-quarter turn
until the right front tire contacts the pavement edge. Then
turn your steering wheelto go straight down the roadway.
“Drive ahead.” Look down the road, to the sides and
to crossroads for situations that might affect your
passing patterns.If you have any doubt whatsoever
about making a successful pass, wait for a better time.
Watch for traffic signs, pavement markings and lines.
If you can see a sign up ahead that might indicate a
turn or an intersection, delay your pass.
A broken
center line usually indicates it’s
all right to pass
(providing the road ahead is clear). Never cross a solid
line on your side of the laneor a double solid line,
even if the road seems empty of approaching traffic.
Do not get too close to the vehicle you want to pass
while you’re awaiting an opportunity.
For one thing,
following too closely reduces your
area of vision,
especially if you’re following a larger vehicle. Also,
you won’t have adequate space ifthe vehicle ahead
suddenly slows or stops. Keep back areasonable
distance.
0
0
When it looks like achance to pass is coming up,
start to accelerate but stay
in the right lane and don’t
get too close. Time your moveso you will be
increasing speed as the timecomes to move into the
other lane. If theway is clear to pass, you will have a
“running start” that more than makes up
for the
distance you would lose by dropping
back. And if
something happens tocause you to cancel your pass,
you need only slow down anddrop back again and
wait for another opportunity.
If other cars are lined upto pass a slow vehicle, wait
your turn. But take care that
someone isn’t trying to
pass you as you pull out to pass the slow
vehicle.
Remember to glance over your shoulder
and check
the blind spot.
Check your mirrors, glance over your shoulder, and
start your left lane change signal before movingout
of the rightlane to pass. When you are far enough
ahead of the passed vehicle to see its front in your
inside mirror, activate your right lane change signal
and move backinto the right lane. (Remember that
your right outside mirror is convex. The vehicle you
just passed may seem to be farther away from you
than it really is.)
Try not to pass more than one vehicle at a time
on two-lane roads, Reconsider before passing the
next vehicle.
0
Don’t overtake a slowly moving vehicle too rapidly.
Even though thebrake lamps are not flashing, it may
be slowing down or starting to turn.
0
If you’re being passed, make it easy for the
following driver to get ahead of you. Perhaps you
can ease a little to the right.
4-13
Loss of Control
Let’s review whatdriving experts say about what
happens when the three control systems (brakes, steering
and acceleration) don’thave enough friction wherethe
tires meet the road to
,do what the driver has asked.
In any emergency, don’t give up. Keep trying to
steer and constantly seek an escape route or area of
less danger.
If your ASR system is off, then an acceleration skid
is also best handled by easing your footoff the
accelerator pedal.
If your vehicle starts to slide, ease your foot off the
accelerator pedal and quickly steer the
way you want the
vehicle to go. If you start steering quickly enough, your
vehicle may straighten out. Always be ready for a
second skid if it occurs.
Of course, traction is reduced when water, snow, ice,
gravel or other material is on the road. For safety, you’ll
Skidding
want to slow down and adjust your driving to these
In a skid, a drivercan lose control of the vehicle.
conditions. It is important to slow downon slippery
Defensive drivers avoid most skidsby taking reasonable
surfaces because stopping distance will be longer and
care suited to existing conditions, and by not “overdriving”
vehicle control more limited.
those conditions. But skidsare always possible.
While drivingon a surface with reduced traction,try your
The three types of skids correspond to your Corvette’s
best to avoid sudden steering, acceleration or braking
three control systems. In the braking skid, yourwheels
(including engine brakingby shifting to a lower gear).
aren’t rolling. In the steering or cornering skid, too
Any sudden changes could cause the tires to slide.
You
much speed or steering in a curve causes tires to slip and
may not realize the surfaceis slippery until your vehicle
lose cornering force. And in the acceleration skid, too
is skidding. Learn to recognize warning clues
-- such as
much throttle causes the driving wheels to spin.
enough water, ice or packed snow on the road to make a
A cornering skid is best handled byeasing your foot off
“mirrored surface” -- and slow down when you have
the accelerator pedal.
any doubt.
Remember: Any ASR system helps avoid only the
acceleration skid.
4-14
Remember: Any anti-lock brake system (ABS) helps
avoid only the braking skid.
Driving at Night
0
Adjust your inside rearview mirror toreduce the
glare from headlamps behind you.
0
Since you can’t see as well, you may need to
slow down and keep more space between you and
other vehicles.
0
Slow down, especially on higher speed roads. Your
headlamps can light up only so much road ahead.
0
In remote areas, watch for animals.
0
If you’re tired, pull off the road in
a safe place
and rest.
Night Vision
No one can see as well at nightas in the daytime. But as
we get older these differences increase. A 50-year-old
driver may require at least twice as muchlight to see the
same thing at night asa 20-year-old.
I
Night driving is more dangerous than day driving. One
reason is that some drivers are likely to be impaired
-- by
alcohol or drugs, with night vision problems,by
orfatigue.
Here are some tips on night
driving.
Drivedefensively.
0
What you do in the daytime can also affectyour night
vision. For example, if you spend the day in bright
sunshine you are wise to wear sunglasses. Youreyes will
have less trouble adjusting to night. But ifyou’re
driving, don’t wear sunglasses at night.They may cut
down on glare from headlamps, but they also make a lot
of things invisible.
Don’t drink and drive.
4-15
You can be temporarily blinded byapproaching
headlamps. It can take a second or two, or even several
seconds, for your eyes to readjust to the dark. When you
are faced with severe glare (as from a driver who
doesn’t lower the high beams, or a vehicle with
misaimed headlamps), slow down a little. Avoid staring
directly into the approaching headlamps.
Driving inRain and on Wet Roads
Keep your windshield and all theglass on your vehicle
clean -- inside and out. Glare at night is made much
worse by dirt on the glass. Even the inside of the glass
can build up afilm caused by dust. Dirty glass makes
lights dazzle and flash more than clean glass would,
making the pupils of youreyes contract repeatedly.
Remember that your headlamps light up far less of a
roadway when you are in a turn or curve. Keep your
eyes moving; that way, it’seasier to pick out dimly
lighted objects. Just as your headlamps should be
checked regularly for proper aim, so should your eyes
be examined regularly. Some drivers suffer from night
blindness -- the inability to see in dim light -- and
aren’t even aware of it.
4-16
Rain and wet roads can mean driving trouble. On a wet
road, you can’t stop, accelerate or turn as well because
your tire-to-road traction isn’t as good as on dry roads.
And, if your tires don’t have much tread left, you’ll get
even less traction. It’s always wise togo slower and be
cautious if rain starts to fall while
you are driving. The
surface may get wet suddenly when your reflexes are
tuned for driving on dry pavement.
The heavier the rain, the harder it is to
see. Even if your
windshield wiper blades are in good shape, a heavy rain can
make it harder tosee road signs and traffic signals, pavement
markings, the edgeof the road and even people walking.
Driving too fast through large water puddlesor even
going through some car washes can cause problems, too.
The water may affectyour brakes. Try to avoid puddles.
But if you can’t, try to slow down before you hitthem.
It’s wise tokeep your windshield wipingequipment in
good shape and keep your windshield washer tank filled
with washer fluid. Replace your windshield wiper
inserts when they show signs of streakingor missing
areas on the windshield, or when strips of rubber start to
separate from the inserts.
I
Wet brakes can cause accidents. They won’t work
well in a quick stop and may cause pulling to one
side. You could lose control of the vehicle.
After driving through a large puddle of water or
a car wash, apply your brake pedal lightly until
1 your brakes work normally.
~
I
.
Hydroplaning
Hydroplaning is dangerous. So much water can build up
under your tires that they can actually ride on the water.
This canhappen if the road is wet enough and you’re
going fast enough. When your vehicle is hydroplaning,
it has little or no contact with the road.
Hydroplaning doesn’t happen often. But it can if your
tires haven’t much tread or if the pressure in one or
more is low. It can happen if a lot of water is standing on
the road. If you can seereflections from trees, telephone
poles or other vehicles, and raindrops “dimple” the
water’s surface, there could be hydroplaning.
Hydroplaning usually happens at higher speeds. There
just isn’t a hard and fast rule about hydroplaning. The
best advice is to slow down when it is raining.
Driving Through Deep Standing Water
NOTICE:
If you drive too quickly through deep puddles or
standing water, water can come in through your
engine’s air intake and badly damage your
engine. Never drive through water that is slightly
lower than the underbody
of your vehicle.If you
can’t avoid deep puddles
or standing water, drive
through them very slowly.
Some Other Rainy Weather Tips
a Turn on your low-beam headlamps -- not just
your parking lamps -- to help makeyou more
visible to others.
a Besides slowing down, allow some extra following
distance. And be especially careful when you pass
another vehicle. Allow yourselfmore clear room
ahead, and be prepared tohave your view restricted
by road spray.
e Have good tires with proper tread depth.
(See “Tires” in the Index.)
4-18
a
City Driving
Here are ways to increase your safety incity driving:
0
Know the best way to get to where you are
going. Get a city map and plan yourtrip into an
unknown part of the cityjust asyou would for a
cross-country trip.
0
Try to use the freeways that rim and crisscross most
large cities. You’ll save time and energy. (See the
next part, “Freeway Driving.”)
0
Treat a green light as a warning signal. A traffic
light is there because the corner isbusy enough to
need it. When a light turns green, and just before
you start to move, check both waysfor vehicles that
have not cleared the intersectionor may be running
the red light.
One of the biggest problems with city streets is the
amount of traffic on them. You’ll want
to watch out for
what the other drivers aredoing and pay attention to
traffic signals.
4-19
Freeway Driving
The most important advice on freeway drivingis: Keep
up with traffic and keep to the right. Drive at the same
speed most ofthe other drivers are driving. Too-fast
or
too-slow driving breaks a smooth traffic flow. Treat the
left lane on a freeway as a passing lane.
At the entrance, there is usually a ramp that leads to the
freeway. If youhave a clear view of the freeway as you
drive along the entrance ramp, you should begin to
check traffic. Try to determine where
you expect to
blend with the flow.Try to merge into the gap at close to
the prevailing speed. Switch on your turn signal, check
your mirrors and glance over your shoulder as often as
necessary. Try to blend smoothly with the traffic flow.
Once you are on the freeway, adjust your speedto the
posted limit or tothe prevailing rate if it’s slower. Stay
in the rightlane unless you want to pass.
Before changing lanes, check your mirrors. Then use
your turn signal.
Mile for mile, freeways (also called thruways, parkways,
expressways, turnpikes or superhighways) are the safest
of all roads. But they have theirown special rules.
Just before you leave the lane, glance quickly over your
shoulder to make sure there isn’t another vehicle in your
“blind” spot.
Once you are moving on the freeway, make certain you
allow a reasonable following distance. Expect
to move
slightly slower at night.
When you wantto leave the freeway,move to the proper
lane well in advance.If you m i s s your exit, do not,
under any circumstances,stop and back up. Drive on to
the next exit.
The exit rampcan be curved, sometimesquite sharply.
Is your vehicle readyfor a long trip? If you keep it
serviced and maintained, it’s ready to
go. If it needs
service, have it donebefore starting out. Of course,
you’ll find experienced and able service experts in
Corvette dealerships all across North America.They’ll
be ready and willingto help if you needit.
Here are some things you can check before a trip:
0
Windshield Washer Fluid: Is the reservoir full?
Are all windowsclean inside and outside?
0
Wiper Blades: Are they in goodshape?
0
Fuel, Engine Oil, Other Fluids: Have you checked
all levels?
0
Lamps: Are they all working? Are the lenses clean?
0
Tires: They are vitally important to a safe,
trouble-free trip. Is the tread goodenough for
long-distance driving? Are the tires all inflated to the
recommended pressure?
0
Weather Forecasts: What’s the weatheroutlook
along your route? Should you delay your trip a short
time to avoid a major storm system?
0
Maps: Do you have up-to-date maps?
The exit speed is usually posted.
Reduce your speed according to
your speedometer,’ not
to your sense of motion. After driving
for any distance
at higher speeds,you may tend to think you are going
slower thanyou actually are.
Before Leavingon a Long Trip
Make sure you’re ready. Tryto be well rested. If you
must start when you’re not
fresh -- such as after a day’s
work -- don’t plan to maketoo many miles that first part
of the journey. Wear comfortableclothing and shoes you
can easily drivein.
4-21
,
Highway Hypnosis
Hill and Mountain Roads
Is there actually such a conditionas “highway hypnosis”?
Or is it just plain falling asleep at the wheel? Call
it
highway hypnosis, lack of awareness, or whatever.
There is something about an easy stretchof road with the
same scenery, along with thehum of the tires on the road,
the drone of the engine, andthe rush of the wind against
the vehicle’that can make you sleepy. Don’t itlethappen
to you! If it does, your vehicle can leave the road in
less
than a second, and you could crash and be injured.
What canyou do about highway hypnosis? First, be
aware that it can happen.
Then hereare some tips:
0
Make sure your vehicle is well ventilated, with a
comfortably cool interior.
0
Keep your eyes moving. Scan the road ahead and to
the sides. Check your rearview mirrors and your
instruments frequently.
0
If you get sleepy,pull off the road into a rest,service
or parking area andtake a nap, get some exercise, or
both. For safety, treatdrowsiness on the highway as
an emergency.
4-22
Driving on steep hills or mountains is differentfrom
driving in flat or rolling terrain.
’A
If you drive regularly insteep country, or if you’re
planning to visit there, hereare some tips that canmake
your trips safer and more
enjoyable.
0
Keep your vehicle in goodshape. Check all fluid
levels and also the brakes, tires,
cooling system and
transmission. These parts can work hard
on
mountain roads.
0
Know how togo down hills. The most important
thing to knowis this: let your engine do some of the
slowing down. Shiftto a lower gear when yougo
down a steep or long hill.
I
I
CAUTION:
Coasting downhill inNEUTRAL (N) or with the
ignition off is dangerous. Your brakes will have to
do allthe work of slowing down. They could getso
hot that they wouldn’t work well. You wouldthen
have poorbraking or even none going downa hill.
You could crash. Always have your engine
running
and your vehicle in gear when you go downhill.
Know how to go uphill. You may want to shift down
to a lower gear. The lower gears help cool your engine
and transmission, and you can climb the
hill better.
If you don’t shift down, your brakescould get so
hot that they wouldn’t work well.You would then
have poor braking or even none going down a hill.
You could crash. Shift down
to let your engine
assist your brakes on a steep downhill slope.
Stay in your own lane when driving on two-lane
roads in hills or mountains. Don’t swing wide or cut
across the center of the road. Drive atspeeds that let
you stay in your own lane.
As you go over the top of a hill, be alert. There couldbe
something in your lane, like astalled car or an accident,
0
You may see highway signs on mountains that warn of
special problems. Examples are long grades, passing or
no-passing zones, a falling rocks areaor windmg
roads. Be alert to these and take appropriate action.
4-23
Winter Driving
Here are some tips for winter driving:
0
Have your Corvette in good shape for winter.
0
You may want to put winter emergency supplies in
your vehicle.
4-24
Include an ice scraper, a small brush or broom,a supply
of windshield washerfluid, a rag, some winter outer
clothing, a small shovel, a flashlight, a red cloth and a
couple of reflective warning triangles. And,if you will
be driving under severe conditions, includea small bag
of sand, a piece of old carpet ora couple of burlap bags
to help provide traction. Be sureyou properly secure
these items in your vehicle.
Driving on Snow or Ice
You can get wet ice when it’s about freezing(32 OF; OOC)
and freezing rain begins tofall. Try to avoid driving on
wet ice until salt and sand crews can get there.
Most of the time, those places where your tires
meet the
road probably have good traction.
However, if there is snow or ice between your tires and the Whatever the condition -- smooth ice, packed, blowing
or loose snow -- drive with caution.
road, you can have a very slippery situation. You’ll have a
lot less traction or “grip” and will need to be very careful.
Keep your ASR system on.It improves your ability to
accelerate when driving on a slippery road.Even though
your vehicle has the ASR system, you’ll want toslow
down and adjust yourdriving to the roadconditions. See
“ASR System” in the Index.
Your anti-lock brakes improve your vehicle’s stability
when you make a hard stop on a slippery road. Even
though you have the anti-lock braking system, you’ll
want to begin stoppingsooner than you would on dry
pavement. See “Anti-Lock” in the Index.
Allow greater foliowing distance on any slippery road.
Watch for slippery spots. The road might be fine
until you hit a spot that’s covered withice. On an
otherwise clear road, ice patches may appear in
shaded areas where the sun can’t reach: around
clumps of trees, behind buildingsor under bridges.
Sometimes the surface of acurve or an overpass may
What’s the worst time forthis? “Wet ice.” Very cold
remain icy when the surroundingroads are clear. If
snow or ice can be slick and hard to drive
on. But wet
you see a patch of ice ahead of you, brake before you
ice can be even more trouble becauseit may offer the
are on it. Try not to brake while you’re actually on
least traction of all.
the ice, and avoid sudden steering maneuvers.
4-25
If You’re Caught in a Blizzard
0
Tie a red cloth to your vehicle to alert police that
you’ve been stopped by the snow.
0
Put on extra clothing or wrap a blanket around you.
If you have no blanketsor extra clothing, makebody
insulators from newspapers, burlap bags, rags, floor
mats -- anything you can wrap around yourself or
tuck under your clothing to keep warm.
If you are stopped by heavy snow, youcould be in a
serious situation. You should probably stay withyour
vehicle unless you know for sure that you are near help
and you can hike through the snow.Here are some
things to do to summon help and keep yourself and your
passengers safe:
Turn on your hazard flashers.
4-26
You can run the engine to keep warm, but be careful.
Snow can trap exhaust gasesunder yourvehicle.
This can cause deadlyCO (carbon monoxide) gas
to get inside.CO could overcome youand kill
you. You can’t seeit orsmell it, so you might not
know it is in yourvehicle. Clear away snow from
around thebase of your vehicle, especiallyany
that is blocking yourexhaust pipe. And check
around again from timeto time to be suresnow
doesn’t collect there.
Open a window just a little on the side of the
vehicle that’s away fromthe wind. This will help
keep CO out.
Run your engine only as long as you must. This saves
fuel. When you run the engine, make it go a little faster
than just idle. That is, push the accelerator slightly. This
uses less fuel forthe heat that you get and it keeps the
battery charged. You will need awell-charged battery to
restart the vehicle, and possibly for signaling later on
with your headlamps. Let the heater run for awhile.
Then, shut the engine off and close the window almost
all the way to preserve the heat. Start the engine again
and repeat this only when you feel really uncomfortable
from the cold. But do itas little as possible. Preserve the
fuel as long as you can. To help keep warm, you can get
out of the vehicle and do some fairly vigorous exercises
every half hour or so until help comes.
4-27
Loading Your Vehicle
Tm
TIRE-LOADING INFORMATION
OCCUPANTS
VEHICLE CAP. WT.
FRT. CTR. RR.
TOTAL LBS.
KG
MAX. LOADING & GVWR SAME AS VEHICLE
CAPACITY WEIGHT
XXX
COLD
TIRE
TIRE SIZE
PRESSURE
SPEED
PSI/KPa
RTG
FRT.
RR.
SPA.
IF TIRES ARE HOT, ADD 4PS1/28KPa
SEE OWNER‘S MANUAL FOR ADDITIONAL
INFORMATION
Two labels on your vehicle show how much weight it
may properly carry.The Tire-Loading Information label
found on the rear edge of the driver’s door tells you the
proper size, speed rating and recommended inflation. It
also gives you important information about the number
of people that can be in your vehicle and the total weight
that you can carry.This weight is called Vehicle
Capacity Weight and includes the weight of all
occupants, cargo, and all nonfactory-installed options.
f
I
M F D BY GENERAL MOTORS CORP
DATE GVWR GAWR FRT GAWR RR
THIS VEHICLE CONFORMS TO ALL APPLICABLE U.S. FEDERAL MOTOR VEHICLE
SAFETY, BUMPER, AND THEFT PREVENTION
STANDARDS IN EFFECT ON THE DATE OF
MANUFACTURE SHOWN ABOVE.
The other label is the Certification label, found on the rear
edge of the driver’s door. It tells you thegross weight
capacity of your vehicle, called the GVWR (Gross Vehicle
Weight Rating). TheGVWR includes the weight of the
vehicle, all occupants, fuel and cargo. Never exceed
the
GVWR for your vehicle, or the GAWR (Gross Axle
Weight Rating) for either the front or rear axle.
And, if you do have a heavy load, you should spread
it
out. Don’t carry more than 100 pounds (45 kg) in your
rear area.
A CAUTION:
Do not load your vehicle any heavierthan the
GVWR, or either the maximumfront or rear
GAWR. If you do, parts on your vehiclecan break,
or it can change the
way your vehicle handles.
These could cause youto lose control. Also,
of your vehicle.
overloading can shorten the life
NOTICE:
Your warranty does not coverparts or
components that fail becauseof overloading.
If you put things inside your vehicle-- like suitcases?
tools, packages or anything else -- they will go as fastas
the vehicle goes.If you have to stop or turn quickly, or
if there is a crash, they’llkeep going.
-
A CAUTION:
Things you put inside your vehicle can strike
and injurepeople in a sudden stop or turn, orin
a crash.
Put things in therear area of your vehicle.
Try to spread the
weight evenly.
Never stack heavier things, like suitcases,
inside the vehicle so that some of them are
above the tops of the seats.
Don’t leave an unsecured child restraint in
your vehicle.
When, you carry something inside the
vehicle, secure it whenever you can.
Towing A Trailer
Your Corvette is neither designed nor intended to tow
a trailer.
4-29
NOTES
e
Section 5 Problems on the Road
Here you’ll find what to do
about some problems that
can occur on the road.
Hazard Warning Flashers
Your hazard warning flashers let you warn others. They
also let police knowyou have a problem. Your front and
rear turn signal lamps will flash on and off.
Press the button to make your frontand rear turn signal
lamps flash on and off.
5-1
Your hazard warning flashers work no matter what
position your key is in,and even if the key isn’t in.
To turn off the flashers, pull out onthe collar.
When the hazard warning flashers are on, your turn
signals won’t work.
I
Batteries can hurt
you. They can be dangerous
because:
They containacid that can burnyou.
Other Warning Devices
They contain gas that can explode or ignite.
If you carry reflective triangles, you can set one up at the sideThey contain enough electricity to
of the road about300 feet (100 m) behind your vehicle.
burn you.
If you don’t follow these stepsexactly, some or all
Jump Starting
of these things can hurt
you.
If your battery has run down, you may want
to use another
vehicle and some jumper cables to start your Corvette.
But please use the following steps to do it safely.
1. Check the other vehicle. It must have a 12-volt
battery with a negative ground system.
NOTICE:
Ignoring these steps could result costly
in damage
to your vehicle that wouldn’t be covered by
your warranty.
Trying to start your Corvette
by pushing or
pulling it could damage yourvehicle, even if you
have a manual transmission. Andif you have an
automatic transmission, itwon’t start that way.
5-2
NOTICE:
If the other system
isn’t a 12-volt systemwith a
negative ground, bothvehicles can be damaged.
2. Get the vehicles closeenough so the jumper cables
can reach, but be sure
the vehicles aren’t touching
each other. If they are, it could cause a ground
connection you don’t want. You wouldn’t be able to
start your Corvette, and the bad grounding
could
damage the electricalsystems.
4. Open the hoods and locate the batteries. Find the
positive (+) and negative (-) terminals on each.
3. Turn off the ignition on both vehicles. Unplug
unnecessary accessoriesplugged into the cigarette
lighter or accessory plug. Turnoff all lamps that
aren’t needed as well as radios. This will avoid
sparks and help save both batteries.
In addition,
it could save your radio!
I NOTICE:
If you leave your radio on, it could bebadly
damaged. The repairs wouldn’t be covered by
your warranty.
An electric fancan start upeven when the engine
is not running and can injure
you. Keep hands,
clothing and tools away from any underhood
electric fan.
I
Using a match neara battery can cause battery
gas to explode. People have beenhurt doing this,
and some have been blinded. Use a flashlight if
you need more light.
CAUTION: (Continued)
5-3
Be sure the battery has enough water. You don’t
need to add water to theDelco Freedom@battery
installed in every new GM vehicle. Butif a battery
has filler caps,be sure the right amount
of fluid is
there. If it is low, add water to take care of that
first. If you don’t, explosive gas could be present.
Battery fluid contains acid that can burnyou.
Don’t get it on you. If you accidentally get it in
your eyes or on your skin, flush the place with
water andget medical help immediately.
5 . Check that the jumper cables don’t have loose or
missing insulation. If they do, you could get a shock.
The vehicles could be damaged, too.
Fans or othermoving engine parts can injure you
badly. Keep your hands away from moving parts
once the engines are running.
6 . Positive (+) goes to positive (+) and negative (-)
goes to negative (-) or a metal engine part. Connect
the red positive (+) cable to the positive(+) terminal
of the vehicle with the dead battery. Use a remote
positive (+) terminal if the vehicle has one.
7. Don't let the other end
touch metal. Connect
it to the positive (+)
terminal of the good
battery. Use a remote
positive (+) terminal if
the vehicle has one.
I
8. Now connect the black
negative (-) cable to
the good battery's
negative (-) terminal.
Don't let the other end
touch anything until the
next step.
9. The other end of the negative cable doesn't go to
the dead battery. Itgoes to a heavy,unpainted metal
part on the engine of the vehiclewith the dead
battery. Attach the cable at least 18 inches (45 cm)
away from the dead battery, but notnear engine
parts that move. The electrical connection is just as
good there, but the chance of sparks getting back to
the battery is much less.
10. Now start the vehicle with the good batteryand run
the engine for a while.
5-5
11. Try to startthe vehicle with the dead battery.
If it won’t start after a few tries, it probably
needs service.
12. Remove the cables in reverse order toprevent
electrical shorting. Take care that they don’t touch
each other or any other metal.
I
A I
Towing Your Vehicle
Try to have a Chevrolet dealeror a professional towing
service tow your Corvette. They can provide the right
equipment and know how to tow your vehicle without
damage. See “Roadside Assistance” in the Index.
If your vehicle has been changedor modified since it
was factory new by adding aftermarket items like fog
lamps, aero skirting, or special tires and wbeels, these
instructions and illustrationsmay not be cbrrect.
Before you do anything, turn on the hazard
warning flashers.
When you call, tell the towing service:
That your vehicle cannot be towed from the rear with
sling-type equipment.
That your vehicle has rear-wheel drive.
The make, model and year of your vehicle.
Whether you can still move the shift lever.
If there was an accident, what was damaged.
A. Heavy Metal Engine Part
B. Good Battery
C. Dead Battery
5-6
When the towing service arrives, let the
tow operator
know that this manual contains detailed towing
instructions and illustrations.The operator may want to
see them.
A CAUTION:
To help avoidinjury to you or others:
Never let passengers ride ina vehicle that is
being towed.
0 Never tow faster thansafe or posted speeds.
0 Never tow with damaged parts not
fully secured.
0 Never get under your vehicle after it has
been lifted by the tow truck.
0 Always secure the vehicle on each
side with
separate safety chains when towingit.
0 Never use J-hooks. Use T-hooks instead.
A vehicle can fall froma car carrierif it isn’t
adequately secured. This can cause a collision,
serious personal injury andvehicle damage. The
vehicle should be tightly secured with chains or
steel cables beforeit is transported.
Don’t use substitutes (ropes, leather straps,
canvas webbing, etc.) that can be cut by sharp
edges underneath thetowed vehicle. Always use
T-hooks inserted in the T-hook slots. Never use
J-hooks. They willdamage drivetrain and
suspension components.
When your vehicle is being towed, have the ignition
key OFF. The steering wheel should be clamped in
a straight-ahead position, with a clamping device
designed for towing service. Do not use the vehicle’s
steering column lock for this. The transmission should
be in NEUTRAL (N) and the parking brake released.
5-7
Front Towing
Tow Limits -- 35 mph (56 km/h), 50 miles (80 km)
Don't have your vehicle towed on the rear wheels unless
you must. If the vehicle must be towed on the rear
wheels, don't exceed theabove limits or your
transmission will be damaged. Go slow over rough
ground, and position one wheel at a time(angled 45 ") if
you have to go over curbsand rises. Wheels at the lifted
end should be at least 4 inches (100 mm) above the
ground. If these limits must be exceeded, then the rear
wheels have to be supported on a dolly.
Attach T-hook chains on both sidesinto slotted holes
behind and inboard of the front wheels. Use these slots
for sling equipment and car carrier securing.
A
Position a 4" X 4" wood beam across sling chains
contacting under fasciajust ahead of thecurb protect
brackets (A).
Position the slingcrossbar against the front of the
4" X 4" beam.
5-9
Rear Towing
\
Attach a separate safety chain aroundthe outboard end
of each lower control arm.
I NOTICE:
Do not towwith sling-type equipment or rear
bumper valance will be damaged.
5-10
I
Use wheel-lift or car carrier equipment. Additional
ramping may be requiredfor car carrier equipment.
NOTICE:
Use safety chains and wheel straps.
Towing a vehicle over rough surfaces could
damage a vehicle. Damage can occur from
vehicle-to-ground or vehicle-to-wheel-lift
equipment. To help avoid damage, install a
towing dolly and raise the vehicle until adequate
clearance is obtained between- the ground and/or
wheel-lift equipment.
5-11
Attach T-hook chains in slots forward and just inboard
of the rear wheels on both sides.
Attach a separate safety chain around the outboard end
of each lower control arm.
I NOTICE:
~
I
~~
I
Do not allow chains to contact spring, as damage
to spring could result.
Engine Overheating
You will find an engine coolant temperature
gauge on
the instrument cluster and LOW
a
COOLANTlight on
the Driver Information Center.
If Steam Is Coming From Your Engine
Steam from an overheated
engine can burnyou
badly, evenif you just open the hood. Stay away
from the engineif you see or hear steam coming
from it. Just turn itoff and get everyone away
from thevehicle until itcools down. Wait until
there is no signof steam or coolant before
opening thehood.
If you keep driving when your engine
is
overheated, the liquids in it can catch
fire. You or
others couldbe badly burned. Stop your engine
if
it overheats, and get out
of the vehicle until the
engine iscool.
I NOTICE:
If your engine catches fire because you keep
driving with no coolant, your
vehicle can be
badly damaged. Thecostly repairs would notbe
covered by your warranty.
If No Steam Is Corning From Your Engine
If you no longer have the overheat warning, you can
drive. Just to be safe, drive slower for about10 minutes.
If the warning doesn’t come backon, you can
drive normally.
If you get the overheat warning but see or hear no
steam, the problem may notbe too serious. Sometimes
the engine can get a little too hot when you:
Climb a long hill on a hot day.
Stop after high-speed driving.
Idle for long periods in traffic.
If .you get the overheat warning with no sign of steam,
try this for a minute or so:
1. Turn off your air conditioner.
2. Turn on your heater to full hot at the highest fan
speed and open the window as necessary.
3. If you’re in a traffic jam, shift to NEUTRAL (N);
otherwise, shift to the highest gear while
driving -- AUTOMATIC OVERDRIVE (@)
or DRIVE (D) for automatic transmissions.
5-14
.
If the warning continues, pull over, stop, and park your
vehicle rightaway.
If there’s still no sign of steam, youcan idle the engine
for twoor three minutes while you’re parked, to see
if the warning stops. But then,
if you still have the
warning, turn oJjcthe engine and get everyone out of
the vehicle until it cools down.
You may decide not to lift the hood but to get service
help right away.
When you decide it’s safe tolift the hood, here’s what
you’ll see:
An electric fan under the hood can start up even
when the engine is not running and can injure
you. Keep hands, clothing and tools away from
any underhood electric fan.
If the coolant inside the coolant recovery tankis boiling,
don’t do anything else until it cools down.
1. Coolant Recovery Tank
2. Coolant High Fill Reservoir with PressureCap
3. Electric Engine Fans
5-15
.hCAUTION:
*
8
’
Heater and radiatorhoses, and otherengine
parts, canbe very hot. Don’t touch them. If you
do, you can be bul‘ned.
Don’t run the engine
if there is a leak.If you run
the engine, it couldlose all coolant.That could
cause an engine
fire, and you could be burned.
Get any leakfixed beforeyou drive thevehicle.
When it is cool, remove the coolant recovery tank cap
and look at the dipstick.
I NOTICE:
The coolant level should be at orabove COLD. If it
isn’t, you may have a leak in the radiator hoses, heater
hoses, radiator, water pump or somewhere else in the
cooling system.
I
5-16
Engine damage from running your
engine
without coolantisn’t coveredby your warranty.
I
If there seems to be no leak, with the engine on, check to
see if the electric engine fans are running. If the engine
is overheating, both fans shouldbe running. If they
aren’t, your vehicle needs service.
How to Add Coolant to the Coolant
Recovery Tank
If you haven’t found a problemyet, but the coolant level
isn’t ator above theCOLD mark, add a50/50 mixture
of clean water (preferably distilled) andDEX-COOL“
(orange-colored, silicate-free) antifreeze atthe coolant
recovery tank. (See “Engine Coolant”in the Index
for more information.)
NOTICE:
In cold weather, water can freeze
and crack the
engine, radiator, heater core and other parts.
Use the recommended coolant and the proper
coolant mix.
-
A CAUTION:
Adding only plain water to your
cooling system
can be dangerous. Plain water,or some other
liquid like alcohol, can boil beforethe proper
coolant mix will. Your vehicle’s coolant warning
system is set for the proper coolant
mix. With
plain water or the wrongmix, your engine could
get too hotbut you wouldn’t get the overheat
warning. Your engine could catch fire andyou or
others couldbe burned. Use a 50/50 mix of clean
water and DEX-COOL antifreeze.
TM
5-17
You can be burned if you spill coolant on hot
engine parts. Coolant contains ethylene
glycol
and itwill burn if the engine parts are hot
enough. Don’t spill coolant on a hot engine.
I
When the coolant in thecoolant recovery tank is ator
above the COLD mark, start your vehicle.
If the overheat warning continues, there’sone more
thing you can try. You can add the propercoolant mix
directly to the coolant high fill reservoir, butbe sure the
cooling system is coolbefore you do it.
Steam andscalding liquidsfrom a hot cooling
system can blow out and burnyou badly. They are
under pressure, and if you turn the coolanthigh
fill reservoir pressure cap even a little they
CAUTION: (Continued)
--
5-18
--
I
can come out at high speed. Never turn the cap
when the cooling system, including the coolant
high fill reservoir pressure cap,is hot. Wait for the
cooling system and coolant high fill reservoir
pressure cap tocool if you ever have to turn the
pressure cap.
How to Add Coolant to the C
Fill Reservoir
mt H
I NOTICE:
Your engine has a specific coolant high fill
reservoir fill procedure. Failure tofollow this
procedure could cause your engineto overheat
and be severely damaged.
1 . You can remove the coolant high fill reservoir
pressure cap when the cooling system, including the
coolant high fill reservoir pressure cap and upper
radiator hose, is no longer hot. Turn thepressure cap
slowly counterclockwise until it first stops. (Don’t
press down while turningthe pressure cap.)
If you hear a hiss, wait for that tostop. A hiss means
there is still some pressure left.
2. Then keep turning the pressure cap, but now push
down as you turn it. Remove the pressure cap.
5-19
You can be burned if you spill coolant on hot
engine parts. Coolant contains ethylene glycol,
and itwill burn if the engine parts are hot
enough. Don’t spill coolant on a hot engine.
I
4. Fill with the proper mix. Add coolant untilyou see
a steady stream of coolant coming from the
bleed valve.
5. Close the bleed valve.
6. Continue to fill the coolant highfill reservoir up to
the base of the filler neck.
7. Rinse or wipe the spilled coolant from the engine
compartment.
3. After the engine cools, open the air bleed valve on
the water pump inlet.
5-20
8. Start the engine and allowit to idle for approximately
four minutes. By this time, the coolant level inside the
coolant high fill reservoir will be lower. Add more of
the proper mix through the filler neck until the level
reaches the base of the filler neck.
I
10. Then fill the coolant recovery tank
to the proper level.
For a complete drain, flush and refill, see your Chevrolet
dealer or a Chevrolet Corvette Service Manual. To
purchase a service manual, see “Service andOwner
Publications’’ inthe Index.
9. Shut the engineoff and replace the pressure cap. Be
sure the arrowson the cap line up like this.
5-21
If a Tire Goes Flat
.Changinga Flat Tire
It’s unusual for a tire to “blow out’’ while you’re driving,
especially if you maintain your tires properly. If air goes
out of a tire, it’s muchmore likely to leak out slowly.
But if you shouldever have a “blowout,” here are a few
tips about what to expect and what to do:
If a tire goes flat, avoid further tire and wheel damage
by driving slowly to a level place. Turnon your hazard
warning flashers.
If a front tire fails, the flat tire will create a drag that
pulls the vehicle toward that side. Take your foot off
the accelerator pedal and grip the steering wheel firmly.
Steer to maintain lane position, and then gently brake
to a stop well out of the traffic lane.
A rear blowout, particularly on a curve, acts much like a
skid and may require the same correction you’d use in a
skid. In any rear blowout, remove your foot from the
accelerator pedal. Get the vehicle under control by
steering the way you want thevehicle to go. It may be
very bumpy and noisy, but youcan still steer. Gently
brake to a stop -- well off the road if possible.
If a tire goes flat, the next part shows how to use your
jacking equipment to change a flat tire safely. If your
vehicle has Extended Mobility Tires (tires with “EMT”
molded on the sidewalls), see “Extended Mobility Tires”
in the Index.
A CAUTION:
3
Changing a tire can cause an injury. The
vehicle
can slipoff the jack androll overyou or other
people. You and they could be badly injured.
Find a level place to change your tire.To help
prevent the vehicle from moving:
1. Set the parking brakefirmly.
2. Put anautomatic transmission shift lever in
PARK (P), or shifta manual transmission
to FIRST (1) or REVERSE (R).
3. l b r n off the engine.
To be even more certain thevehicle won’t move,
you can putblocks at the front and rear
of the
tire farthest away from the being
one changed.
That would be the tire on the other
side of the
vehicle, at the opposite end.
Removing the Spare Tireand Tools
Note that if you've chosen the spare tiredelete option,
your vehicle is not equipped witha jack or wheel
wrench, but does have a wheel lock key and wheel
nut socket.
The following steps will tell you how
to use the jack and
change a tire.
The wheel wrench is on the floor behind the driver's
seat. Move the driver's seat all the way forward and fold
the seatback forward. Loosen the wingnuts and slide the
wheel wrench out of the clamps.
5-23
this card. You will need the information if you ever lose
your wheel lock key.
Always use the wheel nut socket when you use the
wheel wrench provided with your Corvette.
If you have
someone else remove your wheels, make sureyou give
them the special wheel nut socket and wheel lock key.
NOTICE:
Your wheels could be damaged if the wheel nut
socket is not used to remove your Corvette’s wheels.
The jack,wheel nut socketand wheel lock keyare in the
rear storage compartment behind the passenger’s seat.
The wheel nut socket can be used with an air wrench
or
a torque wrench.The wheel lock key can be used with a
torque wrench, but not with an air
or impact wrench.
Open the compartment door and remove the plastic tray.
Lift the jack, wheel nut socket and wheel lock keyout of
the foam container.
I NOTICE:
~~
Your Corvette wheel lock key has a unique registration
number. The registrationnumber is printed on a card
included in your lock nut package.Also on this cardis
lost key replacement information.This number is not
recorded by GM or your dealer, so be surenot to lose
5-24
I
Your wheel lockkey or lock nuts could be
damaged if an airor impact wrench is used with
this key.
t
The tools you’ll be usinginclude the jack (A), wheel
wrench (B), wheel nut socket (C) and wheel lock
key (Dl.
The spare tire is on a tire carrier tray underthe rear end
of your vehicle. See “Compact Spare Tire” later in this
section for more information about thecompact spare.
To lower the tray, position yourself behindthe vehicle
facing the front and use the socket end
of the wheel
wrench to turn the latch bolt clockwise.
Lower the tray
about 1 inch (25.4 mm). Don’t loosen the latch bolt too
much, or the tray couldfall.
5-25
Put the hooked end of the wheel wrench
into the slot in
the tray. Insert the wheel wrench a little
from the side so
it isn’t over the latch bolt. Pull up on the wheel wrench
to lift the tray.
While holding the trayup with the wheel wrench, pull
the latch bolt rearward to release
it from the tray.If it
won’t come free, loosen it a little more.
Carefully lower the tray using the wheel wrench and
remove the spare tire.
5-26
\
Removing the Flat Tire and Installing the
Spare Tire
1. Remove the plastic wheel nutcaps using the socket
end of the wheel wrench by turning the wrenchin
the direction shown.Store the caps somewhere until
you have the flat tire repaired
or replaced.
2. Each wheel will have one locknut. A special wheel
lock key (removal tool)and instructions are
provided. Attach the wheel lock key to the wheel
wrench. Remove the locking wheel nut by turning
counterclockwise.
5-27
3. Attach the wheel nut socket to the wheel wrench and
loosen all the wheel nuts by turning the wrench in
the direction shown. Don't remove them yet.
5-28
4. Attach the wheel wrench to thejack. Hold the wheel
wrench handle so it forms a right angle with the
jack,
then turn it clockwise.
5. When you’ve turned the wrench almost as far as it will
go, swing it around to the other side. Keep turning to
raise the jacklift head a 3 inches (76.2 mm).
6. Position the jack under the vehicle. There are two
locator triangles (A) on the panels (B) near each
wheel. Raise thelift head ( C ) until it fits firmly
under the steel rockerflange (D) between the
triangles nearest theflat tire.
Stay away from the moldings or fender flanges to
avoid damaging them.
5-29
Getting undera vehicle whenit is jacked upis
dangerous. If the vehicle slips off the jack,you
could be badly injured or killed. Never get under
a vehicle whenit is supported only by a jack.
NOTICE:
Raising your vehicle withthe jack improperly
positioned will damage the vehicle or may allow
the vehicle to fall off the jack.Be sure tofit the
jack lift head into the proper
location before
raising your vehicle.
7. Raise the vehicle by turning the wheel wrench
clockwise. Raise the vehiclefar enough off the
ground so there is enough room for the spare tire
to fit. Remove all the wheelnuts and take off the
flat tire.
5-30
-
8. Remove any rust or dirt
from the wheel bolts,
mounting surfaces and
spare wheel.
Rust or dirt on the
wheel, or on the parts to
which it is fastened, can make wheel
the nuts
become loose after a time. The wheel could come
off and cause an accident. When you change a
wheel, remove any rust or dirt from the places
where the wheel attaches to thevehicle. In an
emergency, you can use a cloth or a paper towel
to do this; butbe sure touse a scraper orwire
brush later, if you need to, to get all the rust or
dirt off.
A CAUTION.
Never use oilor grease on studsor nuts. If you
do, the nuts might come
loose. Your wheel could
fall off, causing a.serious accident.
9. Replace the wheel nuts with therounded end of the
nuts toward the wheel. Tighteneach nut by hand
until the wheelis held against thehub.
5-31
I
10. Lower the vehicle by turning the wheel wrench
counterclockwise. Lower the jack completely.
11. Tighten the wheelnuts
firmly ina criss-cross
sequence as shown.
Incorrect wheel nuts or improperly tightened
wheel nuts cancause the wheel to become loose
and even comeoff. This could leadto an accident.
Be sure touse the correctwheel nuts. If you have
to replace them, be sure to get new GM original
equipment wheel nuts.
Stop somewhere as soon as you can and have the
nuts tightened with a torque wrench to 100 lb-ft
(140 N-m).
NOTICE:
Improperly tightened wheelnuts can lead to
brake pulsation and rotordamage. To avoid
expensive brake repairs,evenly tighten the wheel
nuts in the propersequence and to the proper
torque specification.
The LOWPLAT TIRE or SERVICE LTPWS light
will stay on as long asyou are using the compact spare
tire. It shouldgo out when the original tireis replaced.
Storing a mat-- Except Grand Sport Coupe
Rear Tiresor Spare Tire andTools
- A
,A
CAUTION:
Storing a jack, a tire or other equipmentin the
passenger compartment of the vehicle could
cause injury. In a sudden stop orcollision, loose
equipment could strike someone. Store allthese
in the properplace.
After you have the flat tire repaired
or replaced,
install the plastic nut caps and tighten
them to
22 lb-in (2.5 N-m).
5-33
I 1
i
If your vehicle is equipped with a spare tire, the
road tire
is larger than the spare,so you must adjustthe tray to
its lowerposition. Lift and pushthe tire carrier tray
towqrd the front of the vehicle. The tray will drop to
its lowerposition.
If you are returning the spare to its storage area, raise
the tire carrier tray toits upper position.
5-34
Put the tire on the tray. For theflat road tire, lift the latch
bolt, pull it toward the rearof the vehicle, and the bolt
will drop down to the lower position. For the spare tire,
push up the latch bolt and pushit toward the frontof the
vehicle to raise it to the upper position.
Put the wheel wrench back in its place under the driver’s
seat. Be sureto tighten the wingnuts.
Put the jack, wheel nut socket and wheellock key in
the rear storage compartment behind the passenger’s
seat. Make sure the parts are stored properly in the
foam container. Position thejack inthe container so
that you can read the yellow CAUTION label from
the driver’s seat. Replace the plastic trayand close the
storage compartment.
I NOTICE:
Put the hooked end of the wheel wrenchinto the slot in
the tray (A). Lift the tray usingthe wheel wrench (B)
and insert the latch bolt
into the notch inthe tray (C). To
raise the tray, use the socket
end of the wheel wrench to
turn the latch bolt counterclockwise.Turn the latch bolt
until it is snug.
I
Your Corvette’s radio receiverbox is in the rear
storage compartment.To help avoid damage,
carefully place the jack, socket and wheel lock
key into the foam container in the compartment.
Do not toss or ‘place the items against the radio
receiver box or any wiring.
5-35
Storing a Flat Grand Sport Coupe Rear
Tire andTools
Storing a jack or other equipment in the
passenger compartmentof the vehicle could
cause injury. In a sudden stop
or collision, loose
equipment could strike someone. Store all these
in the proper place.
A Grand SportCoupe rear tire will notfit in the tray, so
you must put in on the floor of the rear area. Put the flat
tire in the storagebag provided with the spare. Place the
tire on the rear area floor.
Use the luggagestraps to hold the tire in place. Loosen
the straps, then attach each endof the longer strapto the
rear cargo hooks.
Attach the other strap to the hook behind the console.
Raise the tire carrier tray to its upper position and
tighten the latch bolt until it is snug.
I A CAUTION:
A
Do not place anything on top
of the flat road tire
when it is stored in the rear area.
If you stop
quickly, these things couldfly forward into the
passenger area and hurt someone. Secure any
loose articles in the rear area.
When the tireis stored in the rear cargo area, you can’t
store a removable roof panel. Itwill not fit intothe
latches properly.
Put the wheel wrench back in its place under the driver’s
seat. Be sure to tighten the wingnuts.
5-37
Put the jack, wheel nut socket and wheel lock key inthe
rear storage compartment behind the passenger’s seat.
Make sure the parts are stored properly in the foam
container. Position the jackin the container so that you
can read the yellow CAUTION label fromthe driver’s
seat. Replace the plastic tray and close the storage
compartment.
NOTICE:
Your Corvette’s radio receiver box isin the rear
storage compartment. To help avoid damage,
carefully place the jack,socket and wheel lock
key into the foam container in the compartment.
Do not toss or place the items against the radio
receiver box or any wiring.
Compact SpareTire (If So Equipped)
Although the compact spare tire was fully inflated when
your vehicle was new, it can lose air after a time. Check
the’inflationpressure regularly. Itshould be 60 psi
(420 Wa).
After installing the compact spare on your vehicle, you
should stop as soon as possible and make sure your spare
tire is correctly inflated. The compact spareis made to
perform well at posted speed limits for distances up to
3,000 miles (5 OOO km), so you can finish your trip and
have your full-size tire repaired or replaced where you
want. Of course, it’s best to replace your spare with a
full-size tire as soonas you can. Your spare will last
longer and be in good shapein case you needit again.
When the compact spare is installed, your
vehicle’s handling capabilities will be reduced
during severe maneuvers.If you drive too fast,
you could lose controlof your vehicle. You or
others could beinjured. Don’t drive over 55 mph
(90 km/h) when the compact spare is installed.
5-38
NOTICE:
When the compact spare is installed, don’t take
your vehicle through an automaticcar wash with
guide rails. The compactspare can get caught on
the rails.That can damage the tire andwheel,
and maybe other partsof your vehicle.
If You’re Stuck: In Sand, Mud,
Ice or Snow
What you don’t wantto do when your vehicle is stuck is
to spin your wheels too fast. The method known as
“rocking” can help you get out when you’re stuck, but
you must use caution.
Don’t use your compactspare on other vehicles.
And don’t mix your compact spare tire
or wheel with
other wheels or tires. They won’tfit. Keep your spare
tire and its wheel together.
NOTICE:
Tire chains won’t fit your compact spare. Using
them can damage yourcar andcan damage
the chains too. Don’t use tire chains on your
compact spare.
If you let your tires spinat high speed,they can
explode, and you or others could be injured. And,
the transmissionor other partsof the vehicle can
overheat. That could cause an engine
compartment fireor other damage. When you’re
stuck, spin thewheels as little as possible. Don’t
spin thewheels above35 mph (55 kmh) as shown
on the speedometer.
5-39
I NOTICE:
Spinning your wheels can destroy parts of your
vehicle as well as the tires. If you spin the wheels
too fast while shifting your transmission back
and forth, you can destroy your transmission.
For information about using tire chains on your vehicle,
see “Tire Chains” in the Index.
Rocking Your Vehicle to Get it Out
First, turn your steering wheel left and right. That will
clear the area around your front wheels.
You should turn
your ASR system off. (See “ASR System” in the Index.)
Then shift back and forth between REVERSE (R) and a
forward gear (or with a manual transmission, between
FIRST (1) or SECOND (2) and REVERSE (R)),
spinning the wheels as little as possible. Release the
accelerator pedal while you shift, and press lightly on
the accelerator pedal when the transmission is in gear.
If
that doesn’t get you out after a few tries,
you may need
to be towed out. If you do need
to be towed out,see
“Towing Your Vehicle” in the Index.
5-40
_
I
e
Section 6 ServiceandAppearanceCare
Here you will find informationabout the care of your
Corvette. This section begins with service andfuel
information, and thenit shows how to check important
fluid and lubricant levels.There isalso technical
information about your vehicle, and a part devoteditsto
appearance care.
We hope you’ll want to keep your GM vehicle all GM.
Genuine GM parts have one of these marks:
n
Service
Your Corvette dealer knowsyour vehicle best and wants
you to be happy withit. We hope you’ll go to your
dealer for all your service needs. You’ll get genuine
GM
parts and GM-trained and supported service people.
Delco
6-1
Doing Your Own Service Work
If you want todo some of your own service work, you’ll
want to get the proper Corvette ServiceManual. It tells
you much moreabout how to service your Corvett,e than
this manual can. To order the proper service manual, see
“Service and Owner Publications’’ inthe Index.
Your vehicle has an air bagsystem. Before attempting to
do your own service work, see “Servicing Your Air
Bag-Equipped Corvette” in the Index.
You should keep a record with all parts receipts and list
the mileageand the date of any’iervicework you
perform. See“Maintenance Record” in the Index.
6-2
You can be injured and yourvehicle could be
damaged if you try to do service work
on a
vehicle without knowing enough about it.
Be sure you have sufficient knowledge,
experience, and the proper replacement
parts and toolsbefore you attempt any
vehicle maintenance task.
Be sure to use the proper nuts,
bolts and
other fasteners.“English” and “metric”
fasteners can be
easily confused. If you use
the wrong fasteners, parts can later break
or fall off. You could behurt.
Fuel
If you have the 5.7L Code5 engine, use premium
unleaded gasoline rated at91 octane or higher.
If you have the 5.7L CodeP engine, use premium
unleaded gasoline rated at91 octane or higher for best
performance. You may use middle grade or regular
unleaded gasolines, but your vehicle may not
accelerate
as well.
At a minimum, the gasoline you
use should meet
specifications ASTM D4814 in the United
States and
CGSB 3.5-M93 in Canada. Improved gasoline
specifications have been developed by
the American
Automobile Manufacturers Association(AAMA) for
better vehicle performance andengine protection.
Gasolines meeting the AAMA specificationcould
provide improved driveability andemission control
system protection comparedto other gasolines.
Be sure the posted octane
for premium is atleast 91
(at least 89 for middle grade and87 for regular). If the
octane is less than 87,you may get a heavy knocking
noise when you drive.If it’s bad enough, it candamage
your engine.
If you’re using fuel rated at the recommendedoctane or
higher and you stillhear heavy knocking, your engine
needs service. But don’t worry if youhear a little
pinging noise whenyou’re accelerating or driving up a
hill. That’s normal, and you don’t haveto buy a higher
octane fuel to get rid of pinging, It’s the heavy,constant
knock that means you have a problem.
If your vehicle is certified to meetCalifornia Emission
Standards (indicated on the underhood tune-up label),
it is designed to operate on fuels that meet California
specifications. If such fuels are not available in states
adopting California emissions standards, your vehicle
will operate satisfactorily on fuels meeting federal
specifications, but emission control system performance
may be affected. The malfunction indicator lamp on
your instrument panel may turn on and/oryour vehicle
may fail a smog-check test. If this occurs, return to your
authorized Corvette dealer for diagnosis to determine
the cause of failure. In the event it is determined that the
cause of the condition is the type offuels used, repairs
may not be covered by your warranty.
6-3
In Canada, some gasolines contain an octane enhancing
additive called MMT. If you use such fuels, your
emission control system performance may deteriorate
and the malfunction indicator lamp onyour instrument
panel may also turn on. If this happens, return to your
authorized Corvette dealer for service.
To pfovide cleaner air, all gasolines are now required to
contain additives that will help prevent deposits from
forming in your engine and fuel system, ailowing your
emission control system to function properly. Therefore,
you should not have to add anything to the fuel. In
addition, gasolines containing oxygenates, such as ethers
and ethanol, and reformulated gasolines may be
available in your area to help clean the air. General
Motors recommends that you use these gasolines if they
comply with the specifications described earlier.
I NOTICE:
Your vehicle was not designed for fuel that
contains methanol. Don’t use it. It can corrode
metal parts in your fuel system and also damage
plastic and rubber parts. That damage wouldn’t
be covered under your warranty.
L
A
Fuels in Foreign Countries
If you plan on driving in anothercountry outside the
United States or Canada, the properfuel may be hard to
find. Never use leaded gasoline or any other fuel not
recommended in the previous text on fuel. Costly repairs
caused by use of improper fuel wouldn’t be covered by
your warranty.
To check on fuel availability, ask anauto club, or
contact a major oil company thatdoes business inthe
country where you’ll be driving.
You can also write us at the following address for
advice. Just tell us where you’regoing and give your
Vehicle Identification Number (VIN).
General Motors Overseas Distribution Corporation,
North American Export Sales (NAES)
1908 Colonel Sam Drive
Oshawa, Ontario L1H 8P7
Filling Your Tank
While refueling, place thecap in the indent to the left of
the filler neck.
Gasoline vaporis highly flammable. It burns
violently, and that can cause very bad injuries.
Don’t smoke if you’re near gasoline
or refueling
your vehicle. Keep sparks, flames, and smoking
materials away from gasoline.
To take off the cap, turn it slowly to the left
(counterclockwise).
The cap is undera hinged door on the rear decklid of
your vehicle.
6-5
/rl CAUTION:
If you get gasoline
on yourself and then
something ignites it, you could bebadly burned.
Gasoline can spray outon youif you open the
,fuel filler cap too quickly. This spray can happen
if your tankis nearly full, and is more likely in
hot weather. Open the fuel filler cap slowly and
wait for any “hiss” noiseto stop. Then unscrew
the capall the way.
Be careful not to spill gasoline. Clean gasoline from
painted surfaces as soon as possible. See “Cleaning the
Outside of Your Corvette” in the Index.
6-6
sr
When you putthe cap back on, turn it to the right until
you hear at least three clicks. Make sureyou fully install
the cap. The diagnostic system can determineif the fuel
cap has been left off or improperly installed. This would
allow fuel to evaporate into the atmosphere.See
“Malfunction Indicator Lamp” in the Index.
NOTICE:
If you needa new cap, besure to get the right
type. Your dealer can get onefor you. If you get
the wrong type,it may not fit or have proper
. venting, and yourfuel tank andemissions system
might be damaged.
Checking Things Under theHood
Hood Release
Then go to the side of the vehicle andpull up on the rear
edge of the hood, near the windshield.
To open the hood, first pull thehandle inside the vehicle.
6-7
You’ll see the following when you open the hood with
the LT1 engine:
A. Hydraulic Clutch Fluid Reservoir (if equipped)
B. Brake Fluid Reservoir
C.Battery
D. Electric Engine Fan
E. Air Cleaner
E Coolant Recovery Tank
G. Power Steering Fluid Reservoir
H. Engine Oil Fill Cap
I. Engine OilDipstick
J. Coolant High Fill Reservoir
LT1 Engine Shown, LT4 Engine Similar
K. Automatic Transmission Dipstick (if equipped)
L. Windshield Washer Fluid Reservoir
6-8
I
An electric fan under the hood can
start up and
injure you even when the engineis not running.
Keep hands, clothing and tools away from any
underhood electricfan.
Things that burncan geton hot engine parts and
start afire. These includeliquids likegasoline,
oil, coolant, brake fluid, windshield washer and
other fluids, and plastic or rubber.
You or others
could be burned. Be careful not to drop or spill
things thatwill burn ontoa hot engine.
Then release the hood strut by moving it to the centered
position and lowering the hood. Lower the hood until
the bottom of the hood is the same height as the top
of the windshield, then releaseit.
Before closing the hood, be sure all the filler caps are
on.
6-9
Engine Oil
Checking Engine Oil
It’s a good idea to check your engine oillevel every time
you get fuel. In order to get an accurate reading, the oil
must be warm and the vehicle must be on level ground.
Pull out the dipstick and clean it with a paper towelor a
cloth, then push it back in allthe way. Remove it again,
keeping the tip down.
The engine oil dipstick is
next to the coolant high fill
reservoir. The dipstick
handle is a round, yellow
loop.
Turn off the engine and givethe oil a few minutes to
drain back into the oil pan. If you don’t, the oil dipstick
might not show the actual level.
6-10
When to Add Oil
If the oil is at or below the ADD mark, you’ll need to
add some oil. But you mustuse the right kind. This part
explains what kindof oil to use. For crankcase capacity,
see “Capacities andSpecifications” in the Index.
The engine oil fill cap ison
top of the engine block.
NOTICE:
Don’t add too much oil.
If your engine hasso
much oil that the oil level gets above the upper
mark that shows the proper operating range,
your engine could be damaged.
Just fill it enough to put the level somewhere in the
proper operating range. Push the dipstick all the way
back in when you’re through.
6-11
What Kind of Oil to Use
RECOMMENDED SAE VlSCOSlTT GRADE ENGIWE OILS
Look for two things:
~~~
GM4718M
The Corvette engine requires a special oil meeting
GM Standard GM47 18M. Oils meeting this Standard
may be identified as synthetic. However, not all
synthetic oils will meet this GM Standard. You
should look for and use only an oil that meets GM
Standard GM47 18M.
NOTICE:
If you use oils that don’t have GM4718M
the
Standard designation, you can cause engine
damage not coveredby your warranty.
~
FOR BEST FUEL ECONOMY AND COW STARTING, SELECT M E LOWEST
SAE VlSCOSlTT GRADE OIL FOR THE EXPECTED TEMPERATURE RANGE.
.
LOOK
FOR THIS
SYMBOL
HOT
WEATHER
I
7
“F
“C
6100-
- +3a
+ 80.
- + 27
+60.
- + 16
+40.
-
+20-
--7
0-
+4
- - 18
I,
PREFERRED
SAE sw-30
-1
cow
1
su
1
1
WEATHER
DONOT USESAE2OW-50 OR ANY OTHER
GRADE OIL NOT RECOMMENDED
6-12
SAE5W-30
As shown in the viscosity chart, SAE 5W-30 is best
for your vehicle. However, you
can use SAE
1OW-30 if it’s going tobe 0°F (-18°C) or above.
These numbers on an oil container show its viscosity,
or thickness. Do not use other viscosity oils such as
SAE 20W-50.
Oils meeting these
requirements should also
have the “Starburst”
symbol onthe container.
This symbol indicates that
the oil has been certified
by the American Petroleum
Institute (API). Do not use
any oil which does not
carry this Starburst symbol.
Your Corvette engineis filled at the factory with a
Mobil 1 synthetic oil, which meets all requirements
for your vehicle.
@
Substitute Oil:When adding oil to maintain engine
oil level, oil meeting GM Standard GM47 18M may
not be available. You can add substitute oil designated
SAE 5W-30 with the “Starburst” symbol at all
temperatures. If temperatures are above 0”F (- 18” C),
you may substitute SAE 1OW-30 with the “Starburst”
symbol. Substitute oil not meeting GM Standard
GM47 18M should not be usedfor an oil change.
Engine Oil Additives
Don’t add anything to your oil. Your Corvette dealer is
ready to advise if you think something should be added.
You should look for this onthe oilcontainer, and use
only those oils that are identified as meeting GM
Standard GM4718M andhave the Starburst symbol on
the frontof the oil container.
6-13
.
When to Change Engine Oil
If any one of these is true for you, use the short tripkity
maintenance schedule:
(5 000 km). Never drive your vehicle more than
7,500 miles (12 500 km)or 12 months (whichever
occurs first) withoutan oil change.
Most trips include extensive idling (such as frequent
driving in stop-and-go traffic).
The system won’t detectdust in the oil.So, if you
drive in a dusty area, be sure to change your oil every
3,000 miles (5 000 km)or sooner if the CHANGE OIL
light comes on. Remember to resetthe monitor when the
oil has been changed. For more information, see
“Engine Oil Life Monitor” in the Index.
Most trips are through dusty areas.
What to Do with Used Oil
Most trips are less than 5 to 10 miles (8 to 16 km).
This is particularly important when outside
temperatures are below freezing.
Driving under these conditions causes engine oil to break
down sooner. If any one of theseis true for your vehicle,
you need to change your oil and filter every3,000 miles
(5 OOO km)or 3 months -- whichever occurs first.
If none of them is true, use the long triphighway
maintenance schedule. Change the oil and filter every
7,500 miles (12 500 km) or 12 months -- whichever
occurs first. Driving a vehicle with a fully warmed
engine under highway conditions causes engine oil to
break down slower.
Your Corvette has an Oil Life Monitor.
This featwe will
let you know when to change youroil and filter -- usually
between 3,000 miles (5 O00 k
rn)and 7,500 miles
(12 500 km) since your last oil change. Under severe
conditions, the indicator may come on before3,000 miles
6-14
Did you know that used engineoil contains certain
elements that maybe unhealthy for yourskin and could
even cause cancer? Don’t let used oil stay
on your skin for
very long. Clean your skin and nails with soap and water,
or a good hand cleaner. Wash or throw away clothing or
rags containing used engineoil. (See the manufacturer’s
warnings about the use and disposal of oil products.)
Used oil can be a real threat to the environment. If you
change your own oil,be sure to drain all free-flowing oil
from the filter before disposal. Don’t ever dispose
of oil by
putting it in the trash, pouring it on the ground, into
sewers, or into streams or bodies of water. Instead, recycle
it by taking it to a place that collects used oil.If you have
a problem properly disposing of your used oil, ask your
dealer, a service station or a local recycling center for help.
Air Cleaner
..
A CAUTION:
n
Operating the enginewith the air cleaner off can
cause you or others to be burned. The air cleaner
not only cleans the air, it stops flame
if the engine
backfires. If it isn't there, and the engine
backfires, you could be burned. Don't drive with
it off, and be careful workingon the engine with
the air cleaneroff.
I
Refer to the MaintenanceSchedule to determine when to
replace the air filter.
See "Scheduled Maintenance Services" in the Index.
NOTICE:
If the air cleaneris off, a backfire can causea
damaging enginefire. And, dirt caneasily get
into your engine,which will damage it. Always
have the air cleaner in place
when you're driving.
6-15
Air Filter Replacement
2. Disconnect the clamp from the manifold.
To remove the air filter:
1. Unscrew the three knobs.
6-16
3. Pull the air cleaner straight up.
4. Open the air cleaner to remove the old filter and
install the new one.
5. Reverse the steps.
0 Align the tabs to the slots in the bottom of the
assembly before you replace it.
Install the short knob into the middle hole first.
Then install the longer knobs into the outer holes.
6-17
Automatic Transmission Fluid
When to Check and Change
A good time to check your automatic transmission fluid
level is when the engine oilis changed.
If you do it yourself, be sure to follow all the instructions
here, or you could geta false reading on the dipstick.
I NOTICE:
Change both the fluid and filter every 15,000 miles
(25 000 km) if the vehicle is mainly driven under one or
more of theseconditions:
Too much or too little fluid can damage your
transmission. Too much can mean that some of
the fluid could come out and fall on hot engine
parts or exhaust system parts, starting a Be
fire.
sure to get an accurate reading if you check your
transmission fluid.
In heavy city traffic where the outside temperature
regularly reaches 90 O F (32 C) or higher.
O
In hilly or mountainous terrain.
Uses such as found in taxi, police or delivery service.
If you do not use your vehicle under any of these
conditions, change the fluid and filter at 100,000 miles
(166 000 km).
See “Scheduled Maintenance Services” in the Index.
How to Check
Because this operation canbe a littledifficult, you
may choose to have this done at your Corvette
dealership ServiceDepartment.
Wait at least 30 minutes before checking the
transmission fluid level if you have been driving:
0
When outside temperatures are above 90°F (32°C).
0
At high speed for quite a while.
In heavy traffic -- especially in hot weather.
To get the right reading, the fluid should be at normal
operating temperature, which is 180°Fto 200°F
(82°C to 93°C).
Checking lkansmission FluidHot
Checking the Fluid Hot or Cold
Get the vehicle warmedup by driving about 15 miles
(24 km) when outside temperatures are above 50°F
(10°C). You may have to drive longer to bring the fluid
to 180°F to 200°F (82°C to 93°C) in colder outside
temperatures. See “Automatic Transmission Fluid
Temperature Reading” inthe Index.
0
Park your vehicle on a level place. Keep the engine
running.
0
With the parking brake applied, place the shift lever
in PARK (P).
0
With your foot on the brake pedal, move the shift
lever through each gear range, pausing for about
three seconds in each range. Then, position the shift
lever in,PARK (P).
Checking Transmission Fluid Cold
A cold checkis made after the vehicle has been sitting
for eighthours or more with the engine off and is used
only as a reference. Letthe engine run at idle for five
minutes if outside temperatures are 50°F (10°C) or
more. If it’s colder than 50°F (lO”C),you may have to
idle theengine longer. Should the fluid level be low
during acold.check, you must perform a hot check
before adding fluid. Thiswill giveyou a more accurate
reading of thefluid level.
Let the engine run at idle for three minutes or more.
6-19
Then, without shutting off the engine, follow these
steps:
1. The automatic
transmission fluid
dipstick is behind the
engine oil dipstick,
ne&- the windshield.
The dipstick handle is
a round, red loop.Pull
out the dipstick and
wipe it with a clean
rag or paper towel.
I
2. Push it back in all the way, wait three seconds and
then pull it back out again.
3. Check both sides of the dipstick, and read the lower
level. The fluid level should be in the area marked
“80°F” for a cold check and will move into the
“WARM” area as the temperature increases. When
the fluid is at normal operating temperature(180°F
to 200”F, 82°C to 93”C),the level must be in the
crosshatched area marked “ 190°F.’’See “Automatic
Transmission Fluid Temperature Reading” in the
Index.
4. If the fluid level is in the acceptable range, push the
dipstick back in all the way.
6-20
How to Add Fluid
How to Check
Refer to the MaintenanceSchedule to determine what
kind of transmission fluidto use. See “Recommended
Fluids and Lubricants” inthe Index.
Because this operation can be difficult, you may
choose to havethis done at your Corvette dealership
Service Department.
Add fluid only after checking the transmission fluid
HOT. (A COLD checkis used only as a reference.) If
the fluid level is low, add only enough of the proper
fluid to bring the levelup to the HOT area for a hot
check. It doesn’t take much fluid, generally less than a
pint (0.5 L). Don’t overfill. We recommend you use only
fluid labeled DEXRON@-111,because fluid with that
label is made especiallyfor your automatic transmission.
Damage caused by fluidother than DEXRON-I11 is not
covered by your new vehicle warranty.
If you do it yourself, be sure to follow all the
instructions here, or you could get a false reading.
0
After adding fluid, recheck the fluid level as
described under “Howto Check.”
When the correct fluid level is obtained, push the
dipstick back inall the way.
Manual Transmission Fluid
When to Check
NOTICE:
Too much or too little fluid can damage your
transmission. Too much can mean that some of
the fluid could come out and fall on hot engine
parts or exhaust system parts, starting a fire. Be
sure to get an accurate reading
if you check your
transmission fluid.
Check the fluid level only when your engine is off, the
vehicle is parked on a level place and the transmission is
cool enough for you to rest your fingers on the
transmission case.
A good time to haveit checked is when the engine oil is
changed. However, thefluid in your manual
transmission doesn’t requirechanging.
6-21
Then, follow these steps:
How to Add Fluid
Here’s how to add fluid. Refer to the Maintenance
Schedule to determine what kind of fluid to use.
See
“Recommended Fluids and Lubricants’’ in the Index.
1. Remove the filler plug.
2. Add fluid at the filler plug hole. Add only enough
fluid to bring the fluid levelup to the bottomof the
filler plug hole.
3. Install the filler plug. Be sure the plug is fully seated.
Hydraulic Clutch
The clutch linkage in your vehicleis self-adjusting. The
clutch master cylinder reservoiris filled with hydraulic
clutch fluid.
1. Remove the filler plug.
2. Check that the lubricant level is up to the bottom of
the filler plug hole.
3. If the fluid level is good, install the plug and be sure
it isfully seated. If the fluid level is low, add.more
fluid as described in the next steps.
It isn’t a goodidea to “top off’ your clutch fluid. Adding
fluid won’t correct a leak.
A fluid loss in this system could indicatea problem.
Have the system inspected and repaired.
When to Check and What to Use
How To Check and Add Fluid
The clutch master cylinder is under the Powertrain
Control Module (PCM) in the left reararea of the engine
compartment.
To check the fluid, look at the area betweenthe PCM
and the battery.
To add fluid, remove the PCM unit.
I
1
Refer to the MaintenanceSchedule to determine how
often you should check the fluidlevel in your clutch
master cylinder reservoir and for the proper fluid.
See
“Owner Checks and Services” and “Recommended
Fluids and Lubricants” in the Index.
You must loosen andremove the two screws before the
PCM unit will lift out.
6-23
Fluid should be added if the fluid level is at or
below the
ADD mark on the reservoir.There areadditional
instructions on the reservoir cap.
How to Check Lubricant
When returning the PCM to its proper position, make
sure the unit is fully rearward in the bracket prior to
installing the two screws.
Rear Axle
When to Check Lubricant
Refer to the Maintenance Schedule to determine how
often to check the lubricant. See “Periodic Maintenance
Inspections” in the Index.
If the level is below the bottomof the filler plug hole,
you’ll need to add some lubricant. Add enough lubricant
to raise the level to the bottomof the filler plug hole.
6-24
What to Use
To add lubricant when the level is low, useAxle
Lubricant (GMPart No. 12345977) or S A E SOW-90
GL-5 gear lubricant. To completely refill after draining,
add 4ounces (118 ml) of Limited-Slip Differential
Lubricant Additive (GM Part No. 1052358). Then fill to
the bottomof the filler plug hole with Axle Lubricant
(GM Part No. 12345977) or SAE SOW-90 GL-5 gear
lubricant.
Engine Coolant
The cooling system in yourvehicle is filled with new
DEX-COOL (orange-colored, silicate-free) engine
coolant. This coolant is designed to remain in your
vehicle for 5 years or 100,000 miles (166 000 km),
whichever occurs first.
The following explains your cooling system and how to
add coolant when it is low. If you have a problem with
engine overheating or if you need to add coolant to
your high fill reservoir, see “Engine Overheating”
in the Index.
A 50/50 mixture of water and the proper coolant for
your Corvette will:
0
Give freezing protection down to -34°F (-37°C).
0
Give boiling protection up to 265 O F (129O C).
Protect against rust and corrosion.
Help keep the proper engine temperature.
0
Let the warning lights and gauges work as they should.
NOTICE:
When adding coolant itis important that you use
DEX-COOL (orange-colored,silicate-free)
coolant meeting GM Specification 6277M.
If silicated coolant isadded to thesystem,
premature engine, heater core orradiator
corrosion may result. In addition, the engine
coolant will require changesooner at
30,000 miles (50 000 km) or24 months,
whichever occurs first.
--
6-25
What toUse
Use a mixture of one-half clean water (preferably
distilled) and one-half DEX-COOL (orange-colored,
silicate-free) antifreeze that meets GM Specification
6277M, which won’t damage aluminum parts. Use
GM Engine Coolant Supplement (sealer) (GM Part
No. 3634621) with any complete coolant change. If you
use this mixture, you don’t need to add anything else.
NOTICE:
TM
Adding only plain water to yourcooling system
can bedangerous. Plain water, or some other
liquid like alcohol,can boil beforethe proper
coolant mix will. Your vehicle’scoolant warning
system is set for the proper
coolant mix. With
plain wateror the wrong mix,your engine could
get too hot but you wouldn’t getthe overheat
warning. Your engine could catch fire andyou or
others could beburned. Use a 50/50 mix of clean
water andDEX-COOL (orange-colored.
silicate-free) antifreeze.
TM
If you use an impropercoolant mix, your engine
could overheat andbe badly damaged. The
repair cost wouldn’t be covered by your
warranty. Too much water in the mix can freeze
and crack theengine, radiator, heatercore and
other parts.
If you have to add coolant more than four times a year,
have your dealer check your cooling system.
NOTICE:
If you usethe propercoolant, you don’t have
to
add extra inhibitors
or additives which claim to
improve the system. Thesecan be harmful.
.
Checking Coolant
If this light comes on, it
means you’re low on engine
coolant.
LOW
COOLANT
Your Corvette also has a high fill reservoir located at
the right rear of the enginecompartment.
When your engineis cold, check thedipstick on the cap
of the coolant recovery tank. The coolantlevel should
be at COLD, or a little higher. When your engine is
warm,the level on the dipstick should be up toHOT,
or alittle higher.
If the recoverytank is very low or empty, also add
coolant to the high fill reservoir. To add coolant at
the high fill reservoir, see “Engine Overheating”in
the Index.
6-27
Adding Coolant to theRecovery Tank
I
If you need more coolant, add the propermix at the
coolant recovery tank, but only when your engineis
cool. If the tank is very low or empty, also add coolant
to the coolanthigh fill reservoir. See “Engine
Overheating” in the Index for information.
CAUTION:
You can be burned if you spill coolant on hot
engine parts. Coolant contains ethyleneglycol.
and it will burn if the engine parts arehot
enough. Don’t spill coolant on
a hot engine.
.JTION:
rTurning the coolanthigh fill reservoir pressure cap
when the engineand radiator arehot can allow
steam and scalding liquids to blow out and burn
you badly. Neverturn the pressurecap even a
little when the engineand radiator arehot.
--
--
Add coolant mix at the recovery tank, but be careful not
to spill it.
6-28
For completedrain, flush and refillof the engine,
contact your Chevrolet dealer or the procedure may
be
found in a ChevroletCorvette Service Manual. To
purchase a service manual, see “Service and Owner
Publications” in theIndex.
Coolant High Fill Reservoir Cap
Power Steering Fluid
NOTICE:
Your coolant high fill reservoir cap
is a 15 psi
(105 kPa) pressure-type cap and must be tightly
installed to prevent coolant loss
and possible
engine damage from overheating. Be sure the
arrows on the cap line up with the overflow tube.
Thermostat
Engine coolant temperatureis controlled by a thermostat
in the engine coolant system.The thermostat stops the
flow of coolant through the radiator until the
coolant
reaches a pre-set temperature.
When to Check Power SteeringFluid
It isnot necessary to regularly check power steering
fluid unless you suspect there is a leak inthe system or
you hear an unusual noise.A fluid loss in this system
could indicate a problem. Have the system inspected
and repaired.
6-29
How To Check Power Steering Fluid
What to Use
When the engine compartment is cool, unscrew the cap
and wipe the dipstick with a clean rag. Replace the cap
and completely tighten it. Then remove the cap again
and look atthe fluid level on the dipstick.
Refer to the Maintenance Schedule to determine what
kind of fluid to use. See “Recommended Fluids and
Lubricants” in the Index. Always use the proper fluid.
Failure to use the proper fluid can cause leaks and
damage hoses and seals.
The level shouldbe at the FULL COLD mark.If necessary,
add only enough fluid to bring the level up to the mark.
When the engine
compartment is hot
the kvel should be
at the HOT mark.
When the engine
compartment is
cool, the level
should beat the
FULL COLD mark.
Windshield Washer Fluid
What to Use
When you need windshield washerfluid,.be sure to read
the manufacturer’s instructions before use.If you will be
operating your vehicle in an area where the temperature
may fall below freezing, use afluid that has sufficient
protection against freezing.
[
r
f
l
Ai
g Washer Fluid
NOTICE:
0
0
Open the cap labeledWASHER FLUID ONLY. Add
washer fluid until the tank is full.
When using concentrated washer fluid,
follow the manufacturer’s instructions for
adding water.
Don’t mix water with ready-to-use washer
fluid. Water can cause the solution to freeze
and damage your washer
fluid tank and
other partsof the washersystem. Also,
water doesn’t clean as well as washer fluid.
Fill your washer fluid tank only
three-quarters full when it’s very cold. This
allows for expansion,which could damage
the tankif it is completelyfull.
Don’t use radiator antifreeze in your
windshield washer.It can damage your
washer system and paint.
L
6-31
Brakes
Brake Fluid
So, it isn’t a goodidea to “top off’ your brake fluid,
Adding brake fluid won’t correct a leak.If you add fluid
when your linings are worn, then you’ll have too much
fluid when you get new brake linings.You should add
(or remove) brake fluid, as necessary, only when work
is
done on the brake hydraulic system.
--
A CAUTION:
Your brake master cylinder reservoir is here. It is filled
with DOT-3 brake fluid.
3
-
If you have too much brake fluid, it can spill
on
the engine. The fluid will burn
if the engine is hot
enough. You or others could be burned, and your
vehicle could be damaged. Add brake fluid only
when work is done on the brake hydraulic
system.
There are only two reasons why the brake fluid level inthe
Refer to the Maintenance Schedule to determine when
to
reservoir might go down. The first is that
the brake fluid
check your brake fluid. See “Periodic Maintenance
goes down to an acceptable level during
normal brake
Inspections” in the Index.
lining wear. When new linings are put in, the fluid level
goes back up. The other reason is that fluidis leaking out
of the brake system.If it is, you should have your brake
system fixed, since a leak means that sooner or later your
brakes won’t work well, or won’t work atall.
6-32
Checking Brake Fluid
You can checkthe brake fluid without taking off the cap.
Just look at the brakefluid reservoir. The fluid level
should be above the MIN
mark on the reservoir. If it
isn’t, have your brakesystem checked to see if there is a
leak.
After work is done on the brake hydraulic system, make
sure the levelis between the MIN and MAX marks.
What toAdd
When you do need brakefluid, use only DOT-3 brake
fluid -- such as Delco Supreme 11 (GM Part
No. 1052535). Use new brake fluid from a sealed
container only, and alwaysclean the brake fluid
reservoir cap before removing it.
@
With the wrong kindof fluid in your brake
system, your brakes may not work
well, or they
may not even workat all. This could causea
crash. Always use the proper brakefluid.
NOTICE:
0
Using the wrong fluid can badly damage
a few
brake system parts. For example, just
drops of mineral-based oil, such as engine
oil, in your brake system can damage brake
system parts so badly that they’ll have to be
replaced. Don’t let someone
put in the
wrong kind of fluid.
If you spill brake fluidon your vehicle’s
painted surfaces, the paint finish can be
damaged. Be careful not to spill brake fluid
on your vehicle. If you do, wash it off
immediately. See “Appearance Care” in the
Index.
1
6-33
Brake Wear
Your Corvette has four-wheel disc brakes.
Disc brake pads have built-in wear indicators that make
a high-pitched warning sound when the brake pads are
worn and new pads are needed. The sound may come
and go orbe heard all the time your vehicle is moving
(except when you are pushing on the brake pedal
firmly).
IA
CAUTION:
The brake wear warning sound means that
sooner or later your brakes won’t work well.
That could leadto an accident. When you hear
-.hebrake wear warning sound, have your vehicle
I serviced*
NOTICE:
Continuing to drive with worn-out brake pads
could result in costly brake repair.
Some driving conditions or climates may cause a brake
squeal when the brakes are first applied or lightly
applied. This does not mean somethingis wrong with
your brakes.
Brake linings should always be replaced as complete
axle sets.
Brake Pedal Travel
See your dealer if the brake pedal does not return to
normal height, or if there is a rapid increase in pedal
travel. This could be a sign of brake trouble.
Brake Adjustment
As you make brake stops, your disc brakes
automatically adjust for wear.
6-34
Replacing Brake System Parts
Vehicle Storage
The braking system on a modern
vehicle is complex.
Its many parts have to be of top
quality and work well
together if the vehicle isto have really good braking.
Vehicles we design andtest have top-quality GM brake
parts in them,as your Corvette does when it is new.
When you replace parts ofyour braking system -- for
example, when your brakelinings wear down and you
have to have new ones put -in be sure you get new
genuine GM replacement parts. If you don’t,
your
brakes may no longer work properly.For example, if
someone puts in brakelinings that are wrong for your
vehicle, the balance betweenyour front and rear brakes
can change-- for the worse.The braking performance
you’ve cometo expect can change in many other ways if
someone putsin the wrong replacement brake parts.
If you’re not going to drive your vehicle for 25 days
or more, take off the black, negative (-) cable from
the battery. This will help keep your battery from
running down.
Battery
Contact your dealer to learn how toprepare your vehicle
for longer storage periods.
Every new Corvette has aDelco Freedom’ battery. You
never have to add waterto oneof these. When it’s time
for a new battery, we recommendDelco
a
Freedom
battery. Get one that hasthe replacement number shown
on the original battery’s
label. For battery replacement,
see your dealeror the Corvette Service Manual. To
purchase a service manual,see “Service and Owner
Publications” in the Index.
Batteries have acid that can burn you and gas
that can explode.You can be badly hurt you
if
aren’t careful. See “Jump Starting”
in the Index
for tips on working around a battery without
getting hurt.
Bulb Replacement
Headlamps
For the proper typeof replacement bulb, see
“Replacement Bulbs” in the Index.
Halogen Bulbs
Halogen bulbs have pressurized gas inside and
can burst if you drop or scratch the bulb.
You or
others could be injured. Be sure
to read and
follow the instructionson the bulb package.
1. Open the hood.
2. The headlamps need to be halfway open. Turn
the headlamp switch on, then quickly back
to the
parking lamps setting. You may have to do this a few
times to get the half-open position. You can also
open the headlamps manually. See “Headlamp
Doors” in the Index.
3. Remove the two screws on each sideof the headlamp.
6-36
4. Remove the two screws from both sides of the cover.
Before you remove the last screw, putyour hand
under the cover to holdit.
5. Reach around the hoodand pull the cover straight
out. Be careful not toscratch the paint.
6. Remove the four screws from the retainer near each
corner of the headlamp. Don’t move the large-head
adjusting screws or your headlamp will not be aimed
properly.
Hold the headlamp and remove the retainer.
7. Remove the headlamp and unplug the electrical
connector.
8. Reverse the steps with a new headlamp.
6-37
Front Tbrn Signal Lamps
4. Push the bulb in, turn it counterclockwise, then pull
it out.
1. Open the hood.
2. Find the socket at the front of the engine
compartment.
3. Turn the socket counterclockwise one-quarter of a
turn and pull it out.
6-38
5. Reverse the steps with a new bulb. The socket has
three large tabs and one small tab. Be sure to line up
the small tab with the small notch in the housing.
Sidemarker Lamps
L
2. Pull the bulb straight out.
You can reach the front sidemarkerlamp from inside the
engine compartment.
3. Reverse the steps with a new bulb.
Reach the rear sidemarkerlamp from under the vehicle.
1. Turn the socket counterclockwise one-quarter of a
turn and pullit out.
6-39
Cornering Lamps
2. Push the bulb in,turn it counterclockwise, theh pull
it out.
3. Reverse the steps with a new bulb.
You can reach the front cornering lamp from insidethe
engine compartment.
Fog Lamps
Reach the rear cornering lamp from under the vehicle.
You can reach the fog lamps from under the front bumper.
1. Press the tab on the socket, turn it counterclockwise
one-quarter of a turn and pull it out.
1. Remove the screw in the access door. Open the door.
2. Turn the bulb base counterclockwise one-eighth of a
turn and pull it out.
3. Disconnect the bulb base from the wiring harness.
4. Reverse the steps with a new bulb.
6-40
1_
Center High-Mounted Stoplamp
2. Push the bulb in, turn it counterclockwise, then pull
it out.
You can reachthe center high-mounted stoplamp by
removing the license plate and reaching through the
opening.
3. Reverse the steps with a new bulb.
1. Turn the socket counterclockwise one-quarter of a
turn and pullit out.
6-41
Rear Turn Signal and Taillamps
I
I
2. Pull the lens out.
1. Remove the screws.
3. Push the bulb in, turn it counterclockwise, then pull
it out.
4. Reverse the steps with a new bulb.To prevent water
from getting inside the lens, make sure the lensseal
is properly positioned.
6-42
Back-up Lamps
I
You can reach the back-uplamps by removing the
license plate and reachingthrough the opening.
2. Push the bulb in, turn it counterclockwise, then pull
it out.
3. Reverse the steps with a new bulb.
1. Push the tab on the socket and turn it
counterclockwise.
6-43
Rear Cargo Compartment Lamp-- Coupe
2. Remove the bulb.
3. Reverse the steps with a new bulb.
Rear Cargo Compartment
Lamp -- Convertible
1. Pry the cover off with a screwdriver.
2. Remove the bulb.
3. Reverse the steps with a new bulb.
1. Pry the cover off with a screwdriver. Be sure to pry
from the rear side, or you could break the tabon
the cover.
6-44
Windshield Wiper Blade Replacement
It’s a goodidea to clean or replace the wiper blade
assembly every six months. For the proper windshield
wiper blade length and type, see “Replacement Parts” in
the Index. To remove the wiper blade assembly:
1. Open the hood to gain access to the windshield
wipers.
2. Insert a screwdriver into the release slot (A) on the
wiper arm. (There’s an arrow on the wiper arm
pointing to the slot.)
3. Push down gently to release the wiper blade
assembly (B) from the arm.
4. Reverse the steps to install the new assembly.
6-45
Tires
We don’t make tires. Your new Corvette comes with
high-quality tires made by a leadingtire manufacturer.
If you ever have questions about your tire warranty and
where to obtain service, see your Corvette Warranty
booklet for details.
Poorly maintained and improperlyused tires are
dangerous.
Overloading your tires cancause
overheating asa result of too muchfriction.
You could havean air-out anda serious
accident. See “Loading Your Vehicle”in
the Index.
CAUTION: (Continued)
CAUTION: (Co
Underinflated tires pose the same danger as
overloaded tires. The resulting accident
could cause serious injury. Check alltires
frequently tomaintain the recommended
pressure. Tire pressure should be checked
when your tiresare cold.
Overinflated tires are more likely to be
cut, punctured orbroken by a sudden
impact such as when you hit a pothole.
Keep tires at the recommended pressure.
Worn, old tires can cause accidents.If your
tread is badly worn, or if your tires have
been damaged, replace them.
See “1nfla.tion Tire Pressure” in this section for
the correctinflation pressure for competitive or
high-speed driving.
--
--
Extended Mobility Tires (Option)
If your Corvette hasoptional Goodyear Extended
Mobility Tires (EMT’s), the tires will have “EMT”
molded on the sidewalls. Yourvehicle may also have a
spare tire delete option. With the sparetire delete option,
there’s no spare tire,no tire changing equipment and no
place to store a tire in thevehicle. Extended Mobility
Tires performso well without anyair that a Low Tire
Pressure Warning System (LTPWS)is used to alert you
if a tire has lost pressure.A LOWFLAT TIRElight will
appear on your DriverInformation Center if a tire’s
inflation pressure is less than25 psi (170 kPa). If the
LOWFLAT TIRE lightcomes on, check your tire
pressures as soon asyou can. See“Low Tire Pressure
Warning Light” in the Indexfor additional information.
1
When the LOWELAT TIRE warning light
is on,
your vehicle’s handling capabilities will be
reduced duringsevere maneuvers.If you drive
too fast, you could losecontrol of your vehicle.
You or others could beinjured. Don’t drive over
55 mph (90 kmh) when the LOWLFLAT TIRE
warning light is on. Drive cautiously,and check
your tire pressures as
soon as you can.
6-47
,
I
If a tire goes flat, you won’t need to stop on the side of
the road to change the tire. You can just keep ondriving.
The shorter the distance you drive and the slower the
speed, the greater the chance that the tire will not have
to be replaced. If you drive on a deflated EMT for
distances of 50 miles (80 km) or less and at speeds of
55 mph (90 km/h) or less, there is a good chance that the
tire can be repaired. The tire can operate effectively with
no air pressure for up to 200 miles (320 km) at speeds
up to 55 mph (90 km/h), but the tire would then have to
be replaced. Also remember: When a tire is filled with
air, it provides a cushion between the road and the
wheel. Because you do not have this cushion when
driving ona deflated tire, try to avoid potholes that
could damage your wheel and require replacement of it.
Some road hazards can damage atire beyond repair. This
damage could occur before you’ve driven on the
tire in a
deflated condition. Whenever a tire has been damaged,or
if you’ve driven any distance on a deflated
EMT, check
with a Goodyear EMT Service Center to determine
whether the tire can be repaired or should be replaced. To
maintain your vehicle’s extended mobility feature,all
replacement tires mustbe Extended Mobility Tires.
See the Goodyear Extended Mobility Tire Owner’s
Manual and Limited Warranty supplied with your
Corvette for additional information.
Inflation -- Tire Pressure
The Tire-Loading Information label, whichis on
the rear edge of the driver’s door, shows the correct
inflation pressures for your tires when they’re cold.
“Cold” means your vehicle has been sittingfor at least
three hours or driven no more than 1 mile (1.6 km).
For competitive driving or high-speed driving (over
150 mph or 240 km/h), make sure your tiresare inflated
to 35 psi (240 kPa). When you end this typeof driving,
reduce the cold inflation pressures (if necessary) to those
listed on the Tire-Loading Information label.
I NOTICE:
Don’t let anyone tell you that underinflation or
overinflation is all right. It’s not. If your tires
don’t have enough air (underinflation), you can
get the following:
0 Too much flexing
Too much heat
0 Tireoverloading
0 Badwear
0 Badhandling
Bad fuel economy.
NOTICE: (Continued)
I
(Continued)
NOTICE:
If your tires have too muchair (overinflation),
you can get the following:
Unusualwear
Badhandling
Roughride
Needless damage from road hazards.
I
Tire Rotation
The tires on your Corvette are directional, asymmetrical
and are different sizes front to rear. Due to this, your
tires should notbe rotated. Each tire and wheel should
be used only in the position it isin.
When It’s Time for New Tires
When to Check
Check your tires once month
a
or more.
If you have a compact spare tire,
it should be at
60 psi (420 Wa).
How to Check
Use a good quality pocket-typegage to check tire
pressure. You can’t tellif your tires are properly inflated
simply by looking at them.Radial tires may look
properly inflated even when they’re underinflated.
Be sure to put the valve
caps back on the valve
stems. They help preventleaks by keeping out dirt
and moisture.
One way to tell when it’s time for new tires
is to check the
treadwear indicators, which will appear when your tires
have only 1/16 inch (1.6 mm) or less of tread remaining.
6-49
You need a new tire if any of the following statements
are true:
You can see the indicators at three or more places
around the tire.
You can see cord or fabric showing through the tire’s
rubber.
The tread or sidewall is cracked, cut or snagged deep
enough to show cord or fabric.
0
The tire has a bump, bulge or split.
The tire has a puncture, cut or other damage that
can’t be repaired well because of the size or location
of the damage.
Buying New Tires
To find outwhat kind and size of tires you need, look at
the Tire-Loading Information label.
The tires installed on your vehicle when it was new had
a Tire Performance Criteria Specification (TPC Spec)
number on each tire’s sidewall. When you get new tires,
get ones with that same TPC Spec number. That way
your vehicle will continue to have tires that are designed
to give proper endurance, handling, speed rating,
traction, ride and other things during normal service on
6-50
your vehicle. If your tires have an all-season tread
design, the TPC number willbe followed by an “MS”
(for mud and snow).
If you ever replace your tires with thosenot having a
TPC Spec number, make sure they are the same size,
load range, speed rating and construction type (bias,
bias-belted or radial) as your original tires.
A CAUTION:
Mixing tires could cause
you to lose control while
driving. If you mix tires of different sizes (other
than those originally installed your
on Corvette)
or types (radial and bias-belted
tires), the vehicle
may not handle properly, and
you could have a
crash. Using tires of different sizes (other than
those originally installed on your Corvette)
may
also cause damage to your
vehicle. Be sure touse
the correctsize and type tires on all four
wheels.
It’s all right to drive
with your compact spare
(if you have one). It was developed for use on
your vehicle.
Uniform Tire Quality Grading
The following informationrelates to the system
developed by the United States National Highway
Traffic Safety Administration, which grades tires by
treadwear, traction and temperature performance. (This
applies only to vehiclessold in the United States.) The
grades are molded on the
sidewalls of most passenger
car tires. The Uniform Tire
Quality Grading system does
not apply to deep tread,winter-type snow tires,
space-saver or temporary use spare tires, tires with
nominal rim diameters of 10 to 12 inches(25 to 30 cm),
or to some limited-production tires.
While the tiresavailable on General Motors passenger
cars andlight trucks may vary with respect to these
grades, they must alsoconform to Federal safety
requirements andadditional General Motors Tire
Performance Criteria (TPC) standards.
Treadwear
The treadwear gradeis a comparative rating based on
the wear rateof the tire whentested under controlled
conditions ona specified government test course. For
example, a tire graded 150 would wear one and a half
(1 1/2) times as well on the government course as a tire
graded 100. The relative performance of tires depends
upon the actual conditions of their use, however, and
may depart significantly from thenorm due tovariations
in drivinghabits, service practices and differences in
road characteristics and climate.
-
Traction A, B, C
The traction grades, from highest to lowest,
are A, B, and
C , and they represent the tire’s ability to stopon wet
pavement as measured under controlled conditions on
specified government test surfacesof asphalt and concrete.
A tire marked C may have poor traction performance.
Warning: The traction grade assigned to this tire is based
on braking (straightahead) traction tests and does not
include cornering(turning) traction.
-
Temperature A, B, C
The temperaturegrades are A (the highest), B, and C,
representing the tire’s resistance to the generationof
heat and its ability to dissipate heat when tested under
controlled conditionson a specified indoor laboratory
test wheel. Sustainedhigh temperature can cause the
material of the tire to degenerate and reduce tire life,and
excessive temperature can lead to ,suddentire failure.
The grade Ccorresponds to a level of performance
which all passenger car tires must meet under the
Federal Motor Vehicle Safety Standard No. 109.
6-51
Grades B and A represent higher levels of performance
on the laboratory test wheel than the minimum required
by law.
.
Warning: The temperature grade for this tire is
established for a tire that is properly inflated and not
overloaded. Excessive speed, underinflation, or
excessive loading, either separately or in combination,
can causeheat buildup and possible tire failure.
Wheel Alignment and Tire Balance
The wheels on your vehicle were aligned and balanced
carefully atthe factory to give you the longest tire life
and bestoverall performance.
In most cases, you will not need to have your wheels
aligned again. However, if you notice unusual tire wear
or your vehicle pulling one way or the other, the
alignment may need to bereset. If you notice your
vehicle vibrating when driving on a smooth road, your
wheels may need to be rebalanced.
6-52
Wheel Replacement
Replace any wheel that is bent, cracked, or badly rusted
or corroded. If wheel nuts keep coming loose, the wheel,
wheel bolts and wheel nuts should be replaced.If the
wheel leaks air, replace it (except some aluminum
wheels, which can sometimes be repaired).See your
Corvette dealer if any of these conditionsexist.
Your dealer will know the kindof wheel you need.
,Each newwheel should have the same load-carrying
capacity, diameter, width, offset and be mounted the
same way as the one itreplaces.
If you need to replace any of your wheels, wheel bolts
or wheel nuts, replace them only with newGM original
equipment parts. This way, you will be sure to have the
right wheel, wheel bolts and wheel nutsfor your
Corvette model.
Used Replacement Wheels
L
Using the wrong replacement wheels, wheel bolts
or wheel nuts on your vehiclecan be dangerous.
It could affectthe braking and handling
of your
vehicle, make your tires lose air and make you
lose control. You could have a collision in which
you or others could be injured. Always use the
correct wheel, wheel boltsand wheel nuts for
replacement.
Putting a used wheel onyour vehicle is
dangerous. You can’t know how it’s been used or
how many milesit’s been driven. It could fail
suddenly and cause an accident. If you have to
replace a wheel, use a new GM original
equipment wheel.
r
NOTICE:
The wrong wheel can also cause problems with
bearing life, brake cooling, speedometer/odometer
m
i ,bumper height, vehicle
calibration, headlampa
ground clearanceand tire clearance tothe body
and chassis.
rire Chains
NOTICE:
Don’t use tire chains. They can damage your
vehicle.
See “Changing a Flat Tire”
in the Index for more
information.
6-53
Appearance Care
Remember, cleaning products can be hazardous. Some
are toxic. Others can burst into flame if you strike a
match or get them on a hot part of the vehicle. Some are
dangerous if you breathe their fumes in a closed space.
When you use anything from a container to clean your
Corvette, be sure to follow the manufacturer’s warnings
and instructions. And always open your doors or
windows when you’re cleaning the inside.
Never use these to clean your vehicle:
Don’t use any of these unless this manual saysyou can.
In many uses, these will damage your vehicle:
Alcohol
0
Laundry Soap
0
Bleach
0
Reducing Agents
Cleaning the Insideof Your Corvette
Use a vacuum cleaner often toget rid of dust and loose
dirt. Wipe vinyl or leather with a clean, damp cloth.
0
Gasoline
0
Benzene
0
Naphtha
0
Carbon Tetrachloride
Your Corvette dealer has two GM cleaners, a
solvent-type spot lifter and afoam-type powdered
cleaner. They will clean normal spots and stainsvery
well. Do not use them on vinyl or leather.
0
Acetone
Here are some cleaning tips:
0
Paint Thinner
0
Always read the instructions on the cleaner label.
0
Turpentine
0
Clean up stains as soon as you can -- before they set.
0
Lacquer Thinner
0
Nail Polish Remover
They can allbe hazardous -- some more than
others -- and they can all damage your vehicle, too.
6-54
Use a clean cloth or sponge, and change to a clean
area often. A soft brush may be used if stains
are
stubborn.
0
Use solvent-type cleaners in a well-ventilated area
only. If you use them, don’t saturate the stained area.
If a ring forms after spot cleaning, clean the entire
area immediately or it will set.
Fabric Protection
Your Corvette hascarpet that has been treated with
Scotchgard" Fabric Protector, a 3M product. It protects
fabrics by repelling oil and water, which are the carriers
of most stains. Even withthis protection, you still need
to clean yourcarpet often to keep it looking new.
Further information oncleaning is available by calling
1-800-433-3296 (in Minnesota, 1-800-642-6167).
Cleaning Vinyl
Use warm water and a clean
cloth.
0
Rub with a clean, damp cloth to remove dirt. You
may have to do it more than once.
0
Things like tar, asphaltand shoe polish will stain if
you don't get themoff quickly. Use a clean cloth and
a GM Vinylkeather Cleaner or equivalent product.
Cleaning Coated Moldings
These moldings are around the hatch opening in your
Corvette's rear area.
0
When lightly soiled, wipe with a sponge or soft
lint-free cloth dampened with water.
0
When heavily soiled, use warm soapy water.
You can remove scratches from a coated molding by
wiping briskly with the solvent-type cleaner described
earlier. If a ring forms, repeat the procedure over a larger
area, wiping toward the center of the ring. If the ring
still remains, wipe the whole molding.
Cleaning Leather
Use a soft cloth with lukewarm water and a mild soap or
saddle soap.
For stubborn stains, use a GM Vinylkeather Cleaner
or equivalent product.
Never use oils, varnishes, solvent-based or abrasive
cleaners, furniture polish or shoe polish on leather.
0
Soiled leather should be cleaned immediately.If dirt is
allowed to work into the finish,it can harm the leather.
6-55
Cleaning theTop of the Instrument Panel
Care of Safety Belts
Use only mild soap and water to clean the top surfaces
of the instrument panel. Sprays containing silicones or
waxes may cause annoying reflections in the windshield
and evenmake it difficult to see through the windshield
under certain conditions.
Keep belts clean and dry.
I
Cleaning Soft-Touch Paint Surfaces
Use only mild soap and water to clean the Soft-Touch
paint surfaces in your Corvette.
Cleaning Speaker Covers
Vacuum around aspeaker cover gently, so that the
speaker won’t be damaged. Some spots and stains will
clean off better with just water and mild soap. If
something gets on one of them and you need to use a
solvent, follow these steps:
Gently scrape excess soil from the trim material
with a clean, dull knife or scraper. Use very little
cleaner, light pressure and clean cloths (preferably
cheesecloth). Cleaning should start at the outside of
the stain, “feathering” toward the center. Keep
changing to a clean section of the cloth.
Do not bleachor dye safety belts.If you do, it
may severely weaken them. In a crash they might
not be able to provide adequate protection. Clean
safety belts only with mild soap and lukewarm
water.
Glass
Glass should be cleaned often. GM Glass Cleaner (GM
Part No. 1050427) or a liquid household glass cleaner
will remove normal tobacco smoke and dust films.
Don’t use abrasive cleaners on glass, because they may
cause scratches. Avoid placing decals on theinside rear
window, since they may have to be scraped off later.
If abrasive cleaners are used on the inside
of the rear
window, an electric defogger elementmay be damaged.
Any temporary license should not be attached across the
When you clean a stain from fabric, immediately dry the
defogger grid.
area with a blow dryerto help prevent a cleaning ring.
6-56
Cleaning the Outsideof the
Windshield and Wiper Blades
If the windshield is not clear after using the windshield
washer, or if the wiper bladechatters when running, wax
or other materialmay be on the blade or windshield.
Clean the outside of the windshield with GM
Windshield Cleaner, Bon-Ami Powder@(GM Part
No. 1050011).The windshield is clean if beads do not
form when you rinseit with water.
If you use a glass treatment
or conditioner containing
ethyl alcohol or ethyl sulfate on your glass, be sure to
remove theacrylic roof panel, if so equipped. These
products may damage the panel.
Clean the blade by wipingvigorously with a cloth
soaked in full-strengthwindshield washer solvent.
Then rinse the blade with water.
Wiper blades should bechecked on a regular basis and
replaced when worn.
Weatherstrips
Silicone grease onweatherstrips will make them last
longer, seal better, and notstick or squeak. Apply
silicone grease with a clean
cloth at least every six
months. During very cold,damp weather more frequent
application may be required. (See “Recommended
Fluids and Lubricants” in the Index.)
Cleaning a Removable Roof Panel
Special care is necessary when cleaning, removing
and/or storing the roof panel.
Flush with water to remove dust and dirt, then dry
the panel.
Clean the panel with GM Glass Cleaner. Leave the
cleaner on the panel for one minute, then wipe the
panel with a soft, lint-free cloth.
Don’t use abrasive cleaning materials.
If water drops are frequently allowed to dry on the roof
panel, impurities in the water will adhere to the top.
These impurities may destroy the finish. When the panel
gets wet, you should dry it off.
I NOTICE:
Do not use a glass treatment or conditioner
containing ethyl alcohol or ethyl sulfate on the
roof panel. These products may damage the
panel.
6-57
Cleaning the Outsideof Your Corvette
The paintfinish on your vehicle providqs beauty, depth
of color, gloss retention and durability.
Washing Your Vehicle
The bestway to preserve your vehicle’s finish is to keep
it clean by washing it often with lukewarm or cold
water.
Don’t wash your vehicle in thedirect rays of the sun.
Don’t use strong soaps or chemicaldetergents. Use
liquid hand, dish or carwashing (mild detergent) soaps.
Don’t use cleaning agentsthat are petroleum based,
or that contain acid or abrasives. All cleaning agents
should be flushed promptly and not allowed to dry on
the surface, or they could stain. Dry the finish with a
soft, clean chamois or a 100%cotton towel to avoid
surface scratchesand water spotting.
High pressure car washes may cause water to enter your
vehicle.
NOTICE:
Conveyor systems on some automatic car washes
may damage a Corvette. They may not have
enough clearance for the undercarriage or for the
extra wide rear tireson Grand Sport Coupe
models.
Check with the manager before using a car wash,
I
Finish Care
Occasional waxing or mild polishingof your Corvette
by hand maybe necessary to remove residue from the
paint finish. You can get GM-approved cleaning
products from your dealer. (See “Appearance Care and
Materials” in the Index.)
Your Corvette has a “basecoat/clearcoat” paint finish.
The clearcoat gives moredepth and gloss to the colored
basecoat. Always use waxesand polishes that are
non-abrasive and madefor a basecoatklearcoat
paint finish.
Cleaning Your Convertible Top
I NOTICE:
When you hand wash the top, do it in partial shade.
Use a mild soap, lukewarm water and a soft sponge.
A chamois or cloth may leave lint on the top, and a
brush can chafe thethreads in the top fabric. Don’t use
detergents, harsh cleaners, solvents or bleaching agents.
Machine compounding or aggressive polishing on
a basecoatklearcoat paint finish may dull the
finish or leave swirl marks.
Foreign materialssuch as calcium chloride and other
salts, ice melting agents,road oil and tar, tree sap, bird
droppings, chemicals from industrial chimneys, etc. can
damage your vehicle’sfinish if they remain on painted
surfaces. Wash the vehicle as soon as possible. If
necessary, use non-abrasive cleaners that are marked
safe for painted surfaces to remove foreign matter.
Exterior painted surfaces are subject to aging, weather
and chemicalfallout that can take their toll over a period
of years. You can help to keep the paint finish looking
new by keeping your Corvette garaged or covered
whenever possible.
Your convertible top should be cleaned often. If you use
an automatic car wash, use onewith water jets and
hanging cloths.
When you clean the top, put one hand under it to
support it. Wet the entire vehicle and wash the top
evenly to avoid spots or rings. Let the soap remain on
the fabric for a few minutes. When the top is really dirty,
use a mild foam-type cleaner. Thoroughly rinse the
entire vehicle, then let the top dry in direct sunlight.
To protect the convertible top:
0
After you wash the vehicle, make sure the top is
completely dry before you lower it.
0
Don’t get any cleaner on the vehicle’s painted finish;
it could leave streaks.
0
If you decide to gothrough an automatic car wash,
ask the manager if the equipment could damage
your top.
Cleaning and Storageof Your
Hardtop
The optional hardtop has the same durable finish as the
painted surfaces of your Corvette. You can wash, polish
and wax it.
If you store the hardtop for a long time, keep it covered
in a dry place. Apply silicone grease to all the
weatherstrips.
Aluminum Wheels
Your aluminum wheels have a protective coating similar
to the painted surface of your vehicle. Don’t use strong
soaps, chemicals, chrome polish, abrasive cleaners or
abrasive cleaning brushes on them because you could
damage this coating. After rinsing thoroughly, a wax
may be applied.
NOTICE:
,
Don’t use an automaticcar wash that has hard
silicon carbide cleaning brushes. These brushes
can take theprotective coating off your
aluminum wheels.
6-60
Tires
To clean your tires, use a stiff brush with a tire cleaner.
NOTICE:
When applying a tire dressing alwaystake careto
wipe off any overspray or splash from all painted
surfaces on the body or wheels of the vehicle.
Petroleum-based products may damagethe paint
finish.
Finish Damage
Any stone chips, fractures or deep scratches in the finish
should be repaired right away.
Minor chips and scratches can be repaired with touch-up
materials available from your dealer or other service
outlets. Larger areas of finish damage can be corrected
in your dealer’s body and paint shop.
Underbody Maintenance
Chemical Paint Spotting
Chemicals usedfor ice and snowremoval and,dust
control cancollect on the underbody.If these are not
removed, accelerated corrosion (rust) can occur on the
underbody parts such as fuel lines, frame, floor pan,
and exhaust system eventhough they have corrosion
protection.
Some weather and atmospheric conditions can create a
chemical fallout. Airborne pollutants can fallupon and
attack painted surfaces on your vehicle. This damage
can take two forms: blotchy, ringlet-shaped
discolorations, and small irregular dark spots etched
into the paint surface.
At least every spring,flush these materials from the
underbody with plain water.Clean any areas where mud
and other debris can collect. Dirt packed in closed areas
of the frame should be loosened before being flushed.
Your dealer or an underbody vehicle washing system
can do thisfor you.
Although no defect in the paint job causes this, Corvette
will repair, at no charge to the owner, the surfaces of
new vehicles damaged by this fallout condition within
12 months or 12,000 miles (20 000 km)of purchase,
whichever occurs first.
Fiberglass Springs
NOTICE:
I
I
Don’t use corrosive oracidic cleaning agents,
engine degreasers, aluminum cleaning agents
or
other harsh solvents to clean fiberglass springs;
they’ll damage the springs.
Appearance Care Materials Chart
Vehicle Identification Number (VIN)
Service Parts Identification Label
You’ll find this label on the inside ofyour rear storage
compartment. It’s very helpfulif you ever need to order
parts. On this label is:
yourVIN,
the model designation,
This is the legal identifierfor your Corvette. It appears
on a platein the front corner of the
instrument panel, on
the driver’s side.You can see it if you look through the
windshield from outsideyour vehicle. The VIN also
appears on the Vehicle Certification andService Parts
labels and the certificates of title
and registration.
0
paint information, and
0
a list of all production options and special
equipment.
Be sure that this label is not removed from the vehicle.
Engine Identification
The eighth character in your VIN
is the engine code.
This code will helpyou identify your engine,
specifications, and replacement parts.
6-63
Electrical System
Headlamps
Add-on Electrical Equipment
The headlamp wiring is protected by a circuit breaker.
An electrical overload will cause the lamps to go on and
off, or in some cases to remain off. If this happens, have
your headlamp wiring checked right away.
NOTICE:
Don’t add anything electrical to your Corvette
unless you check with your dealerfirst. Some
electrical equipment can damage your vehicle
and the damage wouldn’t be covered by your
warranty. Some add-on electrical equipment can
keep other components from working as they
should.
Your vehicle has an air bag system. Before attempting to
add anything electrical to your Corvette, see “Servicing
Your Air Bag-Equipped Corvette” in the Index.
Windshield Wipers
The windshield wiper motor is protected by a fuse and
an internal circuit breaker. If the motor overheats due to
heavy snow, etc., the wiper will stop until the motor
cools. If the overload is causedby some electrical
problem and not snow, etc., be sure to get it fixed.
Power Windows and Other Power Options
Circuit breakers protect the power windows and other
power accessories. When the current load is too heavy,
the circuit breaker opens andcloses, protecting the
circuit until the problem is fixed or goes away.
Fuses and Circuit Breakers
Instrument PanelFuse Block
The wiring circuits in yourvehicle are protected from
short circuits bya combination of maxi-fuses,
mini-fuses and circuit breakers. This greatly reduces
the chanceof fires caused byelectrical problems.
Look at the silver-colored bandinside the fuse. If the
band is broken or melted, replace the fuse. Be sure you
replace a bad fuse witha new one of the identical size
and rating.
If you ever have a problem on the road and don’thave
a spare fuse, you can borrow one that has the same
amperage. Just pick somefeature of your vehicle that
you can get along without-- like the radio or cigarette
lighter -- and use its fuse, ifit is the correct amperage.
Replace it as soon asyou can.
The interior fuse center is on the rightside of your
instrument panel. Turn the knob and pull thedoor to
access the fuses.
6-65
t'
1c 7
2
1
N C MDL
BTSI
WIPER
RDO
6
C
7
7 1 .
STOP/HAZ
HORN
TAIL
CRANK
1
1
c
7 3c 7 4c IGN.
7 HTD MIR
7
7 8C 7 9c 71oc 7
5
c
AIR BAG
P/N
7
1
2
c
7
7
1 3 1
RH
ILLUM
LH
ILLUM
CNSL
ILLUM
F.P.
1
5
c
7
171
1
8
C
CCMB GENERATOR
A/C
1 5 1
7
CLUTCH
1
9
c
7
2
7
c
728C
7c7
7 2 5 c
COIL
TURN
ENG
FAN
1
7-c 7=c 7 c I b C
=E 7
7=c7 74oc
3
1
c
PWR
MIRROR
CRUISE
E.C.M.
4
l
C
LHCTSY
742C
SPORT
SEAT
PWR
LOCK
6-66
BAG
AIR
3 9 1
3 7 c
RHCTSY
7
7c7c7
BACKUP
L.C.D.
POWER SEAT
UTlLllY OXYGEN
SEN
7
2
4
c
CLUSTER
P.K.E.
\
\
ml
CRANK
CLUTCH
7 l4C 7
7
1
A/TRANS
ZCENG27=c
7 =CINJ 2
lNJl
=c
CIRCUIT
BREAKERS
CCMP
7C J C
N C PROG
CIGAR
HATCH
Two maxi -fuse blocks
are located under hood
near battery.
POWER WINDOW
N
7
CCMl
7
RDOBATT
7
P
Fuse
Usage
Fuse
Usage
1
Heater, A/C Programmer
13
Console Illumination
2
Brake-Transmission Shift
Interlock
14
Fuel Pump 1
15
Automatic Transmission
16
Central Control Module, Daytime
Running Lamps Module
17
Generator
18
A/C .CompressorClutch, Heater
and A/C Control Head, Heater and
A/C Programmer, R e v Defog
Relay
19
Accessory Plug
20
Heated Oxygen Sensors
21
Real Time Damping Module, ABS
Module, HVAC Solenoid
Assembly
22
Injectors #1,4,6,7
23
Injectors #2,3,5, 8
24
Turn Signal Flashers
25
Ignition Coil and Ignition Coil
Module
3
Windshield WiperNasher Switch
Assembly
4
Radio Receiver (Ignition)
5
Heated Mirrors, Heater and A/C
Control Head, Heater and A/C
Programmer
6
Light Switch, Daytime Running
Lamps Module
7
Horn Relay
8
Hazard Flashers, Brake Switch
9
Crank-Air Bag
10
Crank-Park/Neutral Switch
(Automatic), Clutch Switch
(Manual)
11
RH Illumination
12
LH Illumination
ti47
Fuse
Fuse
Usage
26
Passive Keyless Entry Module
34
Air Bag System
27
Instrument Cluster, Driver
Information Center, Air Bag
System
35
Central Control Module
36
Footwell Courtesy Lamps, Door
Courtesy Lamps, Glove
Compartment Lamps, Lighted
Rearview Mirror
37
Bose Amplifier Relay, Power
Antenna Relay, Cargo
Compartment Lamps
38
Instrument Cluster, Tone
Generator, Dome Lamp Relay
39
Central Control Module
40
Radio Receiver (Battery), Radio
Control Head, Passive Keyless
Entry Module
41
Sport Seats
42
Power Door Lock Switches,
Driver Information Center, Passive
Keyless Entry Module
43
Heater and A/C Programmer
28
Back-up Lamps Switch,
Transmission Position Switch,
One to Four Shift Solenoid
29
Cooling Fan Relay Coil #1, 2 , 3
30
Canister Purge Solenoid, EGR
Circuit (LTl), Mass Airflow
Sensor, One to Four Shift Relay,
Brake Switch (Automatic), Air
Pump Relay
31
Power Mirror Adjuster Control,
Lighted Rearview Mirror, Visor
Vanity Mirrors
32
Cruise Control Engage Switch,
Daytime Running Lamps Module,
Low Tire Pressure Warning
Module, Cruise Control Cut-off
Relay
33
6-68
Usage
Engine Control Module
Fuse
Usage
44
Cigarette Lighter, AccessoryPlug
45
Hatch or Deck Lid Release Relay
K
Power Seats
L
Blank
M
Power Windows
N
Blank
P
Blank
Engine Compartment Fuse Blocks
There aretwo maxi-fuse blocks in theengine
compartment. One ispart of theforward lamp wiring
harness (A), and the otheris part of the ECM-engine
wiring harness (B).
6-69
Forward Lamp Fuse Block
INTERIOR LIGHTING
PRIMARY COOLING FAN
LH HDLP MOTOR
RH HDLP MOTOR
EXTERIOR LIGHTING
POWER ACCSY
AIR PUMP
'-70
Fuse
Usage
1
Interior Lighting
2
Primary Cooling Fan
3
LH Headlamp Motor
4
RH Headlamp Motor
5
Secondary Cooling Fan
6
Exterior Lighting
7
Power Accessory (Power Locks,
Hatch, Lighter, Seats)
8
Air Pump
ECM Engine FuseBlock
Fuse
1
FUEL PUMP
Usage
1
Engine Control Module
2
Fuel Pump
3
Anti-Lock Brakes, Acceleration
Slip Regulation System
A/C Blower
ABS/ASR ECU
Rear Defogger
Ignition
A/C BLOWER
Ignition
Brake Hydraulics
RR DEFOG
IGNITION
IGNITION
BRAKE HYDRAULICS
6-71
Underhood Lamps Fuse
I
Your Corvette has one
single fuse underhood for
the underhood lamps. The
fuse is under the hood on
the driver’s sidemarker
lamp assembly.
Leaving your hood open and your underhood lamps on
can drain your battery. If you need to keep the hood
open for an extended period of time, remove the
underhood lamps fuse.
6-72
Ride Control Fuse
Vehicles equippedwith the
optional Real Time
Damping ride control
system are fuse protected
with a fuse located in the
ABS compartment behind
the driver’s seat.
To access this fuse, pull back thecarpet, remove the
screw and lift the cover.
Replacement Bulbs
Air Conditioning and Heater Control . . . . . . . . . 37
Automatic Transmission Indicator . . . . . . . . 194NA
Back-up ..............................
1156
Center High-Mounted Stoplamp . . . . . . . . . . . 1156
564
Console ...............................
Cornering ............................
1156
Door Courtesy .........................
2 12-2
73
DoorFlood .............................
DriverInformation Center . . . . . . . . . . . . . . . . . . *
FloorCourtesy . . . . . . . . . . . . . . . . . . . . . . . . . 562
Fog ..................................
896
Front ParkingDurn Signal . . . . . . . . . . . . . 2057NA
Headlamp . . . . . . . . . . . . . . . . . . . . . . . . . . HP6054
*
Instrument Cluster.........................
24
License ................................
Mirror Flood . . . . . . . . . . . . . . . . . . . . . . . . . . . . 74
Mirror Reading . . . . . . . . . . . . . . . . . . . . . . . . . 168
*
Radio ...................................
Rear Courtesy (Convertible) . . . . . . . . . . . . . . . 562
Rear Courtesy (except Convertible) . . . . . . . . . 906
24
Sidemarker .............................
Tail/Stop/Turn . . . . . . . . . . . . . . . . . . . . . . . . . 2057
Underhood ............................
2 12-2
Visor Vanity Mirror .......................
74
* These bulbs are not owner.serviceab1e. See your
dealel:
6-73
Capacities and Specifications
Type ................................................................... V8
VIN Engine Code
P
LT1 ...................................................................
LT4 ....................................................................
5
Fuel Delivery ...............................
Sequential Multiport Fuel Injection (SFI)
Valve Arrangement ............................................. Overhead Valve
Piston Displacement. ............................................
350 CID (5.7L)
Bore ..................................................
4.00 inches (101.6 mm)
Stroke ..................................................
3.48 inches (88.39 mm)
Compression Ratio
10.5: 1
LTl .............................................................
LT4 ................................................
.......... 10.67: 1
Horsepower
300
LT1, .................................................................
330
LT4 .................................................................
1-8-4-3-6-5-7-2
Firing Order ...................................................
180°F (82°C)
Thermostat Temperature Specification ...............................
6-74
Replacement Parts
Air Cleaner Filter .....................................................
A 1097C
GM Part No. 25096933 or equivalent
75B-72
Battery ..............................................................
RC27
Coolant High FillReservoir Cap ...........................................
15 psi (105 kPa)
GM Part No. 6410782 or equivalent
CV895C
CrankcaseVentilationValve . . . . . . . . . . . . . . . . . . . . . . . . . . . . . . . . . . . . . . . . . . .
PF52
EngineOilFilter . . . . . . . . . . . . . . . . . . . . . . . . . . . . . . . . . . . . . . . . . . . . . . . . . . . . . . .
GM Part No. 25010908 or equivalent
Flat Ratchet Wrench (Convertible Hardtop Only) . . . . . . GM Part No. 10137741 or equivalent
AC Type CV895C
PCV Valve ..................................................
Serpentine Belt ................................ GM Part No. 10230259 or equivalent
Spark Plug . . . . . . . . . . . . . . . . . . . . . . . . . . . . . . . . . . . . . . . . . . . . . 4 1-943 (0.050 inch Gap)
GM Part No. 5614244 or equivalent
Thermostat ...................................
GM Part No. 10223370 or equivalent
GM Part No. 10172311 or equivalent
Tom@ Wrench ................................
Windshield Wiper Blade
..........................
20 inches (508 mm)
Length ......................
Type .................................................
0.'25 inch (6.35 mm) pin
Wheel Nuts
Wheel Nut Torque . . . . . . . . . .
. . . . . . . . . . . . . . . . . . . . . . . . . . . . 100 lb-ft (140 N-m)
6-75
Capacities (Approximate)
The following approximatecapacities are given in English and metric conversions.
Air Conditioning . . . . . . . . . . . . . . . . . See the refrigerant information label under the hood.
Automatic Transmission
5 quarts (4.7 L)*
Drain and Refill ..............................................
10.8 quarts (10.2 L)*
Overhaul . . . . . . . . . . . . . . . . . . . . . . . . . . . . . . . . . . . . . . . . . . . . .
Cooling System
LT1 . . . . . . . . . . . . . . . . . . . . . . . . . . . . . . . . . . . . . . . . . . . . . .
14.5 quarts (13.7L)
14.6quarts(13.8L)
LT4 . . . . . . . . . . . . . . . . . . . . . . . . . . . . . . . . . . . . . . . . . . . . . . . . . . . .
Crankcase
Without Filter Change .......................................
4.0 quarts (3.8 L)*
With Filter Change .........................................
4.5 quarts (4.3 L)*
FuelTank ................................
. . . . . . . . . . . . . 20.0 gallons (75.7L)
2.2 quarts (2.1 L)*
Manual Transmission (Overhaul) . . . . . . . . . . . . . . . . . . . . . . . . . . . . .
Rear Axle
1.5 quarts (1.42 L)
Lubricant . . . . . . . . . . . . . . . . . . . . . . . . . . . . . . . . . . . . . . . . . . . . . . . . . .
.4.0 ounces (118 ml)
Limited Slip Additive ......................................
Tire Pressures . . . . . . . . . . See Tire-Loading Information label on rear edge of driver’s door
*
Recheck fluid level after filling. See Section 6 or the Index.
6-76
Vehicle Dimensions
Wheelbase ........................................
Tread
Front/Re..............................................
Coupe and Convertible ..................................
GrandSpo.............................................
Length ...............................................
Width
Coupe ...............................................
Convertible ...........................................
Height
Coupe ...............................................
Convertible ...........................................
96.2 inches (2 444 mm)
57.7 inches (1 466 mm)
59.1 inches (1 500 mm)
60.6 inches (1 539 mm)
178.5 inches (4 535 mm)
70.7 inches (1 796 mm)
73.1 inches (1 856 mm)
46.3 inches (1 177 mm)
47.3 inches (1 202 mm)
--
Power Curves LTl Engine
500
450
r
Power Curves
LT1 Engine
c
Power Curves LT4 Engine
-9
500
350
Power Curves
LT4 Engine
,-
1350
- 315
- 280
4315
w
-245
9
2
-no !#
2
250
-
TORQUE
HORSEPOWER
200
150
l 50
ooL
ENGINE SPEED-RPM
175
- 140
-105
-
/
70
-35
ENGINE SPEED- RPM
8
$
ti?
m
Accessory Belt Routing
Air Conditioning Refrigerants
Not all air conditioning refrigerants are the same.
If the air conditioning system in yourvehicle needs
refrigerant, be sure theproper refrigerant is used.If
you’re not sure, ask your Corvette dealer.
6-79
NOTES
6-80
e
I
Section 7 MaintenanceSchedule
Introduction
IMPORTANT.
KEEP ENGINE OIL
AT THE PROPER
LEVEL AND CHANGE AS
RECOMMENDED
This section covers the maintenance required
for your
Corvette. Your vehicle needs these services to retain its
safety, dependability andemission control performance.
I Protection
Plan
Your Vehicle and the Environment
Proper vehicle maintenance not onlyhelps to keep your
vehicle in good working condition, butalso helps the
environment. All recommended maintenance procedures
are important. Improper vehicle maintenance can even
affect the quality of the air we breathe.Improper fluid
levels or the wrong tire inflation canincrease the level
of emissions from your vehicle. To help protect our
environment, and to keep your vehicle in good
condition, please maintain your vehicle properly.
Have you purchased the GM Protection Plan? The Plan
supplements your new vehicle warranties. See your
Warranty and OwnerAssistance booklet, or your
Corvette dealerfor details.
7-1
How This Section is Organized
The remainder of this section is divided into five parts:
“Part A: Scheduled Maintenance Services” shows
what to have doneand how often. Some of these
services can be complex, so unless you are technically
qualified and have the necessary equipment, you should
let your dealer’s service department or anotherqualified
service center dothese jobs.
Performing maintenancework on a vehicle can
be dangerous. In trying to dosome jobs, you can
be seriously injured. Do your own maintenance
work only if you have the requiredknow-how
and theproper tools and.equipment for the job.
If you have any doubt, have a qualified
technician do the
work.
If you are skilled enough to do some work on your
vehicle, you will probably want to get theservice
information GM publishes. See “Serviceand Owner
Publications” inthe Index.
7-2
“Part B: Owner Checks and Services’’ tells you what
should be checked whenever you stop for fuel. It also
explains what you can easily do tohelp keep your
vehicle in good condition.
“Part C: Periodic Maintenance Inspections”
explains importantinspections that your Corvette
dealer’s service department or another qualifiedservice
center should perform.
“Part D: Recommended Fluids and Lubricants”
lists some products GM recommends to help keep your
vehicle properly maintained. These products, ortheir
equivalents, should be used whether you do the work
yourself or have itdone.
“Part E: Maintenance Record’’ provides a place
for you to record the maintenance performedon your
vehicle. Whenever any maintenanceis performed, be
sure to write it downin this part.This will help you
determine when your next maintenance should be done.
In addition, it is agood idea to keep your maintenance
receipts. They may be needed to qualify your
vehicle for
warranty repairs.
Part A: Scheduled Maintenance
Services
Using Your Maintenance Schedule
We at General Motors want to help you keep your
vehicle in good workingcondition. But we don’t know
exactly how you’ll drive it. You may drive very short
distances only a few timesa week. Or you may drive
long distances all the timein very hot, dusty weather.
You may use your vehiclein making deliveries. Or
you may drive it to work,to do errands orin many
other ways.
Because of all the different ways people use their GM
vehicles, maintenance needs vary.You may even need
more frequent checks and replacements than you’ll find
in the schedules in this section. So please read this
section and note how youdrive. If you have any
questions on how to keep your vehicle in good
condition, see your Corvette dealer.
The proper fluids and lubricants to use are listed in
Part D. Make sure whoever services your vehicle
uses these. All parts should be replaced and all
necessary repairs done before you or anyone else
drives thevehicle.
These schedulesare for vehicles that:
carry passengers and cargo within recommended
limits. You will find these limits on your vehicle’s
Tire-Loading Information label. See “LoadingYour
Vehicle’’ in the Index.
are driven on reasonable road surfaces within legal
driving limits.
use the recommended fuel. See “Fuel” in the Index.
Selecting the Right Schedule
First you’ll need to decide which of the two schedules is
right for your vehicle. Here’s how todecide which
schedule to follow:
This part tellsyou the maintenance services you should
have done and when you should schedule them.If you
go to your dealer for your service needs, you’ll know
that GM-trained and supportedservice people will
perform the work usinggenuine GM parts.
7-3
Maintenance Schedule
Short Trip/City Definition
Short Trip/City Intervals
Follow the Short TripKity Maintenance Schedule
if any
one of these conditions is true for your vehicle:
Every 3,000 Miles (5 000 km): Engine Oil and Filter
Change (or 3 months, whicheveroccurs first).
Most trips are less than 5 to 10 miles (8 to 16 km).
This is particularly important when outside
temperatures are below freezing.
Every 6,000 Miles (10 000 km): Chassis Lubrication
(or 6 months, whichever occurs first).
0
Most trips include extensiveidling (such as frequent
driving in stop-and-go traffic).
Most trips are through dusty areas.
0
If the vehicle is used for delivery service, police, taxi
or other commercial application.
One of the reasons you should follow this schedule if
you operateyour vehicle under any of these conditions
is that these conditions cause engine oil to break
down sooney:
Every 15,000 Miles (25 000 km): Air Cleaner Filter
Inspection, if driving in dustyconditions. Automatic
Transmission Service (severe conditions only).
Every 30,000 Miles (50 000 km): Air Cleaner Filter
Replacement. Fuel Tank, Cap and Lines Inspection.
Every 60,000 Miles (100 000 km): Engine Accessory
Drive Belt Inspection.
Every 100,000 Miles (166 000 km): Cooling System
Service (or every 60 months, whichever occursfirst).
Spark Plug Wire Inspection. Spark Plug Replacement.
Automatic Transmission Service (normal conditions).
These intervals only summarize maintenanceservices.
Be sure to followthe complete maintenance schedule
on
the following pages.
7-4
Maintenance Schedule
7 Long Tripmighway Definition
Follow this maintenanceschedule only if none of the
conditions from theShort TripKity Maintenance
Schedule is true.
Driving a vehicle with afully warmed engine under
highway conditions causesengine oil to break
down slower:
I Long Trip/Highway Intervals
I
Every 7,500 Miles (12 500 km): Engine Oil and Filter
Change (or every 12 months, whichever occurs first).
Chassis Lubrication (or every 12 months, whichever
occurs first).
Every 15,000 Miles (25 000 km): Automatic
Transmission Service (severe conditionsonly).
Every 30,000 Miles (50 000 km): Air Cleaner Filter
Replacement. Fuel Tank, Cap and Lines Inspection.
Every 60,000 Miles (100 000 km): Engine Accessory
Drive Belt Inspection.
Every 100,000 Miles (166 000 km): Cooling System
Service (or every 60 months, whichever occurs first).
Spark Plug Wire Inspection. Spark Plug Replacement.
Automatic Transmission Service (normal conditions).
These intervals only summarize maintenanceservices.
Be sure to followthe complete maintenance schedule on
the following pages.
7-5
I
Short TripKity Maintenance Schedule
The services shown in this schedule up to 100,000 miles
( 166 000 km) should be performed after 100,000 miles
(166 000 km)at the same intervals.
Footnotes
The U.S. Environmental Protection Agenc: v or the
California Air Resources Board has determined that the
failure toperform this maintenance item willnot nullify
the emission warranty or limit recall liability prior to the
completion of the vehicle’s useful life. We, however,
urge that all recommended maintenance services be
performed at the indicated intervals and the maintenance
be recorded.
7-6
I
* Your vehicle has an Engine Oil Life Monitor. This
monitor will show you when to change the oil-- usually
between 3,000 miles (5 000 km) and 7,500 miles
(12 500 km) since your last oil change. Under
severe conditions the indicator may come on before
3,000 miles (5 000 km). Never drive your vehicle more
than 7,500 miles (12 500 km)or 12 months whichever
occurs first, without an oil change.
The system won’t detect dust in theoil. So if you
drive in a dusty area be sure to change your oil every
3,000 miles (5 000 km)or sooner if the CHANGE OIL
light comes on. Remember toreset the Oil Life Monitor
when the oil has been changed.For more information,
see “Engine Oil Life Monitor” in the Index.
I
I
Short Trip/City Maintenance Schedule
I
3,000 Miles (5000 km)
6,000 Miles (10 000 km)
Cl Change
0Change engine oil and filter (or every
engine oil andfilter (or every
3 months, whichever occurs first).
An Emission Control Service.
*
3 months, whichever occurs first).
An Emission Control Service.
*
0Lubricate the suspension, steering and
transmission shift linkage, parking brake
cable guides, underbody contact points and
linkage (or every 6 months, whichever
occurs first).
DATE
ACTUAL MILEAGE
SERVICED BY:
DATE
ACTUAL MILEAGE
SERVICED BY:
7-7
I
Short Trip/City Maintenance Schedule
9,000 Miles (15000 km)
0Change engine oil and filter (or every
I
12,000 Miles (20 000 km)
0Change engine oil and filter (or every
3 months, whichever occurs first).
3 months, whichever occurs first).
An Emission Control Service.
An Emission Control Service.
*
*
I7 Lubricate the suspension, steering and
parking brake cable guides, underbody
contact points and linkage (or every
6 months, whichever occurs first).
DATE
ACTUAL MILEAGE SERVICED BY:
DATE
'
ACTUAL MILEAGE
SERVICED BY:
I
Short Trip/City Maintenance Schedule
15,000 Miles (25 000 km)
0Change engine oil and filter (or every
3 months, whicheveroccurs first).
An Emission Control Service.
*
0Inspect air cleaner filter if you are driving
in dusty conditions.Replace filter if
necessary. An Emission ControlService.
0Change automatictransmission fluid and
filter if the vehicleis mainly driven under
one or more of these conditions:
- In heavy city traffic where the outside
temperature regularly reaches 90°F
(32°C) or higher.
I
- In hilly or mountainous terrain.
- Uses such as found in taxi, police or
delivery service.
I f you do not use your vehicle under any of
these conditions, change thefluid and filter
at 100,000 miles (166 000 km).
Manual transmission fluid doesn’t require change.
DATE
ACTUAL MILEAGE
SERVICED BY:
7-9
I
Short Trip/City Maintenance Schedule
18,000 Miles (30 000 km)
I
21,000 Miles (35 000 km)
0Change engine oil and filter (or every
3 months, whichever occurs first).
Change engine oil and filter (or every
3 months, whichever occurs first).
An Emission Control Service.
An Emission Control Service.
*
*
0Lubricate the suspension, steering and
parking brake cable guides, underbody
contact points and linkage (or every
6 months, whichever occurs first).
DATE
ACTUAL
MILEAGE
SERVICED
>
7-10
BY:
DATE
ACTUAL
MILEAGE
SERVICED
BY:
I Short Trip/CityMaintenanceSchedule I
24,000 Miles (40 000 km)
27,000 Miles (45 000 km)
0Change engine oiland filter (or every
0Change engine oil and filter (or every
3 months, whichever occurs first).
3 months, whichever occurs first).
An Emission Control Service.
An Emission Control Service.
*
*
0Lubricate thesuspension, steering and
parking brake cableguides, underbody
contact points and linkage (or every
6 months, whicheveroccurs first).
I
DATE
I
ACTUAL MILEAGE
SERVICED BY:^
I
DATE
I
ACTUALMILEAGE
SERVICED BY:
7-11
Short Trip/City Maintenance Schedule
30,000 Miles (50 000 km)
Cl Change engine oil and filter (or every
- In heavy city traffic where the outside
3 months, whichever occurs first).
An Emission Control Service.
temperature regularly reaches90 O F
(32°C) or higher.
- In hilly or mountainous terrain.
- Uses such as found in taxi, police or
delivery service.
*
0Lubricate the suspension, steering and
parking brake cable guides, underbody
contact points and linkage (or every
6 months, whichever occurs first).
Cl Replace air cleaner filter.
If you do notuse your vehicle under any of
these conditions, change the fluid and filter
at 100,000 miles (166 000 km).
An Emission Control Service.
0Inspect fuel tank, cap and lines for damage
Manual transmission fluid doesn't require change.
or leaks. Inspect fuel cap gasket for any
damage. Replace parts as needed.
An Emission Control Service.
3'
I7 Change automatic transmission fluid and
DATE
ACTUAL
MILEAGE
SERVICED
BY:
filter if the vehicle is mainly driven under
one or more of these conditions:
I
7-12
I
I
Short Trip/City Maintenance Schedule
33,000 Miles (55 000 km)
36,000 Miles (60 000 km)
0Change engine oil andfilter (or every
0Change engine oil and filter(or every
3 months, whichever occursfirst).
3 months, whichever occursfirst).
An Emission Control Service.
An Emission Control Service.
*
*
0Lubricate the suspension, steering and
parking brake cable guides, underbody
contact points and linkage (or every
6 months, whichever occursfirst).
I
DATE
I
ACTUAL MILEAGE
SERVICED BY:
DATE
ACTUAL MILEAGE
SERVICED BY:
7-13
I
Short TripKity Maintenance Schedule
I
39,000 Miles (65000 km)
42,000 Miles (70 000 km)
0Change engine oil and filter (or every
0Change engine oil and filter (or every
3 months, whichever occursfirst).
3 months, whichever occursfirst).
An Emission Control Service.
An Emission Control Service.
*
*
0Lubricate the suspension, steeringand
parking brake cable guides, underbody
contact points and linkage (or every
6 months, whichever occurs first).
DATE
ACTUAL
MILEAGE
SERVICED
7-14
BY:
I
I
Short Trip/City Maintenance Schedule
45,000 Miles (75 000 km)
0Change engine oil andfilter (or every
I f you do not use your vehicle under any of
these conditions, change the fluid and filter
at 100,000 miles (166 000 km).
3 months, whichever occursfirst).
An Emission ControlService.
*
0Change automatic transmissionfluid and
filter if the vehicleis mainly driven under
one or moreof these conditions:
- In heavy city traffic where the outside
temperature regularly reaches90OF
(32 C) or higher.
- In hilly or mountainous terrain.
- Uses such as found intaxi, police or
delivery service.
Manual transmission fluid doesn’t require change.
0Inspect air cleaner filter if you are driving
in dusty conditions. Replace filter if
necessary. An Emission Control Service. 3-
O
I
I
7
1
ACTUAL MILEAGE
SERVICED BY:
7-15
I Short TripKity Maintenance Schedule 1
48,000 Miles (80 000 km)
51,000 Miles (85 000 km)
0Change engine oil and filter (or every
0Change engine oil and filter (or every
3 months, whichever occurs first).
3 months, whichever occurs first).
An Emission Control Service.
An Emission Control Service.
*
*
0Lubricate the suspension, steering and
parking brake cable guides, underbody
contact points and linkage (or every
6 months, whichever occurs first).
"
DATE
ACTUAL
MILEAGE
SERVICED
7-16
BY:
DATE
ACTUAL
MILEAGE
SERVICED
BY:
I
Short,Trip/City Maintenance Schedule
54,000 Miles (90 000 km)
Change engine oil andfilter (or every
3 months, whichever occurs first).
An Emission Control Service.
*
I
57,000 Miles (95000 km)
0Change engine oil and filter (or every
3 months, whichever occurs first).
An Emission Control Service.
*
0Lubricate the suspension, steering and
parking brake cable guides, underbody
contact points andlinkage (or every
6 months, whichever occurs first).
DATE
ACTUAL MILEAGE
SERVICED BY:
7-17
I Short TripKity Maintenance Schedule I
60,000 Miles (100 000km)
0Change engine oil and filter (or every
3 months, whichever occurs first).
An Emission Control Service.
*
0Lubricate the suspension, steering and
parking brake cable guides, underbody
contact points and linkage (or every
6 months, whichever occurs first).
0Change automatic transmission fluid and
filter if the vehicle is mainly driven under
one or more of these conditions:
- In heavy city traffic where the outside
temperature regularly reaches 90O F
(32°C) or higher.
- In hilly or mountainous terrain.
- Uses such as found in taxi, police or
delivery service.
7-18
If you do not use your vehicle under anyof
these conditions, change thefluid and filter at
100,000 miles (166 000 km).
Manual transmission fluid doesn’t require change.
0Inspect engine accessory drive belt.
An Emission Control Sewice.
Replace air cleaner filter.
An Emission Control Service.
0Inspect fuel tank, cap andlines for damage
or leaks. Inspect fuel cap gasket for any
damage. Replace parts as needed.
An Emission Control Service.?
I
Short Trip/City Maintenance Schedule
I
63,000 Miles (105 000 km)
66,000 Miles (110 000 km)
0Change engine oil andfilter (or every
0Change engine oil and filter (or every
3 months, whicheveroccurs first).
3 months, whichever occurs first).
An Emission Control Service.
An Emission Control Service.
*
*
0Lubricate the suspension, steering and
parking brake cable guides, underbody
contact points and linkage (or every
6 months, whichever occurs first).
DATE
ACTUAL MILEAGE
SERVICED BY:
ACTUAL MILEAGE
DATE SERVICED
BY:
I
7-19
)Shortip/City
Maintenance Schedule
69,000 Miles (115 000 km)
72,000 Miles (120 000 km)
0Change engine oil and filter (or every
0Change engine oil and filter (or every
3 months, whichever occurs first).
3 months, whichever occurs first).
An Emission Control Service. *
An Emission Control Service.
*
0Lubricate the suspension, steering and
parking brake cable guides, underbody
contact points and linkage (or every
6 months, whichever occurs first).
I
I
DATE
ACTUAL
MILEAGE
SERVICED
1
I
BY:
DATE
ACTUAL MILEAGE
SERVICED BY:
I
Short Trip/City Maintenance Schedule
I
75,000 Miles (125 000 km)
0Change engine oil andfilter (or every
3 months, whicheveroccurs first).
An Emission Control Service.
*
0Change automatic transmissionfluid and
filter if the vehicleis mainly driven under
one or moreof these conditions:
- In heavy city traffic where theoutside
temperature regularly reaches90 F
(32°C) or higher.
- In hilly or mountainous terrain.
- Uses such as foundin taxi, police or
delivery service.
If you do not use your vehicle under any of
these conditions, change the fluid and filter at
100,000 miles (166 000 km).
Manual transmission fluid doesn’t require change.
0Inspect air cleaner filter if you are driving
in dusty conditions. Replace filter if
necessary. An Emission Control Service. 3-
O
7-21
I
Short TripKity Maintenance Schedule
78,000 Miles (130 000 km)
0Change engine oil and filter (or every
81,000 Miles (135 000 km)
CI Change engine oil and filter (or every
3 months, whichever occurs first).
3 months, whichever occurs first).
An Emission Control Service.
I
*
An Emission Control Service.
*
0Lubricate the suspension, steering and
parking brake cable guides, underbody
contact points and linkage (or every
6 months, whichever occurs first).
DATE
ACTUAL
MILEAGE
SERVICED
7-22
BY:
DATE
ACTUAL
MILEAGE
SERVICED BY:
I Short Trip/City Maintenance Schedule I
84,000 Miles (140 000 km)
87,000 Miles (145 000 km)
0Change engine oil andfilter (or every
0Change engine oil and filter (or every
3 months, whicheveroccurs first).
3 months, whichever occurs first).
An Emission Control Service.
An Emission Control Service.
*
*
0Lubricate the suspension,steering and
parking brake cableguides, underbody
contact points andlinkage (or every
6 months, whicheveroccurs first).
DATE
ACTUAL MILEAGE
SERVICED BY:
DATE
ACTUAL MILEAGE SERVICED BY:
7-23
Short TripKity Maintenance Schedule
90,000 Miles (150 000 km)
0Change engine oil and filter (or every
3 months, whichever occurs first).
An Emission Control Service.
*
0Lubricate the suspension, steering and
parking brake cable guides, underbody
contact points and linkage (or every
6 months, whichever occurs first).
0Change automatic transmission fluid and
filter if the vehicle is mainly driven under
one or more ofthese conditions:
- In heavy city traffic where the outside
temperature regularly reaches 90O F
(32°C) or higher.
- In hilly 'or mountainous terrain.
- Uses such as found in taxi, police or
delivery service.
If you do not use your vehicle under
anyof
these conditions, change thefluid and filter
at 100,000 miles (166 000 km).
Manual transmission fluid doesn't require change.
Cl Replace air cleaner
filter.
An Emission Control Service.
0Inspect fuel tank, cap and lines for damage
or leaks. Inspect fuel cap gasket for any
damage. Replace parts as needed.
I
An Emission Control Service.
7-24
-
I
Short Trip/City Maintenance Schedule
I
93,000 Miles (155000 km)
96,000 Miles (160 000 km)
0Change engine oil andfilter (or every
0Change engine oil and filter (or every
3 months, whichever occurs first).
3 months, whichever occurs first).
An Emission Control Service.
An Emission Control Service.
*
*
0Lubricate the suspension, steering and
parking brake cable guides, underbody
contact points and linkage (or every
6 months, whichever occurs first).
DATE
ACTUAL MILEAGE
SERVICED BY:
DATE
ACTUAL MILEAGE
SERVICED BY:
7-25
I I
I
Short TripKity MaintenanceSchedule
I
I
I
99,000 Miles (165 000 km)
100,000 Miles (166 000 km)
0Change engine oil and filter (or every
0Drkin, flush and refill cooling system
3 months, whichever occurs first).
An Emission Control Service.
(of every 60 months since last service,
whichever occurs first).See “Engine
Caolant” in the Index for what to use.
In pect hoses. Clean radiator, condenser,
pr ;ssurecap and neck. Pressure test cooling
system and pressure cap.
*
1
An Emission ControlService.
DATE
ACTUAL
MILEAGE
SERVICED
7-26
BY:
I
Short Trip/City Maintenance Schedule
El Inspect spark plugwires.
An Emission Control Service.
0Replace spark plugs.
An Emission ControlService.
I
0If you haven’t used yourvehicle under
severe service conditions listed previously
and, therefore, haven’t changed your
automatic transmission fluid, change both
the fluid and filter.
DATE ACTUAL MILEAGE
SERVICED BY:
I
7-27
I
Long Trip/HighwayMaintenanceSchedule
The services shown in this schedule up to 100,000 miles
(166 000 km) should be performed after 100,000 miles
(166 000 km) at the same intervals.
Footnotes
The U.S. Environmental Protection Agency or the
California Air Resources Board has determined that the
failure to perform this maintenance item will not nullify
the emission warranty or limit recall liability prior to the
completion of the vehicle’s useful life. We, however,
urge that all recommended maintenance services be
performed at the indicatedintervals and the maintenance
be recorded.
I
* Your vehicle has an EngineOil Life Monitor. This
monitor will showyou when to change the oil-- usually
between 3,000 miles (5 000 km) and 7,500 miles
(12 500 km) since your last oilchange. Under
severe conditions, the indicator may come on before
3,000 miles (5 000 km). Never drive your vehicle more
than 7,500 miles ( 12 500 km)or 12 months whichever
occurs first, without an oil change.
The system won’t detect dust in the oil.So if you
drive in a dusty area, be sure to changeyour oil every
3,000 miles (5 000 km) or sooner if the CHANGE OIL
light comes on. Remember toreset the Oil Life Monitor
when the oil has been changed. For more information,
see “Engine Oil Life
Monitor” in the Index.
umg Tripmighway Maintenance Schedule
I
7,500 Miles (12 500 km)
15,000 Miles (25 000 km)
0Change engine oil andfilter (or every
0Change engine oil and filter (orevery
12 months, whicheveroccurs first).
12 months, whichever occursfirst).
An Emission Control Service.
An Emission Control Service.
, ; O
*
17 Lubricate the suspension, steering and
Lubricate the suspension, steering and
parking brake cable guides, underbody
contact points andlinkage (or every
12 months, whicheveroccurs first).
DATE
ACTUAL
MILEAGE
SERVICED
*
BY:
parking brake cable guides,underbody
contact points and linkage (orevery
12 months, whichever occurs first).
0Change automatic transmission fluid and
filter if the vehicle is mainly driven under
one or more of these conditions:
- In heavy city traffic where the outside
temperature regularly reaches90O F
(32°C) orhigher.
(Continued)
7-29
I5,OOO Miles (25 000 km) (Continued)
- In hilly or mountainous terrain.
22,500 Miles (37 500 km)
0Change engine oil and filter(or every
12 months, whichever occurs first).
- Uses such as found in taxi, police or
An Emission Control Service.
delivery service.
If you do not useyour vehicle under any of
0Lubricate the suspension, steering and
parking brake cable guides, underbody
contact points and linkage (or every
12 months, whichever occurs first).
these conditions, change thefluid and filter
at 100,000 miles (166 000 km).
Manual transmission fluid doesn’t require change.
DATE
7-30
ACTUAL MILEAGE SERVICED BY:
*
I
I
DATE
I
ACTUAL MILEAGE
SERVICED BY:
I
Long Trip/Highway Maintenance Schedult
I
30,000 Miles (50 000 km)
0Change engine oil andfilter (or every
12 months, whicheveroccurs first).
An Emission Control Service.
*
c]Lubricate the suspension,steering and
parking brake cable guides, underbody
contact pointsand linkage (or every
12 months, whicheveroccurs first).
0Change automatic transmissionfluid and
filter if the vehicleis mainly driven under
one or moreof these conditions:
- In heavy city traffic where the outside
temperature regularly reaches90 OF
(32 C) or higher.
- In hilly or mountainous terrain.
- Uses such as found intaxi, police or
delivery service.
lfyou do not use your vehicle under anyof
these conditions, change the fluid and filter
at 100,000 miles ( I 66 000 km).
Manual transmission fluid doesn’t require change.
[7 Replace air cleaner filter.
An Emission Control Service.
0Inspect fuel tank, cap and lines for damage
or leaks. Inspect fuel cap gasket for any
damage. Replace parts as needed.
An Emission Control Service.
O
7-31
T
on* Tripmighway Maintenance Schedule
~
~~i
~
~~
d7,50C Miles (62 500 km)
45,000 Miles (75000 km)
0Change engine oil and filter (or every
0Change engine oil and filter (or every
12 months, whichever occurs first).
12 months, whichever occurs first).
An Emission Control Service. *
An Emission Control Service.
0Lubricate the suspension, steering and
Lubricate the suspension, steering and
parking brake cable guides, underbody
contact points andlinkage (or every
12 months, whichever occurs first).
parking brake cable guides, underbody
contact points and linkage (or every
12 months, whichever occurs first).
0Change automatic transmission fluid and
filter if the vehicleis mainly driven under
one or more of these conditions:
- In heavy city traffic where the outside
temperature regularly reaches90°F
(32 C) or 'higher.
O
DATE
ACTUAL
MILEAGE
SERVICED
*
BY:
1 Long Trip/Highway Maintenance Schedule
52,500 Miles (87500 km)
0Change engine oil and filter (or every
- In hilly or mountainous terrain.
12 months, whichever occurs first).
- Uses such as found in taxi, police
An Emission Control Service.
or delivery service.
17 Lubricate the suspension, steering and
If you do not useyour vehicle under any o j
these conditions, change the fluid and filter at
100,000 miles ( I 66 000 km).
Manual transmission fluid doesn’t require
change.
DATE
ACTUAL
MILEAGE
SERVICED
*
BY:
parking brake cable guides, underbody
contact points and linkage (or every
12 months, whichever occurs first).
DATE
ACTUAL
MILEAGE
3
SERVICED BY:
7-33
Long Tripmighway Maintenance Schedulc
60,000 Mt&
0 000 km)
Change engine oil and filter (or every
12 months, whichever occurs first).
An Emission Control Service.
*
0Lubricate the suspension, steering and
parking brake cable guides, underbody
contact points and linkage (or every
12 months, whichever occurs first).
Change automatic transmission fluid and
filter if the vehicle is mainly driven under
one or more of these conditions:
- In heavy city traffic where the outside
temperature regularly reaches 90°F
(32°C) or higher.
- In hilly or mountainous terrain.
- Uses such as found in taxi, police or
delivery service.
If you do not useyour vehicle under anyof
these conditions, change thefluid and filter
at 100,000 miles ( I 66 000 km).
Manual transmission fluid doesn’t require change.
0Inspect engine accessory drive belt.
An Emission Control Service.
0Replace air cleaner filter.
An Emission Control Service.
0Inspect fuel tank, cap and lines for damage
or leaks. Inspect fuel cap gasket for any
damage. Replace parts as needed.
An Emission Control Service.
DATE
ACTUAL
MILEAGE
SERVICED
7-34
__
3-
BY:
1
LongTripmighwayMaintenanceSchedule
67,500 Miles (112 500 km)
0Change engine oil andfilter (or every
1
75,000 Miles (125 000 km)
12 months, whichever occurs first).
Change engine oil and filter (or every
12 months, whichever occursfirst).
An Emission Control Service.
An Emission Control Service.
*
0Lubricate the suspension, steering and
parking brake cable guides, underbody
contact points and linkage (or every
12 months, whichever occurs first).
*
0Lubricate the suspension, steering and
parking brake cable guides, underbody
contact points and linkage (or every
12 months, whichever occurs first).
0Change automatic transmission fluid and
filter if the vehicle is mainly driven under
one or more of these conditions:
- In heavy city traffic where the outside
temperature regularly reaches90O F
(32°C) or higher.
(Continued)
7-35
Lung Trip/Highway Maintenance Schedule
75,000 Miles (125 000 km) (Continued)
lr
82,500 Miles (137 500 km)
0Change engine oil and filter (or every
- In hilly or mountainous terrain.
-
12 months, whichever occurs first).
Uses such as found in taxi, police or
delivery service.
An Emission Control Service.
0Lubricate the suspension, steering and
I f you donot useyour vehicle under any of
these conditions, change the fluid and filter
at 100,000 miles (166 000 km).
Manual transmission fluid doesn’t require change.
~~~~~
~
parking brake cable guides, underbody
contact points and linkage(or every
12 months, whichever occursfirst).
~~
I
DATE
ACTUAL
MILEAGE
SERVICED
*
BY:
DATE
ACTUAL
MILEAGE
SERVICED
1
I
BY:
’
Long Trip/Highway Maintenance Schedule
90,000 Miles (150 000km)
0Change engine oil andfilter (or every
12 months, whichever occurs first).
An Emission Control Service.
*
0Lubricate the suspension, steering and
parking brake cable guides, underbody
contact points and linkage (or every
12 months, whicheveroccurs first).
17 Change automatic transmissionfluid and
filter if the vehicle is mainly driven under
one or moreof these conditions:
- In heavy city traffic where the outside
temperature regularly reaches90 O F
(32°C) or higher.
- In hilly or mountainous terrain.
- Uses such as found in taxi, police or
delivery service.
If you do
notuse your vehicle under any of
these conditions,change the fluid and filter
at 100,000 miles (166 000km).
Manual transmission fluid doesn’t require change.
0Replace air cleaner filter.
An Emission Control Service.
0Inspect fuel tank, cap and lines fortdamage
or leaks. Inspect fuel cap gasket for any
damage. Replace parts as needed.
An Emission Control Service.
DATE
ACTUAL MILEAGE SERVICED BY:
7-37
Long Trip/Highway Maintenance Schedule
97,50~
Miles ( ~ O 300
L km)
luu,OOO Miles (166 000 km)
0Drain, flush and refill cooling system
Change engine oil and filter (or every
I 2 months, whichever occurs first).
An Emission Control Service.
(or every 60 months since last service,
whichever occurs first). See “Engine
Coolant’’ inthe Index for what to use.
Inspect hoses. Clean radiator, condenser,
pressure cap and neck. Pressure test the
cooling system and pressure cap.
*
I7 Lubricate the suspension, steering and
parking brake cable guides, underbody
contact points and linkage (or every 12
months, whichever occurs first).
DATE
ACTUAL
MILEAGE
SERVICED
I
An Emission Control Service.
BY:
L w g Tripmighway daintenmce Schedule I
0Inspect spark plug wires.
An Emission
Control Service.
Replace spark plugs.
An Emission Control Service.
0If you haven’t used your vehicleunder
severe service conditions listed previously
and, therefore, haven’t changedyour
automatic transmission fluid, change both
the fluid and filter.
DATE
ACTUAL
MILEAGE
SERVICED
BY:
7-39
Part B: Owner Checks and Services
Windshield Washer Fluid Level Check
Listed below are owner checks and services which
should beperformed at the intervals specified to help
ensure thesafety, dependability and emission control
performance of your vehicle.
Check the windshield washer fluid level in the
windshield washer tank and add the proper fluid
if
necessary. See “Windshield Washer Fluid” in the
Index for further details.
Be sure any necessary repairs are completed at once.
Whenever any fluids or lubricants are added to your
vehicle, make sure they are the proper ones, as shown
in Part D.
At Least Oncea Month
At Each Fuel Fill
It is important for you or a service station attendant to
pegorm these underhood checks at each fuel fill.
Tire Inflation Check
Make sure tires are inflated to the correct pressures. See
“Tires” in the Index for further details.
Cassette Deck Service
Engine Oil Level Check
Clean cassette deck. Cleaning shouldbe done every
50 hours of tape play. See “Audio Systems” in the
Index for further details.
Check the engine oil level and add the proper
if necessary.
oil
See “Engine Oil” in the Index for further details.
Power Antenna Service
Engine Coolant Level Check
Clean power antenna mast. See “Audio Systems”in
the Index for further details.
Check the engine coolant
level and add the proper
coolant mix if necessary. See “Engine Coolant” in the
Index forfurther details.
7-40
At Least Twice a Year
Restraint System Check
Make sure the safety beltreminder light and all your
belts, buckles, latch plates,retractors and anchorages are
working properly. Lookfor any other loose or damaged
safety belt system parts. Ifyou see anything that might
keep a safety belt systemfrom doing its job,have it
repaired. Have any torn or frayed safety belts replaced.
Automatic Transmission Check
Check the transmission fluid level; add if needed. See
“Automatic Transmission” in the Index. A fluid loss
may indicate a problem. Check the system and repair
if needed.
At Least Oncea Year
Key Lock CylindersService
Also look for any openedor broken air bag covers, and
have them repairedor replaced. (The air bag system
does not need regular maintenance.)
Lubricate the key lock cylinders with the lubricant
specified in Part D.
Manual Transmission Check
Lubricate all body door hinges. Also lubricate all
hinges and latches, including those for the hood,
rear compartment, console door and any folding
seat hardware. Part D tells you what to use. More
frequent lubrication may be required when exposed
to a corrosive environment.
Check the transmissionfluid level; add if needed. See
“Manual Transmission” inthe Index. A fluid loss
may indicate a problem. Check the system and repair
if needed.
Body Lubrication Service
7-41
Starter Switch Check
Brake-Transmission Shift Interlock (BTSI) Check
(Automatic Transmission)
?:
When you are doing this check, the vehicle could
move suddenly. If it does, you or others could be
injured. Follow the steps below.
1. Before you start, be sure you have enough room
around the vehicle.
2. Firmly apply both the parking brake (see “Parking
Brake” in the Index if necessary) and the regular brake.
NOTE: Do not use the accelerator pedal, and be
ready to turn off the engine immediately if it starts.
3. On automatic transmission vehicles, try to start the
engine in each gear.The starter should work only in
PARK (P) or NEUTRAL (N). If the starter works in
any other position, your vehicle needs service.
On manual transmission vehicles, put the shiftlever
in NEUTRAL (N), push the clutch down halfway
and try to start theengine. The starter should work
only when the clutch is pushed down all the wayto
the floor. If the starter works when the clutch isn’t
pushed all the waydown, your vehicle needsservice.
7-42
When you are doing this check, the vehicle could
move suddenly. If it does, you or others could be
injured. Follow the steps below.
1. Before you start, be sure you have enough room
around the vehicle. It should be parked on a level
surface.
2. Firmly apply the parking brake (see “Parking Brake”
in the Index if necessary).
NOTE: Be ready to apply the regular brake
immediately if the vehicle begins
to move.
3. With the engine off, turn the key to the RUN
position, but don’t start the engine. Without
applying the regular brake, tryto move the shift
lever out ofPARK (P) with normal effort. If the shift
lever moves out of PARK (P), your vehicle’sBTSI .
needs service.
Steering Column Lock Check
While parked, and with the parking
brake set, try to turn
the key to LOCK in each shift lever position. .
With an automatic transmission, the key should turn
to LOCK only when theshift lever is in PARK (P).
With a manual transmission, the key should turn to
LOCK only when theshift lever is in REVERSE (R).
On vehicles with a key release button, try
to turn the key
to LOCK without pressingthe button. The key should
turn to LOCK only when you press the key button.
On all vehicles, the key should
come out only in LOCK.
Parking Brake and Automatic Transmission
PARK (P) Mechanism Check
Park on a fairly steep hill, with thevehicle facing
downhill. Keeping your foot on the regular brake,
set the parking brake.
To check the parking brake: With the engine running
and transmission in NEUTRAL(N), slowly remove
foot pressure from the regular brake pedal. Do this
until the vehicle is held by the
parking brake only.
To check the PARK (P) mechanism’s holding ability:
Shift to PARK (P).Then release all brakes.
Underbody Flushing Service
At least every spring, use plain water to flushany
corrosive materials from the underbody. Take care to
clean thoroughly any areas where mud and other debris
can collect.
A LAUTIO,.
When you are doing this check, your
vehicle
could beginto move. You or otherscould be
injured and property could be damaged. Make
sure there is room in front
of your vehicle in case
it begins to roll. Be ready to apply the regular
brake at once should the vehicle begin move.
to
7-43
Part C: Periodic Maintenance
Inspections
Listed below are inspections and services which should
be performed at least twice a year (for instance, each
spring and fall). You should let your GM dealer’s
service department or other qualified service center do
these jobs.Make sure any necessary repairs are
completed at once.
Proper procedures to perform these services may be
found in a Corvette
service manual. See “Serviceand
Owner Publications” in the Index. .
7-44
Steering and Suspension Inspection
Inspect the front and rear suspension and steering
system for damaged,loose or missingparts, signs of
wear, or lackof lubrication. Inspect the power steering
lines and hoses for proper hook-up, binding, leaks,
cracks, chafing, etc.
Tire and Wheel Inspection
Inspect the tires for uneven wear or damage.If there is
irregular or premature wear, check the wheel alignment.
Inspect for damaged wheels.
Exhaust System Inspection
Rear Axle Service
Inspect the complete exhaust system.Inspect the body
near the exhaust system.Look for broken, damaged,
missing or out-of-position partsas well as openseams,
holes, loose connections,or other conditions which
could cause a heat build-up inthe floor pan or could let
exhaust fumes into the vehicle.See “Engine Exhaust” in
the Index.
Check the gear lubricant level in the rear axle and add if
needed. See “Rear Axle” in the Index. Afluid loss may
indicate a problem. Check the axle and repair it if
needed.
Radiator and Heater Hose Inspection
Inspect the h0se.s and have them replaced
if they are
cracked, swollen or deteriorated. Inspect all pipes,
fittings and clamps; replaceas needed.
Throttle Linkage Inspection
Brake System Inspection
Inspect the complete system. Inspect brake lines and
hoses for proper hook-up, binding, leaks,cracks,
chafing, etc. Inspect disc brake pads for wear and rotors
for surface condition. Inspect other brakeparts,
including calipers, parking brake, etc. You may need to
have your brakes inspected more oftenif your driving
habits or conditions result in frequent braking.
Inspect the throttle linkagefor interference or binding,
and for damageor missing parts. Replace parts as
needed. Replace any cables thathave high effort or
excessive wear.Do not lubricate accelerator andcruise
control cables.
7-45
Part D: Recommended Fluids and
Lubricants
FLUIDLUBRICANT
USAGE
Engine Coolant
50/50 mixture of water (preferably
distilled) and GM Goodwrench@
DEX-COOL or Havoline@
DEX-COOL
(orange-colored,
silicate-free) antifreeze
conforming to GM Specification
6277M. See “Engine Coolant” in
the Index.
Coolant
Supplement
Sealer
GM Part No. 3634621 or
equivalent with a complete flush
and refill.
Hydraulic Brake
System
Delco Supreme 11 Brake Fluid
(GM PartNo. 1052535 or
equivalent DOT-3 brake fluid).
NOTE: Fluids and lubricants identified below by name,
part number or specification may be obtainedfrom your
GM dealer.
USAGE
Engine Oil
7-46
FLUIDLUBRICANT
The engine requires a special oil
meeting GM Standard GM47 18M.
Oils meeting this Standard may be
identified as synthetic, and should
also be identified with the
American Petroleum Institute
Certified For Gasoline Engines
“Starburst” symbol. However, not
all Synthetic API oils with the
“Starburst” symbol will meet this
GM Standard. You should look for
and use only anoil that meets GM
Standard GM47 18M. For the
proper viscosity, see “Engine Oil”
in the Index.
@
Hydraulic Clutch Hydraulic Clutch Fluid (GMPart
System
No. 12345347 or equivalent).
Parking Brake
Cable Guides
~
Chassis lubricant (GM Part
No. 1052497 or equivalent) or
lubricant meeting requirements of
NLGI Grade 2, Category LB
or
GC-LB.
USAGE
USAGE
FLUIDLUBRICANT
Power Steering
System
GM Synthetic Power Steering
Fluid (GM Part No. 12345866 or
12345867 or equivalent).
Manual
Transmission
Manual Transmission FluidSAE
5W-30 (GM Part No. 1052931 or
equivalent).
Automatic
Transmission
DEXRON@-111Automatic
Transmission Fluid.
Key Lock
Cylinders
Multi-Purpose Lubricant, Superlube@
(GM Part No. 12346241
or equivalent).
Manual
Transmission
Shift Linkage
Chassis lubricant (GM Part
No. 1052497 or equivalent) or
lubricant meeting requirementsof
NLGI Grade 2, Category LB or
GC-LB.
Clutch Linkage
Pivot Points
Engine oil.
FLUID/LUBRICANT
Floor Shift
Linkage
Lubriplate Lubricant aerosol (GM
Part No. 12346293 or equivalent)
or lubricant meeting requirements
of NLGI Grade 2 Category LB or
GC-LB.
Chassis
Lubrication
Chassis lubricant (GM Part
No. 1052497 or equivalent) or
lubricant meeting requirements of
NLGI Grade 2, Category LB or
GC-LB.
Rear Axle
(Limited-Slip
Differential)
Axle Lubricant (GM Part
No. 12345977) and 4 ounces
(1 18 ml)of Limited-Slip
Differential Lubricant Additive
(GM Part No. 1052358 or
equivalent) where required. See
“Rear Axle” in theIndex.
Windshield
Washer Solvent
GM Optikleen@Washer Solvent
(GM Part No. 1051515) or
eauivalent.
f&.
7-47
USAGE
FLUIDLUBRICANT
I
Hood Latch
Assembly Pivots,
Spring Anchor
and Release
Pawl
Lubriplate lubricant aerosol (GM
Part No. 12346293 or equivalent)
or lubricant meeting requirements
of NLGI Grade 2, Category LB or
’ GC-LB .
I
5
Hood and Door
Hinges
(GM Part No. 12346241
or eauivalent).
USAGE
Weatherstrip
Conditioninrr
Part
I
FLUIDLUBRICANT
I
I
Dielectric Silicone Grease (GM
No. 12345579 or equivalent).
I
See “Replacement Parts” in the Indexfor recommended
replacement filters and spark plugs.
Part E: Maintenance Record
After the scheduled servicesare performed, record the
date, odometer readingand who performed the service
in the boxes provided after the maintenanceinterval.
Any additional informationfrom “Owner Checks and
Services” or “Periodic Maintenance” can be addedon
the following record pages. Also, youshould retain all
maintenance receipts. Your owner information portfolio
is a convenient place to store them.
Maintenance Record
I
I
DATE
ODOMETER
READING
I
BY
MAINTENANCE PERFORMED SERVICED
7-49
Maintenance Record
ODOMETER
READING
DATE
7-50
SERVICED BY
MAINTENANCE
PERFORMED
6 Section 8
Customer Assistance Information
Here you will find out howto contact Chevrolet if you
need assistance. This section also tellsyou how to obtain
service publications and howto report any safety defects.
Customer Satisfaction Procedure
This section includes informationon:
0
The Customer Satisfaction Procedure
0
Customer Assistancefor Text Telephone (TTY)
Users
0
The Corvette ActionCenter
0
Roadside Assistance
0
Courtesy Transportation
0
BBB Auto Line - Alternative Dispute Resolution
Program
0
Reporting Safety Defects
0
Service and Owner Publications
8-1
Your satisfaction and goodwill are important to your
dealer and Chevrolet. Normally, any concern you may
have with your vehicle can be handled by your selling or
servicing dealer. Your dealer has the facility, trained
technicians, special tools and up-to-date information to
promptly address any issue which may arise. Chevrolet
has empowered its dealers to make decisions and repair
vehicles, and they are eager to resolve your concern to
your complete satisfaction. If your concern has not been
resolved to your satisfaction, take the following steps:
For help outside of the United States and Canada, call
the followingnumbers as appropriate:
STEP ONE -- Discuss your concern with a member
of dealership management. Normally, concerns can
be quicklyresolved at that level. If the matterhas
already been reviewed with the Sales, Service, or Parts
Manager, contact the owner of the dealership orthe
General Manager.
STEP TWO -- I€ after contactinga member of dealership
management, it appears your concern cannot be resolved
by the dealership without further help, contact the
Chevrolet Customer Assistance Center by calling
1-800-222-1020. In Canada, contact GMof Canada
Customer Assistance Center in Oshawa by calling
1-800-263-3777 (English) or 1-800-263-7854 (French).
0
In Mexico: (525) 625-3256
0
In Puerto Rico: 1-800-496-9992 (English) or
1-800-496-9993 (Spanish)
0
In the U.S. Virgin Islands: 1-800-496-9994
0
In the Dominican Republic: 1-800-75 1-4135
(English) or 1-800-751-4136 (Spanish)
0
In the Bahamas: 1-800-389-0009
0
In Bermuda, Barbados, Antigua and the British
Virgin Islands: 1-800-534-0 122
0
In all other Caribbean countries: 1-809-763- 13 15
0
In other overseaslocations, call GM North American
Export Sales in Canada at 1-905-644-4112 .
For prompt assistance, please have the following information
Customer
available to givethe Customer Assistance Representative:
Your name, address, home and business
telephone numbers
Vehicle Identification Number (This is available
from the vehicle registrationor title, or the plate at
the top left of the instrument panel
and visible
through the windshield.)
Dealership name and location
Vehicle delivery date and present mileage
Nature of concern
We encourage you to call usso we can give your inquiry
prompt attention. However, if you wish
to write
Chevrolet, write to:
Chevrolet Motor Division
Chevrolet Customer AssistanceCenter
P.O. Box 7047
Troy, MI 48007-7047
Refer to your Warranty and Owner Assistance
Information booklet for addressesof Canadian and GM
Overseas offices.
Assistance for Text
Telephone (TTY) Users
To assist customers who are deaf, hard of hearing,
or
speech-impaired and who use Text Telephones(TI%),
Corvette has l T Y equipment available at its Customer
Assistance Center. AnyTTY user can communicate with
Corvette by dialing: 1-800-833-CHEV (1-800-833-2438).
(lTY users in Canada can dial 1-800-263-3830.)
Corvette Action Center
If you have any questions, commentsor problems
regarding your Corvette in general, youcan call the
Corvette Action Center at 1-800-457-VETT. The
Corvette Action Center is open between the hours of
6:OO a.m. to 2:30 p.m. CST, Monday through Friday.
WhencontactingChevrolet,pleaserememberthatyour
concern will likely be resolved in the dealership, using the
dealer's facilities, equipment and personnel. That
is why we
suggest you follow Step One first if you have a concern.
8-3
Roadside Assistance is available 24 hours a day,
365 days a year, by calling 1-800-CHEV-USA
(1-800-243-8872). This toll-free number will provide
you over-the-phone roadside assistance with minor
mechanical problems. If your problem cannot be
resolved over the phone, our advisors have access to a
nationwide network of dealer recommended service
providers. Roadside membership is free, however, some
services may incur costs.
Chevrolet Roadside Assistance
Program
n
L
Available in the UnitedStates and Canada only to
enhance Chevrolet's strong commitment to customer
satisfaction, Chevrolet is excited to announce the
establishment of the ChevroletIGeoRoadside Assistance
Center. As the owner of a1996 ChevroletIGeo,
membership in Roadside Assistance is free.
Roadside offers two levels of serviceto the customer,
Basic Care and Courtesy" Care:
0
Toll-free number, 1 -800-CHEV-USA
0
Free towing for warranty repairs
0
Basic over-the-phone technical advice
0
Available dealer services at reasonable costs (i.e.,
wrecker services, locksmithkey service,
glass repair, etc.)
ROADSIDE Courtesy Care PROVIDES:
Roadside Basic Care services (as outlined above)
Plus:
FREE Non-Warranty Towing (to the closest dealer
from a legal roadway)
FREE Locksmith/Key Service (when keys are lost
on the roador locked inside)
FREE Flat Tire Service (spare installed on the road)
FREE Jump Start (athome or on the road)
0
FREE Fuel Delivery ($5 of fuel delivered on
the road)
Chevrolet/Geo offers Courtesy Transportationfor
customers needing warranty service. Courtesy
Transportation will be offeredin conjunction with the
coverage provided by the BUMPER-TO-BUMPER
New Vehicle Limited Warranty to eligible purchasers of
1996 Chevrolet/Geo passengercar and light duty trucks.
(Please see your selling dealerfor details.)
Basic Care and Courtesy Care are not part of or included
in the coverage provided by the New Vehicle Limited
Warranty. Chevrolet reserves the right to modifyor
discontinue Basic Care and Courtesy Careat any time.
For complete program details, see your Chevrolet/Geo
dealer to obtain a Roadside AssistanceCenter brochure.
The Roadside Assistance Center uses companies that
will provide you with quality and priority service. When
roadside services are required, our advisors will explain
any payment obligations that may be incurred
for
utilizing outside services.
For prompt assistance when calling, please have the
following available to give to the advisor:
Vehicle Identification Number
License plate number
Vehicle color
Vehiclelocation
Telephone number where you can be reached
Note: Courtesy Care is available to Retail and Retail Lease
Vehicle mileage
Customersoperating1994andnewerChevrolet/Geo
.
Description of problem
vehicles for a period of 36 months/36,000 miles. All
Courtesy Care services must be pre-arranged by Chevrolet
Please refer to the Roadside Assistance brochure inside
Roadside or Dealer Service Management.
your owner information portfolio for full program details.
8-5
In Canada, please consult your GM dealer for
information on Courtesy Transportation.
Some state insurance regulations make it impractical to
rent vehicles to people under 21 years of age. If you are
under 21 and havedifficulty renting a vehicle, Chevrolet
will reimburse up to $30/day for documented
transportation you receive.
In Canada, for warranty repairs during the Complete
Vehicle Coverage period in the New Vehicle Limited
Warranty, interim transportation may be available under
the Courtesy Transportation Program. Please consult
your dealer for details.
Canadian Roadside Assistance
Vehicles purchased in Canada have an extensive
Roadside Assistance program acces'sible from anywhere
in Canada orthe United States. Please refer to the
separate brochure provided by the dealer or call
1-800-268-6800 for emergency services.
Courtesy Transportation
Available in the United States and Canada only,
Chevrolet/Geo offers Courtesy Transportationfor
customers needing warranty service. Courtesy
Transportation will be offered in conjunction with the
coverage provided by the BUMPER-TO-BUMPER
New Vehicle Limited Warranty to retail purchasersof
1996 Chevrolet/Geo passenger cars and light duty trucks
(please see your selling dealer for details).
Courtesy Transportationincludes:
0
One way shuttle ridefor any warranty repair
completed during thesame day.
0
Up to $30 maximum daily vehicle rental allowance
for any overnight warranty repair up to
5 days, OR
0
Up to $30 maximum daily cab, bus, or other
transportation allowancein lieu of rental for any
overnight warranty repair upto 5 days, OR
0
Up to $10 daily fuel allowance for rides provided by
another person (i.e., friend, neighbor, etc.) in lieu of
rental for any overnight warranty repair upto 5 days.
Note: All Courtesy Transportation arrangements will
be administeredby your Chevrolet/Geo dealer
service management. Claim amounts should reflect
all actual costs.
0
Chevrolet/Geo Courtesy Transportationis not part of
the BUMPER-TO-BUMPER New Vehicle Limited
Warranty. Chevrolet/Geo reserves the rightto make
any changes or discontinue Courtesy Transportation
at any time without notification.
0
For additional programdetails contact your
Chevrolet/Geo dealer.
GM Participation in BBB AUTO
LINE - Alternative Dispute
Resolution Program*
*This program may not be availablein all states,
depending on state law. Canadian owners refer to your
Warranty and Owner Assistance Information booklet.
General Motors reserves the right tochange eligibility
limitations and/or to discontinueits participation in
this program.
Both Chevrolet and your Chevroletdealer are
committed to making sure you are completely satisfied
with your new vehicle. Our experiencehas shown that,
if a situation arises where youfeel your concern has not
been adequately addressed, the Customer Satisfaction
Procedure described earlier in thissection is very
successful.
There may be instances where animpartial third party
can assist in arriving at a solution to disagreement
a
regarding vehicle repairs or interpretation of the New
Vehicle Limited Warranty. To assist in resolving these
disagreements, Chevrolet voluntarily participates in
BBB AUTO LINE.
8-7
BBB AUTO LINE is an out-of-court program
administered by the Better Business Bureau system
to settle disputes between customers and automobile
manufacturers. This program is available freeof charge
to customers who currently own or lease aGM vehicle.
If you are not satisfied after following the Customer
Satisfaction Procedure, you may contact the BBB using
the toll-free telephone number, or write them at the
following address:
BBB AUTO LINE
Council of Better Business Bureaus
4200 Wilson Boulevard
Suite 800
Arlington, VA 22203
Telephone: 1-800-955-5100
To file a claim, you will be asked to provide your name
and address, your Vehicle Identification Number (VIN),
and a statement of the nature of your complaint.
Eligibility is limited by vehicle age and mileage, and
other factors.
We prefer you utilize the Customer Satisfaction
Procedure before you resort toAUTO LINE, but you
may contact the BBB at any time. The BBB will attempt
to resolve the complaint serving as an intermediary
between you and Chevrolet. If this mediation is
unsuccessful, an informal hearing will be scheduled
where eligible customers may present theircase to an
impartial third-party arbitrator.
The arbitrator will make a decision which you may
accept or reject. If you accept the decision, GM will be
bound by that decision. The entire dispute resolution
procedure should ordinarily take about40 days from the
time you file a claimuntil a decision is made.
Some state laws may requireyou to use this program
before filing a claimwith a state-run arbitration program
or in the courts. For further information, contact the
BBB at 1-800-955-5 100 or the Chevrolet Customer
Assistance Center at 1-800-222- 1020.
REPORTING SAFETY DEFECTS
TO THE UNITED STATES
GOVERNMENT
REPORTING SAFETY DEFECTS
TO THE CANADIAN
GOVERNMENT
If you believe that your vehiclehas a defect whichcould
cause a crash or could cause injuryor death, you should
immediately inform the National Highway Traffic
Safety Administration (NHTSA),in addition to
notifying General Motors.
If you live inCanada, and you believe that your vehicle
has a safetydefect, you should immediately notify
Transport Canada, in addition to notifying General
Motors of Canada Limited. You may write to:
If NHTSA receives similarcomplaints, it may open an
investigation, andif it finds that asafety defect exists in
a group of vehicles,it may order a recall and remedy
campaign. However, NHTSAcannot become involved
in individual problems betweenyou, your dealer, or
General Motors.
To contact NHTSA,you may either call the Auto Safety
Hotline toll-free at 1-800-424-9393 (or 366-0123 in the
Washington, D.C. area)or write to:
NHTSA, U.S. Department of Transportation
Washington, D.C. 20590
You can also obtain otherinformation about motor
vehicle safety from the Hotline.
Transport Canada
Box 8880
Ottawa, Ontario K1G 3J2
REPORTING SAFETY DEFECTS
TO GENERAL MOTORS
Service and Owner Publications
In addition to notifying NHTSA (orTransport Canada)
in a situation like this, we certainly hope you’ll notify
us. Please call us at 1-800-222- 1020, or write:
Chevrolet Customer Assistance Center
P. 0.Box 7047
Troy, Michigan48007-7047
In Canada, please call us at 1-800-263-3777 (English)
or 1-800-263-7854 (French). Or, write:
General Motors of Canada Limited
Customer Assistance Center
1908 Colonel Sam Drive
Oshawa, Ontario LlH 8P7
Service manuals, service bulletins, owner’s manuals and
other service literature are available for purchase for
all
current and many past model General Motors vehicles.
Toll-free telephone numbers for ordering information:
United States . . . . . . . 1-800-55 1-4 123
Canada . . . . . . . . . . . . 1-800-668-5539
Service Manuals
Service manuals contain diagnostic and
repair
information for all chassis and body
systems. They may
be useful for owners who wish
to get a greater
understanding of their vehicle. They are also useful for
owners with the appropriateskill level or training who
wish to perform “do-it-yourself’ service. These are
authentic General Motors service manuals meant
for
professional, qualified technicians.
Service Bulletins
Service bulletins covering various subjectsare regularly
sent to all General Motors dealers.GM monitors product
performance in the field.When service methods are
found which promote better serviceon GM vehicles,
bulletins are created to help the technician
perform
better service. Service bulletins may involve any
number of vehicles.Some will describe inexpensive
service; others will describe expensive service. Some
will advise of new or unexpected conditions, and others
may help avoid future costly repairs. Service bulletins
are meant for qualified technicians. In some cases
bulletins refer to service manuals, specialized tools,
equipment and safety procedures necessaryto service
the vehicle. Since these bulletins are issued throughout
the model year and beyond, an index
is required and
published quarterly to help identify specific bulletins.
Subscriptions are available. You can order an index at
the toll-free numbers listed previously,or aska GM
dealer to see an index or individual bulletin.
Owner Publications
Owner’s manuals, warranty folders andvarious owner
assistance booklets provide owners withgeneral
operation and maintenance information.
8-11
NOTES
8-12
Accessory Plug . . . . . . . . . . . . . . . . . . . . . . . . . . . . . . .
2-52
AirBag . . . . . . . . . . . . . . . . . . . . . . . . . . . . . . . . . . . . . . .
1-17
How Does it Restrain . . . . . . . . . . . . . . . . . . . . . . . . . .
1-2 1
Howitworks . . . . . . . . . . . . . . . . . . . . . . . . . . . . . . . .
1-19
Location . . . . . . . . . . . . . . . . . . . . . . . . . . . . . . . . . . . .
1-19
Servicing ....................................
1-22
1-20
What Makes it Inflate . . . . . . . . . . . . . . . . . . . . . . . . . .
What Will You See After it Inflates . . . . . . . . . . . . . . . 1-21
When Should it Inflate . . . . . . . . . . . . . . . . . . . . . . . . .
1-20
Air Bag Readiness Light ....................
1- 18. 2-76
Air Bag System . . . . . . . . . . . . . . . . . . . . . . . . . . . . . . . .
1- 17
6-15
Aircleaner . . . . . . . . . . . . . . . . . . . . . . . . . . . . . . . . . . . .
AirConditioning ........................
3.2.3.3.3.7
Alarm. Theft-Deterrent ..........................
2- 13
Alignment and Balance. Tire ......................
6-52
Aluminum Wheels. Cleaning . . . . . . . . . . . . . . . . . . . . . . 6-60
Antenna.Power . . . . . . . . . . . . . . . . . . . . . . . . . . . . . . . .
3-20
Antifreeze . . . . . . . . . . . . . . . . . . . . . . . . . . . . . . . . . . . . .
6-25
Anti-Lock Brake System Active Light . . . . . . . . . . 2-80. 4-8
Anti-Lock Brake System Warning Light . . . . . . . . . 2-79. 4-6
Anti-LockBrakes . . . . . . . . . . . . . . . . . . . . . . . . . . . . . . .
4-6
AppearanceCare . . . . . . . . . . . . . . . . . . . . . . . . . . . . . . . 6-54
6-62
Appearance Care Materials .......................
Arbitration Program . . . . . . . . . . . . . . . . . . . . . . . . . . . . . . 8-7
2-50
Ashtray . . . . . . . . . . . . . . . . . . . . . . . . . . . . . . . . . . . . . . .
ASR Active Light . . . . . . . . . . . . . . . . . . . . . . . . . . .
2-8 1. 4.8
ASR Off Light . . . . . . . . . . . . . . . . . . . . . . . . . . . . . . . . .
2-81
ASR System . . . . . . . . . . . . . . . . . . . . . . . . . . . . . . . . . . . .
4-8
ASR System Warning Light . . . . . . . . . . . . . . . . . . . 2.80.4.8
Audio Equipment. Adding ........................
3-18
Audio Systems . . . . . . . . . . . . . . . . . . . . . . . . . . . . . . . . .
3-10
Automatic
Electronic Climate Control System . . . . . . . . . . . . . . . . 3-4
2-23
Overdrive . . . . . . . . . . . . . . . . . . . . . . . . . . . . . . . . . . .
2- 18. 2-2 1
Transmission . . . . . . . . . . . . . . . . . . . . . . . . . . .
Transmission Check . . . . . . . . . . . . . . . . . . . . . . . . . . .
7-41
6-18
Transmission Fluid . . . . . . . . . . . . . . . . . . . . . . . . . . . .
Transmission Park Mechanism Check . . . . . . . . . . . . . 7-43
Transmission. Fluid Temperature Reading . . . . . . . . . 2-97
2-21
Transmission.Operation .......................
Transmission. Shifting . . . . . . . . . . . . . . . . . . . . . . . . .
2-21
Transmission. Starting Your Engine . . . . . . . . . . . . . . 2-18
Axle. Limited-Slip Rear . . . . . . . . . . . . . . . . . . . . . . . . . 2-28
6-24
Axle. Rear . . . . . . . . . . . . . . . . . . . . . . . . . . . . . . . . . . . .
9-1
Back-up Lamp Bulb Replacement . . . . . . . . . . . . . . . . . 6-43
Battery ....................................... 6-35
Jump Starting .................................
5-2
Replacement, Passive Keyless Entry . . . . . . . . . . . . . . . 2-8
Warnings ................................
5-2, 5-4
BBB Auto Line ..................................
8-7
Belt, Engine Accessory ..........................
6-79
Better Business Bureau Mediation . . . . . . . . . . . . . . . . . . . 8-7
Brake
6-34
Adjustment . . . . . . . . . . . . . . . . . . . . . . . . . . . . . . . .
Fluid .......................................
6-32
Master Cylinder ..............................
6-32
Parking .....................................
2-28
PedalTravel .................................
6-3 4
Replacing System Parts ........................
6-35
System Warning Light .........................
2-78
Transmission Shift Interlock ....................
2-3 1
Wear ....................................... 6-34
Brakes, Anti-Lock ...............................
4-6
Brake-Transmission Shift Interlock Check . . . . . . . . . . . 7-42
Braking ........................................
4-5
Braking in Emergencies ...........................
4-9
Break-In, New Vehicle ..........................
2- 15
BTSI .........................................
2-31
BTSICheck ...................................
7-42
Bulb Replacement ..............................
6-36
Bulbs, Replacement . . . . . . . . . . . . . . . . . . . . . . . . . . .
6-73
8-6
Canadian Roadside Assistance ....................
Capacities and Specifications ......................
6-74
2.32.4.27
CarbonMonoxide .........................
Cassette Deck Service ...........................
7-40
Cassette Tape Player . . . . . . . . . . . . . . . . . . 3-1 1.3.13. 3.15
Cassette Tape Player Care ........................
3-19
Center Console .................................
2-48
Center High-Mounted Stoplamp Bulb Replacement . . . . 6-41
Certification Label ..............................
4-28
Chains.Tire ...................................
6-53
Changing a Flat Tire .............................
5-22
Charging System Indicator Light . . . . . . . . . . . . . . . . . . . 2-76
Check Gauges Light .............................
2-93
Checking Your Restraint Systems . . . . . . . . . . . . . . . . . . 1-31
Chemical Paint Spotting ..........................
6-61
Child Restraints ................................
1-26
Securing in the Passenger Seat Position . . . . . . . . . . . 1-26
TopStrap ...................................
1-26
WheretoPut ................................ l-26
Cigarette Lighter ............................... 2-50
Circuit Breakers and Fuses .......................
6-65
Cleaner, Air ...................................
6-15
Cleaning
Aluminum Wheels . . . . . . . . . . . . . . . . . . . . . . . . . .
6-60
Coated Moldings .............................
6-55
Convertible Hardtop ...........................
6-60
Convertible Top ..............................
6-59
9-2
~
Fabric . . . . . . . . . . . . . . . . . . . . . . . . . . . . . . . . . . . . . .
6-55
Glass . . . . . . . . . . . . . . . . . . . . . . . . . . . . . . . . . . . . . . .
6-56
Inside of Your Corvette . . . . . . . . . . . . . . . . . . . . . . . .
6-54
InstrumentPanel . . . . . . . . . . . . . . . . . . . . . . . . . . . . . 6-56
Leather . . . . . . . . . . . . . . . . . . . . . . . . . . . . . . . . . . . . . 6-55
Outside of Your Corvette . . . . . . . . . . . . . . . . . . . . . . .
6-58
Removable Roof Panels . . . . . . . . . . . . . . . . . . . . . . . .
6-57
Soft-Touch Paint Surfaces . . . . . . . . . . . . . . . . . . . . . .
6-56
Speakercovers . . . . . . . . . . . . . . . . . . . . . . . . . . . . . . 6-56
Stains . . . . . . . . . . . . . . . . . . . . . . . . . . . . . . . . . . . . . . 6-54
Tires . . . . . . . . . . . . . . . . . . . . . . . . . . . . . . . . . . . . . . .
6-60
Vinyl . . . . . . . . . . . . . . . . . . . . . . . . . . . . . . . . . . . . . . . 6-55
Weatherstrips . . . . . . . . . . . . . . . . . . . . . . . . . . . . . . . .
6-57
Wheels . . . . . . . . . . . . . . . . . . . . . . . . . . . . . . . . . . . . .
6-60
Windshield and Wiper Blades . . . . . . . . . . . . . . . . . . . 6-57
Climate Control, Automatic Electronic . . . . . . . . . . . . . . . 3-4
Climate Control, Manual . . . . . . . . . . . . . . . . . . . . . . . . . .
3- 1
Clock, Setting the ................................
3-10
Clutch, Hydraulic . . . . . . . . . . . . . . . . . . . . . . . . . . . . . . .
6-22
Comfort Controls . . . . . . . . . . . . . . . . . . . . . . . . . . . . . . . .
3- 1
Compact Disc Care .............................
3- 19
Compact Disc Player . . . . . . . . . . . . . . . . . . . . . . . . . . . .
3- 15
Compact Spare Tire . . . . . . . . . . . . . . . . . . . . . . . . . . . . .
5-38
Competitive Driving . . . . . . . . . . . . . . . . . . . . . . . . . . . .
2- 19
Console,Center . . . . . . . . . . . . . . . . . . . . . . . . . . . . . . . .
2-48
Control of a Vehicle . . . . . . . . . . . . . . . . . . . . . . . . . . . . . .
4-5
'Convertible Hardtop . . . . . . . . . . . . . . . . . . . . . . . . . . . . .
2-64
Convertible Top . . . . . . . . . . . . . . . . . . . . . . . . . . . . . . . .
2-58
Convex Outside Mirror ..........................
2-47
Coolant . . . . . . . . . . . . . . . . . . . . . . . . . . . . . . . . . .
5- 17. 6-25
High Fill Reservoir . . . . . . . . . . . . . . . . . . . . . . . . . . . .
5-19
High Fill Reservoir Cap . . . . . . . . . . . . . . . . . . . . . . . .
6-29
Recovery Tank . . . . . . . . . . . . . . . . . . . . . . . . . . . . . . .
5-17
Coolant Heater. Engine . . . . . . . . . . . . . . . . . . . . . . . . . .
2-20
CoolingSystem . . . . . . . . . . . . . . . . . . . . . . . . . . . . . . . .
5-15
Cornering Lamp Bulb Replacement . . . . . . . . . . . . . . . . 6-40
Corvette Action Center . . . . . . . . . . . . . . . . . . . . . . . . . . .
8-3
Courtesy Lamps . . . . . . . . . . . . . . . . . . . . . . . . . . . . . . . .
2-45
Courtesy Transportation . . . . . . . . . . . . . . . . . . . . . . . . . . .
8-6
Cruise Control . . . . . . . . . . . . . . . . . . . . . . . . . . . . . . . . .
2-38
Customer Assistance for Text Telephone Users . . . . . . . . . 8-3
Customer Assistance Information . . . . . . . . . . . . . . . . . . . 8-1
Customer Satisfaction Procedure ....................
8-1
Damage. Finish . . . . . . . . . . . . . . . . . . . . . . . . . . . . . . .
6-60
Daytime Running Lamps . . . . . . . . . . . . . . . . . . . . . . . . .
2-44
DeadBattery . . . . . . . . . . . . . . . . . . . . . . . . . . . . . . . . . . . 5-2
Defects.Reporting Safety . . . . . . . . . . . . . . . . . . . . . . . . .
8-9
DefensiveDriving . . . . . . . . . . . . . . . . . . . . . . . . . . . . . . .
4-1
Defogger.RearWindow . . . . . . . . . . . . . . . . . . . . . . . . . .
3-8
Defogging . . . . . . . . . . . . . . . . . . . . . . . . . . . . . . . . . 3-3. 3-7
Defrosting . . . . . . . . . . . . . . . . . . . . . . . . . . . . . . . . .
3-3. 3.7
Delayed Accessory Bus (DAB) ....................
2-17
Dimensions.Vehicle . . . . . . . . . . . . . . . . . . . . . . . . . . . .
6-77
Dolby B Noise Reduction . . . . . . . . . . . . . . . . . . . . . . . .
3-10
9-3
Door
2-94
AjarLight ...................................
Flood Lamps ................................
2-45
Locks .......................................
2-3
Storage .....................................
2-47
2-26
Downshifting ..................................
Drive, Automatic Transmission ....................
2-23
Driver Information Center ........................
2-98
1-11
DriverPosition .................................
4-1
Driving ........................................
City ........................................
4-19
Defensive ....................................
4-1
Drunken .....................................
4-2
Freeway ....................................
4-20
4-26
InaBlizzard .................................
In Foreign Countries .........................
. 6-4
IntheRain ..................................
4-16
Night ......................................
4-15
On Curves ...................................
4- 10
On Hill and Mountain Roads ....................
4-22
On Snow and Ice .............................
4-25
Through Deep Water ..........................
4- 18
4-16
WetRoads ..................................
4-24
Winter ......................................
DrunkenDriving ................................
4-2
Electrical Equipment, Adding . . . . . . . . . . 2-19,3-18, 6-64
6-64
Electrical System ...............................
Electronic Climate Control System . . . . . . . . . . . . . . . . . . 3-4
6-47
EMT .........................................
Engine ........................................
6-8
Accessory Belt ...............................
6-79
6-25
Coolant .....................................
2-20
Coolant Heater ...............................
Coolant Level Check ..........................
7-40
Coolant Temperature Gauge ....................
2-82
2-32
Exhaust .....................................
6-69
FuseBlocks .................................
Identification ................................
6-63
Oil .........................................
6-10
Oil,Adding .................................
6-11
Oil, Additives ................................
6-13
6-11
Oil. Checking ................................
7-40
OilLevelCheck ..............................
Oil, Life Monitor ............................. 2-91
Oil, Temperature Gauge ........................
2-90
6-14
Oil,Used ...................................
6-14
Oil, When to Change ..........................
Overheating .................................
5-13
Running While Parked .........................
2-33
Specifications .................................
6-74
StartingYour ................................
2-18
Oil, Pressure Gauge ...........................
2-89
EnglishMetric Button ...........................
2-74
6-4
Ethanol ........................................
Exhaust, Engine ................................
2-32
Express-Down Window ............... . . . . . . . . . . 2-34
6-47
Extended Mobility Tires .........................
uage
Fabric Cleaning . . . . . . . . . . . . . . . . . . . . . . . . . . . . . . .
6-55
FabricProtection . . . . . . . . . . . . . . . . . . . . . . . . . . . . . . .
6-55
Fan Control Buttons ..........................
3.1.3.4
Fiberglass Springs . . . . . . . . . . . . . . . . . . . . . . . . . . . . . .
6-6 1
Fifth Gear. Manual Transmission . . . . . . . . . . . . . . . . . . . 2-24
Filling Your Tank . . . . . . . . . . . . . . . . . . . . . . . . . . . . . . . .
6-5
Filter. Air Cleaner . . . . . . . . . . . . . . . . . . . . . . . . . . . . . .
6- 15
Finish Care . . . . . . . . . . . . . . . . . . . . . . . . . . . . . . . . . . . .
6-58
FinishDamage . . . . . . . . . . . . . . . . . . . . . . . . . . . . . . . . .
6-60
First Gear, Automatic Transmission . . . . . . . . . . . . . . . . 2-23
First Gear, Manual Transmission . . . . . . . . . . . . FranGais
. . . . . . . 2-24
Flashers, Hazard Warning .........................
5-1
Flat Tire. Changing . . . . . . . . . . . . . . . . . . . . . . . . . . . . .
5-22
Fluid Capacities . . . . . . . . . . . . . . . . . . . . . . . . . . . . . . . .
6-76
Fluids and Lubricants . . . . . . . . . . . . . . . . . . . . . . . . . . . .
7-46
Fog Lamp Bulb Replacement .....................
6-40
FogLamps . . . . . . . . . . . . . . . . . . . . . . . . . . . . . . . . . . . .
2-44
Foreign Countries, Fuel ...........................
6-4
Fourth Gear, Manual Transmission . . . . . . . . . . . . . . . . . 2-24..
French
. . . . . . . . . . . . . . . . . . . . . . . . . . . 11
FrontTowing . . . . . . . . . . . . . . . . . . . . . . . . . . . . . . . . . . .
5-8
Front Turn Signal Lamp Bulb Replacement . . . . . . . . . . 6-38
Fuel . . . . . . . . . . . . . . . . . . . . . . . . . . . . . . . . . . . . . . . . . . 6-3
Canada . . . . . . . . . . . . . . . . . . . . . . . . . . . . . . . . . . . . . . 6-4
Gauge . . . . . . . . . . . . . . . . . . . . . . . . . . . . . . . . . . . . . . . 2-94
In Foreign Countries . . . . . . . . . . . . . . . . . . . . . . . . . . .
6-4
6-5
Fuel, Filling YourTank ...........................
Fuses and Circuit Breakers ....................... 6-65
GaugeMarhngs . . . . . . . . . . . . . . . . . . . . . . . . . . . . . .
2-96
Gauges
Engine Coolant Temperature ....................
2-82
Engine Oil Pressure . . . . . . . . . . . . . . . . . . . . . . . . . . . 2-89
Engine Oil Temperature . . . . . . . . . . . . . . . . . . . . . . . .
2-90
Fuel . . . . . . . . . . . . . . . . . . . . . . . . . . . . . . . . . . . . . . .
2-94
GAWR . . . . . . . . . . . . . . . . . . . . . . . . . . . . . . . . . . . . . . .
4-28
Gear Positions ............................
2-21, 2-24
Gross Axle Weight Rating . . . . . . . . . . . . . . . . . . . . . . . .
4-28
Gross Vehicle Weight Rating ......................
4-28..
Guide en
. . . . . . . . . . . . . . . . . . . . . . . . . . . . . . . . . 11
GVWR . . . . . . . . . . . . . . . . . . . . . . . . . . . . . . . . . . . . . 4-28
Halogen Bulbs . . . . . . . . . . . . . . . . . . . . . . . . . . . . . . . .
6-36
Hardtop.Convertible . . . . . . . . . . . . . . . . . . . . . . . . . . . .
2-64
Hazard Warning Flashers ..........................
5-1
Headlamp Bulb Replacement ......................
6-36
HeadlampDoors . . . . . . . . . . . . . . . . . . . . . . . . . . . . . . .
2-43
Headlamps . . . . . . . . . . . . . . . . . . . . . . . . . . . . . . . . . . . .
2-42
HighLow Beam Changer ......................
2-36
Wiring . . . . . . . . . . . . . . . . . . . . . . . . . . . . . . . . . . . . . 6-64
Hearing Impaired, Customer Assistance . . . . . . . . . . . . . . 8-3
3-2, 3-6
Heating . . . . . . . . . . . . . . . . . . . . . . . . . . . . . . . . . . . .
....
111
Heritage Pages
...................................
High-Beam Lamps . . . . . . . . . . . . . . . . . . . . . . . . . . . . . .
2-36
Highway Hypnosis . . . . . . . . . . . . . . . . . . . . . . . . . . . . . . 4-22
Hill and Mountain Roads . . . . . . . . . . . . . . . . . . . . . . . . .
4-22
9-5
Hood ..........................................
Checking Things Under .........................
Release ......................................
Horn .........................................
Hydraulic Clutch ...............................
Hydroplaning ..................................
6-7
6-7
6-7
2-34
6-22
4- 18
2- 16
Ignition Switch ................................
Inflation. Tire ..................................
6-48
Inside Daymight Rearview Mirror . . . . . . . . . . . . . . . . . 2-46
7-44
Inspections ....................................
Brakesystem ................................
7-45
7-45
Exhaust System ..............................
Radiator and Heater Hose ......................
7-45
Steering ....................................
7-44
Suspension ..................................
7-44
7-45
Throttle Linkage ..............................
7-44
Tire ........................................
7-44
Wheel .......................................
Instrument Panel ...............................
2-70
Brightness Control ............................
2-45
Cleaning ....................................
6-56
Cluster .....................................
2-72
6-65
FuseBlock ..................................
2-45
Interior Lamps .................................
Jack. Tire ....................................
Jump Starting ...................................
5-23
5-2
K e y Lock Cylinders Service .....................
Key Release Button .............................
Keys ..........................................
7-41
2-17
2-1
Labels ....................................... 4-28
4-28
Certification .................................
Service Parts Identification .....................
6-63
Tire-LoadingInformation ......................
4-28
Vehicle Identification Number . . . . . . . . . . . . . . . . . . . 6-63
2-42
Lamps ........................................
Courtesy .................................... 2-45
Interior .....................................
2-45
OnReminder ................................
2-43
Latches, Seatback ................................
1-5
Leaving Your Vehicle .............................
2-4'
Leaving Your Vehicle with the Engine Running ....... 2-30
Lighter ....................................... 2-50
Lights
Air Bag Readiness .......................
1-18, 2-76
Anti-Lock Brake System Active . . . . . . . . . . . . . 2-80, 4-8
Anti-Lock Brake System Warning . . . . . . . . . . . . 2-79, 4-6
ASR Active .............................
2-8 1,4-8
ASROff ....................................
2-81
ASR System Warning .....................
2-80, 4-8
Brake System Warning .........................
2-78
Charging System Indicator ......................
2-76
CheckGauges ...............................
2-93
2-94
DoorAjar ...................................
2-83, 6-27
Low Coolant Warning ....................
2-88
LowOil ....................................
.
Low Tire Pressure Warning .....................
2-83
Parking Brake Indicator . . . . . . . . . . . . . . . . . . . . . . . .
2-79
Passive Keyless Entry . . . . . . . . . . . . . . . . . . . . . . . . .
2-92
Safety Belt Reminder ......................
1-6. 2.75
Security . . . . . . . . . . . . . . . . . . . . . . . . . . . . . . . . . . . . 2-93
Service ASR . . . . . . . . . . . . . . . . . . . . . . . . . . . . .
2-80, 4-9
2-86
Service Engine Soon . . . . . . . . . . . . . . . . . . . . . . . . . .
2-85
ServiceLTPWS . . . . . . . . . . . . . . . . . . . . . . . . . . . . . .
Service Ride Control . . . . . . . . . . . . . . . . . . . . . . . . . . 2-92
SystemProblems . . . . . . . . . . . . . . . . . . . . . . . . . . . . .
2-93
Loading YourVehicle . . . . . . . . . . . . . . . . . . . . . . . . . . .
4-28
Locks . . . . . . . . . . . . . . . . . . . . . . . . . . . . . . . . . . . . . . . . .
2-3
Cylinders . . . . . . . . . . . . . . . . . . . . . . . . . . . . . . . . . . .
7-41
Door . . . . . . . . . . . . . . . . . . . . . . . . . . . . . . . . . . . . . . . .
2-3
Key Lock Cylinders Service ....................
7-41
2-4
PowerDoor . . . . . . . . . . . . . . . . . . . . . . . . . . . . . . . . . .
Steering Column Lock Check . . . . . . . . . . . . . . . . . . . 7-43
Low Coolant Warning Light . . . . . . . . . . . . . . . . . 2-83, 6-27
Low Oil Light . . . . . . . . . . . . . . . . . . . . . . . . . . . . . . . . .
2-88
Low Tire Pressure Warning Light . . . . . . . . . . . . . . . . . . 2-83
Lubricants and Fluids . . . . . . . . . . . . . . . . . . . . . . . . . . . .
7-46
Lubrication Service, Body . . . . . . . . . . . . . . . . . . . . . . . .
7-4 1
Maintenance Record . . . . . . . . . . . . . . . . . . . . . . . . . . .
7-49
Maintenance Schedule . . . . . . . . . . . . . . . . . . . . . . . . . . . .
7- 1
Long Tripmighway Definition . . . . . . . . . . . . . . . . . . . 7-5
Long Triphlighway Intervals . . . . . . . . . . . . . . . . 7.5.7.28
Owner Checks and Services .....................
7-40
Periodic Maintenance Inspections . . . . . . . . . . . . . . . . 7-44
Recommended Fluids and Lubricants . . . . . . . . . . . . . 7-46
Scheduled Maintenance Services . . . . . . . . . . . . . . . . . . 7-3
Short TripKity Definition . . . . . . . . . . . . . . . . . . . . . . .
7-4
Short TripKity Intervals . . . . . . . . . . . . . . . . . . . 7.4.7.6
Maintenance. Underbody . . . . . . . . . . . . . . . . . . . . . . . . .
6-61
Malfunction Indicator Lamp ......................
2-86
Manual
Climate Control System . . . . . . . . . . . . . . . . . . . . . . . . .
3-1
Frontseat . . . . . . . . . . . . . . . . . . . . . . . . . . . . . . . . . . . .
1-1
Transmission . . . . . . . . . . . . . . . . . . . . . . . . . . .
2- 18. 2.24
Transmission Check . . . . . . . . . . . . . . . . . . . . . . . . . . . 7-41
Transmission Fluid . . . . . . . . . . . . . . . . . . . . . . . . . . . . 6-21
Transmission. 'Shifting . . . . . . . . . . . . . . . . . . . . . . . . .
2-24
Transmission. Starting Your Engine . . . . . . . . . . . . . . 2-18
MapLamps . . . . . . . . . . . . . . . . . . . . . . . . . . . . . . . . . . .
2-45
Methanol . . . . . . . . . . . . . . . . . . . . . . . . . . . . . . . . . . . . . . 6-4
Mirrors . : . . . . . . . . . . . . . . . . . . . . . . . . . . . . . . . . . . . . .
2-46
Convex Outside . . . . . . . . . . . . . . . . . . . . . . . . . . . . . . 2-47
Inside Daymight Rearview .....................
2-46
Power Remote Control . . . . . . . . . . . . . . . . . . . . . . . . .
2-46
VisorVanity . . . . . . . . . . . . . . . . . . . . . . . . . . . . . . . . .
2-51
MMT . . . . . . . . . . . . . . . . . . . . . . . . . . . . . . . . . . . . . . . . .
6-4
MountainRoads . . . . . . . . . . . . . . . . . . . . . . . . . . . . . . . .
4-22
Multifunction Lever . . . . . . . . . . . . . . . . . . . . . . . . . . . . .
2-35
Neutral. Automatic Transmission . . . . . . . . . . . . . . . . . 2-22
Neutral. Manual Transmission .....................
2-24
New Vehicle Break-In ...........................
2-15
Nightvision . . . . . . . . . . . . . . . . . . . . . . . . . . . . . . . . . . . 4-15
9-7
Odometer . . . . . . . . . . . . . . . . . . . . . . . . . . . . . . . . . .
Odometer. Trip .................................
Off-Road Recovery .............................
Oil. Engine . . . . . . . . . . . . . . . . . . . . . . . . . . . . . . . . . . . .
One to Four Light . . . . . . . . . . . . . . . . . . ; . . . . . . . . . . . .
Overdrive. Automatic Transmission . . . . . . . . . . . . . . . .
Overheating Engine . . . . . . . . . . . . . . . . . . . . . . . . . . . . .
Owner Checks andServices .......................
Owner Publications. Ordering .....................
2-74
2-74
4- 12
6-10
2-25
2-23
5- 13
7-40
8- 11
P a i n t Spotting.Chemical . .
.......
. . . . . . . 6-61
Park
Automatic Transmission .
. . . . . . . . . . . . . . . . 2-21
Shifting Into .....................
. . . . . . . 2-29
Shifting Out of ......................
. . . . . 2-31
Parking
AtNight . . . . . . . . . . . . . . . . . . . . . . . . . . . . . . . . . .
2-12
Brake . . . . . . . . . . . . . . . . . . . . . . . . . . . . . . . . . . . . . .
2-28
Lots . . . . . . . . . . . . . . . . . . . . . . . . . . . . . . . . . . . . . . .
2-12
2-32
Over Things That Burn ........................
Your Vehicle. Manual Transmission . . . . . . . . . . . . . . 2-3 1
Parking Brake Indicator Light .....................
2-79
Parking Brake Mechanism Check . . . . . . . . . . . . . . . . . . 7-43
1-23
Passenger Position . . . . . . . . . . . . . . . . . . . . . . . . . . . . . .
Passing . . . . . . . . . . . . . . . . . . . . . . . . . . . . . . . . . . . . . . . 4-12
2-92
Passive Keyless Entry Light ......................
Passive Keyless Entry System ......................
2-4
2- 14
Pass-Key@ .....................................
Periodic Maintenance Inspections . . . . . . . . . . . . . . . . 7-44
2-52
Plug. Accessory ................................
Power
DoorLocks . . . . . . . . . . . . . . . . . . . . . . . . . . . . . . . . . . .
2-4
2-46
Remote Control Mirrors ........................
Seat . . . . . . . . . . . . . . . . . . . . . . . . . . . . . . . . . . . . . . . . .
1-2
Steering . . . . . . . . . . . . . . . . . . . . . . . . . . . . . . . . . . . .
4-10
Steering Fluid ................................
6-29
Windows . . . . . . . . . . . . . . . . . . . . . . . . . . . . . . . . . . . 2-34
Power Antenna Service ...........................
7-40
Powerseat .....................................
1-2
Pregnancy, Use of Safety Belts ....................
1-23
Problems on the Road ............................
5-1
Publications, Service and Owner . . . . . . . . . . . . . . . . . . . 8-10
R a c i n g or Other Competitive Driving . . . . . . . . . . . . . . 2-19
3-18
Radio Reception ................................
Radios . . . . . . . . . . . . . . . . . . . . . . . . . . . . . . . . . . . . . . .
3-10
Rain, Driving In ................................
4-16
Rear
Axle . . . . . . . . . . . . . . . . . . . . . . . . . . . . . . . . . . . . . . .
6-24
7-45
Axle Service . . . . . . . . . . . . . . . . . . . . . . . . . . . . . . . . .
Cargo Compartment Lamp Bulb Replacement . . . . . . 6-44
Storage .....................................
2-49
Towing .....................................
5-10
Turn Signal Lamp Bulb Replacement . . . . . . . . . . . . . 6-42
Window Defogger ............................. 3-8
Rearview Mirror, Inside Daymight . . . . . . . . . . . . . . . . . 2-46
Reclining Seatbacks ..............................
1-3
Incorrect Usage ....................
1.13.1.29.
1-30
Recovery Tank. Coolant . . . . . . . . . . . . . . . . . . . . . . . .
5- 17
Remote Hatch Release . . . . . . . . . . . . . . . . . . . . . . . . . . . .
2-9
Lap Belt Cinch Feature . . . . . . . . . . . . . . . . . . . . . . . .
1.12
Lap-Shoulder . . . . . . . . . . . . . . . . . . . . . . . . . . . . . . . .
1-11
ReplacementBulbs . . . . . . . . . . . . . . . . . . . . . . . . . . . . . 6-73
Larger Children . . . . . . . . . . . . . . . . . . . . . . . . . . . . . .
1-29
ReplacementParts . . . . . . . . . . . . . . . . . . . . . . . . . . . . . .
6-75
PassengerPosition . . . . . . . . . . . . . . . . . . . . . . . . . . . .
1-23
Replacement.Wheel . . . . . . . . . . . . . . . . . . . . . . . . . . . .
6-53
Reporting Safety Defects . . . . . . . . . . . . . . . . . . . . . . . . . .
8-9
Questions and Answers . . . . . . . . . . . . . . . . . . . . . . . .
1.10
ReminderLight . . . . . . . . . . . . . . . . . . . . . . . . . .
1.6.2.75
Restraints
Replacing After a Crash . . . . . . . . . . . . . . . . . . . . . . . .
1-32
Checking ................................... l-31
Smaller Children and Babies ....................
1-24
Child ....................................... l-26
Use During Pregnancy . . . . . . . . . . . . . . . . . . . . . . . . .
1-23
Replacing Parts After a Crash . . . . . . . . . . . . . . . . . . . 1-32
WhyTheyWork
.
.
.
.
.
.
.
.
.
.
.
.
.
.
.
.
.
.
.
.
.
.
.
.
.
.
.
.
.
.
.
1-7
7-41
Systemcheck . . . . . . . . . . . . . . . . . . . . . . . . . . . . . . . .
SafetyDefects.Reporting . . . . . . . . . . . . . . . . . . . . . . . . .
8-9
Reverse, Automatic Transmission . . . . . . . . . . . . . . . . . . 2-22
vm
Symbols
and
Warnings
Safety
...
......................
Reverse.ManualTransmission . . . . . . . . . . . . . . . . . . . .
2-24
Scheduled Maintenance Services . . . . . . . . . . . . . . . . . . . . 7-3
Ridecontrol . . . . . . . . . . . . . . . . . . . . . . . . . . . . . . . . . . . 2-27
Seatback
Ride Control Fuse . . . . . . . . . . . . . . . . . . . . . . . . . . . . . .
6-72
Latches . . . . . . . . . . . . . . . . . . . . . . . . . . . . . . . . . . . .
1-5
Roadside Assistance . . . . . . . . . . . . . . . . . . . . . . . . . . . . . .
8-4
Reclining
.
.
.
.
.
.
.
.
.
.
.
.
.
.
.
.
.
.
.
.
.
.
.
.
.
.
.
.
.
.
.
.
.
.
.
.
1-3
Roadside Assistance, Canadian . . . . . . . . . . . . . . . . . . . . . 8-6
Seats . . . . . . . . . . . . . . . . . . . . . . . . . . . . . . . . . . . . . . . . . .
1-1
Rocking YourVehicle . . . . . . . . . . . . . . . . . . . . . . . . . . .
5-40
Manual
Front
.
.
.
.
.
.
.
.
.
.
.
.
.
.
.
.
.
.
.
.
.
.
.
.
.
.
.
.
.
.
.
.
.
.
.
1-1
RoofPanel . . . . . . . . . . . . . . . . . . . . . . . . . . . . . . . . . . . .
2-53
Power . . . . . . . . . . . . . . . . . . . . . . . . . . . . . . . . . . . . . . .
1-2
Rotation, Tire . . . . . . . . . . . . . . . . . . . . . . . . . . . . . . . .
6-49
Securing a Child Restraint . . . . . . . . . . . . . . . . . . . . . .
1-26
sport . . . . . . . . . . . . . . . . . . . . . . . . . . . . . . . . . . . . . . . . 1-3
Safety Belts . . . . . . . . . . . . . . . . . . . . . . . . . . . . . . . . . . .
1-6
Seats and Restraint Systems . . . . . . . . . . . . . . . . . . . . . . . .
1-1
Adults . . . . . . . . . . . . . . . . . . . . . . . . . . . . . . . . . . . . . .
1-11
Seats and Seat Controls . . . . . . . . . . . . . . . . . . . . . . . . . . .
1-1
Care . . . . . . . . . . . . . . . . . . . . . . . . . . . . . . . . . . . . . . .
6-56
Second Gear. Automatic Transmission . . . . . . . . . . . . . . 2-23
Children .................................... l-24
Second Gear, Manual Transmission . . . . . . . . . . . . . . . . . 2-24
Driver Position . . . . . . . . . . . . . . . . . . . . . . . . . . . . . . .
1- 11
Security Light . . . . . . . . . . . . . . . . . . . . . . . . . . . . . . . . . .
2-93
Extender . . . . . . . . . . . . . . . . . . . . . . . . . . . . . . . . . . . .
1-31
SecurityShade . . . . . . . . . . . . . . . . . . . . . . . . . . . . . . . . .
2-48
How to Wear Properly . . . . . . . . . . . . . . . . . . . . . . . . .
1- 1 1
9-9
Service .........................................
6-1
ASR Light ..............................
2-80, 4-9
Bulletins, Ordering ............................
8- 11
EngineSoonLight ............................
2-86
LTPWSLight ................................
2-85
Manuals, Ordering ............................
8- 1 1
Parts Identification
Label . . . . . . . . . . . . . .
. . . . . 6-63
Publications, Ordering .........................
8-10
Ride Control Light ............................
2-92
Work, Doing Your Own .........................
6-2
Service and Appearance Care ......................
6-1
Service and Owner Publications . . . . . . . . . . . . . . . . . . . 8-10
Servicing Your Air Bag-Equipped Corvette . . . . . . . . . . 1-22
Shiftspeeds ...................................
2-25
2-21, 2-24
Shifting ..................................
IntoPark ....................................
2-29
Outofpark ..................................
2-31
Sidemarker Lamp Bulb Replacement . . . . . . . . . . . . . . . 6-39
Signaling Turns ................................
2-36
Sixth Gear, Manual Transmission . . . . . . . . . . . . . . . . . . 2-24
Skidding ......................................
4-14
Sound Equipment, Adding ........................
3- 18
Spare Tire. Compact .............................
5-38
Speaker Covers. Cleaning ........................
6-56
Specifications and Capacities ......................
6-74
Specifications, Engine ...........................
6-74
Speech Impaired, Customer Assistance . . . . . . . . . . . . . . . 8-3
2-74
Speedometer ...................................
Sportseat ......................................
1-3
6-6 1
Springs, Fiberglass ..............................
9-10
Stains. Cleaning ................................
6-54
Starter Switch Check ............................
7-42
Starting Your Engine ............................
2-18
Steam ........................................ 5-13
Steering ......................................
4-10
Column Lock Check ..........................
7-43
in Emergencies ...............................
4-11
Power ......................................
4-10
Tips ........................................
4-10
2-35
Wheel, Tilt ..................................
2-47
Storage Compartments ...........................
Storage. Vehicle ................................
6-35
Stuck. If You Are ...............................
5-39
Stuck: In Sand. Mud. Ice or Snow . . . . . . . . . . . . . . . . . . 5-39
Sun Visors ....................................
2-51
Symbols. Vehicle ..................................
x
System Controls. Climate Control System . . . . . . . . . . 3-1. 3-4
System Problems Light ..........................
2-93
Tachometer . . . . . . . . . . . . . . . . . . . . . . . . . . . . . . . .
2-74
Taillamp Bulb Replacement ........................
6-42
Tape Player Care ............................... 3-19
Temperature Control .........................
3-1 3-4
Theft ......................................... 2-12
Theft-Deterrent Alarm System ....................
2-13
Thermostat .................................... 6-29
Third Gear. Manual Transmission . . . . . . . . . . . . . . . . . . 2-24
TiltSteeringWheel .............................
2-35
Time. Setting the ...............................
3-10
.
Tire Chains . . . . . . . . . . . . . . . . . . . . . . . . . . . . . . . . . .
6-53
Tire-Loading Information Label . . . . . . . . . . . . . . . . . . . 4-28
Tires . . . . . . . . . . . . . . . . . . . . . . . . . . . . . . . . . . . . . . . . . 6-46
Alignment and Balance ........................
6-52
BuyingNew . . . . . . . . . . . . . . . . . . . . . . . . . . . . . . . . .
6-50
Changing a Flat ..............................
5-22
Cleaning . . . . . . . . . . . . . . . . . . . . . . . . . . . . . . . . . . . .
6-60
Compact Spare . . . . . . . . . . . . . . . . . . . . . . . . . . . . . . .
5-38
Extended Mobility . . . . . . . . . . . . . . . . . . . . . . . . . . . . 6-47
Inflation . . . . . . . . . . . . . . . . . . . . . . . . . . . . . . . . . . . .
6-48
Inflation Check . . . . . . . . . . . . . . . . . . . . . . . . . . . . . . .
7-40
Inspection and Rotation ........................
6-49
Loading . . . . . . . . . . . . . . . . . . . . . . . . . . . . . . . . . . . .
4-28
Pressure . . . . . . . . . . . . . . . . . . . . . . . . . . . . . . . . . . . .
6-48
Storing a Flat . . . . . . . . . . . . . . . . . . . . . . . . . . .
5-33, 5-36
Temperature . . . . . . . . . . . . . . . . . . . . . . . . . . . . . . . . .
6-5 1
Traction . . . . . . . . . . . . . . . . . . . . . . . . . . . . . . . . . . . .
6-51
Treadwear . . . . . . . . . . . . . . . . . . . . . . . . . . . . . . . . . . .
6-51
Uniform Quality Grading . . . . . . . . . . . . . . . . . . . . . . . 6-51
Wear Indicators . . . . . . . . . . . . . . . . . . . . . . . . . . . . . .
6-49
Wheel Replacement . . . . . . . . . . . . . . . . . . . . . . . . . . .
6-52
When It’s Time for New . . . . . . . . . . . . . . . . . . . . . . .
6-49
TopStrap . . . . . . . . . . . . . . . . . . . . . . . . . . . . . . . . . . . . .
1-26
TorqueLock . . . . . . . . . . . . . . . . . . . . . . . . . . . . . . . . . . .
2-31
Torque, Wheel Nut . . . . . . . . . . . . . . . . . . . . . . . . .
5-32, 6-75
Towing a Trailer . . . . . . . . . . . . . . . . . . . . . . . . . . . . . . . .
4-29
Towing Your Vehicle . . . . . . . . . . . . . . . . . . . . . . . . . . . . . 5-6
TrailerTowing . . . . . . . . . . . . . . . . . . . . . . . . . . . . . . . 4-29
6-18
Transmission Fluid . . . . . . . . . . . . . . . . . . . . . . . . . . . . . .
Automatic . . . . . . . . . . . . . . . . . . . . . . . . . . . . . . . . . . .
6-18
Manual . . . . . . . . . . . . . . . . . . . . . . . . . . . . . . . . . . . . .
6-21
Transmitters. Passive Keyless Entry . . . . . . . . . . . . . . . . . 2-4
Transportation.Courtesy ..........................
8-6
Trip Odometer . . . . . . . . . . . . . . . . . . . . . . . . . . . . . . . . .
2-74
TTYUsers . . . . . . . . . . . . . . . . . . . . . . . . . . . . . . . . . . . . .
8-3
Turn Signal and Lane Change Indicator . . . . . . . . . . . . . 2-36
Turn Signalklultifunction Lever . . . . . . . . . . . . . . . . . . . 2-35
Underbody Flushing Service .....................
Underbody Maintenance .........................
UnderhoodLampsFuse ..........................
Universal Theft-Deterrent ........................
7-43
6-61
6-72
2-13
Vehicle
Control . . . . . . . . . . . . . . . . . . . . . . . . . . . . . . . . . . . . . .
Damage Warnings ..............................
Dimensions . . . . . . . . . . . . . . . . . . . . . . . . . . . . . . . . .
Identification Number . . . . . . . . . . . . . . . . . . . . . . . . .
Loading . . . . . . . . . . . . . . . . . . . . . . . . . . . . . . . . . . . .
Storage . . . . . . . . . . . . . . . . . . . . . . . . . . . . . . . . . . . . .
Ventilation System . . . . . . . . . . . . . . . . . . . . . . . . . . . . . . .
VisorVanity Mirrors ............................
Visors, Sun . . . . . . . . . . . . . . . . . . . . . . . . . . . . . . . . . . . .
Voltmeter . . . . . . . . . . . . . . . . . . . . . . . . . . . . . . . . . . . . .
4-5
ix
6-77
6-63
4-28
6-35
3-9
2-51
2-51
2-77
I
9-11
w a r n i n g Devices . . . . . . . . . . . . . . . . . . . . . . . . . . . . . . . 5-2
Warning Lights. Gauges and Indicators . . . . . . . . . . . . . . 2-74
WasherFluid.Windshield ........................
6-30
WashingYourVehicle ...........................
6-58
Weatherstrips ..................................
6-57
Wheel
6-52
Alignment ..................................
LockKey ...................................
5-24
Nut Torque .............................
5.32. 6.75
Replacement ...................... : . . . . . . . . . . 6-52
Wrench . . . . . . . . . . . . . . . . . .
. . . . . . . . . . . . .5.23
9-12
2-34
Windows .....................................
Express-Down ............................... 2-34
Power ......................................
2-34
2-38
WindshieldWasher .............................
6-30
Fluid .......................................
Fluid Level Check ............................
7-40
Windshield Wipers ..............................
2-37
BladeReplacement ......................
6.45.6.75
6-64
Fuses ......................................
Winter Driving .................................. 4-24
Wiring.Headlamp ...............................
6-64
WreckerTowing .................................
5-6