1
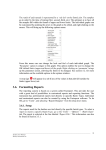
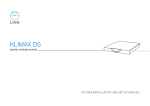
Ripstation Pro
Operating Manual
Ripstation
A Division of Formats Unlimited, Inc
155 Sherwood Avenue
Farmingdale, NY 11735
T: +1 631 249 9393
F: +1 631 249 9273
Authors: Ralph Hill, Patrick McGrath, Robert Warnock
[email protected]
www.ripstation.com/support
© Copyright 2009
100-5-01-000
Copyright
All rights within this document and related software belong to Formats Unlimited.
Ripstation is a registered trademark of Formats Unlimited.
BY USING THIS SOFTWARE YOU ARE AGREEING TO THESE TERMS AND
CONDITIONS.
This software (the SOFTWARE) is prepared as a solution to dealers, systems
integrators. This SOFTWARE is provided as is and with warranty only as detailed
in the applicable License agreement.
Ripstation specifically disclaim to the fullest extent permitted by law all
warranties, expressed or implied, including but not limited to implied warranties of
merchantability and fitness for a particular purpose, with respect to this software.
Ripstation shall have no liability including without limitation in negligence with
respect to this software. Ripstation shall have no liability including without
limitation in negligence with respect to any loss or damage directly or indirectly
arising out of the use of this software.
Without limiting the foregoing, Ripstation shall not be liable, including without
limitation in negligence for any loss of profit, interruption of business, loss or
damage to equipment or data, interruption of operations or any other damage,
including but not limited to direct, special, incidental or consequential damages.
This software must not be used for unauthorised duplication of CD's or any other
works protected by copyright unless permitted by law. No license to infringe
copyright is granted by the possession, installation and/ or use of this software.
Any statutory rights you may have are unaffected.
Ripstation Pro – User Manual
Page 2 of 43
Software EULA
100-5-01-000
Software EULA
End User Software License Agreement
for Ripstation Software
NOTICE TO ALL USERS: PLEASE CAREFULLY READ THE FOLLOWING LEGAL
AGREEMENT ("AGREEMENT") FOR THE LICENSE OF Ripstation ("SOFTWARE") BY
MF Digital Ltd. ("MFD"). BY CLICKING THE ACCEPT BUTTON OR INSTALLING
THE SOFTWARE, YOU (EITHER AN INDIVIDUAL OR A SINGLE ENTITY) CONSENT TO
BE BOUND BY AND BECOME A PARTY TO THIS AGREEMENT. IF YOU DO NOT AGREE
TO ALL OF THE TERMS OF THIS AGREEMENT, CLICK THE BUTTON THAT INDICATES
THAT YOU DO NOT ACCEPT THE TERMS OF THIS AGREEMENT AND DO NOT INSTALL
THE SOFTWARE.
1. License Grant. Subject to the payment of the applicable license
fees, and subject to the terms and conditions of this Agreement and a
pre agreed License term, MFD hereby grants to you a non-exclusive, nontransferable right to use one copy of the specified version of the
Software and the accompanying documentation (the "Documentation") on
one computer only unless otherwise agreed.
2. Term. This Agreement is effective for an unlimited duration unless
and until earlier terminated as set forth herein. This Agreement will
terminate automatically if you fail to comply with any of the
limitations or other requirements described herein. Upon any
termination or expiration of this Agreement, you must destroy all
copies of the Software and the Documentation. You may terminate this
Agreement at any point by destroying all copies of the Software and the
Documentation.
3. Ownership Rights. The Software is protected by International
copyright laws and international treaty provisions. MFD and its
suppliers own and retain all right, title and interest in and to the
Software, including all copyrights, patents, trade secret rights,
trademarks and other intellectual property rights therein. Your
possession, installation, or use of the Software does not transfer to
you any title to the intellectual property in the Software, and you
will not acquire any rights to the Software except as expressly set
forth in this Agreement.
4. Restrictions. You may not rent, lease, loan, sublicense or resell
the Software. You may not permit third parties to benefit from the use
or functionality of the Software via a timesharing, service bureau or
other arrangement. You may not transfer any of the rights granted to
you under this Agreement. You may not reverse engineer, decompile, or
disassemble the Software, except to the extent the foregoing
restriction is expressly prohibited by applicable law. You may not
modify, or create derivative works based upon, the Software in whole or
in part. You may not copy the Software or Documentation. Except that
you may either (a) make one copy of the Software solely for backup or
archival purposes, or (b) transfer the Software to a single hard disk
provided that you keep the original solely for backup or archival
purposes. You may not remove any proprietary notices or labels on the
Software. All copies must contain the same proprietary notices that
appear on and in the Software. All rights not expressly set forth
hereunder are reserved by MFD.
5. Warranty and Disclaimer.
a. Limited Warranty. MFD warrants that for sixty (60) days from the
date of original purchase the media (e.g., CD-Rom) on which the
Software is contained will be free from defects in materials and
workmanship.
Ripstation Pro – User Manual
Page 3 of 43
Software EULA
100-5-01-000
b. Remedies. MFD and its suppliers' entire liability and your exclusive
remedy for any breach of the foregoing warranty shall be, at MFD’s
option, either (i) return of the purchase price paid for the license,
if any, or (ii) replacement of the defective media in which the
Software is contained. You must return the defective media to MFD at
your expense with a copy of your receipt. This limited warranty is void
if the defect has resulted from accident, abuse, or misapplication. Any
replacement media will be warranted for the remainder of the original
warranty period.
c. Warranty Disclaimer. Except for the limited warranty set forth
herein, THE SOFTWARE IS PROVIDED "AS IS." TO THE MAXIMUM EXTENT
PERMITTED BY APPLICABLE LAW, MFD DISCLAIMS ALL WARRANTIES, EITHER
EXPRESS OR IMPLIED, INCLUDING BUT NOT LIMITED TO IMPLIED WARRANTIES OF
MERCHANTABILITY, FITNESS FOR A PARTICULAR PURPOSE, TITLE AND
NONINFRINGEMENT WITH RESPECT TO THE SOFTWARE AND THE ACCOMPANYING
DOCUMENTATION. YOU ASSUME RESPONSIBILITY FOR SELECTING THE SOFTWARE TO
ACHIEVE YOUR INTENDED RESULTS, AND FOR THE INSTALLATION OF, USE OF, AND
RESULTS OBTAINED FROM THE SOFTWARE. WITHOUT LIMITING THE FOREGOING
PROVISIONS, MFD MAKES NO WARRANTY THAT THE SOFTWARE WILL BE ERROR-FREE
OR FREE FROM INTERRUPTIONS OR OTHER FAILURES OR THAT THE SOFTWARE WILL
MEET YOUR REQUIREMENTS. SOME STATES AND JURISDICTIONS DO NOT ALLOW
LIMITATIONS ON IMPLIED WARRANTIES, SO THE ABOVE LIMITATION MAY NOT
APPLY TO YOU. The foregoing provisions shall be enforceable to the
maximum extent permitted by applicable law.
6. Limitation of Liability. UNDER NO CIRCUMSTANCES AND UNDER NO LEGAL
THEORY, WHETHER IN TORT, CONTRACT, OR OTHERWISE, SHALL MFD OR ITS
SUPPLIERS BE LIABLE TO YOU OR TO ANY OTHER PERSON FOR ANY INDIRECT,
SPECIAL, INCIDENTAL, OR CONSEQUENTIAL DAMAGES OF ANY CHARACTER
INCLUDING, WITHOUT LIMITATION, DAMAGES FOR LOSS OF GOODWILL, COMPUTER
FAILURE OR MALFUNCTION, OR FOR ANY AND ALL OTHER DAMAGES OR LOSSES. IN
NO EVENT WILL TOPIARY BE LIABLE FOR ANY DAMAGES IN EXCESS OF THE LIST
PRICE TOPIARY CHARGES FOR A LICENSE TO THE SOFTWARE, EVEN IF TOPIARY
SHALL HAVE BEEN ADVISED OF THE POSSIBILITY OF SUCH DAMAGES.
FURTHERMORE, SOME STATES AND JURISDICTIONS DO NOT ALLOW THE EXCLUSION
OR LIMITATION OF INCIDENTAL OR CONSEQUENTIAL DAMAGES, SO THIS
LIMITATION AND EXCLUSION MAY NOT APPLY TO YOU. The foregoing provisions
shall be enforceable to the maximum extent permitted by applicable law.
7. Miscellaneous. This Agreement is governed by the laws of the
Ireland, without reference to conflict of laws principles, and the
parties agree that the sole location and venue for any litigation which
may arise hereunder shall be Ireland. The application of the United
Nations Convention of Contracts for the International Sale of Goods is
expressly excluded. This Agreement sets forth all rights for the user
of the Software and is the entire agreement between the parties. This
Agreement supersedes any other communications with respect to the
Software and Documentation. This Agreement may not be modified except
by a written addendum issued by a duly authorized representative of
MFD. No provision hereof shall be deemed waived unless such waiver
shall be in writing and signed by MFD or a duly authorized
representative of MFD. If any provision of this Agreement is held
invalid, the remainder of this Agreement shall continue in full force
and effect. The parties confirm that it is their wish that this
Agreement has been written in the English language only.
8. The Software and Documentation are provided with Restricted Rights.
9. You agree not to export this software unless previously agreed with
MFD
Copyright © 2002-2006 MF Digital Ltd, Inc. All Rights Reserved.
Ripstation Pro – User Manual
Page 4 of 43
Overview
100-5-01-000
Overview
Ripstation Pro is a suite of software to allow for batch transfer and encoding of CD
material to digital music files utilising USB attached CD Drives or MF Digital’s 7600 series
robotic autoloaders.
The application operates on the Windows XP Platform.
The product is designed for use by individuals, system integrators and service providers
and offers flexibility, ease of use and high throughput at the core of its operation.
Ripstation Pro is licensed on a seat or site license basis as selected by MF Digital's clients
and subject to the conditions laid down in the applicable license agreement.
This document provides a user manual to allow basic and advanced operation as well as
customisation of all parameters, set up and use of robotics.
Ripstation generally includes the following:
•
•
•
•
•
•
Ripstation
7600 series Hardware
7601 (optional burn choice)
AudioBurn
AudioView
Filemover
This document does not detail each of these applications and it is highly recommended
that the relevant manuals be consulted for each of the above.
Ripstation Pro – User Manual
Page 5 of 43
Contents
100-5-01-000
Contents
1.0 SOFTWARE INSTALLATION
8
1.1 PRE-INSTALL CHECKS
1.2 RUNNING THE EXECUTABLE
1.2.1 REGISTRATION
1.2.2 LIMITS ON REGISTRATION
8
8
8
9
2.0 HARDWARE INSTALLATION
10
2.1 ROBOTIC HARDWARE (MT & PRO SERIES)
2.2 STEP-BY-STEP GUIDE OF ROBOTIC HARDWARE
2.2.1 STEP ONE – REMOVE THE PACKING CONSTRAINTS
2.2.2 STEP TWO – REMOVE THE STABILIZING BRACKET
2.2.3 STEP THREE – PLUG IN THE PERIPHERALS
10
10
10
10
10
3.0 RIPSTATION QUICK START GUIDE
12
4.0 MAIN USER GUIDE
14
4.1 KEY FEATURES
4.2 SUPPORTED CODECS AND BIT RATES
4.3 RIPSTATION V4.3 MAIN SCREEN
4.3.1 BUTTON AND SCREEN OPERATIONS
4.3.1.1 Group 1: Button Controls
4.3.1.2 Group 2: CD-Rom Drive Display Bar
4.3.1.3 Group 3: Cover art Preview
4.3.1.4 Group 4: Metadata Preview
4.3.1.5 Group 5: Batch Status Window
4.3.1.6 Group 6: Internet and metadata provider Connection Status Window
4.3.1.7 Group 7: Batch Logging Window
4.3.2 MAIN SCREEN MENU OPTIONS
4.4 PREFERENCE SETTINGS
4.4.1 Metadata Tab
4.4.2 Data Tab
4.4.3 SQL Tab
4.4.4 Grooming Tab
4.4.5 Logging Tab
4.4.6 Ripping Tab
4.5 STARTING A NEW BATCH
4.5.1 BATCH SETUP
4.5.2 CODEC SETTINGS
4.5.3 OPERATIONS DURING BATCH RIP
14
15
16
17
17
17
18
18
19
19
20
20
21
21
23
24
25
26
27
28
28
29
32
Ripstation Pro – User Manual
Page 6 of 43
Contents
100-5-01-000
4.5.3.1 Operations without Robotic Autoloader
32
4.5.3.2 Operations with Robotic Autoloader (MT & Pro Series)
33
4.5.3.3 Reported errors
33
4.5.4 GETTING COVER ART
ERROR! BOOKMARK NOT DEFINED.
4.6 ACTIONS FOR COMPLETED BATCH
35
4.6.1 AUDIOBURN BUTTON (BURN DVD BACKUPS)
35
4.6.2 PODLOAD BUTTON (LOAD AN IPOD)
35
4.6.3 LOADING AN EXTERNAL HARD DRIVE
35
4.7 ERROR DETECTION & CORRECTION
36
4.8 OUTPUT REPORTS
36
5.0 INTEGRATION WITH OTHER MF DIGITAL PRODUCTS
37
6.0 HELP AND SUPPORT
38
Ripstation Pro – User Manual
Page 7 of 43
Software Installation
100-5-01-000
1.0 Software Installation
1.1 Pre-install Checks
For Standalone PC Options:
•
•
•
•
•
Windows XP or SP2
Microsoft .NET 2.0, download from
http://www.microsoft.com/downloads/details.aspx?FamilyID=0856eacb-43624b0d-8edd-aab15c5e04f5&displaylang=en
PC platforms as specified in pre-install documentation
Always on internet connection
Windows Media Player 10 or above.
In addition, please ensure the required document for metadata access has been
completed and the required key codes have been issued (see section 4.4.1).
1.2 Running the Executable
•
•
•
Ensure target PC is connected to the internet.
To install the software, double click the icon ‘ripstation44prosetup.exe’ to run
and follow the onscreen prompts.
It is recommended that the default paths be selected for installation.
1.2.1 Registration
•
•
To activate the software installation, double click the program shortcut on the
desktop.
When prompted, as shown in figure 1.0, please key in the registration code
supplied at the time of purchase and click ok.
Figure 1.0 – Product Registration Code Screen
Ripstation Pro – User Manual
Page 8 of 43
Software Installation
•
100-5-01-000
Next, enter in the company details when presented with the screen as shown in
figure 1.1 in order to complete the product registration and software installation.
Figure 1.1 – Product Registration Details Screen
All details marked as * are required.
•
Click OK to proceed and the application will connect to our server and verify your
code.
1.2.2 Limits on Registration
In the case of a seat License, ONE code for activation is provided. The application may
be uninstalled at any time and reinstalled on an alternate machine by following the
process above. Please note however, only ONE copy of the software will run at any one
time and a second installation of the software with the same code will prevent the first
installation from being run.
Ripstation Pro – User Manual
Page 9 of 43
Hardware Installation
100-5-01-000
2.0 Hardware Installation
This section details a set of instructions for correct assembly of the robotic hardware. It
begins by listing the items contained within the packaging.
.
2.1 Robotic Hardware (7600 Series)
The autoloader box should contain:
1.
2.
3.
4.
The 7600 series robotic hardware system
Power cable
These Quick Set-up Instructions
Warranty & support documents
2.2 Step-by-step guide of Robotic hardware
2.2.1 STEP ONE – Remove the Packing Constraints
•
•
•
•
•
•
Carefully remove the autoloader from its carton, lifting from the bottom using the
hand cut outs in the foam base.
DO NOT attempt to lift the machine using the spindles, column tower, or pick
arm, as these are delicate pieces and are depended on for proper alignment and
functioning of the unit.
Place the system on a level workspace free of debris, dust, humidity, excessive
heat, and electronic or electromagnetic interference.
Keep out of direct sunlight.
Allow at least six inches of clearance on all sides of unit for ventilation.
Remove protective plastic cover from system and save along with the rest of the
MT packaging.
2.2.2 STEP TWO – Remove the Stabilizing Bracket
•
•
If the system has one, *remove the stabilizing bracket that is attached to
the drive stack and column tower (very important)*. This is an item used
to stabilize the column tower in shipping only and could severely damage the
autoloader if not removed prior to powering on the unit.
Save the stabilizing bracket along with the rest of the packaging.
2.2.3 STEP THREE – Plug in the Peripherals
•
•
•
Plug in a monitor, keyboard and mouse to the robot.
Attach the Ethernet cable.
Using the enclosed 3-prong power cord, plug in the autoloader to a properly
grounded AC receptacle. It is highly recommended that a surge protector is
used to ensure safety in operation.
Ripstation Pro – User Manual
Page 10 of 43
Hardware Installation
100-5-01-000
The assembly is now complete. A small number of test CDs may be placed into input
hopper one (the right-most bin with three ‘spikes’).
All successfully ripped discs will be dropped off onto the accept spindle or appropriate
hopper until the system has completed the quantity of discs requested, or runs out of
media. Should any discs fail to be ripped due to a blemish or otherwise; they will be
placed in the reject pile, in front of the drive stack.
Ripstation Pro – User Manual
Page 11 of 43
Ripstation Pro Quick Start Guide
100-5-01-000
3.0 Ripstation Quick Start Guide
Before using the Ripstation software, please use the following steps as a ‘quick start’
guide to set the initial parameters and perform a simple MP3 batch rip.
1. Open the Ripstation software and on the main screen click the Preferences
icon. The dialog box shown in figure 3.0 opens.
2. Select the ordering of lookups as AMG First and the multiple FreeDB options Second
then Click OK. You can buy your AMG look ups by clicking on the Purchase link (NOTE:
Use of AMG metadata from Macrovision is undertaken under the terms of the
flow down agreement attached as Annex A, please read it carefully).There is
also the option to select a local source in the cdplayer.ini file.
Figure 3.0 – Preferences Dialog Box
3. In the main screen click the new batch icon. The batch properties dialog
opens.
4. If using an 7602/4 device, you will need to configure the side what drive is on, and
choose the correct COM port. To do this from the Source device pull down box,
select 7602/4, the click the edit button beside it:
Ripstation Pro – User Manual
Page 12 of 43
Ripstation Pro Quick Start Guide
100-5-01-000
Figure 3.1 – MFD2/4 Properties Dialog
You then select which drives are left of the robotic arm, and which are right of it.
You can also enable shake mode1
5. If using a legacy MT2/4 device, select it from the dropdown box, then click edit.
You have the option to choose the COM port that the robotic autoloader is
connected to, and to use shake mode1.
Figure 3.2 – MT2/4 Properties Dialog
1
Shake mode was introduced to address sticking discs being double loaded into drive
tray. It is not supported by the MT1 robotic loader.
6. Enter your name, 'testrip' or 'myfirstrip' into the Client Name box. A folder of the
same name will be created. This is where the audio files will be saved.
7. In the output formats section, highlight the MP3 codec and tick the ‘Use’ box on the
left.
8. Stack some CDs onto any input spindle and click ‘Start Batch’ to commence the first
batch rip!
NOTE: Ripping will continue until all CDs are ripped. Click the ‘Open Client
Folder’ button to view the digitally encoded audio files.
Ripstation Pro – User Manual
Page 13 of 43
Ripstation Pro Main User Guide
100-5-01-000
4.0 Main User Guide
4.1 Key Features
•
•
•
•
•
•
•
•
•
•
•
•
•
•
•
•
•
•
•
•
•
•
•
•
•
•
•
•
•
•
Batch encoding
Batch reporting on successful & failed CDs
Live batch process logging window
Metadata lookup logging & reporting
MFD series robotic autoloader and USB2.0 drive support
Batch setup wizard
Simultaneous multiple codec encoding
Client detail entry
SQL connectivity
Support for AMG, FreeDB and CD Player.ini localised metadata services
Full metadata & cover art preview
Full metadata cover art support and embedding
Web based lookup and embedding for missing cover art during batch process
Automatic grooming of tag data during encode process
Embedded company information
UID client watermark embedding
Switchable Unicode support
ID3> 2.4 inc. 1.1
Batch preview window – discs ripped/to go/no cover art/codecs/client name
Single touch start and drive control
Drive stop control
Full C2 error checking
Error output on the fly and post rip
Metadata testing service
Full target device support
Post encode facility
Fully scalable output masks
Fully automatically updated
Amazon cover art support
Integrated DVD burning engine
Ripstation Pro – User Manual
Page 14 of 43
Ripstation Pro Main User Guide
100-5-01-000
4.3 Supported Codecs and bit rates
Installed as standard are the following codecs
Codec
Supported options
FLAC
MP3
Lossless
VBR/CBR
64/128/192/256/320 kbps
VBR/CBR
64/96/128/160/192/256/320 kbps
Lossless
Embedded ID3 wav
Request WAV
Sonos RIFF WAV
VBR/CBR
96/128/160/192/224/320 kbps
45/64/80/96/112/128/160/192/224/256/320/499 kbps
Lossless
Lossless
Lossless
WMA
WAV
AAC
OGG
AIFF
APE
WAVPACK
Optional codecs may be purchased for Ripstation as additional modules.
Ripstation Pro – User Manual
Page 15 of 43
Ripstation Pro Main User Guide
100-5-01-000
4.3 Ripstation Pro Main Screen
The Ripstation main user interface is shown in figure 4.1 below. Operations are carried
out using the button controls at the top of the screen and information is displayed
throughout the rest of the screen. Figure 4.1 shows the interface split into groups from
1-7. Section 4.3.1 of the manual details each of these groups in turn.
Figure 4.1 – Ripstation Main User Interface
Ripstation Pro – User Manual
Page 16 of 43
Ripstation Pro Main User Guide
100-5-01-000
4.3.1 Button and Screen Operations
4.3.1.1 Group 1: Button Controls
Figure 4.2 below shows a closer version of the button controls in the main user
interface. They are labelled 1 –11 and are explained below.
1
2
3
4
5
6
7
8
9
10
11
12
Figure 4.2 – Ripstation Button Controls
Button 1: New Batch / Cancel Batch
Opens the New Batch dialog. If a batch is currently running, this button will change to
the Cancel Batch button as shown in figure 4.1 and will cancel the batch if pressed.
Button 2: Preferences
Opens the preferences dialog.
Button 3: Load
Opens a browser dialog to load previously saved batch settings (.rsf file). Settings file
contains Client Name, folder masks and configurations of all codecs, codec selection
Button 4: Save
Opens a browser dialog to save the current batch settings into a .rsf file.
Button 5: Delete Client Files
Deletes the last client folder that was ripped. Will display a confirmation dialog showing
the name of the folder about to be deleted. NOTE: If no client folder loaded – deletes
all files ripped from the top level folder down.
Button 6: Server Loading Module
Opens the MF Digital 'Audioload' module for server loading– please refer to this
product's user manual.
Button 7: Podload Module
Opens iTunes for add to library function and iPod loading
Button 8: Audioburn Module
Opens the MF Digital Audioburn module for robotic DVD backup of client audio. Please
refer to this product's user manual.
Button 9: Send to Disk
Opens the MF Digital 'Send to HD' module for loading client audio to removable storage.
Please refer to this product's user manual.
Button 10: AudioFile
Opens the optional MF Digital 'AudioFile' module HTML/PDF batch cataloguing. Please
refer to this product's user manual.
Button 12: Help
Opens the Ripstation v4.2 help dialog.
4.3.1.2 Group 2: CD-Rom Drive Display Bar
Ripstation Pro – User Manual
Page 17 of 43
Ripstation Pro Main User Guide
100-5-01-000
The CD-Rom drive display bar shows the status of each CD-Rom device in the system.
For the selected check box, the following information is displayed when a drive is ripping
a disc:
•
•
•
•
•
•
•
•
Thumbnail image of the current album cover art
Album name
Artist name
Album year
Genre
(all above as provided by the metadata provider)
Drive and firmware details
Percentage complete progress bar (also shows drive read speed)
The Stop button (Disc Skip) to the right of each drive display will eject the current disc
and place it onto the reject pile, before moving onto the next disc. Clicking anywhere on
the display bar for a drive will change the information displayed on the cover art,
metadata and batch status windows.
4.3.1.3 Group 3: Cover art Preview
The cover art preview window displays album cover art as shown in figure 4.3 for
example. Disc Cover dimensions are displayed at the top of the window and the
‘Provider’ box shows the source of cover art - “Web” indicates a web retrieved cover art
source (e.g. Amazon). Clicking on the preview image will show a full resolution version
of the cover art (actual pixel size). Click on the full resolution image to close it.
Figure 4.3 – Example of Cover Art Preview
4.3.1.4 Group 4: Metadata Preview
The metadata preview window displays a track listing for the disc in the currently
selected drive, and indicates the metadata provider used as a source for this metadata.
A percentage complete figure is displayed and updated in real time as each track is
synchronously read from the disc and encoded.
Ripstation Pro – User Manual
Page 18 of 43
Ripstation Pro Main User Guide
100-5-01-000
4.3.1.5 Group 5: Batch Status Window
The batch status window as shown in figure 4.4 is designed to give a dynamic preview
of the current batch job.
Figure 4.4 – Batch Status Box
The window provides the following information:
•
•
•
•
•
•
•
Client name - as entered into the New Batch dialog
Discs ripped - displayed in the form N/NN where N is the total ripped to date and
NN is the total size of the batch. A wildcard * is used to denote when no
maximum number of discs has been entered.
Discs failed - number of discs rejected due to failing error correction
Missing Covers - number of discs in current batch for which album art was not
obtained from metadata services or the integrated web search.
Elapsed Time - time elapsed since the start of the batch.
Open Client Folder button - opens the client folder for the current batch in
Windows Explorer. This is useful for checking that folders and files are being
created as expected. This can be clicked safely during the batch process and will
not affect operation.
The settings for each codec that was selected for the current batch - the bit rate
and VBR/CBR settings will be highlighted within the active codec.
4.3.1.6 Group 6: Internet and metadata provider Connection Status Window
The key for the connection status of the internet and the metadata providers is shown
below.
Connectivity not tested
Connectivity tested and status OK
Ripstation Pro – User Manual
Page 19 of 43
Ripstation Pro Main User Guide
100-5-01-000
Connectivity tested and no response received
Internet connectivity is tested every 12 seconds. Metadata provider connectivity is
tested when each database lookup request is sent to the provider. Metadata
connectivity indicators remain amber until a lookup request is sent, a successful
response from the provider will turn the indicator green while no response from the
provider will turn the indicator red.
4.3.1.7 Group 7: Batch Logging Window
Realtime logging of robotic operation, disc loading, metadata lookup, ripping and
encoding process and failed CDs. Each log entry is timestamped.
4.3.2 Main Screen Menu Options
Right clicking in the top left corner of the main screen, over the ‘Ripstation V4’ heading
opens the menu shown in figure 4.5.
Figure 4.5 – Ripstation V4 Menu Options
•
About Ripstation V4 - Opens the about dialog showing program detail
•
MF Digital - Opens the MF Digital homepage in your browser
•
Send Support Request - Opens the Ripstation Support homepage in your
browser
Ripstation Pro – User Manual
Page 20 of 43
Ripstation Pro Main User Guide
100-5-01-000
4.4 Preference Settings
Clicking on the preferences button opens the dialog box as shown in figure
4.6.
Figure 4.6 – Preferences Dialog Box (Metadata Tab)
4.4.1 Metadata Tab
The metadata tab selected in figure 4.6 allows for the following settings to be selected:
•
Local cdplayer.ini - For metadata retrieval from a local cache, check the 'Local
cdplayer.ini' checkbox and key in the full file path to the cdplayer.ini file (e.g.
C:\Windows\cdplayer.ini).
•
All Music Guide (AMG) - AMG access is activated by entering a key in the
license box provided. You will receive a key after completing the purchase look
up procedure detailed below:
(See Annex B AMG Purchase Procedure Document)
Checking the 'Add disc # to title' will append the disc number (specifically for box
sets) to the album title tag.
Checking the 'in parenthesis' will wrap parenthesis (CD01) around the number.
It is recommended to always have these options checked.
Ripstation Pro – User Manual
Page 21 of 43
Ripstation Pro Main User Guide
•
100-5-01-000
FreeDB – This is the web's main free metadata database. You can key in the
web address of freedb.freedb.org or one of the local regional mirrors (shown in
figure 4.7). FreeDB does not provide cover art.
FreeDB regional mirrors..
at.freedb.org (Vienna, Austria)
au.freedb.org (Sydney, Australia)
ca.freedb.org (Winnipeg, Manitoba, Canada)
es.freedb.org (Madrid, Spain)
fi.freedb.org (Tampere, Finland)
fr.freedb.org (Courbevoie, France)
jp.freedb.org (Shizuoka, Shizuoka, Japan)
jp2.freedb.org (Tokyo, Tokyo, Japan)
ru.freedb.org (Saint-Petersburg, Russia)
uk.freedb.org (London, UK)
uk2.freedb.org (London, UK)
us.freedb.org (San Jose, California, USA)
Figure 4.7 – FreeDB Regional Mirrors
•
Tracktype – This is another free metadata service like FreeDB. Key the web
address www.tracktype.org into the FreeDB options in the metadata preferences
as shown in figure 4.6. Tracktype does not provide cover art.
•
Metadata drop down boxes – The boxes beside each metadata service
provider allow the user to choose the order that Ripstation v4.4 queries each
metadata provider. Click the drop down menu to the left of each provider and set
to Never, First, Second or Third.
•
No Data Setting - Four options exist for dealing with albums with no metadata.
•
Automatically Rip - Discs will be ripped using “Unknown Artist” for artist
tag and artist folder name. The album name will be generated using a unique
ID. All albums ripped in this way will be placed into an artist folder called
'Unknown Artist” for later tagging and naming. There are several added
options to automatically rip. The second new option is to have a cddbid text
file placed in the album folder for unknown discs.
•
Automatically Reject - Discs will be rejected and placed in the reject pile.
•
Rip and Reject - This option is the same as Automatically Rip except the
unknown discs will be placed on the reject stack.
•
Query User - User will immediately be prompted to enter album information
manually during the batch process, as shown in figure 4.8.
o Select the genre from the dropdown list
Ripstation Pro – User Manual
Page 22 of 43
Ripstation Pro Main User Guide
o
o
o
o
o
o
o
100-5-01-000
Key in the year of release
Key in the artist name
Key in the album name
Click on each track to rename it
Click the OK button to save and continue
Or Enter the barcode via scanner or manually and click submit to retrieve
metadata
Or Click Skip to reject this CD and continue
Figure 4.8 – Metadata Manual Entry
•
Download missing covers from Amazon - This enables a web based lookup
for cover art when none has been returned via the normal metadata lookup.
Recommended setting is On.
NOTE: This facility cannot always provide 100% accurate cover art particularly for
Various artists discs
•
Include track count in TRCK frames - Check this option when ripping for
iPod or iTunes.
4.4.2 Data Tab
In the preferences dialog box, select the data tab as shown in figure 4.9.
Ripstation Pro – User Manual
Page 23 of 43
Ripstation Pro Main User Guide
100-5-01-000
Figure 4.9 – Preferences Dialog Box – Data Tab
The company URL may be keyed in here such that it becomes embedded in the
‘encoded by’ field in the ID3 tag. Alternatively the box may be left blank.
4.4.3 SQL Tab
In the preferences dialog box, select the SQL tab as shown in figure 4.10.
Figure 4.10 – Preferences Dialog Box – SQL Tab
SQL enabled allows Ripstation Pro to write ALL information from metadata and client
detail to a local SQL server. Simply check the box and key in the server details to enable
this.
Please consult MF Digital detailed documentation for set up details.
Ripstation Pro – User Manual
Page 24 of 43
Ripstation Pro Main User Guide
100-5-01-000
4.4.4 Grooming Tab
In the preferences dialog box, select the Grooming tab as shown in figure 4.11.
Figure 4.11 – Preferences Dialog Box – Grooming Tab
•
Map output genres to - Using the drop down box, select the manufacturer to
groom for and the genres will be mapped to the target list. These are supplied as
standard with Ripstation v4.2 and are updated by MF Digital on a regular basis.
•
Capitalize every word - Check this box to capitalise every new word of a
phrase (e.g. ‘a new day’ becomes ‘A New Day’). Click the edit list to edit the
exceptions for this rule (e.g. of, a , the)
•
Standardise composer names – Ensures consistent composer naming e.g. J S
Bach, Johann Sebastian Bach, J Bach all become ‘Bach’. Click edit to add a
composer.
•
Append artist name - Adds the artist name to the album ‘Greatest Hits’ e.g.
‘Greatest Hits’ by Madonna becomes ‘Greatest Hits, Madonna’. Click edit to add
to the list of album titles to perform this function on – e.g. best of, very best of
etc.
•
Prepend artist name - Adds the artist name to the album ‘Greatest Hits’ e.g.
‘Greatest Hits’ by Madonna becomes ‘Madonna, Greatest Hits’. Click edit to add
to the list of album titles to perform this function on – e.g. best of, very best of
etc.
•
Replace keywords – Primarily for consistency of box sets, we can instruct the
application to, for example search for ‘disc1’ and make it ‘CD 1’. Click edit to add
to the list of keywords to perform this function on.
Ripstation Pro – User Manual
Page 25 of 43
Ripstation Pro Main User Guide
100-5-01-000
•
Delete all after – This function removes all words after specific keywords in the
track title e.g. “Under Pressure Feat. David Bowie” would become “Under
Pressure”. Click edit to add to the list of keywords to perform this function on.
•
Remove Non-ASCII Characters - Non ASCII characters will be replaced with
the closest ASCII character equivalent. For example, “(Götterdämmerung)
Funeral March” will become “(Gotterdammerung) Funeral March”.
NOTE: These options may be selected or unselected.
4.4.5 Logging Tab
In the preferences dialog box, select the Logging tab as shown in figure 4.12.
Figure 4.12 – Preferences Dialog Box – Logging Tab
•
Log all metadata - When checked, this creates a text log file in the client folder
detailing all metadata lookups for the entire batch. Please use this for debug
purposes only when requested by MF Digital Staff.
•
Log cddbinfo.txt – When ripping for a DigiFi server use this option. This file is
required when loading an album to a DigiFi server.
•
Log batch summary - When checked, this creates a text log file in the client
folder detailing failed/rejected CDs and successfully ripped CD's in order they
were ripped.
Ripstation Pro – User Manual
Page 26 of 43
Ripstation Pro Main User Guide
100-5-01-000
•
Log genre in folder.dat – this will place a folder.dat file in the album folder
which contains the genre of the disc. As an example the contents of the file
would look like “genre=latin”.
•
View provider log - Click this to display a running total of metadata lookups
broken down by month and by provider.
•
E-mail alerts – In this section enter in the details for your email account and
you will receive email alerts connected with your batch when any error condition
occurs
4.4.6 Ripping Tab
In the preferences dialog box, select the Ripping tab as shown in figure 4.13.
Figure 4.13 – Preferences Dialog Box – Ripping Tab
•
Skip Heavily Damaged Discs - This allows the software to skip discs that are
badly damaged and or unreadable. This will allow ripping to continue without,
the software continually trying to read the disc and slowing down the process.
•
Rip Sequentially – This option enables the software to load, rip and eject discs
in a sequential order.
NOTE: This option may be selected or unselected.
Ripstation Pro – User Manual
Page 27 of 43
Ripstation Pro Main User Guide
100-5-01-000
4.5 Starting a New Batch
4.5.1 Batch Setup
In the main Ripstation screen, click the ‘New Batch’ button and the Batch
Properties dialog box shown in figure 4.14 appears.
Figure 4.14– Batch Properties Dialog Box
•
•
Source Device – select the model of robotic device you are using, or IDE/USB
Drives to use internal or external CD/DVD Rom drives with no robotics.
Edit – additional edits can be made such as COM port, Shake mode (on/off) and
for MFD 7602/7604 devices, the option to select which side the drives are on.
Shake mode was introduced to address sticking discs being double loaded into
drive tray. It is not supported by 7601 robotic loader.
Figure 4.15 – Source Device Edit Dialog Box
•
•
Number of CDs - key in the number of CDs in the batch, or 0 to rip indefinitely.
Target device – Use Generic for any portable devices, or select from the
manufacturer list to enable file format and grooming. Added direct support for
Vantage Media servers with cddbinfo.txt file output.
Ripstation Pro – User Manual
Page 28 of 43
Ripstation Pro Main User Guide
•
•
•
•
•
•
•
•
•
•
•
•
100-5-01-000
Client Name - Key in the client name (required) and a folder will be created of
the same name inside the default output path folder where all encoded audio
files will be placed.
Output Formats – Displays the CODECs to be used for ripping. To enable a
CODEC to be used, highlight (by the blue bar) the CODEC in the display and
check the ‘Use’ tick box on the left.
[ADD] Click Add to add an output codec to the output list.
[EDIT] Click Edit to edit this Codec's settings. This will open a dialog in order to
configure the codec settings including bit rates and VBR/CBR options (see section
4.5.2).
[DELETE] Click Delete to remove the codec from the output list. Only codecs
that are checked will be used.
Force default filenames should only be checked if multiple formats are being
encoded to. This will prefix the codec name above the album name – e.g.
C:\Root\clientname\MP3\
Use this output path - when checked will force the program to use this path
as the root location for all files and will override the setting within each codec.
Unicode ID3 tags is defaulted to ‘on’ as standard.
Copy Data Tracks - Copy data tracks option introduced to copy data CDs as
part of the batch process.
Audiofiles only - Audio files only option filters out non-audio files by only
copying the following:
*.mp3
*.wav
*.flac
*.aac
*.wma
Make a duplicate copy of output files here – This will place a copy of the
ripped files to the specified location
[Start Batch] closes this screen and starts the batch process.
NOTE: Codec and path settings will be stored from session to session, for a quick
batch simply key in number of CDs and check the codec.
4.5.2 Codec Settings
Ripstation Pro ships with a number of standard CODEC options pre-configured.
However CODECs may be added or deleted and the settings for the MP3, WMA, AAC and
OGG CODECs may be modified.
•
To add a new codec, click the [Add] button in the Batch Properties dialog box.
The New Output dialog will appear as in figure 4.16
Ripstation Pro – User Manual
Page 29 of 43
Ripstation Pro Main User Guide
100-5-01-000
Figure 4.16– New Output Dialog
%A
%B
%C
%D
%E
%F
%G
%H
%I
%J
%K
%M
%N
%P
%S
%T
%U
%V
%W
•
Choose the CODEC you wish to add to the display from the drop down box at the
top and press OK.
•
In the same way, if you would like to delete a CODEC from the display, select
the CODEC to be removed (highlighted by the blue bar) and press [Delete].
•
To modify a CODEC’s settings, select the codec you wish to modify and click the
[Edit] button. For the MP3 CODEC, the box in figure 4.17 appears.
List of variables used in the output paths:
AlbumArtistName
BatchClientUID
BatchClientName
AlbumName
AlbumCreditName (If CreditTitle is “Narrator”)
AlbumCreditName (If CreditTitle is “Co-Author”)
TrackArtistName
ISRC
CDDBId
Date in YYYYMMDD format
Genre
AlbumDiscNumber (if nonzero)
TrackNumber
FirstReleaseLabel
FirstReleaseISBN
TrackName
FirstReleaseUPC
AlbumDiscNumber
AlbumDiscCount
Ripstation Pro – User Manual
Page 30 of 43
Ripstation Pro Main User Guide
%X
%Y
0-9
100-5-01-000
BatchIndex
AlbumDate
BatchUserData (0-9)
Figure 4.17- MP3 CODEC Settings
•
Include Metadata In Output files – If this is checked Ripstation will write out
and embed metadata in the file. If this is unchecked no metadata will be written
into the output.
•
Path - This represents the path the codec's output will use as a root folder. This
may be overridden however in the batch properties screen (figure 4.14) by
checking the ‘Use this output path’ option.
•
Tracks - This is the full track path and name under the root folder. These
settings are configured for each codec and MF Digital recommends that the same
convention be used for all.
•
Cover art – The location and name used for cover art. The recommended
setting is set to album folder and named folder.jpg for maximum compatibility.
Ripstation Pro – User Manual
Page 31 of 43
Ripstation Pro Main User Guide
100-5-01-000
•
Metadata – If log all metadata is selected this will be the pathway for the
location of the xml file which is written out for this option. The user has the
ability to customise the xml file path and name.
•
Data Files – If this is selected any compatible data files will be written out to
this location.
•
Max Length – This gives the user the ability to create clips of the tracks. The
duration of the track is written into this box as seconds. For example if the value
of 30 is entered in the box then Ripstation will rip a 30 second clip of each track
on the disc.
NOTE : Each server as selected in the drop down box in the main batch screen will
dynamically set its own cover art and path naming convention and will highlight the
available codec types.
•
Quality slider (L.A.M.E. MP3 & Windows Media VBR codecs only) - The
quality slider determines how rigorous the codec will be during the audio
encoding phase. Higher quality settings will slow down the encoding process very
slightly. Challenging audio, for example classical music or heavy metal, generally
requires that the slider be moved toward the Slow setting.
The resulting increase in quality is somewhat subjective; a slower speed, higher
quality setting of the quality slider is generally only recommended for challenging
and very dynamic audio, with playback on high end audio equipment. For the
vast majority of MP3 encoding with playback on low to mid-range audio
equipment and portable music players, the default setting (shown above) is
recommended.
4.5.3 Operations During Batch Rip
4.5.3.1 Operations without Robotic Autoloader
•
At the start of a batch process, all selected drives will eject. Place CDs in the
drives and click ‘close all drives’. The batch process will now progress.
•
As each CD is completed, it will be ejected. Replace with another when ready.
At the end of the batch the screen in figure 4.18 will be presented.
Ripstation Pro – User Manual
Page 32 of 43
Ripstation Pro Main User Guide
100-5-01-000
Figure 4.18 – Batch Complete Dialog
When Ripstation can find no more discs to load, the user is now presented with 3
options:
• Cancel the batch (No more discs to rip)
This will end the batch after any discs still being ripped have finished ripping. All
drives will now be closed.
•
Try again (There are still discs to rip)
This will instruct the bot to retry the last attempted spindle. The bot will not retry
a spindle which has been used as an output spindle.
•
Continue from beginning (New discs have been loaded)
This continues the current batch, and will restart from the first spindle.
4.5.3.2 Operations with Robotic Autoloader (MFD & Pro Series)
•
Before clicking the Start Batch button, load the input spindle with CDs. At the
start of the batch process, each drive on the MFD series will open and will be
checked for the presence of a CD – in the case of none found, the drive will be
loaded with a CD from the input spindle, closed and read. This step is followed
for each CD in turn.
When each CD is completed it is collected and either placed on the ‘Accept’ spindle as a
good CD or the small ‘Reject’ pile as a failed CD.
•
At the end of the batch, the dialog box shown in figure 4.18 will appear, either
click the ‘No, I’m Done!’ button to complete the process or add more CDs to the
spindle, key in the number and press the ‘Yes, Add More!’ button, at which point
ripping will recommence.
4.5.3.3 Reported errors
If the robotic autoloader experiences a problem collecting a CD during a batch rip, one
of two error dialog boxes will appear. These dialog boxes are shown in figure 4.19a & b.
Figure 4.19a – Error While Accepting Dialog Box
Ripstation Pro – User Manual
Page 33 of 43
Ripstation Pro Main User Guide
100-5-01-000
Figure 4.19b – Error While Rejecting Dialog Box
Figure 4.18a displays the error while accepting dialog box which occurs when the robotic
autoloader experiences a problem while trying to collect a CD from the input spindle.
•
When this occurs either click ‘yes’ to allow the autoloader to retry the collection
or click ‘no’ and remove the CD from the stack.
Figure 4.18b shows the error while rejecting dialog box which occurs when the robotic
autoloader experiences a problem while trying to collect a CD from the drive.
•
When this occurs either click yes to allow the autoloader to retry the collection or
click no and remove the CD from the drive manually.
Ripstation Pro – User Manual
Page 34 of 43
Ripstation Pro Main User Guide
100-5-01-000
4.6 Actions for Completed Batch
4.6.1 Audioburn button (burn DVD backups)
Refer to the AudioBurn Manual for a detailed usage guide.
4.6.2 Podload button (load an iPod)
When you click the Podload button it opens iTunes and adds the rip files to the library.
Then the user can add the music files to the iPod using the iTunes interface.
4.6.3 Loading an external Hard Drive
Clicking the ‘Send to HD’ button (shown right) loads a client folder to a hard
drive. The standard Windows explorer dialog appears.
Figure 4.26 – Selecting a folder to load to Hard Drive (HD)
•
Select the Location of the external USB hard drive unit, network hard drive or
USB device and click OK.
The files will then be loaded to the device chosen and the file copy dialog appears to
show its progress.
Ripstation Pro – User Manual
Page 35 of 43
Ripstation Pro Main User Guide
100-5-01-000
4.7 Error detection & correction
Ripstation’s error handling consists of:
•
•
•
Auto C2 Check
Burst mode check
Jitter check
4.8 Output Reports
In addition to the live logging window, Ripstation generates a key report automatically
at the end of a batch as follows:
A flat text file detailing the following, saved into the client folder.
(Clientname_log).txt
Ripstation Pro
Client: Test1 UID: 29378975
MP3: 224 kbps CBR
Started: 09/29/2006 11:25
A total of:
16 albums were ripped
2 albums were not ripped
0 albums had no cover
0 albums had no data
Albums Not Ripped
----------------------------------------------------------Pet Shop Boys - Discography
The clientname_log.txt file will be appended to for batches with the same client name,
so they will not be overwritten.
Ripstation Pro – User Manual
Page 36 of 43
Integration with Other MF Digital Products
100-5-01-000
5.0 Integration with Other Ripstation Products
Currently, Audiofile and Audioloader may be added to Ripstation as additional
modules to support automatic generation of the client output catalogue in PDF or HTML.
Ripstation AudioFile
Generates fully customisable and printable HTML album catalogue using cover art and
customisable logo and colours.
Ripstation AudioLoader
AudioLoader enables integrated loading of all XiVA based media servers.
Ripstation AudioGroomer
AudioGroomer enables automated processing to provide much more accurate and
consistent metadata in areas such as compilations, box sets and genre matching
Please contact Ripstation for further information, or visit
www.ripstation.com
Ripstation Pro – User Manual
Page 37 of 43
Help and Support
100-5-01-000
6.0 Help and Support
Support terms are detailed in client specific contracts, but at minimum shall include 24
hour support via our online helpdesk. In addition we offer an extended warranty
package which includes remote access to your site from our headquarters and extended
hardware warranty coverage.
Support response is guaranteed within 24 hours.
Contact details:
Ripstation
A Division of Formats Unlimited, Inc
155 Sherwood Avenue
Farmingdale, NY 11735
T: +1 631 249 9393
F: +1 631 249 9273
Email: [email protected]
Support Helpdesk: www.ripstation.com/support
Ripstation Pro – User Manual
Page 38 of 43
Help and Support
100-5-01-000
Annex A: Macrovision Flow Down Agreement
Macrovision Flow-Down License Terms (Terms of Use)
This application incorporates software and technology of Macrovision Corporation
(“Macrovision”). The Macrovision software and technology (the “Macrovision Technology”)
allows end users to access music-related data (“AMG Data”) over the Internet and otherwise
from proprietary databases (the “AMG Databases”) located on Macrovision servers (the
“Macrovision Servers”) and to perform other functions (Macrovision Technology, AMG Data,
AMG Databases and Macrovision Servers are collectively referred to as the “Macrovision
Services”).
Macrovision grants you a limited, non-exclusive, non-transferable, and non-sublicensable
right and license to access and use Macrovision Services only by means of the intended and
authorized End User functions of this application software.
You agree that you will use the Macrovision Services for your own personal, noncommercial use only. You agree not to: (i) assign, copy, transfer or transmit the Macrovision
Services to any third party; (ii) use or exploit the Macrovision Services, except as expressly
permitted herein; (iii) decompile, disassemble or reverse engineer the Macrovision Services or
any component thereof; (iv) remove any copyright, trademark, trade names, logos or other
intellectual property notices in the Macrovision Services; or (v) sell, distribute, syndicate, publish,
disclose lease, license transfer or otherwise use the Macrovision Services, or any portion thereof,
other than as expressly provided in these Terms of Use.
You agree that the license to use the Macrovision Services granted herein will terminate
if you violate these restrictions. In addition, Macrovision may revoke or terminate this license at
any time in its sole discretion. If your license terminates, you agree to cease any and all use of
the Macrovision Services. You agree to defend, indemnify and hold harmless Macrovision and
its affiliates from all liabilities, claims and expenses, including attorneys’ fees arising from your
breach of these Terms of Use.
Macrovision reserves all rights in the Macrovision Services, including all ownership
rights. You acknowledge that as between you and Macrovision, all right, title and ownership to
the Macrovision Services and components thereof remain the exclusive property of Macrovision,
and nothing herein will be deemed to grant you any ownership rights in the Macrovision Services.
You agree that Macrovision may enforce its rights under this Agreement against you directly in
its own name.
Macrovision reserves the right to delete data from the AMG Databases or to change data
categories for any cause that Macrovision deems sufficient. No warranty is made that the
Macrovision Technology or Macrovision Servers are error-free or that functioning of
Macrovision Technology or Macrovision Servers will be uninterrupted. Macrovision is not
obligated to provide you with any new, enhanced or additional data types or categories that
Macrovision may choose to provide in the future and is free to discontinue its online services at
any time, without any obligation to you.
To the extent that you, the End User, provide any information or original works of
authorship to be added to AMG Databases, you represent and warrant that you are the sole author
of such work(s) and further hereby assign to Macrovision all intellectual property and proprietary
Ripstation Pro – User Manual
Page 39 of 43
Help and Support
100-5-01-000
rights therein, including the right to register the copyright in such work(s) as part of the AMG
Database.
THE MACROVISION SERVICES AND COMPONENTS THEREOF ARE PROVIDED
TO YOU “AS IS.” MACROVISION MAKES NO REPRESENTATIONS OR WARRANTIES,
EXPRESS OR IMPLIED, REGARDING THE ACCURACY OF THE MACROVISION
SERVICES INCLUDING WITHOUT LIMITATION THE IMPLIED WARRANTIES OF
MERCHANTABILITY, FITNESS FOR A PARTICULAR PURPOSE, TITLE AND NONINFRINGEMENT. MACROVISION DOES NOT WARRANT, GUARANTEE OR MAKE
ANY REPRESENTATIONS REGARDING THE CORRECTNESS, ACCURACY,
RELIABILITY, CURRENTNESS OR THE RESULTS THAT WILL BE OBTAINED BY
YOUR USE OF THE MACROVISION SERVICES.
IN NO CASE WILL MACROVISION OR ITS AFFILIATES BE LIABLE TO YOU OR
ANY THIRD PARTY FOR ANY INDIRECT, CONSEQUENTIAL, INCIDENTAL, SPECIAL,
EXEMPLARY, PUNITIVE OR OTHER DAMAGES INCLUDING WITHOUT LIMITATION
ANY LOST PROFITS OR LOST REVENUES OR INTERRUPTION OF BUSINESS UNDER
ANY THEORY OF LAW, INCLUDING CONTRACT, TORT, NEGLIGENCE, INDEMNITY,
STRICT LIABILITY, PRODUCT LIABILITY, OR OTHERWISE ARISING OUT OF OR IN
ANY WAY RELATED TO THE USE OF THE MACROVISION SERVICES. IN NO EVENT
WILL MACROVISION’S LIABILITY FOR DAMAGES WITH RESPECT TO THE
MACROVISION SERVICES BE IN EXCESS OF TEN DOLLARS REGARDLESS OF THE
FORM OF THE CLAIM. SOME JURISDICTIONS DO NOT ALLOW THE EXCLUSION OF
LIABILITY FOR INCIDENTAL OR CONSEQUENTIAL DAMAGES, SO THE ABOVE
EXCLUSION MAY NOT APPLY TO YOU.
Ripstation Pro – User Manual
Page 40 of 43
Help and Support
100-5-01-000
Annex B: AMG Purchase Procedure Document
Purchasing AMG Look Ups
To receive an AMG key to enable AMG metadata in Ripstation you will need to purchase look ups
by clicking on the purchase link in preferences or clicking on the following link:
http://www.ripstation.com/amgdep/purchase.php
Then on the purchase page key in the required details and choose the number of look ups that
you require from the drop down box.
Then click on Preview order and you will be taken to the following page:
Then click on the buy now link and you will be taken to a payment page powered by PayPal to
complete the purchase of your look ups.
Ripstation Pro – User Manual
Page 41 of 43
Help and Support
100-5-01-000
Once you have entered your payment details on the web page click on the “Review Order and
Continue” button.
Once you have reviewed your payment details click on the “Pay Now” link and your transaction
will be processed. Then the following page will be displayed.
You will receive an email confirming your order. You can also at this stage view and print a copy
of your receipt which contains your AMG Key.
Ripstation Pro – User Manual
Page 42 of 43
Help and Support
100-5-01-000
The AMG Key is the Item number. It is displayed as
Item#7a109049f8e443c74e9dafcf4940230a4eb544bf then your AMG key will be
7a109049f8e443c74e9dafcf4940230a4eb544bf.
Please note that the license keys are pay as you go. You must use all lookups from
each key before you enter a new key. Look ups are not carried over between keys.
Ripstation Pro – User Manual
Page 43 of 43